E+H RTA421操作指导
SM421(SM421S)贴片机操作指导书
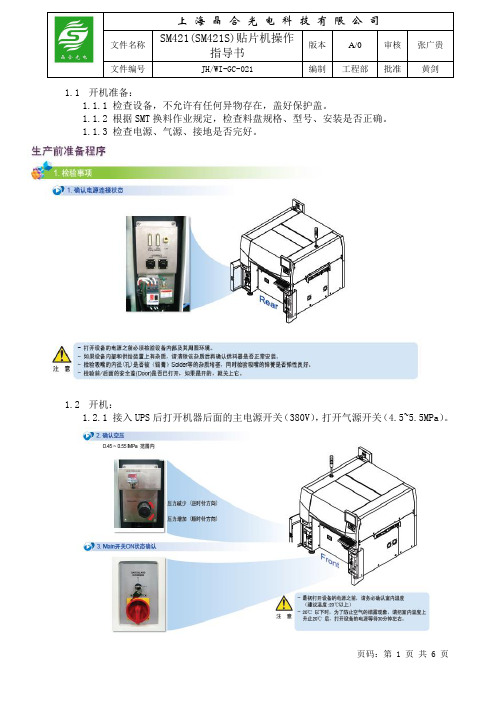
1.1开机准备:1.1.1检查设备,不允许有任何异物存在,盖好保护盖。
1.1.2根据SMT换料作业规定,检查料盘规格、型号、安装是否正确。
1.1.3检查电源、气源、接地是否完好。
1.2开机:1.2.1接入UPS后打开机器后面的主电源开关(380V),打开气源开关(4.5~5.5MPa)。
1.2.2打开机器右下方的电源开关,按下“I/O”键,设备自检,等待进入主菜单。
1.2.3按下“READY”键,将手炳控制器设置成“HOME”模式,按下“HOME START”,设备回原点,WARM UP进行初始化热机。
1.2.4在主菜单FILE中选择“OPEN”,然后将子菜单中的组件类型改为OPT,选择预生产的产品程序,双击鼠标或按“打开”键实现程序调用。
1.2.5将预生产的PCB板实现完好定位,调整导轨宽度,施放顶针。
1.2.6在主菜单的“PRODUCTION”中依此按下“FINISH”、“PCB D/L”、“START”键,设备发出提示音。
1.2.7待主菜单右上角显示“PAUSE”字样后,按下控制面板上的“START”键,放入PCB板。
1.2.8待机器再次发生声响后,按下控制面板上的“STAR T”键,机器开始贴装。
1.2.9中途停机可按下面板上的“STOP”+“RESET”键。
1.2.10半途续贴装时必须按下“CONT”键。
当TRAY盘料用完后,点击“T/F CNT”键,再点击“ALL RESET”,确定即可。
1.2.11生产结束按下控制面板上的“STOP”键。
按两次控制面板上的“RESET”键,1.3关机1.3.1用鼠标点击程序右上角的“X”键1.3.2在子菜单中选择“NO”字样。
1.3.3待屏幕显示“是否推出WINDOWS系统”后,选择“YES”,关闭机器。
1.3.4待屏幕显示“现在可以安全关机”字样后关闭机器右下角电源开关,并放出余气。
6、贴片机安全操作规程6.1. 开机前确认设备内部无异物。
6.2. 每次开机后,设备预热1~2分钟。
fluke中文使用手册421
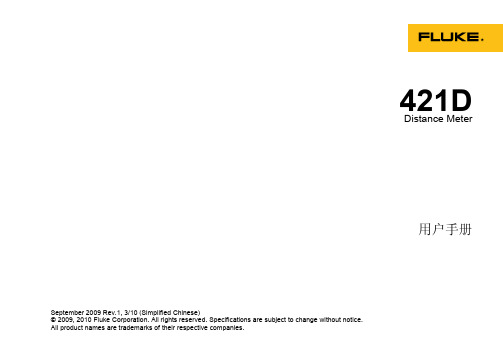
Cobas e411 操作手册

质控
>
安装
> > 扫描条形码卡
确认
> > 选择需要的项目
激活项目
非罗氏质控品:
质控
>
安装
> > 任选一空行
添加
>
分配
选择项目>
确认
>
编辑
输入靶值和 SD
> 更新
指定位置:
> > > 确认
选择需要的项目
激活项目
质控
> 位置分配 指定位置(盘式)或者架号、位置
5
cobas e 411 analyzer
新项目安装和设定
一、添加新项目
1 将试剂放在试剂盘上,执行“试剂扫描(Reagent Scan)” > 项目自动出现在
工作站
“项目选择(Test Selection)”中
2
应用
>
项目
>
校准
> 设定定标频率 >
范围
> 设定项目代码和单位等
二、安装定标品
校准
>
安装
> > 扫描条形码卡
确认
三、安装质控品
罗氏质控品:
开始
非条码样本:
工作站
> > > 项目选择
急诊(E)
放
> > > 置急诊样本在 STAT 位置 急诊架 开始
开始
9) 复做样本 仪器不能自动运行复做。
工作站
> > > > 项目选择
选择项目
重测(R)
保存
10) 结果查看
E+H 雷达操作说明
雷达操作说明基本设置:Measure value(000)[测量值]---E---Group selection[组选择]---basic setup(00)[基本设置]---E---media type(001)[测量介质:选液体liquid]---E---tank shape9(002)[罐的形状:选拱顶罐dome ceiling]---E---medium cond.(003)[介电常数,测硝酸选DC:4….10]---E---process cond.(004)[过程条件:选标准standard]---E---empty calibr.(005)[空罐标定,即参考零点到仪表法兰的距离]---E---full calibr.(006)[满灌标定,即20mA对应的距离]---E---dist./meas. V alue(008)[显示当前测到的液位,dist:上空距离,meas.v.:现在的液面距离]---E---check distance(051)[检查后如显示正常,可选OK,如果要做抑制,选手动Manual]---E---range of mapping(052)[抑制的距离]---输入抑制距离[注意,抑制值为液面以上一点到仪表法兰的距离]---输入好后按E两下---再按E到start mapping(054)[开始抑制],选择ON,将抑制功能打开,同时按+、—,返回主界面。
检查包络线:Measure value(000)---E---Group selection---basic setup(00)---按+,直到出现envelope curve(0E)---按E,直到出现包络线图检查以前的抑制距离:Measure value(000)---E---Group selection---basic setup(00)---按+,直到出现Extended calibr.(扩展标定)(05)---E---选择“pres.map dist.(054)”(检查以前做抑制的距离054),如果要将以前的抑制删除,重新做抑制,可找到(055),按E,选择reset后以前的抑制就删除了,接着重新做抑制,如基本设置所述即可,[选择Manual…..]注意,抑制的距离只能在液面以上做,假如罐高是11m,液面是5m,那抑制的距离可以是11-5=6,但建议做5.5m的抑制,防止把真正的液面作为干扰给抑制掉了。
HHS喷胶系统 C421控制器简易说明
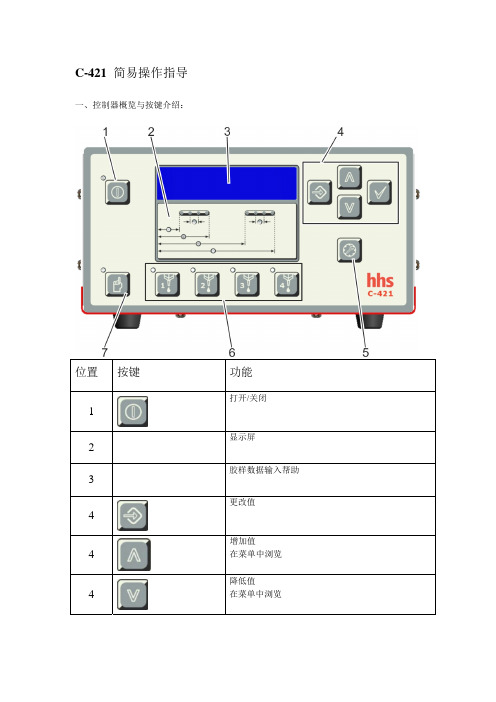
C-421 简易操作指导一、控制器概览与按键介绍:位置按键 功能 1打开/关闭2- 显示屏 3- 胶样数据输入帮助 4更改值4增加值 在菜单中浏览4降低值在菜单中浏览4确认输入5打开“胶样”菜单 6打开/关闭喷枪LED 的含义:关闭:喷枪未激活,与设置无关红色:喷枪激活,设置针对该喷枪黄色:“开路”喷枪故障7打开测试菜单二、菜单概览1、 数据菜单浏览及更改,打开方式:+ 按键组合;浏览更改数据:和; 进入菜单及确认修改:;修改数据:; DISPLAYLAN(语言) en(英语),de(德语)… LCD-CON(对比度) 20(默认值) STANDBY(待机) Y/N 是/否GUN GUN1(喷枪1)D-Dot low .Pr(喷枪类型选择) GUN2(同喷枪1) LEVEL :(1,2,3,4)胶点大小一般为3 GUN3(同喷枪1)START :(1,2,3,4)喷枪开始信号电眼 GUN4(同喷枪1)OFFSET :45mm 电眼到喷枪偏移距离START MIN :最小起始位置V-MIN :Y/N 喷胶系统最小运行速度DOT/LINE :Y/N 点线交替打开/关闭COMP.ON:2.7ms 喷枪打开速度补偿COMP.OFF;2.7ms 喷枪关闭速度补偿PRESSURE V-D/L:50m/min 点间距为5mm 时,最大点线交替速度为100m/minP-DOT:40%点胶压V-MIN:5m/min 喷胶运行最小速度DOT/LINE:Y/N 点线交替打开/关闭P-LINE:25%线胶压V-MAX:300m/min 喷胶运行最大速度P-MAX :100%喷胶最大胶压OPTIONS PROUDCT: piece/ piece. a/ collator 一般选择piece (详阅手册)STOP MODEL: NO/YES 一般默认为NO(详阅手册)START V=0? : NO/YES 一般默认为NO (详阅手册)ONLINECOMP:NO/YES 一般默认为NO (详阅手册)LEVEL:NO/NC 一般默认为NO (详阅手册)RESET:NO/NC 一般默认为NO (详阅手册)PASSWORD密码设置(详阅手册)FLAP 8s 一般默认为8s ,喷枪型号需带有喷嘴帽喷枪或类似的应用TESTFREQUENCY:50HZ 测试模式下喷枪喷点的频率,一般设为50HZ PRESSURE:80% 手动模式下胶压大小,一般设置比较大,便于测试,清洗ERROROPEN LOAD:Y/N ,喷枪断路检测打开或关闭PUMP ERROR:Y/N, 胶泵检测打开或关闭 OFFSET:Y/N,偏移距离检测打开或关闭ENCODER ENC:1.00mm/p, 根据编码器型号不同,来设置分辨率RESET DATARESET DATA: NO/YES 设置参数复位 RESET MODEL:NO/YES 胶样设置参数复位SET UP*(详阅手册)SA VE DATA 所有设置,必须通过确认这一选项来最终保存。
E+H涡街流量计操作说明
1.电磁流量计PROMAG50 2. 80F调试说明3.溶解氧COM223/COM253 4.CPM223/CPM253 ORP5.超声波测量仪FMU 23X6.压力变送器PMP717.在线测量浊度仪CUE21 8.在线COD测量仪9.雷达FMR245 10.继电器(模数转换)RTA42111.72F调试说明12.重锤料位计FMM5013.DTT31质量流量计PROMAG50 电磁流量计一、参数设置10W调试说明1.仪表上电稳定后,按“E”键进入菜单组,出现“Group Select”Measuring Values2.按“+”或“-”,找到“Unit V olume Flow”,可用“+/-”键和“E”键确认体积流量单位,输入10,最后按“E”键确认;3.显示“Unit Volume Flow”,可用“+/-”键和“E”键确认质量流量单位;“m³/h”8.“Unit Totalizer”, 可用“+/-”键和“E”键确认累计值单位;“M³”10.“+”“-”同时按返回,再按“+”或“-”找到“Current Output ”按“E”,选择输出“4—20mA Hart Namur”,再按“E”,用“+、-”输入20mA对应的值,按“E”确认;11.按“E”到“Failsafe Mode”,按“+”或“-”,选择“Max current value”,及报警时输出最大电流值;12.同时按“+”“-”返回到“Current Output 1”,再按“+”或“-”找到“ProcessParameter”,按“E”,将“On-value low flow cut off”设置小流量切除值,一般的设置范围为20mA对应值的1%到5%;80F调试说明4.仪表上电稳定后,按“E”键进入菜单组,出现“Group Select”Measuring Values5.按“+”键两次出现“Quick Setup”,按“E”键进入,出现“Setup Commission”;No6.按“+”或“-”,输入80,最后按“E”键确认;7.重新出现Setup Commission”,按“+”键改为“Yes”,按“E”键确认;No8.显示“Language”选择语言为英语,按“E”键确认,如需选其它语言先用“+”“-”键选择再用“E”键确认;9.显示“Pre-setting”,按“E”键确认;“Act-setting”10.显示“Unit Mass Flow”,可用“+/-”键和“E”键确认质量流量单位;“Kg/h”8.“Unit Totalizer”, 可用“+/-”键和“E”键确认累计值单位;“Kg”9.“Configuration other Unit?”,可用“+/-”键和E键,选择“No”;10.“+”“-”同时按返回到“Quick Setup”菜单,再按“+”或“-”找到“Current Output 1”按“E”,选择输出“4—20mA Hart Namur”,再按“E”,用“+、-”输入20mA对应的值,按“E”确认;11.按“E”到“Failsafe Mode”,按“+”或“-”,选择“Max current value”,及报警时输出最大电流值;12.按“E”返回到“Current Output 1”,再按“+”或“-”找到“ProcessParameter”,按“E”,将“Assign cutoff”选为“Mass flow”,按“E”键,在“On-value low flow cut off”设置小流量切除值,一般的设置范围为20mA对应值的1%到5%;Liquisys COM223/COM253溶解氧调试方法一、调试:(1) 操作说明 :下面对各个操作键进行说明:CAL键:标定,激活标定模式,标定菜单显示。
ERSA软件操作指南 中文版
ERSA软件操作指南中文版
【ERSA软件操作指南】
本操作指南旨在向用户介绍ERSA软件的操作流程和功能模块,帮助用户快速上手并熟练使用该软件。
一、安装和启动
1.系统要求:列出ERSA软件的最低系统要求;
2.安装步骤:详细描述软件的安装过程;
3.启动软件:介绍启动软件的方法和注意事项。
二、用户界面
1.主界面:介绍主界面的布局结构和各个模块的功能;
2.菜单栏:解释菜单栏中各个功能选项的作用;
3.工具栏:说明工具栏上的图标及其对应的功能;
4.侧边栏:介绍侧边栏中各个模块的功能及使用方法;
5.设置选项:详细说明软件的设置选项及其配置方法。
三、基本操作
1.新建项目:说明如何创建一个新的项目;
2.打开和保存项目:介绍打开和保存项目的方法;
3.导入和导出数据:解释如何导入和导出数据文件;
4.撤销和重做操作:说明如何撤销和恢复操作;
5.快捷键:列出软件中常用的快捷键及其功能。
四、功能模块
1.数据管理:介绍数据管理模块的功能和操作方法;
2.数据分析:详细说明数据分析模块的各个功能及使用方法;
3.报表:解释报表模块的操作流程和报表的方法;
4.图表展示:说明图表展示模块的功能和创建图表的步骤;
5.备份与恢复:指导用户进行数据备份和恢复操作。
五、常见问题解答
列出一些用户常见的问题和解答,帮助用户快速解决可能遇到的问题。
六、附件
1.附件一:包含软件的安装文件;
2.附件二:示例数据文件。
【法律名词及注释】
1.法律名词1:相关解释或定义;
2.法律名词2:相关解释或定义;
3.法律名词3:相关解释或定义。
E+H 涡街流量计操作说明
1.电磁流量计PROMAG50 2. 80F调试说明3.溶解氧COM223/COM253 4.CPM223/CPM253 ORP5.超声波测量仪FMU 23X6.压力变送器PMP717.在线测量浊度仪CUE21 8.在线COD测量仪9.雷达FMR245 10.继电器(模数转换)RTA42111.72F调试说明12.重锤料位计FMM5013.DTT31质量流量计PROMAG50 电磁流量计一、参数设置10W调试说明1.仪表上电稳定后,按“E”键进入菜单组,出现“Group Select”Measuring Values2.按“+”或“-”,找到“Unit V olume Flow”,可用“+/-”键和“E”键确认体积流量单位,输入10,最后按“E”键确认;3.显示“Unit Volume Flow”,可用“+/-”键和“E”键确认质量流量单位;“m³/h”8.“Unit Totalizer”, 可用“+/-”键和“E”键确认累计值单位;“M³”10.“+”“-”同时按返回,再按“+”或“-”找到“Current Output ”按“E”,选择输出“4—20mA Hart Namur”,再按“E”,用“+、-”输入20mA对应的值,按“E”确认;11.按“E”到“Failsafe Mode”,按“+”或“-”,选择“Max current value”,及报警时输出最大电流值;12.同时按“+”“-”返回到“Current Output 1”,再按“+”或“-”找到“ProcessParameter”,按“E”,将“On-value low flow cut off”设置小流量切除值,一般的设置范围为20mA对应值的1%到5%;80F调试说明4.仪表上电稳定后,按“E”键进入菜单组,出现“Group Select”Measuring Values5.按“+”键两次出现“Quick Setup”,按“E”键进入,出现“Setup Commission”;No6.按“+”或“-”,输入80,最后按“E”键确认;7.重新出现Setup Commission”,按“+”键改为“Yes”,按“E”键确认;No8.显示“Language”选择语言为英语,按“E”键确认,如需选其它语言先用“+”“-”键选择再用“E”键确认;9.显示“Pre-setting”,按“E”键确认;“Act-setting”10.显示“Unit Mass Flow”,可用“+/-”键和“E”键确认质量流量单位;“Kg/h”8.“Unit Totalizer”, 可用“+/-”键和“E”键确认累计值单位;“Kg”9.“Configuration other Unit?”,可用“+/-”键和E键,选择“No”;10.“+”“-”同时按返回到“Quick Setup”菜单,再按“+”或“-”找到“Current Output 1”按“E”,选择输出“4—20mA Hart Namur”,再按“E”,用“+、-”输入20mA对应的值,按“E”确认;11.按“E”到“Failsafe Mode”,按“+”或“-”,选择“Max current value”,及报警时输出最大电流值;12.按“E”返回到“Current Output 1”,再按“+”或“-”找到“ProcessParameter”,按“E”,将“Assign cutoff”选为“Mass flow”,按“E”键,在“On-value low flow cut off”设置小流量切除值,一般的设置范围为20mA对应值的1%到5%;Liquisys COM223/COM253溶解氧调试方法一、调试:(1) 操作说明 :下面对各个操作键进行说明:CAL键:标定,激活标定模式,标定菜单显示。
HE421 使用手册
美国亨特四轮定位仪HE421 四轮定位仪操作说明书目录注意事项 (4)警告:电源插座插入不适合的供电电源,可能会损坏设备,并可能造成人身伤害。
(4)特别提醒:电源 (4)注意:为了操作安全,总电源一定要接有地线! (4)一定位仪程序界面及操作命令介绍: (6)开机: (6)定位程序操作功能键 (6)程序复位键 (7)定位程序工具条 (8)关闭电源 (8)二、定位过程 (9)准备工作 (9)车辆准备: (9)安装卡具: (9)开始定位 (17)程序准备: (17)选择测量车型标准数据:屏幕出现“调用规格值”弹出式屏幕。
(18)偏差补偿 (21)测量后倾角 (25)举升补偿 (28)调整车辆 (29)WINTOE 前束调整系统 (36)车轴举升调整 (38)三、其他功能介绍 (49)车辆规格 (49)数据库更新 (49)手动输入车型数据 (49)Webspec 方法更新车型数据 (53)其他附加测量 (57)转向提前角 (57)最大转向角 (60)框架角度测量 (60)对称角\退缩角测量 (61)底盘高度测量 (63)轮胎状态 (64)轮胎信息 (65)工作单管理:保存工作单 (66)查看工作单 (66)定位仪设置 (69)四、维护和清洁 (73)常规传感器的维护和清洁 (73)目标板维护和清洁 (73)摄像头维护 (74)操作打印机 (74)更换墨盒 (74)电子密码锁 (74)定位仪的标定 (75)五、其他信息 (75)定位类型: (75)几何中心定位 (75)推进线定位 (75)四轮定位 (76)定位角度和测量 (76)外倾角 (76)后倾角 (77)框架角 (77)几何中心线 (78)包容角(I.A.) (78)单前束 (79)底盘高度 (79)退缩角 (80)内倾角(S.A.I.) (80)推进线和推进角 (81)总前束 (81)转向角差 (82)附录 (83)定位仪标定指导 (83)1.标定检查方法 (83)2.定位仪标定方法 (88)注意事项阅读并遵循设备和工具上贴的所有提醒和警告标签。
Victoria 4.2 中文图文使用说明教程
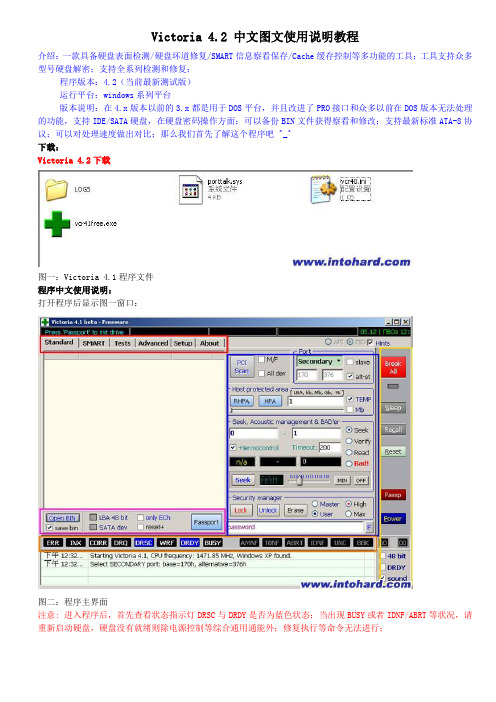
Victoria 4.2 中文图文使用说明教程介绍:一款具备硬盘表面检测/硬盘坏道修复/SMART信息察看保存/Cache缓存控制等多功能的工具;工具支持众多型号硬盘解密;支持全系列检测和修复;程序版本:4.2(当前最新测试版)运行平台:windows系列平台版本说明:在4.x版本以前的3.x都是用于DOS平台,并且改进了PRO接口和众多以前在DOS版本无法处理的功能,支持IDE/SATA硬盘,在硬盘密码操作方面;可以备份BIN文件获得察看和修改;支持最新标准ATA-8协议;可以对处理速度做出对比;那么我们首先了解这个程序吧 ^_^下载:Victoria 4.2下载图一:Victoria 4.1程序文件程序中文使用说明:打开程序后显示图一窗口:图二:程序主界面注意: 进入程序后,首先查看状态指示灯DRSC与DRDY是否为蓝色状态;当出现BUSY或者IDNF/ABRT等状况,请重新启动硬盘,硬盘没有就绪则除电源控制等综合通用通能外;修复执行等命令无法进行;图三:Standard界面窗口Standard面板说明:1)红色标注框为主菜单选项按钮;2)蓝色部分为Standard设置窗口3)粉红色为Standard子设置窗口4)黄色部分为公用控制面板5)橘红色部分为硬盘状态指示灯信息面板Standard窗口关键按钮解释:端口/资源选择图四:端口扫描/资源选择(红色框)PORT 端口Custom 自定义Primary 主盘Secondary 从盘端口资源扫描结果显示图五:端口资源扫描结果显示(蓝色框,这里可以直接点击选择)PCI SCAN:扫描SATA/ATA端口;Host protected area ^|hV FM 2RHPA:取得原始LBA;HPA:设置新的LBA;Security manager:Lock:SET PASSWORD 设置密码 ] l +<-Unlock:解锁Erase:清除Master:主控制密码High:高级密码User:用户密码Max:最大长度一:硬盘检测与坏道修复:进入程序如下图:上图中DRSC与DRDY指示灯可以看出,硬盘未准备就绪或者端口没有选择;Standard----port内选择端口;选择待修硬盘端口,选择后如下图显示;DRSC与DRDY指示灯准备就绪;port显示为我们待修硬盘端口;正确选择后,进入TESTS功能窗口;如下图:上图绿色部分设置测试方式;然后选择红色标注部分;测试将会开始;绿色部分设置名词,可以参考本站MHDD说明内术语;使用ERASE/REMAP/Defectoscop这几个功能使用后都可以起到修复缺陷的功能;Trackback: /TrackBack.aspx?PostId=1165238Victoria 4.3硬盘检测软件的使用方法在网上都可以找到,但是都是抄来抄去。
E+H雷达操作说明_FMR2xx_
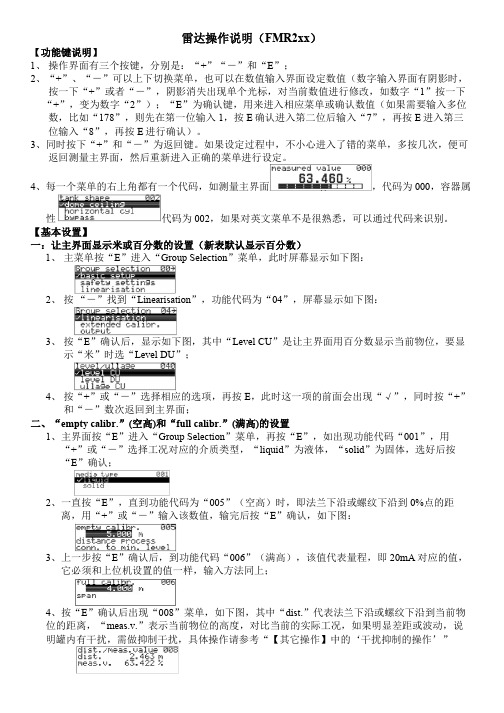
雷达操作说明(FMR2xx)【功能键说明】1、操作界面有三个按键,分别是:“+”“-”和“E”;2、“+”、“-”可以上下切换菜单,也可以在数值输入界面设定数值(数字输入界面有阴影时,按一下“+”或者“-”,阴影消失出现单个光标,对当前数值进行修改,如数字“1”按一下“+”,变为数字“2”);“E”为确认键,用来进入相应菜单或确认数值(如果需要输入多位数,比如“178”,则先在第一位输入1,按E确认进入第二位后输入“7”,再按E进入第三位输入“8”,再按E进行确认)。
3、同时按下“+”和“-”为返回键。
如果设定过程中,不小心进入了错的菜单,多按几次,便可返回测量主界面,然后重新进入正确的菜单进行设定。
4、每一个菜单的右上角都有一个代码,如测量主界面,代码为000,容器属性代码为002,如果对英文菜单不是很熟悉,可以通过代码来识别。
【基本设置】一:让主界面显示米或百分数的设置(新表默认显示百分数)1、主菜单按“E”进入“Group Selection”菜单,此时屏幕显示如下图:2、按“-”找到“Linearisation”,功能代码为“04”,屏幕显示如下图:3、按“E”确认后,显示如下图,其中“Level CU”是让主界面用百分数显示当前物位,要显示“米”时选“Level DU”;4、按“+”或“-”选择相应的选项,再按E,此时这一项的前面会出现“√”,同时按“+”和“-”数次返回到主界面;二、“empty calibr.”(空高)和“full calibr.”(满高)的设置1、主界面按“E”进入“Group Selection”菜单,再按“E”,如出现功能代码“001”,用“+”或“-”选择工况对应的介质类型,“liquid”为液体,“solid”为固体,选好后按“E”确认;2、一直按“E”,直到功能代码为“005”(空高)时,即法兰下沿或螺纹下沿到0%点的距离,用“+”或“-”输入该数值,输完后按“E”确认,如下图:3、上一步按“E”确认后,到功能代码“006”(满高),该值代表量程,即20mA对应的值,它必须和上位机设置的值一样,输入方法同上;4、按“E”确认后出现“008”菜单,如下图,其中“dist.”代表法兰下沿或螺纹下沿到当前物位的距离,“meas.v.”表示当前物位的高度,对比当前的实际工况,如果明显差距或波动,说明罐内有干扰,需做抑制干扰,具体操作请参考“【其它操作】中的‘干扰抑制的操作’”【其它操作】一、干扰抑制的操作(以下只针对空罐时的抑制操作)当空罐雷达有料位显示时,可先查看罐内是否有干扰源,如果有可先做抑制操作,具体操作如下:1、进入菜单“051”,步骤如【基本设置】中的第二点,按到“008”后再按“E”,即可进入“051”,按“-”选择“manual”,如图:2、按“E”进入“052”,输入抑制的范围,即“005”(空高)的值,再按“E”确认,如图:3、按“E”后进入“053”,按“+”选择“on”,再按“E”确认,即启动抑制功能;4、同时按“+”和“-”返回到主界面,观察一分钟左右数值便可稳定。
e-Tracker II设置与使用指南说明书

Setup and Use Guide Addendum to TMR Tracker II User’s Manual and GuideThis addendum covers TMR Tracker II version.2.01.01 and e-Tracker II version. 2.01.01 and upWelcome to e-Tracker by Digi-Star . This guide will assist you in setting up and using this exciting new companion to the TMR Tracker system . This guide covers only the setup and use specific to the email transfer of data. All other features of the e-Tracker program are similar to those features in the TMR Tracker program and as such, you should refer to the TMR Tracker User’s Guide and Manual included on your e-Tracker installation CD for detailed instructions regarding those features.e-Tracker transfers data via email. An active email account is required at the Farm you wish to exchange data with.e-Tracker requires an authorization code. This code must be obtained from Digi-Star at time of installation. e-Tracker is licensed for up to 15 separate databases. Additional licenses can be purchased in blocks of 10. Contact Digi-Star for additional information. e-Tracker can only exchange data with authorized TMR Tracker systems. e-Tracker uniquely identifies each TMR Tracker database by it’s unique serial number. This identification ensures that data will only be assigned to the TMR Tracker system from which it has been sent.NEW!e-Tracker can now transfer data via email attachment or file (floppy, network, etc.).Template Databasee-Tracker ships with a blank Template Database installed. This database can be used to create a “standard” set of data used to quickly setup a farm for TMR Tracker operation. The template can contain standard ingredients, rations, pens, etc. This database can be sent via e-Tracker to the farm and then customized as needed.Edit the Template Database by clicking on TMR Template and then clicking Select. Refer to the TMR Tracker User’s Manual and Guide for detailed information on setting up the database.Adding ContactsWhen e-Tracker is started, the following screen is displayed:To add additional contacts, click Add. The following screen is displayed:Enter the Dairy Name, Contact, Serial Number and email address of the dairy. You can select either a blank database or the Template Database as the starting data for the new contact.The serial number must be obtained from the TMR Tracker program installed on the farm. This serial number is used to uniquely identify the database as belonging to that farm. You can obtain the serial number from the TMR Tracker installation CD or by selecting Help, About TMR, from within the TMR Tracker program at the farm. When complete, click on Save to add the new contact. Repeat as needed.Opening a ContactYou open a contact by highlighting the contact and clicking on Select.Once selected, the e-Tracker program will open to the contact selected. This allows you to view / modify the contacts data. The following screen will be displayed:Once a contact has been opened, the contact name will be displayed in the program’s title bar (see yellow highlight). You will notice that the program looks very much like the TMR Tracker program. In fact, operation, data entry and modification are all identical. Please refer to the TMR Tracker User’s Manual and Guide.You can open other contacts from within the e-Tracker program by selecting Select Dairy and clicking on the contact you want to open.Note: If you have elected to utilize the blank database for your contact, you will need to receive data from the farm. If you elected to use the Template Database, you can send that data to the farm after customization.Setting up emailFrom the main menu, select Data Transfer, Your e-Mail Data.The following screen will be displayed:Enter your server name, email address and password. This will be the address that your clients send their data to. When done, click Save.If you do not know all of this data just fill in bogus information until you get the correct.Step 1Receive Data from ContactOpen your e-mail program.Open the message from the farm and copy the file attachment in to the:“C:\ TMR e II\Trans” folder. The selected file will be called Dat_2_Nt.txt This file stands for Data to Nutritionist.Note: There are many types of e-mail programs and each one works differently. What was explained above may not explain exactly how your program works. If you are having any problems with this please call Digi-Star for further support.To receive data from a contact, select the receive data icon. The following message will appear when you select Receive Data from Dairy.At this time you do not have to be connected to the internet to build the transfer file. Select Yes to continue. The following screen will be displayed:Check the Import Data Transfer file without e-Mail box.Here you can either import the file from e-mail attachment to use a floppy 3.5 disk to transfer the data.Then select OK.Click Receive. The program will now begin to pull in the data files.Each file sent will be shown as it is received. Your recipe screen will flash as each ration is updated to reflect any changes sent. When the transfer is complete, the files will be deleted from the Trans folder and the window will close.When new Rations are sent, the following message will appear:Step 2Send Data to ContactTo send data to a contact, please ensure that you are online with your email server before attempting to send data. Alternatively, you may select to send data via attachment or file.A message will appear when you select Send Data to Dairy asking you to verify that you are online.At this time you do not have to be connected to the Internet to build the transfer file. Select Yes to continue. The following screen will be displayed:Select the contact to send the data to by highlighting the contact and then select the check box Make Transfer File for attachment to e-Mail. Then select OKThe following screen will be displayed:A message area is provided for you to send a text message to the contact. In this case, we have included a message detailing what rations have been changedMessages are not required and this can be left blank.Click Send to send the data. When complete, the screen will disappear.Step 3Now you must open your e-mail program.Start a new message and enter the e-mail address of the farm you are sending to.Then select attach. In most e-mail programs it will let you browse your computer. Here you need to go to the C:\ drive and open the TMR e II folder, then open the Trans folder. Then select the Dat_2_Dy.txt file. This file stands for Data to Dairy. Attach the e-mail and then send.Note: There are many types of e-mail programs and each one works differently. What was explained above may not explain exactly how your program works. If you are having any problems with this please call Digi-Star for further support.。
Premier 412 816 832 用户指南说明书
User Guide Premier 412/816/832Issue 2Premier 412/816/832 User GuideOperating Your Alarm SystemThis document covers the everyday operation of your alarm system, for details on more advanced operation and system programming, please refer to the Premier 412/816/832 Master User Manual.Away Arming the SystemEnter your Access code followed by the "/# key. The Armed light will flash and the exit sounder will sound for the duration of the exit time. Stay Arming the SystemEnter your Access code followed by the $ key. The system will normally arm immediately, the Armed light will flash slowly indicating that the system is Stay armed.Disarming During EntryEnter the premises via the designated entry point. The entry tone will sound, proceed directly to the remote keypad and enter your Access code .Disarming When Not in EntryProceed directly to the remote keypad and enter your Access code followed by the %/& key. Note:If your system consists of only one partition you will not have to press the %/& key.Bypassing ZonesEnter your Access code followed by the ' key. Enter the zone or zones to be bypassed e.g. 02, 04 etc. When all required zones have been selected, press:"/# to Away arm the system with the selected zones bypassed$ to Stay arm the system with the selected zones bypassed( to return to the normal disarmed state with the selected zones bypassedReset Alarms/FaultsEnter your Access code , then enter () or press *.Last Alarm LogEnter your Access code , and then enter (+. The remote keypad will display the zones that caused an alarm when the system was last armed. Press ( to return to the normal disarmed state.Premier 412/816/832 User GuideAcknowledging a New Service FaultShould the Service light start flashing, enter your Access code , and then enter (,. The remote keypad will display all S ervice Faults (see Service Faults Table on back page). Press ( or *-to acknowledge the fault and return to the normal disarmed state.Toggle Chime On and OffEnter your Access code , and then enter (. or /.Change User Access CodeEnter your existing Access code , and then enter (0. Enter your new Access code followed by the "/# key. Now re-enter your new Access code for confirmation.Abort CommunicationsEnter your Access code , and then enter (1.Operating Your Alarm System with Quick Commands If your Installer has programmed the Quick Commands the following procedures can be used:Away Arming the SystemPress the "/# key. The Armed light will flash and the exit sounder will sound for the duration of the exit time.Stay Arming the SystemPress the $ key. The system will normally arm immediately, the Armed light will flash slowly indicating that the system is Stay armed.Bypassing ZonesPress the ' key. Enter the zone or zones to be bypassed e.g. 02, 04 etc. When all required zones have been selected, press:"/# to Away arm the system with the selected zones bypassed$ to Stay arm the system with the selected zones bypassed( to return to the normal disarmed state with the selected zones bypassedLight Fault Condition 1 ACFail2 Telephone Line Fault3 2-Wire Smoke Alarm4 Box Tamper & Auxiliary Input:Press. to view type, lights 1 - 5 indicate: Light 1 = Box TamperLight 2 = Auxiliary TamperLight 3 = Auxiliary PALight 4 = Auxiliary Tamper (UK Bell Module) Light 5 = Bell Tamper (UK Bell Module)5 Date or Time Lost6 Zone Tamper/TroublePress2 to view zone number7 Keypad Tamper/Removed Press1 to view keypad number8 Equipment FaultsPress3 to view fault type:Light 1 = Output 1 FaultLight 2 = Output 2 FaultLight 3 = Siren/Bell FaultLight 4 = 2-Wire Smoke Sensor FaultLight 5 = Auxiliary Fuse FailedLight 6 = Battery FaultLight 7 = Service Timer/Zone Soak Test Failed Light 8 = Communication Fault© Texecom Ltd. 2000 - 2003。
HP ProCurve Wireless Access Point420单频接入点 说明书
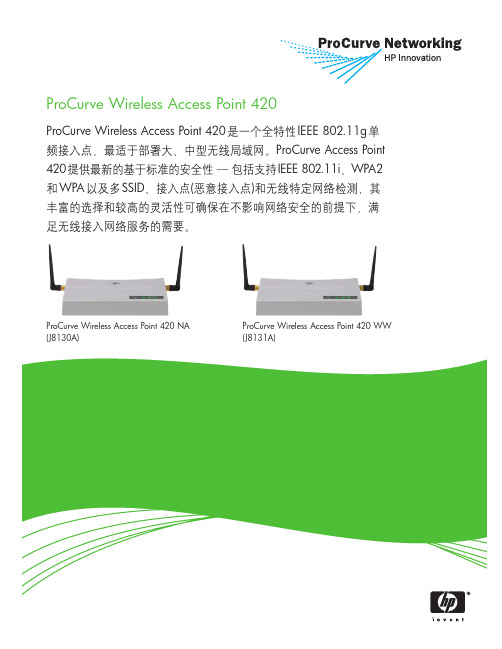
ProCurve Wireless Access Point 420ProCurve Wireless Access Point 420是一个全特性IEEE 802.11g单频接入点,最适于部署大、中型无线局域网。
ProCurve Access Point 420提供最新的基于标准的安全性—包括支持IEEE 802.11i、WPA2和WPA以及多SSID、接入点(恶意接入点)和无线特定网络检测,其丰富的选择和较高的灵活性可确保在不影响网络安全的前提下,满足无线接入网络服务的需要。
ProCurve Wireless Access Point 420 NA ProCurve Wireless Access Point 420 WW特性与优点安全性-在不影响网络安全性的前提下,将无线网络接入拓展至移动用户•可选择IEEE 802.11i、Wi-Fi Protected Access2 (WPA2)或WPA:在允许访问网络前,通过对用户进行验证来阻止未经授权的无线接入;可靠的高级加密标准(AES)或临时密钥完整性协议(TKIP)加密可保证无线通信的数据完整性•IEEE 802.1X:提供基于端口的用户验证,支持可扩展验证协议(EAP) MD-5、TLS、TTLS和PEAP,并可选择AES、TKIP和静态或动态WEP加密,从而保护已验证客户端与接入点之间的无线通信•多达8个SSID,每个SSID均具有独立的VLAN、安全机制和身份验证:允许网络管理员根据用户验证及无线用户与接入点之间的信任安全级,控制用户对网络资源的访问。
例如,标记为“GUEST”的SSID不需要此SSID用户的验证或安全性。
“GUEST”SSID上的所有流量都被置于限制访问互联网接入等特定服务的VLAN上。
对于员工访问则配置另外一个SSID。
“EMPLOYEE”SSID需要使用带AES加密的IEEE 802.11i进行网络验证,以保护无线数据的安全。
AdtempTM 421数字耳朵温度仪产品说明书
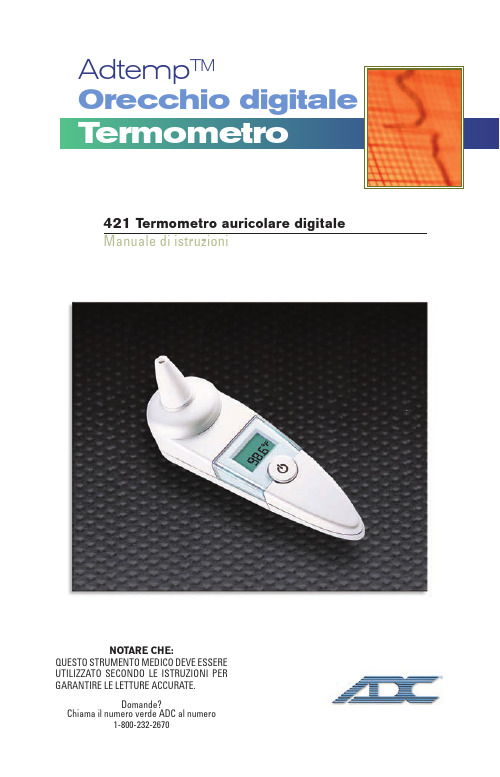
NOTARE CHE:QUESTO STRUMENTO MEDICO DEVE ESSEREUTILIZZATO SECONDO LE ISTRUZIONI PERGARANTIRE LE LETTURE ACCURATE.Domande?Chiama il numero verde ADC al numero1-800-232-2670421 Termometro auricolare digitaleManuale di istruzioniAdtemp TM421 Termometro Auricolare Digitale1. I vantaggi di questo termometro auricolare . . . . . . .3-42. Importanti istruzioni per la sicurezza . . . . . . . . . . .4-53. Come questo termometro auricolaremisura la temperatura . . . . . . . . . . . . . . . . . . . . . . .54. Display e simboli di controllo . . . . . . . . . . . . . . . .5-65. Istruzioni per l'uso . . . . . . . . . . . . . . . . . . . . . . . .6-76. Fahrenheit a Celsius commutabile . . . . . . . . . . . . . .77. Come richiamare 12 letture in modalità memoria . .7-88. Messaggi di errore . . . . . . . . . . . . . . . . . . . . . . . . .89. Pulizia e disinfezione . . . . . . . . . . . . . . . . . . . . . . .810. Sostituzione della batteria . . . . . . . . . . . . . . . . . . . .911. Garanzia . . . . . . . . . . . . . . . . . . . . . . . . . . . . . . . .912. Specifiche tecniche . . . . . . . . . . . . . . . . . . . . . .9-1013. Sito web . . . . . . . . . . . . . . . . . . . . . . . . . . . . . . .1014. Informazioni di contatto . . . . . . . . . . . . . . . . . . . . .311. I vantaggi di questo termometro auricolareUso multiplo (misurazione ad ampio raggio)Questo termometro offre un'ampia gamma di misure da 32,0 ° F a 212,0 ° F (da 0 °C a 100,0 ° C); il che significa che l'unità può essere utilizzata come termometro au-ricolare per misurare la temperatura corporea, ma può anche essere utilizzata per misurare la temperatura superficiale degli oggetti:Temperatura superficiale del latte nella bottiglia del bambinoTemperatura superficiale del bagno del bambinoTemperatura ambienteCopertura della sonda gratuitaQuesto termometro è più user-friendly e più economico, dal momento che non èrichiesta una copertura per sonda.Misura in 1 secondoL'innovativa tecnologia a infrarossi consente di misurare la temperatura del-l'orecchio in solo 1 secondo.Accurato e affidabileL'esclusiva struttura del gruppo sonda, che incorpora un sensore a infrarossi avanzato, assicura che ogni misura sia accurata e affidabile.Delicato e facile da usareIl design ergonomico consente un utilizzo semplice e facile del ter-mometro.Questo termometro può essere utilizzato anche su un bambino chedorme, senza causare alcuna interruzione.Questo termometro è veloce e piacevole da usare per i bambini.Memoria display automaticoL'ultima lettura viene visualizzata automaticamente per 2 secondi quando l'unitàè accesa.Richiami a più lettureGli utenti saranno in grado di richiamare le ultime 12 letture quando entrano in modalità memoria, consentendo un monitoraggio efficiente delle variazioni di tem-peratura.Sicuro e igienicoNessun rischio di rottura del vetro o ingestione di mercurio.Completamente sicuro per l'uso sui bambini.La pulizia della sonda può essere eseguita con un tessuto di cotone imbevuto di alcol, rendendo questo termometro completamente igienico per l'uso da parte di tutta la famiglia.Allarme febbre10 brevi segnali acustici avvisano il paziente che potrebbe avere la febbre.2. Importanti istruzioni di sicurezzaQuesto strumento può essere usato solo per lo scopo descritto in questo opus-colo. Il produttore non può essere ritenuto responsabile per danni causati da un'applicazione errata.Non immergere mai questo strumento in acqua o altri liquidi (non impermeabili). Per le istruzioni di manutenzione, fare riferimento alla sezione "Pulizia e disinfezione".Non utilizzare lo strumento se si ritiene che sia danneggiato o si noti qualcosa di insolito.Non aprire mai lo strumento.Il cerume nel condotto uditivo può causare una lettura della temperatura piùbassa. Pertanto è importante assicurarsi che il canale uditivo del soggetto sia pulito.Questo strumento comprende componenti sensibili e deve essere trattato con cautela. Osservare le condizioni di conservazione e di funzionamento descritte nella sezione "Specifiche tecniche"Proteggilo da:temperature estremeimpatto e cadutacontaminazione e polvereluce direttacaldo e freddoAVVERTIMENTO:L'uso di questo strumento non è inteso come un sostituto per la consultazione con il proprio medicoQuesto strumento NON è impermeabile! MAI immergere nei liquidiQuesto prodotto può contenere una sostanza chimica nota allo stato della California per provocare cancro, difetti alla nascita o altri danni riproduttivi.3. Come questo termometro auricolare misura la temperaturaQuesto termometro misura l'energia infrarossa irradiata dal timpano e dal tessuto circostante. Questa energia viene raccolta attraverso l'obiettivo e convertita in un val-ore di temperatura. La lettura misurata ottenuta direttamente dal timpano (membrana timpanica) può garantire la temperatura dell'orecchio più precisa.Le misurazioni prelevate dal tessuto circostante del condotto uditivo generano letture più basse e possono provocare diagnosi errate di febbre.Per evitare una misurazione imprecisa:Questo termometro è stato testato clinicamente e dimostrato di essere sicuro e accurato quando utilizzato in conformità con il suo manuale di istruzioni operative.Accendere il termometro premendo il pulsante ON / OFF.Dopo aver sentito un segnale acustico (e l'icona della scala della temperaturalampeggia), raddrizzare il condotto uditivo tirando delicatamente la parte cen-trale dell'orecchio verso l'alto e verso l'alto.Posizionare saldamente la sonda nel condotto uditivo, premere il pulsante START e mantenere la sonda nell'orecchio finché il termometro emette un seg-nale acustico per identificare il completamento della misurazione.1. 2.3.Se lo strumento non verrà utilizzato per un periodo prolungato, le batterie dovrebbero essere rimosseAssicurarsi che i bambini non usino lo strumento senza sorveglianza; alcuneparti sono abbastanza piccole da essere ingoiate4. Display e simboli di controlloTutti i segmenti visualizzati: Premere il pulsante ON / OFF per accendere l'unità, tutti i segmenti verranno visualizzati per 2 secondi.Memoria: l'ultima lettura verrà visualizzata automaticamente sul display per 2secondi.Pronto per la misurazione:l'unità è pronta per la misurazione, l'icona ° F o ° C continuerà a lampeggiare.Misurazione completata:la lettura verrà visualizzata sul display con l'icona ° F o ° C lampeggiante, l'unità è di nuovo pronta per la misurazione successiva.Indicazione della temperatura fuori dall'orecchio:Un'icona con le orec-chie incrociate visualizzata sul display se la lettura non rientra nell'intervallo 89,6 ~ 108,0 ° F (32,0 ~ 42,2 ° C).Indicazione di batteria scarica: quando l'unità è accesa, l'icona della batte-ria continuerà a lampeggiare per ricordare all'utente di sostituire la batteria.5. Istruzioni per l'usoPremere il pulsante ON / OFF. Il display è attivato per mostrare tutti i segmentiper 2 secondi.L'ultima lettura della misurazione verrà visualizzata automaticamente sul displayper 2 secondi con l'icona M.Quando l'icona ° F o ° C lampeggia, viene emesso un segnale acustico e il ter-mometro è pronto per la misurazione.Raddrizzare il condotto uditivo tirando l'orecchio verso l'alto e indietro per dareuna visione chiara del timpano.• Per i bambini di età inferiore a 1 anno:tirare indietro l'orecchio.• Bambini di età compresa tra 1 anno e adulto:tirare l'orecchio in alto e indietro.Vedi anche le brevi istruzioni a pagina 5.Mentre si tira delicatamente l'orecchio, inserire la sonda nel canale uditivo e pre-mere il pulsante START. Rilascia il pulsante e attendi il segnale acustico. Questa èl'indicazione che conferma la fine della misurazione.Rimuovere il termometro dal condotto uditivo. Il display mostra la temperatura misurata.1.2.3.4.5.6.NOTA: al fine di garantire letture accurate, attendere almeno 30 sec-ondi dopo 3-5 misurazioni continue. L'accumulo di cerume sulla sonda può causare letture della temperatura meno accurate o in-fezioni incrociate tra gli utenti. Pertanto, è essenziale utilizzare una sonda pulita prima di ogni misurazione. Per la pulizia, seguire le istruzioni nella sezione Pulizia e disinfezione. Dopo aver pulito la sonda con alcool, è necessario attendere 5 minuti prima di eseguirela misurazione successiva, in modo da consentire al termometro di raggiungere la temperatura di riferimento operativa.10 toni brevi suonano quando la temperatura è superiore a 99,5 ° F (37,5 ° C)per avvertire il paziente che potrebbe avere la febbre.Per un bambino, è meglio che il bambino penda piatto con la testa di lato inmodo che l'orecchio sia rivolto verso l'alto. Per un bambino più grande o unadulto, è meglio stare dietro e leggermente al lato del paziente.Prendi sempre la temperatura nello stesso orecchio, poiché le letture della tem-peratura potrebbero essere diverse dall'orecchio destro e dall'orecchio sinistro.Attendere alcuni minuti per prendere la temperatura dell'orecchio dopo aver dor-mito.Nelle seguenti situazioni si consiglia di prendere tre temperature nello stesso orecchio e quella più alta presa come la lettura:1. 2.3.Neonati nei primi 100 giorni.Bambini sotto i tre anni con un sistema immunitario compromesso e per i quali la presenza o l'assenza di febbre è critica.Quando l'utente sta imparando come utilizzare il termometro per la prima volta fino a quando non ha familiarizzato con lo strumento e ottiene letture coerenti.6. Fahrenheit a Celsius commutabileQuesto termometro può visualizzare le misurazioni della temperatura in gradi Fahrenheit o Celsius. Per cambiare la visualizzazione tra ° F e ° C, è sufficiente spegnere l'unità, tenere premuto il pulsante START per 5 secondi. Quando si smette di premere il pulsante START dopo 5 secondi, la scala di misurazione corrente (icona ° F o ° C) lampeggerà sul display. Passa dalla scala di misurazione tra ° F e ° C premendo di nuovo il pulsante START.Una volta selezionata la scala di mis-urazione, attendere 5 secondi e l'unità entrerà automaticamente in modalità di mis-urazione pronta per la misurazione.7. Come richiamare 12 letture in modo memoriaQuesto termometro può richiamare le ultime 12 letture.Modalità memoria:premere il pulsante START per accedere alla modalità di memoria quando l'alimentazione è spenta. L'icona della memoria M lampeggia.Lettura 1 - l'ultima lettura: premere e rilasciare il pulsante START per richia-mare l'ultima lettura. Visualizza 1along con l'icona della memoria.Lettura 12 - lettura in successione: Premere e rilasciare il pulsante START consecutivamente per richiamare le letture in successione, fino alle ultime 12 let-ture. Premendo e rilasciando il pulsante START dopo che le ultime 12 letturesono state richiamate, si riprenderà la sequenza sopra riportata dalla lettura 1.8. Messaggi di erroreTemperatura misurata troppo alta: Visualizza H quando la temperaturamisurata è superiore a 212,0 ° F o 100,0 ° C.Temperatura misurata troppo bassa:visualizza L quando la temperatura misurata è inferiore a 32,0 ° F o 0 ° C.Temperatura ambiente troppo alta: visualizza H in combinazione con s quando la temperatura ambiente è superiore a 104,0 ° F (40,0 ° C).Temperatura ambiente troppo bassa: visualizza L in combinazione con t quando la temperatura ambiente è inferiore a 10 ° C (50 ° F).Visualizzazione della funzione di errore:quando il sistema ha un malfun-zionamento.Display vuoto:verificare se la batteria è stata caricata correttamente. Control-lare anche la polarità (+ e -) delle batterie.Indicazione della batteria scarica: se l'icona della batteria fissa è l'unico simbolo visualizzato sul display, è necessario sostituire immediatamente le bat-terie.9. Pulizia e disinfezioneUtilizzare un tampone imbevuto di alcool o un tessuto di cotone inumidito con alcol (70% Isopropyl) per pulire l'involucro del termometro e la sonda di misurazione. As-sicurarsi che nessun liquido penetri all'interno del termometro. Non utilizzare mai detergenti abrasivi, diluenti o benzene per la pulizia e non immergere mai lo stru-mento in acqua o altri liquidi detergenti. Fare attenzione a non graffiare la superficie dell'obiettivo della sonda e il display.10. Sostituzione della batteriaQuesto strumento è fornito con una batteria al litio, tipo CR2032. Sostituire con una nuova batteria CR2032 quando il simbolo della batteria lampeggiante appare sul display. Rimuovere il coperchio della batteria facendolo scorrere verso il basso.Rimuovere la batteria e sostituirla con una nuova..11. GaranziaQuesto strumento è coperto da una garanzia di 2 anni dalla data di acquisto.La garanzia copre lo strumento e le batterie. La confezione non è inclusa.L'apertura o la modifica dello strumento invalida la garanzia.La garanzia non copre i danni causati da uso improprio, batterie scariche, inci-denti o mancata osservanza delle istruzioni operative. Contattare il servizio di assistenza clienti ADC® per ulteriori informazioni.12. Specifiche tecnicheTermometro auricolare 421Da 32,0 ° F a 212,0 ° F - da 0 ° C a 100,0 ° C 0,1 ° F / ° C ± 0,4 ° F, 89,6 ~ 108,0 ° F (± 0,2 ° C: 32,0 ~ 42,2 ° C)± 2 ° F: 32,0 ~ 89,5 ° F, 108,1 ~ 212,0 ° F (± 1 ° C: 0 ~ 31,9, 42,3 ~ 100,0 ° C)Display a cristalli liquidi, 4 cifre più icone speciali • L'unità è accesa e pronta per la misurazione:1 segnale acustico breve • Completare la misurazione: 1 bip lungo• Errore o malfunzionamento del sistema: 3 bip brevi• Allarme febbre: 10 bip breviGenere:MisurazioneGamma:Risoluzione:Misura:Laboratorio:Precisione:Display:Acustico:• Auto: visualizza l'ultima temperatura misurata• 12 richiami di letture nel modo memoriaDa 50 ° F a 104 ° F (da 10 ° C a 40 ° C)Da -13 ° F a 131 ° F (da -25 ° C a 55 ° C)Circa. 1 minuto dopo l'ultima misurazione è stata presa BATTERIA CR2032 (X1) - almeno 1000 misurazioni 6 "(L) x 1,2" (L) x 1,6 "(H)153mm (L) x 31mm (W) x 40mm (H)1,87 once (53 g con batteria), 1,76 once (50 g senza batteria)Conforme ai requisiti ASTM E-196513. Sito WebInformazioni dettagliate sugli utenti dei nostri termometri e misuratori della pressione sanguigna, nonché altri prodotti e servizi sono disponibili su .Memoria:OperativoTemperatura:ConservazioneTemperatura:AutomaticoSpegnere:Batteria:Dimensioni:Peso:Standard:In base alla legge sull'utente del prodotto medico, è consigliabile un'is-pezione tecnica biennale per gli utenti professionali. Si prega di osservare le norme di smaltimento applicabili.rmazioni di contattoPer registrare il tuo prodotto e ottenere un ulteriore utente dettagliato informazioni sui nostri prodotti e servizi visitaci a:e segui i collegamenti.Per domande, commenti o suggerimentichiamaci al numero:1-800-232-2670Dist. da: ADC®55 Commerce Drive,Hauppauge, NY 11788Ispezionato negli Stati UnitiFatto in Cinatel: 631-273-9600numero verde: 1-800-232-2670fax: 631-273-9659email:***************** Onbo Electronic (Shenzhen) Co., Ltd.No. 497, Ta Laneg Nan RoadTa Laneg StreetBaoan District, Shenzhen, ChinaMicrolife AG, Espenstrasse139, 9443 Widnau, SwitzerlandAmerican Diagnostic Corporation55 Commerce Drive, Hauppauge, New York 11788Telephone: 631-273-9600 • Fax: 631-273-9659Email:*****************Stampato in Cina。
科视LWU421使用教程

科视LWU421使用教程第一步:将电脑电源、投影仪电源、音箱电源、幕布电源插入插头。
将VGA电缆插入计算机的VGA接口。
打开插入式电源。
第二步:打开窗帘进程开关,按下“向下”键,放下窗帘。
窗帘放在底部后,将开关转到“0”位置,关闭电源。
第三步。
打开投影仪。
投影仪开机后,投影仪机身上的橙色灯亮起。
按下遥控器的开机键,橙色灯变为绿色灯,投影仪开始正常启动(启动大约需要3-5分钟)。
第四步。
按下电脑的电源开关,启动电脑。
电脑启动后,按功能键F5(联想)切换到投影模式。
不同电脑的功能键会不一样。
切换方式取决于电脑情况。
如果一次按不下切换键,可以再按一次或两次(显示方式为复制或切换)。
切换后就可以开始正常使用了。
第五步。
当投影仪打开时,指示灯闪烁,表示设备处于启动状态。
当指示灯不闪烁时,可以进行下一步操作。
投影仪打开后,灯泡内压大于10KG/cm,灯丝温度上千度,处于半熔化状态。
因此,开机时禁止晃动和移动投影仪,禁止强行切断电源,以防配件燃烧爆裂。
首先,在使用过程中,如果投影仪因意外断电仍需启动,请等待投影仪冷却5-10分钟后再启动。
其次,连续使用时间不宜过长,一般控制在4小时以内。
在夏季高温环境下,使用时间要短一些(2小时以内)。
再次提醒,开机后注意不断切换画面,保护投影机灯泡,否则LCD面板或DMD面板会局部过热,造成永久性损坏。
第一步。
关闭计算机的电源。
第二步:按两次遥控器关机键,关闭投影仪。
第三步:打开窗帘行程开关,按“向上”键,收起窗帘,当所有窗帘收起后,将开关转到“停止”位置,关闭电源。
步骤4:从计算机上拔下VGA电缆。
投影机散热风扇自动停止运转后,关闭插件电源,将电脑、投影机、音箱、窗帘从插件上拔下。
第五步。
使用完投影设备后,要将投影仪电源插头、音箱电源插头、幕布电源插头、VGA线依次卷好,用电线绑好挂在墙上,以备下次使用。
第六步。
关机后不能马上关电源。
投影机的风扇停止转动,闪烁指示灯停止闪烁后,你要等5分钟,让机器在散热完成后自动停止。
巴法络 buffalo LS421DE 使用手册
第 4 章存取限制...............................................................................23
檢查硬碟.....................................................................................................................42 格式化硬碟................................................................................................................43 完全清除 LinkStation 上的資料........................................................................44 磁碟配額.....................................................................................................................45
卸載硬碟.....................................................................................................................41
好事特酒店管理系统软件说明书
上海火悦电脑有限公司好事特酒店管理系统说明书目录一、快速入门1.使用前准备工作 (3)第一步:安装酒店管理系统 (3)第二步:设置相关基础资料 (6)①字典设置 (6)②客房资料 (7)③商品资料 (7)④协议单位 (8)⑤会员管理 (8)⑥操作员管理 (9)⑦服务员管理 (9)⑧参数设置 (10)⑨数据管理 (10)第三步:设置完成,正式使用2.日常运行操作流程 (11)二、各模块操作方法1.系统主界面 (11)1.1开房登记 (12)1.2追加客房 (12)1.3更换房间 (13)1.4修改登记 (13)1.5房间状态 (14)1.6预订管理 (14)1.7会员充值 (15)1.8退出系统 (16)2.增加消费 (16)2.1消费点单 (16)2.2个人消费明细查询 (17)3.收银结帐 (17)3.1客房结帐 (17)3.2合并帐单 (18)3.3拆分帐单 (18)3.4挂帐单结帐 (19)3.5交班管理 (20)4.报表查询 (20)5.系统维护 (20)5.1修改密码 (21)5.2数据备份 (21)5.3数据还原 (21)三、酒店常见问题解答一、快速入门1.使用前准备工作:第一步:安装酒店管理系统(在已安装好SQL Server2000的前提下)双击软件安装程序,弹出如下对话框:图1图2图3图4图5图6图7图8图9图10(软件注册界面)第二步:在“资料维护”菜单,设置相关基础项目。
①字典设置:分为客户来源、支付方式、证件类别、人员职务、身份证区域。
其中客户来源、证件类别、身份证区域用于登记开房时使用,支付方式用于客房结帐时使用,人员职务用于操作员管理时使用。
②客房资料:客房资料也可以理解为房间的种类(例如:标准单人间、商务双人间等)。
具体到某个客房类型都有其相对应的房间。
在左边点增加分类,可以建立相应的客房类型;选择某个客房类型后,可以在客房列表建立房间资料。
③商品资料:是酒店提供给宾客的并收取一定费用的项目(例如:服务项目、酒水、香烟等)。
