非洲手鼓教程
非洲鼓教学

非洲鼓基本打法及节奏练习教学目标:1、学会非洲鼓得三个基音得基本打法2、掌握非洲鼓左右手得基本节奏组合练习教学重点与难点:1、区分中音T与高音S得打法2、熟练得掌握左右手得协调就是并能正确得打节奏就是本节课得重点所在。
教学过程:一常用标记1、Djembe三个基音得表示(如右图所示)B =(BASS) = 低音T =(TONE) = 中音S =(SLAP) = 高音2、左右手得表示方法R = (Right) = 右手L = (Left ) = 左手3、如何使用左右手一般情况下先用右手打。
有些人在打手鼓中对于应该怎么用左右手有些迷惑,跟着自己得习惯就打下来了,可这往往就是错误得,以后形成习惯了就更不好改过来。
因此,一定要在刚开始练习时就养成正确得习惯。
这对于您以后得学习有很大得帮助。
其实,可以推理出来这个音就是该用左手还就是右手。
无论就是什么节奏型,只要不就是左撇子,它得规律就就是右手先打。
需要注意得就是,休止符号或延长符号,都要占用一只手得。
“R”代表右手,“L”代表左手, “-” 代表延长空开不打。
二非洲手鼓得打法与姿势(1)坐姿示意图:坐式:把djembe夹在两腿中,腰部坐直。
鼓面向外倾斜,双肩臂打开,双手自然落在鼓边,因为djembe就是单面鼓皮得乐器,让它倾斜得目得就就是让声音从鼓腔底部释放出来。
(2)站立式示意图:练习:让学生学习如何系背带(如图)(3)低音B打法:四指并拢,手臂放松;打开,手臂与手腕成直线。
打击得位置靠近鼓得中心,也会根据鼓面得大小位置有所移动,鼓越小打击得位置越就是靠近中心。
无论鼓得大小,手肚在打低音时都必须在鼓面上。
用整个手掌打击,打击时快速得弹起,落下得重心在掌心。
(4)中音T打法打中音得手型与低音一样不变。
先放在低音部位,然后往外挪,让指根与鼓边对齐,然后用手掌得四根指部位打击。
打击时快速得弹起,落下得重心在指肚。
如图:(5)高音S打法打高音时手指放松得张开,但不要张得很大。
非洲手鼓简单的口诀

非洲手鼓打的时候口诀按照:咚哒、咚咚哒来打击。
低音打法:把整个手掌拍到鼓面上,保证手掌在鼓面的中间,手心稍微拱起,手掌发力。
中音打法:用手指敲击鼓边,四指并拢,手臂找到自由落体的感觉,手指微微发力。
高音打法:高音和中音的打法很像,但一般使用手指根部敲击鼓边发声,手指适当放松,像甩鞭子一样,把手摔在鼓边,重心放在手指根部有肉的地方,自然迅速的打击鼓面。
扩展资料:
打非洲手鼓注意事项:
1、要保持小臂和手部保持在同一直线上,尤其是在演奏的过程中,不要让这条直线出现,这种方式也让自己在打鼓的过程中省了很多的力气。
2、打完一个音之后,手一定要快速干脆的抬起来,不要粘在鼓面上,可以把鼓面想象成一个烫手的火炉,手在上面不停地抖动。
3、大拇指是完全张开的,可以保持手部的平衡,同时让你快速击打,并且不会伤害到大拇指。
如果大拇指不张开,大拇指可能会击打到鼓面的边缘或者铁圈上面。
4、打鼓的时候不要低头看,一开始练习的时候不需要太刻意,但是熟练了之后,一定要抬头挺胸看着前方,这样才能打击的更加有自信。
非州鼓基本打法教学
非洲鼓基本打法教学一、非洲鼓的简介非洲鼓,又被称为Djembe,是一种起源于西非的打击乐器。
它的外观独特,通常呈圆形,有三个至四个手柄,每个手柄代表一个不同的音调。
非洲鼓的音色醇厚、深沉,具有强烈的节奏感,是非洲传统音乐的重要乐器之一。
二、非洲鼓的基本打法1.坐姿与姿势打非洲鼓时,坐姿要端正,两腿分开与肩同宽,背部稍微向前倾斜,双脚踩实地面,双手握住鼓柄,手臂放松,以自然舒适的方式放置。
同时,要根据节奏的变化来调整身体的姿势和手臂的力量。
1.手腕与手指打非洲鼓时,手腕和手指是非常重要的。
手腕要放松,以腕关节为轴心,带动手指进行击打。
手指要自然分开,用指肚部分敲击鼓面,避免用指尖或手臂发力。
在击打时,要注意手指的力度和速度的变化,以制造出不同的音色和节奏。
1.节奏与力度节奏是非洲鼓演奏的灵魂。
在打非洲鼓时,要学会倾听节奏的变化,掌握好基本的节奏型。
同时,力度也非常重要,要根据节奏的变化来调整敲击的力度。
一般来说,重拍时要用力击打,轻拍时要轻敲,保持节奏的平衡和韵律感。
1.演奏与配合在演奏非洲鼓时,要学会与其他乐器和歌手进行配合。
要根据歌曲的旋律和节奏来调整自己的演奏方式,与其他乐手和歌手保持一致。
同时,也要学会倾听他人的演奏,以便更好地融入整个音乐场景中。
三、非洲鼓的演奏技巧1.变化敲击方式通过变化敲击的方式,可以制造出不同的音色和效果。
例如,可以用手指肚轻轻敲击鼓面,制造出柔和的音色;也可以用指尖或手臂发力,制造出强烈的音色。
此外,还可以通过改变敲击的速度和力度来制造出不同的效果。
1.掌握节奏型的变化在演奏非洲鼓时,要掌握好基本的节奏型,如四拍、八拍、十六拍等。
同时,也要学会变化节奏型,如加入切分音、三连音等。
这需要不断地练习和尝试,以逐渐熟悉和掌握各种不同的节奏型。
1.与其他乐器和歌手配合在演奏非洲鼓时,要学会与其他乐器和歌手进行配合。
要根据歌曲的旋律和节奏来调整自己的演奏方式,与其他乐手和歌手保持一致。
非洲鼓制作

非洲鼓知识-非洲鼓的制作非洲鼓制作过程手鼓看似粗糙,但制作工艺却需要十分仔细,纯手工制作完成,每一个细节都不可轻视。
下面以图文形式展现一只djembe是如何制作完成的:木质部分:1,木材木材关系到鼓的声音和寿命。
挑选密度高的硬木,树根部的木材做出的鼓质量最好,室外演奏的声音也厚实,相对鼓的重量也最沉。
2,掏空及造型将截好段的木头由内到外进行掏空和定型。
一只真正的手鼓是一段整木头制作的,不存在拼接的过程。
3,晾干需要长时间自然条件下风干晾干,此过程非常重要,一定要让木头干透,否则不仅仅会影响鼓的声音,更会影响到木头的寿命。
4, 打磨及上油此步骤也非常重要,需上皮一端开口的边缘用砂纸打磨平整光滑,否则会导致很多问题,比如上鼓皮的时候磨破鼓皮。
打磨后需上油,以植物油最好。
下面是上鼓皮部分鼓皮要选择老山羊皮,这样的皮厚实,有韧劲,不易拉破。
同时也需要把鼓皮处理光滑。
1。
泡水以使皮变软皮可以卷起來,让水盖过即可,浸泡时间是3小时2。
揉皮将湿透的皮张开铺在平地上,以脚跟来回压踩,进行约20 分钟3。
上框将圆型的(金属制)内皮框置于皮中心,将皮折入框内,将皮越过外框翻出4。
固定固定将已经被内外框箍紧的皮放到鼓上,以绳子开始上垂直线绷皮5 。
风干上完垂直线之后,将鼓放在通风处风干6 。
剃毛(带毛才有)7 。
上紧在垂直绳完全拉紧之后,以剩下的绳子进行横向打节,逐渐将张力转到皮面上8 。
上油涂一层油,以植以油为最佳。
经过以上过程,一直完整的djembe才算制作完成。
非洲鼓基本打法教学
非洲鼓基本打法教学非洲鼓是一种源于非洲的传统打击乐器,具有独特的韵律和动感。
本文将介绍非洲鼓的基本打法,帮助初学者入门。
一、介绍非洲鼓非洲鼓是一种由木材制成的打击乐器,通常有长筒状的鼓体和上面装有皮套的鼓面。
不同的非洲鼓样式和地区有所差异,但基本的打击方法是相似的。
非洲鼓在非洲文化中扮演着重要角色,常用于各种庆祝活动和宗教仪式。
二、正确握持鼓槌在学习非洲鼓的基本打法之前,首先要掌握正确的握持鼓槌的方法。
拇指和食指分别握住鼓槌的上半部分,中指和无名指则放在鼓槌的下半部分,让鼓槌能够自由地摆动。
正确的握持鼓槌可以提高击打的准确性和灵活性。
三、基本打法:基础节奏非洲鼓的基本打法是基础节奏,这是初学者入门的重要基础。
以下将介绍几种基础节奏。
1. Bass音:用鼓槌的鼓面部分轻击鼓面中央,发出低沉有力的声音。
这个音符通常用大写字母“X”表示。
2. Tone音:用鼓槌的鼓面部分轻击鼓面边缘,发出明亮的声音。
这个音符通常用小写字母“o”表示。
3. Slap音:用手掌侧面或者鼓槌的背面击打鼓面,发出尖锐而有弹性的声音。
这个音符通常用感叹号“!”表示。
四、基本打法:传统节奏除了基础节奏外,非洲鼓还有许多传统的节奏,每个节奏都有其独特的韵律和表达方式。
以下将介绍两种常见的传统节奏。
1. Djembe节奏:这个传统非洲鼓节奏源自马里民族,是非洲鼓演奏中最基本和最重要的节奏之一。
它由Bass音、Tone音和Slap音组成,可以通过不同的音符排列形成不同的节奏变化。
2. Conga节奏:这个节奏源自古巴的康加鼓,被广泛应用于非洲鼓演奏中。
它以更快的速度和更强烈的韵律给人以动感和激情。
具体的教学和演奏技巧需要逐步学习和掌握,可以借助专业教材或者请教鼓手专业人士。
五、练习方法学习非洲鼓的基本打法需要长时间的练习和耐心。
以下是一些建议的练习方法。
1. 反复练习基础节奏,并逐渐增加节奏的难度和复杂度。
2. 听取专业鼓手的建议和指导,学习他们的技巧和经验。
羊皮手鼓演奏方法
羊皮手鼓演奏方法摘要:一、羊皮手鼓简介二、羊皮手鼓演奏技巧1.击打方式2.节奏掌握3.情感表达三、演奏注意事项四、练习与表演建议正文:羊皮手鼓,源于非洲大陆,是一种具有深厚文化底蕴的打击乐器。
在我国,羊皮手鼓也逐渐成为了一种受欢迎的乐器。
本文将为您详细介绍羊皮手鼓的演奏方法,帮助您更好地掌握这一独特的乐器。
一、羊皮手鼓简介羊皮手鼓,又称非洲手鼓,主要由羊皮、木制鼓腔和鼓柄组成。
演奏时,演奏者手持鼓柄,用另一只手击打羊皮表面,发出动听的音符。
羊皮手鼓音色丰富,具有较高的艺术价值,既可以独奏,也可以与其他乐器共同演奏。
二、羊皮手鼓演奏技巧1.击打方式击打羊皮手鼓时,建议使用手指、手掌或鼓棒等工具。
手指击打可以产生丰富的谐波,使音色更加饱满。
手掌击打则能使音色更加宽广。
击打时,力量要适中,既要保证音量,又要避免声音过于刺耳。
2.节奏掌握羊皮手鼓的节奏是其灵魂所在。
演奏时,要学会利用不同的击打方式和力度,表现音乐的节奏感。
可以通过练习简单的节奏型,如非洲节奏、拉丁节奏等,来提高自己的节奏感。
3.情感表达羊皮手鼓演奏过程中,情感表达至关重要。
演奏者需将自己的情感融入音乐中,通过鼓声传递给听众。
在表现欢快、热情的曲目时,可以采用快速的击打节奏和较高的音量;在表现柔和、抒情的曲目时,可以采用慢速的击打节奏和较低的音量。
三、演奏注意事项1.保持鼓皮张力:演奏前,确保羊皮手鼓的鼓皮张力适中,以免影响音色和音质。
2.击打位置:击打时要准确击打在鼓皮的中央,以保证音色的一致性。
3.坐姿与握鼓:演奏时,要保持正确的坐姿和握鼓姿势,以免造成肌肉紧张和疲劳。
四、练习与表演建议1.初期练习时,可以从简单的节奏和曲目入手,熟练掌握基本技巧。
2.随着技巧的提高,可以尝试练习更具挑战性的曲目,以及与其他乐器的合奏。
3.在表演过程中,注重与观众的互动,通过表情、肢体语言和鼓声,传达音乐的魅力。
总之,羊皮手鼓是一种富有表现力的乐器,通过不断练习和探索,您可以掌握其演奏技巧,并充分展现音乐的魅力。
非洲鼓的基本打法教学

非洲鼓的基本打法教学非洲鼓作为一种古老而独特的打击乐器,有着深厚的历史和文化背景。
它既能够使人产生强烈的节奏感,又能够表达出情感与故事。
在学习非洲鼓的过程中,了解和掌握基本的打法是至关重要的。
本文将介绍非洲鼓的基本打法,并简要说明每种打法的特点和用途。
1. 手掌打法手掌打法是最常见和基础的非洲鼓打法之一。
它使用手掌的掌侧部分来敲击鼓面,通过改变手掌的位置和力度来产生不同的音响效果。
这种打法简单直接,适合演奏鼓的基本节奏。
在使用手掌打法时,要注意手掌与鼓面间的角度,以获得清晰而有力的声音。
2. 指尖敲击指尖敲击是一种精细而细腻的打法,通常用于演奏鼓面上的细节音响。
这种打法利用手指的指尖轻轻敲击鼓面,产生柔和、细腻的音色。
指尖敲击需要练习手指的控制力度和准确性,以避免过重或不准确的敲击。
3. 掌心滚动掌心滚动是一种常用于非洲鼓演奏中的连贯打法。
它利用手掌心的滚动动作,在鼓面上连续进行快速的敲击,形成连续的音响。
掌心滚动要求手腕和手指的灵活性和协调性,演奏者需要通过充分练习和熟悉乐曲的节奏和速度来获得准确且连贯的效果。
4. 大鼓棍敲击大鼓棍敲击是一种使用鼓棍进行演奏的打法,常见于非洲鼓队伍的演出中。
这种打法利用鼓棍的不同部位对鼓面进行敲击,产生不同的音响效果。
大鼓棍敲击要求演奏者有稳定的握持力和准确的击打力度,以保证每次敲击都能产生清晰而饱满的声音。
5. 掌心滑动掌心滑动是一种创造特殊音响效果的非洲鼓打法。
在演奏过程中,演奏者可以使用手掌心沿着鼓面进行滑动,从而产生连续而渐变的音响。
掌心滑动通常用于非洲鼓乐曲的过渡部分或特定的独奏表演,可以增添音乐的情感和变化。
综上所述,非洲鼓的基本打法涵盖了手掌打法、指尖敲击、掌心滚动、大鼓棍敲击和掌心滑动等多种技巧。
在学习和实践过程中,重要的是熟练掌握每种打法的特点和用途,并能够根据乐曲的需要灵活运用。
通过不断的练习和探索,你将能够更加自如地演奏非洲鼓,表达自己的音乐情感。
非洲鼓初学入门基本手法
非洲鼓初学入门基本手法非洲鼓,作为非洲音乐文化的重要组成部分,具有浓厚的历史和民族特色。
学习非洲鼓可以帮助我们深入了解非洲音乐和文化,同时也可以提高我们的音乐表达能力和节奏感。
本文将介绍非洲鼓初学者的入门基本手法。
一、非洲鼓的基本构造和演奏技巧非洲鼓一般由鼓身、鼓膜和鼓面组成。
学习非洲鼓的第一步是了解其基本构造,熟悉不同部分的名称和功能。
鼓膜是非洲鼓最重要的部分,可以通过敲打鼓膜来发出声音。
在演奏非洲鼓时,需要掌握正确的手腕和手指技巧。
以下是一些基本的手法:1. 敲打:用手掌的下半部分敲打鼓膜,可发出清晰而响亮的声音。
注意手腕的灵活度,敲打时手腕应该放松自然。
2. 弹打:用手指的指尖轻轻弹打鼓膜,产生短促而有力的音符。
掌握正确的弹打力度和角度,可以改变音色和音量。
3. 滑动:用手掌的一侧或手指的侧边沿着鼓膜滑动,产生连续的音符。
滑动的速度和节奏可以自行控制,增加音乐的变化和表现力。
二、基本的非洲鼓节奏和乐器组合非洲鼓的演奏通常与其他乐器共同进行,形成丰富的韵律和和谐的音乐。
对于初学者来说,可以从一些基本的非洲鼓节奏开始练习。
1. 基础节奏1:DjembeDjembe是最常见的非洲鼓之一,也是初学者入门最好的选择之一。
以下是一个简单的Djembe节奏:(示范节奏)这个基础节奏以四个拍子为一个循环,可以反复练习直至熟练。
在演奏时,可以根据自己的感觉加入一些变化和个人风格。
2. 基础节奏2:CongaConga是另一种常见的非洲鼓,与Djembe常一起使用。
以下是一个简单的Conga节奏:(示范节奏)这个基础节奏同样以四个拍子为一个循环,通过左右手的交替演奏,营造出丰富的韵律变化。
三、培养良好的节奏感和合作意识学习非洲鼓不仅仅是学习演奏技巧,更重要的是培养良好的节奏感和合作意识。
以下是一些建议:1. 听音乐:多听一些非洲音乐,尤其是非洲鼓的演奏作品。
通过聆听,可以更好地理解非洲鼓的韵律和节奏特点。
2. 和其他乐器合作:找到一些非洲鼓的伙伴或其他乐器的演奏者一起练习和表演。
非洲鼓(Djembe)自学实用教材
3
影不又而习练的常正能才样么怎。人些一的屋同到响影者或�居邻的围周到响影易 容很 �好的好很是不果效音隔壁墙果如 �的大常非是音声习练里室居在鼓手洲非 ?音消么怎鼓练里家在�八
。性极积和情热的鼓学对你高提 以可音声的鼓好个一�是的说要我后最。的性弹有没和滑防要是定一也索绳�度紧 的定一到调皮鼓把难很则否�疏稀太要不定一索绳的上身鼓�鼓的音调索绳�有还 。了对就耳刺些有说能可�的尖很高很是且并�的状粒颗是音声的它�候时的音高 打你当。来出发面迎上面鼓从音低的乱散不且并厚浑很个一到觉感要你�候时的音 低打你当。显明别区上鼓个一在要音声的个两们它且并�脆尖要音高�厚浑要音低 鼓手洲非的好个一。音声的欢喜己自出调好喜的己自据根以可也你�然当。了对就 紧要还的中象想你比要度紧个这�紧的够足叫就话的去下压难很果如�压一压上皮 鼓在指拇大个两的手双用你是就�呢紧的够足叫才么怎。来出发的美完能才音声的 它�紧的够足皮鼓有只�鼓的音调钮属金是或音调索绳是论无�道知要你先首 ?坏好的色音鼓洲非别辨何如�七 。体一为融声鼓及鼓的你和能才你�松放的正真有只�住记。手乐的秀 优个一为成能才�人的觉感松放到会体正真有只�器乐么什学是论无�密秘的达表 法无个是这说以可�验经松放的同不有期时的同不�的会体常经要是也人的鼓手子 辈一了习学使即是松放。事回一么怎是松放到会体慢慢能才你�样这有只也�的要 重很是个这。松放要己自醒提刻时�识意的松放养培要定一�中程过的习练在 。已而道知不己自你是只�的张 紧是实其肢四的你�觉感的松放到会体有没还本根你�二�松放的正真有没并�的 张紧是还心的你实其�一�为因是这�行不还么怎�了松放够己自得觉人的有能可 。松放再�松放�松放�己自醒提要定一�候时的西东的大度难得觉你些一习练在是 其尤�松放要己自诉告着记要定一你但。系关没也那�觉感的松放到不找始开一你 使即�题问的久长个一是松放习练�的易容不是界境定一到练鼓手把想人的松放会 不个一�升提的速快巧技鼓手的你助有更松放了会学。洒潇你得觉会不也着看人别 �吁吁喘气的累�硬僵体身的你但不�之反。服舒会才着看人别�亮漂和然自最才候 时的鼓打�了松放体身有只。了对就中当鼓打到带觉感个这把�下一会体你。觉感 的着坐的然自最�干不都么什你是就松放�呢松放叫才么怎。的成造松放有没是就 那�疼酸膀肩臂手的你得觉候时的鼓打你果如�要重很松放�中程过的鼓打在 ?松放样怎中程过鼓打在 �六
迷人的邦戈鼓初级教程

邦哥通常小的让你可以夹在膝盖中间演奏.因为邦哥是两个鼓的组合,不是一个鼓,所以打出来的声音是层次分明,有旋律感的.小的那个鼓比大的鼓音要高,能打出一个个很高,很尖脆漂亮的声音出来.大鼓同时增添着美妙的低音.邦哥夹在膝盖上演奏时,通常是把大的鼓放在右面,因为你的右手最有力量和容易熟练.但.如果你是左撇子的话,那就请把大鼓放在左面好了,这样是最适合你的.同理,邦哥放在架子上演奏也是一样的.邦哥的中音(open tone)所有手鼓的中音是指最接近它本身声音的,就是你随便在手鼓上打出一个声音,一般就是它的中音了.因为邦哥鼓太小了,小的让你没法用整个手去打它,取而代之,所以你可以不同的手指组合来演奏它.邦哥的中音是在它的小鼓上打出来的,用你的指尖敲打鼓皮的边缘,你可以用一只手指,两只,三只,或四只,任何组合都可以,只要你觉得合适就行.细听你的鼓,找出能打出最大中音声音的那个点,太接近鼓中间,声音会比较模糊的.在你的鼓上找出你觉得最大最舒服的中音位置出来.邦哥的低音( bass tone)打邦哥的低音和打中音手法一样,不同的是,低音是在那个大的鼓上演奏.让你的手指在大的那个鼓上跳跃,找出最舒服的低音出来吧.邦哥鼓太小了,没法发出一个很好的低音,所以,邦哥要两个鼓连在一起,跟那个能出高音的小鼓比,大鼓就是低音了.这样就出了层次感了.其实,大鼓的音也不算低.邦哥的高音(slap tone)slap这个音是最短,最尖和最急促的,就象你突然拍破了一个塑料袋.打这个音需要耐心的练习,当你能打出一个很舒服的slap音时,会另人兴奋和鼓舞的.我最喜欢把邦哥的这种高音打法用在非洲手鼓上,能打出一个与众不同的声音出来.说实话.这个打法有些难,但只要你用心练习,一定能打的出来.邦哥有一个特别高的音,比其他手鼓高许多,你需要用两只手来打出这个音,一只手控制鼓面,一只手击打,如果你不是左撇子的话,那就左手控制鼓面,右手击打, 用你的大拇指的侧面按住小鼓的中央,同时另一只手打小鼓的边缘,就象你打中音的手法一样.这样你就打出那个漂亮的高音出来了.实验拇指用不同的压力和不同的鼓面位置,打出高音的区别.你会发现当你的拇指越往鼓的边缘移动时,你打出的声音越高.然后,在一点点实验拇指从边缘向中央移动的声音,你会发现能打出很多不同的音出来.一定要控制好两只手的时机,在练习中慢慢体会吧,你一定能行的!。
非洲手鼓最详细的打法
http://www1.tip.nl/~t968103/yankadi/Theory, experiments and exercisesPlaying the Djembe may look easy, and of course it is possible for a beginner to just sit behind the drum and play. But playing properly is certainly as difficult as mastering any other more well known instrument: it will take years of study, practice and dedication!Contrary to most western musical instruments like the guitar, the violin or piano, there is no teaching method for djembe that I know of.The most common way of teaching is that the teacher will show you how the bass, tone and slap are produced by playing these sounds, and letting you hear what they are supposed to sound like. It is up to the student to start praticing and experimenting in order to try and create the same sound. Without any help in the form of theory or precise instructions, it is extremely difficult to figure out what you are supposed to do! Or worse, when you happen to make a proper tone or slap, knowing why it was correct, and why the next time it doesn't seem to work anymore!To me, a teaching method consists a series of concepts and exercises that will gradually lead the student towards developing the motoric, muscular and musical skills necessary to become a proficient player. A gradual increase in the difficulty of the actual music that is being played is only one aspect of such a teaching method. The Djembe is notoriously hard to master if you want to produce the three tones, bass, tone and slap, properly. So a teaching method should also contain experiments, exercises, theory and practices that will clearly outline to the student what they must practice in order to take the next step towards producing a clear tone, or a clear slap.I have been down that path myself. However, I am used to learning a new instrument by myself, so I may have been more methodical than others. I have had lessons, attended workshops and weekends, but I also have read as much as I could find about djembe acoustics, drum acoustics and skin behaviour, and I tried to develop exercises which would lead to the muscle power and dexterity that should produce the desired sounds. I then practiced my own exercises, in order to try and find out if I was right. In some cases I was, in other cases I wasn't. I have had the opportunity to teach a few beginners during drum circles, and I have observed both students, teachers and good players.Over the years I have developed a few concepts, and related exercises, that may help others in learning to play the djembe. I present them here. But please remember that I myself am not a djembe master, but just another student amongst the many. So as with all djembe information the usual caveat applies: if you have a teacher, then by all means follow his or her advice! However, I hope that people will find the explanations, concepts and exercises helpful, and that they will actually aid them in learning to play properly.Happy drumming!DennisTheory, experiments and exercisesPlaying positionSit on the edge of a chair and stand the djembe on the floor between your legs. Tilt the djembe forward, away from you. Hook one leg behind the djembe, so it loosely rests between both your knees and one lower leg behind the djembe. The tilted position (about 20-30 degrees) allows the bass sound to come out of the bottom opening.Imagine the skin on top of the djembe forming a plane into infinity. Your arms and hands should be above this plane and not below it. So don't tilt the djembe too far, sit up straight or use a cushion if necessary.The elbowsYour elbows should be above the plane of the skin. So stick them out untilthey are above this plane. Keep your shoulders down and relaxed. Why isthis important? Because the movement of hitting the djembe uses yourelbows as a pivotal point. If that point is above the plane of the skin, yourhands will travel in an arc that goes towards yourself, in the direction of your stomach, which is the correct way to hit the djembe skin. The picture illustrates the correct elbow and arm position relative to the skin surface.If the elbow is below the plane of the skin, your hands will travel in an arcaway from your body, and you will hit the wood of the djembe first. Wood hasno sound and it does not give - so it will cause pain and injury, not sound.The picture illustrates the wrong elbow position, below the skin surfaceplane.Please note that sitting on a chair, especially if you don't sit straight up, will favour the wrong elbow position - the elbows will be far too low to play properly. Standing up with the djembe strapped on, will favour the right elbow position. There is nothing wrong with sitting on a stool or chair, but take good care that you have elbow room and your elbows are up!The handsRest your hands on the djembe edge, with all fingers flat on the skin, and the knuckles where the fingers join the palm exactly on the djembe edge. The tip of the thumb rests lightly on/against the edge of the djembe. The fleshy mounds on the palm, underneath the knuckles, rest on the edge of the skin. The wrists are in line with the plane of the skin. Your arms and hands will make a 90 degree angle between them, and point to the centre of the djembe skin.The wristThe general playing movement is initiated by the wrist. Bring the wrist up slowly. The hand follows. Bring the wrist down slowly. The hand follows. It is a wave-like movement which will develop into a whip-like movement later. Do not "lock" the arm and wrist into position and move the fingers up and down only, but involve your whole hand, wrist, arm and even your body. Your "consciousness" for the movement is in the wrist, not in the fingers!How to play the bassSit in the correct position first and rest your hand in the centre of the skin. Keep the fingers and thumb together, the hand is stretched but not completely flat, there is a slight hollow underneath the palm and fingers. The complete hand hits the centre of the djembe skin at once. The actual force is with the lower palm area. Let the djembe skin itself provide the power to move your hand away again, like a trampoline. You should neither force your hand to stay on the skin, nor have to move it away from the skin yourself.It is important that your hand does not move sideways, forward or backward whilst playing the bass! Any sliding of the hand or fingers across the skin will result in blisters after prolonged play. Sliding also dampens the bass again.The full force to create a loud bass is in fact in the lower part of your palm. This transfers the full mass and weight of you wrist and forearm into the skin. The fingers have no real "weight" or "mass" to drive a loud bass. The palm, wrist and forearm do!The height of the bass note itself depends mainly on the height of the djembe, not really on the skin and how tight that is.Bass amplificationThe bass is amplified by the djembe stem shape, which flares out slightly or can even be a true trumpet shape. You can amplify the bass even further by creating an extension to this trumpet shape of the stem of the djembe. The trumpet shape does not need to continue in the same direction as the instrument either. In fact, you can reverse the direction of the shape completely, without losing any of its amplification properties. This is common knowledge in the field of acoustics and loud speaker development, notably bass reflex speaker development.ExperimentCreate an extension of the trumpet shape by using any angled surfaces behindyou, for example a floor and a wall (the grey lines in the picture to the left).Stand with your djembe in the position as drawn here, with the wall behind you,and aim the center of the foot at the edge where wall and floor meet. Play abass, and enjoy the full WWWWHHHOOOOMMM that results!If you listen carefully, you may notice a few things. First, since the bass vibration is long in distance (a 70Hz note uses almost 5 meters for 1 cycle!) it takes distance from the instrument to hear the bass properly. By standing as shown in the picture, you put yourself more inside the bass note, and hear it louder.Secondly, since distance is important for low notes, they do not develop their full power at the moment you play, but slightly later. You must play at the "W" of the WWWWHHHOOOOMMM sound, but you will fully hear it at the "O" of the WWWWHHHOOOOMMM sound. So playing the bass just a touch on the early side will prevent the bass notes feeling "sluggish". like they are slowing down the music. Bass notes can travel enormous distances. Their long wavelength makes walls, houses, cars and so on "invisible" to them, and they continue without much interference from whatever is between the source of the note and the listener. Everyone instinctively knows this - as soon as you leave the disco, the music is reduced to a low boom - boom. All the high notes have gone, only the bass notes are left. So carpets, curtains and drapes will not dampen bass notes very much!Elephants communicate with subsonic sounds (very low notes below human hearing, in the 5-30 Hz range) over tens of kilometers. Trees, grassland, hills and so on do not change these notes very much. For comparison, the Djembe bass note, which depends mainly on the hight of the instrument, is between 50 and 70 Hz.You can use all this knowledge to your advantage in stage presentations. Be aware that the public will hear the bass louder than you do. They will hear less of the high contact sound of your hands with the skin, and more of the low boom of the bass. This applies also to the light bass component in tones and slaps! If you accidentally amplify the bass part in your tones and slaps by standing as shown in the picture, your music will not sound as intended, but it will sound muddy! The vertical of the "trumpet shape" behind you does not need to be a wall either: a large crate or box or the front of a stage edge will work just as well.Silencing the bassThere are ways and means to reduce the volume of the bass. The simplest, which is for practicing the djembe at home, is to stand the djembe on a cushion. This will effectively close off the stem of the djembe, reducing the bass volume to zero. It also will prevent the hits on the djembe to travel, as contact sound, via the floors, to other rooms or other houses. Sticking a small cushion or a jumper or coat inside the stem works fine to silence the bass too, but it won't prevent contact sound to travel.If you want to reduce the volume of the bass only, without removing it completely, then the most obvious trick is to change the trumpet shape of the stem back to a straight cylinder shape. This will remove any amplification, and will therefore reduce the overall bass volume.To change the djembe stem from a trumpet shape to a cylinder, get a piece of PVC pipe that has the same diameter as the hole inside the djembe, where the stem and the bowl are connected. Cut it to the length of the stem itself, or slightly less. Wedge the pipe into the hole experimentally, maybe fill up the cavity between djembe stem and pipe with a cloth for now. If you like the result, you can find a more permanent way to fix and unfix the PVC pipe in this position.To adjust the bass volume during play, the most obvious way is by playing softer or louder of course. You can augment the difference by pointing the djembe stem to a square angle behind you, like a floor and wall angle, or a crate and the floor, to amplify the bass. Or by holding the djembe more upright and reflecting the bass notes vertically off the floor towards the ceiling, to reduce bass volume. This applies when you sit down as well: keep the djembe almost upright to reduce the bass volume. To get the most out of your bass, let the djembe lean forward to almost a 45 degree angle, or even lift it off the floor a bit at that angle.Where is the sound?One of the problems when you start playing the djembe, is not knowing where the sounds really are on a drum. Here is a little experiment to show you where they are. Stand the djembe on the floor, and take a timbales stick. Any wooden (drum) stick will do, or even the handle (stick) of a wooden cooking spoon! Make sure the tip is rounded so you won't damage the skin, and the stick is straight. Look carefully at the pictures to see where you hold the stick and how much of the stick is actually over the djembe.ExperimentHit the djembe softly with only the tip of the stick, at a point about halfwaybetween the centre of the skin and the djembe edge. You will hear a fairlylow and soft sound with a definite tone to it. This is comparable to thedjembe tone.Note that the stick in this picture represents the correct arm and elbow position for playing the djembe properly - the elbow is above the plane of the djembe head.Hit the djembe softly with the stick hitting the edge of the djembe, withouthitting the skin at all. This will not produce any sound that is worth having. Itwould be a fairly useless exercise, except to point out that many people try toplay a slap like this, by hitting the wood instead of the skin. Simple advice:don't! Hitting the wood causes pain and injuries, not a slap sound!Note that the stick in this picture represents the wrong arm and elbow position for playing the djembe!Hold the stick very carefully so that it is almost level with the skin. The bit thatis over the skin when the stick rests on the edge is only a fraction of amillimeter higher than the skin, no more! Now hit the djembe softly. You willhear a very loud, hard, sharp and high note. This is comparable to the djembe slap. Remember this!!Final experiment: hit the skin with the point of the stick (like the top picture), but now in the centre of the skin. You will not hear a bass note at all!! Instead, you will hear a dead plop, not even a tone. What have you learned from this experiment?•Some sounds like the bass are not "in the skin" - they depend on your hands and/or the djembe itself.•To produce a sound, you really should hit the skin, not the wood edge... ;-)•The loud slap sound is really there in your djembe, even when you yourself cannot make it yet. You may have noticed that it is difficult to make that slap-like soundconsistently every time with a stick. With your hands, it is even more difficult.However, you know that it is possible, and practice and perseverance will do the rest.The WristThe wrist is crucial to playing the djembe, whether you play tone, bass or slap. I have found that using the wrist is extremely important. A concept that you can use is the whip. Think of your forearm as the whip handle, and your hand and fingers as the strings of the whip. Now move your forearm up and down, and try (don't try this too hard!!) to make your hand and fingers make a "crack" like a whip can. You won't be able to do it, but you will get an idea for the concept. All moves are initiated by the wrist.You can also think of your forearm and hand being like a flail (two wooden sticks connected with a leather hinge, used for threshing grain). If you measure the length of your hand from the wrist line to your middle finger tip, you will find that it is almost as long as your whole forearm!General exercises to learn to use the wristExercise 1This exercise will teach you to initiate all movement from the wrist, and to keep the hand and fingers relaxed.Sit comfortably, and rest your hands on the top of your legs. Really relax your hands so they feel very heavy and sleepy. Now very slowly lift your wrist only, just half an inch. Your hands stay relaxed and thumb and fingertips remain relaxed in contact with your legs. Now put the wrist down quickly. Take care that the hand does not tense up at all – the hand and fingers remain relaxed, the fingers never lose contact with your legs. As soon as the fingers or hand stiffen, bring back your consciousness to the wrist again and relax your hand. Also take care that the fingers do not start to slide along your legs - they remain in a fixed position.Exercise 2This exercise will teach you to "play" a rhythm completely from the wrist, using the same position for tone and slap.Take a simple rhythm, for example | s . . s s . t t | which is a very common rhythm, or any other simple rhythm without bass, that you know well. Play it slowly on your thighs with your wrists. Keep the hands relaxed, the fingertips stay in contact with the legs at all times, and do not move the wrist forward or sideways to distinguish between slaps and tone, just play all notes in the same position.For variety – as well as because you will benefit from it later – reverse your hands and play the rhythm as if you were left-handed. Again wrists only. Make sure your hand does not tense up when you need to concentrate on an unfamiliar rhythm or handing!!!Exercise 3 * Angular movementThis exercise will teach you to cancel out minimal sliding of the fingers. It also is the basis of good tones.Sit comfortably, and rest your hands on the top of your legs. Really relax your hands so they feel very heavy and sleepy. Lift your wrists, keeping your hands very very relaxed. Lift your wrists so high that the fingertips no longer are in contact with your thighs. Without stiffening or tensioning the hand or the fingers at all, bring the wrist down on your leg slowly. You will notice that the fingertips come into contact with the leg first, then the wrist, and the rest of the fingers and the palm do not touch the leg. Instead, they remain slightly curved and very relaxed.Now take special note of the following. As you lift your wrist, the fingers will move or slide backwards a bit along the leg before the are lifted clear. And as you bring down your wrist, the fingers will move forward a bit as the hand goes from a fairly vertical position to a horizontal position again. If you do not observe this, then fake it, by moving the wrists towards yourself as you lift them, and away from your body as you bring them down, so you can see and feel the fingers sliding along your legs.The actual exercise is to cancel out this movement of the fingers along the legs when the wrist is lifted or put down. In order to do this, the wrist must be lifted using a motion away from your body, towards your knees, and put down using a motion towards your body. The angle is about 20-30 degrees off the vertical.This exercise is important because the direction in which you hit the djembe does contribute to the quality of the sound. You can help yourself by using the correct posture and especially by making sure your elbows are above the plane of the djembe head.One lesson my teacher gave me, after I learned to play something loud that came close to a slap, was: "Try and play a soft slap! If you can master the slap quality without being overly loud, you have truly mastered the slap!"OverviewThe tone and slap are each others opposites in virtually everything. But there are two things that do not differ:•Hand position: Both tone and slap are played using the exact same position of the hand relative to the djembe•Volume: How hard you hit controls the volume, not the sound, although slaps are easier to learn if you put some force into them.What differs is everthing else!An important note on tuningOne very important note for beginners: if your djembe is not tuned properly, then you can learn to play a bass and a tone, but not a slap. Advanced players can play a tone and slap on anything, even wood or rubber or carpet or their legs, and you can hear the difference. But as a beginner, you need a tuned djembe that will actually tell you if you are doing it "a bit right already". So go to the djembe tuning page and make sure your djembe is tuned properly.First exercisesWe start with the first exercises towards learning a tone and a slap. The aim of these exercises is not yet to produce a tone and a slap, but to maximise the difference between these two sounds. The djembe skin only has one sound, which consists of a basic tone with many high harmonics. The aim is to play the basic tone only when you want to play a tone, and to play the main harmonics only when you want to play the slap. So the position of your fingers, and how you hit the skin, determine what the sound will be like!The tone - full descriptionKeep your fingers together and press them a tiny bit against each other so youcreate a stiff paddle. Now gently hit the skin with the top half of your fingers andpush down a bit. Don't immediately bounce off, but push down a bit in thedirection of your stomach. As if you want to hit the inside of the djembe bowlthrough the skin. Take note that this is easy to do if your elbows are high enough.Picture 1 shows (in blue) which parts hit the skin - the rest of the hand does nottouch the skin. The blue line represents the djembe edge.If you take away your legs from around the djembe at this point, the djembe won'tfall over because your fingers which are on the skin keep the djembe in positionand exert a slight pull towards yourself. Please note that the knuckles are not touching the edge of the djembe yet! However, the position of the knuckles (where the fingers are connected to the palm) is exactly over the edge of the djembe.Since your whole wrist and hand were travelling downwards, the wrist will travelfurther downwards after the fingers have hit the skin and are pushing down. Thismovement will now help to roll the fingers off the skin again, so the tone canfinally sound. Picture 2 shows (in blue) which parts are on the skin.The purpose of the tone is to hit the djembe skin in such a way that all highovertones will be dampened by your fingers and only the basic note will be left tosound.The final position is when the hand lightly rests with just the palm on the edge ofthe skin and the skin is free to vibrate. The high harmonics are very smallvibrations, so you dampen those during the rolling-off movement when yourfingers are in full contact with the edge of the vibrating skin, but most of the skin isfree to vibrate.Summary: Hit - push down - roll off.The slap - exercise 1The slap is considerably more complicated than the tone. Anyone can hit a djembe hard and produce a loud noise, and most beginners will at some point play loud and soft notes instead of slaps and tones. But the slap and tone really are different notes and can both be loud and soft. The problem with making a good slap is not just the mechanics of how to do it, although that is difficult enough. In order to do it, your fingers must be able to have a suppleness that needs time and exercise to develop. So a beginner will be physically unable to make a good slap without actual practice to train the hand and fingers!With the tone, the idea is to let the whole skin sound, but dampen all the high harmonics. The slap does the opposite. Now we are going to prevent the whole skin from sounding, but not dampen the high harmonics.The first step is really only a first step. Don't expect a slap sound yet. What we are aiming for at this stage is a sound that is different from the tone, that is all.Rest your hand on the skin, with your knuckles on the edge of the djembe. Yourthumb is resting against the edge of the djembe. Now cup your hand a bit, so onlyyour finger tips touch the skin, and nothing else of the fingers. Also, tilt your handslightly so that only the knuckle of your little finger is on the djembe edge, theother knuckles do not touch the skin. There are 6 points in touch with the skinnow: your finger tips, the knuckle under your little finger, and your thumb. Nothingelse. Picture 1 shows the two support points (in blue) and the 4 finger tips on theskin (in red).The fingers are relaxed, not touching each other but not spread out! There is likehalf a millimeter between the fingers, no more. Lift your hand and wrist and bringthem down in this position. Since your hand is tilted a bit (to keep most knuckles off the skin edge) it is natural for your finger tips to hit the skin in sequence, little finger, ring finger, middle finger, index finger. It sounds like a tiny rainfall. Let the finger tips touch the skin very ligtly and bounce off, and you will start to hear a soft high note which is the first main harmonic of the skin. When you hit the skin like this, the actual support points for your hand are the knuckle of your little finger on one side, and your thumb against the edge of the djembe on the other side. That is all, the finger tips now can touch the skin and bounce off.You will notice that as soon as all finger tips hit the skin at once, that you will get a tone again, not the high note! So do it in sequence. The sequential hits will set up a wave pattern in the skin that is the high harmonic that you want for the slap later.The sound is very very soft, you can easily practice this without the neighbours hearing anything. But you need a properly tuned djembe or you won't hear any of the harmonics!Summary: a very light sequential finger tip touch.PracticePractice this very soft slap exercise, and a very soft accompanying tone, with a few rhythms that you know. Your main aim is to create two very different sounds! So don't worry if the high note does not sound like a slap, because that is not what you want yet. You want a high and clear note on the one hand, and a low and dull note on the other hand.The important thing in exercises is that it gives you the opportunity to really exercise. Some people try an exercise a few times, oh yeah, that works, lets do the next exercise. But your muscles, hands and fingers need developing. The movement needs to become natural. This takes time and practice. So just do the exercise like 5 minutes at a time, a few times during the day, for a few weeks. Youcan practice on your legs or a table top, but this will exercise your finger positions only. To practice for the sound, you need the djembe. Practice practice practice until your fingers will know "slap" from "tone" by automatically taking the positions and hitting the djembe skin correctly. Practice on the djembe so you will maximise the difference in sound between tone and slap. Low and dull versus high and clear.Remember: you are practicing the first stage, it won't sound like a slap yet. Do it softly, aim for clarity.If you have not read the previous page, please do so! That information is necessary to continue here. The toneFor the tone, all information was given on the previous page. From there onwards it is just a question of practicing until the hit - push down - roll off movement, which is like Michael Jackson's moonwalk technique, becomes natural and smooth. Once it is smooth you can start adding real force into the tone by starting to use your wrist more so the fingers will be whipped onto the skin, adding extra speed and force.You will really need to put a lot of time into the practice, because the movement is exactly the opposite of what people do naturally, which is hit the djembe edge first and then let the fingers hit the skin. The slap - exercise 2The second exercise is similar to the first exercise. However, some people may be physically unable to do this yet. If that is the case with you, you should start doing hand and finger stretching exercises to make your fingers more supple and to loosen up the ligaments.Put your hand completely flat on the skin, with the knuckles on the edge of the skin. Now lift the knuckles away from the djembe edge but keep the fingers flat on the skin. You can simulate this by imagining there is a piece of paper under your finger tips that you pull towards yourself. The knuckles of your hand are lifted clear off the djembe edge. It is a bit like a tent shape. Now find a position where you can also lift your finger tips off the skin a tiny fraction. You should now be able to rock your hand a tiny bit, with the finger knuckles as the resting point, indicating that both the finger tips and the palm knuckles are clear of the skin.There are now 6 contact points between your hand and the skin. The restingpoints are the knuckle of your little finger on the djembe edge, and your thumbagainst the djembe edge. And the other 4 points are the middle knuckles of eachfinger. The rest of your fingers is not touching the skin, or just barely brushing it.Picture 2 shows these support points (in blue) and the four knuckles (in red). Inpractice the little finger will simply lie flat on the skin.From this position, do the same exercise as in exercise 1: Lift your hand and wrist,and bring them down so the 4 knuckles under each finger hit the skin in sequence,one after the other, very lightly. Again you will hear a clear note emerging.This exercise is physically difficult to do, and the differences are very very minimal. This exercise does benefit from doing it on a wooden table top, because you will instantly feel your finger knuckles hitting the wood so you know you are doing it right. The djembe will reward you with a clear note, but you can feel far less clearly what happens because the skin is far softer than a table top.It helps to loosen up your fingers before practice, by shaking them loose, opening and closing your hand, stretching the fingers, playing Edward Scissorhands and so on until you can feel that the ligaments have had a good workout.Be prepared to spend at least a month of daily exercises on this! If initially you are absolutely unable to do it physically, don't despair, keep working on it, because your hands will become more supple in time.。
非洲手鼓演奏姿势及调音

手鼓的演奏姿势及调音djembe基本的演奏姿势有三个,1,坐在椅子上,鼓身微微向前倾斜,双脚夹住鼓,背部挺直。
2,用背带把鼓绑在身上,站立并把鼓夹在双腿之间,身体微微向下倾斜。
3,把鼓横放在地上,坐在上面击打。
特别留意的是,在打djembe之前,请先把手上的饰物取下,以避免伤及手部和鼓面。
基本音击打djembe不同的手法会产生不同的音色, djembe 基本音有三个。
1,BASS(低音),手指合起来,以手掌击打鼓的中央。
2,TONE(中音),手指合起来,以手掌的上半截手指部分击打鼓边。
3,SLAP(高音),手指散开,以手掌底部的冲击力冲击手指击打鼓面。
打法其一:手腕的姿势打djembe时要注意把肘部的角度固定,也就是说无论什么时候,非洲手鼓肘部的角度都是一定的。
打鼓时主要靠小臂的动作,手腕的力度简单来说,就是好像扳手腕时的那种用力法。
采取这种姿势主要是因为,如果你弯着肘部打鼓,手常常是斜着打到鼓面上。
而斜着打会使高音和中音难以区分。
而且因为斜着会用不必要的力气,使你打鼓的声音不够大。
手腕请一定放直。
无论坐着打还是站着打,都请不要冒着腰弯着背,否则也会让你的手腕手臂难以随心所欲地运用。
所以请把背筋伸展开来。
总结要点:1)肘部总是保持一定的角度,如同扳手腕2)打鼓时手和鼓面保持垂直。
3)手腕伸直。
4)背筋也伸直。
其二,低音(bass)的打法低音,只要在鼓面正中击打就能简单地打出来,但是仅仅这样的话作为djembe的低音还是有点不够。
所以这里介绍一下如何打出好听的低音。
1)包括手指在内,打低音时要使用整个手掌。
打的时候特别注意手指也要击打鼓面。
2)击打时,从手掌到手指,全部都同时接触到鼓面。
3)以手掌的根部刚好进入鼓面为目标,不要打得太正中,否则声音会比较闷。
4)无需用力打,而是靠重力,也就是说其实击打低音是靠手落下去的力量发出的。
5)手落下去的时候注意和鼓面保持垂直。
低音是从djembe的底下发出来的,所以打时可以想象这个音在地面上传开。
非洲鼓入门知识
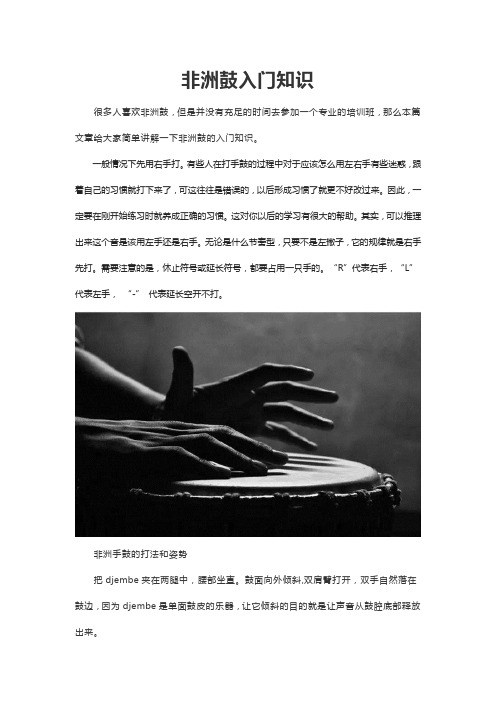
非洲鼓入门知识很多人喜欢非洲鼓,但是并没有充足的时间去参加一个专业的培训班,那么本篇文章给大家简单讲解一下非洲鼓的入门知识。
一般情况下先用右手打。
有些人在打手鼓的过程中对于应该怎么用左右手有些迷惑,跟着自己的习惯就打下来了,可这往往是错误的,以后形成习惯了就更不好改过来。
因此,一定要在刚开始练习时就养成正确的习惯。
这对你以后的学习有很大的帮助。
其实,可以推理出来这个音是该用左手还是右手。
无论是什么节奏型,只要不是左撇子,它的规律就是右手先打。
需要注意的是,休止符号或延长符号,都要占用一只手的。
“R”代表右手,“L”代表左手,“-”代表延长空开不打。
非洲手鼓的打法和姿势把djembe夹在两腿中,腰部坐直。
鼓面向外倾斜,双肩臂打开,双手自然落在鼓边,因为djembe是单面鼓皮的乐器,让它倾斜的目的就是让声音从鼓腔底部释放出来。
四指并拢,手臂放松;打开手臂和手腕成直线打击的位置靠近鼓的中心,也会根据鼓面的大小位置有所移动,鼓越小打击的位置越是靠近中心。
无论鼓的大小,手肚在打低音时都必须在鼓面上。
用整个手掌打击,打击时快速的弹起,落下的重心在掌心。
中音T(嘟)打法打中音的手型和低音一样不变。
先放在低音部位,然后往外挪,让指根和鼓边对齐,然后用手掌的四根指部位打击。
打击时快速的弹起,落下的重心在指肚。
打高音时手指放松并张开,但不要张得很大。
在打击时用手指根部的肉垫打击鼓边,在冲击的同时指尖击打在鼓面上。
指尖和根部肉垫之间的部位是不接触鼓面的。
接触鼓面的只是指尖部位。
(点击咨询)无论是中音还是高音,双手在鼓面上的相互位置不能平行或接近平行,除大拇指外,四个手指都应该在鼓面内,尤其注意小拇指不要离开鼓面。
把大拇指张开,双手会在鼓面上成一个三角形。
两个大拇指形成的是三角形的最底边,两个食指分别是三角形的两个侧边。
这样的双手演奏姿势才是对的。
低音,中音,高音,它们最大的区别是重心位置的不同,就是说发力点的不同,低音的重心位置在手掌上,中音的重心位置在四个手指上,高音的重心位置在手指根部上。
非洲鼓基本打法教学

非洲鼓基本打法教学非洲鼓是一种传统的打击乐器,源自非洲大陆,具有浓郁的文化特色和独特的音乐魅力。
学习非洲鼓的基本打法是成为一名合格非洲鼓手的必备技能。
本文将介绍非洲鼓的基本打法教学,帮助读者初步掌握这一技艺。
一、鼓面的基础敲击非洲鼓的鼓面由木制框架和蒙皮组成,敲击时需要用手击打鼓面产生声音。
下面介绍几种基础的鼓面敲击方式:1. 掌心敲击:将手掌心平放在鼓面上,用手指尖或手掌中心轻轻敲击鼓面,产生清晰的音响。
2. 掌击敲击:手掌轻轻弯曲,利用手掌与鼓面的冲击,产生较为浑厚的音色。
3. 指尖敲击:将手指尖部位指向鼓面,并用力敲击,制造尖锐的音响。
二、基本节奏模式学习非洲鼓的基本节奏模式可以帮助打击者更好地掌握节拍和节奏感。
以下是几种常用的基本节奏模式:1. 基本四分音符节拍:按照每拍一个音符的方式,用手指敲击鼓面,保持稳定的节奏感。
2. 强调节拍:在基本四分音符节拍的基础上,加强每个拍号的力度,使之更加突出。
3. 打击组合节奏:将不同的敲击方式结合起来,形成多样化的节奏效果。
三、学习常见的鼓击技巧为了演奏出丰富多样的鼓击效果,非洲鼓手需要学习和掌握一些常见的鼓击技巧。
下面列举几种常见的鼓击技巧:1. 手掌滑动技巧:用手掌的边缘或侧面沿着鼓面滑动,产生连续的音响效果。
2. 手指掐击技巧:用指尖按压鼓面,迅速松开产生短促的音响。
3. 手指滑动技巧:用指尖轻轻滑动在鼓面上,产生有连贯感的音响效果。
四、和其他乐器的合奏非洲鼓常常与其他乐器一起演奏,形成丰富的乐曲效果。
在与其他乐器合奏时,鼓手需要注意以下几点:1. 熟悉乐曲:了解乐曲的基本结构和节奏,与其他乐器形成协调配合。
2. 保持节奏:稳定的节奏是与其他乐器合奏的基础,鼓手需要始终保持准确的节奏感。
3. 听觉沟通:与其他乐器进行听觉交流,互相依靠和配合,营造和谐的音乐效果。
五、练习注意事项学习非洲鼓的过程需要耐心和恒心,以下是一些建议和注意事项:1. 持续练习:鼓手需要坚持每天练习一定的时间,逐渐提高演奏水平。
非洲鼓(新春版)新详细操作

酋长、王妃 舞姬、鼓神、鼓手
Laila i ko korobé, korobé, korobé, 来啦一口口肉呗!扣肉呗!扣肉呗!
mami watoné, aya 妈咪哇托内,啊咿啊!
sico leco la i ko, sico la i ko, wa wango sico la i ko, C扣拉一扣,C扣拉一扣。哇哇沟,C扣拉一扣。
Fatuo yo si diadialano 发土哟C佳佳拉努 (以上1句唱4遍) Fatuo faye faye fatuo 发土飞飞发土 Fatuo klemaoundio 发土克来忙一要 Fatuo yo si diadialano 发土哟C佳佳拉努 (以上3句唱2遍) Botou mbele botou mbele (Botou mbele) 不痛白来 不痛白来 (不痛白来)(唱3遍) O mami sera O mami casse (botou mebele) o妈咪塞拉 o妈咪卡斯(不痛白来)(唱2遍)
Moribassa 莫哩巴撒 嘿
Moribassa 莫哩巴撒 嘿
Moribassa 莫哩巴撒
Moribassa 莫哩巴撒
斗鼓前奏
斗鼓主节奏
哒 咚咚 哒 咚咚 哒 咚咚 哒 咚咚 哒哒哒哒哒 咚咚咚咚
咚咚咚 哒哒哒哒哒 咚咚咚 哒哒哒哒哒
哒哒哒哒哒 咚咚咚 哒哒哒哒哒 咚咚咚
咚 咚 咚咚
咚 咚 咚咚
激情非洲鼓
同心 同步 同鼓舞
友情提示: 请把手上带的戒指、手链、手镯、手表等饰品摘下, 如有摘不下来的尽量往小臂上方挪动,以免造成不必 要的财产损失~
非洲鼓,是一个俗称,通常指的是来自西非的
Djembe(坚贝),是西非曼丁文化的代表性乐器。
非洲手鼓教程

非洲手鼓教程(总6页)--本页仅作为文档封面,使用时请直接删除即可----内页可以根据需求调整合适字体及大小--非洲手鼓的三个基本音非洲手鼓上有三个基本音;它们是高,中,低音。
当然还有一些其它音色打法,但都不如这三个音重要,通过这三个音的音色变化,非洲手鼓完全可以淋漓尽致的发挥节奏的律动。
下面分别图示讲解三个基本音的演奏规则。
低音,四个手指放松着并拢,大拇指张开,要想打出一个浑厚的低音,重心一定要放在整个手掌上.就是说主要发力点是在手掌,但这并不是说手指一点都不能接触鼓面,手指也是要接触鼓面的,但发力的重心一定要在手掌上,它的击打位置是鼓面的中心附近。
绝不能手的任何部位出离鼓面之外。
中音,跟刚才低音的手型是一样的,但在鼓面上的位置是不同的,四个手指的根部要在鼓面边缘,打中音是要保证四个手指的手指肚同时平整地击打在鼓面上,就是说手指肚一定要先接触鼓面,把发力的重心一定要放在手指肚上。
但手指根部的地方也是要接触鼓边的,只是发力的重心不在这里。
手腕要微微向下并低于手指,手腕不能跷起来或平行于手指。
手腕放松,四个手指并拢。
注意只是给四个手指一个并拢的力量,不要把四个手指绷的象四根棍子一样,尤其是击打在鼓面的那一瞬间,手指也是不能崩紧的。
打中音的时候要体会自由落体的感觉,感觉你的手像一个重物一样从空中落下来。
打中音需要一些力气,前提是手指一定不要绷紧。
中音是比较难打的,需要长久的练习体会,不断调整手型。
千万注意打中音时不要出现参杂着高音的声音。
高音,打高音和中音的位置几乎是一样的,不同的是手指要散开并不是并拢,注意手指是在最自然和最放松的状态下散开,不要故意张的很大。
重心要放在手指根部有肉的地方(在掌心和手指根部之间的位置),靠它的冲击力,手指会自然迅速的击打鼓面。
就像甩鞭子一样,把手指甩出去。
击打在鼓面的只是四个手指的手指尖,手指肚是没有击打在鼓面上的,手指肚和鼓面之间是有一个空间的。
打高音是要体会手指完全放松的感觉,不要给手指加任何的意识,要体会手指就像没有长在身上一样,只有这样,才会通过冲击力更自然的甩出手指。
打非洲鼓的手法和技巧

打非洲鼓的手法和技巧
打非洲鼓的手法和技巧因不同的鼓种和音乐风格而有所不同,但以下是一些常见的手法和技巧:
1. 基本击打:用手掌的中心部分打击鼓面,发出清晰的音响。
2. 手指滑动:用手指从鼓面上滑动,产生连续的滑音效果。
3. 手腕滚动:用手腕作滚动运动,快速连续地击打鼓面,产生连续的滚动音效。
4. 拇指击打:用拇指击打鼓面,产生独特的音响。
5. 手掌弹击:用手掌的边缘部分弹击鼓面,产生明亮且短促的音响。
6. 手指弹击:用手指的指尖弹击鼓面,产生尖锐的音响。
7. 手掌拍击:用手掌的边缘部分拍击鼓面,产生低沉的音响。
8. 双手交替击打:左右手交替击打鼓面,产生快速连续的节奏。
9. 手指弹奏:用手指的指腹弹奏鼓面,产生丰富的音色和变化。
10. 手掌滑动:用手掌从鼓面上滑动,产生连续而柔和的音响。
这些手法和技巧只是非洲鼓演奏的一部分,具体的演奏方式还需根据不同的鼓种和音乐风格进行调整和发展。
非洲手鼓的基本节奏练习

非洲手鼓的基本节奏练习低音中音转换1,|TBBB|BTBB|BBTB|BBBT|2, |BTTT|TBTT|TTBT|TTTB|3,|BTTT|BBTT|4,|BBTB|BTBB|5,|BTTB|BBBT|6,|BTTT|BTBB|7,|BBBT|TBBB|8,|BTTT|TBBB|9,|BBBT|BTTT|10,|BBTB|TBBB|11,|BTBB|TBBB|12,|BBBB|TBBB|13,|TTTT|BTTT|14,|BBTT|BBTT|15,|BBBB|TTTT|16,|BTT BTT|说明如下:1,B表示低音, T 表示中音2,一定要左右手交替演奏,一般右手开始左手结束;3,最后那个是三连音练习,一定要交替着打;4,在练的时候最好有节拍器,先从慢的速度开始吧,拍子一定要打稳;5,这些练习可以初步的练习双手的独立性6,如果你够聪明,勇于思考,你自己也可以编出很多好的练习的,试试吧;注:这些练习其实是左右手的独立性练习,练习你每只手的独立性的,一般不是左瞥子的话,右手开始;在演奏时可以同一手连续击打两次,三次,或更多次,第一,这要看节奏型的需要,以后我写一些这种情况的示范节奏型,你自己在练习中可以体会的到为什么要连续的击打;,第二,或者是你自己的习惯问题,只要你自己觉得舒服或有必要,有一些黑人演奏家,会同一手连续击打鼓面很多次,你看着会觉得很潇洒;关于左右手应该怎么用,主要看它的节奏型,空开也要占一只手的;练习时应用左右手必须按规矩来练,比如节奏kalipuso,要清楚的理解它的节奏,以1st djembe为例,该是:B B B T ,标上左右手的话,就该是:右左右左右左右左,括号中的既是节奏符号中写成“”的,也就是说空开,不用打,这样才能形成正确节奏;但是空开一些音,而你演奏时一般又很快地在打,那么看上去就变成了把括号中的都不写--不打:右、左、右、右;最后两个音变成右手连打,就是这么回事;关于标左右手顺序,以后会标的,要想打出有律动,有层次的感觉,跟力量也有关系,其实是个功力的问题,每个人处理的不一样,时间长了,你会处理的很好的,关于节拍的速度,我觉得新手先从60开始;一秒一拍;所有的练习都是,先这样练着;找找感觉再提高速度;。
初学非洲手鼓第一课

1.音符X –––= 全音符X –= 二分音符X = 四分音符X = 八分音符X = 十六分音符2.音符之间的时值关系X. X 1个八分音符加符点音符加1个十六分音符XX 2个八分音符X = X –= 1个八分音符加何止符XXXX 4 个十六分音符XXX 1个八分音符加2个十六分音符注:X 代表任意一个音。
六4拍日常基础练习提示:建议平常大量练习,时值要打准(1)R L R L R L R L|B T T B | T T S S|(2)R L R L R R L| BB TT BB SS| X4 (反复4遍)第3-6条可以灵活的把T变换为B或者S来练习(3)前八后十六R R L R R L R R L R R L|T TT T TT |T TT T TT |(4)前十六后八R L R R L R R L R R L R| TT T TT T| TT T TT T|(5)十六分音符(四连音)R L R L R L R L R L R L R L R L|TTTT TTTT TTTT TTTT |(6)符点R L R L R L R L|T. T T. T |T. T T. T |(7)切分音R L L R L L R L L R L LTTT TTT TTT TTT一复习三基音的打法 5 -10分钟二复习日常基础练习15-20分钟三非洲手鼓传统节奏基础节奏练习40-60分钟提示:日常大量反复练习1R RL R RL R RL R RL|B SS B TT |B SS B TT |R RL R RL R RL R RL反向练习|B TT B SS |B TT B SS |R RL R R R RL R R2 | B TT B S | B TT B S |R RL R R RL R3 |B TT – S | B TT – S |4 R L R RL R L R RL| S -SS TT | S -SS TT |一复习三基音的打法 5 -10分钟二复习非洲手鼓传统节奏基础节奏练习(第二课)15-20分钟三流行音乐伴奏基础节奏练习40-60分钟提示:日常大量反复练习,分清轻重拍1 R L R L R L R L示范曲目:小倩《一瞬间》B.t t t B t S t 重点2 R RRL R L RRL示范曲目:丽江小倩《温暖》B t ts B B Stt 重点3R L R R L R L R R R(或L) R R LB T B -B S / B T B BB Stt4 RLRL RLRL RLRL RLRLBttt Sttt BtBt Tttt5 R RRL RLRL RRL提示:1 万能节奏型,多练重点(M) (M) 2刚开始可以不加闷音练B Stt tttt Stt 3熟练后可练习加闷音的打法一复习三基音的打法10 分钟二复习非洲手鼓传统节奏基础节奏练习(第二课)10分钟传统节奏专题1 打CALL RL RL L L R R L R 15分钟T TT -T TT|-S S S -| 2. Moribayassa (音译:莫瑞拜雅萨)15分钟这首曲子来自几内亚的东北部的马林克(Malinke)族。
- 1、下载文档前请自行甄别文档内容的完整性,平台不提供额外的编辑、内容补充、找答案等附加服务。
- 2、"仅部分预览"的文档,不可在线预览部分如存在完整性等问题,可反馈申请退款(可完整预览的文档不适用该条件!)。
- 3、如文档侵犯您的权益,请联系客服反馈,我们会尽快为您处理(人工客服工作时间:9:00-18:30)。
非洲手鼓教程-CAL-FENGHAI.-(YICAI)-Company One1
非洲手鼓的三个基本音
非洲手鼓上有三个基本音;它们是高,中,低音。
当然还有一些其它音色打法,但都不如这三个音重要,通过这三个音的音色变化,非洲手鼓完全可以淋漓尽致的发挥节奏的律动。
下面分别图示讲解三个基本音的演奏规则。
低音,四个手指放松着并拢,大拇指张开,要想打出一个浑厚的低音,重心一定要放在整个手掌上.就是说主要发力点是在手掌,但这并不是说手指一点都不能接触鼓面,手指也是要接触鼓面的,但发力的重心一定要在手掌上,它的击打位置是鼓面的中心附近。
绝不
能手的任何部位出离鼓面之外。
中音,跟刚才低音的手型是一样的,但在鼓面上的位置是不同的,四个手指的根部要在鼓面边缘,打中音是要保证四个手指的手指肚同时平整地击打在鼓面上,就是说手指肚一定要先接触鼓面,把发力的重心一定要放在手指肚上。
但手指根部的地方也是要接触鼓边的,只是发力的重心不在这里。
手腕要微微向下并低于手指,手腕不能跷起来或平行于手指。
手腕放松,四个手指并拢。
注意只是给四个手指一个并拢的力量,不要把四个手指绷的象四根棍子一样,尤其是击打在鼓面的那一瞬间,手指也是不能崩紧的。
打中
音的时候要体会自由落体的感觉,感觉你的手像一个重物一样从空中落下来。
打中音需要一些力气,前提是手指一定不要绷紧。
中音是比较难打的,需要长久的练习体会,不断调整手型。
千万注意打中音时不要出现参杂着高音的声音。
高音,打高音和中音的位置几乎是一样的,不同的是手指要散开并不是并拢,注意手指是在最自然和最放松的状态下散开,不要故意张的很大。
重心要放在手指根部有肉的地方(在掌心和手指根部之间的位置),靠它的冲击力,手指会自然迅速的击打鼓面。
就像甩鞭子一样,把手指甩出去。
击打在鼓面的只是四个手指的手指尖,手指肚是没有击打在鼓面上的,
手指肚和鼓面之间是有一个空间的。
打高音是要体会手指完全放松的感觉,不要给手指加任何的意识,要体会手指就像没有长在身上一样,只有这样,才会通过冲击力更自然的甩出手指。
高音的声音大小取决于手指的放松程度,越放松打出来的高音会越高越好听。
同样的,手腕也是低于手指的,并且打高音时手腕要稍微的绷紧。
无论是中音还是高音,双手在鼓面上的相互位置不能平行或接近平行,除大拇指外,四个手指都应该在鼓面内,尤其注意小拇指不要离开鼓面。
把大拇指张开,双手会在鼓面上成一个三角形。
两个大拇指形成的是三角形的最底边,两个食指分别是三角形的两个
侧边。
这样的双手演奏姿势才是对的。
低音,中音,高音,它们最大的区别是重心位置的不同,就是说发力点的不同,低音的重心位置在手掌上,中音的重心位置在四个手指上,高音的重心位置在手指根部上。
无论是打高音,中音还是低音,他们有一些共同点如下;1,小臂,手腕,手指要保持一条直线,尤其是在手演奏的运行中,不要拐来拐去的改变这条直线,这是最省力气的打鼓方法。
2,无论打什么音,打完之后手都要快速干脆的抬起来,不要粘在鼓面上,就像人眨眼睛一样,一瞬间就要抬起来。
或者说是就像击打在一个滚烫的火炉上一样,手要马上抬起来。
3,手腕千万不要上下抖来抖去的,手腕基本上是不变的,基本上是靠手臂带动手腕的力气来打鼓,手腕是固定的。
尤其是打中音和高音的时候,更要注意手腕不要抖动。
如果手腕抖来抖去的话,一是不美观,二是打不上力气,三是打不出好听的声音。
打鼓时注意观察你的手腕。
还有,无论什么时候,肘部的角度都是一定的,就像掰手腕时那种用力方法。
4,大拇指都是完全张开的,张开的好处,一是保持手的平衡,二是可以更容易快速的击打,三是不容易伤害到大拇指,如果打中高音时大拇指没有张开的话,很容易把大拇指打在鼓面的边缘或铁圈上,大拇指会很疼痛。
所以要克制锻炼大拇指张开的习惯。
5,打任何音色的时候都不要低头看你的鼓,这样显的很没有自
信。
一定要挺胸抬头。
