MST-45全向麦克风资料
全向麦克风
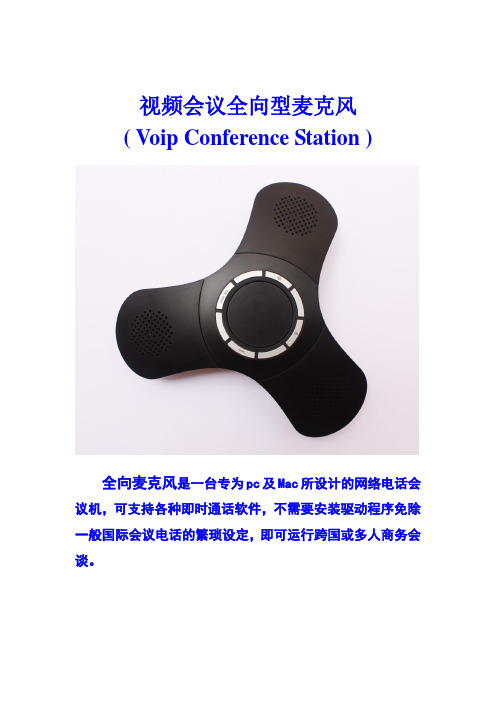
视频会议全向型麦克风( Voip Conference Station )全向麦克风是一台专为pc及Mac所设计的网络电话会议机,可支持各种即时通话软件,不需要安装驱动程序免除一般国际会议电话的繁琐设定,即可运行跨国或多人商务会谈。
麦克风自带高质扬声器(音箱),USB接口与电脑相连,它不需要安装驱动程序,可用做视频会议电话机、网络会议电话机、skype 会议电话机、QQ、MSN等。
设有静音便捷键,具有回音消除、背景杂音过滤等功能。
它的支持操作系统为Microsoft WinowsXP、windows7、Windows8、Windows Vista、苹果MAC系统。
是一款可携式喇叭麦克风。
适用于各种视频会议和即时通讯软件,可外接音箱.拾音半径6米左右,适合80平方米以内的会议室。
适合20人左右中型会议。
全向接收,你可以在会议室的任何地点发言,对方都能清楚地听到;回音消除效果很好,对回音杂音干净消除。
★完全的双向通话,清晰的音质★内置DSP,消除回音,抑制噪音★可调节的音量控制器和静音按钮★精巧轻便,适合携带★即插即用,免驱动适用于视高视频会议(seegle)、V2视频会议(威速科技)等各种网络视频会系统。
产品参数:iTalk-03按键音量控制钮USB电源开关麦克风静音开关指示灯电源开关灯亮表示待机及通话模式静音按钮灯亮表示静音模式物品清单:1、麦克风 2、USB连接线 3、说明书 4、保修卡包装尺寸:连接电脑:支持软件:WebEx视频会议、V2威速视频会议、视高 seegle视频会议、红杉树、PPMEET视频会议、网动LiveUC、iomeeting、清扬、好视通、金谷、金虎Kinghoo、中新凯润(CNKaran)、星澜等... ...skype、QQ、MSN messenger、GTalk、Yahoo Call Center、iaxTalk,X-Lite、voipBuster、SJphone、Net2Phone Dialer、Net2Phone Communication、AIM phone、X-PRO、Firefly、eyeBeam、ICQphone.。
TG-45UV中文说明书++20140521

目录
整机配件 准备工作 充电须知(1) 充电须知(2) 安装天线 安装背夹 安装外接式扬声器/麦克风耳机 装/卸锂电池 熟悉对讲机 基本操作 LCD显示屏 LCD图标解释 按键快捷键 菜单功能 功能快捷键操作流程 功能操作及说明 静噪等级设置
01 02 02 03 04 04 05 06-07 08 09 09 09 10-12 13 14-22 23 23
安装天线
握住天线底座,按顺时针方向将天线旋入对讲机顶部的 连接器中,直至旋紧为止。
⊙ 请不要将天线用作把柄、把钥匙串或外接式扬声器/麦克风
挂在天线上, 这样使用会损坏天线并降低对讲机的性能。
VFO MR
A/B
BAND
MENU
^
2TXP 5WN 8BEEP
^
3SAVE 6ABR 9TOT
EXIT
1STEP 4VOX 7TDR
1STEP 4VOቤተ መጻሕፍቲ ባይዱ 7TDR
* SCAN
0SQL #
*
0 #
基本操作
状态指示灯
发射-红灯亮 接收-绿灯亮
外部接口(扬声器/麦克风孔)
用于外接耳机; 或者外接写频线时,可利用PC写频软件进行写频操作以及程序升级。
基本操作
11
12
菜单快捷设置
1 按MENU键 2 再次按MENU键 3 按上移或下移键(调整设置菜单各项) 4 按MENU键确认或EXIT键退出(如图所示)
使用前注意事项
是具有优良设计和先进持术的产品.下列建议将帮助您履 行保修条款中的义务,了解和认识使用对讲机的安全性。 请将对讲机及其所有部件和配件放在小孩子接触不到的地方。 请不要试图拆开对讲机,非专业人员对对讲机的处理可能会造成损坏。 请使用本公司配套的锂电池及充电器,以免损坏对讲机。 请使用本公司配套的天线,以免缩短通讯距离。 请不要将对讲机长时间暴露于阳光下,或放在过热的地方。 请不要将对讲机放在有灰尘或潮湿的地方。 请不要用烈性化学制品,清洗剂或强洗剂清洗对讲机。 未安装天线时,请不要发射。 如果发现对讲机发出异味或烟雾,请立即关断对讲机的电源,并且从对讲机取下锂电池,并 请与泉盛经销商联络。
MOTOTRBO R7 无线遥控讲话器麦克风及配件说明书

RADIO ACCESSORIESOPERATIONS CRITICAL WIRELESS BLUETOOTH® ACCESSORIESConnect your MOTOTRBO R7 radio to the WM500 Wireless Remote Speaker Microphone with a built in battery that lasts up to 40 hours.R7R7Removable BlackREMOTE SPEAKER MICROPHONES ACCESSORIES WITH STANDARD 3.5MM JACKR7R7REMOTE SPEAKER MICROPHONES REPLACEMENT KITSR7HEADSETSHeavy Duty Behind-the-HeadHeadset withNoise-CancelingBoom Microphone(See user guide for replace-ment parts)R7R7with Nexus Connector (Hat notincluded) (See user guide forreplacement parts)PTT Nexus Adapter (Requiresheadset - options listed above)R7 R7battery label. These batteries do not require* If the R7 IMPRES battery is initially inserted into the charger with older software, it will begin the initialization process with a solid yellow indication. Do not remove the battery from the charger until the charger indicates solid green. This process may takeCAPACITYAt 60% Capacity: 43% INCREASE IN CHARGE CYCLESR7VEHICLE CHARGING SOLUTIONS R7CHARGING SOLUTIONSCharge up to 6 R7 radios or batteries simultaneously with our IMPRES 2 Multi-Unit Fast Charger.R7Power Cord for IMPRES 2 Multi-Unit Charger,UK PlugPower Cord for IMPRES 2 Multi-Unit Charger,EURO PlugPower Cord for IMPRES 2 Multi-Unit Charger,BZL PlugR7Motorola Solutions, Inc. 500 West Monroe Street, Chicago, IL 60661 U.S.A. 800-367-2346 MOTOROLA, MOTO, MOTOROLA SOLUTIONS and the Stylized M Logo are trademarks or registered trademarks of Motorola Trademark Holdings, LLCFor more information, please visit/R7。
YT-485语音控制器说明书
语音控制器说明书V1.2 (型号:YT-485)秦皇岛千目电子有限公司电话:************传真:************/1.产品特性 (2)2.产品图片、接口介绍 (2)2.1产品外形和接口图片 (2)2.2接口 (3)2.3产品尺寸 (3)3.语音录制过程 (3)3.1音频准备 (3)3.2连接好硬件设备 (4)3.2.1电源连接 (4)3.2.2通讯连接 (4)3.3软件录音 (4)3.3.1软件连接 (4)3.3.2加载文件 (5)3.3.3录音下载 (6)3.3.4放音测试 (6)3.4软件设置参数 (6)4.指令格式 (7)4.1普通协议格式 (7)4.2MODBUS-RTU协议格式 (7)5.技术支持及联系方式 (7)语音控制器说明书(型号:YT-485)YT-485语音模块是秦皇岛千目电子2015年全新工业级产品。
具有价格低、稳定可靠、可重复录音、体积小等特点。
主要应用范围:安装工程、报警提示、产品扩展语音功能等。
1.产品特性●板载功放模块,最高可输出功率达10w,声音响亮。
●WA V音频格式,音频录制时间可达24分钟。
●语音信息可分段录制、分段播放。
并且可随时更换语音信息。
●全新音频播放控制算法,音质更好。
●板载FLASH存储器,成本低、可靠性更好。
●板载音量调节,可根据实际安装需求进行调整。
●控放音方式:485总线控制。
适用于距离较远,或节点较多的情况。
●性能参数:工作电源:直流12V工作温度:-20~85℃音频输出功率:8欧10W2.产品图片、接口介绍2.1产品外形和接口图片2.2接口◆电源接口:工业电源接口,可接入12V直流电源。
端子V+:接直流电的正极。
端子G:接直流电的负极。
◆485通讯接口A+、B-:与485通讯设备功能1:进行模块参数设置,下载语音。
(注:需要专门软件,我司免费提供)功能2:远程发送指令,控制语音模块播放语音。
◆SP1、SP2:2路声音输出接口,直接接无源喇叭,播放语音。
AKG

HT81 载波频率 调制 音频带宽 频率稳定性 额定频偏 1KHz的总谐波失真 的总谐波失真 压扩特性 信噪比 限幅器 射频输出 电流消耗 电源要求 电池寿命 输入灵敏度 音频输入额定偏移 输入阻抗 幻象供电 静噪门限 音频输出
PT81 710.2-860.9MHz FM 50-2KHz +/-10ppm 30KHz <0.5% 有 >100dB(A) 有 10mW 170mA/2.4v 2 x AA >8小时 1400Mv/1KHz 220Kohms/660pF 3pin-6V/6KB
SR81
<0.4%
130mA 2 x AA >10小时 350Mv/1khZ 220KOhms
技术参数: 技术参数 导引音调数据系统可将所有重要的发射器数据发射到接收器,可获得无干扰的可靠操作 状态LED灯 状态 灯 显示系统当前的操作状态 PT 4000 便携发射器 便携发射器/HT4000 背亮显示 即使在黑暗的舞台中,也能保证获得简便的安装以及准确的状态监听 长达15个小时的电池寿命 长达 个小时的电池寿命 SBMS智能电池管理系统保证一对 尺寸电池可使用 个小时, 智能电池管理系统保证一对AA尺寸电池可使用 个小时, 智能电池管理系统保证一对 尺寸电池可使用15个小时 BP 4000是池组可使用 个小时。 是池组可使用12个小时 是池组可使用 个小时。 柔软瓷釉外层 有助减少手持噪音 推拨式开关 使用简便的单独控制,可设定所有功能参数 充电和可编程预设 选配的BP 4000电池组可以在发射器内充电,AKG服务部可对全新的频率预设进行编排 电子锁定的开关按钮推式静音开关 容易识别的两个控制,让你获得简单但重要的功能 压入式充电系统 革命性的WMS 4000充电系统包括自选的CU 4000充电器和BP 4000电池组。 这个系统使电池充电变得简单,并大大降低操作成本。 1200个可选择的频率 个可选择的频率 宽阔的频率范围为大型多声道系统提供足够的可使用频率。原厂以预设让你轻松找到适合的频率。 1插孔用于遥距静音开关 插孔用于遥距静音开关 即使将挂腰发射器隐藏,也能轻易进行静音设定 电子锁定开关按钮和推式静音开关 坚硬的专业3针迷你 针迷你XLR连接器 坚硬的专业 针迷你 连接器 接受所有带迷你XLR连接器的AKG话筒,包括MicroMics,CK 77 WR和 Discreet Acoustics模块系列颈挂式话筒等。 可书写的颜色编码条 镁质机壳 轻巧而非常坚硬 充电和可编程预设
话筒的分类及技术参数

6、传声器阻抗
传声器的阻抗有两种,即输出阻抗与负载阻抗。 传声器的输出阻抗即为传声器的交流内阻,通 常在频率为1000Hz,声压约为1Pa时测得。一般在 1KΩ以下为低阻抗,大于1KΩ为高阻抗。常用的 低阻传声器输出阻抗约为200~600 Ω。 高阻传声器的阻值约为20~50 KΩ 。专业传声器一 般都采用200~600 Ω的抵阻抗,以200 Ω为多。
2、无线话筒的特点 ⑴真实感和细腻感 ⑵亲切感 ⑶临场感 ⑷解脱了话筒线的束缚
3、无线话筒的频段
关于无线话筒的频段,无线电波管理委员会有如 下规定: ⑴30~50MHz——需较长天线、频率太低 ⑵88~108MHz——FM调频收音机可接收 民用频段 ⑶150~169MHz——用于公安、消防、工程和出 租车 ⑷200~255MHz——进口无线MIC ⑸500MHz以上为军用频段
强指向性传声器就是这种专门为了拾取 一定方位的音源声音的传声器。它采用驻 极体或电容传声器做极头,采用细长的管 子做声波干涉管,制作成管状传声器,人 们称为枪式传声器。强指向性传声器用途 很广泛,例如在歌剧、话剧、戏曲的舞台 台口和新闻采访中使用。
频率失真是指波形与声源波形相同,但是一 些频率或谐波的强度与声源不同了,即当输出的 音频信号的谐波数量和输入 的音频信号的谐波数 量相同,但在幅度上产生了变化,即某些频率幅 度增强了或者削弱了。
3、频率响应特性 频率响应是传声器输出电平与频率的 关系。它是指传声器在一恒定声压作用下, 传声器的输出电平随不同频率的电压变化。 频率响应可以用频率响应曲线来表示。通 常传声器应取平直的频响曲线,但有些时 候应取中高频段提升约3dB的频响曲线,这 样可增加拾音的明亮度on):
具有这种指向特性的传声器对自各个方 向的声波呈现出基本相同的灵敏度。 收录机中的传声器属于全指向性式。
SmartMic MTV500 USB桌面式麦克风用户手册说明书
SmartMic MTV500USB Desktop Microphone USB桌面式麦克风User Manual鋀宔寯㘄StatementPlease read this manual carefully before using and strictly operate and store in accordance with the instructions. Please save it for your future reference. If the user manual can not help you to solve problems, please ask your retailer for help or email us: ******************.Cautions1.Do not use the unit under moisture condition or water, don't expose it to rain. Please store it in a cool, dry place.2.Please use and store it in normal temperature. Do not move it from overheat e d to supercooled condition frequently as well as keep away from heat sources such as heater or oven.3.When using and storing, please pay attention to dust and moisture.4.Be careful to violent collision.5.To avoid acoustical feedback, do not hold the microphone close to the loudspeakers.6.For the best pick-up pattern, do not hold your hand against the microphone cover.Introductionsuch as home-recording, studio, podcasting and much more.Easy-to-operate, gain control, mute button features, you can create a clear and ample audio as you wish.The SmartMic MTV500 also incorporates real-time monitoring features, like a built-in headphone jack with a volume control, allowing you to directly monitor zero-latency microphone signal.No need to install any driver, the SmartMic MTV500 can be directly connected to the computer through the supplied cable.Product Structure①⑥⑦③①Pop filter③Gain control ④Power/Mute button⑤Volume control⑥3.5mm headphone jackConnect a headphone to monitor the audio output.②Polar pattern switchMode Indicator Status Omnidirectional Lights off Cardioid Green Light Mode Indicator Status Power ON Solid Green Light Mute ON Flashes Green LightOperational Instruction⑦Standard USB-C output (DC 5V)⑧Desktop stand1. Unfold the microphone and lay it flat on the table, adjust it to an ideal angle,And always face the front side of the microphone's pop filter to you.green.4. Select SmartMic MTV500 as the input/output device on your computer.5. Polar Pattern Introduction OmnidirectionalPick up sound equally from all directions, capturing a natural blend of voice and ambiance with low sensitivity to wind and handling noise, as well as to vocal plosives.CardioidMaximizes the rejection of sound coming from the sides and rear of the mic and can be used as a directional microphone to capture full, rich, natural-sounding so you can secure the intelligibility of audio.)Setups ProcedureMac OSX Setup Procedure1.Connect the microphone to your computer via the supplied USB-C to USB-A output cables.2.Open the Apple interface and select the "System Preferences"3.Select the icon of "Sound".4.Choose "SmartMic MTV500" as input device and click "OK".5.Choose "SmartMic MTV500" as output device and click "OK".Windows Setup Procedure1. Connect the microphone to your computer via the supplied USB-C to USB-A cable.2. Open the control panel and select the "SmartMic MTV500"3. Select "Audio" tab and choose "SmartMic MTV500" as input device.TipsTo get optimum sound performance, adjust the microphone's pick-up angle. For maximum clarity and intelligibility, position the microphone pointed directly at the subject's mouth.Before adjusting the angle, slightly loosen the knobs. Avoid tightening or loosening knobs with great force as it might damage the screw threads.Always mount the pop filter to avoid plosive when recording.SpecificationsPolar Pattern Omnidirectional/Cardioid Frequency Response20-20kHzSensitivity-36±3dB(0dB=1V/Pa,1kH 1.5V 2.2K) Signal-to-noise ratio80dBMaximum SPL130dBGain Control0~39dBOperating Voltage5V 150mAHeadphone Amplifier Impedance>16ohms Output power 130mWTHD 0.01% Frequency Response 15Hz-20,000Hz Signal-to-noise ratio100dB Headphone gain0~35 dBMaterial ABS housingOutput USB-CDimensions88×100×171mm (3.5*3.9*6.7'') Weight 300.5g (10.6 oz.)Packing Lists• SmartMic MTV500 Microphone• 1.2m (3.9') USB-C to USB-A audio cable • Warranty Card• User Mannual。
全向麦克风产品使用手册说明书
产品使用简介(1)除说明书有特殊标示的操作方式以外,请勿尝试拆卸或更换产品内的任何零件。
(2)请勿将产品放入任何液体中,此产品非防水设计。
(3)如果有任何液体不小心进入产品内时,请立即断开连接并移开此产品。
(4)为避免触电,请在安装或卸载产品时,确保手上没有沾水。
(5)请勿将此产品放置于热源附近或直接暴露在火源附近。
(6)请勿将本产品放置在有强大电磁力的环境中,否则会导致产品故障。
产品概述非常感谢您使用本公司的全向麦克风产品!在使用本产品之前,请仔细阅读产品使用说明书。
本说明书介绍了全向麦克风产品的功能、安装和使用操作的一般方法。
本产品全向麦克风是一款蓝牙无线或USB有线连接的网络会议通话设备,全向麦克风设备之间蓝牙级联可扩展拾音和放音应用范围,具有回声抵消和环境降噪的最新一代语音处理算法,通话音质清晰自然,机身轻便,便于携带,安装操作方便,特别适用于手机、平板、电脑终端之间的网络会议通话等应用场景。
产品使用手册中图片为示意说明图,具体请以产品实物为准。
包装清单全向麦克风X1数据线X1使用说明书X1Product introduction(1)Do not try to disassemble or replace any parts in the product except for the operation methods marked in the manual.(2)Do not put the product into any liquid,this product is not waterproof.(3)If any liquid accidentally enters the product,please disconnect and remove the product immediately.(4)To avoid electric shock,please make sure that your hands are not wet when installing or uninstalling the product.(5)Do not place this product near a heat source or directly expose it to a fire source.(6)Do not place this product in an environment with strong electromagnetic force,otherwise it will cause product failure.product descriptionThank you very much for using the omnidirectional microphone product of our company!Before using this product,please read the product instruction manual carefully.This manual introduces the function,installation and operation of omnidirectional microphone products.This product omnidirectional microphone is a network conference call device with Bluetooth wireless or USB wired connection.Bluetooth cascading between omnidirectional microphone devices can expand the application range of sound pickup and playback.It has the latest generation of voice echo cancellation and environmental noise reduction.Processing algorithm,the sound quality of the call is clear and natural,the body is light,easy to carry,easy to install and operate,especially suitable for application scenarios such as network conference calls between mobile phones, tablets,and computer terminals.The pictures in the product manual are schematic illustrations, please refer to the actual product for details.Packing listOmnidirectional microphone X1Data cable X1Instruction manual X1产品介绍②麦克风②扬声器③蓝牙指示灯③蓝牙键⑤开关机键⑤组队级联键⑤音量“一”键⑧麦克风静音键⑧音量“+”键⑩级联指示灯⑩环形指示灯⑩充电指示灯⑩USB-C接口设备指示灯说明(1)开机:环形指示灯绿灯逐渐亮起,语音提示“开机,等待蓝牙连接”。
TG-45UV中文说明书++20140521

菜单
菜单号
设置参数
菜单
菜单号
1
步进频率
STEP
MENU+1
STEP 1 20.5K
按MENU键,再 按 或 键选择
STEP 1 12.5K
2.5/5.0/6.25 /10.0/12.5/ 25.0KHZ
MENU
PTT/ EXIT
P23
参数确定
2
发射功率
TXP
MENU+2
TXP 2 HIGH
按MENU键,再 按 或 键选择
使用说明书
福建省信息化局(省无线电管理办公室)友情提醒
购买、使用本设备属于设置使用无线电台(站)的行为,必须依法办理设 台审批手续,领取无线电台执照。在使用设备过程中,应当按照电台执照核 定的项目工作。擅自设置使用无线电台(站)、干扰无线电业务、不按核定 项目工作以及其他违反无线电管理法规的行为,由无线电管理机构给予行政 处罚。严重的无线电违法行为,还可能触犯《刑法》第288条或《治安管理 处罚法》第28条,将被处以三年以下有期徒刑、拘役或者管制,并处或者单 处罚金的刑事处罚或者由公安机关处以拘留的行政处罚。
倒频功能 频率扫描 信道扫描 收音机自动搜索 信令搜索 光标“ ”转换 高低功率快速转换 遥晕、遥毙、遥活 个呼、组呼、群呼 亚音频表 亚音数码表 技术指标
47 47 48 48 49 49 49 50-51 51-54 55 56-57 58
整机配件
请小心从包装箱内取出对讲机。我们建议您在废弃包装材料之前确认一下箱内是否有下列物品。 若有任何物品在搬运中丢失或损坏,请立即向送货人提出索赔书。
CALL键(FM/报警键)
LCD图标解释
该符号指示当前为模拟亚音频 该符号指示当前为数字亚音频 表示发射频率为接收频率加上一个频差频率 表示发射频率为接收频率减去一个频差频率 表示当前工作的信道接收和发射频率不一致 双守候状态 声控发射功能 频率/信道模式下的接收和发射频率倒置 在信道工作在窄带方式下该符号出现 电池电量显示 键盘锁定 当前发射功率为低功率 指示当前工作频点;当前菜单设置 信号强度指示 指示信道编号 频率尾数指示
MST-45全向麦克风资料
标配3米镀金USB音频连接线
免驱动声卡,即插即用。
理想的小组会议,免费上网服务呼叫和音乐欣赏。
充分全双工会话,清澈的声音,内置全向麦克风,有效直径5~10米。
Hi -Fi的放大器和高品质的扬声器。
采用先进的DSP回声消除技术,处理回声减少噪音。
可调播放音量。
理想的便携设备,体积小,重量轻。
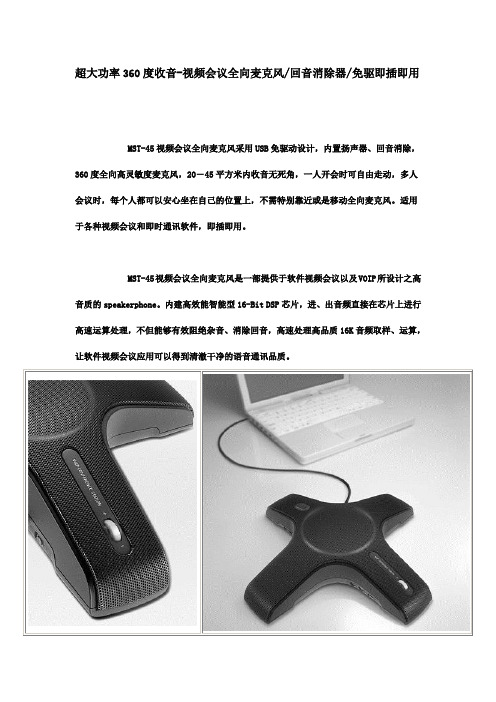
其免提喇叭麦克风的设计,更令用者在参加软件视频会议或使用即时通讯软件时更显轻松。其喇叭音量的输出,亦足以6-20个人,甚至小型会议室的使用需求。另为顾及使用者之私密性,视频会议全向麦克风提供了一个3.5mm的麦克及耳机音源插孔,让使用者可以外接麦克风或耳机。
高音质原音真实呈现
通话犹如面对面沟通,多人或三方以上的会议时,可以清楚知道谁在说话,不需要每次发言都要先报自己的名字,让会议进行更加顺畅。
工作温度/温度
0-60摄氏度,0-95% RH
主机尺寸
290mmX280mmX101mm
重量
680g/1500g(包装前后)
硬件规格
内建全指向麦克风
4Ω2W喇叭
USB供电
电气规格
操作电压:4.5V ~ 5.5V
麦克风
全指向性
感度:-36 +/- 3 dB
频率:20 ~ 16,000 Hz
系统需求
附有USB接孔的PC或是Mac
网络实时通讯软件skype腾讯QQ、MSN、新浪UC、视频会议软件...等
宽带上网环境(ADSL或Cable Modem...等)
MST-45视频会议全向麦克风采用USB免驱动设计,内置扬声器、回音消除,360度全向高灵敏度麦克风,20-45平方米内收音无死角,一人开会时可自由走动,多人会议时,每个人都可以安心坐在自己的位置上,不需特别靠近或是移动全向麦克风。适用于各种视频会议和即时通讯软件,即插即用。
MP34DT05-A数字MEMS麦克风说明说明书
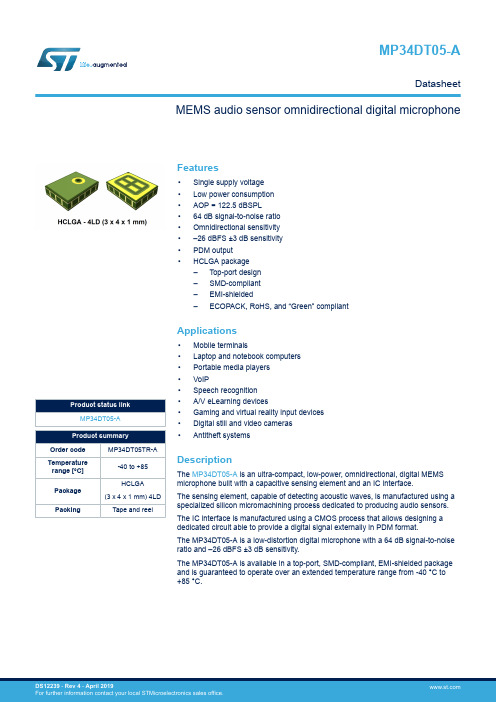
Features•Single supply voltage •Low power consumption •AOP = 122.5 dBSPL•64 dB signal-to-noise ratio •Omnidirectional sensitivity •–26 dBFS ±3 dB sensitivity •PDM output•HCLGA package –Top-port design –SMD-compliant –EMI-shielded –ECOPACK, RoHS, and “Green” compliantApplications•Mobile terminals•Laptop and notebook computers •Portable media players •VoIP•Speech recognition •A/V eLearning devices•Gaming and virtual reality input devices •Digital still and video cameras •Antitheft systemsDescriptionThe MP34DT05-A is an ultra-compact, low-power, omnidirectional, digital MEMS microphone built with a capacitive sensing element and an IC interface.The sensing element, capable of detecting acoustic waves, is manufactured using a specialized silicon micromachining process dedicated to producing audio sensors.The IC interface is manufactured using a CMOS process that allows designing a dedicated circuit able to provide a digital signal externally in PDM format.The MP34DT05-A is a low-distortion digital microphone with a 64 dB signal-to-noise ratio and –26 dBFS ±3 dB sensitivity.The MP34DT05-A is available in a top-port, SMD-compliant, EMI-shielded package and is guaranteed to operate over an extended temperature range from -40 °C to +85 °C.MEMS audio sensor omnidirectional digital microphoneMP34DT05-ADatasheet1Pin descriptionFigure 1. Pin connectionsGND CLKLRDOUTVddBOTTOM VIEWTable 1. Pin descriptionPin descriptionAcoustic and electrical specifications 2Acoustic and electrical specifications2.1Acoustic and electrical characteristicsThe values listed in the table below are specified for Vdd = 1.8 V, Clock = 2.4 MHz, T = 25 °C, unless otherwisenoted.Table 2. Acoustic and electrical characteristics1.Typical specifications are not guaranteed.2.Input clock in static mode.3.Duty cycle: min = 40% max = 60%.4.Time from the first clock edge to valid output data.Table 3. Distortion specifications @ 1 kHz1.Typical specifications are not guaranteed.2.2Timing characteristicsTable 4. Timing characteristicsFigure 2.Timing waveformsCLKPDM RPDM LTiming characteristics2.3Frequency responseFigure 3.Typical frequency response normalized to 1 kHzFrequency responseApplication recommendations 3Application recommendationsFigure 4. MP34DT05-A electrical connections (top view)VddFigure 5. MP34DT05-A electrical connections for stereo configuration (top view)VddPower supply decoupling capacitors (100 nF ceramic, 1 μF ceramic) should be placed as near as possible to pin1 of the device (common design practice).The L/R pin must be connected to Vdd or GND (refer to Table 6. L/R channel selection).4Carrier tape mechanical specificationsFigure 6.Carrier tape without microphone (top view)Figure 7.Carrier tape with microphone (top view)Carrier tape mechanical specifications5Process recommendationsTo ensure a consistent manufacturing process it is strongly advised to comply with following recommendations:•The recommended pick-up area for the MP34DT05-A package must be defined using the worst case (ie. no device alignment during picking process). This area has been defined considering all the tolerances of thecomponents involved (reel, package, sound inlet). Picker tolerance shall be considered as well.•To prevent damage to the MEMS membrane or incorrect pick-up and placement, do not pick up the component on the inlet area•For the package outline please refer to Figure 7. Carrier tape with microphone (top view). Nozzle shape, size, and placement accuracy are the other key factors to consider when deciding on the coordinates for thepicking.•Device alignment before picking is highly recommended.• A vacuum force greater than 7 psi must be avoided• 1 kPa = 0.145 psi (lb/in²) = 0.0102 kgf/cm² = 0.0098 atm•MSL (moisture sensitivity level) Class 3•Maximum of 3 reflow cycles is recommended•All recommended dimensions (device safe-picking area) do not include the pick-and-place equipment tolerancesFigure 8. Recommended picking areaTo have a safe pick-up "by design", ST strongly advises an ad hoc nozzle.The following picker ensures that the holes for the vacuum and the air stream are ALWAYS away from theporthole of the device (4 vacuum ports located at each corner of the device).The recommended nozzle also has a recess, in the form of a cross, which guarantees that the porthole is alwaysleft at atmospheric pressure. By using the recommended nozzle, the membrane will not suffer any sudden airdisturbances during the picking or placing of the devices in the tape and reel.Figure 9. Recommended picker designSensing element 6Sensing elementThe sensing element shall mean the acoustic sensor consisting of a conductive movable plate and a fixed plateplaced in a tiny silicon chip. This sensor transduces the sound pressure into the changes of coupled capacitybetween those two plates.7Absolute maximum ratingsStresses above those listed as “absolute maximum ratings” may cause permanent damage to the device. This isa stress rating only and functional operation of the device under these conditions is not implied. Exposure tomaximum rating conditions for extended periods may affect device reliability.Table 5. Absolute maximum ratingsThis device is sensitive to mechanical shock, improper handling can cause permanent damage to the part.This device is sensitive to electrostatic discharge (ESD), improper handling can cause permanent damage to the part.Absolute maximum ratingsFunctionality 8Functionality8.1L/R channel selectionThe L/R digital pad lets the user select the DOUT signal pattern as shown in Table 6. L/R channel selection. TheL/R pin must be connected to Vdd or GND.Table 6. L/R channel selectionNote: As the L/R pin is internally connected to GND via a 200 kohm pull/down resistor, it is not mandatory toconnect the pin itself to GND for the respective channel selection.9Package informationIn order to meet environmental requirements, ST offers these devices in different grades of ECOPACK packages,depending on their level of environmental compliance. ECOPACK specifications, grade definitions and product status are available at: . ECOPACK is an ST trademark.9.1Soldering informationThe HCLGA (3 x 4) 4LD package is also compliant with the RoHS and “Green” standards and is qualified for soldering heat resistance according to JEDEC J-STD-020.Land pattern and soldering recommendations are available at .Figure 10. Recommended soldering profile limitsRAMP-DOWNRAMP-UPt s PREHEATt LT L to T PT SMAXT SMINT PT L30 60 90 120 150 180 210 240 270 300 330 360 390T25° to PEAKT E M P E R A T U R ECRITICAL ZONETIMETable 7. Recommended soldering profile limitsDescriptionParameter T L to T PPackage information9.2HCLGA package informationFigure 11. HCLGA (3 x 4 x 1 mm) 4-lead package outline and mechanical dataDimensions are in millimeter unless otherwise specified General Tolerance is +/-0.15mm unless otherwise specifiedOUTER DIMENSIONSITEM DIMENSION [mm]TOLERANCE [mm]1.0± 3 ]L [ h t g n e L 1.0± 4 ]W [ h t d i W 1.0± 00.1]H [ t h g i e H1.0±52.0 ØP A DM00231908_31.The MEMS microphone plastic cap can exhibit some level of variation in color when the device is subjected to thermal processes. This variation does does not affect acoustic or electrical performance.2.Ring plating can be subject to change not affecting acoustic and electrical performance.Figure 12. Land patternRevision historyTable 8. Document revision historyIMPORTANT NOTICE – PLEASE READ CAREFULLYSTMicroelectronics NV and its subsidiaries (“ST”) reserve the right to make changes, corrections, enhancements, modifications, and improvements to ST products and/or to this document at any time without notice. Purchasers should obtain the latest relevant information on ST products before placing orders. ST products are sold pursuant to ST’s terms and conditions of sale in place at the time of order acknowledgement.Purchasers are solely responsible for the choice, selection, and use of ST products and ST assumes no liability for application assistance or the design of Purchasers’ products.No license, express or implied, to any intellectual property right is granted by ST herein.Resale of ST products with provisions different from the information set forth herein shall void any warranty granted by ST for such product.ST and the ST logo are trademarks of ST. For additional information about ST trademarks, please refer to /trademarks. All other product or service names are the property of their respective owners.Information in this document supersedes and replaces information previously supplied in any prior versions of this document.© 2019 STMicroelectronics – All rights reserved。
TM eFLEX MM-840 75x 300x数字麦克风镜的用户手册说明书
© TMe FLEX MM-84075x/300x D IGITAL MICROSCOPE WITH FLEXIBLE NECKINSTRUCTION MANUALTable of ContentsImportant information .............................................................. 4 Product description .................................................................. 4 Computer requirements & software installation ......................... 5 Package contents ..................................................................... 6 Product overview ................................................................... 7 Product specification ............................................................... 8 Assembling the stand............................................................. 9 Attaching the microscope to the stand .. (10)Focusing ............................................................................... 11 Preparation .......................................................................... 11 For viewing an object at a distance oron the stand ................................................................. 12 13 1475x effective magnification (21” monitor).................................. 300x effective magnification (21” monitor)...............................Adjusting the LED light intensity (15)Taking a snapshot (16)Using the xploview software (17)System settings menu (18)Device setup (19)Timed shot setup (19)Movie setup (19)Save setting (19)Language setting (19)Advanced settings (20)Saved files (20)Full screen viewing (21)Care and maintenance (21)Warning (22)Important informationPlease read this instruction manual carefully before using this product, and retain these instructions for future reference. Improvements and changes to this text necessitated by typographical errors, or improvements to the software and/or equipment may be made at any time without notice.Product description1.This digital microscope differs from a traditional optical microscope. Instead of looking through an eyepiece, the magnified image or live video is displayed on a computer monitor via a USB connection.2.The effective magnification power depends on the size of the monitor used – the larger the monitor, the higher the magnification. This device has 2 magnification powers, it can magnify images up to 75x and 300x when placed directly on top of the object and through a 21” monitor.3.This device has 4 built-in LED lights. The intensity of these lights can be adjusted.Computer requirements & software installationGo to /software to download the latest software and corresponding software installation guide for the MM-840. The computer requirements (operating system, etc.) may be different depending on the software version.Product specification* Please note the effective magnification is a combination of the optical system and a high powered digital zoom.FocusingPreparationRotate the focusing knob to the left (clockwise) to the furthest position.For viewing an object at a distance or on the standFrom the preparation position, rotate the focusing knob to the right (counter-clockwise) until the image is sharp and clear. The closer the microscope to the object, the higher the magnification power.Place the microscope directly on top of an object or a specimen slide.From the preparation position, rotate the focusing knob to the right (counter-clockwise) until the first focal point has been reached where the image is sharp and clear. Effective magnification of 75x can be achieved when viewing on a 21” monitor.Place the microscope directly on top of an object or a specimen slide.From the preparation position, rotate the focusing knob to the right (counter-clockwise) until the second focal point has been reached where the image is sharp and clear. Effective magnification of 300x can be achieved when viewing on a 21” monitor.Taking a snapshotThe snapshot button is touch-sensitive. Touch the snapshot button located on top of the device to take a snapshot.Using the xploview softwareThe following buttons are available:Clicking this will open the systemsettings menu (see next section).Clicking this will capture the onscreen image of the device.Clicking this will activate or deactivate thetimed shot feature. When activated,images will be captured at a regular interval.Clicking this will activate or deactivatethe video recording feature.Clicking this will show the copyright andversion information of the applicationsoftware.Clicking this will shut down theapplication software.System settings menuThe first time the xploview software is started, the default settings will be loaded, you may change these settings manually in the system settings menu.Device setupIf the image captured by the Digital Microscope was not displayed by default, you can change this by selecting it from the "Device" drop-down menu.The resolution of images you capture can be changed from the "Resolution" drop-down menu.Timed shot setupThe frequency and duration of automatic images capture can be adjusted under this option.Movie setupThe resolution of videos you record can be changed from the "Resolution" menu. You can also set a maximum file size for each video.Save settingThe default location for captured images or videos can be changed under this option.Language settingThe language of the xploview software can be changed under this option.Advanced settingsBy clicking the "More..." button on the right of the system settings menu, you will be able to manually adjust all of the image settings. Note that the settings available may be different, depending on your operating system.Saved filesWith the xploview application software opened, you can locate the saved files folder by clicking the "More..." button located on the left of the main software window.Full screen viewingTo activate the full screen mode, click the full screen button located on the bottom right hand corner of the xploview application software window.To exit full screen mode, either double click on the screen, or press the “Esc” button on the keyboard.Care and maintenanceKeep the device dry and protect it from water and moisture.Do not leave your device in a place with an extreme high or low temperature.Do not touch the device with a wet hand as it may damage the device, or cause an electric shock to the user.Do not use or store the device in dusty, dirty areas as itsmoving parts may be damaged.Do not use harsh chemicals, cleaning solvents or strongdetergents to clean the device. Wipe it with a soft cloth slightly dampened in a mild soap-and-water solution.21WarningDo not place lighted Digital Microscope upon the eye, doing so may cause permanent eye damage.Do not attempt to open or dismantle the Digital Microscope.22。
全向性麦克风和指向性麦克风 话筒极头的指向类型

全向性麦克风和指向性麦克风话筒极头的指向类型全向性麦克风:磁性、陶瓷和驻极体式麦克风都是全向性麦克风,即等量接受各方向的声音。
目前,驻极体式麦克风被广泛应用于声学领域,它是采用一种绝缘的永久性极化材料制成。
声音进入麦克风,声波的疏密变化引起带负电的薄金属膜片振动,随即将声能转变为机械能,膜片振动在驻机体上产生压力,传递至驻极体后板。
驻极体后板和膜片底部都与场效应晶体管前置放大器相连并有一终端通向外部。
当膜片振动时,膜片和驻极体后板间的距离和空间发生改变,产生电压,通过固定在麦克风上的场效应晶体管,将机械能转变为电能,再通过终端传到放大器。
驻极体式麦克风频响宽,灵敏度高且耐用,而膜片是它唯一运动的部分。
指向性麦克风:根据极性形式来分类,对前面传来的声音比后面传来的声音反应敏感得多。
指向性麦克风有两个开口在膜片的两端,一边一个。
膜片的振动根据相位关系,取决于两端的压力差。
在后声孔的前端置一细密的声学滤网起延时作用,这样从后面传来的声音可同时从前后两个声孔到达振膜并抵消,因而指向性麦克风的极性图呈心形状。
心形指向这种指向得名于它的拾音范围很像是一颗心:在话筒的正前方,其对音频信号的灵敏度非常高;而到了话筒的侧面(90度处),其灵敏度也不错,但是比正前方要低6个分贝;最后,对于来自话筒后方的声音,它则具有非常好的屏蔽作用。
而正是由于这种对话筒后方声音的屏蔽作用,心形指向话筒在多重录音环境中,尤其是需要剔除大量室内环境声的情况下,非常有用。
除此之外,这种话筒还可以用于现场演出,因为其屏蔽功能能够切断演出过程中产生的回音和环境噪音。
在实际中,心形指向话筒也是各类话筒中使用率比较高的一种,但是要记住,像所有的非全向形话筒一样,心形指向话筒也会表现出非常明显的临近效应。
心形指向点击此处查看全部新闻图片超心形指向这种指向类型与过心形指向非常相似,也经常被混淆,但是,一般超心形指向类型的指向性要比过心形稍稍差一些,且其对来自话筒后方声音的灵敏度区域也要小得多。
Shure TwinPlex Lavalier Microphones TL45, TL46, TL
TL45, TL46, TL47, TL48™TwinPlex Lavalier MicrophonesShure TwinPlex Lavalier online user guide for TL45, TL46, TL47, TL48. Includes how to attach windscreen, clip options, wiring diagrams, and specifications.Version: 11.2 (2023-B)Table of ContentsTL45, TL46, TL47, TL48 TwinPlex™ Lavalier Microphones3简要说明3特点 3各种型号 4 Shure TwinPlex 拾音头5保养与维护5 TwinPlex 附件快速入门5频率限制 6连接防尘罩 6领夹式话筒支座 7固定夹 7双固定夹 7双齿夹 7粘贴安装 8粘贴式双齿夹 8领夹式话筒距离 8螺纹安装说明8附件8可替换配件 9提供的附件 9可选配附件 10接线和端接10典型接线表 10把 LEMO 转换为 TA4F11 Lectrosonics 腰包的 TA5F 接线(伺服偏置布线) 12适用于 Sony 腰包的 Hirose 接线 12 Q5X 腰包的 LEMO 接线 13 MTQG 连接器组件 14 RPM400 前置放大器14特点 14前置放大器安装套件 15规格15频率响应 19认证20•◦◦◦•◦TL45, TL46, TL47, TL48TwinPlex Lavalier Microphones简要说明Shure TwinPlex 超小全向型领夹式话筒的设计优于其他 5 mm 领夹式话筒,用于专业剧院、电影、电视和企业活动。
TwinPlex 双振膜技术实现了卓越的反馈前增益、离轴响应、低本底噪声,同时带来身临其境的非凡清晰度,不受数字干扰的影响。
电缆本身超级安静,并且已测试证明在同类电缆中具有最耐用、最可靠的性能。
M-Four-多指向性电子管放大电容话筒
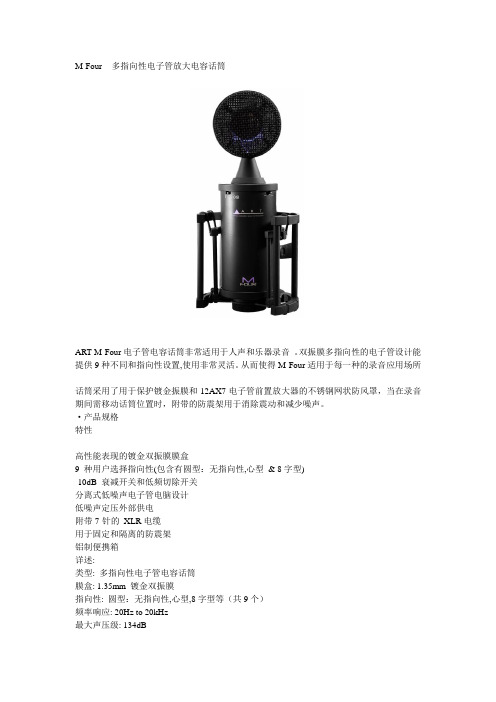
M-Four - 多指向性电子管放大电容话筒
ART M-Four电子管电容话筒非常适用于人声和乐器录音。
双振膜多指向性的电子管设计能提供9种不同和指向性设置,使用非常灵活。
从而使得M-Four适用于每一种的录音应用场所
话筒采用了用于保护镀金振膜和12AX7电子管前置放大器的不锈钢网状防风罩,当在录音期间需移动话筒位置时,附带的防震架用于消除震动和减少噪声。
·产品规格
特性
高性能表现的镀金双振膜膜盒
9 种用户选择指向性(包含有圆型:无指向性,心型& 8字型)
-10dB 衰减开关和低频切除开关
分离式低噪声电子管电脑设计
低噪声定压外部供电
附带7-针的XLR电缆
用于固定和隔离的防震架
铝制便携箱
详述:
类型: 多指向性电子管电容话筒
膜盒: 1.35mm 镀金双振膜
指向性: 圆型:无指向性,心型,8字型等(共9个)
频率响应: 20Hz to 20kHz
最大声压级: 134dB
灵敏芳: 12mv/Pa = 2dB (0dB=1v/Pa 1000Hz) 信噪比: 70dB @ 1Pa
阻抗: <200欧姆
等值噪声电平: 20dB (IEC268-4 A Weight) 电源需求: 电源供电。
Miktek PM5 手持舞台麦克风说明书
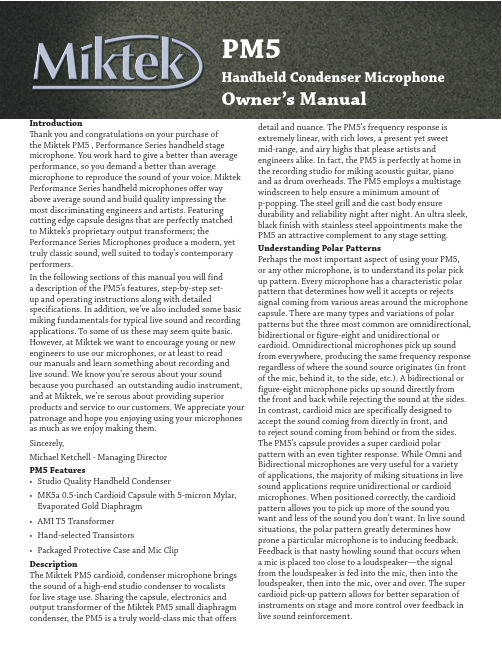
IntroductionThank you and congratulations on your purchase ofthe Miktek PM5 , Performance Series handheld stage microphone. You work hard to give a better than average performance, so you demand a better than average microphone to reproduce the sound of your voice. Miktek Performance Series handheld microphones offer way above average sound and build quality impressing the most discriminating engineers and artists. Featuring cutting edge capsule designs that are perfectly matchedto Miktek’s proprietary output transformers; the Performance Series Microphones produce a modern, yet truly classic sound, well suited to today’s contemporary performers.In the following sections of this manual you will finda description of the PM5’s features, step-by-step set-up and operating instructions along with detailed specifications. In addition, we’ve also included some basic miking fundamentals for typical live sound and recording applications. To some of us these may seem quite basic. However, at Miktek we want to encourage young or new engineers to use our microphones, or at least to readour manuals and learn something about recording and live sound. We know you’re serous about your sound because you purchased an outstanding audio instrument, and at Miktek, we’re serous about providing superior products and service to our customers. We appreciate your patronage and hope you enjoying using your microphones as much as we enjoy making them.Sincerely,Michael Ketchell - Managing DirectorPM5 Features• Studio Quality Handheld Condenser• MK5a 0.5-inch Cardioid Capsule with 5-micron Mylar, Evaporated Gold Diaphragm• AMI T5 Transformer• Hand-selected Transistors• Packaged Protective Case and Mic ClipDescriptionThe Miktek PM5 cardioid, condenser microphone brings the sound of a high-end studio condenser to vocalistsfor live stage use. Sharing the capsule, electronics and output transformer of the Miktek PM5 small diaphragm condenser, the PM5 is a truly world-class mic that offers detail and nuance. The PM5’s frequency response is extremely linear, with rich lows, a present yet sweetmid-range, and airy highs that please artists and engineers alike. In fact, the PM5 is perfectly at home in the recording studio for miking acoustic guitar, piano and as drum overheads. The PM5 employs a multistage windscreen to help ensure a minimum amount ofp-popping. The steel grill and die cast body ensure durability and reliability night after night. An ultra sleek, black finish with stainless steel appointments make the PM5 an attractive complement to any stage setting. Understanding Polar PatternsPerhaps the most important aspect of using your PM5, or any other microphone, is to understand its polar pick up pattern. Every microphone has a characteristic polar pattern that determines how well it accepts or rejects signal coming from various areas around the microphone capsule. There are many types and variations of polar patterns but the three most common are omnidirectional, bidirectional or figure-eight and unidirectional or cardioid. Omnidirectional microphones pick up sound from everywhere, producing the same frequency response regardless of where the sound source originates (in front of the mic, behind it, to the side, etc.). A bidirectional or figure-eight microphone picks up sound directly from the front and back while rejecting the sound at the sides. In contrast, cardioid mics are specifically designed to accept the sound coming from directly in front, andto reject sound coming from behind or from the sides. The PM5’s capsule provides a super cardioid polar pattern with an even tighter response. While Omni and Bidirectional microphones are very useful for a varietyof applications, the majority of miking situations in live sound applications require unidirectional or cardioid microphones. When positioned correctly, the cardioid pattern allows you to pick up more of the sound you want and less of the sound you don’t want. In live sound situations, the polar pattern greatly determines how prone a particular microphone is to inducing feedback. Feedback is that nasty howling sound that occurs when a mic is placed too close to a loudspeaker—the signal from the loudspeaker is fed into the mic, then into the loudspeaker, then into the mic, over and over. The super cardioid pick-up pattern allows for better separation of instruments on stage and more control over feedback in live sound reinforcement.PM5 SpecificationsType.....................Condenser Polar Pattern: .............CardioidFrequency Response: .......20Hz - 20KHz Impedance: ...............200 Ohms Sensitivity . . . . . . . . . . . . . . . . -35dBV/Pa Low Cut Filter .............80 Hz Length: ..................7.1 inches Width: ...................2.0 inches Depth: ...................2.0 inches Net Weight:...............0.65 poundsStand Mounting the PM5The PM5 can be mounted to any standard microphone stand using the included mic stand holder. If you are using a US standard 5/8-inch mic stand, remove the Euro adapter by unscrewing it from the mic holder. Slide the microphone into the holder from the rear to the front with a downward motion until it snaps into place.Microphone PlacementTo help maximize the quality of your performance, you must pay careful attention to the placement of your PM5, and specifically, how it is positioned for the instrument or vocalist that you’re miking. As you become more experienced in miking techniques, you’ll quickly realize the microphone placement is critical to getting the sound you want while maximizing gain before feedback. When placing the mic around any instrument or sound source, take notice of the postion of the front of house and monitor loudspeakers. In general, it’s good practice to set the microphone behind the main or front of house PA speakers to avoid feedback from those speakers. Also, position the microphone in front of a monitor loudspeaker within a 110 degree arch a shown nin the diagram below. As you’re changing the microphone’s position, be sure to check that the mic input is still set toa good level without clipping, as described in the previous Powering the PM5Since the PM5 is a condenser microphone it needs to be operated by connecting it to a 48 volt Phantom power source. Most quality mixers, outboard mic pres and DAW mic channels have Phantom power available as a standard feature. You can also use an external phantom supply, if necessary. Since most mixers and outboard mic pres have a dedicated switch to engage the phantom power, be sure to check that the Phantom power is on. Once the Phantom power source is turned on, the PM5 receives the Phantom power directly from a mic cable. Note: Without Phantom power the PM5 will not pass audio.Setting Up the Signal LevelIn order to get a good signal, first be sure that the PM5 is connected to a mixer or recorder input that is microphone level. Most quality mixers, mic pre’s and recorders provide microphone inputs with a mic trim (“Trim” AKA Mic Gain or Level) control. The purpose of the mic trim control is to set a good signal level and minimize any noise associated with the mic inputs electronics. A good mic pre will also have a Clip or Peak LED to show you when the input is at overload;the level which distortion begins to occur. To set a good clean level, set the PM5 up in front of the desired sound source and slowly turn up the mic trim until you see the Clip LED light up. Then, turn the trim control down until the LED does not light any more. On most microphone inputs, the best setting is when the trim control is turned up as high as possible without lighting the PEAK LED. The Proximity EffectAll cardioid or uni-directional microphones exhibit aphenomenon known as “proximity effect”. The proximity effect is the increase in low frequency response amicrophone exhibits as it is moved closer to the sound source. Vocalist tend to love this effect since when they get really close to the mic they get the “FM radio”, big bass sound. A good vocalist with good mic technique will use the proximity effect to adjust their tonal response in real time. The key to developing the best mic technique is experimentation, along with awareness of the general principle that, the closer your PM5 is to a signal source, the greater the bass response. The proximity effect’s bass lift is caused by the amount of pressure present at the ports that are used to create the directional pattern. Since omnidirectional microphones do not have ports, they do not have proximity effect.Front of House SpeakerMonitor SpeakerFront of House Speaker110º。
MST-30全向麦克风操作说明
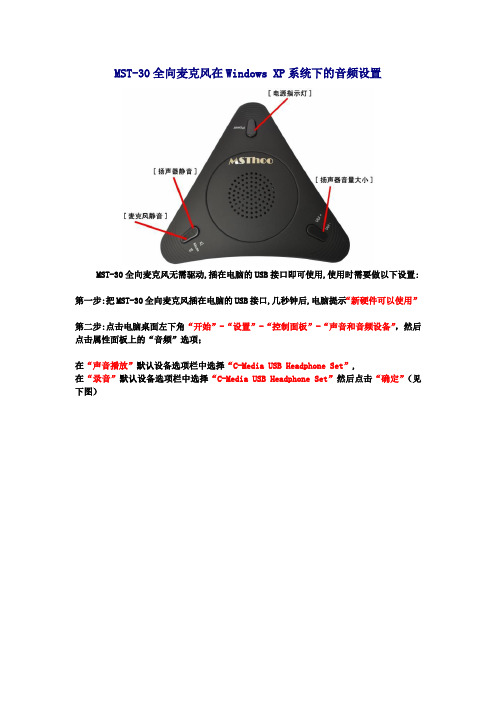
MST-30全向麦克风在Windows XP系统下的音频设置MST-30全向麦克风无需驱动,插在电脑的USB接口即可使用,使用时需要做以下设置:第一步:把MST-30全向麦克风插在电脑的USB接口,几秒钟后,电脑提示“新硬件可以使用”第二步:点击电脑桌面左下角“开始”-“设置”-“控制面板”-“声音和音频设备”,然后点击属性面板上的“音频”选项;在“声音播放”默认设备选项栏中选择“C-Media USB Headphone Set”,在“录音”默认设备选项栏中选择“C-Media USB Headphone Set”然后点击“确定”(见下图)第三步:点击“音量”,然后点击“设备音量”调到最高,然后点击“应用”(见下图)然后点击“设备音量”下面的“高级”按钮,弹出新窗口,点击“选项”-“属性”(见下图)弹出新窗口,选择“录音”,并在“显示下列音量控制”栏下,把“Wave In”前面的选择框中勾选“对号”,然后点击“确定”(见下图)弹出新窗口“Wa…”,把音量调到最高。
(见下图)此全向麦克风有闭音键,按一下按钮,指示灯变亮,就是关闭了麦克风或扬声器,再按一下指示灯熄灭,就是开启了全向麦克风或扬声器。
(见下图)MST-30全向麦克风在Windows 7系统下的音频设置MST-30全向麦克风无需驱动,插在电脑的USB接口即可使用,使用时需要做以下设置: 第一步:把MST-30全向麦克风插在电脑的USB接口,几秒钟后,电脑提示“新硬件可以使用”第二步:点击电脑桌面左下角“开始”-“控制面板”-“硬件和声音”-“声音”,然后点击属性面板上的“管理音频设备”选项;在“播放”选项栏中选择“C-Media USB Headphone Set”, 为默认设备在“录制”选项栏中选择“C-Media USB Headphone Set”默认设备,(见下图)第三步:点击“播放”,然后双击“扬声器”-“级别”将音量调到最高(100),然后点击“应用”(见下图)然后点击“录制”双击“麦克风”-“级别”将音量调到最高(100),然后点击“应用”(见下图)此全向麦克风有闭音键,按一下按钮,指示灯变亮,就是关闭了麦克风或扬声器,再按一下指示灯熄灭,就是开启了全向麦克风或扬声器。
- 1、下载文档前请自行甄别文档内容的完整性,平台不提供额外的编辑、内容补充、找答案等附加服务。
- 2、"仅部分预览"的文档,不可在线预览部分如存在完整性等问题,可反馈申请退款(可完整预览的文档不适用该条件!)。
- 3、如文档侵犯您的权益,请联系客服反馈,我们会尽快为您处理(人工客服工作时间:9:00-18:30)。
内建全指向麦克风
4Ω2W喇叭
USB供电
电气规格
操作电压:4.5V ~ 5.5V
麦克风
全指向性
感度:-36 +/- 3 dB
频率:20 ~ 16,000 Hz
系统需求
附有USB接孔的PC或是Mac
网络实时通讯软件skype腾讯QQ、MSN、新浪UC、视频会议软件...等
宽带上网环境(ADSL或Cable Modem...等)
超大功率360度收音-视频会议全向麦克风/回音消除器/免驱即插即用
MST-45视频会议全向麦克风采用USB免驱动设计,内置扬声器、回音消除,360度全向高灵敏度麦克风,20-45平方米内收音无死角,一人开会时可自由走动,多人会议时,每个人都可以安心坐在自己的位置上,不需特别靠近或是移动全向麦克风。适用于各种视频会议和即时通讯软件,即插即用。
工作温度/温度
0-60摄氏度,0-95% RH
主机尺寸
290mmX280mmX101mm
重量
680g/1500g(包装前后)
其免提喇叭麦克风的设计,更令使用者在参加软件视频会议或使用即时通讯软件时更显轻松。其喇叭音量的输出,亦足以6-20个人,甚至小型会议室的使用需求。另为顾及使用者之私密性,视频会议全向麦克风提供了一个3.5mm的麦克及耳机音源插孔,让使用者可以外接麦克风或耳机。
高音质原音真实呈现
通话犹如面对面沟通,多人或三方以上的会议时,可以清楚知道谁在说话,不需要每次发言都要先报自己的名字,让会议进行更加顺畅。
即时沟通零距离、高效率
标配3米镀金USB音频连接线
免驱动声卡,பைடு நூலகம்插即用。
理想的小组会议,免费上网服务呼叫和音乐欣赏。
充分全双工会话,清澈的声音,内置全向麦克风,有效直径5~10米。
Hi -Fi的放大器和高品质的扬声器。
采用先进的DSP回声消除技术,处理回声减少噪音。
可调播放音量。
理想的便携设备,体积小,重量轻。
MST-45视频会议全向麦克风是一部提供于软件视频会议以及VOIP所设计之高音质的speakerphone。内建高效能智能型16-Bit DSP芯片,进、出音频直接在芯片上进行高速运算处理,不但能够有效阻绝杂音、消除回音,高速处理高品质16K音频取样、运算,让软件视频会议应用可以得到清澈干净的语音通讯品质。
兼容USB 1.0 & 2.0,免驱动设计。
全向麦克风相关性能参数
产品型号
MST-45全指向型麦克风
按键
音量控制钮
USB电源开关
麦克风静音开关
LED指示灯
绿灯表示待机及通话模式
红灯表示静音模式
声音功能
声音取样频率:16KHz
通讯模式:全双工同时对谈
回音消除:高于60dB
支持AGC (音频自动增益控制)功能
