BEAWebLogicServer8JMS入门
WebLogic基础篇

用、网络应用和数据库应 用的Java应用服务器。将Java的动态功能和Java Enterprise标准的安全性引入大型网络应用的开发、集成、部署和管理之中
• Domain:域是个逻辑概念,用来组织管理一系列的应用服务器实例,也就
In Unix
• 2、通过ftp工具或命令行把安装程序上传到服务 器某个临时目录 • 1) .bin的安装方法 • 首先赋予.bin可执行权限 • chmod a+x filename.bin • 然后执行 • ./filename.bin -mode=console • 2) .jar的安装方法 • java -jar filename.jar -mode=console
台或多台被管理服务器
• Node Manager:节点管理器是一个单独运行的后台程序,一般运行在被管理服务
器的机器上,用来提供远程启动和停止服务器(Server)的功能
WebLogic Server
• Domain and Server的关系 • 一个Domain 可以包含一个或多个 WebLogic Server实例,甚至是Server集 群。一个Domain中有一个且只能有一个 Server 担任管理Server的功能,其它的 Server具体实现一个特定的逻辑功能。
In Windows
• 5选择安装组件,一般只需要勾选WebLogic Server->Server,单击下一 步
In Windows
• 6产品安装目录,不改动,选择默认的E:\bea\weblogic81 ,单击下一步
In Windows
• 7出现选择安装Windows服务界面,一般不需要把server作为windows服 务运行,选择No,单击下一步
Bea Weblogic Server V8.1Sp2在Windows Ser ver 2003中安装的步骤
Bea Weblogic Server的安装步骤目录1.weblogic主程序的安装2.说明环境:操作系统:Windows Server 2003 Enterprise Edition Sp1Weblogic server:weblogic Server 8.1 Sp2正文1.双击Weblogic Server的安装程序:2.准备工作结束后,出现具体版本号,然后跳过具体版本号,进入Weblogic Server V8.1 Sp2的安装引导界面,点击下一步:3.是否同意许可,选择是。
4.选择Bea主目录的安装路径5.点击下一步,选择安装的类型,这里选择完全:6.点击下一步,并选择成品安装目录7.点击下一步,开始安装。
8.安装完成后的成功页面,如下:如何需要安装XML Spy的可以把前面的方框勾上,点击完成就会开始安装XML Spy。
这里选择不安装。
说明:1、安装过程中,没有出现任何的错误信息,说明weblogic server成功安装。
2、在bea主目录下的文件夹代表的意思分别是:Ext_componets------------------配合weblogic server使用的组成部分,组件。
Jdk141_05-----------------------Sun Java 2 SDK的1.4.1版本,1.4.1指明安装在机器上的Sun SDK版本。
Jrockit81sp2_141_05------------Weglogic JRockit SDK.1.4.1指明了安装在机器上的版本。
Logs--------------------------------存放weblogic server使用过程中所产生的日志。
User_projects---------------------存放用户定义的用户工程。
Utils--------------------------------包含支持安装所有BEA Weblogic 品台产品的有用工具。
BEA WebLogic Workshop 8.1 快速上手指南

BEA WebLogic Workshop 8.1 ® 快速上手指南開始使用BEA WebLogic Workshop 8.1™台灣比爾亞系統台北市敦化南路二段105號23F電話: (02) 27841623傳真: (02) 278416252003年7月BEA WebLogic Workshop™版權宣告比爾亞系統公司版權所有,出版於2003年7月1日(版本1.1)使用權利說明非經比爾亞系統公司(BEA Systems, Inc)同意,不得擅自使用電子媒介或設備,將本文全文或部分影印、重製、翻譯或刪除。
本文所有資訊若有所更動將不另行通知,且不列入比爾亞系統(BEA System)保證的一環。
更進一步,比爾亞系統不保證本文章所提供的內容及解釋名詞完整無誤,若有誤概不負責。
商標及服務標記BEA、WebLogic和Tuxedo是比爾亞系統公司(BEA Systems, Inc)註冊商標。
BEA WebLogicE-Business Platform、BEA E-Business Control Center、BEA Campaign Manager forWebLogic、BEA WebLogic Commerce Server、BEA WebLogic Personalization Server、BEAWebLogic Portal、BEA eLink、BEA WebLogic Integration、BEA WebLogic Server、BEAWebLogic Workshop以及BEA WebLogic Enterprise皆為比爾亞系統公司(BEA Systems, Inc)的商標。
尚未列出的商標仍屬於比爾亞系統公司所有。
BEA WebLogic Workshop 8.1 ™快速上手指南第 2 頁目錄表版權宣告 (2)如何使用這份指南 (4)額外的教育資源 (4)更多的資訊、資料表、產品手冊 (4)評估軟體 (4)新聞稿 (4)開發者資源 (4)BEA WEBLOGIC WORKSHOP 8.1產品概述 (5)視覺化開發環境 (5)執行期框架 (7)J AVA 控制項 (9)BEA W EB L OGIC W ORKSHOP 8.1之應用程式型別 (10)BEA WEBLOGIC WORKSHOP 8.1 快速上手範例 (12)安裝BEA W EB L OGIC W ORKSHOP (12)快速上手範例情境-A VITEK E LECTRONICS公司 (13)一步步體驗BEA W EB L OGIC W ORKSHOP (14)範例 #1. 導覽與設定範例資料 (15)視覺化開發環境 (16)自動部署 (17)範例 #2. 建立一個客制化的控制項 (18)內建的J AVA 控制項 (18)客製J AVA 控制項 (19)非同步作業控制項 (23)範例 #3. 新建企業級的網路服務 (26)支援非同步W EB S ERVICES (27)自動化部署與測試 (29)鬆散耦合 (32)範例 #4. 建置企業層級的網站應用程式 (38)J AVA P AGE F LOW 技術 (38)自動化的資料繫結 (43)自動化的部署與測試 (46)範例#5:用JAVA 控制項方式建立網頁應用程式 (50)範例 #6: 使用XMLBEANS來處理JAVA中的XML (55)BEA WEBLOGIC WORKSHOP 8.1背後的奧妙 (58)結語 (59)附錄:BEA WEBLOGIC WORKSHOP 8.1 規格需求 (60)進階:產品資訊和開發資源 (60)如何使用這份指南這份快速上手指南帶來一些當您準備探索和評估BEA WebLogic Workshop 8.1 ™可能是有用的重要題材。
WebLogic JMS 介绍 打印版
Weblogic JMS 编程 限于译者的水平和能力,错误和不当之处在所难免,希望广大读者给予批评指正。
Java研究组织 www.javaresearch.org 疾风摩郎 dengke@javaresearch.org 2002年6月21日 第一篇 Weblogic JMS介绍 下列小节提供了针对WebLogic服务器的Java消息服务的概要介绍: l什么是JMS? lWebLogic JMS的特性 lWebLogic JMS的架构 lWebLogic JMS的扩展 一.什么是JMS? JMS是一个企业级的消息系统,也称为面向消息的中间件。
它允许应用程序通过消息交流进行通信。
一条消息可以是一个请求,一个报告,也可以(或者)是一个事件,这种事件中包含了用来在不同应用程序间协调通信所需的信息。
消息提供了一个抽象级别,使你能从应用程序代码中分离出目的系统的详细资料。
Java消息服务是一套访问企业级消息系统的标准API。
详细地,JMS: l授权Java应用程序共享一个消息系统以便进行消息交流。
l提供一套标准的接口来创建、发送并且接收消息,简化应用程序的开发。
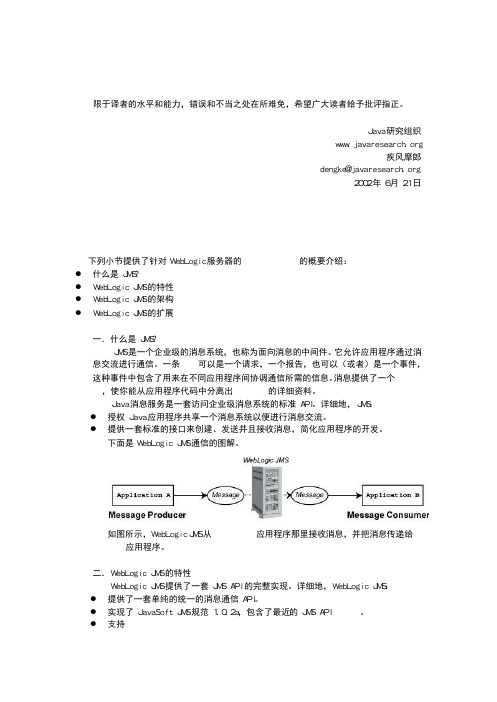
下面是WebLogic JMS通信的图解。
如图所示,WebLogic JMS从消息生产者应用程序那里接收消息,并把消息传递给消息消费者应用程序。
二.WebLogic JMS的特性 WebLogic JMS提供了一套JMS API的完整实现。
详细地,WebLogic JMS: l提供了一套单纯的统一的消息通信API。
l实现了JavaSoft JMS规范1.0.2a,包含了最近的JMS API勘误表。
l支持集群 l支持跨越不同操作系统和机器架构的应用程序间的消息通信。
l能够从WebLogic管理控制台和(或)使用JMS API来设置属性,覆盖原来的值,进行配置。
l允许JMS应用程序之间与其它使用Java事务API(JTA)处理事务的资源管理者(主要是数据库)具有协同工作的能力。
Weblogic_Server_8.1培训教程

北京海天起点技术服务有限公司
技术部
北 京 海 天 起 点 技 术 服 务 有 限 公 司
课程概述
• WebLogic Server 8.1 体系架构
• WebLogic Server 8.1 安装配置
• WebLogic Server 8.1 控制台操作
– 做为独立程序安装 例:server1001_win32.exe
WLS 8.1 安装
• Server安装(unix系统)
– 特定平台版本安装
*.bin,其中包含JDK/JRE环境
– 平台无关版本安装 *.jar,需要预装对应平台的JDK/JRE
WLS 8.1 安装
• 支持平台
– Microsoft Windows 2000, Windows 2003
• WLS术语-Cluster
– 一组同版本的server的逻辑组合 – 可以提供容错、高可用性及负载均衡 – 对客户透明
WLS 8.1 体系架构
• WLS术语-Cluster
WLS 8.1 体系架构
• WLS术语-Domain
– 一组逻辑相关的WebLogic Server资源 – 作为一个整体单元进行管理,一个Domain有且 仅有一个控制台
– 可以根据地域、功能、组织等进行划分
– 对应用透明
WLS 8.1 体系架构
• WLS术语-Domain
WLS 8.1 体系架构
• WLS术语-Administration Server
– domain的控制中心 – 保存整个domain的配置信息和日志 – 对应于domain的控制台(console)
Server and Windows XP
JMS入门小例子+weblogic的安装及在weblogic中配置JMS服务
JMS入门小例子+weblogic的安装及在weblogic中配置JMS服务JMS是一个由AS提供的Message服务。
它能接受消息产生者(Message Provider)所发出的消息,并把消息转发给消息消费者(Message Consumer)。
以下是接收端和发送端的详细布署步骤,适用于初学者的学习接收端需要的包:commons-logging-1.1.1.jarjettison-1.0.jarjms-1.1.jarlog4j-1.2.15.jarspring.jarspring-asm-3.0.5.RELEASE.jarspring-beans-3.0.5.RELEASE.jarspring-context-3.0.5.RELEASE.jarspring-core-3.0.5.RELEASE.jarspring-expression-3.0.5.RELEASE.jarspring-jms-2.5.6.jarspring-transaction-3.0.5.jarspring-web-3.0.5.RELEASE.jarweblogic.jarxml-apis.jar发送端需要的包:commons-logging-1.1.1.jarjettison-1.0.jarjms-1.1.jarlog4j-1.2.15.jarspring-asm-3.0.5.RELEASE.jarspring-beans-3.0.5.RELEASE.jarspring-context-3.0.5.RELEASE.jarspring-core-3.0.5.RELEASE.jarspring-expression-3.0.5.RELEASE.jarspring-jms-2.5.6.jarspring-jms.jarspring-transaction-3.0.5.jarweblogic.jarxml-apis.jar一、新建一个工程用做接收端本例名为jmsMessageReceive1、在Web.xml文件中添加如下内容:<!-- 加载多个spring配置文件--><context-param><param-name>contextConfigLocation</param-name><param-value>classpath:spring-jms.xml</param-value></context-param><listener><listener-class>org.springframework.web.context.ContextLoaderListener</listener-class> </listener><listener><listener-class>org.springframework.web.util.Log4jConfigListener</listener-class></listener><context-param><param-name>log4jConfigLocation</param-name><param-value>classpath:log4j.properties</param-value></context-param><context-param><param-name>log4jRefreshInterval</param-name><param-value>60000</param-value></context-param>2、在src文件夹下新建spring-jms.xml文件,内容如下:<?xml version="1.0" encoding="UTF-8"?><beans xmlns="/schema/beans"xmlns:xsi="/2001/XMLSchema-instance"xmlns:aop="/schema/aop"xmlns:tx="/schema/tx"xmlns:jaxws="/jaxws"xsi:schemaLocation="/schema/beans/schema/beans/spring-beans-2.0.xsd/schema/aop/schema/aop/spring-aop-2.0.xsd/schema/tx/schema/tx/spring-tx-2.0.xsd/jaxws /schemas/jaxws.xsd"> <bean id="jkJndiTemplate"class="org.springframework.jndi.JndiTemplate"><property name="environment"><props><prop key="java.naming.factory.initial">weblogic.jndi.WLInitialContextFactory</prop><prop key="java.naming.provider.url">t3://localhost:7001</prop><prop key="java.naming.security.principal">weblogic</prop><prop key="java.naming.security.credentials">weblogic</prop></props></property></bean><bean id="jkJndiConnectionFactory"class="org.springframework.jndi.JndiObjectFactoryBean"><property name="jndiTemplate" ref="jkJndiTemplate"></property><property name="jndiName" value="JKFC"></property></bean><bean id="jkConnectionFactory"class="org.springframework.jms.connection.CachingConnectionFactory"><property name="targetConnectionFactory"ref="jkJndiConnectionFactory"></property><property name="sessionCacheSize" value="1"></property></bean><bean id="destinationResolver" class="org.springframework.jms.support.destination.JndiDestinationResolver"><property name="jndiTemplate" ref="jkJndiTemplate"></property><property name="cache" value="true"></property><property name="fallbackToDynamicDestination" value="false"></property> </bean><bean id="jkListener" class="com.ylw.jms.JmsMessageListener"></bean><bean id="jkMsgListener" class="org.springframework.jms.listener.adapter.MessageListenerAdapter"><constructor-arg ref="jkListener"/><property name="defaultListenerMethod" value="onMessage"/></bean><bean id="jkJmsContainer" class="org.springframework.jms.listener.DefaultMessageListenerContainer"><property name="connectionFactory" ref="jkConnectionFactory"></property><property name="destinationResolver" ref="destinationResolver"></property><property name="concurrentConsumers" value="1"></property><property name="destinationName" value="JKTP"></property><property name="messageListener" ref="jkMsgListener"></property></beans>3、在src下新建包com.ylw.jms在jms包下新建class文件JmsMessageListener.java,内容如下:package com.ylw.jms;import javax.jms.JMSException;import javax.jms.Message;import javax.jms.MessageListener;import javax.jms.TextMessage;/**** 项目名称:jmsMessageReceive* 类名称:JMSMessageListener* 类描述:JMS消息监听* 创建人:ylw* 创建时间:2012-3-2 下午03:47:00* 修改人:ylw* 修改时间:2012-3-2 下午03:47:00* 修改备注:* 版本:**/public class JmsMessageListener implements MessageListener {/* (non-Javadoc)* @see javax.jms.MessageListener#onMessage(javax.jms.Message) */public void onMessage(Message message) {System.out.println("监听成功...");String msg = "";System.out.println( "Message: " + message.toString() );try {msg = ((TextMessage)message).getText();} catch (JMSException e) {// TODO Auto-generated catch blocke.printStackTrace();System.out.println("传入的msg内容为: ");System.out.println(msg);}}除此之外,还要在src文件夹下新建log4j.properties文件,这里为了避免初学者到处找所以加入内容,如下:#'rootLogger' Never expunge! We need it when error!log4j.rootLogger=info, stdout, R.zephyr.validate.dao=info, R.zephyr.idsrv.services.impl=info, R#.zephyr.idsrv.util.ProperiesHelper=info, stdout, R#.zephyr.cis.task.SxccbReadCisPkgTask=debug,stdout,R.hibernate=errorlog4j.appender.stdout=org.apache.log4j.ConsoleAppenderyout=org.apache.log4j.PatternLayout# Pattern to output the caller's file name and line number.yout.ConversionPattern=%-5p [%t] (%F:%L) - %m%nlog4j.appender.console=org.apache.log4j.ConsoleAppenderyout=org.apache.log4j.PatternLayoutyout.ConversionPattern=%d{ISO8601}:%6r:%p:%m%nlog4j.appender.R=org.apache.log4j.DailyRollingFileAppenderlog4j.appender.R.File=logs/imageproserver.log#log4j.appender.R.File=C:\\bits-ios.loglog4j.appender.R.MaxFileSize=10MB# Keep one backup filelog4j.appender.R.MaxBackupIndex=10yout=org.apache.log4j.PatternLayoutyout.ConversionPattern=%d: at %l%n [%t] %-p - %m%n到这里JMS接收端完成。
JMS简介

1. JMS基本概念JMS(Java Message Service)是访问企业消息系统的标准API,它便于消息系统中的Java应用程序进行消息交换,并且通过提供标准的产生、发送、接收消息的接口简化企业应用的开发。
2. JMS基本功能JMS是用于和面向消息的中间件相互通信的应用程序接口。
它既支持点对点(point-to-point)的域,又支持发布/订阅(publish/subscribe)类型的域,并且提供对下列类型的支持:经认可的消息传递,事务型消息的传递,一致性消息和具有持久性的订阅者支持。
JMS还提供了另一种方式来对您的应用与旧的后台系统相集成。
3. WebLogic JMS Server介绍WebLogic Server8.1符合JAVA规范,并通过Sun Microsystems J2EE 1.3认证.作为WebLogic的一部分,当然WebLogic JMS Server也完全遵从JMS规范,还支持集群,并可以应用于实际企业系统.下图是WebLogic JMS Server体系结构.图中可以看到WebLogic JMS Server主要组件有: WebLogic JMS servers(用于消息通信),Java客户端,JNDI(用于域名查找), 后备存储(用于持久消息存储,基于文件或者JDBC数据库).二. WebLogic JMS特性1. 消息通信模型JMS 支持两种消息通信模型:点到点(point-to-point)(PTP)模型和发布/订阅(Pub/Sub)模型。
除了下列不同之外,这两种消息通信模型非常地相似:PTP 模型规定了一个消息只能有一个接收者;Pub/Sub 模型允许一个消息可以有多个接收者。
2. 消息组成消息传递系统的中心就是消息。
一条 Message 分为三个组成部分:· 头(header)是个标准字段集,客户机和供应商都用它来标识和路由消息。
· 属性(property)支持把可选头字段添加到消息。
weblogic的使用
weblogic的使用
WebLogic是一种常用的Java应用服务器,它能够提供高度可扩展的企业级应用程序运行环境。
使用WebLogic可以简化应用程序开发、部署和管理过程,提高应用程序的可靠性和性能。
以下是WebLogic 的使用方法:
1. 安装WebLogic服务器:在官方网站下载WebLogic服务器安装包,按照安装向导完成安装过程。
2. 创建WebLogic域:WebLogic域是WebLogic服务器的逻辑管理单元,通过创建域可以管理应用程序、配置服务器等。
使用配置向导创建域。
3. 部署应用程序:将应用程序的WAR或EAR文件部署到WebLogic 服务器中,可以使用WebLogic控制台或命令行工具进行部署。
4. 配置服务器:通过WebLogic控制台或命令行工具可以配置WebLogic服务器,如配置JDBC数据源、安全设置、JMS等。
5. 启动和停止服务器:可以使用WebLogic控制台或命令行工具启动和停止WebLogic服务器。
6. 监控服务器:通过WebLogic控制台可以实时监控WebLogic 服务器的运行状态、应用程序状态、日志等信息。
7. 优化服务器性能:WebLogic服务器提供了多种性能优化选项,如配置缓存、调整线程池大小等。
8. 备份和恢复服务器:通过备份WebLogic域和应用程序,可以实现服务器数据的备份和恢复。
WebLogic的使用需要一定的Java和Web应用程序开发基础,但是通过学习官方文档和示例,可以快速掌握WebLogic的使用方法。
第2章 BEA WEBLOGIC8.1安装配置说明

第2章BEA WEBLOGIC8.1安装配置说明§2.1 BEA 安装向导在WebLogic Platform 8.1安装文件根目录下, 找到并单击执行文件server810_win32,出现如下图所示界面:图2-1-1初始化窗口上图是安装初始化页面,完成后,自动出现如图2-1-2所示窗口:图2-1-2 欢迎窗口图2-1-2是WebLogic Platform 8.1欢迎界面,如退出安装请点击“Exit”,点击“Next”,东软检察业务综合管理信息系统3.0用户手册进入图2-1-3所示窗口继续安装:图2-1-3 BEA License 协议选择“Yes”接受协议,此时“Next”键变成有效,单击进入下一步安装:图2-1-4 选择 BEA 安装根路径第2章BEA WEBLOGIC8.1安装配置说明在图2-1-4中,在左上栏默认选择“Create a new BEA Home”, 在“BEA Home Directory”栏的文本框中可以直接输入WebLogic Platform 8.1的安装目录,也可通过文本框下面的“Browse”键和“Reset”键来选择,其中“Reset”键功能是恢复显示上一次文本框中路径。
确认输入正确路径后,单击“Next”进入下一步安装:图2-1-5 选择安装类型在图2-1-5所示窗口中,有两种安装类型可供选择,选择“Custom Installation(自定义安装)”,单击“Next”,进入下一步安装:东软检察业务综合管理信息系统3.0用户手册图2-1-6 选择安装的组件图2-1-6中有多个组件供选择安装,选择“WebLogic Server->Server”,如上图所示,确认后,单击“Next”进入下一步安装:图2-1-7 选择产品安装路径在图2-1-7中,选择产品安装路径,可以通过“Browse”键和“Reset”键另行第2章BEA WEBLOGIC8.1安装配置说明选择,建议使用默认路径:BEA Home Directory\weblogic81,确认后,单击“Next”进入下一步安装:图2-1-8 安装Node Manager图2-1-8中,有两个选择项,选择下面一项,即“No,do not install now. See product documentaion for post-install registration of Node Manager as Windows Service”,如上图所示,确认后,单击“Next”进入下一步安装:东软检察业务综合管理信息系统3.0用户手册图2-1-9 BEA WebLogic Platform 8.1图2-1-9是BEA WebLogic Platform 8.1的安装窗口,右下角进度条即是安装进度说明,等待安装进度条满时,自动跳入到图2-1-10所示窗口:2-1-10 安装结束图2-1-10显示安装成功信息,即Message:Congratulations! Wbeblogic Platform 8.1 has been successfully instralled to d:\bea\weblogic8.1.说明安装成功!下一步可以创建WebLogic Configuration!【注意】不要选中Install XML Spy选择Run the Configration Wizard,确认后,单击“Done”进入下一步安装:第2章BEA WEBLOGIC8.1安装配置说明图2-1-11 配置向导在图2-1-11所示窗口中选择默认值:Create a new WebLogic configuration,确认后,单击“Next”进入下一步安装:图2-1-12 选择配置路径如图2-1-12所示,采用默认路径,确认后,单击“Next”进入下一步安装:东软检察业务综合管理信息系统3.0用户手册图2-1-13 选择配置方式如图2-1-12所示,采用默认选择:Express,确认后,单击“Next”进入下一步安装:图2-1-14 配置超级用户信息在图2-1-14中输入超级用户的信息,其中用户名和密码(八位或八位以上)是必填项,填写完毕,确认后,单击“Next”进入下一步安装:第2章BEA WEBLOGIC8.1安装配置说明图2-1-15 确认口令在图2-1-15所示窗口的文本框中输入您在图2-1-14中所输入的用户密码内容,确认后,按回车,进入下一步安装:图2-1-16 WebLogic 配置安装在图2-1-16中,“Configration Name”项采用默认值“mydomain”,点击“Create”,进行WebLogic配置安装,右下角显示安装进度条。
weblogic入门文档
Weblogic入门目录概述 (1)weblogic安装、配置 (1)weblogic数据源配置 (5)weblogic部署Web应用 (11)使用Eclipse开发weblogic项目 (15)FAQ (20)概述奉旨研究weblogic,现将我近两天的试用的情况总结为本文档,供开发人员一起研究,一起进步。
本文中weblogic为8.12中文版,Eclipse为3.0,已安装tomcat, lomboz等插件(详细请查阅William编写的文档:《J2EE入门》)weblogic安装、配置1.安装weblogic安装比较傻瓜化,关键注意两点:BEA主目录:这是weblogic基础工具程序的主目录产品安装目录:这是weblogic产品的安装目录选好目录后,一路NEXT。
任务一完成!2.配置[开始] — [程序] — [BEA Weblogic Platform 8.1] — [Confguration Wizard] 开始配置选择[新建Weblogic配置] 下一步选择[base weblogic server domain] 下一步使用默认就可以下一步填写管理员账号、密码下一步选择jdk版本下一步使用默认就可以,创建任务二完成!weblogic数据源配置以MSSQL为例启动服务,进入控制台(http://127.0.0.1:7001/console) 点击[connection pools]点击[configure a new JDBC Connection Pool]数据库类型选择MS SQL Server数据库驱动选择Microsoft’s MS SQL Server Driver (Type4) Versions: 2000 (友情提醒:一般是倒数第三个)点击[Continue]填写基本信息,点击[Continue]测试连接,成功后,点击[Create and Deploy],连接池配置完毕在左边目录结构中点击[Services]—[JDBC]—[Data Source]点击[configure a new JDBC Data Source]依次,填写[Name],[JNDI Name],选择连接池、服务器,点击[Create]任务三完成!weblogic 部署Web 应用以部署留言板程序为例启动服务,进入控制台点击[Web Application Module]点击[Deploy a new Web Application Module]选择项目所在目录,一路点下去就行了。
weblogic基础知识
1.DomainWebLogic域是一个服务器/集群的管理组,用户可以通过某个中央位置来管理、监控整个服务器域,这个中心就是管理服务器,相对的,受控服务器或者叫被管理服务器是指域中除了管理服务器以外的所有的服务器。
一个domain可以包含一个或多个weblogic server实例,甚至是server集群。
一个domain中有一个且只能有一个server担任管理server的功能,其它的server具体实现一个特定的逻辑功能。
2.AdminServer3.managedServer4.ProxyServer代理服务器也是受管理服务器。
代理服务器用于为集群提供负载平衡和故障转移;此外还具有一下特点:#是客户端与群集交互的第一级;#使集群看上去就像一个服务器。
//代理服务器可以基于软件也可以基于硬件;//基于软件的代理服务器可以是内部weblogic servlet或第三方应用程序。
//基于硬件的代理服务器通常是物理负载平衡器。
//代理(不管是基于硬件还是软件)提供客户端与集群进行交互的方式。
根据集群构架,可选择三种基本代理:HTTPClusterServlet;web server插件;物理负载平衡器(如local director或F5 networks big IP)。
5.ClusterWebLogic集群是一个weblogic Server组,在一个集群中的服务器可以获得集群范围的命集群优点:@@可以任意添加服务器,这样网站的可扩展性和利用度只受用户硬件预算的限制;@@集群对开发人员和用户是完全透明的,在网络上集群就像一个weblogic服务器一样;@@不需要关闭网站,可在集群中动态添加服务器。
6.节点管理器节点管理器是指在物理的机器上运行的一个守护进程,通过它,管理服务器可以获得诸如在控制台中强制重启远程机器上的server灯功能(没有节点管理器的情况下也是可以强制关闭远程服务器的,但是不能重启)。
Weblogic经典入门

weblogic 实用手册一、weblogic 概述WebLobic Server是美国BEA公司开发的一个业界领先的应用服务器。
是SUN J2EE的纯java实现。
WebLogic长期以来一直被认为是市场上最好的J2EE工具之一。
像数据库或邮件服务器一样,WebLogic Server对于客户是不可见的,为连接在它上面的客户提供服务。
WebLogic最常用的使用方式是为在internet或intranet上的Web服务提供安全、数据驱动的应用程序。
WebLogic对J2EE架构的支持:WebLogic Server提供了对SUN J2EE架构的支持。
SUN 公司的J2EE架构是为企业级提供的一种支持分布式应用的整体框架。
为集成后端系统,如ERP系统,CRM系统,以及为实现企业级计算提供了一个简易的,开放的标准。
二、WebLogic Server 产品包括:WebLogic ServerWebLogic Server Enterprise - WebLogic+Bea Tuxedo 事物处理引擎WebLogic Express 不包含EJB,RMI,CORBA的WebLogic Server,只用于创建Web应用程序Weblogic 可以完成下列工作:三、WebLogic 服务功能介绍1 在使用IP地址的一台计算机,或在使用集群捆绑在一起的多台计算上,或在通过代理服务器管理的多台计算机上建立拥有相同域名的不同站点2 部署基于J2EE标准编写的服务器JA V A代码,包括servlet,JSP,JavaBean 和EBJ。
3 使用J2EE扩展网络服务集成分布式系统,包括用于数据库连接的JDBC、用于信息传递的JMS、用于网络目录访问的JNDI、用于分布式事物处理的JTA和用于电子邮件处理的JavaMail.4 部署使用远程方法调用(RMI)的纯Java分布式应用程序5 通过使用RMI—IIOP(RMI over Internet Inter-ORB Protocol)协议部署近似CORBA的分布式应用系统。
BEA Weblogic Server集群安装配置手册

B E A W e b l o g i c S e r v e r集群目录第1章引言 (1)1.1目的 (1)1.2适用范围 (1)1.3读者对象 (1)1.4术语定义 (1)第2章升级流程说明 (1)2.1概述 (1)2.2卸载WEBLOGIC9.2 (1)2.3安装WEBLOGIC10.3 (2)1.1启动安装界面 (2)1.2接收许可协议 (2)1.3创建一个新的BEA H OME (3)1.4安装类型选择C USTOM选项 (3)1.5选择S ERVER组件 (4)1.6开始安装 (4)1.7完成安装 (5)2.4配置数据库连接地址 (6)2.5部署应用程序 (6)2.6配置集群环境 (6)2.7发布生产环境 (7)第3章WEBLOGIC安装准备 (1)3.1硬件配置 (1)3.2软件配置 (1)3.3集群环境说明 (1)第4章WINDOWS环境下的集群配置 (1)4.1W EB L OGIC 10.3集群配置 (1)4.1.1 创建主控服务器domain (1)4.1.2 创建被管服务器domain (12)4.2A PACHE H TTP S ERVER配置 (22)4.2.1 安装Apache (22)4.2.2 安装weblogic module扩展模块 (22)4.2.3 配置Apache Http Server (22)4.3启动集群 (23)4.3.1 启动Apache Http Server (23)4.3.2 启动主控服务器 (24)4.3.3 启动代理服务 (25)4.3.4 启动被管服务器1 (25)4.3.5 启动被管服务器2 (26)4.4验证集群启动 (26)4.5停止集群 (27)4.5.1 停止被管服务器1 (27)4.5.2 停止被管服务器2 (27)4.5.3 停止代理服务器 (27)4.5.4 停止主控服务器 (28)4.5.5 停止Apache Http Server (28)4.6将数据源部署到集群上 (29)4.7将应用部署到集群上 (32)第5章AIX环境下的集群配置 (35)5.1W EB L OGIC 10.3集群配置 (35)5.1.1 用图形界面方式配置集群 (35)5.1.2 用命令行方式配置集群 (36)5.2A PACHE H TTP S ERVER配置 (37)5.2.1 安装Apache (37)5.2.2 安装weblogic module扩展模块 (38)5.2.3 配置Apache Http Server (39)5.3启动集群 (39)5.3.1 启动Apache Http Server (39)5.3.2 启动主控服务器 (40)5.3.3 启动代理服务器 (40)5.3.4 启动被管服务器1 (41)5.3.5 启动被管服务器2 (41)5.4验证集群启动 (42)5.5停止集群 (42)5.5.1 停止被管服务器1 (42)5.5.2 停止被管服务器2 (42)5.5.3 停止代理服务器 (42)5.5.4 停止主控服务器 (42)5.5.5 停止Apache Http Server (43)5.6将数据源部署到集群上 (43)5.7将应用部署到集群上 (43)第1章引言1.1 目的本文档是上线升级设置流程文档。
Weblogic基础入门学习系列
weblogic 学习系列一:weblogic server 的安装作者:wangwd2003年4月16日WebLogic 7.0,其功能强大、方便易用性,使得其市场占有率也很高。
尤其是在开发一些企业化的web应用程序方面更能提供灵活强大的支持,个人希望将自己在使用过程中的心得写出来,共同提高。
本系列主要想向大家介绍以下内容:1、Weblogic Server的安装;2、Weblogic Domain and Server配置;3、Weblogic 与 Jbuilder的整合;4、Weblogic Server发布第一个Web Application(JSP);5、Weblogic ConnectionPool的建立;6、DataSource 与Tx DataSource的区别;7、Weblogic Server发布Web Application (Servlet);8、Weblogic ConnectionPool在Servlet中的运用;9、Weblogic 发布EJB组件;以上内容,只是初步设定,在学习的过程中,会根据实际情况增加。
对此有兴趣的同事请关注。
在此我就不再多说了,让我们尽快开始轻松的学习之旅。
本假设如下前提:windows 2000 Professional操作系统。
WebLogic 7.0安装在C:\bea下。
一、Weblogic Platform 简单介绍:组成:A:Weblogic Server and Weblogic WorkgroupB:Weblogic IntegrationC:Weblogic PortalD:Weblogic Platform Samples and UtilitesE:Weblogc Integration Complementary Products二、安装:在界面窗口双击platform702_win32即可开始安装weblogic Server,如图1图1这时启动安装向导如图2图2点击next按钮如图3图3这是安装协议,这个毫无疑问地应该点选yes,然后再点击next如图4:图4对于图4有几点说明:系统默认安装目录为c:\bea,如果在你的系统中有bea目录,系统会自动要求覆盖这个目录。
Weblogic配置jms服务文档
weblogic提供jms消息服务的中间件,功能性能都说得过去,下面是在配置jms服务中注意的问题,以及详细步骤,仅供参考:单机配置一、基于点对点的方式配置(QUEUE)1.先配置持久化存储:例如:c:\sss(必须提前建好该目录)2. 配置JMS服务器3. 配置JMS模块4. 配置子部署5. 创建队列(JNDI唯一程序段靠JNDI NAME 来获取工厂类和队列)6. 创建工厂注:在同一个JMS Module中创建不同的subdeployment,然后ConnectionFactory和Queue 要配给不同的subdeployment,ConnectionFactorytarget到你的server,Queue target到JMS Server。
二、基于发布者/订阅者方式的配置(TOPIC)步骤基本同上,只不过配置jms模块的时候添加topic资源。
注:消息类型:简单文本 (TextMessage)、可序列化的对象 (ObjectMessage)、属性集合 (MapMessage)、字节流 (BytesMessage)、原始值流 (StreamMessage),还有无有效负载的消息 (Message)。
注:1.订阅模式接受消息时分为两种情况,一种是同步接收,用receive()方法来接收消息,即阻塞式接收消息;第二种是异步接收消息,用s etMessageListener(TopicSubscriber)方法来给监听消息,同时改接收类实现MessageListener接口,实现其中的onMessage 方法来处理接收的消息。
整个接收消息的过程是非阻塞的。
2. 发布/订阅模型在可靠性上提供的2种方式:持久订阅模式和非持久订阅模式非持久订阅模式:只有当客户端处于激活状态,也就是和JMS 服务器保持连接的状态下,才能接收到发送到某个Topic的消息,而当客户端处于离线状态时,则这个时间段发到Topic的消息将会永远接收不到。
BEA WebLogic介绍
1面向开发人员的初级培训课程1.1 BEA WebLogic Server 8.1: Servlet/JSP开发课程代码:WLS-D11-81 课程天数:5天课程内容:本课程主要学习在BEA WebLogic Server™ 8.1应用服务器上开发Web应用。
主要内容包括,呈现层组件的主要特性和各种服务技术,呈现层组件有Servlets和JSP,服务技术包括名字服务、分布式交易服务及多层数据库存取服务等。
这些技术在MVC(Model-View-Controller)应用架构中被广泛的使用。
这门课程还涵盖了Web应用部署、WebLogic Server控制台的使用、设计模式的概念以及MVC设计架构。
如何快速开发、创建、测试和调试基于WebLogic Server 8.1的Web应用。
2面向开发人员的高级培训课程2.1 BEA WebLogic Server 8.1 : EJB开发课程代码:WLS-D21-81 课程天数:5天课程内容:本课程主要讲解EJB 2.0(企业级JavaBean)的开发,包括无状态、有状态会话Bean,实体Bean及消息驱动Bean。
课程还包括EJB部署和容器管理持久(container-managed persistence)以及容器管理事务、安全。
通过学习,熟悉Java消息服务(JMS)典型的应用场景及消息客户端的编程。
此外,课程还简单学习WebLogic管理控制台以便对EJB组件进行部署和监控。
通过学习将获取EJB架构设计的实际经验,学习开发无状态会话Bean、有状态会话Bean、实体Bean及消息驱动Bean。
此外通过课程,还可以对OR映射(object-relational mapping)技术有一定了解,并学习通过BEA WebLogic Server 8.1如何部署和监控EJB。
2.2 BEA WebLogic Server 8.1 : Web Services开发课程代码:WLS-D29-81 课程天数:5天课程内容:课程详细介绍如何创建企业级WEB服务和在BEA WebLogic Server8.1部署WEB服务。
BEA WebLogic Server WebLogic Tuxedo Connector快速入门指
BEA WebLogicServer™WebLogic TuxedoConnector Quick StartGuideRelease8.1betaDocument Date:December2002Revised:December9,2002CopyrightCopyright©2002BEA Systems,Inc.All Rights Reserved.Restricted Rights LegendThis software and documentation is subject to and made available only pursuant to the terms of the BEA Systems License Agreement and may be used or copied only in accordance with the terms of that agreement.It is against the law to copy the software except as specifically allowed in the agreement.This document may not,in whole or in part, be copied photocopied,reproduced,translated,or reduced to any electronic medium or machine readable form without prior consent,in writing,from BEA Systems,Inc.Use,duplication or disclosure by the ernment is subject to restrictions set forth in the BEA Systems License Agreement and in subparagraph(c)(1)of the Commercial Computer Software-Restricted Rights Clause at FAR 52.227-19;subparagraph(c)(1)(ii)of the Rights in Technical Data and Computer Software clause at DFARS 252.227-7013,subparagraph(d)of the Commercial Computer Software--Licensing clause at NASA FAR supplement16-52.227-86;or their equivalent.Information in this document is subject to change without notice and does not represent a commitment on the part of BEA Systems.THE SOFTWARE AND DOCUMENTATION ARE PROVIDED“AS IS”WITHOUT WARRANTY OF ANY KIND INCLUDING WITHOUT LIMITATION,ANY WARRANTY OF MERCHANTABILITY OR FITNESS FOR A PARTICULAR PURPOSE.FURTHER,BEA Systems DOES NOT WARRANT,GUARANTEE,OR MAKE ANY REPRESENTATIONS REGARDING THE USE,OR THE RESULTS OF THE USE,OF THE SOFTWARE OR WRITTEN MATERIAL IN TERMS OF CORRECTNESS, ACCURACY,RELIABILITY,OR OTHERWISE.Trademarks or Service MarksBEA,Jolt,Tuxedo,and WebLogic are registered trademarks of BEA Systems,Inc.BEA Builder,BEA Campaign Manager for WebLogic,BEA eLink,BEA Manager,BEA WebLogic Commerce Server,BEA WebLogic Enterprise,BEA WebLogic Enterprise Platform,BEA WebLogic Express,BEA WebLogic Integration,BEA WebLogic Personalization Server,BEA WebLogic Platform,BEA WebLogic Portal,BEA WebLogic Server,BEA WebLogic Workshop and How Business Becomes E-Business are trademarks of BEA Systems,Inc.All other trademarks are the property of their respective companies.WebLogic Tuxedo Connector Quick Start GuidePart Number Date Software VersionN/A December9,2002BEA WebLogic ServerVersion8.1betaContents1.WebLogic Tuxedo Connector Quick Start GuideConfiguring the WebLogic Tuxedo Connector.................................................1-1 Set the TraceLevel......................................................................................1-2Build the Simpapp Example.......................................................................1-3Create a WTCServer MBean......................................................................1-3Create a Local Tuxedo Domain.................................................................1-4Create a Remote Tuxedo Domain..............................................................1-4Create Exported Services...........................................................................1-5Create Imported Services...........................................................................1-5Deploy the WTCServer MBean.................................................................1-6Register TDOM1as a WebLogic Server User...........................................1-6 Configuring Tuxedo..........................................................................................1-7Run the Example...............................................................................................1-8 WebLogic Server to Tuxedo Interoperability............................................1-9Tuxedo to WebLogic Server Interoperability............................................1-9WebLogic Tuxedo Connector Quick Start Guide iiiiv WebLogic Tuxedo Connector Quick Start GuideC HAPTER1WebLogic TuxedoConnector Quick StartGuideNote:For more detailed information on how to configure the WebLogic TuxedoConnector for this WebLogic Server Release,see the WebLogic TuxedoConnector Programmer’s Guide at{docroot}/wtc_admin/index.html.The following sections describe how to configure WebLogic Tuxedo Connector toallow WebLogic Server to interoperate with Tuxedo Releases6.5and higher:!Configuring the WebLogic Tuxedo Connector!Configuring Tuxedo!Run the ExampleConfiguring the WebLogic Tuxedo Connector Note:This section summarizes how to configure the WebLogic Tuxedo Connectoron a Windows platform.UNIX users can adapt the instructions by makingappropriate substitutions such as replacing the“\”with“/”and“.cmd”with“.sh”.WebLogic Tuxedo Connector Quick Start Guide11WebLogic Tuxedo Connector Quick Start Guide2WebLogic Tuxedo Connector Quick Start GuideThis example extends the Tuxedo simpapp application to run over TDomains.This allows clients of the TOUPPER service to run on either Tuxedo or the WebLogic Server examplesServer .The example provides the following services:!TOUPPER :A Tuxedo service that converts a string to upper case.A WebLogic Server client invokes the TOUPPER EJB and connects to the Tuxedo TOUPPER service.!Tolower :A service implemented by an EJB in WebLogic Server.The client for the Tolower service runs on Tuxedo.The following sections describe how to configure WebLogic Tuxedo Connector using the Administration Console:!Set the TraceLevel !Build the Simpapp Example !Create a WTCServer MBean !Create a Local Tuxedo Domain !Create a Remote Tuxedo Domain !Create Exported Services !Create Imported Services !Deploy the WTCServer MBean !Register TDOM1as a WebLogic Server UserSet the TraceLevelNote:For more information on TraceLevel ,see Monitoring the WebLogic TuxedoConnector located at/wls/docs70/wtc_admin/Install.html.TraceLevel is a WebLogic Server Property.Update the JAVA_OPTIONS variable in the SAMPLES_HOME \server\config\examples\startExamplesServer.cmd file.Example:JAVA_OPTIONS=-Dweblogic.wtc.TraceLevel=100000Configuring the WebLogic Tuxedo Connector where100,000specifies the maximum level of WebLogic Tuxedo Connectortracing.Build the Simpapp ExampleUse the following steps to build the simpapp example:1.Boot your WebLogic examplesServer.2.Open a new shell window and change directories to yourSAMPLES_HOME\server\src\examples\wtc\atmi\simpapp directory.3.Set environment variables using theSAMPLES_HOME\server\config\examples\setExamplesEnv.cmd file.4.Build the wtc_toupper.jar file using ant.Enter the following command:ant5.Change directories to theSAMPLES_HOME\server\src\examples\wtc\atmi\simpserv directory.6.Build the wtc_tolower.jar file.Enter the following command:ant7.Click Deployment→EJB and check to see that the wtc_tolower.jar andwtc_toupper.jar are deployed.Create a WTCServer MBeanUse the following steps to create and configure a WTCServer MBean using theWebLogic Server Console:1.Click the Services Node.2.Right-click the WebLogic Tuxedo Connector Node.3.Select Configure a New WTCServer.4.Enter the Name of your WTCServer in the Name field.Example:mySimpapp5.Click Create.WebLogic Tuxedo Connector Quick Start Guide31WebLogic Tuxedo Connector Quick Start GuideCreate a Local Tuxedo DomainUse the following steps to configure a local Tuxedo domain:1.Right-click Local WLS Domains.2.Select Configure a New WTCLocalTuxDom.3.Enter the following values for the following fields on the General tab:Access Point:TDOM2AccessPoint ID:TDOM2Network Address:<the network address and port of your WebLogic Server>Example://123.123.123.123:56784.Click Create.5.If you are connecting to a Tuxedo6.5domain,do the following:a.Click the Connections tab.b.Set the Interoperate field to Yes.c.Click Apply.Create a Remote Tuxedo DomainUse the following steps to configure a remote Tuxedo domain:1.Right-click Remote Tuxedo Domains.2.Select Configure a New WTCRemoteTuxDom.3.Enter the following values for the following fields on the General tab:Access Point:TDOM1AccessPoint ID:TDOM1Local Access Point:TDOM2Listen Address:<the network address and port of Tuxedo>Example://123.123.123.123:12344WebLogic Tuxedo Connector Quick Start GuideConfiguring the WebLogic Tuxedo Connector4.Click Create.Create Exported ServicesUse the following steps to configure an exported service:1.Right-click Exported Services.2.Select Configure a New WTCExport.3.Enter the following values for the following fields on the General tab:Resource Name:TOLOWERLocal Access Point:TDOM2EJB Name:tuxedo.services.TOLOWERHome4.Click Create.Create Imported ServicesUse the following steps to configure an imported service:1.Right-click Imported Services.2.Select Configure a New WTCImport.3.Enter the following values for the following fields on the General tab:Resource Name:TOUPPERLocal Access Point:TDOM2Remote Access Point List:TDOM14.Click Create.WebLogic Tuxedo Connector Quick Start Guide51WebLogic Tuxedo Connector Quick Start GuideDeploy the WTCServer MBeanUse the following steps to deploy the WTCServer Mbean to examplesServer:1.Click mySimpapp.2.Click Targets.3.Select examplesServer.4.Click the right-arrow button.5.Click ApplyRegister TDOM1 as a WebLogic Server UserUse the following steps to register TDOM1as a WebLogic Server user:1.Click on the Security node.2.Click on Realms.3.Select your default security Realm.4.Click on Users.5.Click the Configure a new User text link.6.Click DefaultAuthenticator7.In the General tab,do the following:a.Add TDOM1in the Name field.b.Enter and validate a password.c.Click apply.6WebLogic Tuxedo Connector Quick Start GuideConfiguring Tuxedo Configuring TuxedoUse the following steps to configure your Tuxedo domain:1.Your PATH environment variable needs to include the path of your C eset PATH to check the status and add the path if necessary.2.Copy the simpapp example from your Tuxedo installation and create a workingTuxedo simpapp directory.3.Change directories to your working Tuxedo simpapp directory.4.Set environment variables using the setEnv.cmd located at TUXDIR.Update thefollowing parameters:TUXDIR-base directory of the TUXEDO SoftwareAPPDIR-base directory of the sample program5.Build the clients:buildclient-o simpcl-f simpcl.cbuildserver-o simpserv-f simpserv.c-s TOUPPER6.Copy the ubbdomain and dom1config files from theSAMPLES_HOME\src\examples\wtc\atmi\simpapp directory to your Tuxedosimpapp directory.7.Copy the tolower.c file from theSAMPLES_HOME\src\examples\wtc\atmi\simpserv directory to your Tuxedosimpapp directory.8.Modify the ubbdomain for your Tuxedo environment.This includes setting thepathnames for APPDIR,TUXCONFIG,and TUXDIR and setting the machine name.Replace all<braced>items with information for your environment.Example:APPDIR="\home\me\simpapp"TUXCONFIG="\home\me\simpapp\tuxconfig""TUXDIR="\usr\tuxedo"9.Load the ubbdomain file:tmloadcf-y ubbdomain1WebLogic Tuxedo Connector Quick Start Guide10.Modify the dom1config for your Tuxedo environment.This includes creatinglog devices and updating the network addresses.Example:DMTLOGDEV="d:\my_apps\tlog"AUDITLOG="d:\my_apps\aud"DMTLOGNAME="DMTLOG_TDOM1"TDOM1NWADDR="//TuxedoMachine:1234"TDOM2NWADDR="//WTCMachine:5678"11.Load the dom1config file.set BDMCONFIG=d:\mydomain\simpapp\bdmconfigdmloadcf-y dom1config12.Build the tolower clientbuildclient-v-f tolower.c-o tolower13.Boot the Tuxedo domaintmboot-y14.Verify all processes have started using the tmadmin psc command.Thefollowing domain processes should have booted:!DMADM,GWADM,and GWTDOMAIN!The TOUPPER service offered by the simpserv server!The TOLOWER service is offered by the GWTDOMAIN serverRun the ExampleRun each client to demonstrate interoperability between Tuxedo and WebLogicServer.Run the Example WebLogic Server to Tuxedo InteroperabilityStart a WebLogic Server client from theSAMPLES_HOME\server\src\examples\wtc\atmi\simpapp directory to invokethe TOUPPER EJB and connect to the Tuxedo TOUPPER e the followingcommand:run.cmd allcapsThe Tuxedo service replies to your WebLogic Server application with:Returned string is:ALLCAPSTuxedo to WebLogic Server InteroperabilityRun the tolower client from the Tuxedo simpapp directory to invoke the TolowerEJB and return the results to the e the following command:tolower ALLSMALLThe WebLogic Server service replies to your Tuxedo client with:Returned string is:allsmall1WebLogic Tuxedo Connector Quick Start Guide。
- 1、下载文档前请自行甄别文档内容的完整性,平台不提供额外的编辑、内容补充、找答案等附加服务。
- 2、"仅部分预览"的文档,不可在线预览部分如存在完整性等问题,可反馈申请退款(可完整预览的文档不适用该条件!)。
- 3、如文档侵犯您的权益,请联系客服反馈,我们会尽快为您处理(人工客服工作时间:9:00-18:30)。
BEA WebLogic Server8.1 JMS入门一. JMS简介1. JMS基本概念JMS(Java Message Service)是访问企业消息系统的标准API,它便于消息系统中的Java应用程序进行消息交换,并且通过提供标准的产生、发送、接收消息的接口简化企业应用的开发。
2. JMS基本功能JMS是用于和面向消息的中间件相互通信的应用程序接口。
它既支持点对点(point-to-point)的域,又支持发布/订阅(publish/subscribe)类型的域,并且提供对下列类型的支持:经认可的消息传递,事务型消息的传递,一致性消息和具有持久性的订阅者支持。
JMS还提供了另一种方式来对您的应用与旧的后台系统相集成。
3. WebLogic JMS Server介绍WebLogic Server8.1符合JA V A规范,并通过Sun Microsystems J2EE 1.3认证.作为WebLogic的一部分,当然WebLogic JMS Server也完全遵从JMS规范,还支持集群,并可以应用于实际企业系统.下图是WebLogic JMS Server体系结构.图中可以看到WebLogic JMS Server主要组件有: WebLogic JMS servers(用于消息通信),Java客户端,JNDI(用于域名查找), 后备存储(用于持久消息存储,基于文件或者JDBC数据库).二. WebLogic JMS特性1. 消息通信模型JMS 支持两种消息通信模型:点到点(point-to-point)(PTP)模型和发布/订阅(Pub/Sub)模型。
除了下列不同之外,这两种消息通信模型非常地相似:PTP 模型规定了一个消息只能有一个接收者;Pub/Sub 模型允许一个消息可以有多个接收者。
2. 消息组成消息传递系统的中心就是消息。
一条Message 分为三个组成部分:? 头(header)是个标准字段集,客户机和供应商都用它来标识和路由消息。
? 属性(property)支持把可选头字段添加到消息。
如果您的应用程序需要不使用标准头字段对消息编目和分类,您就可以添加一个属性到消息以实现这个编目和分类。
提供set<Type>Property(...) 和get<Type>Property(...) 方法以设置和获取各种Java 类型的属性,包括Object。
JMS 定义了一个供应商选择提供的标准属性集。
? 消息的主体(body)包含要发送给接收应用程序的内容。
每个消息接口特定于它所支持的内容类型。
JMS 为不同类型的内容提供了它们各自的消息类型,但是所有消息都派生自Message 接口。
? StreamMessage:包含Java 基本数值流,用标准流操作来顺序的填充和读取。
? MapMessage:包含一组名/值对;名称为string 类型,而值为Java 的基本类型。
? TextMessage:包含一个String。
? ObjectMessage:包含一个Serializable Java 对象;能使用JDK 的集合类。
? BytesMessage:包含未解释字节流: 编码主体以匹配现存的消息格式。
? XMLMessage: 包含XML内容。
扩展TextMessage,XMLMessage 类型的使用,使得消息过滤非常便利。
3. 消息确认模式非事务性会话中,应用程序创建的会话有5 种确认模式,而在事务性会话中,确认模式被忽略。
五种确认模式说明:? AUTO_ACKNOWLEDGE:自动确认模式。
一旦接收方应用程序的方法调用从处理消息处返回,会话对象就会确认消息的接收。
? CLIENT_ACKNOWLEDGE:客户端确认模式。
会话对象依赖于应用程序对被接收的消息调用一个acknowledge()方法。
一旦这个方法被调用,会话会确认最后一次确认之后所有接收到的消息。
这种模式允许应用程序以一个调用来接收,处理并确认一批消息。
注意:在管理控制台中,如果连接工厂的Acknowledge Policy(确认方针)属性被设置为"Previous"(提前),但是你希望为一个给定的会话确认所有接收到的消息,那么就用最后一条消息来调用acknowledge()方法。
? DUPS_OK_ACKNOWLEDGE:允许副本的确认模式。
一旦接收方应用程序的方法调用从处理消息处返回,会话对象就会确认消息的接收;而且允许重复确认。
在需要考虑资源使用时,这种模式非常有效。
注意:如果你的应用程序无法处理重复的消息的话,你应该避免使用这种模式。
如果发送消息的初始化尝试失败,那么重复的消息可以被重新发送。
? NO_ACKNOWLEDGE:不确认模式。
不确认收到的消息是需要的。
消息发送给一个NO_ACKNOWLEDGE 会话后,它们会被WebLogic 服务器立即删除。
在这种模式下,将无法重新获得已接收的消息,而且可能导致下面的结果:1. 消息可能丢失;和(或者)另一种情况:2. 如果发送消息的初始化尝试失败,会出现重复消息被发送的情况。
? MULTICAST_NO_ACKNOWLEDGE:IP组播下的不确认模式,同样无需确认。
发送给一个MULTICAST_NO_ACKNOWLEDGE会话的消息,会共享之前所述的NO_ACKNOWLEDGE 确认模式一样的特征。
这种模式支持希望通过IP 组播方式进行消息通信的应用程序,而且无需依赖会话确认提供的服务质量。
注意:如果你的应用程序无法处理消息的丢失或者重复,那么你应该避免使用这种模式。
如果发送消息的初始化尝试失败的话,重复的消息可能会被再次发送。
注:在上表的5 种确认模式中,AUTO_ACKNOWLEDGE ,DUPS_OK_ACKNOWLEDGE 和CLIENT_ACKNOWLEDGE 是JMS 规范定义的,NO_ACKNOWLEDGE 和MULTICAST_NO_ACKNOWLEDGE是WebLogic JMS 提供的。
三. 配置JMS1. 创建连接工厂(1) 启动WebLogic Server8.1,登录控制台,选中JMS Connection Factories节点,点击右边的" Configure a new JMS Connection Factory...";(2) 填写连接工厂的名称SendJMSFactory和JNDI名称SendJMSFactory,点击"Create";(3) 勾上"myserver",将SendJMSFactory应用到myserver;2. 定义后备存储(1) 选中JMS Stores节点,点击右边的" Configure a new JMS Connection Factory...";(2) 填写文件后备存储的名称SendFileStore和目录Directionary E:BEAuser_projectsdomainsmydomainsendfilestore,点击"Create".3. 创建JMS服务器(1) 选中JMS Servers节点,点击右边的" Configure a new JMSServer...";(2) 填写JMS服务器的名称SendJMSServer和Paging Store设为" SendFileStore",点击"Create";(3) Target选中"myserver",将SendJMSServer应用到myserver.4. 创建消息队列(1) 展开"SendJMSServer"节点,点击" Configure a new JMS Queue...";(2) 填写消息队列的名称SendJMSQueue和JNDI名称SendJMSQueue,点击"Create";四. JMS应用程序一个JMS 应用程序由下列元素组成:? JMS 客户机。
用JMS API 发送和接收消息的Java 程序。
? 非JMS(Non-JMS)客户机。
认识到这一点很重要- 旧的程序经常成为整个JMS 应用程序的一部分,而且它们的包含应该在设计时预先考虑。
? 消息。
在JMS 和非JMS 客户机之间交换的消息的格式和内容是JMS 应用程序设计所必须考虑的部分。
? JMS 供应商。
供应商必须提供特定于其MOM 产品的具体的实现。
? 受管对象。
消息传递系统供应商的管理员创建了一个对象,它独立于供应商专有的技术。
包括连接工厂ConnectionFactory和目的Destination。
一种典型的JMS 程序需要经过下列步骤才能开始消息产生和使用:? 通过JNDI 查找ConnectionFactory。
? 通过JNDI 查找一个或多个Destination。
? 用ConnectionFactory 创建一个Connection。
? 用Connection 创建一个或多个Session。
? 用Session 和Destination 创建所需的MessageProducer 和MessageConsumer。
? 启动Connection。
下面利用上面配置的JMS资源演示点对点消息发送和接收的过程。
五. 设计消息发送端1. 使用的JMS资源服务器URL: t3://localhost:80连接工厂: SendJMSFactory队列: SendJMSQueue2. 设计步骤? 初始化JNDI TreeHashtable env = new Hashtable();env.put(Context.INITIAL_CONTEXT_FACTORY, JNDI_FACTORY);env.put(Context.PROVIDER_URL, PROVIDER_URL);return new InitialContext(env);? lookup ConnectionFactoryqconFactory = (QueueConnectionFactory) ctx.lookup(JMS_FACTORY);? lookup Destinationqueue = (Queue) ctx.lookup(queueName);? 用ConnectionFactory 创建Connectionqcon = qconFactory.createQueueConnection();? 用Connection 创建一个Sessionqsession = qcon.createQueueSession(false, Session.AUTO_ACKNOWLEDGE);? 用Session 和Destination 创建MessageProducerqsender = qsession.createSender(queue);? 启动Connection。
