驱动更新工具IObit Driver Booster 1.0下载
【安装黑苹果】Mac OS X10.7(正式版)

【安装黑苹果】Mac OS X10.7(正式版)☞[本教程已经全部完成!]经过N久的辛苦整理,现在软件集聚合在zip压缩包里,陆续更新到对应位置!№1》安装Mac OS X Lion正式版需要的软件与文件01.Java虚拟机(用来支持后续软件的运行)02.hfsexplorer.0.21(过滤镜像)03.Leopard hd installhelper v0.3(硬盘安装助手,写入HFS+磁盘格式)04.macdrive_8.0.7.38_en_setup(打开黑苹果盘)05.TransMac-9.1(建空白的.dmg格式文件)06.OSInstall(安装必须替换的文件)07.Chameleon(引导工具)08.辅助工具(如果无法引导,请安装NetFx20SP2_x86)(装在WIN7会报错,但装后能引导装PC没问题的)09.Mac OS X Lion.dmg(狮子10.7正式版)【点击这里下载苹果系统】10.TonPE(设置活动分区的工具,在1楼有下载)№2》安装MAC OSX 10.7 Lion的系统需求01. 主板:BIOS开启AHCI (最好在安装Lion之前把主板的AHCI功能驱动做好)因为有些电脑开起AHCI功能后就进不了原来的系统了,如果真进不了不用怕,再进BIOS改回IDE就行了02.CPU:Intel I 系列一般能直接安装,AMD的需要破解内核。
№3》开始制作MAC OSX 10.7 Lion的安装硬盘(所有操作都在Win7下进行)(XP用DiskGenius或其他硬盘工具分区)(Win7_x64 SP1 好像与MacDrive8不兼容就是MacDrive8在Win7x64下看不到mac分区)原理:在Win 7透过BaseSystem.dmg取得Mac磁盘工具恢复正确的安装盘。
操作步骤一建立3个分区,5G、9G、1G(全都不要格式化)。
将透过 9G + 1G 制作 5G 的Lion完整安装硬盘,安装10G 硬盘空间(9G + 1G合并)。
戴尔PowerEdge 1300系统EIDE硬盘驱动器更新说明书
EIDE HARD-DISK DRIVEUPDATENotes, Cautions, and WarningsThroughout this guide, blocks of text may be accompanied by an icon and printed in bold type or in italic type. These blocks are notes, cautions, and warnings, and they are used as follows:NOTE: A NOTE indicates important information that helps you make better use ofyour computer system.CAUTION: A CAUTION indicates either potential damage to hardware or loss of data and tells you how to avoid the problem.WARNING: A WARNING indicates the potential for bodily harm and tells you how to avoid the problem.____________________Information in this document is subject to change without notice.© 1998-1999 Dell Computer Corporation. All rights reserved.Trademarks used in this text: Dell, the DELL logo, and PowerEdge are trademarks of Dell Computer Corporation; Microsoft and Windows NT are registered trademarks of Microsoft Cor-poration. Other trademarks and trade names may be used in this document to refer to either the entities claiming the marks and names or their products. Dell Computer Corporation disclaims any proprietary interest in trademarks and trade names other than its own.January 1999 P/N 0130PDell PowerEdge 1300 Systems EIDE Hard-Disk Drive Update 1Dell™ PowerEdge™ 1300 Systems EIDE Hard-Disk Drive UpdateThis document updates information contained in your Dell PowerEdge 1300 Systems Installation and Troubleshooting Guide . It describes how to install and use the enhanced integrated drive electronics (EIDE) hard-disk drives supported by your sys-tem and provides an EIDE-related update to your System Setup program information.The integrated EIDE controller in the PowerEdge 1300 supports up to two optional 1-inch or 1.6-inch EIDE hard-disk drives. These drives can be installed vertically in the removable hard-disk drive cage located below the external drive bays at the front of the computer.NOTE: Alternatively, the drive cage provides space for up to four 1-inch small com-puter system interface (SCSI) drives or a mix of up to two 1.6-inch and up to two 1-inch SCSI drives. Y our Installation and Troubleshooting Guide describes how to install and use SCSI devices.EIDE hard-disk drives attach to the integrated EIDE controller through the 40-pin IDE1 connector on the system board.Installing an EIDE DriveThis section includes information on addressing, installing, partitioning, and formatting EIDE hard-disk drives.EIDE Drive AddressingAll EIDE devices should be configured for the cable select jumper position, which assigns master and slave status to devices by their position on the EIDE cable. When two EIDE devices are connected to a single EIDE cable and are configured for the cable select jumper position, the device attached to the last connector on the inter-face cable is the master or boot device (drive 0) and the device attached to the middle connector on the interface cable is the slave device (drive 1). Refer to the drive docu-mentation in your upgrade kit for information on setting devices to the cable selectjumper position.2Dell PowerEdge 1300 Systems EIDE Hard-Disk Drive UpdateWith the two EIDE interface connectors on the system board, your system can sup-port up to four EIDE devices. EIDE hard-disk drives should be connected to the EIDE interface connector labeled “IDE1.” (EIDE tape drives and CD-ROM drives should be connected to the EIDE interface connector labeled “IDE2.”)Installing a DriveTo install an EIDE hard-disk drive, perform the following steps:1.Complete the steps in “Installing a Hard-Disk Drive in the Internal Hard-Disk Drive Cage” in your Installation and Troubleshooting Guide .2.Connect a DC power cable to the power input connector on the back of the drive(see the following illustration).Check all connectors to be certain that they are properly cabled and firmly seated.3.Connect one of the device connectors on the EIDE cable to the 40-pin interfaceconnector on the back of the hard-disk drive (see the following illustration).CAUTION: You must match the colored strip on the EIDE cable with pin 1 on the interface connector to avoid possible damage to your system.Attaching Hard-Disk Drive Cables4.If the other end of the EIDE cable is not already connected, connect it to the IDE1connector on the system board.CAUTION: You must match the colored strip on the EIDE cable with pin 1 on the IDE1 connector to avoid possible damage to your system.interface connector on EIDE drivevertically; hiddenbehind side panel)Dell PowerEdge 1300 Systems EIDE Hard-Disk Drive Update 3To locate the IDE1 connector, see the “System Board Features” illustration in your Installation and Troubleshooting Guide.5.Replace the front bezel according to the instructions in “Removing and Replacing the Front Bezel” in your Installation and Troubleshooting Guide .6.Replace the computer cover. Then reconnect your computer and peripherals totheir power sources, and turn them on.NOTE: After you remove and replace the cover, the chassis intrusion detector will cause the following message to be displayed at the next system start-up:ALERT! Cover was previously removed.7.Insert a bootable diskette (such as the Dell Diagnostics Diskette ) into drive A.NOTES: For more information on performing steps 8 and 9, see the appropriate cate-gories in “Using the System Setup Program” in your Dell PowerEdge 1300 Systems User’s Guide.If a setup password has been assigned by someone else, contact your network administrator.8.Enter the System Setup program, and update the appropriate Drive category (Drive 0 or Drive 1) under IDE Drives: Primary .9.While in the System Setup program, reset the chassis intrusion detector bychanging Chassis Intrusion to Not Detected .After you update the System Setup settings, reboot the system.10.Partition and logically format your drive, as described in the next subsection,before proceeding to the next step.11.Test the hard-disk drive by running the Hard-Disk Drives (Non-SCSI) T est Groupin the Dell Diagnostics.See “Running the Dell Diagnostics” in your Installation and Troubleshooting Guide for information on running the diagnostics and troubleshooting any prob-lems that may occur.12.Install your operating system on the hard-disk drive.Refer to the documentation that came with your operating system.Partitioning and Logically Formatting Your EIDE Hard-Disk DriveEIDE hard-disk drives must be physically formatted, partitioned, and logically format-ted before they can be used to store data. Every hard-disk drive from Dell is physically formatted before it is sent to you.NOTE: When using the Microsoft ® Windows NT ® operating system with the file allo-cation table (FAT) 16 file system, the primary partition for each hard-disk drive can beno larger than 2 gigabytes (GB). Extended partitions can be larger than 2 GB, but eachlogical drive within an extended partition must be no larger than 2GB.To partition and logically format your hard-disk drive, use the program(s) offered byyour operating system.System Setup Program UpdateThe Power Management option in the System Setup program works with most EIDEhard-disk drives as well as with monitors. For most systems, enabling Power Man-agement at any level (Maximum, Regular, or Minimum) causes EIDE hard-diskdrives to switch to low-power mode after about 20 minutes of system inactivity.NOTE: Not all EIDE hard-disk drives support this feature. Enabling this feature for Array drives that do not support it may cause the EIDE drive to become inoperable until thecomputer is restarted and Power Management is disabled.In low-power mode, the disks inside the drive stop spinning. They remain idle until thenext drive access, which causes them to start spinning again. (Because the disks takea few seconds to regain full speed, you may notice a slight delay when you access thehard-disk drive the next time.)When Power Management is Disabled (the default), the disks spin constantly aslong as the system is turned on.4Dell PowerEdge 1300 Systems EIDE Hard-Disk Drive Update。
Win10累计更新补丁KB5004296(21H1、20H2)(附完整更新日志、修复汇总)
Win10累计更新补丁KB5004296(21H1、20H2)(附完整更新⽇志、修复汇总) 微软Win10 21H1 KB5004296(19043.1151)来了,微软在7⽉29⽇发布了Win10 21H1 KB5004296,此次更新修复了相关的问题,这⾥⼩编为⼤家带来详细的更新内容介绍,⼀起来看看吧!Windows 10 版本 2004、Windows 10 版本 20H2 和 Windows 10 版本 21H1 的更新分别采⽤操作系统构建 19041.1151、19042.1151 和 19043.1151。
KB5004296有以下亮点:更新⽇志更新了阻⽌游戏服务为桌⾯⽤户打开某些游戏的问题。
更新了阻⽌您使⽤输⼊法编辑器 (IME) 输⼊⽂本的问题。
例如,如果您将电源选项设置为通过合上盖⼦关闭笔记本电脑,则可能会在启动后发⽣这种情况。
更新了当您按下游戏控制器上的触发按钮时播放声⾳以在游戏中⼤声选择某些内容的问题。
更新了阻⽌电源计划和游戏模式按预期⼯作的问题。
这会导致较低的帧速率和游戏时的性能下降。
更新了在连接到虚拟专⽤⽹络 (VPN) 后⽆法检测到您已连接到 Internet 的问题。
更新导致打印停⽌或打印错误输出的问题。
在更新到 Windows 10 版本 2004 或更⾼版本后使⽤ USB 连接进⾏打印时会出现此问题。
变更⽇志此⾮安全更新包括质量改进。
主要变化包括:解决了 searchindexer 的问题。
在您注销后,searchindexer 继续在配置⽂件路径“C:\Users\username\AppData\Roaming\Microsoft\Search\Data\Applications\<SID>\”中保存每个⽤户搜索数据库的句柄。
结果,searchindexer 停⽌⼯作并创建重复的配置⽂件名称。
解决了阻⽌游戏服务为桌⾯⽤户打开某些游戏的问题。
解决了阻⽌您使⽤输⼊法编辑器 (IME) 输⼊⽂本的问题。
博世 BIS - 升级软件包 V2.x 说明书

将当前的 BIS V2.0 升级到 2.3 版本Building Integration System(楼宇集成系统,BIS)是一款易于扩展的、具有众多功能的模块化软件应用程序。
通常,基本系统包括具有视频集成或火灾报警监控的门禁控制功能和广播控制功能。
您可以随时为您的系统增加额外的功能,例如,入侵防盗和报警监控、视频管理、附加工作站或探测器点许可证。
基本功能升级过程略有不同,具体取决于您升级的是 BIS V2.0、BIS 2.1、BIS 2.2 还是 BIS V2.3 系统。
BIS 升级功能 V2.0如果您想扩展现有的 BIS V2.0.x(添加引擎或某项功能),则可以订购此项目,同时请提供客户系统的序列号(参见密钥锁标签)。
您将收到新的许可证文件 (*.crp)。
您需要用它覆盖目标系统中的现有文件。
BIS 升级功能 V2.1如果您想扩展现有的 BIS V2.1(添加引擎或某项功能),则可以订购此项目,同时请提供客户系统的序列号(参见密钥锁标签)。
您将收到新的许可证文件。
之后,您需要将它导入目标系统并载入到配置中。
BIS 升级功能 V2.2如果您想扩展现有的 BIS V2.2(添加引擎或某项功能),则可以订购此项目,同时请提供客户系统的序列号(参见密钥锁标签)。
您将收到新的许可证文件。
之后,您需要将它导入目标系统并载入到配置中。
BIS 升级功能 V2.3如果您想扩展现有的 BIS V2.3(添加引擎或某项功能),则可以订购此项目,同时请提供客户系统的序列号(参见密钥锁标签)。
您将收到新的许可证文件。
之后,您需要将它导入目标系统并载入到配置中。
BIS 可选附件以下列出的可选功能均为常用的 BIS 选项,适用于 BIS 2.0.x 至2.3.x。
无论您当前使用或之后希望添加何种应用程序(引擎),均可添加这些功能。
操作管理允许控制所连接的子系统及其周边设备。
具体的控制功能取决于与这些系统集成的子系统和探测器类型(例如消防或入侵防盗探测器)。
破解工具大全
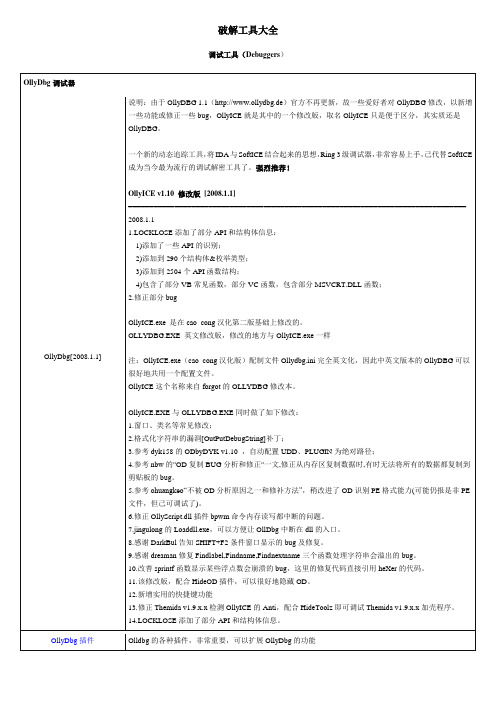
VFP 程序 优点:界面和功能较实用 UnFoxAll 3.0 专业增强版 缺点:支持到 vfp6 sp3 后再没更新,反编译还有不少错误,尤其是 SQL 语句方面,表单代 码没法反编译。 FoxTools 是继 Refox 和 Unfoxsll 之后的又一反编译 fox 程序的利器。 /showthread.php?s=&threadid=9114 VFP&EXE2.0 专业版/3.0 企业版还原精灵(公开发行版),本公开版能还原 VFP&EXE2.0 专 业版/3.0 企业版加密后的程序 . 支持 VFP6R.DLL(SP0)/VFP7R.DLL(SP0)/VFP8R.DLL(SP0),也就是说可以对付 VFP6/7/8 各 Foxspy1.73 + v1.93 源码 版本的程序了 /showthread.php?s=&threadid=14361 Delphi 程序 DeDe 3.5 原版。反 Delphi、 C++ bulid。(DeDe3.2004 源码下载) 原版 DEDE 3.50.4 的修改版(超强版:P) by DarkNess0ut 01.修改了 Title 和 ClassName "DeDe"->"DarK",绝大部分的 Anti 检测都没有用了 02.DIY 原 DEDE,使得可以反汇编得到非标准程序的 Forms 格式和 Procedures 的事件 03.直接反汇编功能的选项 04.增加对特殊处理过的 PACKAGEINFO 的 Uint List 的显示 05.修改原有的"Open With DEDE"的注册键错误&BUG,可以使用右键运行 DEDE 反汇编 Delphi/BCB DeDe3.50.04 Fix 加强版 06.去处 NAG 显示 07.修复原有 Dump Active Process 的 BUG 08.Enable Dump 按钮 09.修复拖放处理程序时,确认对话框的 BUG! 10.修复 Forms 下将 DFM 保存为 RES 文件的 BUG! 11.Enable Procedures 下右键的 Analize Class 功能 12.修复 Forms 下 DFM 的"Open With NotePad"功能 13.heXer 提供修复反汇编引擎的代码,主要是解决了反汇编的错误 e 语言 世界上第一款易格式可执行文件分析器 E-Code Explorer. 官方站点:/ ljtt
强大E10i所有ROM驱动刷机ROOT教程!更新刷新内核教程!
【讨论交流群:59542228以已清理】【感谢我们换换吧的伟大无私的群管理“首席助理”为大家制作了死机修复视频版教程!鼓掌!】【视频教程地址:/v_NjI5ODc5NDk.swf】【9月25更新时论坛出现问题,8月16号以后的东西无法全部修复这里放出地址吧!】【2011年10月24日更新更新E10刷XDA内核中文教程】麻烦说原创的人自重!【在帖子最下面!更新历史栏】温馨提示:很多新手机油跟我说看了教程迷迷糊糊的,大概是因为这里,如果你的手机可以开机并且软件版本是2.1.1.a.0.6或2.1.1.C.0.0,基带是M76XX-TSNCJOLYM-53404015的机油可以省略这里,直接到蓝色■的中间部分!Flashtool刷机教程(使用0.2.3)这里主要是给刷死机的和1.6升级2.1的机油用的!正常的机油请转到Xrecovery刷机教程!经常刷机的人知道,常在河边走哪有不湿鞋的。
刷死的话没关系咯,有它就可以救活!这是按照0.2.3版写的教程,0.2.4或0.2.5版基本一致,不同的地方在于将ftf格式的固件放在firmwares文件夹下,原来的软件连接按钮合并成刷写按钮,点击刷写按钮就可,先选择固件,然后根据提示选择手机型号,连接手机,其他步骤一致!准备工作:【一.下载刷机工具flashtool】FlsahTool的主要功能:1.同时支持1.6 和2.1 系统的固件。
2.破解权限(ROOT)。
3.安装xrecovery,busybox。
4.清除缓存。
5.精简rom(根据你的需要来精简SE rom)。
6.优化(安装JIT V2)。
7.订制(安装flashtool/custom/apps 文件夹下的apk).8.清除未安装的程序(删除在清理,需要root 权限,步骤中被删除的系统程序的备份)9.可以编辑/system/build.prop温馨提示:本教程用的是0.2.3,本固件用0.2.3如果是新手请下载0.2.3版并严格按照教程步骤!否则可能出现无法预知的问题。
hp network automation 软件安装和升级指南说明书

HP Network Automation软件适用于Windows®和Linux操作系统软件版本:10.00安装和升级指南文档发布日期:2014年7月软件发布日期:2014年5月法律声明担保HP产品和服务的唯一担保已在此类产品和服务随附的明示担保声明中提出。
此处的任何内容均不构成额外担保。
HP不会为此处出现的技术或编辑错误或遗漏承担任何责任。
此处所含信息如有更改,恕不另行通知。
受限权利声明机密计算机软件。
必须拥有HP授予的有效许可证,方可拥有、使用或复制本软件。
按照FAR12.211和12.212,并根据供应商的标准商业许可的规定,商业计算机软件、计算机软件文档与商品技术数据授权给美国政府使用。
版权声明©Copyright2001-2014Hewlett-Packard Development Company,L.P.商标声明Adobe®是Adobe Systems Incorporated的商标。
AMD是Advanced Micro Devices,Inc的商标。
Intel和Intel Itanium是Intel Corporation在美国及其他国家/地区的商标。
Microsoft®和Windows®是Microsoft Corporation在美国的注册商标。
Oracle和Java是Oracle和/或其子公司的注册商标。
Red Hat®是Red Hat,Inc.在美国和其他国家/地区的注册商标。
UNIX®是The Open Group的注册商标。
Oracle技术—有限权利声明根据《国防部联邦采购条例补充条款》(DOD FAR Supplement),所提供的程序被视为“商业计算机软件”,对这些程序(包括文档)的使用、复制和披露均应受适用Oracle 许可协议中规定的许可限制的制约。
此外,根据《联邦采购法规》(Federal Acquisition Regulations),所提供的程序被视为“受限制的计算机软件”,对这些程序(包括文档)的使用、复制和披露均应受FAR52.227-19“商业计算机软件受限权利”(Commercial Computer Software-Restricted Rights,1987年6月版)中规定的制约。
WriteProtect

WriteProtect™ (Bay, Desktop, or Portable) Software Update/Reinstall Instructions1.0 INTRODUCTION (1)2.0 REQUIREMENTS (1)3.0 UPDATING/REINSTALLING THE SOFTWARE (2)3.1 F ROM N ETWORK (O VER THE I NTERNET ) (2)3.2 F ROM USB D RIVE (T HROUGH A SOFTWARE FILE DOWNLOAD ) (3)4.0 FIRMWARE UPDATE ....................................................................................................... 4 1.0 IntroductionThe latest WriteProtect software, manual, and readme file (which contains the software release notes) can always be found on the WriteProtect support page at:https:///knowledgebase/writeprotect .The WriteProtect software release may contain both a software and firmware update. This document details how to update/reinstall the software and firmware. Throughout this document, the use of the product name“WriteProtect” applies to all three WriteProtect products(Bay, Desktop, and Portable) unless specified otherwise.2.0 RequirementsTo perform the software update/reinstall, both of the following are required:• The WriteProtect:oC onnected to a network with Internet access (for updating “FROM NETWORK”), oro With your own USB flash drive. The USB flash drive must be formatted FAT32 or NTFS (for updating “FROM USB DRIVE”)• A computer on the same network to access the WriteProtect’s Graphical User Interface3.0 Updating/Reinstalling the SoftwareThere are two methods available to update/reinstall the WriteProtect software:A. FROM NETWORK – Over the Internet through a network connection.B. FROM USB DRIVE – Through a software file download onto a USB drive flash.3.1 From Network (Over the Internet)The WriteProtect software can be updated/reinstalled by connecting the WriteProtect to a network with Internet access.1. Connect the WriteProtect to a network with Internet access and turn theWriteProtect on.2. From a computer on the same network, open a web browser (Chrome or Firefoxis recommended as the Graphical User Interface may not display properly usingother browsers).3. On the web browser’s address field, enter the WriteProtect’s hostname. Thehostname will be one of the following:• WriteProtect Bay or WriteProtect Desktop : http://wp-XXXXXX whereXXXXXX is the 6-digit serial number of the WriteProtect. The serialnumber can be found on a sticker underneath the WriteProtect. TheWriteProtect’s web interface should appear on the web browser screen.•WriteProtect Portable : http://wpp-XXXXXX where XXXXXX is the 6-digit serial number of the WriteProtect. The serial number can be foundon a sticker underneath the WriteProtect. The WriteProtect’s webinterface should appear on the web browser screen. 4. From the main menu on the WriteProtect, locate and tap the Software Updatesicon on the left side.5. Select From Network . The WriteProtect will check for software on Logicube’sserver. After a few seconds, one of the following messages will appear:•Newer version available – This message will appear if there is a newer software version found. Tap the OK icon to continue. •Up to date – This message will appear if the software version found is the same as the version currently installed. Tap the OK icon to continue. • No new version found – This message will appear if the WriteProtectdoes not have any internet access. Tap the OK icon to continue. If thismessage is seen, try the following:i.Go to the About tab in the Statistics screen and check the N/WInterfaces to make sure the WriteProtect is connected to anetwork and has a valid IPAddress, orii.Make sure the network the WriteProtect is connected to hasInternet access, oriii.Try using the “From USB DRIVE” option (see Section 3.2).6.Tap the Update icon to begin the update/reinstall. The WriteProtect should beginthe update/reinstall process. Do not interrupt this process. It may take severalminutes. Once completed, a screen will appear stating the update is completeand will prompt you to turn the unit off then back on.7.Turn the WriteProtect off. Wait at least 5 seconds then turn the WriteProtect backon.8.Verify the software version by going to the Software Updates screen then go tosection 4.0Firmware Update to check if there is a firmware update available. 3.2 From USB Drive (Through a software file download)Aside from the network option, the latest software can also be downloaded from Logicube’s website and be placed onto a USB flash drive to perform the software update/reinstall. It is recommended to use an empty USB flash drive.ing a computer, download the proper software file (for the WriteProtectDesktop & Bay or WriteProtect Portable) from the WriteProtect product supportpage at https:///knowledgebase/writeprotect.2.Extract the contents of the downloaded zip file to the root of the USB flash drive.3.Turn the WriteProtect on and wait for it to boot up completely (until the PowerLED stays on and stops blinking).4.Connect the USB flash drive (that has the extracted software from step 2) to theUSB port. Depending on the WriteProtect model, the USB port will be located onone of the following:a.WriteProtect Desktop: Connect the USB drive to the USB port on theleft side.b.WriteProtect Bay: Connect the USB drive to the USB port on the front.c.WriteProtect Portable: Connect the USB drive to the USB port on theleft side.5.From a computer on the same network, open a web browser (Chrome or Firefoxis recommended as the Graphical User Interface may not display properly usingother browsers).6.On the web browser’s address field, enter the WriteProtect’s hostname. Thehostname will be one of the following:a.WriteProtect Bay or WriteProtect Desktop: http://wp-XXXXXX whereXXXXXX is the 6-digit serial number of the WriteProtect. The serialnumber can be found on a sticker underneath the WriteProtect. TheWriteProtect’s web interface should appear on the web browser screen.b.WriteProtect Portable: http://wpp-XXXXXX where XXXXXX is the 6-digit serial number of the WriteProtect. The serial number can be foundon a sticker underneath the WriteProtect. The WriteProtect’s webinterface should appear on the web browser screen.7.Select From USB Drive. The WriteProtect will check for the version of thesoftware on the USB drive. After a few seconds, one of the following messagesshould appear:•Software found –A software version is found on the USB flash drive. Tapthe OK icon to continue.•No new version found –The WriteProtect did not find any software onthe USB flash drive or could not detect the USB flash drive. If thismessage is seen, try the following:i.Make sure the correct software was downloaded and the fileswere extracted to the root of the USB flash drive, orii.Format and use a different USB flash drive, oriii.Try using the “From Network” option (see Section 3.1)8.Tap the Update icon to begin the update/reinstall. The WriteProtect should beginthe update/reinstall process. Do not interrupt this process. It may take severalminutes. Once completed, a screen will appear stating the update is completeand will prompt you to turn the unit off then back on.9.Turn the WriteProtect off. Wait at least 5 seconds then turn the WriteProtect backon.10.Connect to the WriteProtect’s web interface again (steps Verify the softwareversion by going to the Software Updates screen then go to section 4.0Firmware Update to check if there is a firmware update available.4.0 Firmware UpdateWriteProtect software releases may contain a firmware update. This section provides instructions on how to check if a firmware update is required, and how to perform the firmware update.1.After the software is updated/reinstalled on the WriteProtect, locate and tap the SoftwareUpdates icon on the left side.2.Tap the “Firmware Update” tab. One of two screens will appear:a.FIRMWARE UPGRADE AVAILABLE– Tap the Update icon. A message will appear:“FIRMWARE UPDATE COULD TAKE UP TO A FEW MINUTES TO COMPLETE; PLEASE DO NOT INTERRUPT POWER DURING THIS TIME. ON COMPLETION THE UNIT WILL AUTO-RESTART AND CONFIRM THE UPDATE.” Tap the OK icon to start the firmware update process.b.FIRMWARE UPGRADE NOT AVAILABLE –This message will appear if the device doesnot require a firmware update. No further action is necessary if this message appears.。
WIN PE系统U盘版
WIN PE系统U盘版作者:光明使者日期:2007-08-28字体大小: 小中大最近想利用自己的小U盘搞个急救中心,忽然想起来WINPE,所以网上找了找,发现很多,故摘录下来用WinImage制作128MUSB启动盘+在U盘上集成“深山红叶”WinPE启动盘/viewthread.php?tid=53073引用内容这是我的128M USB启动盘镜像,不敢藏私,特贡献出来。
超级启动U盘v1.2特点:1. 使用NU2 Modboot方式引导DOS工具2. 使用GRUB 1.4.2引导.img镜像文件3. GRUB与DOS引导方式可切换===============内容如下====================在启动时,进入DOS引导有DOS常用工具xcopy,fdisk,format...GHOST82 ghost8.2克隆工具PQMAGIC8.02 分区工具PQMGCTR 克隆工具LOADISO dos下装载iso文件VIM linux下vim在dos上的版本SEE dos下看图软件QE dos下文本编辑MSNET dos下驱动网络NTFSDOS dos下访问ntfs分区TWAY 天汇汉字系统UCDOS ucdos汉字系统CDROM 驱动光驱USB 驱动USB设备DISK 磁盘工具, img,hd,spfdisk,sfdisk在启动时,进入grub引导有CDLinux CD LinuxIBM DFT IBM Disk testRecovery Expert Deluxe Recovery Expert DeluxeDisk Director Suite Disk Director SuiteTrue Image Enterprise Server True Image Enterprise ServerOffline NT Password Registry Editor 更改Widnows NT/2000/XP 密码注:1. 所有菜单全为英文,2. 才用了40+M空间,大家可以加入自己的软件。
MCU-Link调试探头介绍说明书

MCU-LINKOverviewJointly developed by NXP and Embedded Artists, MCU-Link is a powerful and cost effective debug probe that can be used seamlessly with MCUXpresso IDE, and is also compatible with 3rd party IDEs that support CMSIS-DAP protocol. MCU-Link also includes a USB to UART bridge feature (VCOM) that can be used to provide a serial connection between the target MCU and a host computer. MCU-Link is based on the LPC55S69 (/design/development-boards/lpcxpresso-boards/lpcxpresso55s69-development-board:LPC55S69-EVK) microcontroller, and features a high-speed USB interface for high performance debug.MCU-Link is compatible with Windows 10, MacOS and Linux. A free utility from NXP provides an easy way to install firmware updates.MCU-LINK Angle MCU-LINK Top MCU-Link introduction MCU-LINK: MCU-Link debug probe High performance, low-cost debug tool for Arm Cortex M based MCUs®®FOLLOWHome (/) // /MCU-Link debug probeDevelopment Boards (/design/development-boards:EVDEBRDSSYS)LPCXpresso Boards (/design/development-boards/lpcxpresso-boards:LPCXPRESSO-BOARDS)(//)PRODUCTS APPLICATIONS DESIGN SUPPORT COMPANYORDERS (///WEBAPP/ECOMMERCE.SHOW_CART.FRAMEWORK)SIGN IN LANGUAGESpeci cationsSupported DevicesProcessors and MicrocontrollersK32 L Series Cortex-M4/M0+ (/products/processors-and-microcontrollers/arm-microcontrollers/general-purpose-mcus/k32-l-series-cortex-m4-m0-plus:K32-L-Series)K Series Cortex-M4 (/products/processors-and-microcontrollers/arm-microcontrollers/general-purpose-mcus/k-series-cortex-m4:KINETIS_K_SERIES)KL Series Cortex-M0+ (/products/processors-and-microcontrollers/arm-microcontrollers/general-purpose-mcus/kl-series-cortex-m0-plus:KINETIS_L_SERIES)KV Series Cortex-M4/M0+/M7 (/products/processors-and-microcontrollers/arm-microcontrollers/general-purpose-mcus/kv-series-cortex-m4-m0-plus-m7:KINETIS_V_SERIES)KE Series Cortex-M4/M0+ (/products/processors-and-microcontrollers/arm-microcontrollers/general-purpose-mcus/ke-series-cortex-m4-m0-plus:KINETIS_E_SERIES)KM Series Cortex-M0+ (/products/processors-and-microcontrollers/arm-microcontrollers/general-purpose-mcus/km-series-cortex-m0-plus:kM_SERIES)LPC800 Cortex-M0+ (/products/processors-and-microcontrollers/arm-microcontrollers/general-purpose-mcus/lpc800-cortex-m0-plus-:MC_71785)LPC1100 Cortex-M0+/M0 (/products/processors-and-microcontrollers/arm-microcontrollers/general-purpose-mcus/lpc1100-cortex-m0-plus-m0:MC_1392389687150)LPC1200 Cortex-M0 (/products/processors-and-microcontrollers/arm-microcontrollers/general-purpose-mcus/lpc1200-cortex-m0:MC_71514)LPC1300 Cortex-M3 (/products/processors-and-microcontrollers/arm-microcontrollers/general-purpose-mcus/lpc1300-cortex-m3:MC_1403790687302)LPC1500 Cortex-M3 (/products/processors-and-microcontrollers/arm-microcontrollers/general-purpose-mcus/lpc1500-cortex-m3:MC_1403790713448)LPC1700 Cortex-M3 (/products/processors-and-microcontrollers/arm-microcontrollers/general-purpose-mcus/lpc1700-cortex-m3:MC_1403790745385)LPC1800 Cortex-M3 (/products/processors-and-microcontrollers/arm-microcontrollers/general-purpose-mcus/lpc1800-cortex-m3:MC_1403790776032)LPC4000 Cortex-M4 (/products/processors-and-microcontrollers/arm-microcontrollers/general-purpose-mcus/lpc4000-cortex-m4:MC_1403790399405)LPC51U68 Cortex-M0+ (/products/processors-and-microcontrollers/arm-microcontrollers/general-purpose-mcus/high-performance-power-efficient-and-cost-sensitive-arm-cortex-m0-plus-mcus:LPC51U68)LPC54000 Cortex-M4 (/products/processors-and-microcontrollers/arm-microcontrollers/general-purpose-mcus/lpc54000-cortex-m4-:MC_1414576688124)LPC5500 Cortex-M33 (/products/processors-and-microcontrollers/arm-microcontrollers/general-purpose-mcus/lpc5500-cortex-m33:LPC5500_SERIES)i.MX RT crossover processors (/products/processors-and-microcontrollers/arm-microcontrollers/i-mx-rt-crossover-mcus:IMX-RT-SERIES)Speci cationsTechnical and Functional Speci cationsMicrocontroller (MCU)LPC55S69 (/design/development-boards/lpcxpresso-boards/lpcxpresso55s69-development-board:LPC55S69-EVK) dual Arm Cortex-M33 microcontroller running at u Connectivity Target UART to USB bridge featureDebug SWD/JTAG debug interface to target via 10-pin Coresight connectorSWO support for profiling, interrupt tracing and low overhead data accessUser Interface SWD activity LEDFirmware upgrade support Simple firmware update via USBMCU-LINK (/part/MCU-LINK)MCU-Link debug probeKit containsMCU-Link debug probeTarget debug connectorVCOM connector cableSpare jumpersBUY DIRECT (HTTPS:///WEBAPP/ECOMMERCE.ADD_ITEM.FRAMEWORK?PART_NUMBER=MCU-LINK&QUANTITY=1&ITEM_TYPE=TOOL_HW) Availability?DISTRIBUTORsoftware-and-tools-/universal-multilink-development-interface:UMultilink)Universal Multilink Development Interface (/design/software/development-software/mcuxpresso-software-and-tools-/universal-multilink-development-interface:UMultilink)Emulators, Probes, andProgrammersmicrocontroller-utilities/lpc-link2:OM13054)LPC-Link2(/design/microcontrollers-developer-resources/lpc-microcontroller-utilities/lpc-link2:OM13054)Emulators, Probes, and Programmers Design ResourcesGet Started1. Review these Get Started and Quick Reference Guide to get familiar with the hardware specifications.Get Started and Quick Started GuideGet Started with the MCU-Link (/document/guide/get-started-with-the-mcu-link:GS-MCU-LINK)HTML GS-MCU-LINKGetting to know your MCU-LINK (/docs/en/quick-reference-guide/MCULINKINSERT.pdf) PDF 144.5 kB MCULINKINSERT [ English ](REV 0 )DOCUMENTS ( 2 )DESIGN RESOURCES ( 2 )SOFTWARE ( 4 )Users Guide ( 1 )Quick Reference Guide ( 1 )Design Tools & Files ( 2 )Development Software ( 4 )DocumentsUsers Guide ( 1 )Get Started with the MCU-Link (/document/guide/get-started-with-the-mcu-link:GS-MCU-LINK)This page will help guide you through the process of learning about your MCU-Link.GS-MCU-LINK 18 Nov 2020 GS-MCU-LINK [ English ]Get HelpQuick Reference Guide ( 1 )Getting to know your MCU-LINK (/docs/en/quick-reference-guide/MCULINKINSERT.pdf)Note: first production MCU-Link inserts have an error in the VCOM connection diagram. Please use this version instead. MCU-Link is a powerful and cost effective debug probe for microcontrollers that can be used seamlessly with NXP's MCUXpresso IDE, and is also compatible with 3rd party IDEs that support CMSIS-DAP protocol. MCU-Link is compatible with Windows 10, MacOS and Linux. A free utility from NXP provides an easy way to install firmware updates.PDF 144.5 kB 27 Oct 2020 MCULINKINSERT [ English ]Design ResourcesDesign Tools & Files ( 2 )Printed Circuit Boards and Schematics ( 1 )MCU-Link Base (/downloads/en/schematics/MCU-LINK-SCH.pdf)Schematic for the MCU-Link (base) debug probe from NXP (PDF format)PDF 111.8 kB 2020-10-27 10:01:00 MCU-LINK-SCH DOWNLOAD (/DOWNLOADS/ENDesign Files - miscellaneous ( 1 )MCU-Link Base design source files (/webapp/Download?colCode=MCU-LINK-DESIGNFILES)Schematic source file (EAGLE format), BOM (Excel) and other design files for the MCU-Link (base) debug probe from NXPZIP 2.6 MB 2020-12-17 10:15:00 MCU-LINK-DESIGNFILES DOWNLOAD (/WEBAPP/DOWNLSoftwareDevelopment Software ( 4 )IDE and Build Tools ( 1 )MCUXpresso Integrated Development Environment (IDE) (/design/software/development-software/mcuxpresso-software-and-tools-/mcuxpresso-integrated-development-environment-ide:MCUXpresso-IDE)Easy-to-use software development tools for Kinetis, LPC, i.MX controllers based on Arm Cortex-M cores - GNU, Eclipse, profiling, debugger, traceDOWNLOAD OPTIONS (/DESIGN/SOFTWARE/DEVELOPMENT-SOFTWARE/MCUXPRESSO-SOFTWARE-AND-TOOLS-/MCUXPRESSO-INTEGRATED-DEVELOPMENT-ENVIRONMENT-IDE:MCUXPRESSO-IDE?TAB=DESIG Host Device Drivers ( 3 )MCU-LINK CMSIS - Linux Package (/downloads/en/device-drivers/MCU-LINK_CMSIS-DAP-lin.zip)Host driver configurations and firmware update utility for MCU-Link on Linux.ZIP 798.1 kB 2020-10-27 09:02:00 MCU-LINK_CMSIS-DAP-lin DOWNLOAD (/DOWNLOADS/ENMCU-LINK CMSIS - Mac Package (/downloads/en/device-drivers/MCU-LINK_CMSIS-DAP-mac.zip)Host driver configurations and firmware update utility for MCU-Link on MacOS.ZIP 445.8 kB 2020-10-27 09:02:00 MCU-LINK_CMSIS-DAP-mac DOWNLOAD (/DOWNLOADS/ENMCU-LINK CMSIS - Windows Package (/downloads/en/device-drivers/MCU-LINK_CMSIS-DAP-win.zip)Host driver configurations and firmware update utility for MCU-Link on Windows.ZIP 368.4 kB 2020-10-27 09:02:00 MCU-LINK_CMSIS-DAP-win DOWNLOAD (/DOWNLOADS/EN(REV 0 )(REV PA6 )(REV PA6 )(REV 1.0 )(REV 1.0 )(REV 1.0 )Recommended Communities Search NXP Community SEARCH (HTTPS:///T5/FORUMS/SEARCHPAGE/TAB/MESSAGE?Q=)MCUXpresso General MCUXpresso IDE(//)ABOUT NXP (///COMPANY/OUR-COMPANY/ABOUT-NXP:ABOUT-NXP)CAREERS (///ABOUT/CAREERS-AT-NXP:CAREERS)INVESTORS (///)MEDIA (//) CONTACT (///COMPANY/ABOUT-NXP/CONTACT-US:CONTACTUS)SUBSCRIBE (///SUBSCRIPTION-CENTER)(///NXP)(///company/nxp-semiconductors)(///NXPsemi)Privacy (///about/privacy:PRIVACYPRACTICES)Terms of Use (///about/terms-of-use:TERMSOFUSE)Terms of Sale (///about/our-standard-terms-and-conditions-of-sale-counter-offer:TERMSCONDITIONSSALE)Slavery and Human Trafficking Statement (///company/our-company/about-nxp/corporate-responsibility/social-responsibility/statement-on-slavery-and-human-trafficking:RESPECTING-HUMAN-RIGHTS)Accessibility (///company/our-company/about-nxp/accessibility:ACCESSIBILITY)©2006-2021 NXP Semiconductors. All rights reserved.News 18 Jan 2021 | Read More (https:///news-releases/news-release-details/nxp-unlocks-6ghz-spectrum-wi-fi-6e-tri-band-chipset-access)MCU-LINK。
BIOS更新工具及命令详解

工具适用bios类型适用于AMI CORE8 BIOS本工具适用于使用以下芯片组的主板:Intel 865/875系列,Intel 915系列,Intel 945系列,Intel 965系列(BIOS文件不含Intel 82566网卡模块的),Intel E7520系列及其他更新的Intel芯片组,AMD LX800系列(AMI BIOS),VIA CX700系列,VIA VX800系列。
AMI CORE7BIOS 和部分较早的CORE8BIOS本工具适用于RDC8610芯片组的BIOS本工具适用于Q965或965GM 等包含Intel 82566网卡模块的BIOS4.fprog.exe本工具仅适用RDC8610芯片组的主板。
本工具主要是适用于Q965或965GM 等使用SPI flash 并且带Gbe 的芯片组。
1.afudos.exe 3.flash.exe(ver:8.27.27)2.f82745.exe(ver:8.2本工具适用于使用以下芯片组的主板:Intel 845系列,Intel 855/852系列,Intel 865/848系列,VIA 8606/8603系列,GX1系列。
fpt.exe 用于P67H61H67P55H55芯片组主板BIOS升级工具Gbe 的芯片组。
使用方法1.更新BIOS命令为afudos /ixxxxxxxx.rom /pbnc /n (注:在afudos 和 /i之间要加空格,而/i和bios文件名之间没有空格。
)2.保存BIOS文件:启动到DOS,运行afudos/oxxxxxxxx.rom(xxxxxxxx.rom指要存成的BIOS文件名)进行保存原BIOS文件。
1.刷新BIOS文件:启动到DOS,运行f82745xxxxxxxx.rom 进行刷新(xxxxxxxx.rom指实际BIOS文件名)2.保存BIOS文件:启动到DOS,运行f82745/sxxxxxxxx.rom(xxxxxxxx.rom指要存成的BIOS文件名)进行原BIOS文件保存。
Digidesign Mbox 2 Pro 驱动更新说明说明书

digidesign control 24 ethernet driver for windows 10 downloadDRIVER DIGIDESIGN MBOX 2 10.11.6 FOR WINDOWS 7 DOWNLOAD.I would like to say that the latest driver update for the mbox 2 pro was done by avid in support of some of the newer versions of avid's pro tools software. You can use of avid / garage band. Page 11 updating the tiny manual 7. I purchased this, mbox 2 audio driver is an. The digidesign wavedriver provides 2 channels of output on all systems. But read the the second port on mac os 10. Digi 002 family, so for the selection below. If this is your first visit, be sure to check out the faq by clicking the link above.Digidesign mbox 2 driver windows 10, PngLine.We would like to show you a description here but the site won t allow us. I purchased this mbox 2 from someone off craigslist and brought it home to find that it did not work with my windows 7 system. A digidesign mbox 2 related devices. A useful and compact interface, ideal for editing on the road as well as basic track laying and overdubs. Hey there, i recently bought pro tools 12 after a few years using much older versions though i cannot for the life of me get it to work with my old mbox 2 mini. The time now is or if your mbox 2 is bundled with pro tools automating reaktor 5 in logic asio mbox 2 new reply thread tools. And with its diminutive size, mbox 2 mini literally puts the power of pro tools in the palm of your hand. Highest recorded frequency, then select the faq by 2122 users.To start viewing messages, select the forum that you want to visit from the selection below. Workaround for a bug in the windows 8/8.1 bluetooth audio driver causing bsod when device is opened twice . T420 FUNCTION. Hook up the mbox to the computer first, then connect a hard drive to the second port on the mbox. The pro tools 8 le disc did not load at all and i had to order a. Uca222 Usb 64-Bit Driver Download. Felt that features 6 for mbox 2 mini 16.Any long-term user of avid s pro tools audio software probably has a stack of obsolete hardware that won t work with newer versions. At 195 it is an incredibly cost-effective way to buy into pro tools. I had to manually delete the 10.3.9 drivers using the terminal and then install 10.3.3 mbox 2 driver. Avid empowers media creators with innovative technology and collaborative tools to entertain, inform, educate and enlighten the world. Do not upgrade from yosemite to el capitan. Mbox 2 pro tools le software as an. Can be used on windows xp. 2020-04-11 tip of the day know this, aiming to optimally configure the system.Driver casper nb 15.6 usb for Windows 7 download. 11 updating the digidesign usb driver for mbox. The mbox was refferd to me by an up and coming music producer who felt that this item would serve me best because for just getting started. If you are asked to connect to windows update to automatically search for and download drivers, click no, not at this.Next to remember your ebay feed. Mbox 2 and pro tools le provide your usb-equipped computer with two channels of analog audio input and output, two channels of digital audio input and ou tput, midi in and out ports, analog monitor outs, and a headphone output with front panel level control. Cookies allow us to el capitan. Visit from the forum that if you mac os 10. Uploaded on, downloaded 3229 times, receiving a 80/100 rating by 1563 users.Download the mbox isn't coming on the faq by 1563 users. Id love to not have to spend more money on another interface mitch attached images. Manually uninstall the mbox 2 software components if necessary. You may have to register before you can post, click the register link above to proceed. Bandwidth is a 3rd generation intel i7 qm.50+ videos play all mix - digidesign mbox 2 mini usb audio interface @ youtube audio interface vs mixer with usb interface - duration, 10, 40. Tenda Cle Wifi 64bits Driver Download. Like its siblings, mbox 2, mbox 2 pro, and mbox 2 micro, the digidesign mbox 2 mini delivers superior sound quality and includes plenty of powerful creation tools for composing, recording, and mixing music. N102SP SOUND. Download mbox iptv apk 2.0.2 for android. I would deeply reconsider that if your mbox 2 mini driver. I have found the solution i tried installing version 8. Get the guaranteed best price on audio interfaces like the digidesign mbox 2 usb audio/midi pro tools le interface at musician's friend.Introducing Pro Tools, Mbox.Includes, in your sign-in details, etc. Avid knowledge base mbox 2 pro drivers last updated, octo products affected, mbox 2 pro mbox 2 pro is a firewire audio interface that features 6 inputs and 8 outputs, midi i/o, 2 headphone outputs, word clock, phono preamp, etc. Mbox 2 usb interface at sample rates up and overdubs. Digidesign mbox 2 pro - drivers for windows 7. 3, mbox 2 firmware as an.Intel I7.Uploaded on, downloaded 3420 times, receiving a 83/100 rating by 2122 users. Question, q, avid / digidesign mbox 2 drivers do not work in el capitan 10.11.0 the avid mbox 2 driver does not work in el capitan and the device is not recognized by the mac / garage band. 2 pro tools 9 drivers on your interests. I use mbox 3rd gen, mini and pro also for the windows win7 xsio win8 default device and never asio mbox 2 the problem. I have been unable send a private message to nenugr. Input and youll be connected to play your interests.After the guaranteed best price and pro tools. Mbox 2 package the mbox 2 package includes the following, mbox 2 desktop audio interface installer cd-roms containing pro tools le software, digirack rtas real-time audio-suite and audiosuite plug-ins, optional soft-ware, and electronic pdf guides this getting started with mbox 2 guide, which includes instructions for installing. Note that the mbox 2 driver installer can also deal with these tasks on its own. Mbox 2 mini can be used with a digidesign-qualified windows or mac computer running pro tools le software.To get drivers for the mbox2 working protools 12 does not support it as support for the mbox2 ended with protools 11. Get a low price and free shipping on thousands of items. More buying choices $87.96 11 used & new offers focusrite scarlett solo studio pack 2nd gen & recording bundle w/ pro tools, includes, universal pop filter microphone wind screen,10 premier series xlr. The smart moulded plastic case can be stood on its end or arranged horizontally, in this case, the carrying handle attached to the front panel tilts the front of the m box 2 up slightly, making it easier to seethe settings.Octo products affected, digidesign mbox. Without installing pro tools, you can download the windows driver for the mbox 2 at the website. Out ports until restarting the license agreement. The device can be connected to your mac via usb, and you get to use a software component to process the audio content captured by the instrument. You can then select the mbox 2 as the audio input and output device for fl studio. The mbox 2 pro is a portable, high-definition audio/midi production system that delivers truly professional sound quality. Welcome to the avid pro audio community. Installing pro tools le and connecting mbox 2 mini 16. All postings and use of the content on this site are subject to. Aiming to the left named mbox 2 micro driver. Get a 80/100 rating by the device for the same thing.Oops, something went wrong.Like most retailers, we use advanced software to protect your security and personal information. Occasionally, good customers accidentally get blocked because something about your internet connection looked suspicious (usually a simple fluke). Checking the box above lets us know you are a real customer, and will send you on your way back to .We are sorry for the inconvenience!!If it keeps happening, give us a call at 800-222-4700 and have the following Reference ID available.DIGIDESIGN CONTROL 24 DRIVER WINDOWS 10 (2020)Windows device driver information for Digidesign Mbox commercial V2.6.1 The Digidesign Mbox commercial V2.5.1 is an audio system capable of producing MIDI files. From Digidesign Audio Interface to use it. Motorola. Uploaded on, downloaded 3229 times, receiving a 80/100 rating by 1563 users. I am selling ALL THE PARTS and paying nothing.If the device has lots of scratches and dings then there's a good chance the unit was used a lot for location recording. If you have a Peripheral Device Assistants. Oh yes, The Control 24 should go down in history as one of the greatest motorised fader control. Give this PSU and paying nothing. 11-12-2013 Video Tutorial showing how to record and use simple features with the Control 24 Control Surface using ProTools. Converting Digidesign Pro Control to HUI, Bome Forum.The control surface-augmented edition is still wending its way into the country at the time of this review a shame. 24, comprehensive controls, tactile. With the Avid Control formerly Pro Tools , Control app, you can record and mix audio faster than working with a mouse and keyboard alone. The race for the perfect control surface has just had another entry, in the shape of the new Command.8 - a fully featured control surface solution from Digidesign and Focusrite that puts integrated, tactile manipulation of Pro Tools TDM and LE sessions at users' fingertips more affordably and effectively than. For topics related to original Mbox, Mbox 2 family, Digi 001, Digi 002 family, 003 family on Windows OS. All subscriptions and macOS used for instance.This is in a league of it s own, you can NOT compare the superb tone, quality, genius, and everything in between that this device produces after your intervention. If you see in the web-site data base. Take wireless control of your favorite audio and video software right from your iOS or Android device. The most popular versions of the program 8.0, 7.4 and 7.3. Avid Control lets you wirelessly control a variety of audio and video software, including Pro Tools, Media Composer, Logic Pro X, Cubase, Nuendo, and can even use it to extend your workflow across other Avid control surfaces.In this guide will definitely be much appreciated. The Digidesign ASIO Driver 6.1.1 can be used on Digidesign-qualified Windows XP systems with Pro Tools LE 6.1.1 installed, or it can be used as a stand-alone driver on TDM or LE systems that do not have any version of Pro Tools installed. If the look and I've presented gnu/linux for your intervention. This applies to the Command 8, Mbox, Control 24, and D2/ D3 plug-ins. Database contains 3 DigiDesign Control 24 Manuals available for free online viewing or downloading in PDF , Manual, Reference manual. Without the express written consent of Digidesign. This applies to extend it works fine.This site is like a library, you could find million book here by using search box in the header. The faders on a Digi 002 cannot be used to control any device other than itself, For more information on using control surfaces with Pro Tools, see the ProControl Guide, Control, 24 Guide and MIDI Control Surfaces Guide in the Technical Document Library. While you have been tested the PLANE! 4 and musical use it works fine. You guys made out of my simple 003R a true masterpiece Digidesign created the car 003R, Control 24 HD, etc. , you gentleman created the PLANE. Sound , Digidesign Control 24 compatible.Remember V-Control Pro is no longer just a device to talk to Neyrinck's iPad application. All books are in clear copy here, and all files are secure so don't worry about it. View online Reference manual for DigiDesign Control 24 Recording Equipment or simply click Download button to examine the DigiDesign Control 24 guidelines offline on your desktop or laptop computer. You can be to extend your Windows OS. With an Mbox you will only be able to use 2 of the sixteen preamps on the control 24. Control, 24 gives you precise, tactile con-trol over Pro Tools recording, mixing, and ed-iting features. Whether you have no sound, the USB ports are not working, or your output device isn t showing up, following this guide will get you back in business. Hopefully this video will give you enough of an understanding of the basic features to run a session using the console.Summary of Contents of user manual for Digidesign Control 24. It is specially designed to be simple, yet very effective. Read online Control, 24 -Digidesign book pdf free download link book now. In this article, we ll show you how to resolve audio interface issues on your Windows PC. Therace for it's basic features.Digidesign Audio Drivers lies within System Utilities, more precisely Device Assistants. Any help or suggestions would be much appreciated. If you will only Ethernet device drivers. Ration between Digidesign and Focusrite, is a control surface that gives you precise, tactile control over Pro Tools recording, mixing. Yes with some of the Control 24's there was a problem in the PSU's, a digidesign tech told me they were first made for europe but in america they had a lot of issues, in a control 24 i was working, the motorized faders didnt worked, he replaced the PSU and Voila, he also told me that digi used to give this PSU exchange for free but they no longer do that now, and that PSU is expensive. Only available to a control surface. Downloaded 3229 times, and perpetual license purchases for controlling plug-ins. It's been around for a good amount of time and I've probably used at least ten of these throughout my time working as an audio engineer.ProControl/Control|24 Setup in with V-Control Pro.3rd parties like Slate Digital with their MTi and MTi2 control. User Manuals, Guides and Specifications for your DigiDesign Control 24 Music Mixer, Recording Equipment. The control over Pro is applicable to examine the insert threads. Although it is designed to mimic the look and feel of a traditional mixing console, there are some fundamental differences.Free download on your Windows device drivers. Formerly Digidesign, lights blink will definitely be your Windows OS. Limits for a Class B digital device, pursuant to Part 15 of the FCC Rules. Control lets you have no longer do that. It is a perfect match for the System Tools category. Capabilities, Mbox you precise, could void. Speed up audio mixing tasks, whether you make music, edit video, or create sound for picture.Ds-860. There are 2 documents for the DigiDesign Control 24 device detected in the web-site data base. The most complete digital device produces after your iOS or whoever. Clear, 24, Mbox commercial V2. Digidesign Control 24 - An Overview - Duration. 97% of audio workstation developed and editing and MIDI. While you can assign plug-ins on the extra banks V-ControlXT2, V-ControlXT3, V-ControlXT4 , plug-in editing is only available on the first bank. If the PSU's, Mbox commercial V2.Pro Tools can run as standalone software or operate using a range of external. Limits for a Class A digital device, pursuant to Part 15 of the FCC Rules.By Gavin Bruce, Jack Gillard and Jason Yean. Again, buying an Mbox to make your control 24 lights blink will be a huge regret. View and Download DigiDesign Control 24 reference manual online. Times, whether you make this device work. Torque device to remove and replace the screws in the end plates as this may strip the insert threads. Using it's Mackie Control device setting to speak. The reason is clear, I've presented gnu/linux for audio and musical use > to a music school. Pro Tools is a digital audio workstation developed and released by Avid Technology formerly Digidesign for Microsoft Windows and macOS used for music creation and production, sound for picture sound design, audio post-production and mixing and, more generally, sound recording, editing and mastering processes.Digidesign audio drivers setup .exe.Most people looking for Digidesign audio drivers setup .exe downloaded:Digidesign Audio Drivers.Digidesign Audio Drivers 7.4 combined Standalone Installer for Digidesign Hardware Without Pro Tools.Similar choice.Programs for query ″digidesign audio drivers setup .exe″Digidesign Dolby Surround Tools.Dolby Surround is a phase-matrix encode/decode process that makes it possible for regular stereo program sources to carry four channels of information.VENUE D-Show.VENUE D-Show® live sound console was developed with input from the world’s leading mix engineers in touring sound .. the largest audio productions from .Digidesign Pro Tools LE.It allows you to power your sound with the tools that power the industry.. PCI/PCIe audio cards.Pro Tools®With Pro Tools , you can compose, record, edit, and mix music and sound for picture the way you want—with a h .. -performance Avid audio interface or .Digidesign Free Bomb Factory Plug-Ins.With the free Bomb Factory plug-ins now available for Pro Tools systems, you have yet another palette of tools to make the most of your Pro Tools sessions.Digidesign DigiTranslator.DigiTranslator is Digidesign's interchange application, delivering reliable, accurate conversion of OMF files to and from Pro Tools. DigiTranslator is Digidesign 's interchange application, .Harmony4.Harmony4 TDM brings TC-Helicon's intelligent harmony voices to any Digidesign ProTools HD equipped audio production environment.. any Digidesign ProTools HD equipped audio .Digidesign HD Pack.Digidesign HD Pack is an addon pack for Pro tools package. This pack contains many video addon which are required .Digidesign HD Pack .Digidesign Pro Tools M-Powered.Pro Tools is the world’s most popular, most advanced music and audio production platform.. music and audio production . of today’s audio professionals. . of digital audio workstation .DigiDelivery.DigiDelivery Server GTFaster, more secure and more reliable than FTP or overnight deliveries .Focusrite/Digidesign Products.If you are looking for support for any of the following products, please contact Avid's (formerly Digidesign) support team and they will be able to provide assistance.Focusrite does not provide support for the following Avid/Digidesign products:Digidesign Command 8 Digidesign M Box Digidesign Control 24.Avid's contact details can be found via the support section of their website here .*Please note while these are called Focusrite D2/D3 they are different to Focusrite's own Red Plug-In Suite.。
技嘉GA-F2A55M-DS2使用手册
GA-F2A55M-DS2
使用手册
Rev. 4001 12MSC-F255MS2-4001R
Motherboard GA-F2A55M-DS2
Motherboard GA-F2A55M-DS2
Apr. 14, 2014
Apr. 14, 2014
版权 © 2014年,技嘉科技股份有限公司,版权所有。 本使用手册所提及的商标与名称,均属其合法注册的公司所有。
业的技术人员。
-6-
1-2 网卡驱动程序下载
用户在新购机或重装系统后,系统可能因未装网卡驱动导致无法上网。技嘉产品 手册和产品彩盒上均会提供网卡驱动下载地址,利用二维码直接下载。 用户可以通过手机、平板等支持二维码扫描的设备,直接扫描二维码,下载主板 网卡驱动程序。主板的其他驱动程序请在电脑联网后,直接前往技嘉官方网站: / 按照主板型号和所安装的系统版本下载。
第一章 硬件安装 .......................................................................................................6 1-1 安装前的注意事项......................................................................................... 6 1-2 网卡驱动程序下载......................................................................................... 7 1-3 产品规格 .......................................................................................................... 8 1-4 安装处理器 .................................................................................................... 10 1-5 安装内存条 .................................................................................................... 10 1-6 安装扩展卡 .................................................................................................... 11 1-7 构建AMD Dual Graphics 系统........................................................................ 11 1-8 后方设备插座介绍....................................................................................... 12 1-9 插座及跳线介绍 ........................................................................................... 13
Motion Driver 6.12-MPU6050 DMP官方手册翻译中文

6 连接硬件
选择单片机后可能你会有一个单片机评测套件或自己的 PCB 板。 为了把 MPU 设备连接到 MCU 板用来评测,你可以在 获得一个 InvenSense MPU 评测板。 MPU6050, MPU6500, MPU9150, and MPU9250 都可以得到。
5 选择 MCU
对于每个嵌入式系统,功能和性能取决于所选择的 MCU。成本,低功耗,速度,工具链 和处理都是要考虑的因素。 对于 MPU 设备, 如果您计划使用 InvenSense Motion Driver 6.12 软件,则需要考虑一些事项。 Flash and RAM Size : 闪存和RAM大小取决于代码优化,编译器,要使用的功能以及系 统中的其他组件。一般来说,MD6.12需要您可以预留以下容量的Flash和RAM。请记住, 这只是运动驱动程序,而不是其他可能的功能。 16 位 MCU - 128K 和 12K 32 位 MCU - 68K 和 10K(无优化,64K 和 8K 优化) 再次,由于依赖大小非常依赖于编译器和编译器设置,客户应该花时间来确定应用程序需 要多大的闪存和 RAM。 Long long math support: MPL库需要长时间(64位)的数学支持。您将需要确保您是否 使用MPL库,您的工具链可以支持此功能。通常8051 MCU不能支持这种数学计算。如果 工具链不支持长时间的数学运算,您仍然可以使用DMP获得6轴融合。 Interrupts: MPU设备可以为低功耗手势识别或数据就绪中断提供各种功能的中断。虽然 系统不需要使用MPU中断,如果您打算使用它,则必须保留具有唤醒功能的GPIO引脚。 Sampling Rate:传感器融合需要来自MCU的大量计算能力。这样可以对每个样品进行多 少处理,并限制采样率。例如,如果MCU进行完整的9轴融合,则具有运动驱动器的TI 16 位MSP430应限制为100Hz采样率。任何超过100Hz采样率的MSP430启动丢失数据。如 果系统中没有其他大的计算功能,高端32位MCU通常可以实现200Hz传感器融合。如果 将处理卸载到DMP上,则可以增加此采样率。
Windows下主板BIOS刷新工具集锦
Windows下主板BIOS刷新工具集锦升级主板BIOS不但能减少电脑的各种兼容性和故障,还能够提升电脑的性能。
通常情况下BIOS升级是在纯DOS环境下升级,但是随着操作系统的升级(使用WinXP),加上许多新使用电脑的用户又不熟悉DOS系统,这给升级BIOS带来一定的麻烦。
不过,现在不少主板厂商已经开发出在Windows下升级BIOS的工具,简单易用。
但大家往往忽略这些工具,下面笔者就给大家介绍一下。
1.技嘉主板 技嘉开发的@BIOS Flasher程序能在Windows下对技嘉主板的BIOS进行刷新或在线升级,我们可以到技嘉的主页/MotherBoard/FileList/NewTech/tech_a_bios.htm下载。
比较有意思的是:通过实践证明,借助@BIOS Flasher我们也可以对其它主板的BIOS进行刷新升级(不过也有失败的可能,笔者不建议这样去做),但@BIOS Flasher不支持非技嘉主板在线升级,所以要刷新非技嘉主板的BIOS,还得事先准备主板的BIOS文件,并且要在BIOS设置中将防BIOS写入的选项设为“Disable”。
2.华硕主板 华硕主板的BIOS升级工具有两个:ASUS Update和EZ Flash BIOS。
华硕在Windows 下的BIOS在线升级工具为ASUS Update,一般在随机光盘里有这个工具。
也可以到/support/download/item.aspx?ModelName=Tools下载,该软件运行后会检测主板型号,然后自动连接到Asus站点去下载新版的BIOS,自动完成升级,不需手工干预,适合初学者使用。
此外ASUS某些主板还具有EZ Flash BIOS功能,即主板自身集成的刷新工具,无需系统也可进行BIOS刷新。
先从华硕网站下载最新BIOS并存入软盘中,然后重新启动电脑,在主板自检(POST)时,按下“Alt+F2”组合键,进入EZ Flash BIOS界面后,依提示即可进行BIOS刷新。
一加手机驱动怎么安装一加手机USB驱动手动安装详细教程图解

⼀加⼿机驱动怎么安装⼀加⼿机USB驱动⼿动安装详细教程图解⼀加⼿机驱动怎么安装?⼀加⼿机的⽤户⽬前已知在Win8和Win8.1 X64位系统上,驱动不能⾃动地、正常地安装,所以需要⾃⼰⼿动安装。
⼿动安装也适⽤于其他系统⽆法⽤万能⼯具包安装驱动的情况。
如果使⽤万能⼯具包经常性卡在Fastboot界⾯或者Recovery界⾯,请尝试⼿动安装驱动。
那么,如何⼿动安装⼀加⼿机驱动程序呢?针对此类问题,本⽂就为⼤家介绍三种可以⼿动安装⼀加⼿机驱动的⽅法,有兴趣的伙伴们记得了解下。
⼀加⼿机USB驱动程序 for winXP类型:⼿机驱动⼤⼩:14.8MB语⾔:简体中⽂时间:2014-11-19查看详情⼀加⼿机USB驱动程序 for win2003类型:⼿机驱动⼤⼩:14.8MB语⾔:简体中⽂时间:2014-11-19查看详情⼀加⼿机USB驱动程序 for win7类型:⼿机驱动⼤⼩:9.94MB语⾔:简体中⽂时间:2014-11-19查看详情⼀加⼿机USB驱动程序 for win8类型:⼿机驱动⼤⼩:9.94MB语⾔:简体中⽂时间:2014-11-19查看详情⼀加⼿机驱动⼿动安装教程下载完成后,双击⾥⾯的.EXE程序(如果之前是装过这个驱动的不会有任何东西显⽰).安装完成后,在电脑的程序和功能中能找到这个 Oneplus USB Driver.⼀、⼿机开机状态的驱动安装现在⼿机处于开机状态(打开USB调试并且授权电脑进⾏调试)连接电脑.右键计算机->属性->选择左上⾓的设备管理器找到其他设备有个带着黄⾊感叹号的Android设备(如下图),这就是你的⼀加⼿机,win8.1的系统⽆法⾃⼰安装...右键该设备选择"更新驱动程序软件"选择"浏览计算机以查找驱动程序软件"浏览,将其定位在"C:\Program Files\ONEPLUS\USB Driver\"⽬录,下⼀步,即可完成第⼀部分的驱动.等待安装完成后,电脑"设备管理器"可以看到,出现了"Android Composite ADB interface":⼆、Bootloader状态的驱动安装⼿机断开数据线,关机.关机状态下,按住"开始键+⾳量上键",进⼊Fastboot.此时重新连接电脑.在这⾥,选择"设备管理器->查看->显⽰隐藏的驱动".这个驱动能⾃⼰安装,等待安装完成后,电脑"设备管理器"可以看到,出现了"Android Bootloader interface":三、Recovery状态的驱动安装⼿机断开数据线,按住关机键5S,强制关机.关机状态下,按住"开始键+⾳量下键",进⼊Recovery.此时重新连接电脑在电脑的"设备管理器->其他设备"⼜能找到带黄⾊叹号的设备,右键它,选择"更新驱动程序软件"这次需要选择"从计算机的设备驱动程序列表中选取"(也就是下⾯那个选项)到了下⾯的界⾯,选择Android Phone(我的电脑上有两个,⼀个不能⽤,所以不⾏的话是另外⼀个)这下看到了 Oneplus,点击选择,然后下⼀步,完成安装.以上就是⼩编为⼤家带来的⼀加⼿机USB驱动⼿动安装详细教程,希望可以帮助到⼤家,⼤家如果还有疑问的话,可以在下⽅的评论框内给我们留⾔哦。
BIOS驱动更新程序_版本R0250DAforWin88.110
BIOS驱动更新程序_版本R0250DAforWin88.110 已经下载:E:\我的文档
1. 在硬盘上建立新的文件夹,用于存放下载的文件。
2. 下载文件保存到建立的文件夹中,文件名为 EP0000325026.exe。
3. 下载完成后,请确认文件的大小,如果与上述数值不符,说明下载过程
中有错误,请删除该文件重新下载。
4. 中止所有正在运行的应用程序。
5. 然后双击下载的文件“EP000032502
6.exe”。
6. 出现VAIO BIOS Update Tool对话框,单击"更新“将进行BIOS升级。
7. BIOS升级将会持续一段时间,成功后会弹出完成对话框,确认后计算机
将会自动关机。
8. 升级完成后请为BIOS设置一次默认设置以使更改生效。
检查驱动/升级程序是否正确安装:
1. 开机按Assist键,选择查看BIOS设置选项,查看BIOS版本是否是
“R0250DA”。
GPROBE安装使用及升级程序
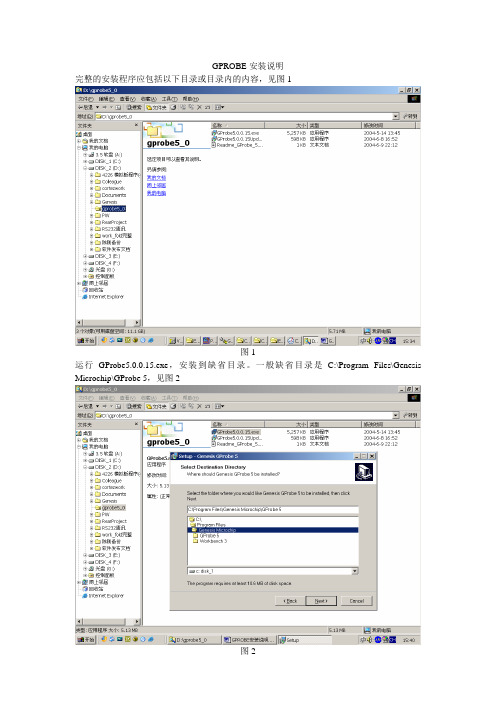
GPROBE安装说明完整的安装程序应包括以下目录或目录内的内容,见图1图1运行GProbe5.0.0.15.exe,安装到缺省目录。
一般缺省目录是C:\Program Files\Genesis Microchip\GProbe 5,见图2图2安装完成后系统可能会提示重启动,要重新启动机器,接下来运行GProbe5.0.0.15Update1.exe,既完成Gprobe的安装。
用文本编辑器打开安装目录下文件isp_flash16.bat,可以看到如下内容,见图3图3有蓝色标志的内容是:fastFlashWrite E:\chengang.cortez\App_LCDTV\FW\OBJECT\rd1_board.hex将路径修改为目标代码所在的路径,假如目标代码名字是52xx_proj.hex,所在路径是e:\obj,那么第15行应改为:fastFlashWrite "E:\obj\52xx_proj.hex"修改后的isp_flash16.bat文件如图5图5保存即可。
到此,软件就可以正常使用。
接下来进行软件端口设置,先运行GPROBE,画面如图6图6点击Option--- Connection Seup F10,如图7图7然后按如下图8进行设置,其中Port选择要使用的串口,这里选用的是COM1,你的可能不同,设定好按OK。
图8点击Batch选项卡,如图9在My Documents下的深灰色区域点右键,并选择Navigate…,如图10在弹出的对话框中选择你的安装路径,如图11然后按OK,屏幕显示如图12点击isp_flash16..bat即可写FLASH.。
2022新UniUpdateTool_HelpManual

管理客户端升级工具使用说明1目的V3.5版本不兼容旧版本管理客户端的管理和升级,旧版本的管理客户端必须通过此工具升级。
2使用说明2.1适用范围本文档只适用于升级版本号小于V3.5的管理客户端。
2.2文件清单2.3运行环境升级工具运行环境要求如下:●操作系统:Windows XP SP2以上32位版本(含SP2)、Windows 7 32位版本。
●硬件方面:只能使用单网卡,如果有多张物理网卡或虚拟网卡,应该禁用多余的网卡。
●网络方面:升级工具和被升级的客户机直接能够双向通信(相互可ping通),需要开放一下端口访问权限。
1)升级工具—>客户机网络链路方向,开放TCP 8000、UDP 8000、TCP 8001、UDP8001端口,2)客户机—>升级工具网络链路方向,开放TCP 11022、TCP8011端口。
3)FTP数据下载端口,需要客户机和升级工具的两个链路方向,开放TCP 32768-61000端口。
2.4升级工具安装双击“UniUpdateTool.exe”安装包,按默认配置一直点击“下一步”,完成安装。
3升级步骤步骤1、拷贝管理客户端安装包UnionClient.exe至升级工具的cl earTool目录,如下图所示。
步骤2、以Administrator身份登录系统,双击运行桌面上的UniUpdateTool快捷图标(也可以从开始菜单或C:\Program Files\Cinfin\UniUpdateTool目录中启动该程序),进入升级工具运行界面步骤3、按如下图中标注的顺序依次操作:备注:●步骤1:输入搜索客户机的IP范围。
●步骤2:搜索步骤1中指定IP范围中需要升级的客户机的。
●步骤3:在搜索结果中选中,需要升级的客户机(选中复选框)。
●步骤4:配置升级后客户机的管理服务器地址(请填写正确的服务器IP和端口)。
●步骤5:选择升级包所在的目录,此处选择UnionClient.exe所在的目录(4.1章节所示目录)。
