康乔兰科嵌入式下吸油烟机
海尔 CXW-219-C2900U1 侧吸式二速电子触摸按键吸油烟机 使用说明书

使用说明书家用吸油烟机·使用前请仔细阅读本说明书·本公司保留说明书解释权·产品外观请以实物为准·阅后请与发票一并妥善保存·如遇产品技术或软件升级,恕不另行通知智能家电操控智慧场景定制智家商城购物家电报装报修型号CXW-219-EC900U1 CXW-219-EC902U1CXW-219-C2900U1GB/T 17713GB 29539吸油烟机吸油烟机能效限定值及能效等级家用和类似用途电器的安全 第1部分:通用要求 家用和类似用途电器的安全 吸油烟机的特殊要求 家用和类似用途电器噪声限值GB 4706.1 GB 4706.28 GB 19606该产品执行国家标准:目录目录产品部件介绍技术数据与装箱单安装指导安全注意事项456产品操作说明8清洁保养1013保修说明故障排除及处理11告用户环境书123安全注意事项标志解释技术参数与装箱单2. 所示噪音值为A 计权声功率级,声压级为A 计权声功率级减14分贝;3. 风量、风压、最大静压:实测值与明示值的允差不超过明示值的-10%;4.瞬时气味降低度符合国家标准要求。
注: 1. 爆炒状态下瞬时风量可达 20 m 3/min ,最大静压值可达420Pa (C2900U1);装箱单本产品因不断研究改进,保留吸油烟机各部件的变更权利,恕不另行通知,敬请谅解。
注:出厂不配备内装饰罩,内装饰罩需单独购买爆炒状态下瞬时风量可达 21 m 3/min ,最大静压值可达420Pa (EC900U1/EC902U1);产品部件介绍主要零部件名称(17)灯板电脑板下玻璃(18)电源盒(20)(21)加热模块*20部件仅C2900U1*21部件仅EC902U1*2部件仅C2900U1上玻璃中玻璃动态防油屏油网灯罩外装饰罩123456789101112131415161718192021工具准备及安装条件3.安装吸油烟机的位置应具备以下条件安装步骤①吸油烟机使用的房间应该通风良好,无易燃,易爆或腐蚀性材料或物品;②安装吸油烟机的墙面体应有足够的强度,且表面平直;1.安装吸油烟机应具备以下工具:冲击电钻、冲击电钻头、米尺、水平尺、玻璃刀、十字花螺丝刀、平口螺丝刀、人字形螺丝刀、内六角螺丝刀、万用表、测电笔、尖嘴钳、电源测试仪(相位仪)、活扳手、美工刀、胶枪。
ELECTROLUX PURE A9-40 PURE A9-60 空气净化器 用户手册说明书

用户指导手册PA91-604GYPA91-404GYPA91-404DG设备:A.控制面板B.出风口C.空气质量灯D.空气质量传感器E.织物手柄F.多层过滤器G.进气门H.进气口I.产品手柄控制面板:J.装载指示灯K.手动模式指示灯L.WiFi指示灯M.童锁指示灯N.过滤器更换指示灯O.离子发生器指示灯P.编程指示灯Q.风扇速度滑动条R.智能模式指示灯S.模式键T.开/关键PURE A9-40/PURE A9-60 空气净化器说明功能可能会随新应用程序的发布而增加或更新。
2CN4 5安全说明本用户手册提供了适用于您的型号的具体操作说明。
请仅按照本用户手册中的说明使用本机。
这些说明并不意味着涵盖可能发生的每种可能的条件和情况。
安装、操作和维护任何设备时,必须遵守常识和注意事项。
警告!避免火灾或触电。
请勿使用延长线或适配器插头。
请勿从电源线上取下任何插脚。
本机可在50 Hz 或60 Hz 电源下使用,无需任何更改。
在任何情况下,切勿切断、拆除或绕过接地插脚(参见第5页图24)。
英标版,另见第5页图25。
请勿在本机或任何其他设备附近存放或使用汽油或其他易燃蒸气和液体。
请阅读有关可燃性和其他警告的产品标签。
请勿让水或任何其他液体或易燃洗涤剂进入本机,以免触电和/或引发火灾。
拆卸过滤器时请勿触摸风扇叶片。
儿童和弱势群体的安全警告!窒息、受伤或永久伤残风险。
8岁及以上儿童以及体力、感官或智力受损、或缺乏相关经验和知识的人员使用本设备时,应处于监护之下,或在安全使用本设备方面给予相应指导,了解其中所存在的危险。
儿童不得将本品当作玩具使用。
除非处于监护之下,否则不得由儿童进行清洁和用户维护。
除非处于持续监护之下,否则三岁以下儿童不得靠近本设备。
保证儿童远离所有包装。
电气信息警告!避免火灾或触电。
如果您不确定插座是否已通过延时保险丝或断路器充分接地或进行保护,则请由合格的电工根据国家电气规范和适用的当地法规和条例安装合适的插座。
康宝压深型吸油烟机(B版)安装使用说明书

CXW -170系列(B版)一、警告内容---------------------二、附件清单----------------------三、主要技术参数------------------四、主要零、部件名称---------------五、功能与特点--------------------六、安装方法----------------------七、使用方法----------------------八、常见故障的诊断与处理-----------九、注意事项----------------------十、维护与保养---------------------十一、电气原理图-------------------1 2 34 5 67 1 2 3 6感谢您选购康宝CXW-170系列吸油烟机,为了您的安全和正确操作本产品,在安装和使用本机前,请仔细阅读本使用说明书,它会详细向您介绍本机的功能与特点、安装使用及维护方面的内容,阅后与购机发票一并保存,以备查阅.CXW-170系列 橡胶脚型号序号45123使用说明书、服务卡、安装卡、维修站名册附 件 名 称数量备注1套1套1件2只 集油杯 止回阀组件 钢膨胀管M6×60警告1.吸油烟机排出的气体不应排到用于排出燃烧煤气或其他 燃料的烟雾使用的热烟道中;2.禁止炉火直接烘烤吸油烟机;3.吸油烟机在炉灶消耗煤气或其他燃料时使用,房间必须通 风良好;4.如果不按说明书规定的方法清洗,吸油烟机有起火的危险.2只图2、康宝牌CXW-170系列吸油烟机安装尺寸示意图1、外观美:线条流畅、色彩和谐;2、吸力强:采用大功率电机与千叶轮的完美配合,吸力强劲;3、低噪声:风道的气流系统设计合理及采用低噪声滚珠轴承电机,叶 轮经过动平衡严格检验,使吸油烟机的运转更平稳,噪声更低;4、使用安全可靠:采用高品质的琴键机电开关,使用安全可靠;5、易清洗:结构简单,拆洗容易。
养老服务中心厨房设备及排烟系统购置采购清单
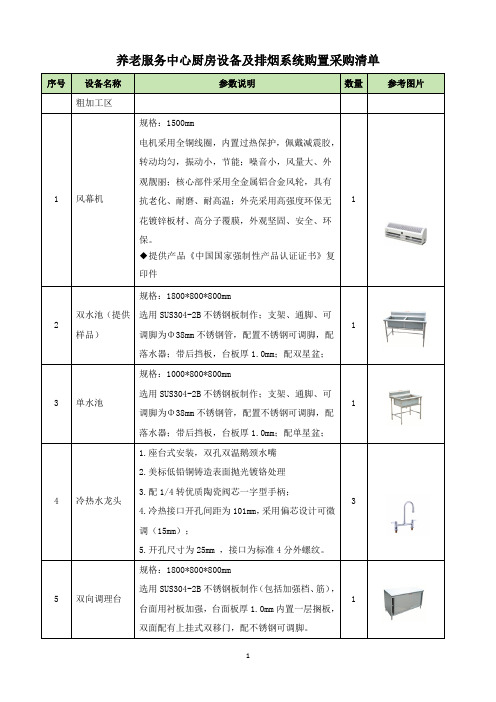
养老服务中心厨房设备及排烟系统购置采购清单序号设备名称参数说明数量参考图片粗加工区1 风幕机规格:1500mm电机采用全铜线圈,内置过热保护,佩戴减震胶,转动均匀,振动小,节能;噪音小,风量大、外观靓丽;核心部件采用全金属铝合金风轮,具有抗老化、耐磨、耐高温;外壳采用高强度环保无花镀锌板材、高分子覆膜,外观坚固、安全、环保。
◆提供产品《中国国家强制性产品认证证书》复印件12双水池(提供样品)规格:1800*800*800mm选用SUS304-2B不锈钢板制作;支架、通脚、可调脚为Φ38mm不锈钢管,配置不锈钢可调脚,配落水器;带后挡板,台板厚1.0mm;配双星盆;13 单水池规格:1000*800*800mm选用SUS304-2B不锈钢板制作;支架、通脚、可调脚为Φ38mm不锈钢管,配置不锈钢可调脚,配落水器;带后挡板,台板厚1.0mm;配单星盆;14 冷热水龙头1.座台式安装,双孔双温鹅颈水嘴2.美标低铅铜铸造表面抛光镀铬处理3.配1/4转优质陶瓷阀芯一字型手柄;4.冷热接口开孔间距为101mm,采用偏芯设计可微调(15mm);5.开孔尺寸为25mm ,接口为标准4分外螺纹。
35 双向调理台规格:1800*800*800mm选用SUS304-2B不锈钢板制作(包括加强档、筋),台面用衬板加强,台面板厚1.0mm内置一层搁板,双面配有上挂式双移门,配不锈钢可调脚。
16 四层货架规格:1200*500*1800mm选用SUS304-2B不锈钢制作,搁档采用约0.7mm不锈钢复边成条状,配置不锈钢可调脚,不锈钢封口盖加厚型圆管制作;格栅型。
17 四门冰箱SIZE:约 1220*750*1960mm采用进口压缩机-高效节能;全铜管制冷系统-导热好,耐用;R134a制冷剂、环戊烷发泡剂-环保;电子式控制器-操作方便,精度高;自闭门结构-密封好,操作方便;一体发泡技术-坚固耐用;PE网架、环保不锈锅-符合食品卫生要求;噪音低-安静舒适;脚轮底脚可互换,平台台面整体发泡,可配挡水板-方便灵活◆产品具有自动消杀功能,经检测冷柜自动消杀后,大肠杆菌和金黄色葡萄球菌绝对灭杀值>3,(提供具有CMA资质检则机构出具的检测报告复印件;18 灭蝇灯规格:约370*220*180mm诱蚊方式: UVA紫光灯灭蚊方式:粘捕式覆盖面积:50-90㎡机身材质:全新ABS 说明:专业诱蚊灯管;符合标准的粘捕纸;时尚、简约型设计;广泛适用家居场所、商业场所和食品厂、餐饮类。
科蓝油烟净化器配置表
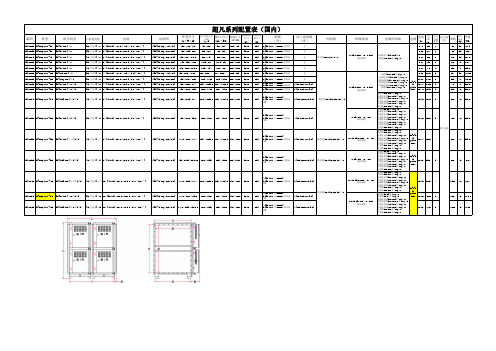
BS前置电箱
电场
[2K,含电器]×1 1×[2K(11B),487.5×483.4×240“51孔”] [3K,含电器]×1 1×[3K(11B),600.5×581.3×240“88孔”] [4K,含电器]×1 1×[4K(11B),657.0×642.0×240“110孔”] [3K,含电器]×1 2×[3K(11B),600.5×581.3×240“88孔”] [4K,含电器]×1 2×[4K(11B),657.0×642.0×240“110孔”] [2K,含电源]×2 4×[2K(11B),487.5×483.4×240]“51孔”] [3K,含电器]×2 4×[3K(11B),600.5×581.3×240“88孔”] [4K,含电器]×2 4×[4K(11B),657.0×642.0×240“110孔”] [3K,含电器]×2 6×[3K(11B),600.5×581.3×240“88孔”]
4*[BS(11C),长658mm] 253 2*[BS(11C),长658mm,带排油
口]
4*[BS(11C),长658mm] 253 2*[BS(11C),长658mm,带排油
口]
法兰连接板 (件)
控制箱
无
无
无
(外控箱162*100*40)*1
无
无
无
无
2*[8K,1267*88*3.0] 2*[9K,1726*88*3.0]
口1*][BS(11C),长658mm]
253 1*[BS(11C),长658mm,带排油
口1*][BS(11C),长658mm]
253 1*[BS(11C),长658mm,带排油
口1*][BS(11C),长658mm]
253 1*[BS(11C),长658mm,带排油
解放家庭“煮”妇-太太J021烟机大揭秘
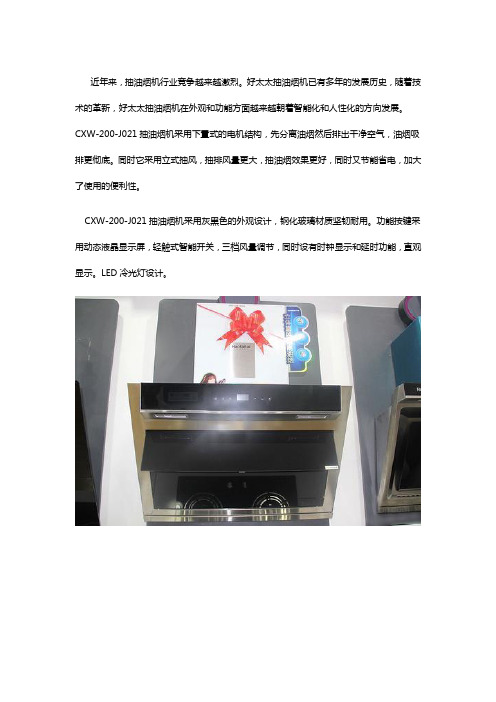
近年来,抽油烟机行业竞争越来越激烈。
好太太抽油烟机已有多年的发展历史,随着技术的革新,好太太抽油烟机在外观和功能方面越来越朝着智能化和人性化的方向发展。
CXW-200-J021抽油烟机采用下置式的电机结构,先分离油烟然后排出干净空气,油烟吸排更彻底。
同时它采用立式抽风,抽排风量更大,抽油烟效果更好,同时又节能省电,加大了使用的便利性。
CXW-200-J021抽油烟机采用灰黑色的外观设计,钢化玻璃材质坚韧耐用。
功能按键采用动态液晶显示屏,轻触式智能开关,三档风量调节,同时设有时钟显示和延时功能,直观显示。
LED冷光灯设计。
CXW-200-J021抽油烟机采用灵动玻璃大平面导油板设计,伸展式上开口进风通道,集中拢烟,将油烟全面吸进。
CXW-200-J021抽油烟机采用下置式的电机结构设计,先分离油烟然后排出干净空气。
同时采用立式抽风,同时又节能省电。
全铜制带温控的双滚珠轴承电机设计,运转起来电机的噪音更小,静享烹饪时光。
编辑点评:随着技术的革新,近年来,抽油烟机在外观和功能方面都有了突破式的发展,抽油烟的效果越来越好同时加大了使用的便利性。
CXW-200-J021抽油烟机,灵动玻璃大平面导油板,不沾油,易清洁,伸展式上开口的进风通道,集中拢烟,全面吸进油烟。
方太油烟机系列产品使用安装说明书

操作
警告 1. 防过猛过重操作按键; 2. 防灶具空烧; 3. 防通电拆卸和违嘱拆卸; 4. 防油杯油满外溢; 5. 防非专业人员拆检; 6. 禁止炉火直接烘烤油烟机。
使用方法 操Βιβλιοθήκη 界面描述产品信息型号
EMG9030
净重
76 lbs(34.5 Kg)
油网及蝶翼板中的油脂沉淀物可能着火,绝不 在此产品附近使用明火。请不要在使用固体燃 料(比如木头或煤)的加热设备附近安装此产 品。禁止有飘飞的火花。 请避免在烟机下方使用会产生火焰的食品。 为降低灶台油火风险: 1. 绝不使灶台表面的器具在无人看管下高档位
运行。溢锅造成冒烟和可能起火的油脂外溢, 请在低档或中档设置下缓慢加热油脂。 2. 烹饪时请总是开启烟机。 3. 请清洁油烟机,叶轮、滤网上或在排烟管道 里不应积油。 4. 请使用合适尺寸的锅具。请总是使用与灶台 表面的器具尺寸吻合的炊具。 为降低灶烤一体机上方油火对人身伤害的危 险,请遵守以下说明: 1. 用合身的锅盖、烤板或金属托盘扑灭火焰, 然后关闭灶具。注意谨防烫伤。如果火焰未 立即熄灭,请疏散并报火警。 2. 油锅着火时,请立即关闭油烟机 ( 油烟机的 运行会助燃火势 )。立即采用有效的灭火措 施,如用金属封盖盖住明火、关闭燃气总阀、 使易燃物远离明火等。 3. 绝不拿起着火的锅具,您可能被烫伤。 4. 请勿用水,包括湿抹布或毛巾灭火,这样会 导致猛烈的蒸汽喷发。 仅在以下条件使用灭火器: 1. 当您上过基础的灭火器课程,并且已经知 道如何操作; 2. 当火较小并且控制在火源处; 3. 当您已打火警电话; 4. 当您背向出口时可救火。 人身伤害危险 此产品不适用于(包括儿童在内)身体、感知 或精神能力减弱或缺乏经验或知识的人群,除 非在对其安全负责的人监督或指导如何安全使 用此产品的情况下。孩童应受监管,确保其不 玩弄此产品。 油烟机可能有非常锋利的边,在进行安装、清 洁或修理时,谨防被油烟机内金属板快口等划 伤和擦伤。应佩戴合格的防护手套。 操作中可触及部分会变得很烫。绝不触摸变烫 的部分。保持儿童在安全距离以外。
侧吸式与顶吸式油烟机有什么区别?各有什么特点?

侧吸式与顶吸式油烟机有什么区别?各有什么特点?第一章侧吸式油烟机的旋流技术旋流是此品牌的一个技术概念,其三大核心技术包括:1、双曲面旋涡油烟分离技术:---接触面广烟机上下分离器中的滤板经特殊工艺加工制成,能高效净化油烟。
烟机启动后,经整流后的气流按照先慢后快(进风口风速将近3米/秒)的规律进入过滤器后,经两次双曲面旋流分离,在离心力的作用下,使其90.5%的油烟吸咐在分离器管壁上,进而自然随管壁流到下面的油杯里。
然后风机再进行三次分离,有效地使将较为清洁的空气排出或返回到厨房,这样就能产生足够高的油烟净化率,可达90.5%,机身内壁及风机几乎不积油。
上、下分离器可方便地取下来用普通的洗洁精随意清洗,任何家庭成员均能轻松胜任,无需花钱请专业人士来清洗,。
实现终身免拆洗。
由于风轮不积油,长期保持平衡状态。
故能达到电机自然寿命约15年。
同时保证排出的气体不至于污染室外环境,彻底改变了居家环境和室外空气质量,是真正环保型的烟机。
2、旋流整流技术(风洞整流技术):——更低安装此技术来源于航空航天先进特有的旋流空气动力学原理。
烟机启动后,根据此原理设计的离心式风机高速旋转,使不规则运动或旋转的气流成为均匀,平整,柔和的气流。
以保证吸风口可以足够近的靠近锅(保证足够高的抽吸油烟的能力),可使油、废气、异味一经产生即被吸走,吸排更彻底,甚至爆炒干辣椒也闻不到呛味,油烟吸净率达到99%,而进风也不至于扰动火焰。
同时保证了油烟在进入吸风口前不会旋转或扰动而使油烟中的废油甩到吸风口的周围而破坏厨房环境,充分体现环保。
3:、侧面进风:——吸得更干净上下分离器呈弧形分布,可组合气体引力场。
下分离器低位安装,离锅较近。
普通烟机在启动后,首先进入风口的是位于锅面上方左、右、前三个方向根本不需抽走的空气,然后才是最下方的油烟,因而其真正用于抽油烟的有效排风量不及原标准值的三分之一。
按市面上所标出的最大每分钟23个立方的的烟机来看,其有效排风量不到每分钟10个立方,而侧面进风设计可使烟机启动后产生的高速气流截流,使16.6个立方的排风量几乎全部用于吸油烟,可吸尽99%以上的油烟,使得整个厨房不再会有逃逸的油烟,还家庭洁净空间,您无需再为橱柜、墙壁因油烟污染而担心,是开放式厨房的理想选择。
gaggenau-al400122-al400192-吸油烟机-使用说明书-中文

Gaggenauzh使用说明和安装说明AL400122 AL400192吸油烟机zh 安全性2目录使用说明书1安全性................................................................... 22重要提示............................................................... 33避免材料损坏........................................................ 44环境保护和节约..................................................... 45操作模式............................................................... 46了解机器............................................................... 57首次使用前............................................................ 58操作基本知识........................................................ 59清洁和保养............................................................ 610处理故障............................................................... 811客户服务............................................................... 912处理旧机器 (913)安装说明书 (9)13.4安全安装 (12)1 安全性请注意以下安全注意事项。
Miele DA 6066 W C DA6086 W C 抽油烟机 使用与安装说明书
使用与安装说明书抽油烟机为避免意外或损坏电器,安装和首次使用之前请务必仔细阅读本使用与安装说明书。
zh-CN M.-Nr. 10639850目录______________________________________________________________________________________________________________________________________________注意事项与安全说明 (4)环境保护 (13)运行模式 (14)电器结构示意图 (15)操作 (17)开启烟机 (17)选择功率级别 (17)关闭烟机 (17)打开/关闭照明灯 (17)功率管理 (17)开启/关闭功率管理 (18)安全关机 (18)节能提示 (19)清洁与保养 (20)外壳 (20)有关玻璃表面的重要提示 (21)清洁滴漏槽 (21)滤油网 (21)活性炭过滤网 (24)处理活性炭过滤网 (24)售后服务/保修 (25)铭牌位置 (25)安装 (26)安装之前 (26)保护膜 (26)安装说明 (26)组装部件 (27)电器尺寸 (29)炉灶和抽油烟机之间的安全距离(S) (30)安装建议 (31)排气管道连接 (32)冷凝槽 (33)消音器 (33)2目录______________________________________________________________________________________________________________________________________________电气连接 (35)技术参数 (36)产品标准 (37)3注意事项与安全说明______________________________________________________________________________________________________________________________________________4注意事项与安全说明______________________________________________________________________________________________________________________________________________身体、感官精神障碍、或缺乏经验常识的人士,只可在有人看管时使用本电器。
除油烟机 安装及说明书
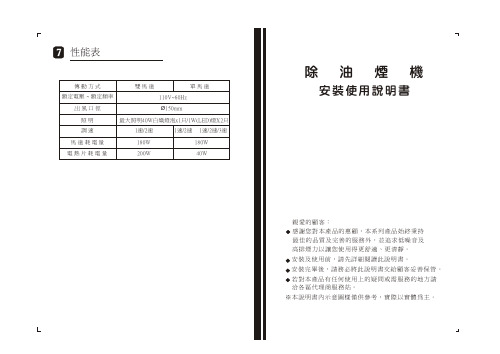
除 油 煙 機高排煙力以讓您使用得更舒適、更清靜。
安裝及使用前,請先詳細閱讀此說明書。
感謝您對本產品的惠顧,本系列產品始終秉持親愛的顧客:最佳的品質及完善的服務外,並追求低噪音及※本說明書內示意圖樣僅供參考,實際以實體為主。
安裝完畢後,請務必將此說明書交給顧客妥善保管。
若對本產品有任何使用上的疑問或需服務的地方請洽各區代理商服務站。
安裝使用說明書性能表傳 動 方 式 雙 馬 達 單 馬 達額定電壓出 風 口 徑 Ø150mm照 明 最大照明40W白熾燈泡x1只/1W(LED)燈X2只~ 額定頻率110V~60Hz調 速 1速/2速 1速/2速 1速/2速/3速 馬 達 耗 電 量 180W 180W 電 熱 片 耗 電 量 200W 40W二. 按裝施工說明.............P3四. 使用注意事項.............P5一. 按 裝 原 則...............P2 三. 使用方法.................P4七. 性能表..................P7五. 保 養.................P5六. 異常狀況之處理...........P6異常狀況之處理使用中發現異常狀況時,請將電源插頭拔掉,並就近洽經銷商或服務站或具專業資格人員至府上維修。
處理異常狀況時請將開關電源關掉。
異常狀況原 因 及 處 置 方 法電源線損壞請就近洽經銷商或服務站或具有專業資格人員至府上維修。
電源線規格:300V 0.75mm2*3c。
插頭規格:125V 7A 兩扁一圓插頭。
馬達不轉A. 查看開關或插頭接觸是否正常。
B. 查看燈泡是否會亮以確定電源是否正常。
C. 拆下保護網,用手轉動風葉,如轉不動則查看風葉是否 卡住。
若是,則請更換整組馬達。
D.如風葉用手輕動皆能運轉自如,則是電容器的問題:1.先查看電容器與馬達接線是否脫落。
2.若接線正常,就是電容器損壞,必須更換電容器。
HAUSLANE 厨房抽油烟机使用说明书

Table of ContentsSafety InformationSafety Information....................................Warranty Information...............................23Specifications............................................44Tools Needed...........................................4Preparation: What to do beforeinstallation.................................................1. Read This Manual...................................................2. Gather Your Tools..................................................3. Inspect the Unit.......................................................4. Ensure There is Proper Height Clearance...........5. Check Your Power Supply and Ducts..................6. Figure Out Ducting Requirements & InstallAdapter....................................................................7. Prepare the Cabinet (Soffit)...................................8. Find a Helper...........................................................Before installing your range hood, read the entire instruction manual. Installers, leave this manual with the homeowner.How to Use Your Range Hood................1. Testing the Unit.......................................................2. Uninstall the Range Hood’s Bottom Cover..........3. Jack Up the Hood...................................................4. Screw It Into Place...................................................5. Double-Check Installation & Remove Support...6. Check for Airtightness............................................7. Plug the Range Hood In.........................................8. Reinstall Bottom Cover & Baffle Filters.................9. Keep This Manual....................................................Basic Maintenance Instructions..............Maintaining the Baffle Filter Maintaining the Lighting Cleaning Your Range HoodWiring Diagram........................................Troubleshooting Tips..............................Contact ing the Front Control Panel (5)161514131212131313How to Install Your Range Hood (11)55555566111111111212121212Use this range hood only in the manner intended by the manufacturer. If you have the questions, contact Hauslane ******************************************.Before servicing or cleaning, switch power off at service panel and lock service panel to prevent power from being switched on accidentally. When the service disconnecting means cannot be locked, securely fasten a prominent warning device, such as a tag, to the service panel.Installation work and electrical wiring must be done byqualified personnel in accordance with all applicable codes and standards, including fire-rated construction codes and standards.Sufficient air is needed for proper combustion and exhaust-ing of gases through the flue (chimney) of fuel-burning equipment to prevent back drafting. Follow the heating equipment manufacturer's guidelines and safety standards such as those published by the National Fire Protection Association (NFPA), and the American Society for Heating, Refrigeration and Air Conditioning Engineers (ASHRAE), and the local code authorities.When cutting or drilling into wall or ceiling, do not damage electrical wiring and other hidden utilities.Ducted fans must always be vented to the outdoors.Do not use this unit with any solid-state speed control device.To reduce the risk of fire, use only steel ductwork.1.2.3.4.5.6.7.8.This unit must be grounded.9.1.2.3.4.5.Never leave surface units unattended at high settings. Boil overs cause smoking and greasy spillovers that may ignite.Heat oils slowly on low or medium settings.Always turn hood ON when cooking at high heat or when cooking flaming foods.Clean ventilating fans frequently. Grease should not be allowed to accumulate on fan or fie proper pan size. Always use cookware appropriate for the size of the surface element.TO REDUCE THE RISK OF FIRE, ELECTRICAL SHOCK, OR INJURY, OBSERVE THE FOLLOWING:TO REDUCE THE RISK OF A RANGE TOP GREASE FIRE:1.2.3.4.SMOTHER FLAMES with a close-fitting lid, cookie sheet or metal tray, then turn off the burner. BE CAREFUL TO PREVENT BURNS. IF THE FLAMES DO NOT GO OUT IMMEDIATELY, EVACUATE AND CALL THE FIRE DEPARTMENT.NEVER PICK UP A FLAMING PAN as you may be burned.DO NOT USE WATER, including wet dishcloths or towels. This could cause a violent steam e an extinguisher ONLY if:A. You own a Class ABC extinguisher and you know how to operate it.B. The fire is small and contained.EVENT OF A RANGE TOP GREASE FIRE, OBSERVE THE FOLLOWING*:Package Contents....................................Any defects or damage to light bulbsChange in color or finish due to chemical usageImproper installation not in accordance with the instructions Dents, bumps, and scratches incurred during shipping, handling, or installationDamage caused by failure to follow care and cleaningguidelines, including damage caused by the use of abrasive cleanersAlterations made to the unit by the purchaser or installer Damage caused by accidental impact, fire, flood, freezing, and normal wearBends and warping caused by forced connections, over-tightened fittings, and inadequate support during installationThis range hood is warranted to the original purchaser to be free of defects in material and workmanship for two (2) years from the date of purchase.Our obligation shall be limited to the repair or replacement of a unit (at our discretion) that may prove, by our sole examina-tion, to be defective under normal use and service during the warranty period. We may issue credit in the amount of the invoice value of the defective product (or a percentage of it according to use) in lieu of repair or replacement. Any failure of this product that is not traceable to a defect in material or workmanship is not covered by this warranty. These non-war-rantable items include, but are not limited to: A thorough inspection must be made before installation and any damage must be promptly reported. We will not be liable for failures or damage that could have been discovered or avoided by proper inspection and testing prior to installation.Incidental repairs that would involve a minimum of time and effort on behalf of the purchaser will not be consid-ered warranty work and no compensation will be deemed forth coming.This warranty is non-transferable and shall be voided if the unit is removed from its initial installation or if it is not installed following the instructions.Under no circumstance shall we be held liable for personal injury or property damage resulting fromimproper installation or use of this product. We will not be held liable for inconvenience caused by loss of use of this product, costs incurred for labor or materials, removal and installation of replacement units, or any otherincidental or consequential damages. Costs relating to obtaining access for repair or replacement are the responsibility of the user.This warranty does not extend to commercial and institutional installation or use.Warranty Claim ProcedureDescription of the range hood Proof of saleDetails regarding the defectName(s) and address(es) of the owner and installer If a claimable defect occurs, please contact our customer service team at 1-800-929-0168 (8 a.m. - 5 p.m., PST, Monday-Friday)*****************************Before you make your claim call, please ensure that you have:Claims must be filled out in writing and returned within six (6)months of the appearance of a defect. Failure to comply with this stipulation will make this warranty null and void. We reserve the right to a thirty-day (30) delay following the receipt of a claim in which to inspect the product. We assume no responsibility for labor costs,removing or replacing a previously installed product,transportation, or the return of a product.Warranty Information2.3.hazardous or explosive materials and vapors.To avoid damage and noisy and/or unbalanced impellers,keep drywall/construction dust, etc. off power unit.Mount your range hood so that the bottom of the hood is 24" to 30" above the cooking surface. The minimum hood distance above cooktop must not be less than 24"; any installation less than 24" may cause overheating and cause damage to the range hood, HAUSLANE does not warrant this improper installation.4.5.6.7.8.Two to three installers are recommended because of the larger size and weight of this hood.To reduce the risk of fire and to properly exhaust air, be sure to duct air outside. Do not exhaust air into spaces within walls and ceiling or into attics, crawl space or garages.Because of the high exhausting capacity of this hood, you should make sure enough air is entering the house to replace exhausted air by opening a window close to or in the e with approved cord-connection kit only.Please read product specification label on range hood for further information and requirements.CAUTIONC.The fire department has been called.D.You can fight the fire with your back to an exit.*Based on "Kitchen Fire Safety Tips" published by NFPA.Package Contents Tools Needed54321Electric Drill & Extendedlength head driver bitSafety GlovesPencilFlathead ScrewdriverPhilips Screwdriver131211Safety GogglesMeasuring TapeAluminum Foil Tape109876Keyhole Saw 1”Utitlity KnifeLevelAdjustable WrenchNeedle Nose Pliers12345691011121378SpecificationsBefore installing your range hood, carefully follow these steps:1. Read This ManualRead through all the steps. If you fail to read the instructions carefully, we will not be responsible for damages incurred on your part. If you’re not confident in your abilities to install the range hood properly, we recommend hiring a certified technician to complete the installation.2. Gather Your ToolsEnsure you have all the necessary tools according to the previous page.3. Inspect the UnitUnpack the unit and check your range hood for damage or missing parts. Plug it in to an outlet to ensure the fan and lights work. If anything is damaged or missing, contact the seller to get the issues solved. Don’t throw away packaging until you’re sure you are fully satisfied with the product.4. Ensure There is Proper Height ClearanceTo ensure the highest performance, the bottom of your range hood must be between 24” and 30” from the top of thecooking surface. For gas ranges, the required distance is 30”. Do not exceed the maximum height of 30" while in operation. This is very important! Installing at the incorrect height could lead to drastic reduction in the range’s performance or even cause a fire.5. Check Your Power Supply and DuctsCheck to ensure your main voltage is in line with the required voltage outlined on the rating plate inside this hood. Also check the domestic power supply to guarantee adequate earthing before installation.This range hood must be ducted to the outside. Don’tconnect the range hood to exhaust ducts that carry any type of combustion fumes like fireplaces, boilers, or any similar items. The vents should have a short, straight run to the outside. Avoid any elbows if possible, and if an elbow isrequired, a minimum of a 12” straight run is imperative before the elbow.6. Figure Out Ducting Requirements & Install AdapterThis range hood requires ducting to the outside for ventila-tion. This range hood comes pre-installed with a vertical 6” round adapter. The package comes with a horizontal and a vertical rectangular adapter.Look at the duct you’re going to attach the range hood to.Preparation: What to Do Before InstallationIs it a vertical rectangular duct?If so, take off the round adapter that is preinstalled on the unit by removing 10 screws. Attach the rectangular adapter in its place and tighten the adapter with thepreviously-removed 10 screws. Remove the tape holdingFailure to remove the tape from the3-1/4” x 10” rectangular horizontal through wall6” round horizontalthrough cabinet3-1/4” x 10” rectangulaorhorizontal through cabinet 3-1/4” x 10”rectangulaor vertical throughcabinet6” round vertical through cabinet7. Prepare the Cabinet (Soffit)Measure the size of the outlet adapter relative to the cabinet. If it is not already done, you’ll need to cut an opening in the cabinet to ensure the outlet adapter and power cable can pass through. If you must do this, use a pencil and ruler to mark the area, then cut with a wall/key-hole saw.If you’re installing the UC-PS18SS-30 under a cabinet with a recessed bottom, we recommend using 4” wood fillers on each side to stabilize the cabinet for mountingpurposes. For UC-PS18SS-36, we recommend using 6” wood fillers on each side for easier, more secure mount-ing.9. Find a HelperThis range hood is best installed by two or more people due to its size and weight. Again, it is recommended to hire a certified technician for installation to reduce the risk of damage or injury.Failure to remove the tape from the damper the existing black rubber gasket.Is it a horizontal rectangular duct?If so, remove existing round adapter by removing the 10 screws. Cover the opening with the shutoff plate and secure with 10 screws. This renders the round duct opening useless, and you can move forward with the installation of proper arrangements for horizontal discharge.Remove the 5 screws and carefully take off the large shutoff plate on the back of the hood. Then, carefully remove the 8 screws holding the small sealing lid inside the back of the hood.Attach the horizontal rectangular adapter into the back of the hood. Attach it using the 8 screws you removed from theFailure to remove the tape from the damper the existing black rubber gasket.Is it a 6” round duct?You won’t have to make any extra preparations. The range hood will attach directly to your duct. Be sure toCabinet or soffit with flush bottom21Cabinet with recessed bottom12Cabinet or soffit with flush bottomFour, (4)21Cabinet with recessed bottom12UC-PS18-301. Round Vertical Adapter2. Rectangular Vertical Adapter12Cabinet with recessed bottom1Cabinet with flush bottom3. Rectangular Horizontal AdapterCabinet or soffit with flush bottom21Cabinet with recessed bottom12Cabinet or soffit with flush bottom21Cabinet with recessed bottom12UC-PS18-361. Round Vertical Adapter2. Rectangular Vertical Adapter12Cabinet with recessed bottom12Cabinet with flush bottom3. Rectangular Horizontal AdapterWhen you’ve completed all the preparation steps, you’re ready to install your range hood.How to Install Your Range Hood1. Test the UnitPlug the unit into an outlet and press the touch panel to make sure that the unit is working.If the range hood is not working properly, *****************).After the screws are in place for the front mounting holes, work on the rear left, then rear right. If you feel that you need to install the range hood more securely, you can use the additional two mounting screw holes in the front/cen-ter.TIP: To easily reach the rear mounting holes, use an extension tool for the power drill.3. Jack Up the HoodIf you are not removing the range, place the plywood (30” x 24”) over the range / cooktop to avoid possible damage. Put the cabinet jacks on the plywood and place the second piece of plywood over the two cabinet jacks. Using the cabinet jacks, lift the hood into its position under the cabinet. Ensure that the adapter and power cord enter the cabinet openings and that the power cord is not pinched between the hood and the cabinet.If you do not wish to use a cabinet jack, you will need three people. Have two helpers holding the range hood in place while the third person inserts the screws to mount the range hood. For cabinet jack operation, please refer to its manual.2. Uninstall the Range Hood’s Bottom CoverRemove the baffle filter from the hood by pushing the filter knob inward. Slowly pull the filter down and remove gently from the range hood. Then, remove the bottom cover by carefully unscrewing the eight screws as shown.Screws5. Double-Check Installation and Remove SupportBe sure that the hood is securely attached before removing the cabinet jacks and plywood.7. Plug the Range Hood InPlug the power cable into an outlet.UC-PS18 USER MANUAL12 Now that your range hood is installed, it’s time to learn how touse it. It is very simple to use and is operated entirely using thefront control panel.How to Turn Light On/OffThis range hood has a single light setting. Press the lightbulbFor halogen lamps never touch bulbs duringHow to Set the Fan SpeedPress the on/off button (1) to turn the range hood on. Toincrease/decrease fan speed, use the up/down arrows (3 & 4)to find your desired fan speed.How to Set the ClockPress the on/off button for 3 seconds. When the timestarts flashing, touch the up and down arrows (3 & 4) toreach the desired hour. Then, press the on/off buttononce again to set the minutes using the up and downbuttons.How to Set the Timer DelayThis range hood has a timer delay button that comes inhandy if you need to use your hood for a set period oftime. While the fan is operating, press the timer delaybutton (5). When the timer delay indicator comes up onthe display, touch the up and down buttons to set thetimer anywhere from 1 to 15 minutes.1- ON/OFF2- LIGHT3- DOWN4- UP5- TIMER DELAYHow to Use Your Range Hood12345Maintaining the Baffle FilterClean the grease filters frequently—we suggest cleaning every 2 weeks. For your convenience, the filters are dishwasher safe!Your range hood requires some easy routine maintenance to keep it running efficiently.Basic Maintenance Instructions1.2.3.4.Remove the baffle filters from the hood by pushing the filter knob inward. Then, carefully pull the baffle filter down and remove it gently.Clean the baffle filters with warm water and detergent, or place them in the dishwasher. Be careful with the filters to avoid damage.Let the baffle filters dry completely.Reinstall the baffle filters.Maintaining the LightingThis range hood uses two lamps of 3W.1.2.3.Turn off power. For halogen lights, let light bulbs cool completely before removing, if needed (about 5 minutes).Wearing protective gloves, rotate the light bulb counterclockwise to disengage the bulb.Place new lightbulb into the socket and rotateCleaning Your Range HoodThis range hood will look great and function correctly for a long time with proper care. Here are a few do's and dont's when Failure to maintain basic standards of care and cleaning will increase the risk of fire.Wiring DiagramYELLOW/GREEN YELLOW/GREENTroubleshooting TipsFailure to maintain basic standards of care and cleaning will increase the risk of fire.*****************.Contact HauslaneExtended WarrantiesIf you are interested in an extended warranty, sign up on our website at Parts and AccessoriesIf you need replacement parts or accessories, visit Contact UsWe’d be happy to answer your questions or resolve any issues you may have.Phone: 1-800-929-0168Find Us and Connect with Us。
荣事达抽油烟机cxw-280-k007使用说明书
荣事达抽油烟机cxw-280-k007使用说明书1.首先油烟机电源插座必须使用有可靠地线的专用插座,置于原因相信已经不用多说了,家电产品的用电安全才是第一位的。
2.为了保证排烟效果和使用安全,在安装时油烟机的安装高度应不低于650mm,尽可能安装在炉灶正上方。
为了获得良好的排烟效果,最好在烹饪前开启吸油烟机1-2分钟。
3.在更换油烟机灯泡时,功率不要超过说明书上标示的最大值,否则容易导致连接灯座的电线和灯座的温升过高,加速电线绝缘层的老化,造成触电的潜在危险,甚至导致火灾。
gorenje 94cm油烟机安装说明书-中文

适用产品型号:WHT94ORAB WHT94ORAW安装使用说明书吸油烟机戈兰尼电器(上海)有限公司Gorenje gospodinjski aparati , d .o .o .戈兰尼电器上海有限公司()地址:上海市长宁区天山西路1068号联强国际广场A 栋2楼B 网址:委托生产商:海信(广东)厨卫系统有限公司目录温馨提示注意事项为保证使用安全,避免造成人身伤害和财产损失,请务必遵守以下安全注意事项。
表示必须禁止的内容表示强制施行的内容表示必须注意的内容本产品符合下列国家标准:GB 4706.1-2005 《家用和类似用途电器的安全 第一部分:通用要求》GB 4706.28-2008 《家用和类似用途电器的安全 吸油烟机的特殊要求》GB 29539-2013 《吸油烟机能效限定值及能效等级》GB /T 17713-2011《吸油烟机》注意事项..............................................................1产品简介..............................................................3产品安装..............................................................5使用说明 ..............................................................8清洁、保养和维护.....................................................10电气原理图...........................................................12常见故障及处理方法 (12)客户服务.............................................................13环保清单.............................................................14保修卡 (15)产品发票粘贴栏 (16)由衷地感谢您选用g orenje 厨房电器产品,安装使用之前,请详细阅读本说明书。
西门子 欧式吸油烟机 LC32943TI LC36943TI 说明书
cn LC32943TILC36943TI欧式吸油烟机CHIMNEY COOKER HOOD 使用及安装说明书OPERATION AND INSTALLATION INSTRUCTION220~50Hz150W2X20W14.5≥300(最大时)≤69(声功率级)21.2900适用于LC32943TI51.“照明”按键用于接通和关闭照明灯。
2.“风速1,2,3”按键用于控制风机转速。
3个按键控制档风速调节。
3.“风机开关0 ”按键用于切断风机电源,与1档同一个按键。
该说明仅适合LC32943TI 控制开关1.“照明”按键用于接通和关闭照明灯。
2. “风速”按键用于设置风机转速。
3档风速调节。
3.“延时”按键用于设置延时关闭风机时间。
4.“风机开关”按键用于接通或切断风机电源。
该说明仅适合LC36943TI1234567812345678照明单独控制,灯灭。
照明单独控制,不受其它,启动后按风速键。
再次按下开关键需延时时间,显示窗左边显示时间,时间范围可选择同时按下风速键和。
分钟。
再同时按下风速键和延时键持续距气灶最低750mm 距电灶最低650mm我们在每款吸油烟机中都配备了一个调节罩。
调节罩安装于装饰罩内,可向上抽出,以适合您的安装高度。
在使用调节罩前,请注意图中所示的尺寸。
调节罩通过挂脚用螺丝固定在墙上。
最高840mm 最少10mm300mm45mm 调节罩装饰罩挂脚为了使吸油烟机能够很好的排出厨房内的油烟:请勿使排风管的弯曲角度小于90度。
请勿使排风管出现“凹”形的弯曲,并尽可能的减少弯曲角的数量。
请勿使排风管与直径小于Ø175mm 的排风管连接在一起。
请勿使用直径小于Ø175mm 的管道作为中间连接管。
连接排风管11最长1.75m Ø175mm175mm 175mm按图所示将装饰罩和调节罩固定在吸油烟机。
将装饰罩垂直的插入吸油烟机。
将调节罩从装饰罩抽出,与挂脚用螺丝固定。
惠而浦 CXW-WVB9933BK 吸油烟机 安装及使用说明书

吸油烟机
安装及使用说明书
安装及使用说明书
前言
使用本产品前请仔细阅读本说明书,并请妥善保管。 本机包含可再次利用的材料,废弃时请协助正确处理或回收利用,以利于保护环境。 本产品今后如有结构、性能参数变化,恕不另行通知。
目录
产品介绍
重要提示信息
2
新吸油烟机使用注意事项
2
装箱清单
3
主要技术参数
3
产品执行标准
手势控制键:吸油烟机上电后,手势控制功能自动开启。 左挥(从左向右挥手):加速,低-高-爆炒-低…循环切换档位。挥手时照明灯同 步开启,但若此时风机处于工作状态下,则不改变照明灯的状态。 右挥(从右向左挥手):减速,爆炒-高-低-爆炒…循环切换档位。挥手时照明灯 同步开启,但若此时风机处于工作状态下,则不改变照明灯的状态。 悬停:用手掌悬放置在手势功能区域1秒,相当于按一次电源键(关机状态下悬停 =开机进入待机状态,翻板自动打开;待机或照明灯开启状态下悬停=关机操作; 风机运转状态下悬停=进入延时关机状态,再次悬停=直接关机)。 手势控制功能关闭和开启:在关机状态下,长按开关键3秒,“叮咚”一声,指示 灯闪烁3秒后恢复原指示状态,则手势功能关闭;若想再次开启手势功能:1、可 断电后重新上电 ;2、长按开关键3秒,“叮咚”一声,开关指示灯闪烁3秒,手 势功能开启,开关键指示灯恢复原指示状态。
800-850
安装步骤:
钻孔时请确认墙内预埋电气电线的位置,钻孔请避开电气电线,以免发生触电危险及 其他不便。 1、参照安装钻孔图在安装吸油烟机的墙面上相应的位置上用冲击电钻钻出直径为 10 mm 深度为 50 mm 的孔 3 只,埋设好膨胀管,用木螺钉将整机挂钩板固定到墙壁上, 安装完之后请检查整机挂钩板和装饰罩固定板是否水平。 2、卸下箱体顶部出风口处十字槽盘头螺钉,然后对风罩的孔位,分别用卸下的螺钉将 风罩紧固在箱体上。
- 1、下载文档前请自行甄别文档内容的完整性,平台不提供额外的编辑、内容补充、找答案等附加服务。
- 2、"仅部分预览"的文档,不可在线预览部分如存在完整性等问题,可反馈申请退款(可完整预览的文档不适用该条件!)。
- 3、如文档侵犯您的权益,请联系客服反馈,我们会尽快为您处理(人工客服工作时间:9:00-18:30)。
康乔兰科橱柜嵌入式下吸式油烟机
是真正意义上嵌入式厨房电器的油烟机
康乔兰科橱柜嵌入式油烟机下吸式,是真正意义上嵌入式厨房电器的油烟机,与开放式整体厨房配合完美无间。
吸油烟吸力得到有力增强,与近吸式油烟机、欧式油烟机、中式油烟机包括集成环保灶的功能基本上是一样的,可以说橱柜嵌入式下吸式油烟机是将一台近吸式油烟机机与集成环保灶有力结合的产物。
间距两者优点于一身。
下吸式油烟机与近吸式油烟机不同的点,一是风柜下置,不碍眼,不滴油,不占空间;二是风机下置,电机与风轮发出的声音被围着的橱柜阻隔了一下,噪音减弱;三是烟管往下走,不影响厨房美观;四是与橱柜搭配很合理,显得更有档次;五是因噪音得到减弱,可以加大电机功率,吸力更加强劲;六是顶部可设酱料台,方便操作。
七,比集成环保灶好清洗,好维修有比集成环保灶更能与整体厨房融合在一起。
