TestDirector项目的配置手册
TD使用手册

27
2.缺陷过滤 1)点击 按钮,过滤器对话框打开。
28
2)点击Filter Conditiation框中的Detected By,选 择过滤条件对话框打开。
29
3)条件选择完毕后,点击OK按钮,关闭过滤对话框, 缺陷列表中会根据你选择的过滤条件进行显示。
30Leabharlann 3.新增视图 1)点击 ,选择Add to Favorites,新增喜欢的视图 对话框打开。
拼 写 检 查 ( Check Spelling ) 拼写按钮
拼 写 选 项 ( Spelling Options)
辞典(Thesaurus)
打开辞典对话框,并显示所选中单词的同 义、近义或反义词。你能够替换掉所选择 的词或查找新的词。 打开增加缺陷对话框,并能够让你增加一 个新的缺陷。 打开在线帮助并为当前的内容显示帮助主 题。
菜单栏(Menu Bar)
位于TestDirector工程名的紧下面。 菜单名称随你选择的模块名称不同而改变。
模 块工 具栏 ( Module Toolbar)
位于菜单栏下面。 包括当前所使用TestDirector模块中经常使用到的命令。
工 具 按 钮 (Tools Button)
位于窗口的右上角。 能够让你改变用户密码和另外的一些用户属性。
9
1.2 TestDirector窗口
当你打开一个工程时,TestDirector的主窗口会 打开你上次工作时使用过的模块。在标题栏上会显示 工程名和你的用户名。
10
所有的TestDirector模块都包括如下内容:
TestDirector 工 具 栏 (TestDirector Toolbar) 位于TestDirector工程名的紧上面。 假如此工具栏不可见,请点击Show Toolbar按钮。
TD使用手册_翻译版
TestDirector®User’s GuideVersion 7.6欢迎使用TestDirector欢迎您使用TestDirector,它是Mercury Interactive公司推出的基于WEB的测试管理工具。
TestDirector能够帮助你组织和管理软件测试过程的每个阶段,包括测试需求定义、测试计划、测试执行和缺陷跟踪。
使用手册这个手册描述了如何使用TestDirector来管理你的应用程序整个测试过程。
它包TestDirector文档套件在线资源Part I TestDirector Basics1、概述(Introduction)欢迎您使用TestDirector,它是Mercury Interactive公司推出的基于WEB的测试管理工具,无论是通过Internet还是通过Intranet你都可以以基于Web的方式来访问TestDirector。
应用程序测试是非常复杂的,它需要开发和执行数以千计的测试用例。
通常情况下,测试需要多样式的硬件平台、多重的配置(计算机,操作系统,浏览器)和多种的应用程序版本。
管理整个测试过程中的各个部分是非常耗时和困难的。
TestDirector能够让你系统地控制整个测试过程,并创建整个测试工作流的框架和基础,使整个测试管理过程变得更为简单和有组织。
TestDirector能够帮助你维护一个测试工程数据库,并且能够覆盖你的应用程序功能性的各个方面。
在你的工程中的每一个测试点都对应着一个指定的测试需求。
To meet the various goals of a project, you organize the tests in your project into unique groups. TestDirector还为你提供了直观和有效的方式来计划和执行测试集、收集测试结果并分析数据。
TestDirector还专门提供了一个完善的缺陷跟踪系统,它能够让你跟踪缺陷从产生到最终解决的全过程。
TestDirector8.0用户使用手册

TestDirector8.0用户使用说明广州世度信息咨询有限公司目录1.如何安装汉化包 (3)2.如何下载控件 (3)3.操作流程 (3)3.1 测试人员: (3)3.2 开发人员: (3)3.3 开发经理 (3)3.4 管理人员: (4)3.5 其他人员: (4)4.使用说明 (4)4.1 如何登录 (4)4.2 如何退出登录 (4)4.3 如何设置显示列 (4)4.4 如何显示缺陷详细信息 (5)4.5 如何处理缺陷详细信息 (5)4.6 如何fixedbug状态和fixed指派人 (6)4.7 如何更改密码 (6)4.8 如何查找bug (6)1.如何安装汉化包安装汉化包补丁程序:$CU/CU_Doc/TD安装和使用/TD8.0_SP2_汉化补丁.exe默认安装即可2.如何下载控件TestDirector8.0服务端地址:http://192.168.1.10:8080/TDBIN/start_a.htm ,第一次运行时需要按照提示安装一个控件(目前支持IE6,IE7不支持IE8等其他浏览器)3.操作流程3.1 测试人员:a.new bugb.fixed –> 关闭(如果问题已经解决,应将该bug关闭)c.fixed –> 未通过(如果问题依然存在,将bug状态fixed为“未通过”,同时将bug转给相应的开发人员fixed)目前该组成员有:chendongyin3.2 开发人员:a.new –> open(先必须将bugopen看以后才能做其他操作,open后表示该Bug正在处理)b.open –> fixed(如果问题已经fixed,则状态由“open”fixed为“fixed”,同时将bug转给相应的测试人员验证)c.open –> 不是问题(如果测试人员提交的bug不是问题,可以将bug状态改成“不是问题”,同时将bug转给开发人员相应的开发经理进行确认)d.open –> rejectd(如果问题不严重,并且暂时有其他重要的事物在处理,则可以暂时将bug状态fixed为“暂不fixed”的临时状态,在程序发布前不允许存在该临时状态)e. rejectd–> open(对于暂不fixed的bug,在程序发布前必须要再次open处理)f.未通过–> open(对测试没有通过的bug要重新open后再处理)g.对于不属于自己处理的bug,可以直接“指派给”相应的开发经理,让开发经理重新指派相应的开发人员处理(不需要fixed bug状态)目前该组成员有:yezhenghai、liuharui、zhangyang3.3 开发经理a.具有开发人员的所有权限b.不是问题–> 未通过(对于开发人员提交的“不是问题”进行判断后,确定该bug需要fixed,可以将状态由“不是问题”fixed为“未通过”,同时将bug转给相应的开发人员处理)c.不是问题–> 关闭(对于开发人员提交的“不是问题”进行判断后,确认该bug确实不是问题,需要将该bug状态由“不是问题”fixed为“关闭”,同时不需要指派该bug)d.open->关闭(对测试没有通过的bug,如果不是问题,则open后直接可以关闭该Bug,并说明理由)e.分配bug给相应的开发人员(不需要fixed bug状态)目前该组成员有:tanglongbin3.4 管理人员:a.具有所有权限目前该组成员有:admin3.5 其他人员:由于现在不需要处理TD,故只有查看bug的权限目前该组成员有:wangchunbo,liguangyou,说明:在程序发布时,所有的bug状态只允许存在“关闭”和“不是问题”两种状态。
TestDirector简易配置使用手册
TestDirector 7.2 使用简介本文用于简单描述测试管理TestDirector 7.2的安装、配置、使用过程,旨在指导从来没有接触过该软件的人员可以快速使用它。
主要内容有:1、安装前期准备2、安装TestDirector 7.23、客户端配置和控件下载4、创建项目5、定制项目模块、加入用户和授权6、Defect使用7、缺陷生命周期:安装前期准备注意:如果你不用第三方数据库,则这个步骤不是必须的.testDirector需要一种数据库支持,所支持的数据库有access, SQL server, oracle ,Sybase , Access我们以sql server2000为例放入sql server2000光盘,在自动运行导航界面中点击” 安装数据库服务器”,按向导安装即可,有不明之处处,请参考Microsoft SQL Server 安装盘下的Readme.文件安装TestDirector 7.21.放入TestDirector 7.2安装盘,运行SETUP.ex2.e文件,出现欢界面,点击next按钮.2.输入license NO,例如: 902V142-Q10I510-GB10GB0-2BJ02R0,点击next按钮3.选择支持的数据库服务器类型:MS_SQL server, Access, Sybase, Oracl,可选一个或多个, 点击next按钮4.输入连接串,如:DBNETLIB,这里我们采用默认的,点击next按钮5.指定项目安装的目录(其实大部分文件都安装在c盘下,所以有没指定一个样,哈)6.输入你用于发送邮件的smtp服务名称(可以是ip),或者用系统iis有smtp服务,这里我们输入一个smtp服务器名称:,点击next按钮7.输入虚拟目录名称,并指定物理安装位置,这里我们用默认值TDBIN和c:\inetpub\TDBIN,点击next按钮8.这是一个你前面设置的信息摘要,确认正确后,点击install按钮开始安装9.等待几分钟后就可以了,去轻松一下吧!10.拷贝完文件后,显示了一个注册界面,点击next按钮11.在文件区中,显示了一个进入TestDirector的url链接,你要可要记得它:http://KM/TDBIN/default.htm,点击Start按钮结束安装,进入 TestDirector去看看吧,服务器安装到此结束,哈哈客户端配置和控件下载1、如果你要对项目定制和管理,则要从服务器下载客户端安装程序。
TD操作手册
TestDirector8.0 后台管理员使用手册Site Administrator1.在浏览器里输入:http://tianhuiying/TDBIN/start_a.htm进入开始界面2.单击页面左上角的“Site Administrator”,进入:在输入框里输入正确的Site Administrator密码,单击“Login”按钮,Enter回车进入,密码为123456。
自定义(customize)管理1.进入客户端的安装,安装完毕,进入TD的登陆界面。
在TD登录页面右上角点击“CUSTOMIZE(自定义)”。
2.选择要登录的域和项目,输入用户帐号和密码。
Admin密码为123456,其余用户登录时为空。
登录缺陷管理界面管理员(admin)登录时密码为123456,其余所有用户默认为空。
(详解TD后台管理)TD---之Site Administrator一、域与工程管理在浏览器里输入:http://IP地址/td/start_a.htm,进入后页面如下:单击页面左上角的“Site Administrator”,进入:在输入框里输入正确的Site Administrator 密码,单击“Login ”按钮,Enter 回车进入:1.创建域(Create Domain)单击上图的“”按钮,可以新创建一个项目域,弹出如下图:创建工程创建域 工程项域在Domain Name 输入框中输入域名,例如:兴邦产业网,单击OK 按钮,产生如图效果:2.删除域(Delete Domain)单击界面上的“”按钮,弹出提示,确定即可以删除该域。
注意:如果该域下有工程存在,不能直接将域删除,必须先将所有工程删除后,才能删除域。
3.创建工程(Create Project)选中你要创建工程的域名,例如“兴邦产业网”域,单击“”按钮,进入:新创建的域新域的物理地址在Project Name输入框里输入工程名或项目名,例如:兴邦产业网第一期改版,然后你可以选择在哪个域下创建工程,下拉选择框“In Domain”。
TestDirector操作手册
错误!未找到引用源。
年月日发布年月日起实施目录1概述 (4)1.1测试管理过程 (4)1.2需求定义 (4)1.3测试计划 (5)1.4测试执行 (6)1.5缺陷跟踪 (6)2开始 (7)2.1启动TestDirector (7)2.2TestDirector窗口 (10)2.3TestDirector工具栏 (11)2.4修改密码 (12)2.5修改用户属性 (13)3开发需求树 (13)3.1关于需求树 (14)3.2创建需求树 (14)3.3查看关联缺陷 (16)3.4从需求创建测试 (17)3.4.1 转换需求到测试 (17)3.4.2 从需求产生测试 (21)4测试计划 (24)4.1开发测试计划树 (25)4.1.1关于测试计划树 (25)4.1.2创建测试计划树 (25)4.1.3添加测试到测试计划树 (26)4.1.4修改测试计划树 (28)4.2连接测试到需求 (30)4.2.1关于连接测试到需求 (30)4.2.2连接需求到一个测试 (32)4.2.3连接测试到一个需求 (33)4.2.4需求和测试覆盖的使用 (35)4.3构建测试 (36)4.3.1关于构建测试 (36)4.3.2设计测试步骤 (36)4.3.3调用一个具有参数的手动测试 (38)4.4创建自动化测试 (41)5测试集 (43)5.1创建测试集 (44)5.1.1关于创建测试集 (44)5.1.2添加测试集 (45)5.1.3添加测试到测试集 (47)5.2计划测试运行 (48)5.2.1关于计划测试运行 (48)5.2.2计划测试运行 (50)6 缺陷记录 (55)6.1增加BUG(测试员&程序员) (55)6.2修改BUG 状态 (57)1概述1.1测试管理过程TestDirector的测试管理包括如下四个阶段:需求定义(Specify Requirements):分析应用程序并确定测试需求。
测试计划(Plan Tests):基于测试需求,建立测试计划。
TestDirector用户指南

使用TestDirector的20个步骤作者:熊 浩1. 检查应用程序文档以确定测试范围,包括测试目标,测试策略。
2. 构建Requirements Tree以定义全部的测试需求。
3. 为需求树中的每一个需求创建详细的测试需求列表。
描述每一个需求,为之分配优先级,必要时可添加附件。
4. 生成报告和图表以助于分析测试需求。
复审需求以确保该需求适宜测试范围。
5. 检查应用程序、系统环境和测试资源以确定测试目标。
6. 将应用程序划分为模块或功能以备测试。
构建Test Plan Tree,将应用程序层次性的划分为测试单元或主题。
7. 为每个模块确定你所需要的测试类型。
向Test Plan Tree中的每一个测试添加基本定义。
8. 将每一个测试链接到相应的一个或多个需求。
9. 在Test Plan Tree中,通过为测试添加测试步骤开发手工测试。
测试步骤描述了每一个测试的测试操作、需要检查的点和预期结果。
然后确定哪些测试需要被自动化。
10. 通过使用Mercury Interactive的测试工具或者定制的测试工具、第三方测试工具为你所决定的需要自动化的测试创建测试脚本。
11. 生成报告和图表以助于分析测试计划数据。
复审测试以确定该测试适宜测试目标的程度。
12. 定义多个测试集以用于在项目中达到各种各样的测试目标。
确定在每一个测试集中包括哪些测试。
13. 确定测试执行的时间并给测试人员分配任务。
14. 在相应的测试集中自动或手工的执行测试。
15. 查看测试运行的结构以确定是否在应用程序中发现了缺陷。
生成报告和图表以助于分析测试运行结果。
16. 报告在应用程序中检测到的缺陷。
项目相关人员可以在测试过程中的任意阶段添加缺陷。
17. 复审新缺陷并且确定哪些缺陷应当被修复。
18. 改正那些需要修复的缺陷。
19. 测试新创建的应用程序。
继续以上过程知道缺陷被修复。
20. 生成报告和图表以助于分析缺陷修复的过程,还可以帮助确定何时发布应用程序。
TestDirector的使用

TD中的EMAIL发送流程 TD中的EMAIL发送流程
当Defect的状态改变时,TD会定时向相关人员发 Defect的状态改变时,TD会定时向相关人员发 送邮件,必要时,还可以手动发送邮件。
状态 Open/Reopen Fixed Rejected Developer
用户 TDAdmΒιβλιοθήκη n/Tester Tester/TDAdmin
Full permission to modify the contents of the test project None Create tests and modify their own tests None Create and execute test sets. Modify their own test sets None Create and change defect statuses from fixed to close Report defects and modify status Report defects and modify status of their own reported defects to fixed None
Requirements (测试需求)
在TD中,可以由粗到细制定测试需求。例 TD中,可以由粗到细制定测试需求。例 如功能测试,可以按照子系统的划分,逐步细 化到每个功能模块,而每个功能模块的测试需 求还可以再往下细分。如登录测试 ,可以分 为用户名称检查、密码检查;用户名称检查又 可以按照输入的内容分:合法字符、非法字符、 空字符、存在的用户名称、不存在的用户名称、 存在但类似的名称(如添加空格或大小写变化) 等等。测试需求不要求具体到实际的测试过程。
Defect的流转过程 Defect的流转过程
TestDirector-8.0安装配置方法及汉化
TestDirector 8.0安装配置方法及汉化1.安装前环境配置TD的WEB服务容器为IIS,必须得先安装IIS环境TD的后台默认为Access以选择使用Sybase、MS-SQL Server、Oracle. TD也支持邮件服务,可以选择安装邮件服务或则暂时不安装。
如果需要安装则在安装前做好邮件服务器的相关配置。
test director7.6或director8.0Maintenance no.:KSQMQSQ-HQSQDQS-Q3QSQ3S-Q2SSQI8 License no.:B343P-44B44-43444-6444S2.安装事项在安装时,要对系统进行一些安装设置,以下对一些关键设置进行简单解释。
另外系统管理员账号必须设置有密码。
1)数据库连接设置设置数据库连接时,Access为默认必选,可以选择另外一种合适的数据库做为TD的连接数据库,该数据库可以在创建TD项目时,选择作为项目的数据库。
2)虚拟目录设置其中的虚拟目录名TDBIN下将保存TD的一些运行文件。
3.安装注意安装TD时,系统资源消耗比较大,容易造成安装失败或错误,所以在安装时,尽量不要进行的系统操作,等待安装完成。
4.安装后配置1)汉化在安装目录TDBIN/Install/下存放的是一些为连接服务的客户端加载的系统文件。
其中的tdclientui80.xco文件,该文件会自动加载到客户端的C:\Program Files\Common Files\Mercury Interactive\TD2000_80目录下,并生成为tdclientui80.ocx文件。
注意其中两个文件的后缀名区别。
文件后缀可通过更改方式变换为OCX或XCO.由于Mercury并为发行官方的汉化包,所以采用第三方的资源包进行汉化。
汉化方式,把得到的汉化资源dclientui80.xco文件粘贴到服务器TDBIN/Install/目录下,覆盖掉原文件即可。
TestDirector安装配置

TestDirector 安装/配置一、安装安装前提:系统安装有IIS、压缩软件RAR双击TestDirector 7.6 Enterprise.part01.rar点击setup.exe根据提示安装即可(安装时不用配置邮件等,安装完毕后再统一配置)二、配置1、邮件配置打开TD默认页面点击Site Administrator ,输入管理口令进入管理界面选中TD Servers标签页,点击Mail Protocol选中单选框Windows MAPI,填入“MS Exchange 设置”(和我们公司的邮箱系统一致,非本公司选取其他项)其他:在TD服务器上安装邮件客户端(Microsoft Outlook),申请专为TD定制的帐号,正确配置即可注意:只有邮件客户端启动后,TD才可以正常发邮件2、新建库(项目)配置打开TD默认页面点击Site Administrator ,输入管理口令进入管理界面选中Projects标签页,这里可以创建域、创建项目等点击”Create”按钮,可以新建一个域(比如test),在这个域中可以建立多个项目(比如test_project)选中所建的域(比如test),点击右FRAM上方的”Create”按钮即可创建项目(或鼠标右击域,点击菜单“Create Project”)系统弹出对话框,输入要创建的项目名称(比如test_project),并选择此项目的TD库要用的数据库类型(包括ACCESS、ORACLE、SYBASE、MS SQL) 点击”Next”,根据提示直到出现”Create”按钮,即可创建一个项目,即TD创建了一个TD库3、用户创建打开TD默认页面点击Site Administrator ,输入管理口令进入管理界面选中Users标签页,这里可以创建、删除用户等在创建用户时,用户名建议用英文,可以在”Full Name”中填入中文名,也可以填入相对应的邮箱地址,以便可以利用TD发邮件4、项目配置打开TD默认页面点击TestDirector,进入管理、使用总界面在”Project”下拉框中选择要配置的项目,点击右上角的CUSTOMIZE,系统弹出对话框,输入管理员口令确认(当然也可以在此对话框中选择域和项目) 以下进入项目本身配置,包括用户权限、分组、自定义等等●项域配置(TD列表显示内容以及提TD需要录入项)✓点击“Customize Project Entities”,进入项目本身需要我们自己定义的项✓对于测试库来说,经常用的是“DETECT”,那么可以在“SYSTEMFIELDS”中添加我们经常用的(比如流转到、受理人、受理时间、问题描述等);“USER FIELDS”中添加我们经常用的(比如发布版本号、来源、提出人等)●项域子项配置✓点击“Customize Project Lists”,进入项目子项配置,可以给项目域加入子项✓选中一个项域,点击“New Item”按钮即可添加子项(比如,选中来源,添加子项“市场部”、“厂商”、“网络部”等)●组定义配置(用户组,便于做权限控制)✓点击“Setup Groups”,系统弹出组设置、自定义的界面✓系统默认的组为:Develper、Project Manager、QA Tester、TDAdmin 、Viewer等几种。
TestDirector使用说明
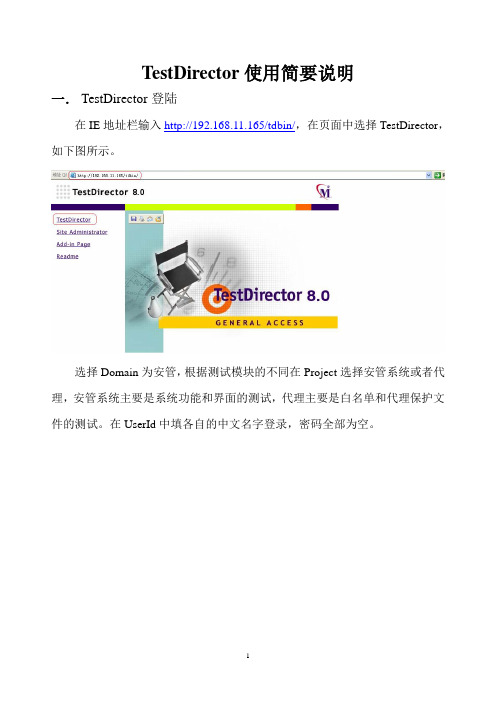
TestDirector使用简要说明一.TestDirector登陆
在IE地址栏输入http://192.168.11.165/tdbin/,在页面中选择TestDirector,如下图所示。
选择Domain为安管,根据测试模块的不同在Project选择安管系统或者代理,安管系统主要是系统功能和界面的测试,代理主要是白名单和代理保护文件的测试。
在UserId中填各自的中文名字登录,密码全部为空。
二.填写用户感受
在进入TestDirector中之后,选择TESTPLAN按钮,在左侧Subject树中
点击用户感受前的+号,选择自己的用户名,在Details选项的Description中,填写各自的使用感受。
为了统一格式,第一行先注明时间,感受在时间之后开始写起。
如图所示:
三.提交BUG和缺陷
选择DEFECTS按钮,如图选择Add Defects
在弹出的对话框中,填入相应的信息,如下图:
Sumary中填入要提交BUG和缺陷的概要内容;Serverity中选择缺陷的严重级别,根据情况酌情选择;
Assigned To中选择这一缺陷所属模块的研发负责人;Priority中选择此缺陷需要处理的优先级别;Subject选择这一缺陷所属的主题,该主题为在TESTPLAN中建立的测试计划主题;Description中填入该BUG和缺陷出现的详细步骤和前提,为研发人员解决问题提供方便。
提交BUG图片时,需要将BUG图片保存在本地,然后在点击添加附件按钮,将保存到本地的BUG图片导入,如下图。
TestDirector项目的配置手册
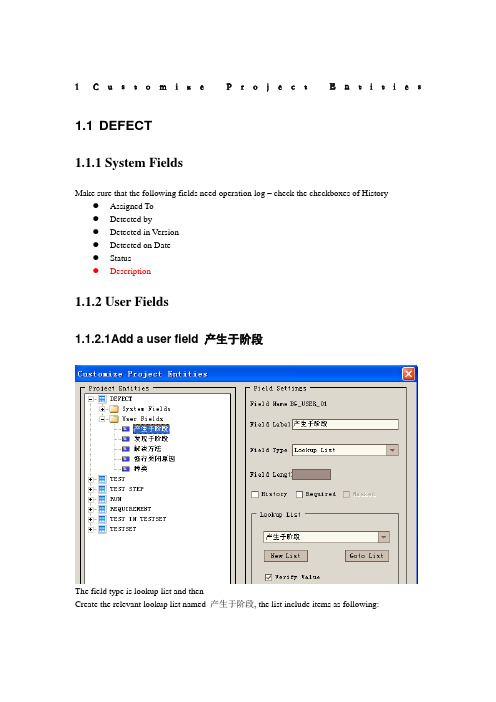
1C u s t o m i z e P r o j e c t E n t i t i e s 1.1 DEFECT1.1.1System FieldsMake sure that the following fields need operation log – check the checkboxes of History●Assigned To●Detected by●Detected in Version●Detected on Date●Status●Description1.1.2User Fields1.1.2.1 A dd a user field 产生于阶段The field type is lookup list and thenCreate the relevant lookup list named 产生于阶段, the list include items as following:1.1.2.2 A dd a user field 解决方法The field type is lookup list and thenCreate the relevant lookup list named 解决方法, the list include items as following:1.1.2.3 C reate a user field 种类The field type is lookup list and thenCreate the relevant lookup list named 缺陷种类, the list include items as the following: image1.1.2.4 C reate a user field 强行关闭原因1.1.2.5 C reate a user field 发现于阶段The field type is lookup list and theCreate the relevant lookup list named 发现于阶段, the list include items as following1.2 Requirement1.2.1System Field1.2.1.1 R eviewedCheck the check box of Lookup list link to this field. Please refer to the following image.2Customize Project Lists2.1 Bug statusSet the bug status as the following image2.2 评审缺陷种类set the 评审缺陷种类as the following image3Setup groups3.1 测试工程师Create a new group 测试工程师and setup it’s permissions as following3.1.1DEFECTS3.1.1.1 A dd Defect:3.1.1.2 M odify defectSet the privilege as the following imageClear all the options of “Owner Only” because this option does not work properly. Remove all the transition rules except status, the transition rules are as following image3.1.1.3 D elete DefectClear the checkbox to forbid this group to delete defects.3.1.2Requirements Setup as the following imageFollowing are some detailed settings AttachmentDescriptionDirect Cover StatusPriorityReviewed3.1.3Test Plan3.1.3.1 A dd Test3.1.3.2 M odify TestCheck all the checkboxes under the node “Modify Test”Check all the options of “Owner Only” except Executions Status and Status Clear the options of “Owner Only” of Executions Status and Status Remove all the transition rules.3.1.3.3 D elete Test3.1.3.4 A dd Design Step3.1.3.5 M odify Design StepCheck all the checkboxes under this node.3.1.3.6 D elete Design Step3.1.3.7 A dd Folder3.1.3.8 M odify FolderCheck all the checkboxes under this node.3.1.3.9 D elete Folder3.1.3.10 Move Folder3.1.3.11 Copy Folder3.1.3.12 Generate Script3.1.4Test LabCheck all the checkboxes to grant all the privileges to this groupUncheck all the options of “Owner Only”Remove all the transition rules.3.1.5AdministrationSet up as the following image3.2 测试经理Create a new group 测试经理(create as 测试工程师). And setup it’s permissions as following3.2.1Defect3.2.1.1 A dd defectThe same as group 测试工程师3.2.1.2 M odify defectThe same as group 测试工程师except the transition rule of status3.2.1.3 D elete defectCheck the check box to enable this group to erase defects, and clear the option of “Owner Only”. In another word, this group can delete all the defects.3.2.2RequirementsCheck all the checkboxes to grant all the privileges to this group.Clear all the options of “Owner Only”except attachment and description.Check the options of “Owner Only”of attachment and descriptionClear all transition rules.3.2.3Test plan3.2.3.1 A dd TestThe same as group “测试工程师”3.2.3.2 M odify TestThe same as group “测试工程师” except Designer.The setting of Designer of this group is as following image3.2.3.3 D elete TestThe same as group “测试工程师”3.2.3.4 A dd Design Step The same as group “测试工程师”3.2.3.5 M odify Design Step The same as group “测试工程师”3.2.3.6 D elete Design Step The same as group “测试工程师”3.2.3.7 A dd FolderThe same as group “测试工程师”3.2.3.8 M odify FolderThe same as group “测试工程师”3.2.3.9 D elete FolderThe same as group “测试工程师”3.2.3.10 Move FolderThe same as group “测试工程师”3.2.3.11 Copy FolderThe same as group “测试工程师”3.2.3.12 Generate Script The same as group “测试工程师”3.2.4Test labThe same as group “测试工程师”3.2.5AdministrationSetup as the following image3.3 开发工程师Create a new group 开发工程师(create as developer). And setup it’s permissions as following 3.3.1Defects3.3.1.1 A dd DefectClear the checkbox to forbid this group to add defect.Setup as the following imageClear all the option of “Owner Only”Remove all the transition rules except statusSet the transition rules of Status as following imageClear the checkbox to forbid this group to erase defect.3.3.2RequirementsSetup as the following image3.3.3Test planClear all the checkboxes to forbid all the privileges to this group 3.3.4Test labClear all the checkboxes to forbid all the privileges to this group 3.3.5AdministrationThe same as group 测试工程师3.4 开发经理Create a new group 开发经理(create as 开发工程师). And setup it’s permissions as following 3.4.1Defects3.4.1.1 A dd DefectThe same as group “开发工程师”3.4.1.2 M odify DefectSetup as the following imageClear all the options of “Owner Only”Clear all the transition rules except status, the transition rules of status is as following3.4.1.3 D elete DefectThe same as the group 开发工程师3.4.2RequirementsThe same as the group 开发工程师3.4.3Test PlanThe same as the group 开发工程师3.4.4Test LabThe same as the group 开发工程师3.4.5AdministrationThe same as the group 开发工程师3.5 测试员Create a new group 测试员(create as 测试工程师). And setup it’s permissions as following 3.5.1DefectsClear all the checkboxes to forbid all the privileges to this group3.5.2RequirementsClear all the checkboxes to forbid all the privileges to this group3.5.3Test PlanClear all the checkboxes to forbid all the privileges to this group 3.5.4Test LabSetup as the following image3.5.5AdministrationThe same as group 测试工程师4Setup workflow4.1 Script Generator-List Customization for defectsModule4.2 Script Generator- Add defect field customization 4.2.1测试工程师(需要添加期望解决日期与解决人)Setup as the following image4.2.2测试经理The same as 测试工程师4.3 Script Generator –Defect details fieldcustomization4.3.1测试工程师4.3.2测试经理The same as 测试工程师4.3.3开发工程师The same as 测试工程师4.3.4开发经理The same as 测试工程师4.4 Script Generator – Script Editor 4.4.1Defects module script4.4.1.1 D efects_Bug_NewModify the sub as the following image4.4.2Test Plan Module script4.4.2.1 T estPlan_Test_NewModify the sub as the following image。
TD服务器搭建及配置指南(TestDirector)
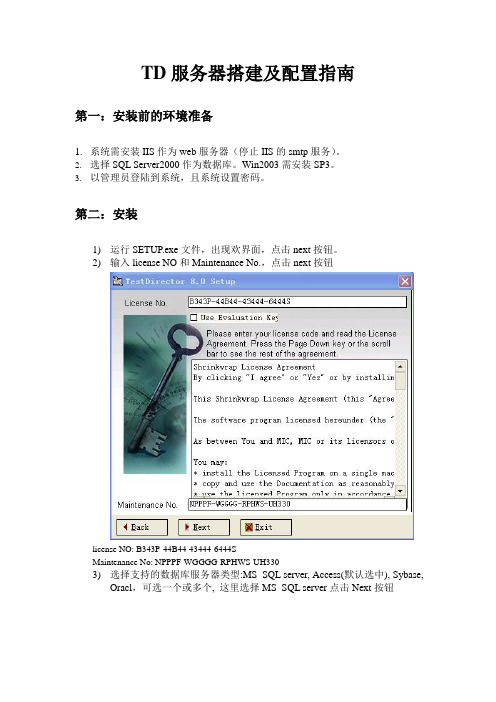
TD服务器搭建及配置指南第一:安装前的环境准备1.系统需安装IIS作为web服务器(停止IIS的smtp服务)。
2.选择SQL Server2000作为数据库。
Win2003需安装SP3。
3.以管理员登陆到系统,且系统设置密码。
第二:安装1)运行SETUP.exe文件,出现欢界面,点击next按钮。
2)输入license NO和Maintenance No.,点击next按钮license NO: B343P-44B44-43444-6444SMaintenance No: NPPPF-WGGGG-RPHWS-UH3303)选择支持的数据库服务器类型:MS_SQL server, Access(默认选中), Sybase,Oracl,可选一个或多个, 这里选择MS_SQL server点击Next按钮4)输入SQL Server服务器名.此服务器名需和运行的SQL Server服务器名一致。
点击Next。
5)输入用户名及密码。
此用户名为登陆系统用户名,拥有系统的管理员权限。
点击Next。
6)输入路径。
此路径会设为共享目录,便于客户端向数据库写入数据。
点击Next。
7)设置邮件服务器。
此处不建议设置邮件服务器,安装完成后再进行详细设置。
点击Next。
8)设置虚拟路径和物理路径9)选择Install SiteScope,点击Next。
10)再点击Next,选择默认设置,最后点击Install,进行安装。
注意:安装完成之后所有项目的管理员密码为空。
第三:安装过程中会遇到的问题及解决办法第一个问题:2003的IIS是手工启动的。
启动后,不显示td的初始界面,但在其他机器上,通过网络浏览没有问题。
解决方法.修改win2003的IIS的TDBIN的属性,开始-管理工具-Internet信息服务(IIS)管理器中,本地计算机-网站-默认网站-TDBIN,右键菜单属性-HTTP头à【MIME类型】,点【新建】按钮,填扩展名为ini,MIME类型为text/*,继续新建扩展名分别为:lld、dll、ocx、xco、exe、adt、adm、xxx,MIME类型都填为text/*。
testdirector8.0使用教材
测试计划(Test Plan) 测试计划(Test Plan)
基于已定义的测试需求,创建相应的测试计划。
测试计划模块(Test Plan) Plan) 测试计划模块(
Design Steps Tab,设 计步骤标签页,一个测试步 骤列表,描述怎样去执行测 试计划树中当前所选中的测 试。 Test Script Tab,测试 脚本标签页,测试计划树中 当前所选中的测试的TSL测 试脚本。 Attachments Tab,附 件标签页,附件列表, Reqs Coverage Tab, 需求覆盖标签页,测试计划 树上当前所选中测试对应的 需求列表。
登录
在Domain列表中选择你准备进入的域 Domain列表中选择你准备进入的域 在Project列表中选择你准备进入的项目 Project列表中选择你准备进入的项目 在User ID框中,选择或输入你的用户名称 ID框中,选择或输入你的用户名称 在Password框中,输入管理员指派给你的密码。 Password框中,输入管理员指派给你的密码。 点击“Login”按钮。TestDirector会打开在你上一次运 点击“Login”按钮。TestDirector会打开在你上一次运 行TestDirector任务时所用过的那个模块(需求、测试计 TestDirector任务时所用过的那个模块(需求、测试计 划、测试实验室和缺陷)。
缺陷管理(Defects) 缺陷管理(Defects)
增加新缺陷、确定缺陷修复属性、修复打开的缺陷和分析 缺陷数据。
ห้องสมุดไป่ตู้
添加缺陷
点击窗口左上 角的“Add defect ” 按纽,弹出记录BUG 信息的窗口。 在这个增加缺 陷的对话框中,我们 需要输入BUG的详细 信息:发现BUG的人 员、发现BUG的日期、 BUG的严重性、 BUG的优先级、发现 BUG程序的版本等。
Test+Director+8[1].0管理员使用说明
![Test+Director+8[1].0管理员使用说明](https://img.taocdn.com/s3/m/ce7201126edb6f1aff001f45.png)
Test Director 8.0 管理员使用手册1. 目的......................................................................................................................................- 2 -2. 概要......................................................................................................................................- 2 -3. TD的安装............................................................................................................................- 3 -2.1操作系统........................................................................................................................- 3 -2.2数据库............................................................................................................................- 3 -2.3安装TD..........................................................................................................................- 3 -2.4配置................................................................................................................................- 9 - 4. 测试工程配置....................................................................................................................- 11 -4.1测试工具配置..............................................................................................................- 11 -4.1.1管理员密码的修改...........................................................................................- 11 -4.1.2 Licenses的修改更新.........................................................................................- 13 -4.1.3 TDServers的配置.............................................................................................- 14 -4.1.4 DB Servers的配置............................................................................................- 16 -4.1.5创建项目管理...................................................................................................- 18 -4.1.6创建成员管理...................................................................................................- 19 -4.2项目组配置..................................................................................................................- 21 -4.2.1管理员登录.......................................................................................................- 21 -4.2.2管理员信息修改...............................................................................................- 22 -4.2.3设置用户...........................................................................................................- 23 -4.2.4设置用户组.......................................................................................................- 25 -4.2.5配置邮件...........................................................................................................- 27 -4.2.6设置通知规则...................................................................................................- 29 -4.2.7项目属性列表...................................................................................................- 30 -4.2.8项目测试定制...................................................................................................- 31 -4.2.9设置缺陷属性显示...........................................................................................- 33 -5. 小结....................................................................................................................................- 35 -1.目的目前TD管理员使用说明为数不多、流传不广,据了解很多TD用户希望有管理员使用说明。
TestDirector使用手册
TestDirector 使用手册1:简介TestDirector是MI(Mercury Interactive)公司一个测试管理工具,是业界第一个基于Web 的测试管理系统,它可以在您公司内部或外部进行全球范围内测试的管理。
通过在一个整体的应用系统中集成了测试管理的各个部分,包括需求管理,测试计划,测试执行以及错误跟踪等功能,TestDirector极大地加速了测试过程。
电子商务正影响着许多公司制定计划和建立自己的IT系统。
很快,一个Web应用软件就能被创建,开发并立即展现在您的客户、供应商或合作伙伴的面前。
然而,由于紧凑的开发计划和复杂的系统基构,Web应用软件的测试经常是被忽视的。
为了与新经济同步,您必须开发经过系统测试的高品质的网络应用软件。
您需要设立一个中央点来管理测试过程。
一套基于Web的测试管理系统提供了一个协同合作的环境和一个中央数据仓库。
由于测试人员分布在各地,您需要一个集中的测试管理系统能让测试人员不管在何时何地都能参与整个测试过程。
IT部门增长地会非常快,人员也会不断流动。
您必须以最快的速度培训新的测试人员,教会他们所有与测试有关的知识技术。
重点在于管理复杂的开发和测试过程,改善部门间的沟通,加速您测试的成功。
TestDirector能消除组织机构间、地域间的障碍。
它能让测试人员、开发人员或其它的IT 人员通过一个中央数据仓库,在不同地方就能交互测试信息。
TestDirector将测试过程流水化——从测试需求管理,到测试计划,测试日程安排,测试执行到出错后的错误跟踪——仅在一个基于浏览器的应用中便可完成,而不需要每个客户端都安装一套客户端程序。
需求管理程序的需求驱动整个测试过程。
TestDirector 的Web 界面简化了这些需求管理过程,以此您可以验证应用软件的每一个特性或功能是否正常。
通过提供一个比较直观的机制将需求和测试用例、测试结果和报告的错误联系起来,从而确保能达到最高的测试覆盖率。
TestDirector详细使用步骤
TestDirector详细使用步骤1、计划测试运行(Scheduling Test Runs)TestDirector能够让你去控制测试集中测试的执行。
本章描述了:●计划测试运行(Scheduling a Test Run)●修改测试运行计划(Modifying a Test Run Schedule)●有序地组织测试(Arranging Tests Sequentially)●查找测试(Finding Tests)●查看执行流程图(Viewing the Execution Flow Diagram)1.1关于计划测试运行(About Scheduling Test Runs)在执行流程中,你能够为执行的测试指定日期和时间,以及设置条件。
条件是基于在执行流程中另一个已定义测试的结果。
通过设置条件,你能够要求TestDirector去推迟执行当前的测试,直到另一个已定义的测试已经完成运行或通过。
你也能够设置测试执行的顺序。
例如在New Order测试集中,你能够决定Test2的运行仅仅需要在Test1已经结束;Test3运行仅仅需要Test2通过;Test2必须在Test3之前运行一天。
不象执行网格,它显示的测试仅仅具有测试运行信息,执行流程显示的测试具有在图中的条件。
注意,在执行流程中,你仅仅只能够计划测试运行。
在执行流程图中,测试集是以测试集图标在表现,每个测试是以一个测试图标在表现。
一个虚线箭头当一个测试具有时间依赖时,一个时间依赖图标将被添加到这图表中。
1.2 计划测试运行(Scheduling a Test Run)执行流程能够让你查看已经发生的执行过程和控制测试被执行的方式。
你能够指定在什么时间(时间依赖)和什么条件(执行条件)下,测试被执行。
计划一轮测试运行:1.在执行流程上,双击一个测试或右击一个测试并选择Test Run Schedule。
测试运行计划的对话框被打开,并现在执行条件标签页。
TestDirector_简易教程
TD用了1年了,已经非常上手了。
这个是我以前写的一个简易教程,TD真的是个很强大的家伙,而且使用和安装都比较简单。
还有就是安装盒使用过程中遇到的问题和解决办法。
一、服务器端安装(server2003)服务器配置:要求安装IIS并建立网站,如果是server2003,得将服务器设置为应用程序服务器;步骤:按照安装向导一步步安装完成后,在计算机管理/Internet服务iis管理/网站/新建网站,将目录设置为TD的安装目录即可。
二、客户端安装(XP系统)在客户端输入服务器上建立的网址如:http://hostname:port/TDBIN/default.htm,选择testDirector项,进入客户端界面,输入用户名和密码即可。
三、管理员使用1.创建域和项目2.分配用户在testDirector界面,点击Cutomize,分配用户给project。
(用户组需先在管理员界面中创建)3.4.管理员帐号登陆客户端,创建需求树。
5.定制测试项目的各个字段管理员帐号登陆客户端,点击右上角顶点Cutomize,进入Project Cutomize界面,选择Customize Project Entities,展开Test节点,定义系统字段。
可以将系统字段改成中文的,以便在输出成测试计划报表的时候方便阅读。
6.设置权限设置只有管理员才能修改或删除缺陷或测试:Customize /setup groups /新建一个组(如果是采用它默认的组,不能修改权限),然后点击change,在这里就可以修改权限.这个权限内荣很丰富:比如能删除、可视、编辑等的权限。
在修改defects时,发现虽然设置了某一个权限,但是仍无法修改,原因是:在右测的Transition Rules中,要把From To的内容改成: from any to any(或按需要改)四、测试人员使用1.测试计划(TEST PLAN标签)在测试计划树中按测试类型和测试模块建立测试文件夹,再在文件夹中建立各个测试步骤,并在测试步骤中添加测试用例2.测试实验室(TEST LAB标签)在Test Sets Tree中建立测试集,然后从测试计划树或需求中导入测试步骤(发现从测试树中导入不成功)然后就run即可。
- 1、下载文档前请自行甄别文档内容的完整性,平台不提供额外的编辑、内容补充、找答案等附加服务。
- 2、"仅部分预览"的文档,不可在线预览部分如存在完整性等问题,可反馈申请退款(可完整预览的文档不适用该条件!)。
- 3、如文档侵犯您的权益,请联系客服反馈,我们会尽快为您处理(人工客服工作时间:9:00-18:30)。
1C u s t o m i z e P r o j e c t E n t i t i e s 1.1 DEFECT1.1.1System FieldsMake sure that the following fields need operation log – check the checkboxes of History●Assigned To●Detected by●Detected in Version●Detected on Date●Status●Description1.1.2User Fields1.1.2.1 A dd a user field 产生于阶段The field type is lookup list and thenCreate the relevant lookup list named 产生于阶段, the list include items as following:1.1.2.2 A dd a user field 解决方法The field type is lookup list and thenCreate the relevant lookup list named 解决方法, the list include items as following:1.1.2.3 C reate a user field 种类The field type is lookup list and thenCreate the relevant lookup list named 缺陷种类, the list include items as the following: image1.1.2.4 C reate a user field 强行关闭原因1.1.2.5 C reate a user field 发现于阶段The field type is lookup list and theCreate the relevant lookup list named 发现于阶段, the list include items as following1.2 Requirement1.2.1System Field1.2.1.1 R eviewedCheck the check box of Lookup list link to this field. Please refer to the following image.2Customize Project Lists2.1 Bug statusSet the bug status as the following image2.2 评审缺陷种类set the 评审缺陷种类as the following image3Setup groups3.1 测试工程师Create a new group 测试工程师and setup it’s permissions as following3.1.1DEFECTS3.1.1.1 A dd Defect:3.1.1.2 M odify defectSet the privilege as the following imageClear all the options of “Owner Only” because this option does not work properly. Remove all the transition rules except status, the transition rules are as following image3.1.1.3 D elete DefectClear the checkbox to forbid this group to delete defects.3.1.2Requirements Setup as the following imageFollowing are some detailed settings AttachmentDescriptionDirect Cover StatusPriorityReviewed3.1.3Test Plan3.1.3.1 A dd Test3.1.3.2 M odify TestCheck all the checkboxes under the node “Modify Test”Check all the options of “Owner Only” except Executions Status and Status Clear the options of “Owner Only” of Executions Status and Status Remove all the transition rules.3.1.3.3 D elete Test3.1.3.4 A dd Design Step3.1.3.5 M odify Design StepCheck all the checkboxes under this node.3.1.3.6 D elete Design Step3.1.3.7 A dd Folder3.1.3.8 M odify FolderCheck all the checkboxes under this node.3.1.3.9 D elete Folder3.1.3.10 Move Folder3.1.3.11 Copy Folder3.1.3.12 Generate Script3.1.4Test LabCheck all the checkboxes to grant all the privileges to this groupUncheck all the options of “Owner Only”Remove all the transition rules.3.1.5AdministrationSet up as the following image3.2 测试经理Create a new group 测试经理(create as 测试工程师). And setup it’s permissions as following3.2.1Defect3.2.1.1 A dd defectThe same as group 测试工程师3.2.1.2 M odify defectThe same as group 测试工程师except the transition rule of status3.2.1.3 D elete defectCheck the check box to enable this group to erase defects, and clear the option of “Owner Only”. In another word, this group can delete all the defects.3.2.2RequirementsCheck all the checkboxes to grant all the privileges to this group.Clear all the options of “Owner Only”except attachment and description.Check the options of “Owner Only”of attachment and descriptionClear all transition rules.3.2.3Test plan3.2.3.1 A dd TestThe same as group “测试工程师”3.2.3.2 M odify TestThe same as group “测试工程师” except Designer.The setting of Designer of this group is as following image3.2.3.3 D elete TestThe same as group “测试工程师”3.2.3.4 A dd Design Step The same as group “测试工程师”3.2.3.5 M odify Design Step The same as group “测试工程师”3.2.3.6 D elete Design Step The same as group “测试工程师”3.2.3.7 A dd FolderThe same as group “测试工程师”3.2.3.8 M odify FolderThe same as group “测试工程师”3.2.3.9 D elete FolderThe same as group “测试工程师”3.2.3.10 Move FolderThe same as group “测试工程师”3.2.3.11 Copy FolderThe same as group “测试工程师”3.2.3.12 Generate Script The same as group “测试工程师”3.2.4Test labThe same as group “测试工程师”3.2.5AdministrationSetup as the following image3.3 开发工程师Create a new group 开发工程师(create as developer). And setup it’s permissions as following 3.3.1Defects3.3.1.1 A dd DefectClear the checkbox to forbid this group to add defect.Setup as the following imageClear all the option of “Owner Only”Remove all the transition rules except statusSet the transition rules of Status as following imageClear the checkbox to forbid this group to erase defect.3.3.2RequirementsSetup as the following image3.3.3Test planClear all the checkboxes to forbid all the privileges to this group 3.3.4Test labClear all the checkboxes to forbid all the privileges to this group 3.3.5AdministrationThe same as group 测试工程师3.4 开发经理Create a new group 开发经理(create as 开发工程师). And setup it’s permissions as following 3.4.1Defects3.4.1.1 A dd DefectThe same as group “开发工程师”3.4.1.2 M odify DefectSetup as the following imageClear all the options of “Owner Only”Clear all the transition rules except status, the transition rules of status is as following3.4.1.3 D elete DefectThe same as the group 开发工程师3.4.2RequirementsThe same as the group 开发工程师3.4.3Test PlanThe same as the group 开发工程师3.4.4Test LabThe same as the group 开发工程师3.4.5AdministrationThe same as the group 开发工程师3.5 测试员Create a new group 测试员(create as 测试工程师). And setup it’s permissions as following 3.5.1DefectsClear all the checkboxes to forbid all the privileges to this group3.5.2RequirementsClear all the checkboxes to forbid all the privileges to this group3.5.3Test PlanClear all the checkboxes to forbid all the privileges to this group 3.5.4Test LabSetup as the following image3.5.5AdministrationThe same as group 测试工程师4Setup workflow4.1 Script Generator-List Customization for defectsModule4.2 Script Generator- Add defect field customization 4.2.1测试工程师(需要添加期望解决日期与解决人)Setup as the following image4.2.2测试经理The same as 测试工程师4.3 Script Generator –Defect details fieldcustomization4.3.1测试工程师4.3.2测试经理The same as 测试工程师4.3.3开发工程师The same as 测试工程师4.3.4开发经理The same as 测试工程师4.4 Script Generator – Script Editor 4.4.1Defects module script4.4.1.1 D efects_Bug_NewModify the sub as the following image4.4.2Test Plan Module script4.4.2.1 T estPlan_Test_NewModify the sub as the following image。
