Linux安装DB2说明
Linux下DB2数据库安装教程
Linux下DB2数据库安装教程最近因为⼯作需要在学习DB2数据库,本教程讲解DB2数据库在inux下的安装步骤。
安装前请查看说明来增加了解,先弄明⽩改安装什么版本,这⾥我⽤的是最新的Express-C版本,这个版本是提供给个⼈学习⽤的版本。
管理客户端从v9.7版本之后就不再带有控制中⼼了,⽽是使⽤ Data Studio Client。
Linux版本:Linux版本下的DB2数据库采⽤的官⽅免费版本,操作系统⽤的CentOS6.2。
安装过程:1、下载:db2_v101_linuxia32_expc.tar.gz2、解压,解压完成后会在当前⽬录下有⼀个 ./expc ⽂件夹[root@localhost opt]# tar -zxvf db2_v101_linuxia32_expc.tar.gz3、进⼊这个⽬录[root@localhost opt]# cd expc/4、执⾏安装[root@localhost expc]# ./db2_install5、添加组和⽤户:组(⽤户名)db2iadm1(db2inst1)db2fadm1( db2fenc1)[root@localhost expc]# groupadd -g 2000 db2iadm1[root@localhost expc]# groupadd -g 2001 db2fadm1[root@localhost expc]# useradd -m -g db2iadm1 -d /home/db2inst1 db2inst1[root@localhost expc]# useradd -m -g db2fadm1 -d /home/db2fenc1 db2fenc1[root@localhost expc]# passwd db2inst1[root@localhost expc]# passwd db2fenc16、安装 license(产品许可证)PS:如果是ExpressC版本就不⽤做[root@localhost adm]# pwd/opt/ibm/db2/V10.1/adm[root@localhost adm]# chmod -R 775 *[db2inst1@localhost adm]$ ./db2licm -a /tmp/seagull/db2v10/license/db2ese_c.lic7、创建实例和样本数据库[root@localhost instance]# pwd/opt/ibm/db2/V10.1/instance[root@localhost instance]# chmod -R 775 *[root@localhost instance]# ./db2icrt -p 50000 -u db2fenc1 db2inst1[root@localhost instance]# su - db2inst1[db2inst1@localhost ~]$ db2samplCreating database "SAMPLE"...Connecting to database "SAMPLE"...Creating tables and data in schema "DB2INST1"...Creating tables with XML columns and XML data in schema "DB2INST1"...'db2sampl' processing complete.[db2inst1@localhost ~]$ db2startSQL1026N The database manager is already active.[db2inst1@localhost ~]$ db2 connect to sampleDatabase Connection InformationDatabase server = DB2/LINUX 10.1.2SQL authorization ID = DB2INST1Local database alias = SAMPLE[db2inst1@localhost ~]$ db2 "select * from staff"8、创建 das 管理服务器为了远程客户端能够⽤控制中⼼来控制数据库服务器,需要在数据库服务器上安装 das,当然,如果只是远程连接⽽不是远程管理,可以不⽤装,这⾥我安装了⼀下。
Linux使用命令行安装DB2【详解】
DB2 ESE V9.7文本方式安装主要流程:(1)解压安装包,检查安装先决条件(2)执行安装程序(3)注册license(Express-C版无需注册)(4)创建3个用户组和3个用户,分别是实例用户、受限用户、管理用户(5)创建一个管理服务器(6)创建一个实例(7)配置DB2访问协议(8)配置DB2实例默认端口号一、安装前准备工作1、将下载的安装文件上传到待安装的LINUX 机器,解压缩v9.7_linuxx64_server.tar.gz 文件到某个目录[root@redflag11012601 app]# ll v*gz-rw-r--r-- 1 root root 810576392 05-03 19:44 v9.7_linuxx64_server.tar.gz[root@redflag11012601 app]# tar xzf v9.7_linuxx64_server.tar.gz2、解压产生两个目录server和db2[root@redflag11012601 app]# cd server[root@redflag11012601 server]# ll总计 64drwxr-xr-x 6 bin bin 4096 2009-11-16 db2-r-xr-xr-x 1 bin bin 5340 2009-11-16 db2ckupgrade-r-xr-xr-x 1 bin bin 5293 2009-11-16 db2_deinstall-r-xr-xr-x 1 bin bin 5163 2009-11-16 db2_install-r-xr-xr-x 1 bin bin 5127 2009-11-16 db2ls-r-xr-xr-x 1 bin bin 5145 2009-11-16 db2prereqcheck-r-xr-xr-x 1 bin bin 5145 2009-11-16 db2setupdrwxr-xr-x 15 bin bin 4096 2009-11-16 doc-r-xr-xr-x 1 bin bin 5181 2009-11-16 installFixPackserver 的子目录有多个可执行的脚本,其中db2prereqcheck是先决条件检查,db2setup 是图形界面安装程序,db2_install是命令行方式安装。
如何在Linux虚拟环境下搭建DB2数据库DPF

如何在Linux虚拟环境下搭建DB2数据库DPFDB2的分区架构一般适合于统计类和分析的应用,主要用来为大规模数据处理、高并发数据访问提供支持。
DPF是DB2的多分区数据库,那么DPF要怎么搭建呢?下面小编就给大家介绍下如何在Linux虚拟化环境搭建DB2数据库DPF,给不知道怎么搭建的朋友做个指导。
如何在Linux虚拟环境下搭建DB2数据库DPF一、创建用户和组1、使用root用户添加系统用户/usr/sbin/groupadd -g 1997 db2igrp#instance所在的group,加入这个group的所有用户都具有DBA权限/usr/sbin/groupadd -g 1998 db2fgrp#fenced用户所在的group/usr/sbin/useradd -u 1997 -g db2igrp -d /cbusdb/db2inst1 db2inst1#db2inst1用户/usr/sbin/useradd -u 1998 -g db2fgrp -d /cbusdb/db2fenc1 db2fenc1#db2fenc1用户/usr/sbin/groupadd db2fadmin/usr/sbin/useradd -g db2fadmin db2admin2、使用root用户添加数据库账号/opt/ibm/db2/V10.5/instance/db2icrt -s ese -u db2fenc1 db2inst1#在所有的机器上,使用root用户,建立db2 admin server:/opt/ibm/db2/V10.5/instance/dascrt -u db2admin#启动db2 admin server:db2admin start3、修改节点配置文件#vim /cbusdb/db2inst1/sqllib/db2nodes.cfg0 cbusdb01 01 cbusdb01 12 cbusdb02 03 cbusdb02 14、修改实例参数su - db2inst1db2iauto -on db2inst1db2set DB2_SKIPINSERTED=ondb2set DB2_USE_ALTERNATE_PAGE_CLEANING=ondb2set DB2_EVALUNCOMMITTED=ondb2set DB2_SKIPDELETED=ondb2set DB2COMM=TCPIPdb2set DB2FCMCOMM=TCPIP4db2set DB2RSHCMD=/bin/rsh#注意如果配置的ssh则此处需要修改成db2set DB2RSHCMD=/usr/bin/sshdb2set DB2CODEPAGE=1386db2set DB2TERRITORY=86db2set DB2_PARALLEL_IO=*5、配置服务端口DB2c_db2inst1 61000/tcpDB2_db2inst1 61001/tcpDB2_db2inst1_1 61002/tcpDB2_db2inst1_2 61003/tcpDB2_db2inst1_3 61004/tcpDB2_db2inst1_4 61005/tcpDB2_db2inst1_END 61008/tcp6、调整系统参数,设置dpf所需的资源/sbin/sysctl -w kernel.sem=“250 32000 32 1024”/sbin/sysctl -w kernel.msgmnb=16384/sbin/sysctl -w kernel.msgmni=1024/sbin/sysctl -w kernel.msgmax=8192/sbin/sysctl -w kernel.shmmni=4096/sbin/sysctl -w kernel.shmall=2097152/sbin/sysctl -w kernel.shmmax=10737418247、修改环境变量cat 。
linux下命令行的方式DB2数据库安装和卸载
安装1.系统依赖检测执行./db2prereqcheck[root@localhost server]# ./db2prereqcheck提示信息:下载对应版本的so文件放在/usr/lib下,再执行,DB2系统依赖检测,正常2.安装1)命令行安装执行db2_install,出现以下界面选择ESE,是服务器版本,安装成功创建数据库,指定编码格式为GBK[db2inst1@localhost ~]$ db2 create db DBTE using codeset GBK territory CNConnect to db DBTE,报错,如下执行下列语句[db2inst1@localhost V9.7]$ db2 update db cfg for DBTE using UTIL_HEAP_SZ 5000 DATABASE_MEMORY 50000原因:应该是我的util_heap_sz参数不够大,之前设置为automatic 的话,应该是默认分配了512再连接成功,如下图常用操作命令db2 =>connect to sample ---连接到sample数据库db2 =>list tables ---查看库下面的所有表db2 => select * from staff wheredept=10 ---查询某张表dept等于10的所有记录db2 => quit ---退出db2DB20000I The QUIT command completed successfully.$ db2ilist; ---查看实例列表db2inst1$ db2 get instance ---查看当前所运行的实例Thecurrent database manager instance is: db2inst1卸载1.Remove DB[首先删除数据库](1)su - db2inst1(2)db2 list db directory(3)db2 drop db <db name>2.Remove Instance【删除实例】(1)su - root(2)cd <db2 dir>/instance(3)./db2ilist(4)./db2idrop -f <instance name>3.Remove das【删除das】(1)su - root(2)cd <db2 dir>/instance(3)./daslist(4)./dasdrop <das user>4.Uninstall【卸载】(1)su - root(2)cd <db2 dir>/install(3)./db2_deinstall -a5.Remove user ( db2inst1,db2fenc1,dasusr1)【删除用户】userdel -r <username>please lookinto the file /etc/passwd before and after you deleted users。
linux下安装DB2的详细步骤
linux下安装DB2的详细步骤安装前准备:DB2 10.1的版本需要在Linux5以上版本,核心要求2.6.16以上。
可以通过lsb_release –a和uname –a命令查看系统版本和核心版本。
/etc/redhat-release文件中描述了系统的版本信息。
第一步在IBM网站下载,下载db2数据包,目前我下载的是db2_v1012_linuxia32_expc_lite.tar.gz第二步把下载下来的包(名称有可能是:db2_v1012_linuxia32_expc_lite.tar.gz)通过FTP放进opt目录第三步用命令解压db2_v1012_linuxia32_expc_lite.tar.gz如下:#cd /opt#gunzip db2_v1012_linuxia32_expc_lite.tar.gz# tar -xvf db2_v1012_linuxia32_expc_lite.tar第四步解压以后会有目录名如:tar -xvf DB2_V81_PE_LNX_32_NLV,点击进去以后,可以看到有三个文件,其它一个是用指令(db2_install)安装,另一个是图片介面(db2setup)切换到/opt/devinst/db2_v101fp2/linuxia32/s121127/expc_lite/,用指令如下:#cd /opt/devinst/db2_v101fp2/linuxia32/s121127/expc_lite/#sh db2_install稍后会出现如果提示:DB2.ADMCL DB2 Administration Client for LINUX26DB2.ESE DB2 Enterprise Server Edition for LINUX26DB2.ADCL DB2 Application Development Client for LINUX26 然后进行选择,选择时一定要用大写如果选择:DB2.ESE这时它自己会执行所有文件,执行完以后在:/opt目录里面会出现:IBM表示安装已经完毕接下来,我们要创建实例和创建数据库第五步(注册license)要注册license不然到时没法创建数据库,license在哪里你要自己去找一下,一般情况会出现在这里:/home/db/db2/V10.1/adm/db2licm/opt/devinst/db2_v101fp2/linuxia32/s121127/expc_lite/db2/license/ db2expc_uw.lic然后在root用户下执行#/home/db/db2/V10.1/adm/db2licm –a/opt/devinst/db2_v101fp2/linuxia32/s121127/expc_lite/db2/license/db 2expc_uw.lic第六步创建用户组和用户# groupadd -g 901 db2grp# groupadd -g 902 db2fgrp# groupadd -g 903 db2agrp# useradd -g db2grp -u 801 -d /home/db2inst1 -m -s /bin/sh db2inst1# useradd -g db2fgrp -u 802 -d /home/db2fenc -m -s /bin/sh db2fenc# useradd -g db2agrp -u 803 -d /home/db2das -m -s /bin/sh db2das第七步修改密码# passwd db2inst1Changing password for db2inst1.New password:[db2inst1]Re-enter new password:[db2inst1]创建完成后,执行如下命令,检查用户组和用户是否创建成功。
Linux 下 DB2 的安装

Linux 下DB2 的安装DB2(7.1)在AIX上的安装DB2 7.1EE的安装步骤一,安装前的准备工作1,内存要求:db2要求的内存取决于服务器进程和客户端并发连接数,最小256MB。
2,硬盘空间free要大于300M(/usr),db2是安装在/usr/lpp/db2_07_01下;3,基本上不需要打什么补丁,但注意尽量打全,因为有可能会用到除tcpip之外的协议,如IPX / SPX,NetBIOS…;4,建db2的用户(3个,分别为Instance user(db2inst1),UDF user(db2fenc1),admin user(db2admin)),3个用户分别属于db2iadm1.db2fadm1.db2asgrp这3个组。
这步可以跳过,在db2安装过程中系统会自动建;二,安装DB21, 以root用户登录;2,插入光盘;3,建mount点,mkdir /cdrom;4,mount光盘,mount –rv cdrfs /dev/cd0 /cdrom注:弟4步可以用下面步骤代替smitty manfs选cdrom File System选Add a cdrom File Systems.Device Name处(用F4选cd0)Mount point处(键入/cdrom)这样建立了一个文件系统,以后mount光盘只要用mount /cdrom就可以了。
5,./db2setup开始安装db2可以用./db2setup –d这样会产生一个安装的log文件,/tmp/db2setup.trc6,选DB2 UDB Enterprise Edition7,选Create a DB2 Instance建instance会建用户,组,注意密码默认是ibmdb28,Create the Administration Server建db2管理员用户,组,密码同上9,安装结束三,确认安装1,以db2inst1登录;2,db2sampl,建sample数据库;3,db2start,启动数据库;4,db2 connect to sample,连接成功5,删掉sample数据库,db2 drop databaseDB2 UDB 7.1 Enterprise Extended Edition Install on Red Hat Linux 7.1The purpose of this document is to provide a step-by-step installation of DB2 UniversalDatabase 7.1 Enterprise Extended Edition (DB2 EEE) on Red Hat Linux 7.1. It does not coverall the possible installation methods or running environments. All steps should be performed asroot unless otherwise noted.Overview of Installation Steps:1. Install Red Hat 7.1 on servers2. Configure networking hardware3. Setup NFS filesystem4. Create users and groups5. Enable rsh6. Install and setup DB27. Configure multiple nodes8. Configure the Administration Server9. Configure the Kernel10. Create a database(Step 1) Install Red Hat 7.1Typical installs of Red Hat 7.1 do not include all the necessary packages to install and run DB2EEE. When installing Red Hat 7.1 choose the option not to install a firewall. The followingservices also need to be installed:✍ X - if you wish to run the DB2 Java Control Center✍ Xinetd - required for DB2 Communication✍ rsh - required for DB2 EEE only (ssh will not work)✍ pdksh - required for install✍ Nfs-utils - required for NFS mount(Step 2) Configure networking hardwareDB2 EEE systems require communication between partitions. The demands forinter-nodecommunication vary based upon implementation. It is recommended that inter-node communication be isolated to a network dedicated for this purpose. The following example setupsplits network activity between a public network and a private network for DB2 EEE by utilizingtwo network cards in each machine.Machine: DB2lab9Hostname: DB2lab9NIC 1 - IP address (public): 9.19.156.33- Subnet : 255.255.252.0NIC 2 - IP address (private): 10.10.10.9- Subnet: 255.255.255.0Machine: DB2lab10Hostname: DB2lab10NIC 1 - IP address (public): 9.19.156.34- Subnet: 255.255.252.0NIC 2 - IP address (private): 10.10.10.10- Subnet: 255.255.255.0(Step 3) Setup NFS file systemThe scalability of DB2 EEE is a result of maximizing the parallelism of hardware resources.There are a small number of configuration control files that all partitions in a DB2 system share.These files are made available by a NFS mounted file system. The steps for creating and testingthe NFS mount are:1. Create a directory /db2home on all the machines that will be in the cluster2. On the first machine in the cluster (the instance owner) prepare and mount the exported filesystemA. Create the /etc/exports file on DB2lab9B. Add the following entry /db2home db2lab*.local.domain(rw)C. On DB2lab9 restart the NFS service./etc/init.d/nfs restartD. Verify the export is working correctlyshowmount --exports3. On all other machines in the cluster mount the file systemA. Add the following entry to /etc/fstab ‘DB2lab9:/db2home /db2home nfs rw 0 0’B. Mount the exported file system on all the machines in the clustermount /db2homeC. Verify the mount by issuing the mount command with no options(Step 4) Create users and groupsThe DB2 setup program can create the necessary users and groups. The following are steps tocreate the required groups and users manually to ensure consistency across all machines.1. Create the necessary groups on all machinesgroupadd -g 550 db2iadmgroupadd -g 551 db2fadmgroupadd -g 552 db2as2. Create the necessary users on all machinesuseradd -u 550 -g 550 -d /db2home/db2inst1 db2inst1useradd -u 551 -g 551 -d /db2home/db2fenc1 db2fenc1useradd -u 552 -g 552 -d /db2home/db2as db2as3. Set passwords for users on all machinespasswd db2inst1passwd db2fenc1passwd db2asThe user db2inst1 will be the instance owner and administrator for DB2 EEE. Stored procedureswill run under the db2fenc1 ID.(Step 5) Setup rshDB2 EEE uses rsh to perform remote execution on machines in the cluster. There are twomethods for enabling rsh. The first method is to provide a security file .rhosts file in the instanceowner’s home directory. The second method is to provide a security file/etc/hosts.equiv for everymachine in the cluster. In either case the file/s list the users allowed to issue remote commandsand the machines where the remote commands may originate. User root is disabled from usingrsh in Red Hat Linux 7.1.Method One:1. Create the /db2home/db2inst1/.rhosts.equiv file2. Add the following entries to the .rhosts.equiv file:DB2lab9 db2inst1DB2lab10 db2inst13. Restart xinetd service on all machines/etc/init.d/xinetd restart4. Verify the rsh service is workingA. Login as user db2inst1B. Issue a remote command on each machine for example:rsh DB2lab10 ls /usrMethod Two:1. On every machine in the cluster create the /etc/hosts.equiv file2. Add the following entries to the hosts.equiv files:DB2lab9 db2inst1DB2lab10 db2inst13. Restart xinetd service on all machines/etc/init.d/xinetd restart4. Verify the rsh service is workingA. Login as user db2inst1B. Issue a remote command on each machine for example:rsh DB2lab10 ls /usr(Step 6) Install and Setup DB2 EEEThe install steps may depend on how you obtained DB2. If you downloaded the code you willneed to extract the files from the tar file before proceeding. If you obtained DB2 EEE on CD thiswill not be necessary. There are two scripts important to the setup and installation of DB2,db2_install and db2setup. The first, db2_install, will only install the DB2 libraries and can not beused to setup DB2 EEE or create db2 instances. The db2setup utility can be used for bothprocesses. This example will use both utilities to complete the installation. Complete thefollowing steps on each machine.1. Extract the DB2 RPMs (only required for downloaded TAR files)tar -xf db2eee linuxeee.english.tar2. Extract any fix pack appropriate for your version leveltar -xf FP3_U475391.tar3. Install the code on each serverdb2_install/FP3_U475391/installpatchDB2 will be installed into the following path /usr/IBMdb2/V7.1/. The db2setup script requires libncurses.so.4 to be viewed properly. This library is not installed during the default install of Red Hat 7.1. The alternative to installing these libraries is to create a symbolic link to libncurses.so.5 with the following command. However, you will need topay close attention when running db2setup. The screen may display characters that do notexist.ln -sf /usr/lib/libncurses.so.5 /usr/lib/libncurses.so.44. Begin the setup of DB2 on the first machine (db2lab9)/usr/IBMdb2/V7.1/install/db2setup5. Choose the option to create a DB2 instance (this will only be completed on one node)6. Provide the proper user and group information as created in step 4 and continue the setupdb2inst1 will be used for the DB2 Instancedb2fenc1 will be used for the Fenced User7. Verify the setup by stopping and starting the db2 instance (db2inst1)As user db2inst1 issue the db2start and db2stop(Step 7) Configure multiple nodesAfter you have configured and setup DB2 EEE you will need to create new partitions. The/db2home/db2inst1/sqllib/db2nodes.cfg specifies what partitions exist in the DB2 EEE system.To add partitions:1. Add an entry into the db2nodes.cfg for the new partition1 db2lab10 02. Update the services file for listening ports both for external communication and for FCMcommunication between nodes. You can copy the entries from the end of the/etc/servicesfile or simply copy the file from the instance owning machine.3. To use a specific network for FCM communication edit the/db2home/db2inst1/sqllib/db2nodes.cfg and specify what network FCM should flow over.0 db2lab9 0 10.10.10.91 db2lab10 0 10.10.10.104. Verify communication by stopping and starting the instance, db2start and db2stop (Step 8) Configure the Administration ServerThe Administration Server is used for administration of instances.1. Begin the setup of the Administration Server by executing the db2setup command /usr/IBMdb2/V7.1/install/db2setup2. Choose the option to create an instance3. Select the option to create the Administration Server4. Provide the proper user and group information as created in step 4 and continue the setupdb2as will be used for the Administration Server(Step 9) Configure the KernelTo increase performance and the number of simultaneous connections to DB2 EEE change ipckernel parameters.1. Configure the msgmni parametersysctl - w kernel.msgmni=1282. Configure the parameter to be applied at boot timeAppend the following line to /etc/sysctl.conf:kernel.msgmni=128(Step 10) Create a DatabaseBy default the create database command will create the initial database objects in the instanceowner’s home directory. This is not the desired location as the instance owner’s home directoryresides on the NFS mounted file system. To change this specify a location when using the createdatabase command. The initial database objects known as the system catalogs will only reside onthe first partition. Rows in user created tables will be striped across the partitions. The pathspecified on the create database command must exist on all the machines and the instance owner’sID must have read write access to the path. The best option is to give ownership of the path tothe instance owner’s ID.1. As root create a directory for database objects on db2lab9 and db2lab10mkdir /testdbdir2. Change ownership of this directory to the instance owner on db2lab9 and db2lab10 chown /testdbdir db2inst13. As db2inst1 create the test databasedb2 “create database test on /testdbdir”For setup instructions of the DB2 Control Center refer to the After Installing DB2 on Red Hatsection of the following HOWTO:/HOWTO/DB2-HOWTO/Additional thanks to:✍ Nancy Miller for reviewing this document and providing constructive insights. ✍ Dan Scott for his web resources unavailable anywhere else.Monty WrightDB2 SpecialistAdvanced Technical Supportmontywri@。
Linux系统环境下DB2服务器的安装
Linux系统环境下DB2服务器的安装与配置一、系统环境:Centos Linux 5.4 Enterprise Edition(默认已安装)二、服务器前期基本配置1.更改主机名为DB2servervi /etc/sysconfig/network#修改成如下配置NETWORKING=yesNETWORKING_IPV6=noHOSTNAME=DB2serverGATEWAY=192.168.1.1vi /etc/hosts添加如下一行:192.168.1.49 DB2server(注:这里服务器的ip为当前机器的ip地址)2.修改系统时间date -s 07/13/2013date -s 15:41:003.关闭selinuxvi /etc/selinux/config#修改如下行SELINUX=disabled4.设置eth0的IP地址为192.168.1.49/24vi /etc/sysconfig/network-scripts/ifcfg-eth0# Advanced Micro Devices [AMD] 79c970 [PCnet32 LANCE]DEVICE=eth0BOOTPROTO=staticBROADCAST=192.168.1.255HWADDR=00:0C:29:8B:14:B2IPADDR=192.168.1.49NETMASK=255.255.255.0NETWORK=192.168.1.0ONBOOT=yes5.设置DNS地址为192.168.1.1vi /etc/resolv.conf#添加如下一行nameserver 192.168.1.16.关闭不需要的服务注:在日常的服务器维护过程中,原则上只保留syslog,network,sshd,Crond 服务chkconfig list|grep 3:onchkconfig network onchkconfig syslog onchkconfig sshd onchkconfig crond on对于其他的服务,采用service XXX stopchkconfig XXX off即可。
在linux上部署安装db2

一、在linux(虚机)上部署DB2(8.2版本)(一)用命令行安装及配置db2数据库1.利用远程终端工具上传DB2_V82_ESE_LNX_32_NLV.tar到linux系统上。
如放置在/tmp/gxs目录中。
2.进入“/tmp/gxs”目录,执行tar命令解压db2的安装包3.解压后在gxs目录中的内容如下拷到license中,否则db2安装完后不能使用。
4.执行db2_install命令,进行db2数据库安装。
5.如下所示,输入DB2.ESE后,回车确定。
6.安装完毕后的页面如下所示。
DB2默认安装在/opt/IBM目录下。
7.创建用户id,如下所示。
可。
如下所示。
8.创建实例,首先我们使用以下命令创建管理服务器实例,切换到root用户,进入/opt/IBM/db2/V8.1/instance目录中。
执行:./dascrt -u dasusr1命令9.接着使用以下命令创建数据库实例db2inst1这个命令有一些可选的参数。
特别地,-a选项允许我们指定一个不同于缺省的“server”的认证机制。
10.创建共享库链接,进入/opt/ibm/db2/v8.1/cfg/目录中,如下所示11.设置db2实例环境变量。
用su命令切换到db2实例所用者用户终端12.执行db2start命令,验证db2是否成功安装。
13.设置服务端口,输入db2命令,进入db2命令行模式(c) Copyright IBM Corporation 1993,2002Command Line Processor for DB2 SDK 8.2.0Y ou can issue database manager commands and SQL statements from the command prompt. For example:db2 => connect to sampledb2 => bind sample.bndFor general help, type: ?.For command help, type: ? command, where command can bethe first few keywords of a database manager command. For example:? CA TALOG DA TABASE for help on the CA TALOG DA TABASE command? CA TALOG for help on all of the CA TALOG commands.To exit db2 interactive mode, type QUIT at the command prompt. Outside interactive mode, all commands must be prefixed with 'db2'.To list the current command option settings, type LIST COMMAND OPTIONS.For more detailed help, refer to the Online Reference Manual.db2 =>14.执行:update database manager configuration using svcename server1|50000其中:server1|50000两者选其一,server1|为服务名,50000为端口号15.执行get database manager configuration16.创建数据库:create database dbname如果此处失败,在命令行执行db2start,或者重新启动系统(reboot)。
Linux 上安装DB2(图形界面)
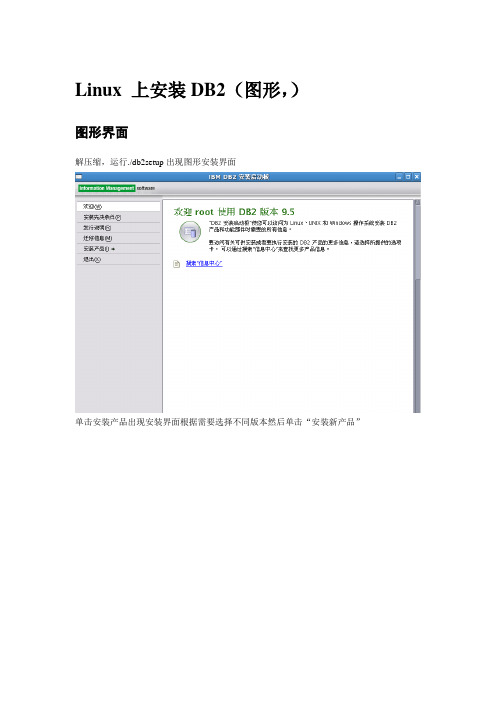
Linux 上安装DB2(图形,)
图形界面
解压缩,运行./db2setup出现图形安装界面
单击安装产品出现安装界面根据需要选择不同版本然后单击“安装新产品”
出现安装向导界面直接单击下一步。
单击接受许可协议,下一步。
根据需要选择安装类型,这里选择的是“典型安装”,单击下一步。
安装或创建响应文件窗口,选项一直接安装DB2到计算机不创建响应文件,选项二仅创建响应文件不安装,选项三安装DB2到计算机并且保存响应文件。
响应文件可以保存用户对此次安装的设置,实现无人自动运行安装DB2,同时安装很多台
DB2时非常好用。
选择安装目录单击下一步
安装SA MP Base Component 单击下一步。
入密码就好了。
)
创建实例,下一步。
DB2实例所有者创建用户,密码。
下一步。
受防护的用户,同上,下一步。
准备DB2工具目录,选择准备DB2工具目录,下一步。
为运行状况监视器通知指定的联系人,选择‘将此任务延迟到完成安装之后’单击下一步。
总结界面,没什么问题,单击完成。
开始安装。
安装完成后切换用户
Su – db2inst1
输入db2start 出现如下图说明DB2启动成功
输入db2 create database test1创建数据库。
这样数据库基本安装成功。
Linux下DB2安装与配置
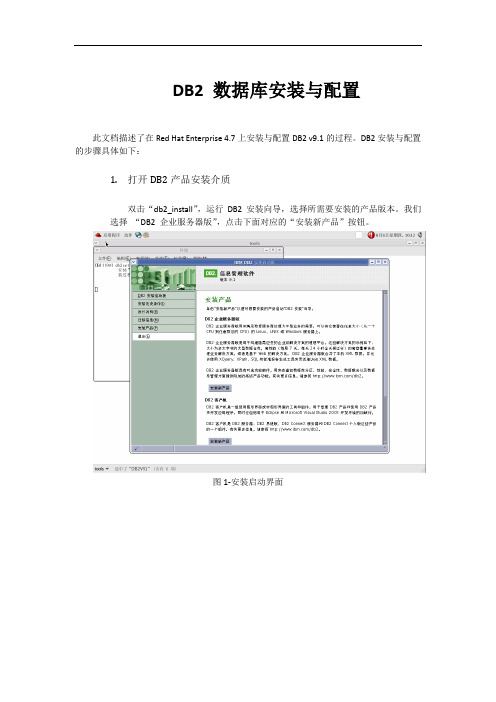
DB2 数据库安装与配置此文档描述了在Red Hat Enterprise 4.7上安装与配置DB2 v9.1的过程。
DB2安装与配置的步骤具体如下:1.打开DB2产品安装介质双击“db2_install”,运行DB2安装向导,选择所需要安装的产品版本。
我们选择“DB2 企业服务器版”,点击下面对应的“安装新产品”按钮。
图1-安装启动界面2.确认所选择的安装版本图2-安装版本简介3.阅读并接受许可协议图3-软件许可协议4.选择安装类型选择相应的安装类型时,安装类型信息显示区域有相关介绍,可根据实际需要选择。
这里,我们选择“定制安装”。
5.选择安装并创建响应文件图5-安装操作界面6.选择需要安装的功能部件,以及安装目录图6-选择功能部件界面7.选择安装语言包默认选择简体中文和英语。
可根据需要选择其他语言。
图7-选择语言界面8.指定信息中心安装位置默认安装到本机,如果需要,可更改为其他主机和端口。
图8-指定DB2信息中心位置9.创建管理服务器用户信息这里保持默认,密码设置为其用户名。
图9-设置“DB2管理服务器用户(DAS)”信息10.设置DB2实例选择是否创建数据库实例。
默认选择“创建DB2实例”。
图10-设置DB2实例11.为DB2实例设置分区选项这里默认选择“单一分区实例”。
图11-为DB2实例设置分区选项12.设置实例所有者用户此用户用来启动和关闭实例。
这里保留默认设置,密码设置为用户名。
图12-设置DB2实例所有者的用户信息13.设置受防护用户的用户信息保留默认设置,密码设置为用户名。
图13-设置受防护用户的用户信息14.配置实例通信和启动此处配置实例的服务名称以及端口号。
这里保留默认设置。
图14-配置实例通信和启动15.配置数据库实例工具目录如果需要对数据库进行定时处理等操作的话,需要配置此项。
图15-工具目录的设置16.设置通知图16-设置通知17.预览设置信息图17-预览设置信息18.执行安装配置图18-执行安装配置如果使用的是定制安装,且选择了其他语言包,则需要使用卷标为DB2_NLPACK_9_1_0_3_LNXX86_64_1的光盘。
linux中安装db2和编译环境配置

4.
rm /home/db2adm1/das
5. 创建数据库实例:
/opt/IBM/db2/V8.1/instance/db2icrt -s ese -u db2inst1 db2inst1
如果返回tail 22:
tail: cannot open `+2' for reading: No such file or directory
设置db2实例中的服务端口(db2inst1用户):
db2start
db2 update database manager configuration using svcename DB2_db2inst1
db2 update database manager configuration using svcename 60000
1. 解压缩
tar xvf DB2_V82_ESE_LNX_32_NLV.tar
2. 安装
1>. sh db2_install -p DB2.ESE
2>. sh db2_install -p DB2.ADMCL
3>. sh db2_install -p DB2.ADCL
3. 创建DB2用户:
3. 解压成功后执行./installFixPak -y
4. 进入/opt/IBM/db2/V8.1/instance目录执行./db2iupdt -e
执行成功后OK!
注:常用数据库管理命令:
设置db2实例运行环境变量
su db2inst1
db2set DB2COMM=tcpip ;; 设置允许 db2 通过 tcpip 方式访问
DB2安装详细教程
DB2安装教程1、安装好redhatlinux虚拟机2、点击我的电脑进入3、双击Filesystem进入4、找到tmp文件夹双击进入5、在tmp文件夹下建立db2和111新文件夹6、将已拷贝好的32位的v9.7_linuxia32_server.tar-DB2压缩包和lic压缩包放入建好的db2文件夹中7、回到linux桌面右击进入系统编辑器终端,键入su - 回车进入用户编辑;8、cd /tmp/db2进入db2文件夹;再输入两个小写ll查看db2包内容;9、tar xzvf lic.zip解压lic文件10、tar xzvf v9.7_linuxia32_server.tar-DB2.gz解压此压缩包;11、cd server进入server文件夹,可输入两个小写ll查看server包内含的文件;12、./db2_install安装db2;2.2.3选择路径输入yes系统会安装到默认的路径,使用默认路径即可。
该路径:/tmp/1112.2.4选择安装的版本我们安装企业版,输入ESE即可。
之后系统会自动安装直至完成。
1.1 安装完成后的配置2.3.1创建组groupadd -g 999 db2iadm1groupadd -g 998 db2fadm1groupadd -g 997 dasadm12.3.2创建用户useradd -u 1004 -g db2iadm1 -m -d /home/db2inst1 db2inst1useradd -u 1003 -g db2fadm1 -m -d /home/db2fenc1 db2fenc1useradd -u 1002 -g dasadm1 -m -d /home/dasusr1 dasusr12.3.3修改用户密码passwd db2inst1passwd db2fenc1passwd dasusr12.3.4创建管理服务器/tmp/111/instance/dascrt -u dasusr12.3.5创建一个实例/tmp/111/instance/db2icrt -a SERVER -u db2fenc1 db2inst12.3.6配置DB2实例的TCP/IP通信切换到实例用户下,启动db2su - db2inst1db2start对db2进行配置db2set DB2_SKIPINSERTED=ONdb2set DB2_EV ALUNCOMMITTED=ONdb2set DB2_SKIPDELETED=ONdb2set DB2_HASH_JOIN=YESdb2set DB2_RR_TO_RS=YESdb2set DB2CODEPAGE=1386db2set DB2COMM=TCPIPdb2set DB2_PARALLEL_IO=*db2 update dbm cfg using svcename 500002.3.7更新产品许可证密钥db2licm -a /tmp/db2/db2V9.7/db2ese_c.licdb2licm -a /tmp/db2/db2V9.7/db2geo.licdb2licm -a /tmp/db2/db2V9.7/db2poese.licdb2licm -a /tmp/db2/db2V9.7/db2so.licdb2licm -a /tmp/db2/db2V9.7/sam31.licdb2licm -a /tmp/db2/db2V9.7/db2ese.lic2.3.8添加自动运行db2set DB2AUTOSTART=NOsu -输入vi /var/lock/subsys/local的后面加上以下内容先按I键后su - db2inst1 -c "db2start"输完后按ESC输入:qw确定下一步重启shutdown -r now开机后使用db2inst1登陆。
DB2在Linux下的安装
DB2在Linux下的安装二〇一五年十一月七日星期六目录1. 安装环境说明 (2)2. 基础准备 (2)3. 安装步骤 (2)3.1. 安装包上传解压 (2)3.2. 安装前检查 (2)3.3. 安装 (5)4. 附录 (20)1.安装环境说明操作系统:SUSE Linux Enterprise Server 11 (x86_64)数据库:db2 V9.7(64bit)2.基础准备操作系统,可在下述地址下载:链接:/s/1bnBKRuB 密码:0pef这个是说开启了内存地址随机化机制(address space layout randomization)功能,这个功能对DB2本身没有太大影响,有个别工具db2pd db2egcf 会出现异常,若有强迫症,如下:官方解释:DBT3534Wdb2prereqcheck实用程序确定ASLR设置为ON并且这可能导致某些工具发生问题。
说明地址空间布局随机化(ASLR)缺省情况下在某些Linux分发上已激活。
ASLR被设计为在随机地址装入共享内存对象。
ASLR启用后,DB2数据库不能保证地址对共享内存对象可用。
地址空间中的此冲突意味着尝试将共享内存对象附加至特定地址的进程可能无法完成任务,从而导致shmat子例程失败。
但是,后续使用新进程重试共享内存附加时可能会成功。
结果是一组随机失败。
已知会见到此错误的一些进程包括:db2pd、db2egcf和db2vend。
此问题可能导致的一些错误包括以下各项:db2pd命令可能会报告找不到数据,即使实例或数据库处于活动状态。
db2egcf进程(用于监视)可能会错误地确定实例已关闭并启动故障转移操作。
在备份和日志归档操作中,db2vend进程可能会失败,并产生错误,指示未能启动子进程。
用户响应通过设置以下内核参数来关闭随机化:kernel.randomize_va_space=0通过发出以下命令来临时禁用随机化并重新启动DB2实例:echo0>/proc/sys/kernel/randomize_va_space或者sysctl-wkernel.randomize_va_space=0上面两条命令是临时更改,重启后,该值会还原成2要想永远关闭,则编辑/etc/sysctl.conf文件新增一行kernel.randomize_va_space=0保存退出后,运行sysctl-p使之生效,重启后也有效了。
linux下DB2数据库安装教程
DB2安装及使用1概述1.1编写目的目前由于项目的需要,多次用到DB2数据库,但因为与之前广泛、熟练使用的Oracle 数据库的差异,使得DB2数据库在应用过程中出现了一些安装及使用上的问题;为了解决这些问题,特此编写此文档;1.2适用范围此文档适应于开发人员、测试人员、实施人员等;1.3名词解释此节将对下文中出现的,以及涉及DB2数据库必须了解的名词做出解释;用户:指操作系统用户,非DB2数据库用户,DB2无数据库用户的概念;系统:DB2数据库的一个安装;实例:数据库管理器,是数据库管理器在内存中的映像,是管理数据的DB2代码,为数据库的运行提供环境;数据库:是一个对象集合,这些对象指表空间、表、视图、索引等,这些对象存储在表空间中;表空间:用来存储数据库对象,由多个容器组成;容器:这里指表空间容器,可以理解为物理存储空间,是表等数据库对象实实在在存储的地方;模式:是数据库对象的逻辑分组集合;数据库中所建的每一个对象都有模式,这些模式会隐式会显式的增加为对象的前缀;数据页(datapage):数据库最小的存储、读写单位,有4KB,8KB,16KB,32KB几种类型;2DB2安装前2.1搭建环境2.1.1软件准备操作系统:CentOS-6.5-i386-minimal.iso环境载体:VirtualBox-4.3.24-98716-Win.1425444683.exe注:此处使用虚拟机virtualbox作为环境载体做安装演示,由于以后的生产环境并不涉及虚拟机方面的安装和使用,故在此不对virtualbox的安装做详述;有兴趣研究的同事可以在互联网上搜索相关教程即可;以下直接介绍操作系统的安装;2.1.2软件安装打开安装好的virtualbox软件,点击【新建】在弹出的窗口中,根据实际情况依次填写名称、选择相应的类型和版本,此处选择linux类型,OtherLinux(32位)版本,点击【下一步】接下来为虚拟机分配内存,按实际情况和需要滑动标尺或直接填写相应的数值即可,此处选择2048MB大小,点击【下一步】分配虚拟硬盘,这一步是为了给操作系统分配一个活动的空间,操作系统中信息和数据将存储在此空间内,在这里我们选择第二个【现在创建虚拟硬盘】,点击【创建】虚拟硬盘文件类型,直接选择默认的即可,点击【下一步】此处选择【固定大小】,性能较好,点击【下一步】接下来,选择虚拟硬盘文件创建的位置和大小,可根据实际情况做配置,此处选择安装在E盘,硬盘大小为20G,点击【创建】,即开始创建接下来就是等待安装,直至安装完成2.1.3软件配置点击virtualbox主界面上的【设置】按钮,在弹出的窗口中进程参数设置在左边的树状模块中选择【系统】--【处理器(P)】,在拓展性前的选勾,如图所示再选择【存储】,点击【没有磁盘】,在右边显示的内容中,点击磁盘模样的图标,点击【选择一个虚拟光盘】,找到你的CentOS-6.5-i386-minimal.iso文件的位置,选中即可再选择树状模块中的【网络】--【网卡1】,在连接方式中选择与宿主机网卡的通讯方式,此处选择HOST_ONLY方式,名称是宿主机网卡的名称;设置完毕,点击确定即可;2.1.4 OS安装点击virtualbox主界面的【启动】按钮,在弹出的窗口选择第一项,如图所示,回车即可在完成自检之后,在弹出的窗口中选择SKIP,跳过测试,ENTER回车然后点击NEXT设置语言,此处选择简体中文,点击Next选择键盘语言,一般为美式英语,点击【下一步】选择存储设备,此处选择基本存储设备,点击【下一步】即可,在检测完存储设备后,选择【是,忽略所有数据】,点击【下一步】即可设置主机名和网络配置,此处直接点击【下一步】,具体参数可在系统建好后在设置;时间设置,选择城市【亚洲/上海】,在【系统时间选择UTC时间】前打勾,点击下一步设置root用户密码,根据实际情况自定义设置即可,点击下一步选择安装类型,由于是在虚拟机中安装,且兼顾宿主机的情况,我们选择【创建自定义布局】,点击下一步接下来就是最重要的操作系统分区的创建,点击【空闲】一行,点击【创建】,选择【标准分区】,依次创建以下节点:根目录“/”,/boot目录,swap分区(一般为内存大小的1.5-2倍);如下所示分区建好后,如下图所示,点击【下一步】然后会弹出是否格式化的提示,选择【格式化】,并在弹出的窗口中选择【将修改写入磁盘】,等待分区的创建完成即可分区建好之后,会弹出安装引导装载程序的窗口,直接点击【下一步】即可然后,就进入系统的安装阶段,系统自检、分析依赖包后,就会进行安装包的安装,由于是简化版的linux,所以安装过程较为简单,等待安装完成即可安装完成后,点击【重新装载】,启动操作系统;启动后输入root及密码就可以登录系统使用了2.2 OS参数设置2.2.1网络设置2.2.1.1虚拟机网卡设置使用root用户登录操作系统,输入# vi /etc/sysconfig/network-scripts/ifcfg-eth0;在该文件中编辑以下内容(IP信息可以自定义,只需要子网掩码、网关与之相对应即可)启动网络输入#service network start 回车;2.2.1.2宿主机网卡设置以win8为例,打开网络和共享中心,点击【更改适配器设置】,可以看到在安装virtualbox 时安装的名为VirtualBox Host-Only Network的网卡右键--【属性】,双击【Internet协议版本IPV4】,设置与虚拟机中的网卡在同一网段的相对应的IP、子网掩码等信息,如图所示通讯测试;在宿主机的cmd命令窗口中,输入ping 172.16.217.140,若可以ping通,则表明二者之间的通讯畅通;2.2.2其他设置2.2.2.1关闭防火墙输入# service iptables status ---查看防火墙状态# service iptables stop ---关闭防火墙# service iptables start ---启动防火墙注:至此OS的环境搭建就完成了,接下来就是DB2数据库的安装!3 DB2安装中3.1软件准备DB2版本:db2_v9.7_linuxia32_server.tar.gz;SSH工具:SecureCRT;3.2软件安装3.2.1软件上传在home目录下新建一个文件夹,以供文件上传之用输入# mkdir /home/db2package使用SecureCRT工具登录到OS(具体用法在此不做详述),使用快捷键ALT+P,打开SFTP界面,如图所示输入sftp>cd /home/db2package/ ----进入文件上传目标目录sftp>lcd /D:/exe/serverinstal/ ----进入本地存储DB2安装文件的目录sftp>put db2_v9.7_linuxia32_server.tar.gz --put命令上传DB2安装文件回车即可开始上传3.2.2软件解压输入# cd /home/db2package/ ---进入软件上传的目录 # tar -xzvf db2_v9.7_linuxia32_server.tar.gz ---回车即可进行解压3.2.3安装解压完成后,会在软件上传的目录下生产一个server目录,进入目录# cd /home/db2package/server该目录下就包含了db2的安装程序,如图所示db2prereqcheck ----先决条件检查,用于检测当前环境是否符合DB2安装要求db2setup ----图形化界面安装,需要配置X环境,在此不再详述;db2_install ----命令行安装,以下将使用此种方式进行安装说明;db2_deinstall ----卸载安装DB2时,运行db2_install文件输入# ./db2_install回车进行安装,片刻后会出现一些选项,首先是安装路径,默认路径是/opt/ibm/db2/v9.7;输入“否”,表示选择默认路径;输入“是”,表示不选择默认路径,则会提示你输入新的安装路径此处我们选择输入“否”;则会出现下图所以内容其中,以下表示DB2的产品ESE --企业版CONSV --连接服务器版WSE --工作组版EXP --易捷版PE --个人版CLIENT --客户机RTCL --运行时客户机此处,根据实际需要选择版本,我们选择EXP,安装易捷版,输入EXP,回车,即可进行安装,如下图注:到此处,DB2就安装完毕了,下面我们来介绍DB2的使用;4 DB2安装后的使用4.1创建用户此处创建的用户属于操作系统用户,DB2无数据库用户,此点与Oracle等其他关系型数据库有所不同;使用root用户登录# groupadd db2grp ---实例用户用户组# groupadd db2fgrp ---受防护用户用户组# groupadd dasadm ---DAS用户用户组# useradd -m -g db2grp -d /home/db2inst -s /bin/bash db2inst --创建实例用户# useradd -m -g db2fgrp -d /home/db2fenc -s /bin/bash db2fenc --创建防护用户# useradd -m -g dasadm -d /home/dasusr -s /bin/bash dasusr --创建DAS用户# passwd db2inst ---设置密码,不详述# passwd db2fenc# passwd dasusr其中,实例用户:每个实例都必须对应一个操作系统用户,该用户用于操作所有的DB2进程,管理所有DB2的文件系统和设备,必须创建;受防护用户:用于在数据库的运行空间外运行用户自定义的函数和存储过程,主要用于UDF,虽无大用处,但是建议创建;DAS用户:用于远程管理,可以不创建,此处就没有创建此用户;4.2创建实例以root用户登录操作系统进入DB2的安装目录下输入# cd /opt/ibm/db2/V9.7/instance创建数据库实例输入# ./db2icrt -p 50000 -u db2fenc db2inst其中50000表示监听端口,db2inst为实例名称,需要与实例用户名相同,db2fenc 表示该受防护用户可使用该实例;设置数据库实例随系统重启而启动输入# su - db2inst$./db2iauto -on db2inst启动数据库实例输入$db2start创建数据库启动数据库实例后输入$ exit ---登出,至root用户# mkdir /home/test/testdb ---创建数据库安装目录# chown a+w /home/test/testdb ---更改目录权限# su - db2inst ---切换至实例用户$ db2 create db testdb on /home/test/testdb using codeset gbk territory cn其中,testdb 为数据库名称,/home/test/testdb为数据库创建目录,应该提前创建;创建表空间a.在创建表空间之前,我们可以先创建一个缓冲池,若不创建,将会使用数据库默认缓冲池IBMDEFAULTBP;输入 $ db2 connect to testdb -----连接数据库$ db2 create bufferpool bp32k size 10000 pagesize 32k其中,bp32k 为缓冲池名称,size表示缓冲池大小,pagesize 表示数据页大小b.输入$ exit ---登出,至root用户# mkdir /usr/db2/ ---创建数据库安装目录# chown a+w /usr/db2/ ---更改目录权限# su - db2inst ---切换至实例用户$ db2 "create tablespace db2inst pagesize 32k managed by database using (file '/usr/db2/tablespace_db2inst' 3g) bufferpool bp32k"其中,db2inst 为表空间名,pagesize为数据页大小,需要与引用的缓冲池的数据也大小相同;using 表示表空间创建的目录以及大小(即容器),目录应该事先存在,bufferpool 表示引用的缓冲池;4.4 DB2数据导出导入这里存在导出表结构和表数据的情况;使用案例请直接看4.4.5节;导出表结构输入$ db2look -d testdb -e -a -x -i db2inst -w db2inst -o test.sql其中testdb --数据库名db2inst --用户名db2inst --密码test.sql --文件名执行sql文件输入$ db2 -tvf test.sql4.4.2数据库表数据导出数据库表数据导出输入$ db2move testdb export -u db2inst -p db2inst其中 testdb --数据库名db2inst --用户名db2inst --密码4.4.3数据库单个表导出使用export命令输入 $ export to test.del of del MODIFIED BYCODEPAGE=1386 select * from pt_oper 其中,test.del为导出文件名,del 为文件格式,CODEPAGE=1386表示编码4.4.4数据库单个表数据导入使用import命令输入$ import from test.del of del MODIFIED BY COMPOUND =50 insert into pt_oper其中test.del为导出文件名,del 为文件格式4.4.5数据库数据迁移用例# su - db2inst ----切换实例用户$ db2start ----启动实例$ db2 connect to testdb ----连接数据库$ mkdir /home/test$ cd /home/test$ db2look -d testdb -e -a -x -i db2inst -w db2inst -o test.sql -----导出数据库全表结构$ db2 -tvf test.sql ----执行数据库结构的sql脚本,导入全表结构$ mkdir /home/dbdata$ cd /home/dbdata$ db2move testdb export -u db2inst -p db2inst ----导出数据库全表数据$ db2move testdb import -u db2inst -p db2inst ----导入数据库全表数据5Q&A5.1问题一Q:在使用过程中,会遇到创建的模式名与用户名不一样的情况,导致在执行sql过程中报错;A:这是因为DB2的特点是一个对象需要加上模式名才会有效,即schema.Object的形式,如果不加模式名,系统会自动以当前登录名为模式名,隐式的加到该对象前;解决方法:建立的实例最好与实例用户名相同;在执行sql时加上需要使用的模式名;。
Linux虚拟环境下怎么搭建DB2数据库DPF(2)

Linux虚拟环境下怎么搭建DB2数据库DPF(2)三、配置rshrsh是远程运行shell的服务.db2使用rsh服务运行启动和停止数据库服务器的命令,以及大部分管理命令。
1、安装rsh#yum install rsh*2、配置rsh的安全文件#vi /etc/securetty#add the content#------------------#rsh#rlogin#rexec#------------------3、修改rsh的配置参数/etc/xinetd.d/rsh ##在生产环境建议配置ssh免密登录#vi /etc/xinetd.d/rshservice shell{socket_type = streamwait = nouser = rootlog_on_success += USERIDlog_on_failure += USERIDserver = /usr/sbin/in.rshddisable = no}4、修改rsh的配置文件rlogin#vi /etc/xinetd.d/rloginservice login{disable = nosocket_type = streamwait = nouser = rootlog_on_success += USERIDlog_on_failure += USERIDserver = /usr/sbin/in.rlogind}4、免密登陆,实例用户db2inst1的家目录中创建.rhosts文件cat $HOME/.rhostscbusdb01 db2inst1cbusdb02 db2inst15、CentOS7.0需要单独下载xinetdyum install xinetd #低于此版本可不下载6、重启rsh服务service xinetd restart7、验证rsh服务rsh cbusdb01 datersh cbusdb02 date#db2_all echo hi 没有返回yum install ksh四、配置时钟服务器1、安装ntp服务器#yum install ntp*# ntpdate -u 202.112.10.36#ntpdate #service ntpd start#chkconfig ntpd on2、修改ntp配置#允许内网其他机器同步时间restrict 192.168.1.0 mask 255.255.255.0 nomodify notrap#互联网时间服务器server 210.72.145.44 perfer # 中国国家受时中心server 202.112.10.36# server 59.124.196.83# #允许上层时间服务器主动修改本机时间restrict 210.72.145.44 nomodify notrap noqueryrestrict 202.112.10.36 nomodify notrap noqueryrestrict 59.124.196.83 nomodify notrap noquery#外部时间服务器不可用时,以本地时间作为时间服务server 127.0.0.1fudge 127.0.0.1 stratum 103、修改时区cp -f /usr/share/zoneinfo/Asia/Shanghai /etc/localtimeclock -w4、在节点2上配置时钟服务器*/5 * * * * /usr/sbin/ntpdate cbusdb01五、配置nfs服务1、yum install nfs*# yum install portmap rpcbind #安装nfs客户端2、配置需要共享的资源#vi /etc/exports/cbusdb *(rw,sync,no_root_squash)/cbusdblog *(rw,sync)3、启动nfs serverservice rpcbind startservice nfs startservice nfslock restart4、导出资源exportfs -rv5、显示NFS Server上所有的共享卷showmount -e6、在客户端挂载共享目录#mount 192.168.1.122:/cbusdb /cbusdb#vi /etc/fstabcbusdb01:/cbusdb /cbusdb nfs rw,timeo=300,retrans=5,hard,intr,bg,nolock,suid六、关闭selinuxvim /etc/sysconfig/selinux#SELINUX=disabled七、测试、创建数据库1、启动数据库#db2start2、创建数据库#db2 “create db cbusdb on /cbusdblog using codeset gbk territory cn”上面就是在Linux虚拟化环境中搭建DB2数据库DPF的方法介绍了,本文详细介绍了DB2的安装过程及搭建,不知道如何搭建的朋友赶紧学习一下吧。
- 1、下载文档前请自行甄别文档内容的完整性,平台不提供额外的编辑、内容补充、找答案等附加服务。
- 2、"仅部分预览"的文档,不可在线预览部分如存在完整性等问题,可反馈申请退款(可完整预览的文档不适用该条件!)。
- 3、如文档侵犯您的权益,请联系客服反馈,我们会尽快为您处理(人工客服工作时间:9:00-18:30)。
Linux(RedHat Enterprise Linux 5.4)下的DB2安装__使用图形界面可以使用图形界面,也可以使用手工安装的方式。
我们先介绍最简单的安装方法。
1.从IBM网站下载DB2 9.7 express C版本:文件名db2exc_971_LNX_x86.tar.gz,。
2.在LINUX下解压缩及解包#gzip -d db2exc_971_LNX_x86.tar.gz#tar -xvf db2exc_971_LNX_x86.tar3.进入相关目录,运行安装文件#xhost +#cd expc#./db2setup先允许所有用户使用xwindows界面。
在当前目录中要找到db2setup文件,然后执行它。
如果权限不够,先运行chmod +x db2setup4.根据图形界面安装可以选择安装位置或内容等。
过程中需要对其中的三个DB2用户的名字和密码进行设置,并记录下来。
注意DB2没有自己独立的用户管理系统,因此这几个用户实际就是LINUX的用户。
最后完成安装。
5.验证安装成功。
[root@bogon expc]# su - db2inst1[db2inst1@bogon ~]$ db2 create database testDB20000I The CREATE DATABASE command completed successfully.[db2inst1@bogon ~]$其中db2inst1为安装过程中创建的三个用户之一,为实例的管理者用户。
创建数据库成功表明安装成功。
更多的初始配置见DB2手工安装。
########################################################DB2 for linux手动安装步骤第一步下载db2数据包当前最新版本为9.7,从IBM网站下载免费的Express C版本。
db2exc_971_LNX_x86.tar.gz及语言包db2exc_nlpack_971_LNX_x86.tar.gz(后者可选)。
第二步上传安装文件把下载下来的包ftp上传到待安装的LINUX机器上第三步解包db2exc_971_LNX_x86.tar.gz# gzip -d db2exc_971_LNX_x86.tar.gz# tar -xvf db2exc_971_LNX_x86.tar第四步安装解包以后会有目录名为expc,进入找到db2_install和db2setup文件,前者为手动安装,后者为图形界面安装。
#cd expc#./db2_install设定安装目录等以后,耐心等待安装任务完成。
默认安装路径是/opt/ibm/db2/V9.7,可检查之。
第五步注册license本安装无须这一步。
对于企业版等版本,需要注册license才能使用。
对于V8.1 ESE版,注册license的文件一般是:/opt/DB2_V81_PE_LNX_32_NLV/db2/license/db2ese.lic,否则需要自己找一下db2ese.lic,根据实际情况执行#/opt/IBM/db2/V8.1/adm/db2licm -a /opt/334_ESE_LNX26_32_NLV/db2/license/db2ese.lic若提示:DBI1402I License added successfully.DBI1426I This product is now licensed for use as specified inthe License Acceptance and License Informationdocuments pertaining to the licensed copy of thisproduct. USE OF THE PRODUCT CONSTITUTES ACCEPTANCE OFTHE TERMS OF THE IBM LICENSE ACCEPTANCE AND LICENSEINFORMATION DOCUMENTS, LOCATED IN THE FOLLOWINGDIRECTORY: /opt/IBM/db2/V8.1/license/zh_CN.utf8表明注册成功第六步创建DB2运行所需要的用户组和用户注意DB2并没有独立的用户管理系统,必须借用OS用户来提供安全性认证,所以这里需要创建LINUX用户和组。
# groupadd -g 901 db2grp# groupadd -g 902 db2fgrp# groupadd -g 903 db2agrp# useradd -g db2grp -u 801 -d /home/db2inst1 -m -s /bin/sh db2inst1# useradd -g db2fgrp -u 802 -d /home/db2fenc -m -s /bin/sh db2fenc# useradd -g db2agrp -u 803 -d /home/db2das -m -s /bin/sh db2das这里的默认用户名是:DAS用户 dasusr1 组名: dasadm1管理实例的用户 db2inst1 组名:db2iadm1受防护用户 db2fenc1 组名: db2fadm1但是DB2用户可以任意起名。
第七步添加密码# passwd db2inst1Changing password for db2inst1.New password:[输入新密码]Re-enter new password:[再次输入新密码]Password changed创建完成后,执行如下命令,检查用户组和用户是否创建成功。
# more /etc/group |grep db2# more /etc/passwd |grep db2如果结果中包含那三个用户和组,则创建成功。
正确的结果应该是:# more /etc/group |grep db2dialout:x:16:db2inst1,db2fenc,db2dasvideo:x:33:db2inst1,db2fenc,db2dasdb2grp:!:901:db2fgrp:!:902:db2agrp:!:903:# more /etc/passwd |grep db2db2inst1:x:801:901::/home/db2inst1:/bin/shdb2fenc:x:802:902::/home/db2fenc:/bin/shdb2das:x:803:903::/home/db2das:/bin/sh第八步创建实例。
b1. 进入/opt/ibm/db2/V9.7/instance目录# cd /opt/ibm/db2/V9.7/instance2. 执行以下命令# ./dascrt -u db2das# ./db2icrt -u db2inst1 db2inst1这里dascrt创建的是DB2 adminstration server,每台服务器只有一个这种server,为进行DB2管理(比如运行控制中心)所必须,同时指定其管理用户是db2das。
db2icrt创建的是实例,其名字一般和管理用户名一样,这里均为db2inst1。
3 启动DB2切换到db2das用户,执行db2admin启动DB2管理服务器。
$ db2admin start切换到db2inst1用户,执行db2start启动数据库实例。
$ db2start第九步配置DB21 设置DB2自启动。
使用root用户执行以下命令:# cd /opt/ibm/db2/V9.7/instance# ./db2iauto -on db2inst1设置对db2inst1在LINUX启动时自动启动。
2 配置网络切换到db2inst1用户。
# su - db2inst1修改DB2的服务端口为50000,这里默认端口就是50000。
$ db2 update dbm cfg using SVCENAME 50000DB20000I The UPDATE DATABASE MANAGER CONFIGURATION command completedsuccessfully.修改DB2连接方式为TCPIP,然后可通过JDBC、ODBC等访问本DB2服务器上的数据库,安装了DB2客户端的其它机器也可访问数据库。
$ db2set DB2COMM=TCPIP至此,安装过程结束。
第十步创建和访问数据库,安装验证1 启动与关闭数据库实例做任何事情之前,首先要启动数据库实例切换到db2inst1用户,执行db2start启动数据库实例。
$ db2startSQL1063N DB2START processing was successful.若需要,可运行下面的命令来关闭数据库实例首先在db2inst1用户下强制关闭实例上的所有应用程序。
$ db2 force applications all关闭数据库实例。
$ db2stopSQL1064N DB2STOP processing was successful.2 创建数据库$ su - db2ins1$ db2 create database test1DB20000I The CREATE DATABASE command completed successfully.数据库创建成功了。
3 远程访问数据库笔者是在VMWARE虚拟机上安装RHEL5.4和DB2的,在主机上也安装了DB2 ESE for windows V9.7,经实验这样配置后主机可以访问到虚拟机上的DB2数据库。
方法是在主机上运行db2cmd,然后运行:C:\Documents and Settings\Administrator>db2 catalog tcpip node bogon remote 192.168.211.132 server 50000DB20000I CATALOG TCPIP NODE 命令成功完成。
DB21056W 直到刷新目录高速缓存之后,目录更改才生效。
C:\Documents and Settings\Administrator>db2 catalog database test1 as test_1 atnode bogonDB20000I CATALOG DATABASE 命令成功完成。
DB21056W 直到刷新目录高速缓存之后,目录更改才生效。
C:\Documents and Settings\Administrator>db2? Copyright IBM Corporation 1993,2007DB2 客户机 9.7.0 的命令行处理器可从命令提示符处发出数据库管理器命令和 SQL 语句。