FDTD_install_windows
BFD2安装以及使用教程

BFD2教程BFD 2已经出来很久了,新特性包括:新增10套鼓组音色可批量摆话筒的位置音色的力度分层达到惊人的96层可导入多个采样,作为同一音色不同力度层的采样用增加了BFD完全没有的效果器部分,实际上是模拟了一个长得有点像SSL的台子,有EQ、压缩、镶边、降bit、延迟、滤波、失真等等,还可以自己加效果器。
5000多个可直接使用的groove支持多通道输出更好更容易的管理成千上万个采样多了AUX,信号的走向也便的复杂了可以控制每个鼓件发送给room、overhead话筒的量了,原来只能选军鼓和地鼓的,这回细致了可以调整各个鼓件之间的串音了可以更快速更方便的自由映射键位了现在网络上可以找的到的就是5DVD版本的BFD2另外还流传有第六张DVD,其实就是一个音色补丁,解压后有4.34 GB。
先来说说安装步骤。
首先我们要解压。
由于下载到的是很多文件名一样而扩展名有些微差异的文件,很多朋友没搞明白是怎么回事,其实这是Winrar创建的分卷压缩包,它将一个文压缩并在压缩的同时将这个压缩包分成若干个文件,你必须同时拥有这些文件才解压出完整的原始文件。
上图是DVD1的分卷压缩包,大家可以看到文件名其实都一样是dyn-fxpbfd2d1而扩展名分别是Rar和R+数字··数字都是连续的,这几十分卷包的编号。
dyn-fxpbfd2d1.rar是整个分卷的第一个包,所以没有以数字做扩展名。
用记事本打开dyn-fxpbfd2d1.sfv文件的话,可以看到所有分卷的列表,你可以对照一下自己的文件看看有没有缺少。
除了这些分卷以外,这里还有一个dyn-fxpbfd2uk.rar,这个不属于分卷,它是一个独立的压缩包,这里面就是破解文件了,包含了MacOSX版本和Windows版本。
其它几张DVD除了不含破解以外,都和DVD1一样是分卷压缩包。
分卷压缩包解压的方法和普通压缩包一样,在任意一个分卷上点击鼠标右键,选择“解压到...”就可以了Winrar会自动搜索其他的分卷完成解压。
FDTD2016a64位破解安装
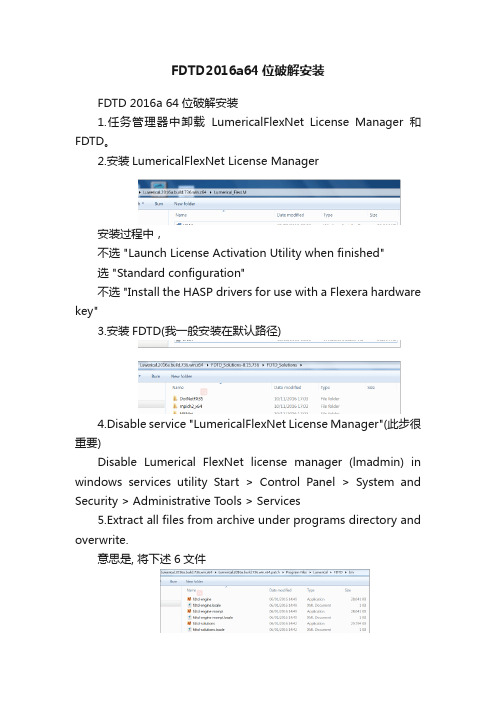
FDTD2016a64位破解安装FDTD 2016a 64位破解安装1.任务管理器中卸载LumericalFlexNet License Manager和FDTD。
2.安装LumericalFlexNet License Manager安装过程中,不选 "Launch License Activation Utility when finished"选 "Standard configuration"不选 "Install the HASP drivers for use with a Flexera hardware key"3.安装FDTD(我一般安装在默认路径)4.Disable service "LumericalFlexNet License Manager"(此步很重要)Disable Lumerical FlexNet license manager (lmadmin) in windows services utility Start > Control Panel > System and Security > Administrative Tools > Services5.Extract all files from archive under programs directory and overwrite.意思是, 将下述6文件拷贝到和FDTD安装的路径下的bin将下述文件里的LUMERICL和FDTD安装的路径下的bin(确保lumericl)在安装过程中,可能会出现替换不了原来件的情况,可能是后台在运行lumericl。
请进行一下操作(亦可在第四步Disable service "LumericalFlexNet License Manager"进行后操作)Ctrl+shift+esc,并对一下三项运行禁止。
TDSv2出现的问题及解决办法

TDSv2出现的问题及解决办法说明:TDSV2可以运行在以下三种系统中:1)Vista2)windows xp + sp23)windows server 2003 + R2助手问题汇总一、现象描述:运行助手时如果出现下面的提示:解决办法:需要安装2005c++Deploy.exe,安装文件在(开始→程序→TDSV2→2005c++Deploy.exe)二、运行助手时如果出现提示:解决办法:需要安装dotnetfx3.exe,安装文件在(开始→程序→TDSV2→dotnetfx3.exe)三、如果在安装2005c++Deploy.exe的过程中出现下面的错误提示:解决办法:需要按下面的操作进行:1.点击开始→运行,输入services.msc后回车,弹出如下界面2.找到Windows Installer服务如果这个服务被禁运了,如上图中显示的已禁用,则需要把这个服务启用,步骤如下在这个服务上点击右键→选择属性,弹出如下界面:把启动类型设置为手动,然后点击应用,最后点击确定。
3.如果没有找到Windows Installer 这个服务,那么需要安装补丁:WindowsInstaller-KB893803-x86.exe。
如果安装完这个补丁并重新启动系统后,还是没有这个服务则需要重新安装操作系统。
四、升级助手时弹出下面的提示:或者下面的提示:解决办法:1查看系统托盘里(右下角,有时被隐藏了,点以下展开按钮)是否有TDSV2的程序在开着,如果有,则都关闭掉。
重新运行助手。
2、第二种可能是安装目录TDSV2Assitant的文件夹属性被设置成了隐藏,把隐藏勾去掉即可五、在安装dotnetfx3.exe时出现下面的提示,解决办法:重新安装操作系统六、用户运行助手,弹出升级界面,几秒钟后又消失了,经查,用户在安装助手时,直接安装在了F盘,因此造成升级过程中无法写入文件。
解决办法:在F盘新建一个文件夹TDSV2Assitant,把安装后的那些文件都放到这个文件夹里,发送TDSV2助手的快捷方式到桌面,重新运行助手就OK了。
无法定位程序输入点Dininstalldriview于动态链

无法定位程序输入点Dininstalldriview于动态链
1、在看到该错误提示框后,记录下框里提示的那个.dll名称,就是缺少这个程序。
2、下载并放至电脑某一位置上。
3、在该.dll名称的程序下载好后,返回到电脑桌面点击开始菜单,并找到重启一项,点击它。
4、接着,在我们点击了重启选项后,这时我们电脑进入关机重启状态,一进入到开机状态时我们要不间断按下F8键,然后我们会打开进入到我们电脑的安全模式选项。
5、在安全模式选项中,随即进入安全模式下的电脑桌面,然后这里我们打开我的电脑,并点击C盘。
6、在我们点击打开C盘后,接下来我们依次打开windows文件,并在它的文件中找到system32且点击打开进入。
7、最后,找到我们刚下载的那个.dll后缀的程序文件,把它复制到该文件选项下即可。
nmake install 用法

nmake install 用法nmake install 是一种软件安装工具,主要用于在Windows系统上编译和安装软件。
它是Microsoft Visual Studio中的一部分,是在Windows平台上最常用的构建工具之一。
本文将详细介绍nmake install的用法,帮助读者了解如何使用它来编译和安装软件。
1. nmake install简介nmake install是nmake命令的一种参数组合,它在执行完nmake build命令后,会自动将编译后的文件复制到指定的目录中。
一般来说,nmake install命令会在使用了nmake build命令编译源代码后执行,用于将编译生成的可执行文件、库文件、配置文件等复制到系统中适当的位置,以便用户可以方便地使用和操作。
2. nmake install的基本用法nmake install命令的基本用法非常简单,只需要在命令行中输入“nmake install”即可。
但在执行之前,我们需要在当前目录下创建一个名为Makefile的文件,并在其中定义安装规则和相关参数。
2.1 创建Makefile文件在执行nmake install之前,我们需要先创建一个名为Makefile的文件。
在该文件中,我们需要定义一些规则和变量,以指定编译结果的安装位置和安装方式。
首先,我们可以定义两个变量,分别用于指定编译结果的安装目录和待安装文件的位置。
例如:```INSTALL_DIR = C:\Program Files\MySoftwareFILE_TO_INSTALL = bin\MyApp.exe```在上述例子中,INSTALL_DIR变量指定了待安装文件的目标目录,而FILE_TO_INSTALL变量则指定了待安装的文件的位置。
接下来,我们需要定义规则,以指定在执行nmake install时需要执行的操作。
一般来说,我们需要在Makefile文件中定义一个名为install的规则。
Windows系统下GES、BEAM程序安装过程

附录 A EGSnrc和BEAMnrc的安装过程本论文中所使用的操作系统是32位Windows 8 企业版;EGS版本是NRCC于2013年3月31日发布的EGSnrc V4 2.4.0 Windows版;BEAMnrc是NRCC于2013年3月29日发布的BEAMnrc V4 2.4.0 Windows版。
EGSnrc和BEAMnrc程序均可以在NRCC的官网免费下载,下载地址分别是:http://www.irs.inms.nrc.ca/inms/irs/EGSnrc/EGSnrc.htmlhttp://www.irs.inms.nrc.ca/inms/irs/BEAM/beamhome.htmlNRCC的官方网站在发布EGSnrc V4 2.4.0之后的一个月左右关闭了相关程序的下载,之后于2013年6月初恢复了EGSnrc程序的下载,下载地址如下:http://www.nrc-cnrc.gc.ca/eng/solutions/advisory/egsnrc/download_egsnrc.html截至到笔者撰写论文时为止,BEAMnrc程序的官网下载仍然没有恢复,不过我已经在蒙特卡罗方法论坛中上传了程序的安装包以方便有需要的学者使用,链接如下:/forum/read.php?tid=16405如本文第3章所述,BEAMnrc程序是基于EGSnrc程序运行的,所以在安装BEAMnrc 程序之前必须先安装EGSnrc程序。
在安装这两个程序之前还有一些准备工作必须提前完成以保证安装过程的顺利进行,下面进行详细阐述。
A 1预备程序的安装A 1.1Fortran编译器EGSnrcMP程序是基于Mortran语言编写的。
Mortran语言不是建立在编译基础上的一种语言,而是建立在Fortran语言基础上的一种语言,所以在实际使用时,用Mortran 语言编写的程序需要先要翻译成为标准的Fortran语言,然后再将翻译好的Fortran语言送到机器上运行[19]。
qt在windows_安装配置

Installing Qt/Windows本人在windows下使用Qt所以下面介绍一下在windwos安装Qt的情况。
qt在windows安装,很简单,我们按照下面的步骤:第一步:准备安装软件请大家准备好软件qt-win-opensource-4.0.1-mingw.exe 和devcpp-4.9.9.2_setup.exe如果大家没有软件,可以到官方网站下载,或者去下载.第二步:安装软件大家先安装devcpp-4.9.9.2_setup.exe,详细过程就不讲了,windows软件大同小异接下来安装qt-win-opensource-4.0.1-mingw.exe,安装过程也差不多,大家在安装过程中到了MinGW时,要注意在find MinGW (previously installed MinGW)是选择你安装的devcpp 的目录比如:c:Dev-Cpp 其它的就不用管了,一直用‘next’就可以了第三步:编译应用程序1. 在这时就安装好了软件,接下来,我们来编译运行一个程序。
在记事本中我输入源代码////////////////////////////////////////////////////#include <QApplication>#include <QPushButton>int main(int argc, char *argv[]){QApplication app(argc, argv);QPushButton hello("Hello world!");hello.resize(100, 30);hello.show();return app.exec();}////////////////////////////////////////////////////我们保存文件为:helloworld.cpp2. 接下来我从开始菜单进入Qt 4.0.1 command Prompt 在dos下进入文件的目录。
FDTD_install_windows

local network. Please see the USB Network Key License Manager section for more
information.
This step does not apply to trial users.
This completes the FDTD Solutions installation. See the following pages for additional setup and configuration information.
2 Configu.r.e...e..n..g..i.n..e.............................................................................................. 4
3 Cluster .s.e..t.u..p..................................................................................................... 6
4b. Configure license - Trial users
5. Configure your USB network k ey
© 2003 - 2012 Lumerical Solutions, Inc
Windows
3
1. Open the License Configuration utility in the Windows start menu from Start-> All Programs-> Lumerical-> FDTD Solutions-> Configure license
D-Cube-Edit_系统安装手册

D-Cube-Edit_系统安装手册D3-Edit HD系统安装手册2006年7月目录目录 (2)前言 (4)第一部分拆箱核对配件 (4)1.4U机箱前面板主要功能介绍 (4)2.后面板接口图 (5)第二部分开机检测 (6)第三部分 D3-Edit HD软件安装说明 (8) 一.软件安装前的准备工作 (8)二.安装数据库 (8)三.全新安装D3-Edit HD软件 (9)第1步 (9)第2步 (10)第3步 (10)第4步 (11)第5步 (11)第6步 (12)第7步 (12)第8步 (12)第9步 (13)第10步 (13)第11步 (14)第12步 (14)第13步 (16)第14步 (16)第15步 (17)四.D3-Edit HD软件升级安装说明 (18)第1步:升级板卡驱动 (18)第2步:卸载老版本软件 (18)第3步:安装新版本软件 (18)第4步:手动升级数据库 (18)五.首次启动D3-Edit HD软件 (19)第1步:配置系统参数 (19)第2步:启动软件 (20)第2步:选择编辑格式 (20)附录1:D3-Edit HD数据库脚本说明(SQL) (21)第一节数据库脚本升级通用操作方法 (21)第1步 (21)第2步 (22)第3步 (22)第4步 (22)第5步 (23)第6步 (23)第二节数据库表格更新通用操作方法 (24)第三节全新创建完整数据库操作方法 (29)第四节软件版本对应数据库脚本升级列表 (31)附录2:X.MIO板卡安装说明 (32)1 新驱动安装说明 (32)2 驱动升级说明 (35)附录3:插件设置说明 (36)附录4:Geforce 7800双屏设置说明 (37)前言本手册作为D3-Edit HD高标清非线性编辑系统的组成部分,所有整机出货产品均配备此系统安装手册。
本手册指导您如何正确连接系统外围设备及配件,并提供了正确安装和卸载D3-Edit HD软件的方法。
MTK编译环境安装方法
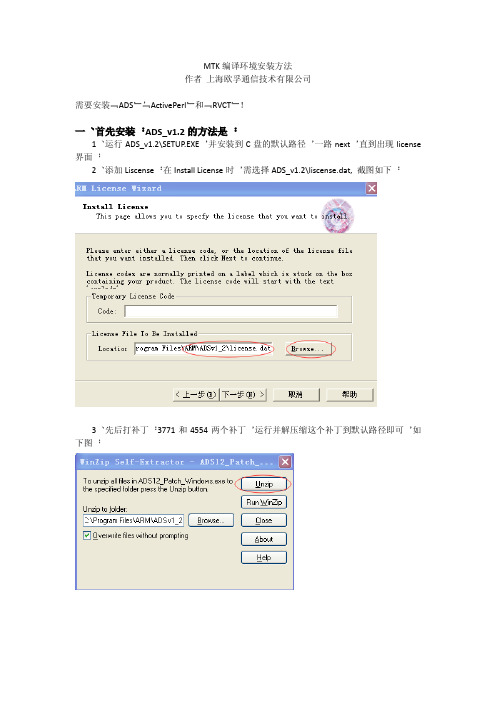
MTK编译环境安装方法作者上海欧孚通信技术有限公司需要安装“ADS”,“ActivePerl”和“RVCT”!一、首先安装:ADS_v1.2的方法是:1、运行ADS_v1.2\SETUP.EXE,并安装到C盘的默认路径,一路next,直到出现license 界面;2、添加Liscense:在Install License时,需选择ADS_v1.2\liscense.dat,截图如下:3、先后打补丁:3771和4554两个补丁,运行并解压缩这个补丁到默认路径即可,如下图;二、安装Perl,直接运行:ActivePerl-5.8.8.822-MSWin32-x86-280952.msi,并安装到默认路径即可;三、安装RVCT;1、首先安装RVCT:运行RVCT\RVDS_3_1\setup.exe并安装到默认路径,一路next.直到出现license界面,如下图:2、安装license,浏览装机软件目录,选择\RVCT\rvds.dat,Add该文件,如下图:3、将RVCT\rvct_31_crack\crack中所有文件copy到安装目录(比如安装到默认C盘:C:\Program Files\ARM\RVCT\).然后运行crack.bat到结束;4、用C:\Program Files\ARM\Licenses\rvds.dat,覆盖C:\Program Files\ARM\RVCT\rvds.dat;5、用高版本的RVCT\rvct_31_crack\armar.exe覆盖低版本,armarm.exe的目录如下:C:\Program Files\ARM\RVCT\Programs\3.1\569\win_32-pentium四、安装Office2007或更高版本后重启电脑,即可编译MTK。
Mellanox OFED 安装指南说明书
INSTALLING UBUNTU OS FOR MELLANOX OPENFABRICS ENTERPRISE LINUX DISTRIBUTION ON HPE INFINIBAND EDR/ETHERNET 100G ADAPTERSInstallation guideCONTENTSIntroduction (3)About this document (3)System requirements (3)Installation process overview (3)Verify network adapter is installed (3)Download the Mellanox drivers (4)Install the OFED installation package (4)Post-installation actions (8)Additional links (11)INTRODUCTIONHPE and Mellanox® have aligned to enable end-to-end connectivity solutions for hyperconverged infrastructures. By leveraging the highest throughputs and lowest latency that Mellanox intelligent interconnect solutions provide, HPE customers can take advantage of data delivery speeds of up to 100Gb/s InfiniBand or 10/25/40/50/56/100Gb/s Ethernet. These speeds enable customers to run high-performance workloads such as real-time response and extreme computing.About this documentThis document is intended for users familiar with Linux® environments. This guide covers the steps for installing the Mellanox Linux OpenFabrics Enterprise Distribution (OFED), the software stack used to manage InfiniBand and Ethernet network adapter cards, specifically using the Mellanox ConnectX®-5 platform for HPE InfiniBand EDR/Ethernet 100Gb 2-port 841QSFP28 Adapter 872726-B21. IMPORTANTSuperuser privileges are required for installation. Use the superuser (root) or use the sudo prefix if the sudo package is enabled.SYSTEM REQUIREMENTSThe following table lists the system requirements to install the Mellanox InfiniBand drivers.TABLE 1. Installation requirementsRequirementOperating system Ubuntu 18.04NIC HPE InfiniBand EDR/Ethernet 100Gb 2-port 841QSFP28 Adapter 872726-B21INSTALLATION PROCESS OVERVIEWThe high-level steps for installing the drivers are:1.Verify the network adapter is present.2.Download the Mellanox drivers (OFED file).3.Install the OFED installation package.4.Perform the post-installation actions.5.Update the firmware.Verify network adapter is installedIssue the following command to verify the network adapter is installed:user@ubuntu-gpu1:~$ lspci -v | grep MellanoxSample output:user@ubuntu-gpu1:~$ lspci -v | grep Mellanox86:00.0 Ethernet controller: Mellanox Technologies MT27800 Family [ConnectX-5]86:00.1 Ethernet controller: Mellanox Technologies MT27800 Family [ConnectX-5]Download the Mellanox driversThe Mellanox drivers are available at: https:///page/products_dyn?product_family=26&mtag=linux_sw_driversFIGURE 1. MLNX_ OFED Download Center screenSelect the following options from the Mellanox Download Center:•Version: 4.7-1.0.0.1•OS Distribution: Ubuntu•OS Distribution Version: Ubuntu 18.04•Architecture: As applicable•Download: tgz: MLNX_OFED_LINUX-4.7-1.0.0.1-ubuntu18.04-x86_64.tgzInstall the OFED installation packageFollow these steps to install the OFED package.Installation of the OFED package is executed by running the installation script mlnxofedinstall. Refer to the MLNX_OFED Documentation Rev 4.7-1.0.0.1 for other installation methods.1.Copy the downloaded OFED file to the /tmp directory.user@ubuntu-gpu1: cp MLNX_OFED_LINUX-4.7-1.0.0.1-ubuntu18.04-x86_64$ /tmp2.Issue the following commands to extract the .tar file.user@ubuntu-gpu1:~$ cd /tmpuser@ubuntu-gpu1:/tmp$ sudo tar -xzf ./MLNX_OFED_LINUX-4.7-1.0.0.1-ubuntu18.04-x86_64.tgz3.Run the installation script (mlnxofedinstall) by following these commands:user@ubuntu-gpu1:/tmp$ cd MLNX_OFED_LINUX-4.7-1.0.0.1-ubuntu18.04-x86_64/user@ubuntu-gpu1:/tmp/MLNX_OFED_LINUX-4.7-1.0.0.1-ubuntu18.04-x86_64$ sudo ./mlnxofedinstall Sample output:Logs dir: /tmp/MLNX_OFED_LINUX.3524.logsGeneral log file: /tmp/MLNX_OFED_LINUX.3524.logs/general.logThe following list shows the MLNX_OFED_LINUX packages that you have chosen (some might have been added by the installer due to package dependencies):ofed-scriptsmlnx-ofed-kernel-utilsmlnx-ofed-kernel-dkmsrshim-dkmsiser-dkmssrp-dkmslibibverbs1ibverbs-utilslibibverbs-devlibibverbs1-dbglibmlx4-1libmlx4-devlibmlx4-1-dbglibmlx5-1libmlx5-devlibmlx5-1-dbglibrxe-1librxe-devlibrxe-1-dbglibibumadlibibumad-staticlibibumad-develibacmibacm-devlibrdmacm1librdmacm-utilslibrdmacm-devmstflintibdumplibibmadlibibmad-staticlibibmad-devellibopensmopensmopensm-doclibopensm-develinfiniband-diagsinfiniband-diags-compatmftkernel-mft-dkmslibibcm1libibcm-devperftestibutils2libibdm1cc-mgrar-mgrdump-pribsimibsim-docknem-dkmsknemmxmucxsharphcollopenmpimpitestslibdapl2dapl2-utilslibdapl-devsrptoolsmlnx-ethtoolmlnx-iproute2This program will install the MLNX_OFED_LINUX package on your machine. Note that all other Mellanox, OEM, OFED, RDMA, or Distribution IB packages will be removed. Those packages are removed due to conflicts with MLNX_OFED_LINUX. Do not reinstall them. Do you want to continue?[y/N]:yChecking SW Requirements...One or more required packages for installing MLNX_OFED_LINUX are missing.Attempting to install the following missing packages:libgfortran3 flex swig chrpath tk debhelper automake quilt gfortran libnl-route-3-200 m4 libltdl-dev dpatch bison graphviz autoconf autotools-dev tclRemoving old packages...Installing new packagesInstalling ofed-scripts-4.7...Installing mlnx-ofed-kernel-utils-4.7...Installing mlnx-ofed-kernel-dkms-4.7...Installing rshim-dkms-1.8...Installing iser-dkms-4.7...Installing srp-dkms-4.7...Installing libibverbs1-41mlnx1...Installing ibverbs-utils-41mlnx1...Installing libibverbs-dev-41mlnx1...Installing libibverbs1-dbg-41mlnx1...Installing libmlx4-1-41mlnx1...Installing libmlx4-dev-41mlnx1...Installing libmlx4-1-dbg-41mlnx1...Installing libmlx5-1-41mlnx1...Installing libmlx5-dev-41mlnx1...Installing libmlx5-1-dbg-41mlnx1...Installing librxe-1-41mlnx1...Installing librxe-dev-41mlnx1...Installing librxe-1-dbg-41mlnx1...Installing libibumad-43.1.1.MLNX20190905.1080879...Installing libibumad-static-43.1.1.MLNX20190905.1080879...Installing libibumad-devel-43.1.1.MLNX20190905.1080879...Installing ibacm-41mlnx1...Installing ibacm-dev-41mlnx1...Installing librdmacm1-41mlnx1...Installing librdmacm-utils-41mlnx1...Installing librdmacm-dev-41mlnx1...Installing mstflint-4.13.0...Installing ibdump-5.0.0...Installing libibmad-5.4.0.MLNX20190423.1d917ae...Installing libibmad-static-5.4.0.MLNX20190423.1d917ae...Installing libibmad-devel-5.4.0.MLNX20190423.1d917ae...Installing libopensm-5.5.0.MLNX20190923.1c78385...Installing opensm-5.5.0.MLNX20190923.1c78385...Installing opensm-doc-5.5.0.MLNX20190923.1c78385...Installing libopensm-devel-5.5.0.MLNX20190923.1c78385...Installing infiniband-diags-5.4.0.MLNX20190908.5f40e4f...Installing infiniband-diags-compat-5.4.0.MLNX20190908.5f40e4f...Installing mft-4.13.0...Installing kernel-mft-dkms-4.13.0...Installing libibcm1-41mlnx1...Installing libibcm-dev-41mlnx1...Installing perftest-4.4...Installing ibutils2-2.1.1...Installing libibdm1-1.5.7.1...Installing cc-mgr-1.0...Installing ar-mgr-1.0...Installing dump-pr-1.0...Installing ibsim-0.7mlnx1...Installing ibsim-doc-0.7mlnx1...Installing knem-dkms-1.1.3.90mlnx1...Installing knem-1.1.3.90mlnx1...Installing mxm-3.7.3112...Installing ucx-1.7.0...Installing sharp-2.0.0.MLNX20190922.a9ebf22...Installing hcoll-4.4.2938...Installing openmpi-4.0.2rc3...Installing mpitests-3.2.20...Installing libdapl2-2.1.10mlnx...Installing dapl2-utils-2.1.10mlnx...Installing libdapl-dev-2.1.10mlnx...Installing srptools-41mlnx1...Installing mlnx-ethtool-5.1...Installing mlnx-iproute2-5.2.0...Selecting previously unselected package mlnx-fw-updater.(Reading database ... 148359 files and directories currently installed.)Preparing to unpack .../mlnx-fw-updater_4.7-1.0.0.1_amd64.deb ...Unpacking mlnx-fw-updater (4.7-1.0.0.1) ...Setting up mlnx-fw-updater (4.7-1.0.0.1) ...Added 'RUN_FW_UPDATER_ONBOOT=no to /etc/infiniband/openib.confAttempting to perform Firmware update...The firmware for this device is not distributed inside Mellanox driver: 86:00.0 (PSID: HPE0000000009) To obtain firmware for this device, please contact your HW vendor.Failed to update Firmware.See /tmp/MLNX_OFED_LINUX.3524.logs/fw_update.logDevice (86:00.0):86:00.0 Ethernet controller: Mellanox Technologies MT27800 Family [ConnectX-5]Link Width: x16PCI Link Speed: 8GT/sDevice (86:00.1):86:00.1 Ethernet controller: Mellanox Technologies MT27800 Family [ConnectX-5]Link Width: x16PCI Link Speed: 8GT/sInstallation passed successfullyTo load the new driver, run:/etc/init.d/openibd restart4.Load the new driver by running the following command:user@ubuntugpu2:/tmp/MLNX_OFED_LINUX-4.7-1.0.0.1-ubuntu18.04-x86_64$ sudo /etc/init.d/openibd restartSample output:Unloading HCA driver: [ OK ]Loading HCA driver and Access Layer: [ OK ]Post-installation actionsAfter installation is complete, follow these steps:1.Update IP settings if necessary by updating the /etc/netplan/*.yaml file.a.You can find a way to identify the logical name of the Mellanox Ethernet interface used to update the *.yaml file by running thecommand:user@ubuntu-gpu1:~$ sudo lshw -class networkThis command will list all Ethernet interfaces. The Mellanox Ethernet interface will have listed product: MT27800 Family [ConnectX-5] and vendor: Mellanox Technologies.Sample output:*-network:0description: Ethernet interfaceproduct: MT27800 Family [ConnectX-5]vendor: Mellanox Technologiesphysical id: 0bus info: pci@0000:86:00.0logical name: ens4f0version: 00serial: b8:83:03:58:d3:38width: 64 bitsclock: 33MHzcapabilities: pciexpress vpd msix pm bus_master cap_list ethernet physical autonegotiation configuration: autonegotiation=on broadcast=yes driver=mlx5_core driverversion=4.7-1.0.0 duplex=full firmware=16.24.1000 (HPE0000000009) ip=10.20.100.125 latency=0 link=yesmulticast=yesb.Identify the logical name and use this logical name to edit the network interfaces on the netplan *.yaml file.Sample execution:user@ubuntu-gpu1:/tmp$ cd /etc/netplan/user@ubuntu-gpu1:/etc/netplan$ sudo vi /etc/netplan/01-netcfg.yaml# This file describes the network interfaces available on your system# For more information, see netplan(5).network:version: 2renderer: networkdethernets:eno1:dhcp6: nodhcp4: noaddresses: [X.X.X.X/XX]gateway4: X.X.X.Xnameservers:addresses: [X.X,X.X]ens4f0:dhcp6: nodhcp4: noaddresses: [X.X.X.X/XX]gateway4: X.X.X.Xnameservers:addresses: [X.X,X.X]a.)Reapply netplan if necessaryuser@ubuntu-gpu1:/etc/netplan$ sudo netplan apply2.Confirm activation by issuing the following command:user@ubuntu-gpu1:~$ ibv_devinfoSample output:hca_id: mlx5_1transport: InfiniBand (0)fw_ver: 16.24.1000node_guid: b883:03ff:ff58:d339sys_image_guid: b883:03ff:ff58:d338vendor_id: 0x02c9vendor_part_id: 4119hw_ver: 0x0board_id: HPE0000000009phys_port_cnt: 1Device ports:port: 1state: PORT_DOWN (1)max_mtu: 4096 (5)active_mtu: 1024 (3)sm_lid: 0port_lid: 0port_lmc: 0x00link_layer: Ethernethca_id: mlx5_0transport: InfiniBand (0)fw_ver: 16.24.1000node_guid: b883:03ff:ff58:d338sys_image_guid: b883:03ff:ff58:d338vendor_id: 0x02c9vendor_part_id: 4119hw_ver: 0x0board_id: HPE0000000009phys_port_cnt: 1Device ports:port: 1state: PORT_ACTIVE (4)max_mtu: 4096 (5)active_mtu: 1024 (3)sm_lid: 0port_lid: 0port_lmc: 0x00link_layer: EthernetCheck the firmware version and update if needed. The latest firmware version when this document was published is 16.25.1020.Identify the PCI address by using the following command:user@ubuntu-gpu1:~$ lspci -v | grep MellanoxSample output:86:00.0 Ethernet controller: Mellanox Technologies MT27800 Family [ConnectX-5]86:00.1 Ethernet controller: Mellanox Technologies MT27800 Family [ConnectX-5]3.Check the firmware version using the PCI address of the device by issuing the command:~]# mstflint -d < device PCI address> qSample execution:user@ubuntu-gpu1:~$ sudo mstflint -d 86:00.0 q[sudo] password for user:Image type: FS4FW Version: 16.24.1000FW Release Date: 26.11.2018Product Version: 16.24.1000Rom Info: type=UEFI version=14.17.11 cpu=AMD64type=PXE version=3.5.603 cpu=AMD64Description: UID GuidsNumberBase GUID: b88303ffff58d338 8Base MAC: b8830358d338 8Image VSD: N/ADevice VSD: N/APSID: HPE0000000009Security Attributes: secure-fw4.To update the firmware, download the firmware update from:https:///hpsc/swd/public/detail?swItemId=MTX_57d79dca3161495e963d90095e5.Install the firmware by issuing the command:mstflint -d <device number of first device> -i <File path/<FW filename> burnSample execution:user@ubuntu-gpu1:/tmp$ sudo tar -xzf ./fw-ConnectX5-rel-16_25_1020-872726-B21_Ax-UEFI-14.18.19-FlexBoot-3.5.701.tar.gzuser@ubuntu-gpu1:/tmp$ sudo mstflint -d 86:00.0 -i /tmp/fw-ConnectX5-rel-16_25_1020-872726-B21_Ax-UEFI-14.18.19-FlexBoot-3.5.701.signed.bin burnCurrent FW version on flash: 16.24.1000New FW version: 16.25.1020Initializing image partition - OKWriting Boot image component - OK-I- To load new FW run mstfwreset or reboot machine.6.Reboot the server and confirm the firmware update.ubuntu-gpu1:~$ sudo rebootuser@ubuntu-gpu1:~$ sudo mstflint -d 86:00.0 qSample output:[sudo] password for user:Image type: FS4FW Version: 16.25.1020FW Release Date: 30.4.2019Product Version: 16.25.1020Rom Info: type=UEFI version=14.18.19 cpu=AMD64type=PXE version=3.5.701 cpu=AMD64Description: UID GuidsNumberBase GUID: b88303ffff58d338 8Base MAC: b8830358d338 8Image VSD: N/ADevice VSD: N/APSID: HPE0000000009Security Attributes: secure-fwInstallation guideMake the right purchase decision.Contact our presales specialists.Share nowGet updates© Copyright 2020 Hewlett Packard Enterprise Development LP. The information contained herein is subject to change withoutnotice. The only warranties for Hewlett Packard Enterprise products and services are set forth in the express warrantystatements accompanying such products and services. Nothing herein should be construed as constituting an additionalwarranty. Hewlett Packard Enterprise shall not be liable for technical or editorial errors or omissions contained herein.Linux is the registered trademark of Linus Torvalds in the U.S. and other countries. Mellanox and ConnectX are registeredtrademarks of Mellanox Technologies. All third-party marks are property of their respective owners.a00094362ENW, January 2020Check if the document is availablein the language of your choice.ADDITIONAL LINKSHPE and Mellanoxhttps:///oem/hpe/Mellanox OFED documentationhttps:///display/MLNXOFEDv471001HPE firmware downloadhttps:///hpsc/swd/public/detail?swItemId=MTX_57d79dca3161495e963d90095eLEARN MORE AThttps:///v2/GetPDF.aspx/c04154440.pdf。
winnfsd使用方法

(原创实用版5篇)编制人员:_______________审核人员:_______________审批人员:_______________编制单位:_______________编制时间:____年___月___日序言下面是本店铺为大家精心编写的5篇《winnfsd使用方法》,供大家借鉴与参考。
下载后,可根据实际需要进行调整和使用,希望能够帮助到大家,谢射!(5篇)《winnfsd使用方法》篇1Winnfsd是一个文件系统,用于在虚拟机或容器中创建和配置文件系统。
以下是使用Winnfsd的步骤:1. 安装Winnfsd:首先,您需要安装Winnfsd。
您可以从官方网站下载Winnfsd安装程序,然后按照安装向导的指示进行操作。
2. 创建文件系统:安装完成后,您可以创建一个新的文件系统。
在Winnfsd 中,您可以选择不同的文件系统类型,例如ext4、FAT32等。
选择适当的文件系统类型后,您可以设置文件系统的挂载点和其他选项。
3. 配置文件系统:完成文件系统的创建后,您需要配置文件系统。
您可以在Winnfsd中设置文件系统的权限、所有权和其他选项。
4. 启动文件系统:完成配置后,您可以启动文件系统。
在Winnfsd中,您可以选择启动文件系统的方式,例如在虚拟机或容器中启动文件系统。
5. 使用文件系统:启动文件系统后,您可以在其中创建、编辑和删除文件和文件夹。
6. 卸载文件系统:当您不再需要使用文件系统时,您可以卸载它。
在Winnfsd中,您可以卸载文件系统并从系统中删除它。
以上是使用Winnfsd的基本步骤。
《winnfsd使用方法》篇2WnNFS (Wine+Nestlé)+SD是一种特殊的文件系统,由两个程序(Wine和Nestlé)和一个硬件(SD卡)组成。
以下是使用WnNFS (Wine+Nestlé)+SD的基本步骤:1. 安装Wine:首先,您需要安装Wine。
加拿大枫叶报警 winload软件操作图文说明
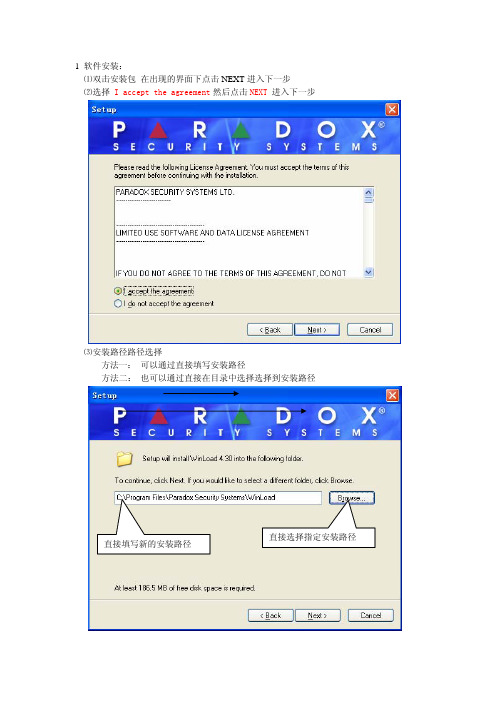
1 软件安装:⑴双击安装包在出现的界面下点击NEXT进入下一步进入下一步⑵选择 I accept the agreement然后点击NEXT⑶安装路径路径选择方法一: 可以通过直接填写安装路径方法二: 也可以通过直接在目录中选择选择到安装路径直接选择指定安装路径直接填写新的安装路径路径选择完成后,点击Next进入下一步⑷安装路径确认点击 是(Y)确认路径⑸软件名称如果需要更改软件名字,可在这里直接修改不创建开始菜单文件夹,如需创建则选中 点击Next进入下一步⑹ 创建快捷方式(可根据需要选择)创建桌面快捷方式创建快速运行快捷方式点击Next 进入下一步⑺ 核对已选择的内容,没问题直接点击Install ,开始安装程序⑻安装完成运行winload ,点击 Finsh运行winload软件安装结束二: 软件操作准备⑴软件语言选择在Select language 中,选择Chinese Senboll 点击 OK 进入下一步⑵ 输入密码 ,然后点击确认⑶找回密码的提示设置在提示问题的下拉菜单中选择问题,在提示问题的答案中,填写答案,然后点击确认,运行软件Ⅱ连接设置要想在Winload 和主机之间建立连接,就要对Winload 进行连接设置,方法有两种,一种是通过307USB 适配器直接连接,另一种是通过MODEM 电话拨号远程连接 第一次使用时,连接设置会自动弹出,如果更改的话在软件窗口的设置栏中点击连接即可 ⑴307USB 适配器连接设置选择直接连接方式,在下拉菜单栏中选择307USB 和 计算机的连接串口号在支持的解调器下拉(3)硬件连接(1) 新建账号(2) 填写主机基础信息远程电话拨号设置电话号码填写好点击下一步设备选择(3)选择主机的型号以及版本,然后点击确认,主机的基本信息就会显示出来(4) 连接主机选择连接方式: 用307USB则选择直接连接用电话远程拨号选择Modem连接选择完毕点击连接注意: (Ⅰ)选择直接连接则在调制解调器连接方式连接中的串口选择中,选择串口为灰色的串口,即不启动拨号连接,(Ⅱ)如果选择电话远程拨号,则在直接连接的串口选择中选择灰色串口,即不启用直接连接(5) 连接成功的显示如下连接成功后,主机所有的编程都会在软件的左边菜单栏中显示出来, (6) 选中主机,双击主机,软件会自动弹出主机的编程板,选中模块,双击模块,软件会自动弹出模块的编程板主机编程如图选择信息上传范围和信息传送方向后点击START 注意:在对主机编程前应先上传主机信息到软件 上传过程:(7) 编程:编程只需将相应的内容选中或填写进去即可,并且主机会将当前修改的内容以红色显示。
Win8.1激活教程 完整电话激活教程

Win8.1激活教程完整电话激活教程•更新时间:2013-10-20•来源:本站小编•关健字:Win8.1激活•点击:•文章内容国外消息证实,微软已经改变了Win8.1电话授权转移策略,泄漏密钥最快半小时就会被锁定。
当前尝试电话激活Win8.1已经鲜有成功的了。
Win8.1正式上市后不久,微软就有意打击电话激活行为;一周前,Win8.1英国电话激活开始增加了数字识别,稍微提升了该操作的门槛;现在看来,微软有意关闭Win8.1电话激活这条“盗版通道”了。
另外,最新的KMS工具适应于所有版本的Windows 8.1以及Office2013等的激活。
- KMSpico(Win8.1激活工具) v9.0.2 最新版下载:/html/KMSpicoWin8.1.html- Windows 8.1 RTM(x86/x64)简体中文专业版下载:/html/Windows8.1_RTM.html伴随着微软官方Win8.1正式版下载的发布,Win8.1激活的问题也成了网友面前的一道难题。
在现在Win8.1激活工具尚不完善的情况下,系统之家小编为您整理了一篇完整的Win8.1正式版电话激活教程。
使用电话激活Win8.1系统,我们需要用到以下工具:- Skype 史上最佳网络电话软件:下载- Key 检测工具:下载- VPN工具:下载Win8.1正式版电话激活教程开始:1.首先利用命令替换系统密钥,按下Win + X,打开命令提示符(管理员),输入下面命令替换密钥(win8和8.1激活步骤相同,请自行更换可用密钥)slmgr.vbs -ipk 988NM-XKXT9-7YFWH-H2Q3Q-C34DH*Win8.1系统电话激活可用密匙最后更新【10.20】slmgr.vbs -ipk N6KXJ-P6YWY-4C92Q-J7BVB-R6XGM[新]Windows 8.1 PRO/ENTERPRISE RTM VL MAK Keyslmgr.vbs -ipk 7W638-VNRGV-Q3W6C-TF93K-KP9HDslmgr.vbs -ipk Y2FN7-8V44C-WP6B8-YV6DY-PR27DWindows 8&8.1 RTM Pro WMC Offline Activation RETAIL Keysslmgr.vbs -ipk RD29G-RWM68-8DNJG-KFDTD-DV3JDslmgr.vbs -ipk GKPJB-Q648G-H2NKP-VTYQ4-84YRQslmgr.vbs -ipk BY77H-B3PFR-92WFN-HQJFH-KHGB3Windows 8 PRO/ENTERPRISE Offline Activation MAK Keyslmgr.vbs -ipk 2VNV4-77CKK-GRDM3-4FPQK-QV3HCslmgr.vbs -ipk 4RHDN-D6CT9-8PJCM-C7XBP-HH3HCslmgr.vbs -ipk 6WWPC-KN4KX-8TB87-6JDP8-MR9VCslmgr.vbs -ipk D7HNG-C6MPP-DVR4B-V2GX4-JHRDPslmgr.vbs -ipk HJQNJ-879TM-47X6T-F3Q9C-HH3HCslmgr.vbs -ipk JXNBF-VG8TP-PBDBW-TB2K2-P9T7Cslmgr.vbs -ipk K6K3W-TJNGF-JGTVK-PT484-BY2K2slmgr.vbs -ipk NJ34M-WQ2DX-T8W7T-CBRMX-YDR92slmgr.vbs -ipk QJCYT-NRQM2-GM973-3PK49-RM2K2slmgr.vbs -ipk YTD27-N9T2C-P9Y7W-W6MDC-749VC2.简单判断Win8电话激活密钥是否有效1.Wiin + R,输入Slui 3 ,回车,输入密钥,点激活;如果出现错误代码:0XC004C003说明密钥失效;出现错误代码:0XC004C008,Congratulations,赶紧用电话激活。
windows dtrace 用法

windows dtrace 用法Windows DTrace 是一项非常有用的工具,它可以帮助开发人员和系统管理员在 Windows 操作系统上进行高级的故障排除和性能分析。
下面将介绍一些关于Windows DTrace 的基本用法。
首先,要使用 Windows DTrace,您需要在您的计算机上安装 Windows Performance Toolkit(WPT)。
WPT 是一个独立安装的组件,可以从 Microsoft 的官方网站上下载和安装。
安装完成后,您可以在命令提示符或 PowerShell 中访问DTrace 工具。
DTrace 是一个强大的命令行工具,它提供了一种方便的方式来跟踪和监视操作系统的各个方面,包括内核函数调用、用户进程活动、网络通信等。
下面是一些常见的 DTrace 用法示例:1. 跟踪系统调用:使用 DTrace 来监视系统调用可以帮助我们了解应用程序与操作系统之间的交互情况。
例如,您可以使用以下命令跟踪一个特定进程的系统调用:```dtrace -p <PID> -n 'syscall:::entry { printf("%s\n", probefunc); }'```这将打印出进程的系统调用名称。
2. 跟踪进程活动:通过使用DTrace,您可以监视进程的活动,包括函数调用、线程执行等。
例如,下面的命令将打印指定进程的函数调用栈:```dtrace -n 'pid1234:::entry { ustack(); }'```这将显示进程 ID 为 1234 的进程的函数调用栈。
3. 跟踪网络通信:使用 DTrace,您可以监视网络连接和数据包传输。
例如,以下命令将显示所有连接到本地主机的 TCP 连接信息:```dtrace -n 'tcp:::connect { printf("%s:%d connected\n", args[2]->tcps_raddr, args[2]->tcps_rport); }'```这将打印出每个建立的 TCP 连接的远程地址和端口。
ODYSSEE求解器安装指南说明书

ContentsODYSSEE Solver (2)Download installers (2)ODYSSEE Solver installation (2)For Windows: (2)For RHEL 7.9: (2)Licenses (3)Examples for Windows (4)Examples for RHEL 7.9 (4)Help Documents for Windows (4)Help Documents for RHEL 7.9 (4)ODYSSEE SolverInstallation guideODYSSEE SolverODYSSEE Solver includes:➢ODYSSEE QUASAR: A solver to make predictive models and data mining analysis.➢ODYSSEE NOVA: An optimizer to search for the optimal variables to minimize an objective function, while respecting constraints defined.Download installersGo to the MSC Software Download Center to download:➢ODYSSEE Solver product exists for:•Windows 10, ODYSSEE-Solver_2023.*_x64.exe•RHEL 7.9 Supported plateform and fully certified, RHEL 8.6 Supported plateform, ODYSSEE-Solver-2023.1-1.el8.x86_64.rpmNote: The Helium MSC Licensing tool must be installed either on the server for a network license or on the user's computer for a seat license. Please, go to the MSC Software Download Center to download: MSC Licensing Helium.ODYSSEE Solver installationFor Windows:1.If ODYSSEE Solver was already installed in past, removed manually the examples directory inpersonal user directory usually: UserName\Documents\ODYSSEE\Solver\Examples2. Execute the new set-up ODYSSEE Solver_2023.*_x64.exe.3. Select the language.4. During the installation select the directory installation and click on Next. By default, it is:C:\Program Files\ODYSSEE\Solver5. Click on install button.For RHEL 7.9:1. Uninstall old versions if they exist on the computer.a. Open a command promptb. Write the command: sudo yum remove ODYSSEE-Solver2. Install the new set-up ODYSSEE-Solver-2023.1-1.el8.x86_64.rpm.a. Write the command: sudo yum install ODYSSEE-Solver-2023.1-1.el8.x86_64.rpm3. Execute ODYSSEE Solver run:a. "QuasarEngine_2" for the AI solverb. or "Nova" for the OptimizerLicensesA license file has been sent by e-mail from your Hexagon/MSC contact.ODYSSEE-Solver_2023.*_x64.exe is compatible with Helium MSC licensing (FLEXERA system).To check the license:•Open a command prompt•Go by the cd command in the ODYSSEE Solver directory•Run “QuasarEngine_2.exe”A message appears asking to configure the license:(1) Select a license file(2) Configure a network license server IpFor both types of licenses (Network or seat), enter 2And next, specify the Network license server Ip: 27500@HOSTNAME or 27500@ip and press enter.o HOSTNAME or ip of the server if you received a network license.o HOSTNAME or ip of the local computer if you received a seat license.Note: for seat license, to obtain the host name, open a command prompt and enter ipconfig/all.Note (Windows): if ODYSSEE Solver return this message: Unable to checkout a token for ODYSSEE Solver, check- If the user computer can ping on the server.- If the LMtool service is started on the server.o Launch LMtools.exe.o Go to the Service/Licenseo Select the good service in the list.o Go to Start/Stop/reread tab.o Start the service.o Retry to launch the application.Note: If there is no service, please refer to MSC Licensing Helium User’s Guide.pdf available in MSC Software Download Center.Examples for WindowsQuasar examples are available in:C:\Program Files\ODYSSEE\Solver\Documentation\Quasar\_ExamplesOr into.\Documents\ODYSSEE\Solver\Examples\QuasarNova examples are available in:C:\Program Files\ODYSSEE\Solver\Documentation\Nova\examplesOr into.\Documents\ODYSSEE\Solver\Examples\NovaExamples for RHEL 7.9Quasar examples are available in:/usr/local/bin/ODYSSEE/Solver/Documentation/Quasar/_ExamplesOr into/home/.../Documents/ODYSSEE/Solver/Examples/QuasarNova examples are available in:/usr/local/bin/ODYSSEE/Solver/Documentation/Nova/examplesOr into/home/.../Documents/ODYSSEE/Solver/Examples/NovaHelp Documents for WindowsThe Help document for Quasar is available in:C:\Program Files\ODYSSEE\Solver\Documentation\Quasar\Quasar Help2022.*.pdfThe Help document for Nova is available in:C:\Program Files\ODYSSEE\Solver\Documentation\Nova\Nova Help 2022.*.pdf Help Documents for RHEL 7.9The Help document for Quasar is available in:/usr/local/bin/ODYSSEE/Solver/Documentation/Quasar/Quasar Help 2023.*.pdfThe Help document for Nova is available in:/usr/local/bin/ODYSSEE/Solver/Documentation/Nova/Nova Help 2023.*.pdf。
Installshield入门指南

Installshield入门指南1 说明(适用范围)阅读对象:IS的初用者;本指南的校对、补充、修改者。
适用版本:IS10~IS12目的:本手册将用一个实例来讲述Installshield 12的安装程序制作方法;本手册使用is 12中的Windows Installer-Installscript MSI Project作为安装讲解工程。
2 IS介绍2.1IS介绍从6.0到9.0版本,它的每一个版本大概都分为三个系列,就如同操作系统WINDOWS XP一样,每一个版本都分为Professional,Express,Developer。
简单的可以这样解释(详细区别大家可以到网上搜,应该很多):Express功能最少,使用也最简单,限制使用脚本功能等。
适合制作常规的安装包。
Professional开放的功能较多,包括脚本功能。
但还是有一些限制,我了解的就是无法编辑界面,缺少一些外部库等等。
Developer不用说是最全的了。
从10版本开始,IS最大的变化就是界面变了。
变的花哨了许多,功能更多了。
比如增加了对SQL的支持,最终加入了对XML的支持。
而且,从10开始,名字也有些改变:Premier Edition对应原来的Developer,其他的还是和原来一样。
以下的介绍全部是针对Installshield Premier Edition12的,请大家务必注意。
2.2IS各工程类型简介IS将安装工程根据工程的特点分了几大类:InstallScript ;Windows Installer;Universal installer。
其中,Universal这个比较好理解,为了适应不同操作系统而作,用来做跨平台的安装程序。
InstallScript和Windows Installer的区别,就是如果你使用InstallScript模式是使用脚本来驱动安装界面,使用Windows Installer则主要是使用操作系统自带的安装服务来驱动安装。
农业大棚监控项目-系统软件安装-系统安装过程1.

点击安装SQL Server 2000组件,
点击安装数据库服 务器
依次单击下一步,
出现如左图所示界 面,选择自定义, 单击下一步
依次单击下一步,出现如 右图所示界面,选择使用 本地系统账户,单击下一 步
点击同意条款, 单击安装。
等待右图所示两个 进度条读取完毕。
出现左图所示界面,单 击完成。至此,.Net Framework 4.0 语言简 体中文包安装完毕。
系统安装过程1
具体步骤
1。安装SQL Server2000 2。安装.Net Framework 4.0 3。安装.Net Framework 4.0 语言简体中
文包 4。还原用户账号管理数据库-UserDBS 5。还原全职通-3000系统数据库-
WLWGS 6。安装全职通-3000系统
1。安装SQL Server2000
出现如右图所示界面, 选择混合模式,输入 密码sa,单击下一步
依次单击下一步,出 现如右图所示提示, 点击两次确定
出现如左图所示界 面,等待进度条读 取完毕
等待右图所示四个 提示框加载完毕
单击完成,至此,
SQL Server 2000 安装完毕
2。安装.Net Framework 4.0
双击 doNetFx40_Ful l_x86_x64.exe, 打开.Net Framework 4.0 的安装包,
等待下图界面加载完 毕会出现右图所示界 面,点击同意条面,单击完成。
出现右图所 示界面,单 击稍后重新 启动,至 此,.Net
Framework 4.0安装完毕。
inno setup isdotnetinstalled 方法
inno setup isdotnetinstalled 方法摘要:1.介绍inno setup isdotnetinstalled 方法2.方法的原理和作用3.如何在inno setup 中使用isdotnetinstalled 方法4.方法的优点和局限性5.总结和建议正文:Inno Setup 是一款用于制作Windows 安装程序的开源工具,它支持多种编程语言和框架。
在Inno Setup 中,isdotnetinstalled 方法是一个非常有用的功能,它可以帮助我们检查目标系统是否安装了.NET Framework。
接下来,我们将详细介绍inno setup isdotnetinstalled 方法。
首先,我们来了解一下isdotnetinstalled 方法的原理和作用。
该方法通过检测目标系统上的.NET Framework 版本信息,判断系统是否安装了.NET Framework。
这样一来,我们就可以根据检测结果,为用户提供适当的安装选项。
例如,如果目标系统没有安装.NET Framework,我们可以在安装程序中提供安装.NET Framework 的选项;如果已经安装了.NET Framework,我们则可以跳过这一步骤。
那么,如何在Inno Setup 中使用isdotnetinstalled 方法呢?方法非常简单,只需在脚本中调用isdotnetinstalled 函数,并将结果存储在一个变量中。
然后,我们可以根据这个变量的值来执行相应的操作。
下面是一个简单的示例代码:```[Setup]; 检查.NET Framework 是否安装var IsDotNetInstalled = IsDotNetInstalled();if (IsDotNetInstalled) thenbeginMessageBox(".NET Framework 已安装", "提示", MB_OK);end elsebeginMessageBox(".NET Framework 未安装", "提示", MB_OK);end;```这段代码首先调用isdotnetinstalled 方法,将结果存储在IsDotNetInstalled 变量中。
- 1、下载文档前请自行甄别文档内容的完整性,平台不提供额外的编辑、内容补充、找答案等附加服务。
- 2、"仅部分预览"的文档,不可在线预览部分如存在完整性等问题,可反馈申请退款(可完整预览的文档不适用该条件!)。
- 3、如文档侵犯您的权益,请联系客服反馈,我们会尽快为您处理(人工客服工作时间:9:00-18:30)。
© 2003 - 2012 Lumerical Solutions, Inc
4a. Configure license - Customers
FDTD S olu tion s
Windows Installation
Release 8.5
Contents
1
Table of Contents
Part I Windows
2
1 Installat.i.o..n...i.n..s..t.r.u..c..t.i.o..n..s.................................................................................... 2
1. Uninstall Older Versions Uninstall any previously installed versions of FDTD Solutions on your PC. Unplug any USB hardware keys before uninstalling.
2
Windows Installation
1 Windows
Welcome to the FDTD Solutions Installation Manual for Windows. Please contact support@ if you have any questions.
4. Click the "Import from file" button and select your license file.
5. On the Actions selection box, choose "Apply these settings to my user account only"
local network. Please see the USB Network Key License Manager section for more
ห้องสมุดไป่ตู้
information.
This step does not apply to trial users.
This completes the FDTD Solutions installation. See the following pages for additional setup and configuration information.
2 Configu.r.e...e..n..g..i.n..e.............................................................................................. 4
3 Cluster .s.e..t.u..p..................................................................................................... 6
2. Open the License Configuration utility in the Windows start menu from Start-> All Programs-> Lumerical-> FDTD Solutions-> Configure license
3. Select "Evaluation code" from the top drop down menu.
2. Select "Licensed product (HASP)" from the top drop down menu.
3. On the Actions selection box, choose "Apply these settings to my user account only"
4. Click OK to save these settings. 5. Connect your USB hardware key. You
should see a small red light in the back of the key.
1. You were emailed a trial license file (. dat) when you first downloaded the installation package. Save this file to a temporary location like your desktop.
6. Click OK to save these settings.
4
Windows Installation
Customers with red USB keys
can configure their licenses in a number of
ways. For example, licenses can be restricted to a single computer or shared across your
Concurrent computing refers to running multiple simultaneous simulations, usually on different computers. Distributed computing refers to running a single simulation using multiple cores/processors/workstations, giving access to a greater total amount of memory and reducing computation time. Only some simulation engines support distributed computing (eg. the FDTD engine).
4 FAQ ............................................................................................................ 7
Trial .l.i.c..e..n...s..e...v..a..l.i.d...a..t.i.o..n................................................................................................................... 7 Insta.l.l.e..r...e..r..r..o..r..s............................................................................................................................... 8 Cras.h..e..s....a..n..d...g...r.a..p...h..i.c..s...p...r.o...b..l.e..m....s................................................................................................ 9 Para..l.l.e..l..e...n..g..i.n...e...i.s..s...u..e..s................................................................................................................. 10 MPI.C..H....e..r..r.o...r..w....h..i.l.e...r..u..n...n..i.n..g....s..i.m....u..l.a..t.i.o...n...o..r...c..o..n...f.i.g..u...r.a..t..i.o..n...t..e..s..t............................................. 11
3. Run the installer Launch the install wizard by double clicking on the "FDTD_Solutions_Installer" program icon. The installer will guide you through the installation process.
4b. Configure license - Trial users
5. Configure your USB network k ey
© 2003 - 2012 Lumerical Solutions, Inc
Windows
3
1. Open the License Configuration utility in the Windows start menu from Start-> All Programs-> Lumerical-> FDTD Solutions-> Configure license
1.1 Installation instructions
The following section describes the standard installation process for FDTD Solutions. Please login to your computer as an Administrator before starting the installation process.
