CursorAdapter使用的例子
CursorAdapter使用心得

CursorAdapter使用心得以下是我的使用心得。
1.用了CursorAdapter之后你可以将数据处理也可以类代对像化。
这个要比视图灵活得多。
比如说以上我的类.这是第一层的所有用到的CursorAdapter类都是继承这个类的的。
*- 主程式类DEFINE CLASS MainDataClass as CursorAdapterDataSourceType="ODBC"DataSource=sql CONNECT([xsconn],.T.)UseDeDataSource= .T.FetchSize=-1MaxRecords=-1FetchMemo= .T.SendUpdates= .T.PROCEDURE initthis.CursorFillENDPROC*- 反回是否有记录存在PROCEDURE isReccount as BooleanLOCAL lRetu as BooleanSELECT (this.Alias)IF RECCOUNT() =0lRetu = .f.ELSElRetu = .t.ENDIFRETURN lRetuENDPROC*- 更新PROCEDURE update as BooleanLOCAL lRetu as BooleanSELECT (this.Alias)lRetu=TABLEUPDATE(.t.)IF lRetu = .f.LOCAL iErrorDIMENSION iError(1)AERROR(iError)MESSAGEBOX([错原因:]+CHR(13)+ALLTRIM(iError(2)),16,"更新失败")RELEASE iErrorENDIFRETURN lRetuENDPROCENDDEFINE接下去要使用到的表是这样。
也就是第二层。
我的商品库用到的类。
DEFINE CLASS spk as MainDataClassAlias=[spk]Tables=[spk]SelectCmd = [select spk.* from spk order by spid]UpdateNameList = [SPID spk.SPID, SPNAME spk.SPNAME, DW spk.DW,BZS spk.BZS, CD s pk.CD, KCWZ spk.KCWZ, LSJ spk.LSJ, PFJ spk.PFJ, KCSL spk.KCSL, KCDJ spk.KCDJ, KCJ E spk.KCJE, BZ spk.BZ, ZGKC spk.ZGKC, ZDKC spk.ZDKC,]+;[JGA spk.JGA,JGB spk.JGB,JGC spk.JGC ,JGD spk.JGD,JGE spk.JGE,JGF spk.JGF ]KeyFieldList = [SPID]UpdatableFieldList = [SPID, SPNAME, DW, CD, KCWZ, BZS,LSJ, PFJ, BZ, ZGKC, ZDKC,JG A,JGB,JGC,JGD,JGE,JGF]CursorSchema=[SPID C(10), SPNAME C(40), DW C(10),BZS N(10,0), CD C(20), KCWZ C(10 ), LSJ N(12, 4), PFJ N(12, 4), KCSL N(12, 2), KCDJ N(12, 4), KCJE I, BZ C(40), ZGKC N(12, 2 ), ZDKC N(12, 2),]+;[ JGA N(10,4),JGB N(10,4),JGC N(10,4),JGD N(10,4),JGE N(10,4),JGF N(10,4)] ENDDEFINE以上的代码是对商品库的一些主要设置。
Android各种Adapter的用法

Android 各种Adapter 的用法同样是一个ListView ,可以用不同的Adapter 让它显示出来,比如说最常用的ArrayAdapter ,SimpleAdapter ,SimpleCursorAdapter ,以及重写BaseAdapter 等方法。
ArrayAdapter 比较简单,但它只能用于显示文字。
而SimpleAdapter 则有很强的扩展性,可以自定义出各种效果,SimpleCursorAdapter 则可以从数据库中读取数据显示在列表上,通过从写BaseAdapter 可以在列表上加处理的事件等。
下面先来看看ArrayAdapter :?1 2 3 4 5 6 7 8 9 10 11 12 13 14 15 16 17 18 package com.shang.test;import java.util.ArrayList;import android.app.Activity;import android.os.Bundle;import android.widget.ArrayAdapter;import android.widget.ListView;/**** @author shangzhenxiang**/public class TestArrayAdapterActivity extends Activity{private ListView mListView;private ArrayList<String> mArrayList = new ArrayList<String>();19202122232425262728293031323334353637 @Overrideprotected void onCreate(Bundle savedInstanceState) {super.onCreate(savedInstanceState);setContentView(yout.testarrayadapter);mListView = (ListView) findViewById(R.id.myArrayList);mListView.setAdapter(new ArrayAdapter<String>(this, yout.simple }private ArrayList<String> getData() {mArrayList.add("测试数据1");mArrayList.add("测试数据2");mArrayList.add("测试数据3");mArrayList.add("测试数据4");mArrayList.add("测试数据5");mArrayList.add("测试数据6");return mArrayList;}}布局里面有个ListView就可以了:?1 2 3 4 5 6 7 8 91011121314<?xml version="1.0" encoding="utf-8"?><LinearLayout xmlns:android="/apk/res/android"android:orientation="vertical"android:layout_width="match_parent"android:layout_height="fill_parent"><TextViewandroid:layout_width="match_parent"android:layout_height="wrap_content"android:text="@string/hello"/><ListViewandroid:id="@+id/myArrayList"android:layout_width="match_parent"android:layout_height="wrap_content"/></LinearLayout>上面的代码中用到了ArrayAdapter的构造方法:public ArrayAdapter (Context context, int textViewResourceId, T[] objects) Api中是这么描述的:其中Context为当前的环境变量,可以显示一行文字的一个布局文件,和一个List的集合,也就是数据源。
Android适配器学习和使用
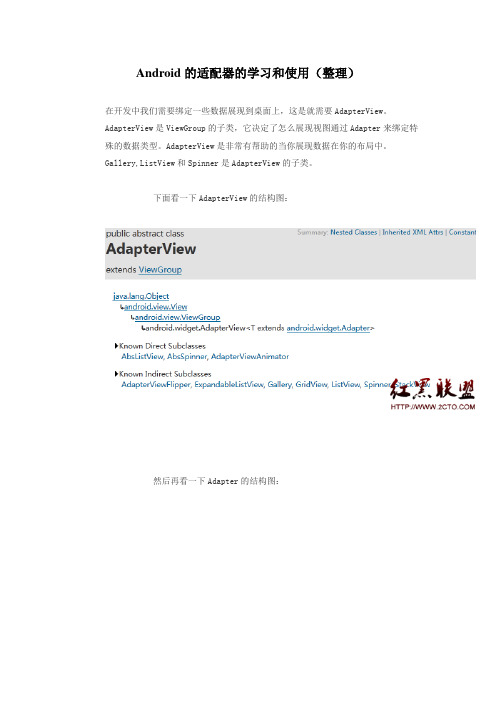
Android的适配器的学习和使用(整理)在开发中我们需要绑定一些数据展现到桌面上,这是就需要AdapterView。
AdapterView是ViewGroup的子类,它决定了怎么展现视图通过Adapter来绑定特殊的数据类型。
AdapterView是非常有帮助的当你展现数据在你的布局中。
Gallery,ListView和Spinner是AdapterView的子类。
下面看一下AdapterView的结构图:然后再看一下Adapter的结构图:上面已经充分展现了他们的子类和父类的基础关系。
下面我们看一个ListViewDemo的例子:先来看一个简单的adapter的例子:public class SimpleList extends ListActivity {private String[] mListString={"姓名:王魁锋","性别:男","年龄:23", "居住地:上海市普陀区","邮箱:wangkuifeng0118@"};private ListView mListView=null;@Overrideprotected void onCreate(Bundle savedInstanceState) {// TODO Auto-generated method stubsuper.onCreate(savedInstanceState);mListView=this.getListView();setListAdapter(new ArrayAdapter<String>(this,yout.simple_list_item_1,mListString));mListView.setOnItemClickListener(new OnItemClickListener() {@Overridepublic void onItemClick(AdapterView<?> parent, View view, int position, long id) {// TODO Auto-generated method stubToast.makeText(SimpleList.this, "你选择了:"+mListString[position], 1).show();}});}这里用到了系统定义好的适配模式,当然这只能用来简单的数据适配,下面看一下效果:接下来看一个稍微复杂点的,SimpleAdapter怎么适配:public class IconList extends ListActivity {private String[] mListTitle = { "姓名", "性别", "年龄", "居住地","邮箱"};private String[] mListStr = { "王魁锋", "男", "23", "上海市普陀区","wangkuifeng0118@"};ListView mListView = null;ArrayList<Map<String,Object>> mData= newArrayList<Map<String,Object>>();;@Overrideprotected void onCreate(Bundle savedInstanceState) {// TODO Auto-generated method stubmListView = getListView();int lengh = mListTitle.length;for(int i =0; i < lengh; i++) {Map<String,Object> item = new HashMap<String,Object>(); item.put("image", R.drawable.portrait);item.put("title", mListTitle[i]);item.put("text", mListStr[i]);mData.add(item);}SimpleAdapter adapter = newSimpleAdapter(this,mData,yout.iconlist,new String[]{"image","title","text"},newint[]{R.id.image,R.id.title,R.id.text});setListAdapter(adapter);mListView.setOnItemClickListener(new OnItemClickListener() {@Overridepublic void onItemClick(AdapterView<?> parent, View view,int position, long id) {// TODO Auto-generated method stubToast.makeText(IconList.this,"您选择了标题:" + mListTitle[position] + " 内容:"+mListStr[position],Toast.LENGTH_LONG).show();}});super.onCreate(savedInstanceState);}}上面的数据可以是同数据库读取的也可以是从网络获取的,这里不做过多介绍,看下效果:哈哈看起来美观了些,如果要做更复杂的布局,哪就要用BaseAdapter了。
CA类及其在远程数据访问中的意义

CA类及其在远程数据访问中的意义转自《电脑编程技巧和维护》Visual FoxPro 8.0 的CursorAdapter类及其在远程数据访问中的意义[摘要] 本文从Visual FoxPro应用程序的观点深入剖析Visual FoxPro 8.0中新增的CursorAdapter类及其在远程数据访问中的意义。
CursorAdapter对各种远程数据源提供了一种统一的面向对象的访问接口,开发人员借此可以轻松实现基于Native(本地数据)、ODBC、ADO、XML的数据访问。
[关键词] CursorAdapter,远程数据访问,ADO,视图,Cursor,COM一、引言就在“Visual FoxPro已过时,并即将被淘汰……”的一片喧嚣声中,Microsoft于去年6月正式发布了Visual FoxPro 8.0。
据称,这是自Visual FoxPro 3.O发布以来最精彩的一个版本。
新增众多如:结构化异常处理、事件绑定、数据环境子类、XML Web services、自动递增字段、控件延迟绑定、Windows XP风格支持等等令人目不暇接的功能,着实让全球Foxer们兴奋不已,然而其中最值得令人称道的当数CursorAdapter类,笔者以为这是Visual FoxPro 8.0最抢眼的一个亮点。
长期以来,Visual FoxPro因为其先天的弱点如:表的脆弱性、安全性、数据库的容量以及通用性等等,一直成为人们攻击的目标。
因而越来越多的VFP程序员开始抛弃DBF表,转而采用如SQL Server、Oracle 等一些大型数据库来存储数据,而将VFP作为c/s结构中的前端开发工具或者作为基于COM的三层结构应用程序的中间层开发工具。
然而,传统的方式通常是使用远程视图或SQL Pass Through然后经过ODBC 来访问远程数据。
随着新的基于组件技术的数据访问规范OLE DB和扩展标记语言XML的出现,对VFP 开发人员来说无疑产生了极大的吸引力。
Android listview与adapter用法
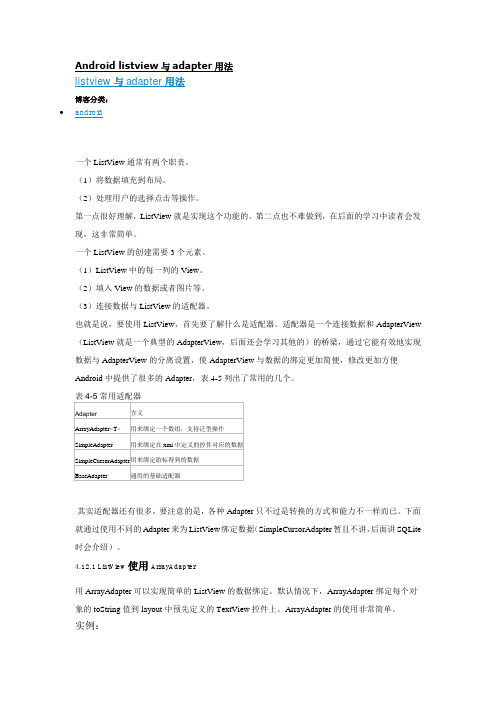
Android listview与adapter用法listview与adapter用法博客分类:android一个ListView通常有两个职责。
(1)将数据填充到布局。
(2)处理用户的选择点击等操作。
第一点很好理解,ListView就是实现这个功能的。
第二点也不难做到,在后面的学习中读者会发现,这非常简单。
一个ListView的创建需要3个元素。
(1)ListView中的每一列的View。
(2)填入View的数据或者图片等。
(3)连接数据与ListView的适配器。
也就是说,要使用ListView,首先要了解什么是适配器。
适配器是一个连接数据和AdapterView (ListView就是一个典型的AdapterView,后面还会学习其他的)的桥梁,通过它能有效地实现数据与AdapterView的分离设置,使AdapterView与数据的绑定更加简便,修改更加方便Android中提供了很多的Adapter,表4-5列出了常用的几个。
其实适配器还有很多,要注意的是,各种Adapter只不过是转换的方式和能力不一样而已。
下面就通过使用不同的Adapter来为ListView绑定数据(SimpleCursorAdapter暂且不讲,后面讲SQLite 时会介绍)。
4.12.1 ListView使用ArrayAdapter用ArrayAdapter可以实现简单的ListView的数据绑定。
默认情况下,ArrayAdapter绑定每个对象的toString值到layout中预先定义的TextView控件上。
ArrayAdapter的使用非常简单。
实例:工程目录:EX_04_12在布局文件中加入一个ListView控件。
<?xmlversion="1.0"encoding="utf-8"?><LinearLayoutxmlns:android="/apk/res/android"android:layout_width="fill_parent"android:layout_height="fill_parent"><!-- 添加一个ListView控件--><ListViewandroid:id="@+id/lv"android:layout_width="fill_parent"android:layout_height="fill_parent"/></LinearLayout>然后在Activity中初始化。
arrayadapter的三个参数

一、ArrayAdapter的作用ArrayAdapter是Android中常用的适配器类,用于将数据源绑定到UI组件,如ListView、Spinner等,使数据能够在界面上显示出来。
在使用ArrayAdapter时,需要使用三个参数来进行实例化,这三个参数分别是数据源、布局资源和目标控件。
下面将分别对这三个参数进行详细介绍。
二、数据源数据源是指要显示的数据集合,通常是一个数组或者List集合。
当实例化ArrayAdapter时,需要将数据源传入构造方法中,这样ArrayAdapter就能够根据数据源来展示列表项。
可以将一个String数组作为数据源,然后ArrayAdapter会将数组中的每个元素显示在列表中。
在使用数据源时,需要保证数据源与要显示的控件相匹配,例如如果是ListView要显示的是String类型的数据,那么数据源也应该是String类型的数组或List集合。
三、布局资源布局资源是用来定义列表项的布局文件,通常是一个包含要显示数据的TextView或者其他控件的XML文件。
在实例化ArrayAdapter时,需要将布局资源的ID传入构造方法中,这样ArrayAdapter就知道要使用哪个布局来显示每个列表项。
布局资源可以根据需求进行定制,例如可以在布局中添加多个控件来显示不同的数据,或者对控件进行样式的调整。
四、目标控件目标控件是指要显示数据的UI组件,通常是一个ListView、Spinner 或者GridView。
在实例化ArrayAdapter时,需要将目标控件的Context和布局资源的ID传入构造方法中,这样ArrayAdapter就能够将数据显示到目标控件上。
需要注意的是,目标控件的类型需要与数据源相匹配,例如如果数据源是String类型的数组,那么目标控件应该是ListView或者Spinner等可以显示String类型数据的控件。
五、总结在使用ArrayAdapter时,需要重点关注三个参数:数据源、布局资源和目标控件。
Android学习笔记--- 采用ListView实现数据列表显示,以及各种适配器使用,和如何写自己的适配器

Android学习笔记---采用ListView实现数据列表显示,以及各种适配器使用,和如何写自己的适配器19_采用ListView实现数据列表显示 --------------------------------------------------ListView显示界面的设置: --------------------------姓名 n n n 电话n n n 存款老周 n 12345687895 n n41111 老方 n 12515466874 n n5000 ------------------------------1.在使用SimpleCursorAdapter adapter=new SimpleCursorAdaptern n (this,yout.item,cursor,new String[]{"name","phone","amount"},new int []n n {,R.id.phone,R.id.amount});这个SimpleCursorAdapter适配器的时候: 出现这个异常: -----------------------------------------------03-12 23:23:22.934: E/AndroidRuntime(23439): Caused by:n n ng.IllegalArgumentException: column '_id' does not exist n --------------------------------------------------------------------这个异常跟SimpleCursorAdapter ,这个源码有关: 可以查看源码,会有说明: ---------------------------方法:1.把数据库表中的主键id改成:_id n n n2.处理查询后的结果集:主键起一个别名: n n n select personid as _id,name,phone,amount from person order by personid ascn n limit ?,? ----------------------------------------------1.使用android自带的两种适配器,实现listview显示的代码: n 在DBSQLIte项目的基础上,复制一份,并重新命名:ListViewDBSQLIte2./ListViewDBSQLIte/src/com/credream/db/DBSQLIteActivity.java package com.credream.db; n n import java.util.ArrayList; n import java.util.HashMap; n import java.util.List; n n importjavax.security.auth.PrivateCredentialPermission; n n import com.credream.adapter.PersonAdapter; n import com.credream.entity.Person; n import com.credream.service.PersonService; n n import android.app.Activity; n import android.database.Cursor; n import android.os.Bundle; n import android.view.View; n import android.widget.AdapterView; n import android.widget.ListView; n import android.widget.SimpleAdapter; n import android.widget.SimpleCursorAdapter; n import android.widget.Toast; n import android.widget.AdapterView.OnItemClickListener; n n public class DBSQLIteActivity extends Activity { n n private nListView listView; nn nprivate PersonService personService; n n /** Called when the activity is first created. */ n n n@Override n n public void onCreate(Bundle savedInstanceState) { n n n nn n super.onCreate(savedInstanceState); n n n n nsetContentView(yout.main); n n n nn personService=new PersonService(this); n n nlistView= (ListView)this.findViewById(R.id.listView); n n n//给每个条目设置监听对象 n nlistView.setOnItemClickListener(new nItemClickListener ()); n n n//show(); n n n//测试使用SimpleCursorAdapter 适配器的时候用这个n n n//show2(); n n //测试使用自定义适配器的时候,用这个n n n show3(); nn n } n n nn n n final class ItemClickListener implements OnItemClickListener{ n n n n @Override n nn public void onItemClick(AdapterView<?> parent, View view, int position,n n long id) n nn { n nn // AdapterView<?> parent指的是用户点击的一个view对象, View view就是点击的那个view n 控件, int position就是所点击的那一条值,在list中的索引值, long id就是listview在内n 部进行排序用的 n nn ListView lvView=(ListView)parent; n n //使用自定义的适配器使用方法: n nn Person person=(Person)lvView.getItemAtPosition(position); n nn n Toast.makeText(getApplicationContext(), person.getId().toString(), 1).show(); n n nn //使用cursor,也就是show2()的时候,cursor适配器的用法 n n n //SimpleCursorAdapter 适配器来显示listView控件 nn nn /*Cursor cursor=(Cursor)lvView.getItemAtPosition(position); n n nint personid=cursor.getInt(cursor.getColumnIndex("_id")); n nn n Toast.makeText(getApplicationContext(), personid+"", 1).show();*/ nn nn } nn n n n n} n n n n n n n nn n private void show() { List<Person> persons=personService.getScrollData(0, 20); n List<HashMap<String, Object>> data=new ArrayList<HashMap<String,Object>>(); n for(Person person:persons){ HashMap<String, Object> item=new HashMap<String, Object>(); n item.put("name", person.getName()); item.put("phone", person.getPhone()); item.put("amount", person.getAmount()); data.add(item); } //适配器:SimpleAdapter 和 item.xml中的条目显示 SimpleAdapter nadapter=new SimpleAdapter(this,data,yout.item,newn n String[]{"name","phone","amount"},new int[]{,R.id.phone,R.id.amount}); n // data,yout.item,把数据data绑定到yout.item上,也就是item.xml n 指定的格式 //把name 这个key指向的值,指定到name显示控件上 listView.setAdapter (adapter); /*SimpleAdapter 的内部工作原理,将data当然以hashMap的形式,让这些数据按照,key和R.id n 中的控件对应的形式显示内部显示的实现过程: n* int total=adapter.getCount(); //取得总素,然后迭代,然后调用View显示,(显示的时候获取屏幕高度,然后获取每个显示控件 n 的高度,然后计算出每页显示多少个项)int perpage=7;// for(int i=0;i<perpage;i++){ View view=adapter.getView(i, , parent); //用于得到条目的view对象 */ } //SimpleCursorAdapter 适配器来显示listview private void show2(){ Cursorcursor=personService.getCursorScrollData(0, 20); n SimpleCursorAdapter adapter=new SimpleCursorAdapter(this,yout.item,cursor, n new String[]{"name","phone","amount"},new int[] n {,R.id.phone,R.id.amount}); n listView.setAdapter(adapter); } //采用自定义适配器来实现数据的绑定 private void show3(){ List<Person> persons=personService.getScrollData(0, 20); n PersonAdapter adapter=new PersonAdapter(this, persons,yout.item); n listView.setAdapter (adapter); } } n --------------------------------------------2.建立一个自定义的适配器:来实现显示数据效果: /ListViewDBSQLIte/src/com/credream/adapter/PersonAdapter.java packagecom.credream.adapter; n import java.util.List; n import com.credream.db.R; importcom.credream.entity.Person; n import android.content.Context; import youtInflater; import android.view.View; import android.view.ViewGroup; import android.widget.BaseAdapter; import android.widget.TextView; n public class PersonAdapter extends BaseAdapter { privateList<Person> persons;//在绑定的数据 private int resouce;//绑定条目界面 private LayoutInflater inflater;//布局填充器,是系统的,所以要使用到系统上下文 public PersonAdapter(Contextcontext,List<Person> persons, int resouce) { n this.persons = persons; this.resouce = resouce; inflater=(LayoutInflater)context.getSystemService n (YOUT_INFLATER_SERVICE); } n@Override public int getCount() { // TODO Auto-generated method stub return persons.size(); } n @Override public Object getItem(int position) { // TODO Auto-generated method stub return persons.get(position); } //当显示的时候listView有缓存功能,在访问第一页的时候,他会为每一个条目new 一个对象 //然后, @Override public long getItemId(int position) { return position; } //View convertView这个如果第一次的话,就没有缓存传过来的事null //如果不是第一次的话,那么传过来的应该不是null,含有以前缓存的条目 //这样写性能不好,因为每次的显示条目的时候都要,调用这个方法,都会执行,三个控件的赋n 值@Override public View getView(int position, View convertView, ViewGroup parent) {TextView nameView=null; TextView phoneView=null; TextView amountView=null; nif(convertView==null){ n//创建view对象 convertView= inflater.inflate(resouce, null);//指定用哪n 一个resource的xml文件来生成一个view对象 //给控件赋值n nnameView=(TextView)convertView.findViewById n (); n phoneView=(TextView)convertView.findViewById n(R.id.phone); n amountView=(TextView)convertView.findViewById n (R.id.amount); nViewCachecache=new ViewCache(); View=nameView; ncache.phoneView=phoneView;ncache.amountView=amountView; nconvertView.setTag(cache); n}else{ nViewCache cache=(ViewCache) convertView.getTag(); nnameView=View; n phoneView=cache.phoneView; namountView=cache.amountView; n} n//性能没有优化的情况n/*TextView nameView=(TextView) convertView.findViewById n (); nTextView phoneView=(TextView)convertView.findViewById n (R.id.phone); nTextView amountView=(TextView)convertView.findViewById n (R.id.amount);*/ Person person=persons.get(position); nameView.setText(person.getName()); phoneView.setText(person.getPhone()); amountView.setText(person.getAmount().toString()); nreturn convertView; } private final class ViewCache{ //在android中使用public比较多,因为,使用public,不用多次创n建,private,每次自己使用的时候都会创建,public //创建一次,就可以共享 public TextView nameView; public TextView phoneView; public TextView amountView; } n } ------------------------------------------/ListViewDBSQLIte/res/layout/item.xml <?xml version="1.0" encoding="utf-8"?> <LinearLayout xmlns:android="/apk/res/android" n nandroid:layout_width="wrap_content" n n android:layout_height="match_parent" n nandroid:baselineAligned="false" n n android:orientation="horizontal" > n n n <TextView n n n n android:layout_width="120dp" n n n n android:layout_height="wrap_content" n n n nandroid:id="@+id/name"n n n n n android:text="xxxxx" n n n n /> n<TextView n n n nandroid:layout_width="150dp" n n n n android:layout_height="wrap_content" n n n nandroid:id="@+id/phone" /> n nn n <TextView n n n n android:layout_width="fill_parent" n n n n android:layout_height="wrap_content" n n n n android:id="@+id/amount" /> n </LinearLayout> -----------------------------------------------------/ListViewDBSQLIte/res/layout/main.xml <?xml version="1.0" encoding="utf-8"?> <LinearLayoutxmlns:android="/apk/res/android" n n android:layout_width="fill_parent" n n android:layout_height="fill_parent" n n android:orientation="vertical" > n n n <LinearLayoutn n n android:layout_width="wrap_content" n n android:layout_height="wrap_content" n nandroid:baselineAligned="false" n n android:orientation="horizontal" > n n n <TextView n n n n android:layout_width="120dp" n n n n android:layout_height="wrap_content" n n n nandroid:text="@string/name"n n n n n /> n<TextView n n n n android:layout_width="150dp" n n n n android:layout_height="wrap_content" n n n n android:text="@string/phone" /> n nn n <TextView n n n n android:layout_width="fill_parent" n n n n android:layout_height="wrap_content" n n n n android:text="@string/amount" /> n </LinearLayout> n nn n nn n nn n n <ListView n n n nandroid:layout_width="fill_parent" n n n n android:layout_height="wrap_content" n n n nandroid:id="@+id/listView"/> </LinearLayout> ----------------------------------------------------------注意这里将item.xml中除了命名空间的代码考到main.xml中然后修改这个地方就可以,给listview显示的数据加标题了: n <LinearLayoutn n n android:layout_width="wrap_content" n nandroid:layout_height="wrap_content" n n android:baselineAligned="false" n nandroid:orientation="horizontal" > n n n <TextView n n n n android:layout_width="120dp" n n n n android:layout_height="wrap_content" n n n n android:text="@string/name"n n n n n /> n<TextView n n n n android:layout_width="150dp" n n n n android:layout_height="wrap_content" n n n n android:text="@string/phone" /> n nn n <TextView n n n n android:layout_width="fill_parent" n n n n android:layout_height="wrap_content" n n n n android:text="@string/amount" /> n</LinearLayout> -----------------------------------------------3.还有<GridView>控件的使用,网格显示控件,比如android的应用主页面显。
自定义CursorAdapter,实现ListView中动态加载button

前言:Android中的自带的CursorAdapter适配器可以加载固定格式的数据绑定。
但在实际应用开发中,会碰到ListView中Item项显示根据数据不同,而变化显示。
举例:在我们实际开发中碰到这样的问题根据一个主题答题情况,显示不同的按钮,且点击按钮后,转到各自的处理界面。
【主题状态】第一次答题,显示【开始】按钮事件:点击按钮,下载题库,转到答题界面【主题状态】答题还未结束,显示【继续】按钮事件:点击按钮,转到答题界面【主题状态】全部答题完成,显示【重做】按钮事件:点击按钮,清空答题痕迹,转到答题界面,重新答题实现的效果图:在这样的情况下,原来系统自带的CursorAdapter适配器就不能满足需求的实现。
1 自定义CursorAdapter 说明自定义CursorAdapter 需要重写两个函数1.1 public void bindView(View view, Context context, Cursor cursor)说明:绑定视图函数View 参数:当前ListView 的Item View,在View 中包含了ListView Item 界面元素界面元素调用的方式为:TextView noteData = (TextView) view.findViewById(R.id.note_list_time);Cursor参数:当前游标根据Cursor来获取数据的方法String ID= Cursor.getString(3)1.2 public View newView(Context arg0, Cursor arg1, ViewGroup arg2)获取ListView中的Item 界面元素的函数一般的情况下,扩展定义好的XML界面布局文件return mInflater.inflate(yout.note_item, arg2, false);2 ListView中Button点击事件的实现ListView 中实现Item中的Button事件,在实现Button事件时,最关键的事情是,当前button 对于的Item的唯一标识,而如何保存这唯一标识到button中呢.在View中包含了setTag 和getTag 一对方法,同过这样的方法可以在View’绑定时,把Item 中的唯一标识保存到Button的Tag中,并在Button的点击事件中读取标识。
- 1、下载文档前请自行甄别文档内容的完整性,平台不提供额外的编辑、内容补充、找答案等附加服务。
- 2、"仅部分预览"的文档,不可在线预览部分如存在完整性等问题,可反馈申请退款(可完整预览的文档不适用该条件!)。
- 3、如文档侵犯您的权益,请联系客服反馈,我们会尽快为您处理(人工客服工作时间:9:00-18:30)。
package com.chinamobile.icontact.im.message;import java.util.Date;import java.util.HashMap;import java.util.Map;import android.content.Context;import android.database.Cursor;import android.graphics.Color;import android.text.Spannable;import android.text.style.ForegroundColorSpan;import youtInflater;import android.view.View;import android.view.ViewGroup;import android.widget.AbsListView;import android.widget.CursorAdapter;import android.widget.LinearLayout;import android.widget.TextView;import com.chinamobile.icontact.im.UI.Activity.R;import com.chinamobile.icontact.im.database.SmsDatabaseManager;import com.chinamobile.icontact.im.message.SmsSearchWordAdapter.ViewHolder; import com.chinamobile.icontact.im.utility.LogCat;public class SmsSearchCursorAdapter extends CursorAdapter implements AbsListView.RecyclerListener {private static final String TAG = SmsSearchCursorAdapter.class.getSimpleName();private Context mContext;private String constraint;private int smsCount = 0;private LayoutInflater mInflater;private Map<String, String> contactMap;private SmsDatabaseManager smsDBManager;private Map<Integer, Integer> itemBackgroudColorMap;private int color = Color.rgb(255, 165, 0);class ViewHolder {LinearLayout lineLayout;TextView smsComeFrom;TextView content;TextView time;}ViewHolder holder = null;public SmsSearchCursorAdapter(Context context, Cursor c) {super(context, c, false);mContext = context;smsDBManager = SmsDatabaseManager.getInstance(mContext);contactMap = smsDBManager.getContactsNameMap();this.mInflater = LayoutInflater.from(context);System.out.println("=========SmsSearchCursorAdapter========"); }public void setConstraint(String constraint, int smsCount) {System.out.println("---------------setConstraint---");this.smsCount = smsCount;this.constraint = constraint;getItemColorMap(this.smsCount);}@Overridepublic View newView(Context context, Cursor cursor, ViewGroup parent) { // TODO Auto-generated method stubSystem.out.println("---------------newView---");View convertView = null;holder = new ViewHolder();convertView = View.inflate(mContext,yout.sms_searchword_list_item, null);holder.lineLayout = (LinearLayout) convertView.findViewById(R.id.sms_search);holder.smsComeFrom = (TextView) convertView.findViewById(R.id.sms_from_number);holder.time = (TextView) convertView.findViewById(R.id.sms_time);holder.content = (TextView) convertView.findViewById(R.id.sms_content);return convertView;}@Overridepublic void bindView(View convertView, Context context, Cursor cursor) { System.out.println("---------------bindView---");int position = cursor.getPosition();MessageDataObject mdo = new MessageDataObject();String number = cursor.getString(cursor.getColumnIndexOrThrow(SmsDatabaseManager.address));String content = cursor.getString(cursor.getColumnIndexOrThrow(SmsDatabaseManager.body));Date time = new Date(cursor.getLong(cursor.getColumnIndexOrThrow(SmsDatabaseManager.date)));mdo.set_msg_from_number(number);mdo.set_msg_body(content);mdo.set_msg_time(time);initControls(mdo);setItemBackgroudColor(position);}@Overridepublic void onMovedToScrapHeap(View view) {System.out.println("---------------onMovedToScrapHeap---");}private void initControls(MessageDataObject mdo) {int indexOfBody_Up = 0;int indexOfBody_Down = 0;String contactName = null;String number = mdo.get_msg_from_number();if (number != null) {contactName = contactMap.get(smsDBManager.numberFilter(number));}if (contactName != null) {holder.smsComeFrom.setText("来自:" + contactName);} else {holder.smsComeFrom.setText("来自:" + number);}holder.time.setText(MessageUtils.getFormatDate(mdo.get_msg_time()));String body = mdo.get_msg_body();if (body != null) {indexOfBody_Up = body.indexOf(constraint.toUpperCase());indexOfBody_Down = body.indexOf(constraint.toLowerCase());}if (indexOfBody_Up != -1) {lightOfBody(holder, body, indexOfBody_Up);}if (indexOfBody_Down != -1) {lightOfBody(holder, body, indexOfBody_Down);}}private void lightOfBody(ViewHolder holder, String body, int indexOfBody) { Spannable spannableString = FacesUitlity.matchFace(body);spannableString.setSpan(new ForegroundColorSpan(color), indexOfBody, indexOfBody + constraint.length(),Spannable.SPAN_EXCLUSIVE_EXCLUSIVE);holder.content.setText(spannableString);}private void setItemBackgroudColor(int position) {int setColor = 0;if (position % 2 == 0) {setColor = itemBackgroudColorMap.get(0);} else {setColor = itemBackgroudColorMap.get(1);}holder.lineLayout.setBackgroundColor(setColor);}private void getItemColorMap(int smsCount) {itemBackgroudColorMap = new HashMap<Integer, Integer>();itemBackgroudColorMap.put(1, Color.argb(255, 245, 245, 245));itemBackgroudColorMap.put(0, Color.WHITE);}}。