modelsim_se_6.5_install
安装modelsim6.5可能出现的问题以及解决办法

有时安装系统时不能填用户名和组织名,或是随便填一个,后来要更改用户名,该怎么办呢电脑用户名为中文造成Modelsim SE读取注册文件错误今天安装Modelsim SE6.5的时候,使用网上的破解软件破解;发现使用Modelsim ?License Wizard导入破解文件生成的license.dat时候报错;错误信息如下:Fatal License Error:Unable to check out alicense.RuntheModelsimLicensing wizard from the start->Programs menu to diagnose the problem仔细阅读发现是license.dat文件里面含有非法字符;因此打开license.dat发现应该是装机的时候用户名和组织是默认中文造成的。
找了改正用户名和组织名的方法,给大家分享;如何修改XP安装时的用户名和公司名?在java程序开发中,每个类开头加入javadoc注释时,生成的作者名总要修改,不方便,在网上找到了可行的方法下面是彻底修改安装操作系统时的用户名和公司名(1)打开“注册表编辑器”。
(2)选择HKEY_LOCAL_MACHINE/Software/Microsoft/Windows NT/Current Vers-ion ? ? ? ? 注册表项。
(3)在其右边的值项窗格中,双击RegisteredOwner 值项,打开“编辑字符串”对话框。
(4)在“数值数据”文本框中更改个人的信息,单击“确定”按钮即可。
(5)双击RegisteredOrganization 值项,打开“编辑字符串”对话框。
下面是修改系统中显示的用户名??右键“我的电脑”---“管理”---“本地用户和组”---“用户”,右键点击你要修改的用户名,选择“重命 ? 名”,改成你要的名字就可以了?这两个方法都做后,系统启动时的名字也会改变。
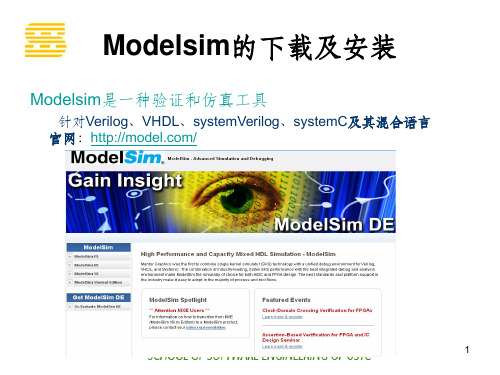
Modelsim的下载及安装
You compile your design units into the library( compatible across all supported platforms)
编辑课件
7
Modelsim 6.5基本仿真流程
4.右击“我的电脑”,“属性”/“高级”/“环境变量”,新 建系统变量LM_LICENSE_FILE,变量值赋LICENSE.dat 所在路径(…\win32\LICENSE.dat)确定,重启计算机
编辑课件
5
Modelsim 6.5基本仿真流程
编辑课件
6
Modelsim 6.5基本仿真流程
1. Creating the Working Library
编辑课件
15
Modelsim 6.5基本仿真流程
3. Create the working library. File/ New /Library
Work中自动创建了一个_info
的文件。表明此目录为
Modelsim的工作库,不 能改动。
编辑课件
16
Modelsim 6.5基本仿真流程
4. Then
2.选择SE6.5版本,进入注册页面
编辑课件
3
Modelsim的下载及安装
3.注册后进入ftp,选择倒数第二个exe文件,下载源文件, 倒数第一个安装说明文件,也可以下载
编辑课件
4
Modelsim的下载及安装
3.安装后,到网上下载modelsim6.5的破解软件 modelsim6.5_keygen。运行里面的mentorkg.exe文件 ,产生license.txt ,后缀名txt改为dat,复制到安装目录 的win32下
modelsimSE6.0安装
modelsimSE6.0安装我安装的版本是Modelsim SE 6.2b ,相信其它版本也不会在安装问题上有太大的差异.如果存在,这里的方法也应该可作为一个很好的参考.1) 打开您下载到或是通过其他什么什么路径搞到的安装文件,找到Setup 文件, 双击之, 然后一路“确定” 或点“是”(选择FULL版本的较好),安装到自己选定的路径后, 它会要求你重启电脑, 这时你可以重启了.2) 重启后, 这时你就要用license 进行注册了.注册方法是这样的:注册器是一个Keygen软件来着, 你可以从网上下载到注册器(如果自己已经有的话那就自然方便了), 然后双击Keygen 这时会弹出一个对话窗口, 要求你在hostid下面的输入框里输入你的网卡号(网卡号获取方法在下面有介绍). 这时你可以在其中输入你的网卡号,也可不用理它,直接点generate, 这时你会发现生成了一个license.dat 文件,这个就是你的注册文件了.在这个文件里就有你的网卡号HOSTID后面的一串码就是你的网卡号了.3) 然后你要做的就是把这个license.dat文件复制到你的Modelsim 安装路径下的win32文件里面.(比如我的安装路径是D:\Modeltech_6.2b, 我就在D盘找个Modeltech_6.2b文件,进去后再找到win32文件,进去后把license.dat复制到这里)4) 下一步是很关键的了, 这一步你需要创建一个环境变量LM_LICENSE_FILE.创建方法如下: 在桌面左键“我的电脑” ->属性->高级->环境变量,然后在系统变量中新建一个变量,编辑用户变量中的变量名为. LM_LICENSE_FILE ,变量值即为你的license.dat的安装路径,比如我的就是D:\Modeltech_6.2b\win32\license.dat ,编辑系统变量中的变量名:CDSROOT,变量值:D:\Modeltech_6.2b\win32确定后,就可以了.5) 运行一下Modelsim,如果运行成功,没有出现什么启动不了的error 窗口,那你就大功告成了.6) 如果在第五步中,你发现老是弹出错误窗口, 显示Error: “System clock has been set back” in the MAX+PLUS II software. 这时老兄您就中彩了, 我正是为这个问题烦了好几天. 不过还好,我在网上找了到解决这个问题原因:Error: “System clock has been set back” in the MAX+PLUS IIsoftware.You receive this error message if the vendor daemon has detected one ormore system files dated in the future compared to the system clock.One possible solution is to locate the files that have an invalid date stampand to open each file and then save it so that it has the correct date/timestamp. The vendor daemon primarily looks at system files in thefollowing directories:■ C:\ (The root directory)■ The directory where your Microsoft Windows files are installed (forexample, C:\WINNT)■ Your MAX+PLUS II software directory (for exampleC:\MAXPLUS2)One way to find the affected files is to use the Windows Find utility.Search by date and specify files with a date later than today’s date. Somefiles may be hidden, so make sure that the Find utility isconfigured todisplay all files.If your MAX+PLUS II software was installed with an incorrect systemclock, you may need to perform the following steps:1. Uninstall the MAX+PLUS II software.2. Set the system clock to the current time and date.3. Restart the PC.4. Reinstall the MAX+PLUS II software in a different directory.上面说的意思是, 当你碰到这个问题时,原因是软件中的vendor daemon发现你的机子中系统文件的创建日期超前了你的电脑上的系统时钟(也就是你电脑上显示的时间).这时你的解决办法就是通过搜索文件找到这些文件,然后删掉这些文件.方法如下:进入C盘,修改文件查看方式,使你可以看到所有文件.然后点“系统任务”中的“搜索文件或文件夹”,查找所有文件和文件夹->高级选项->指定日期, 修改时间范围, 我是从当前时间搜索到2050年,通过先后选定“修改日期” “访问日期” “创建日期”,最后我搜索到了一堆2098年创建的文件和2013年创建的文件.我把这些文件统统删了. 然后卸载掉原来的Modelsim ,重启后,再次按照1 à5的步聚重新安装,这下终于搞定了.*_*以上就是我的安装过程,希望上面的东东能够给各位同仁有所帮助.*_*对了,还要介绍一下获取你的网卡号的方法:开始->所有程序->附件->命令提示符,这时就进入DOS环境下,输入ipconfig /all ,enter后就可看到一堆的输出, 仔细找一下Physical Address 后面12位码就是你的网卡号了.(也可以通过开始->运行,输入cmd, 进入DOS 环境。
安装modelsim6.5可能出现的问题以及解决办法

有时安装系统时不能填用户名和组织名,或是随便填一个,后来要更改用户名,该怎么办呢电脑用户名为中文造成Modelsim SE读取注册文件错误今天安装Modelsim SE6.5的时候,使用网上的破解软件破解;发现使用Modelsim ?License Wizard导入破解文件生成的license.dat时候报错;错误信息如下:Fatal License Error:Unable to check out alicense.RuntheModelsimLicensing wizard from the start->Programs menu to diagnose the problem仔细阅读发现是license.dat文件里面含有非法字符;因此打开license.dat发现应该是装机的时候用户名和组织是默认中文造成的。
找了改正用户名和组织名的方法,给大家分享;如何修改XP安装时的用户名和公司名?在java程序开发中,每个类开头加入javadoc注释时,生成的作者名总要修改,不方便,在网上找到了可行的方法下面是彻底修改安装操作系统时的用户名和公司名(1)打开“注册表编辑器”。
(2)选择HKEY_LOCAL_MACHINE/Software/Microsoft/Windows NT/Current Vers-ion ? ? ? ? 注册表项。
(3)在其右边的值项窗格中,双击RegisteredOwner 值项,打开“编辑字符串”对话框。
(4)在“数值数据”文本框中更改个人的信息,单击“确定”按钮即可。
(5)双击RegisteredOrganization 值项,打开“编辑字符串”对话框。
下面是修改系统中显示的用户名??右键“我的电脑”---“管理”---“本地用户和组”---“用户”,右键点击你要修改的用户名,选择“重命 ? 名”,改成你要的名字就可以了?这两个方法都做后,系统启动时的名字也会改变。
Modelsim的下载及安装
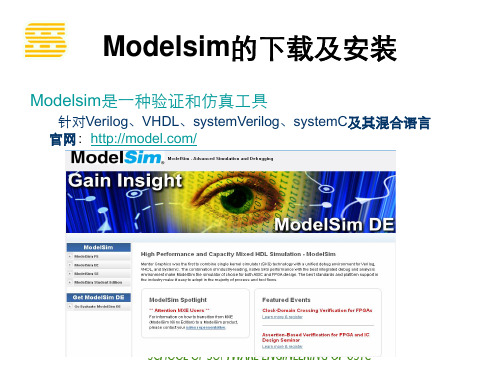
Modelsim是一种验证和仿真工具
针对Verilog、VHDL、systemVerilog、systemC及其混合语言 官网:/
Modelsim的下载及安装
1.进入SE的download
Modelsim的下载及安装
2.选择SE6.5版本,进入注册页面
4.右击“我的电脑”,“属性”/“高级”/“环境变量”,新 建系统变量LM_LICENSE_FILE,变量值赋LICENSE.dat 所在路径(…\win32\LICENSE.dat)确定,重启计算机
Modelsim 6.5基本仿真流程
Modelsim 6.5基本仿真流程
1. Creating the Working Library In ModelSim, all designs are compiled into a library. You typically start a new simulation in ModelSim by creating a working library called “work” ( the default library name).
Modelsim 6.5基本仿真流程
1. Create a new directory and copy the design files for this lesson into it. Counter.v tcounter.v
2. Start modelsim File /Change Directory (to the directory you created)
Modelsim的下载及安装
3.注册后进入ftp,选择倒数第二个exe文件,下载源文件, 倒数第一个安装说明文件,也可以下载
ModelSim6.0SE软件的安装

ModelSim6.0软件的安装1. 点击 ModelSim6.0SE 下载 ModelSim6.0SE 安装包,保存并解压到D:盘根目录下。
2. 进入到 D:\modelsim6.0\Disk1 文件夹,双击 setup.exe 文件,启动安装向导。
3. 在安装模式对话框上,点击 Full Product 按钮。
4. 在随后弹出的版权声明对话框上点击 Next 按钮,继续。
5. 在 license 确认对话框上,点击 Yes 按钮,继续。
6. 安装路径设为: C:\Modeltech_6.0,点击 Next 按钮,继续。
7. 点击 Next 按钮,继续。
8. 当询问是否安装 Hardware Security Key 的对话框弹出时,点击 No 按钮,继续。
9. 点击是(Y) 按钮,在桌面上建立快捷方式。
10. 点击是(Y) 按钮,将软件的安装路径加入到系统环境。
11. 点击 Finish 按钮,完成主程序安装。
12. 当弹出 license 安装向导对话框时,点击 Close 按钮。
13. 进入 D:\modelsim6.0 文件夹,双击 keygen.exe 图标,启动 license 产生器。
在 license 产生器的主界面上,点击 Generate 按扭,产生 license 文件,然后点击 Exit 按钮,退出。
14. 将 D:\modelsim6.0 下的 license.dat 文件复制到 C:\Modeltech_6.0 下。
15. 在桌面上,选中“我的电脑”图标,点击鼠标右键。
在弹出菜单上,选择“属性”,进入系属性设置对话框。
选择“高级”栏目,点击“环境变量”按钮。
16. 在环境变量设置对话框上,点击用户变量栏目的“新建”按钮,新建一个环境变量。
变量名为:LM_LICENSE_FILE,变量值为:C:\Modeltech_6.0\license.dat 。
点击“确定”按钮,退出环境变量设置对话框。
Modelsim的下载及安装

② right-click test_counterAdd / To Wave / All items in
region
编辑课件
23
Modelsim 6.5基本仿真流程
③ Run the simulation.
2. Compiling Your Design 在library中完成设计文件的编译,支持多平台
You compile your design units into the library( compatible across all supported platforms)
编辑课件
7
Modelsim 6.5基本仿真流程
编辑课件
14
Modelsim 6.5基本仿真流程
1. 1. Create a new directory and copy the design files for this lesson into it. Counter.v tcounter.v
2. 2. Start modelsim File /Change Directory (to the directory you created)
编辑课件
15
Modelsim 6.5基本仿真流程
3. Create the working library. File/ New /Library
Work中自动创建了一个_info
的文件。表明此目录为
Modelsim的工作库,不 能改动。
编辑课件
16
Modelsim 6.5基本仿真流程
4. Then
modelsim使用教程
modelsim使用教程ModelSim是一款常用的硬件描述语言(HDL)仿真工具,本教程将向您介绍如何使用ModelSim进行仿真。
步骤1:安装ModelSim首先,您需要下载和安装ModelSim软件。
在您的电脑上找到安装程序并按照提示进行安装。
步骤2:创建工程打开ModelSim软件,点击"File"菜单中的"New",然后选择"Project"。
在弹出的对话框中,选择工程的存储位置,并为工程命名。
点击"OK"完成工程创建。
步骤3:添加设计文件在ModelSim的工程窗口中,右键点击"Design"文件夹,选择"Add Existing File"。
然后选择包含您的设计文件的目录,并将其添加到工程中。
步骤4:配置仿真设置在工程窗口中,右键点击"Design"文件夹,选择"Properties"。
在弹出的对话框中,选择"Simulation"选项卡。
在"Top level entity"字段中,选择您的设计的顶层模块。
点击"Apply"和"OK"保存设置。
步骤5:运行仿真在ModelSim的工具栏中,找到"Simulate"按钮,点击并选择"Start Simulation"。
这将打开仿真窗口。
在仿真窗口中,您可以使用不同的命令来控制和观察设计的行为。
步骤6:查看仿真结果您可以在仿真窗口中查看信号波形、调试设计并分析仿真结果。
在仿真窗口的菜单栏中,您可以找到一些常用的查看和分析工具,如波形浏览器、信号分析器等。
步骤7:结束仿真当您完成仿真时,可以选择在仿真窗口的菜单栏中找到"Simulate"按钮,并选择"End Simulation"以结束仿真。
Modelsim安装步骤

选择FULL Product安装模式,出现如图3所示的安装界面,如图1-3所示
图1-3
选择next,然受选择yes,出现如图1-4所示的安装路径选择对话框,
图1-4选择安装路径
这里我选择默认安装路径c:\Modeltech_6.0。连续两次next出现如图1-5所示的文件安装界面
图4-11全局约束条件
设置输出网表文件的文件名、路径及格式等,一般情况下使用缺省值即可,如图4-12所示。点击完成后就关闭综合向导开始进行综合,在综合运行过程中,在信息窗口可看到滚动的综合结果及运行流程,出现本例中的pseudorandom.vhd的器件使用报告。如果信息窗口是关闭的,可点击Window\pseudorandom.vhd再次打开设计文件。在综合完成后信息窗口显示Finished Synthesis run。
2
先找到的安装文件夹的crack目录下的keygen.exe文件,然后运行。如图2-1所示:
图2-1
点击“Generate”会出现图2-2
。
图2-2
这表示License文件生成成功。将生成的License文件license.dat复制到Modelsim Se v6.0安装目录(我这里的安装目录是C:\Modeltech_6.0)。
1、指定器件库
选择SynthesisWizard(综合向导)方式后,出现如图4-8所示器件设置对话框。
图4-8指定器件库
2、输入文件
在如图4-18所示对话框中,首先设置工作目录,点击设置工作目录出现如图4-9所示对话框,工作目录底下将保存所有的输出文件。然后点击输入文件,出现如图4-10所示对话框。Encoding选项是为状态机选择编码方式。如选中Resource Sharing表示没有连接在一起的运算器(加法器,乘法器)将被共享。设置完后点击下一步。
Modelsim SE 6.5a使用指南
Modelsim SE使用指南ModelSim的功能侧重于编译、仿真,不能指定编译的器件,不具有编程下载能力。
不象Synplify 和MAX+PLUS II可以在编译前选择器件。
而且ModelSim在时序仿真时无法编辑输入波形,不象MAX+PLUS II可以自行设置输入波形,仿真后自动产生输出波形,而是需要在源文件中就确定输入,如编写测试台程序来完成初始化、模块输入的工作,或者通过外部宏文件提供激励。
这样才可以看到仿真模块的时序波形图。
ModelSim还具有分析代码的能力,可以看出不同的代码段消耗资源的情况,从而可以对代码进行改善,以提高其效率。
菜单栏标题栏下方为菜单栏。
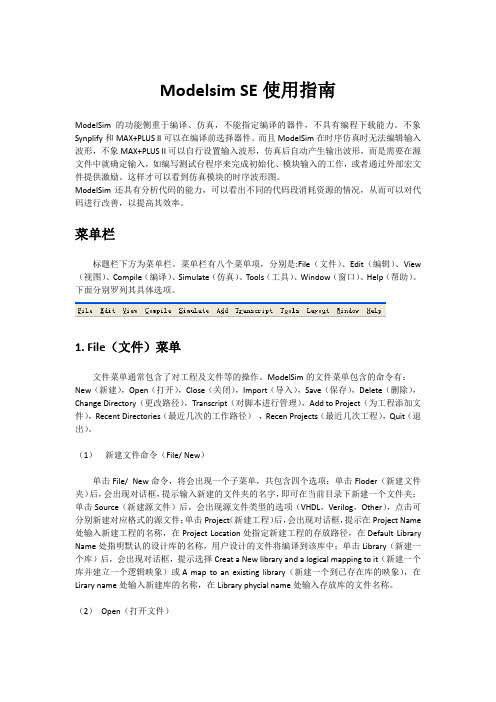
菜单栏有八个菜单项,分别是:File(文件)、Edit(编辑)、View (视图)、Compile(编译)、Simulate(仿真)、Tools(工具)、Window(窗口)、Help(帮助)。
下面分别罗列其具体选项。
1. File(文件)菜单文件菜单通常包含了对工程及文件等的操作。
ModelSim的文件菜单包含的命令有:New(新建),Open(打开),Close(关闭),Import(导入),Save(保存),Delete(删除),Change Directory(更改路径),Transcript(对脚本进行管理),Add to Project(为工程添加文件),Recent Directories(最近几次的工作路径),Recen Projects(最近几次工程),Quit(退出)。
(1)新建文件命令(File/ New)单击File/ New命令,将会出现一个子菜单,共包含四个选项:单击Floder(新建文件夹)后,会出现对话框,提示输入新建的文件夹的名字,即可在当前目录下新建一个文件夹;单击Source(新建源文件)后,会出现源文件类型的选项(VHDL,Verilog,Other),点击可分别新建对应格式的源文件;单击Project(新建工程)后,会出现对话框,提示在Project Name 处输入新建工程的名称,在Project Location处指定新建工程的存放路径,在Default Library Name处指明默认的设计库的名称,用户设计的文件将编译到该库中;单击Library(新建一个库)后,会出现对话框,提示选择Creat a New library and a logical mapping to it(新建一个库并建立一个逻辑映象)或A map to an existing library(新建一个到已存在库的映象),在Lirary name处输入新建库的名称,在Library phycial name处输入存放库的文件名称。
modelsim_se_6.6_install

ModelSim® SEInstallation InstructionsSoftware Version 6.6© 2010 Mentor Graphics CorporationAll rights reserved.This document contains information that is proprietary to Mentor Graphics Corporation. The original recipient of this document may duplicate this document in whole or in part for internal business purposes only, provided that this entire notice appears in all copies. In duplicating any part of this document, the recipient agrees to make every reasonable effort to prevent the unauthorized use and distribution of the proprietary information.This document is for information and instruction purposes. Mentor Graphics reserves the right to make changes in specifications and other information contained in this publication without prior notice, and the reader should, in all cases, consult Mentor Graphics to determine whether any changes have been made.The terms and conditions governing the sale and licensing of Mentor Graphics products are set forth in written agreements between Mentor Graphics and its customers. No representation or other affirmation of fact contained in this publication shall be deemed to be a warranty or give rise to any liability of Mentor Graphics whatsoever.MENTOR GRAPHICS MAKES NO WARRANTY OF ANY KIND WITH REGARD TO THIS MATERIAL INCLUDING, BUT NOT LIMITED TO, THE IMPLIED WARRANTIES OF MERCHANTABILITY AND FITNESS FOR A PARTICULAR PURPOSE.MENTOR GRAPHICS SHALL NOT BE LIABLE FOR ANY INCIDENTAL, INDIRECT, SPECIAL, OR CONSEQUENTIAL DAMAGES WHATSOEVER (INCLUDING BUT NOT LIMITED TO LOST PROFITS) ARISING OUT OF OR RELATED TO THIS PUBLICATION OR THE INFORMATION CONTAINED IN IT, EVEN IF MENTOR GRAPHICS CORPORATION HAS BEEN ADVISED OF THE POSSIBILITY OF SUCH DAMAGES.RESTRICTED RIGHTS LEGEND 03/97U.S. Government Restricted Rights. The SOFTWARE and documentation have been developed entirely at private expense and are commercial computer software provided with restricted rights. Use, duplication or disclosure by the U.S. Government or a U.S. Government subcontractor is subject to the restrictions set forth in the license agreement provided with the software pursuant to DFARS 227.7202-3(a) or as set forth in subparagraph (c)(1) and (2) of the Commercial Computer Software - Restricted Rights clause at FAR 52.227-19, as applicable.Contractor/manufacturer is:Mentor Graphics Corporation8005 S.W. Boeckman Road, Wilsonville, Oregon 97070-7777.Telephone: 503.685.7000Toll-Free Telephone: 800.592.2210Website: SupportNet: /Send Feedback on Documentation: /doc_feedback_form TRADEMARKS: The trademarks, logos and service marks ("Marks") used herein are the property of Mentor Graphics Corporation or other third parties. No one is permitted to use these Marks without the prior written consent of Mentor Graphics or the respective third-party owner. The use herein of a third-party Mark is not an attempt to indicate Mentor Graphics as a source of a product, but is intended to indicate a product from, or associated with, a particular third party. A current list of Mentor Graphics’ trademarks may be viewed at: /trademarks.End-User License Agreement: You can print a copy of the End-User License Agreement from: /eula.Mentor Graphics Application SoftwareMentor Graphics Application SoftwarePlanning Your Software Configuration. . . . . . . . . . . . . . . . . . . . . . . . . . . . . . . . . . 3 Ordering Licenses . . . . . . . . . . . . . . . . . . . . . . . . . . . . . . . . . . . . . . . . . . . . . . . . . . . 4 Obtaining the Software. . . . . . . . . . . . . . . . . . . . . . . . . . . . . . . . . . . . . . . . . . . . . . . 4 Installing the Software. . . . . . . . . . . . . . . . . . . . . . . . . . . . . . . . . . . . . . . . . . . . . . . . 6 Support Information . . . . . . . . . . . . . . . . . . . . . . . . . . . . . . . . . . . . . . . . . . . . . . . . . 7Mentor Graphics provides key system documentation in PDF on this DVD for additional reference while loading software. Refer to the following manuals:•ModelSim SE Release Highlights (release_highlights_se.pdf)•Licensing Mentor Graphics Software (mgc_licen.pdf)NoteThese installation instructions pertain to all releases in the ModelSim SE 6.6 series. Planning Your Software ConfigurationThe supported platforms for this product include:•SUSE Linux Enterprise Server 9.0, 9.1, 10, and ll.•Red Hat Enterprise Linux 3, 4, and 5.•Solaris 8, 9, and 10.•Windows XP and Vista.This release uses the following licensing versions:•FLEXnet v10.8.5•MSL v2009.2•MGLS v8.7_4.2.0•PCLS 2009.268For floating licenses you need to verify that the vendor daemon (mgcld) and the license server (lmgrd) have FLEXnet versions equal to or greater than 10.8.5, but the vendor daemon cannot have a FLEXnet version greater than the license server. The vendor daemons and license server that are shipped with this release are FLEXnet version 10.8.5. If the current FLEXnet version of your vendor daemon and lmgrd are less than 10.8.5, then it will be necessary to stop yourOrdering Licenseslicense server and restart it using the vendor daemon and license server contained in this release. For node-locked licenses, you do not need to do anything.For more information on configuration requirements and product availability for these operating systems, visit the Mentor Graphics SupportNet website at . Ordering LicensesNew users must order software licenses prior to installing Mentor Graphics software. To order licenses, contact your local Mentor Graphics sales office. They can provide you with information on the number of node-locked and floating licenses your company purchased and any current license sever configurations you may have. You must provide them with:•Any new license server configuration•The host ID numbers of client and license server workstations for node-locked licenses•The host ID number of the license server workstation for all floating licensesExisting customers are reminded that your licensing report is available at the Customer Support website (/ebase).NoteThe Customer Support website requires a login and password. To register and obtain apassword, go to /user/register. If you have difficulties,email csd_registration@.Obtaining the SoftwareYou can obtain the software from SupportNet or a DVD sent to you from Mentor Graphics. Follow the instructions in either of these two sections, then continue to the section “Installing the Software” on page6.Downloading Software From SupportNet1.Log on to the Mentor Graphics SupportNet./2.Click the Downloads tab.3.In the Select Release box, choose the version you need to download and then click thered arrow to the right of the box.You will be redirected to the download page for that specific version.Obtaining the Software4.Click the name of your release (next to a big blue arrow) to continue the downloadprocess.5.Download the following files:o Windows:•<product>-win32-<version>.exe•<product>-gcc-4.2.1-mingw32.zipo UNIX/Linux:•install.<platform>•<product>-base.mis•<product>-docs.mis•<product>-gcc-<platform>.mis•<product>-<platform>.misDVD ContentsFiles common to the Windows and UNIX/Linux DVDs:•RELEASE_NOTES — Release notes for the current release.•EULA — End User License Agreement•ERRATA — Text file containing any additional information.•readme — Concise installation instructions.Files specific to the Windows DVD:•<product>-win32-<version>.exe — Self extracting executable.•<product>-gcc-4.2.1-mingw32.zip — SystemC gcc 4.2.1 for Windows XP and Vista. Files specific to Unix/Linux DVD:•install.<platform>o install.sunos5 — Mentor Graphics Install executable for Sun Ultrasparc running Solaris.o install.linux — Mentor Graphics Install executable for x86 or x86_64 running Linux.o install.sunos5x86 — Mentor Graphics Install executable for x86 or x86_64 running Solaris.Installing the Software•<product>_install/<product>-base.mis — Base install file, contains the base functionality for all platforms.•<product>_install/<product>-docs.mis — Documentation install file, contains manuals, help files, tech notes, etc.•<product>_install/<product>-<platform>.miso<product>_install/<product>-sunos5.mis — Platform installation files for Sun Ultrasparc running Solaris 8 and greater.o<product>_install/<product>-sunos5v9.mis — Platform installation files for 64bit Sun Ultrasparc running Solaris 8 and greater.o<product>_install/<product>-sunos5x86.mis — Platform installation files for x86 running Solaris 10.o<product>_install/<product>-sunos5x86_64.mis — Platform installation files for x86_64 running Solaris 10.o<product>_install/<product>-linux.mis — Platform installation files specific to Linux Redhat 3 and greater.o<product>_install/<product>-linux_x86_64.mis — Platform installation files specific to 64-bit AMD64/EM64T Linux.o<product>_install/<product>-win32.mis — Platform installation files specific to Windows XP and Vista.•<product>-gcc-<product>.miso<product>-gcc-linux.mis — SystemC gcc for 32bit Linux.o<product>-gcc-linux_x86_64.mis — SystemC gcc for 64bit Linux.o<product>-gcc-sunos5.mis — SystemC gcc for Sun Ultrasparc Solaris.o<product>-gcc-sunos5x86.mis — SystemC gcc for x86 Solaris 10.o<product>-gcc-4.2.1-mingw32.zip — SystemC gcc for Windows XP and Vista. Installing the SoftwareThis section provides information about the installation procedures.Linux and UNIX1.Execute the Install file (install.<platform>) specific to the platform you are installingfrom to begin the installation process.Support Information o install.linux — Use this if you are installing from a x86 or x86_64 desktop running Linux.o install.sunos5x86 — Use this if you are installing from a x86 or x86_64 desktop running Solaris.o install.sunos5 — Use this if you are installing from a Sun Ultrasparc desktop running Solaris.e the Mentor Graphics Install Program (MIP) interface to install the product to thelocations required. The MIP interface provides documentation by selecting the Helpbutton at the top of the window.3.When selecting the .mis files you want to install, direct the MIP to your DVD drive andthe directory:<product>_install/4.Add the product’s executables directory to your PATH environment variable:PATH=<install_dir>/<platform>where <platform> can be sunos5, sunos5v9, sunos5x86, sunos5x86_64, linux, orlinux_x86_64.Windows1.Double-click the <product>-win32-<version>.exe file to install the product and followthe onscreen instructions.2.Copy <product>-gcc-4.2.1-mingw32.zip into the <install_dir>/ folder.3.Open up the zip file <product>-gcc-4.2.1-mingw32.zip and extract the contents into this<install_dir>/ folder.Support InformationIf you have questions about this software release, please log in to SupportNet. You may search thousands of technical solutions, view documentation, or open a Service Request online at: /If your site is under current support and you do not have a SupportNet login, you may easily register for SupportNet by filling out the short form at:/user/register.cfmAll customer support contact information can be found on our web site at:/contacts/supportcenters/Support Information。
ModelSim SE 6.5下载及安装步骤

ModelSim SE 6.5下载及安装步骤1 ModelSim SE 6.5下载在ModelSim网站下载ModelSim SE 6.5源文件,进入后,进入DOWNLOADS,再进入Download Archives,在MODELSIM SE中选择版本,这里选择SE 6.5,进入请求下载的注册界面,简单注册一下,进入ftp,点击倒数第二个exe文件,下载源文件。
点击倒数第一个文件,这是一个安装说明文件,也可以下载下来。
2 安装ModelSim SE 6.5重要提示:安装路径不能有空格,否则,安装会成功,但是仿真时,会出问题。
双击源文件ModelSim-win32-6.5-se.exe,安装ModelSim。
依次出现下面以下界面,点击【Next>>】,点击【Agree】点击【Browse】,选择安装路径,此处安装在E:\Eapp\EDA\ModelSim下,点击【Next>>】,正在安装,单击【Yes】,建立桌面快捷方式,单击【Yes】,单击【Yes】,单击【Yes】,重启计算机。
3 ModelSim SE 6.5破解3.1 生成LECENSE.dat文件到网上下载一个ModelSim SE 6.5的破解文件,我下载的是ModelSim6.5_KeyGen 文件夹,里面有个MentorKG.exe文件,双击它产生LECENSE.txt文件,将文件后缀txt改成dat。
复制LECENSE.dat到Modelsim SE 6.5\win32下,此处为E:\Eapp\EDA\Modelsim SE 6.5\win32。
3.2 右击桌面上的“我的电脑”,打开“属性”/“高级”/“环境变量”,在系统变量中新建LM_LICENSE_FILE,编辑中输入上一步LECENSE.dat所在的路径,E:\Eapp\EDA\Modelsim SE 6.5\win32\ LICENSE.dat,确定即可。
关于Modelsim在win7系统上的安装教程
2012.05.12Xin飞扬学习FPGA,不可避免的要用到仿真。
仿真软件,我们可以选择Qii自带的波形仿真软件,也可以使用Modelsim来进行。
在这里我将讲述如何在win7系统下安装Modelsim。
本人多次都没有安装成功,最后历经千辛万苦,终于成功了。
在这里和大家分享一下安装的经验。
以下是图文介绍在这里我安装的是Modelsim6.5g,如果有不同其他版本的安装也可参考此教程一:软件安装:首先双击modelsim‐win32‐6.5g‐se.exe,运行此程序(注意防火墙或者杀毒软件的拦截问题) 出现如下界面(图1)我的电脑安装过程中(图1)点击next , 直到安装路径的选择,自己选择安装路径(图2)(如果提示需要新建文件夹的话,选择Yes, 选择好安装路径后,点击next2012.05.12Xin飞扬出现下面界面点击agree(否则无法安装),然后等待安装的进行。
安装到50%后会出现让你选择是否添加2012.05.12Xin飞扬到桌面快捷方式,界面如下。
如果需要的话,选择Yes ,桌面会出现下面的快捷方式图标选择是否添加快捷方式后,再次出现是否将Modelsim的路径添加到你的路径(Start菜单吧)里面下面是路径选择截图最后会提示你是否添加硬件安全钥匙驱动,在这里我们选择No(因为我们自己会设置license 的)2012.05.12Xin飞扬到这里,软件安装结束。
接下来将是软件的破解了(破解是很重要的哦)。
(点击完done之后可能出现如下界面。
暂时不要关闭)(在弄完license之后,会用到这个的)二:软件破解1:首先生成license文件。
运行mentorKG。
Exe文件,生成license.txt文件,这里需要将其后缀改为license.dat。
然后将其放到如下地方,就是你的安装路径:\modeltech_6.5g\win32\LICENSE.dat。
2012.05.12Xin飞扬这里会用到安装完之后出现的界面,这里我们选择“Install a new license”,,然后出现下面界面点击空白处右侧的“Browse”,找到存放license的地方后点击打开,出现下面界面,2012.05.12Xin飞扬选择continue,出现是否添加到环境变量的提示,如果选择“Add”,会出现下面界面2012.05.12Xin飞扬(可以选择“Show test results”,来查看测试结果)这里是我的电脑安装后的测试结果显示选择左下角的“exit“,退出license的测试。
Modelsim的下载及安装演示文稿
Modelsim的下载及安装
1.进入SE的download
Modelsim的下载及安装
2.选择SE6.5版本,进入注册页面
Modelsim的下载及安装
3.注册后进入ftp,选择倒数第二个exe文件,下载源文件, 倒数第一个安装说明文件,也可以下载
Modelsim的下载ቤተ መጻሕፍቲ ባይዱ安装
Modelsim 6.5基本仿真流程
2. FOR EXAMPLE: Your gate-level design and test bench are compiled into working library, The design references gate-level models in resource library (separate).
2. Compiling Your Design 在library中完成设计文件的编译,支持多平台
You compile your design units into the library( compatible across all supported platforms)
Modelsim 6.5基本仿真流程
Modelsim 6.5基本仿真流程
3. Create the working library. File/ New /Library
Work中自动创建了一个_info
的文件。表明此目录为
Modelsim的工作库,不 能改动。
Modelsim 6.5基本仿真流程
4. Then
Transcript window:
vlib work vmap work work
Modelsim 6.5基本仿真流程
破解失败时参考
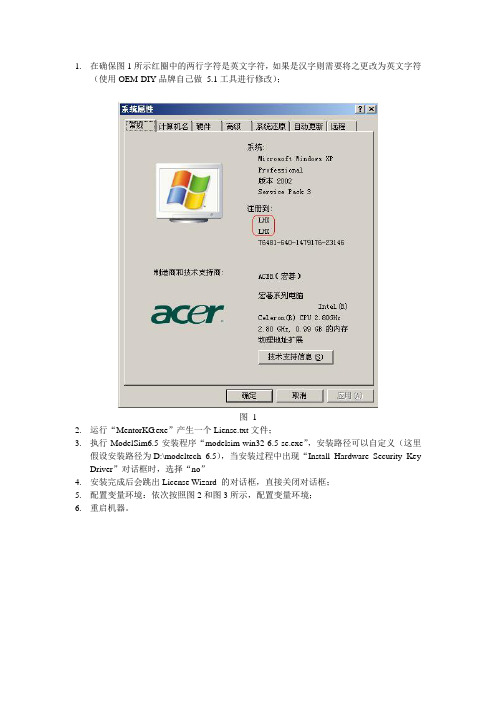
1.在确保图1所示红圈中的两行字符是英文字符,如果是汉字则需要将之更改为英文字符(使用OEM-DIY品牌自己做 5.1工具进行修改);图 12.运行“MentorKG.exe”产生一个Liense.txt文件;3.执行ModelSim6.5安装程序“modelsim-win32-6.5-se.exe”,安装路径可以自定义(这里假设安装路径为D:\modeltech_6.5),当安装过程中出现“Install Hardware Security Key Driver”对话框时,选择“no”4.安装完成后会跳出License Wizard 的对话框,直接关闭对话框;5.配置变量环境:依次按照图2和图3所示,配置变量环境;6.重启机器。
图 2图 3modelsim se6.5破解过程1 ModelSim SE 6.5下载在ModelSim网站下载ModelSim SE 6.5源文件,进入后,进入DOWNLOADS,再进入Download Archives,在MODELSIM SE中选择版本,这里选择SE 6.5,进入请求下载的注册界面,简单注册一下,进入ftp,点击倒数第二个exe文件,下载源文件。
点击倒数第一个文件,这是一个安装说明文件,也可以下载下来。
2 安装ModelSim SE 6.5双击源文件ModelSim-win32-6.5-se.exe,安装ModelSim。
依次出现下面以下界面,点击【Next>>】,点击【Agree】点击【Browse】,选择安装路径,此处安装在E:\Eapp\EDA\ModelSim下,点击【Next>>】,正在安装,单击【Y es】,建立桌面快捷方式,单击【Y es】,单击【Y es】,单击【Y es】,重启计算机。
3 ModelSim SE 6.5破解3.1 生成LECENSE.dat文件到网上下载一个ModelSim SE 6.5的破解文件,我下载的是ModelSim6.5_KeyGen文件夹,里面有个MentorKG.exe文件,双击它产生LECENSE.txt文件,将文件后缀txt改成dat。
modelsim安装+使用说明

1 Modelsim安装步骤此处以Modelsim Se v6.0的安装为例说明具体的安装步骤以及应该注意的事项:Modelsim Se v6.0的安装:运行Modelsim Se v6.0目录中的的自解压缩安装文件,如下图1-1所示:图1-1 自解压缩安装文件等待解压缩完成之后,会出现Modelsim Se v6.0的安装选择画面,如图1-2所示,图1-2 选择安装模式选择FULL Product 安装模式,出现如图3所示的安装界面,如图1-3所示图1-3选择next,然受选择yes,出现如图1-4所示的安装路径选择对话框,图1-4 选择安装路径这里我选择默认安装路径c:\Modeltech_6.0。
连续两次next出现如图1-5所示的文件安装界面图1-5安装文件复制完成后会弹出如图1-6所示的对话框图1-6 选择“是(Y)”出现图1-7图1-7 和图1-8图1-8 点击“确定”安装完成后,出现图1-9图1-9 点击“是(Y)”后在桌面建立快捷方式。
紧接着出现图1-10图1-10 添加桌面快捷方式选择默认。
图1-11 完成安装完成安装,如图1-11所示。
2 配置Modelsim Se v6.0的的环境变量:先找到的安装文件夹的crack目录下的keygen.exe文件,然后运行。
如图2-1所示:图2-1点击“Generate”会出现图2-2。
图2-2这表示License文件生成成功。
将生成的License文件license.dat复制到Modelsim Se v6.0安装目录(我这里的安装目录是C:\Modeltech_6.0)。
然后打开计算机属性对话框的“高级”选项卡,找到用户环境变量LM_LICENSE_FILE,然后编辑,输入变量值C:\Modeltech_6.0\license.dat(也就是License文件的物理路径)如图2-3所示:图2-3 Modelsim v6.0 用户环境变量设置编辑完成之后,确定。
Modelsim 6.5 SE安装过程
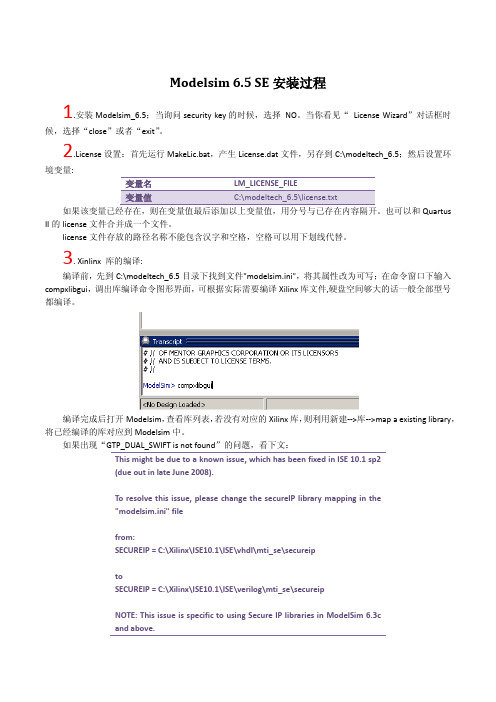
Modelsim 6.5 SE安装过程1.安装Modelsim_6.5;当询问security key的时候,选择NO。
当你看见“License Wizard”对话框时候,选择“close”或者“exit”。
2.License设置:首先运行MakeLic.bat,产生License.dat文件,另存到C:\modeltech_6.5;然后设置环境变量:变量名LM_LICENSE_FILEQuartus II的license文件合并成一个文件。
license文件存放的路径名称不能包含汉字和空格,空格可以用下划线代替。
3. Xinlinx 库的编译:编译前,先到C:\modeltech_6.5目录下找到文件"modelsim.ini",将其属性改为可写;在命令窗口下输入compxlibgui,调出库编译命令图形界面,可根据实际需要编译Xilinx库文件,硬盘空间够大的话一般全部型号都编译。
编译完成后打开Modelsim,查看库列表,若没有对应的Xilinx库,则利用新建-->库-->map a existing library,将已经编译的库对应到Modelsim中。
如果出现“GTP_DUAL_SWIFT is not found”的问题,看下文:This might be due to a known issue, which has been fixed in ISE 10.1 sp2(due out in late June 2008).To resolve this issue, please change the secureIP library mapping in the"modelsim.ini" filefrom:SECUREIP = C:\Xilinx\ISE10.1\ISE\vhdl\mti_se\secureiptoSECUREIP = C:\Xilinx\ISE10.1\ISE\verilog\mti_se\secureipNOTE: This issue is specific to using Secure IP libraries in ModelSim 6.3cand above.4. Altera 库的编译:1)先到C:\modeltech_6.5目录下找到文件"modelsim.ini",将其属性改为可写(右键->属性)。
Modelsim6.5基本仿真步骤
复制以下路径文件到新建的仿真目录下(我的仿真目录是/我的文档/MODELSIM/BASICSIMULATION),
Verilog–<install_dir>/examples/tutorials/verilog/basicSimulation/counter.vand tcounter.v
a)在主窗口中选择Simulate > End Simulation
b)输入命令vsim -novopt counter
14、打开之前生成的波形文件
a)输入view wave
b)选择File > Load
c)双击waveedit.do文件
15、导出刚才创建的波形
a)第一种是导出格式为HDL格式的test bench文件。
i.File > Export > Waveform
ii.选择Verilog Testbench(你用什么就选什么)
iii.如果必要的话输入1000for End Time
iv.在文件名中输入“export”然后点OK
v.
vi.通过以上步骤,modelsim就根据波形自动创建了一个名为export.v的test bench文件。
*/
for (i = 4'b0; ((carry == 4'b1) && (i <= 7)); i = i+ 4'b1)
begin
increment[i] = val[i] ^ carry;
carry = val[i] & carry;
end
end
endfunction
always @ (posedge clk or posedge reset)
ModelSim 6.5破解图文教程

modelsim安装与使用图解没有客套话,开始:准备安装,我用的是xp sp2。
软件:modelsim-win32-6.3e-se.exeCrack_ModelSim_SE_6.3e.rar一、安装modelsim如果机器中已经装了modelsim,先卸载吧。
安装modelsim-win32-6.3e-se.exe选Full Product,碰到有Next 只管点,一步步直到完成。
下面注意要选“否”选择退出Exit二、配置license建个目录C:\FLEXLM解压Crack_ModelSim_SE_6.3e.rar执行MakeLic.bat然后自动打开一个记事本窗口。
选择“文件” “另存为”,保存到C:\FLEXLM,文件名是LICENSE.TXT。
我的电脑(右键)→属性→高级→环境变量系统变量→新建LM_LICENSE_FILEC:\FLEXLM\LICENSE.TXT选确定退出。
下面也很重要,修改C:\Modeltech_6.3e\modelsim.ini 文件。
先复制modelsim.ini,防止改错。
把modelsim.ini 去掉“只读”属性。
找到V optFlow = 1 把 1 改为0 ,关掉优化选项。
不然,调试的时候看不到波形。
现在桌面上的ModelSim SE 6.3e 图标已经可以进入modelsim 了。
如果不顺利,换台计算机试试,modelsim不是在每台计算机上都能运行!三、准备要调试的文件通常我都会建一个工作区C:\WorkSpace,把要调试的程序放到这里。
举个例子:建一个项目CLK,放到C:\WorkSpace\CLK 目录下。
在rtl目录下放hdl代码,sim 用于放modelsim 的project 文件,project我放的是ise 的project文件。
在rtl目录下建两个文件:main_tb.v 和timescale.v,代码如下,文件CLK.rar也有:文件:main_tb.v`include "timescale.v"`define CYC(n) repeat (n) @ (posedge clk);module main_tb;reg clk = 0;reg rst;parameter FAST_PERIOD = 20;initialbeginclk = 1;forever# (FAST_PERIOD/2) clk = ~clk;endinitialbeginrst = 1'b1;`CYC(10)rst = 1'b0;endendmodule文件:timescale.v`timescale 1ns / 1ns接下来,要把timescale.v复制到sim 目录下。
- 1、下载文档前请自行甄别文档内容的完整性,平台不提供额外的编辑、内容补充、找答案等附加服务。
- 2、"仅部分预览"的文档,不可在线预览部分如存在完整性等问题,可反馈申请退款(可完整预览的文档不适用该条件!)。
- 3、如文档侵犯您的权益,请联系客服反馈,我们会尽快为您处理(人工客服工作时间:9:00-18:30)。
ModelSim® SE Installationand Licensing GuideSoftware Version 6.5© 1991-2009 Mentor Graphics CorporationAll rights reserved.This document contains information that is proprietary to Mentor Graphics Corporation.The original recipient of this document may duplicate this document in whole or in part for internal business purposes only,provided that this entire notice appears in all copies.In duplicating any part of this document,the recipient agrees to make every reasonableThis document is for information and instruction purposes. Mentor Graphics reserves the right to make changes in specifications and other information contained in this publication without prior notice,and the reader should, in all cases, consult Mentor Graphics to determine whether any changes have been made.The terms and conditions governing the sale and licensing of Mentor Graphics products are set forth in written agreements between Mentor Graphics and its customers. No representation or other affirmation of fact contained in this publication shall be deemed to be a warranty or give rise to any liability of Mentor Graphics whatsoever.MENTOR GRAPHICS MAKES NO WARRANTY OF ANY KIND WITH REGARD TO THIS MATERIAL INCLUDING, BUT NOT LIMITED TO, THE IMPLIED WARRANTIES OF MERCHANTABILITY AND FITNESS FOR A PARTICULAR PURPOSE.MENTOR GRAPHICS SHALL NOT BE LIABLE FOR ANY INCIDENTAL, INDIRECT, SPECIAL, OR CONSEQUENTIAL DAMAGES WHATSOEVER(INCLUDING BUT NOT LIMITED TO LOST PROFITS) ARISING OUT OF OR RELATED TO THIS PUBLICATION OR THE INFORMATION CONTAINED IN IT, EVEN IF MENTOR GRAPHICS CORPORATION HAS BEEN ADVISED OF THE POSSIBILITY OF SUCH DAMAGES.RESTRICTED RIGHTS LEGEND 03/97ernment Restricted Rights.The SOFTWARE and documentation have been developed entirely at private expense and are commercial computer software provided with restricted rights. Use, duplication or disclosure by the U.S. Government or a U.S. Government subcontractor is subject to the restrictions set forth in the license agreement provided with the software pursuant to DFARS 227.7202-3(a) or as set forth in subparagraph (c)(1) and (2) of the Commercial Computer Software - Restricted Rights clause at FAR 52.227-19, as applicable.Contractor/manufacturer is:Mentor Graphics Corporation8005 S.W. Boeckman Road, Wilsonville, Oregon 97070-7777.Telephone: 503.685.7000Toll-Free Telephone: 800.592.2210Website:SupportNet: /Send Feedback on Documentation:/user/feedback_form.cfm TRADEMARKS: The trademarks, logos and service marks ("Marks") used herein are the property of Mentor Graphics Corporation or other third parties. No one is permitted to use these Marks without the prior written consent of Mentor Graphics or the respective third-party owner. The use herein of a third-party Mark is not an attempt to indicate Mentor Graphics as a source of a product, but is intended to indicate a product from, or associated with, a particular third party. A current list of Mentor Graphics’trademarks may be viewed at:/terms_conditions/trademarks.cfm.Table of ContentsChapter 1Installation and Licensing . . . . . . . . . . . . . . . . . . . . . . . . . . . . . . . . . . . . . . . . . . . . . . . . . . .5 Upgrading to a New Release . . . . . . . . . . . . . . . . . . . . . . . . . . . . . . . . . . . . . . . . . . . . . . . . .5 Supported Platforms. . . . . . . . . . . . . . . . . . . . . . . . . . . . . . . . . . . . . . . . . . . . . . . . . . . . . . . .5 SystemC Supported Platforms . . . . . . . . . . . . . . . . . . . . . . . . . . . . . . . . . . . . . . . . . . . . . .6 Discontinued and Retiring Operating Systems . . . . . . . . . . . . . . . . . . . . . . . . . . . . . . . . . . .7 Licensing . . . . . . . . . . . . . . . . . . . . . . . . . . . . . . . . . . . . . . . . . . . . . . . . . . . . . . . . . . . . . . . .7 Licensing on Windows Platforms. . . . . . . . . . . . . . . . . . . . . . . . . . . . . . . . . . . . . . . . . . . .8 Licensing on UNIX Platforms . . . . . . . . . . . . . . . . . . . . . . . . . . . . . . . . . . . . . . . . . . . . . .8 Mentor Graphics Licensing on UNIX Platforms . . . . . . . . . . . . . . . . . . . . . . . . . . . . . . . .9 Installation . . . . . . . . . . . . . . . . . . . . . . . . . . . . . . . . . . . . . . . . . . . . . . . . . . . . . . . . . . . . . . .9 Windows Installation Instructions . . . . . . . . . . . . . . . . . . . . . . . . . . . . . . . . . . . . . . . . . . .10 Uninstalling from a Windows Machine . . . . . . . . . . . . . . . . . . . . . . . . . . . . . . . . . . . . . . .15 Linux and UNIX Installation Instructions . . . . . . . . . . . . . . . . . . . . . . . . . . . . . . . . . . . . .16 UNIX Client (Obtains License From a Server) . . . . . . . . . . . . . . . . . . . . . . . . . . . . . . . . .18 UNIX License Server . . . . . . . . . . . . . . . . . . . . . . . . . . . . . . . . . . . . . . . . . . . . . . . . . . . . .19 Regenerating Your Design Libraries. . . . . . . . . . . . . . . . . . . . . . . . . . . . . . . . . . . . . . . . . . .19 Regenerating Methods . . . . . . . . . . . . . . . . . . . . . . . . . . . . . . . . . . . . . . . . . . . . . . . . . . . .20 Library Compatibility Between Versions. . . . . . . . . . . . . . . . . . . . . . . . . . . . . . . . . . . . . .21 Library Notes . . . . . . . . . . . . . . . . . . . . . . . . . . . . . . . . . . . . . . . . . . . . . . . . . . . . . . . . . . .21 Technical Support . . . . . . . . . . . . . . . . . . . . . . . . . . . . . . . . . . . . . . . . . . . . . . . . . . . . . . . . .21 Support . . . . . . . . . . . . . . . . . . . . . . . . . . . . . . . . . . . . . . . . . . . . . . . . . . . . . . . . . . . . . . . .21 Updates. . . . . . . . . . . . . . . . . . . . . . . . . . . . . . . . . . . . . . . . . . . . . . . . . . . . . . . . . . . . . . . .21 Latest Version E-mail. . . . . . . . . . . . . . . . . . . . . . . . . . . . . . . . . . . . . . . . . . . . . . . . . . . . .21 FLEXnet Licenses . . . . . . . . . . . . . . . . . . . . . . . . . . . . . . . . . . . . . . . . . . . . . . . . . . . . . . . . .22 License Transfers and Server Changes. . . . . . . . . . . . . . . . . . . . . . . . . . . . . . . . . . . . . . . .22 Where to Obtain Your License. . . . . . . . . . . . . . . . . . . . . . . . . . . . . . . . . . . . . . . . . . . . . .22 Troubleshooting Common Licensing Problems. . . . . . . . . . . . . . . . . . . . . . . . . . . . . . . . .23 If You Have Additional Problems With Licensing. . . . . . . . . . . . . . . . . . . . . . . . . . . . . . .23 Maintenance Renewals and Licenses . . . . . . . . . . . . . . . . . . . . . . . . . . . . . . . . . . . . . . . . .23 License File Examples . . . . . . . . . . . . . . . . . . . . . . . . . . . . . . . . . . . . . . . . . . . . . . . . . . . .25 The SERVER Line . . . . . . . . . . . . . . . . . . . . . . . . . . . . . . . . . . . . . . . . . . . . . . . . . . . . . . .26 The DAEMON Line. . . . . . . . . . . . . . . . . . . . . . . . . . . . . . . . . . . . . . . . . . . . . . . . . . . . . .26 The INCREMENT Line . . . . . . . . . . . . . . . . . . . . . . . . . . . . . . . . . . . . . . . . . . . . . . . . . . .27 Mentor Graphics Install. . . . . . . . . . . . . . . . . . . . . . . . . . . . . . . . . . . . . . . . . . . . . . . . . . . . .28 Troubleshooting Common Errors. . . . . . . . . . . . . . . . . . . . . . . . . . . . . . . . . . . . . . . . . . . .30 Troubleshooting Common Problems . . . . . . . . . . . . . . . . . . . . . . . . . . . . . . . . . . . . . . . . .32 IndexEnd-User License AgreementList of TablesTable 1-1. Supported Platforms . . . . . . . . . . . . . . . . . . . . . . . . . . . . . . . . . . . . . . . . . . . . . .5 Table 1-2. Supported Platforms for SystemC. . . . . . . . . . . . . . . . . . . . . . . . . . . . . . . . . . . .6 Table 1-3. Discontinued and Retiring Operating Systems . . . . . . . . . . . . . . . . . . . . . . . . . .7 Table 1-4. Determining UNIX Workstation ID . . . . . . . . . . . . . . . . . . . . . . . . . . . . . . . . . .8 Table 1-5. License Server Versions Supported for ModelSim. . . . . . . . . . . . . . . . . . . . . . .22 Table 1-6. Exact Access Dates for ModelSim Releases. . . . . . . . . . . . . . . . . . . . . . . . . . . .24 Table 1-7. Feature Names in the ModelSim SE License File. . . . . . . . . . . . . . . . . . . . . . . .27 Table 1-8. Troubleshooting Common Errors . . . . . . . . . . . . . . . . . . . . . . . . . . . . . . . . . . . .30 Table 1-9. Troubleshooting Common Problems. . . . . . . . . . . . . . . . . . . . . . . . . . . . . . . . . .32Chapter1Installation and LicensingUpgrading to a New ReleaseWhen you upgrade to ModelSim v6.5 from v6.3x (or earlier), you will need to regenerate your design libraries after installing the software. For more information, refer to the section Regenerating Your Design Libraries .Release 6.5 of ModelSim uses version 10.8.5 of FLEXnet. Sites that have existing license servers running an older version must shut down the servers and restart them using the license server (lmgrd) and vendor daemon (mgcld) provided in this release.Supported PlatformsTable 1-1. Supported PlatformsPlatform OSBinary VCO name 1Memory capacity EM64T•SUSE Linux Enterprise Server 9.0, 9.1, 10•Red Hat Enterprise Linux 3, 4,532-bit linux 3GB 264-bit linux_x86_64terabytes UltraSPARC•Solaris 83,9,10(32-bit only)32-bit sunos54GB •Solaris 83, 9, 10(64-bit capable)64-bit sunos54GB 64-bit sunos5v9terabytes x86•Windows XP, and Vista 32-bit win322GB 3GB 4•Red Hat Linux 9.0•Red Hat Enterprise Linux 3, 4,532-bitlinux, linuxle3GB 2•Solaris 10(64-bit capable)32-bit sunos5x86 4 GB 64-bitsunos5x86_64terabytesInstallation and Licensing Supported PlatformsSystemC Supported PlatformsSystemC runs on a subset of supported platforms, as shown in Table 1-2. Refer to SystemC Simulation in the User’s Manual for more details.For the Windows platform, you must install the compilers manually. The following steps describe how to obtain and install your required compiler.1.Install the product.This installs the base product and the documentation.2.Navigate to the following site/downloadsor to the following location on the installation media:AMD64•SUSE Linux Enterprise Server 9.0, 9.1, 10•Red Hat Enterprise Linux 3, 4,532-bit linux 3GB 264-bit 3linux_x86_64terabytes1. The VCO name refers to the platform directories that are created during installation.2. Memory usage is limited to the maximum process size allowed by the Linux kernel.3. ModelSim runs on all UltraSPARC hardware including the Sun Blade platform.4.The product is now /LARGEADDRESSAWARE by default.This applies to Windows configurations that include the/3GB or /userva boot switches for XP and Vista, respectively.Table 1-2. Supported Platforms for SystemCPlatform/OSSupported compiler versions 32-bit support 64-bit support Intel and AMD x86-based architectures (32- and 64-bit)SUSE Linux Enterprise Server 9.0,9.1, 10Red Hat Enterprise Linux 3, 4, 5gcc 4.0.2, gcc 4.1.2VCO is linux (32-bit binary)VCO is linux_x86_64 (64-bit binary)yesyesSolaris 8, 9, and 10gcc 4.1.2yes no Solaris 10 on x86gcc 4.1.2yes yes Windows XP, and Vista 11. SystemC supported on this platform with gcc-4.2.1-mingw32.Minimalist GNU for Windows (MinGW) gcc 4.2.1yesnoTable 1-1. Supported Platforms (cont.)Platform OSBinary VCO name 1Memory capacityInstallation and LicensingDiscontinued and Retiring Operating Systems CD:/<tool>_install/3.Locate the appropriate MinGW .zip file:o modelsim-gcc-4.2.1-mingw32.zip for Windows XP and Vista.4.Extract the contents of the .zip file to the top level of your install directory.Discontinued and Retiring Operating SystemsThe following is a list of discontinued operating systems and their last-supported ModelSim release.Technical support will answer questions regarding discontinued operating systems,but no patches are available subsequent to the last supported ModelSim release.Also, please be aware of the operating systems that Mentor Graphics has scheduled to retire. Retiring operating systems will receive patches through the number release indicated.Table 1-3. Discontinued and Retiring Operating Systems Operating System Status Last supportedModelSim release Windows 98, ME, and NT 4.0discontinued 6.1xSolaris 2.6 and 2.7discontinued 6.1xAIX 4.3discontinued 6.1xHP 700discontinued 6.2xHP-UX 11.0, 11i discontinued 6.2xRS6000 / AIX 5.1, 5.2discontinued 6.2xRedHat Linux 7.2, 7.3, and 8.0discontinued 6.3xRedHat Linux Advanced Workstation 2.1discontinued 6.3xRedHat Linux Enterprise version 2.1discontinued 6.3xWindows 2000discontinued 6.4xItanium 2 / Red Hat Enterprise Linux 5discontiuned 6.4xLicensingModelSim uses FLEXnet licenses which are tied to a workstation or hardware ID(see below for how to locate your ID).When you purchase ModelSim,Mentor Graphics will generate and e-mail you a license file that you install on either a license server or on the stand-alone system that runs ModelSim.The following is an abbreviated example of a license file:Installation and LicensingLicensingSERVER server1 117234f39g1m 1650DAEMON mgcld <install_dir>/win32/mgcldINCREMENT qhsimvh mgcld 2007.220 4-dec-2007 1 DD35265192B8C3224364VENDOR_STRING=66E0B055 SN=6264745SIGN2="1688 0801 FAEC 27CE A6AD 0C2D F9DB C37D 1E9C 7B5A F483 67BE 4F11 2C0C B7FC135B50AE6C20BE1E A9912BCC51BB756D E2D5CFB7C801FCE768F4 A24A A499"INCREMENT qhsimvlog mgcld 2007.220 4-dec-2007 1 8D05E6017C8E0DE044ABVENDOR_STRING=1AF05984 SN=6264744SIGN2="071F 2C8E F935 C771 9C0A 763A CE62 9424 9B00 6810 7C5A E8C5 3BD3 0DF79E041511233E9A52B8B0FD65CFCB8B301384CF3D8323444F51F0F6EE 177B 79DC"The installation instructions on subsequent pages tell you how to install the license file.Keep in mind that you should modify the license file only as directed in these instructions. Make sure you do not inadvertently add spaces or line breaks to the file; this may prevent ModelSim from running.Licensing on Windows PlatformsNoteThe Windows directions refer to the Start button. If you are using Windows Vista, youshould use the Windows logo in place of the “Start” button.On Windows platforms the hardware identifier may be either a hardware security key or an Ethernet ID. To determine a security key ID number, check the number printed on the key. To determine the Ethernet ID, select Start > Run then Open "cmd" (Windows XP) to open a command prompt. At the command prompt type:ipconfig -all | moreCheck the configuration listing for your Ethernet "Physical Address".Licensing on UNIX PlatformsOn UNIX platforms you’ll need your workstation ID to obtain a license. Here are the commands that return the ID:Table 1-4. Determining UNIX Workstation IDPlatform Syntax NotesLinux/sbin/ifconfig eth0Look for the line that reads something like this:"Ethernet HWaddr 00:00:00:00:00:00."Remove the colons and you have the required 12-digitID.SPARC hostid SPARCInstallation and LicensingInstallation Mentor Graphics Licensing on UNIX PlatformsTo use this version of ModelSim in a Mentor Graphics environment, you must be running Mentor Graphics Licensing MSL v2007.3with MGLS v8.5_0.5and PCLS2007.291(or newer) and Packaging Information version v3.0_9.6 (or newer).To check your current versions, do the following:1.Make sure the MGLS_HOME environment variable is set to:<install directory>/modeltech/<platform>/mgls2.Execute $MGLS_HOME/bin/mgls_admin -vIf you are running a license server with an earlier version, you need to shut down the license server and restart it using the license server (lmgrd) and vendor daemon (mgcld) found in MGLS. Platform-specific MGLS is included in the ModelSim installation at : <install directory>/modeltech/<platform>/mglsIn ModelSim,the MGLS_HOME environment variable is set in a non-persistent way inside the simulation environment.If MGLS_HOME is already set,it will be changed temporarily to point at the known good mgls tree while ModelSim is invoked. The persistent setting ofMGLS_HOME will not be changed.The mgcld daemon is automatically installed into the binary directory when you install ModelSim.InstallationNoteThe instructions for Windows refer to the Start button. If you are using Windows Vista,you should use the Windows logo in place of the Start button.The commands for installing ModelSim are case-sensitive,so you must be enter them exactly as shown. If you are upgrading from a previous release, it is recommended that you install your upgrade in its own directory to avoid overwriting your old files and libraries.License-Specific InstructionsThe following sections describe how to install ModelSim, depending on the license specific to your operating system environment or platform:•Node-Locked License on a Stand-Alone Windows PC•Floating License on a Stand-Alone Windows PC•Windows PC Client (Obtains License from a Server)Installation and LicensingInstallation•Windows PC License Server•Stand-Alone UNIX Workstation•UNIX Client (Obtains License From a Server)•UNIX License ServerNoteWhen referring to installation paths, this manual uses the term “modeltech” as a generic representation of the install directory for all versions of ModelSim. The name of theactual install directory on your system may contain additional version identifiers.Windows Installation InstructionsModelSim uses Mentor Graphics Install for installation on Windows machines. The main product executable is named:modelsim-win32-<ver>.exeand the gcc compiler is named:modelsim-gcc-4.2.1-mingw32.zipNode-Locked License on a Stand-Alone Windows PCUse this setup if you are installing on a stand-alone Windows PC with a node-locked license. Node-locked licenses are tied to a hardware key (attached either to the parallel port or a USB port) or system Ethernet ID. Therefore, ModelSim can be run on one system only. A hardware key may be moved from one system to another but ModelSim will run only on the system that has the key attached. In the case of an Ethernet ID, ModelSim can be run only on the system with that specific Ethernet ID.NoteIf you are installing on an Windows machine, make sure you are logged in as"administrator" when running the installation program.1.If you received a hardware security key(dongle),install it on the parallel or USB port ofyour PC. Skip this step if you licensed ModelSim to the PC's Ethernet ID.2.Install ModelSim from the CD or via a downloaded installation executable.3.Once the software is done installing,you will be prompted to install a hardware securitykey driver. Choose Yes if you installed a security key in step 1; choose No if youlicensed ModelSim to the PC’s Ethernet ID.Installation4.After installation is complete, save the license.dat file to<install_dir>\win32\license.dat.The license.dat file was attached to the e-mail you received from Mentor Graphics.Make sure there are no extra spaces or line breaks in the license file. It must exactlymatch the license you received by e-mail, including upper and lower case and anybackslashes (\).5.Set the LM_LICENSE_FILE environment variable with the pathname to the license file:o For Windows XP, right-click the My Computer icon and select Properties, and then select the Advanced tab and then Environment Variables.For Windows Vista, right-click the Compter icon and select Properties, then selectAdvanced System settings and then select Environment Variables.Add LM_LICENSE_FILE with a value of<install_dir>\win32\license.dat.The software does not look for licensing variables in the registry,therefore you mustset either LM_LICENSE_FILE or MGLS_LICENSE_FILE environment variable.6.Reboot your PC.7.Invoke ModelSim through the Windows Start menu.Floating License on a Stand-Alone Windows PCUse this setup if you are installing on a stand-alone Windows PC with a floating license.When stand-alone PCs use a floating license, ModelSim and the license server run on the same system.1.If you received a hardware security key(dongle),install it on the parallel or USB port ofyour PC. Skip this step if you licensed ModelSim to the PC's Ethernet ID.2.Install ModelSim from the CD or via a downloaded installation executable.3.Once the software is done installing,you will be prompted to install a hardware securitykey driver. Choose Yes if you installed a security key in step 1; choose No if youlicensed ModelSim to the PC’s Ethernet ID.4.After installation is complete, save the license.dat file to<install_dir>\win32\license.dat.Make sure there are no extra spaces or line breaks in the license file. It must exactlymatch the license you received by e-mail, including upper and lower case and anybackslashes (\).5.Verify the name of your PC via the Windows Control Panel by System > ComputerName.Installation6.Open the license.dat file and change the server name to the name of your e a texteditor like Notepad rather than a word processor.Word processors may add extra hidden formatting characters to the file and cause problems.Edit the DAEMON line to point to the full path for the mgcld.exe, for example:SERVER server1 123456789123 1717DAEMON mgcld C:\<install_dir>\win32\mgcld.exe7.Set the LM_LICENSE_FILE environment variable with the port# and hostname:o For Windows XP, right-click the My Computer icon and select Properties, then select the Advanced tab and then Environment Variables.For Windows Vista, right-click the Compter icon and select Properties, then selectAdvanced System settings and then select Environment Variables.Add LM_LICENSE_FILE with a value of 1650@hostname, where hostname is thename of your PC.The software does not look for licensing variables in the registry,therefore you mustset either LM_LICENSE_FILE or MGLS_LICENSE_FILE environment variable.8.Reboot your PC.unch lmtools.exe from the<install_dir>\win32 directory.10.Choose the Config Services tab and add the pathnames for lmgrd.exe,license.dat, anddebug.log. Typical entries might look like this:lmgrd.exe -- <install_dir>\win32\lmgrd.exeLicense file -- <install_dir>\win32\license.datDebug log file -- <install_dir>\win32\debug.logClick Save Setup when you finish entering the pathnames.11.Choose the Start/Stop/Reread tab and click Start Server.12.To verify that the server started, choose the Config Services tab and click View Log.Look for two lines similar to the following:14:31:00 (lmgrd) Starting vendor daemons ...14:31:00 (lmgrd) Started mgcld (pid 1088)Close lmtools once the server is started.13.Invoke ModelSim through the Windows Start menu.Windows PC Client(Obtains License from a Server)Use this setup if you are installing on a Windows PC that will obtain a license from a Windows PC or UNIX license server.1.Install ModelSim from the CD or via a downloaded installation executable.Installation2.Once the software is done installing,you will be prompted to install a hardware securitykey driver. Choose No since you are obtaining the license from a server.3.Once installation is complete, check with your system administrator for the licenseserver’s hostname (the network machine name) and port# (1650 is the default portnumber).4.Set the LM_LICENSE_FILE environment variable with the port# and hostname givenyou by the system administrator.o For Windows XP, right-click the My Computer icon and select Properties, then select the Advanced tab and then Environment Variables.For Windows Vista, right-click the Compter icon and select Properties, then selectAdvanced System settings and then select Environment Variables.Add LM_LICENSE_FILE with the value port#@hostname,reflecting the data givenyou by your system administrator, such as 1650@server1.The software does not look for licensing variables in the registry,therefore you mustset either LM_LICENSE_FILE or MGLS_LICENSE_FILE environment variable.5.Reboot your PC.6.Make sure the license server is running, then invoke ModelSim through the WindowsStart menu.Windows PC License ServerUse this setup if you are installing a Windows PC license server that checks out licenses to Windows or UNIX clients.If you already have a FLEXnet installation on the server, you need to install only the mgcld daemon and the license file (contact support@ if this is your situation).1.If you received a hardware security key(dongle),install it on the parallel or USB port ofyour server. Skip this step if you licensed ModelSim to the server’s Ethernet ID.2.Install ModelSim from the CD or via a downloaded installation executable. You canaccess the ModelSim installation executable on the web at either of the following: /downloads3.Once the software is done installing,you will be prompted to install a hardware securitykey driver. Choose Yes if you installed a security key in Step 1; choose No if youlicensed ModelSim to the server’s Ethernet ID.4.After installation is complete, save the license.dat file to<install_dir>\win32\license.dat.InstallationMake sure there are no extra spaces or line breaks in the license file. It must exactlymatch the license you received by e-mail, including upper and lower case and anybackslashes (\).5.Verify the name of your server via the Windows Control Panel by selecting System >Computer Name.6.Open the license.dat file and change the server name to the name of your server. Use atext editor like Notepad rather than a word processor. Word processors may add extrahidden formatting characters to the file and cause problems. Edit the DAEMON line topoint to the full path for the mgcld.exe, for example:SERVER server1 123456789123 1717DAEMON mgcld C:\<install_dir>\win32\mgcld.exe7.Set the LM_LICENSE_FILE environment variable with the port# and hostname.o For Windows XP, right-click the My Computer icon and select the Advanced tab and then Environment Variables.Add LM_LICENSE_FILE with a value of 1650@hostname, where hostname is thename of your server.The software does not look for licensing variables in the registry,therefore you mustset either LM_LICENSE_FILE or MGLS_LICENSE_FILE environment variable.8.Reboot the server.unch lmtools.exe from the<install_dir>\win32 directory.10.Choose the Config Services tab and add the pathnames for lmgrd.exe,license.dat, anddebug.log. Typical entries might look like this:lmgrd.exe -- <install_dir>\win32\lmgrd.exeLicense file -- <install_dir>\win32\license.datDebug log file -- <install_dir>\win32\debug.logClick Save Setup when you finish entering the pathnames.11.Choose the Start/Stop/Reread tab and click Start Server.12.To verify that the server started, choose the Config Services tab and click View Log.Look for two lines similar to the following:14:31:00 (lmgrd) Starting vendor daemons ...14:31:00 (lmgrd) Started mgcld (pid 1088)Close lmtools once the server is started.Installation Troubleshooting Windows PC Server SetupThe Licensing Wizard located in the ModelSim program group can help you solve ModelSim licensing problems. Run the wizard on a client machine to check the availability of the license from your PC server.In addition to running the Licensing Wizard, try the following:•Open a DOS window and go to the appropriate<install_dir>\win32directory.Enter the command:lmutil.exe lmdiagThis allows you to verify each feature independently.•From a DOS window, and the same win32 directory, enter the following:lmutil.exe lmstat -aThis shows you all licenses that are available.•Go to the debug.log inside the win32 directory. This may provide other information about the source of the license server problems.•Verify that FLEXnet 10.8.5 was installed on the server. Launch lmtools.exe from the <install_dir>\win32 directory and select Help > About.Uninstalling from a Windows MachineTo remove any or all products installed with the Mentor Graphics Install:1.From the Start Menu, select Settings > Control Panel > Add or Remove Programs.2.Select Mentor Graphics Products.This launches the Install program in Remove modeautomatically where you can select the products to remove.3.Select from:o Sort by Target — Choose this sort option to list all targets you have installed to.o Sort by Product — Choose this sort option to list all installed products.4.Select individual, multiple, or Select All products to be removed.5.Click Next to proceed to the Confirm Removal Selection window.6.Click Remove.The Install program will prompt you to remove itself after the last product is removed.7.Click Done.。
