Labview8.6安装步骤
LabVIEW安装指南
Windows 处理器 RAM
运行引擎
开发环境
Pentium III/Celeron 866 MHz或等 效处理器
Pentium 4/M或等效处理器
256 MB
1 GB
屏幕分辨率
1024 x 768像素
1024 x 768像素
操作系统
Windows 8(32位、64位) Windows 7/Vista(32位、64位) Windows XP SP3(32位) Windows Server 2003 R2(32位) Windows Server 2008 R2(64位)
注:LabVIEW在Windows操作系统上的使用有下列限制。
• LabVIEW不支持Windows 2000/NT/Me/98/95以及Windows XP x64。 • 以访客账户登录Windows操作系统,不能访问操作系统上安装的LabVIEW。
安装LabVIEW模块和工具包的附加系统要求
LabVIEW模块和工具包可能有额外的系统要求。 找到LabVIEW开发平台DVD 1上的LabVIEW 开发平台自述文件 (readme_platform.html),找到相应的模块或工具包的部分,可查看特定模块或工具包时文件目录 N/A
LabVIEW和LabVIEW 帮助包含16位彩色图形。 LabVIEW至少需要16位彩色配置。
LabVIEW使用专用目录存放临时文件。 NI建议预 留磁盘空间存放临时文件。
Adobe Reader N/A
如需查看PDF格式的LabVIEW用户手册,必须安装 Adobe Reader。
Windows
LabVIEW™安装指南
开始之前
• 您的软件是否属于批量许可协议(VLA)?安装须知请咨询VLA管理员。 • 您是否从上一个版本的LabVIEW升级?在安装新版LabVIEW之前,请参考LabVIEW开发平台DVD 1上的LabVIEW升
labview教程LabVIEW(LaboratoryVirtualInstr
labview教程LabVIEW(LaboratoryVirtualInstr
LabVIEW (Laboratory Virtual Instrument Engineering Workbench)是一种强大的虚拟仪器软件,用于开发测试、测量和控制应用程序。
下面是一个简单的LabVIEW教程:
1. 安装和开启LabVIEW: 首先需要下载并安装LabVIEW软件,然后开启程序,会看到一个新建项目的界面。
2.创建新项目:在界面上选择新建项目,输入项目相关信息,创建一个新的项目。
3.创建VI: 在项目中创建一个VI(Virtual Instrument),VI类似于一个函数块,可以接收输入信号并输出经过处理的信号。
4.编辑VI: 在VI中,可以添加控件和图形元素,编写程序及控制流,实现数据采集、处理、输出等功能。
5. 连接设备:在使用LabVIEW过程中,需要连接不同的设备,可以使用计算机界面所提供的串口、USB、GPIB等接口进行连接。
6. 运行程序:在编辑完程序后,可以点击运行按钮,程序开始运行并输出结果。
7. 调试和优化:在运行程序的过程中,可能会遇到一些问题,需要对程序进行调试、优化和修改,以确保程序能够正常运行。
需要注意的是,LabVIEW是一个非常强大和复杂的软件,需要一定的编程基础和相关经验才能够熟练使用。
因此,刚开始学习时需要
认真阅读官方文档并进行系统的学习和实践。
LabVIEW8.5中文专业版安装破解过程
安装和破解步骤说明:此文件是persebe根据网络上网友的建议以及自己的实验得出的安装步骤。
注意:安装完成后会提示在重启电脑之前不要运行LabVIEW,就按提示来,具体为什么我也不清楚,貌似NI的软件都这样(比如Multisim)。
一般按照安装-----破解----重启电脑-----再运行LabVIEW这个顺序来!!!!1,运行labview_85_ch.exe文件,进行自解压和安装,在解压由用户确定解压后的暂存文件存放目录,不是安装的目标文件路径;2,在安装过程中会要求你选择是安装试行版本还是正式版本,选择正式版本,这时要求输入产品序列后,用KeyGen.exe产生的序列后填入,进入正式安装模块硬件驱动步骤;3,安装完成后,会在目标路径和C:\Program Files\National Instruments\Shared\License Manager\Licenses产生旧的试运行版本的许可证文件,用户只对C盘下的许可证文件破解即可;4,运行KeyGen.exe文件,每次选择一个选择项,然后点击Create License File按钮产生许可证文件去覆盖相应的c盘目录小的许可证文件。
例如,选择“Professional Development system with MathScript"项,再点击“Greater license File...”按钮产生许可证文件覆盖C:\Program Files\National Instruments\Shared\LicenseManager\Licenses\LabVIEW_PDSMD_PKG_080500.lic文件,用Remote Panels项产生文件覆盖相同目录下的LV_RemotePanelConnection.lic文件,由于破解的许可证不全,因此用户得不到所有文件的许可证授权,不可主要的已经得到。
5,可能在安装完毕以后用户还没来得及产生License覆盖文件之前,安装程序就要求用户输入二十位产品激活码,用户可以不必理会,选择今后激活产品,然后产生步骤4的License文件就可以。
如何安装LABVIEW
祝你成功!
另外,也可以使用破解补丁:
LabView 8.2中文20周年版+破解[我自己在用~]
8.2地址:ftp:///evaluation/labview/pc/labview_82_chs.exe
破解补丁:/dinga/attachments/month_0610/62006101818533.rar
4.激活完毕
参考破解说明:
因为一直使用NI公司的使用版软件,所以总是有30天的使用限制,这给使用带来很大的不便,因此寻求破解方法是必须的。以前总是在网上寻找破解的Crack,但是也不是所有的都有人破解,于是在寻找之时我想能否从修改系统时间的角度进行“曲线救国”,结果发现可行。
破解的具体方法如下:
3:安装完成后重启系统
4:运行license manager-即NI许可证管理器(位置在:开始->程序->national instruments->NI license manager)。 打开license manager后,在:选项->安装许可证文件->找到你用注册机生成的.lic文件位置即可。这七个都要安装,安装完之后就可以运行软件了!
首先下载labview8.2注册机,现在网上很多,随便提供个链接/blog/batch.download.php?aid=75经测试可下
1:载入虚拟镜像后开始安装NI LabWindows CVI 8.2完பைடு நூலகம்专业版
2:用注册机算出注册码(点Generate),再算出一授权文件.lic(点Create License File...),这个地方一共有生成七个lic文件,上面的注册机里一共有七个选项,每一个都要生成,每一个都要保存好,最好存在labview目录下!
LabVIEW8.6安装说明
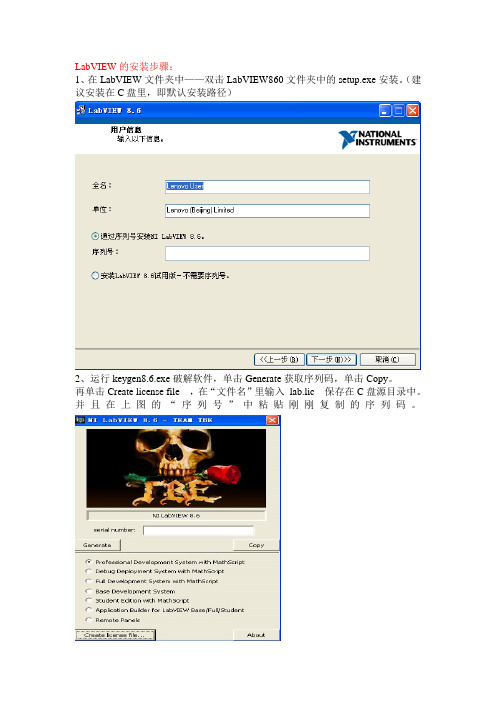
LabVIEW的安装步骤:
1、在LabVIEW文件夹中——双击LabVIEW860文件夹中的setup.exe安装。
(建议安装在C盘里,即默认安装路径)
2、运行keygen8.6.exe破解软件,单击Generate获取序列码,单击Copy。
再单击Create license file ,在“文件名”里输入lab.lic 保存在C盘源目录中。
并且在上图的“序列号”中粘贴刚刚复制的序列码。
3、如下图单击“以后”
4、单击“下一步”
5、下面填一些无关紧要的信息,单击“下一步”
6、单击“取消”
7、不需要重启计算机,启动一下LabVIEW软件,会看到是试用版30天。
启动软件后,如下图单击“激活LabVIEW组件”。
8、如下图操作:单击“安装许可证文件”
9、找到之前保存在C盘里的“lab.lic”文件打开即可。
关闭软件,启动一下LabVIEW软件,会发现不是试用版了,而是专用版。
DAQ的安装:
1、单击Labview文件夹中的“NIDAQ880f2”,单击“确定”
2、单击“Unzip”
3、单击“确定”
4、单击“下一步”
5、单击“下一步”
6、等待安装完成,不必要重启计算机
7、在桌面上单击刚安装完成的DAQ软件快捷方式。
8、如下图操作:完成注册向导
9、忘记了序列码,可以如下操作,查看序列码
10、添加注册——完成。
Labview控件安装简单说明
LabView控件安装及例程简单说明一、RBHCardOperation.llb控件z功能说明:RBHCardOperation.llb是瑞博华公司为用户提供的在LabVIEW下编程使用的一组板卡驱动程序vi。
当前版本1.0,支持6.0及以上版本的LabVIEW开发环境使用。
该组vi包括了用户级的模拟量输入/输出,数字量输入/输出vi模块,以及为方便用户灵活编程需要的底层硬件操作vi模块。
每个vi均带有详细的在线使用帮助,使用这些vi,用户可以在LabVIEW环境下对本公司提供的硬件板卡进行快捷、方便的编程操作。
z安装说明:运行安装程序RBH_LabVIEWsetup.exe,按程序提示正确安装本控件。
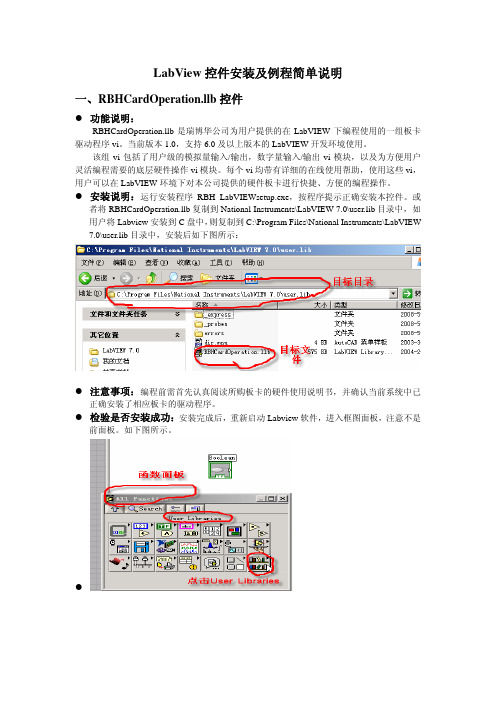
或者将RBHCardOperation.llb复制到National Instruments\LabVIEW 7.0\user.lib目录中,如用户将Labview安装到C盘中,则复制到C:\Program Files\National Instruments\LabVIEW7.0\user.lib目录中,安装后如下图所示:z注意事项:编程前需首先认真阅读所购板卡的硬件使用说明书,并确认当前系统中已正确安装了相应板卡的驱动程序。
z检验是否安装成功:安装完成后,重新启动Labview软件,进入框图面板,注意不是前面板。
如下图所示。
zz 控件简介: 控件窗口见如图1所示。
(每个vi 的详细说明见在线帮助)驱动控件分为四类:1. 用户级vi 模块共8个vi ,其中包括4个模拟量输入vi ,一个模拟量输出vi ,两个数字量输入vi 及一个数字量输出vi 。
用户可以使用这些vi 方便的实现数字量的输入、输出,数字量的输入输出。
2. 中级数据采集 vi 模块 为方便用户灵活编程和实现特定的数据采集要求而提供的模拟量输入(A/D )操作的11个vi 。
用户可以根据这些vi 方便的实现数据连续采集及控制,包括单缓冲区采集方式操作和多缓冲区操作方式。
LabVIEW Real-Time Module 8.6 用户手册说明书
LabVIEW Real-Time Module™Release and Upgrade NotesVersion 8.6This document provides system requirements, installation instructions,descriptions of new features, and information about upgrade andcompatibility issues for version 8.6 of the LabVIEW Real-Time Module.Refer to the Getting Started with the LabVIEW Real-Time Module manualfor exercises you can complete to familiarize yourself with the Real-TimeModule.ContentsSystem Requirements (2)Installing the Real-Time Module 8.6 (3)Activating the Real-Time Module (3)RT Target Configuration (4)New Real-Time Module 8.6 Features (5)CompactRIO Scan Mode Support (5)NI Distributed System Manager Support (6)New VIs for Managing Memory and CPU Resources (7)Reliance™ File System Support (7)Software-Triggered Timing Sources (7)Easier IP Address Setup for RT Targets (7)TDMS Support for VxWorks Targets (8)Improved Ethernet Compatibility (8)Real-Time Execution Trace Toolkit 2.0.1 (8)Activating the Real-Time Execution Trace Toolkit (8)Upgrade and Compatibility Issues (9)Upgrading from RT Module 8.5.x (9)Upgrading from RT Module 8.2.x and Earlier (9)Real-Time Module Examples (10)Known Issues with the Real-Time Module 8.6 (10)System RequirementsTable1 describes the system requirements to run version 8.6 of theReal-Time Module. The Real-Time Module system requirements are inaddition to the LabVIEW system requirements listed in the LabVIEWRelease Notes.Table 1. System Requirements for the Real-Time Module 8.6Platform Media and SystemRequirements Important NotesWindows 2000/XP/Vista National Instrumentsrecommends that you haveat least 300 MB of diskspace for the minimumReal-Time Moduleinstallation or 750 MB ofdisk space for the completeReal-Time Moduleinstallation, which includesthe Real-Time andEmbedded drivers from theNational InstrumentsDevice Drivers media.You might need more memory than the LabVIEW-recommended 1 GB of RAM depending on the size of the application you design in LabVIEW on the host computer.To view and control the front panel of a VI running on an RT target remotely using a Web browser, National Instruments recommends Internet Explorer 5.5 with Service Pack 2 or later.Real-Time Module Release and Upgrade © National Instruments Corporation 3Real-Time Module Release and Upgrade NotesInstalling the Real-Time Module 8.6This section includes information about installing the Real-Time Module on a development, or host, computer from the CD included in theReal-Time Module kit. If you installed the Real-Time Module from the LabVIEW 8.6 Platform DVD, you do not need to reinstall the Real-Time Module from the CD.Note You must install LabVIEW 8.6 before attempting to install the Real-Time Module 8.6. Refer to the LabVIEW Release Notes for the LabVIEW installation instructions.Complete the following steps to install the Real-Time Module on the host computer.1.Disable any automatic virus detection programs before you install. Some virus detection programs interfere with the installation program.2.Log on as an administrator or as a user with administrator privileges.3.Insert the LabVIEW Real-Time Module installation CD into theCD-ROM drive. The LabVIEW Real-Time Module installationprogram runs automatically.4.Follow the instructions that appear on the screen. The prompt directsyou to install the Real-Time Module and activate your Real-TimeModule license. Refer to the Activating the Real-Time Module sectionof this document for more information about activating the Real-TimeModule.5.Install the Real-Time and Embedded drivers and any other drivers thatyou require from the National Instruments Device Driver media.Activating the Real-Time ModuleRefer to the Activation Instructions for National Instruments Software for information about activation. You also can activate software at /activate.RT Target ConfigurationUse Measurement & Automation Explorer (MAX) to configure RT targetsand to install software and drivers on targets.•Networked RT Targets—Refer to the Max Remote Systems Helpbook in the Measurement & Automation Explorer Help, available byselecting Help»MAX Help from MAX, for information aboutconfiguring networked RT targets.•Desktop PC Targets—Refer to the Using Desktop PCs as RT Targetswith the LabVIEW Real-Time Module document for information aboutconfiguring a desktop PC as a networked RT target. You can access thedocument from Windows by selecting to install the Real-Time Moduledocumentation when you install the Real-Time Module. Select Start»All Programs»National Instruments»LabVIEW 8.6»LabVIEWManuals to open the labview\manuals directory and thendouble-click RT_Using_PC_as_RT_Target.pdf to open thedocument.Real-Time Module Release and Upgrade New Real-Time Module 8.6 FeaturesThe Real-Time Module 8.6 includes the following new features. Refer tothe LabVIEW Help, available by selecting Help»Search the LabVIEWHelp, for more information about the following new features.CompactRIO Scan Mode SupportThe Real-Time Module 8.6 supports the new CompactRIO Scan Modefeatures. Refer to the Getting Started with CompactRIO and LabVIEW:Scan Mode Edition manual for an introduction to using the newCompactRIO Scan Mode features.NI Scan Engine SupportThe Real-Time Module 8.6 includes support for the NI Scan Engine. TheNI Scan Engine enables efficient access to coherent sets of I/O channelsusing a scan that stores data in a global memory map and updates all valuesat a single rate. Refer to the Real-Time Module»Real-Time ModuleConcepts»Accessing I/O with the NI Scan Engine»Using the NI ScanEngine topic on the Contents tab of the LabVIEW Help for moreinformation about the NI Scan Engine and related features.I/O Variable SupportIf you have an RT target with the NI Scan Engine installed, you can takeadvantage of the I/O variable, a new variable type that simplifies I/Oaccess. LabVIEW automatically detects I/O modules connected to targetswith the NI Scan Engine installed, and creates an I/O variable in theProject Explorer window for each connected I/O channel. Refer to theReal-Time Module»Real-Time Module Concepts»Accessing I/O withthe NI Scan Engine»Using I/O Variables topic on the Contents tab of theLabVIEW Help for more information about I/O variables.I/O Forcing SupportI/O variables support forcing for debugging and manual control of I/O. Usethe NI Distributed System Manager to force and unforce I/O valuesmanually. Use the Forcing VIs on the NI Scan Engine palette to force andunforce I/O values programmatically. Refer to the VI and FunctionReference»Measurement I/O VIs and Functions»NI Scan EngineVIs»Forcing VIs book on the Contents tab of the LabVIEW Help for moreinformation about the Forcing VIs.© National Instruments Corporation5Real-Time Module Release and Upgrade NotesScan Engine FaultsRT targets with the NI Scan Engine installed use faults to addressasynchronous error conditions. Refer to the Real-Time Module»Real-Time Module Concepts»Accessing I/O with the NI ScanEngine»Scan Engine Faults topic on the Contents tab of the LabVIEWHelp for more information about faults.Scan Engine VIsThe Real-Time Module 8.6 installs the new NI Scan Engine palette as asubpalette of the Measurement I/O palette. You can use the NI Scan EngineVIs to programmatically interface with the scan engine running on thetarget. Refer to the VI and Function Reference»Measurement I/O VIsand Functions»NI Scan Engine VIs book on the Contents tab of theLabVIEW Help for more information about the NI Scan Engine VIs.Project & System Comparison DialogThe Real-Time Module 8.6 includes a new Project & SystemComparison dialog box that you can use to resolve conflicts that resultfrom project configuration or hardware changes involving targets with theNI Scan Engine installed.Function BlocksThe Real-Time Module 8.6 includes standard function blocks defined inthe IEC 1131-3 specification. The functionality of the Real-Time functionblocks partially overlaps with functionality provided by LabVIEW VIs andfunctions. Use function blocks if you want to publish parameter values withshared variables or if you want to use the IEC 1131-3 function blockprogramming paradigm. Refer to the Real-Time Module»Real-TimeVIs»Function Blocks book on the Contents tab of the LabVIEW Help formore information about using function blocks in LabVIEW.NI Distributed System Manager SupportYou can use the new NI Distributed System Manager to monitor andmanage variables, faults, scan engine modes, and system resources on RTtargets. From LabVIEW, select Tools»Distributed System Manager tolaunch the NI Distributed System Manager. Refer to the NI DistributedSystem Manager Help for information about using the NI DistributedSystem Manager.Real-Time Module Release and Upgrade New VIs for Managing Memory and CPU ResourcesThe Real-Time Module 8.6 includes new Real-Time Utilities VIs you canuse to monitor target CPU and memory usage programmatically. TheReal-Time Module also includes new SMP CPU Utilities VIs you can useto specify the set of CPUs available for automatic load balancing on amulti-CPU target with the NI RT Extensions for SMP installed. Refer to theReal-Time Module»Real-Time VIs»Real-Time Utilities VIs book on theContents tab of the LabVIEW Help for information about the Real-TimeUtilities VIs. Refer to the Real-Time Module»Real-Time VIs»SMP CPUUtilities VIs book on the Contents tab of the LabVIEW Help forinformation about the SMP CPU Utilities VIs.Reliance™ File System SupportThe Reliance™ file system provides fast disk access and data preservationin the event of a power interruption. Refer to the Using Desktop PCs as RTTargets with the LabVIEW Real-Time Module document for informationabout installing the Reliance™ file system on an RT Desktop PC target.Reliance™ is a trademark of Datalight, Inc. Copyright 1989–2008Datalight, Inc., All Rights Reserved. Datalight® is a registered trademarkof Datalight, Inc.Software-Triggered Timing SourcesThe Real-Time Module 8.6 supports software-triggered timing sources.You can use software-triggered timing sources to trigger timed structuresbased on software-defined or user-defined events, rather than a hardwareclock. Refer to the Fundamentals»Loops and Structures»Concepts»Timed Structures»Selecting a Timing Source for a Timed Structuretopic on the Contents tab of the LabVIEW Help for information aboutcreating and using software-triggered timing sources.Easier IP Address Setup for RT TargetsRT targets with the Real-Time Module 8.6 installed include automaticnetwork connection capabilities. When you plug an RT 8.6 target into anetwork and turn the target on, the target uses the target name to attempt aDHCP network connection. If the target is unable to initiate a DHCPconnection, the target connects to the network with a link-local IP address.© National Instruments Corporation7Real-Time Module Release and Upgrade NotesTDMS Support for VxWorks TargetsThe Real-Time Module 8.6 includes TDMS support for VxWorks targets.Refer to the VI and Function Reference»Programming VIs andFunctions»File I/O VIs and Functions»TDM Streaming VI andFunctions book on the Contents tab of the LabVIEW Help for informationabout the TDM Streaming VI and functions.Improved Ethernet CompatibilityThe Real-Time Module 8.6 includes expanded Ethernet chipset support forRT Desktop PCs. Refer to the National Instruments Web site at /info and enter the info code etspc for more information about whichEthernet chipsets are compatible with RT Desktop PCs.Real-Time Execution Trace Toolkit 2.0.1The LabVIEW 8.6 Real-Time Module includes a 30-day full-featuredevaluation of the Real-Time Execution Trace Toolkit 2.0.1. The Real-TimeExecution Trace Toolkit includes the Real-Time Execution Trace Tool andthe Execution Trace Tool VIs. You can use the Execution Trace Tool VIsto capture the timing and execution data of VI and thread events forapplications running on an RT target. The Real-Time Execution Trace Tooldisplays the timing and event data, or trace session, on the host computer.In LabVIEW, select Tools»Real-Time Module»Execution Trace Tool todisplay the Real-Time Execution Trace Tool.Refer to the Real-Time Execution Trace Toolkit book in the LabVIEWHelp for information about using the Real-Time Execution Trace Toolkit todebug real-time applications. Select Help»Search the LabVIEW Help todisplay the LabVIEW Help. In the LabVIEW Help, browse to Toolkits»Real-Time Execution Trace Toolkit to view the Real-Time ExecutionTrace Toolkit book.Activating the Real-Time Execution Trace ToolkitRefer to the Activation Instructions for National Instruments Software forinformation about activation. You also can activate software at /activate.Real-Time Module Release and Upgrade Upgrade and Compatibility IssuesUpgrading from RT Module 8.5.xYou might encounter the following compatibility issue when upgrading tothe Real-Time Module 8.6 from the Real-Time Module 8.5.x.Floppy Disk Support DiscontinuedThe Real-Time Module no longer includes updated versions of the PXI andDesktop PC Floppy Disk Utilities. You can still use Measurement &Automation Explorer (MAX) to create previous versions of the RT floppydisks, which will continue to work with newer versions of the Real-TimeModule. However, older versions of the RT floppy disks do not supportdevice drivers added to subsequent versions of the Real-Time Module. Ifyou need to use the latest device drivers, you mush use MAX to create anRT 8.6 USB Utility drive.FieldPoint 20x0 Support DiscontinuedThe Real-Time Module no longer supports FP-20x0 and cFP-20x0 targets.You can still use FP-20x0 and cFP-20x0 targets with LabVIEW, but youcannot install the Real-Time Module 8.6 on FP-20x0 and cFP-20x0 targets.Upgrading from RT Module 8.2.x and EarlierYou might encounter the following compatibility issues when upgrading tothe Real-Time Module 8.6 from the Real-Time Module 8.2.x and earlier.RTX Support DiscontinuedThe Real-Time Module no longer supports RTX desktop targets and nolonger contains the Shared Memory VIs. Refer to the Using Desktop PCsas RT Targets with the LabVIEW Real-Time Module document forinformation about configuring a PC as an ETS RT target.IrDA Support DiscontinuedThe Real-Time Module no longer supports the IrDA protocol and no longercontains the associated IrDAVIs.Timed Loop Priority RestrictionThe Timed Loop does not support Priority values greater than 65,535.© National Instruments Corporation9Real-Time Module Release and Upgrade NotesCompatibility with VxWorks 6.1When you install the Real-Time Module 8.6 on the host computer, you alsomust install version 8.6 of the Real-Time Module software on cRIO-901xtargets. The Real-Time Module 8.6 updates the operating system oncRIO-901x targets from VxWorks 6.1 to VxWorks 6.3. Some functions inVxWorks 6.3 are not compatible with VxWorks 6.1. If you use customC code in a LabVIEW application running on a cRIO-901x target, you mustrecompile the .OUT files for VxWorks 6.3. Refer to the NI Web site at/info and enter the info code rtvx for more information.Front Panel:Open Method ErrorIn the Real-Time Module 8.2.1 and earlier, the Front Panel:Open methodfailed without returning an error. The FP.Open method now returnserror53.Real-Time Module ExamplesUse the NI Example Finder, available by selecting Help»Find Examplesfrom LabVIEW, to browse or search for RT example VIs. You also canaccess example VIs from the labview\examples\Real-Time directory. Known Issues with the Real-Time Module 8.6Refer to the readme_RT.html file on the LabVIEW 8.6 Real-TimeModule installation CD for information about known issues with theReal-Time Module 8.6.You also can launch the readme_RT.html file from Windows after youinstall the Real-Time Module. Complete the following steps to access thereadme_RT.html file from Windows.1.Select Start»All Programs»National Instruments»LabVIEW 8.6»Readme to open the labview\readme directory.The labview\readme directory contains the HTML readme files forLabVIEW and any installed LabVIEW modules and add-ons.2.Double-click readme_RT.html to open the LabVIEW Real-TimeModule Readme.Real-Time Module Release and Upgrade National Instruments, NI, , and LabVIEW are trademarks of National Instruments Corporation.Refer to the Terms of Use section on /legal for more information about NationalInstruments trademarks. Other product and company names mentioned herein are trademarks or tradenames of their respective companies. For patents covering National Instruments products, refer to theappropriate location: Help»Patents in your software, the patents.txt file on your CD, or/patents.© 2000–2008 National Instruments Corporation. All rights reserved.371374E-01June08。
LabVIEW8.5中文专业版安装破解过程

LabVIEW8.5中文专业版安装破解过程第一篇:LabVIEW8.5中文专业版安装破解过程安装和破解步骤说明:此文件是persebe根据网络上网友的建议以及自己的实验得出的安装步骤。
注意:安装完成后会提示在重启电脑之前不要运行LabVIEW,就按提示来,具体为什么我也不清楚,貌似NI的软件都这样(比如Multisim)。
一般按照安装-----破解----重启电脑-----再运行LabVIEW这个顺序来!!1,运行labview_85_ch.exe文件,进行自解压和安装,在解压由用户确定解压后的暂存文件存放目录,不是安装的目标文件路径;2,在安装过程中会要求你选择是安装试行版本还是正式版本,选择正式版本,这时要求输入产品序列后,用KeyGen.exe产生的序列后填入,进入正式安装模块硬件驱动步骤;3,安装完成后,会在目标路径和C:Program FilesNational InstrumentsSharedLicense ManagerLicenses产生旧的试运行版本的许可证文件,用户只对C盘下的许可证文件破解即可;4,运行KeyGen.exe文件,每次选择一个选择项,然后点击Create License File按钮产生许可证文件去覆盖相应的c盘目录小的许可证文件。
例如,选择“ProfessionalDevelopment system with MathScript"项,再点击“Greater license File...”按钮产生许可证文件覆盖C:Program FilesNational InstrumentsSharedLicenseManagerLicensesLabVIEW_PDSMD_P KG_080500.lic文件,用Remote Panels项产生文件覆盖相同目录下的LV_RemotePanelConnection.lic文件,由于破解的许可证不全,因此用户得不到所有文件的许可证授权,不可主要的已经得到。
LabVIEW8.6中文破解版安装方法
下载
点击下边下载相关程序:
labview8.6下载(中文版)
LabVIEW8.6下载(英文版)
LabvIEW8.6下载(德文版)
LabvIEW8.6下载(法文版)
LabvIEW8.6下载(日文版)
LabvIEW8.6下载(韩文版)
NI DAQ(新加数据采集系统,包括很多硬件的驱动程序)
LabVIEW8.6注册机
下载上边的两个程序,大概需要两个半个钟头吧(400k/s左右的速度)!
2.准备
双击
出现下边的界面
单击,会在的空白出现数字,
点击,然后点击出现
在“文件名”中输入个名字(我这里输入“lab”),然后把该文件放在C盘别的目录下(不要放在桌面,我放在c盘主目录)否则会出错。
3.安装
双击运行见到“下一步”就点……直到出现需要输入SERIAL NUMBER时单击右键选“粘贴”,单击“下一步”,完成安装。
需要注意的是到最后的时候不需要激活,点“完成”就可以了。
4.破解
运行“NI许可证管理器”-“选项”-"安装许可证文件",如下:
好了,可以尽享虚拟世界的快乐了……O(∩_∩)O~。
labview入门教程
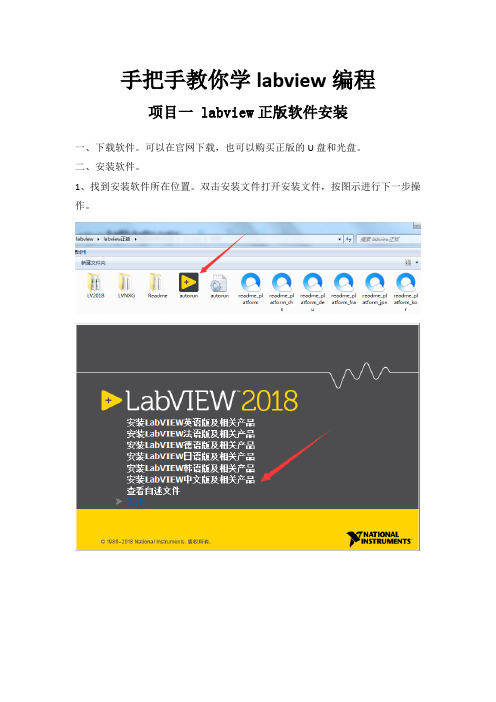
手把手教你学labview编程项目一 labview正版软件安装一、下载软件。
可以在官网下载,也可以购买正版的U盘和光盘。
二、安装软件。
1、找到安装软件所在位置。
双击安装文件打开安装文件,按图示进行下一步操作。
查看自己电脑的版本:鼠标选中桌面上的计算机图标,右键点击属性。
查看自己的电脑是32位系统还是64位系统。
我的电脑是32位操作系统所以选择的是labview中文版,32位。
点击下一步进行下一步操作。
等待安装完成,安装文件较多,可能要等待的时间较久。
点击下一步重启电脑完成安装。
三、labview软件注册1、点击电脑开始菜单,再点击所有程序,找到NI许可证管理器。
2、单击打开许可证管理器,点击激活软件3、在弹出的窗口输入账号密码登录,没有账号点击创建账号注册NI用户账号。
4、登录后在相应的地方输入产品的序列号进行激活。
软件激活后便可以正常使用。
项目二 labview破解版软件安装一、下载数据包。
在网上搜索labview 2018破解版,下载相应的安装数据包,下载后进行解压。
二、软件安装。
1、双击运行2018LV-WinChn进行安装。
2、选择数据保存位置,建议选择默认,点击Unzip。
3、进入安装向导,点击“下一步”。
安装过程弹出安装Labview硬件支持,点击不需要支持,破解版暂时没办法解决硬件支持问题。
如果需要使用硬件请下载正版激活。
这里可以重启,也可以稍后重启,安装完后先不要打开软件。
三、软件破解。
1、回到刚才下载的数据包中,运行破解程序“NI License Activator 1.2”右键选择所有需要激活的地方,点activate进行激活。
2、当全部变为绿色表示破解成功。
3、运行软件即可正常使用。
项目三两个数值相加一、新建VI。
双击打开Labview软件。
在弹出的窗口点击创建项目,按以下图示进行下一步操作完成VI创建。
创建完成后会有前面板和程序框图两个窗口。
前面板主要用来放置控件,程序框图用来编写程序。
labview_8.5安装教程(最强)
LabVIEW8.5安装教程(免费版)1、双击LabVIEW8.5中文版图标如图1所示。
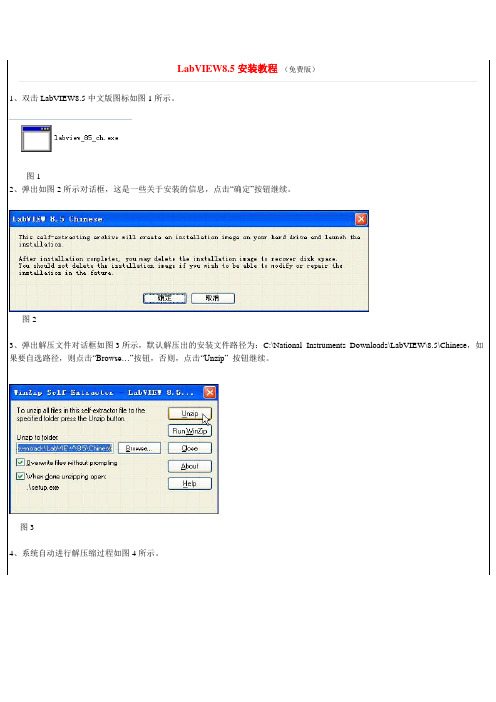
图12、弹出如图2所示对话框,这是一些关于安装的信息,点击“确定”按钮继续。
图23、弹出解压文件对话框如图3所示,默认解压出的安装文件路径为:C:\National Instruments Downloads\LabVIEW\8.5\Chinese,如果要自选路径,则点击“Browse…”按钮,否则,点击“Unzip” 按钮继续。
图34、系统自动进行解压缩过程如图4所示。
图45、解压完成后弹出如图5所示对话框,告诉你498个文件被成功地解压,点击“确定”按钮继续。
图56、系统进行安装程序的初始化,界面如图6所示。
图67、初始化完成弹出安装向导如图7所示,点击“下一步”按钮继续。
图77.1、弹出图7.1,全名及单位可以随便写,选择“通过序列号安装NI LabVIEW 8.5”图7.17.2、回到下载的安装文件目录下,将keygen.rar解压缩,得到KetGen.exe,如下图7.2左。
然后点击双击打开KeyGen.exe,弹出图7. 2右,然后点击“Generrate”产生serial number,点击“Copy”;图7.2左图7.2右7.3、选择“Full Development System with mathScript”,点击“Create license file”,弹出图7.3右,然后随便起个名字,如“3”保存到C盘目录下(一定要保存在C下)。
图7.3左图7.3右8、然后回到安装界面,如下。
单选“通过序列号安装LabVIEW8.5”,然后Ctrl+V将“Copy的serial number”复制到序列号选项中,点击“下一步”按钮继续;图89、采用默认的安装路径安装路径:(C:\Program Files\National Instraments\LabVIEW8.5\),点击“下一步”按钮继续;图910、弹出“选择组件”对话框如图10所示,点击“下一步”按钮继续。
LabVIEW安装指南说明书
LabVIEW Platform Media
• Insert the LabVIEW Platform media and follow the onscreen instructions. • When prompted, enter the serial number for each product you want to activate.
© 2012–2014 National Instruments All rights reserved.
375842C-01
Jun14
2 Install NI Device Nhomakorabearivers
NI Device Drivers
• Insert the NI Device Drivers media when the installer prompts you to Install Hardware Support or after LabVIEW finishes installing.
Platform media for information about protecting existing VIs and projects before installing a new version of LabVIEW.
1 Install LabVIEW, Modules, and Toolkits
For answers to common questions about installing LabVIEW and NI device drivers, refer to / gettingstarted or the LabVIEW Installation Troubleshooting Guide (troubleshooting_guide.html) on the LabVIEW Platform media.
LabView_8.下载、安装、破解及序列号、激活码生成方法
下载
点击下边下载相关程序:
labview8.6下载(中文版)
LabVIEW8.6下载(英文版)
LabvIEW8.6下载(德文版)
LabvIEW8.6下载(法文版)
LabvIEW8.6下载(日文版)
LabvIEW8.6下载(韩文版)
NI DAQ(新加数据采集系统,包括很多硬件的驱动程序)
LabVIEW8.6注册机
下载上边的两个程序,大概需要两个半个钟头吧(400k/s左右的速度)!
2.准备
双击“”
出现下边的界面
单击“”,会在的空白出现数字,
点击,
然后点击,出现
在“文件名”中输入个名字(我这里输入“lab”),然后把该文件放在C盘别的目录下(不要放在桌面,我放在c盘主目录)否则会出错。
3.安装
双击运行见到“下一步”就点……直到出现需要输入SERIAL NUMBER时单击右键选“粘贴”,单击“下一步”,完成安装。
需要注意的是到最后的时候不需要激活,点“完成”就可以了。
4.破解
运行“NI许可证管理器”-“选项”-"安装许可证文件",如下:
我这里的“许可证文件”为“lab”,单击“打开”就可以了……好了,可以尽享虚拟世界的快乐了……O(∩_∩)O~
破解安装基本过程如下:
QQ群1:83840017
QQ群2:86738634
百度hi群号:1249096(强烈建议)
QQ在线:850523188(联系我)。
LabView_8.6_快速入门教程
II. 虚拟仪器简介
1. 虚拟仪器的概念
bVIEW的编程环镜
1. LabVIEW应用程序的构成 2. LabVIEW的操作选板 3. 善用LabVIEW的联机帮助
IV. LabVIEW的初步操作
1. 编辑前面板 2. 编辑程序框图 3. 运行和停止VI运行 4. 调试VI 5. 牛刀小试
labview的初步操作运行运行连续运行连续运行暂停暂停中止执行中止执行正在运行正在运行高亮执行高亮执行程序开始运行程序开始运行程序开始运行程序开始运行程序语法错误程序语法错误程序语法错误程序语法错误列出错误列出错误单步执行单步执行acompanypursuingexcellenceamp
众达光通科技(苏州)有限公司
➢ LabVIEW帮助 当单击即时帮助窗口中 详 细帮助信息 会弹出相应的完整的帮助信息。 这是一个Windows标准风格的帮助窗口, 包含了LabVIEW全部的帮助信息。你也可 以选择主菜单 帮助 -> 搜索LabVIEW帮助 选项打开它。
A company pursuing excellence & innovation, your faithful partner, and we care.
Confidential 2
LabVIEW概述
★ 什么是LabVIEW?
➢ LabVIEW是实验室虚拟仪器集成环境(Laboratory Virtual Instrument Engineering Workbench)的简称,是美国国家仪器有限公司(National Instruments,简称NI)的创新软件产品,也是目前应用最广、发展最快、功能最 强的图形化软件集成开发环境。
Labview安装教程
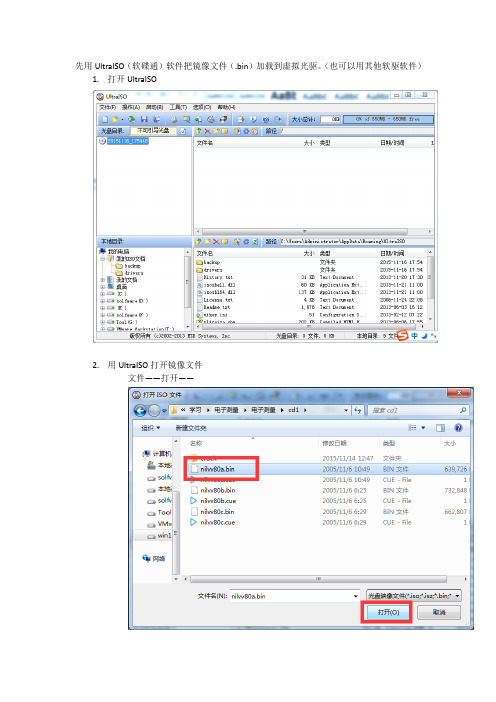
先用UltraISO(软碟通)软件把镜像文件(.bin)加载到虚拟光驱。
(也可以用其他软驱软件)1.打开UltraISO2.用UltraISO打开镜像文件文件——打开——3.打开之后4.加载到虚拟光驱a)点击工具——加载到虚拟光驱——加载b)加载好之后,打开我的电脑,就会看到我们刚刚加载的镜像文件了打开加载的镜像文件(打开上图的CD 驱动器),找到autorun 打开。
点击第一个,开始安装之旅。
点击第二个选项选择安装盘(最好不要安装在C盘)(名字最好改成wssb)接下来我们需要做的就是等待它安装好就ok了。
最重要的环节破解!!打开文件电子测量——crack——Keygen.exe点击generate 获取CID然后点击create license file 生成证书文件保存到你的安装目录下(是一个.lic文件)终于到了最后一步了,安装证书文件。
(win7和win8有一点区别,win10 同win8)Win7:点击开始——所有程序——National Instruments ——NI License ManagerWin8:点击Windows键在方格界面里找到NI License Manager 点击打开就好了如果没找到有,也没关系,随便找到一个图标右键——打开文件位置这时候路径选择到start menu ——程序——National Instruments——NI License Manager (所以说win8 真的是很坑很坑,还是win7用起来方便很多很多)打开好了的界面点击选项——安装许可证文件找到刚才生成的.lic 文件安装,就完成了破解工作。
到此所有的安装完毕,尽情享受吧!!。
NI LabVIEW安装说明
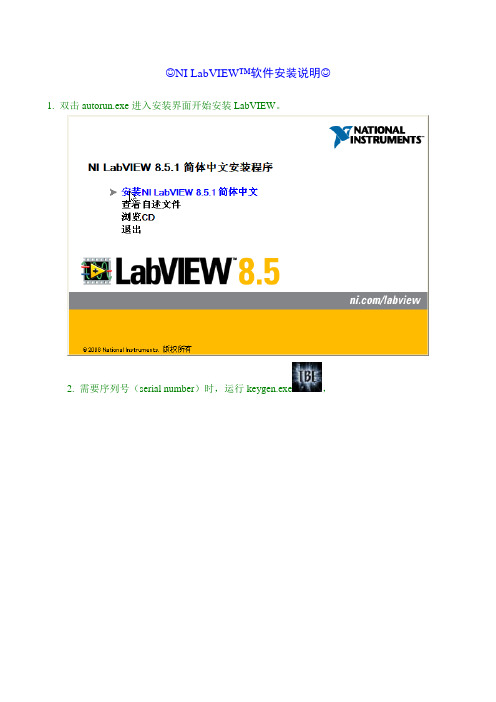
☺NI LabVIEW™软件安装说明☺1. 双击autorun.exe进入安装界面开始安装LabVIEW。
2. 需要序列号(serial number)时,运行keygen.exe,
点击Generate生成序列号,点击Copy复制序列号,粘贴到安装过程的输入框,再点击Create license file...产生一个.lic许可证文件并保存到临时目录(如C:\pro.lic,注意:该临时路径不可含中文,否则提示错误)。
以LabVIEW专业版为例,如要使用其全部功能,需分别选中以下3个选项并各自生成一个许可证文件。
3. NI设备驱动可选择安装(会在LabVIEW安装完成后提示插入设备驱动光盘,若为ISO镜像,可直接载入虚拟光驱使用)或在LabVIEW安装完毕后单独进行。
4. 安装即将完毕时,取消选中安装界面中的“启动激活向导…”复选框
打开NI License manager许可证管理器(位于开始菜单→National Instruments中),选择选项→安装许可证文件,按提示导入第2步的.lic文件。
(或者直接将.lic文件复制到安装目录的National Instruments\Shared\License Manager\Licenses文件夹)
5. 刷新(F5)许可证管理器,确认相应组件前边的方框被绿色充满,表示激活,搞定!重启计算机即可使用。
6. NI其他模块、工具包的安装方法类同!
7. NI软件的许可证管理与本地网络连接有关,如果正常激活过的软件提示许可证过期,请确认本地连接已启用。
******注意:支持正版! keygen仅供个人学习和交流,请于使用后24小时内删除******。
National Instruments LabVIEW 升级说明
LabVIEW升级说明™本升级说明介绍在Windows、Mac OS和Linux平台上将LabVIEW升级至8.6版本的步骤、升级时需考虑的各种问题和LabVIEW 8.6的新增功能。
在新版本的LabVIEW中加载在较早版本LabVIEW中保存的VI之前,请阅读升级说明,了解潜在的兼容性问题。
在新版本的LabVIEW中加载在较早版本LabVIEW中保存的VI时,应考虑为这些文件创建备份。
将LabVIEW 7.1或更早版本升级至LabVIEW 8.6时,请阅读升级说明和下列文档,了解LabVIEW 7.1及更早版本至LabVIEW 8.6的改动、改进和新增功能。
•LabVIEW 8.0升级说明-升级和兼容性问题部分和LabVIEW 8.0 新功能及更改部分为升级用户提供了重要信息。
请登录NI网站/info并输入信息代码upnote8查看LabVIEW 8.0升级说明。
•LabVIEW 8.2升级说明-升级和兼容性问题部分和LabVIEW 8.2 新功能及更改部分为升级用户提供了重要信息。
请登录NI网站/info并输入信息代码upnote82查看LabVIEW 8.2升级说明。
•LabVIEW 8.5升级说明-升级和兼容性问题部分和LabVIEW 8.5 新功能及更改部分为升级用户提供了重要信息。
请登录NI网站/info并输入信息代码upnote85查看LabVIEW 8.5升级说明。
关于LabVIEW 8.6的功能、LabVIEW编程理论、LabVIEW使用分步指导以及VI、函数、选板、菜单、工具、属性、方法、事件、对话框的参考信息,见LabVIEW帮助。
LabVIEW帮助中还列出了NI提供的各种LabVIEW文档资源。
选择帮助»搜索LabVIEW帮助,可打开LabVIEW帮助。
目录升级至LabVIEW 8.6 (2)转换VI (3)升级模块、工具包和仪器驱动 (3)升级附加的NI软件 (5)从上一个LabVIEW版本升级 (5)升级和兼容性问题 (6)从LabVIEW 8.5升级 (6)远程前面板许可证升级(Windows) (8)应用程序生成器的相同组成部分 (8)从LabVIEW 8.2升级 (8)从LabVIEW 8.0升级 (13)从LabVIEW 7.x升级 (17)从LabVIEW 6.x升级 (29)从LabVIEW 5.x或更早版本升级 (32)LabVIEW 8.6新增功能及改动 (32)安装LabVIEW (32)LabVIEW文档 (32)新增VI范例 (32)LabVIEW 升级说明/china程序框图的改进......................................................................................................................................33前面板的改进..........................................................................................................................................34编程环境的改进......................................................................................................................................34新增和更改的VI 和函数,以及节点的改进...................................................................................36新增类、属性、方法和事件................................................................................................................40自动整理程序框图..................................................................................................................................40使用快速放置功能放置对象................................................................................................................40编辑多个对象的属性.............................................................................................................................41LabVIEW Web 服务(Windows, 基础软件包中未包括).....................................................41NI 分布式系统管理器............................................................................................................................41LabVIEW MathScript 的改进(基础软件包中未包括).........................................................41处理定点数的上溢..................................................................................................................................43合并LLB (基础软件包中未包括) (44)升级至LabVIEW 8.6如要从上一个LabVIEW 版本进行升级,请先阅读本节内容及升级和兼容性问题中的升级至LabVIEW 8.6和从LabVIEW x.x 升级,x.x 指尚未升级的LabVIEW 版本号。
Labview 安装说明
Labview 安装说明
1.正常安装。
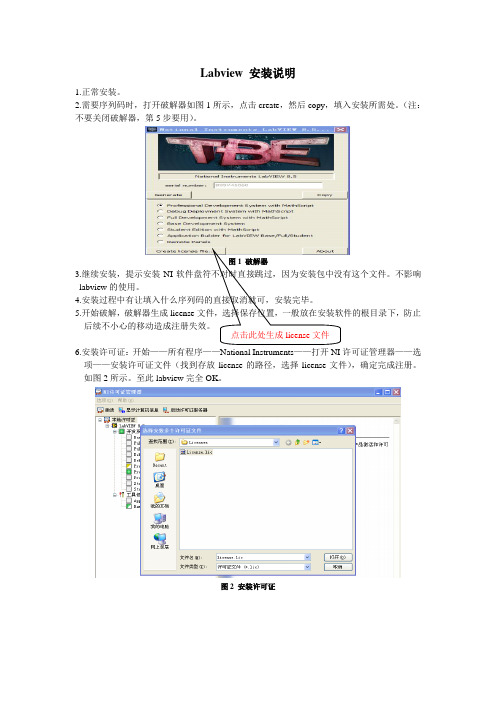
2.需要序列码时,打开破解器如图1所示,点击create ,然后copy ,填入安装所需处。
(注:不要关闭破解器,第5步要用)。
图1 破解器
3.继续安装,提示安装NI 软件盘符不对时直接跳过,因为安装包中没有这个文件。
不影响labview 的使用。
4.安装过程中有让填入什么序列码的直接取消就可,安装完毕。
5.开始破解,破解器生成license 文件,选择保存位置,一般放在安装软件的根目录下,防止后续不小心的移动造成注册失效。
6.安装许可证:开始——所有程序——National Instruments ——打开NI 许可证管理器——选项——安装许可证文件(找到存放license 的路径,选择license 文件),确定完成注册。
如图2所示。
至此labview 完全OK 。
图2 安装许可证
点击此处生成license 文件。
labview教程
labview教程LabVIEW是一款强大的图形化编程软件,用于实时数据采集、仪器控制、测量设备、数据处理和分析等应用。
本教程将带你快速入门LabVIEW,介绍一些基本操作和常用功能。
1. 下载和安装LabVIEW软件- 前往官方网站下载最新版本的LabVIEW软件,并按照提示进行安装。
2. 打开LabVIEW并创建一个新的VI(Virtual Instrument)- 打开LabVIEW软件后,点击菜单栏上的"File",选择"New VI"。
- 这将在编辑器中创建一个新的虚拟仪器。
3. LabVIEW界面介绍- LabVIEW的界面主要由菜单栏、工具栏、面板和编辑区组成。
- 菜单栏提供各种功能和选项,例如文件操作、编辑、调试和运行。
- 工具栏包含了常用的操作工具,例如选择、连线和调节大小等。
- 面板是VI的前端界面,用于显示和操作数据。
- 编辑区是VI的主要工作区域,用于构建程序逻辑和连接各种功能模块。
4. 基本操作和函数- 拖拽控件和函数:在工具栏中选择需要的控件或函数,拖拽到面板或编辑区中。
- 连线功能模块:使用鼠标从一个输出端口拖拽线条到另一个输入端口,将功能模块串联起来。
- 配置控件和函数:右键点击控件或函数,选择"Properties"或"Configure"进行参数设置。
- 调试和运行程序:点击编辑器中的运行按钮,或按下快捷键Ctrl+R,运行程序并查看结果。
5. 数据采集和显示- 使用数据采集模块:LabVIEW提供了丰富的数据采集函数和工具,用于连接和读取各种传感器、仪器和设备。
- 配置数据显示:选择适当的图表或指示器,配置其参数和样式,将采集的数据显示在界面上。
6. 仪器控制和操作- 使用仪器控制模块:LabVIEW支持与各种仪器进行通信和控制,例如示波器、多用途数据采集卡等。
- 配置仪器控制:选择合适的仪器控制函数,配置通信接口和命令参数,实现对仪器的操作和控制。
- 1、下载文档前请自行甄别文档内容的完整性,平台不提供额外的编辑、内容补充、找答案等附加服务。
- 2、"仅部分预览"的文档,不可在线预览部分如存在完整性等问题,可反馈申请退款(可完整预览的文档不适用该条件!)。
- 3、如文档侵犯您的权益,请联系客服反馈,我们会尽快为您处理(人工客服工作时间:9:00-18:30)。
下载
点击下边下载相关程序:
labview8.6下载(中文版)
LabVIEW8.6下载(英文版)
LabvIEW8.6下载(德文版)
LabvIEW8.6下载(法文版)
LabvIEW8.6下载(日文版)
LabvIEW8.6下载(韩文版)
NI DAQ(新加数据采集系统,包括很多硬件的驱动程序)
LabVIEW8.6注册机
下载上边的两个程序,大概需要两个半个钟头吧(400k/s左右的速度)!
2.准备
双击“”
出现下边的界面
单击“ ”,会在的空白出现数字,
点击,
然后点击,出现
在“文件名”中输入个名字(我这里输入“lab”),然后把该文件放在C盘别的目录下(不要放在桌面,我放在c盘主目录)否则会出错。
3.安装
双击运行见到“下一步”就点……直到出现需要输入SERIAL NUMBER时单击右键选“粘贴”,单击“下一步”,完成安装。
需要注意的是到最后的时候不需要激活,点“完成”就可以了。
4.破解
运行“NI许可证管理器”-“选项”-"安装许可证文件",如下:
我这里的“许可证文件”为“lab”,单击“打开”就可以了……好了,可以尽享虚拟世界的快乐了……O(∩_∩)O~
简单地说就是:
1、下载安装程序包和Labview8.6 keygen.exe(TBE版本)
2、keygen.exe 点击Generate生成一个序列号,用于安装过程中使用。
3、安装完成后使用keygen.exe的Create license file生成一个Lic文件,保存到程序安装目录下,注意:要保存到非中文路径的目录下,才能保存成功。
4、点击电脑的开始->程序->National Instrument ->NI License Manager ->选项->安装许可证文件,找到刚才生成的Lic文件添加即可。
