中文版Photoshop CS短期培训教程10
中文版Photoshop CS5完全自学一本通

9.4.1创建图层组 9.4.2将图层移入或移出图层组 9.4.3取消图层组
9.6.1设计分析 9.6.2制作步骤
9.7.1本章小结 9.7.2举一反三——三折页的设计
10.1设置图层的混 合效果
10.2应用图层样式
10.3使用“样式” 面板
10.4填充和调整图 层
10.5使用智能对象 10.6使用智能滤镜
4.3.1了解前景色和背景色 4.3.2使用“拾色器”对话框 4.3.3使用“颜色库”对话框 4.3.4使用“吸管工具”选取颜色 4.3.5使用“颜色”面板 4.3.6使用“色板”面板
4.4.1使用“填充”命令 4.4.2使用“油漆桶工具” 4.4.3使用“渐变工具”
4.5.1设计分析 4.5.2制作步骤
5
9.5使用“图 层复合”面板
9.6实例:制作 杂志封面
9.7总结扩展
9.1.1什么是图层 9.1.2 “图层”面板 9.1.3图层的类型
9.2.1在“图层”面板中创建新图层 9.2.2使用命令创建新图层 9.2.3创建背景图层 9.2.4将背景图层转换为普通图层
9.3.1选择图层 9.3.2移动、复制和删除图层 9.3.3调整图层的叠放顺序 9.3.4锁定图层 9.3.5链接图层 9.3.6栅格化图层 9.3.7对齐图层 9.3.8合并图层 9.3.9盖印图层
1.2.1位图图像 1.2.2矢量图像
1.3.1 Photoshop CS5的系统要求 1.3.2安装Photoshop CS5 1.3.3启动Photoshop CS5
1.4.1更加出色的媒体管理 1.4.2跨平台性能 1.4.3轻松完成复杂选择 1.4.4内容识别填充 1.4.5操控变形 1.4.6混合器画笔 1.4.7镜头校正 1.4.8出众的HDR成像 1.4.9轻松实现3D凸出
PS培训课程
课程:图形处理软件:Photoshop cs2教学纲要第一节:Photoshop 基本操作1.启动Photoshop●使用Windows的“开始”/程序/Photoshop。
●使用快捷方式图标启动Photoshop,现在Windows桌面上建立一个快捷方式图标,以后双击该图标即可打开Photoshop。
●打开扩展名为.PSD文件的同时,启动Photoshop。
2.认识工作界面、工具箱标题栏、菜单栏、选项栏、工具箱、图像窗口、调板、工作区、状态栏等项●选择“窗口/工作区/复位调板位置”命令,可以将调板恢复至默认的状态。
●色彩控制工具:设定前景色和背景色,单击切换按钮或X键进行互换;单击初始化可以使前景色和背景色恢复到黑白状态。
Alt+Del——填充前景色Ctrl+Del ——填充背景色●模式工具:标准模式和快速蒙板状态,Q键进行切换●屏幕显示工具:标准窗口、全屏显示、全屏隐藏,F键进行切换。
●跳转工具:可以激活并且切换到设顶的图像编辑程序。
Photoshop CS中为ImageReady CS。
3.文件的存取1)打开已有的文件或图像●执行“文件”菜单中的OPEN命令●执行Ctrl+O快捷键命令●双击Photoshop主窗口工作区,即可打开“打开”对话框。
●在“查找范围”选定文件夹,选择“文件类型”●在“打开”对话框中,双击文件名列表中的文件名即可打开该文件。
●打开多个连续的文件,单击一个文件,然后按下Shift单击末尾文件。
●打开多个不连续的文件,在选中的文件后按下Ctrl,继续选择其他的文件。
●执行“文件”菜单还可以选择“最近打开的文件”。
2)创建新文件1.执行“文件”菜单的NEW命令或按下“Ctrl+N”,弹出对话框。
2.在对话框中输入“名称”,如不输入则使用默认名称(未标题-1、未标题-2、…)。
3.然后在图像的“预设栏”中设置图像的宽度、长度、分辨率和模式。
通常先选定长度单位,再设置数值。
中文版Photoshop CC 2018基础培训教程(全彩版

10.1文字的输入与 编辑
10.2创建变形文字 与路径文字
课堂练习——制作促 销贴
课后习题——制作摄 影书籍封面
1
11.1通道的操 作
2
11.2通道运算
3
11.3通道蒙版
4
11.4图层蒙版
5
11.5剪贴蒙版 与矢量蒙版
课堂练习—— 制作合成特效
课后习题—— 更换背景效果
12.1滤镜菜单及应 用
5.1修复与修 补工具
2
5.2修饰工具
3
5.3擦除工具
4
课堂练习—— 制作风景插画
5
课后习题—— 制作贴图效果
6.2图像的移动、 复制和删除
6.1图像编辑工具
6.3图像的裁切和 图像的变换
课堂练习—— 绘制音乐调节
器
课后习题—— 制作产品手提 袋
7.1绘制图形 7.2绘制和选取路径
7.3创建3D图形 7.4使用3D工具
12.2滤镜使用技巧
课堂练习——制作特 效花朵
课后习题——制作淡 彩钢笔画效果
13.1制作时钟图标
课堂练习1——制作 相机图标
课堂练习2——制作 看图图标
课后习题1——制作 手机APP界面1
01
课后习题 2——制作 手机APP界 面2
02
13.2制作 阳光情侣模 板
03
课堂练习 1——制作 大头贴照片 模板
中文版Photoshop CC 2018 基础培训教程(全彩版
读书笔记模板
01 思维导图
03 目录分析 05 读书笔记
目录
02 内容摘要 04 作者介绍 06 精彩摘录
思维导图
本书关键字分析思维导图
Photoshop基础实用教程全册教案
Photoshop基础实用教程全册教案第一章:Photoshop基础知识1.1 教学目标了解Photoshop的界面布局和工作原理学会使用工具箱和选项栏掌握图像的基本操作方法1.2 教学内容Photoshop的界面布局工具箱的基本工具及其功能选项栏的设置和使用图像的基本操作(打开、保存、关闭等)1.3 教学步骤1. 介绍Photoshop的界面布局,包括菜单栏、工具箱、选项栏、面板等。
2. 讲解工具箱中的基本工具,如选择工具、裁剪工具、画笔工具等,并演示其使用方法。
3. 介绍选项栏的设置和使用,如画笔的大小、硬度等。
4. 教授图像的基本操作,如打开文件、保存文件、关闭文件等。
1.4 教学评价学生能够熟练操作Photoshop界面学生能够使用工具箱中的基本工具进行操作学生能够设置和使用选项栏第二章:选择工具和遮罩2.1 教学目标学会使用选择工具进行图像的选择掌握遮罩的概念和应用2.2 教学内容选择工具的使用方法,包括套索工具、魔术棒工具等遮罩的创建和编辑,包括快速遮罩、调整边缘等2.3 教学步骤1. 介绍选择工具的使用方法,演示套索工具和魔术棒工具的选择操作。
2. 讲解遮罩的概念和应用,演示快速遮罩和调整边缘的使用方法。
2.4 教学评价学生能够熟练使用选择工具进行图像选择学生能够理解遮罩的概念并应用遮罩进行图像编辑第三章:图像的基本编辑3.1 教学目标学会使用Photoshop编辑图像,包括裁剪、旋转、翻转等3.2 教学内容图像的裁剪方法,包括裁剪工具和切片工具图像的旋转和翻转方法,包括旋转工具和自由变换3.3 教学步骤1. 介绍裁剪工具和切片工具的使用方法,演示图像的裁剪操作。
2. 讲解旋转工具和自由变换的使用方法,演示图像的旋转和翻转操作。
3.4 教学评价学生能够熟练使用裁剪工具和切片工具进行图像裁剪学生能够使用旋转工具和自由变换进行图像旋转和翻转第四章:图层的基本操作4.1 教学目标学会使用图层进行图像编辑,包括图层的创建、删除、隐藏等4.2 教学内容图层的创建和删除方法,包括新建图层、删除图层图层的隐藏和显示方法,包括隐藏图层、显示图层4.3 教学步骤1. 介绍新建图层和删除图层的使用方法,演示图层的创建和删除操作。
photoshop cs 教程
photoshop cs 教程
以下是Photoshop CS的一些基础教程:
1. 配置工作环境:打开Photoshop CS后,你需要了解和配置工作环境。
可以选择预设的工作环境或自定义自己的工作环境。
2. 图像调整:学习如何调整图像的亮度、对比度、色彩饱和度等。
可以使用调整图层或调整工具来实现。
3. 图层操作:学习如何创建、编辑和组织图层。
掌握图层的不透明度、混合模式、蒙版等属性的使用。
4. 选择工具:了解如何使用选择工具精确选择图像中的特定区域。
学习不同的选择工具,并掌握它们的使用方法。
5. 修复图像:学习如何修复图像中的缺陷,如去除红眼、修复瑕疵和划痕。
6. 文字处理:学习如何在图像中添加和编辑文字。
掌握文字工具的使用,以及文字的对齐、描边和阴影效果。
7. 滤镜效果:了解Photoshop CS中各种滤镜效果的使用方法。
学习如何应用滤镜来改变图像的外观和风格。
8. 图像合成:学习如何使用图层蒙版和透明度来合并多个图像。
掌握图像合成的技巧和方法。
9. 图像导出:了解如何将图像导出为不同的文件格式,并掌握不同导出选项的使用方法。
10. 学习资源:利用网络上的教程、视频和练习项目来提高你的Photoshop CS技能。
参加培训课程或认证考试也是提升技能的好途径。
希望以上教程能够帮助你入门Photoshop CS,并逐渐掌握更高级的技巧和功能。
不断练习和尝试新的技术,你会逐渐成为一名熟练的图像编辑者!。
photoshop基础学习教程教案初学者入门课件
Photoshop基础学习教程教案PPT 初学者入门课件第一章:Photoshop概述1.1 课程目标了解Photoshop的基本概念和功能熟悉Photoshop的工作界面和基本操作1.2 教学内容Photoshop简介Photoshop的应用领域工作界面介绍图像基本概念1.3 教学过程1. 导入:展示Photoshop的实例作品,激发学生的兴趣2. 讲解:详细介绍Photoshop的基本概念和功能3. 演示:展示Photoshop的工作界面和基本操作4. 练习:学生自行尝试操作Photoshop,熟悉工作界面1.4 课后作业学生自行寻找一张图片,尝试在Photoshop中打开并简单编辑第二章:Photoshop基本操作2.1 课程目标掌握Photoshop的基本操作,包括文件管理、图像选择、图像移动等2.2 教学内容文件管理:新建、打开、保存、关闭文件图像选择:选框工具、套索工具、魔棒工具等图像移动:移动工具、变换工具等2.3 教学过程1. 讲解:详细介绍Photoshop的基本操作2. 演示:展示Photoshop的基本操作实例3. 练习:学生自行尝试操作Photoshop,熟悉基本操作2.4 课后作业学生自行找一张图片,尝试使用选框工具选择图像并进行移动第三章:图像编辑3.1 课程目标学会使用Photoshop编辑图像,包括裁剪、调整大小、旋转等3.2 教学内容裁剪工具:裁剪图像、自由裁剪、透视裁剪等调整图像大小:图像大小、画布大小旋转图像:旋转、翻转、扭曲等3.3 教学过程1. 讲解:详细介绍Photoshop图像编辑的相关工具和功能2. 演示:展示Photoshop图像编辑的实例3. 练习:学生自行尝试操作Photoshop,进行图像编辑3.4 课后作业学生自行找一张图片,尝试使用裁剪工具进行裁剪,并调整图像大小和旋转第四章:图层的基本概念与应用4.1 课程目标掌握图层的概念和基本操作,了解图层在Photoshop中的重要性4.2 教学内容图层的概念:图层的概念、图层的分类图层基本操作:新建图层、删除图层、隐藏图层、锁定图层、合并图层等图层应用实例:图层蒙版、图层样式、图层过滤等4.3 教学过程1. 讲解:详细介绍图层的概念和基本操作2. 演示:展示图层应用的实例3. 练习:学生自行尝试操作Photoshop,熟悉图层的基本操作4.4 课后作业学生自行找一张图片,尝试创建新图层并进行简单的编辑第五章:色彩调整与修饰5.1 课程目标学会使用Photoshop调整图像色彩,包括亮度、对比度、色阶等掌握Photoshop的基本修饰工具,如橡皮擦、仿制图章等5.2 教学内容色彩调整:亮度/对比度、色阶、曲线、色相/饱和度等基本修饰工具:橡皮擦、仿制图章、修补工具等5.3 教学过程1. 讲解:详细介绍Photoshop色彩调整和修饰工具的使用方法2. 演示:展示Photoshop色彩调整和修饰的实例3. 练习:学生自行尝试操作Photoshop,进行色彩调整和修饰5.4 课后作业学生自行找一张图片,尝试使用Photoshop调整色彩,并使用基本修饰工具进行修饰第六章:路径的创建与编辑6.1 课程目标学会使用Photoshop创建和编辑路径,理解路径的概念和应用6.2 教学内容路径的概念和类型:矢量路径、像素路径钢笔工具:创建路径、调整路径、锚点编辑路径选择工具:选择路径、调整路径路径应用:将路径转换为选区、填充路径、描边路径6.3 教学过程1. 讲解:详细介绍路径的概念和Photoshop中的路径工具2. 演示:展示路径的创建和编辑实例3. 练习:学生自行尝试操作Photoshop,练习路径的创建和编辑6.4 课后作业学生自行创作一幅简单的矢量插画,使用路径工具进行创作。
Photoshop基础培训教程(2024)

Exposure
模拟胶片摄影的滤镜软件,提供多种胶片模拟预设和 调整工具。
2024/1/30
25
创意合成和后期处理技巧
01
02
03
04
图层蒙版
使用图层蒙版将不同的图像或 滤镜效果进行合成,实现创意
效果。
调整图层
通过调整图层对图像进行色彩 、亮度、对比度等调整,不破
坏原图信息。
色彩平衡与替换
利用色彩平衡工具调整图像色 彩,或使用色彩替换工具实现
特定颜色的替换。
细节增强与降噪
使用锐化工具增强图像细节, 或使用降噪工具减少图像噪点
。
2024/1/30
26
2024/1/30
THANKS
感谢观看
27
插值方法
选择合适的插值方法,如 “双三次插值”或“最近 邻插值”,以获得更好的 图像质量。
2024/1/30
12
裁剪、旋转和变形操作指南
裁剪工具
使用裁剪工具可以裁 剪掉图像中不需要的 部分,同时可以通过 调整裁剪框的大小和 位置来重新构图。
旋转画布
通过菜单栏中的“图 像”-“旋转画布”选 项,可以将整个图像 旋转90度、180度或 任意角度。
2024/1/30
霓虹灯文字特效
运用色彩搭配和滤镜功能制作霓虹灯 文字效果。
金属质感文字特效
利用渐变、图层样式和滤镜制作金属 质感文字。
22
06
滤镜效果与创意实现
2024/1/Biblioteka 023内置滤镜效果介绍及演示
模糊滤镜
用于柔化图像,减少 细节和对比度,包括 高斯模糊、动感模糊
Photoshop培训教程

Photoshop培训教程Photoshop是一款功能强大的图像处理软件,广泛应用于设计、摄影、艺术等领域。
本教程将介绍Photoshop的基本操作和常用功能,帮助初学者快速入门。
一、界面介绍打开Photoshop,你会看到一个复杂的界面,但不用担心,我们将一一介绍各个部分的功能。
首先是菜单栏,包含了各种功能和选项,如文件、编辑、图像等。
接下来是工具栏,其中包含了各种工具,如画笔、橡皮擦、剪切工具等。
再往下是选项栏,可以根据所选工具的不同,显示对应的选项和设置。
在界面的右侧是图层面板,用于管理图像的各个图层。
最下方是状态栏,显示当前图像的一些信息,如缩放比例、颜色模式等。
二、基本操作1. 新建文件:点击菜单栏的“文件”选项,选择“新建”,可以设置新建文件的尺寸、分辨率等参数。
2. 打开图像:点击菜单栏的“文件”选项,选择“打开”,找到你想要编辑的图像文件并打开。
3. 保存图像:点击菜单栏的“文件”选项,选择“保存”或“另存为”,将图像保存到指定位置。
4. 放大和缩小:使用工具栏中的放大镜和缩小镜工具,点击图像进行放大或缩小。
5. 移动图像:使用工具栏中的手指工具,点击图像并拖动,可以移动图像的位置。
三、常用功能1. 调整图像色彩:点击菜单栏的“图像”选项,选择“调整”子菜单,可以调整亮度、对比度、饱和度等参数,改善图像色彩效果。
2. 裁剪图像:使用工具栏中的裁剪工具,选择你想要保留的部分并裁剪图像。
3. 图层操作:在图层面板中,可以创建、删除、合并图层,调整图层的透明度和混合模式,实现图像的叠加效果。
4. 文字编辑:使用工具栏中的文字工具,在图像上添加文字,并可以调整字体、大小、颜色等属性。
5. 修复图像缺陷:使用工具栏中的修复画笔和修复画笔工具,可以修复图像中的瑕疵、划痕等问题。
6. 滤镜效果:点击菜单栏的“滤镜”选项,选择不同的滤镜效果,如模糊、锐化、风格化等,为图像添加特殊效果。
四、进阶技巧1. 图层蒙版:在图层面板中,点击“添加图层蒙版”按钮,可以通过绘制黑白图像来控制图层的显隐部分。
(完整版)传智播客十天PS公开课课堂笔记
(完整版)传智播客十天PS公开课课堂笔记疯狂十天PS公开课课堂笔记分享第一天:界面构成1 菜单栏2 工具箱3 工具属性栏4 悬浮面板5 画布ctrl + N 新建对话框(针对画布进行设置)打开对话框:ctrl + O (字母)画布三种显示方式切换:F隐藏工具箱,工具属性栏,悬浮面板:TAB缩放工具:Z切换到:暂时切换到满画面显示:ctrl + 0 (数字)按住空格:暂时切换到抓手(移动画布)LOGO:标志效果分析思路:1 构图2 配色网格:ctrl + " (参考线的单位,必须和画面的单位统一)调节网格大小:ctrl +K (首选项) ---- ctrl + 6 (参考线网格和切片)调出辅助线:ctrl +R(标尺) --- 鼠标左键按住拖拽得到辅助线移动工具:V选区:控制操作的范围。
ctrl + TAB: 切换当前软件中所打开的画布。
规则选区:矩形选框工具(椭圆选框工具)M调出隐藏工具的方法:在相应有隐藏工具的工具上--- 按鼠标右键调出。
1:用shift可以约束到正方形or 正圆。
2:以鼠标落点为中心:alt1 +2 = 绘制以鼠标落点为中心正方形or 正圆。
快捷键切换隐藏工具:shift + 相应工具的快捷键前景色:alt + 回格(退格)背景色:ctrl+ 回格恢复到默认的前景色背景色:D前景色和背景色之间进行切换:Xctrl + alt + Z: 撤销操作取消选择:ctrl + D隐藏辅助线:ctrl + ;裁剪工具:C色彩的三大要素:色相,饱和度,明度。
第二天:新建图层的快捷键:ctrl + shift + alt + N切换隐藏工具:shift + 相应工具组的快捷键。
删除图层的方法:1 :直接拖拽要删除的图层到图层面板右下角的垃圾桶位置,直接删除。
2:在V移动工具的状态下,选中要删除掉的图层,按delete进行删除。
3:alt + L + L + L选区的布尔运算:针对已经存在的选区进行编辑。
中文版Photoshop CC+Illustrator CC平面设计实训教程

中文版Photoshop CC+Illustrator CC平面设计实训教程中文版Photoshop CC+Illustrator CC平面设计实训教程》配套教学教案第1讲课时内容:设计软件的基础知识教学目标:掌握位图和矢量图、分辨率、图像的色彩模式和文件格式、页面设置和图片大小、出血、文字转换、印前检查和小样等平面设计基本知识。
教学重点:掌握常用的图像文件格式;掌握对图像的页面、大小、出血等操作。
教学难点:色彩模式的使用和区分。
教学思路:通过讲解位图和矢量图、分辨率、图像的色彩模式和文件格式、页面设置和图片大小、出血、文字转换、印前检查和小样的知识,掌握设计软件的基础知识。
教学手段:(1)通过设计欣赏案例熟悉设计理念和软件功能;(2)通过软件功能解析深入研究软件功能和制作特点。
教学内容:讨论问题:1、Photoshop和Illustrator中转换文字操作的方法?2、常用的图像格式类型?具体内容大纲:1.1 位图和矢量图1.1.1 位图1.1.2 矢量图1.2 分辨率1.2.1 图像分辨率1.2.2 屏幕分辨率1.2.3 输出分辨率1.3 色彩模式1.3.1 CMYK模式1.3.2 RGB模式1.3.3 灰度模式1.3.4 Lab模式1.4 文件格式1.4.1 TIF(TIFF)格式1.4.2 PSD格式1.4.3 AI格式1.4.4 JPEG格式1.4.5 EPS格式1.5 页面设置1.5.1 在Photoshop CC中设置页面1.5.2 在Illustrator CC中设置页面1.6 图片大小1.6.1 在Photoshop CC中调整图像大小1.6.2 在Illustrator CC中调整图像大小1.7 出血1.7.1 在Photoshop CC中设置出血1.7.2 在Illustrator CC中设置出血1.8 文字转换1.8.1 在Photoshop CC中转换文字1.8.2 在Illustrator CC中转换文字1.9 印前检查1.10 小样1.10.1 带出血的小样1.10.2 成品尺寸的小样小结:1.了解图像文件的两大类:位图图像和矢量图形。
Photoshop-CS(PS)基础知识教程(完整版)入门与提高
Photoshop 入门基础Photoshop CS(PS)基础知识教程(完整版)Photoshop入门教程第一课:Photoshop开门十件事AdobePhotoshop 是目前最流行的平面设计软件之一。
可以说,只要你接触平面设计,那么无论早晚,你都要和它打交道。
关于Photoshop,要说的实在太多太多,但不论你想让它成为你的左膀右臂,或者仅仅是用它来做一些最基础的图像处理工作,那么下面的10件事都是你一定要知道的,无论你是个初学者或是已经对它有了一定的了解。
1.快捷键的使用:这是Photoshop基础中的基础,却也是提高工作效率的最佳方法。
快捷键的使用,使你可以将精力更好的集中在你的作品而不是工具面板上。
一旦你能够熟练的使用快捷键,你就可以使用全屏的工作方式,省却了不必要的面板位置,使视野更开阔,最大限度的利用屏幕空间;一些简单的命令可以用键盘来完成,不必分心在工具的选择上,哪怕它只占用了极少的时间,但我们更希望在工作时不被打断。
注意:你应该尽量多使用快捷键,下面的这些快捷键是提高效率的好帮手,但不知为什么很多书中都一带而过,甚至没有提及,请一定要牢牢记住。
Ctrl+J:复制当前图层到一个新层;J:切换到喷枪工具;M:切换到选框工具;[ ]:在当前工具为画笔模式时(包括喷枪、画笔、铅笔、仿制图章历史画笔、橡皮及模糊和加深等工具),依次增减笔头大小;Shift+BackSpace:调出填充对话框。
一开始,你可能无法记住所有的快捷键,可以使用Photoshop的工具提示来帮助你。
方法是打开编辑>预置>常规,选择“显示工具提示”。
这样,当你把鼠标移动到工具面板上时,工具名称和其快捷键就会出现,直到你移走鼠标才会消失.2.无接缝贴图:无论是对3D图像或是网页的制作,无接缝贴图都是很重要的,我们可以在Photoshop中轻易的完成.定制好你的图像后,运行滤镜>其它>位移,在水平和垂直方向上位移,一般设置位移量为图像大小的一半,最重要的是将未定义区域设为折回。
Photoshop 课程教学大纲(完整)

Photoshop 课程教学大纲(完整)的方法与技巧4)修整图像的方法与技巧5)应用实例--修整照片2、重点、难点绘制与修整图像工具的设置和使用、绘制和修整图像的方法和技巧。
3、教学基本要求学生需要掌握绘制和修整图像工具的设置和使用,了解绘制和修整图像的方法和技巧,能够应用所学知识进行实际操作和修整照片。
第五章图层的基本应用1、课程内容1)图层的基本概念2)新建、删除图层3)图层的填充与透明4)图层的叠加模式5)应用实例--图层融合2、重点、难点图层的基本概念、图层的填充与透明、图层的叠加模式。
3、教学基本要求学生需要掌握图层的基本概念,能够新建、删除图层,掌握图层的填充与透明,了解图层的叠加模式,能够应用所学知识进行图层融合的实例操作。
第六章文字处理1、课程内容1)文字工具的使用2)文字的编辑与变形3)字符和段落的属性4)应用实例--设计海报2、重点、难点文字工具的使用、文字的编辑和变形、字符和段落的属性。
3、教学基本要求学生需要掌握文字工具的使用,能够进行文字的编辑和变形,了解字符和段落的属性,能够应用所学知识进行海报设计。
第七章图像的调整与修饰1、课程内容1)色彩平衡的调整2)曲线的调整3)色阶的调整4)亮度/对比度的调整5)应用实例--调整图片2、重点、难点色彩平衡、曲线、色阶和亮度/对比度的调整。
3、教学基本要求学生需要掌握色彩平衡、曲线、色阶和亮度/对比度的调整,能够应用所学知识进行图片调整的实例操作。
第八章滤镜的应用1、课程内容1)滤镜的作用及分类2)应用实例--图像特效处理2、重点、难点滤镜的作用和分类。
3、教学基本要求学生需要了解滤镜的作用和分类,能够应用所学知识进行图像特效处理的实例操作。
第九章绘图与绘制1、课程内容1)绘图工具的使用2)图形的绘制3)应用实例--绘制简笔画2、重点、难点绘图工具的使用、图形的绘制。
3、教学基本要求学生需要掌握绘图工具的使用,能够进行图形的绘制,能够应用所学知识进行简笔画的实例操作。
photoshop课件(免费下载)
中文版Photoshop CS图像处理培训教程
7)面板组
在默认状态下,每一个面板组中的第一个面板为当 前可操作面板,单击相应的面板标签可将该面板置 为当前,单击面板组右侧的“关闭”按钮 将关闭该 组面板;单击“最小化”按钮将收缩面板,只显示 标题栏及标签部分;单击“还原”按钮 则可还原面 板的显示。 选择“窗口”菜单下的面板组命令可以显示或隐藏 相应的面板组。在某一面板上按住鼠标左键不放, 将其拖动至工作界面的空白处释放,可以将该面板 单独拆分出来;将其拖动到其他面板组的面板标签 旁释放则可将其合并到其他面板组中。
中文版Photoshop CS图像处理培训教程
喷绘广告
中文版Photoshop CS图像处理培训教程
5)效果图后期处理
很多逼真的室内或室外建筑效果图场景中 的人物、地面和树木等配景都是经过 Photoshop后期加入的。它可以为室内或室 外模型添加丰富的配景效果。
中文版Photoshop CS图像处理培训教程
1.Photoshop与图像处理
为了使初学者对Photoshop的图像处理功能 有一个较为全面的认识,下面从作品赏析 的角度来了解一下Photoshop在图像处理方 面的应用。
中文版Photoshop CS图像处理培训教程
1)产品形象设计
利用Photoshop强大的绘图功能可以为企业 进行VI设计(标志、名片、便笺和工作牌 等),可以绘制人物、物品、卡通与产品 的形状,并可利用填充、编辑和图层样式 等工具和命令来丰富图像。
中文版Photoshop CS图像处理培训教程
本章导读
Photoshop集设计、图像处理和图像输出于一体, 可以为美术设计人员的作品添加艺术魅力;为摄 影师提供颜色校正和润饰、瑕疵修复以及颜色浓 度调整的绘图、通道、路 径和滤镜等多种图像处理手段,可以设计出灯箱 广告、海报、招贴、宣传画和企业CIS等高质量的 平面作品。本课主要介绍Photoshop CS的启动与 退出、图像文件的基本操作、优化设置Photoshop CS以及一些与Photoshop相关的基本概念,为后面 的学习打下基础。
中文版Photoshop CS6图像处理培训教程
10.1课堂讲解 10.2上机实战
10.3常见疑难解析 10.4课后练习
11.1课堂讲解 11.2上机实战
11.3常见疑难解析 11.4课后练习
12.1课堂讲解 12.2上机实战
12.3常见疑难解析 12.4课后练习
13.1课堂讲解 13.2上机实战
13.3常见疑难解析 13.4课后练习
14.1课堂讲解 14.2上机实战
5.1课堂讲解 5.2上机实战
5.3常见疑难解析 5.4课后练习
6.1课堂讲解 6.2上机实战
6.3常见疑难解析 6.4课后练习
7.1课堂讲解
7.2上机实战
7.3常见疑难解 析
7.4课后练习
8.1课堂讲解
8.2上机实战
8.3常见疑难解 析
8.4课后练习
9.1课堂讲解 9.2上机实战
9.3常见疑难解析 9.4课后练习
感谢观看
这是《中文版Photoshop CS6图像处理培训教程》的读书笔记模板,暂无该书作者的介绍。
读书笔记
这是《中文版Photoshop CS6图像处理培训教程》的读书笔记模板,可以替换为自己的心得。
精彩摘录
这是《中文版Photoshop CS6图像处理培训教程》的读书笔记模板,可以替换为自己的精彩内容摘录。
中文版Photoshop CS6图像 处理培训教程
读书笔记模板
01 思维导图
03 目录分析 05 读书笔记
目录
02 内容摘要 04 作者介绍 06 精彩摘录
思维导图
本书关键字分析思维导图
教程Hale Waihona Puke 应用图像中文版
内容
图像
标识
中文版
图像
结构 课堂
中文版 Photoshop CC 从入门到精通

0 5
第10章通 道与蒙版的 应用
1.1 Photoshop的应用领域 1.2熟悉Photoshop 2020的工作界面 1.3设置工作区 1.4使用辅助工具 1.5数字图像基础 同步训练
2.1文件的基本操作 2.2图像的视图操作 2.3修改图像和画布大小 2.4裁剪图像 2.5拷贝与粘贴图像 2.6撤销/返回/恢复文件 2.7使用“历史记录”面板还原操作 同步训练
实例1制作玻璃金属边框字 实例2制作积雪文字 实例3制作放射光线文字 实例4制作钻石文字 实例5制作卡片文字 实例6制作黄金文字 实例7制作彩色玻璃文字 实例8制作镜面海报文字 实例9制作多彩立体文字
实例1制作快餐店促销海报 实例2制作商场口红广告 实例3制作牙膏宣传海报 实例4制作健身俱乐部宣传单 实例5月饼包装盒平面图 实例6月饼包装盒效果图 实例7制作户外灯箱广告平面图 实例8制作户外灯箱广告效果图 实例9制作公交车站台广告平面图
3.1认识选区 3.2基本选区创建工具 3.3魔棒与快速选择工具 3.4其他创建选区的方法 3.5选区的基本操作 3.6修改与编辑选区 同步训练
4.1认识图层 4.2创建新图层 4.3编辑图层 4.4设置图层效果 4.5应用图层样式 4.6图像变换与变形 4.7合并与盖印图层 同步训练
5.1创建与编辑文字 5.2变形文字与栅格化文字 5.3设置字符与段落样式 5.4创建路径文字 5.5编辑文本 同步训练
目录分析
第1章开启
1
Photoshop设
计之门Βιβλιοθήκη 第2章文件和图 2像的基础操作
3 第3章选区的应
用
4 第4章图层应用
技术
5 第5章文字输入
与设计
0 1
第6章照片 颜色与色调 调整
photoshop基础学习教程教案

Photoshop基础学习教程教案第一章:Photoshop简介1.1 课程目标了解Photoshop的基本概念和功能熟悉Photoshop的工作界面和基本操作1.2 教学内容Photoshop的基本概念和功能Photoshop的工作界面图像的基本概念和基本操作1.3 教学步骤1. 引入话题:介绍Photoshop的重要性和应用领域。
2. 讲解Photoshop的基本概念和功能。
3. 演示Photoshop的工作界面和基本操作。
4. 练习:学生自主操作,熟悉Photoshop的工作界面和基本操作。
第二章:图像的基本操作2.1 课程目标掌握图像的基本操作,包括选择、移动、缩放、旋转和裁剪等。
2.2 教学内容选择工具的使用移动、缩放和旋转图像裁剪图像2.3 教学步骤1. 引入话题:介绍图像的基本操作的重要性。
2. 讲解选择工具的使用,包括矩形选框、套索和魔术棒等。
3. 演示移动、缩放和旋转图像的操作。
4. 讲解裁剪图像的方法和技巧。
5. 练习:学生自主操作,掌握选择工具和图像基本操作。
第三章:图层的基本操作3.1 课程目标掌握图层的基本操作,包括创建、隐藏、显示、复制、删除和调整顺序等。
3.2 教学内容图层的概念和作用图层的创建、隐藏、显示和删除图层的复制和调整顺序3.3 教学步骤1. 引入话题:介绍图层的概念和作用。
2. 讲解图层的创建、隐藏、显示和删除操作。
3. 演示图层的复制和调整顺序的操作。
4. 练习:学生自主操作,掌握图层的基本操作。
第四章:色彩的基本调整4.1 课程目标掌握色彩的基本调整方法,包括色阶、亮度和对比度等。
4.2 教学内容色阶调整亮度和对比度调整色彩平衡调整4.3 教学步骤1. 引入话题:介绍色彩调整的重要性。
2. 讲解色阶调整的方法和技巧。
3. 演示亮度和对比度调整的操作。
4. 讲解色彩平衡调整的方法和技巧。
5. 练习:学生自主操作,掌握色彩的基本调整方法。
第五章:文字的添加和编辑5.1 课程目标掌握文字的添加和编辑方法,包括字体、大小、颜色和位置等。
Photoshop cs 10
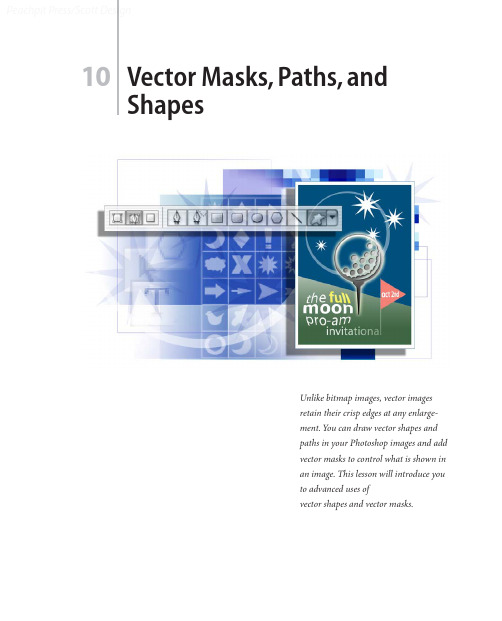
10Vector Masks, Paths, andShapesUnlike bitmap images, vector imagesretain their crisp edges at any enlarge-ment. You can draw vector shapes andpaths in your Photoshop images and addvector masks to control what is shown inan image. This lesson will introduce youto advanced uses ofvector shapes and vector masks.Peachpit Press/Scott DesignPeachpit Press/Scott DesignLESSON 10336Vector Masks, Paths, and ShapesIn this lesson, you’ll learn how to do the following:•Differentiate between bitmap and vector graphics.•Draw and edit layer shapes and layer paths.•Describe and use the thumbnails and link icon for a shape layer.•Create complex layer shapes by combining or subtracting different shapes.•Combine vector paths to create a shape.•Use edit mode to add and edit a text layer.•Use a text layer to create a work path.•Use a work path to create a vector mask.•Load and apply custom layer shapes.This lesson will take at least an hour or an hour and a half to complete. The lesson isdesigned to be done in Adobe Photoshop, but information on using similar functionalityin Adobe ImageReady is included where appropriate.If needed, remove the previous lesson folder from your hard drive, and copy the Lesson10folder onto it from the Adobe Photoshop CS Classroom in a Book CD.Note: Windows 2000 users need to unlock the lesson files before using them. For more infor-mation, see “Copying the Classroom in a Book files” on page 3.Peachpit Press/Scott DesignClassroom in a Book About bitmap images and vector graphicsBefore working with vector shapes and vector paths, it’s important that you understandthe basic differences between the two main categories of computer graphics: bitmapimages and vector graphics. You can use Photoshop or ImageReady to work with eithertype of graphics; moreover, in Photoshop you can combine both bitmap and vector datain an individual Photoshop image file.Bitmap images, technically called raster images, are based on a grid of colors known aspixels. Each pixel is assigned a specific location and color value. In working with bitmapimages, you edit groups of pixels rather than objects or shapes. Because bitmap graphicscan represent subtle gradations of shade and color, they are appropriate for continuous-tone images such as photographs or artwork created in painting programs. A disadvan-tage of bitmap graphics is that they contain a fixed number of pixels. As a result, they canlose detail and appear jagged when scaled up on-screen or if they are printed at a lowerresolution than that for which they were created.Vector graphics are made up of lines and curves defined by mathematical objects calledvectors. These graphics retain their crispness whether they are moved, resized, or havetheir color changed. Vector graphics are appropriate for illustrations, type, and graphicssuch as logos that may be scaled to different sizes.Logo drawn as vector artPeachpit Press/Scott DesignLESSON 10338Vector Masks, Paths, and ShapesGetting startedIn the previous lesson, you learned how to use the Pen tool to create simple shapes andpaths. In this lesson, you’ll learn advanced uses of paths and vector masks to create aposter for a fictitious golf tournament. Y ou’ll learn how to add text to an image by incor-porating the tournament information.You’ll start the lesson by viewing the final image, which is an example of a poster for anearly autumn golf tournament.1Start Adobe Photoshop, holding down Ctrl+Alt+Shift (Windows) orCommand+Option+Shift (Mac OS) to restore the default preferences. (See “Restoringdefault preferences” on page 4.)As messages appear, select Yes to confirm that you want to reset preferences, No to defersetting up your color monitor, and Close to close the Welcome Screen.) to open the File Browser.2On the tool options bar, select the File Browser button ( Array 3In the File Browser Folders palette, go to the Lessons/Lesson10 folder and select thatfolder.4Click the 10Start.psd thumbnail and then Shift-click to select the 10End.psdthumbnail.5On the File Browser menu bar, choose File > Open to open both files in Photoshop.If a notice appears asking whether you want to update the text layers for vector-basedoutput, click Update.Note: The “update text layers” notice might occur when transferring files between computers,especially between Windows and Mac OS.ADOBE PHOTOSHOP CS Classroom in a Book6Select each file in turn and examine the display in the image window and the Layers palette listings. If you wish to do so, you can minimize the 10End.psd file by clicking the appropriate button on the file title bar.7Close the File Browser.Now you’ll start the lesson by creating a new document for the poster.Creating the poster backgroundMany posters are designed to be scalable, either up or down, while retaining a crispness to their appearance. You’ll create shapes with paths and use masks to control what appears in the poster.Adding a colored shape to the backgroundYou’ll begin by creating the backdrop for a poster image.1If the 10Start.psd file is not still open and selected, do that now.Peachpit Press/Scott DesignPeachpit Press/Scott DesignLESSON 10340Vector Masks, Paths, and ShapesSome work on the file has been done for you; the image already contains a backgroundlayer with a green gradient fill and a series of horizontal and vertical guides. The guidesare locked in position. (If you do not see the guides, choose View > Show to open thesubmenu and make sure that the Guides command is checked, or choose it now.)2Choose View > Rulers to display a horizontal and a vertical ruler.3In the Layers palette group, drag the tab for the Paths palette out of the palette group.Since you’ll be using the Layers and Paths palettes frequently in this lesson, it’s convenientto have them separated.4In the Color palette, set the foreground RGB color to a deep blue color by typing 0 asthe R value, 80 as the G value, and 126 as the B value.5On the toolbox, select the Rectangle tool (). Then, in the tool options bar, make surethat the Shape Layers option is selected.6Drag a rectangle from the intersection of the top and leftmost guides to the intersectionof the third horizontal guide (about three-fourths of the way down the image, slightlybelow the 5-inch mark) and the vertical guide near the right margin of the page. Array You’ve created a rectangle with a deep blue fill, set within enough of the edge to form awhite border. (If you don’t get that result, make sure that you’ve selected the Rectangletool—which is below the Type tool on the toolbox—and not the Rectangular Marqueetool. Also, make sure that the Shape Layers option is selected in the tool options bar.)ADOBE PHOTOSHOP CS Classroom in a Book7In the toolbox, select the Direct Selection tool (), hidden under the Path Selection tool (), and click anywhere on the path (edge) of the blue rectangle to select the path, so that selection handles appear in the four corners.8Select the lower left handle of the blue shape, being careful to select just the handle and not a path segment.9Shift+drag the handle upward to the next horizontal guide (at about the four-inch mark on the ruler) and release the mouse button when the handle snaps into place against the guide.Now the lower edge of the blue shape slopes down from left to right.10Choose View > Show > Guides to hide the guides, because you are finished using them for this lesson. Y ou’ll be using the rulers again, so do not hide them yet.11Click anywhere inside or outside the blue rectangle in the image window to deselectthe path and hide its handles.Peachpit Press/Scott DesignPeachpit Press/Scott DesignLESSON 10342Vector Masks, Paths, and ShapesNotice that the border between the blue shape and the green background has a grainyquality. What you see is actually the path itself, which is a non-printing item. This is avisual clue that the Shape 1 layer is still selected.About shape layersA shape layer has two components: a fill and a shape. The fill properties determine thecolor (or colors), pattern, and transparency of the layer. The shape is a layer mask thatdefines the areas in which the fill can be seen and those areas in which the fill is hidden.In the blue layer you’ve just created, the fill is your dark blue color. The color is visible inthe upper part of the image, within the shape you drew, and is blocked in the lower partof the image so that the green gradient can be seen behind it.In the Layers palette for your poster file, you’ll see a new layer, named Shape 1, above theBackground layer. There are three items represented along with the layer name: twothumbnail images and an icon between them.The left thumbnail shows that the entire layer is filled with the deep blue foregroundcolor. The small slider underneath the thumbnail is not functional, but symbolizes thatthe layer is editable.The thumbnail on the right shows the vector mask for the layer. In this thumbnail, whiteindicates the area where the image is exposed, and black indicates the areas where theimage is blocked.ADOBE PHOTOSHOP CS Classroom in a BookThe icon between the two thumbnails indicates that the layer and the vector mask are linked.A. Fill thumbnailB. Layer-masklink icon C. Mask thumbnailSubtracting more shapes from a shape layerAfter you create a shape layer (vector graphic), you can set options to subtract new shapes from the vector graphic. You can also use the Path Selection tool and the Direct Selection tool to move, resize, and edit shapes. You’ll add some stars to your “sky” (the bluerectangle you just created) by subtracting star shapes from the blue shape. To help you position the stars, you’ll refer to the Star Guides layer, which has been created for you. Currently, that layer is hidden.1In the Layers palette, click the box to the far left of the Star Guides layer to display the eye icon () for that layer (but leave the Shape 1 layer selected). The Star Guides layer is now visible in the image window.A B CPeachpit Press/Scott DesignLESSON 10344Vector Masks, Paths, and Shapes2In the Paths palette, make sure that the Shape 1 Vector Mask is selected.3In the toolbox, select the Polygon tool (), hidden under the Rectangle tool (). 4In the tool options bar, select the following:•In Sides, type 9 and press Enter.•Click the Geometry Options arrow (immediately to the left of the Sides option) to open the Polygon Options. Select the Star check box, and type 70% in the Indent Sides By option. Then click anywhere outside the Polygon Options to close it.•Select the Subtract From Shape Area option () or press either hyphen or minus to select it with a keyboard shortcut. The pointer now appears as crosshairs with a small minus sign ().Peachpit Press/Scott Design5Move the crosshairs pointer over the center of one of the white dots and drag outward until the tips of the star rays reach the edge of the faint circle around the dot.Note: As you drag, you can rotate the star by dragging the pointer to the side.When you release the mouse, the star shape appears to fill with white. However, this is not a fill; the star is a cutout from the blue shape, and the white you see is the background layer underneath it. If the background layer were another image, pattern, or color, that’s what you would see inside the star shape.6Repeat Step 5 for the other three white dots to create a total of four stars.Notice that all the stars have grainy outlines, reminding you that the shapes are selected. Another indication that the shapes are selected is that the Shape 1 vector mask thumbnail is highlighted (outlined in white) in the Layers palette.7In the Layers palette, click the eye icon for the Star Guides layer to hide it.Notice how the thumbnails have changed in the palettes. In the Layers palette, the left thumbnail is as it was, but the mask thumbnails in both the Layers palette and Path palette show the slant of the blue shape with the star-shaped cutouts.Vector Masks, Paths, and ShapesDeselecting pathsDeselecting paths is sometimes necessary to see the appropriate tool options bar whenyou select a vector tool. Deselecting paths can also help you view certain effects that mightbe obscured if a path is highlighted. Before proceeding to the next section of this lesson,you’ll make sure that all paths are deselected.1Select the Path Selection tool (), which is currently hidden under the Direct Selectiontool ().2In the tool options bar, click the Dismiss Target Path button ().Note: An alternate way to deselect paths is to click in the blank area below the paths in thePaths palette.Your paths are now deselected and the grainy path lines have disappeared, leaving a sharpedge between the blue and green areas. Also, the Shape 1 Vector Mask is no longerhighlighted in the Paths palette.Drawing pathsNext, you’ll add more elements to your poster, but you’ll work with these elements ondifferent layers. Throughout this lesson, you’ll create new layers so you can draw, edit,paste, and reposition elements on one layer without disturbing other layers.Before you begin, make sure that the Shape 1 layer is still selected in the Layers palette.1In the Layers palette, click the New Layer button () at the bottom of the palette tocreate a new layer.A new layer, named Layer 1, appears above the Shape 1 layer in the Layers palette and isautomatically selected.2Select the Ellipse tool (), which is currently hidden under the Polygon tool ().3In the tool options bar, select the Paths option ().4Start dragging the Ellipse tool in the upper left area of the poster and then hold down Shift as you continue dragging. Release the mouse button when the circle is close to the bottom edge of the blue shape.5Hold down Shift and draw a second circle within the first.6Compare the sizes and positions of your circles to the 10End.psd image and make any necessary changes:•To move a circle, select the Path Selection tool () and use it to drag the circle to another location. (If necessary, choose View > Snap To > Guides to deselect this command so that you can move the circles exactly where you want them.)Vector Masks, Paths, and Shapes•To resize a circle, select it with the Path Selection tool and choose Edit > Free TransformPath; then hold down Shift and drag a corner handle to resize the circle without distortingits shape. When you finish, press Enter to apply the transformation.Note: In the Paths palette, only the new Work Path appears at this time. The Shape 1 VectorMask that you created earlier (the blue shape with star cutouts) is associated with the Shape 1layer. Since you are not working on the Shape 1 layer now, that vector mask does not appearin the Paths palette.Understanding work pathsWhen you draw a shape in Photoshop, the shape is actually a vector mask that defines the areas in which theforeground color appears. That’s why you see two thumbnails in the Layers palette for each shape layer: onefor the layer color and a second one for the shape itself (as defined by the layer mask).A work path is sort of a shape-for-hire: It stands at the ready, independent of any specific layer but availableto serve as the basis of a vector mask on a layer. You can use the work path repeatedly to apply it to severaldifferent layers.This concept differs from the approach used by many popular vector-graphics applications, such as AdobeIllustrator, so if you are used to working in that kind of program, this may take some getting used to. It mayhelp you to understand this if you bear in mind that the underlying metaphor behind Photoshop is tradi-tional photography, where the admission of light into a camera lens determines the shapes, colors, and trans-parencies of the negative, and then darkroom exposure determines what areas of the photographic paperdevelop into areas of color or darkness and light.The Paths palette displays only two types of paths. The first type includes any vector paths associated with thecurrently selected Layer. The other type is the Work Path—if one exists—because it is available to be appliedto any layer.Because a vector path is automatically linked to a layer when you create it, transforming either the layer orthe vector path (such as by resizing or distortion) causes both the layer and the vector path to change. Unlikea vector path, a work path is not tied to any specific layer, so it appears in the Paths palette regardless of whichlayer is currently selected.7Using the Path Selection tool (), select the second (inner) circle. Then select theExclude Overlapping Path Areas option () in the tool options bar.In the Paths palette, the thumbnail now shows a white area only between the two subpaths.Note: This may be difficult to see if the palette icons are small. To enlarge them, choose Palette Options on the Paths palette menu and select a larger Thumbnail Size option.)Combining paths into a filled shapeYour next task is to define the two circles as a single element, so that you can add a colored fill.1Using the Path Selection tool (), click and Shift-click as necessary to select both of the circle paths.2In the tool options bar, click the Combine button.The Combine button is now dimmed because the two paths are now treated as one shape.Vector Masks, Paths, and Shapes3In the toolbox, click the Default Foreground And Background Colors button (), which is to the lower left of the two larger color swatches and changes them back to black and white.A. Foreground Color buttonB . Default Foreground AndBackground Colors buttonC. Switch Foreground And Background Colors buttonD. Background Color button 4In the same area of the toolbox, click the Switch Foreground And Background Colorsbutton (), so that the foreground is white and the background black.5In the Paths palette, drag the work path to the Fill Path With Foreground Color button () at the bottom left of the palette.6In the Layers palette, change the Opacity to 40%, either by scrubbing the Opacity label,typing in the text box, or dragging the pop-up slider.You can try different Opacity values and compare the results they produce.7If the circle shape is still selected, click the Dismiss Target Path button () in the tool options bar, and then choose File > Save.Unlike the star-shaped cutouts on the Shape 1 layer, the area between the two circles on Layer 1 now has a white fill. Otherwise, you could not change the opacity of the white area. For example, if you experimented with reducing the layer opacity for the Shape 1 layer, the blue shape would become more transparent, but the stars would remain solid white because that is the color on the layer behind that area of Layer 1.Working with typeIn Adobe Photoshop, you create and edit type directly on-screen (rather than in a dialog box), and quickly change the font, style, size, and color of the type. Y ou can apply changes to individual characters and set formatting options for entire paragraphs. In this part of the lesson, you’ll learn about working with type by adding text to your logo.When you click in an image with the Type tool () to set an insertion point, you put the Type tool in edit mode. You can then enter and edit characters on the currently targeted layer. Before you can perform other actions or use other tools, you must commit your editing in the layer or cancel it.For example, if you select another tool in the toolbox, this automatically commits your text changes. Or, on the tool options bar, you can click the Commit Any Current Edits button () to accept the text edits, or click the Cancel Any Current Edits button () toreject them. Any of these actions takes the Type tool out of edit mode.Vector Masks, Paths, and ShapesAdding type to the image in edit modeYour first editing task is to enter formatted text into the image.1Select the Type tool (), and then choose Window > Character to open the Characterpalette group.2In the Character palette, select the following options:•For the font family, select a sans serif font (such as Myriad, one of the fonts included onthe Adobe Photoshop CS Classroom in a Book CD).•For the font style, select Roman (sometimes called Plain or Regular, depending on thefont family you use).•For the font size (), type 38 pt.•For the leading (), type 28 pt.3In the Character palette group, click the Paragraph palette tab, and then select theCenter Text alignment option.Notice that most of these character and paragraph options are also available in the tooloptions bar. Of the selections you’ve made so far, only the Leading option is not there.4In the toolbox, make sure that the foreground color is white.Try the following keyboard shortcuts for setting black and white colors: First, press D. This which sets the foreground to black and the background to white. Then, press X. This is the same as clicking the Switch Foreground And Background Colors button in the toolbox, which reverses the colors, making the foreground white and the background black.5Click the Type tool just below the “horizon” (where the blue rectangle meets the green gradient background) and slightly to the left of center. Then type the following three lines, pressing the Return key so that the lines break as shown:the fullmoonpro-am6Double-click the word moon to select it, and then using either the tool options bar or the Character palette, change the font size to 48.Note: If you need to adjust the placement of the text, select the Move tool ()and drag the text. Then reselect the Type tool.7Choose File > Save.Vector Masks, Paths, and ShapesStylizing and warping textIn keeping with the spirit of the tournament, you’ll distort the text so that it suggests a fullmoon. After you warp the text, you can continue to edit it with the Type tool, as needed.Before you begin, make sure that the “the full moon pro-am” text layer is still targeted.1With the Type tool () selected in the toolbox, click the Create Warped Text button() on the tool options bar to open the Warp Text dialog box.2In the Style pop-up menu, select Inflate and then click OK to close the dialog box,leaving the other settings at the default values.3Drag the Type tool to select the words full and moon.4In the Character palette or the tool options bar, select Bold as the font style.5Double-click the word full to select it (but not the word moon).6In the Color palette, select a bright yellow color by entering the following values:R=239, G=233, B=7.7In the tool options bar, click the Commit Any Current Edits button () to deselect the text so that you can see the results.8Choose File > Save.When you select the Commit Any Current Edits button, you deselect the text. However, that doesn’t mean that the text has to be absolutely final. You can still reselect it later with the Type tool and make additional edits.Adding a new text layerYou’ll get a little more practice using text by adding another word to your poster.1In the Layers palette, select Layer 1.2With the Type tool () selected, click the Default Foreground And Background Colors button to set them to black and white, respectively. (Or, press T and then D to do these.) 3In the Character palette, select the same sans serif font that you used to type the full moon pro-am, select Roman as the font style, 36 as the font size, and 28 as the leading. 4Click anywhere in the upper area of the poster (so that it is clearly separated from the area of the warped “full moon” text) and type invitational.The word appears in black text in the image window. In the Layers palette, a new, active layer, named Layer 2, is above Layer 1.5Select the Move tool () and drag the word invitational to center it in the lower part of the image window, just below the “the full moon pro-am” text block.Notice that the layer name changes from “Layer 2” to “invitational” in the Layers palette. 6Close the Character palette group.7Choose File > Save.Vector Masks, Paths, and ShapesCreating work paths from textCurrently, the word invitational appears on a type layer, not as a work path. That’s aboutto change. After you use the type layer to create a work path, you can save the work pathand manipulate it like any other path. Because it is a vector path instead of rasterized, thecharacters maintain their sharp edges.Before you begin, compare the position of the word invitational in the 10End.psd samplefile to your file and make sure that it is sized, spelled, and positioned exactly the way youwant it to be. After you create the work paths, you won’t be able to change the positioneasily and may have to start the process over if you aren’t satisfied with the results.1In the Layers palette, make sure that the “invitational” type layer is selected, and thenchoose Layer > Type > Create Work Path.On the Paths palette, notice that a new Work Path listing appears, including a thumbnailof the “invitational” text.2In the Layers palette, select the “invitational” text layer and drag it to the Delete Layerbutton () at the bottom of the palette, and then choose File > Save.Now, only the grainy outlines of the work path remain to represent the word invitational.Creating work paths from a type layer leaves the original type layer intact and fully editable as text—that is, you can still use the Type tool to select and alter it. However, you are going to use just the work paths to manipulate the shape of the text. Y ou don’t want to keep the “invitational” text layer because it would appear in the poster and visually compete with what you’re going to create from the work path.Altering the appearance of the work pathsYou can now start working with the new work paths as vector shapes. You’ll use the Direct Selection tool, which can be used to edit any path.1Zoom in to 200% so that you can easily see the details in the letter L of the word invita-tional and at least an inch of the blue shape directly above it.2In the toolbox, select the Direct Selection tool (), hidden under the Path Selection tool ().3In the image window, click the “L” part of the work path.4Select the two path points at the top of the L subpath by clicking one of the points and then Shift-clicking the other. (The points appear solid when selected and hollow when not selected.)5Start dragging the two points upward and then hold down Shift to constrain the movement, stopping when the L extends to about the level of the lower edge of the shape you created from two circles. The L is now about five or six times as tall as it was originally.Vector Masks, Paths, and Shapes6Click outside the work path to deselect it, and then zoom out again so that you can seethe entire poster.Double-click the Zoom tool ()to switch quickly to 100% view. To switch to Fit on Screen view, double-click the Hand tool icon ().7Choose File > Save.Adding a gradient layerRight now, your “invitational” element is merely a work path, not something that wouldshow up in print. To start the process of making it appear in the poster, you’ll create agradient layer that you can combine with the work path in the procedure following thisone.1In the Layers palette, click the New Layer button () to create a new Layer 2.2In the toolbox, select the Gradient tool ().3Set the foreground to white and the background to black, by pressing D to set thedefault colors (black and white) and then pressing X to reverse them (white and black).4In the tool options bar, click the pop-up arrow to open the gradient picker.5Select the second gradient option in the top row (Foreground to Transparent), andthen press Enter.。
- 1、下载文档前请自行甄别文档内容的完整性,平台不提供额外的编辑、内容补充、找答案等附加服务。
- 2、"仅部分预览"的文档,不可在线预览部分如存在完整性等问题,可反馈申请退款(可完整预览的文档不适用该条件!)。
- 3、如文档侵犯您的权益,请联系客服反馈,我们会尽快为您处理(人工客服工作时间:9:00-18:30)。
18
路径的描边
路径的描边包括使用画笔、铅笔、橡皮擦和图章等工具对路径进行 描边。
©2006 北京必联信息技术有限公司
19
将路径作为选区载入
在PhotoShop中,选区和路径之间可以相互转化。将路径作为选区 载入,就可对选区进行填充和变换等操作。
©2006 北京必联信息技术有限公司
20
将选区转换成路径
工具的工具属性栏类似,这里不再列出,选中其中的 选框,绘制路径时将在路径上自动附着磁性锚点。
©2006 北京必联信息技术有限公司
7
形状工具组的使用
使用形状工具 组的工具可以绘制 矩形、圆角矩形、 椭圆、直线、多边 形以及软件本身提 供的自定义图形形 状。 单击工具箱 中的自定义形状工 具 ,其工具属 性栏各选项含义如 图10-6所示。
图10-33 灯箱广告效果
©2006 北京必联信息技术有限公司
22
©2006 北京必联信息技术有限公司
10
添加锚点工具的使用
添加锚点工具可对创建好的路径添加锚点。当创建路径的某个位置进行细化 修改时,使用该工具添加一个锚点后可以使曲线的弧度更加容易控制。添加锚点 有以下两种方式: 单击工具箱中的添加锚点工具 ,在路径上单击鼠标即可添加一个锚点,添加
的锚点以实心显示。添加锚点后光标会自动变为直接选择工具光标状态 ,此时 拖动该锚点可以改变路径的形状。 在路径上单击鼠标右键,在弹出的快捷菜单中选择“添加锚点”命令也可以添加 一个锚点。
©2006 北京必联信息技术有限公司
11
删除锚点工具的使用
删除锚点工具与添加锚点工具是相反的操作,它用于删除不需要的锚点。删 除锚点工具的使用方法与添加锚点工具类似,有以下两种方法: 单击工具箱中的删除锚点工具 ,将鼠标置于要删除的锚点上,然后单击鼠标
即可删除该锚点,同时路径的形状也会发生相应的变化。 将鼠标置于要删除的锚点上,单击鼠标右键,在弹出的快捷菜单中选择“删除锚 点”命令也可以删除该锚点。
16
路径的高级操作
路径的填充 路径的描边 将路径作为选区载入 将选区转换成路径
©2006 北京必联信息技术有限公司
17
路径的填充
路径的填充是指用指定的颜色或图案填充路径内部的区域。在进行 路径填充前,需要先设置好前景色或背景色;如果要使用图案填充,则 先将所需的图像定义成图案。
©2006 北京必联信息技术有限公司
可分别创建形状图层、 用于切换钢笔、自由钢笔工具和各种形状工 选中该复选框,可自 具,以便用不同的工具来创建所需路径。 动添加或 删除锚 工作路径和填充区 点。 域。
图10-1 钢笔工具的工具属性栏 10-
©2006 北京必联信息技术有限公司
6
自由钢笔工具的使用
单击工具箱中的自由钢笔工具 ,其工具属性栏与钢笔 复
隐藏路径 在路径控制面板中选中路径,按【Ctrl+H】键可将路径隐藏, 再按此键则可显示路径。 保存路径 导出路径 如果用户需要进行复杂的作品设计,Photoshop提供了将路径 导出到Illustrator进行进一步编辑的功能,处理完成后再将其载入到 Photoshop文件中。
©2006 北京必联公司
12
转换点工具的使用
利用转换点工具 可以在平滑曲线和直线间相互转换。
©2006 北京必联信息技术有限公司
13
认识路径控制面板
路径的基本操作一般 都是通过路径控制面板来 实现的,单击工作界面中 的“路径”标签,打开路 径控制面板。各项含义如 图10-15所示。若用户在 界面中找不到路径控制面 板,可以选择[窗口] [路 径]菜单命令将其打开。
第10课 10课
路径的应用
课堂讲解 上机实战
©2006 北京必联信息技术有限公司
1
课堂讲解
路径概述 路径操作的基本工具 认识路径控制面板 路径的基本操作 路径的高级操作
©2006 北京必联信息技术有限公司
2
路径概述
路径是由多个锚点的矢量线条构成的图像,大多由贝塞尔曲线构成。 在图像显示效果中表现为一些不可打印的矢量图形,用户可以沿着封闭 的路径进行填充和描边,还可以将路径与选区进行相互转换。将路径工 具配合路径控制面板使用还能发挥更强大功能。
©2006 北京必联信息技术有限公司
3
路径操作的基本工具
路径创建工具 路径选择工具 路径编辑工具
©2006 北京必联信息技术有限公司
4
路径创建工具
钢笔工具的使用 自由钢笔工具的使用 形状工具组的使用
©2006 北京必联信息技术有限公司
5
钢笔工具的使用
使用钢笔工具可以创建直线或曲线路径。单击工具箱中的钢笔工具,其工具 属性栏各选项含义如图10-1所示。
单击该按钮,将自动建立 一个新路径。
。
单击该按钮,可以将当 单击该按钮,将自动删除 当前路径。 前选区转换成路 。 径。
。
图10-15 路径控制面板
©2006 北京必联信息技术有限公司
14
路径的基本操作
创建路径 路径创建和编辑的操作技巧
©2006 北京必联信息技术有限公司
15
路径创建和编辑的操作技巧
单击 该 按钮 , 将使 用 画笔工具 和当前 前景色为 当前路 径描边。 单击该按钮,可以用 前景色填充当前 路径。 单 击该 按 钮 ,可 以 将 当前 路径 转换 成 选区。 路径缩览图:显示该 路径的预览图。
当 前 路径:以 蓝 色条显 示 的路径为当前工作路 径。 路径名称:显示了该路径 的名称,用户可以修 改或给路径命名。
©2006 北京必联信息技术有限公司 可以绘制固定比 例的路径。 只在当前层中创建图形形 态和前景色填充效 果。 可 以 绘 制 固 定 尺寸 的 矩 形。 选中该复选框,在绘 制矩形时可以使 边缘靠近像素边 缘。 用于绘制尺寸不受 限制的路径。 。
。 可以绘制正方形。
可 创 建 新 的 形 状路 径 , 用于切换钢笔工具和各 可创建新的形 种形状工具。 且 没有 填 充 颜色。 状图层。
从中可选择预设 的路径形状。
绘制路径时可以从图形 的中心开始绘制。
图10-6 设置形状工具组的工具属性栏 10-
8
路径选择工具
使用路径选择工具可以选择和移动路径,路径选择工具包括路径选 择工具和直接选择工具两种。
©2006 北京必联信息技术有限公司
9
路径编辑工具
添加锚点工具的使用 删除锚点工具的使用 转换点工具的使用
将选区转换成路径,可以进一步修改图像形状。
©2006 北京必联信息技术有限公司
21
上机实战
本课上机实战将练习制作一幅灯 箱广告,其效果如图10-33所示。本 效果的制作主要通过在图像上创建选 区并将其羽化,再将选区填充渐变效 果,然后输入文字并为其添加“浮雕 效果”。通过练习,读者可以掌握使 用路径工具选择复杂选区、羽化选区 和渐变选区的方法,以及文字工具的 使用和“图层样式”命令的操作方法。 对于未练习到的内容,读者可以结合 课堂讲解自己练习。
