中国稳网—DELL引导盘下载所有型号
戴尔便携式 Thunderbolt 3 固态硬盘 500 GB 1 TB 用户指南说明书
Dell Portable Thunderbolt™ 3 Solid State Drive 500 GB/1 TBUser’s GuideNotes, cautions, and warningsCopyright©2018 Dell Inc. All rights reserved.This product is protected by U.S. and international copy right and intellectual propertylaws. Dell™ and the DELL logo are trademarks of Dell Inc. in the United States and/or otherjurisdictions. All other marks and names mentioned herein may be trademarks of theirrespective companies.2018-02Rev. A01NOTE: A NOTE indicates important information that helps you make better use of yourcomputer.CAUTION: A CAUTION indicates potential damage to hardware or loss of data if instructionsare not followed.WARNING: A WARNING indicates a potential for property damage, personal injury,or death.ContentsWhat’s in the box (4)Features (5)Before using your device (7)Introduction (8)Getting Started (9)Connecting the solid state drive (9)Disconnecting the solid state drive (10)Ejecting the solid state drive in Windows (11)Ejecting the solid state drive using the Utility (11)Thunderbolt™ 3 SSD Utility (12)Installing the Thunderbolt™ 3 SSD Utility (12)Using the Thunderbolt™ 3 SSD Utility (13)Drive Status (13)T ools (14)Security (14)Locking the solid state drive (15)Unlocking the drive (16)Unlocking the drive with PSID (17)Safely removing the solid state drive using the Thunderbolt™ 3 SSD Utility (18)Performance (19)Help (20)Managing the solid state drive in Windows (21)Troubleshooting (22)Specifications (29)Statutory information (30)What’s in the box2131 Dell Portable Thunderbolt™Solid State Drive2 Thunderbolt™3 cable3 Documents33Features1 Status LED2 Thunderbolt™3 port12The Dell Portable Thunderbolt™ 3 SSD features a single LED indicator located on the left of the Thunderbolt™ 3 port. Use this to help determine the status of the device power and status of the internal cooling fan.3 Thunderbolt™ 3connectorThe following table describes the status LED behavior on the SSD.LED behavior Power Fan Activity Blinking White ON ON Yes White ON ON No Blinking Amber ON Malfunction Yes Amber ON Malfunction NoOff OFF NA NABefore using your deviceCAUTION: Unplugging the portable solid state drive from your computer when the lightindicator is blinking white may cause data loss or damage to your device.IntroductionDell Portable Thunderbolt™ 3 SSD bus powered external SSD’s are high-performance, ultra-portable, and reliable storage solutions. They are ideal for transferring large amounts of data quickly to help maintain productivity whether at home, in the workplace, or on the road.Use the Thunderbolt™ 3 SSD Utility to manage the drive.Getting StartedConnecting the solid state driveFollow the procedure below to connect the drive to your computer.1 Connect one end of the Thunderbolt™ 3 cable shipped with the device intothe Thunderbolt™ 3 port on your computer. Connect the other end into theThunderbolt™ 3 port on the Dell Portable Thunderbolt™ 3 SSD. A window will popup after a few seconds.2 In the pop-up window you are asked if you want to allow the drive to connect to yoursystem. Choose the Always Connect option from the drop down menu, and click OK.Disconnecting the solid state drive CAUTION:The status LED turns white when the drive is connected.To remove the Dell Portable Thunderbolt™ 3 SSD, you have two options:See “Ejecting the solid state drive in Windows” or “Safely removing the solid state drive using the Thunderbolt™ 3 SSD Utility”.Ejecting the solid state drive in WindowsTo remove the Dell Portable Thunderbolt™ 3 SSD using Windows eject drive follow these steps:1 Move the cursor to the Windows System Tray and choose the Eject option for the Dell Portable SSD.2 When the Safe T o Remove Hardware message appears, disconnect the cable.Ejecting the solid state drive using the UtilitySee “Thunderbolt™ 3 SSD Utility”.Thunderbolt™ 3 SSD UtilityThe Dell Portable SSD Utility installation file in located on the drive, and also available to download at /support. The Dell portable SSD works without additional software. It is recommended to install the software utility to monitor performance. You also need the utility to lock the SSD for security.Installing the Thunderbolt™ 3 SSD Utility1 Use Windows Explorer to open or view the drive. Double-click on This PC on the desktop, the drive isdisplayed along with other storage devices.This PC2 Double-click on the Thunderbolt™3 SSD Utility installation file located on the drive. Follow the instructionsthat appear.Using the Thunderbolt™ 3 SSD UtilityDrive StatusThe Status tab displays when the utility is launched. This is useful for checking how much storage capacity is available and provides information useful for troubleshooting.ToolsSecuritySecurity is not enabled by default. When you use this security feature to lock the drive, you will create a password that must be entered to unlock it. The locked status continues after the drive is disconnected. That is, when the drive is connected again, you need to enter the password to unlock the drive.Each time you lock the drive, you need to complete the procedure to create a password. You can use the same password used in previous sessions.NOTE: When you lock the drive, you must create a password. Set a password that you canremember easily to unlock the drive.CAUTION: Also keep in mind that you must remember this password to unlock the drive.There is no way to unlock the drive if you forget the password. It will be necessary to resetthe drive if you forget your password. This means you will lose any data on the drive.Locking the solid state drive1 To lock the drive, go to the T ools menu and click on the Lock button. A new menu appears.2 Enter the password used to unlock the drive. Use a password that is difficult to guess, but one that you canremember. You cannot unlock the drive without the password. Retype the password in the space provided.3 Click on the Submit button to create the password and put the drive into locked status.Unlocking the drive1 To unlock the drive, go to the T ools menu and click on the Unlock button. A new menu appears.2 Enter the password used to unlock the drive and click on the Submit button.If the password is forgotten, enter the PSID used to unlock the drive and click on the Submitbutton.CAUTION: All data and password on the SSD will be erased, if unlock by PSID.Unlocking the drive with PSIDNOTE: The PSID is printed on the bottom of the Dell Portable Thunderbolt™ 3 SSD, andon a sticker located inside the box shipped with the device. The sticker can be pealedoff and placed as per your preference.Safely removing the solid state drive using the Thunderbolt™ 3 SSD UtilityTo safely remove the SSD using the Thunderbolt™ 3 SSD Utility, open the utility and click on the Eject Drive button at the top of the menu interface.PerformanceUse the Performance tab to test drive speed.HelpUse the Help tab to view documentation and help information for the SSD.Managing the solid state drive in WindowsYou can use Windows Administrative T ools to partition or change the file system on the Dell Portable Thunderbolt™ 3 SSD.Go to Control Panel (View by Small/Large icons) > Administrative T ools > Computer Management > Storage > Disk Management to access the Windows Disk Management interface.TroubleshootingI cannot see Dell SSD Disk Volume whenI insert Dell Portable SSD. What shouldI do?Check the below items.1 Thunderbolt™ 3 USB-C connector and Thunderbolt™ 3 Cable• Look for the Thunderbolt™lightning bolt logo on theplatform. The port looks identical to the USB-C, but it is aThunderbolt™ 3 connector.• Thunderbolt™ 3 cable should have a Thunderbolt™ lightningbolt logo with the numeral 3.2 Thunderbolt™3 Softwarea. Make sure that Thunderbolt™ 3 software is installed andrunning. If the software is running, the Thunderbolt™ 3software icon appears in the Windows System Tray.b. T o check if the Dell Portable SSD is detected and approvedon the Thunderbolt™ software.-Click on the right button of your mouse on softwareicon.-Check devices on View Attached Devices / ApproveAttached Devices (Always Connect) / ManageApproved Devices.3 Disk ManagementProblemsPossible Solutions a. Is the Dell Portable SSD Disk detected?• If Disk is detected, check item 3(b) and 4.• If Disk is NOT detected, check item 5, 6, and 7.b. The file system of Dell Portable SSD should be supported bythe OS.Common symptomsThe following table contains information about common symptoms you might encounter and the possible solutions.I cannot see Dell SSD Disk Volumewhen I insert Dell Portable SSD. Whatshould I do?(continued): a.View -> Devices by T ype -> Disk drives NVMe SSD of Dell Portable SSD detected or not detected.b. View -> Devices by T ype -> Storage ControllersDriver of NVM Express Controller of Dell Portable SSD isloaded or not loaded.If not, check item 6.c. View -> Devices by T ype -> System devicesThunderbolt™ Controller - 1575 of Dell Portable SSD isdetected normally or not.6 Device Status shows “Resource is not enough” in Device ManagerSystem BIOS is responsible to allocate the memory resources forattached devices. Contact the manufacturer of the notebook ormotherboard.•Right-click your mouse on NVM Express Controller. •Choose Properties item.•Go to General page.• Check the description on Device Status.7 Power Shortagea. Remove other Thunderbolt™accessories and insert the SSD asthe First (Primary) plug-in device to a Thunderbolt™ 3 port onthe computer.b. Install SD1-TSeries Portable SSD Utility first to diagnose thepower supply for Dell Portable SSD automatically. If there ispower shortage problem, a pop-up menu warns the user of theproblem.4 Security LockedInstall SD1-TSeries Portable SSD Utility first to check the security status of Dell Portable SSD. It can be unlocked by the Utility.•Open the Utility.•Go to page TOOLS.•Press the Unlock button.•Input the password on Unlock SSD page, then Submit.5 Device ManagerNothing displays when I launch the SD1-TSeries Portable SSD Utility.What can I do if I forget the password for security function?What should I do if the “Remaining Life” is showing a warning message The user must have administrator privilege to open Utility. Login as administrator and open the Utility.1 Look for PSID on Product Label.2 Open the Utility.3 Go to page TOOLS.4 Press the Unlock button.5 Input the PSID to the page Erase Recovery with PSID, thenSubmit.Remaining Life refers to the endurance of the NAND flash. This is calculated by how much data has been written to the flash. It is a value estimated by the flash manufacturer.If a warning message displays for the Remaining Life, to avoid data loss, it is recommended to back up any important data in the drive. If the Dell Portable SSD is still under warranty, it can be returned to the manufacturer. A ReturnMerchandise Authorization (RMA) order is required.NOTE: The data and password on SSD will be erased, if the SSD is unlocked by PSID.What are the consequences if I turn off the TRIM function?How to change Windows Disk volume to Mac platform?How to change Mac Disk volume to Windows platform?It is likely that you will not get the optimal performance. Other SSD installed on your system with NTFS will be affected as well.1 Open Disk Utility on Mac platform.2 Erase Dell Portable SSD to macOS supported File System.1 Open Command Prompt and execute diskpart to clean DellPortable SSD.2 Open Disk Management.3 Initialize disk.4New volume for Dell Portable SSD.NOTE: Converting the file system will erase the entire contents ofthe drive. All data currently on the drive will be lost.NOTE: Converting the file system will erase the entire contents of the drive. All data currently on the drive will be lost.What should I do if BSoD (Blue Screen of Death) with Stop Code 0x0000001A, MEMORY_MANAGEMENT, after hot-plugging the Dell Portable SSD on Windows Platform? Dell Portable SSD should be safely removed using the Eject icon in the Windows System Tray or by SD1-TSeries Portable SSD Utility. Removing the Dell Portable SSD without following the proper eject procedure, then hot-plugging the Dell Portable SSD can cause the operating system BSoD. However, the SSD should still work well after a COLD BOOT together with your Windows platform.T o repair Dell Portable SSD and resolve the BSoD problem:1 Connect the Dell Portable SSD to powered off Windowsplatform.2 Power on the platform.3 Back up data to another drives.4 Format Dell Portable SSD.NOTE: There is a very low probability of this occurring. However, if it happens, it will keep happening until the problem is corrected.What should I do if the Dell Portable SSDcannot be accessed after hot-pluggingthe Dell Portable SSD on Mac Platform?Removing then hot-plugging the Dell Portable SSD can cause the Dell Portable SSD to be undetected or inaccessible. The SSD should still work after a cold boot on a Mac platform. Symptoms of failed detection:1 No Volume of Dell Portable SSD can be accessed. 2Under System Information, Driver Installed status is No.NOTE: There is a very lowprobability of this occurring.However, if it happens, itwill keep happening until theproblem is corrected.For example:System Information->Hardware->PCIpci1179,116:T ype: NVM Express ControllerDriver Installed: NoWhat should I do if the Dell Portable SSDcannot be accessed after hot-pluggingthe Dell Portable SSD on Mac Platform?(continued)3 Under System Information, Thunderbolt™ bus would have the value SD1-T1000 Dell SSD / SD1-T0500 Dell SSD. T o repair Dell Portable SSD and resolve the access problem:1Connect the Dell Portable SSD to a powered off Mac Computer.2Power on the platform.3Back up data to another drive.4Open Disk Utility.5Click View -> Show All Devices.6Unmount the volume of Dell Portable SSD.7 Erase “KXG50ZNV512G NVMe TOSHIBA 512GB Media” or”KXG50ZNV1T02 NVMe TOSHIBA 1024GB Media” to macOSsupported File System.For example: System Information->Hardware->Thunderbolt™ Bus->SD1-T1000Dell SSDSpecificationsGeneralModel number SD1-T0500, SD1-T1000Storage Media1TB NVMe SSD ( SD1-T1000)512GB NVMe SSD ( SD1-T0500)Connection Interface Thunderbolt™ 3RatingOperating Voltage 5V (2.4A)Physical characteristicsWeight61 gm (2.1 oz)DimensionsLength98.8 mm (3.89 in)Width48 mm (1.89 in)Height19 mm (0.75 in)EnvironmentalOperating temperature0°C (32°F) to 35°C (95°F)Operating humidity<95% relative humidity (non-condensing)Certificates CE, VCCI, FCC, ACMA, IC, NRTL, CBWarranty Three-year limited warrantyNOTE: For more information about Dell Warranty and SupportPolicy go to .System Requirements Desktop or notebook computer with a Thunderbolt™ 3 port and one of thefollowing operating systems:• Windows 10 x64• Mac OS X 10.13 or laterNOTE: Speed varies depending on host hardware, software, usage, and storage capacity.Statutory informationWarrantyLimited warranty and return policiesThe Dell Portable Thunderbolt™ 3 SSD, carry a 3-year limited hardware warranty. If purchased together with a Dell system, it will follow the system warranty.For U.S. customers:This purchase and your use of this product are subject to Dell’s end user agreement, which you can find at / terms. This document contains abiding arbitration clause.For European, Middle Eastern and African customers:Dell-branded products that are sold and used are subject to applicable national consumer legal rights, the terms of any retailer sale agreement that you have entered into (which will apply between you and the retailer) and Dell’s end user contract terms. Dell may also provide an additional hard ware warranty–full details of the Del lend user contract and warranty terms can be found by going to , selecting your country from the list at the bottom of the “home” Page and then clicking the” terms and conditions” link for the end user terms or the” support” link for the warranty terms.For non-U.S. customers:Dell-branded products that are sold and used are subject to applicable national consumer legal rights, the terms of any retailer sale agreement that you have entered into (which will apply between you and the retailer) and Dell’s warranty terms. Dell may also provide an additional hardware warranty – full details of Dell’s warranty terms can be found by going to , Selecting your country from the list at the bottom of the “home” page and then clicking the “terms and conditions” link or the” support” link for the warranty terms.。
3-10_6_4-10_6_5 (i5 P55A HD5770 ALC889) 完美教程
【11.11】一步步安装原版10.6.3-10.6.4-10.6.5 (i5+ P55A +HD5770+ALC889) 完美教程 - Mac OS X Snow Leopard - Windows7 SP1关注 - 远景论坛提供Windows7中文版旗舰版下载,主题桌面及软件首页首页新闻资讯新闻资讯电脑使用电脑使用软件评测软件评测智能手机智能手机互动互动论坛论坛官方微博官方微博高级搜索高级搜索高级搜索远景论坛 » Mac OS X Snow Leopard » 【11.11】一步步安装原版10.6.3-10.6.4-10.6.5(i5+ P55A +HD5770+ALC889) 完美教程安全提问母亲的名字爷爷的名字父亲出生的城市您其中一位老师的名字您个人计算机的型号您最喜欢的餐馆名称驾驶执照的最后四位数字登录注册入住远景登录 rss私人消息 (0) 公共消息 (0) 论坛任务 (0)系统消息 (0) 好友消息 (0) 帖子消息 (0) 1 2 3 4 5远景寻求正规IDC服务器带宽赞助赞助远景,在远景上刊登广告@ 展望 Windows7 远景无限远景论坛积分规则、等级制度说明富站长论坛 - 广告街2010 PCBETA版主招聘启事 3A网络 1000M双线 99元/年远景论坛新管理章程说明汕头电信百独1899元保证99.9M WindowsPhone7 中文网远景苹果主题论坛 海波 - 远景带宽合作伙伴[教程] 【11.11】一步步安装原版10.6.3-10.6.4-10.6.5 (i5+ P55A +HD5770+ALC889) 完美教程发帖12345678910... 97下一页返回列表发短消息加为好友aurakingUID239274 帖子1122 主题7 精华0 积分449 PB币1476 威望0 贡献0 家族Mac Fans 阅读权限30 性别男来自上海在线时间1 小时注册时间2007-2-11 最后登录2010-11-7PCBETA Beta1UID239274 帖子1122 PB币1476 威望0 贡献0 1楼跳转到 » 倒序看帖打印字体大小: tT auraking发表于 2010-9-22 22:18 | 只看该作者 | 资讯版本帖最后由 auraking 于 2010-11-11 20:09 编辑一、前言1、本教程虽然是写给新人,但是一点基础知识都没的请先看下面的帖子,论坛置顶帖:在远景令人反感的几种发帖回帖方式2、本教程基于的硬件INTEL i5 750 2.66 oc 3.2~3.8技嘉 P55A-UD3R 1.0 F12内存: G Skill F3-12800CL7-2GBECO 1600 2G*2硬盘:ST3500320NS + ST31000528AS光驱:PIONEER BD-RW BDR-205HD5770(ATI原厂1G DDR5,蓝宝OEM, DP+HDMI+DVIx2)ALC889 (板载,注意这里不是ALC889a)RTL8168D/8111D(板载有线网卡)显示器:Dell U2311H + Dell U2311H键盘鼠标:USB接口3、与本硬件配置不一样的很可能无法一样顺利安装成功或不能跟我一样完美,这都是正常的。
戴尔PowerEdge 1300系统EIDE硬盘驱动器更新说明书
EIDE HARD-DISK DRIVEUPDATENotes, Cautions, and WarningsThroughout this guide, blocks of text may be accompanied by an icon and printed in bold type or in italic type. These blocks are notes, cautions, and warnings, and they are used as follows:NOTE: A NOTE indicates important information that helps you make better use ofyour computer system.CAUTION: A CAUTION indicates either potential damage to hardware or loss of data and tells you how to avoid the problem.WARNING: A WARNING indicates the potential for bodily harm and tells you how to avoid the problem.____________________Information in this document is subject to change without notice.© 1998-1999 Dell Computer Corporation. All rights reserved.Trademarks used in this text: Dell, the DELL logo, and PowerEdge are trademarks of Dell Computer Corporation; Microsoft and Windows NT are registered trademarks of Microsoft Cor-poration. Other trademarks and trade names may be used in this document to refer to either the entities claiming the marks and names or their products. Dell Computer Corporation disclaims any proprietary interest in trademarks and trade names other than its own.January 1999 P/N 0130PDell PowerEdge 1300 Systems EIDE Hard-Disk Drive Update 1Dell™ PowerEdge™ 1300 Systems EIDE Hard-Disk Drive UpdateThis document updates information contained in your Dell PowerEdge 1300 Systems Installation and Troubleshooting Guide . It describes how to install and use the enhanced integrated drive electronics (EIDE) hard-disk drives supported by your sys-tem and provides an EIDE-related update to your System Setup program information.The integrated EIDE controller in the PowerEdge 1300 supports up to two optional 1-inch or 1.6-inch EIDE hard-disk drives. These drives can be installed vertically in the removable hard-disk drive cage located below the external drive bays at the front of the computer.NOTE: Alternatively, the drive cage provides space for up to four 1-inch small com-puter system interface (SCSI) drives or a mix of up to two 1.6-inch and up to two 1-inch SCSI drives. Y our Installation and Troubleshooting Guide describes how to install and use SCSI devices.EIDE hard-disk drives attach to the integrated EIDE controller through the 40-pin IDE1 connector on the system board.Installing an EIDE DriveThis section includes information on addressing, installing, partitioning, and formatting EIDE hard-disk drives.EIDE Drive AddressingAll EIDE devices should be configured for the cable select jumper position, which assigns master and slave status to devices by their position on the EIDE cable. When two EIDE devices are connected to a single EIDE cable and are configured for the cable select jumper position, the device attached to the last connector on the inter-face cable is the master or boot device (drive 0) and the device attached to the middle connector on the interface cable is the slave device (drive 1). Refer to the drive docu-mentation in your upgrade kit for information on setting devices to the cable selectjumper position.2Dell PowerEdge 1300 Systems EIDE Hard-Disk Drive UpdateWith the two EIDE interface connectors on the system board, your system can sup-port up to four EIDE devices. EIDE hard-disk drives should be connected to the EIDE interface connector labeled “IDE1.” (EIDE tape drives and CD-ROM drives should be connected to the EIDE interface connector labeled “IDE2.”)Installing a DriveTo install an EIDE hard-disk drive, perform the following steps:1.Complete the steps in “Installing a Hard-Disk Drive in the Internal Hard-Disk Drive Cage” in your Installation and Troubleshooting Guide .2.Connect a DC power cable to the power input connector on the back of the drive(see the following illustration).Check all connectors to be certain that they are properly cabled and firmly seated.3.Connect one of the device connectors on the EIDE cable to the 40-pin interfaceconnector on the back of the hard-disk drive (see the following illustration).CAUTION: You must match the colored strip on the EIDE cable with pin 1 on the interface connector to avoid possible damage to your system.Attaching Hard-Disk Drive Cables4.If the other end of the EIDE cable is not already connected, connect it to the IDE1connector on the system board.CAUTION: You must match the colored strip on the EIDE cable with pin 1 on the IDE1 connector to avoid possible damage to your system.interface connector on EIDE drivevertically; hiddenbehind side panel)Dell PowerEdge 1300 Systems EIDE Hard-Disk Drive Update 3To locate the IDE1 connector, see the “System Board Features” illustration in your Installation and Troubleshooting Guide.5.Replace the front bezel according to the instructions in “Removing and Replacing the Front Bezel” in your Installation and Troubleshooting Guide .6.Replace the computer cover. Then reconnect your computer and peripherals totheir power sources, and turn them on.NOTE: After you remove and replace the cover, the chassis intrusion detector will cause the following message to be displayed at the next system start-up:ALERT! Cover was previously removed.7.Insert a bootable diskette (such as the Dell Diagnostics Diskette ) into drive A.NOTES: For more information on performing steps 8 and 9, see the appropriate cate-gories in “Using the System Setup Program” in your Dell PowerEdge 1300 Systems User’s Guide.If a setup password has been assigned by someone else, contact your network administrator.8.Enter the System Setup program, and update the appropriate Drive category (Drive 0 or Drive 1) under IDE Drives: Primary .9.While in the System Setup program, reset the chassis intrusion detector bychanging Chassis Intrusion to Not Detected .After you update the System Setup settings, reboot the system.10.Partition and logically format your drive, as described in the next subsection,before proceeding to the next step.11.Test the hard-disk drive by running the Hard-Disk Drives (Non-SCSI) T est Groupin the Dell Diagnostics.See “Running the Dell Diagnostics” in your Installation and Troubleshooting Guide for information on running the diagnostics and troubleshooting any prob-lems that may occur.12.Install your operating system on the hard-disk drive.Refer to the documentation that came with your operating system.Partitioning and Logically Formatting Your EIDE Hard-Disk DriveEIDE hard-disk drives must be physically formatted, partitioned, and logically format-ted before they can be used to store data. Every hard-disk drive from Dell is physically formatted before it is sent to you.NOTE: When using the Microsoft ® Windows NT ® operating system with the file allo-cation table (FAT) 16 file system, the primary partition for each hard-disk drive can beno larger than 2 gigabytes (GB). Extended partitions can be larger than 2 GB, but eachlogical drive within an extended partition must be no larger than 2GB.To partition and logically format your hard-disk drive, use the program(s) offered byyour operating system.System Setup Program UpdateThe Power Management option in the System Setup program works with most EIDEhard-disk drives as well as with monitors. For most systems, enabling Power Man-agement at any level (Maximum, Regular, or Minimum) causes EIDE hard-diskdrives to switch to low-power mode after about 20 minutes of system inactivity.NOTE: Not all EIDE hard-disk drives support this feature. Enabling this feature for Array drives that do not support it may cause the EIDE drive to become inoperable until thecomputer is restarted and Power Management is disabled.In low-power mode, the disks inside the drive stop spinning. They remain idle until thenext drive access, which causes them to start spinning again. (Because the disks takea few seconds to regain full speed, you may notice a slight delay when you access thehard-disk drive the next time.)When Power Management is Disabled (the default), the disks spin constantly aslong as the system is turned on.4Dell PowerEdge 1300 Systems EIDE Hard-Disk Drive Update。
window7操作系统各版本下载地址
window7操作系统版本有:Windows 7 Starter(简易版)、Windows 7 Home Basic(家庭普通版)、Windows 7 Home Premium(家庭高级版)、Windows 7 Professional(专业版)、Windows 7 Enterprise(企业版)、Windows 7 Ultimate(旗舰版)。
一、简体中文版(中国大陆适用)1、Windows 7 enterprise (X64) - DVD (Chinese Simplified)文件名: cn_windows_7_enterprise_x64_dvd_x15-70741.isoSHA1: EE20DAF2CDEDD71C374E241340DEB651728A69C4下载地址:ed2k://|file|cn_windows_7_enterprise_x64_dvd_x15-70741.iso|3203516416|876DCF115C2EE28D74B178BE1A84AB3B|/2、Windows 7 enterprise (X86) - DVD (Chinese Simplified)文件名: cn_windows_7_enterprise_X86_dvd_x15-70737.isoSHA1: 50F2900D293C8DF63A9D23125AFEEA7662FF9E54下载地址:ed2k://|file|cn_windows_7_enterprise_x86_dvd_x15-70737.iso|2465783808|41ABFA74E 57353B2F35BC33E56BD5202|/3、Windows 7 Home Basic (x86) – DVD (Chinese Simplified)下载地址:ed2k://|file|cn_windows_7_home_basic_x86_dvd_x15-65975.iso|2604238848|AF82993D CF8F3D7AA08D54693691BB48|/4、Windows 7 Home Premium (x64) – DVD (Chinese Simplified)下载地址:ed2k://|file|cn_windows_7_home_premium_x64_dvd_x15-65718.iso|3341268992|9F9760 45631A6A2162ABE32FC77C8ACC|/5、Windows 7 Home Premium (x86) – DVD (Chinese Simplified)下载地址:ed2k://|file|cn_windows_7_home_premium_x86_dvd_x15-65717.iso|2604238848|98E1E B474F92343B06737F227665DF1C|/6、Windows 7 Professional (x64) – DVD (Chinese Simplified)文件名:cn_windows_7_professional_x64_dvd_x15-65791.isoSHA1: 5669A51195CD79D73CD1861D51E7E8D43DF53D1下载地址:ed2k://|file|cn_windows_7_professional_x64_dvd_x15-65791.iso|3341268992|34748005 21D169FBF3F5E527CD835156|/7、Windows 7 Professional (x86) – DVD (Chinese Simplified)文件名: cn_windows_7_professional_x86_dvd_x15-65790.isoSHA1: EBD595C3099CCF57C6FF53810F73339835CFBB9D下载地址:ed2k://|file|cn_windows_7_professional_x86_dvd_x15-65790.iso|2604238848|E812FBE7 58F05B485C5A858C22060785|/8、Windows 7 Professional, VL Build (x64) – DVD (Chinese Simplified)文件名: cn_windows_7_professional_vl_build_x64_dvd_x15-71029.isoSHA1: 2270C4A0715B204282AF1E8E05CBDCFCC776EB46下载地址:ed2k://|file|cn_windows_7_professional_vl_build_x64_dvd_x15-71029.iso|3203971072|2 3155387CBD0771CFBA528CB1E7B170F|/9、Windows 7 Professional, VL Build (x86) – DVD (Chinese Simplified)文件名:cn_windows_7_professional_vl_build_x86_dvd_x15-71025.isoSHA1:C91EBE17156604336CAB054A9A5186B5162D42A0下载地址:ed2k://|file|cn_windows_7_professional_vl_build_x86_dvd_x15-71025.iso|2466107392|9 EA7E0C2594B5A236FD09D572CA39770|/10、Windows 7 Starter (x86) – DVD (Chinese Simplified)文件名: cn_windows_7_starter_x86_dvd_x15-69303.isoSHA1:C9B9F3143328AFE62BF3EACA164BE02B17B04532下载地址:ed2k://|file|cn_windows_7_starter_x86_dvd_x15-69303.iso|2604238848|5A6796B2B6A9 7B3E372F7C37D3A42AA4|/11、Windows 7 Ultimate (x64) – DVD (Chinese Simplified)文件名: cn_windows_7_ultimate_x64_dvd_x15-66043.isoSHA1:4A98A2F1ED794425674D04A37B70B9763522B0D4下载地址:ed2k://|file|cn_windows_7_ultimate_x64_dvd_x15-66043.iso|3341268992|7DD7FA757C E6D2DB78B6901F81A6907A|/12、Windows 7 Ultimate (x86) – DVD (Chinese Simplified)文件名: cn_windows_7_ultimate_x86_dvd_x15-65907.isoSHA1:B589336602E3B7E134E222ED47FC94938B04354F下载地址:ed2k://|file|cn_windows_7_ultimate_x86_dvd_x15-65907.iso|2604238848|D6F139D7A45 E81B76199DDCCDDC4B509|/二、英文版(欧美适用)1、Windows 7 enterprise (X64) - DVD (English)文件名: en_windows_7_enterprise_x64_dvd_X15-70749.isoSHA1:A89DCE706D527206CD464EF86ACD3A3D13A332DB下载地址:ed2k://|file|en_windows_7_enterprise_x64_dvd_X15-70749.iso|3121215488|CB90BE6 D74E6E661F8663BD7E17AD2FF|/2、Windows 7 enterprise (X86) - DVD (English)文件名: en_windows_7_enterprise_x86_dvd_X15-70745.isoSHA1: C6B905E48FDB6CB5BFCA967715A64461B812D40C下载地址:ed2k://|file|en_windows_7_enterprise_x86_dvd_X15-70745.iso|2400401408|4117C4C B9648A9ED79CC6CFB47A10696|/3、Windows 7 Home Basic (x86) – DVD (English)文件名: en_windows_7_home_basic_x86_dvd_x15-65654.isoSHA1:101574FAA17FDB430BB027271EF0A58F0E18AD47下载地址:ed2k://|file|en_windows_7_home_basic_x86_dvd_x15-65654.iso|2501894144|7E4414CAD21CE37FBF360B732095F05C|/4、Windows 7 Home Premium (x64) – DVD (English)文件名: en_windows_7_home_premium_x64_dvd_x15-65733.isoSHA1: 336779EA6B65F63E11A609B4D021439C47AB315B下载地址:ed2k://|file|en_windows_7_home_premium_x64_dvd_x15-65733.iso|3224686592|9154F 9E4021BEAF83439A42FA267ACBD|/5、Windows 7 Home Premium (x86) – DVD (English)文件名: en_windows_7_home_premium_x86_dvd_x15-65732.isoSHA1: CC9D8220B2179E784D85BF1EA98D2EE2190D534F下载地址:ed2k://|file|en_windows_7_home_premium_x86_dvd_x15-65732.iso|2501894144|ACAD6 04EFB0BB898EFA4D0067618BCC4|/6、Windows 7 Professional (x64) – DVD (English)文件名:en_windows_7_professional_x64_dvd_x15-65805.isoSHA1:50127304441A793EE51B3F501289F6599A559E9F下载地址:ed2k://|file|en_windows_7_professional_x64_dvd_x15-65805.iso|3224686592|A71F26 E478076FFC75F02CB6459E87B0|/7、Windows 7 Professional (x86) – DVD (English)文件名:en_windows_7_professional_x86_dvd_x15-65804.isoSHA1:697FA06554502FB21D30275273B25737299C020D下载地址:ed2k://|file|en_windows_7_professional_x86_dvd_x15-65804.iso|2501894144|61D69F22 50F114B95720CB81D3C1C5EE|/8、Windows 7 Professional, VL Build (x64) – DVD (English)文件名:en_windows_7_professional_vl_build_x64_dvd_x15-71037.isoSHA1:BFCD2254872303F5569FE165440F5CF17059C7A2下载地址:ed2k://|file|en_windows_7_professional_vl_build_x64_dvd_x15-71037.iso|312105779 2|2FFC0489F663F51F84AAA42127CD06A0|/9、Windows 7 Professional, VL Build (x86) – DVD (English)文件名:en_windows_7_professional_vl_build_x86_dvd_x15-71033.isoSHA1:304817E859A5B27E828F46AAC54CB46A576A34CC下载地址:ed2k://|file|en_windows_7_professional_vl_build_x86_dvd_x15-71033.iso|2400239616|A 9A9F338CE1040FCFB8D22DBD7269765|/10、Windows 7 Starter (x86) – DVD (English)文件名:en_windows_7_starter_x86_dvd_x15-68956.isoSHA1:5DC1457BC4B3D94097F499B15DFDB3C21DADCDF5下载地址:ed2k://|file|en_windows_7_starter_x86_dvd_x15-68956.iso|2501894144|28533D4E8DF0 66DE756CDC96D34187D3|/11、Windows 7 Ultimate (x64) – DVD (English)文件名:en_windows_7_ultimate_x64_dvd_X15-65922.isoSHA1:326327CC2FF9F05379F5058C41BE6BC5E004BAA7下载地址:ed2k://|file|en_windows_7_ultimate_x64_dvd_X15-65922.iso|3224686592|6719AFC5486 F38BE75F2DF39C8527113|/12、Windows 7 Ultimate (x86) – DVD (English)文件名:en_windows_7_ultimate_x86_dvd_X15-65921.isoSHA1:5395DC4B38F7BDB1E005FF414DEEDFDB16DBF610下载地址:ed2k://|file|en_windows_7_ultimate_x86_dvd_X15-65921.iso|2501894144|09902C7687C 9CA86BD935BD0EFB61D3A|/。
windows7品牌机oem原版光盘镜像下载大全
Windows7 品牌机OEM原版光盘镜像下载大全(2.11加入华硕32位)本帖最后由 1+1 于 2010-3-11 21:35 编辑更新日志:2009-12-14 11:58 首批加入联想(32位)、戴尔(32位)两个品牌2009-12-24 22:10 第二批加入戴尔(64位)(由坛友terror77 提供)2010-01-11 20:42 第三批加入惠普(32位)家庭基础版2010-02-11 21:25 第四批加入华硕(32位)品牌声明:1、其他品牌机版本的Win7 OEM版正在整理中,随后加入。
2、安装前请先验证光盘SHA1值,若发现校验值不符,切勿安装,并望及时向软媒论坛反馈!下载前请先阅读:关于Windows 7“OEM版”以及“OEM版”与“MSDN”的区别(参考自翱翔的博客)第一、Windows 7“OEM版”制作流程是:1、微软向“OEM”厂商提供Windows 7有关版本的“母版”(与““MSDN”相关光盘镜像是一样的);2、“OEM”厂商在“母版”中加入有关版本的“OEM密钥”和相关品牌的“OEM证书”;3、在品牌机的BIOS中加入“SLIC 2.1”。
第二、所谓“OEM版”,来源于两个方面:1、“OEM”厂商的“随机光盘镜像”;2、IT爱好者动手打造冠之以“OEM版”。
第三、在Windows 7“母版”中加入“OEM密钥”、“OEM证书”其实非常容易。
——综上所述不难看出:Windows 7“OEM版”与“MSDN版”的根本区别是:光盘镜像中有没有“OEM密钥”、“OEM证书”。
另外,只有在电脑的BIOS中加入“SLIC 2.1”(这是必不可少的大前提),Windows 7“OEM版”才能发挥其特有作用:实现自行激活。
///////////////////////////////////////////////////////////////////////////• 联想 Windows 7 x86(32位) “OEM”简体中文旗舰版光盘镜像迅雷下载:迅雷下载光盘镜像的校验值:MD5: F0040D3F268B39DB17D9B000E69FAA0DSHA1: 46D524BB069115FB8C4C765723B30764943718D5CRC32: D8F2E0BB/////////////////////////////////////////////////////////////////////////// • 戴尔(Dell)Windows 7 x86(32位)OEM 简体中文旗舰版光盘镜像校验值:Size: 2625306624 字节MD5: 964D5109E36666C8C4E96057B5AF8C78SHA1: 3FD566108DDFCF4FC84B1EA37AF1AF0353B6F249CRC32: D5D13FA3/////////////////////////////////////////////////////////////////////////// • 戴尔(Dell)Windows 7 x64(64位)OEM 简体中文旗舰版光盘镜像电驴下载(右键使用迅雷下载):电驴下载光盘镜像校验值:CRC32: 2C90D21AMD5: 48818A0917B643D24D194767EF7B5240SHA1: 40253D867683ED4653BAF5F8819D2A991C5DA1DA/////////////////////////////////////////////////////////////////////////// • 惠普(HP)Windows 7 x86(32位)OEM 简体中文家庭基础版光盘镜像电驴下载(右键使用迅雷下载):电驴下载光盘镜像校验值MD5: 2E534EB0F32171FE635758201C16A356SHA1: 9632066E0FE2608850E7F77696683838922C501BCRC32: F222DC15/////////////////////////////////////////////////////////////////////////// • 华硕 Windows 7 x86(32位) “OEM”简体中文旗舰版光盘镜像校验值:MD5: B07CF26888F3859AAA26EB42DD0C2799SHA1: 1ABE2FB93F4CD40DF3EC836BB18F890A9E0FDC37CRC32: 6B82A71C///////////////////////////////////////////////////////////////////////////友情提示:1、在BIOS成功刷入“××品牌SLIC 2.1”的前提下,安装后即可自行激活。
DELL服务器系统安装引导盘安装
ELL PowerEdge 2950 服务器 RAID 的详细配置方法(附图)(2011-12-17 11:09:12)标签:分类:操作系统raid29502003本文记录了一次由三块 SAS 硬盘组建 RAID-5 并完成 WINDOWS 2003 SERVER 系统的完整过程。
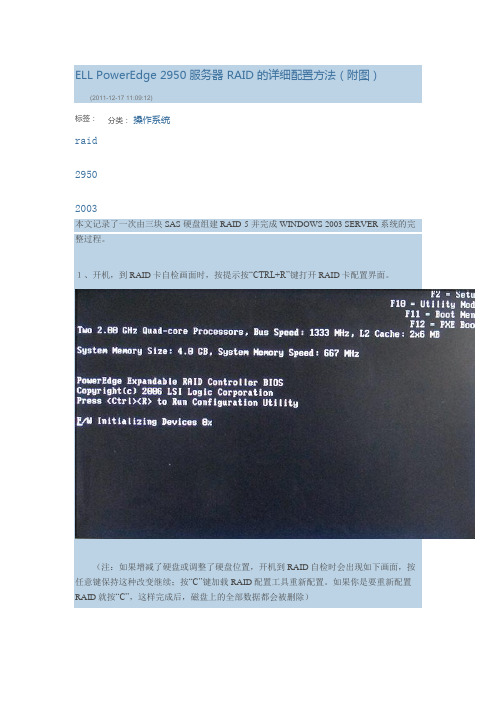
1、开机,到RAID卡自检画面时,按提示按“CTRL+R”键打开RAID卡配置界面。
(注:如果增减了硬盘或调整了硬盘位置,开机到RAID自检时会出现如下画面,按任意键保持这种改变继续;按“C”键加载RAID配置工具重新配置。
如果你是要重新配置RAID就按“C”,这样完成后,磁盘上的全部数据都会被删除)因为磁盘排列已经改变,打开的RAID配置工具显示虚拟硬盘0出错,见下图:2、打开RAID配置工具,如下图,这台服务器只有一个虚拟硬盘 Disk 0,由三块硬盘组成,容量272.250GB。
3、按上下光标键选中“Disk Group 0”,按“F2”键弹出配置菜单,通过光标键选择“Delete Disk Group”,按回车,删除此虚拟磁盘排列。
4、弹出警告确认框。
光标键定位“OK”按钮后回车执行删除。
(回车确定后,磁盘上的全部数据将被删除!)5、服务器上已没有任何硬盘排列存在了。
6、在“No Configuration Present”上按“F2”键弹出配置菜单,通过光标键选中“Create New VD”,回车,创建新的硬盘排列。
7、之后会打开如下所示硬盘排列配置对话框。
首先选择RAID类型:光标键(上、下、左、右、TAB)定位在“RAID Level”右侧蓝色矩形按钮上选择一个RAID类型后回车。
(到底允许组成哪种类型的RAID决定于你已插入的硬盘数量,如果下拉菜单中没有你想组建的RAID类型,说明接入计算机的硬盘数量不够或硬盘数量没有按规定必须成双数)8、选择好RAID类型后,在下方“Physical Disks”区选择挂入的硬盘:用上下光标键选中硬盘再按空格键挂载或卸载硬盘。
DELL OEM WIN 7 简体中文32位与64位全部8张原版镜像下载 图为证
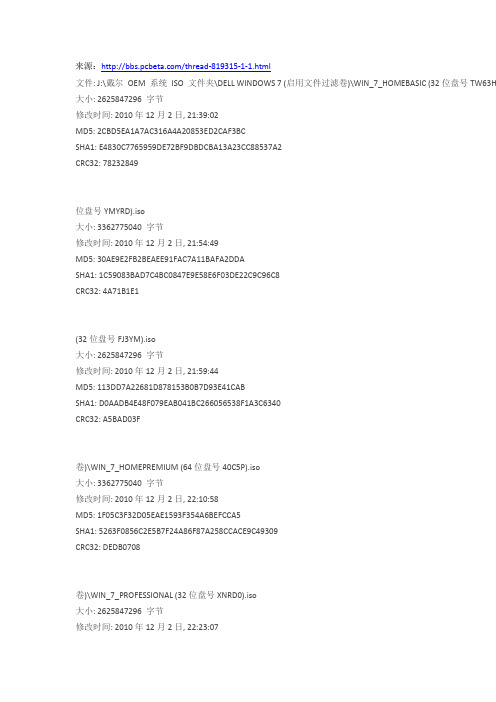
来源:/thread-819315-1-1.html文件: J:\戴尔OEM 系统ISO 文件夹\DELL WINDOWS 7 (启用文件过滤卷)\WIN_7_HOMEBASIC (32位盘号TW63H 大小: 2625847296 字节修改时间: 2010年12月2日, 21:39:02MD5: 2CBD5EA1A7AC316A4A20853ED2CAF3BCSHA1: E4830C7765959DE72BF9DBDCBA13A23CC88537A2CRC32: 78232849位盘号YMYRD).iso大小: 3362775040 字节修改时间: 2010年12月2日, 21:54:49MD5: 30AE9E2FB2BEAEE91FAC7A11BAFA2DDASHA1: 1C59083BAD7C4BC0847E9E58E6F03DE22C9C96C8CRC32: 4A71B1E1(32位盘号FJ3YM).iso大小: 2625847296 字节修改时间: 2010年12月2日, 21:59:44MD5: 113DD7A22681D878153B0B7D93E41CABSHA1: D0AADB4E48F079EAB041BC266056538F1A3C6340CRC32: A5BAD03F卷)\WIN_7_HOMEPREMIUM (64位盘号40C5P).iso大小: 3362775040 字节修改时间: 2010年12月2日, 22:10:58MD5: 1F05C3F32D05EAE1593F354A6BEFCCA5SHA1: 5263F0856C2E5B7F24A86F87A258CCACE9C49309CRC32: DEDB0708卷)\WIN_7_PROFESSIONAL (32位盘号XNRD0).iso大小: 2625847296 字节修改时间: 2010年12月2日, 22:23:07MD5: 13C31865D11F7CC60F7CF9FD9AC04637SHA1: 007A22AC63A43E4D245615F4D7C2C65F4F0A7096 CRC32: 59EAB9C3(64位盘号4XK0T).iso大小: 3362775040 字节修改时间: 2010年12月2日, 22:37:42MD5: 878C15BA72102BFD0E3852C1EAE4E7C0SHA1: 7512E88E166621F3FDFB5F5C28B5AEB7AD3814CD CRC32: BC1B5566位盘号725MX).iso大小: 2625847296 字节修改时间: 2010年12月2日, 22:44:10MD5: 09845EEF668DBC131A7AEB24A8D1B541SHA1: 91C301D33F429F6D6859AB73334D2B1A49905708 CRC32: 2A4207EC盘号TKX2T).iso大小: 3362775040 字节修改时间: 2010年12月2日, 22:57:59MD5: 48818A0917B643D24D194767EF7B5240SHA1: 40253D867683ED4653BAF5F8819D2A991C5DA1DA CRC32: 2C90D21A位盘号TW63H).iso大小: 2625863680 字节修改时间: 2010年12月2日, 21:44:10MD5: D93A04E811A79394FE1478CFF5FAFEFBSHA1: 58E147EF0362699AAFA440D6FBAFCBF53CB14257 CRC32: 5BDE4C0C大小: 3362783232 字节修改时间: 2010年12月2日, 21:49:30MD5: 8D8127743F714295C8B50E40746B0A31SHA1: 966C9808BD0CE9F819712EC46AA83F9F212AA560 CRC32: DF72B6AB大小: 2625863680 字节修改时间: 2010年12月2日, 22:03:28MD5: DBD12F77014E3A4EF6DC352984DF011ASHA1: 3B56B47B2E551D0E5AF6BE780C499808B09D08F9 CRC32: B226A283大小: 3362783232 字节修改时间: 2010年12月2日, 22:17:37MD5: 9635825C298062FC8F8E6377CE975A2BSHA1: BE84FE821D87BAC363FB1D5BAE6AB31C7C27EACA CRC32: CF8123B5大小: 2625863680 字节修改时间: 2010年12月2日, 22:26:37MD5: E3D70BDF76E21235803ABF5ED2BF64D0SHA1: 1BDC7E7367004D9665371D25F474EAF10B00FBCE CRC32: 0B351973大小: 3362783232 字节修改时间: 2010年12月2日, 22:33:20MD5: 5D399F5FF560D02C17394EB209DEB9C4SHA1: 5A6656B83EF47BF9BA3836C13581DD8F6D1F07BE CRC32: 9771E852大小: 2625863680 字节修改时间: 2010年12月2日, 22:47:45MD5: 70A4BDAE623C70BDE37F6691CE771926SHA1: F75AF0309E972331A769A1A69C3DB88FEC46C77D CRC32: 6B4DBE45大小: 3362783232 字节修改时间: 2010年12月2日, 22:53:47MD5: 6422DB9E210AE3FBCEFC5A32ACE9D9ECSHA1: 73336B253F108445E06F5D5B37EBAA4922E96D60 CRC32: 3545F25FDSCN0093.JPG(207.5 KB)DSCN0094.JPG(199.7 KB)DSCN0095.JPG(206.57 KB)DSCN0096.JPG(201.27 KB)捕获.PNG(86.54 KB)捕获.PNG(88.22 KB)。
收集的Windows系列安装序列号和ISO下载地址
DP7CM-PD6MC-6BKXT-M8JJ6-RPXGJ(可用)
F4297-RCWJP-P482C-YY23Y-XH8W3(可用)
HCQ9D-TVCWX-X9QRG-J4B2Y-GR2TT(可用)
M6TF9-8XQ2M-YQK9F-7TBB2-XGG88(可用)
中文语言包下载地址:http://218.108.29.28:2080/OS/WindowsXP_X64_EN/CHS.MSI
Windows XP Professional x64 Edition with SP2 VOL正版密钥:
B66VY-4D94T-TPPD4-43F72-8X4FY
VCFQD-V9FX9-46WVH-K3CD4-4J3JM
方正:
家庭版:FK4VC-XP9C3-BD78M-68492-BP9BY (XXXXX-119-0002964-XXXXX)
专业版:F4G2M-BH2JF-GTGJW-W82HY-VMRRQ (XXXXX-119-0002973-XXXXX)
富士通:
家庭版:JY6V8-QV6YB-BD3GX-67DC9-JT7WD (XXXXX-119-0001373-XXXXX)
HH7VV-6P3G9-82TWK-QKJJ3-MXR96(可用)
TDWGX-DMF97-BJYDQ-X9DJV-CYHWQ(可用)
T8FMX-Q4HQJ-3JW77-JGPDC-FY9DG(可用)
G6X78-XG4KV-3MXT7-FT8YM-F3YW3(可用)
OEM版:
华硕:
家庭版:
KR63J-B34MB-CVP9K-T478G-8Y3XG
DELL服务器R410用引导盘方法安装系统文档
引导盘下载链接:/cn/zh/forum/thread.asp?fid=15&tid=261838
注意:采用DOSA光盘引导和安装服务器系统,将使您服务器硬盘上的所有数据丢失,因此此方法仅供全新的服务器和确认数据有备份前提下的服务器安装
此安装方式仅支持零售版操作系统并且是集成SP2的,如果是盗版光盘,如市面上常见的WINDOWS2000 3IN1版本则无法使用(DELL强烈建议您采用正版软件)
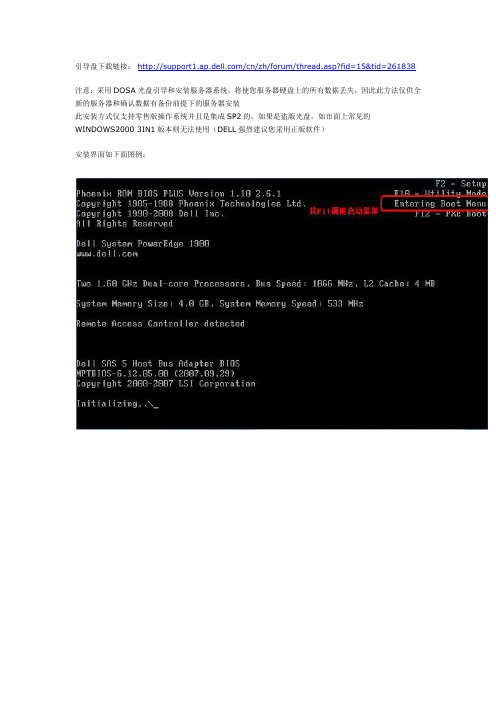
安装界面如下面图例:
稍等片刻,屏幕出现如下界面(不同版本的DOSA光盘界面可能略有不同,但所有步骤一样)
引导光碟将检测您的服务器硬件,这里需要5-10分钟左右,请耐心等待。
注:windows2003 SP2非R2版本,可以选择windows2003 Service Pack2 R2 Edition.
R2版本的第一张光盘和普通的2003版本是一样的,安装完成后再安装第二张R2补丁,如果不安装就是普通版的2003(标准版,企业版等)。
windows系统下载地址大全
系统下载大全(最下面有点说明)下载好请校验SHA1值查看文件是否损坏连接为ed2k链接,可复制地址,然后在下载软件中新建任务来下载(或浏览器地址栏)(win8只推荐用最新版)Win10预览版安装密钥:NKJFK-GPHP7-G8C3J-P6JXR-HQRJRWindows 10 32位简体中文版预览版/W9TPI/FD54DF81A4CCF4511BA1445C606DDBA2/WindowsTechnic alPreview-x86-ZH-CN.isoSHA1:3EE3A2033BE666BA55AFED3FCF6BB52A7C15C7CCWindows 10 64位简体中文版预览版/W9TPI/FD54DF81A4CCF4511BA1445C606DDBA2/WindowsTechnic alPreview-x64-ZH-CN.isoSHA1:135E3193571C5AF9FBF36D24D07B2BE7EE49B2E8Windows 8.1 with Update 32位大客户专业版(简体中文)ed2k://|file|cn_windows_8.1_professional_vl_with_update_x86_dvd_4048630.iso|3086659584 |41CAAB5DAC5643F6E0048576D609C19A|/SHA1:FECD698316EB602A566FCF7F1F2172BFF9BC7713Windows 8.1 with Update 64位大客户专业版(简体中文)ed2k://|file|cn_windows_8.1_professional_vl_with_update_x64_dvd_4050293.iso|4136626176 |4D2363F9E06BFD50A78B1E6464702959|/SHA1:BD1B866707D07C6A460E6AD6E1124782F16ABC60Windows 7 With SP1 32位简体中文旗舰版ed2k://|file|cn_windows_7_ultimate_with_sp1_x86_dvd_u_677486.iso|2653276160|7503E4B9 B8738DFCB95872445C72AEFB|/SHA1:B92119F5B732ECE1C0850EDA30134536E18CCCE7 ISO/CRC:76101970Windows 7 With SP1 64位简体中文旗舰版ed2k://|file|cn_windows_7_ultimate_with_sp1_x64_dvd_u_677408.iso|3420557312|B5854868 1854236C7939003B583A8078|/SHA1: 2CE0B2DB34D76ED3F697CE148CB7594432405E23 ISO/CRC: 69F54CA4Windows XP with SP3 32位简体中文专业版-大客户版ed2k://|file|zh-hans_windows_xp_professional_with_service_pack_3_x86_cd_vl_x14-74070.iso |630237184|EC51916C9D9B8B931195EE0D6EE9B40E|/SHA1:d142469d0c3953d8e4a6a490a58052ef52837f0fWindows XP with SP2 64位英文专业版-大客户版ed2k://|file|en_win_xp_pro_x64_with_sp2_vl_X13-41611.iso|628168704|5573EEA1F40FE32E46F4615B6A4E71D8|/SHA1:cd9479e1dbad7f26b8bdcf97e4aa71cbb8de932b(下面的地址为sp2 SP2 64位韩语、简体中文、繁体中文语言包)/download/f/d/a/fdac56ee-928a-4d51-9d6d-c7c64e9f5bae/ARM MUIx3.iso系统安装完请安装环境组件(我的另一个分享:windows软件与应用里有)安装电脑驱动(去官网下载,没有的,笔记本用驱动人生,台式机用驱动精灵下载安装)有什么问题不会的可以问度娘,不会操作可以私信我win7,win8,win8.1支持在原系统上覆盖安装和自定义安装(但只支持相同的位数,同32位或同64位)如果是预装win8要换系统,请更改bios,然后u盘启动我这里都是官方原版镜像文件,U盘安装的请解压都U盘,开机进入U盘pe系统,然后通用安装(不会的可以问度娘)在原系统下装双系统的:系统镜像下载解压到非安装盘后,打开sources文件夹里的setup.exe 就能自定义安装了(可以安装到其它分区,组件双系统)win7,win8,win8.1都有激活工具(在我另一个分享里,windows软件与应用文件夹里)。
戴尔笔记本怎么在官网下载出厂软件
戴尔笔记本怎么在官网下载出厂软件我们担心下载到有毒或者错误的软件,很会去官网下载,比如戴尔笔记本电脑,怎么下载出厂软件呢?以下是小编收集整理的关于在戴尔网站下载出厂软件的方法,希望对你有帮助。
在戴尔网站下载出厂软件的方法首先打开戴尔官方网站,依次找到:支持> 产品支持> 常见解决方案> 软件和下载的相关链接,如下图所示,然后点击右下角的“我的戴尔下载”。
点击“我的戴尔下载”会进到一个叫“My Dell Downloads”的页面,然后我们点击“继续”如下图所示:这时候会跳转到一个登录页面,如果没有账号,需要自己注册一个账号。
如何登录成功后,会让你注册你的系统,也就是绑定你的机器,然后自动为你提供出厂软件,这个时候我们我们勾选许可协议,然后点击“注册系统”。
(必须是戴尔机器,否则无法注册)这个时候浏览器会弹出一个加载项,必须点安装,否则无法完成注册,。
6点击安装后,系统会再次刷新页面,然后再弹出一个点击安装的界面,继续点击安装,插件安装成功后,系统会再次扫描你的机器,如果扫描发现是戴尔的型号,这个时候就会跳转到下载页面,到时候你只需要选择自己的戴尔机型点击下载就行了。
相关阅读:戴尔笔记本厂家有什么特点?有两大特点,戴尔笔记本的厂家跟顾客的交流最近。
你可以根据你自己的需要去定制你的电脑,是由顾客先挑选一款适合自己的,然后再生产。
举例:把戴尔和华硕相比吧。
华硕的电脑增加了不少的功能,什么指纹识别、附带电脑包、彩壳什么的。
当你看中这款型号时,这些可有可无的功能你必须得要,得为它们花钱。
但是戴尔不一样。
如果你觉得指纹识别功能没什么用,如果你已经有了一个电脑包,或者想要购买一个便宜的电脑包,再或者你不需要漂亮的彩壳,戴尔可以把这些没用的功能都取消掉,同时相应的降低商品的价格,让消费者得到实惠。
由消费者直接和厂家联系,不通过中间商。
戴尔没有任何中间商。
如果你在电脑卖场看到打有戴尔旗号的商铺,那一定不是正宗的渠道。
Dell服务器操作系统安装教程
Dell服务器操作系统安装教程Dell服务器操作系统安装教程1、准备工作1.1 确认服务器型号和操作系统要求1.2 操作系统安装镜像文件1.3 准备安装媒介(如USB驱动器或DVD光盘)1.4 确保服务器连接到稳定的电源和网络2、安装前的操作系统设置2.1 进入服务器的BIOS设置界面2.2 确保服务器的启动顺序设置为从准备的安装媒介启动2.3 确定是否需要其他特殊的BIOS设置,如RD配置3、操作系统安装过程3.1 启动服务器并让其从安装媒介引导3.2 根据操作系统的安装向导,选择合适的语言和地区设置 3.3 确认许可协议并接受3.4 选择安装类型(如全新安装、升级或自定义)3.5 根据需要,进行磁盘分区和格式化3.6 选择要安装的目标位置3.7 安装操作系统并等待安装过程完成4、安装后的操作系统设置4.1 完成操作系统安装后重新启动服务器4.2 根据操作系统的向导,进行一些基本配置,如设置计算机名称、网络连接等4.3 安装和更新设备驱动程序4.4 安装所需的更新补丁和安全补丁4.5 安装所需的应用程序和工具4.6 配置服务器的安全设置和网络设置4.7 进行必要的系统优化和性能调整4.8配置备份和恢复策略附件:1、操作系统安装镜像文件2、Dell服务器型号和操作系统要求列表3、操作系统安装和配置常见问题及解决方法法律名词及注释:1、许可协议 - 操作系统的使用许可协议,规定了使用操作系统的条件和限制。
2、更新补丁 - 操作系统或软件发布的修复程序,用于解决已知的安全漏洞或其他问题。
3、安全补丁 - 专门用于修复和加强操作系统安全性的更新。
4、设备驱动程序 - 用于操作系统与硬件设备之间通信的软件。
5、应用程序 - 在操作系统上运行的软件程序,用于完成特定的任务或提供特定的功能。
6、工具 - 用于辅助操作系统管理和维护的实用程序。
Dell Update Packages 版本 7.1 用户指南说明书
Dell Update Packages 版本 7.1用户指南注、小心和警告注: “注”表示可以帮助您更好地使用计算机的重要信息。
小心: “小心”表示可能会损坏硬件或导致数据丢失,并说明如何避免此类问题。
警告: “警告”表示可能会造成财产损失、人身伤害甚至死亡。
© 2012 Dell Inc.本文中使用的商标:Dell™、Dell 徽标、Dell Boomi™、Dell Precision ™、OptiPlex™、Latitude™、PowerEdge™、PowerVault™、PowerConnect™、OpenManage™、EqualLogic™、Compellent™、KACE™、FlexAddress™、Force10™和 Vostro™是 Dell 公司的商标。
Intel®、Pentium®、Xeon®、Core®和 Celeron®是 Intel 公司在美国和其他国家/地区的注册商标。
AMD®是 Advanced Micro Devices 公司的注册商标,AMD Opteron™、AMD Phenom™和 AMD Sempron™是 AMD (Advanced Micro Devices) 公司的商标。
Microsoft®、Windows®、Windows Server®、Internet Explorer®、MS-DOS®、Windows Vista®和 Active Directory®是微软公司在美国和/或其他国家/地区的商标或注册商标。
Red Hat®和 Red Hat® Enterprise Linux®是 Red Hat 公司在美国和/或其他国家/地区的注册商标。
Novell®和 SUSE®是 Novell 公司在美国和其他国家/地区的注册商标。
戴尔PowerConnect 81xx系列交换机入门指南说明书
____________________
Information in this publication is subject to change without notice. © 2012 Dell Inc. All rights reserved. Reproduction of these materials in any manner whatsoever without the written permission of Dell Inc. is strictly forbidden. Trademarks used in this text: Dell™, the DELL logo, PowerConnect™, OpenManage™, ReadyRails™ , and Torx™ are trademarks of Dell Inc. Microsoft®, Windows® are registered trademarks of Microsoft Corporation in the United States and/or other countries. Other trademarks and trade names may be used in this publication to refer to either the entities claiming the marks and names or their products. Dell Inc. disclaims any proprietary interest in trademarks and trade names other than its own.
戴尔Latitude 5280移动瘦客户端快速入门指南说明书
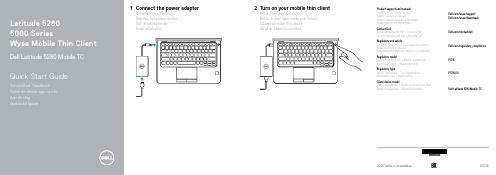
1Connect the power adapterNetzadapter anschließenBranchez l’adaptateur secteur Sluit de netadapter aanAnslut nätadaptern2Turn on your mobile thin clientMobile Thin Client einschaltenMettez le client léger mobile sous tension Schakel uw mobile thin client inSlå på din bärbara tunna klientProduct support and manuals Produktsupport und Handbücher Support produits et manuelsProductondersteuning en handleidingen Produktsupport och handböcker/wyse/support /wyse/downloadsContact DellKontaktaufnahme mit Dell | Contacter Dell Contact opnemen met Dell | Kontakta Dell /contactdellRegulatory and safetySicherheitshinweise und Zulassungsinformationen Réglementations et sécuritéRegelgeving en veiligheid | Reglering och säkerhet /regulatory_complianceRegulatory modelMuster-Modellnummer | Modèle réglementaire Beschreven model: | Regleringsmodell P72SRegulatory typeMuster-Typnummer | T ype réglementaire Beschreven type: | RegleringstypP72S001Client device modelClient-Gerätemodell | Modèle du périphérique client Model clientapparaat | KlientenhetsmodellDell Latitude 5280 Mobile TC© 2017 Dell Inc. or its subsidiaries.2017-06FeaturesFunktionen | Caractéristiques | Kenmerken | Funktioner1. Infrared (IR) camera (optional)2. Infrared emitter (optional)3. Camera status light (optional)4. Camera (optional)5. uSIM card slot (optional)6. microSD card reader7. Dual array microphones8. Power button9. Nobel Wedge lock slot10. Network port11. VGA port12. USB 3.0 port with PowerShare13. Headset/Microphone port14. Touch Fingerpint reader (optional)15. Battery charge status light16. Speakers17. T ouchpad18. Smart card reader (optional)19. USB 3.0 port20. HDMI port21. DisplayPort over USB T ype-C22. Power connector port23. Service tag label1. Caméra infrarouge (IR) (en option)2. Émetteur infrarouge (en option)3. Voyant d’état de la webcam(en option)4. Webcam (en option)5. Logement de carte uSIM (en option)6. Lecteur de carte microSD7. Deux microphones8. Bouton d’alimentation9. Emplacement pour verrou de sécuritéNoble10. Port réseau11. Port VGA12. Port USB 3.0 avec PowerShare13. Port casque/microphone14. Lecteur d’empreintes digitales(en option)15. Voyant de niveau de charge de labatterie16. Haut-parleurs17. Pavé tactile18. Lecteur de carte à puce (en option)19. Port USB 3.020. Port HDMI21. DisplayPort avec USB T ype-C22. Port du connecteur d’alimentation23. Étiquette du numéro de service1. Infrarotkamera (optional)2. Infrarotsender (optional)3. Kamerastatusanzeige (optional)4. Kamera (optional)5. USIM-Kartensteckplatz (optional)6. microSD-Kartenleser7. Dual-Array-Mikrofone8. Betriebsschalter9. Steckplatz für Nobel Wedge-Schloss10. Netzwerkanschluss11. VGA-Anschluss12. USB 3.0-Anschluss mit PowerShare13. Headset-/Mikrofonanschluss14. Fingerabdruckleser mit T ouch-Funktion(optional)15. Akkuladeanzeige16. Lautsprecher17. Touchpad18. Smart Card-Leser (optional)19. USB 3.0-Anschluss20. HDMI-Anschluss21. DisplayPort über USB T yp-C22. Netzanschluss-Port23. Service-Tag-Etikett1. Infraroodcamera (optioneel)2. Infraroodzender (optioneel)3. Camera-statuslampje (optioneel)4. Camera (optioneel)5. uSIM-kaartsleuf (optioneel)6. microSD-kaartlezer7. Dual array-microfoons8. Aan-uitknop9. Sleuf voor Nobel Wedge-slot10. Netwerkpoort11. VGA-poort12. USB 3.0-poort met PowerShare13. Headset/microfoon-poort14. Vingerafdruklezer (optioneel)15. Lampje voor batterijladingsstatus16. Luidsprekers17. Toetsenblok18. Smart card-lezer (optioneel)19. USB 3.0-poort20. HDMI-poort21. DisplayPort via USB Type-C22. Netconnectorpoort23. Servicetaglabel1. Infraröd (IR) kamera (tillval)2. Infraröd sändare (tillval)3. Kamerastatuslampa (tillval)4. Kamera (tillval)5. uSIM-kortplats (tillval)6. microSD-kortläsare7. Dubbla matrismikrofoner8. Strömbrytare9. Nobel Wedge-låsfack10. Nätverksport11. VGA-port12. USB 3.0-port med PowerShare13. Headset-/mikrofonport14. Fingertrycksavläsare (tillval)15. Statusindikatorlampa förbatteriladdning16. Högtalare17. Pekskiva18. Smartkortläsare (tillval)19. USB 3.0-port20. HDMI-port21. DisplayPort via USB Type-C22. Port för nätanslutning23. Etikett med servicenummer。
- 1、下载文档前请自行甄别文档内容的完整性,平台不提供额外的编辑、内容补充、找答案等附加服务。
- 2、"仅部分预览"的文档,不可在线预览部分如存在完整性等问题,可反馈申请退款(可完整预览的文档不适用该条件!)。
- 3、如文档侵犯您的权益,请联系客服反馈,我们会尽快为您处理(人工客服工作时间:9:00-18:30)。
DELL服务器引导光盘下载连接,DELL引导盘万能驱动支持所有型号注意了。
以下连接有所有的DELL服务器引导光盘驱动。
请注意DELL服务器是DVD光驱还是CD光驱然后下相应的ISO/cn/zh/forum/thread.asp?fid=15&tid=261838&type=email_tool下面引用原文如果不需要安装SA软件只安装系统可以用以下链接,但安装时需将server Administrator 勾去掉。
【Dell Systems Build and Update Utility】173_A016.5.0ftp:///sysman/cdu_1.6_core_173_A01.iso-------------------------------------------下面链接光盘包括:【Dell Systems Build and Update Utility】, 【the IT Assistant consol e】, 【the OpenManage Server Administrator agent】, 【Systems Service and Diagnosti cs Tools and Systems Documentation】.6.5 Dell DVD ISO - Dell Systems Management Tools and Documentation下载链接:CD1&CD2:/support/drivers/cn/zh/cnbsd1/DriverDetails/DriverFileFormats?DriverI d=68RWT&FileId=2731101038下载到同一个空的文件夹里面需整合成一张光盘:命令:copy /b OM* OM_6.5.0_SMTD_A01.iso [Windows]cat OM* > OM_6.5.0_SMTD_A01.iso [Linux]支持的机型:PowerEdge 1800PowerEdge 1850PowerEdge 1855PowerEdge 1955 PowerEdge 2900 PowerEdge 2950 PowerEdge 2970 PowerEdge 6800 PowerEdge 6850 PowerEdge 6950 PowerEdge 800 PowerEdge M600 PowerEdge M605 PowerEdge M610 PowerEdge M610x PowerEdge M710 PowerEdge M710HD PowerEdge M805 PowerEdge M905 PowerEdge M910 PowerEdge 1900 PowerEdge 830 PowerEdge 840 PowerEdge 850 PowerEdge 860 PowerEdge 2800 PowerEdge 2850 PowerEdge R200 PowerEdge R210 PowerEdge R300 PowerEdge R310 PowerEdge R410 PowerEdge R510 PowerEdge R610PowerEdge R715 PowerEdge R805 PowerEdge R810 PowerEdge R815 PowerEdge R900 PowerEdge R905 PowerEdge R910 PowerEdge T100 PowerEdge T105 PowerEdge T110 PowerEdge T300 PowerEdge T310 PowerEdge T410 PowerEdge T605 PowerEdge T610 PowerEdge T710 PowerVault DL2000 PowerVault DL2100 PowerVault DP100/NF100 PowerVault DP500/NF500 PowerVault DP600/NF600 PowerVault MD1000 PowerVault MD1120 PowerVault MD1200 PowerVault MD1220 PowerVault MD3000 PowerVault MD3000i PowerVault NX1950 PowerVault NX3000支持的操作系统:ESX 4.0Red Hat Enterprise Linux 4Red Hat Enterprise Linux 5Red Hat Enterprise Linux 6SuSE Linux ES 10 SP2 x86_64SuSE Linux ES 11Windows Server 2003Windows Server 2003 x64Windows Server 2008 R2Windows Server 2008 x64Windows Server 2008 x86XenServer 5 Dell Edition (embedded)======================================================6.4如果不需要安装SA软件只安装系统可以用以下链接,但安装时需将server Administrator 勾去掉。
【Dell Systems Build and Update Utility 】6.4.0, 225_A00下载链接:/sysman/cdu_1.5_core_225_A00.iso-------------------------------------------下面链接光盘包括:【Dell Systems Build and Update Utility】, 【the IT Assistant consol e】, 【the OpenManage Server Administrator agent】, 【Systems Service and Diagnosti cs Tools and Systems Documentation】.6.4.0, 12_A00 Dell DVD ISO - Dell Systems Management Tools and Documentation下载链接:CD1: /support/downloads/download.aspx?c=us&cs=04&l=en&s=bs d&releaseid=R287586&SystemID=PWE_2950&servicetag=&os=WNET&osl=en&devicei d=17861&devlib=0&typecnt=0&vercnt=6&catid=-1&impid=-1&formatcnt=0&libid=36&type id=-1&dateid=-1&formatid=-1&source=-1&fileid=431273CD2: /support/downloads/download.aspx?c=us&cs=04&l=en&s=bs d&releaseid=R287586&SystemID=PWE_2950&servicetag=&os=WNET&osl=en&devicei d=17861&devlib=0&typecnt=0&vercnt=6&catid=-1&impid=-1&formatcnt=0&libid=36&type id=-1&dateid=-1&formatid=-1&source=-1&fileid=431276需整合成一张光盘:命令:copy /b OM_6.4.0_SMTD_A00.iso.001+OM_6.4.0_SMTD_A00.iso.002 OM_640_SMTD_ A00.iso [Windows]cat OM_6.4.0_SMTD_A00.iso.001 OM_6.4.0_SMTD_A00.iso.002 > OM_640_SMTD_A0 0.iso [Linux]支持的机型:PowerEdge 1800PowerEdge 1850PowerEdge 1855PowerEdge 1950PowerEdge 1955PowerEdge 2900PowerEdge 2950PowerEdge 2970PowerEdge 6800PowerEdge 6850PowerEdge 6950PowerEdge 800PowerEdge M600PowerEdge M605PowerEdge M610PowerEdge M610xPowerEdge M710PowerEdge M710HDPowerEdge M805PowerEdge M905PowerEdge M910PowerEdge 1900PowerEdge 830PowerEdge 840PowerEdge 850PowerEdge 860PowerEdge 2800 PowerEdge 2850 PowerEdge R200 PowerEdge R210 PowerEdge R300 PowerEdge R310 PowerEdge R410 PowerEdge R510 PowerEdge R610 PowerEdge R710 PowerEdge R715 PowerEdge R805 PowerEdge R810 PowerEdge R815 PowerEdge R900 PowerEdge R905 PowerEdge R910 PowerEdge T100 PowerEdge T105 PowerEdge T110 PowerEdge T300 PowerEdge T310 PowerEdge T410 PowerEdge T605 PowerEdge T610 PowerEdge T710 PowerVault DL2000 PowerVault DL2100 PowerVault DP100/NF100 PowerVault DP500/NF500 PowerVault DP600/NF600 PowerVault MD1000PowerVault MD1120PowerVault MD1200PowerVault MD1220PowerVault MD3000PowerVault MD3000iPowerVault NX1950PowerVault NX3000支持的操作系统:Novell SuSE Linux ES 11VMWare ESX 4.0Microsoft Windows Server 2008 x64Red Hat Red Hat Enterprise Linux 4Red Hat Red Hat Enterprise Linux 4.7Red Hat Red Hat Enterprise Linux 5.2Red Hat Red Hat Enterprise Linux 5Novell SuSE Linux ES 10 SP2 x86_64Microsoft Windows Server 2008 x86Microsoft Windows Server 2003Microsoft Windows Server 2008 R2Microsoft Windows Server 2003 x64======================================================6.3.0, A00 Dell DVD ISO - Dell Systems Management Tools and Documentation下载链接:CD1:ftp:///secure/sysman/OM_6.3.0_SMTD_A00.iso.001CD2:ftp:///secure/sysman/OM_6.3.0_SMTD_A00.iso.002需整合成一张光盘:命令:copy /b OM_6.3.0_SMTD_A00.iso.001+OM_6.3.0_SMTD_A00.iso.002 OM_630_S MTD_A00.iso [Windows]--------如果不需要安装SA软件只安装系统可以用以下链接,但安装时需将server Administrator勾去掉。
