kindeditor使用方法==
kindEditor编辑器使用方法

kindeditor的使用方法asp例子<script>KindEditor.ready(function(K) {//全局配置var serverScriptPath='/editor/asp/';//服务端文件文件夹URL绝对路径,最后要有/var editorPluginsPath="/editor/plugins/";//编辑器的插件文件夹URL绝对路径,最后要有///全局配置结束var editor1 = K.create('textarea[name="editor_id"]', {//指定textarea //不要改动uploadJson : serverScriptPath+'upload_json.asp',fileManagerJson : serverScriptPath+'file_manager_json.asp',cssPath :editorPluginsPath+'code/prettify.css',emoticonsPath:editorPluginsPath+"/emoticons/images/",//不要改动结束allowFileManager : true});});</script>记得要引入二个JS文件,下载包里有,自己找一下。
<script charset="utf-8" src="../editor/kindeditor.js"></script><script charset="utf-8" src="../editor/lang/zh_CN.js"></script>需要在调用的地方放一个文本框,就可以显示出编辑器了。
51CTO下载-kindeditor使用方法(jsp+strcuts2.0)

Kindeditor的使用方法注:本使用法是针对jsp+stcuts2.0的用法1.从kindeditor官网/下载kindeditor编辑器。
2.解压kindeditor压缩包,然后把解压的文件夹放到相应项目的WebRoot下。
3..找到kindeditor目录下的plugins/image/image.html页面,修改如下代码,默认为php,修改为你的jsp上传处理页面为:var imageUploadJson = (typeof KE.g[id].imageUploadJson == 'undefined') ?'../../jsp/upload_json.jsp' : KE.g[id].imageUploadJson;。
4.修改upload_json.jsp页面里的代码为:<%@ page language="java" import="java.util.*" pageEncoding="UTF-8"%><%@pageimport="org.apache.struts2.dispatcher.multipart.MultiPartRequestWr apper"%><%@page import="java.util.concurrent.locks.*"%><%@pageimport="java.io.*"%><%@ page import="org.json.simple.*"%><%//Struts2 请求包装过滤器MultiPartRequestWrapperwrapper=(MultiPartRequestWrapper)request;//获得上传的文件名String fileName = wrapper.getFileNames("imgFile")[0];//获得未见过滤器File file = wrapper.getFiles("imgFile")[0];//----------重新构建上传文件名---------final Lock lock = new ReentrantLock();String newName = null;lock.lock();try{//加锁为防止文件名重复newName = System.currentTimeMillis()+fileName.substring(stIndexOf("."),fileName.length());}finally{lock.unlock();}//------锁结束---------//获取文件输出流FileOutputStream fos = newFileOutputStream(request.getSession().getServletContext().getRealP ath("/")+"ke_upload/" + newName);//设置 KE 中的图片文件地址String newFileName = request.getScheme() + "://"+request.getServerName() + ":" + request.getServerPort()+request.getContextPath() + "/ke_upload/" + newName;byte[] buffer = new byte[1024];//获取内存中当前文件输入流InputStream in = new FileInputStream(file);try{int num =0;while((num = in.read(buffer)) >0){fos.write(buffer,0,num);}}catch(Exceptione){e.printStackTrace(System.err);}finally{in.close();fos.close();}//发送给 KEJSONObject obj = new JSONObject();obj.put("error", 0);obj.put("url", newFileName);out.println(obj.toJSONString());%>5.进入kindeditor\jsp\lib目录下,把commons-fileupload-1.2.1.jar、commons-io-1.3.2.jar、json_simple-1.1.jar这三个jar包放到相应项目的WEB-INF 文件夹下的lib文件夹里面:6.进入kindeditor\jsp的demo.jsp页面。
详细介绍如何使用kindEditor编辑器

详细介绍如何使用kindEditor 编辑器今天群里的朋友问我能不能写个kindEditor 编辑器的使用教程,说是弄了半天没有搞定。
由于PHP 啦后台正好用了这个编辑器,我有写经验,正好教他的同时写出来分享给大家kindEditor 编辑器是一个由JS 写成的在线编辑器,很多网站或CMS 等都有用它,口碑不错,目前最新版本是4.1.10。
其实它的用法非常简单,我是在下载了它的安装包后看了一些demo 然后就把它放到PHP 啦的后台上去了。
好了教程正式开始一、下载下载最新版本的kindEditor (官方网站 ),下载后打开examples/index.html 就可以看到一排例子。
二、部署将解压后的文件包kindeditor-4.1.10里的asp jsp php 这几个带有服务端脚本的文件夹删除,然后上传到你网站的相应目录中,在这里我假设放到了plugin 目录。
三、嵌入在需要加入编辑器的页面的HTML 中倒入1 <link rel="stylesheet" href="/plugin/kindeditor-4.1.10/themes/default/default.css" /> 2 <script charset="utf-8" src="/plugin/kindeditor-4.1.10/kindeditor-min.js"></script>3 <script charset="utf-8" src="/plugin/kindeditor-4.1.10/lang/zh_CN.js"></script> 然后添加一个输入框1 <textarea id="editor_id" name="content"></textarea>最后在加入一段JS1 KindEditor.ready(function(K) {2 window.editor = K.create('#editor_id',{3 cssPath:'/public/plugin/editor/plugins/code/prettif y.css',4 uploadJson:'/upload/image.php',5 resizeType :1,6 allowPreviewEmoticons : true,7 allowImageUpload : true,8 });9 });好了。
kindeditor用法
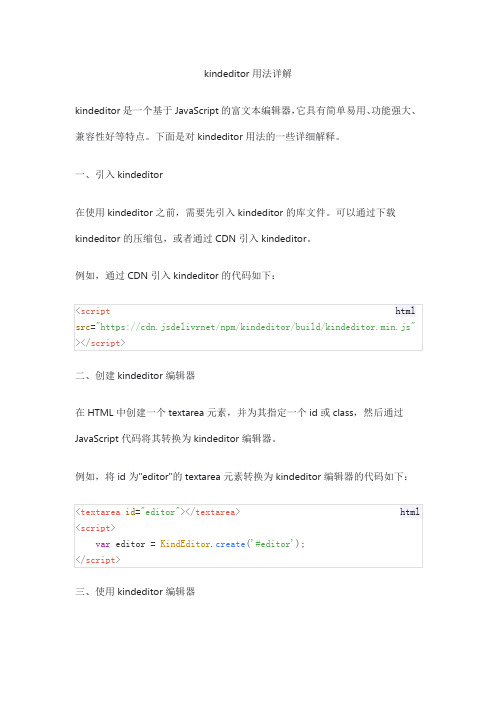
kindeditor用法详解
kindeditor是一个基于JavaScript的富文本编辑器,它具有简单易用、功能强大、兼容性好等特点。
下面是对kindeditor用法的一些详细解释。
一、引入kindeditor
在使用kindeditor之前,需要先引入kindeditor的库文件。
可以通过下载kindeditor的压缩包,或者通过CDN引入kindeditor。
例如,通过CDN引入kindeditor的代码如下:
二、创建kindeditor编辑器
在HTML中创建一个textarea元素,并为其指定一个id或class,然后通过JavaScript代码将其转换为kindeditor编辑器。
例如,将id为"editor"的textarea元素转换为kindeditor编辑器的代码如下:
三、使用kindeditor编辑器
使用kindeditor编辑器非常简单,可以通过调用editor对象的方法来执行各种操作。
以下是一些常用的方法:
1.获取编辑器内容:
2.设置编辑器内容:
3.插入图片:
4.插入链接:
5.获取焦点:
6.执行其他操作:
kindeditor还提供了许多其他方法,例如删除选中内容、查找和替换文本、设置样式等。
可以参考kindeditor的官方文档或示例代码来了解更多用法。
KindEditor文本编辑器

配置KindEditor文本编辑器时间:2012-06-16 10:23来源:/ForEvErNoME 作者:ForEvErNoME 点击:1116次我要投稿高质量的 空间,完美支持1.0/2.0/3.5/4.0/MVC等之前一直使用CKEditor和CKFinder结合的文本编辑器,偶然机会看到KindEditor,感觉界面挺好看的,示例代码比较多,API文档内容清晰简单,于是下载尝试用下。
1.什么是KindEditorKindEditor 是一套开源的在线HTML编辑器,主要用于让用户在网站上获得所见即所得编辑效果,开发人员可以用KindEditor 把传统的多行文本输入框(textarea)替换为可视化的富文本输入框。
KindEditor 使用JavaScript 编写,可以无缝地与Java、.NET、PHP、ASP 等程序集成,比较适合在CMS、商城、论坛、博客、Wiki、电子邮件等互联网应用上使用。
2.前期准备到官网下载最新版的KindEditor 4.11,解压文件后可得文件结构:asp:与asp结合的示例代码:与结合的示例代码attached:上传文件的根目录,可在相关的代码中修改examples:功能演示的示例代码jsp:与jsp结合的示例代码lang:语言包php:与php结合的示例代码plugins:控件的功能代码的实现kindeditor.js:配置文件kindeditor-min.js:集成文件由于使用的是,所以将不需要的文件夹删掉。
其中在中demo.aspx是参考代码,也可以删掉。
3.配置KindEditor(1)新建网站,将精简后的kindeditor文件夹放到网站根目录下下,并且引用kindeditor//bin/LitJSON.dll文件。
(2)新建index.aspx文件,引入相关文件<link href="kindeditor/plugins/code/prettify.css" rel="stylesheet" type="text/css" /> <script src="kindeditor/lang/zh_CN.js" type="text/javascript"></script><script src="kindeditor/kindeditor.js" type="text/javascript"></script><script src="kindeditor/plugins/code/prettify.js" type="text/javascript"></script> <script type="text/javascript">KindEditor.ready(function (K) {var editor = K.create('#content', {//上传管理uploadJson: 'kindeditor//upload_json.ashx',//文件管理fileManagerJson: 'kindeditor//file_manager_json.ashx',allowFileManager: true,//设置编辑器创建后执行的回调函数afterCreate: function () {var self = this;K.ctrl(document, 13, function () {self.sync();K('form[name=example]')[0].submit();});K.ctrl(self.edit.doc, 13, function () {self.sync();K('form[name=example]')[0].submit();});},//上传文件后执行的回调函数,获取上传图片的路径afterUpload : function(url) {alert(url);},//编辑器高度width: '700px',//编辑器宽度height: '450px;',//配置编辑器的工具栏items: ['source', '|', 'undo', 'redo', '|', 'preview', 'print', 'template', 'code', 'cut', 'copy', 'paste','plainpaste', 'wordpaste', '|', 'justifyleft', 'justifycenter', 'justifyright','justifyfull', 'insertorderedlist', 'insertunorderedlist', 'indent', 'outdent', 'subscript','superscript', 'clearhtml', 'quickformat', 'selectall', '|', 'fullscreen', '/','formatblock', 'fontname', 'fontsize', '|', 'forecolor', 'hilitecolor', 'bold','italic', 'underline', 'strikethrough', 'lineheight', 'removeformat', '|', 'image', 'multiimage','flash', 'media', 'insertfile', 'table', 'hr', 'emoticons', 'baidumap', 'pagebreak','anchor', 'link', 'unlink', '|', 'about' ]});prettyPrint();});</script>(3)在页面中添加一个textbox控件,将id命名为content,把属性"TextMode"属性改为Multiline。
miniUI_KindEditor使用
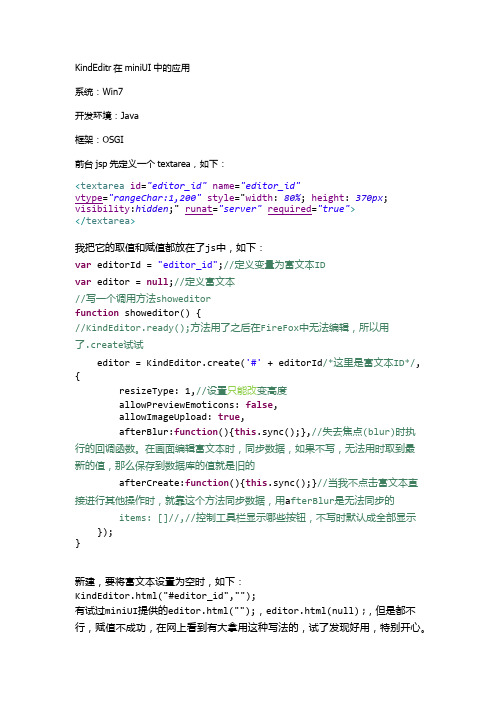
KindEditr在miniUI中的应用系统:Win7开发环境:Java框架:OSGI前台jsp先定义一个textarea,如下:<textarea id="editor_id"name="editor_id"vtype="rangeChar:1,200"style="width: 80%; height: 370px; visibility:hidden;" runat="server"required="true"></textarea>我把它的取值和赋值都放在了js中,如下:var editorId = "editor_id";//定义变量为富文本IDvar editor = null;//定义富文本//写一个调用方法showeditorfunction showeditor() {//KindEditor.ready();方法用了之后在FireFox中无法编辑,所以用了.create试试editor = KindEditor.create('#' + editorId/*这里是富文本ID*/, {resizeType: 1,//设置只能改变高度allowPreviewEmoticons: false,allowImageUpload: true,afterBlur:function(){this.sync();},//失去焦点(blur)时执行的回调函数。
在画面编辑富文本时,同步数据,如果不写,无法用时取到最新的值,那么保存到数据库的值就是旧的afterCreate:function(){this.sync();}//当我不点击富文本直接进行其他操作时,就靠这个方法同步数据,用a fterBlur是无法同步的items: []//,//控制工具栏显示哪些按钮,不写时默认成全部显示});}新建,要将富文本设置为空时,如下:KindEditor.html("#editor_id","");有试过miniUI提供的editor.html("");,editor.html(null) ;,但是都不行,赋值不成功,在网上看到有大拿用这种写法的,试了发现好用,特别开心。
KindEditor3.5.2最新ASP、PHP版分享及使用方法
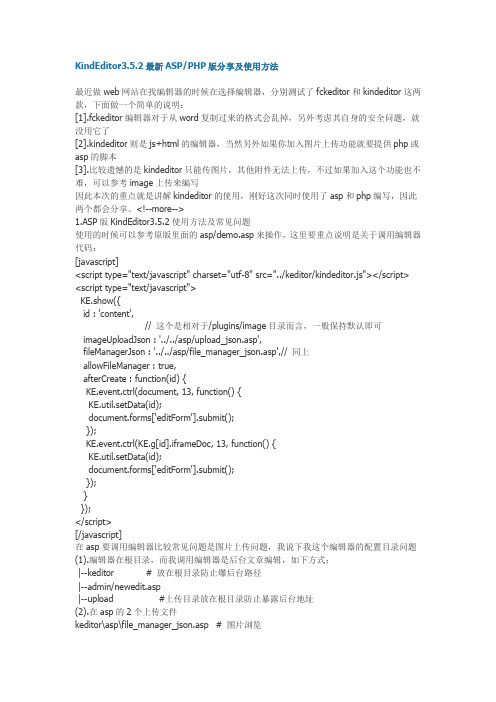
KindEditor3.5.2最新ASP/PHP版分享及使用方法最近做web网站在找编辑器的时候在选择编辑器,分别测试了fckeditor和kindeditor这两款,下面做一个简单的说明:[1].fckeditor编辑器对于从word复制过来的格式会乱掉,另外考虑其自身的安全问题,就没用它了[2].kindeditor则是js+html的编辑器,当然另外如果你加入图片上传功能就要提供php或asp的脚本[3].比较遗憾的是kindeditor只能传图片,其他附件无法上传,不过如果加入这个功能也不难,可以参考image上传来编写因此本次的重点就是讲解kindeditor的使用,刚好这次同时使用了asp和php编写,因此两个都会分享。
<!--more-->1.ASP版KindEditor3.5.2使用方法及常见问题使用的时候可以参考原版里面的asp/demo.asp来操作,这里要重点说明是关于调用编辑器代码:[javascript]<script type="text/javascript" charset="utf-8" src="../keditor/kindeditor.js"></script> <script type="text/javascript">KE.show({id : 'content',// 这个是相对于/plugins/image目录而言,一般保持默认即可imageUploadJson : '../../asp/upload_json.asp',fileManagerJson : '../../asp/file_manager_json.asp',// 同上allowFileManager : true,afterCreate : function(id) {KE.event.ctrl(document, 13, function() {KE.util.setData(id);document.forms['editForm'].submit();});KE.event.ctrl(KE.g[id].iframeDoc, 13, function() {KE.util.setData(id);document.forms['editForm'].submit();});}});</script>[/javascript]在asp要调用编辑器比较常见问题是图片上传问题,我说下我这个编辑器的配置目录问题(1).编辑器在根目录,而我调用编辑器是后台文章编辑,如下方式:|--keditor # 放在根目录防止爆后台路径|--admin/newedit.asp|--upload #上传目录放在根目录防止暴露后台地址(2).在asp的2个上传文件keditor\asp\file_manager_json.asp # 图片浏览在该文件中,涉及到上传目录的设置问题,代码如下:[vb]rootPath = "/upload/"rootUrl = "../upload/"[/vb]keditor\asp\upload_json.asp # 图片上传在该文件中,涉及到上传目录的设置问题,代码如下:[vb]'文件保存目录路径savePath = "/upload/"'文件保存目录URLsaveUrl = "../upload/"[/vb](3)同时在编辑器中加入插入代码的功能,具体不详说,查看附件代码这样子设置完目录的结构就不会出现"服务器出现故障"的提示,出现这个提示一般可能有以下几种情况:(1).上传目录设置问题(2).从官方下载的版本默认是utf-8格式,如果用到gbk中可能会出现这个错误提示(3).程序本身出错(没有修改程序是不会这个问题!)<a href='/wp-content/uploads/2011/03/keditor.zip'>点我下载:keditor 3.5.2 for asp Modify by 冷锋</a>2.PHP版KindEditor3.5.2使用方法及常见问题PHP版的和ASP原理差不多就是在目录设置有点不一样,注意下就可以了,就不多说,只说下目录结构:|--keditor # 更目录|--keditor/attached # 上传目录|--system/newedit.php # 调用编辑器页面目录在后台目录设置常见keditor/php目录下两个php文件,建议不要调整目录结构。
kindeditor使用方法

∙ 1.下载KindEditor最新版本。
打开下载页面。
∙ 2.把kindeditor放在你的网站目录下,随意目录,只要路径设置对就可以!∙ 3.要显示编辑器的位置添加TEXTAREA输入框。
如果已经有TEXTAREA,属性里添加ID即可。
∙代码∙<textarea id="content_1"name="content"style="width:700px;h eight:300px;"></textarea>∙ 4.在相应页面上添加kindeditor的引用,添加如下代码:∙∙代码∙<script type="text/javascript" charset="utf-8" src="/editor/ kindeditor.js"></script><script type="text/javascript">KE.show({id : 'content_1' //TEXTAREA输入框的ID });</script>∙∙src=..... 这里根据你的kindeditor放置位置而变化。
∙怎么获取textarea的文本内容?1.在<textarea id="content_1" name="content" style="width:700px;height: 300px;"></textarea>后面添加隐藏input和button,代码如下:∙代码∙<input id="content_1_1" type="hidden" runat="server" value=""/> <asp:Button ID="Button1" runat="server" Text="保存"OnClientClick="save();" OnClick="Button1_Click" CssClass="i_1" />∙添加事件处理代码1.首先是客户端代码,在服务器代码之前执行,代码如下:∙∙代码∙function save(){var s = KE.util.getData("content_1");s = KE.util.escape(s);document.getElementById("content_1_1").value = s;}∙∙已经在服务器控件中取到了,保存的时候保持content_1_1的value就可以了。
kindeditor在线编辑器增加附件上传功能

</tr>
<tr>
<td class="left1">说明:</td>
<td class="right1">
<input type="text" id="imgTitle" name="imgTitle" value="" maxlength="100" style="width:220px;" />
//定义允许上传的文件扩展名
$ext_arr = array('doc', 'xls', 'ppt', 'pdf', 'txt', 'rar' , 'zip');
//最大文件大小
$max_size = 1000000;
//更改目录权限
@mkdir($save_path, 0777);
srand((double)microtime()*1000000);
} else {
document.getElementById('url').style.display = 'block';
document.getElementById('imgFile').style.display = 'none';
}
}
</script>
</head>
<body>
<form name="uploadForm" method="post" enctype="multipart/form-data" action="../php/uploadaccessory.php">
KindEditor使用手册

KindEditor使用手册一简单使用方法1. 把所有文件上传到程序所在目录下,例如:http://你的域名/editor/。
2. 在此目录下创建attached文件夹,并把权限改成777。
3. 要添加编辑器的地方加入以下代码。
(原来的TEXTAREA或其它编辑器可以先注释。
)这里[]里的内容要根据你的实际情况修改。
-----------------------------------------------------------------------<input type="hidden" name="[原TEXTAREA名字]" value="[这里放你要编辑的内容]"><script type="text/javascript" charset="utf-8" src="[JS路径]/KindEditor.js"></script><script type="text/javascript">var editor = new KindEditor("editor"); //创建编辑器对象editor.hiddenName = "[原TEXTAREA名字]";editor.editorWidth = "[编辑器宽度,例如:700px]";editor.editorHeight = "[编辑器高度,例如:400px]";editor.show(); //显示//提交时获得最终HTML代码的函数function KindSubmit() {editor.data();}</script>-----------------------------------------------------------------------4. FORM的onsubmit属性里添加KindSubmit()函数。
KindEditor在线HTML编辑器的使用方法
KindEditor是一款用Javascript编写的开源在线HTML编辑器,主要用户是让用户在网站上获得可见即可得的编辑效果,开发人员可以用KindEditor 把传统的多行文本输入框(textarea)替换为可视化的富文本输入框。
你可以在其官网了解更多信息,包括演示、文档、下载等。
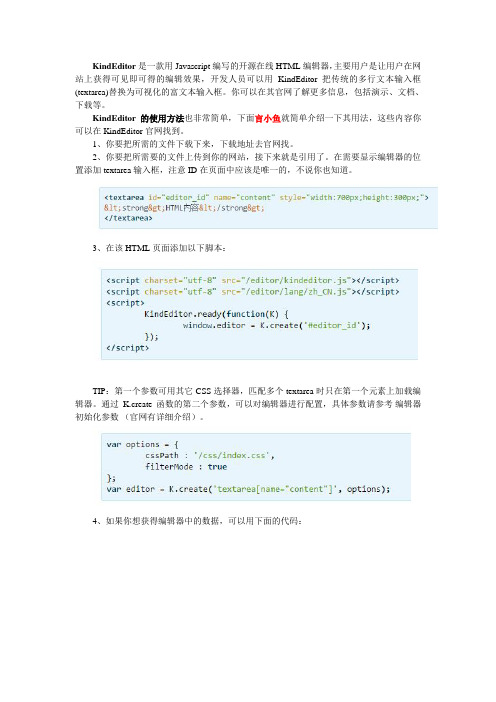
KindEditor的使用方法也非常简单,下面言小鱼就简单介绍一下其用法,这些内容你可以在KindEditor官网找到。
1、你要把所需的文件下载下来,下载地址去官网找。
2、你要把所需要的文件上传到你的网站,接下来就是引用了。
在需要显示编辑器的位置添加textarea输入框,注意ID在页面中应该是唯一的,不说你也知道。
3、在该HTML页面添加以下脚本:
TIP:第一个参数可用其它CSS选择器,匹配多个textarea时只在第一个元素上加载编辑器。
通过K.create函数的第二个参数,可以对编辑器进行配置,具体参数请参考编辑器初始化参数(官网有详细介绍)。
4、如果你想获得编辑器中的数据,可以用下面的代码:
KindEditor的使用方法就介绍到这里了,如果您还有不明白的地方可以去官网查找详细资料,相信一定能找到您想要的答案!。
kindEditor完整认识 PHP上调用并上传图片说明
引用:/yanghbmail/blog/item/6fc7beec9531e33462d09f2a.htm lkindEditor完整认识 PHP上调用并上传图片说明。
2011年02月03日星期四 20:26最近又重新捣鼓了下kindeditor,之前写的一篇文章/yanghbmail/blog/item/c681be015755160b1d9583e7.htm l感觉有点不太全面细致,所以今天再重新写下。
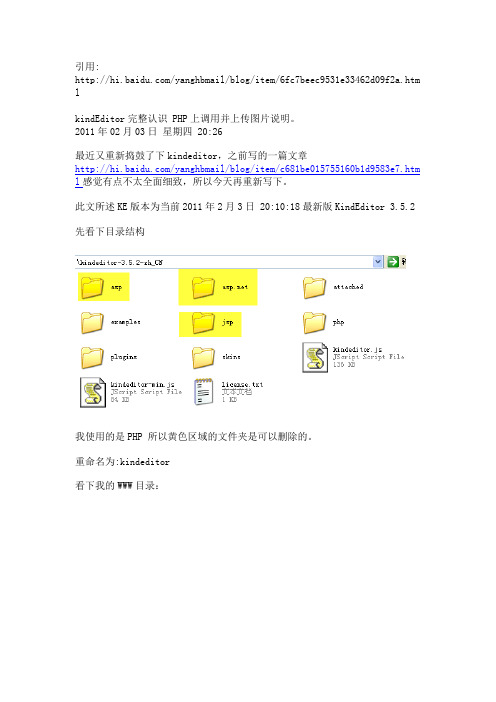
此文所述KE版本为当前2011年2月3日 20:10:18最新版KindEditor 3.5.2 先看下目录结构我使用的是PHP 所以黄色区域的文件夹是可以删除的。
重命名为:kindeditor看下我的WWW目录:这里的关键文件就是图中的两个其它我划掉的是我自己的文件夹-----------------dome.php----------------------<?php$htmlData = '';if (!empty($_POST['content1'])) {if (get_magic_quotes_gpc()) {echo '上面的';$htmlData = stripslashes($_POST['content1']);} else {echo '下面的';$htmlData = $_POST['content1'];}}?><!doctype html><html><head><meta charset="utf-8" /><title>KindEditor PHP</title><link rel="stylesheet" href="./kindeditor/examples/index.css" /> //此处的引入文件位置路径为相对于该PHP文件的位置此为demo.php<script charset="utf-8" src="./kindeditor/kindeditor.js"></script> //此处的引入文件位置路径为相对于该PHP文件的位置此为demo.php<script>KE.show({id : 'content1',imageUploadJson : '../../php/upload_json.php', //<<相对于kindeditor3.5.5\plugins\image\image.htmlfileManagerJson : '../../php/file_manager_json.php', //<<相对于kindeditor3.5.5\plugins\file_manager\file_manager.htmlallowFileManager : true,afterCreate : function(id) {KE.event.ctrl(document, 13, function() {KE.util.setData(id);document.forms['example'].submit();});KE.event.ctrl(KE.g[id].iframeDoc, 13, function() {KE.util.setData(id);document.forms['example'].submit();});}});</script></head><body class="ke-content"><?php echo $htmlData; ?><form name="example" method="post" action="demo.php"><textarea id="content1" name="content1" cols="100" rows="8"style="width:700px;height:200px;visibility:hidden;"><?php echo htmlspecialchars($htmlData); ?></textarea><br /><input type="submit" name="button" value="提交内容" /> (提交快捷键: Ctrl + Enter)</form></body></html>注意上面的4处红色文件的位置。
kindeditor 用法

KindEditor是一个流行的开源富文本编辑器,用于Web开发。
以下是KindEditor的基本用法:1. 引入KindEditor的JS文件:在HTML页面中引入KindEditor的JS文件,可以通过下载或在线引用。
确保在引入JS文件之前已经引入了jQuery库,因为KindEditor是基于jQuery的。
html复制代码<script src="path/to/kindeditor.js"></script>2. 创建KindEditor编辑器:在HTML页面中创建一个textarea元素,然后使用KindEditor的jQuery插件将其转换为富文本编辑器。
html复制代码<textarea id="editor"></textarea>javascript复制代码$(document).ready(function() {var editor = KindEditor.create('textarea[id=editor]', {width: '100%',height: '500px',// 其他配置项...});});3. 使用KindEditor的API:通过KindEditor提供的API,可以实现各种编辑器操作,如获取和设置内容、设置配置项、监听事件等。
可以使用KindEditor的官方文档或示例代码来了解更多API的使用方法。
4. 保存和提交内容:当用户完成编辑后,可以通过KindEditor提供的API获取编辑器中的内容,并将其提交到服务器进行处理。
例如,可以使用editor.html()方法获取编辑器中的HTML内容。
javascript复制代码var content = editor.html();// 将content提交到服务器...以上是KindEditor的基本用法。
kindeditor inserttext

kindeditor inserttext中括号内的内容是"[kindeditor inserttext]",那么我将以如何使用KindEditor富文本编辑器为主题,写一篇1500-2000字的文章,逐步介绍如何使用该工具。
文章标题:使用KindEditor富文本编辑器轻松创建精美的网页内容引言:在现代互联网时代,网页内容的创建和展示变得至关重要。
为了提高用户体验,一个简洁、美观的网页编辑工具是不可或缺的。
KindEditor富文本编辑器是一个功能强大、易于使用的工具,它为网页开发人员和内容创作者提供了许多特性和功能,帮助他们创建出高质量的网页内容。
本文将一步一步解释如何使用KindEditor富文本编辑器来实现这一目标。
第一步:下载和安装KindEditor富文本编辑器首先,从KindEditor官方网站下载最新版本的编辑器。
然后,将下载的文件解压缩到您的项目文件夹中。
随后,您需要引入必要的JavaScript和CSS文件到您的网页代码中,并根据您的需求进行定制配置。
第二步:初始化KindEditor编辑器为了在您的网页中使用KindEditor富文本编辑器,您需要初始化编辑器实例。
创建一个HTML元素(如textarea或div),并为其指定一个ID作为容器。
然后,在您的JavaScript代码中,使用KindEditor.create函数来初始化编辑器。
您可以通过传递一些配置选项来自定义编辑器的外观和行为,比如设置编辑器的高度、宽度、工具栏按钮等等。
第三步:编辑网页内容一旦您成功地初始化了KindEditor编辑器,您就可以开始编辑网页内容了。
编辑器提供了丰富的功能,比如字体样式、颜色、大小、加粗、斜体、添加链接、插入图片、表格等等。
您只需单击相应的按钮或使用快捷键即可完成操作。
编辑器还支持撤销和重做功能,以及对文本的搜索和替换。
您还可以通过代码视图查看和编辑HTML代码。
kindeditor的使用
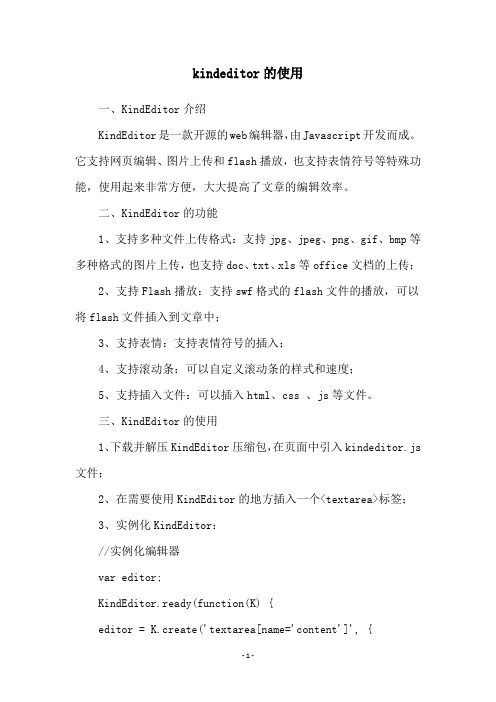
kindeditor的使用一、KindEditor介绍KindEditor是一款开源的web编辑器,由Javascript开发而成。
它支持网页编辑、图片上传和flash播放,也支持表情符号等特殊功能,使用起来非常方便,大大提高了文章的编辑效率。
二、KindEditor的功能1、支持多种文件上传格式:支持jpg、jpeg、png、gif、bmp等多种格式的图片上传,也支持doc、txt、xls等office文档的上传;2、支持Flash播放:支持swf格式的flash文件的播放,可以将flash文件插入到文章中;3、支持表情:支持表情符号的插入;4、支持滚动条:可以自定义滚动条的样式和速度;5、支持插入文件:可以插入html、css 、js等文件。
三、KindEditor的使用1、下载并解压KindEditor压缩包,在页面中引入kindeditor.js 文件;2、在需要使用KindEditor的地方插入一个<textarea>标签;3、实例化KindEditor://实例化编辑器var editor;KindEditor.ready(function(K) {editor = K.create('textarea[name='content']', {tresizeType : 1,tallowPreviewEmoticons : false,tallowImageUpload : false,titems : [tt'fontname', 'fontsize', '|', 'forecolor', 'hilitecolor', 'bold', 'italic', 'underline',tt'removeformat', '|', 'justifyleft', 'justifycenter','justifyright', 'insertorderedlist',tt'insertunorderedlist', '|', 'emoticons', 'image','link']});});4、提交表单:当提交表单时,调用 KindEditor.sync() 将编辑器中的内容同步到 textarea 中。
KindEditor在线编辑器应用文档

以纯文本(不带任何格式)的形式把内容粘贴到编辑器
从Word中粘贴
把从Word中拷贝的内容粘贴到编辑器中,并去除繁杂格式。
全部选中
选中编辑区内的所有内容
粗体
使当前选区内的文字在粗体和非粗体间变换
斜体
使当前选区内的文字在斜体和非斜体间变下划线间变换
中划线
插入一个表格
表格属性
编辑选定表格的各项属性值
插入行(在上方)
在当前选区上方插入一个表格行
插入行(在下方)
在当前选区下方插入一个表格行
删除行
删除当前鼠标或选区所在行
插入列(在左侧)
在当前鼠标所在单元格的左侧插入一列
插入列(在右侧)
在当前鼠标所在单元格的右侧插入一列
删除列
删除选区所在的表格列
代码状态
切换编辑区到代码状态模式
KindEditor在线编辑器应用文档
图标
标题
描述
撤消(Ctrl + Z)
撤消上次的操作
恢复(Ctrl + Y)
恢复最后的操作
剪切(Ctrl + X)
拷贝当前的选区到剪贴板,然后删除它
拷贝(Ctrl + C)
拷贝当前的选区到剪贴板
粘贴(Ctrl + V)
把剪贴板中的内容插入到编辑器当前光标所在位置,或替换选区
两端对齐
使当前选区所在格式块两端对齐
编号
使当前选中的文字块按数字编号排列或取消编号格式
项目符号
使当前选中的文字块按项目符号排列或取消项目符号格式
增加缩进量
增加选定文字块的缩进量
减少缩进量
减小选定文字块的缩进量
插入或修改图片
如何在vue中使用kindeditor富文本编辑器
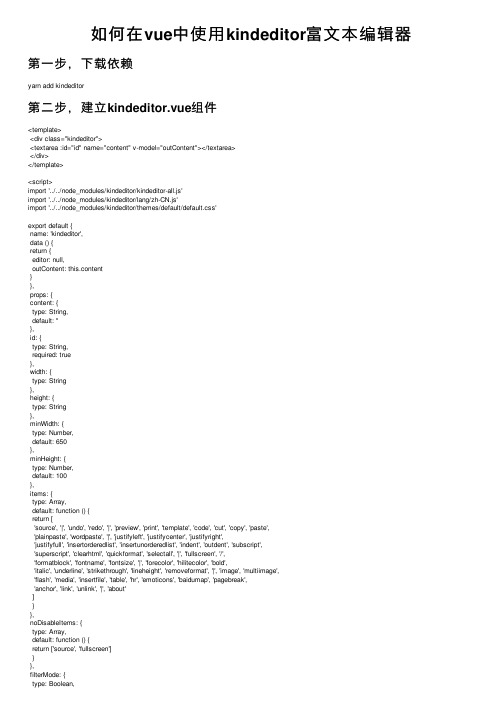
如何在vue中使⽤kindeditor富⽂本编辑器第⼀步,下载依赖yarn add kindeditor第⼆步,建⽴kindeditor.vue组件<template><div class="kindeditor"><textarea :id="id" name="content" v-model="outContent"></textarea></div></template><script>import '../../node_modules/kindeditor/kindeditor-all.js'import '../../node_modules/kindeditor/lang/zh-CN.js'import '../../node_modules/kindeditor/themes/default/default.css'export default {name: 'kindeditor',data () {return {editor: null,outContent: this.content}},props: {content: {type: String,default: ''},id: {type: String,required: true},width: {type: String},height: {type: String},minWidth: {type: Number,default: 650},minHeight: {type: Number,default: 100},items: {type: Array,default: function () {return ['source', '|', 'undo', 'redo', '|', 'preview', 'print', 'template', 'code', 'cut', 'copy', 'paste','plainpaste', 'wordpaste', '|', 'justifyleft', 'justifycenter', 'justifyright','justifyfull', 'insertorderedlist', 'insertunorderedlist', 'indent', 'outdent', 'subscript','superscript', 'clearhtml', 'quickformat', 'selectall', '|', 'fullscreen', '/','formatblock', 'fontname', 'fontsize', '|', 'forecolor', 'hilitecolor', 'bold','italic', 'underline', 'strikethrough', 'lineheight', 'removeformat', '|', 'image', 'multiimage','flash', 'media', 'insertfile', 'table', 'hr', 'emoticons', 'baidumap', 'pagebreak','anchor', 'link', 'unlink', '|', 'about']}},noDisableItems: {type: Array,default: function () {return ['source', 'fullscreen']}},htmlTags: {type: Object,default: function () {return {font: ['color', 'size', 'face', '.background-color'],span: ['style'],div: ['class', 'align', 'style'],table: ['class', 'border', 'cellspacing', 'cellpadding', 'width', 'height', 'align', 'style'], 'td,th': ['class', 'align', 'valign', 'width', 'height', 'colspan', 'rowspan', 'bgcolor', 'style'], a: ['class', 'href', 'target', 'name', 'style'],embed: ['src', 'width', 'height', 'type', 'loop', 'autostart', 'quality','style', 'align', 'allowscriptaccess', '/'],img: ['src', 'width', 'height', 'border', 'alt', 'title', 'align', 'style', '/'],hr: ['class', '/'],br: ['/'],'p,ol,ul,li,blockquote,h1,h2,h3,h4,h5,h6': ['align', 'style'],'tbody,tr,strong,b,sub,sup,em,i,u,strike': []}}},wellFormatMode: {type: Boolean,default: true},resizeType: {type: Number,default: 2},themeType: {type: String,default: 'default'},langType: {type: String,default: 'zh-CN'},designMode: {type: Boolean,default: true},fullscreenMode: {type: Boolean,default: false},basePath: {type: String},themesPath: {type: String},pluginsPath: {type: String,default: ''},langPath: {type: String},minChangeSize: {type: Number,default: 5},loadStyleMode: {type: Boolean,default: true},urlType: {type: String,default: ''},newlineTag: {type: String,default: 'p'default: 2},dialogAlignType: {type: String,default: 'page'},shadowMode: {type: Boolean,default: true},zIndex: {type: Number,default: 811213},useContextmenu: {type: Boolean,default: true},syncType: {type: String,default: 'form'},indentChar: {type: String,default: '\t'},cssPath: {type: [ String, Array ] },cssData: {type: String},bodyClass: {type: String,default: 'ke-content' },colorTable: {type: Array},afterCreate: {type: Function},afterChange: {type: Function},afterTab: {type: Function},afterFocus: {type: Function},afterBlur: {type: Function},afterUpload: {type: Function},uploadJson: {type: String},fileManagerJson: {type: Function},allowPreviewEmoticons: { type: Boolean,default: true},allowImageUpload: {type: Boolean,default: true},allowFlashUpload: {allowMediaUpload: {type: Boolean,default: true},allowFileUpload: {type: Boolean,default: true},allowFileManager: {type: Boolean,default: false},fontSizeTable: {type: Array,default: function () {return ['9px', '10px', '12px', '14px', '16px', '18px', '24px', '32px']}},imageTabIndex: {type: Number,default: 0},formatUploadUrl: {type: Boolean,default: true},fullscreenShortcut: {type: Boolean,default: false},extraFileUploadParams: {type: Array,default: function () {return []}},filePostName: {type: String,default: 'imgFile'},fillDescAfterUploadImage: {type: Boolean,default: false},afterSelectFile: {type: Function},pagebreakHtml: {type: String,default: '<hr style=”page-break-after: always;” class=”ke-pagebreak” />' },allowImageRemote: {type: Boolean,default: true},autoHeightMode: {type: Boolean,default: false},fixToolBar: {type: Boolean,default: false},tabIndex: {type: Number}},watch: {content (val) {this.editor && val !== this.outContent && this.editor.html(val)},outContent (val) {this.$emit('update:content', val)mounted () {var _this = this_this.editor = window.KindEditor.create('#' + this.id, {width: _this.width,height: _this.height,minWidth: _this.minWidth,minHeight: _this.minHeight,items: _this.items,noDisableItems: _this.noDisableItems,filterMode: _this.filterMode,htmlTags: _this.htmlTags,wellFormatMode: _this.wellFormatMode,resizeType: _this.resizeType,themeType: _this.themeType,langType: _ngType,designMode: _this.designMode,fullscreenMode: _this.fullscreenMode,basePath: _this.basePath,themesPath: _this.cssPath,pluginsPath: _this.pluginsPath,langPath: _ngPath,minChangeSize: _this.minChangeSize,loadStyleMode: _this.loadStyleMode,urlType: _this.urlType,newlineTag: _this.newlineTag,pasteType: _this.pasteType,dialogAlignType: _this.dialogAlignType,shadowMode: _this.shadowMode,zIndex: _this.zIndex,useContextmenu: _eContextmenu,syncType: _this.syncType,indentChar: _this.indentChar,cssPath: _this.cssPath,cssData: _this.cssData,bodyClass: _this.bodyClass,colorTable: _this.colorTable,afterCreate: _this.afterCreate,afterChange: function () {_this.afterChange_this.outContent = this.html()},afterTab: _this.afterTab,afterFocus: _this.afterFocus,afterBlur: _this.afterBlur,afterUpload: _this.afterUpload,uploadJson: _this.uploadJson,fileManagerJson: _this.fileManagerJson,allowPreviewEmoticons: _this.allowPreviewEmoticons,allowImageUpload: _this.allowImageUpload,allowFlashUpload: _this.allowFlashUpload,allowMediaUpload: _this.allowMediaUpload,allowFileUpload: _this.allowFileUpload,allowFileManager: _this.allowFileManager,fontSizeTable: _this.fontSizeTable,imageTabIndex: _this.imageTabIndex,formatUploadUrl: _this.formatUploadUrl,fullscreenShortcut: _this.fullscreenShortcut,extraFileUploadParams: _this.extraFileUploadParams,filePostName: _this.filePostName,fillDescAfterUploadImage: _this.fillDescAfterUploadImage, afterSelectFile: _this.afterSelectFile,pagebreakHtml: _this.pagebreakHtml,allowImageRemote: _this.allowImageRemote,autoHeightMode: _this.autoHeightMode,fixToolBar: _this.fixToolBar,tabIndex: _this.tabIndex})}}</script><style>第三步,引⼊使⽤<template><div id="app"><editor id="editor_id" height="500px" width="700px" :content.sync="editorText":afterChange="afterChange()":loadStyleMode="false"@on-content-change="onContentChange"></editor><div> editorTextCopy: {{ editorTextCopy }} </div></div></template><script>import editor from './components/kindeditor.vue'export default {name: 'app',components: {editor},data () {return {editorText: '直接初始化值', // 双向同步的变量editorTextCopy: '' // content-change 事件回掉改变的对象}},methods: {onContentChange (val) {this.editorTextCopy = val;window.console.log(this.editorTextCopy)},afterChange () {}}}</script>效果如下:以上就是vue中使⽤kindeditor富⽂本编辑器的详细内容,更多关于vue kindeditor富⽂本编辑器的资料请关注其它相关⽂章!。
Kindeditor中实用的编辑器api详解和实例用法(一)
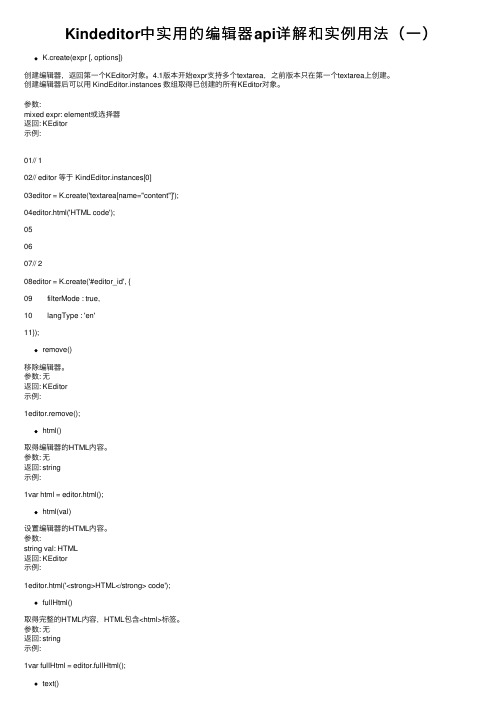
Kindeditor中实⽤的编辑器api详解和实例⽤法(⼀)K.create(expr [, options])创建编辑器,返回第⼀个KEditor对象。
4.1版本开始expr⽀持多个textarea,之前版本只在第⼀个textarea上创建。
创建编辑器后可以⽤ KindEditor.instances 数组取得已创建的所有KEditor对象。
参数:mixed expr: element或选择器返回: KEditor⽰例:01// 102// editor 等于 KindEditor.instances[0]03editor = K.create('textarea[name="content"]');04editor.html('HTML code');050607// 208editor = K.create('#editor_id', {09 filterMode : true,10 langType : 'en'11});remove()移除编辑器。
参数: ⽆返回: KEditor⽰例:1editor.remove();html()取得编辑器的HTML内容。
参数: ⽆返回: string⽰例:1var html = editor.html();html(val)设置编辑器的HTML内容。
参数:string val: HTML返回: KEditor⽰例:1editor.html('<strong>HTML</strong> code');fullHtml()取得完整的HTML内容,HTML包含<html>标签。
参数: ⽆返回: string⽰例:1var fullHtml = editor.fullHtml();text()取得编辑器的纯⽂本内容。
(包含img和embed)参数: ⽆返回: string⽰例:1var text = editor.text();text(val)设置编辑器的内容,直接显⽰HTML代码。
09模块-知识点拓展-网站建设与管理基础及实训(PHP版)(第2版)-吴代文-清华大学出版社

知识点拓展[1]KindEditor的使用KindEditor是一套开源的在线HTML编辑器,主要用于让用户在网站上获得所见即所得编辑效果,开发人员可以用KindEditor把传统的多行文本输入框(textarea)替换为可视化的富文本输入框。
要在动态网页(如PHP网页)中使用KindEditor在线HTML编辑器,需要经过以下几个步骤。
1)到/网站下载KindEditor在线HTML编辑器。
将下载的压缩包解压后如图9-17所示。
KindEditor目前支持ASP、PHP、和JSP等动态网页技术,因此可以在这四中动态网页中集成KindEditor在线HTML编辑器。
图9-17KindEditor目录结构2)在动态网页头部(<head>与</head>之间)导入下面代码即可在网页中使用KindEditor 在线HTML编辑器。
<link rel="stylesheet"href="kindeditor/themes/default/default.css"/><link rel="stylesheet"href="kindeditor/plugins/code/prettify.css"/><script charset="utf-8"src="kindeditor/kindeditor.js"></script><script charset="utf-8"src="kindeditor/lang/zh_CN.js"></script><script charset="utf-8"src="kindeditor/plugins/code/prettify.js"></script><script>KindEditor.ready(function(K){var editor1=K.create('textarea[name="Description"]',{cssPath:'kindeditor/plugins/code/prettify.css',uploadJson:'kindeditor/php/upload_json.php',fileManagerJson:'kindeditor/php/file_manager_json.php',allowFileManager:true,afterCreate:function(){var self=this;K.ctrl(document,13,function(){self.sync();K('form[name=example]')[0].submit();});K.ctrl(self.edit.doc,13,function(){self.sync();K('form[name=example]')[0].submit();});}});prettyPrint();});</script>3)在网页的表单中设计一个多行文本输入框,注意要将多行文本输入框的visibility属性设置为“hidden”,多行文本框代码如下所示。
- 1、下载文档前请自行甄别文档内容的完整性,平台不提供额外的编辑、内容补充、找答案等附加服务。
- 2、"仅部分预览"的文档,不可在线预览部分如存在完整性等问题,可反馈申请退款(可完整预览的文档不适用该条件!)。
- 3、如文档侵犯您的权益,请联系客服反馈,我们会尽快为您处理(人工客服工作时间:9:00-18:30)。
kindeditor详细使用说明1.下载KindEditor 最新版本。
打开下载页面2. 解压zip文件,将所有文件上传到您的网站程序目录下。
例如:http://您的域名/editor/3.在需要显示编辑器的位置添加TEXTAREA输入框。
id在当前页面必须是唯一的值,还有,在有些浏览器上不设宽度和高度可能显示有问题,所以最好设一下宽度和高度。
宽度和高度可用inline样式设置,也可用编辑器初始化参数设置。
在TEXTAREA里设置HTML内容即可实现编辑,在这里需要注意的是,如果从服务器端程序(ASP、PHP、等)直接显示内容,则必须转换HTML特殊字符(>,<,&,")。
具体请参考各语言目录下面的demo.xxx程序,目前支持ASP、、PHP、JSP。
<textarea id="editor_id" name="content" style="width:700px;height:300px;"><strong>HTML内容</strong></textarea>4.在该HTML页面添加以下脚本。
<script charset="utf-8" src="/editor/kindeditor.js"></script><script> KE.show({ id : 'editor_id' });</script>注:KE.show的原理是先执行KE.init设置一些变量,等DOM 全部创建以后才开始执行KE.create创建编辑器。
如果浏览器不触发DOMContentLoaded事件(例如:jQuery的$.ready,点击某个按钮,通过innerHTML 插入HTML等),则不能使用KE.show,需要直接调用KE.init和KE.create。
KE.init({ id : 'editor_id'});$.ready(function() { KE.create('editor_id');});调用KE.show和KE.init时,除id之外还可以设置其它的参数,具体属性请参考编辑器初始化参数。
5.取得编辑器的HTML内容。
KindEditor的可视化操作在新创建的iframe上执行,代码模式下的textarea框也是新创建的,所以最后提交前需要将HTML数据同步到原来的textarea,KE.sync函数会完成这个动作。
KindEditor在默认情况下自动寻找textarea所属的form元素,找到form后onsubmit 事件里添加KE.sync函数,所以用form方式提交数据,不需要手动执行KE.sync函数。
//取得HTML内容html = KE.html('editor_id');//同步数据后可以直接取得textarea的valueKE.sync('editor_id');html = document.getElementById('editor_id').value;html = $('#editor_id').val(); //jQuery//设置HTML内容KE.html('editor_id', 'HTML内容');编辑器初始化参数1.调用KE.show或KE.init时可以设置以下参数。
1.idTEXTAREA输入框的ID,必须设置。
数据类型:String2.items配置编辑器的工具栏,其中"-"表示换行,"|"表示分隔符。
数据类型:Array默认值:['source', '|', 'fullscreen', 'undo', 'redo', 'print', 'cut', 'copy', 'paste','plainpaste', 'wordpaste', '|', 'justifyleft', 'justifycenter', 'justifyright','justifyfull', 'insertorderedlist', 'insertunorderedlist', 'indent', 'outdent', 'subscript','superscript', '|', 'selectall','-','title', 'fontname', 'fontsize', '|', 'textcolor', 'bgcolor', 'bold','italic', 'underline', 'strikethrough', 'removeformat', '|', 'image','flash', 'media', 'advtable', 'hr', 'emoticons', 'link', 'unlink', '|', 'about']3.width编辑器的宽度,可以设置px或%,比TEXTAREA输入框样式表宽度优先度高。
数据类型:String默认值:TEXTAREA输入框的宽度注: 3.2版本开始支持。
4.height编辑器的高度,只能设置px,比TEXTAREA输入框样式表高度优先度高。
数据类型:String默认值:TEXTAREA输入框的高度注: 3.2版本开始支持。
5.minWidth数据类型:Int指定编辑器最小宽度,单位为px。
默认值:2006.minHeight数据类型:Int指定编辑器最小高度,单位为px。
默认值:1007.filterMode数据类型:Booleantrue时过滤HTML代码,false时允许输入任何代码。
默认值:false注: 3.4以前版本的filterMode默认值为true。
8.htmlTags指定要保留的HTML标记和属性。
哈希数组的key为HTML标签名,value为HTML属性数组,"."开始的属性表示style属性。
数据类型:Object默认值:{ font : ['color', 'size', 'face', '.background-color'], span : ['style'], div : ['class', 'align', 'style'], table: ['class', 'border', 'cellspacing', 'cellpadding', 'width', 'height', 'align', 'style'], 'td,th': ['class', 'align', 'valign', 'width', 'height', 'colspan', 'rowspan', 'bgcolor', 'style'], a : ['class', 'href', 'target', 'name', 'style'], embed : ['src', 'width', 'height', 'type', 'loop', 'autostart', 'quality', 'style', 'align', 'allowscriptaccess', '/'], img : ['src', 'width', 'height', 'border', 'alt', 'title', 'align', 'style', '/'], hr : ['class', '/'], br : ['/'], 'p,ol,ul,li,blockquote,h1,h2,h3,h4,h5,h6' : ['align', 'style'], 'tbody,tr,strong,b,sub,sup,em,i,u,strike' : []}注:filterMode为true时有效。
3.4版本开始属性可设置style,保留所有inline样式。
9.resizeMode2或1或0,2时可以拖动改变宽度和高度,1时只能改变高度,0时不能拖动。
数据类型:Int默认值:210.skinType风格类型,default数据类型:String默认值:default11.wyswygMode可视化模式或代码模式数据类型:Boolean默认值:true12.cssPath指定编辑器iframe document的CSS,用于设置可视化区域的样式。
数据类型:String或Array默认值:空注:3.4.1版本开始可指定多个CSS文件。