KindEditor使用说明书
KINDEditor使用手册
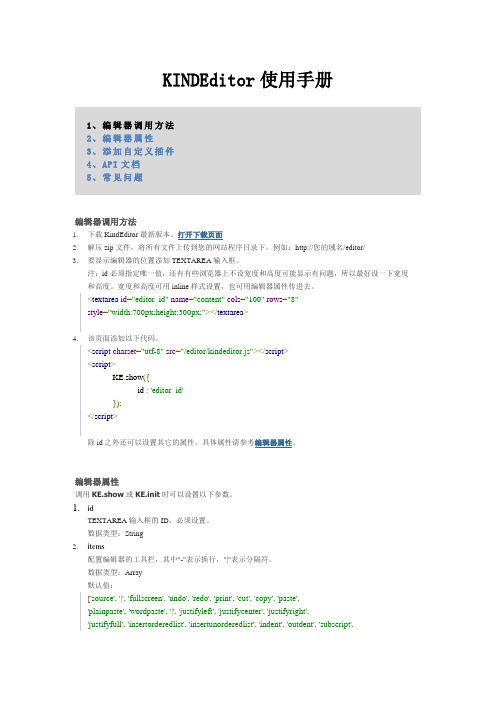
KINDEditor使用手册1、编辑器调用方法2、编辑器属性3、添加自定义插件4、API文档5、常见问题编辑器调用方法1.下载KindEditor最新版本。
打开下载页面2.解压zip文件,将所有文件上传到您的网站程序目录下。
例如:http://您的域名/editor/3.要显示编辑器的位置添加TEXTAREA输入框。
注:id必须指定唯一值,还有有些浏览器上不设宽度和高度可能显示有问题,所以最好设一下宽度和高度。
宽度和高度可用inline样式设置,也可用编辑器属性传进去。
<textarea id="editor_id"name="content"cols="100"rows="8"style="width:700px;height:300px;"></textarea>4.该页面添加以下代码。
<script charset="utf-8"src="/editor/kindeditor.js"></script><script>KE.show({id :'editor_id'});</script>除id之外还可以设置其它的属性,具体属性请参考编辑器属性。
编辑器属性调用KE.show或KE.init时可以设置以下参数。
1.idTEXTAREA输入框的ID,必须设置。
数据类型:String2.items配置编辑器的工具栏,其中"-"表示换行,"|"表示分隔符。
数据类型:Array默认值:['source','|','fullscreen','undo','redo','print','cut','copy','paste','plainpaste','wordpaste','|','justifyleft','justifycenter','justifyright','justifyfull','insertorderedlist','insertunorderedlist','indent','outdent','subscript','superscript','|','selectall','-','title','fontname','fontsize','|','textcolor','bgcolor','bold','italic','underline','strikethrough','removeformat','|','image','flash','media','advtable','hr','emoticons','link','unlink','|','about']3.width编辑器的宽度,可以设置px或%,比TEXTAREA输入框样式表宽度优先度高。
kindeditor删除上传图片并且删除服务器里面的图片
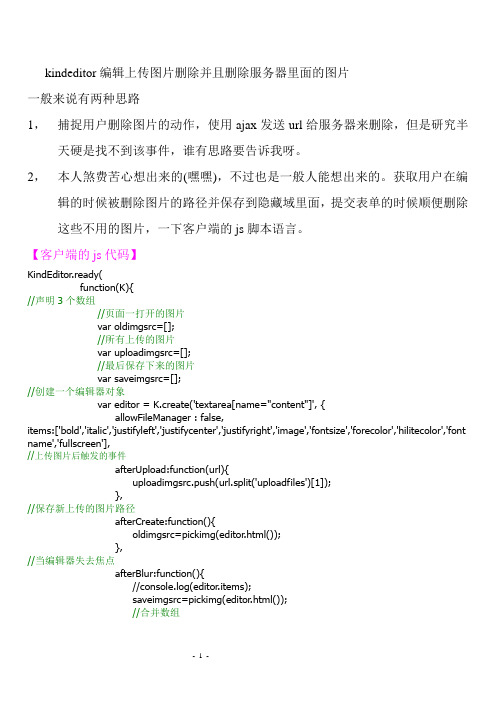
kindeditor编辑上传图片删除并且删除服务器里面的图片一般来说有两种思路1,捕捉用户删除图片的动作,使用ajax发送url给服务器来删除,但是研究半天硬是找不到该事件,谁有思路要告诉我呀。
2,本人煞费苦心想出来的(嘿嘿),不过也是一般人能想出来的。
获取用户在编辑的时候被删除图片的路径并保存到隐藏域里面,提交表单的时候顺便删除这些不用的图片,一下客户端的js脚本语言。
【客户端的js代码】KindEditor.ready(function(K){//声明3个数组//页面一打开的图片var oldimgsrc=[];//所有上传的图片var uploadimgsrc=[];//最后保存下来的图片var saveimgsrc=[];//创建一个编辑器对象var editor = K.create('textarea[name="content"]', {allowFileManager : false,items:['bold','italic','justifyleft','justifycenter','justifyright','image','fontsize','forecolor','hilitecolor','font name','fullscreen'],//上传图片后触发的事件afterUpload:function(url){uploadimgsrc.push(url.split('uploadfiles')[1]);},//保存新上传的图片路径afterCreate:function(){oldimgsrc=pickimg(editor.html());},//当编辑器失去焦点afterBlur:function(){//console.log(editor.items);saveimgsrc=pickimg(editor.html());//合并数组var allimgsrc=oldimgsrc.concat(uploadimgsrc).concat(saveimgsrc);//删除相同的元素var uniq=new arr_uniq(allimgsrc);uniq.uniq();var resultimg=[];//如果没有上传新图片if( uploadimgsrc.length==0 ) {//比较不同的元素resultimg=slectArray(allimgsrc,saveimgsrc);}else{resultimg=slectArray(allimgsrc,saveimgsrc);}//比较出页面一打开的图片和编辑完之后图片中不同路径的图片$('#delimg').html("");for(var r in resultimg){if($('#delimg').size()==1){//隐藏域为delimg[],保存多个删除的图片路径$('#delimg').append('<input type="hidden" name="delimg[]" value="'+resultimg[r]+'"/>');}else{$('textarea[name="content"]').after('<span id="delimg"><input type="hidden" name="delimg[]" value="'+resultimg[r]+'"/></span>');}}}});});//以上面需要使用到下面三个函数//返回编辑器里面非http的图片的内容function pickimg(content){///(.*?)\/uploadfiles\/(.*?)/var re=/src="(.*?)\/uploadfiles\/(.*?)"/ig;arr=content.match(re);var ar=[];var tmp='';for(var i in arr){tmp=arr[i].split('uploadfiles')[1];ar[i]=tmp.replace('"','');}return ar;}//返回数组不相同的元素function slectArray(a,b){var c=[];for(var i=0;i<a.length;i++){if(b.indexOf(a[i])<0 ){c.push(a[i]);}}for(var i=0;i<b.length;i++){if(a.indexOf(b[i])<0 ){c.push(b[i]);}}return c;}//删除不同元素function arr_uniq(arr){this.arr=arr;}arr_uniq.prototype.uniq=function(){this.ori = [].concat(this.arr);for (var i=0;i<this.arr.length;i++){for (var j=i+1;j<this.arr.length;j++ ){if (this.arr[i]==this.arr[j]){this.arr.splice(j,1);}}}return this.arr;}【服务端的php代码】//删除不需要的本地图片if( !empty($_POST['delimg']) ){//delimg隐藏域名字foreach( $_POST['delimg'] as $v ) {@unlink(图片的绝对路径);}}。
KindEditor 3.5.1添加内容分页
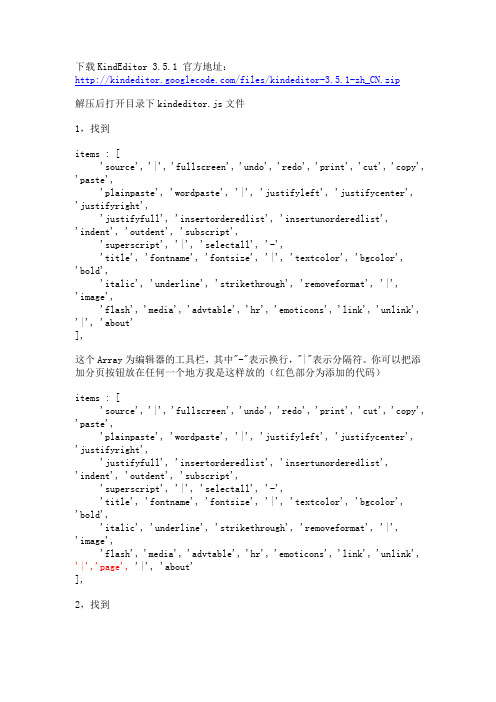
下载KindEditor 3.5.1 官方地址:/files/kindeditor-3.5.1-zh_CN.zip解压后打开目录下kindeditor.js文件1,找到items : ['source', '|', 'fullscreen', 'undo', 'redo', 'print', 'cut', 'copy', 'paste','plainpaste', 'wordpaste', '|', 'justifyleft', 'justifycenter','justifyright','justifyfull', 'insertorderedlist', 'insertunorderedlist', 'indent', 'outdent', 'subscript','superscript', '|', 'selectall', '-','title', 'fontname', 'fontsize', '|', 'textcolor', 'bgcolor', 'bold', 'italic', 'underline', 'strikethrough', 'removeformat', '|', 'image', 'flash', 'media', 'advtable', 'hr', 'emoticons', 'link', 'unlink', '|', 'about'],这个Array为编辑器的工具栏,其中"-"表示换行,"|"表示分隔符。
KindEditor文本编辑器
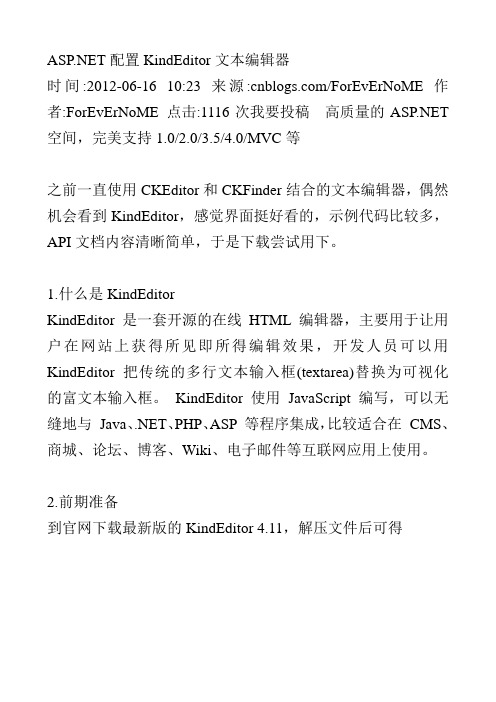
配置KindEditor文本编辑器时间:2012-06-16 10:23来源:/ForEvErNoME 作者:ForEvErNoME 点击:1116次我要投稿高质量的 空间,完美支持1.0/2.0/3.5/4.0/MVC等之前一直使用CKEditor和CKFinder结合的文本编辑器,偶然机会看到KindEditor,感觉界面挺好看的,示例代码比较多,API文档内容清晰简单,于是下载尝试用下。
1.什么是KindEditorKindEditor 是一套开源的在线HTML编辑器,主要用于让用户在网站上获得所见即所得编辑效果,开发人员可以用KindEditor 把传统的多行文本输入框(textarea)替换为可视化的富文本输入框。
KindEditor 使用JavaScript 编写,可以无缝地与Java、.NET、PHP、ASP 等程序集成,比较适合在CMS、商城、论坛、博客、Wiki、电子邮件等互联网应用上使用。
2.前期准备到官网下载最新版的KindEditor 4.11,解压文件后可得文件结构:asp:与asp结合的示例代码:与结合的示例代码attached:上传文件的根目录,可在相关的代码中修改examples:功能演示的示例代码jsp:与jsp结合的示例代码lang:语言包php:与php结合的示例代码plugins:控件的功能代码的实现kindeditor.js:配置文件kindeditor-min.js:集成文件由于使用的是,所以将不需要的文件夹删掉。
其中在中demo.aspx是参考代码,也可以删掉。
3.配置KindEditor(1)新建网站,将精简后的kindeditor文件夹放到网站根目录下下,并且引用kindeditor//bin/LitJSON.dll文件。
(2)新建index.aspx文件,引入相关文件<link href="kindeditor/plugins/code/prettify.css" rel="stylesheet" type="text/css" /> <script src="kindeditor/lang/zh_CN.js" type="text/javascript"></script><script src="kindeditor/kindeditor.js" type="text/javascript"></script><script src="kindeditor/plugins/code/prettify.js" type="text/javascript"></script> <script type="text/javascript">KindEditor.ready(function (K) {var editor = K.create('#content', {//上传管理uploadJson: 'kindeditor//upload_json.ashx',//文件管理fileManagerJson: 'kindeditor//file_manager_json.ashx',allowFileManager: true,//设置编辑器创建后执行的回调函数afterCreate: function () {var self = this;K.ctrl(document, 13, function () {self.sync();K('form[name=example]')[0].submit();});K.ctrl(self.edit.doc, 13, function () {self.sync();K('form[name=example]')[0].submit();});},//上传文件后执行的回调函数,获取上传图片的路径afterUpload : function(url) {alert(url);},//编辑器高度width: '700px',//编辑器宽度height: '450px;',//配置编辑器的工具栏items: ['source', '|', 'undo', 'redo', '|', 'preview', 'print', 'template', 'code', 'cut', 'copy', 'paste','plainpaste', 'wordpaste', '|', 'justifyleft', 'justifycenter', 'justifyright','justifyfull', 'insertorderedlist', 'insertunorderedlist', 'indent', 'outdent', 'subscript','superscript', 'clearhtml', 'quickformat', 'selectall', '|', 'fullscreen', '/','formatblock', 'fontname', 'fontsize', '|', 'forecolor', 'hilitecolor', 'bold','italic', 'underline', 'strikethrough', 'lineheight', 'removeformat', '|', 'image', 'multiimage','flash', 'media', 'insertfile', 'table', 'hr', 'emoticons', 'baidumap', 'pagebreak','anchor', 'link', 'unlink', '|', 'about' ]});prettyPrint();});</script>(3)在页面中添加一个textbox控件,将id命名为content,把属性"TextMode"属性改为Multiline。
miniUI_KindEditor使用
KindEditr在miniUI中的应用系统:Win7开发环境:Java框架:OSGI前台jsp先定义一个textarea,如下:<textarea id="editor_id"name="editor_id"vtype="rangeChar:1,200"style="width: 80%; height: 370px; visibility:hidden;" runat="server"required="true"></textarea>我把它的取值和赋值都放在了js中,如下:var editorId = "editor_id";//定义变量为富文本IDvar editor = null;//定义富文本//写一个调用方法showeditorfunction showeditor() {//KindEditor.ready();方法用了之后在FireFox中无法编辑,所以用了.create试试editor = KindEditor.create('#' + editorId/*这里是富文本ID*/, {resizeType: 1,//设置只能改变高度allowPreviewEmoticons: false,allowImageUpload: true,afterBlur:function(){this.sync();},//失去焦点(blur)时执行的回调函数。
在画面编辑富文本时,同步数据,如果不写,无法用时取到最新的值,那么保存到数据库的值就是旧的afterCreate:function(){this.sync();}//当我不点击富文本直接进行其他操作时,就靠这个方法同步数据,用a fterBlur是无法同步的items: []//,//控制工具栏显示哪些按钮,不写时默认成全部显示});}新建,要将富文本设置为空时,如下:KindEditor.html("#editor_id","");有试过miniUI提供的editor.html("");,editor.html(null) ;,但是都不行,赋值不成功,在网上看到有大拿用这种写法的,试了发现好用,特别开心。
KindEditor添加自定义插件
一、添加"你好"插件1.定义ng['hello'] = "你好"。
ng['hello']="您好";2.定义KE.plugin['hello'],所有逻辑都在这个对象里,点击图标时默认执行cl ick方法。
KE.plugin['hello']={click:functi on(id){alert("您好");}};3.页面里添加图标定义CS S。
.ke-icon-hello{backgr ound-image: url(./skins/defaul t.gif);backgr ound-positi on:0px-672px;width:16px;height:16px;}4.最后调用编辑器时ite ms数组里添加hel lo。
KE.show({id :'conten t1',items:['hello']});演示地址:在新窗口打开二、添加插入远程图片的插件1.定义ng['remote_imag e'] = "插入远程图片"。
ng['remote_imag e']="插入远程图片";2.定义KE.plugin['remote_imag e']。
KE.plugin['remote_imag e']={click:functi on(id){KE.util.select ion(id);var dialog=new KE.dialog({id : id,cmd :'remote_imag e',width:310,height:90,title: ng['image'],yesBut ton : ng['yes'],noButt on : ng['no']});dialog.show();},check:functi on(id){var dialog Doc = KE.util.getIfr ameDo c(KE.g[id].dialog);var url = KE.$('url', dialog Doc).value;var title= KE.$('imgTit le', dialog Doc).value;var width= KE.$('imgWid th', dialog Doc).value;var height= KE.$('imgHei ght', dialog Doc).value;var border= KE.$('imgBor der', dialog Doc).value;if(url.match(/\.(jpg|jpeg|gif|bmp|png)$/i)==null){ alert(ng['invali dImg']);window.focus();KE.g[id].yesBut ton.focus();return false;}if(width.match(/^\d+$/)==null){alert(ng['invali dWidt h']);window.focus();KE.g[id].yesBut ton.focus();return false;}if(height.match(/^\d+$/)==null){alert(ng['invali dHeig ht']);window.focus();KE.g[id].yesBut ton.focus();return false;}if(border.match(/^\d+$/)==null){alert(ng['invali dBord er']);window.focus();KE.g[id].yesBut ton.focus();return false;}return true;},exec:functi on(id){KE.util.select(id);var iframe Doc = KE.g[id].iframe Doc;var dialog Doc = KE.util.getIfr ameDo c(KE.g[id].dialog);if(!this.check(id))return false;var url = KE.$('url', dialog Doc).value;var title= KE.$('imgTit le', dialog Doc).value;var width= KE.$('imgWid th', dialog Doc).value;var height= KE.$('imgHei ght', dialog Doc).value;var border= KE.$('imgBor der', dialog Doc).value;this.insert(id, url, title, width, height, border);},insert:functi on(id, url, title, width, height, border){ var html ='<img src="'+ url +'" ';if(width>0) html +='width="'+ width+'" ';if(height>0) html +='height="'+ height+'" ';if(title) html +='title="'+ title+'" ';html +='alt="'+ title+'" ';html +='border="'+ border+'" />';KE.util.insert Html(id, html);yout.hide(id);KE.util.focus(id);}};3.页面里添加图标定义CS S。
KindEditor3.5.2最新ASP、PHP版分享及使用方法
KindEditor3.5.2最新ASP/PHP版分享及使用方法最近做web网站在找编辑器的时候在选择编辑器,分别测试了fckeditor和kindeditor这两款,下面做一个简单的说明:[1].fckeditor编辑器对于从word复制过来的格式会乱掉,另外考虑其自身的安全问题,就没用它了[2].kindeditor则是js+html的编辑器,当然另外如果你加入图片上传功能就要提供php或asp的脚本[3].比较遗憾的是kindeditor只能传图片,其他附件无法上传,不过如果加入这个功能也不难,可以参考image上传来编写因此本次的重点就是讲解kindeditor的使用,刚好这次同时使用了asp和php编写,因此两个都会分享。
<!--more-->1.ASP版KindEditor3.5.2使用方法及常见问题使用的时候可以参考原版里面的asp/demo.asp来操作,这里要重点说明是关于调用编辑器代码:[javascript]<script type="text/javascript" charset="utf-8" src="../keditor/kindeditor.js"></script> <script type="text/javascript">KE.show({id : 'content',// 这个是相对于/plugins/image目录而言,一般保持默认即可imageUploadJson : '../../asp/upload_json.asp',fileManagerJson : '../../asp/file_manager_json.asp',// 同上allowFileManager : true,afterCreate : function(id) {KE.event.ctrl(document, 13, function() {KE.util.setData(id);document.forms['editForm'].submit();});KE.event.ctrl(KE.g[id].iframeDoc, 13, function() {KE.util.setData(id);document.forms['editForm'].submit();});}});</script>[/javascript]在asp要调用编辑器比较常见问题是图片上传问题,我说下我这个编辑器的配置目录问题(1).编辑器在根目录,而我调用编辑器是后台文章编辑,如下方式:|--keditor # 放在根目录防止爆后台路径|--admin/newedit.asp|--upload #上传目录放在根目录防止暴露后台地址(2).在asp的2个上传文件keditor\asp\file_manager_json.asp # 图片浏览在该文件中,涉及到上传目录的设置问题,代码如下:[vb]rootPath = "/upload/"rootUrl = "../upload/"[/vb]keditor\asp\upload_json.asp # 图片上传在该文件中,涉及到上传目录的设置问题,代码如下:[vb]'文件保存目录路径savePath = "/upload/"'文件保存目录URLsaveUrl = "../upload/"[/vb](3)同时在编辑器中加入插入代码的功能,具体不详说,查看附件代码这样子设置完目录的结构就不会出现"服务器出现故障"的提示,出现这个提示一般可能有以下几种情况:(1).上传目录设置问题(2).从官方下载的版本默认是utf-8格式,如果用到gbk中可能会出现这个错误提示(3).程序本身出错(没有修改程序是不会这个问题!)<a href='/wp-content/uploads/2011/03/keditor.zip'>点我下载:keditor 3.5.2 for asp Modify by 冷锋</a>2.PHP版KindEditor3.5.2使用方法及常见问题PHP版的和ASP原理差不多就是在目录设置有点不一样,注意下就可以了,就不多说,只说下目录结构:|--keditor # 更目录|--keditor/attached # 上传目录|--system/newedit.php # 调用编辑器页面目录在后台目录设置常见keditor/php目录下两个php文件,建议不要调整目录结构。
kindEditor富文本框简介及常见问题处理
kindEditor的简介及一些问题处理一、简介:KindEditor是一套开源的HTML可视化编辑器,主要用于让用户在网站上获得所见即所得编辑效果,兼容IE、Firefox、Chrome、Safari、Opera 等主流浏览器。
KindEditor使用JavaScript编写,可以无缝的于Java、.NET、PHP、ASP等程序接合。
KindEditor非常适合在CMS、商城、论坛、博客、Wiki、电子邮件等互联网应用上使用,2006年7月首次发布 2.0以来,KindEditor依靠出色的用户体验和领先的技术不断扩大编辑器市场占有率,目前在国内已经成为最受欢迎的编辑器之一。
二、资产监督管理系统中的应用:2.1 在资产监督管理系统中的具体界面:在资产监督管理系统中,信息发布中具体信息的信息内容就使用了kindEditor来实现,具体界面如下图:界面中主要应用了字体,文字颜色,字体背景,字体大小等通用的字体编辑方法和排版格式,还应用了发送表情的方法。
2.2具体的实现方法:资产质量监督管理系统前台界面主要是通过jsp实现,信息发布也不例外。
调用时需要将lang,themes,plugins三个文件夹都拷贝在jsp文件的目录下。
具体的方法调用如下,其中,items后的内容为具体的编辑功能引用,items之前的为kindEditor 的调用及一些属性的设置。
相关jsp界面中对js的调用有以下两条:kindeditor-min.js主要是kindEditor调用的具体方法。
其中:_version可以看到当前kindEditor的版本信息;k.opitons中包含了该kindEditor所有的默认配置及属性。
Items中为所提供的所有编辑功能。
langType 为各功能的语言显示类型,minWidth,minHeight为编辑器的大小配置,fullScreenMode为是否全屏显示,colorTable中可添加具体字体颜色,fontSizeTable中可添加所需要的字体大小,htmlTags下可进行tags 的各个属性的配置更改。
KindEditor使用手册
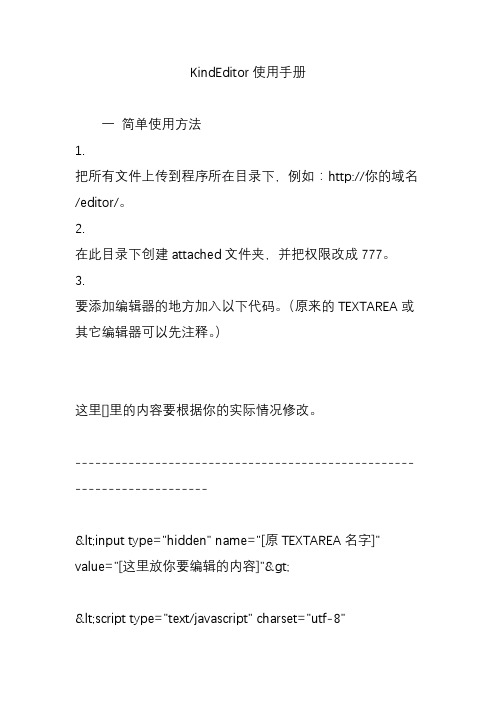
KindEditor使用手册一简单使用方法1.把所有文件上传到程序所在目录下,例如:http://你的域名/editor/。
2.在此目录下创建attached文件夹,并把权限改成777。
3.要添加编辑器的地方加入以下代码。
(原来的TEXTAREA或其它编辑器可以先注释。
)这里[]里的内容要根据你的实际情况修改。
-----------------------------------------------------------------------<input type="hidden" name="[原TEXTAREA名字]" value="[这里放你要编辑的内容]"><script type="text/javascript" charset="utf-8"src="[JS路径]/KindEditor.js"></script><script type="text/javascript">var editor = new KindEditor("editor"); //创建编辑器对象editor.hiddenName = "[原TEXTAREA名字]"; editor.editorWidth = "[编辑器宽度,例如:700px]"; editor.editorHeight = "[编辑器高度,例如:400px]"; editor.show(); //显示//提交时获得最终HTML代码的函数function KindSubmit() {editor.data();}</script>----------------------------------------------------------------------- 4.FORM的onsubmit属性里添加KindSubmit()函数。
kindEditor富文本框简介及常见问题处理

kindEditor的简介及一些问题处理一、简介:KindEditor是一套开源的HTML可视化编辑器,主要用于让用户在网站上获得所见即所得编辑效果,兼容IE、Firefox、Chrome、Safari、Opera 等主流浏览器。
KindEditor使用JavaScript编写,可以无缝的于Java、.NET、PHP、ASP等程序接合。
KindEditor非常适合在CMS、商城、论坛、博客、Wiki、电子邮件等互联网应用上使用,2006年7月首次发布 2.0以来,KindEditor依靠出色的用户体验和领先的技术不断扩大编辑器市场占有率,目前在国内已经成为最受欢迎的编辑器之一。
二、资产监督管理系统中的应用:2.1 在资产监督管理系统中的具体界面:在资产监督管理系统中,信息发布中具体信息的信息内容就使用了kindEditor来实现,具体界面如下图:界面中主要应用了字体,文字颜色,字体背景,字体大小等通用的字体编辑方法和排版格式,还应用了发送表情的方法。
2.2具体的实现方法:资产质量监督管理系统前台界面主要是通过jsp实现,信息发布也不例外。
调用时需要将lang,themes,plugins三个文件夹都拷贝在jsp文件的目录下。
具体的方法调用如下,其中,items后的内容为具体的编辑功能引用,items之前的为kindEditor 的调用及一些属性的设置。
相关jsp界面中对js的调用有以下两条:kindeditor-min.js主要是kindEditor调用的具体方法。
其中:_version可以看到当前kindEditor的版本信息;k.opitons中包含了该kindEditor所有的默认配置及属性。
Items中为所提供的所有编辑功能。
langType 为各功能的语言显示类型,minWidth,minHeight为编辑器的大小配置,fullScreenMode为是否全屏显示,colorTable中可添加具体字体颜色,fontSizeTable中可添加所需要的字体大小,htmlTags下可进行tags 的各个属性的配置更改。
kindEditor4.1版修改上传图片宽高(图片自适应)
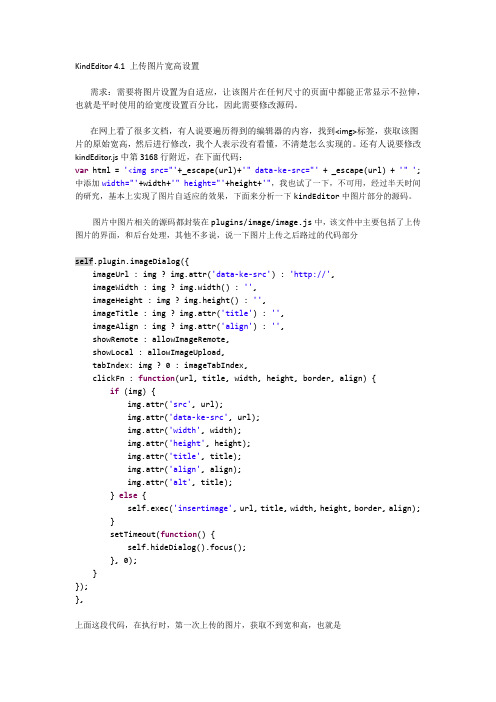
KindEditor 4.1上传图片宽高设置需求:需要将图片设置为自适应,让该图片在任何尺寸的页面中都能正常显示不拉伸,也就是平时使用的给宽度设置百分比,因此需要修改源码。
在网上看了很多文档,有人说要遍历得到的编辑器的内容,找到<img>标签,获取该图片的原始宽高,然后进行修改,我个人表示没有看懂,不清楚怎么实现的。
还有人说要修改kindEditor.js中第3168行附近,在下面代码:var html = '<img src="'+_escape(url)+'" data-ke-src="' + _escape(url) + '" '; 中添加width="'+width+'" height="'+height+'",我也试了一下,不可用,经过半天时间的研究,基本上实现了图片自适应的效果,下面来分析一下kindEditor中图片部分的源码。
图片中图片相关的源码都封装在plugins/image/image.js中,该文件中主要包括了上传图片的界面,和后台处理,其他不多说,说一下图片上传之后路过的代码部分self.plugin.imageDialog({imageUrl : img ? img.attr('data-ke-src') : 'http://',imageWidth : img ? img.width() : '',imageHeight : img ? img.height() : '',imageTitle : img ? img.attr('title') : '',imageAlign : img ? img.attr('align') : '',showRemote : allowImageRemote,showLocal : allowImageUpload,tabIndex: img ? 0 : imageTabIndex,clickFn : function(url, title, width, height, border, align) { if (img) {img.attr('src', url);img.attr('data-ke-src', url);img.attr('width', width);img.attr('height', height);img.attr('title', title);img.attr('align', align);img.attr('alt', title);} else {self.exec('insertimage', url, title, width, height, border, align);}setTimeout(function() {self.hideDialog().focus();}, 0);}});},上面这段代码,在执行时,第一次上传的图片,获取不到宽和高,也就是clickFn : function(url, title, width, height, border, align) {这一行中width和height都是空值,图片上传后,右键点击图片属性,设置图片宽高,之后可以把宽和高加到HTML代码中,if (img)为图片获取到宽和高的时候,进入,获取不到的时候进入else。
前端文本框插件KindEditor
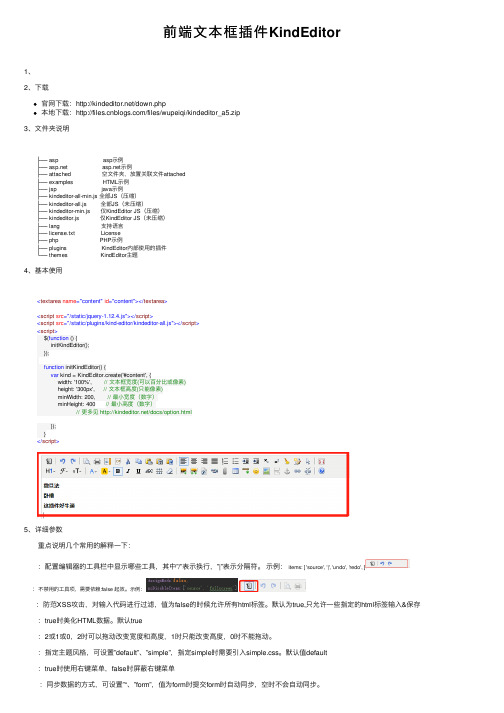
前端⽂本框插件KindEditor1、2、下载官⽹下载:/down.php本地下载:/files/wupeiqi/kindeditor_a5.zip3、⽂件夹说明├── asp asp⽰例├── ⽰例├── attached 空⽂件夹,放置关联⽂件attached├── examples HTML⽰例├── jsp java⽰例├── kindeditor-all-min.js 全部JS(压缩)├── kindeditor-all.js 全部JS(未压缩)├── kindeditor-min.js 仅KindEditor JS(压缩)├── kindeditor.js 仅KindEditor JS(未压缩)├── lang ⽀持语⾔├── license.txt License├── php PHP⽰例├── plugins KindEditor内部使⽤的插件└── themes KindEditor主题4、基本使⽤<textarea name="content" id="content"></textarea><script src="/static/jquery-1.12.4.js"></script><script src="/static/plugins/kind-editor/kindeditor-all.js"></script><script>$(function () {initKindEditor();});function initKindEditor() {var kind = KindEditor.create('#content', {width: '100%', // ⽂本框宽度(可以百分⽐或像素)height: '300px', // ⽂本框⾼度(只能像素)minWidth: 200, // 最⼩宽度(数字)minHeight: 400 // 最⼩⾼度(数字) // 更多见 /docs/option.html});}</script>5、详细参数 重点说明⼏个常⽤的解释⼀下: :配置编辑器的⼯具栏中显⽰哪些⼯具,其中”/”表⽰换⾏,”|”表⽰分隔符。
kindeditor在线编辑器增加附件上传功能

</tr>
<tr>
<td class="left1">说明:</td>
<td class="right1">
<input type="text" id="imgTitle" name="imgTitle" value="" maxlength="100" style="width:220px;" />
//定义允许上传的文件扩展名
$ext_arr = array('doc', 'xls', 'ppt', 'pdf', 'txt', 'rar' , 'zip');
//最大文件大小
$max_size = 1000000;
//更改目录权限
@mkdir($save_path, 0777);
srand((double)microtime()*1000000);
} else {
document.getElementById('url').style.display = 'block';
document.getElementById('imgFile').style.display = 'none';
}
}
</script>
</head>
<body>
<form name="uploadForm" method="post" enctype="multipart/form-data" action="../php/uploadaccessory.php">
如何在vue中使用kindeditor富文本编辑器
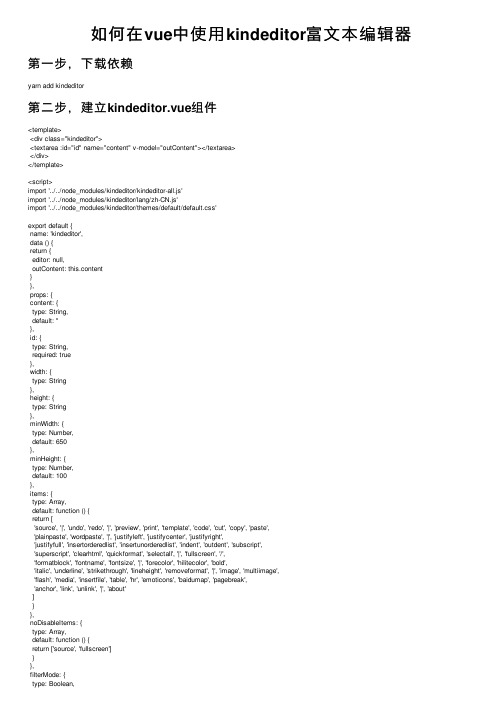
如何在vue中使⽤kindeditor富⽂本编辑器第⼀步,下载依赖yarn add kindeditor第⼆步,建⽴kindeditor.vue组件<template><div class="kindeditor"><textarea :id="id" name="content" v-model="outContent"></textarea></div></template><script>import '../../node_modules/kindeditor/kindeditor-all.js'import '../../node_modules/kindeditor/lang/zh-CN.js'import '../../node_modules/kindeditor/themes/default/default.css'export default {name: 'kindeditor',data () {return {editor: null,outContent: this.content}},props: {content: {type: String,default: ''},id: {type: String,required: true},width: {type: String},height: {type: String},minWidth: {type: Number,default: 650},minHeight: {type: Number,default: 100},items: {type: Array,default: function () {return ['source', '|', 'undo', 'redo', '|', 'preview', 'print', 'template', 'code', 'cut', 'copy', 'paste','plainpaste', 'wordpaste', '|', 'justifyleft', 'justifycenter', 'justifyright','justifyfull', 'insertorderedlist', 'insertunorderedlist', 'indent', 'outdent', 'subscript','superscript', 'clearhtml', 'quickformat', 'selectall', '|', 'fullscreen', '/','formatblock', 'fontname', 'fontsize', '|', 'forecolor', 'hilitecolor', 'bold','italic', 'underline', 'strikethrough', 'lineheight', 'removeformat', '|', 'image', 'multiimage','flash', 'media', 'insertfile', 'table', 'hr', 'emoticons', 'baidumap', 'pagebreak','anchor', 'link', 'unlink', '|', 'about']}},noDisableItems: {type: Array,default: function () {return ['source', 'fullscreen']}},htmlTags: {type: Object,default: function () {return {font: ['color', 'size', 'face', '.background-color'],span: ['style'],div: ['class', 'align', 'style'],table: ['class', 'border', 'cellspacing', 'cellpadding', 'width', 'height', 'align', 'style'], 'td,th': ['class', 'align', 'valign', 'width', 'height', 'colspan', 'rowspan', 'bgcolor', 'style'], a: ['class', 'href', 'target', 'name', 'style'],embed: ['src', 'width', 'height', 'type', 'loop', 'autostart', 'quality','style', 'align', 'allowscriptaccess', '/'],img: ['src', 'width', 'height', 'border', 'alt', 'title', 'align', 'style', '/'],hr: ['class', '/'],br: ['/'],'p,ol,ul,li,blockquote,h1,h2,h3,h4,h5,h6': ['align', 'style'],'tbody,tr,strong,b,sub,sup,em,i,u,strike': []}}},wellFormatMode: {type: Boolean,default: true},resizeType: {type: Number,default: 2},themeType: {type: String,default: 'default'},langType: {type: String,default: 'zh-CN'},designMode: {type: Boolean,default: true},fullscreenMode: {type: Boolean,default: false},basePath: {type: String},themesPath: {type: String},pluginsPath: {type: String,default: ''},langPath: {type: String},minChangeSize: {type: Number,default: 5},loadStyleMode: {type: Boolean,default: true},urlType: {type: String,default: ''},newlineTag: {type: String,default: 'p'default: 2},dialogAlignType: {type: String,default: 'page'},shadowMode: {type: Boolean,default: true},zIndex: {type: Number,default: 811213},useContextmenu: {type: Boolean,default: true},syncType: {type: String,default: 'form'},indentChar: {type: String,default: '\t'},cssPath: {type: [ String, Array ] },cssData: {type: String},bodyClass: {type: String,default: 'ke-content' },colorTable: {type: Array},afterCreate: {type: Function},afterChange: {type: Function},afterTab: {type: Function},afterFocus: {type: Function},afterBlur: {type: Function},afterUpload: {type: Function},uploadJson: {type: String},fileManagerJson: {type: Function},allowPreviewEmoticons: { type: Boolean,default: true},allowImageUpload: {type: Boolean,default: true},allowFlashUpload: {allowMediaUpload: {type: Boolean,default: true},allowFileUpload: {type: Boolean,default: true},allowFileManager: {type: Boolean,default: false},fontSizeTable: {type: Array,default: function () {return ['9px', '10px', '12px', '14px', '16px', '18px', '24px', '32px']}},imageTabIndex: {type: Number,default: 0},formatUploadUrl: {type: Boolean,default: true},fullscreenShortcut: {type: Boolean,default: false},extraFileUploadParams: {type: Array,default: function () {return []}},filePostName: {type: String,default: 'imgFile'},fillDescAfterUploadImage: {type: Boolean,default: false},afterSelectFile: {type: Function},pagebreakHtml: {type: String,default: '<hr style=”page-break-after: always;” class=”ke-pagebreak” />' },allowImageRemote: {type: Boolean,default: true},autoHeightMode: {type: Boolean,default: false},fixToolBar: {type: Boolean,default: false},tabIndex: {type: Number}},watch: {content (val) {this.editor && val !== this.outContent && this.editor.html(val)},outContent (val) {this.$emit('update:content', val)mounted () {var _this = this_this.editor = window.KindEditor.create('#' + this.id, {width: _this.width,height: _this.height,minWidth: _this.minWidth,minHeight: _this.minHeight,items: _this.items,noDisableItems: _this.noDisableItems,filterMode: _this.filterMode,htmlTags: _this.htmlTags,wellFormatMode: _this.wellFormatMode,resizeType: _this.resizeType,themeType: _this.themeType,langType: _ngType,designMode: _this.designMode,fullscreenMode: _this.fullscreenMode,basePath: _this.basePath,themesPath: _this.cssPath,pluginsPath: _this.pluginsPath,langPath: _ngPath,minChangeSize: _this.minChangeSize,loadStyleMode: _this.loadStyleMode,urlType: _this.urlType,newlineTag: _this.newlineTag,pasteType: _this.pasteType,dialogAlignType: _this.dialogAlignType,shadowMode: _this.shadowMode,zIndex: _this.zIndex,useContextmenu: _eContextmenu,syncType: _this.syncType,indentChar: _this.indentChar,cssPath: _this.cssPath,cssData: _this.cssData,bodyClass: _this.bodyClass,colorTable: _this.colorTable,afterCreate: _this.afterCreate,afterChange: function () {_this.afterChange_this.outContent = this.html()},afterTab: _this.afterTab,afterFocus: _this.afterFocus,afterBlur: _this.afterBlur,afterUpload: _this.afterUpload,uploadJson: _this.uploadJson,fileManagerJson: _this.fileManagerJson,allowPreviewEmoticons: _this.allowPreviewEmoticons,allowImageUpload: _this.allowImageUpload,allowFlashUpload: _this.allowFlashUpload,allowMediaUpload: _this.allowMediaUpload,allowFileUpload: _this.allowFileUpload,allowFileManager: _this.allowFileManager,fontSizeTable: _this.fontSizeTable,imageTabIndex: _this.imageTabIndex,formatUploadUrl: _this.formatUploadUrl,fullscreenShortcut: _this.fullscreenShortcut,extraFileUploadParams: _this.extraFileUploadParams,filePostName: _this.filePostName,fillDescAfterUploadImage: _this.fillDescAfterUploadImage, afterSelectFile: _this.afterSelectFile,pagebreakHtml: _this.pagebreakHtml,allowImageRemote: _this.allowImageRemote,autoHeightMode: _this.autoHeightMode,fixToolBar: _this.fixToolBar,tabIndex: _this.tabIndex})}}</script><style>第三步,引⼊使⽤<template><div id="app"><editor id="editor_id" height="500px" width="700px" :content.sync="editorText":afterChange="afterChange()":loadStyleMode="false"@on-content-change="onContentChange"></editor><div> editorTextCopy: {{ editorTextCopy }} </div></div></template><script>import editor from './components/kindeditor.vue'export default {name: 'app',components: {editor},data () {return {editorText: '直接初始化值', // 双向同步的变量editorTextCopy: '' // content-change 事件回掉改变的对象}},methods: {onContentChange (val) {this.editorTextCopy = val;window.console.log(this.editorTextCopy)},afterChange () {}}}</script>效果如下:以上就是vue中使⽤kindeditor富⽂本编辑器的详细内容,更多关于vue kindeditor富⽂本编辑器的资料请关注其它相关⽂章!。
kindeditor 正文格式
kindeditor 正文格式
在使用 kindeditor 进行编辑的时候,可以按照以下格式进行调整正文的样式:
1. 标题格式:可以使用 H1-H6 标签设置标题的大小和样式,例如:使用 H1 标签设置一级标题,使用 H2 标签设置二级标题,以此类推。
2. 加粗、倾斜和下划线:可以使用 B、I 和 U 标签分别给文字添加加粗、倾斜和下划线效果。
3. 文字对齐:可以使用 DIV 标签设置文字的对齐方式,如左对齐、居中对齐和右对齐等。
4. 文字颜色和背景色:可以使用 FONT 标签设置文字的颜色和背景色,通过设置相应的 CSS 属性来改变颜色。
5. 段落格式:可以使用 P 标签生成段落,在编辑器中按下"Enter"键可以生成新的段落。
6. 引用格式:可以使用 BLOCKQUOTE 标签设置文字的引用样式,将引用的文字加上这个标签来表示。
7. 列表格式:可以使用 UL 和 OL 标签分别表示无序列表和有序列表,可以使用 LI 标签表示列表项。
8. 插入图片和链接:可以使用 IMG 标签插入图片,可以使用
A 标签插入链接。
9. 清除样式:可以使用 REMOVEFORMAT 标签清除选中文字的样式,还可以使用 CLEAR 标签清除浮动样式。
以上是一些常用的正文格式,可以根据具体的需求进行拓展和调整。
kindEditor完整认识 PHP上调用并上传图片说明
引用:/yanghbmail/blog/item/6fc7beec9531e33462d09f2a.htm lkindEditor完整认识 PHP上调用并上传图片说明。
2011年02月03日星期四 20:26最近又重新捣鼓了下kindeditor,之前写的一篇文章/yanghbmail/blog/item/c681be015755160b1d9583e7.htm l感觉有点不太全面细致,所以今天再重新写下。
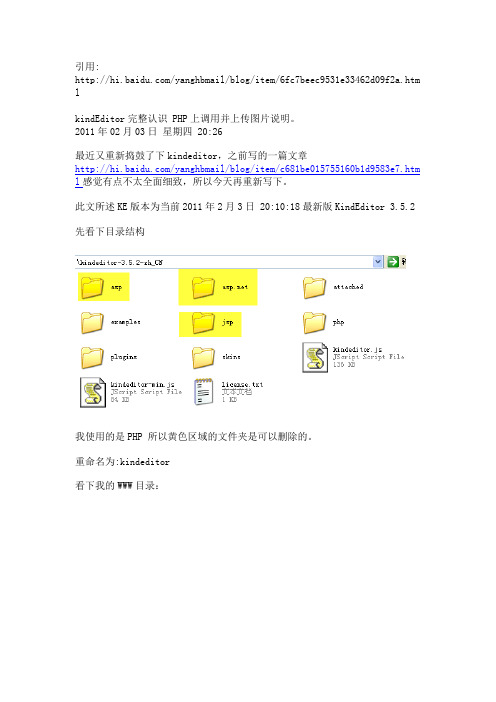
此文所述KE版本为当前2011年2月3日 20:10:18最新版KindEditor 3.5.2 先看下目录结构我使用的是PHP 所以黄色区域的文件夹是可以删除的。
重命名为:kindeditor看下我的WWW目录:这里的关键文件就是图中的两个其它我划掉的是我自己的文件夹-----------------dome.php----------------------<?php$htmlData = '';if (!empty($_POST['content1'])) {if (get_magic_quotes_gpc()) {echo '上面的';$htmlData = stripslashes($_POST['content1']);} else {echo '下面的';$htmlData = $_POST['content1'];}}?><!doctype html><html><head><meta charset="utf-8" /><title>KindEditor PHP</title><link rel="stylesheet" href="./kindeditor/examples/index.css" /> //此处的引入文件位置路径为相对于该PHP文件的位置此为demo.php<script charset="utf-8" src="./kindeditor/kindeditor.js"></script> //此处的引入文件位置路径为相对于该PHP文件的位置此为demo.php<script>KE.show({id : 'content1',imageUploadJson : '../../php/upload_json.php', //<<相对于kindeditor3.5.5\plugins\image\image.htmlfileManagerJson : '../../php/file_manager_json.php', //<<相对于kindeditor3.5.5\plugins\file_manager\file_manager.htmlallowFileManager : true,afterCreate : function(id) {KE.event.ctrl(document, 13, function() {KE.util.setData(id);document.forms['example'].submit();});KE.event.ctrl(KE.g[id].iframeDoc, 13, function() {KE.util.setData(id);document.forms['example'].submit();});}});</script></head><body class="ke-content"><?php echo $htmlData; ?><form name="example" method="post" action="demo.php"><textarea id="content1" name="content1" cols="100" rows="8"style="width:700px;height:200px;visibility:hidden;"><?php echo htmlspecialchars($htmlData); ?></textarea><br /><input type="submit" name="button" value="提交内容" /> (提交快捷键: Ctrl + Enter)</form></body></html>注意上面的4处红色文件的位置。
Kindeditor中实用的编辑器api详解和实例用法(一)
Kindeditor中实⽤的编辑器api详解和实例⽤法(⼀)K.create(expr [, options])创建编辑器,返回第⼀个KEditor对象。
4.1版本开始expr⽀持多个textarea,之前版本只在第⼀个textarea上创建。
创建编辑器后可以⽤ KindEditor.instances 数组取得已创建的所有KEditor对象。
参数:mixed expr: element或选择器返回: KEditor⽰例:01// 102// editor 等于 KindEditor.instances[0]03editor = K.create('textarea[name="content"]');04editor.html('HTML code');050607// 208editor = K.create('#editor_id', {09 filterMode : true,10 langType : 'en'11});remove()移除编辑器。
参数: ⽆返回: KEditor⽰例:1editor.remove();html()取得编辑器的HTML内容。
参数: ⽆返回: string⽰例:1var html = editor.html();html(val)设置编辑器的HTML内容。
参数:string val: HTML返回: KEditor⽰例:1editor.html('<strong>HTML</strong> code');fullHtml()取得完整的HTML内容,HTML包含<html>标签。
参数: ⽆返回: string⽰例:1var fullHtml = editor.fullHtml();text()取得编辑器的纯⽂本内容。
(包含img和embed)参数: ⽆返回: string⽰例:1var text = editor.text();text(val)设置编辑器的内容,直接显⽰HTML代码。
kindeditor上传文件
kindeditor上传文件引用js文件:<link rel="stylesheet" href="plugins/kindeditor/themes/default/default.css" /> <script charset="utf-8" src="plugins/kindeditor/kindeditor-min.js"></script> <script charset="utf-8" src="plugins/kindeditor/lang/zh_CN.js"></script> KindEditor.ready(function(K) {//初始化编辑器var editor1 = K.create('.editor', {cssPath : '/plugins/kindeditor/plugins/code/prettify.css',uploadJson : '/plugins/kindeditor/php/upload_json.php',fileManagerJson : '/plugins/kindeditor/php/file_manager_json.php',allowFileManager : true,afterCreate : function() {}});prettyPrint();});/*$(function() {var editor = KindEditor.create('textarea[name="content"]');});*///单图上传KindEditor.ready(function(K) {var editor = K.editor({allowFileManager : true});K('#image1').click(function() {editor.loadPlugin('image', function() {editor.plugin.imageDialog({imageUrl : K('#url1').val(),clickFn : function(url, title, width, height, border, align) {K('#url1').val(url);editor.hideDialog();}});});});});KindEditor.ready(function(K) {var editor = K.editor({allowFileManager : true});K('#image2').click(function() {editor.loadPlugin('image', function() {editor.plugin.imageDialog({imageUrl : K('#url2').val(),clickFn : function(url, title, width, height, border, align) {K('#url2').val(url);editor.hideDialog();}});});});});//批量上传图片KindEditor.ready(function(K) {var editor = K.editor({allowFileManager : true});K('#J_selectImage').click(function() {editor.loadPlugin('multiimage', function() {editor.plugin.multiImageDialog({clickFn : function(urlList) {var div = K('#J_imageView');div.html('');K.each(urlList, function(i, data) {div.append('<img src="' + data.url + '">');});editor.hideDialog();}});});});});html:<p>PC端图片:<input readonly name="pic" type="text" id="url1" value="{twotree#$info.pic}" class="text-input small-input"/><input type="button" id="image1" value="选择图片" class="button"/><font style="color:red"> 【图片大小不能超过1M】</font></p><p>手机端图片:<input readonly name="pic1" type="text" id="url2" value="{twotree#$info.pic1}" class="text-input small-input"/><input type="button" id="image2" value="选择图片" class="button"/><font style="color:red"> 【图片大小不能超过1M】</font></p>。
让kindeditor的图片适应编辑器
使用kindeditor上传图片使kindeditor中的图片适应编辑器大小作者:kiss灬小祥语言:java 在jsp里使用版本:4.1.7 2013年4月21发布的,最新版哦公司做博文发布系统,需要一个在线所见即所得的编辑器,找了好多比如ckediter,ewebediter,kindeditor,ueditor。
最后还是选择了kindeditor。
只因为看它顺眼。
恩。
就是顺眼。
关于kindeditor的使用我就不说了,官网有详细的中文介绍,主要说一下使用过程中的问题。
错误一上传图片的时候按照官网的配置,总是报上传错误。
当我满怀欣喜的下载下来,并且按照配置配置好了。
然后就伤了以下为我的编辑器配置:KindEditor.ready(function(K) {window.editor = K.create("#content",{//上传程序(是一段写在jsp里面的上传代码)uploadJson : '../editor/jsp/upload_json.jsp',//文件管理程序(获取文件、图片列表,并显示)fileManagerJson : '../editor/jsp/file_manager_json.jsp',//可以设置是否显示图片空间按钮(不安全,发布到互联网以后不建议显示)allowFileManager : false,//按钮组items:['forecolor', 'hilitecolor', 'bold','italic', 'underline', 'removeformat','undo', 'redo', '|','justifyleft', 'justifycenter', 'justifyright','justifyfull', 'insertorderedlist', 'insertunorderedlist','formatblock', 'fontname', 'fontsize', '|', 'image', 'multiimage','emoticons', 'link'],//是否可以拖动0:不可以resizeType:0,themeType:"simple",//这是关系到图片自动缩小的样式,想让图片适应编辑器,一定要写哦,等会贴代码cssPath:"../tools/css/kindeditoriframe-user.css",width:"650px",height:"300px"});});Ok,配置好了。
- 1、下载文档前请自行甄别文档内容的完整性,平台不提供额外的编辑、内容补充、找答案等附加服务。
- 2、"仅部分预览"的文档,不可在线预览部分如存在完整性等问题,可反馈申请退款(可完整预览的文档不适用该条件!)。
- 3、如文档侵犯您的权益,请联系客服反馈,我们会尽快为您处理(人工客服工作时间:9:00-18:30)。
编辑器使用方法1. 下载编辑器下载 KindEditor 最新版本,下载之后打开 examples/index.html 就可以看到演示。
下载页面: /down.php2. 部署编辑器解压 kindeditor-x.x.x.zip 文件,将所有文件上传到您的网站程序目录里,例如:http://您的域名/editor/Note您可以根据需求删除以下目录后上传到服务器。
∙asp - ASP程序∙ - 程序∙php - PHP程序∙jsp - JSP程序∙examples - 演示文件3. 修改HTML页面1.在需要显示编辑器的位置添加textarea输入框。
<textarea id="editor_id" name="content"style="width:700px;height:300px;"><strong>HTML内容</strong></textarea>Note∙id在当前页面必须是唯一的值。
∙在textarea里设置HTML内容即可实现编辑,在这里需要注意的是,如果从服务器端程序(ASP、PHP、等)直接显示内容,则必须转换HTML 特殊字符(>,<,&,”)。
具体请参考各语言目录下面的demo.xxx程序,目前支持ASP、 、PHP、JSP。
∙在有些浏览器上不设宽度和高度可能显示有问题,所以最好设一下宽度和高度。
宽度和高度可用inline样式设置,也可用编辑器初始化参数设置。
2.在该HTML页面添加以下脚本。
<script charset="utf-8" src="/editor/kindeditor.js"></script><script charset="utf-8" src="/editor/lang/zh_CN.js"></script><script>var editor;KindEditor.ready(function(K) {editor = K.create('#editor_id');});</script>Note∙第一个参数可用其它CSS选择器,匹配多个textarea时只在第一个元素上加载编辑器。
∙通过K.create函数的第二个参数,可以对编辑器进行配置,具体参数请参考编辑器初始化参数。
var options = {cssPath : '/css/index.css',filterMode : true};var editor = K.create('textarea[name="content"]', options);4. 获取HTML数据// 取得HTML内容html = editor.html();// 同步数据后可以直接取得textarea的valueeditor.sync();html = document.getElementById('editor_id').value; // 原生APIhtml = K('#editor_id').val(); // KindEditor Node APIhtml = $('#editor_id').val(); // jQuery// 设置HTML内容editor.html('HTML内容');Note∙KindEditor的可视化操作在新创建的iframe上执行,代码模式下的textarea框也是新创建的,所以最后提交前需要将HTML数据同步到原来的textarea,editor.sync()函数会完成这个动作。
∙KindEditor在默认情况下自动寻找textarea所属的form元素,找到form 后onsubmit事件里添加sync函数,所以用form方式提交数据,不需要手动执行sync()函数。
编辑器初始化参数width编辑器的宽度,可以设置px或%,比textarea输入框样式表宽度优先度高。
∙数据类型: String∙默认值: textarea输入框的宽度示例:K.create('#id', {width : '700px'});height编辑器的高度,只能设置px,比textarea输入框样式表高度优先度高。
∙数据类型: String∙默认值: textarea输入框的高度minWidth指定编辑器最小宽度,单位为px。
∙数据类型: Int∙默认值: 650minHeight指定编辑器最小高度,单位为px。
∙数据类型: Int∙默认值: 100items配置编辑器的工具栏,其中”/”表示换行,”|”表示分隔符。
∙数据类型: Array∙默认值:['source', '|', 'undo', 'redo', '|', 'preview', 'print','template', 'code', 'cut', 'copy', 'paste','plainpaste', 'wordpaste', '|', 'justifyleft', 'justifycenter', 'justifyright','justifyfull', 'insertorderedlist', 'insertunorderedlist','indent', 'outdent', 'subscript','superscript', 'clearhtml', 'quickformat', 'selectall', '|', 'fullscreen', '/','formatblock', 'fontname', 'fontsize', '|', 'forecolor','hilitecolor', 'bold','italic', 'underline', 'strikethrough', 'lineheight','removeformat', '|', 'image', 'multiimage','flash', 'media', 'insertfile', 'table', 'hr', 'emoticons', 'baidumap', 'pagebreak','anchor', 'link', 'unlink', '|', 'about'noDisableItemsdesignMode为false时,要保留的工具栏图标。
∙数据类型: Array∙默认值: [‘source’, ‘fullscreen’]filterModetrue时根据htmlTags过滤HTML代码,false时允许输入任何代码。
∙数据类型: Boolean∙默认值: trueNote4.1.1版本开始默认值为true。
htmlTags指定要保留的HTML标记和属性。
Object的key为HTML标签名,value为HTML 属性数组,”.”开始的属性表示style属性。
∙数据类型: Object∙默认值:{font : ['color', 'size', 'face', '.background-color'],span : ['.color', '.background-color', '.font-size','.font-family', '.background','.font-weight', '.font-style', '.text-decoration', '.vertical-align', '.line-height'],div : ['align', '.border', '.margin', '.padding','.text-align', '.color','.background-color', '.font-size', '.font-family', '.font-weight', '.background','.font-style', '.text-decoration', '.vertical-align', '.margin-left'],table: ['border', 'cellspacing', 'cellpadding', 'width','height', 'align', 'bordercolor','.padding', '.margin', '.border', 'bgcolor','.text-align', '.color', '.background-color','.font-size', '.font-family', '.font-weight','.font-style', '.text-decoration', '.background','.width', '.height', '.border-collapse'],'td,th': ['align', 'valign', 'width', 'height', 'colspan','rowspan', 'bgcolor','.text-align', '.color', '.background-color','.font-size', '.font-family', '.font-weight','.font-style', '.text-decoration', '.vertical-align', '.background', '.border'],a : ['href', 'target', 'name'],embed : ['src', 'width', 'height', 'type', 'loop', 'autostart', 'quality', '.width', '.height', 'align', 'allowscriptaccess'],img : ['src', 'width', 'height', 'border', 'alt', 'title','align', '.width', '.height', '.border'],'p,ol,ul,li,blockquote,h1,h2,h3,h4,h5,h6' : ['align', '.text-align', '.color', '.background-color', '.font-size', '.font-family', '.background','.font-weight', '.font-style', '.text-decoration', '.vertical-align', '.text-indent', '.margin-left'],pre : ['class'],hr : ['class', '.page-break-after'],'br,tbody,tr,strong,b,sub,sup,em,i,u,strike,s,del' : []}wellFormatModetrue时美化HTML数据。
