ANSYS Connection Worksheet-Mech_AC_160_WS1b-Connections
ansys mechanical 16.0 release lecture 1 introducti
16.0 ReleaseLecture 1Introduction to ANSYS WorkbenchIntroduction to ANSYS MechanicalWelcome!Welcome to the ANSYS Mechanical application introductory training course.This training course covers the basics of using ANSYS Mechanicalin performing structural and thermal analyses.It is intended for all new or occasional ANSYS Mechanical users, regardlessof the CAD software used.Course Objectives:–General understanding of the user interface, as related to geometry import, meshing, application of loads and supports, and postprocessing–Procedure for performing FEA simulations, including linear static, modal, and harmonic structural analyses and nonlinear steady-state thermal analyses–Utilizing parameters for ‘what-if’ scenarios•Training Courses are also available covering the use of other Workbench modules(e.g. DesignModeler,Design Exploration, etc.) .Morning Lecture – IntroductionLecture – Chapter 2: Mechanical BasicsWorkshop 2.1Lecture – Chapter 3: General PreprocessingWorkshop 3.1Lecture – Chapter 3, continued Afternoon Workshop 3.2Lecture – Chapter 3, continuedWorkshop 3.3 or Workshop 3.4Lecture – Chapter 4: Meshing in MechanicalWorkshop 4.1Lecture – Chapter 4 (continued)Workshop 4.2Lecture – Chapter 5: Modeling ConnectionsWorkshop 5.1Morning Lecture – Chapter 5 (continued)Workshop 5.2Lecture – Chapter 6: Remote Boundary ConditionsWorkshop 6.1Lecture – Chapter 6 (continued)Workshop 6.2Lecture – Chapter 7: Static Structural AnalysisWorkshop 7.1Afternoon Lecture – Chapter 7 (continued)Workshop 7.2Lecture – Chapter 8: Modal AnalysisWorkshop 8.1Lecture – Chapter 9: Thermal AnalysisWorkshop 9.1Morning Lecture – Chapter 10: Multistep AnalysisWorkshop 10.1Lecture – Chapter 11: Results and PostprocessingWorkshop 11.1Afternoon Lecture – Chapter 12: CAD and ParametersWorkshop 12.1Choice of Appendix Chapters or discussion of user issues** This course has been designed to run to just over 2.5 days to allow the last afternoon to be more informal. There is a choice of Appendix Chapters that explore different analysis types or go into some subjects in more depth. If time allows user problems can also be discussed depending on the number of attendees.Lecture 1: ContentsA.About ANSYS Inc.B.ANSYS Customer PortalC.ANSYS Workbench OverviewD.DemonstrationE.SummaryF.Overview of MechanicalG.APPENDIXA: About ANSYS Inc.FOCUSEDThis is all we do.Leading product technologies in all physics areas Largest development team focused on simulationDEDICATED 2,700+7540employeeslocationscountriesMARKET LEADERLong-term growth, financial stability and CAD agnosticPROVENValidating our solutions on themost advanced product applications40+ yearsBreadth of TechnologiesStructural Mechanics: From Linear Statics Fluid Mechanics:From Single-Phase Flows Electromagnetics: From Low-Frequency Windings Systems:From Data SharingTo High-Speed ImpactTo Multiphase CombustionTo High-Frequency Field AnalysisTo Multi-Domain System AnalysisThe ANSYS Customer PortalContains over 85,000 support assets powered by a modern web user interface and powerful search engine.Over 5.2 million page views in 2014SupportProductsDownloadsKnowledge ResourcesClassroom Training WebinarsService RequestsProduct AssetsLatest Release Updates ToolsPrevious Release(s) Extension Library (AppStore)SolutionsConference Proceedings Class3 Reports Documentation Training & Tutorialshttps://About searchThe ANSYS Customer Portal’s search is powered bydedicated Google® hardware.Mesh = Meshed = MeshingExport = Exported = ExportingXXXXX = YYYYY = ZZZZZExample:You want a meshing tutorial for ANSYS Meshing and your search has results for other products that are not of interest to you; by selecting the product facet “ANSYS Meshing” you can narrow down your results further.Support / downloads / trainingSubmit and review service requestsIf you cannot find the answer to your question within the ANSYS Customer Portal then you can submit a service request. A member of ANSYS technical support will then get back toyou with advice or a solution.Download the latest software and updatesDownload ISO images if you wish to create a DVD which is recommend for installations onmultiple computers and allows you to keep an archive of the installation for later re-use.Package downloads can also be selected if you want to install files directly.Download classroom and video training materialTraining and tutorial material are available for both a broad range of ANSYS products anduser’s experience. Search the hundreds of courses available and improve your knowledgeof ANSYS software.C. ANSYS WorkbenchANSYS Workbench is a project-management tool. It can be considered as the top-level interface linking all our software tools.Workbench handles the passing of data between ANSYS Geometry / Mesh / Solver / Postprocessing tools.This greatly helps project management. You do not need worry about the individual files on disk (geometry, mesh etc). Graphically, you can see at-a-glance how a project has been built. Because Workbench can manage theindividual applications AND pass databetween them, it is easy to automaticallyperform design studies (parametricanalyses) for design optimisation.D. DemonstrationDemonstration : 01_WB_Presentation.mp4 •What you can learn in this demonstration :–How to use Workbench project page–How to save, open, archive a project–How to create different analysis–Understand each stage of an analysis–Edit units, properties and files options–Working with parametersE: SummaryANSYS Workbench is a convenient way of managing your simulation projects.Workbench is used to launch the individual software components, and used to transfer data between them.It is easy to see at-a-glace how a model has been built, and determine which files were used for a particular simulation (pairing geometry files to solver runs)Workbench also makes it straightforward to perform parametric analyses (without the user needing to manually launch each application in turn), and makes it easy to simulate multi-physics scenarios like fluid-structure interaction.F. Mechanical OverviewAnalysis types available in Workbench - Mechanical:†•Structural (static and transient):–Linear and nonlinear structural analyses.•Dynamics:–modal, harmonic, response spectrum, random vibration, flexible and rigid dynamics.•Heat Transfer (steady state and transient):–Solve for temperature field and heat flux. Temperature-dependent conductivity, convection, radiation and materials allowed.•Magnetostatic:–Perform various magnetic field analyses.•Electrical:–Simulate electrical devices such as motors, solenoids, etc..† Note, the active ANSYS license dictates what functionality is available to the user. Not all features listed are covered in this Introductory course.… Mechanical OverviewAdd-on licenses for Mechanical:•Rigid Dynamics•Fatigue Module•ACP16.0 Workbench products are available for Windows and Linux operating systems. •Check the ANSYS web site or online documentation for the latest compatibilities.Network licensing capabilities are used for all ANSYS and ANSYS Workbench products.G. APPENDIX. . . Workbench OverviewThe options visible in the left-hand column show all the products (systems) you have licenses for.TIP: If this list appears empty, you have a problem with your licensing. “Analysis Systems” are ready-made stencils that include all the individual systems (applications) needed for common analyses (for example Geometry + Mesh + Solver + Post-Processor) “Component Systems” are the individual building-blocks for each stage of the analysis“Design Exploration” provides tools for optimising designs and understanding the parametric response.. . . Basic WorkflowDragging an Analysis System ontothe project desktop lays out aworkflow, comprising all the stepsneeded for a typical analysis.Workflow is from top to bottom.As each stage is complete, the iconat the right-hand side changes. . . Alternative WorkflowHowever, an analysis could equally well be prepared by selecting theindividual Component Systems that are needed for this analysis, and thenlinking them together with connectors.TIP: There are two ways to create the connectors between the systems:1)Use the mouse to draw a line (eg A2 to B3, B4 to C4 etc)2)Or, simply drop the new system on the cell of the upstream one, and thelink will be generated automatically.. . . Cell StatesAs each stage in the model-build is completed, the state of thecell changes.Status after creating Geometry in A3, not yet opened Mechanical in A4 Status after model has solvedwaiting for post-processing Icon MeaningUp to DateRefresh required. Upstream data has changedUpdate required. Local data has changedUnfulfilled. Upstream data does not existAttention RequiredSolvingUpdate FailedUpdate InterruptedChanges pending (was up-to-date, but upstream data has changed). . . Sharing Data between Different Solvers Workbench can be used to transfer data between solvers. In this 1-way FSI (fluid-structure-interaction) example, we transfer the loads from a Fluent CFD simulation over to a Mechanical system to perform a stress analysisThe square connector shows that the geometry created in cell A2 (CFD model) is being shared with cell B3 (FEA model). The round connector shows that the CFD results are being transferred as a Setup (input) condition to be used for FEA stress analysis.. . . File Location on DiskShould you need to identify the individual files on your disk for each stage of the project, these can be found by enabling View > Files. The resulting table will cross-reference the directory and filename with the project cells.Filename Directory. . . Use of Archive / RestoreThe workbench project comprises many files and directories. If you need to either archivethe project, or bundle it to send to us for a Technical Support query, use the ‘Archive’ tool.This generates a single zipfile of the entire project.When archiving, you can choose whetherto include the computed result files or not(omitting these may make it small enoughto send by email)If you restore an archive you can choosewhere you save (and solve) the project.If you double click on a .wbpz file it willunpack the file to the location given byTools>Options>Folder for TemporaryFilesMost Workbench applications will let you specify key quantities as a parameter (rather than a constant). This will be covered later.In this example:•When creating the geometry inDesignModeler, hole diameter is set tobe an input parameter.•When reviewing the results, themaximum stress is set as an outputparameterWe could just have easily set up a CFD analysis, looking at different loading conditions and reporting the pressure drops.•Clicking on ‘Parameter Set’ lets us vary these parameters. •Four different geometric designs are being tested.•The whole process is automated. Workbench will recursively: i.Create the geometry, based on the parameters in the table ii.Take this into Mechanical and remesh and solve and then the postprocessor•The user just needs to sit back and wait, and the matrix of experiments (each requiring several different applicationsto be launched in turn) is computed automatically.1] Create new row in table with each design (in this case hole diameter)3] The desired result (set up in Mechanical) is reported here2] Click here tocompute all the designs4] The ‘Exported’ option allows snapshots of each DP to be saved to a different project… Starting Mechanical There are two methods of launching Workbench: •From the Windows start menu:•From the CAD systemThe Units menu in Workbench:•Select from predefined unit systems.•Create custom unit systems.•Controls unit display for Engineering Data, Parameters and Charts.•Activate the Units System dialog to unit display preferences.Units can be displayed inthe active Project system oras they were defined in theirsource (e.g. CAD system).Create custom unit systems by duplicating existing systems then modifying. Custom unit systems can be exported and imported.. . . License PreferencesWorkbench license control is handled through the user interface shown below, activated from the Workbench project page:“Tools > License Preferences . . . “. . . License PreferencesThe order of license preference is specified using the up/down arrows (first available is used). •The “Use License” column indicates desired licenses to use (0 = off, 1 = on).Workbench users can specify whether a single license isshared when multiple applications are open, or if eachapplication accesses their own license.31 © 2015 ANSYS, Inc. February 27, 2015。
ANSYS常见错误和警告及其解决方法

ANSYS常见错误和警告及其解决方法1、some contact elements overlap with the other contact element which can cause over constraint。
一些接触单元与其他接触单元重叠,这可能导致过度约束。
解决方法:这是由于在同一实体上,即有绑定接触(MPC)的定义,又有刚性区或远端载荷(MPC)的定义,操作中在定义刚性区或远端载荷时避免选择不必要的DOF自由度,以消除过约束。
2、error:element type 1 is PLANE42,which can't be used with the VMES command,meshing of volume 3 aborted。
单元类型1是PLANE42,不能使用命令VMES划分体网格,划分体3中止。
解决方法:修改单元类型为适合体网格的单元类型,如solid、shell等;使用AMESH。
3、error:keypoint 10 is referenced by only one line. Improperly connected line set for AL command。
关键点10只在一条线上。
不适合使用AL命令连接线。
解决方法:AL命令是用线来定义面,而选择两条线可能只有两个关键点,因为关键点10不在线上,而定义面至少有三个点,因此,需要再选一条线。
4、Element type 1 is Solid95,which can not be used with the AMES command,meshing of area 2 aborted。
这是因为不同单元类型对应不同的划分网格操作。
上面的错误是因为单元类型为Solid95(实体单元),不能用AMES命令划分面网格。
5、Shear modulus must be positive for material 1 in element 1。
Ansys 帮助文档使用说明
ANSYS的帮助文件使用说明很多网友都曾觉得ANSYS使用起来有一定的难度,经常会遇到这样或那样的问题,但市面上的参考书又不尽如人意,那究竟有没有比较好的参数书?有的,个人认为ANSYS的帮助文件就是一本不错的参数书。
接下来就ANSYS在线帮助的使用做一些基本的介绍,希望能对初学者有所帮助。
ANSYS的帮助文件包括所有ANSYS命令解释及所有的GUI解释,还包括ANSYS各模块的分析指南,实例练习等。
一.进入帮助系统可以通过下列三种方式进入:1.进入ANSYS的操作界面后,在应用菜单中选取Help进入;2.在ANSYS程序组中选取Help System进入:Start Menu > Programs > ANSYS XX>Help System;3.在任何对话框中选取Help。
二.帮助系统的内容安排:点击帮助系统的目录,就看到如下的ANSYS帮助系统的整体内容安排:1.前面4个部分是与软件版本,安装,注册相关的信息,只需作相应的了解即可,如下:※Release Notes※ANSYS Installation and Configuration Guide for UNIX※ANSYS Installation and Configuration Guide for Windows※ANSYS, Inc. Licensing Guide2.接下来两个部分是比较重要的部分,ANSYS的命令和单元手册,对用到的命令和单元应作详细的了解和掌握。
※ANSYS Commands Reference※ANSYS Element Reference3.下面四个部分是ANSYS相关的操作手册,说明如下:※Operations Guide 基本界面,操作指南※Basic Analysis Procedures Guide 基础分析指南※Advanced Analysis Techniques Guide 高级分析指南※Modeling and Meshing Guide 建模与分网指南4.以下几个部分则是ANSYS分模块的分析指南,如下:※Structural Analysis Guide 结构分析指南※Thermal Analysis Guide 热分析指南※CFD FLOTRAN Analysis Guide 流体分析指南※Electromagnetic Field Analysis Guide 电磁场分析指南※Coupled-Field Analysis Guide 耦合场分析指南5.为更好的使用ANSYS方便,快捷的解决更多的工程实际问题,建议仔细学习以下几个部分:※APDL Programmer's Guide:APDL操作手册※ANSYS Troubleshooting Guide:ANSYS错误信息指南※Mechanical Toolbar:机械工具栏※ANSYS/LS-DYNA User's Guide:ANSYS/LS-DYNA操作指南※ANSYS Connection Users Guide:接口技术指南6.欲快速掌握ANSYS的使用,莫过于通过实例和练习,而ANSYS 的帮助系统中则提供大量的例题及练习供用户参考,所以以下两个部分是经常光顾的。
ansys错误及解决方法汇总

ansys错误及解决⽅法汇总原因分析:这是由于proe的许可⽂件错误导致的提⽰,只要点击ok,proe将会⾃动关闭。
重启打开还是⼀样。
究竟如何解决呢,考虑到开始proe软件可以正常运⾏,经过⼀段时间后出现-1错误,其原因是:移动或删除了许可证⽂件的.,从⽽导致⽆法正常找到许可证⽂件。
解决⽅法:⽅法⼀:如果删除了许可证⽂件我们需要再创建⼀个替换完整的许可证⽂件,如果只是移动了许可证⽂件的位置,我们只需要双击运⾏proe安装⽬录下的C/D/E:\PROE\proeWildfire4.0\bin\ptcsetup.bat(我的是D:\PROE\proeWildfire 4.0\bin),当提⽰添加许可证的时候浏览新的许可证路径加进去即可。
⽅法⼆:更简单的⽅法是不⽤运⾏ptcsetup.bat直接修改以下⽂件即可:⽤记事本⽅式打开bin⽬录下proe1.psf,找到“ENV=PTC_D_LICENSE_FILE”字符串,修改“=”号后⾯的路径即可(这个路径是新指定的proe许可证⽂件路径),如下图所⽰:⽅法三:按步骤操作⼯具/原料:proe完整安装包1、打开运⾏安装包的setup.exe⽂件;2、另外打开安装包或安装路径下的crack⽂件夹,找到license.dat然后使⽤记事本的⽅式打开它;3、把记事本⾥⾯的“00-00-00-00-00-00”全部替换为setup.exe⾸页的ptc主机id,不⽤区分字母⼤⼩写。
替换⽅法:ctrl+H调出替换对话框,填写完成,点击全部替换。
4、替换完成,另存为c盘。
覆盖原⽂件;5、从crack⽂件夹复制三个⽂件再次破解。
1.复制proe_WF5_Win32_crk.exe⽂件到C:\ProgramFiles\PTC\CreoElements\Pro5.0\i486_nt\obj并执⾏。
2.复制proe_mech_WF5_Win32_#1_crk.exe⽂件到C:\Program Files\PTC\Creo Elements\Pro5.0\mech\i486_nt\bin并执⾏。
ANSYS常见错误提醒和解决办法

ESYS is not valid for line element.原因:是由于我使用 LATT的时候,把“-- 〞的那个不小心填成了“1〞。
经过 ANSYS的命令手册里说那是没适用的工程,但是依照我的理解,这些所谓的没适用的工程实质上都是 ANSYS在为后续的版本留接口。
关于 LATT,实质上那个工程可能就是单元坐标系的设置。
当我发现原因后,把 1 改成 0——即使用全局直角坐标系,就没有WARNING了。
自然,直接空白也没有问题。
使用 *TREAD的时候,有的时候显然看文件好好的,但是却出现*TREAD end-of-file in data read.今后认真检查,发现我 TXT的数据文件里,分开是采用 TAB键分开的。
但是在最后一列后边,若是把鼠标点上去,发现数据后边还有一个空格键。
于是,我把每个列最后多的空格键删除,尔后发现上边的信息就没有了。
Coefficient ratio exceeds 1.0e8 - Check results.这个大概是跟收敛相关,但是我找不到详尽的原因。
我建立的一个桥梁解析模型,尽管我解析的结果完满吻合我的力学看法判断,规律完满吻合根本规律,数据也根本吻合实质察看,但是却还是不断出现这个警告信息。
*TREAD end-of-file in data readtxt中的表格数据不完满!No *CREATE for *END. The *END command is ignored忘了写 *END了吧,呵呵Keypoint 1 is referenced by only one line. Improperlyconnected line set for AL command两条线不共点 , 试一试 nummrg 命令。
L1 is not a recognized PREP7 command, abbreviation, ormacro. This command will be ignored还没有进入 prep7 ,先: /prep7Keypoint 2 belongs to line 4 and cannot be moved要点点 2 属于线 4,搬动初级体素时先搬动高级体素!Shape testing revealed that 32 of the 640 new or modifiedelementsviolate shape warning limits. To review test results,please see theoutput file or issue the CHECK command.单元形状奇异,在我的模型中 6 面体单元的三个边长差距较大,可忽略该错误用命令流建模的时候遇到的The drag direction (from the keypoint on drag line 27 thatis closestto a keypoint KP of the given area 95) is orthogonal to theareanormal at that KP. Area cannot be dragged by the VDRAG command.意思是拉伸源面的法向与拉伸路径垂直,不能够使用 VDRAG命令出现的环境ASEL,S,LOC,Z,143e-3VDRAG,ALL, , , , , ,27本意是按地址 z=143e-3 地址的面,尔后沿编号27 的线拉伸,出错,以前用该语句没有任何问题。
ANSYS有限元分析实用教程-m16机械工具条MechanicalToolbar
Training Manual
INTRODUCTION TO ANSYS 5.7 - Part 1
求解按钮
January 30, 2001 Inventory #001441 16-10
机械式工具条 - 快速指南
结果标签
• 结果标签用于:
– 查看期望环境下的变形形状或云图
Training Manual
机械式工具条
…快速指南
• 运用 MTB 做分析十分简单— 按从左到右的顺序简单地使 用标签.
Training Manual
INTRODUCTION TO ANSYS 5.7 - Part 1
•
并且能提供许多形式的帮助窗口 :
– 所有的按钮和菜单提供 “工具技巧” 和提示. – 许多对话框有一个 Help 按钮 提供上下文相关的帮助. – [?] 旁的[向导] 按钮 提供每一个分析步详细的说明.
机械式工具条
…概述
• MTB 有一些局限性, 主要是为了保证其简单性和方便性:
Training Manual
INTRODUCTION TO ANSYS 5.7 - Part 1
– 无实体建模能力. 几何模型是输入的 — 通过 IGES 以及接口产品. 您 也可以从ANSYS .db 文件 “输入” 几何模型. – 仅包含常用的图形控制和后处理功能. 然而, Utility Menu 是有效的因 而可使用所有的图形功能. – 无非线性或多物理场能力.
机械式工具条
…快速指南
分析序列 标签 新模型, 恢复模型, 存储模型
Training Manual
INTRODUCTION TO ANSYS 5.7 - Part 1
“全模式 ANSYS”
ansys接口问题(一定要看)
ANSYS导入proe之part档的问题为了保证上述两种软件的版木兼容,Pro/E的版本不得高于同期的AnsyS的版本:同时要安装ansys里的和proe接口模块!ansys安装程序里已经有了不需要下载。
(l)在开始程序下运行Ansys,选择utilities下的ans_admin项,在ans_dmin 弹出图框中选择configuration options,在下一个confirguration options弹出图框中选择configuration connection for pro/E,在configure ansys connection for pro/E中的ansys product中选择ansys multip,在graphicsdevice name中选择win32,在出现SuccesS 图框中记下config.anscon文件位置。
在出现的Pro/Einstallationinformation下的Pro/Einstallationpath中填入安装Pro/E的路径。
在language used with Pro/E中选择语言usa,最后将记录下的config.anscon拷贝到Pro/E的安装目录下。
这样就可以将Pro/E的模型直接传到Ansys中了。
同时应注意在Pro/E中建立的模型应予存盘.设置好以后重气计算机!在proe菜单栏里就有ansys菜单了!在proe里建好模型点ansys菜单就可以在proe里启动ansys 找到proe工作目录下的.anf文件!从ansys里读入那个文件在执行plot画图命令就可以把proe里建的模型导入到ansys里了!我用的是ansys8.0和proe野火2.0 成功关联.大家好像对ANSYS导入proe之part档的问题一直没有很好的解决,在此我把我的方法给大家。
1) 在同机的同一操作系统下安装有Pro/E和ANSYS两种软件;2) 保证上述两种软件的版本兼容,Pro/E的版本不得高于同期的ANSYS的版本;我的是ANSYS8.1 PROE20013) 开始-选择ANSYS-unitilities-ANS_ADMIN-Configuration Connection for Pro/E?-OK?-Configuration options?Utility Work space in?选择Graphics device name(NT: Win32)?Product 给出Language used with?给出Pro/Engineer installation path 如"e:\proe2001"- OK;?Pro/Engineer:usascii4) 运行Pro/Engineer并配置config.pro;名称值说明fem_ansys_annotations yes 输出“模拟”分析名为ANSYS中的注释。
[neubt]ansys_16.0安装教程
![[neubt]ansys_16.0安装教程](https://img.taocdn.com/s3/m/99bf64dbb14e852458fb5779.png)
完整的安装文件如下,其中crack 文件夹下有两个文件夹。
2.2 安装前注意事项安装前建议先关闭360 等杀毒软件,因为如果设置防毒等级较高的话,可能安装中有的命令它自动阻止了,虽然一般情况下没问题。
下载和安装路径都要用英文,而且今后使用中ANSYS 的文件名最好也用英文,貌似它还不支持中文。
本教程操作系统为windows 8.1 x64专业版。
相信32 位系统中安装过程也类似。
2.3 用虚拟光驱加载安装光盘下载并安装虚拟光驱【推荐精灵虚拟光驱(Daemon Lite Tools) ,下载地址为打开虚拟光驱,点击界面中间的"添加DT 虚拟光驱",如果之前使用过,界面中将本身就存在一个光驱的盘符,例如J:。
这样界面最底下将出现两个光盘盘符H:和J:。
再点击最左侧的"添加映像",在弹出的"打开"对话框中选择Disk1和Disk2,然后确定。
然后在映像目录选择Disk1,右键选择载入到H:盘。
之后我们看到界面左下角的H 盘已经显示为一个黄底黑字的A 的图像,表示Disk 1 已经成功加载了。
同理,进行相同的操作,在映像目录选择Disk2,右键选择载入到J:盘。
两个安装盘都加载成功后,虚拟光驱的界面应如下图:最下侧的文件都将显示有两个光盘。
如果不是这样,请重新添加。
这时在"计算机"目录下会看到这样的显示,说明两个安装光盘已经可以按照正常硬盘分区打开。
安装ANSYS Product产品主程序打开DISK1,以管理员身份运行"reReqCheck"文件,程序将会检查你还需要安装所必须的组件。
【下文如果没说明,各程序都是以管理员身份运行。
】如果显示你还需要安装其它组件,那么运行"InstallPreReqs",它会自动帮你安装相应组件。
提示全都安装完成之后,可以再检查一下。
当然,肯定可以直接运行"InstallPreReqs"安装各组件啦。
ANSYS中文操作手册

ANSYS中文操作手册本操作手册旨在为ANSYS软件的新手用户提供必要的指导和帮助,使用户能够更好地应用和掌握该软件。
环境搭建在开始使用ANSYS软件之前,需要正确安装并配置好所需环境,包括:- 操作系统:Windows、Linux或MacOS等。
- ANSYS软件版本:需要选择适合自己的软件版本,并正确安装激活。
- 显卡:需要支持OpenGL,并且需要具有足够的性能来运行ANSYS软件。
常用工具与操作建模在ANSYS软件中进行建模操作时,通常使用以下工具和功能:- Geometry模块:用于创建和编辑几何模型,支持各种基本几何形体的创建和操作。
- Meshing模块:用于创建并生成网格模型,支持自动或手动设置网格参数。
- CAD接口:可以导入各种CAD软件生成的几何模型进行后续处理。
求解在完成建模和网格生成之后,需要进行模拟计算并解算出相关结果,ANSYS提供了多种求解器工具,例如:- Fluent:用于模拟流动、传热和物质传递等。
- Mechanical:用于模拟结构和声学等。
- CFX:用于模拟流动和传热等。
后处理ANSYS软件中的后处理模块可以对计算结果进行可视化处理和分析,包括:- Post-processing:用于生成和查看计算结果的图表和报告。
- Workbench:提供了一款基于图形界面的后处理工具。
常见问题如何解决ANSYS软件启动缓慢的问题?ANSYS软件启动缓慢通常是由于系统资源不足或软件配置不正确所致。
可以尝试以下措施解决:- 关闭其他不必要的程序和软件。
- 检查系统硬件配置是否满足ANSYS软件的最低要求。
- 检查软件激活是否成功,如果有问题需要重新安装和激活。
模拟计算收敛较慢怎么办?模拟计算收敛较慢可以尝试以下方法:- 调整求解器设置,例如逐步递增计算步骤的大小。
- 检查模型是否存在问题,例如几何形状等不合理因素,需要进行修正。
- 增加计算资源,例如使用更强大的服务器或高性能显卡来加速计算。
Mech_AC_160_WS2c-Friction

Workshop 2CContact with Friction16.0 ReleaseANSYS MechanicalAdvanced ConnectionsWorkshop 2C: Contact with FrictionGoal•Create contact pairs between three parts (piston, cylinder and seal).•Run 2 load step analysis to simulate assembly of the three parts together.•Post Process force along axis to assembly parts.Model Description •2D Axisymmetric •Piston is constrained from movement. •Cylinder is displaced to simulate assembly •Materials: –Steel for Piston and Cylinder –Elastomer for O-Ring •1st load reconciles interference between piston and inside diameter of O-ring •2nd load step slides cylinder onto piston-O-ring subassembly. PistonCylinder O-ringSteps to Follow:Restore Archive… browse for file “WS2c_friction.wbpz”Save as•File name: “WS2c-friction”•Save as type: Workbench Project Files (*.wbpj)The project Schematic should look like the picture to the right.•Highlight the Engineering Data Cell and open by clicking on theRight Mouse Button (RMB)=>Edit to verify the predefinedmaterial properties–Elastomer and Structural Steel•Verify that the units are in Unit > Metric (mm,kg,N,s,mV,mA)system. If not, fix this by clicking on…–Utility Menu=>Units=> Unit > Metric (mm,kg,N,s,mV,mA)Return to the project schematic pageDouble click (or RMB=>Edit…) on the Model Cell to open a Mechanical SessionOnce inside the Mechanical application, verify the working unit system•“Unit > Metric (mm,kg,N,s,mV,mA)”The piston-cylinder assembly is already set up as a 2D axisymmetric model with the necessary boundary conditions and loads. It remains to define the contact pairs between the parts, set up the solution control analysis settings, run the solution and post process the results.Expand each folder in the project tree to become familiar with the model and to confirm material assignments for each part, boundary conditions, loads and Analysis Settings.Note: Auto contact detection did not create adequate contact relationships for this model. There is only one bonded contact pair created by default and it is insufficient for representing the assembly.•Target definition should includethe three surfaces on the pistonside as shown. Contact shouldbe on the O-Ring side (2 edges)•Change Type to Frictional–Friction Coefficient = 0.2•Behavior = Asymmetric•Trim Contact=Off•PinBall= 2.0 mm•Interference Treatment =Add Offset,Ramped EffectsRedefine the O-ring To Piston contact region as follows: target Contact•Insert an additional manual contact region between O-ring and Cylinder wall by highlighting Contact branch and RMB>Insert>Manual Contact.•Defined this new region with similar specifications below.ContactTargetHighlight Analysis Settings:•Specify two load steps•Customize Auto Time Stepping specs as shown•Large Deflection ON, weak springs OFF•Activate Unsymmetric Newton-Raphson solverThe full Unsymmetric N-R solver is helpfulwhen dealing with large frictional sliding,however it will require more memory duringthe solve.Apply the displacement load of 10mm to the cylinder at load step 2 only.Execute the solve.•After many iterations and bisections, the solution converges.Review the Total Deformation results.•Change the contour bar to clarify the deformation of the O-ring geometry •Animate the resultHighlight Solution Branch and RMB>Insert>Contact Tool•Insert and post process contact status, pressure, frictional stress and penetration for O-ring To Piston Contact•Repeat for O-ring To Cylinder contact。
ANSYS16.0版本以上安装方法-许可证安装法

ANSYS16.0版本以上安装⽅法-许可证安装法⼀.准备⼯作1.安装虚拟光驱(win7需要装,win8以上不需要)2.下载相关ANSYS⾼版本安装包,可利⽤百度云搜索引擎.⼆.正式开始1.将ANSYS17.0安装包DVD1加载到虚拟光驱,打开DVD1,⾸先安装准备⽂件,找到点击打开PreReqCheck,看是否需要安装准备⽂件,需要的话再点击InstallPreReqs进⾏安装.2. InstallPreReqs安装完成后,出现以下情况则准备⼯作安装完毕.3.点击Setup,开始安装.⾸先安装ANSYS许可证管理器,如下图:点击打开后出现:点OK进⾏。
同意之后点此往下进⾏。
安装⽬录⾃选,最好安装在C盘,其他盘也没什么影响。
⼀直往下进⾏到许可证安装成功。
到此界⾯,许可证管理器安装成功,但是不要发布,即将中的⼩勾去掉,点击继续,点退出。
4. Copy folder "Shared files" from crack to < ANSYS progdir> (by default C:\Program Files\ANSYS Inc\ ) and overwrite original ones即复制安装包中破解⽂件到安装许可证管理器的⽬录下进⾏覆盖,by default C:\Program Files\ANSYS Inc\ ),我这⾥以C盘安装为例。
5.将license和SSQ.lic⽂本放到以下路径完成后再将其放到如图⽂件夹中:6.再将该两个⽂件复制到Program Files\ANSYS Inc\中.7. REBOOT COMPUTER 即重起电脑,谨记8. Run Start > Programs > ANSYS, Inc. License Manager > Server ANSLIC_ADMIN Utility即从开始菜单找到如图,打开9. Click "Specify the License Server Machine" > "Add Server Machine Specification" > be sure that ANSYS FLEXlm port number is 1055 > for Hostname 1 input name (or IP-address) of computer > OK > Close点击添加,输⼊电脑名称。
ansys错误解决

今天终于成功安装ansys了,哈哈我是用笔记本的,这个比较麻烦,方法如下:1、首先,也是最最最重要的一点(如果你是用本本装ansys的话),先把无线网络连接禁用了,否则下面的努力将是白费。
(在计算机-管理-设备管理器那里)!!!2、打开MAGNiTUDE文件夹,双击allcalc.exe,不要选择y,否则会因为你有多个网络连接而产生错误的license。
程序提示“Do you want a license forcurrent host”时,输入Y,然后自己键入。
最好查看icense是否与自己本本的匹配3.下面就是按序安装就好了4.安装好了最好重启。
如果遇到“无法启动系统”什么的,可以如下设置:在“运行”窗口,输入regedit,在注册表中找到如下三个项目(只用设置前两个注册表值就可以了):HKEY_LOCAL_MACHINE_SYSTEM_ControlSet001_Services_ANSYS, Inc. LicenseManagerHKEY_LOCAL_MACHINE_SYSTEM_ControlSet002_Services_ANSYS, Inc. LicenseManagerHKEY_LOCAL_MACHINE_SYSTEM_CurrentControl_SetServices_ANSYS, Inc. License Manager查看里面是否有“ImagePath”项,若无(一般情况下是没有这一项的),在其中的两个中新建一“可扩充字符串值”名称就用“ImagePath”数值数据用:"C:\Program Files\ANSYS Inc\Shared Files\Licensing\winx64\ansysli_server.exe" -nodaemon -k runservice新建两个第三个就能自动同步。
(这里说明一下,路径要按照自己实际文件名来,我是win7 64位的,所以不一样,你找到ansysli_server.exe在哪就哪)在设置完注册表后重启电脑,点击开始--所有程序--ANSYS,Inc.LicenseManager--右击Server ANSLIC_ADMIN Utility(以管理员身份运行)--Start theANSYS, Inc. License Manager--之后选择license文件就能顺利完成注册了(当界面左下角显示各项都‘running’时,恭喜你,尽情享受吧)。
ANSYS Mechanical 连接功能(一)

•为了仿真实体和面(壳)体的面和边之间的关系,ANSYS Mechanical 提供丰富的连接选项。
实体的面到实体的面面体的面到面体的面面体的边缘到面体的边缘•Mechanical 支持刚体间的接触关系。
•刚体到刚体•刚体到柔性体•在模型中,当一个体的刚度明显大于其他体时,可以将其指定为刚体,其余体定义为柔性体,这样做有助于提高效率。
两个刚体之间的接触刚体和柔性体之间的接触•接触的定义•当两个独立的表面互相接触,并且相切时,我们说他们处于接触状态。
•在通常情况下,相接触的表面具有以下特性:•不会相互渗透•产生压缩的法相力和切向摩擦力•一般情况下,不产生拉伸的法向力(表面可以分离)•接触是一种状态变化引起的非线性:系统的刚度取决于接触状态(部件是接触还是分离)•可用的接触类型•绑定(Bonded):处于闭合或接近状态的面或边之间不渗透、不分离、不滑动•无分离(No Separation):与绑定接触相似,但是在接触面的切向可以产生无摩擦的滑动•无摩擦(Frictionless):无渗透,但是面之间可以自由的滑动和分离。
•粗糙(Rough):与无摩擦接触类似,但是不能够滑动•摩擦(Frictional):可以产生摩擦,用户可以定义摩擦系数,可以自由的分离。
是最常用也是和真实情况最接近的接触类型。
•接触相容性•接触体之间不发生渗透。
因此,程序必须在两个表面间建立关系,防止在分析中两表面相互渗透。
•当程序阻止相互渗透时,我们说它执行了接触相容性。
•Mechanical 提供不同的接触方程,在接触界面执行接触相容性。
F目标面接触面当不执行接触相容性时,接触面直接发生渗透。
F•ANSYS Mechanical 中支持的接触方程和特性如下表所示:*切向刚度不能够直接由用户输入•法向拉格朗日方程在法向使用拉格朗日乘子,在切向使用罚函数。
•下表列出了不同接触方程的优点(+)和缺点(-):•对于所有柔性体的接触,默认使用增广拉格朗日方程•默认检测方法(Detection Method)是:•对于面面接触,在高斯点检测•对于边边接触,在垂直于目标的节点检测•渗透容限(Penetration Tolerance):对基于罚函数的方程,在法向上允许的最大渗透•默认值为基体单元厚度的10%•如果基体单元为壳或梁,“厚度”通常情况下是单元厚度的四倍•弹性滑动容限(Elastic Slip Tolerance):允许的最大“弹性滑动”(与接触面相切)•默认值为接触对上平均接触长度的1%•法向刚度(Normal Stiffness)是乘子或系数(FKN),根据程序算出的刚度确定─对于绑定和无摩擦接触,默认 FKN=10.0。
解决ansysworkbench...

解决ansysworkbench...多种解决ansys workbench 不能正常运⾏的⽅法如下。
(⼀)⽅法1、以管理员⾝份运⾏“ANSYS License manager”2、在选项列表中找到Specify the License Server Mavhine3、点击,出现以下界⾯:4、选择OK,⽽后出现以下界⾯,选择ADD:5、在以下界⾯中,将服务器主机名输⼊,点击“OK”即可(⼆)⽅法, FLExlm not running问题FLExlm not running是端⼝被占⽤了,只要关闭被占⽤端⼝就可以。
第⼀步:开始>运⾏> 输⼊cmd 回车进⼊dos界⾯,再出⼊netstat -a -o,(注意:是空格-a空格-o否则⽆效),找到计算机名:1055端⼝对应的pid值。
第⼆步:打开任务管理器查看进程,打开“查看”-“选项列”,勾选PID选项,找到PID值对应的映像名称,右击结束进程。
第三步:打开Server ANSLIC_ADMIN Utility ,点击stop the ANSYS,lnc.License Manager,再点击start the ANSYS,lnc.License Manager,看看FLEXlm是不是变成running了。
我的是ansys12.1已解决,希望能帮到你!!13.0试试看(三)⽅法,此种⽅法就是运⾏许可管理Server ANSLIC_ADMIN Utility,,,先点击stop ,,再点击start ,,再看是不是全部running(四),⽅法,重新⽣成许可⽂件license.txt,,再重新装载许可⽂件。
同样是先运⾏Server ANSLIC_ADMIN Utility,再点击,找到刚⽣成的许可⽂件(最好复制到软件安装的⽂件地址中),装⼊之后,再点击,不⾏的话,就实⾏第三个⽅法就⾏,实在不⾏的话就实⾏第⼆种⽅法,那就绝对解决问题,祝你⼯作愉快!!就是FLEXlm没有运⾏,这个问题怎么解决呢?解决⽅法:1.按Server Anslic_Admin Utility 中的Stop...停步所有许可证,并关闭本窗⼝;2.打开任务管理器,结束所有与ansys相关的进程;3.删除C:、Program Files\ANSYS Inc\Shared Files下的License⽂件夹;4.删除开始菜单中的Inc. License Manager这个选项;5.重新启动计算机;6.打开ansys安装程序,重新安装Install ANSYS, Inc. License Manager,就像最初装ansys⼀样,⼀步⼀步安装,中间需要添加*.txt的许可证⽂件,直到最后安装完毕。
ANSYS中使用接触向导定义多个接触对详细实例(图文)
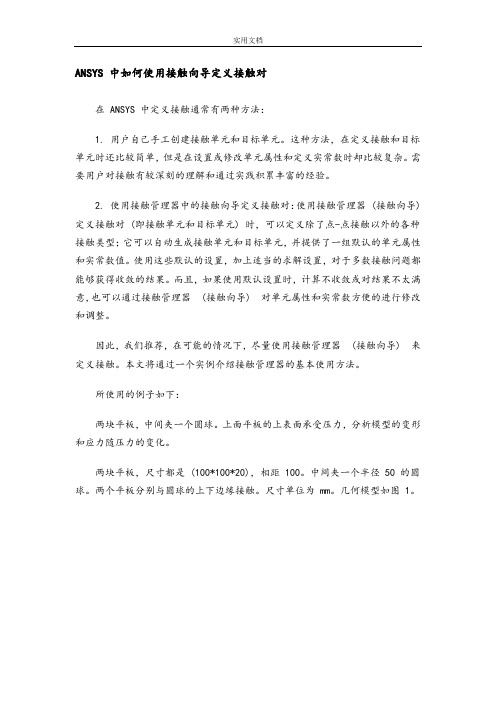
ANSYS 中如何使用接触向导定义接触对在 ANSYS 中定义接触通常有两种方法:1. 用户自己手工创建接触单元和目标单元。
这种方法,在定义接触和目标单元时还比较简单,但是在设置或修改单元属性和定义实常数时却比较复杂。
需要用户对接触有较深刻的理解和通过实践积累丰富的经验。
2. 使用接触管理器中的接触向导定义接触对:使用接触管理器 (接触向导) 定义接触对 (即接触单元和目标单元) 时,可以定义除了点-点接触以外的各种接触类型;它可以自动生成接触单元和目标单元,并提供了一组默认的单元属性和实常数值。
使用这些默认的设置,加上适当的求解设置,对于多数接触问题都能够获得收敛的结果。
而且,如果使用默认设置时,计算不收敛或对结果不太满意,也可以通过接触管理器(接触向导) 对单元属性和实常数方便的进行修改和调整。
因此,我们推荐,在可能的情况下,尽量使用接触管理器(接触向导) 来定义接触。
本文将通过一个实例介绍接触管理器的基本使用方法。
所使用的例子如下:两块平板,中间夹一个圆球。
上面平板的上表面承受压力,分析模型的变形和应力随压力的变化。
两块平板,尺寸都是 (100*100*20),相距 100。
中间夹一个半径 50 的圆球。
两个平板分别与圆球的上下边缘接触。
尺寸单位为 mm。
几何模型如图 1。
图 1 中,为了能够划分映射网格,分别对体积进行了切割材料属性为:两块平板: E = 201000 Mpa;μ= 0.3圆球: E = 70100 Mpa;μ= 0.33接下来对各个 Volumes 划分网格,单元类型采用 solid186 (20 节点六面体),单元边长统一取 6 mm。
网格划分结果如图 2 所示:载荷为上平板上表面均布压力,最大值 10 Mpa;约束条件将在后面介绍。
以下介绍如何使用接触管理器 (接触向导) 来分析这一接触问题。
一、使用接触管理器(接触向导) 前的准备工作1. 在 ANSYS 中,接触单元和目标单元必须覆盖在已有的单元表面上。
ANSYS常见运行错误及其解决办法

ESYS is not valid for line element.原因:是因为我使用LATT的时候,把“--”的那个不小心填成了“1”。
经过ANSYS的命令手册里说那是没有用的项目,但是根据我的理解,这些所谓的没有用的项目实际上都是ANSYS 在为后续的版本留接口。
对于LATT,实际上那个项目可能就是单元坐标系的设置。
当我发现原因后,把1改成0——即使用全局直角坐标系,就没有WARNING了。
当然,直接空白也没有问题。
NO.0002使用*TREAD的时候,有的时候明明看文件好好的,可是却出现*TREAD end-of-file in data read.后来仔细检查,发现我TXT的数据文件里,分隔是采用TAB键分隔的。
但是在最后一列后面,如果把鼠标点上去,发现数据后面还有一个空格键。
于是,我把每个列最后多的空格键删除,然后发现上面的信息就没有了。
NO.0003Coefficient ratio exceeds1.0e8-Check results.这个大概是跟收敛有关,但是我找不到具体的原因。
我建立的一个桥梁分析模型,尽管我分析的结果完全符合我的力学概念判断,规律完全符合基本规律,数据也基本符合实际观测,但是却还是不断出现这个警告信息。
NO.0004*TREAD end-of-file in data readtxt中的表格数据不完整!NO.0005No*CREATE for*END.The*END command is ignored忘了写*END了吧,呵呵NO.0006Keypoint1is referenced by only one line.Improperly connected line set for AL command两条线不共点,尝试nummrg命令。
NO.0007L1is not a recognized PREP7command,abbreviation,or macro.This command will be ignored 还没有进入prep7,先:/prep7NO.0008Keypoint2belongs to line4and cannot be moved关键点2属于线4,移动低级体素时先移动高级体素!NO.0009Shape testing revealed that32of the640new or modified elementsviolate shape warning limits.To review test results,please see theoutput file or issue the CHECK command.单元形状奇异,在我的模型中6面体单元的三个边长差距较大,可忽略该错误NO.0010用命令流建模的时候遇到的The drag direction(from the keypoint on drag line27that is closestto a keypoint KP of the given area95)is orthogonal to the areanormal at that KP.Area cannot be dragged by the VDRAG command.意思是拉伸源面的法向与拉伸路径垂直,不能使用VDRAG命令ASEL,S,LOC,Z,143e-3VDRAG,ALL,,,,,,27本意是按位置z=143e-3位置的面,然后沿编号27的线拉伸,出错,之前用该语句没有任何问题。
ANSYS知识普及5——如何模拟销轴连接(ANSYS专家编辑,非原创,欢迎转摘)
ANSYS知识普及5——如何模拟销轴连接(ANSYS专家编辑,非原创,欢迎转摘)作者:技术邻ANSYS专家本人准备出一个ANSYS知识普及系列,将有用的网上资料归拢,由于知识水平有限,不对之处请谅解。
也欢迎各位网友提供好的资料分享,让我们共同完成这个ANSYS知识普及系列。
编辑人:技术邻ANSYS专家声明:1、ANSYS知识普及系列中所有资料均来自网上;2、如侵犯知识产权,请联系ANSYS专家本人或者技术邻,我将第一时间删除。
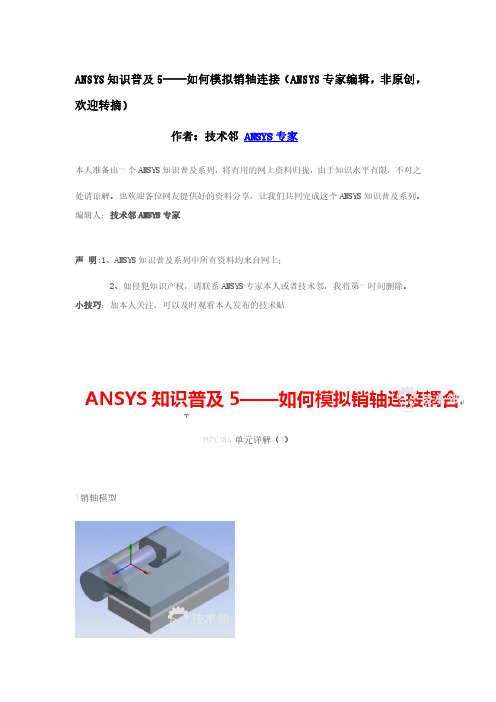
小技巧:加本人关注,可以及时观看本人发布的技术贴MPC184单元详解(1)1.销轴模型MPC184单元描述MPC184包括使用拉格朗日乘子法实现运动约束的一类常用的多点约束单元。
这些单元可以简单地分为“约束单元”或“连接单元”。
用户可以在一些需要施加运动约束的场合中使用这些单元。
这些约束可以简单到铰链上的具有相同的位移值,也可以复杂到包括模型的刚性部分,或者在柔性体之间以某一特定方式传递运动的运动约束。
例如,结构中可能包含一些刚性部件或者通过转动或滑块约束连接在一起的运动部件。
结构的刚性部分可以使用MPC184的刚性杆或刚性梁单元来模拟,运动部分可以使用MPC184的滑块,球铰,销轴和万向联轴器单元模拟。
因为这些单元使用拉格朗日乘子法实现,ANSYS能够输出约束反力和力矩。
约束单元如果没有其它说明,使用这些单元时,三维单元选项(KEYOPT(2)=0)为默认值。
销轴链接设置KEYOPT(1)=6定义二节点销轴链接。
销轴单元的二个节点必须有相同的空间坐标。
MPC184销轴链接单元只有一个基本自由度-绕着轴或销相对旋转。
单元能够包括控制特性,如未约束自由度上的挡块,锁定器。
旋转边界条件也可以施加到相对运动分量上。
另外,相对旋转方向可以施加线性刚度和阻尼特性。
ANSYS单元库中另一种旋转链接单元是COMBIN7。
COMBIN7单元允许用户控制连接柔度,摩擦,阻尼和其它控制特性。
局部坐标系固定在链接上,并与之一起运动,所以,该单元可以应用于大变形分析中,(更多详细内容参见COMBIN7-销轴链接单元)。
ANSYS16.0新功能亮点_简版

ANSYS16.0新功能亮点ANSYS日前推出了工程设计仿真软件最新版ANSYS 16.0,新产品在结构、流体、电磁、多物理场耦合仿真等领域都有了重要的技术进展。
ANSYS16.0新版本提供面向复合材料设计的新功能和用于全面了解求解结果的后处理工具;大幅提升了HPC性能,简化了复杂流体动力学工程问题;同时,提供众多验证电子设备可靠性和性能的功能;16.0版还推出了直观的沉浸式仿真环境,大大降低了多物理场仿真的入门门槛。
以下是ANSYS16.0新版本主要功能亮点,欲了解更多16.0版新功能请点击屏幕左下角“阅读原文”;您也可以报名参加ANSYS16.0系列在线培训,获得16.0版新功能详细解读和使用技巧。
⏹结构软件新功能亮点◆3D复合材料建模16.0版可提供更高级的3D建模功能,能够更方便地将几何结构用于3D复合材料成形并在结构边界和下降区使用适当的3D单元形状创建整洁的3D模型。
16.0还可提供高级材料属性,包括切变依赖性和用于模拟矩阵中的空隙等局部缺陷的排除因子(knock-off factors)。
◆改进多部件间的接触仿真ANSYS 16.0进一步改进了多部件之间的接触仿真,这是结构分析中最具挑战性的仿真技术。
该版本能够实现大部分工作在求解器上完成,用户可以更加放心地使用默认设置,保证绝大多数情况下的收敛,并将接触计算速率提高2~5倍。
接触建模新功能示例◆多物理场涡轮振动仿真借助ANSYS 16.0,用户现在可以对叶片旋转机械组件的强制响应使用简化工作流程,将CFD与FEM链接起来以应对调谐或失谐强制响应。
在每个阶段均可使用高保真解,而无需使用简化性假设和限制性方法。
CFD和FEM均通过利用求解场的环状对称性质,实现快速而准确的求解。
除了新功能和技术增强外,ANSYS 16.0还提高了求解器性能,可帮助用户加快求解速度。
NASA Rotor 67风扇在进气变形情况下的强制响应分析映射结果⏹流体软件新功能亮点◆简化复杂流体力学问题ANSYS 16.0 推出了流体动力学对于复杂几何的前处理,采用Fluent网格划分实现大型复杂几何结构的网格划分,大大提升效率,且独特的ANSYS 伴随求解器实现智能外形优化。
- 1、下载文档前请自行甄别文档内容的完整性,平台不提供额外的编辑、内容补充、找答案等附加服务。
- 2、"仅部分预览"的文档,不可在线预览部分如存在完整性等问题,可反馈申请退款(可完整预览的文档不适用该条件!)。
- 3、如文档侵犯您的权益,请联系客服反馈,我们会尽快为您处理(人工客服工作时间:9:00-18:30)。
Workshop 1B
Connection Worksheet
16.0 Release
ANSYS Mechanical
Advanced Connections
Workshop 1B: Connection Worksheet
Goal
Use Connection Worksheet together with Redundancy Analysis tool to evaluate and resolve an over constrained condition
Model Description
Same model as Workshop 1A
Assembly of 12 parts with many contacts
and joints, one longitudinal spring and
one beam element.
Materials:
•Linear structural steel
Assuming you completed WS1A successfully, you should have ended with a converged solution and with various warning messages about potential over constraint in the message window:
Note that these messages are not necessarily a problem, if solution is converged and results shown to be valid.
Nevertheless it is always worthy of an investigation.
With Connections Folder highlighted, click on “Worksheet” button in the Utility Menu With all options checked, click “Generate”
From the Contact Information Table, all of the contact regions are Bonded, Face-to-Face, with program controlled default specifications as expected.
Scroll down further to find feedback on the existing joints, spring and beam connections. Note especially the recommendation to run the Redundancy Analysis to detect redundant joint constraints.
…Workshop 1B: Connection Worksheet
Scroll down to the Connection Matrix. Note there are multiple connections involving parts 1,4,5 and 11
…Workshop 1B: Connection Worksheet
With Connections Folder still highlighted, RMB => Redundancy Analysis
This brings up a table below the graphics window that lists all the constrained DOFs associated with the Joints.
Click on the yellow lightning bolt to run the Redundancy Analysis
…Workshop 1B: Connection Worksheet The Table is now updated to list those DOFs which are redundant
Click on the Convert.. button to release redundant constraints
…Workshop 1B: Connection Worksheet
Clicking on the “Set” button will apply these changes to the actual joint definitions in the model Verify the changes made by examining the expanded Joint Folder, compare with the original settings.
With these changes made, re-solve the model.
Solution converges as before, but without the warnings of possible overconstraint:
Post Process Results: Compared with results from end of WS1A, the joints that have been suppressed as part of the redundancy analysis were not necessary.。
