Cisco交换机配置DHCP方案
Cisco dhcp server 配置文档
Configuring DHCPThis chapter describes how to configure Dynamic Host Configuration Protocol(DHCP).For a completedescription of the DHCP commands listed in this chapter, refer to the “DHCP Commands” chapter ofthe Cisco IOS IP and IP Routing Command Reference publication. To locate documentation of othercommands that appear in this chapter, use the command reference master index or search online.As explained in RFC2131,Dynamic Host Configuration Protocol, DHCP provides configurationparameters to Internet hosts.DHCP consists of two components:a protocol for delivering host-specificconfiguration parameters from a DHCP server to a host and a mechanism for allocating networkaddresses to hosts.DHCP is built on a client/server model,where designated DHCP server hosts allocatenetwork addresses and deliver configuration parameters to dynamically configured hosts.DHCP supports three mechanisms for IP address allocation:•Automatic allocation—DHCP assigns a permanent IP address to a client.•Dynamic allocation—DHCP assigns an IP address to a client for a limited period of time (or until the client explicitly relinquishes the address).•Manual allocation—The network administrator assigns an IP address to a client and DHCP is used simply to convey the assigned address to the client.The format of DHCP messages is based on the format of Bootstrap Protocol(BOOTP)messages,whichensures support for BOOTP relay agent functionality and interoperability between BOOTP clients andDHCP servers. BOOTP relay agents eliminate the need for deploying a DHCP server on each physicalnetwork segment. BOOTP is explained in RFC951,Bootstrap Protocol (BOOTP), and RFC1542,Clarifications and Extensions for the Bootstrap Protocol.DHCP Server OverviewThe Cisco IOS DHCP server feature is a full DHCP server implementation that assigns and manages IPaddresses from specified address pools within the router to DHCP clients.If the Cisco IOS DHCP servercannot satisfy a DHCP request from its own database, it can forward the request to one or moresecondary DHCP servers defined by the network administrator.Figure14 shows the basic steps that occur when a DHCP client requests an IP address from a DHCPserver. The client, Host A, sends a DHCPDISCOVER broadcast message to locate a Cisco IOS DHCPserver.A DHCP server offers configuration parameters(such as an IP address,a MAC address,a domainname, and a lease for the IP address) to the client in a DHCPOFFER unicast message.Configuring DHCPDHCP Server Overview Figure 14DHCP Request for an IP Address from a DHCP Server Note A DHCP client may receive offers from multiple DHCP servers and can accept any one ofthe offers; however, the client usually accepts the first offer it receives. Additionally, theoffer from the DHCP server is not a guarantee that the IP address will be allocated to theclient;however,the server usually reserves the address until the client has had a chance toformally request the address.The client returns a formal request for the offered IP address to the DHCP server in a DHCPREQUESTbroadcast message. The DHCP server confirms that the IP address has been allocated to the client byreturning a DHCPACK unicast message to the client.Note The formal request for the offered IP address (the DHCPREQUEST message) that is sentby the client is broadcast so that all other DHCP servers that received theDHCPDISCOVER broadcast message from the client can reclaim the IP addresses that theyoffered to the client.If the configuration parameters sent to the client in the DHCPOFFER unicast message bythe DHCP server are invalid (a misconfiguration error exists), the client returns aDHCPDECLINE broadcast message to the DHCP server.The DHCP server will send to the client a DHCPNAK denial broadcast message, whichmeans the offered configuration parameters have not been assigned,if an error has occurredduring the negotiation of the parameters or the client has been slow in responding to theDHCPOFFER message (the DHCP server assigned the parameters to another client)of theDHCP server.The Cisco IOS DHCP server feature offers the following benefits:•Reduced Internet access costsUsing automatic IP address assignment at each remote site substantially reduces Internet accesscosts. Static IP addresses are considerably more expensive to purchase than are automaticallyallocated IP addresses.•Reduced client configuration tasks and cost sBecause DHCP is easy to configure, it minimizes operational overhead and costs associated withdevice configuration tasks and eases deployment by nontechnical users.•Centralized managementBecause the DHCP server maintains configurations for several subnets,an administrator only needsto update a single, central server when configuration parameters change.Host A DHCP ACK (unicast)DHCPREQUEST (broadcast)DHCPOFFER (unicast)DHCPDISCOVER (broadcast)Cisco IOS DHCP server 32369Configuring DHCPDHCP Configuration Task ListBefore you configure the Cisco IOS DHCP server feature, complete the following tasks:•Identify an external File Transport Protocol(FTP),Trivial File Transfer Protocol(TFTP),or remote copy protocol (rcp) server that you will use to store the DHCP bindings database.•Identify the IP addresses that you will enable the DHCP server to assign,and the IP addresses that you will exclude.•Identify DHCP options for devices where necessary, including:–Default boot image name–Default router(s)–Domain Name System (DNS) server(s)–NetBIOS name server•Decide on a NetBIOS node type (b, p, m, or h).•Decide on a DNS domain name.DHCP Configuration Task ListThe DHCP server database is organized as a tree. The root of the tree is the address pool for naturalnetworks, branches are subnetwork address pools, and leaves are manual bindings to clients.Subnetworks inherit network parameters and clients inherit subnetwork parameters.Therefore,commonparameters,for example the domain name,should be configured at the highest(network or subnetwork)level of the tree.Note Inherited parameters can be overridden.For example,if a parameter is defined in both thenatural network and a subnetwork, the definition of the subnetwork is used.Address leases are not inherited.If a lease is not specified for an IP address,by default,theDHCP server assigns a one-day lease for the address.To configure the Cisco IOS DHCP server feature, first configure a database agent or disable conflictlogging, then configure IP addresses that the DHCP server should not assign (excluded addresses) andshould assign (a pool of available IP addresses) to requesting clients. These configuration tasks areexplained in the following sections. Each task in the following list is identified as required or optional.•Configuring a DHCP Database Agent or Disabling DHCP Conflict Logging (Required)•Excluding IP Addresses (Required)•Configuring a DHCP Address Pool (Required)•Configuring Manual Bindings (Optional)•Configuring a DHCP Server Boot File (Optional)•Configuring the Number of Ping Packets (Optional)•Configuring the Timeout Value for Ping Packets (Optional)•Enabling the Cisco IOS DHCP Server and Relay Agent Features (Optional)Configuring DHCPDHCP Configuration Task List Configuring a DHCP Database Agent or Disabling DHCP Conflict LoggingA DHCP database agent is any host, for example, an FTP, TFTP, or RCP server that stores the DHCPbindings database.You can configure multiple DHCP database agents and you can configure the intervalbetween database updates and transfers for each agent.To configure a database agent and database agentparameters, use the following command in global configuration mode:If you choose not to configure a DHCP database agent,disable the recording of DHCP address conflictson the DHCP server. To disable DHCP address conflict logging, use the following command in globalconfiguration mode:Excluding IP AddressesThe DHCP server assumes that all IP addresses in a DHCP address pool subnet are available forassigning to DHCP clients. You must specify the IP address that the DHCP server should not assign toclients. To do so, use the following command in global configuration mode:Configuring a DHCP Address PoolYou can configure a DHCP address pool with a name that is a symbolic string (such as “engineering”)or an integer (such as 0).Configuring a DHCP address pool also places you in DHCP pool configurationmode—identified by the (config-dhcp)# prompt—from which you can configure pool parameters (forexample,the IP subnet number and default router list).To configure a DHCP address pool,complete therequired tasks in the following sections.Configuring the DHCP Address Pool Name and Entering DHCP Pool Configuration ModeTo configure the DHCP address pool name and enter DHCP pool configuration mode,use the followingcommand in global configuration mode:CommandPurpose Router(config)#ip dhcp database url[timeout seconds | write-delay seconds ]Configures the database agent and the interval between database updates and database transfers.CommandPurpose Router(config)#no ip dhcp conflict logging Disables DHCP address conflict logging.CommandPurpose Router(config)#ip dhcp excluded-addresslow-address [high-address ]Specifies the IP addresses that the DHCP server should not assign to DHCP clients.CommandPurpose Router(config)# ip dhcp pool name Creates a name for the DHCP server address pool and places you in DHCPpool configuration mode (identified by the config-dhcp# prompt).Configuring DHCPDHCP Configuration Task List Configuring the DHCP Address Pool Subnet and MaskTo configure a subnet and mask for the newly created DHCP address pool,which contains the range of available IP addresses that the DHCP server may assign to clients,use the following command in DHCP pool configuration mode:Note You can not configure manual bindings within the same pool that is configured with thenetwork command.To configure manual bindings,see the “Configuring Manual Bindings”section.Configuring the Domain Name for the ClientThe domain name for a DHCP client places the client in the general grouping of networks that make up the domain.To configure a domain name string for the client,use the following command in DHCP pool configuration mode:Configuring the Domain Name System IP Servers for the ClientDHCP clients query DNS IP servers when they need to correlate host names to IP addresses. Toconfigure the DNS IP servers that are available to a DHCP client,use the following command in DHCP pool configuration mode:Configuring the NetBIOS Windows Internet Naming Service IP Servers for the ClientWindows Internet Naming Service (WINS)is a name resolution service that Microsoft DHCP clients use to correlate host names to IP addresses within a general grouping of networks.To configure the NetBIOS WINS servers that are available to a Microsoft DHCP client,use the following command in DHCP pool configuration mode:CommandPurpose Router(config-dhcp)#network network-number[mask |/prefix-length ]Specifies the subnet network number and mask of the DHCP address pool.The prefix length specifies the number of bits that comprise theaddress prefix. The prefix is an alternative way of specifying thenetwork mask of the client.The prefix length must be preceded bya forward slash (/).CommandPurpose Router(config-dhcp)#domain-name domain Specifies the domain name for the client.CommandPurpose Router(config-dhcp)#dns-server address[address2...address8]Specifies the IP address of a DNS server that is available to a DHCP client.One IP address is required; however, you can specify up to eight IPaddresses in one command line.Configuring DHCPDHCP Configuration Task List Configuring the NetBIOS Node Type for the ClientThe NetBIOS node type for Microsoft DHCP clients can be one of four settings:broadcast,peer-to-peer,mixed, or hybrid. To configure the NetBIOS node type for a Microsoft DHCP, use the followingcommand in DHCP pool configuration mode:Configuring the Default Router for the ClientAfter a DHCP client has booted, the client begins sending packets to its default router. The IP address of the default router should be on the same subnet as the client.To configure a default router for a DHCP client, use the following command in DHCP pool configuration mode:Configuring the Address Lease TimeBy default,each IP address assigned by a DHCP server comes with a one-day lease,which is the amount of time that the address is valid.To change the lease value for an IP address,use the following command in DHCP pool configuration mode:Configuring Manual BindingsAn address binding is a mapping between the IP address and MAC address of a client. The IP address of a client can be assigned manually by an administrator or assigned automatically from a pool by aDHCP server.Manual bindings are IP addresses that have been manually mapped to the MAC addresses of hosts that are found in the DHCP database.Manual bindings are stored in NVRAM on the DHCP server.Manual bindings are just special address pools.There is no limit on the number of manual bindings but you can only configure one manual binding per host pool.CommandPurpose Router(config-dhcp)#netbios-name-serveraddress [address2...address8]Specifies the NetBIOS WINS server that is available to a Microsoft DHCP client. One address is required; however, you can specify up toeight addresses in one command line.CommandPurpose Router(config-dhcp)#netbios-node-type type Specifies the NetBIOS node type for a Microsoft DHCP mandPurpose Router(config-dhcp)#default-routeraddress [address2... address8]Specifies the IP address of the default router for a DHCP client. One IP address is required,although you can specify up to eight addresses in onecommand line.CommandPurpose Router(config-dhcp)# lease {days[hours ][minutes ]| infinite }Specifies the duration of the lease. The default is a one-day lease.Configuring DHCPDHCP Configuration Task List Automatic bindings are IP addresses that have been automatically mapped to the MAC addresses of hoststhat are found in the DHCP database.Automatic bindings are stored on a remote host called a databaseagent. The bindings are saved as text records for easy maintenance.To configure a manual binding, first create a host pool, then specify the IP address of the client andhardware address or client identifier. The hardware address is the MAC address. The client identifier,which is required for Microsoft clients(instead of hardware addresses),is formed by concatenating themedia type and the MAC address of the client. Refer to the “Address Resolution Protocol Parameters”section of RFC1700,Assigned Numbers, for a list of media type codes.To configure manual bindings, use the following commands beginning in global configuration mode:Command PurposeStep1Router(config)# ip dhcp pool name Creates a name for the a DHCP server address pool and places youin DHCP pool configuration mode—identified by the(config-dhcp)# prompt.Step2Router(config-dhcp)#host address [mask| /prefix-length]Specifies the IP address and subnet mask of the client.The prefix length specifies the number of bits that comprise the address prefix. The prefix is an alternative way of specifying the network mask of the client.The prefix length must be preceded by a forward slash(/).Step3Router(config-dhcp)# hardware-address hardware-address typeorRouter(config-dhcp)#client-identifierunique-identifier Specifies a hardware address for the client.The type value:•Indicates the protocol of the hardware platform. Strings and values are acceptable. The string options are:–ethernet–ieee802•The value options are:– 1 10Mb Ethernet– 6 IEEE 802If no type is specified, the default protocol is Ethernet.orSpecifies the distinct identification of the client in dotted hexadecimal notation, for example, 01b7.0813.8811.66, where 01 represents the Ethernet media type.Step4Router(config-dhcp)# client-name name(Optional) Specifies the name of the client using any standardASCII character. The client name should not include the domainname. For example, the name mars should not be specified as.Configuring DHCP DHCP Configuration Task ListConfiguring a DHCP Server Boot FileThe boot file is used to store the boot image for the client. The boot image is generally the operatingsystem the client uses to load.To specify a boot file for the DHCP client,use the following command inDHCP pool configuration mode:Command PurposeRouter(config-dhcp)# bootfile filename Specifies the name of the file that is used as a boot image. Configuring the Number of Ping PacketsBy default, the DHCP server pings a pool address twice before assigning the address to a requestingclient.If the ping is unanswered,the DHCP server assumes(with a high probability)that the address isnot in use and assigns the address to the requesting client. To change the number of ping packets theDHCP server should send to the pool address before assigning the address,use the following commandin global configuration mode:Command PurposeRouter(config)#ip dhcp ping packets number Specifies the number of ping packets the DHCP server sends to a pooladdress before assigning the address to a requesting client.The defaultis two packets.Configuring the Timeout Value for Ping PacketsBy default, the DHCP server waits 500milliseconds before timing out a ping packet. To change theamount of time the server waits, use the following command in global configuration mode:Command PurposeRouter(config)# ip dhcp ping timeout milliseconds Specifies the amount of time the DHCP server must wait beforetiming out a ping packet. The default 500 milliseconds. Enabling the Cisco IOS DHCP Server and Relay Agent FeaturesBy default,the Cisco IOS DHCP server and relay agent features are enabled on your router.To reenablethese features if they are disabled, use the following command in global configuration mode:Command PurposeRouter(config)#service dhcp Enables the Cisco IOS DHCP server and relay features on your router.Use the no form of this command to disable the Cisco IOS DHCP server and relayfeatures.Configuring DHCPMonitoring and Maintaining the DHCP ServerMonitoring and Maintaining the DHCP ServerTo clear DHCP server variables, use the following commands in privileged EXEC mode, as needed:Command PurposeRouter#clear ip dhcp binding address |*Deletes an automatic address binding from the DHCP database.Specifying address clears the automatic binding for a specific(client)IPaddress, whereas specifying asterisk (*) clears all automatic bindings. Router#clear ip dhcp conflict address |*Clears an address conflict from the DHCP database.Specifying addressclears the conflict for a specific IP address whereas specifying an asterisk(*) clears conflicts for all addresses.Router#clear ip dhcp server statistics Resets all DHCP server counters to 0.To enable DHCP server debugging, use the following command in privileged EXEC mode:Command PurposeRouter# debug ip dhcp server{events | packets | linkage}Enables debugging on the DHCP server.To display DHCP server information, use the following commands in EXEC mode, as needed:Command PurposeRouter> show ip dhcp binding[address]Displays a list of all bindings created on a specific DHCP server. Router> show ip dhcp conflict[address]Displays a list of all address conflicts recorded by a specific DHCP server. Router#show ip dhcp database[url]Displays recent activity on the DHCP database.Note Use this command in privileged EXEC mode.Router> show ip dhcp server statistics Displays count information about server statistics and messages sent andreceived.Configuration ExamplesThis section provides the following configuration examples:•DHCP Database Agent Configuration Example•DHCP Address Pool Configuration Example•Manual Bindings Configuration ExampleConfiguring DHCPConfiguration Examples DHCP Database Agent Configuration ExampleThe following example stores bindings on host 172.16.4.253. The file transfer protocol is FTP. Theserver should wait 2 minutes (120 seconds) before writing database changes.ip dhcp database ftp://user:password@172.16.4.253/router-dhcp write-delay 120DHCP Address Pool Configuration ExampleIn the following example, three DHCP address pools are created: one in network 172.16.0.0, one insubnetwork 172.16.1.0,and one in subnetwork 172.16.2.0.Attributes from network 172.16.0.0,such as the domain name, DNS server, NetBIOS name server, and NetBIOS node type, are inherited insubnetworks 172.16.1.0and 172.16.2.0.In each pool,clients are granted 30-day leases and all addresses in each subnetwork, except the excluded addresses, are available to the DHCP server for assigning toclients. Table 5 lists the IP addresses for the devices in three DHCP address pools.ip dhcp database ftp://user:password@172.16.4.253/router-dhcp write-delay 120ip dhcp excluded-address 172.16.1.100 172.16.1.103ip dhcp excluded-address 172.16.2.100 172.16.2.103!ip dhcp pool 0network 172.16.0.0 /16domain-name dns-server 172.16.1.102 172.16.2.102netbios-name-server 172.16.1.103 172.16.2.103netbios-node-type h-node!ip dhcp pool 1network 172.16.1.0 /24default-router 172.16.1.100 172.16.1.101lease 30!ip dhcp pool 2network 172.16.2.0 /24default-router 172.16.2.100 172.16.2.101lease 30T able 5DHCP Address Pool DevicesPool 0 (Network 172.16.0.0)Pool 1 (Subnetwork 172.16.1.0)Pool 2 (Subnetwork 172.16.2.0)DeviceIP Address Device IP Address Device IP Address Default routers–Default routers 172.16.1.100172.16.1.101Default routers 172.16.2.100172.16.2.101DNS server 172.16.1.102—172.16.2.102————NetBIOS name server 172.16.1.103—172.16.2.103————NetBIOS node type h-node ————Configuring DHCPConfiguration ExamplesManual Bindings Configuration ExampleThe following example creates a manual binding for a client named .The MAC addressof the client is 02c7.f800.0422 and the IP address of the client is 172.16.2.254.ip dhcp pool Marshost 172.16.2.254hardware-address 02c7.f800.0422 ieee802client-name MarsBecause attributes are inherited, the previous configuration is equivalent to the following:ip dhcp pool Marshost 172.16.2.254 mask 255.255.255.0hardware-address 02c7.f800.0422 ieee802client-name Marsdefault-router 172.16.2.100 172.16.2.101domain-name dns-server 172.16.1.102 172.16.2.102netbios-name-server 172.16.1.103 172.16.2.103netbios-node-type h-nodeCisco IOS IP and IP Routing Configuration GuideP1C-73Configuring DHCP Configuration ExamplesCisco IOS IP and IP Routing Configuration GuideP1C-74。
思科cisco路由器dhcp动态分配ip地址实现方法
思科cisco路由器dhcp动态分配ip地址实现⽅法本⽂实例讲述了思科cisco路由器dhcp动态分配ip地址实现⽅法。
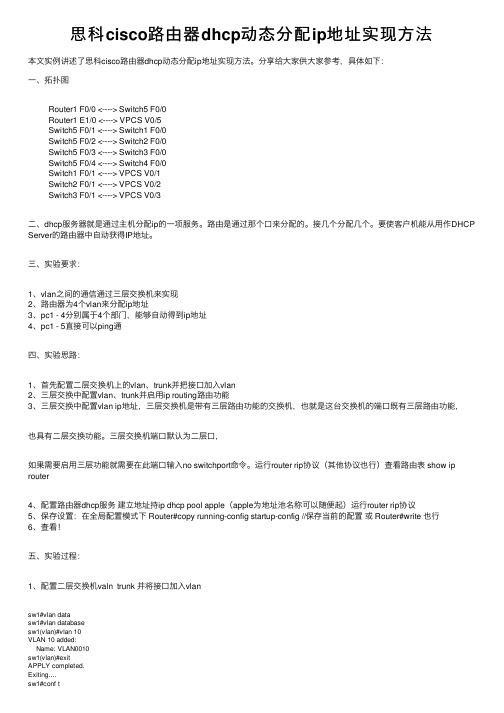
分享给⼤家供⼤家参考,具体如下:⼀、拓扑图Router1 F0/0 <----> Switch5 F0/0Router1 E1/0 <----> VPCS V0/5Switch5 F0/1 <----> Switch1 F0/0Switch5 F0/2 <----> Switch2 F0/0Switch5 F0/3 <----> Switch3 F0/0Switch5 F0/4 <----> Switch4 F0/0Switch1 F0/1 <----> VPCS V0/1Switch2 F0/1 <----> VPCS V0/2Switch3 F0/1 <----> VPCS V0/3⼆、dhcp服务器就是通过主机分配ip的⼀项服务。
路由是通过那个⼝来分配的。
接⼏个分配⼏个。
要使客户机能从⽤作DHCP Server的路由器中⾃动获得IP地址。
三、实验要求:1、vlan之间的通信通过三层交换机来实现2、路由器为4个vlan来分配ip地址3、pc1 - 4分别属于4个部门,能够⾃动得到ip地址4、pc1 - 5直接可以ping通四、实验思路:1、⾸先配置⼆层交换机上的vlan、trunk并把接⼝加⼊vlan2、三层交换中配置vlan、trunk并启⽤ip routing路由功能3、三层交换中配置vlan ip地址,三层交换机是带有三层路由功能的交换机,也就是这台交换机的端⼝既有三层路由功能,也具有⼆层交换功能。
三层交换机端⼝默认为⼆层⼝,如果需要启⽤三层功能就需要在此端⼝输⼊no switchport命令。
运⾏router rip协议(其他协议也⾏)查看路由表 show ip router4、配置路由器dhcp服务建⽴地址持ip dhcp pool apple(apple为地址池名称可以随便起)运⾏router rip协议5、保存设置:在全局配置模式下 Router#copy running-config startup-config //保存当前的配置或 Router#write 也⾏6、查看!五、实验过程:1、配置⼆层交换机valn trunk 并将接⼝加⼊vlansw1#vlan datasw1#vlan databasesw1(vlan)#vlan 10VLAN 10 added:Name: VLAN0010sw1(vlan)#exitAPPLY completed.Exiting....sw1#conf tEnter configuration commansw1(config)#interface f0/0sw1(config-if)#sw m tsw1(config-if)#interface f0/1sw1(config-if)#sw ac vlan 10sw1(config-if)#exitsw1(config)#exitsw1#show vlan-switchsw2 - 4相同配置2、配置三层交换(vlan、trunk、vlan ip)sw3-1#vlan dasw3-1(vlan)#vlan 10VLAN 10 added:Name: VLAN0010sw3-1(vlan)#vlan 20VLAN 20 added:Name: VLAN0020sw3-1(vlan)#vlan 30VLAN 30 added:Name: VLAN0030sw3-1(vlan)#vlan 40VLAN 40 added:Name: VLAN0040sw3-1(config)#ip routing 在三层交换中启动路由功能sw3-1(config)#interface vlan 10sw3-1(config-if)#ip ad 192.168.1.1 255.255.255.0 配置vlan ipsw3-1(config-if)#no shutsw3-1(config-if)#exitsw3-1(config)#interface vlan 20sw3-1(config-if)#ip ad 192.168.2.1 255.255.255.0sw3-1(config-if)#no shutsw3-1(config-if)#exitsw3-1(config)#interface vlan 30sw3-1(config-if)#ip address 192.168.3.1 255.255.255.0sw3-1(config-if)#no shutsw3-1(config-if)#interface vlan 40sw3-1(config-if)#ip ad 192.168.4.1 255.255.255.0sw3-1(config-if)#no shutsw3-1(config-if)#exitsw3-1(config)#interface rang f0/1 - 4 配置trunksw3-1(config-if-range)#sw m tsw3-1(config-if-range)#exitsw3-1(config)#interface f0/0sw3-1(config-if)#no switchport 启动三层接⼝sw3-1(config)#interface f0/0sw3-1(config-if)#ip address 10.0.0.1 255.0.0.0 配置接⼝ipsw3-1(config-if)#no shutsw3-1(config)#ip route 0.0.0.0 0.0.0.0 10.0.0.3 配置默认路由sw3-1(config)#router rip 启⽤rip协议sw3-1(config-router)#network 192.168.1.0sw3-1(config-router)#network 192.168.2.0sw3-1(config-router)#network 192.168.3.0sw3-1(config-router)#network 192.168.4.0sw3-1(config-router)#network 10.0.0.0查看路由表3、配置dhcp路由器dhcp(config)#interface f0/0dhcp(config-if)#ip addressdhcp(config-if)#ip address 10.0.0.3 255.0.0.0dhcp(config-if)#interface 192.168.237.1 255.255.255.0dhcp(config)#inte e1/0dhcp(config-if)#ip add 192.168.237.1 255.255.255.0dhcp(config-if)#no shutdhcp(config-if)#exitdhcp(config)#router ripdhcp(config-router)#network 10.0.0.0dhcp(config-router)#network 192.168.237.0show ip route 同上dhcp(config)#ip dhcp pool apple 建⽴地址池dhcp(dhcp-config)#network 192.168.0.0 255.255.0.04、在三层交换指定dhcp服务器即路由器的ip 地址。
CISCO交换机路由器配置手册
CISCO交换机路由器配置手册王国栋编著……………… 目录………………交换机1、cisco 2950 交换机2、cisco 1950 交换机3、VLAN 间的通信路由器一、路由器配置1、路由器基本配置2、路由器的密码恢复3、恢复出厂设置4、备份IOS5、恢复IOS6、备份路由器配置7、静态路由的配置8、RIP路由协义配置9、IGRP路由协议配置10、EIGRP路由协议配置11、ospf路由协议基本配置12、点到点链路上的ospf13、广播链路上的ospf14、基于区域的ospf简单口今及MD5认证15、多区域的OSPF16、OSPF末节区域和完全末节区域17、OSPF命令汇总二、ACL NAT DHCP1、标准访问控制列表(Access Control Iists ) (list 列表)2、扩展访问控制列表(Access Control Iists ) (list 列表)3、命名ACL4、NAT(network address translation)网络地址翻译(1)、静态NAT配置(2)、动态NAT(3)、PAT(端口地址转换)配置5、DHCP (dynamic host configuration protocol) 动态主机配置协议三、远程接入、VPN1、HDLC (高级数据链路控制high-level data link control)2、路由器serial端口的基本配置3、PPP(1)、PPP的PAP认证(2)、PPP的CHAP认证4、帖中继(1)、帧中继基本配置(2)、点对多点帧中继(3)、|点对点帧中继上的RIP协议5、DDN(Digital Data Network 数字数据网)和数字链路6、ISDN7、ADSL Asymmetrical digital subscriber loop 非对称数字用户环路8、VPN 虚专用网络(Virtual Private Networks)交换机部分一、交换机配置图:二、环境说明:S2950-1 S2950-2 为12端口快速以太网交换机三、配置实例:1、cisco 2950 交换机//switch>enable//进入特权模式//switch #configure terminal//进入全局配置模式//switch (config)#hostname s2950-1//给交换机命名为S2950-1enable password 123456//设置密码ip address 192.168.0.1 255.255.255.0ip default-gateway 192.168.0.254ip domain-name //设置IP 、网关和域名ip name-server 200.0.0.1//设置域名服务器interface fastethernet 0/1//进入端口配置模式//s2950-1 (config-if)#speed auto//将接口速率设置成自适应(默认)//speed 100 10 auto//将接口速率设置成10/100自适应duplex full//将接口设置成全双功(默认)//duplex full falf autoend//s2950-1#copy running-config startup-config//保存配置文件valn database//从特权模式进入VLAN配置子模式//s2950-1 (vlan)#vtp server//VTP就是VLAN中继协议//设置交换机为VTP服务模式//vtp server client transparentvtp domain name-vtp-server//设置管理域的域名为name-vtp-server//创建管理域并命名end//s2950-1#configure terminal//s2950-1 (config)#interface fastethernet 0/1//s2950-1 (config-if)#switchport mode trunk//将端口fastethernet0/1设置为主干端口end//s2950-1#vlan database//s2950-1 (vlan)#//进入VLAN 配置模式valn 2 name namevlan-2//创建VLAN 2 并命名为namevlan-2//交换机默认所有未配置VLNA的交换机均为VLAN 1 //所以这里从VLAN 2 开始设置valn 3 name namevlan-3//创建VLAN 3并命名为namevlan-3valn 4 name namevlan-4valn 5 name namevlan-5exit//s2950-1#configure terminal//s2950-1 (config)#interface fastethernet 0/2//s2950-1 (config-if)#switchport mode access//设置当前端口为静态VLAN模式switchport access vlan 2//把当前端口分配给V ALN 2exit//s2950-1 (config)#interface fastethernet 0/3//s2950-1 (config-if)#switchport mode accessswitchport access vlan 3exit//s2950-1 (config)#interface fastethernet 0/4//s2950-1 (config-if)#switchport mode accessswitchport access vlan 4exit//s2950-1 (config)#interface fastethernet 0/5//s2950-1 (config-if)#switchport mode accessswitchport access vlan 5end//s2950-1#copy running-config startup-config//writeshow running-config//show vtp status//show vlan//show interface//show interface brief//show version2、cisco 1950 交换机//switch>enable//switch #configure terminal//switch (config)#hostname s2950-1enable password 123456username text1 password text2ip address 192.168.0.1 255.255.255.0ip default-gateway 192.168.0.254ip domain-name ip name-server 200.0.0.1interface fastethernet 0/1//s1950-1 (config-if)#speed auto//speed 100 10 autoduplex full//duplex full falf autoend//s1950-1#copy running-config startup-config//s1950-1#configure terminal//s1950-1 (config)#vtp server//在配置模式下设置交换机为VTP服务器//vtp server client transparent//也可以根据需要将交换机设置为VTP客户模式,或透明模式vtp domain name-vtpserver//创建VTP管理域并设置域名为name-vtpserverend//S1950VTP这块配置内容和s2950不一样//s1950-1#configure terminal//s1950-1 (config)#interface fastethernet 0/1//s1950-1 (config-if)#trunk on//设置VLAN主干端口//trunk on|off|desirable|autoEnd//trunk 的内容和S2950不一样//s1950-1#vlan database//s1950-1 (vlan)#valn 2 name namevlan-2//创建VLAN 2 并命名为namevlan-2//交换机默认所有未配置VLNA的交换机均为VLAN 1 ,//所以这里从VLAN 2 开始设置valn 3 name namevlan-3valn 4 name namevlan-4valn 5 name namevlan-5exit//s1950-1#configure terminal//s1950-1 (config)#interface fastethernet 0/2//s1950-1 (config-if)#vlan-membership static namevlan-2//划分VLAN端口//将本端口设置为namevlan-4的成员//S1950这块配置内容和s2950不一样exit//s1950-1 (config)#interface fastethernet 0/3//s1950-1 (config-if)#vlan-membership static namevlan-3exit//s1950-1 (config)#interface fastethernet 0/4//s1950-1 (config-if)#vlan-membership static namevlan-4exit//s1950-1 (config)#interface fastethernet 0/5//s1950-1 (config-if)#vlan-membership static namevlan-5end//s1950-1#copy running-config startup-configshow running-config//show vtp status//show vlan//show interface//show ip interface brief//显示所有接口的简短信息//show version3、VLAN间的通信(1)、利用三层交换机实现VLAN间的通信拓朴图:配置实例:S2950#vlan databaseS2950(vlan)#vlan 2 name namevlan-2S2950(vlan)#vlan 3 name namevlan-3S2950(vlan)#exitS2950#configure terminalS2950(config)#interface fastethernet 0/5S2950(config-if)#switchport mode accessS2950(config-if)#switchport access vlan 2S2950(config-if)#exitS2950(config)#interface fastethernet 0/6S2950(config-if)#switchport mode accessS2950(config-if)#switchport access vlan3S2950(config-if)#exitS2950(config)#ip routing//打开三层交换机的路由功能S2950(config)#interface vlan 2//将VLAN当成一个接口进行配置S2950(config-if)#no shutdownS2950(config-if)#ip address 192.168.0.1 255.255.255.0 S2950(config-if)#exitS2950(config)#interface vlan 3S2950(config-if)#no shutdownS2950(config-if)#ip address 192.168.1.1 255.255.255.0S2950(config-if)#endS2950#show ip router//由于是在同一三层交换机上,用show ip router 可以看到自动生存的路由表(2)、利用路由器实现VLAN间的通信配置拓朴图:配置实例:S2950#vlan databaseS2950(vlan)#vlan 2S2950(vlan)#vlan 3S2950(vlan)#exitS2950#configure terminalS2950(config)#interface fastehernet 0/1S2950(config-if)#switchport mode accessS2950(config-if)#switchport access vlan 2S2950(config-if)#exitS2950(config)#interface fastethernet 0/6S2950(config-if)#switchport mode accessS2950(config-if)#switchport access vlan 3S2950(config-if)#exitS2950(config)#(end)RouterA(config)#interface ethernet 0RouterA(config-if)#no shutdownRouterA(config-if)#ip address 192.168.0.1 255.255.255.0 RouterA(config-if)#exitRouterA(config)#interface ethernet 1RouterA(config-if)#no shutdownRouterA(config-if)#ip address 192.168.1.1 255.255.255.0 RouterA(config-if)#endRouterA#show ip route//可以看到由路器自动生成的两条路由表路由器部分一、路由器配置1、路由器基本配置(1)路由器基本的配置拓扑图:(2)、环境说明:Cisco 1605路由器(3)、配置实例://Router>enable//Router#configure terminal//Router(config)#enable password text1//enable secret texe2hostname R1no ip domain lookup//不用DNS 解析主机IPinterface fastethernet 0/1//R1605-1(config-if)#ip address 192.168.0.2 255.255.255.0no shutdownexit//R1605-1 (config)#interface fastethernet 0/2//R1605-1 (config-if)#ip address 192.168.0.2 255.255.255.0no shutdownexit//R1605-1 (config)#ip route 0.0.0.0 0.0.0.0 192.168.1.2//配置默认路由//no ip route 0.0.0.0 0.0.0.0 192.168.1.2ip routing//起动路由功能//R1605-1(config)#line vty 0 4//VTY是路由器给远程登陆准备的虚拟端口//0 4表示可以同时打开5个会话//line vty 0 4是进入VTY端口(也就是同时充许5个会话登陆),对VTY端口//进行配置//R1605-1(config-line)#password 123456//设置telnet登陆时使用的密码//no password 这样就不能从telnet登陆了.(当你no password 取消掉了密码,//telnet会拒绝连接,这样就关闭了telnet)//要想明确禁止从telnet登陆最好使用ACL关闭23端口login//要求输入密码方能从telnet远程登陆,//no login 不使用密码就可以从telnet登陆end//R1605-1#write//copy running-config startup-config ,保存配置end//R1605-1#Show running-config//show version//show interface//show ip interface brief//显示所有接口的简短信息//show ip route//traceroute ip 192.168.3.1//show ip arp//show ip rip database//show runing-configexit2、路由器的密码恢复(1)、密码恢复的基本原理对CISCO的网络设备进行密码恢复的主要武器是配置注册码。
cisco DHCP
CISCO的路由器(IOS12.0 T1以后),可以配置为dhcp的中继设备,DHCP的客户端设备,也可以配置为DHCP的服务器。
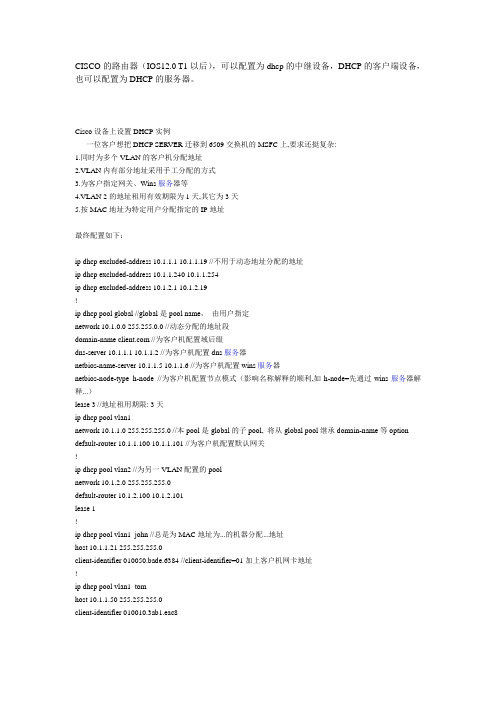
Cisco设备上设置DHCP实例一位客户想把DHCP SERVER迁移到6509交换机的MSFC上,要求还挺复杂:1.同时为多个VLAN的客户机分配地址2.VLAN内有部分地址采用手工分配的方式3.为客户指定网关、Wins服务器等4.VLAN 2的地址租用有效期限为1天,其它为3天5.按MAC地址为特定用户分配指定的IP地址最终配置如下:ip dhcp excluded-address 10.1.1.1 10.1.1.19 //不用于动态地址分配的地址ip dhcp excluded-address 10.1.1.240 10.1.1.254ip dhcp excluded-address 10.1.2.1 10.1.2.19!ip dhcp pool global //global是pool name,由用户指定network 10.1.0.0 255.255.0.0 //动态分配的地址段domain-name //为客户机配置域后缀dns-server 10.1.1.1 10.1.1.2 //为客户机配置dns服务器netbios-name-server 10.1.1.5 10.1.1.6 //为客户机配置wins服务器netbios-node-type h-node //为客户机配置节点模式(影响名称解释的顺利,如h-node=先通过wins服务器解释...)lease 3 //地址租用期限: 3天ip dhcp pool vlan1network 10.1.1.0 255.255.255.0 //本pool是global的子pool, 将从global pool继承domain-name等option default-router 10.1.1.100 10.1.1.101 //为客户机配置默认网关!ip dhcp pool vlan2 //为另一VLAN配置的poolnetwork 10.1.2.0 255.255.255.0default-router 10.1.2.100 10.1.2.101lease 1!ip dhcp pool vlan1_john //总是为MAC地址为...的机器分配...地址host 10.1.1.21 255.255.255.0client-identifier 010050.bade.6384 //client-identifier=01加上客户机网卡地址!ip dhcp pool vlan1_tomhost 10.1.1.50 255.255.255.0client-identifier 010010.3ab1.eac8相关的DHCP调试命令:no service dhcp //停止DHCP服务[默认为启用DHCP服务]sh ip dhcp binding //显示地址分配情况show ip dhcp conflict //显示地址冲突情况debug ip dhcp server {events | packets | linkage} //观察DHCP服务器工作情况如果DHCP客户机分配不到IP地址,常见的原因有两个。
Cisco 3750交换机配置DHCP
Cisco 3750交换机配置DHCP2009-02-27 14:53Cisco 3750交换机配置DHCP服务器实例网络环境:一台3750交换机,划分三个vlan, vlan2 为服务器所在网络,命名为server,IP地址段为192.168.2.0,子网掩码:255.255.255.0,网关:192.168.2.1,域服务器为windows 2003 advance server,同时兼作DNS服务器,IP地址为192.168.2.10,vlan3为客户机1所在网络,IP地址段为192.168.3.0,子网掩码:255.255.255.0,网关:192.168.3.1命名为work01,vlan4为客户机2所在网络,命名为work02,IP地址段为192.168.4.0,子网掩码:255.255.255.0,网关:192.168.4.1,3750作DHCP服务器,端口1-8划到VLAN 2,端口9-16划分到VLAN 3,端口17-24划分到VLAN 4.DHCP服务器实现功能:各VLAN保留2-10的IP地址不分配置,例如:192.168.2.0的网段,保留192.168.2.2至192.168.2.10的IP地址段不分配.安全要求:VLAN 3和VLAN 4 不允许互相访问,但都可以访问服务器所在的VLAN 2, 默认访问控制列表的规则是拒绝所有包。
配置命令及步骤如下:第一步:创建VLAN:Switch>enSwitch#Vlan DatabaseSwitch(Vlan)>Vlan 2 Name serverSwitch(Vlan)>Vlan 3 Name work01Switch(vlan)>Vlan 4 Name work02第二步:设置VLAN IP地址:Switch#Config TSwitch(Config)>Int Vlan 2Switch(Config-vlan)Ip Address 192.168.2.1 255.255.255.0Switch(Config-vlan)No ShutSwitch(Config-vlan)>Int Vlan 3Switch(Config-vlan)Ip Address 192.168.3.1 255.255.255.0Switch(Config-vlan)No ShutSwitch(Config-vlan)>Int Vlan 4Switch(Config-vlan)Ip Address 192.168.4.1 255.255.255.0Switch(Config-vlan)No ShutSwitch(Config-vlan)Exit/*注意:由于此时没有将端口分配置到VLAN2,3,4,所以各VLAN会DOWN 掉,待将端口分配到各VLAN后,VLAN会起来*/第三步:设置端口全局参数Switch(Config)Interface Range Fa 0/1 - 24Switch(Config-if-range)Switchport Mode AccessSwitch(Config-if-range)Spanning-tree Portfast第四步:将端口添加到VLAN2,3,4中/*将端口1-8添加到VLAN 2*/Switch(Config)Interface Range Fa 0/1 - 8Switch(Config-if-range)Switchport Access Vlan 2/*将端口9-16添加到VLAN 3*/Switch(Config)Interface Range Fa 0/9 - 16Switch(Config-if-range)Switchport Access Vlan 3/*将端口17-24添加到VLAN 4*/Switch(Config)Interface Range Fa 0/17 - 24Switch(Config-if-range)Switchport Access Vlan 4Switch(Config-if-range)Exit/*经过这一步后,各VLAN会起来*/第五步:配置3750作为DHCP服务器/*VLAN 2可用地址池和相应参数的配置,有几个VLAN要设几个地址池*/ Switch(Config)Ip Dhcp Pool Test01/*设置可分配的子网*/Switch(Config-pool)Network 192.168.2.0 255.255.255.0/*设置DNS服务器*/Switch(Config-pool)Dns-server 192.168.2.10/*设置该子网的网关*/Switch(Config-pool)Default-router 192.168.2.1/*配置VLAN 3所用的地址池和相应参数*/Switch(Config)Ip Dhcp Pool Test02Switch(Config-pool)Network 192.168.3.0 255.255.255.0Switch(Config-pool)Dns-server 192.168.2.10Switch(Config-pool)Default-router 192.168.3.1/*配置VLAN 4所用的地址池和相应参数*/Switch(Config)Ip Dhcp Pool Test03Switch(Config-pool)Network 192.168.4.0 255.255.255.0Switch(Config-pool)Dns-server 192.168.2.10Switch(Config-pool)Default-router 192.168.4.1第六步:设置DHCP保留不分配的地址Switch(Config)Ip Dhcp Excluded-address 192.168.2.2 192.168.2.10 Switch(Config)Ip Dhcp Excluded-address 192.168.3.2 192.168.3.10 Switch(Config)Ip Dhcp Excluded-address 192.168.4.2 192.168.4.10第七步:启用路由/*路由启用后,各VLAN间主机可互相访问*/Switch(Config)Ip Routing第八步:配置访问控制列表Switch(Config)access-list 103 permit ip 192.168.2.0 0.0.0.255 192.168.3.0 0.0.0.255Switch(Config)access-list 103 permit ip 192.168.3.0 0.0.0.255 192.168.2.0 0.0.0.255Switch(Config)access-list 103 permit udp any any eq bootpcSwitch(Config)access-list 103 permit udp any any eq tftpSwitch(Config)access-list 103 permit udp any eq bootpc anySwitch(Config)access-list 103 permit udp any eq tftp anySwitch(Config)access-list 104 permit ip 192.168.2.0 0.0.0.255 192.168.4.0 0.0.0.255Switch(Config)access-list 104 permit ip 192.168.4.0 0.0.0.255 192.168.2.0 0.0.0.255Switch(Config)access-list 104 permit udp any eq tftp anySwitch(Config)access-list 104 permit udp any eq bootpc anySwitch(Config)access-list 104 permit udp any eq bootpc anySwitch(Config)access-list 104 permit udp any eq tftp any第九步:应用访问控制列表/*将访问控制列表应用到VLAN 3和VLAN 4,VLAN 2不需要*/Switch(Config)Int Vlan 3Switch(Config-vlan)ip access-group 103 outSwitch(Config-vlan)Int Vlan 4Switch(Config-vlan)ip access-group 104 out第十步:结束并保存配置Switch(Config-vlan)EndSwitch#write memory。
Cisco三层交换机与Routeros OSPF+DHCP服务器配置实例
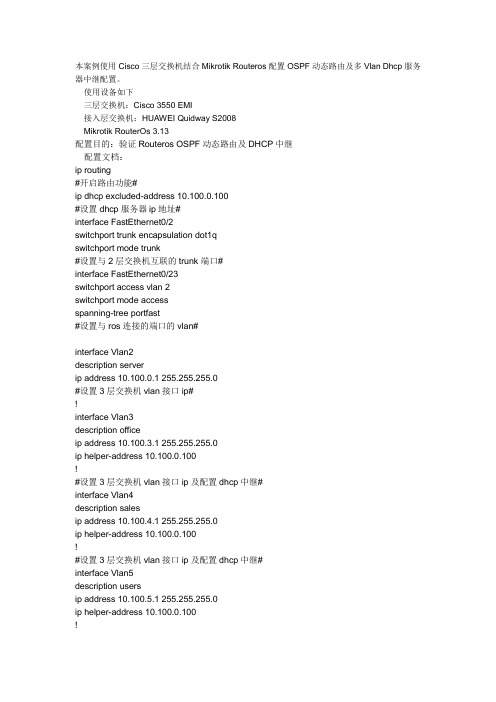
本案例使用Cisco三层交换机结合Mikrotik Routeros配置OSPF动态路由及多Vlan Dhcp服务器中继配置。
使用设备如下三层交换机:Cisco 3550 EMI接入层交换机:HUAWEI Quidway S2008Mikrotik RouterOs 3.13配置目的:验证Routeros OSPF动态路由及DHCP中继配置文档:ip routing#开启路由功能#ip dhcp excluded-address 10.100.0.100#设置dhcp服务器ip地址#interface FastEthernet0/2switchport trunk encapsulation dot1qswitchport mode trunk#设置与2层交换机互联的trunk端口#interface FastEthernet0/23switchport access vlan 2switchport mode accessspanning-tree portfast#设置与ros连接的端口的vlan#interface Vlan2description serverip address 10.100.0.1 255.255.255.0#设置3层交换机vlan接口ip#!interface Vlan3description officeip address 10.100.3.1 255.255.255.0ip helper-address 10.100.0.100!#设置3层交换机vlan接口ip及配置dhcp中继#interface Vlan4description salesip address 10.100.4.1 255.255.255.0ip helper-address 10.100.0.100!#设置3层交换机vlan接口ip及配置dhcp中继#interface Vlan5description usersip address 10.100.5.1 255.255.255.0ip helper-address 10.100.0.100!#设置3层交换机vlan接口ip及配置dhcp中继#router ospf 10router-id 10.100.0.1log-adjacency-changesnetwork 10.100.0.0 0.0.255.255 area 10.100.0.0#配置ospf进程及area信息#HUAWEI Quidway S2008 配置:interface Ethernet0/6switchport access vlan 5!#配置用户端口#interface Ethernet0/7switchport access vlan 3!#配置用户端口#interface Ethernet0/8switchport access vlan 4#配置用户端口#interface Ethernet0/9switchport mode trunkswitchport trunk allowed vlan all!#设置与3层交换机互联的trunk端口#Mikrotik Routeros:/ip pooladd name="vlan3" ranges=10.100.3.2-10.100.3.254add name="vlan4" ranges=10.100.4.2-10.100.4.254add name="vlan5" ranges=10.100.5.2-10.100.5.254#设置不同Vlan的地址池#/ip dhcp-serveradd address-pool=vlan3 authoritative=after-2sec-delay bootp-support=static \ disabled=no interface=in lease-time=3d name="vlan3" relay=10.100.3.1 add address-pool=vlan4 authoritative=after-2sec-delay bootp-support=static \ disabled=no interface=in lease-time=3d name="vlan4" relay=10.100.4.1 add address-pool=vlan5 authoritative=after-2sec-delay bootp-support=static \ disabled=no interface=in lease-time=3d name="vlan5" relay=10.100.5.1#设置Dhcp-server 使之支持Dhcp中继#/routing ospf areaadd area-id=0.0.0.0 authentication=none disabled=no name="backbone" \type=defaultadd area-id=10.100.0.0 authentication=none disabled=no name="area1" \type=default#配置ospf area#/ip addressadd address=10.100.0.100/24 broadcast=10.100.0.255 comment="" disabled=no \ interface=in network=10.100.0.0#配置内部IP地址#/ip dnsset allow-remote-requests=yes cache-max-ttl=1w cache-size=2048KiB \max-udp-packet-size=512 primary-dns=192.168.100.208 \#配置dns#/ip firewall natadd action=masquerade chain=srcnat comment="" disabled=no \src-address=10.100.0.0/16#配置NAT#/routing ospfset distribute-default=always-as-type-2 metric-bgp=20 metric-connected=20 \metric-default=1 metric-rip=20 metric-static=20 mpls-te-area=unspecified \mpls-te-router-id=unspecified redistribute-bgp=no \redistribute-connected=no redistribute-rip=no redistribute-static=no \router-id=10.100.100.2/routing ospf interfaceadd authentication=none authentication-key="" cost=10 dead-interval=40s \disabled=no hello-interval=10s interface=in network-type=broadcast \passive=no priority=1 retransmit-interval=5s transmit-delay=1s/routing ospf networkadd area=area1 disabled=no network=10.100.0.0/16#配置OSPF路由协议#cisco3550#show ip routeCodes: C - connected, S - static, R - RIP, M - mobile, B - BGPD - EIGRP, EX - EIGRP external, O - OSPF, IA - OSPF inter areaN1 - OSPF NSSA external type 1, N2 - OSPF NSSA external type 2E1 - OSPF external type 1, E2 - OSPF external type 2, E - EGPi - IS-IS, su - IS-IS summary, L1 - IS-IS level-1, L2 - IS-IS level-2ia - IS-IS inter area, * - candidate default, U - per-user static routeo - ODR, P - periodic downloaded static routeGateway of last resort is 10.100.0.100 to network 0.0.0.010.0.0.0/24 is subnetted, 4 subnetsC 10.100.4.0 is directly connected, Vlan4C 10.100.5.0 is directly connected, Vlan5C 10.100.3.0 is directly connected, Vlan3C 10.100.0.0 is directly connected, Vlan2O*E2 0.0.0.0/0 [110/1] via 10.100.0.100, 01:09:52, Vlan2[admin@MikroTik] /ip route> printFlags: X - disabled, A - active, D - dynamic, C - connect, S - static, r - rip, b - bgp, o - ospf, m - mme, B - blackhole, U - unreachable, P - prohibit# DST-ADDRESS PREF-SRC GATEWAY-STATEGATEWAY DISTANCE INTERFACEADS 0.0.0.0/0 reachable 192.168.18.1 0 o ut1ADC 10.100.0.0/24 10.100.0.100 0 in2ADo 10.100.3.0/24 reachable 10.100.0.1 110 in3ADo 10.100.4.0/24 reachable 10.100.0.1 110 in4ADo 10.100.5.0/24 reachable 10.100.0.1 110 in5ADC 192.168.18.0/24 192.168.18.158 0 out。
Cisco路由器做DHCP和DNS服务器

Cisco路由器做DHCP和DNS服务器Cisco路由器作为网络设备的重要组成部分,除了实现数据转发和路由功能外,还可以承担DHCP(动态主机配置协议)和DNS(域名系统)服务器的角色。
本文将介绍如何在Cisco路由器上配置DHCP和DNS服务器,并详细解释其原理和作用。
一、概述在计算机网络中,DHCP和DNS是两个非常重要的网络协议。
DHCP协议用于自动分配IP地址给连接到网络的设备,而DNS协议则负责将域名解析为IP地址,以实现设备之间的通信。
二、Cisco路由器配置DHCP服务器1. 进入路由器的全局配置模式:```enableconfigure terminal```2. 创建一个IP地址池,指定可分配的IP地址范围、默认网关和DNS服务器:```ip dhcp pool POOL_NAMEnetwork NETWORK_ADDRESS SUBNET_MASKdefault-router DEFAULT_GATEWAYdns-server DNS_SERVER```其中,POOL_NAME为IP地址池的名称;NETWORK_ADDRESS 为网络地址;SUBNET_MASK为子网掩码;DEFAULT_GATEWAY为默认网关的IP地址;DNS_SERVER为DNS服务器的IP地址。
3. 指定DHCP租约的有效期:```lease DAY HOURS MINUTES```其中,DAY为天数,HOURS为小时数,MINUTES为分钟数。
4. 退出DHCP配置模式:```exit```5. 启用DHCP服务器:```service dhcp```三、Cisco路由器配置DNS服务器1. 进入路由器的全局配置模式:```enableconfigure terminal```2. 创建一个静态DNS解析:```ip host DOMAIN_NAME IP_ADDRESS```其中,DOMAIN_NAME为域名,IP_ADDRESS为对应的IP地址。
DHCP中继实验(cisco)

DHCP中继实验(cisco)最近看到大家经常由于DHCP的问题犯愁,为了让大家更明白的了解DHCP并且会配置,特此发这个贴相信大家认证看完对DHCP就会了如指掌1.配置DHCP Server(1)开启DHCP 功能r2(config)#service dhcp(2)配置DHCP 地址池r2(config)#ip dhcp poolccie1 地址池名为ccie1r2(dhcp-config)#network 10.1.1.0 255.255.255.0 可供客户端使用的地址段r2(dhcp-config)#default-router10.1.1.1 网关r2(dhcp-config)#dns-server 10.1.1.1 10.1.1.2 DNSr2(dhcp-config)#lease 1 11 租期为1 天1 小时1 分(默认为一天)r2(config)#ip dhcp poolccie2 地址池名为ccie1r2(dhcp-config)#network 20.1.1.0 255.255.255.0 可供客户端使用的地址段r2(dhcp-config)#default-router20.1.1.1 网关r2(dhcp-config)#dns-server 20.1.1.1 20.1.1.2 DNSr2(dhcp-config)#lease 1 11 租期为1 天1 小时1 分(默认一天)(3)去掉不提供给客户端的地址注:因为某些IP 地址不希望提供给客户端,比如网关地址,所以我们要将这些地址从地址池中移除,这样服务器就不会将这些地址发给客户端使用。
r2(config)#ip dhcp excluded-address10.1.1.1 10.1.1.10 移除10.1.1.1 到10.1.1.10r2(config)#ip dhcp excluded-address网段的地址发给客户,而不会错把20.1.1.0/24 网段的地址发给客户呢。
怎样配置以cisco 3560的DHCP

怎样配置以cisco 3560的DHCP1.同时为多个VLAN的客户机分配地址2.VLAN内有部分地址采用手工分配的方式3.为客户指定网关、Wins服务器等4.VLAN 2的地址租用有效期限为1天,其它为3天5.按MAC地址为特定用户分配指定的IP地址最终配置如下:ip dhcp excluded-address 10.1.1.1 10.1.1.19 //不用于动态地址分配的地址ip dhcp excluded-address 10.1.1.240 10.1.1.254ip dhcp excluded-address 10.1.2.1 10.1.2.19!ip dhcp pool global //global是pool name,由用户指定network 10.1.0.0 255.255.0.0 //动态分配的地址段domain-name //为客户机配置域后缀dns-server 10.1.1.1 10.1.1.2 //为客户机配置dns服务器netbios-name-server 10.1.1.5 10.1.1.6 //为客户机配置wins服务器netbios-node-type h-node //为客户机配置节点模式(影响名称解释的顺利,如h-node=先通过wins服务器解释...)lease 3 //地址租用期限: 3天ip dhcp pool vlan1network 10.1.1.0 255.255.255.0 //本pool是global的子pool, 将从global pool继承domain-name等optiondefault-router 10.1.1.100 10.1.1.101 //为客户机配置默认网关!ip dhcp pool vlan2 //为另一VLAN配置的poolnetwork 10.1.2.0 255.255.255.0default-router 10.1.2.100 10.1.2.101lease 1!ip dhcp pool vlan1_john //总是为MAC地址为...的机器分配...地址host 10.1.1.21 255.255.255.0client-identifier 010050.bade.6384 //client-identifier=01加上客户机网卡地址!ip dhcp pool vlan1_tomhost 10.1.1.50 255.255.255.0client-identifier 010010.3ab1.eac8相关的DHCP调试命令:no service dhcp //停止DHCP服务[默认为启用DHCP服务]sh ip dhcp binding //显示地址分配情况show ip dhcp conflict //显示地址冲突情况debug ip dhcp server {events | packets | linkage} //观察DHCP服务器工作情况如果DHCP客户机分配不到IP地址,常见的原因有两个。
Cisco交换机DHCP_Snooping功能详述
Cisco交换机DHCP Snooping功能详述一、采用DHCP服务的常见问题架设DHCP服务器可以为客户端自动分配IP地址、掩码、默认网关、DNS服务器等网络参数,简化了网络配置,提高了管理效率。
但在DHCP服务的管理上存在一些问题,常见的有:●DHCP Server的冒充& 被过滤广告nbsp; ●DHCP Server的DOS攻击,如DHCP耗竭攻击●某些用户随便指定IP地址,造成IP地址冲突1、DHCP Server的冒充由于DHCP服务器和客户端之间没有认证机制,所以如果在网络上随意添加一台DHCP服务器,它就可以为客户端分配IP地址以及其他网络参数。
只要让该DHCP服务器分配错误的IP 地址和其他网络参数,那就会对网络造成非常大的危害。
2、DHCP Server的拒绝服务攻击通常DHCP服务器通过检查客户端发送的DHCP请求报文中的CHADDR(也就是Client MAC address)字段来判断客户端的MAC地址。
正常情况下该CHADDR字段和发送请求报文的客户端真实的MAC地址是相同的。
攻击者可以利用伪造MAC的方式发送DHCP请求,但这种攻击可以使用Cisco 交换机的端口安全特性来防止。
端口安全特性(Port Security)可以限制每个端口只使用唯一的MAC地址。
但是如果攻击者不修改DHCP请求报文的源MAC地址,而是修改DHCP报文中的CHADDR字段来实施攻击,那端口安全就不起作用了。
由于DHCP服务器认为不同的CHADDR值表示请求来自不同的客户端,所以攻击者可以通过大量发送伪造CHADDR的DHCP请求,导致DHCP服务器上的地址池被耗尽,从而无法为其他正常用户提供网络地址,这是一种DHCP耗竭攻击。
DHCP耗竭攻击可以是纯粹的DOS攻击,也可以与伪造的DHCP服务器配合使用。
当正常的DHCP服务器瘫痪时,攻击者就可以建立伪造的DHCP 服务器来为局域网中的客户端提供地址,使它们将信息转发给准备截取的恶意计算机。
思科3560DHCP实验
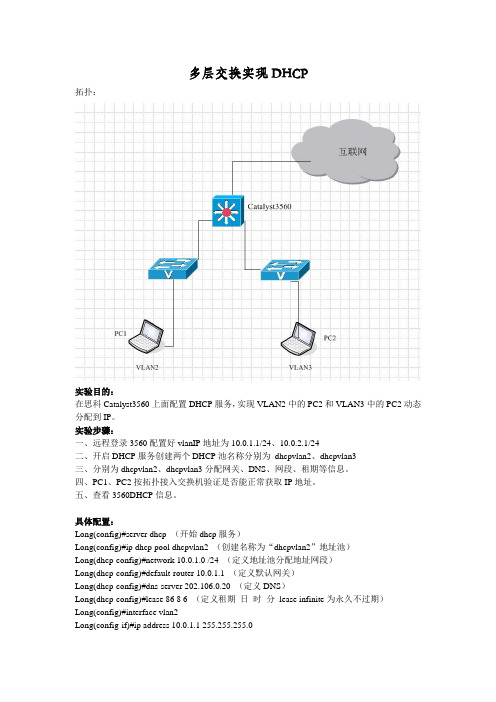
多层交换实现DHCP拓扑:实验目的:在思科Catalyst3560上面配置DHCP服务,实现VLAN2中的PC2和VLAN3中的PC2动态分配到IP。
实验步骤:一、远程登录3560配置好vlanIP地址为10.0.1.1/24、10.0.2.1/24二、开启DHCP服务创建两个DHCP池名称分别为dhcpvlan2、dhcpvlan3三、分别为dhcpvlan2、dhcpvlan3分配网关、DNS、网段、租期等信息。
四、PC1、PC2按拓扑接入交换机验证是否能正常获取IP地址。
五、查看3560DHCP信息。
具体配置:Long(config)#server dhcp (开始dhcp服务)Long(config)#ip dhcp pool dhcpvlan2 (创建名称为“dhcpvlan2”地址池)Long(dhcp-config)#network 10.0.1.0 /24 (定义地址池分配地址网段)Long(dhcp-config)#default-router 10.0.1.1 (定义默认网关)Long(dhcp-config)#dns-server 202.106.0.20 (定义DNS)Long(dhcp-config)#lease 86 8 6 (定义租期日时分lease infinite为永久不过期)Long(config)#interface vlan2Long(config-if)#ip address 10.0.1.1 255.255.255.0Long(config-if)#no shLong(config)#ip dhcp pool dhcpvlan3Long(dhcp-config)#network 10.0.2.0 /24Long(dhcp-config)#default-router 10.0.2.1Long(dhcp-config)#dns-server 202.106.0.20Long(dhcp-config)#lease 86 8 6Long(config)#interface vlan3Long(config-if)#ip address 10.0.2.1 255.255.255.0Long(config-if)#no shLong (config)#ip dhcp excluded-address 10.0.1.1 10.0.2.1 (排除分配地址)相关的DHCP调试命令:no service dhcp //停止DHCP服务[默认为启用DHCP服务]sh ip dhcp binding //显示地址分配情况show ip dhcp conflict //显示地址冲突情况debug ip dhcp server {events | packets | linkage} //观察DHCP服务器工作情况如果DHCP客户机分配不到IP地址,常见的原因有两个。
2960_dhcp服务配置

cisco2960交换机的dhcp服务配置 (2011-02-17 10:39)/space.php?uid=24946452&do=blog&id=125299标签: 交换机style分类:Network首先,cisco2960交换机是支持dhcp server功能的。
网上有人说不支持,那是错误的。
配置过程中参考了/art/200805/74377.htm这篇文章,写的非常好。
只不过这篇文章中配置的是路由器,我配置的是交换机。
配置时参考介绍选择自己需要的操作即可。
向作者表示感谢!参考文章:/art/200805/74377.htm第一步:查看设备是否支持IOS DHCP Server功能一般的Cisco路由器或访问服务器,以及少部分安装有路由交换模块或多层交换功能卡的交换机都具有IOS DHCP Server功能。
如果还没有确认你的设备是否具备这一功能,那么,你可以按如下方法在命令行界面(CLI)下进行快速检测,步骤如下:2960>enablePassWord?2960#config t'进入配置模式Enter configuration commands? one per line.End with CNTL/Z.2960?config?#ip dhcp ?如果出现的是下面的信息,那么很遗憾,你的设备不支持IOS DHCP Server功能:% Unrecognized command如果支持DHCP Server功能,应该显示如下:anzhenoffice(config)#ip dhcp?dhcp dhcp-client dhcp-server第二步:在交换机上进行配置1.设置DHCP数据库代理DHCP数据库代理是用于存储DHCP绑定信息的一台主机,它可以是FTP、TFTP或者是RCP服务器。
当然,如有必要,你可以配置多个DHCP数据库代理。
同样,不配置DHCP数据库代理也是允许的,但这是以不能在DHCP数据库代理上存储地址冲突日志为代价的。
Cisco实验:【DHCP配置】客户端跨网段通过DHCP服务器自动获取动态IP和固定IP地址

Cisco实验:【DHCP配置】客户端跨⽹段通过DHCP服务器⾃动获取动态IP和固定IP地址模拟环境:R1为路由器e0/0接⼝和e0/1接⼝分别连接两个⽹段,e0/0连接⽤户区域,e0/1连接服务器区域;⽤户区域中SW1为接⼊层交换机,连接⼀台PC(R2模拟)和⼀台打印机(R5模拟);服务器区域中连接⼀台DHCP服务器(R3模拟);要求实现PC通过DHCP服务器⾃动获取动态IP地址,打印机通过DHCP服务器获取固定IP地址。
R2 模拟PC 获取100.1.1.0/24段内地址R5 模拟打印机获取100.1.1.200/24固定地址SW1 接⼊层交换机R1 路由器 e0/0:100.1.1.1/24;e0/1:13.1.1.1/24R3 模拟DHCP服务器 13.1.1.3/24*Cisco路由器模拟成PC,关闭路由选择协议 no ip routing,*指定⽹关 ip default-gateway x.x.x.xR1配置信息:Router>enableRouter#configure terminalRouter(config)#hostname R1R1(config)#interface ethernet 0/1R1(config-if)#ip address 13.1.1.1255.255.255.0R1(config-if)#no shutdownR1(config-if)#exitR1(config)#interface ethernet 0/0R1(config-if)#ip address 100.1.1.254255.255.255.0R1(config-if)#no shutdownR1(config-if)#ip helper-address 13.1.1.3//⽹关接⼝设置中继,实现将⽤户⽹段内的DHCP请求中继到服务器⽹段的DHCP服务器获取地址R3配置信息(DHCP Server):Router>enableRouter#configure terminalRouter(config)#hostname ServerServer(config)#interface ethernet 0/0Server(config-if)#ip address 13.1.1.3255.255.255.0Server(config-if)#no shutdownServer(config)#service dhcp //开启DHCP服务Server(config)#ip dhcp pool CCIE //创建名为CCIE的地址池Server(dhcp-config)#network 100.1.1.0255.255.255.0//指定⽹段地址池为100.1.1.0/24Server(dhcp-config)#default-router 100.1.1.254//指定⽹关Server(dhcp-config)#dns-server 100.1.1.254//指定DNS服务器Server(dhcp-config)#domain-name //指定域名Server(dhcp-config)#lease 1030//修改租期,天时分,默认为1天Server#show run | section dhcp //查看DHCP配置信息ip dhcp pool CCIEnetwork 100.1.1.0255.255.255.0default-router 100.1.1.254dns-server 100.1.1.254domain-name lease 1030Server(config)#ip dhcp excluded-address 100.1.1.254100.1.1.254//排除范围地址不参与分配,从低地址-⾼地址的⼀个范围Server(config)#ip dhcp pool PrinterServer(dhcp-config)#host 100.1.1.200255.255.255.0//指定主机地址池Server(dhcp-config)#default-router 100.1.1.254Server(dhcp-config)#dns-server 100.1.1.254Server(dhcp-config)#domain-name Server(dhcp-config)#lease 300Server(dhcp-config)#client-identifier 01aa.bbcc.0050.00//指定客户端的ID,⽤于识别该地址分配到指定的设备;01+MAC地址⼩数点前移Server#show run | section dhcpip dhcp excluded-address 100.1.1.254ip dhcp pool CCIEnetwork 100.1.1.0255.255.255.0default-router 100.1.1.254dns-server 100.1.1.254domain-name lease 1030ip dhcp pool Printerhost 100.1.1.200255.255.255.0client-identifier 01aa.bbcc.0050.00default-router 100.1.1.254dns-server 100.1.1.254domain-name lease 3Server(config)#no ip routing //关闭路由协议,模拟成终端设备Server(config)#ip default-gateway 13.1.1.1//设置设备⽹关R2配置信息(PC):Router>enableRouter#configure terminalRouter(config)#hostname PCPC(config)#no ip routing //关闭路由协议,模拟成终端设备PC(config)#interface ethernet 0/0PC(config-if)#ip address dhcp //DHCP获取地址PC(config-if)#no shutdownR5配置信息(Printer):Router>enableRouter#configure terminalRouter(config)#hostname PrinterPrinter(config)#no ip routing //关闭路由协议,模拟成终端设备Printer(config)#interface ethernet 0/0Printer(config-if)#ip address dhcp client-id ethernet 0/0//DHCP⾃动获取地址,获取时出⽰连接接⼝的客户端ID⽤于匹配主机地址池中客户端ID Printer(config-if)#no shutdown。
思科模拟器:3560交换机实现DHCP功能

思科模拟器:3560交换机实现DHCP功能思科模拟器:交换机实现DHCP功能1、打开Cisco Packet Tracer,点击【交换机】,选择第六个图标3560交换机,按住鼠标左键拖动到工作区。
只有这个交换机及以上级别的才具备DHCP功能,我们之前讲的2960只可以划分Vlan,不支持DHCP服务2、在工作区内拖入3台电脑,用直通线和交换机连接3、打开交换机属性界面,在命令行中输入代码,划分Vlan 10和Vlan 20两个Vlan代码如下:【Switch>enableSwitch#vlan database% Warning: It is recommended to configure VLAN from config mode,as VLAN database mode is being deprecated. Please consult userdocumentation for configuring VTP/VLAN in config mode.Switch(vlan)#vlan 10 name v10VLAN 10 modified:Name: v10Switch(vlan)#vlan 20 name v20VLAN 20 modified:Name: v20Switch(vlan)#exit4、设置vlan10和Vlan20的默认地址池和网关dns,代码如下:【Switch(config)#ip dhcp pool vlan10 *设置相应的VLANSwitch(dhcp-config)#default-router 192.168.1.254 *设置该地址池的默认网关Switch(dhcp-config)#network 192.168.1.0 255.255.255.0 *设置分配的地址池Switch(dhcp-config)#dns-server 202.1.1.1 *设置该地址池的默认DNS地址。
- 1、下载文档前请自行甄别文档内容的完整性,平台不提供额外的编辑、内容补充、找答案等附加服务。
- 2、"仅部分预览"的文档,不可在线预览部分如存在完整性等问题,可反馈申请退款(可完整预览的文档不适用该条件!)。
- 3、如文档侵犯您的权益,请联系客服反馈,我们会尽快为您处理(人工客服工作时间:9:00-18:30)。
ip helper-address 192.168.0.69 DHCP Server IP
interface Vlan12
ip address 192.168.2.254 255.255.255.0
ip helper-address 192.168.0.69 DHCP Server IP
Switch(Config-pool)Dns-server 192.168.2.10
Switch(Config-pool)Default-router 192.168.3.1
/*配置VLAN 4所用的地址池和相应参数*/
Switch(Config)Ip Dhcp Pool Test03
Switch(Config-pool)Network 192.168.4.0 255.255.255.0
Switch(Config-vlan)No Shut
Switch(Config-vlan)>Int Vlan 3
Switch(Config-vlan)Ip Address 192.168.3.1 255.255.255.0
Switch(Config-vlan)No Shut
Switch(Config-vlan)>Int Vlan 4
安全要求:
VLAN 3和VLAN 4 不允许互相访问,但都可以访问服务器所在的VLAN 2,
默认访问控制列表的规则是拒绝所有包.
配置命令及步骤如下:
第一步:创建VLAN:
Switch>en
Switch#Vlan Database
Switch(Vlan)>Vlan 2 Name server
Switch(Config)Ip Dhcp Pool Test01
/*设置可分配的子网*/
Switch(Config-pool)Network 192.168.2.0 255.255.255.0
/*设置DNS服务器*/
Switch(Config-pool)Dns-server 192.168.2.10
交换机端口正在经历生成树计算,一般需要30-50秒才能进入转发状态。MS客户机没有收到DHCP SERVER的
响应就会给网卡设置一个169.169.X.X的IP地址。解决的方法是把交换机端口设置为Portfast方式:
CatOS(4000/5000/6000): set spantree portfast mod_num/port_num enable; IOS(2900/3500):
Switch(Config-if-range)Switchport Access Vlan 4
Switch(Config-if-range)Exit
/*经过这一步后,各VLAN会起来*/
第五步:配置3550作为DHCP服务器
/*VLAN 2可用地址池和相应参数的配置,有几个VLAN要设几个地址池*/
Switch(Config)Ip Dhcp Excluded-address 192.168.3.2 192.168.3.10
Switch(Config)Ip Dhcp Excluded-address 192.168.4.2 192.168.4.10
第七步:启用路由
/*路由启用后,各VLAN间主机可互相访问*/
第四步:将端口添加到VLAN2,3,4中
/*将端口1-8添加到VLAN 2*/
Switch(Config)Interface Range Fa 0/1 - 8
Switch(Config-if-range)Switchport Access Vlan 2
/*将端口9-16添加到VLAN 3*/
3.在DHCP服务器上设置网络地址分别为192.168.1.0、192.168.2.0的作用域,并将这些作用域的“路
由器”选项设置为对应VLAN的接口IP地址。
二 利用三层交换机自带的DHCP功能实现多VLAN的IP地址自动分配
(一) 配置方法一
1.同时为多个VLAN的客户机分配地址
!
ip dhcp pool vlan2 //为另一VLAN配置的pool
network 10.1.2.0 255.255.255.0
default-router 10.1.2.100 10.1.2.101
lease 1
!
ip dhcp pool vlan1_john //总是为MAC地址为...的机器分配...地址
ip dhcp excluded-address 10.1.1.240 10.1.1.254
ip dhcp excluded-address 10.1.2.1 10.1.2.19
!
ip dhcp pool global //global是pool name, 由用户指定
network 10.1.0.0 255.255.0.0 //动态分配的地址段
Switch(Config)Interface Range Fa 0/9 - 16
Switch(Config-if-range)Switchport Access Vlan 3
/*将端口17-24添加到VLAN 4*/
Switch(Config)Interface Range Fa 0/17 - 24
Switch(Config)access-list 103 permit udp any any eq bootpc
器解释...)
lease 3 //地址租用期限: 3天
ip dhcp pool vlan1
network 10.1.1.0 255.255.255.0 //本pool是global的子pool, 将从global pool继承domain-name等
option
default-router 10.1.1.100 10.1.1.101 //为客户机配置默认网关
Switch(Config-vlan)Ip Address 192.168.4.1 255.255.255.0
Switch(Config-vlan)No Shut
Switch(Config-vlan)Exit
/*注意:由于此时没有将端口分配置到VLAN2,3,4,所以各VLAN会DOWN掉,待将端口分配到各VLAN后,V
2.VLAN内有部分地址采用手工分配的方式
3.为客户指定网关、Wins服务器等
4.VLAN 2的地址租用有效期限为1天,其它为3天
5.按MAC地址为特定用户分配指定的IP地址
最终配置如下:
ip dhcp excluded-address 10.1.1.1 10.1.1.19 //不用于动态地址分配的地址
Switch(Vlan)>Vlan 3 Name work01
Switch(vlan)>Vlan 4 Name work02
第二步:设置VLAN IP地址:
Switch#Config T
Switch(Config)>Int Vlan 2
Switch(Config-vlan)Ip Address 192.168.2.1 255.255.255.0
解决方案:
一,如果不用交换机的DHCP功能而是利用PC的DHCP功能!
1.在交换机上配置DHCP服务器:
ip dhcp-server 192.168.0.69
2.在交换机中为每个VLAN设置同样的DHCP服务器的IP地址:
interface Vlan11
ip address 192.168.1.254 255.255.255.0
interface ... ; spanning-tree portfast
(二) 配置方法二
一台3550EMI交换机,划分三个vlan
vlan2 为服务器所在网络,命名为server,IP地址段为192.168.2.0,子网掩码:255.255.255.0,网
关:192.168.2.1,域服务器为windows 2000 advance server,同时兼作DNS服务器,IP地址为192.168.2.10
3550作DHCP服务器,端口1-8划到VLAN 2,端口9-16划分到VLAN 3,端口17-24划分到VLAN 4.
DHCP服务器实现功能:
各VLAN保留2-10的IP地址不分配置,例如:192.168.2.0的网段,保留192.168.2.2至192.168.2.10的IP地址
段不分配.
LAN会起来*/
第三步:设置端口全局参数
Switch(Config)Interface Range Fa 0/1 - 24
Switch(Config-if-range)Switchport Mode Access
Switch(Config-if-range)Spanning-tree Portfast
vlan3为客户机1所在网络,IP地址段为192.168.3.0,子网掩码:255.255.255.0,网关:192.168.3.1命名为
work01
vlan4为客户机2所在网络,命名为work02,IP地址段为192.168.4.0,子网掩码:255.255.255.0,网
关:192.168.4.1,
host 10.1.1.21 255.255.255.0
client-identifier 010050.bade.6384 //client-identifier=01加上客户机网卡地址
!
ip dhcp pool vlan1_tom
host 10.1.1.50 255.255.255.0