EC-Win(RTOS-32)-SystemManager-Quickstart系统管理
VMWARE GSX 虚拟实现 Win2003 集群及 MsSql2k 集群(故障转移)
利用 VMWARE GSX 虚拟实现 Win2003 集群及 MsSql2k 集群(故障转移)/jszt/sqlserver/sqlserver1.html一、软件环境Windows2003 Enterprise Edition + SP1VMWare GSX Server 3.2.0 build-14497 ;Plainmaker2.5 ;( / 可下载)Sql Server2000 Enterprise EditionSql Server SP4二、步骤1、在 VMWARE GSX 中,安装 windows2003 Enterprise Edition SP1把其虚拟机文件另复制一份,分别取名为 nodeA 、 nodeB ,在原有一块网卡的基础上,再添加一个虚拟网卡;如图:2、创建仲裁盘及共享磁盘利用 Plainmaker 生成 200M 的仲裁盘和 2000M 的共享磁盘;生成方法如图所示:将两个虚拟磁盘添加进 nodeA 和 nodeB 虚拟机的磁盘中;3、分别设置两个虚拟机的仲裁盘、共享磁盘、主机名、网卡将 QDISK.pln 和 SHAREDISK.pln 添加进虚拟机中,分别设置为 SCSI 1:0 和 SCSI 1:1 ;如图:在虚拟机文件 winNetEnterprise.vmx 中加入如下内容:disk.locking="FALSE"然后启动系统,设置两块磁盘为主分区,进行格式化,格式化为 NTFS 系统;这个操作需要分别在两个节点上做。
进行网络设置如下:nodeA主机名: nodeA两个网卡分别为 public 和 privatePublicip 地址: 192.168.0.197子网掩码: 255.255.255.0网关: 192.168.0.1DNS : 192.168.0.1Privateip 地址: 10.1.1 .1子网掩码: 255.255.255.0nodeB主机名: nodeB两个网卡分别为 public 和 privatePublicip 地址: 192.168.0.198子网掩码: 255.255.255.0网关: 192.168.0.1DNS : 192.168.0.1Privateip 地址: 10.1.1 .2子网掩码: 255.255.255.04、安装 Active Directory 服务及 DNS 服务启动 nodeA ,进入“开始菜单”- > “管理工具”— > “配置服务器向导”;选择“自定义配置”如图:点击“下一步”,然后选择“域控制器”,如图:在“域控制类型”页面中,选择“新域的域控制器”,如图:在“创建一个新域”中选择“在新林中的域”,如图:点击“下一步”,输入域名“ ”;如图:在“注册诊断”的时候,会要求进行 DNS 的配置,此时选择直接安装并配置 DNS 服务;如图:在“权限”页面,选择“只与 windows2000 或 windows server 2003 操作系统兼容的权限”,如图:输入还原模式启动密码之后,点击下一步系统会自动配置域控制器和 DNS 服务,此时要求放入 win2003 企业版光盘,配置完成后,重新启动计算机。
WINDOWS故障修复台 免去重装的烦恼
WINDOWS故障修复台免去重装的烦恼下午休息,同事递给我一台笔记本,说是缺少文件,无法启动了。
拿来一看,启动时系统显示windows could not start because the following file is missing or corrupt \system2\ntoskrnl.exe please re-install a copy of the above file 按以前的做法我就直接拿GHOST恢复了,但是考虑到C盘会不会有一些重要资料,于是便没轻举妄动,先想想办法看能否修复再说。
拿出一张XP盘,从光盘启动进入故障修复台。
既然是ntoskrnl.exe 文件丢失,那就找个拷回去,可这个文件在那里呢?在网上搜索一下,发现在windows\driver cache\i386\有这个文件,可是让我迷茫的是居然利用cmd命令无论如何也进不去driver cache 这个文件夹,原因是里面有个空格。
气死我了!进入纯DOS模式,发现这个文件夹名称显示为DRIVER~1,可以进去,但在纯DOS里又不能使用EXPAND命令。
怎么办呢?灵机一动,我就在WINDOWS下又新建了一个短名称的文件夹,然后把所需要的文件拷贝进去。
再次进入故障修复台,一切OK!具体命令为:expand sp2.cab -F:ntoskrnl.exe c:\windows\system32 注意SP2.CAB就是我们需要的文件。
本以为万事大吉了,谁料系统是启动起来了,可当登陆的时候就会自动注销。
看来还是中病毒了。
再次利用故障修复台,在XP光盘的I386目录下EXPAND一个叫做userinit.ex_的文件到C盘SYSTEMS32下(expand userinit.ex_ c:\windows\system32)。
这时系统会提示成功复制一个文件userinit.exe。
然后再次输入命令(copy c:\windows\system32\userinit.exe userinit32.exe )到此就万事大吉,巧用故障修复台,免去了重装系统的危险啊!送上进入故障修复台办法:第一种方法:在xp中将故障恢复控制台加入启动菜单中:开始->运行->浏览->在xp盘上找到i386\winnt32.exe后回车,在运行对话框中已有的命令后加上一个空格,再加入/cmdcons->回车->是。
WindowsSystem32ConfigSystem文件丢失的修复方法
启动故障恢复控制台、创建临时文件夹、将现有注册表文件备份到新位置、删除现有位置的注册表文件,然后将注册表文件从修复文件夹复制到 System32\Config 文件夹中。
完成此过程之后将创建一个注册表,您可以使用此注册表启动 Windows XP具体步骤将 Windows XP 启动盘插入软盘驱动器,或将 Windows XP 安装光盘插入 CD-ROM 驱动器,然后重新启动计算机。
按照提示,单击以选中从 CD-ROM 驱动器启动计算机所需的所有选项。
出现“欢迎使用安装程序”屏幕时,按 R 键启动故障恢复控制台。
如果您使用的是双启动或多启动计算机,请从故障恢复控制台中选择要访问的安装。
按照提示,键入管理员密码。
如果管理员密码为空,则只需按 Enter 键。
在故障恢复控制台命令提示符处,键入下列几行命令,并在每行之后按 Enter 键:md tmpcopy c:\windows\system32\config\system c:\windows\tmp\copy c:\windows\system32\config\software c:\windows\tmp\copy c:\windows\system32\config\sam c:\windows\tmp\copy c:\windows\system32\config\security c:\windows\tmp\copy c:\windows\system32\config\default c:\windows\tmp\delete c:\windows\system32\config\systemdelete c:\windows\system32\config\softwaredelete c:\windows\system32\config\samdelete c:\windows\system32\config\securitydelete c:\windows\system32\config\defaultcopy c:\windows\repair\system c:\windows\system32\config\systemcopy c:\windows\repair\software c:\windows\system32\config\softwarecopy c:\windows\repair\sam c:\windows\system32\config\samcopy c:\windows\repair\security c:\windows\system32\config\securitycopy c:\windows\repair\default c:\windows\system32\config\default键入 exit 退出故障恢复控制台。
火眼金睛 快速找出设置的组策略项

火眼金睛快速找出设置的组策略项作者:俞木发来源:《电脑爱好者》2021年第03期在默认情况下,当我们运行组策略编辑器,在其中设置某个策略后,对应地就会在“C:\Windows\System32\GroupPolicy”下的Machine(对应计算机配置)和User(对应用户配置)文件夹中生成策略文件。
如果在电脑中修改了某些策略,现在需要取消,那么我们就可以通过查看其中的策略配置文件并结合策略表现来进行排查。
比如近日一个朋友的电脑,其孩子学习组策略设置,他在使用电脑时发现无法在任务栏上添加工具栏了,菜单中的选项变为灰色不可用(图1)。
结合上述提示可知道,朋友的电脑可能是在组策略中设置了一条限制添加任务栏的策略。
那么具体策略设置在哪里呢?使用记事本程序打开“C:\Windows\Svstem32\GroupPolicy\User\comment.cmtx”,其中的ns0、ns1……就分别表示在组策略编辑中更改的项目名称。
从图1可以知道这个策略是针对任务栏生效,因为任务栏位于桌面,所以可以初步判断出策略的项目应该是和comment.cmtx文件中的“Microsoft.Policies.WindOwsDesktop”代码相关。
这段代码在组策略编辑器中对应的位置是“用户配置(对应C:\Windows\System32\GroupPolicy \User文件夹)→管理模板(对应comment.cmtx中的admTemplate)→桌面(对应代码中的WindowsDesktop)”(图2)。
打开组策略编辑窗口,按提示展开上述项目,可以看到右侧窗格中的“禁止添加、拖、放和关闭任务栏的工具栏”策略被设置为“已启用”,按提示将其设置为“未配置”,故障就消除了(图3)。
当然,我们这里只是结合故障现象和comment.cmtx中更改的项目进行判断,如果无法据此作出精确的判断,那么还可以根据注册表键值的变化来进行排查。
戴尔OpenManage服务器更新实用程序2.0.0自述文件说明书

######################################################################DELL(TM) OPENMANAGE(TM) SERVER UPDATE UTILITY 2.0.0 README######################################################################This readme provides information for Dell OpenManage ServerUpdate Utility version 2.0.0.Release Date: December 2009This file also contains updated information for your "Dell OpenManageServer Update Utility User's Guide" and any other technicaldocumentation that is included with Server Update Utility (SUU).See the Dell Support website located at "" for moreinformation and to download the latest version of SUU.Note: For information on Dell Update Packages (DUP), see the DUPReadme files present on the SUU DVD.This file contains the following sections:* Criticality* Compatibility/Minimum Requirements* Release Highlights* Installation* User Notes* Known Issues###################################################################### CRITICALITY######################################################################3 - OptionalIt is recommended that you review the update procedure to determine ifit applies to your system. The update contains changes that may impactonly certain configurations, or provides new features that may/may notapply to your environment.###################################################################### COMPATIBILITY/MINIMUM REQUIREMENTS######################################################################This section provides information about the minimum requirements forSUU 2.0.0.====================================================================== SUPPORTED OPERATING SYSTEMS====================================================================== The following operating systems are supported by SUU 2.0.0:Microsoft Windows Operating Systems* Microsoft Windows Server(TM) 2003 R2 Web, Standard and EnterpriseEditions with SP2 (32-bit x86)* Microsoft(R) Windows(R) Server 2003 R2 Standard, Enterprise, and Datacenterx64 Editions with SP2* Microsoft Windows Small Business Server 2003 Standard and PremiumEditions with SP2* Microsoft Windows Server 2008 Core Web, Standard, and EnterpriseEditions (32-bit x86) with SP2* Microsoft Windows Server 2008 Core Standard, Enterprise, and DatacenterEditions (x64) with SP2* Microsoft Windows Essential Business Server 2008 Standard and PremiumEditions* Microsoft Windows Small Business Server 2008 Standard and PremiumEditions* Microsoft Windows Storage Server 2008 R2 Express, Workgroup, Standard,and Enterprise Editions* Microsoft Windows Unified Data Storage Server 2008 Workgroup, Standard,and Enterprise Editions* Microsoft Windows Server 2003 Compute Cluster Edition and MicrosoftWindows Server 2008 HPC Edition* Microsoft Windows Server™ 2008 R2 Standard, Enterprise, and Datacenter EditionsLinux Operating Systems* SUSE(R) Linux Enterprise Server 11* SUSE Linux Enterprise Server 10 SP3* Red Hat(R) Enterprise Linux(R) 5 server (Update 3) (x86_32)* Red Hat Enterprise Linux 5 server (Update 3) (x86_64)* Red Hat Enterprise Linux 4.8 server (x86_32)* Red Hat Enterprise Linux 4.8 server (x86_64)Virtualization Operating Systems* VMware(R) ESX Version 4.0 U1* VMware ESX Version 3.5 Update 5* Microsoft Hyper-V Server 2008 R2See the 'Dell Systems Software Support Matrix' for the latest list ofsupported Dell PowerEdge(TM) systems and operating systems. The 'Dell SystemsSoftware Support Matrix' is available on the Dell Support website at"/manuals."====================================================================== SUPPORTED WEB BROWSERS====================================================================== SUU 2.0.0 supports the following Web browsers:* Internet Explorer 8.0, Internet Explorer 7.0,Internet Explorer 6.0 with SP2, and Mozilla(R)Firefox(R) 3.0 for Windows 2003 Professional* Internet Explorer 8.0, Internet Explorer 7.0,Mozilla Firefox 3.0 for Windows® 7 Professional Edition* Internet Explorer 6.0 with SP2* Internet Explorer 7.0* Internet Explorer 8.0* Mozilla Firefox 3.0 and Mozilla Firefox 2.0 for :- SUSE Linux Enterprise Server 10 SP3- SUSE Linux Enterprise Server 11* Mozilla Firefox 3.0- Red Hat Enterprise Linux Version 4.8- Red Hat Enterprise Linux Version 5.3====================================================================== SUPPORTED SYSTEMS====================================================================== SUU 2.0.0 supports the following PowerEdge systems runningthe Windows operating systems listed in the "Supported OperatingSystems" section:PE T410, PE R410, PE T710, PE T310, PE R610, PE R710, PE T610, PE M610,PE M710,PE T110, PE R210, PE R510PE T100, PE 105, PE M600, PE R805, PE R900, PE T605, PE M605, PE R905v,PE T300, PE R300, PE R200,PE M805, PE 905,NX 1950, NX 3000,PE 1950, PE 2900, PE 2950, PE 1955, PE 1900, PE 840, PE 860, PE 6950,PE 2970,PE 1800, PE 1850, PE 2800, PE 2850, PE 1855, PE 800, PE 6800, PE 6850,PE 830, PE 850PE SC1425, PE SC1435SUU 2.0.0 supports the following PowerEdge systems running the supportedRed Hat Enterprise Linux and SUSE Linux operating systems:PE T410, PE R410, PE T710, PE T310, PE R610, PE R710, PE T610, PE M610,PE M710,PE T110, PE R210, PE R510PE M710,PE T110, PE R210, PE R510PE T100, PE 105, PE M600, PE R805, PE R900, PE T605, PE M605, PE R905v,PE T300, PE R300, PE R200,PE M805, PE 905,PE1950, PE2900, PE2950, PE1955, PE1900, PE840, PE860, PE6950, PE2970,PE 1800, PE 1850, PE 2800, PE 2850, PE 1855, PE 800, PE 6800, PE 6850,PE 830, PE 850PE SC1425, PE SC1435SUU 2.0.0 supports the following Dell PowerVault(TM) systems runningon the Windows operating system:PV500, PV 600, PV/NF/DP 100, DL2000SUU 2.0.0 supports the following Dell PowerVault systems runningon the Linux operating system:PV500, PV600, PV/NF/DP 100, DL2000Note: Other systems and operating systems may be supported in thisrelease. See the 'Dell Systems Software Support Matrix' for thelatest list of supported PowerEdge systems and operatingsystems. The 'Dell Systems Software Support Matrix' is availableon the Dell Support website at "/manuals."Note: Running SUU 2.0.0 on an unsupported system may produce unexpectedresults.###################################################################### RELEASE HIGHLIGHTS######################################################################Added support to the following systems:PE T110, PE R210, PE R510, PE T310Note: For a detailed table of supported Dell systems and operatingsystems, see the 'Dell Systems Software Support Matrix' availableon the Dell Support website at "/manuals."###################################################################### INSTALLATION###################################################################### SUU is a stand-alone application that runs directly from a DVD. Formore information on installing SUU, see the "Dell OpenManageServer Update Utility User's Guide."Note: Only users with administrator (Microsoft Windows) or root (Linux) privileges can perform updates with SUU.###################################################################### USER NOTES###################################################################### This section provides information to help enhance your experience withSUU in specific implementations and environments.* If you launch SUU from a command shell and then press <Ctrl><c>, theSUU procedure, as well as any running updates, will terminate.(137862)* When you launch SUU, the utility inventories the targeted system.Depending on the system configuration, this process may take severalminutes to complete. (138439)* The figures and examples in the "Dell OpenManage Server UpdateUtility User's Guide" are used as examples only and may not beidentical to the SUU GUI. (137294, 136624)* When you verify the SUU return codes, use the operating system-specific commands to view the exit codes. (137296)For example:Microsoft Windows: echo %ERRORLEVEL%Red Hat Enterprise Linux: echo $?###################################################################### KNOWN ISSUES###################################################################### This section provides information about known issues with this releaseof SUU.* If you have multiple PowerEdge Expandable RAID Controller (PERC)cards installed on a system, you may be required to run the SUUupdate procedure several times to update the firmware on all theinstalled cards.* If your CERC ATA RAID controllers are configured with the H661firmware, SUU cannot update the firmware to the latest version.To update the firmware, use the "-force" option to manually applythe DUP with the latest firmware version. (134775)* When updating multiple, identical devices on the same system, SUUapplies the latest update to all instances of all devices. Forexample, if your system is configured with three controllersconfigured with firmware/driver versions 1.2, 1.3, and 1.4,and the repository version is 1.4, SUU applies version 1.4 to allinstances of all devices. (136620)* When you run SUU using the "-p" option, SUU reports the currentinstance log location ("suu -p") instead of the SUU instance loglocation ("suu -u") that is performing the update. (135925)* SUU uses DUPs to update various system components. During a Red Hat Enterprise Linux update, the DUPs create a "/var/lock/.spsetup"file using the Linux lockfile utility during the initial executionprocedure. Kernel panics or sudden reboots during DUP execution(reboots where TERM signals are not sent to running processes orwhere running processes do not have time to catch these signals)can generate a "/var/lock/.spsetup" lock file that cannot bedeleted. SUU reports the update as successful and prompts youto reboot the system. When you run SUU again on the same system,the comparison reports no change in device status. If thissituation occurs and no update is in progress, remove"/var/lock/.spsetup" before running another update on the system.(137287)* If a NIC teaming application is installed on the system, SUU updatesthe NIC base driver only if the driver is compatible with theteaming application. To verify driver compatibility, run DUP on thesystem to update the driver and read the generated messages.(138648)* Devices that are disabled in the operating system are notinventoried or updated by SUU. To update or inventory these devices,enable the devices in the operating system and then relaunch SUU.(142111)* Do not use the RAC virtual media to run SUU remotely on a system.This procedure breaks the virtual media connection, causing the SUUupdate procedure to fail. (144487)* SUU fails if it is run from a pathname that contains specialcharacters. For example, ",:,/,\,$, etc. It is recommended to usea directory name without any special characters for runningSUU. As an example, a case where you can get directory namewith special characters is:In the SUSE Linux Enterprise Server operating system, when aUSB DVD-ROM or USB disk is attached, it may by default, mountto a directory name that contains special characters. Forexample, /media/USB:1:2/ (42279)* If a RAC DUP package (RAC 4/P or RAC 4/i) is running and SUU isstarted, the RAC package may fail. To resolve this issue, run SUUonly after the RAC package has completed execution. (23184)* In Linux, if there is not enough space in the var partition or tmpfolder, SUU displays the following error message:"Not enough space available in the /var or /tmp folder. Please makesure you have at least x MB." The value ‘x’ is the minimum amountof space required to apply the selected updates.This value varies according to the selected updates. Ensure thatyou have sufficient space in the var partition or tmp folder andrestart SUU to start the system inventory. (66118).* In some cases where the latest Intel NIC driver (Intel(R) PROPCIE Gigabit Family of Adapters 9.5, base driver version 9.6.31.0)is installed as part of Dell Systems Build and Update Utility(SBUU) install, SUU may not be able to inventory the respectiveNIC. This may happen because SBUU would not have installed theumbrella software. In these cases, install the umbrella with theumbrella installer (available at or in the SERVICEdirectory on the Dell Systems Management Tools and DocumentationDVD) to get the Intel NIC inventoried by SUU (DF130363).##################################################################### THIRD PARTY DISCLAIMER#####################################################################The following disclaimer applies to the "TreeTable" control code inIT Assistant:Copyright 1997, 1998 Sun Microsystems, Inc. All Rights Reserved.Redistribution and use in source and binary forms, with orwithout modification, are permitted provided that the followingconditions are met:- Redistributions of source code must retain the above copyrightnotice, this list of conditions and the following disclaimer.- Redistribution in binary form must reproduce the abovecopyright notice, this list of conditions, and the followingdisclaimer in the documentation and/or other materialsprovided with the distribution.Neither the name of Sun Microsystems, Inc. or the names ofcontributors may be used to endorse or promote products derivedfrom this software without specific prior written permission.This software is provided "AS IS," without a warranty of anykind. ALL EXPRESS OR IMPLIED CONDITIONS, REPRESENTATIONS ANDWARRANTIES, INCLUDING ANY IMPLIED WARRANTY OF MERCHANTABILITY, FITNESS FOR A PARTICULAR PURPOSE OR NON-INFRINGEMENT, ARE HEREBY EXCLUDED. SUN AND ITS LICENSORS SHALL NOT BE LIABLE FOR ANYDAMAGES OR LIABILITIES SUFFERED BY LICENSEE AS A RESULT OF ORRELATING TO USE, MODIFICATION OR DISTRIBUTION OF THIS SOFTWARE ORITS DERIVATIVES. IN NO EVENT WILL SUN OR ITS LICENSORS BE LIABLEFOR ANY LOST REVENUE, PROFIT OR DATA, OR FOR DIRECT, INDIRECT,SPECIAL, CONSEQUENTIAL, INCIDENTAL OR PUNITIVE DAMAGES, HOWEVER CAUSED AND REGARDLESS OF THE THEORY OF LIABILITY, ARISING OUT OF THE USE OF OR INABILITY TO USE THIS SOFTWARE, EVEN IF SUN HASBEEN ADVISED OF THE POSSIBILITY OF SUCH DAMAGES.You acknowledge that this software is not designed, licensed orintended for use in the design, construction, operation ormaintenance of any nuclear facility.###################################################################### Information in this document is subject to change without notice.(C) 2004-2009 Dell Inc. All rights reserved.Reproduction in any manner whatsoever without the written permissionof Dell is strictly forbidden.Trademarks used in this text: "Dell", "PowerEdge", "PowerVault", and"Dell OpenManage" are trademarks of Dell Inc.; "Microsoft","Windows", "Windows Server", and "Internet Explorer" are eithertrademarks or registered trademarks of Microsoft Corporation in theUnited States and/or other countries; "Red Hat" and "Red Hat EnterpriseLinux" are registered trademark of Red Hat Linux, Inc.; "SUSE" is aregistered trademark of Novell, Inc. in the United States and othercountries; "Intel" is a registered trademark of Intel Corporation.;"Mozilla" and "Firefox" are registered trademarks of Mozilla.Other trademarks and trade names may be used in this document to referto either the entities claiming the marks and names or their products.Dell Inc. disclaims any proprietary interest in trademarks and tradenames other than its own.The utilities provided with the Dell OpenManage Server Update Utilityare provided "as is". Dell disclaims any and all warranties, express,implied or statutory, with respect to the utilities, including, butnot limited to, the implied warranties of merchantability, fitness fora particular purpose, title and any warranty of non-infringement. Usethe Server Update Utility at your own risk. Dell shall not be liablefor any direct or indirect damages incurred in using the Server UpdateUtility. In no event shall Dell or its suppliers be responsible forany direct or indirect damages whatsoever (including, withoutlimitation, damages for loss of profits, loss of use, loss of data,business interruption, or other pecuniary loss, nor for punitive,incidental, consequential, or special damages of any kind, under anypart of this agreement, even if advised or aware of the possibility ofsuch damage).October 2009。
怎样修复“WindowsSystem32ConfigSystem中文件丢失或损坏”故障

怎样修复“WindowsSystem32ConfigSystem中⽂件丢失或损坏”故障怎样修复“Windows/System32/Config/System中⽂件丢失或损坏”故障此类错误通常说明计算机由于注冊表的原因不能启动,下列操作应该可以修正以上错误。
然⽽,须要特别注意的是,你须要将5个注冊表区域所有进⾏替换。
仅仅简单的替换⼀个或者两个将会潜在的导致其它的错误注意假设你使⽤的是WindowsXP的OEM版本号,那么你不应该⽤法2。
否则,你的操作系统将不再可⽤。
OEM安装版本号创建了事先不存在的username和password。
因此,对于你个⼈来讲,以下的操作指导不会解决这个问题。
对于OEM版本号XP的最简单⽅法是使⽤制造商提供的恢复盘⼜⼀次安装XP系统简单⽅法1/重新启动机器2/按住F8键,直到出现菜单3/菜单出现后,使⽤⽅向键选择“近期⼀次正确的配置”选项4/按回车键5/此时,计算机应该⼜⼀次安装近期⼀次的正常启动所使⽤的配置⽂件6/重新启动计算机7/假设仍然存在问题,那么採⽤以下的复杂⽅法复杂⽅法第⼀步1/将Windows XP的安装光盘放⼊光驱,重新启动计算机2/在“欢迎使⽤安装程序”界⾯,按R键,进⼊恢复控制台3/在恢复控制台中会显⽰当前Windows的安装列表4/你须要依据你所安装的Windows XP系统的路径选择对应的数字。
假设你只安装了⼀个单系统,那么应该选择15/此时,须要你输⼊管理员Administrator⽤户的password。
假设你曾经没有设过此password,那么直接按回车键就可以6/假设password正确,那么将恢复控制台提⽰符,进⼊恢复控制台命令交互界⾯7/在恢复控制台提⽰符后键⼊下述命令,每⼀⾏命令⽤回车键结束md tmpcopy c:/windows/system32/config/system c:/windows/tmp/system.bakcopy c:/windows/system32/config/software c:/windows/tmp/software.bakcopy c:/windows/system32/config/sam c:/windows/tmp/sam.bakcopy c:/windows/system32/config/security c:/windows/tmp/security.bakcopy c:/windows/system32/config/default c:/windows/tmp/default.bakdelete c:/windows/system32/config/systemdelete c:/windows/system32/config/softwaredelete c:/windows/system32/config/samdelete c:/windows/system32/config/securitydelete c:/windows/system32/config/defaultcopy c:/windows/repair/system c:/windows/system32/config/systemcopy c:/windows/repair/software c:/windows/system32/config/softwarecopy c:/windows/repair/sam c:/windows/system32/config/samcopy c:/windows/repair/security c:/windows/system32/config/securitycopy c:/windows/repair/default c:/windows/system32/config/default8/在上述命令运⾏完成后,键⼊Exit,退出恢复控制台9/重新启动计算机第⼆步10/计算机⼜⼀次启动后使⽤Administrator⾝份登录。
赛门铁克产品中文知识库文档列表

1. 赛门铁克产品中文知识库文档列表 (1)2. Symantec Endpoint Protection (SEP) 简体中文文档汇总(持续更新) (2)3. Symantec Endpoint Protection 11.0 主要文章 (8)4. NetBackup (NBU) 简体中文文档汇总(持续更新) (12)5. Backup Exec for Windows Servers (BEWS) 简体中文文档汇总(持续更新) (20)6. Backup Exec System Recovery (BESR) 简体中文文档汇总(持续更新) (30)7. Symantec Brightmail Gateway (SBG) 简体中文文档汇总(增加中) (34)8. Symantec Information Foundation 产品简体中文文档归总(持续更新) (35)9. Cluster Server (VCS) 简体中文文档汇总(持续更新) (38)10. Enterprise Vault (EV) 简体中文文档汇总(持续更新) (39)11. Storage Foundation (SF) 简体中文文档汇总(持续更新) (41)12. Volume Manager(VxVM)简体中文文档汇总(持续更新) (44)13. Volume Replicator (VVR) 简体中文文档汇总(持续更新) (45)1.赛门铁克产品中文知识库文档列表service1.symantec./SUPPORT/INTER/ent-securitysimplifiedchinesekb.nsf/cn_docid/本文档翻译自英文文档。
原英文文档可能在本翻译版发布后进行过修改更新。
赛门铁克对本翻译文档的准确度不做保证。
情形按照产品分类,将现有中文知识库文档汇总,以方便各位查阅。
解释Security (安全产品)•Symantec Endpoint Protection (SEP)•Symantec Brightmail Gateway (SBG)•Symantec Mail Security for SMTP (SMS)Availability (存储产品)•Symantec Backup Exec (BEWS)•Symantec Backup Exec System Recovery (BESR)•Symantec Cluster Server (VCS)•Symantec Enterprise Vault (EV)•Symantec NetBackup (NBU)•Storage Foundation (SF)•Symantec Volume Manager (VxVM)•Symantec Volume Replicator (VVR)•文档号:最近更新: 2009-12-02Date Created: 2009-10-15产品: All Products2.Symantec Endpoint Protection (SEP) 简体中文文档汇总(持续更新)本文档翻译自英文文档。
Windows Server 2003 SP1系统加速问题一则

Windows Server 2003 SP1系统加速问题一则
SavEn
【期刊名称】《电脑迷》
【年(卷),期】2008(000)021
【摘要】由于工作需要,笔者最近将系统由Windows XP升级至Windows Server 2003 SP1。
机器配置为映泰TA780G主板,AMD Athlon 64 X25000+处理器,使用了4GB内存,显卡
【总页数】1页(P47-47)
【作者】SavEn
【作者单位】
【正文语种】中文
【中图分类】TP316.7
【相关文献】
1.Windows Server 2003 SP1 RC抢先报道 [J], 张妙凤
2.Windows Server 2003 SP1浮出水面 [J], 无
3.让服务器更安全——Windows Server 2003 SP1安全配置向导 [J], 孙成
4.Windows Server 2003 SP1中的6大安全改进 [J], JackieLiu
5.Windows Server2003 Service Pack1的故事——微软讲述 Windows Server 2003 SP1的故事——3位关键的SP1参与者展示发布路线图以及SP1的新安全功能和修复程序 [J], KarenForster; 林颖华
因版权原因,仅展示原文概要,查看原文内容请购买。
Windows NT类的操作系统启动菜单
Windows NT类的操作系统,也就是Windows NT/2000/XP中,有一个特殊文件,也就是“BOOT.INI”文件,这个文件会很轻松地按照我们的需求设置好多重启动系统。
“BOOT.INI”文件会在已经安装了Windows NT/2000/XP的操作系统的所在分区,一般默认为C:\下面存在。
但是它默认具有隐藏和系统属性,所以你要设置你的文件夹选项,以便把“BOOT.INI”文件显示出来。
我们可以用任何一种文本编辑器来打开他它。
一般情况下,它的内容如下:[boot loader]timeout=30default=multi(0)disk(0)rdisk(0)partition(1)\Windows[operating systems]multi(0)disk(0)rdisk(0)partition(1)\Windows="Microsoft Windows XP Professional" /fastdetect在Windows 2000或者是XP系统中,我们可以很容易的设置“BOOT.INI”文件。
那就是在“我的电脑”上面点击右键,选择“属性”打开“系统属性”对话框,再点击“高级”选项卡,在“启动和故障修复”里面点击“设置”按钮,就可以打开“启动和故障修复”对话框了,在这里面我们就可以对它进行详细设置。
如果你拥有Windows XP操作系统,那么你可以用“系统配置实用程序”来更方便的编辑“BOOT.INI”文件。
具体做法是:打开“开始”菜单,点击“运行”命令,再在弹出的文本框中输入“msconfig”点击“确定”后就会弹出“系统配置实用程序”,再点击“BOOT.INI”选项卡,就会出现如图所示的界面。
在这里,我们可以很方便地设置文件。
言归正传,现在,来说明一下这个文件内容的含义。
1.系统加载部分([boot loader])这一部分很简单,只有两个设定。
那就是“timeout=”和“default=”。
如何修复System中文件丢失或损坏
windows/system32/config/system损坏或丢失解决方法2012-5-7同事一台电脑移动一下位置,结果出现这种情况了,试过以下网上的方法都不行.经我的折腾最后弄好了!现在分享一下自己的经历!1.先找硬件问题,插插内存,换换内存2.问题依旧,可能就是部正常关机或者硬盘有坏道引起system文件损坏了。
3.先进PE把system文件备份一份!!!能备份成功的话,说明尚有可能修复,不能的话,90%恢复不了,硬盘有坏道了!4.按网上的步骤一步步来;拷贝,修复,最后一次配置。
都不行的话可以试试下面的方法5.死马当活马医,进pe修改system!随便修改一下保存退出。
重启试试!不行,按最后一次配置。
不行,进PE恢复文件,搜索SYSTEM,拷出,替换!不行,最后一次配置!6.好了,我同事电脑就到这个步骤就能进系统了!!因以下文的损坏或丢失windows/system32/config/system 解决方法收藏这是因为你电脑的初始化文件遭破坏所致。
导致破坏的原因也可能是病毒或其他原因。
由于Windows启动需要读取System.ini,Win.ini和注册表文件,如果C盘根目录下有config.sys,Autoexec.bat 文件,这两个文件也会被读取。
只要这些文件存在错误信息就可能出现死机。
1,这个问题多半是由于内存条质量原因引起,请先检查与更换内存测试2,硬盘坏道,请修复。
3,以上都不是的话,请用以下方法当XP启动不起来并提示以下文件损坏或丢失windows无法启动WINDOWS/system32/config/system 需要光盘启动按"r"修复时,采用这种办法前提是你必须能重启到DOS下,如果你的系统是NTFS的话,那还要DOS支持才行;请用相关启动光盘或MaxDOS启动到DOS下先到windows/repair目录里然后copy system c:/windows/system32/config/system这样就可以重启到桌面了但这样你以前的设置就全没了,这是恢复到你第一次启动到桌面时的配置,你还要重新安装你的驱动和设置如何是用windows 2000系统也出现这个提示:C:/winnt/system32/config/system 或者c:/winnt/system32/drivers/ntfs.sys文件丢失,方法也是可以用2000的系统安装光盘进入安装界面按R键进行修复.如何不用是用2000还是用XP同样出现这两种问题的话,我想一定是硬件有问题,第一可能内存有质量问题(特别是旧内存),第二有可能是硬盘的问题,旧硬盘出现比较多一些.电脑显示system文件丢失。
西门子数控系统 常见问题及解答
Q1. 840D OEM显示故障A:机床制造厂家在HMI安装使用PROGRAM PACKAGE等软件编制的画面,修改了HMI原有的菜单系统,所以请参考机床生产厂家的使用说明书,完成数据恢复操作。
Q2. HMI与NCU的版本配置有什么要求?A: NCU更换为572.3, PC卡更换为05.03.42, 问题解决。
注:关于HMI与NCU兼容表,请您与本地的西门子办事处联系。
Q3. 840D密码问题A: 如果条件允许,可按下面的方法试试:备份好NC, PLC数据清NC数据读回备份的NC数据此时,制造商的密码又是SUNRISE了Q4. 840D面板故障A: 1. 检查MPI电缆2. MCP面板保险丝Q5. 840D取消屏保的方法A: 开F盘的mmc2.ini可以改变时间。
在系统上,按如下步骤操作:Start up->MMC->Editor编辑F:\MMC2\MMC.INI文件中MMCScreenOffTimeInMinutes = 5; latency for screen saver将设定值改为0,即可。
Q6. 请教810D系统PCU 50上的USB口如何激活?A: 首先,HMI的操作系统必须是Windows XP系统。
需要修改一下F:\MMC2\MMC.INI文件(打开文件方法见问题5)。
找到其中的FloppyDisk=A:改为FloppyDisk=G:因为系统有C,D,E,F四个驱动器,当U盘插上后,系统自动默认其为G盘。
看到这儿,大家都应该明白了,修改过后,所有界面上对软盘的操作都变成了对U盘的操作。
如果需要软盘和U盘同时有效,需要安装其他软件。
Q7. 谁知道880系统的口令?A: 默认是1111,如果自己改过但忘记了,可以用下面指令读出(在MDI或程序中输入然后执行):@300 R1 K11此指令是把第11号参数读入R1,然后查看R1,就知道密码了。
Q8. 机床黑屏问题A: 液晶显示屏有个”四怕”:怕进水:不要让任何带有水分的东西进入LCD。
StarWind iSCSI SAN 软件:使用 StarWind 和 Symantec Backu

Copyright © StarWind Software 2008-2011. All rights reserved.StarWind iSCSI SAN Software: Tape Drives UsingStarWind and Symantec Backup ExecCOPYRIGHTCopyright © StarWind Software 2008-2011. All rights reserved. No part of this publication may be reproduced, stored in a retrieval system, or transmitted in any form or by any means, electronic, mechanical, photocopying, recording or otherwise, without the prior written consent of StarWind Software.TRADEMARKS“StarWind”, “StarWind Software” and the StarWind and the StarWind Software logos are trademarks of StarWind Software which may be registered in some jurisdictions. All other trademarks are owned by their respective owners.CHANGESThe material in this document is for information only and is subject to change without notice. While reasonable efforts have been made in the preparation of this document to assure its accuracy, StarWind Software assumes no liability resulting from errors or omissions in this document, or from the use of the information contained herein. StarWind Software reserves the right to make changes in the product design without reservation and without notification to its users.TECHNICAL SUPPORT AND SERVICESIf you have questions about installing or using this software, check this and other documents first - you will find answers to most of your questions here or there. If you need further assistance, please contact us.Table of ContentsIntroduction (4)Provisioning the Tape Device (5) (11)Connecting to a Remote Device using iSCSI InitiatorSymantec Backup Exec (18) (18)Configuring Symantec Backup ExecPerforming backup (38)Restoring data (50)GuideIntroductionStarWind enables tape drives to be exported over a standard IP network. This allows you to use a centralized tape drive that can be accessed by any client machine as though it had a locally attached tape drive.This document provides basic step-by-step instructions for configuring StarWind to use Symantec Backup Exec with a exported tape drive. For information about Symantec Backup Exec such as system requirements, compatibility, release notes, technical support, etc., please visit.Provisioning the Tape DeviceLaunch the StarWind console selecting Start -> All Programs -> StarWind Software -> StarWind -> StarWind. After the console is launched its icon appears in the system tray. Double click the icon with the left mouse button or single click it with the right and select Start Management pup-up menu item. From the StarWind Servers tree please select the server you want to connect to. Press the right mouse button over the desired host and select the Connect popup menu item. You will be prompted to enter the login and password. Default ones are: root, starwind. You can always change them later.Press Add Target button to continue.In the Wizard that appears, specify a target name. The name must be a unique name by which the device will be declared to the iSCSI initiators connecting to StarWind over an IP network.Press the Next button to continue.Select Tape device.Press the Next button to continue.Select Create new virtual disk to create a new hard disk image or Mount existing virtual disk to mount an existing image that you’ve prepared before.Press the Next button to continue.If you have decided to create a new virtual disk, specify the location and the name of the virtual disk you want to be created. The virtual disk size is specified in megabytes. Refer to the online help for details regarding additional parameters (Fill with zeroes,Compressed and Encrypted).Press the Next button to continue.Check the device parameters are correct. Press the Back button should any changes be required.Press the Next button to continue.A summary of the created device is displayed on the last wizard page (see image below).Press the Finish button to close the wizard.Connecting to a Remote Device using iSCSI InitiatorLaunch Computer Management console. Note that it currently shows no tape devices connected.Launch the Microsoft iSCSI Software Initiator applicationStart->All Programs->Microsoft iSCSI Initiator-> Microsoft iSCSI Initiator. Switch to the Discovery tab.In the Target Portals group press the Add button.In the ‘Add Target Portal’ dialog, type in the IP address of the StarWind server and port number assigned to StarWind (default : 3260).Press the OK button.Switch to the Targets tab. Select the target name from the list (if no targets are listed, press the Refresh button).Press the Log On… button.The Log On to Target dialog window appearsPress the OK button.If the logon is successful, the iSCSI device will show as ‘Connected’. It may take a few seconds for the device to appear in Windows.After these steps the tape device will appear as a local device.Symantec Backup ExecConfiguring Symantec Backup ExecThe Getting Started Wizard appears when Symantec Backup Exec has not previously been started.Click on the "Step 1 - Create Logon Accounts"A Logon Account Wizard window will appear.Press the Next button to continue.Select the "Add a new logon account" option.Press the Next button to continue.Enter the credentials for the user.Press the Next button to continue.Type a meaningful account name for this logon account.Press the Next button to continue.Choose to make logon account restricted or common.Press the Next button to continue.Select if the account should be a default one.Press the Next button to continue.Verify the settings for the logon account. Press the Back button if changes are required.Press the Next button to continue.Optionally Check the Add… checkbox to add another logon account.Press the Finish button.You will be returned back to the Getting started page.Click on the "Step 2 - Configure Devices"The Device Configuration Wizard window will appear.Press the Next button.Backup Exec will review the devices available for performing backups.Press the Next button.Select the "Install tape device drivers" option.Press the Next button.Driver Installer window will appear.Press the Next button.Installer warns that driver does not support USB tape drives, if you are using one - refer to the device vendors for the drivers.Press the Next button to continue or close the wizard and install the drivers manually if you're using a USB tape drive.Select "Use Symantec tape driversfor all supported tape devices".Press the Next button.The installer will scan your system for supported tape drives.Press the Next button.The installer indicates the drivers have been successfully installed.Press the Next button.Driver installation is complete.Press the Finish button to continue.Once again you will be returned to the Getting Started window.Close the window.Performing backupOpen the BackupExec application.Press the Backup button to continue.A Backup wizard window will appear.Select the "Create a backup job with custom settings"Press the Next button to continue.Select the data to be backed up.Press the Next button to continue.Specify the logon account for the resource if needed. Then test all the resources.Press the Next button to continue.Select the order in which the volumes will be backed up.Press the Next button to continue.Specify a meaningful name for your backup job.Press the Next button to continue.Select the destination backup device.Press the Next button to continue.Specify the overwrite options.Press the Next button to continue.Select backup options.Press the Next button to continue.Complete the backup wizard by selecting whether to run the job now or schedule it for later.Press the Finish button to continue.The information dialog appearsPress the OK button.Switch to Job Monitor. Here you can see all the backup process.Restoring dataOpen Backup Exec application.Press the Restore button to continue.。
开始→运行(cmd)命令大全(绝对经典)

开始→运行(cmd)命令大全(绝对经典)CMD运行指令开始→运行→CMD→键入以下命令即可:gpedit.msc-----组策略sndrec32-------录音机Nslookup-------IP地址侦测器explorer-------打开资源管理器logoff---------注销命令tsshutdn-------60秒倒计时关机命令lusrmgr.msc----本机用户和组services.msc---本地服务设置oobe/msoobe /a----检查XP是否激活notepad--------打开记事本cleanmgr-------垃圾整理net start messenger----开始信使服务compmgmt.msc---计算机管理net stop messenger-----停止信使服务conf-----------启动netmeetingdvdplay--------DVD播放器charmap--------启动字符映射表diskmgmt.msc---磁盘管理实用程序calc-----------启动计算器dfrg.msc-------磁盘碎片整理程序chkdsk.exe-----Chkdsk磁盘检查devmgmt.msc--- 设备管理器regsvr32 /u *.dll----停止dll文件运行drwtsn32------ 系统医生rononce -p ----15秒关机dxdiag---------检查DirectX信息regedt32-------注册表编辑器Msconfig.exe---系统配置实用程序rsop.msc-------组策略结果集mem.exe--------显示内存使用情况regedit.exe----注册表winchat--------XP自带局域网聊天progman--------程序管理器winmsd---------系统信息perfmon.msc----计算机性能监测程序winver---------检查Windows版本sfc /scannow-----扫描错误并复原winipcfg-------IP配置taskmgr-----任务管理器(2000/xp/2003)command--------cmdfsmgmt.msc 共享文件夹netstat -an----查看端口osk 屏幕键盘install.asp----修改注册网页eventvwr.msc 时间查看器secpol.msc 本地安全设置services.msc 服务2Kaccwiz.exe > 辅助工具向导acsetups.exe > acs setup dcom server executableactmovie.exe > 直接显示安装工具append.exe > 允许程序打开制定目录中的数据arp.exe > 显示和更改计算机的ip与硬件物理地址的对应列表at.exe > 计划运行任务atmadm.exe > 调用管理器统计attrib.exe > 显示和更改文件和文件夹属性autochk.exe > 检测修复文件系统autoconv.exe > 在启动过程中自动转化系统autofmt.exe > 在启动过程中格式化进程autolfn.exe > 使用长文件名格式bootok.exe > boot acceptance application for registry bootvrfy.exe > 通报启动成功cacls.exe > 显示和编辑aclcalc.exe > 计算器cdplayer.exe > cd播放器change.exe > 与终端服务器相关的查询charmap.exe > 字符映射表chglogon.exe > 启动或停用会话记录chgport.exe > 改变端口(终端服务)chgusr.exe > 改变用户(终端服务)chkdsk.exe > 磁盘检测程序chkntfs.exe > 磁盘检测程序cidaemon.exe > 组成ci文档服务cipher.exe > 在ntfs上显示或改变加密的文件或目录cisvc.exe > 索引内容ckcnv.exe > 变换cookiecleanmgr.exe > 磁盘清理cliconfg.exe > sql客户网络工具clipbrd.exe > 剪贴簿查看器clipsrv.exe > 运行clipboard服务clspack.exe > 建立系统文件列表清单cluster.exe > 显示域的集群_cmd_.exe > 没什么好说的!cmdl32.exe > 自动下载连接管理cmmgr32.exe > 连接管理器cmmon32.exe > 连接管理器监视cmstp.exe > 连接管理器配置文件安装程序comclust.exe > 集群comp.exe > 比较两个文件和文件集的内容*compact.exe > 显示或改变ntfs分区上文件的压缩状态conime.exe > ime控制台control.exe > 控制面板convert.exe > 转换文件系统到ntfsconvlog.exe > 转换iis曰志文件格式到ncsa格式cprofile.exe > 转换显示模式cscript.exe > 较本宿主版本csrss.exe > 客户服务器runtime进程csvde.exe > 曰至格式转换程序dbgtrace.exe > 和terminal server相关dcomcnfg.exe > dcom配置属性dcphelp.exe >dcpromo.exe > ad安装向导ddeshare.exe > dde共享ddmprxy.exe >debug.exe > 就是debug啦!dfrgfat.exe > fat分区磁盘碎片整理程序dfrgntfs.exe > ntfs分区磁盘碎片整理程序dfs_cmd_.exe > 配置一个dfs树dfsinit.exe > 分布式文件系统初始化dfssvc.exe > 分布式文件系统服务器diantz.exe > 制作cab文件diskperf.exe > 磁盘性能计数器dllhost.exe > 所有com+应用软件的主进程dllhst3g.exe >dmadmin.exe > 磁盘管理服务dmremote.exe > 磁盘管理服务的一部分dns.exe > dns applications dnsdoskey.exe > 命令行创建宏dosx.exe > dos扩展dplaysvr.exe > 直接运行帮助drwatson.exe > 华生医生错误检测drwtsn32.exe > 华生医生显示和配置管理dtcsetup.exe > installs mdtcdvdplay.exe > dvd播放dxdiag.exe > direct-x诊断工具edlin.exe > 命令行的文本编辑器(历史悠久啊!)edlin.exe > 命令行的文本编辑器(历史悠久啊!)esentutl.exe > ms数据库工具eudcedit.exe > type造字程序eventvwr.exe > 事件查看器evnt_cmd_.exe > event to trap translator; configuration tool evntwin.exe > event to trap translator setupexe2bin.exe > 转换exe文件到二进制expand.exe > 解压缩extrac32.exe > 解cab工具fastopen.exe > 快速访问在内存中的硬盘文件faxcover.exe > 传真封面编辑faxqueue.exe > 显示传真队列faxsend.exe > 发送传真向导faxsvc.exe > 启动传真服务fc.exe > 比较两个文件的不同find.exe > 查找文件中的文本行findstr.exe > 查找文件中的行finger.exe > 一个用户并显示出统计结果fixmapi.exe > 修复mapi文件flattemp.exe > 允许或者禁用临时文件目录fontview.exe > 显示字体文件中的字体forcedos.exe > forces a file to start in dos mode. 强制文件在dos模式下运行freecell.exe > popular windows game 空当接龙ftp.exe > file transfer protocol used to transfer files over a network connection 就是ftp了gdi.exe > graphic device interface 图形界面驱动grovel.exe >grpconv.exe > program manager group convertor 转换程序管理员组help.exe > displays help for windows 2000 commands 显示帮助hostname.exe > display hostname for machine. 显示机器的hostnameie4uinit.exe > ie5 user install tool ie5用户安装工具ieshwiz.exe > customize folder wizard 自定义文件夹向导iexpress.exe > create and setup packages for install 穿件安装包iisreset.exe > restart iis admin service 重启iis服务internat.exe > keyboard language indicator applet 键盘语言指示器ipconfig.exe > windows 2000 ip configuration. 察看ip配置ipsecmon.exe > ip security monitor ip安全监视器ipxroute.exe > ipx routing and source routing control program ipx路由和源路由控制程序irftp.exe > setup ftp for wireless communication 无线连接ismserv.exe > intersite messaging service 安装或者删除service control manager中的服务jdbgmgr.exe > microsoft debugger for java 4 java4的调试器jetconv.exe > convert a jet engine database 转换jet engine数据库jetpack.exe > compact jet database. 压缩jet数据库jview.exe > command-line loader for java java的命令行装载者krnl386.exe > core component for windows 2000 2000的核心组件label.exe > change label for drives 改变驱动器的卷标lcwiz.exe > license compliance wizard for local or remote systems. 许可证符合向导ldifde.exe > ldif cmd line manager ldif目录交换命令行管理licmgr.exe > terminal server license manager 终端服务许可协议管理lights.exe > display connection status lights 显示连接状况llsmgr.exe > windows 2000 license manager 2000许可协议管理llssrv.exe > start the license server 启动许可协议服务器lnkstub.exe >locator.exe > rpc locator 远程定位lodctr.exe > load perfmon counters 调用性能计数logoff.exe > log current user off. 注销用户lpq.exe > displays status of a remote lpd queue 显示远端的lpd打印队列的状态,显示被送到基于unix的服务器的打印任务lpr.exe > send a print job to a network printer. 重定向打印任务到网络中的打印机。
戴尔 EMC OpenManage 集成 for Microsoft System Center V
用于系统中心配置管理器和系统中心虚拟机管理器的 Dell EMC OpenManage Integration for Microsoft System Center V7.1安装指南注、小心和警告注: “注”表示帮助您更好地使用该产品的重要信息。
小心: “小心”表示可能会损坏硬件或导致数据丢失,并说明如何避免此类问题。
警告: “警告”表示可能会造成财产损失、人身伤害甚至死亡。
© 2009 - 2019 Dell Inc. 或其子公司。
保留所有权利。
Dell、EMC 和其他商标是 Dell Inc. 或其附属机构的商标。
其他商标可能是其各自所有者的商标。
2019 - 01Rev. A001 OMIMSSC 简介 (5)2 OMIMSSC 组件 (6)3 安装或管理 OMIMSSC 的工作流程 (7)规划在 SCCM 上安装 OMIMSSC (7)规划在 SCVMM 上安装 OMIMSSC (7)Planning for upgrading OMIMSSC (8)从一个 OMIMSSC 设备迁移到另一个 OMIMSSC 设备 (8)4 OMIMSSC 的系统要求 (9)帐户权限 (9)OMIMSSC 的一般系统要求 (9)SCCM 的 OMIMSSC 控制台扩展的系统要求 (10)SCVMM 的 OMIMSSC 控制台扩展的系统要求 (10)网络要求 (10)5 安装和配置 OMIMSSC (12)从 Web 下载 OMIMSSC (12)Setting up OMIMSSC Appliance (12)登记多个 Microsoft 控制台 (13)启动 OMIMSSC 管理员门户以下载 OMIMSSC 组件 (13)安装 SCCM 的 OMIMSSC 控制台扩展 (14)安装 SCVMM 的 OMIMSSC 控制台扩展 (14)在 OMIMSSC 中登记 Microsoft 控制台 (14)从已登记的 Microsoft 控制台启动 OMIMSSC (15)在浏览器中添加 OMIMSSC IP 地址 (15)启动 SCCM 的 OMIMSSC 控制台扩展 (15)启动 SCVMM 的 OMIMSSC 控制台扩展 (16)6 OMIMSSC 许可 (17)上传许可证之后的选项 (17)新购买过程中的许可证文件 (17)堆叠许可证 (17)更换许可证 (18)重新导入许可证 (18)导入多个许可证 (18)强制执行措施 (18)升级许可证 (18)评估许可证 (18)在服务器查找后在 OMIMSSC 中占用许可证 (18)目录3将许可证导入到 OMIMSSC (18)查看许可证详情 (19)7 管理 OMIMSSC 及其组件 (20)查看 OMIMSSC 设备详细信息 (20)查看 OMIMSSC 用户管理 (20)查看或刷新已登记的控制台 (20)更改 OMIMSSC 设备密码 (20)修复或修改安装程序 (20)修复适用于 SCCM 的 OMIMSSC 控制台扩展 (21)修复适用于 SCVMM 的 OMIMSSC 控制台扩展 (21)在 OMIMSSC 管理员门户中修改 SCCM 和 SCVMM 帐户 (21)备份 OMIMSSC 设备 (21)执行 OMIMSSC 设备备份 (22)还原 OMIMSSC 设备 (22)还原 OMIMSSC 设备 (22)升级 OMIMSSC (23)关于服务包更新 (23)升级 SCCM 的 OMIMSSC 控制台扩展 (25)升级 SCVMM 的 OMIMSSC 控制台扩展 (25)重新引导 OMIMSSC 设备 (26)注销 OMIMSSC 设备 (26)卸载 OMIMSSC (26)从 OMIMSSC 中取消登记 Microsoft 控制台 (26)卸载适用于 SCCM 的 OMIMSSC 控制台扩展 (27)卸载 SCVMM 的 OMIMSSC 控制台扩展 (27)其他卸载步骤 (27)移除设备 VM (28)8 访问 Dell EMC 支持站点上的文档 (29)联系戴尔 (29)4目录OMIMSSC 简介OpenManage Integration for Microsoft System Center (OMIMSSC) 提供集成到产品的 System Center 套件的功能。
解决win10系统的10016错误代码造成的
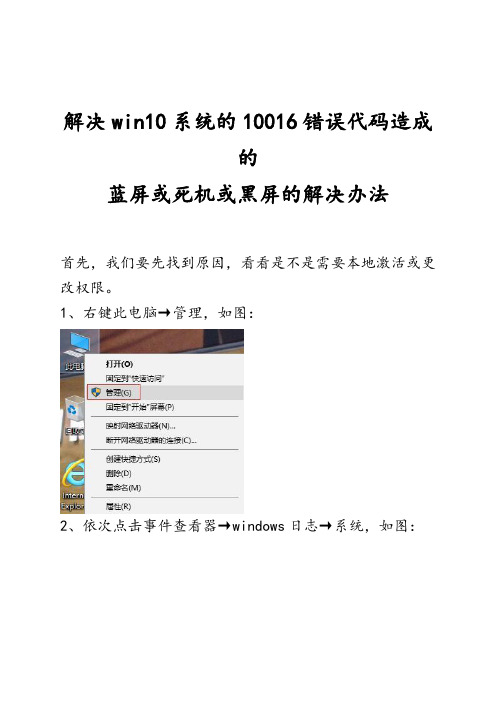
解决win10系统的10016错误代码造成的蓝屏或死机或黑屏的解决办法首先,我们要先找到原因,看看是不是需要本地激活或更改权限。
1、右键此电脑→管理,如图:2、依次点击事件查看器→windows日志→系统,如图:3、稍等片刻就有了,让后到右边窗口双击其中一个,如图:我这个比较严重,有6个这样的代码。
应用程序-特定权限设置并未向在应用程序容器不可用SID (不可用)中运行的地址 LocalHost (使用 LRPC) 中的用户 NT AUTHORITY\LOCAL SERVICE SID (S-1-5-19)授予针对 CLSID 为{6B3B8D23-FA8D-40B9-8DBD-B950333E2C52}、APPID 为{4839DDB7-58C2-48F5-8283-E1D1807D0D7D}的COM 服务器应用程序的本地激活权限。
此安全权限可以使用组件服务管理工具进行修改嗯没错,全是这个{6B3B.....和{4839.....造成的!!!!那么我们就需要解决一下了。
其次,那么我们就需要解决一下了。
1、按WIN+R或右键开始→运行,输入regedit→确定,进入注册表,如图:打开之后,直接选中第一个。
2、按CTRL+F或点击编辑→查找,复制刚刚的{6B3B8D23-FA8D-40B9-8DBD-B950333E2C52},找到它。
如图:3、右键此项→权限,如图:4、点击你所使用的用户名或管理员,勾选下面的两个勾,点击高级,如图:5、点击更改,如图:点击高级,如图:点击立即查找,如图:找到你所使用的用户名或管理员,点两次确定。
同理,给{4839DDB7-58C2-48F5-8283-E1D1807D0D7D}也这样修改一下。
最后,我们需要彻底解决它了!!!!1、点击开始→找到windows系统→控制面板,如图:2、查看方式更改为大图标,如图:依次找到管理工具→组件服务,如图:3、双击打开组件服务,点击前面的箭头就可以了,如图:4、找到ShellServiceHost,按下S就能很快定位了,右键此项→属性。
NetApp磁盘阵列安装手册
NetApp磁盘阵列安装手册目录目录 (1)一、磁盘阵列的系统安装 (2)1.1初始化磁盘阵列 (2)1.2输入license序列号 (8)1.3配置CIFS (9)1.4在机头中安装阵列操作系统 (11)二、磁盘阵列的SSL安全认证配置 (13)2.1通过浏览器来管理磁盘阵列 (13)2.2配置SSL安全认证 (15)三、磁盘阵列的空间配置和分配 (18)3.1在aggr0中添加新的磁盘 (18)3.2消除磁盘Aggregate的快照预留空间 (22)3.3缩小卷vol0的磁盘空间 (22)3.4创建新的Volume (27)3.5消除Volume的快照预留空间 (31)3.6在新建卷上的参数修改 (33)3.7在IBM主机上安装NetApp磁盘路径管理软件 (34)3.8创建LUN存储单元 (36)3.8.1开启FCP功能 (36)3.8.2创建一个Qtree (38)3.8.3创建一个Lun存储单元 (39)3.8.4在主机上使用LUN来存储数据 (44)一、磁盘阵列的系统安装1.1初始化磁盘阵列NetApp FAS3020C是NetApp产品中一款有双机头的磁盘阵列,需要先在每个机头中安装好操作系统,才能正常使用。
安装步骤如下:1,通过笔记本电脑或其它Windows平台PC机的串口,连接到机头上的串口上;2,通过超级终端,以默认值连接来进行操作;操作过程如下:CFE version 3.0.0 based on Broadcom CFE: 1.0.40Copyright (C) 2000,2001,2002,2003 Broadcom Corporation.Portions Copyright (c) 2002-2005 Network Appliance, Inc.CPU type 0xF29: 2800MHzTotal memory: 0x80000000 bytes (2048MB)CFE> bye输入bye 后,开始启动;CFE version 3.0.0 based on Broadcom CFE: 1.0.40Copyright (C) 2000,2001,2002,2003 Broadcom Corporation.Portions Copyright (c) 2002-2005 Network Appliance, Inc.CPU type 0xF29: 2800MHzTotal memory: 0x80000000 bytes (2048MB)Starting AUTOBOOT press any key to abort...Loading: 0x200000/24732624 0x19963d0/33360796 0x3966f70/1995456 Entry at 0x00200000 Starting program at 0x00200000Press CTRL-C for special boot menu提示按CTRL-C后弹出启动菜单;Special boot options menu will be available.Mon Mar 20 07:54:25 GMT [cf.nm.nicTransitionUp:info]: Interconnect link 0 is UPNetApp Release 7.0.3: Fri Dec 2 06:00:21 PST 2005Copyright (c) 1992-2005 Network Appliance, Inc.Starting boot on Mon Mar 20 07:54:14 GMT 2006(1) Normal boot.(2) Boot without /etc/rc.(3) Change password.(4) Initialize all disks.(4a) Same as option 4, but create a flexible root volume.(5) Maintenance mode boot.Selection (1-5)?4a这里选择4a,初始化所有的磁盘,并且创建一个root卷,此卷将用于操作系统的安装;Zero disks and install a new file system? y选择y,确认将所有的磁盘零化,并且安装新的文件系统;This will erase all the data on the disks, are you sure? Y选择y,确认将删除磁盘上的所有数据;Zeroing disks takes about 80 minutes. .................................................................................................................................................................... .................................................................................................................................................................... .................................................................................................................................................................... .................................................................................................................................................................... .................................................................................................................................................................... .................................................................................................................................................................... .................................................................................................................................................................... ..................................................................Mon Mar 20 09:15:30 GMT [raid.disk.zero.done:notice]: Disk 0a.23 Shelf ? Bay ? [NETAPP X276_S10K7288F10 NA01] S/N [3KR16HQC00007617E7VE] : disk zeroing complete...............Mon Mar 20 09:15:34 GMT [raid.disk.zero.done:notice]: Disk 0a.18 Shelf ? Bay ? [NETAPP X276_S10K7288F10 NA01] S/N [3KR18YGC000076187JGK] : disk zeroing complete ....................Mon Mar 20 09:15:40 GMT [raid.disk.zero.done:notice]: Disk 0a.20 Shelf ? Bay ? [NETAPP X276_S10K7288F10 NA01] S/N [3KR18MYR0000761769S1] : disk zeroing complete .............Mon Mar 20 09:15:43 GMT [raid.disk.zero.done:notice]: Disk 0a.22 Shelf ? Bay ? [NETAPP X276_S10K7288F10 NA01] S/N [3KR18QV900007617LZY3] : disk zeroing complete ..................Mon Mar 20 09:15:48 GMT [raid.disk.zero.done:notice]: Disk 0a.16 Shelf ? Bay ? [NETAPP X276_S10K7288F10 NA01] S/N [3KR18PE1000076187KXZ] : disk zeroing complete ...............Mon Mar 20 09:15:52 GMT [raid.disk.zero.done:notice]: Disk 0a.21 Shelf ? Bay ? [NETAPP X276_S10K7288F10 NA01] S/N [3KR17PT300007617M1P2] : disk zeroing complete .................................................................................................................................................................... ...............Mon Mar 20 09:16:42 GMT [raid.disk.zero.done:notice]: Disk 0a.17 Shelf ? Bay ? [NETAPP X276_S10K7288F10 NA01] S/N [3KR18Y6700007617695Y] : disk zeroing complete .................................................................................................................................................................... .............Mon Mar 20 09:18:44 GMT [raid.disk.zero.done:notice]: Disk 0a.19 Shelf ? Bay ? [NETAPP X276_S10K7288F10 NA01] S/N [3KR1911Z0000761769R8] : disk zeroing completeMon Mar 20 09:18:45 GMT [raid.vol.disk.add.done:notice]: Addition of Disk /aggr0/plex0/rg0/0a.18 Shelf 1 Bay 2 [NETAPP X276_S10K7288F10 NA01] S/N [3KR18YGC000076187JGK] to aggregate aggr0 has completed successfullyMon Mar 20 09:18:45 GMT [raid.vol.disk.add.done:notice]: Addition of Disk /aggr0/plex0/rg0/0a.17 Shelf 1 Bay 1 [NETAPP X276_S10K7288F10 NA01] S/N [3KR18Y6700007617695Y] to aggregate aggr0 has completed successfullyMon Mar 20 09:18:45 GMT [raid.vol.disk.add.done:notice]: Addition of Disk /aggr0/plex0/rg0/0a.16 Shelf 1 Bay 0 [NETAPP X276_S10K7288F10 NA01] S/N [3KR18PE1000076187KXZ] to aggregate aggr0 has completed successfullyMon Mar 20 09:18:45 GMT [wafl.vol.add:notice]: Aggregate aggr0 has been added to the system. Mon Mar 20 09:18:46 GMT [fmmbx_instanceWorke:info]: no mailbox instance on primary sideMon Mar 20 09:18:47 GMT [fmmbx_instanceWorke:info]: Disk 0a.18 is a primary mailbox disk Mon Mar 20 09:18:47 GMT [fmmbx_instanceWorke:info]: Disk 0a.17 is a primary mailbox disk Mon Mar 20 09:18:47 GMT [fmmbx_instanceWorke:info]: normal mailbox instance on primary side Mon Mar 20 09:18:47 GMT [fmmbx_instanceWorke:info]: Disk 0b.18 is a backup mailbox diskMon Mar 20 09:18:47 GMT [fmmbx_instanceWorke:info]: Disk 0b.17 is a backup mailbox diskMon Mar 20 09:18:47 GMT [fmmbx_instanceWorke:info]: normal mailbox instance on backup sideMon Mar 20 09:18:48 GMT [lun.metafile.dirCreateFailed:error]: Couldn't create vdisk metafile directory /vol/vol0/vdisk.DBG: Set filer.serialnum to: 1071155ifconfig e0a mediatype autoConfiguring onboard ethernet e0a.Contacting DHCP server.Ctrl-C to skip DHCP search ...Mon Mar 20 09:18:48 GMT [rc:info]: Contacting DHCP serverMon Mar 20 09:18:52 GMT [rc:info]: DHCP config failedConfiguring e0a using DHCP failed.NetApp Release 7.0.3: Fri Dec 2 06:00:21 PST 2005System ID: 010******* (); partner ID: <unknown> ()System Serial Number: 1071155 ()System Rev: E0slot 0: System BoardProcessors: 1Memory Size: 2048 MBslot 0: Dual 10/100/1000 Ethernet Controller VIe0a MAC Address: 00:a0:98:03:88:13 (auto-unknown-cfg_down)e0c MAC Address: 00:a0:98:03:88:10 (auto-unknown-cfg_down)e0d MAC Address: 00:a0:98:03:88:11 (auto-unknown-cfg_down) slot 0: FC Host Adapter 0a8 Disks: 2176.0GB1 shelf with ESH2slot 0: FC Host Adapter 0b8 Disks: 2176.0GB1 shelf with ESH2slot 0: Fibre Channel Target Host Adapter 0cslot 0: Fibre Channel Target Host Adapter 0dslot 0: SCSI Host Adapter 0eslot 0: NetApp ATA/IDE Adapter 0f (0x000001f0)0f.0 245MBslot 3: NVRAMMemory Size: 512 MBPlease enter the new hostname []: headb输入这个机头的主机名,这里举例为headb;Do you want to configure virtual network interfaces? [n]: y问是否要配置虚拟网卡,如果要创建的话,输入y;Number of virtual interfaces to configure? [0] 1输入要配置几块虚拟网卡,如配置1块虚拟网卡,就输入1;Name of virtual interface #1 []: vif1输入虚拟网卡的名称,这里举例为vif1;Is vif1 a single [s] or multi [m] virtual interface? [m] s选择虚拟网卡的类型是single还是multi,这里选择s;Number of links for vif1? [0] 2虚拟网卡所包含真实网卡的数量,如果用两块网卡绑定成一块虚拟网卡就输入2;Name of link #1 for vif1 []: e0a输入用于绑定的真实网卡的设备名,可以从阵列设备后面的网络接口上看到;Name of link #2 for vif1 []: e0b输入用于绑定的真实网卡的设备名,可以从阵列设备后面的网络接口上看到;Please enter the IP address for Network Interface vif1 []: 192.168.0.88输入虚拟网卡的IP地址;Please enter the netmask for Network Interface vif1 [255.255.255.0]:输入虚拟网卡的掩码,默认就直接回车;Should virtual interface vif1 take over a partner virtual interface during failover? [n]: y是否允许虚拟网卡在故障时切换到另一个机头上,输入y;The clustered failover software is not yet licensed. To enablenetwork failover, you should run the 'license' command forclustered failover.会提示说没有输入Clustered failover功能的license,需要输入才能实现网络切换功能;Please enter the partner virtual interface name to be taken over by vif1 []: vif1输入另一个机头上的会被切换过来的虚拟网卡的名字;Please enter media type for vif1 {100tx-fd, tp-fd, 100tx, tp, auto (10/100/1000)} [auto]:输入虚拟网卡的类型,一般是自适应,选默认auto;Please enter the IP address for Network Interface e0c []:输入网卡e0c的IP地址,不设置就直接回车;Should interface e0c take over a partner IP address during failover? [n]: n是否允许网卡e0c在故障时切换到另一个机头上,这里不配置就输入n;Please enter the IP address for Network Interface e0d []:输入网卡e0d的IP地址,不设置就直接回车;Should interface e0d take over a partner IP address during failover? [n]: n是否允许网卡e0d在故障时切换到另一个机头上,这里不配置就输入n;Would you like to continue setup through the web interface? [n]: n问是否通过web方式来进行继续的安装,输入n,不需要;Please enter the name or IP address of the default gateway:输入默认网关的名字和IP地址,无须输入就直接回车;The administration host is given root access to the filer's/etc files for system administration. To allow /etc root accessto all NFS clients enter RETURN below.Please enter the name or IP address of the administration host:输入超级管理主机的主机名或IP地址,没有就直接回车;Where is the filer located? []: nanjing问磁盘阵列设备的位置,可以随便写,比如南京,就输入nanjing;Do you want to run DNS resolver? [n]:是否配置DNS,输入n,不配置;Do you want to run NIS client? [n]:是否配置NIS,输入n,不配置;This system will send event messages and weekly reports to Network Appliance Technical Support. To disable this feature, enter "options autosupport.support.enable off" within 24 hours. Enabling Autosupport can significantly speed problem determination and resolution should a problem occur on your system. For further information on Autosupport, please see: /autosupport/ Press the return key to continue.提示说,阵列系统默认的自动发送事件日志和周报告功能是打开的,如果需要关闭,请输入options autosupport.support.enable off。
EC-WIN使用教程

EC-WIN使⽤教程北京盟通科技有限公司Ec-win使⽤教程2016/6/20Beijing Motrotech Technology Co., Ltd. ——————————————————————————————————————————————————————————————————————————————EC-Win 使⽤教程EC-Win 是action 公司提供的⼀套基于windows 操作系统的完整EtherCAT 主站解决⽅案,包含了实时操作系统-On Time RTOS-32、EtherCAT 主站协议栈-EC-Master 和EtherCAT 配置诊断⼯具-EC-Engineer 。
EC-Win 可以运⾏于Windows XP SP3 32Bit/Windows 7 SP1 32Bit/Windows 7 SP1 64Bit 。
EC-win 使得RTOS-32和windows 操作系统共享同⼀台计算机。
使⽤户在使⽤windows 桌⾯系统的同时,⼜能确保RTOS-32的硬实时和性能。
这两个操作系统是相互独⽴的,因此RTOS-32操作系统不受windows 异常和错误的影响。
⼀、软件介绍1、 System ManagerSystem Manager 是⼀个集成了多种功能的管理界⾯,主要⽤于实时部分的配置和管理。
它提供了内存配置、CPU 和PCI 设备分配到实时系统、应⽤部署到实时部分和使⽤Visual Studio创建应⽤例程等功能。
2、 EC-EngineerEC-Engineer 是⽤于EtherCAT ⽹络配置和诊断的⼯具。
它可以使⽤离线、在线或者远程连接三种不同的⽅式进⾏⽣成⽹络配置⽂件,其中离线模式需要⽤户⼿动配置⽹络,在线和远程连接根据扫描到的⽹络信息⾃动⽣成配置信息。
同时还可以使⽤本地或者远程的⽅式对正在运⾏的EtherCAT 主站进⾏诊断功能。
⼆、运⾏准备⼯作1、添加实时部分⾸次打开System Manager 软件的界⾯如图所⽰,我们⾸先需要创建⼀个实时部分。
- 1、下载文档前请自行甄别文档内容的完整性,平台不提供额外的编辑、内容补充、找答案等附加服务。
- 2、"仅部分预览"的文档,不可在线预览部分如存在完整性等问题,可反馈申请退款(可完整预览的文档不适用该条件!)。
- 3、如文档侵犯您的权益,请联系客服反馈,我们会尽快为您处理(人工客服工作时间:9:00-18:30)。
7.1. Build instructions for RTOS-32 (with System Manager) ............................................... 31 7.2. Build instructions for RTOS-32 (no System Manager) .................................................. 31 7.2.1. Preparations for EC-Master Example Programs ................................................... 31 7.2.2. Recommended generic build instructions for RTOS-32 .....................ild instructions for Windows XP / Windows 7 ........................................................... 32 8. Appendix ........................................................................................................................... 34
acontis technologies GmbH
SOFTWARE
Windows Realtime Extension & EtherCAT-Master Stack
Getting Started Guide
Version 6.0
Edition: 2014-07-31
© Copyright acontis technologies GmbH
4.1. EC-Win configuration .................................................................................................... 17 4.1.1. 5. 6. Identify your Network Controller ............................................................................ 17
2.1. Prerequisites ................................................................................................................. 10 2.2. EC-Master demo application ......................................................................................... 10 2.3. The EC-Win Software Development Kit (SDK) ............................................................. 11 2.4. EC-SlaveTestApplication (EC-STA).............................................................................. 11 2.5. System Manager ........................................................................................................... 13 3. 4. Setup the Real-time Extension Runtime........................................................................... 14 Network Controller Setup ................................................................................................. 17
1. Introduction
EC-Win is a bundle of the acontis EtherCAT-Master Stack (EC-Master) for RTOS-32 and the acontis Rtos32Win real-time extension for Windows XP 32-Bit / Windows 7 32-Bit / Windows 7 64-Bit. The acontis Rtos32Win enables RTOS-32 to share a single computer with a Microsoft Windows desktop operating system while maintaining RTOS-32 hard real-time determinism and performance. Both operating systems operate independent from each other, and, therefore, RTOS-32 operation is immune to desktop Windows exceptions and faults.
EtherCAT Hardware Setup ............................................................................................... 19 Generating an EtherCAT configuration (ENI) ................................................................... 20
6.1. Prerequisites ................................................................................................................. 20 6.2. Run the ECMaster Demo application............................................................................ 20 6.3. Prerequisites ................................................................................................................. 25 6.4. Building the Demo using the System Manager ............................................................. 25 6.5. Debugging the Demo .................................................................................................... 30 7. Building the EC-Win Example Programs .......................................................................... 31
Table of Contents
Inhalt
1. Introduction ......................................................................................................................... 4 1.1. Documentation ................................................................................................................ 5 1.2. Architecture of EC-Win ................................................................................................... 5 1.3. Directory structure of the EC-Win package .................................................................... 6 2. Getting Started with EC-Win ............................................................................................. 10
8.1. Adding User settings in a System Manager configuration ............................................ 34 8.2. Relation between RTOS files and cmd line parameters ............................................... 34
