软件测试基本点(参考文件)
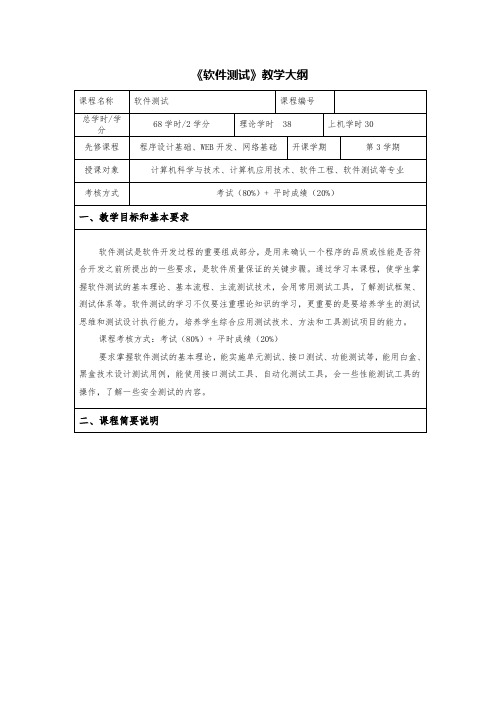
软件测试教学大纲+完整版
10.2.5 构建触发器
10.2.6 job关联
10.2.7 添加HTML Publisher插件
10.2.8 添加 Reports
10.2.9 报告展示
10.2.10 Jenkins中的HTML展示
10.3本章小结
4
2学时
上机内容:
接口自动化测试练习
第11章WebUI自动化测试
7.5 本章小结
2
2学时
上机内容:
用Firefox浏览器抓取报文并进行分析
第8章 接口测试
8.1 为什么要做接口测试
8.2 接口测试的定义
8.3 接口测试实例分析
8.3.1 接口文档解析
8.3.2 测试用例设计
8.4 接口测试工具
8.4.1 安装Postman工具
8.4.2 使用Postman的基础功能
4.2.6 测试总结
4.3 系统上线与运维
4.4 本章小结
2
第5章 白盒测试用例设计及应用
5.1 逻辑覆盖法
5.1.1 语句覆盖
5.1.2 判定覆盖
5.1.3 条件覆盖
5.1.4 条件判定组合覆盖
5.1.5 多条件覆盖
5.1.6 修正条件判定覆盖
5.2 基本路径测试法
5.2.1 程序的控制流图
5.2.2 控制流图的环路复杂性
12.2.2 项目介绍
12.2.3 需求分析
12.2.4 脚本开发
12.2.5 使用LoadRunner完成H5网站的脚本开发
12.3 场景设计精要
12.4 性能测试分析思路
12.4.1 观察现象
12.4.2 层层递进
12.4.3 缩小范围
软件测评方案

1.测评概述软件测评主要是指对软件进行评估,从而得出关于软件质量、可用性、可靠性、适用性以及安全性等方面的结论,而软件测评开展的依据性文件主要包含基于国标或者基于相关国军标文件而来;本文档主要探讨基于国标文件的软件测评通用方案,主要详细介绍软件测评过程中需要使用到的软件测试类型。
2.测试类型2.1.功能测试功能项测试:分析最主要的业务,根据需求规格说明书,比较是否实现全部功能且与需求一致。
体现为测试项的充分性覆盖到需求中的每一个要求。
数据库功能测试:web 是否实现对数据库的增、删、改、查功能。
通过进行无效数据值删除、修正等操作测试系统是否支持处理无效值。
通过填充缺失值或删除缺失值对应数据条目等操作测试系统是否支持处理缺失值。
通过合并重复数据或者删除重复数据等操作测试系统是否支持处理重复数据。
测试系统是否支持逻辑矛盾、关联性验证、不合理数据的清除。
业务流测试:不直接体现在需求文档中,而是需要根据测试人员经验进行分析,梳理的业务交互,例如不同用户之间的流程转换,发起流程,处理流程等。
2.2.性能测试性能的测试主要重点和难点体现在用户和业务的模型分析搭建上,设计的模型必须基于现实且合理规划,才能更大可能地找到系统瓶颈,保障交付使用后系统正常运行。
以下对模型的初步设计和规划基于招标文件及测试人员以往项目经验进行推断,说明性能测试策略制定过程,不作为实际实施过程中的指导内容,只作参考。
具体策略需要研制方、需求方商讨后确定。
a)分钟级性能指标策略针对数据处理能力中的如下性能指标要求:机位规划≤5min,装备规划≤5min,人员规划≤5min,计划推演≤8min,质量评定时间≤1min,数据备份恢复时间≤60min。
依据以往项目经验,参与制定任务规划的人员较少,通常为3~5 左右。
而分钟级指标要求显然不是为了查看高并发下,业务的响应时间。
这种时候,需要考虑的是包含任务要素最多、最复杂、耗时最久的最坏情况下,业务完成时间是否满足要求。
软件测试中的43个功能测试点

15. 检查多次使用返回键的情况: 在有返回键的地方,返回到原来页面,重复多次,看会否出错。
16. 搜索检查: 有搜索功能的地方输入系统存在和不存在的内容,看搜索结果是否正确.如果可以输入多个搜索条件,可以同时添加合理和不合理的条件,看系统处理是否正确,搜索的时候同样要注意特殊字符,某些系统会在输入特殊字符的时候,将系统中所有的信息都搜索到。
36.多浏览器验证:越来越多的各类浏览器的出现,用户访问Web程序不再单单依赖于Microsoft Internet Explorer,而是有了更多的选择:Maxthon、Firefox、Tencent Traveler等,考虑使用多种浏览器访问系统,验证效果。
37.安装测试:对于C/S架构的系统,安装程序的测试是一个重要方面,安装程序自动化程度、安装选项和设置(验证各种方案是否都能正常安装)、安装过程中断测试、安装顺序测试(分布式系统)、修复安装及卸载测试。
41.Ajax 技术的应用:Ajax有很多优点,但也有很多缺点,如果利用优点、避免缺点,是我们对新的Web2.0应用的一个挑战。而Ajax的应用最直接的问题就是用户体验,用户体验的效果直接关系到是否使用Ajax技术。“会做,并不意味着应该做、必须做”,这就是对Ajax技术的很重要的注解。
42.Ajax技术的应用:Ajax采用异步调用的机制实现页面的部分刷新功能,异步调用存在异常中断的可能,尝试各种方法异常中断异步的数据调用,查看是否出现问题。在这里遇到的一个问题就是对日期控件的操作,已经如果页面数据较多的时候的刷新。
17. 输入信息位置: 注意在光标停留的地方输入信息时,光标和所输入的信息会否跳到别的地方。
18. 上传下载文件检查:上传下载文件的功能是否实现,上传文件是否能打开。对上传文件的格式有何规定,系统是否有解释信息,并检查系统是否能够做到。下载文件能否打开或者保存,下载的文件是否有格式要求,如需要特殊工具才可以打开等。上传文件测试同时应该测试,如果将不能上传的文件后缀名修改为可以上传文件的后缀名,看是否能够上传成功,并且,上传文件后,重新修改,看上传的文件是否存在。
软件测试必备文档
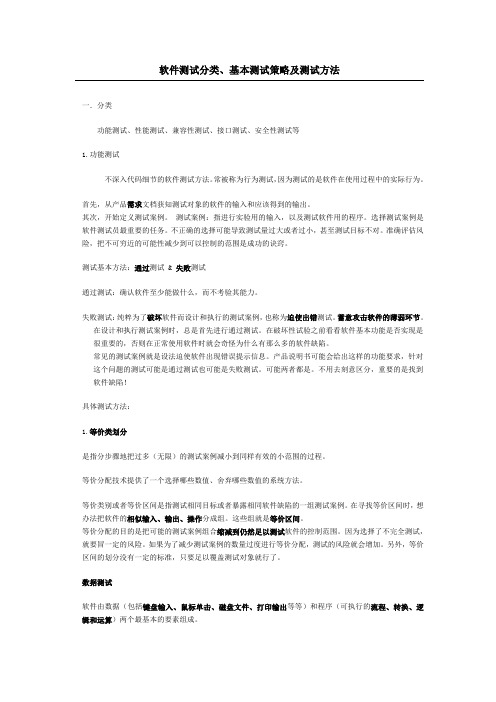
软件测试分类、基本测试策略及测试方法一.分类功能测试、性能测试、兼容性测试、接口测试、安全性测试等1.功能测试不深入代码细节的软件测试方法。
常被称为行为测试,因为测试的是软件在使用过程中的实际行为。
首先,从产品需求文档获知测试对象的软件的输入和应该得到的输出。
其次,开始定义测试案例。
测试案例:指进行实验用的输入,以及测试软件用的程序。
选择测试案例是软件测试员最重要的任务。
不正确的选择可能导致测试量过大或者过小,甚至测试目标不对。
准确评估风险,把不可穷近的可能性减少到可以控制的范围是成功的诀窍。
测试基本方法:通过测试 & 失败测试通过测试:确认软件至少能做什么,而不考验其能力。
失败测试:纯粹为了破坏软件而设计和执行的测试案例,也称为迫使出错测试。
蓄意攻击软件的薄弱环节。
在设计和执行测试案例时,总是首先进行通过测试。
在破坏性试验之前看看软件基本功能是否实现是很重要的,否则在正常使用软件时就会奇怪为什么有那么多的软件缺陷。
常见的测试案例就是设法迫使软件出现错误提示信息。
产品说明书可能会给出这样的功能要求,针对这个问题的测试可能是通过测试也可能是失败测试。
可能两者都是。
不用去刻意区分,重要的是找到软件缺陷!具体测试方法:1.等价类划分是指分步骤地把过多(无限)的测试案例减小到同样有效的小范围的过程。
等价分配技术提供了一个选择哪些数值、舍弃哪些数值的系统方法。
等价类别或者等价区间是指测试相同目标或者暴露相同软件缺陷的一组测试案例。
在寻找等价区间时,想办法把软件的相似输入、输出、操作分成组。
这些组就是等价区间。
等价分配的目的是把可能的测试案例组合缩减到仍然足以测试软件的控制范围。
因为选择了不完全测试,就要冒一定的风险。
如果为了减少测试案例的数量过度进行等价分配,测试的风险就会增加。
另外,等价区间的划分没有一定的标准,只要足以覆盖测试对象就行了。
数据测试软件由数据(包括键盘输入、鼠标单击、磁盘文件、打印输出等等)和程序(可执行的流程、转换、逻辑和运算)两个最基本的要素组成。
软件系统的主要测试内容及技术
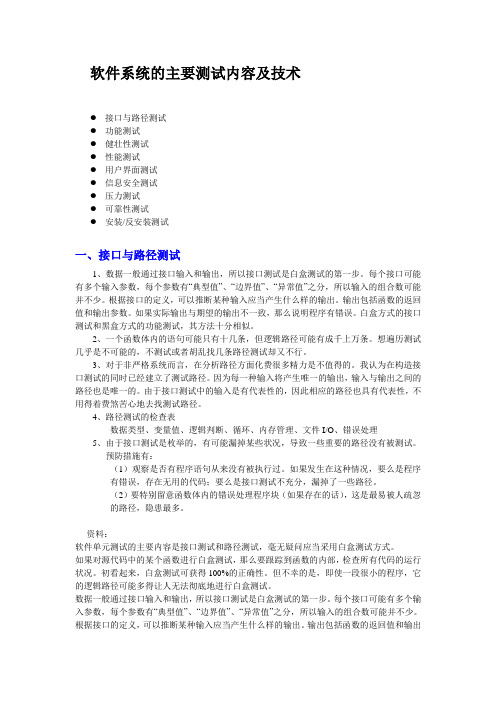
软件系统的主要测试内容及技术●接口与路径测试●功能测试●健壮性测试●性能测试●用户界面测试●信息安全测试●压力测试●可靠性测试●安装/反安装测试一、接口与路径测试1、数据一般通过接口输入和输出,所以接口测试是白盒测试的第一步。
每个接口可能有多个输入参数,每个参数有“典型值”、“边界值”、“异常值”之分,所以输入的组合数可能并不少。
根据接口的定义,可以推断某种输入应当产生什么样的输出。
输出包括函数的返回值和输出参数。
如果实际输出与期望的输出不一致,那么说明程序有错误。
白盒方式的接口测试和黑盒方式的功能测试,其方法十分相似。
2、一个函数体内的语句可能只有十几条,但逻辑路径可能有成千上万条。
想遍历测试几乎是不可能的,不测试或者胡乱找几条路径测试却又不行。
3、对于非严格系统而言,在分析路径方面化费很多精力是不值得的。
我认为在构造接口测试的同时已经建立了测试路径。
因为每一种输入将产生唯一的输出,输入与输出之间的路径也是唯一的。
由于接口测试中的输入是有代表性的,因此相应的路径也具有代表性,不用得着费煞苦心地去找测试路径。
4、路径测试的检查表数据类型、变量值、逻辑判断、循环、内存管理、文件I/O、错误处理5、由于接口测试是枚举的,有可能漏掉某些状况,导致一些重要的路径没有被测试。
预防措施有:(1)观察是否有程序语句从来没有被执行过。
如果发生在这种情况,要么是程序有错误,存在无用的代码;要么是接口测试不充分,漏掉了一些路径。
(2)要特别留意函数体内的错误处理程序块(如果存在的话),这是最易被人疏忽的路径,隐患最多。
----资料:软件单元测试的主要内容是接口测试和路径测试,毫无疑问应当采用白盒测试方式。
如果对源代码中的某个函数进行白盒测试,那么要跟踪到函数的内部,检查所有代码的运行状况。
初看起来,白盒测试可获得100%的正确性。
但不幸的是,即使一段很小的程序,它的逻辑路径可能多得让人无法彻底地进行白盒测试。
数据一般通过接口输入和输出,所以接口测试是白盒测试的第一步。
软件测试(理论基础)

软件测试(理论基础)Chapter 1_软件测试概述软件测试的IEEE定义:使⽤⼈⼯或⾃动的⼿段来运⾏或测量软件系统的过程,⽬的是检验软件系统是否满⾜规定的需求,并找出与预期结果之间的差异。
软件测试的发展趋势:①测试⼯作将进⼀步前移。
软件测试不仅仅是单元测试、集成测试、系统测试和验收测试,还对需求的精确性和完整性的测试技术、对系统设计的测试技术将成为新的研究热点。
②软件架构师,开发⼯程师,QA⼈员,测试⼯程师将进⾏更好的融合③测试职业将得到更充分的尊重。
④设置独⽴的软件测试部门将成为越越来软件公司的共识。
⑤测试外包服务将快速增长,和软件开发外包⼀样,软件测试外包将成为全球化的趋势。
软件测试⼯程师的素质:责任⼼;沟通能⼒;团队合作精神;耐⼼、细⼼和信⼼;保持怀疑的态度,有缺陷预防的意识;不断学习的能⼒。
合格的测试⼯程师应具有的能⼒:①⼀般能⼒:包括表达、交流、协调、管理、质量意识、软件开发过程⽅法、软件⼯程等;②测试技能及⽅法:包括测试基本概念及⽅法、对测试⼯具的掌握、对专业测试标准的熟悉程度等;③测试规划能⼒:包括风险分析及防范能⼒、测试⽬标及计划的制定能⼒等;④测试执⾏能⼒:包括测试数据/脚本/⽤例的制定能⼒、测试⽐较及分析能⼒、缺陷记录及处理能⼒;⑤测试分析、报告和改进能⼒:包括测试度量、统计技术、测试报告、过程监测及持续改进能⼒。
测试⼯程师的职责:测试⼈员要了解项⽬需求内容,从⽤户的⾓度提出⾃⼰的测试看法;测试⼈员要编写合理的测试计划并与项⽬整体计划有机地整合在⼀起;测试⼈员要编写覆盖率⾼的测试⽤例;测试⼈员要认真仔细的实施测试⼯作,并提交测试报告以供项⽬参考;测试⼈员要进⾏缺陷跟踪和分析。
Chapter 2_软件测试基础软件的概念:软件是计算机系统中与硬件相互依存的⼀部分,包括程序、数据、与其相关⽂档的完整结合。
软件 = 程序 + 数据 + ⽂档。
软件的特点:①软件是⼀种逻辑体,⽽不是具体的物理体,因⽽它具有抽象性;②软件的⽣产与硬件不同,它没有明显的制造过程,对软件质量的控制,必须在开发⽅⾯下功夫;③在软件运⾏和使⽤期间,没有硬件那样的机械磨损和⽼化问题,然⽽它存在退化问题,必须进⾏多次的修改和维护;④软件的开发和运⾏常常受计算机系统的制约,对计算机系统有着不同程度的依赖性,为了解除这种依赖性,在软件开发过程中提出了软件移植问题。
软件测试技术标准
软件测试技术标准
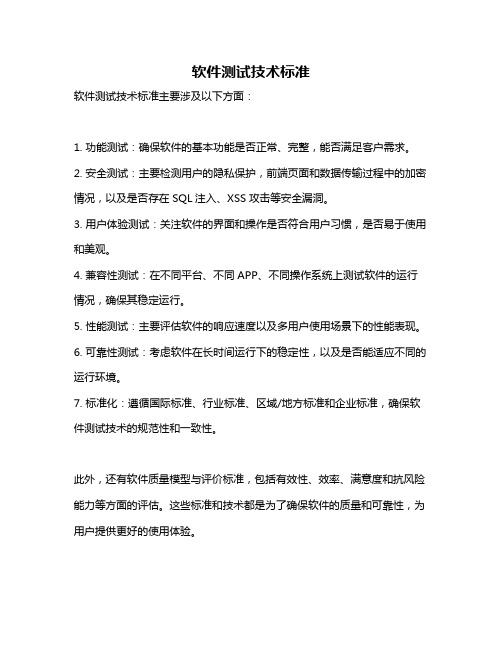
软件测试技术标准主要涉及以下方面:
1. 功能测试:确保软件的基本功能是否正常、完整,能否满足客户需求。
2. 安全测试:主要检测用户的隐私保护,前端页面和数据传输过程中的加密情况,以及是否存在SQL注入、XSS攻击等安全漏洞。
3. 用户体验测试:关注软件的界面和操作是否符合用户习惯,是否易于使用和美观。
4. 兼容性测试:在不同平台、不同APP、不同操作系统上测试软件的运行情况,确保其稳定运行。
5. 性能测试:主要评估软件的响应速度以及多用户使用场景下的性能表现。
6. 可靠性测试:考虑软件在长时间运行下的稳定性,以及是否能适应不同的运行环境。
7. 标准化:遵循国际标准、行业标准、区域/地方标准和企业标准,确保软件测试技术的规范性和一致性。
此外,还有软件质量模型与评价标准,包括有效性、效率、满意度和抗风险能力等方面的评估。
这些标准和技术都是为了确保软件的质量和可靠性,为用户提供更好的使用体验。
软考中项知识点
软考中的项知识点什么是软考软考是指软件技术专业资格(Software Professional Qualifications)考试,是由中国软件行业协会主办的全国性职业技能等级考试。
软考的目标是评价软件相关专业人员的综合能力,包括软件工程师、网络工程师、项目经理等。
软考的分类与级别软考分为三个级别:初级、中级和高级。
每个级别又分为不同的类别,如软件设计师、软件测试师、软件项目经理等。
考生可以根据自己的实际情况选择报考的级别和类别。
软考的考试科目软考的考试科目根据不同的级别和类别有所不同,但一般包括以下几个方面的知识点:1. 软件基础知识•操作系统原理:包括进程管理、内存管理、文件系统等基本概念和原理。
•计算机网络:包括网络基本概念、网络协议、网络安全等。
•数据库原理:包括数据库的基本概念、关系数据库理论、数据库设计等。
•数据结构与算法:包括常用的数据结构如数组、链表、树和图,以及常见的排序和查找算法。
2. 软件工程•软件需求分析与设计:包括需求获取、需求分析、概要设计和详细设计等。
•软件开发方法与工具:包括敏捷开发、迭代开发、持续集成等开发方法以及常用的开发工具如集成开发环境、版本控制工具等。
•软件测试与质量保证:包括测试的基本原理、测试用例设计、测试工具和质量保证的方法等。
•软件项目管理:包括项目组织与管理、项目计划与控制、项目评估与风险管理等。
3. 软件应用领域知识•嵌入式软件:包括嵌入式系统的基本概念、硬件和软件的交互等。
•移动应用开发:包括移动应用的基本原理、常用的开发工具和技术等。
•云计算与大数据:包括云计算的基本原理、大数据的处理和分析等。
•人工智能与机器学习:包括人工智能的基础知识、机器学习的算法和应用等。
如何备考软考备考软考需要系统地学习相关知识,并进行针对性的练习和复习。
下面是一些备考软考的建议:1.系统学习:根据软考的考试大纲,制定学习计划,按照每个科目的知识点逐一学习。
可以参考教材、网络资源和培训课程进行学习。
软件测试参考文献
JULY–SEPTEMBER 19990740-7475/99/$10.00 ©1999 IEEE 53W ITHTHE GROWING COMPLEXITYand interaction of vehicle functions, a reliable functional test methodology has become a major concern of the automobile industry. In 1995, Ford Motor Company started a concen-trated effort to define for itself and its suppliers an effective test strategy for functionality veri-fication. Ford successfully applied the strate-gy in a highly cost-conscious environment that demands high quality and fast test turnaround.The robust test method (RTM) presented here is an important component of this strategy.RTM was born out of Japanese industry’s need to establish its competitive capability after World War II by providing high-quality products. Genichi Taguchi, through his re-search in the 1950s and early 1960s, devel-oped and validated a Design of Experiments technique that uses orthogonal arrays.1Madhav Phadke,2,3while working at AT&T in the 1980s, further developed the tech-nique by defining a methodology for apply-ing orthogonal arrays to software testing. In 1994, he introduced the methodology to Ford Motor Company. RTM’s introduction into the test process translated into a quan-tum jump in test quality, allowing the de-tection of previously undetected faults.Robust testing was first applied to subsystem-level functional design verification. It led to the detection of more errors than module and system functional tests combined, while reducing test turnaround time by 30%.RTM advantagesRTM is a functional test generation methodology based on orthogonal arrays.4By functional Design Verification we under-stand the totality of tests used to verify that a given device under test (DUT) delivers the functionality defined in the corresponding engineering specification.5,6RTM uses the same set of orthogonal ar-rays 7used originally by Taguchi, but Taguchi’s design-of-experiments method deals with process parameter variations,while RTM focuses on functional input val-ues to the device under test.RTM’s major advantages are thats it is applicable at all integration stages (including software)5s it enables easy correlation of test results from different stagess it offers a structured approach to test sit is applicable to both input-dependent and state-dependent output values, as long as the relationships are well definedsits black-box approach allows test set definition in parallel with design, thus enabling a shorter project turnaround s it is independent of a specific product implementationswhen specifications change during de-velopment, it enables very fast changes of the test sets it saves development timesbeing independent of the test engineer’s prior experience, RTM typically expands the palette of tested combinationssit enables considerable product im-provement in the product definition phaseGenerating Functional Design Verification TestsThe Robust Test Method,a functional testgeneration methodology,translated into a quantum jump in test quality at Ford. Applied to subsystem-level design verification, it detected more errors than module and system tests combined, while reducing test turnaroundtime by 30%.SUSANA STOICA Ford Motor CompanyThe design and test of one of the first modules to use RTM il-lustrates the advantages of this method. For the original mod-ule, the designers had spent three weeks to produce a traditional, intuitive, functional test set. Using RTM to design a new generation of the same module, the group needed only two days to produce a new test set. At the same time, they ex-panded the number of combinations tested. Moreover, the orig-inal design had 18 different ways in which the software code could enter a given state. By applying RTM, the designers re-designed the code flow so that the new design had only three access options to the same piece of code.RTM’s main distinction is that it tests several input changes at the same time, rather than one at a time. The orthogonal array methodology ensures that the test space coverage is bal-anced (that is, all inputs are tested an equal number of times). As a result of this property and the fact that the test set defin-ition is implementation independent, RTM usually defines test cases that the engineers never thought of. It also detectsend cases (combinationsand/or sequences of inputsignals that occur very rarely)that could cause unexpectedresults during normal func-tional mode. In the above-mentioned case, RTM-basedtesting found an activationsequence that would havedisabled the module’s func-tionality. Following this find-ing, the engineers modifiedthe design to eliminate theproblem.In comparison with other test methodologies (see Table 1), RTM offers a definite advantage in coverage and time spent designing the test set. RTM also gives considerably better cov-erage than one-factor-at-a-time testing, which is comparable in test set size and test generation time. (One-factor-at-a-time tests change one input parameter value at a time.)The typical approach to functional design verification is a combination of one-factor-at-a-time and random/intuitive testing. The random/intuitive method mainly tests for faults previously found in similar products. This is an insufficient method, especially for products with completely new func-tions and thus no previously known failure modes. RTM’s only disadvantage is that it cannot give a measure of the percentage of fault detection. Producing test traceability tables, which list all the functional requirements to be met and the tests covering them, compensates for this disadvan-tage. In our experience, once we have tested a product with RTM, combined with detailed timing verifications using one-factor-at-a-time tests, we findno further functional errors atthe higher levels of productintegration or in the field.RTM effects on productdevelopmentFigure 1 shows the typicalproduct developmentprocess model. Followingthis model, one developstest specifications only afterthe design phase is completeand performs tests only afterthe implementation phase.With RTM, the processchanges somewhat, asshown in Figure 2, reflectingthe capability of designingthe RTM-based test set as54IEEE DESIGN & TEST OF COMPUTERSsoon as the first cut of the design requirements specification becomes available, even before the specification is released. Having the test set produced very early in the design cycle by an independent person allows a more-objective look at the completeness and clarity of the software/hardware def-inition. The result is a more-reliable design.If a specification remains the same during the design cycle, the RTM-generated test sequence does not change even if the particular implementation changes. Hence our up-front work is not lost. Sometimes the design specification changes late in the design phase due to changing hardware requirements or new customer specifications. Even in these cases, once RTM is used for test set generation, reapplying it takes much less time than what traditional test generation methods require. The methodologyTo understand RTM, consider a very simple, hypothetical audio system. The system consists of a number of different audio components: a radio, a phone, a tape deck, a CD play-er, and a TV set. These components can be in On or Off states. All the devices can function only when the ignition key is On, so we consider the ignition key’s state another variable, or factor. Table 2 presents a synopsis of the input factors and their levels(the values taken by the factors), sort-ed according to priorities defined in the system require-ments. We refer to this as version A of our system definition. The different factors have certain functional priorities: 1.If the ignition key is in the Off position, everything elseis Off.2.If the phone is On, everything else is Off.3.If the phone is Off, and the TV is switched On, every-thing else is Off.4.If both the phone and the TV are Off, and the CD play-er is switched On, the radio and the tape deck are Off.5.If the phone, the TV, and the CD player are Off, and thetape is switched On, the radio is Off.Once we understand these interdependencies, we are ready to set up the test set. We know that we have six fac-tors (inputs), each with two levels. As in any other test method, we must start from an initial level, called the over-all mean,for all the factors. The overall mean will represent the first test. We will need additional tests to cover all the other factor levels not covered in the original test. Thus, we will need at least one more level for each factor—that is, each factor has one more degree of freedom. Hence, the minimum number of tests, or the total number of degrees of freedom,is Nfr= 1 + 6 ×(2−1) = 7.Another parameter to consider in calculating the mini-mum number of tests needed is the product of the numberof levels of the two highest-level count factors, or Ph. In ourexample, all the factors have two levels; hence, Ph= 2 ×2 =4. The minimum number of tests is Tmin= MAX (Nfr, Ph), which in our example is 7.As mentioned before, RTM uses orthogonal arrays to de-fine the optimum factor combinations to achieve a balanced coverage of the test space. One can find these arrays in books dealing with the design of experiments (Ross1and Phadke,2for example). The arrays are matched to the prob-lem according to the number of tests and the number of fac-tors needed in the orthogonal array, as well as the numberJULY–SEPTEMBER 199955of levels in each factor. For example, an orthogonal arrayof type L36(211×312) contains 36 tests for a total of 23 factors, of which 11 have two levels and 12 have three levels.For our case, we require an orthogonal array with a min-imum of seven tests and designed for a minimum of six fac-tors, each with two levels. The smallest orthogonal arraysatisfying these conditions is the L8(27) shown in Table 3, which has eight tests (> 7) and can accommodate up to sev-en (> 6) two-level factors.2This array has one more factor than we need, which means that we can discard one of the columns. Is any column bet-ter to discard than the others? To answer this question, we first must see why this array is considered orthogonal. We notice that each level (1 and 2) appears an equal number of times in each column under “Factors.” Also, we notice that each level of a certain factor combines an equal number of times with the levels of another factor. That is, each factor has four level 1s and four level 2s. If we follow the combina-tions of factors, we can see two interactions of type 1-1, two of type 1-2, two of type 2-1, and two of type 2-2. This means that all the possible interactions will be tested an equal num-ber of times. Hence, if we omit any column, we will still pre-serve the same interactions. In our case, we will omit column 7, as we have only six factors. To define the tests, we need to assign each factor to a given column and then substitute the level numbers with level values, as shown in Table 4.The next step is to verify that the five requirements previ-ously specified for the system are covered by the tests in the orthogonal array. Analyzing Table 4, we find that we have more than enough tests to verify that all the audio system components are Off while the ignition key is in the Off po-sition (requirement 1), as well as for the case when the phone is On (requirement 2). However, we do not have enough tests to cover requirements 3, 4, and 5. The solution is to generate an orthogonal array that assumes the ignition key is On for all tests and changes some of the factor-level as-signments to obtain different factor interactions (Table 5.)Array manipulation techniquesThe number of orthogonal arrays one can choose from is limited. Because the factors usually do not fit the available tables exactly, we can either modify the existing tables or modify the test requirements definition. There are three table modification techniques: merging columns, adding dummy levels, and compounding factors.To explain these techniques, we modify the audio system definition given in Table 2 by adding levels to several fac-tors, obtaining version B shown in Table 6. For example, the56IEEE DESIGN & TEST OF COMPUTERSignition key now has three levels: two levels at which the au-dio system is functional, Accessory (Acc.) and Run, and the Off level. The phone has one additional level, Hold, which is equivalent to Off from the point of view of the rest of the system. The tape deck has three levels, and the radio has a total of four levels.In this case the individual factors have different numbers of levels, which means that we cannot choose a table that exactly fits our requirements. First we calculate the mini-mum number of tests:T min = MAX(Nfr, Ph) = 12where Nfr= 1 + 3 ×(3 −1) + 2 ×(2 −1) + 1 ×(4 −1) = 12 andPh= 4 ×3 = 12.Searching the orthogonal array list, we find array L12. This array cannot be used because all the factors have only twolevels and no column manipulation is allowed. Next is the L′16(45), which has five 4-level factors, one less factor than we need. Considering that we have two 2-level factors, we can combine them into one 4-level factor, thus reducing the factor count:s Level 1 = TV and CD are both Off.s Level 2 = TV is Off; CD is On.s Level 3 = TV is On; CD is Off.s Level 4 = TV and CD are both On.Because we have four levels available for certain para-meters that need only three, we must apply one more tech-nique to adapt the original L′16table to our needs: using dummy levels to fill in for missing ones. We choose the dum-my levels so as to have more of the critical levels for a cer-tain variable or to allow a better test of the rest of the factors. For example, there is no need to test any state more than the others for the tape deck, but by choosing the Off state as the fourth, dummy level, we will allow more visibility for the ra-dio states.Combining the TV and CD factors reduced the factor count by one, hence, we have enough columns to cover all the fac-tors. Table 7 represents the resulting orthogonal array. Another option is to choose the L18(21×37) orthogonal array, which has dimensions much closer to our needs. To adapt this array, we must merge two columns, one with two and another with three levels, to accommodate a min-imum four-level variable. We chose to merge columns 1 and 2 into a six-level column and assigned each of the oth-er factors to a three-level column. (Well-defined rules gov-ern which columns can be merged and what influence the merging has on the remaining columns. Usually, certain columns must remain open when two others merge. For more information on this topic, see Phadke2and Raghavarao.7) Table 8 shows the result (column 8, not shown, was left empty).For this example, we chose to fill the dummy level for TV and CD with Off states (marked Off′) to allow better visibil-ity of the Tape and Radio states. For the Radio dummy lev-els, we chose FM2′and AM′. We could have chosen any two of the three radio bands.JULY–SEPTEMBER 199957Simplifying the test setThe methodologies for adjusting the test set are using slid-ing levels and reducing (removing from the table) nonessen-tial factor levels. Their purpose is to fulfill the test needs witha smaller set of tests—that is, a smaller orthogonal array. Let us consider an even more complex set of factors, which includes, in addition to the ones mentioned for ver-sion B, three levels of each radio band: AM, FM1, and FM2. Hence, for version C, the Radio factor has 10 levels: three AMs, three FM1s, three FM2s, and Off. Table 9 shows the fac-tor table with the associated values and their levels.Now the minimum number of tests is Tmin= MAX(Nfr, Ph)= 30, where Nfr= 1 + 2 ×(2 −1)+3 ×(3 −1)+1 ×(10 −1) =18 and Ph= 10 ×3 = 30.To reduce the number of tests below 30, we use the slid-ing-level technique. With this technique, we cover the Radio factor using two factors each with fewer levels. One factor determines the band (am, fm1, fm2, or Off), and the other determines the wavelengths inside the band. For example, to combine Radio = FM1 and Radio level = 2 in the orthog-onal table, we select FM1 for the test and 95.5 for the wave-length. Table 10 (next page) represents the modified C version of the audio factor set.For the modified factors definition, Tmin= MAX(Nfr, Ph) =14, where Nfr= 1 + 4 ×(3 −1) + 2 ×(2 −1) + 1 ×(4 −1) = 14and Ph= 3 ×4 = 12.Hence, we must look for a table that can accommodate two 2-level factors, four 3-level factors, and one 4-level fac-tor. L18meets this condition perfectly, in spite of the increase in state count. Table 11 contains the resulting test set. In this case, we use column 8 for the wavelength definition. Column 2 could be used instead of column 8 with the same effectiveness. For a better understanding of the transforma-tion, we added a column to the right of the table to show the previously existing generic values in column 8. Another way of reducing the test set is by analyzing the importance of testing all the different state combinations. If not all of them need testing, we can directly reduce the test set. If all are important, we can split the tests into several smaller sets.For example, we may decide that testing two wavelength58IEEE DESIGN & TEST OF COMPUTERSvalues for each of the AM, FM1, and FM2 bands is sufficient. We decide to alternate which wavelength value is tested and merge the TV and CD factors. Thus, we obtain version D shown in Table 12. Having five factors, each with four or fewer levels, means that we can fit the tests in the L16′(45) table, as seen in Table 13. For better coverage of the Radio states, we replaced the TV+CD state “On/Off,” which does not yield much information, with “Off/Off.”If the coverage of the different radio stations is insufficient in Tables 11 and 13, first we run the tests to make sure that the interactions of system components are correct. Then we run a separate set of tests to verify that the radio stations are correct. The maximum interaction that the latter tests must verify is that the radio remains on the same wavelength when other audio system components are switched On and Off. Setting up state-dependent testsLet’s consider an even more complex situation, in which the next state of some factorsdepends on a previous state.In this case, we have only aphone and a radio in the car(version E). This system hasthe following requirements:1.The ignition key hasfour positions: Off, Acc.,Run, and Crank.2.If the ignition key is inthe Off position, every-thing else is Off.3.If the ignition key is inCrank position, thephone and radio aredisabled.4.If the phone is On, theradio cannot be heard,even if it is in the Onposition.5.If the phone is on Holdor Off and the radio isOn, the radio can beheard.6.The radio can be on theAM, FM1, or FM2 band.7.The radio also has aSeek key that cansearch for the next radiostation in increasing(Seek_U) or decreasing(Seek_D) order.8.When the radio is per-forming a Seek opera-JULY–SEPTEMBER 19995960IEEE DESIGN & TEST OF COMPUTERSJULY–SEPTEMBER 199961array that meets our needs. It can accommodate one 2-level factor and nine 4-level factors. For our test set, we combine columns 1 and 2, generating an eight-level factor, and we have eight columns left. Table 16 contains the full orthogo-nal array definition. (It is important in a real test environment to specify the exact order in which the different inputs must be activated because they sometimes lead to different out-put state sequences.)Completing the test set definitionTo complete the test set definition, we must define the ex-pected outputs and produce the requirements for the test traceability table.As an example of how to define the expected results, see Table 16. It preserves the states for the Radio band’s previ-ous values from the last change. In the table, the values marked * do not make sense, hence they were skipped. Although the orthogonal array columns could have been moved without losing any test content, we left them in their original locations for an easier understanding of how the ex-ample specific values were filled in.To produce the traceability table, we must list all the re-quirements and then all the tests covering that requirement, making sure that the coverage is sufficient. Table 17 is the traceability table for the example in Table 16.Table 18 compares the number of tests we would gener-ate using exhaustive testing with the number of tests we gen-erate using RTM. The table shows a considerable reduction in the number of tests—the more complex the problem, the greater the reduction. All the examples, as well as the ex-perience of those who have used the technique, show that RTM is a useful tool for the test engineer. Since one cannot afford to run all the tests that would be generated with the exhaustive method, RTM offers a valid alternative.RTM is not a panacea. For example, one might decide that the design verification results provide enough confi-dence in the final product’s quality that testing factor inter-actions during manufacturing is unnecessary. If one relies mainly on process control, there is no reason to apply the methodology. Also, for detailed timing verification, one-fac-tor-at-a-time testing offers a more practical approach. RTM’s main use is interaction testing—testing systems with multi-ple components and/or multiple inputs that can change at the same time.Furthermore, there is more than one way to apply the techniques presented here to a given problem. The quality of the resulting test set depends on certain factors:s the availability of a well-defined requirements specifi-cation for the system under tests the test engineer’s having enough time to thoroughly understand the specification62IEEE DESIGN & TEST OF COMPUTERSJULY–SEPTEMBER 199963s the knowledge and experience of the person setting upthe data and choosing the orthogonal arrayF INALLY ,if we apply RTM only after the product is built, wedon’t take full advantage of the methodology. We obtain thefull benefit by using RTM as a tool for finalizing the designquirements specification phase.AcknowledgmentsI thank Euge Greenstein and Deepak Goel, who encouraged meto write about RTM, Madhav Phadke, who introduced me to themethodology, and Marion Mahoney, who defined the orthogonal-array format used in the article. I also owe thanks to the many RTMtrainees who gave me a better understanding of the problems testengineers face in different domains of electronics design.References 1.P.J. Ross, Taguchi Methods for Quality Engineering , McGraw-Hill, New York, 1988.2.M.S. Phadke, Quality Engineering Using Robust Design , Pren-tice-Hall, Englewood Cliffs, N.J., 1989.3.M.S. Phadke, “Planning Efficient Software Tests,” Crosstalk: J.of Defense Software Engineering , Oct. 1997.4.G. Taguchi and S. Konishi, Orthogonal Arrays and Li nearGraphs , ASI Press, Dearborn, Mich., 1987. 5.S. Stoica, “System Design Verification Tests—An Overview,”Lecture Series, Proc. Int’l Test Conf., IEEE Computer Society Press, Los Alamitos, Calif., 1999.6.S. Stoica, “A Lifecycle Approach to Design Validation—Is It Nec-essary? Is It Feasible?,” Proc. Int’l Test Conf., IEEE CS Press, 1998.7.D. Raghavarao, Construction of Combinatorial Problems in De-sign Experiments , John Wiley & Sons, New York, 1971.is a senior technical special-software testing. Stoica has an MSc and a PhD from the Polytech-nical Institute in Bucharest, Romania. Send questions and comments about this article to Susana Stoica, Ford Motor Co., Research and Vehicle Development, MD 5015 – 1D053, 20,000 Rotunda Drive, Dearborn, MI 48121-2053; ssto-ica@。
软件测试复习重点
第1章1. 重要1.软件测试的正面性观点【验证软件正常工作】✧软件测试就是为程序能够按预期设想那样运行而建立足够的信心✧【软件测试是一系列活动已评价一个程序或系统的特性或能力是否达到预期的结果】✧测试是为了验证软件是否符合用户需求,即验证软件产品是够能正常工作2.软件测试的反面性观点【测试是为了证明成粗有错误】测试是为了发现错误而执行的一个程序或者系统的过程3.IEEE 的软件测试定义使用人工或自动手段来运行或测试某个系统的过程,其目的是在于检验它是否满足规定的需求或是弄清预期结果与实际结果之间的差别4.什么是“验证“验证”是检验软件是否已正确地实现了产品规格书所定义的系统功能和特性5.什么是“有效性确认”“有效性确认”是确认所开发的软件是否满足用户真正需求的活动[软件测试是由“验证(Verification)”和“有效性确认(Validation)”活动构成的整体]6.软件测试和软件开发的关系2. 次重要1.为什么要进行软件测试1.软件总存在缺陷2.软件中存在的缺陷给我们带来的算是是巨大的3.测试所有工程学科的基本组成单元,自然也是软件开发的重要组成部分。
4.软件人员水平越高,找出问题的时间越早,软件越容易更正,产品发布后越稳定2.软件测试的其它观点风险的观点:软件测试就是对风险的不断评估,引导软件开发的工,进而将最终发布的软件所存在的风险降到最低经济的观点:以最小的代价获得最高的软件产品质量第2章1. 重要1.ISO 8492对质量的定义质量是产品或服务多满足明示或暗示需求能力的固有特性和特征的集合2.IEEE对软件质量的定义软件产品满足规定的和隐含的于需求能力有关的全部特性和特征3.McCall软件质量模型4.IEEE (1983) 729 软件缺陷一个标准的定义从产品内部看,软件缺陷是软件产品开发或维护过程中所存在的错误、毛病等各种问题;从外部看,软件缺陷是系统所需要实现的某种功能的失效或违背。
软件测试教学大纲
《软件测试》课程教学大纲一、课程基本信息课程编号:××××课程名称:软件测试学时:32学时实验学时:8学时课程类别:专业课课程性质:必修课先行课程:C语言,数据结构,面向对象开发工具,数据原理适用专业:计算机科学与技术,计算机软件技术责任单位:计算机工程系二、课程性质、目的与任务本课程是计算机科学与技术及软件技术专业的专业必修课。
其教学目的是通过本课程学习,使学生系统地学习软件测试的基本概念和基本理论,深刻理解和掌握软件测试和软件测试过程的基本方法和基本技术。
了解和掌握现代各种新的软件测试技术和主要发展方向。
为学生将来从事实际软件测试工作和进一步深入研究打下坚实的理论基础和实践基础。
三、课程的内容及要求、教学重点与难点(一)软件测试概述1、主要教学内容及要求1)理解软件测试的背景,软件缺陷和故障的概念2)理解软件测试的意义3)理解软件开发过程与软件测试的关系4)理解软件质量的概念及质量保证体系5)了解软件测试职业与素质的要求2、知识点与能力点要求1)知识点:软件测试等相关概念。
(二)软件测试策略与过程1、主要教学内容及要求1)理解软件测试的方法与策略2)明确单元测试的主要任务和过程3)理解软件测试的复杂性4)明确集成测试的方法和确认测试的准则5)明确系统测试的八个领域测试要点6)明确验收测试的主要内容和相关配置2、知识点与能力点要求1)知识点:软件测试方法与策略2)能力点:单元测试、集成测试、系统测试及验收测试的方法3、教学的重点与难点1)教学重点:软件测试方法与策略(三)黑盒测试及其用例的设计1、主要教学内容及要求1)理解黑盒测试的基本概念2)理解黑盒测试的两个典型问题3)掌握黑盒测试的等价类划分法4)掌握黑盒测试的边界分析法5)掌握黑盒测试的因果图法和决策表法2、知识点与能力点要求1)知识点:黑盒测试方法2)能力点:黑盒测试方法3、教学的重点与难点1)教学重点:黑盒测试方法(三)白盒测试及其用例的设计1、主要教学内容及要求1)理解白盒测试的基本概念2)理解白盒测试的覆盖理念3)掌握白盒测试的路径表达4)掌握白盒测试的路径测试法2、知识点与能力点要求1)知识点:白盒测试方法2)能力点:白盒测试方法3、教学的重点与难点1)教学重点:白盒测试方法(五)特定环境及应用测试1、主要教学内容及要求1)理解特定环境测试2)掌握客户/服务器体系结构测试方法3)掌握图形用户界面GUI测试内容4)理解实时系统测试5)理解面向对象的软件测试基本概念与基本知识6)掌握面向对象软件测试的常用方法2、知识点与能力点要求1)知识点:特定环境下的测试方法2)能力点:特定环境下的测试方法3、教学的重点与难点1)教学重点:特定环境下的测试方法(六)软件自动化测试基础1、主要教学内容及要求1)理解软件测试的基本概念2)理解软件自动化测试生存周期方法学及其应用3)认识软件自动化测试工具与测试平台的获取及引入4)了解软件自动化测试工具与测试平台的获取及引入(七)Rational系统测试组件的运用主要教学内容及要求1)了解Rational测试组件的主要功能及适用范围2)了解Rationalpurify、PureCoverage软件测试的基本思想与策略3)掌握Rationalpurify、PureCoverage进行软件测试的过程4)掌握Rational Quantify、Robot进行软件测试的过程(八)WinRunner测试系统工具的运用主要教学内容及要求1)了解WinRunner系统的主要功能及适用范围2)了解WinRunner系统进行软件测试的基本思想与策略3)掌握运用WinRunner系统工具的应用配置4)掌握运用WinRunner系统实现功能测试(九)软件测试管理主要教学内容及要求1)了解测试组织策划和组织管理2)了解测试系统体系结构以及配置和管理测试环境3)理解软件测试计划的重要性和作用4)了解测试文档类型及应用测试文档四、课程教学各环节的基本要求1、课堂讲授的基本要求课堂讲授着点于加深基本理论及测试技术的掌握,技术讲解以案例分析为主。
Ch3-软件测试计划、文档及测试用例
案例研究1
StarMoon技术公司的Cathy Jones负责在六个月内开
发一个电子购物系统。但由于开发小组部分成员没有 受到足够的培训,致使开发阶段的工作延后了三个星 期才完成。 开发工作告一段落后,系统被移交给Don Allen领导的 测试小组。测试小组制定了一份测试计划,测试系统 的跨平台兼容性以及在IE上工作是否正常。测试结束, 测试报告送交开发小组。开发小组更正了发现的错误 后,按原定期限把软件产品交付给客户。 但是,当客户在Netscape 浏览器上运行这个电子购 物系统时,发现系统不能正常工作。结果,客户以系 统不能工作为由拒收产品
软件测试方法与实践
- Ch.3软件测试计划
1
第三章 软件测试计划与文档
3.1 3.2 3.3 3.4 3.5 软件测试生命周期 测试计划 测试设计 测试实施过程 测试文档
2
3.1 软件测试生命周期
在统一软件开发过程(RUP)定义中,测试生命周期分为:
测试计划:《软件测试合同》,《软件测试技术规格说明》,软件测试需求,安排 测试人员,提供测试工具。 测试设计:分解测试项目,设计测试环境,设计测试用例,编写测试用例概 要说明 测试开发:测试用例编码,定义测试条件、输入值和预期输出值,编写测试 用例详细说明 测试执行:执行软件测试用例,记录测试结果《测试记录》,编写《软件问 题报告》,测试的结果提交开发单位,尽可能自动执行测试 缺陷跟踪:软件缺陷跟踪管理是测试工作的一个重要部分,测试的目的是为 了尽早发现软件系统中的缺陷,而对软件缺陷进行跟踪管理的目的是确保每 个被发现的缺陷都能够及时得到处理。 测试评估:评价软件的各项指标,如果达到预期的结果,停止测试,提交用 户单位,如果达不到预期的结果,软件继续修改,并进行回归测试,单元测 试、集成测试、系统测试评估等活动。 等阶段(见下图)
软件测试 测试用例模板
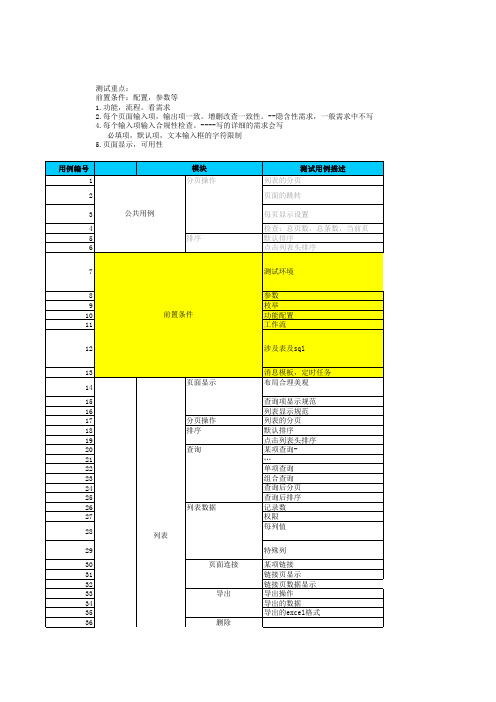
正常的
各种格式的
文档空 文档容量 文件名称
功能1 功能1 功能1
某列空,列格式非法,某列只有空 格 中间有空行,首行空,末行空 插入的空行,清空数据的空行 错误提示
excel格式的附件 txt格式的附件 word格式的附件 rar格式的附件 exe格式的附件,等 office2003的,2007的
说明列的来源和计算方法,尤其是统计列报告
导出的数据,和查询的数据一致 excel格式正确
打开的页面是否正确; 点击的时机是否正确; 提示语是否正确; 弹出页面还是新开tab页还是在当前页?
1、“”登陆,点击菜单:“”
显示“”页面 页面显示正确、美观,布局合理
显示规范
默认显示项
必填项
1.是否有提示,是否有蒙板
(toolbar或者操作 列)
38394041页面显示42 43 44
保存(提交) 45
46
取消,返回 47
新建 保存草稿
48
49
编辑页面
50
51
52
53 54 55
56 功能页面
57 58 59 60 61 62 63 64
65
66
查看详细页面
67
68
69
70
71
删除
72
73
74
75 76
修改 查看详细页面
排序
测试用例描述 列表的分页 页面的跳转
每页显示设置 检查:总页数,总条数,当前页 默认排序 点击列表头排序
7
测试环境
8
参数
9
枚举
10
前置条件
功能配置
11
工作流
12
涉及表及sql
软件测试用例(参考文件)

功能测试用例总结(通用)一、登陆测试:1.不输入用户名和密码或者输入不存在的用户名在登录时是否等正常登录或有提示信息2.系统是否是允许同一个用户名多次登陆3.系统是否是允许在同一客户端登录多个用户账户二、图形界面测试1.窗体是否能够利用快捷键或菜单命令正确的打开和关闭2.窗体是否能够改变大小、移动和滚动3.窗体的数据是否能够利用鼠标、快捷键等操作4.当窗体被覆盖并重新调用后,窗体是否能够正确实时刷新,是否能够被反显加亮5.窗体相关的功能是否可以操作6.是否显示相关的下拉菜单、工具条、滚动条、对话框、按钮、图标和其他控制,既能正确显示(位置)又能调用;7.显示多窗体时,窗体名称是否能够正确表示;窗体名称是否和菜单的名称相一致8.多用户联机时所有窗体的数据等是否能够实时更新9.鼠标无规则点击时是否会产生无法预料的结果10.窗体的提示是否符合既定编程规则,鼠标点击窗体提示信息是否进入到死循环(遇到过)11.窗体是否能够被关闭,在关闭时提示是否需要保存12.窗体控件的大小、对齐方向、颜色、背景等属性的设置值是否和程序设计规约相一致13.窗体控件布局是否合理、美观14.窗体焦点是否按照编程规范落在既定的控件上15.窗体显示的文字(全、半角、格式、拼写)是否正确三、功能测试:1、用户数据校验:在文本框中输入数据进行测试,其中①需要校验数据的有效性、类型、格式、长度、全角、半角、中文字符、英文字符、数字字符、特殊字符、及几种字符的组合。
②根据数据库字段的设计进行逐一校验,包括字符类型:数字,字母,字符以及长度的校验。
2、对界面可操作按钮进行测试。
包括【新增(N)】【保存(S)】【修改(M)】【查询(A)】【打印(P)】【退出(X)】。
同时需要对鼠标右键的菜单进行测试。
3、数据保存测试。
将1 和2 进行组合。
4、必要条件控制测试。
在做了3 时将必要条件(如:a、编号、姓名不可为空b、编号、姓名不可重复)控制测试联合起来。
软件测试的基本方法

软件测试的基本方法在软件开发过程中,软件测试是确保软件质量的重要环节。
它通过检查、验证和验证软件的各个方面,以确保软件在发布之前符合预期的质量标准。
本文将介绍软件测试的基本方法,包括黑盒测试、白盒测试、灰盒测试、单元测试、集成测试和系统测试。
一、黑盒测试方法黑盒测试是一种测试方法,它将软件视为一个黑盒,只关注其输入和输出,而不考虑其内部实现。
测试人员根据需求规格说明书或用户手册,设计测试用例,并验证软件是否按照规格要求正确运行。
黑盒测试的优点是可以独立于实现细节进行测试,但缺点是无法揭示软件内部的错误。
二、白盒测试方法白盒测试是一种测试方法,它基于对软件内部结构的了解。
测试人员通过检查源代码、控制流程和变量使用情况,设计测试用例来测试软件的各个分支和路径。
白盒测试的优点是可以揭示软件内部的错误,但缺点是需要对源代码有一定的了解,并且测试覆盖范围有限。
三、灰盒测试方法灰盒测试是黑盒测试和白盒测试的结合,它兼顾了对软件功能和内部结构的测试。
测试人员根据需求规格和部分源代码,设计测试用例来验证软件的正确性和可靠性。
灰盒测试的优点是可揭示软件内部错误,并针对用户需求进行测试,但缺点是需要对源代码有一定了解,并且测试的覆盖范围有限。
四、单元测试方法单元测试是测试软件的最小单元——模块或函数。
测试人员编写测试用例,针对每个功能进行测试,并验证其功能是否按照预期工作。
单元测试的优点是可以尽早发现和解决软件缺陷,但缺点是无法测试多个模块之间的交互。
五、集成测试方法集成测试是测试多个模块或子系统之间的交互和数据传输是否正常。
测试人员根据系统设计和接口规范,设计测试用例来验证系统的集成和协调工作。
集成测试的优点是可以测试模块间的交互,但缺点是测试范围较广,测试覆盖率可能不够。
六、系统测试方法系统测试是对整个软件系统进行的测试,目的是验证系统是否满足定义的需求和规格。
测试人员设计测试用例,模拟真实环境和用户操作,测试软件的功能、性能、可靠性和安全性等方面。
软件测试标准有哪些

软件测试标准有哪些软件测试标准是指在软件测试过程中所遵循的一系列规范和要求,其目的是为了保证软件质量,提高软件的可靠性和稳定性。
软件测试标准通常包括测试计划、测试用例、测试执行、测试报告等内容,下面将详细介绍软件测试标准的具体内容。
首先,软件测试标准需要明确的测试目标和范围。
在制定测试标准时,需要明确测试的目的是什么,要测试的范围是什么,以及测试的重点是什么。
这样可以确保测试的有效性和针对性。
其次,软件测试标准需要包括详细的测试计划。
测试计划是测试活动的指导文件,需要包括测试的时间安排、测试的资源分配、测试的方法和技术、测试的环境等内容。
测试计划需要根据具体的项目和需求进行制定,确保测试活动能够顺利进行。
另外,软件测试标准还需要包括测试用例的编写和执行。
测试用例是测试活动的核心,是用来验证软件功能和性能的具体测试步骤。
测试用例需要根据需求和设计文档编写,覆盖到软件的各个功能和场景,确保软件的全面测试。
此外,软件测试标准还需要包括测试执行和缺陷管理。
在测试执行阶段,需要按照测试计划和测试用例进行测试活动,并及时记录测试结果和发现的缺陷。
缺陷管理是指对发现的缺陷进行记录、跟踪和解决,确保软件质量达到要求。
最后,软件测试标准还需要包括测试报告和总结。
测试报告是测试活动的输出成果,需要包括测试执行的结果、发现的缺陷情况、测试的覆盖率等内容。
测试总结是对整个测试活动的回顾和总结,包括测试过程中的经验教训和改进措施。
总的来说,软件测试标准是软件测试活动的指导文件,是保证软件质量的重要手段。
通过遵循软件测试标准,可以提高软件的可靠性和稳定性,确保软件能够满足用户的需求和期望。
软件测试标准的制定和执行是软件开发过程中不可或缺的环节,对于保证软件质量和项目进度具有重要意义。
(完整word)软件测试的基本流程与测试规范

软件测试的基本流程与测试规范目录前言 (1)一、软件测试的流程 (2)1.测试基本流程图 (2)2。
测试各阶段工作流程 (3)2。
1需求分析阶段 (3)2。
2计划与设计阶段 (3)2。
3测试实施阶段 (4)2.4测试结束 (5)2。
5测试验收和归档 (6)二、软件测试规范 (7)1.测试阶段所基于的文档(包括但不限于) (8)1.1软件需求规格说明书 (8)1。
2软件设计说明(概要设计或详细设计) (8)1。
3软件设计原型(demo) (8)1.4接口文档 (9)2.测试的种类(按阶段划分) (9)2。
1单元测试 (9)2.2集成测试 (10)2.3冒烟测试(非必须) (11)2.4系统测试 (12)2。
5随机测试(非必须) (12)2。
6验收测试(非必须) (13)3.测试的类型(按测试内容划分) (13)3。
1功能测试 (13)3.2界面测试(UI测试) (19)3.3接口测试 (19)3.4性能测试 (20)3。
5兼容性测试 (21)3。
6安全测试 (22)3。
7安装测试 (23)4.缺陷管理 (24)4。
1缺陷提交规范 (24)4。
2缺陷生命周期 (26)4。
3缺陷等级划分 (27)前言此文档就项目中测试部分的工作流程进行了一个梳理,参考了不同的资料,提炼整理的内容为业内已经成型、被大多数项目采用和认可的。
因此,该流程并不针对某一个具体的企业或者项目,运用到某一个项目中时,可进行必要的增减和修改.另外,文章中测试规范部分,也是查阅了网上很多的资料、参考了其他项目文档,并结合本人经验整理而成,可以覆盖到项目开发过程中会遇到的绝大部分的测试面,针对不同的测试内容,该规范也能够起到一定的指导和参考作用。
但是在实际的工作中,放到具体的项目里,也需要根据具体情况和要求进行适当的调整。
一、软件测试的流程1。
测试基本流程图2。
测试各阶段工作流程2.1需求分析阶段测试需求是整个测试过程的基础;确定测试对象以及测试工作的范围和作用。
软件测试说明书的模板
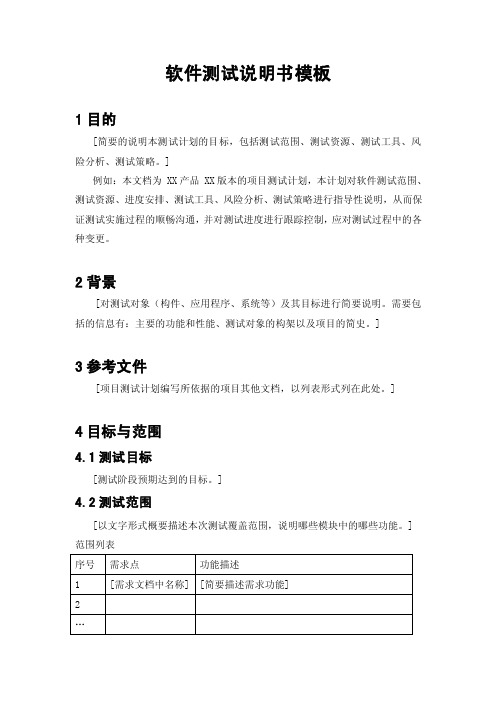
软件测试说明书模板1目的[简要的说明本测试计划的目标,包括测试范围、测试资源、测试工具、风险分析、测试策略。
]例如:本文档为 XX产品 XX版本的项目测试计划,本计划对软件测试范围、测试资源、进度安排、测试工具、风险分析、测试策略进行指导性说明,从而保证测试实施过程的顺畅沟通,并对测试进度进行跟踪控制,应对测试过程中的各种变更。
2背景[对测试对象(构件、应用程序、系统等)及其目标进行简要说明。
需要包括的信息有:主要的功能和性能、测试对象的构架以及项目的简史。
]3参考文件[项目测试计划编写所依据的项目其他文档,以列表形式列在此处。
]4目标与范围4.1测试目标[测试阶段预期达到的目标。
]4.2测试范围[以文字形式概要描述本次测试覆盖范围,说明哪些模块中的哪些功能。
] 范围列表[以列表的形式列出此次测试需要覆盖的模块和功能。
]4.3性能要求[列出本版本接受性能测试的功能点,无性能需求此部分可为空。
]4.4测试输出[列出测试阶段完成后,需要输出的各类文档、报告。
]5测试资源5.1人力资源5.1.1人员组成5.1.2人员安排5.2测试工具5.3测试环境5.3.1服务器[以列表形式说明服务器软硬件环境,主要用于集成测试、性能测试的环境分析。
]5.3.2客户端软硬件要求[以列表形式说明客户端软硬件要求,并简要说明用途。
]6测试策略6.1测试设计其中功能测试用例必须依照《功能测试用例模版》进行编写;6.2功能测试6.3集成测试7测试进度8系统风险下面是余秋雨经典励志语录,欢迎阅读。
不需要的朋友可以编辑删除!!关于年龄1.一个横贯终生的品德基本上都是在青年时代形成的,可惜在那个至关重要的时代,青年人受到的正面的鼓动永远是为成功而搏斗,而一般所谓的成功总是带有排他性、自私性的印记。
结果,脸颊上还没有皱纹的他们,却在品德上挖下了一个个看不见的黑洞。
2.我不赞成太多地歌颂青年,而坚持认为那是一个充满陷阱的年代。
陷阱一生都会遇到,但青年时代的陷阱最多、最大、最险。
- 1、下载文档前请自行甄别文档内容的完整性,平台不提供额外的编辑、内容补充、找答案等附加服务。
- 2、"仅部分预览"的文档,不可在线预览部分如存在完整性等问题,可反馈申请退款(可完整预览的文档不适用该条件!)。
- 3、如文档侵犯您的权益,请联系客服反馈,我们会尽快为您处理(人工客服工作时间:9:00-18:30)。
一、功能测试1、对话框测试输入进行测试。
包括日文字符、英文字符、数字字符、特殊字符、及几种字符的组合。
2、对界面可操作按钮进行测试。
包括【新增(N)】【保存(S)】【修改(M)】【查询(A)】【打印(P)】【退出(X)】。
同时需要对鼠标右键的菜单进行测试。
3、数据保存测试。
将1 和2 进行组合。
4、必要条件控制测试。
在做了3 时将必要条件(如:a、编号、姓名不可为空b、编号、姓名不可重复)控制测试联合起来。
二、图形界面测试1.窗体是否能够基于相关的输入或菜单命令适当的打开2.窗体是否能够改变大小、移动和滚动3.窗体的数据是否能够利用鼠标、功能键、方向箭头和键盘操作4.当窗体被覆盖并重新调用后,窗体是否能够正确再生5.窗体相关的功能是否可以操作6.是否显示相关的下拉菜单、工具条、滚动条、对话框、按钮、图标和其他控制,既能正确显示又能调用7.显示多窗体时,窗体名称是否能够正确表示8.活动窗体是否能够被反显加亮9.多用户联机时所有窗体是否能够实时更新10.鼠标无规则点击时是否会产生无法预料的结果11.窗体声音及提示是否符合既定编程规则12.窗体是否能够被关闭13.窗体控件的大小、对齐方向、颜色、背景等属性的设置值是否和程序设计规约相一致14.窗体控件布局是否合理、美观15.窗体控件TAB 顺序是否从左到右,从上到下16.窗体焦点是否按照编程规范落在既定的控件上17.窗体画面文字(全、半角、格式、拼写)是否正确18.鼠标有多个形状时是否能够被窗体识别(如漏斗状时窗体不接受输入)三、功能测试就是对产品的各功能进行验证,根据功能测试用例,逐项测试,检查产品是否达到用户要求的功能。
常用的测试方法如下:1.页面链接检查:每一个链接是否都有对应的页面,并且页面之间切换正确。
2.相关性检查:删除/增加一项会不会对其他项产生影响,如果产生影响,这些影响是否都正确。
3.检查按钮的功能是否正确:如update, cancel, delete, save 等功能是否正确。
4.字符串长度检查: 输入超出需求所说明的字符串长度的内容, 看系统是否检查字符串长度,会不会出错.5.字符类型检查: 在应该输入指定类型的内容的地方输入其他类型的内容(如在应该输入整型的地方输入其他字符类型),看系统是否检查字符类型,会否报错.6.标点符号检查: 输入内容包括各种标点符号,特别是空格,各种引号,回车键.看系统处理是否正确.7.日文字符处理: 在可以输入日文的系统输入日文,看会否出现乱码或出错.8.检查带出信息的完整性: 在查看信息和update 信息时,查看所填写的信息是不是全部带出.,带出信息和添加的是否一致9.信息重复: 在一些需要命名,且名字应该唯一的信息输入重复的名字或ID,看系统有没有处理,会否报错,重名包括是否区分大小写,以及在输入内容的前后输入空格,系统是否作出正确处理.10.检查删除功能:在一些可以一次删除多个信息的地方,不选择任何信息,按”delete”,看系统如何处理,会否出错;然后选择一个和多个信息,进行删除,看是否正确处理.11.检查添加和修改是否一致: 检查添加和修改信息的要求是否一致,例如添加要求必填的项,修改也应该必填;添加规定为整型的项,修改也必须为整型.12.检查修改重名:修改时把不能重名的项改为已存在的内容,看会否处理,报错.同时,也要注意,会不会报和自己重名的错.13.重复提交表单:一条已经成功提交的纪录,back 后再提交,看看系统是否做了处理。
14.检查多次使用back 键的情况: 在有back 的地方,back,回到原来页面,再back,重复多次,看会否出错.15.search 检查: 在有search 功能的地方输入系统存在和不存在的内容,看search 结果是否正确.如果可以输入多个search 条件,可以同时添加合理和不合理的条件,看系统处理是否正确.16.输入信息位置: 注意在光标停留的地方输入信息时,光标和所输入的信息会否跳到别的地方.17.上传下载文件检查:上传下载文件的功能是否实现,上传文件是否能打开。
对上传文件的格式有何规定,系统是否有解释信息,并检查系统是否能够做到。
18.必填项检查:应该填写的项没有填写时系统是否都做了处理,对必填项是否有提示信息,如在必填项前加*19.快捷键检查:是否支持常用快捷键,如Ctrl+C Ctrl+V Backspace 等,对一些不允许输入信息的字段,如选人,选日期对快捷方式是否也做了限制。
20.回车键检查: 在输入结束后直接按回车键,看系统处理如何,会否报错21.完成相同或相近功能的菜单用横线隔开放在同一位置22.菜单深度一般要求最多控制在三层以内。
四、通用测试用例补充1、焦点转移问题:(1)使用Tab 键测试焦点转移;(2)当保存时如果提示“有未输入的必填”项回到页面后,(3)焦点应转移到未输入的必填项中最靠前的一项上2、数字格式:(1)如果对数字格式有限制则看是否符合限制(2)格式没有限制时,所有输入数据的小数点位数应该一致3、输入文本框类型控件的测试:(1)空值测试(2)空格测试;前面输入空格,中间输入空格,末尾输入空格和全部输入空格,程序是否进行处理,保存成功后,数据库中的数据是否与页面显示的一致(3)长度测试(最大字符)(4)类型测试(如果有类型要求)(5)特殊字符的测试4、关于文本框录入为数字时的测试:(1)对数字长度有没有限制,输入1 位数,2 位数,等等有没有提示信息5、关于文本框录入数字型小数点的测试:(1)录入整数加小数点、小数点加整数和单独的小数点,保存时系统是否有提示,是否成功6、关于文本框填写不符合条件的信息保存确认后清空与否的测试:(1)比如在文本框中录入不符合条件的数据(类型不符合或者超多等),保存确定后只要清空错误的数据即可7、文本框内容的合理性如果是输入正数的文本框:(如:职工人数)还要判断是否为负数。
8、大小写问题:要求数据唯一性时是否区分大小写9、下拉列表的检测:检查列表中的内容是否漏选,重选;如果列表中的数据要求从其他页面或者数据库中获得的,就要检查是否与该页面中有数据一致。
10、时间:(1)注意要修改系统时间到2004-01-02/2004-11-12(2)起始时间不可大于终止时间(3)检查日期为空时程序的反应。
(4)数据库中的日期是否能够正确显示在页面上(5)输入错误日期时程序的反应。
(6)如果有输入日期不得大于当前日期的限制,则是否通过(7)如果有输入日期不得小于当前日期的限制,则是否通过11、边界值:(1)输入条件规定了值的范围(2)应取刚达到这个范围的边界的值作为测试输入数据(3)以及刚刚超越这个范围边界的值作为测试输入数据(4)输入条件规定了值的个数(5)最大个数(6)最小个数(7)比最小个数少一(8)比最大个数多一12、保存操作的测试:(1)保存成功/失败后检查数据库(2)检查必录项(3)保存成功/失败是否有相应的提示信息13、删除操作的测试:(1)删除提示成功/失败后看查看数据库(2)删除时是否有确认对话框(3)删除成功/失败是否有提示信息(4)确定是逻辑删除还是物理删除;物理删除是否已经把数据库中的数据删除掉,逻辑删除是否改变了标志位。
15、修改操作的测试:(1)修改提示成功后看数据库中的记录是否已经修改16、查询操作的测试:(1)查询到的记录是否与数据库中的记录相符(2)检查组合查询时,查询结果是否正确(3)查询列表下如果可以查询纪录的详细信息,检测查询条件是否改变(4)查询条件中有日期这一项的查看是否有默认值及其值是否符合要求17、分页显示的测试:(1)检查是否能够正常分页显示(2)检查是否能够正常前进或后退(3)检查是否能够正确选择一页的显示记录数(4)检查是否能够正确选择显示第x 页18、必录项的测试:(1)检查必录项是否提示必须输入19、工作流程的测试:(1)每个模块的工作流程是否可以正常运行(2)每个模块的工作流程过程是否与详细设计要求的一致(3)不按正常的工作流程操作是否可以正常运行20、系统自动生成项的测试:(1)应该自动生成数据的地方是否自动生成了数据(2)系统自动生成的数据是否符合详细设计的要求(3)自动生成数据的该条信息是否可以正常使用(4)自动生成数据后系统是否可以正常运行21、重复某项操作的测试(包括按钮、某个流程):(1)某项操作重复进行时是否正确运行(2)某项操作重复进行后再进行其他操作是否正确(3)某项操作重复进行后再进行其他操作系统是否正常运行22、权限的问题:(1)检查具有不同权限的用户登录时,是否具有跟其权限相符合的操作;检查不权限的用户是否具有相应的权限23、链接测试:(1)将鼠标按到链接上然后移动一下再放开鼠标页面是否会出错。
(2)当链接打开一个新页面时检查页面初始化状态是否有异常情况。
24、关于统一性的测试:页面对于同样的成功或者失败的提示信息是否统一(包括标点符号的统一)25、关于计算方面的测试:查看计算结果是否正确,进行增删改操作后其值是否进行相应正确改变26、唯一性测试:(1)要求数据唯一并且是逻辑删除时,是否允许与已删除的记录重复(2)要求唯一性的数据,在两人(或两人以上)同时操作时是否能正确地执行27、窗口最大化、最小化、关闭、确定按钮、取消按钮的测试28、打印测试:(1)打印按钮是否可用(2)在打印窗口中设置打印参数(3)打印设置是否方便用户使用(4)打印出来的是否与设置的打印参数一致(5)打印的内容是否正确(6)打印结束后是否能正常运行29、提示信息的测试:(1)检验应该有提示信息的是否有提示信息(2)相应提示信息的内容表达是否正确(3)提示信息的内容用户是否接受(4)确认后是否可以正常运行30、用户登陆测试:(1)用户权限测试(2)录入不存在的用户名和密码有提示信息(3)录入用户名不录入密码有提示信息(4)录入密码不录入用户名有提示信息(5)录入正确的用户名和密码进入相应的系统页面(6)重置按钮的测试五、信息重复数据常见测试方法1、多次,快速点击提交,信息重复(用户有时会因为网速慢,多次点击,此情况常发生)2、通过复制URL,同时打开两个相同页面,点击提交,信息重复(重要信息,用户恶意行为)3、提交后,在页面没有跳转的时候,进行刷新,信息重复4、如果提交后,有提示,重复提交的方法可以通过鼠标点击提交,手动敲击回车。
5、涉及到权限和时间差导致的重复,常见情况是系统中有审核审批等情况,A用户提交信息,在B用户还没有点击审核的时候,A用户点击了修改按钮,B用户审核后,A用户又一次提交。
(此类情况发生过)。
