cognos 10.2.2 快速安装指南
cognos10.2安装配置及Samples配置
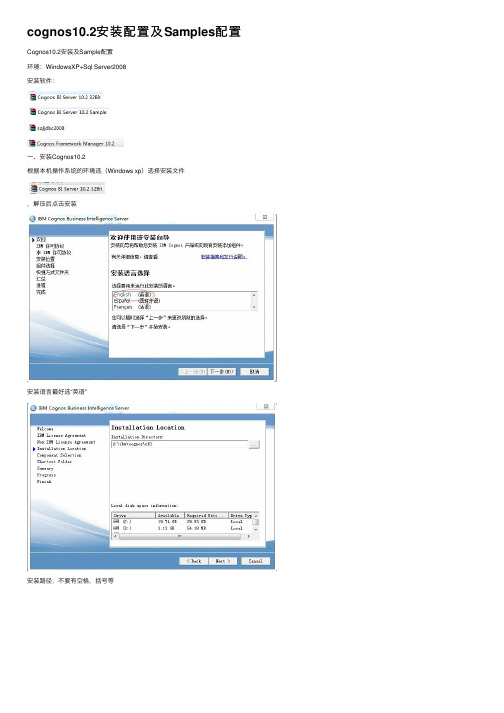
cognos10.2安装配置及Samples配置Cognos10.2安装及Sample配置环境:WindowsXP+Sql Server2008安装软件:⼀、安装Cognos10.2根据本机操作系统的环境选(Windows xp)选择安装⽂件,解压后点击安装安装语⾔最好选“英语”安装路径,不要有空格,括号等这⾥全选,后⾯依次按“next”安装下去遇到的安装问题及解决⽅法第⼀次安装Cognos10.2,按⾃动的卸载,第⼆次安装时出现提⽰“安装程序⽆法继续,因为需要特地进⾏重新启动,请.....”,安装不了;最后删除了安装路径下的⽂件及临时⽂件,还有注册表中相关的“Cognos”和“netscape”项才可以安装。
⼆、配置Tomcat1. 将webcontent⽬录 (D:\ibm\cognos\c10\webcontent) 下的所有⽂件,全部拷贝到webapps\p2pd⽬录 (D:\ibm\cognos\c10\webapps\p2pd)下2. 在开始-->程序-->IBM Cognos 10-->IBM Cognos Configuration,点Restart按钮确保服务可以正常启动3.在ID地址栏输⼊http://ye-pc:9300/p2pd/servlet/dispatch,看到页⾯,说明配置成功三、安装Cognos BI Server 10.2 Sample安装时语⾔选择“英语”,安装路径注意不要和正式Cognos⽬录相同,这⾥我选择的安装⽬录是:D:\ibm\cognossample\c10四、在现有Cognos系统添加Cognos sample1.以SqlServer为例,还原数据库⽂件进⼊D:\ibm\cognossample\c10\webcontent\samples\datasources,可以看到不同种类的数据源进⼊SqlServer⽂件夹,解压⽂件进⼊到我的SqlServer2008,还原数据库在源设备中选择已经解压好的数据库⽂件GOSALES同样的⽅法还原GOSALESDW,还原好后查看数据库2.在Cognos Connection导⼊我们的样例报表进⼊D:\ibm\cognossample\c10\webcontent\samples\content复制⽂件到正式的Cognos的D:\ibm\cognos\c10\deployment⽬录下,复制好⽂件后在IE地址栏输⼊http://ye-pc:9300/p2pd/servlet/dispatch,进⼊Cognos connection 中IBM Cognos Administration进⼊内容管理,新建导⼊在“部署档案库”框中,选择档案库:“IBM_Cognos_Samples”、“IBM_Cognos_PowerCube”、“IBM_Cognos_Metrics”、“IBM_Cognos_DrillThroughSamples”、“IBM_Cognos_Mobile”、“IBM_Cognos_csgodw”或“IBM_Cognos_Office”。
cognos安装手册
Cognos 安装手册1.Linux 环境下cognos安装1.1. 安装的必要条件1、创建oracle账户:在数据库中创建cognos使用的数据库账户,并且保证有权访问数据库。
2、准备一台Linux环境的服务器,并创建后安装cognos使用帐户。
3、为安装文件目录分配足够的磁盘空间。
4、启动数据库监听,确保数据库正常5、如果是需要使用oracle数据库,安装对应的数据库客户端32位。
6、准备一台连接linux服务口机器,安装SSH Secure Shell Client及TightVNC Viewer。
1.2. IBM Cognos Business Intelligence for Linux安装1.2.1. 安装jdk1、在data目录下新建java文件夹,然后将文件上传至java文件夹。
Cd /data/Mkdir java2、然后查看jdk安装文件的权限,如果没有执行权限,则需为该文件添加执行权限,执行jdk安装文件。
3、用文本编辑器打开/etc/profile,在文件未尾加入java环境变量,再输入:wq,保存。
Vi /etc/profile,I:JAVA_HOME=/data/java/jdk.6.0_35PATH=$JAVA_HOME/bin:$PATHCLASSPATH=.:$JAVA_HOME/lib/dt.jar:$JAVA_HOME/lib/tools.jarexport JAVA_HOMEexport PATHexport CLASSPATH:wq4、执行配置文件令其生效,之后执行命令验证是否安装成功。
1.2.2. 安装HttpServer 1、将文件上传至/data/setup/2、进入安装文件存放目录,设置权限,并解压安装文件。
3、创建安装目录:# cd httpd-2.2.22# mkdir –p /data/httpd# ./configure –prefix=/data/httpd –enable-modules=so –enable-rewrite # make# make install4、、进入httpserver 安装文件,查看文件,并编辑httpd.conf# cd /data/httpd# ls#cd conf#vi httpd.conf6、进入httpserver 安装文件,查看文件,并编辑httpd.conf# cd /data/httpd# vi conf/httpd.conf在文件的<IfModule alias_module>中加入以下文字#cognosScriptAlias /ibmcognos/cgi-bin/ "/data/ibm/cognos/c10_64/cgi-bin/"<Directory "/data/ibm/cognos/c10_64/cgi-bin/">AllowOverride NoneOptions NoneOrder allow,denyAllow from all</Directory>Alias /ibmcognos/ "/data/ibm/cognos/c10_64/webcontent/"<Directory "/data/ibm/cognos/c10_64/webcontent/">Options Indexes MultiViewsAllowOverride NoneOrder allow,denyAllow from all</Directory>4、启动httpServer# cd /data/httpd/bin# ls# ./apachectl start1.2.3. 安装Oracle客户端此处略1.2.4. Cognos安装文件准备1、打开SSH Secure Shell Client,输入服务器IP点、用户名、端口号,点击连接,输入密码,进入。
安装Cognos10.2问题解决参考
安装Cognos10.2问题解决参考1. 安装Cognos10.2 Server【注意】在“组件选择”步骤,最后⼀个不选。
其他基本上都是默认选择。
所选组件:IBM Cognos Business Intelligence Server应⽤程序层组件GatewayContent Manager对话框条⽬信息:[安装位置] D:\Cognos10\c10[快捷⽅式⽂件夹] IBM Cognos 10摘要错误⽇志位置: D:\Cognos10\c10\instlog\tl-BISRVR-10.1-6235.144-20170316_1015_summary_error.txt2.配置Cognos10资料库新建⼀个⼲净的资料库⽤户,并赋予相应的权限:需要先建⽴的⼀个单独的数据表空间,⽤作新⽤户的默认表空间;create user cogtest identified by cogtest default tablespace users temporary tablespace temp;grant connect to cogtest;grant resource to cogtest;grant unlimited tablespace to cogtest;grant create any table to cogtest;grant create any view to cogtest;sqlplus cognosm/cognosm@ora11g3.修改⽹关URI进⼊程序 BM Cognos 10?IBM Cognos Configuration 进⾏Cognos 10的设置,选择“环境”,设置“⽹关URI”为: http://localhost:9300/p2pd/servlet/dispatch即:将原⽹关URI:http://localhost:80/ibmcognos/cgi-bin/cognos.cgi修改为: http://localhost:9300/p2pd/servlet/dispatch4.配置数据源1)在cognos服务器安装oracle客户端,要求和cognos⾥的数据库驱动版本⼀致(cognos\c10\webapps\p2pd\WEB-INF\lib中的数据库驱动)2)在⽹页登陆cognos,在页⾯右上⾓点击“启动-IBM Cognos Administration”,进⼊cognos管理页⾯。
COGNOS安装配置说明

1 Cognos安装说明 (2)1.1 Cognos安装 (2)1.1.1安装环境检查 (2)1.1.2安装Oracle10g客户端及JDK (2)1.1.3安装Cognos ReportNet Server (2)1.1.4安装Cognos PowerPlay Server (6)1.1.5安装Cognos Supplementary Languages (10)1.1.6安装Cognos Framework Manager (15)1.1.7安装Cognos Intelligence OLAP Modeling 8.1 Windows (19)1.1.8安装Cognos SDK (25)1.2 Cognos配置 (30)1.2.1 IIS配置 (30)1.2.2 Geteway Settings配置 (38)1.2.3 Cognos 知识库配置 (38)1.2.4配置中文包 (42)1.2.5 Configuration Manager配置 (46)1.2.6 Access Manager - Administration配置 (56)1.2.7 Cognos Configuration LDAP配置 (58)1Cognos安装说明1.1Cognos安装1.1.1安装环境检查安装环境检查主要检查Cognos涉及的各个网络层面间的服务器间是否连通、安装需要的存储空间是否满足安装需要、操作系统是否按Cognos的要求打了补丁。
在安装Cognos应用服务器前,需要为Cognos创建一个空的数据库作为Cognos的知识库,因此首先检查在数据库服务器上是否创建了空的数据库CM8,并检查在Cognos应用服务器上的Cognos用户是否可以连接到数据库CM8上,检查Cognos用户是否具有创建表、视图和存储过程的权限。
安装Cognos应用服务器及其他相关组件大概需要3G左右的存储空间,检查安装需要的存储空间是否足够。
Cognos10.1安装配置指南(是目前最全的Cognos安装,全文共77页)
Cognos安装配置指南说明:本文是介绍IBM Cognos详细安装配置步骤的文档,所有的安装配置步骤都是基于在管理员权限下进行操作的,在参照下文进行安装时请按照从上往下的顺序一步步来执行。
安装环境:服务器:10.160.17.51操作系统:64位WINDOWS2008安装介质:bisrvr64101ml.iso(从安装原光盘制作成的ISO镜像文件)一、安装步骤:首先要确保10.160.17.51服务器上安装有虚拟光驱(建议虚拟光驱软件:Daemon tools lite4.45及以上版本)和DB2客户端1、双击下图中红色圈起来的安装介质把安装介质载入虚拟光驱2、安装介质载入虚拟光驱后在“计算机”里就多了一个下图中用红色圈起来的光盘3、双击安装光盘,此时安装程序就会自动运行,在弹出来的页面中点击“是”4、选择“中文(中国)(中文(中华人民共和国))”然后点击下一步5、点击“我同意”然后选择下一步6、默认安装目录是下图中的安装目录,但安装位置中的“(x86)”一定要删除掉,因为Cognos 系统是不支持带括号的路径删除掉“(x86)”后的点击下一步然后点击“是”7、组件里的内容要全选,然后点击下一步8、点击下一步9、再次点击下一步10、此时就开始安装在安装过程中会弹出一个提示框直接点击确定11、点击完成,完成Cognos的安装二、配置步骤:(一)Cognos内容库创建及配置步骤:1、Cognos内容库是在10.160.17.51服务器上用DB2创建的,首先在10.160.17.51服务器上点击下图开始菜单中的“命令窗口-管理器”2、在命令窗口里面按次序输入以下7条命令,每条命令输入完后按回车键1)db2 create db content using codeset UTF-8 TERRITORY CN示例输入第一条命令,剩下的6条命令按此方法依次进行输入后按回车键2)db2 connect to content3)db2 "create bufferpool BP_32K immediate size 1000 pagesize 32768"4)db2 "create system temporary tablespace TEMP_TB pagesize 32768 bufferpool BP_32K"5)db2 "create user temporary tablespace USER_TEMP_TB pagesize 4096 bufferpool IBMDEFAULTBP6)db2 "create regular tablespace REG_TBSPC_4K pagesize 4096 bufferpool IBMDEFAULTBP"7)db2 update db cfg using LOCKTIMEOUT 240 APPLHEAPSZ 10243、拷贝DB2驱动到Cognos里1)按下图打开10.160.17.51服务器上DB2的驱动文件夹,对db2java.zip、db2jcc.jar、db2jcc_license_cu.jar三个文件进行复制操作2)按下图打开10.160.17.51服务器上Cognos接收驱动的文件夹,然后把刚才复制的三个文件db2java.zip、db2jcc.jar、db2jcc_license_cu.jar粘贴到该文件夹中,并把db2java.zip 改名为db2java.jar4、配置Cognos内容库1)展开开始菜单中的IBM Cognos 10-64,然后右击IBM Cognos Configuration图标,选择以管理员身份运行2)展开Content Manager然后右击IBM Cognos Content Store选择“删除”然后选择“是”3)右击Content Manager选择新建资源中的数据库4)在名称里输入:“Content Store”,类型选择“DB2 数据库”然后点击确定5)在“数据库服务器和端口号”里输入:10.160.17.51:50000,然后点击“用户ID和密码”右边的笔,在弹出来的提示框里输入用户名:“db2admin”,输入两次密码:“db2admin”然后点击确定6)在“数据库里名称”里输入:“content”7)右击“Content Store”选择测试测试通过后点击关闭8)选择文件菜单里的另存为UTF-8然后点击关闭最后关闭IBM Cognos Configuration(二)配置Cognos Web服务并启动Cognos运行Cognos有两种方式:第一种是用Cognos自带的Tomcat运行Cognos,第二种是配置IIS运行Cognos,两种配置方式同时配上后都可以运行,没有任何影响。
cognos安装部署

Cognos安装及报表迁移部署硬件环境要求:1、操作系统:windowns xp sp22、内存:2G及以上3、CPU:2.2G HZ 双核及以上注意:因cognos服务启动占用较多资源,机器配置要求较高,否则运行时反应很慢。
软件环境要求:cognos 8.4、oracle 10g、apache_2.2安装部署步骤:1、cognos目前项目中使用的有三个组件(Cognos server、FrameworkManageer、Trasformer),名称分别为c8bisrvr_win32_8.4.27.78_ml、c8bimodel_win32_8.4.27.78_ml、cogtrapp_win32_8.4.27.78_ml,安装时首先安装server(c8bisrvr_win32_8.4.27.78_ml),其他两个组件可按任意顺序安装,特别注意:所有组件安装必须指定同一个目录下,否则安装不能成功。
2、安装oracle 10g,新建两个实例orcl和cognosdb,根据实际情况进行创建和命名,如:特别注意:新建cognos数据库实例时,必须指定字符集为UTF-8。
3、在oracle安装目录下找到【oracle安装根目录】\product\10.2.0\db_1\jdbc\lib\classes12.jar,把classes12.jar复制到cognos安装目录【cognos安装目录】\c8\webapps\p2pd\WEB-INF\lib 下。
4、在【cognos安装目录】\c8\bin\jre\1.5.0\lib\ext下找到bcprov-jdk14-134.jar,复制放到JDK安装目录下【JDK安装目录】\jdk1.5.0_06\jre\lib\ext下,这样设置COGNOS启动JRE。
5、安装apache_2.2.4-win32-x86-no_ssl,可默认安装,安装完成之后,找到apache安装目录【apache安装根目录】\conf\httpd.conf,修改httpd.conf 配置文件。
COGNOS服务器安装配置手册
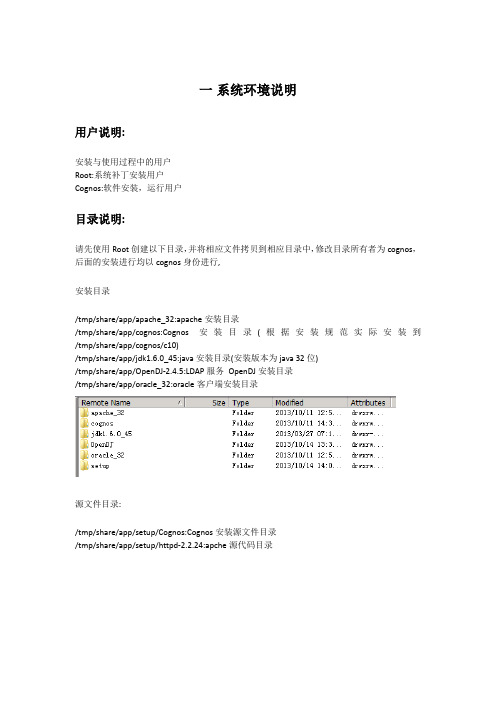
一系统环境说明用户说明:安装与使用过程中的用户Root:系统补丁安装用户Cognos:软件安装,运行用户目录说明:请先使用Root创建以下目录,并将相应文件拷贝到相应目录中,修改目录所有者为cognos,后面的安装进行均以cognos身份进行,安装目录/tmp/share/app/apache_32:apache安装目录/tmp/share/app/cognos:Cognos安装目录(根据安装规范实际安装到/tmp/share/app/cognos/c10)/tmp/share/app/jdk1.6.0_45:java安装目录(安装版本为java 32位)/tmp/share/app/OpenDJ-2.4.5:LDAP服务OpenDJ安装目录/tmp/share/app/oracle_32:oracle客户端安装目录源文件目录:/tmp/share/app/setup/Cognos:Cognos安装源文件目录/tmp/share/app/setup/httpd-2.2.24:apche源代码目录默认配置文件说明.bash_profile cognos10_linux.conf tnsnames.ora mecool-20131204.ldifhttpd.confkettle-start.bat MECOOLDB-BACK.sqlcreate schema.SQLCognos SVR安装时的RPM.txt.bash_profile:用户cognos的登录用户角本,路径为/home/cognos/Cognos10_linux.conf:apache的Cognos虚拟目录配置信息,路径为/tmp/share/app/apache_32/confTnsnames.ora:连接oracle服务的配置信息,路径为/tmp/share/app/oracle_32/network/admin Mecool-20131204.ldif:OpenDJ目录内容备份,安装系统导入路径为/tmp/share/app/setup/OpenDJ-2.4.5Kettle-start.bat:etl启动文件,供windows任务计划调用MECOOLDB-BACK.sql:为mecool数据仓库mecool用户表,存储过程等定义Create schema.sql:为oracle表空间,用户创建语句Httpd.conf:为apche配置文件,本文件不用拷贝,供阅读本文件apache配置部分参考Cognos SVR安装时的RPM:RHEL6.4(64位版本)验证安装所需数据包,RHEL6.4为默认安装,如无意外,请顺序执行包安装提供上述文件是可以直接在上述文件中修改相关配置路径信息,方便安装配置操作。
cognos 安装手册

Cognos安装手册1.软件准备cognos8_1.win.isocognos8_ngpack.win.isoframework.c8.win.isosdk.c8.win.iso2.安装说明本手册中cognos服务器环境为WidowsXp/Windows 2003 Server本手册中数据库均为oracle10g本手册中cognos服务器ip:192.168.100.77本手册中cognos实例库信息:cognos/cognos@cognos,ip:192.168.100.88本手册中开发客户端是指我个人的机器,非cognos服务器。
3.Cognos服务器端安装3.1. 程序安装:3.1.1.Cognos Server组件安装在虚拟光驱中装载cognos8_1.win.iso,会自动弹出安装界面,在安装语言选项中选择默认的“English”,点击“Next”在许可协议中选择“I accept”,点击“Next”选择安装路径,点击“Next”选择安装组件。
在这里展开后可以看到,Cognos BI Server包括Application Tier Server应用层组件、网关及内容管理等几个组件。
因为我们知识库是连接到其它数据库,所以最后一项不选,即在此选择默认即可。
点击“Next”。
选择要在菜单显示的文件夹,点击“Next”出现安装的信息概要,点击“Next”安装中。
点击“Finish”完成安装。
3.1.2.Cognos中文包安装在虚拟光驱中装载cognos8_ngpack.win.iso,会自动弹出安装界面,在安装语言选项中选择默认的“English”,点击“Next”点击“I Accept”接受许可协议选择安装的文件夹目录,该目录与Cognos其他组件安装目录相同。
选择安装的语言,只选择“Simplified Chinese”即可。
接着选择开始菜单的目录点击“Next”进行安装,最后点击Finish完成安装。
cognos安装使用教程

Cognos的主界面包括菜单栏、工具栏、导航窗格、工作区和状态栏。菜单栏提供文件、 编辑、视图等基本操作;工具栏提供常用功能的快捷按钮;导航窗格显示项目、文件夹 和报表等资源的树状结构;工作区用于显示和编辑报表;状态栏显示当前登录用户和系
统状态信息。数据源配置01Fra bibliotek添加数据源
在Cognos中,可以通过“数据源”向导添加新的数据源。支持的数据
硬件要求
安装Cognos的服务器应具备足够 的内存、处理器和存储空间,以确 保系统的稳定运行和性能。
网络要求
确保服务器可以访问互联网,以便 下载安装包和获取更新。
安装包准备
从官方网站下载最新版本的Cognos 安装包。确保选择与您的操作系统和 硬件兼容的版本。
在下载安装包之前,请仔细阅读官方 文档,了解安装过程中的注意事项和 常见问题。
确保服务器的防火墙和安全设置允许Cognos的正常运行,包括网络通 信和文件访问等。
03
cognos安装步骤
安装向导启动
下载Cognos安装包
从IBM官方网站或其他可信来源下载 Cognos的安装包。
启动安装程序
双击下载的安装包,启动Cognos的安装向 导。
选择安装语言
在安装向导中选择您偏好的安装语言。
源类型包括关系型数据库、多维数据库、XML文件等。添加数据源时需
要提供数据源的名称、类型、连接字符串等信息。
02
配置数据源属性
在数据源配置界面中,可以设置数据源的属性,如连接超时时间、查询
超时时间、最大连接数等。这些属性可以根据实际需要进行调整,以优
化系统性能。
03
测试数据源连接
配置完成后,可以点击“测试连接”按钮,验证数据源配置是否正确。
Cognos10 安装配置手册
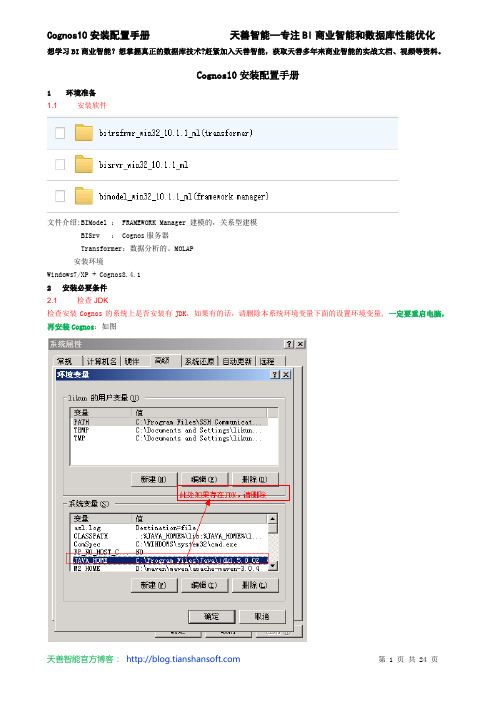
Cognos10安装配置手册1环境准备1.1 安装软件文件介绍:BIModel : FRAMEWORK Manager 建模的,关系型建模BISrv : Cognos服务器Transformer:数据分析的。
MOLAP安装环境Windows7/XP + Cognos8.4.12安装必要条件2.1 检查JDK检查安装Cognos的系统上是否安装有JDK,如果有的话,请删除本系统环境变量下面的设置环境变量,一定要重启电脑,再安装Cognos:如图3安装Cognos10文件3.1 安装IBM Cognos 10 BI Server即Cognos服务器,对应我们安装文件bisrvr_win32_10.1.1_mlbisrvr_win32_10.1.1_ml=> win32点击3.1.1打开文件issetup.exe,如下图,选择“中文(中国)”点击下一步3.1.2选择安装目录,"下一步" 提示目录不存在,选择是,创建Cognos根目录3.1.3选择Cognos Content Database ,安装Cognos自带的Database store [选择需要安装的组件,把Cognos Conten Database选上,这里安装Cognos Content Database,我们用其自带的资料库存储信息,选择下一步]3.1.4点击“下一步”直到“完成”3.2 安装IBM Cognos Transformer 对应我们的安装文件bitrsfrmr_win32_10.1.1_ml(transformer)3.2.1打开文件bitrsfrmr_win32_10.1.1_ml(transformer) => win32 点击issetup.exe,如下图,选择“English”点击下一步3.2.2选择安装目录,"下一步" 提示是否安装与之前目录相同,选择“Yes”3.2.3下一步提示是否备份,选择“No”.3.2.4点击“下一步”,直到“完成”3.3 安装BIModel对应我们的安装文件: bimodel_win32_10.1.1_ml(framework manager)3.3.1打开文件bimodel_win32_10.1.1_ml(framework manager) => win32 点击issetup.exe,如下图,选择“English”点击下一步3.3.2选择安装目录,"下一步" 提示是否安装与之前目录相同,选择“Yes”3.3.3下一步提示是否备份,选择“No”.3.3.4点击“下一步”,选择语言为“Simplified Chinese”3.3.5点击“下一步”,直到“完成”4安装后环境配置4.1 配置前准备条件如果使用Cognos自带的Tomcat web容器,请将C:\Program Files\cognos\c8\webcontent下的所有文件拷贝到C:\Program Files\cognos\c8\webapps\p2pd 下面.(一般我们就使用Tomcat,这一步必须做)4.2 配置IBM Cognos Configuration,并启动服务。
cognos安装教程
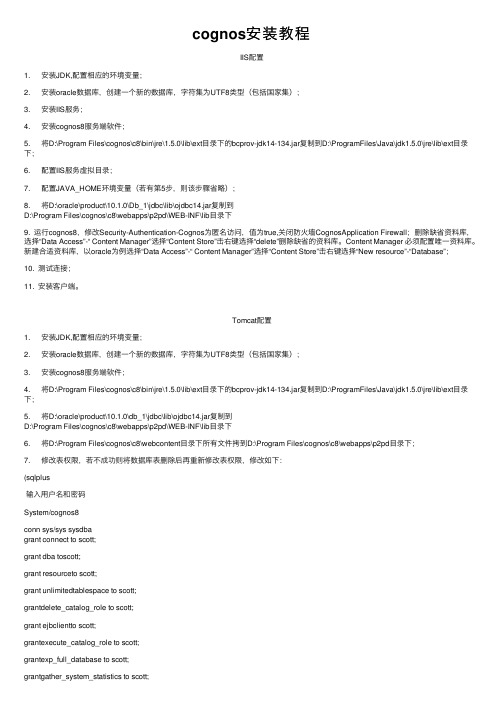
cognos安装教程IIS配置1. 安装JDK,配置相应的环境变量;2. 安装oracle数据库,创建⼀个新的数据库,字符集为UTF8类型(包括国家集);3. 安装IIS服务;4. 安装cognos8服务端软件;5. 将D:\Program Files\cognos\c8\bin\jre\1.5.0\lib\ext⽬录下的bcprov-jdk14-134.jar复制到D:\ProgramFiles\Java\jdk1.5.0\jre\lib\ext⽬录下;6. 配置IIS服务虚拟⽬录;7. 配置JAVA_HOME环境变量(若有第5步,则该步骤省略);8. 将D:\oracle\product\10.1.0\Db_1\jdbc\lib\ojdbc14.jar复制到D:\Program Files\cognos\c8\webapps\p2pd\WEB-INF\lib⽬录下9. 运⾏cognos8,修改Security-Authentication-Cognos为匿名访问,值为true,关闭防⽕墙CognosApplication Firewall;删除缺省资料库,选择“Data Access”-“ Content Manager”选择“Content Store”击右键选择“delete”删除缺省的资料库。
Content Manager 必须配置唯⼀资料库。
新建合适资料库,以oracle为例选择“Data Access”-“ Content Manager”选择“Content Store”击右键选择“New resource”-“Database”;10. 测试连接;11. 安装客户端。
Tomcat配置1. 安装JDK,配置相应的环境变量;2. 安装oracle数据库,创建⼀个新的数据库,字符集为UTF8类型(包括国家集);3. 安装cognos8服务端软件;4. 将D:\Program Files\cognos\c8\bin\jre\1.5.0\lib\ext⽬录下的bcprov-jdk14-134.jar复制到D:\ProgramFiles\Java\jdk1.5.0\jre\lib\ext⽬录下;5. 将D:\oracle\product\10.1.0\db_1\jdbc\lib\ojdbc14.jar复制到D:\Program Files\cognos\c8\webapps\p2pd\WEB-INF\lib⽬录下6. 将D:\Program Files\cognos\c8\webcontent⽬录下所有⽂件拷到D:\Program Files\cognos\c8\webapps\p2pd⽬录下;7. 修改表权限,若不成功则将数据库表删除后再重新修改表权限,修改如下:(sqlplus输⼊⽤户名和密码System/cognos8conn sys/sys sysdbagrant connect to scott;grant dba toscott;grant resourceto scott;grant unlimitedtablespace to scott;grantdelete_catalog_role to scott;grant ejbclientto scott;grantexecute_catalog_role to scott;grantexp_full_database to scott;grantgather_system_statistics to scott;grantimp_full_database to scott;grant resourceto scott;grantselect_catalog_role to scott;-- Grant/Revokesystem privilegesgrant create anymaterialized view to scott;grant create anytable to scott;grant create anyview to scott;grant createtable to scott;grant drop anymaterialized view to scott;grant drop anytable to scott;grant unlimitedtablespace to scott;若重新创建⽤户,则:create userscottidentified by scottdefault tablespace USERStemporary tablespace TEMPprofile DEFAULT;grant connect toscott;grant dba toscott;grant resourceto scott;grant unlimitedtablespace to scott;grantdelete_catalog_role to scott;grant ejbclientto scott;grantexecute_catalog_role to scott;grantexp_full_database to scott;grantgather_system_statistics to scott;grantimp_full_database to scott;grant resourceto scott;grant select_catalog_roleto scott;-- Grant/Revokesystem privilegesgrant create anymaterialized view to scott;grant create anytable to scott;grant create anyview to scott;grant createtable to scott;grant drop anymaterialized view to scott;grant drop anytable to scott;grant unlimitedtablespace to scott;8. 运⾏cognos8,修改Security-Authentication-Cognos为匿名访问,值为true,关闭防⽕墙CognosApplication Firewall;删除缺省资料库,选择“Data Access”-“ Content Manager”选择“Content Store”击右键选择“delete”删除缺省的资料库。
Cognos安装配置手册

山东省城市商业银行合作联盟Cognos安装配置手册2013-6文件修订历史目录1 安装前准备 (4)1.1 系统要求 (4)1.2 安装软件环境要求: (4)1.3 操作系统要求 (4)1.4 下载并安装JRE (6)1.5 安装Oracle或DB2 (7)2 安装和配置Cognos BI 产品 (10)2.1 安装Cognos BI Server 产品 (10)2.1.1 设置环境变量 (10)2.1.2 Cognos BI Server安装 (11)2.1.3 启动服务 (16)2.1.4 配置tomcat servlet网关 (19)2.2 安装IHS (20)2.3 配置IHS (27)2.4 配置cognos (28)2.5 安装transformer (34)2.6 安装配置OpenLDAP (40)2.6.1 安装所需要的安装包 (40)2.6.2 安装openssl-devel(安装第2.6.1节指定的版本) (40)2.6.3 安装cyrus-sasl(安装第2.6.1节指定的版本) (41)2.6.4 安装BerkeleyDB(安装第2.6.1节指定的版本) (41)2.6.5 安装OpenLDAP(安装第2.6.1节指定的版本) (41)2.6.6 配置OpenLDAP (41)2.6.7 配置LDAP Admin (42)2.6.8 配置Cognos Configuration (45)3 验证 (48)3.1 验证cognos connection (48)3.2 验证数据库连接 (48)1安装前准备1.1系统要求Cognos BI Server 可以安装在以下操作系统:1.Windows2.UNIX(Sun Solaris, HP-UX, IBM AIX)3.Linux机器内存最小为 2G,可用硬盘空间最小为 3.5G,其中 2.5G 为软件安装所需,1G 为 Cognos BI Server 各组件作为临时文件夹所用。
IBM Cognos Command Center Version 10.2.0 快速入门指南说明书
IBM Cognos Command CenterVersion 10.2.0Quick Start GuideThis guide gets you started with a typical installation for IBM Cognos Command Center.Product overviewIBM ®Cognos ®Command Center ®provides self-service automation for business users to view and run automated processes.Through a single interface,users can run and monitor their processes from web-enabled devices and respond to real-time alerts and information.Before you install Cognos Command Center,perform the following tasks,verify that you have the necessary software,a license key,and documentation.When you install Cognos Command Center for the first time,you must first design your system and identify computers for each component.For more information,see the System Architecture section in the IBM Cognos Command Center Installation Guide .For each workstation that you designate for the installation,perform the following tasks:v Install Microsoft .NET Framework.v Review and meet the minimum system requirements for each component that you plan to install.For information on supported environments and system requirements,see the requirements page(/support/docview.wss?uid=swg27039626).named cccAgent and run the cccAgent Windows service under this account.For information on planning and installing the agent component on a UNIX or Linux system,see the IBM Cognos Command Center Agent for UNIX Installation Guide .Microsoft SQL Server database or an Oracle database.If you plan to install the server component,you must also meet the system requirements for the repository.If you use an Oracle RDBMS and want to maintain full control over the database parameters,you must create a new empty schema in the Oracle database before you run the installation wizard.The Cognos Command Center Windows installation wizard runs as a 32-bit application.If you use an Oracle database in a 64-bit Windows environment,you must install the Oracle 32-bit driver and temporarily change the values for several Windows environment variables before you run the installation wizard.For more information,see the IBM Cognos Command Center Installation Guide .To use the web client,you must install and configure the appropriate version of Microsoft IIS (Internet Information Services)on each workstation.The IIS version that you choose depends on the Windows version.v For Windows 2003or Windows 2003R2,install IIS version 6.0v For Windows 2008,install IIS version 7.0v For Windows 2008R2,install IIS version 7.5The Cognos Command Center installation wizard installs all of the Cognos Command Center components that you select.In the wizard,you can also create or update the RDBMS repository.The installation wizard leads you through the installation of one or more of the following components:the client,the command line client,the agent,the server,and web application.Run the installation wizard on each Windows workstation in your Cognos Command Center system,and select one or more components for each installation.1.Run the IBMCognosCommandCenterStarter.10.2.msi file or the IBMCognosCommandCenterStandard.msi file.2.In the wizard,follow the prompts to proceed with the installation.After you install and configure the components,complete the installation.1.In the installation wizard,on the Ready to install page,click Finish.plete the installation of the server.installed.v To start the server from the server installation directory,run the SccServer.exe file.v To start the agent component,from the agent installation directory,run the SccAgent.bat file.v To start the client component,from the desktop,click the Cognos Command Center icon.Respond to the prompts and remember to use the host name and port number of the Cognos Command Center server.v To start the web client,open a web browser and enter the following URL in the address bar:https://CCC-HOST:8180/ HomeAfter you install Cognos Command Center components,there are security,communication,registration,and other tasks to complete.More informationFor more information,see the following resources:v Product support(/software/analytics/staranalytics/customercenter/support.html)v IBM User Communities(/community/)IBM Cognos Command Center Version10.2.0Licensed Materials-Property of IBM.©Copyright IBM Corp.2008,ernment Users Restricted Rights-Use,duplication or disclosure restricted by GSA ADP Schedule Contract with IBM Corp.IBM,the IBM logo,and ®are trademarks or registered trademarks of International Business Machines Corp.,registered in many jurisdictions worldwide.Other product and service names might be trademarks of IBM or other companies.A current list of IBM trademarks is available on the web at“Copyright and trademark information”/legal/copytrade.shtml.Part Number:CF3YLENPrinted in Ireland。
windows下cognos安装
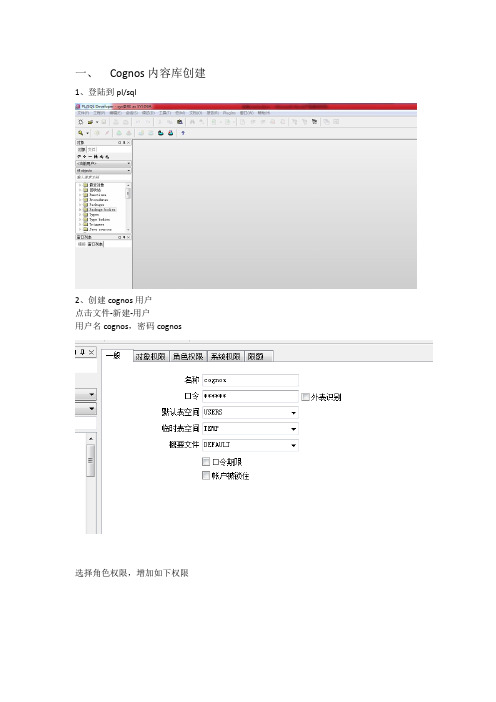
一、Cognos内容库创建1、登陆到pl/sql2、创建cognos用户点击文件-新建-用户用户名cognos,密码cognos选择角色权限,增加如下权限点击应用,关闭完成用户创建3、使用创建的用户登陆pl/sql4、登陆成功,完成cognos内容库创建二、cognos安装1、点击台州cognos部署内容\安装软件\cognos\bi_svr_32b_10.2.1_win_ml\win32下的issetup.exe,选择(english)英语,点击下一步2、3、自己选择安装目录,点击next4、点击yes5、点击next6、点击next7、8、9、点击ok10、点击finish11、复制oracle安装目录oracle\product\11.2.0\server\jdbc\lib下的ojdbc6.jar到cognos安装目录ibm\cognos\c10\webapps\p2pd\WEB-INF\lib目录下12、复制congos安装目录\ibm\cognos\c10\webcontent\下的所有内容到ibm\cognos\c10\webapps\p2pd\目录下13、点击复制和替换14、点击开始菜单,选择ibm cognos configuration15、打开Environment页面,修改Gateway URI,和Controller URI for gateway,将http://localhost:80/ibmcognos/cgi-bin/cognos.cgi替换为:http://localhost:9300/p2pd/servlet/dispatch16、点击content store 右键点击删除17、点击yes18、右键content manager 新建database19、给内容库起个名字,type选择oracle database,点击ok20、点击编辑21、输入第一步为cognos创建的内容库用户名密码,点击ok22、输入对应SID23、右击cognos content 点击测试24、测试成功,点击关闭25、点击start26、选择yes27、点击ok28、点击continue29、点击closse完成配置30、复制gatewayurl内容,打开ie31、出现如下界面则cognos安装完成三、FM安装1、点击cognos部署内容\安装软件\cognos\fm_10.2.1_win_ml\win32下的issetup.exe,2、安装和cognos安装一样,在出现时点击确定2、默认安装即可3、点击ok,4、点击finish。
Cognos10的安装及使用入门_J

2013-12-21
Powered by 数据中国大讲坛
15
BISever服务器安装
2013-12-21
Powered by 数据中国大讲坛
16
目录
Cognos简介 Congos安装配置 服务器安装配置 IIS配置方式 Tomcat 配置方式 客户端安装配置 Cognos的使用 Framework Manager进行建模 ReportStudio创建报表
Powered by 数据中国大讲坛
21
IIS配置
2013-12-21
Powered by 数据中国大讲坛
22
IIS配置
2013-12-21
Powered by 数据中国大讲坛
23
目录
Cognos简介 Congos安装配置 服务器安装配置 IIS配置方式 Tomcat 配置方式 客户端安装配置 Cognos的使用 Framework Manager进行建模 ReportStudio创建报表
Cognos基础使用
九天玄烨(黄烨)
数据中国大讲坛
2013-12-21 Powered by 数据中国大讲坛 1
课程介绍
黄烨 国内某上市公司,现主要负责报表平台产品的设计与整合 。精通Java、Oracle、DB2以及银行监管业务。擅长模型 设计及各类型报表开发。主要工具有DataStage、 Informatic、Webi、Cognos、MSTR等。 2013年12月21日晚八点半,YY频道85536471,由黄烨为 您讲述《cognos安装及使用入门》。 /forum.php?mod=viewthread&tid=2 410 数据中国大讲坛首次cognos课程。感谢黄烨的无私分享。 本次课程将带领学员完成 1. cognos的安装 2. 第一个cognos报表的创建
Cognos10安装部署技巧
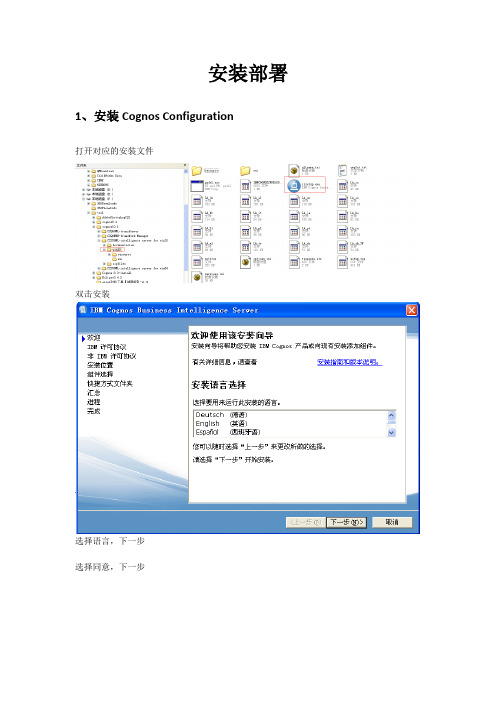
安装部署1、安装Cognos Configuration打开对应的安装文件双击安装选择语言,下一步选择同意,下一步选择安装路径,下一步(不存在的目录,需要点击“是”新建)下一步下一步下一步剩下步骤自动完成安装选择启动Cognos Configuration,点击完成,以启动Cognos。
点击文件—另存为UTF8,初始化配置库信息。
拷贝…\cognos\c10\webcontent目录下所有文件到…\cognos\c10\webapps\p2pd目录下。
启动Cognos Configuration,完成后在IE下输入http://localhost:9300/p2pd/servlet/dispatch(如是服务器,则需要把对应的localhost全部修改为IP地址)注意:如果要使用oracle为配置库,则要把oracle的配置库设置为UTF-8字符集的,查询本地数据库字符集的SQL为:select userenv('language') from dual,显示SIMPLIFIED CHINESE_CHINA.AL32UTF8为UTF-8字符集。
1、在sql/plus中以dba登录Conn / as sysdba2、执行转换语句:Shutdown immediate;Startup mount exclusive;Alter system enable restricted session;Alter system set job_queue_processes=0;Alter system set aq_tm_processes=0;Alter database open;Alter database national character set internal_use UTF8;Shutdown immediate;Startup;并且要把oracle的驱动拷贝到cognos的bin目录下。
IBM Cognos TM1版本10.2.2快速入门指南说明书
IBM Cognos TM1Version 10.2.2Quick Start GuideThe Quick Start Guide gets you started with IBM Cognos TM1.Translated Versions:To obtain the Quick Start Guide in other languages,access the PDF and HTML from the Quick Start CD.Product OverviewIBM ®Cognos ®TM1®integrates business planning,performance measurement,scorecarding,and multiple sources of data.Cognos TM1provides immediate visibility into data,accountability within a collaborative process,and a consistent view of information.Cognos TM1helps managers quickly identify and stabilize operational fluctuations to take advantage of new opportunities.v Cognos TM1Webv Cognos TM1Operations Consolev Cognos TM1Architectv Cognos TM1Perspectivesv Cognos TM1APIsv Cognos TM1Applicationsv SamplesThe following components are optional and may be added during the initial installation or later:v Cognos TM1Performance Modeler (includes Cognos TM1Scorecarding)v Cognos Insight (web-based client).Cognos Insight can be installed as a stand-alone component or as part of your Cognos TM1installation.For more information,see the Cognos Insight website.v Translated documentation.To display the Help documentation in a language other than English,select the additional languages you want from the Translated Documentation list during installation.English documentation is installed by default.Vista,Windows7,or Windows Server2008operating system software,right-click the issetup.exe file and click Run as Administrator.For all other Windows operating system software,double-click issetup.exe.4.Select the components that you want to install:Installing on a single computerThe components that you need to install Cognos TM110.2.2on a single computer are selected by default.Accept the default selections.Installing across multiple computersTo distribute the Cognos TM1components across different computers,run the installation and select only thecomponents you need for this computer.Then move to the other computers and select the other componentsyou need during the installation.For detailed instructions on how to install different components on separatecomputers,see the IBM Cognos TM1Installation and Configuration Guide.v Start the IBM Cognos TM1Admin Server and the IBM Cognos TM1Applications server.v Start at least one Cognos TM1server,such as one of the default sample databases.v If you plan to use the Cognos TM1Operations Console,start the SData server.Cognos TM1on a computer with a Microsoft Windows operating system,edit the services so that the user account that runs the service has the administrative privileges that are needed by Cognos TM1.For more information,see the IBM Cognos TM1Installation and Configuration Guide.This requirement applies only to services on the Microsoft Windowsoperating system.Cognos TM1services that are installed on UNIX always run as ROOT.More informationFor more technical resources,see:v Cognos TM1product and feature information(/software/data/cognos/products/tm1)v Product support(/support/docview.wss?uid=swg27040698)Licensed Materials-Property of IBM©Copyright IBM Corp.2007,2014.US Government Users Restricted Rights–Use,duplication or disclosure restricted by GSA ADP Schedule Contract with IBM Corp.IBM,the IBM logo,®,TM1and Cognos,are trademarks or registered trademarks of International Business Machines Corp.,in many jurisdictions worldwide.Other product and service names might be trademarks of IBM or other companies.A current list of IBM trademarks is available on the Web at Copyright and trademark information(/legal/copytrade.shtml)Part Number:CF44CMLPrinted in Ireland。
Windows下cognos安装的步骤
1安装Oracle10G。
1.完整的服务端:在文件夹“所需东西”里有Oracle10G的安装文件,把Oracle进行一下安装(另外参考数据库安装文档)。
安装完后,建立表空间“df”,建立用户“df”,密码为“df”。
然后在“df”中用户下导入“85_dw.dmp”。
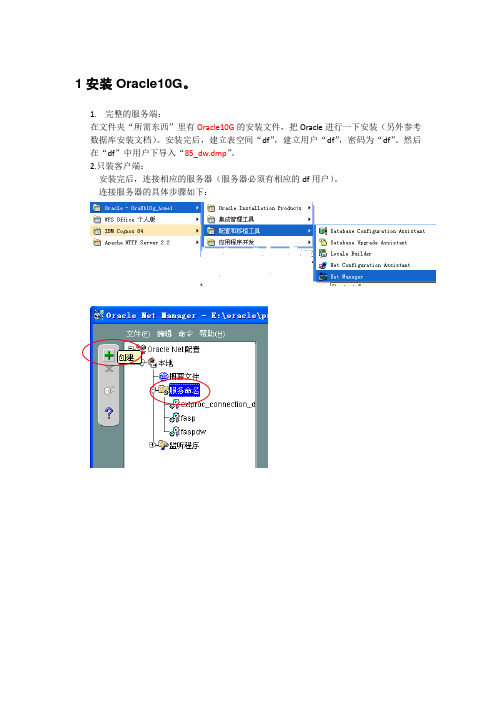
2.只装客户端:安装完后,连接相应的服务器(服务器必须有相应的df用户)。
连接服务器的具体步骤如下:2 安装jdk1.5在文件夹“所需东西”里有“jdk-1_5_0-windows-i586.exe”,点击进行安装。
安装完后,在“我的电脑”—> “属性”---> “高级”-->“环境变量”里添加“JAVA_HOME”路径为jdk1.5的安装路径。
3安装Cognos的服务端。
在文件夹“所需东西”里有“c8bisrvr_win32_8.4.27.78_ml”的安装文件夹下win32里“issetup.exe”,进行Cognos的服务端安装。
步骤如下:打开c8bisrvr_win32_8.4.27.78_ml\win32目录,点击安装文件issetup.exe。
按步骤安装。
选择安装路径。
选择Cognos自带内容数据库(红线标示部分)。
设置Cognos快捷确认安装信息安装安装完成把Cognos84安装目录下的\bin\jre\1.5.0\lib\ext中的“bcprov-jdk14-134.jar”拷贝到上面安装的jdk1.5的安装目录“\jdk1.5.0\jre\lib\ext”下。
选中内容数据库,点击绿三角启动服务选中IBM COGNOS 8 服务,,点击绿三角启动服务启动成功4.安装APACHE 服务器点击文件安装。
进入安装界面接受协议填写服务器信息选择安装方式更改安装路径点击change。
放开拦截打开D:\Apache Software Foundation\Apache2.2\conf目录下的httpd.conf文件将以下代码加入到文件最后部分。
Cognos_10_环境搭建安装配置指引

Cognos_10_环境搭建安装配置指引IBM Cognos 环境搭建指引一.下载并安装Oracle 10g。
注意事项:1.如果操作系统曾经安装过Oracle且删除的时候做的不干净,则会导致Oracle安装失败或者安装后无法使用。
建议有类似情况的同事,重装操作系统,是否GHOST版没有关系。
2.在默认情况下,Oracle执行基本安装,所创建的数据库不支持UTF-8字符集。
因此,必须选择高级安装方式,并在安装选项中设置字符集为UTF-8,以免在启动IBM Cognos 服务出错。
二.使用Oracle 10g创建用户并授权。
浏览器访问URL:http://localhost:5560/isqlplus/ 以SYSTEM用户登录,密码为orcl对应的密码执行相关SQL:create user zhanjq identified by zhanjq ;grant connect,resource,dba to zhanjq ;三.安装Cognos 10组件。
注意事项:1.六个组件可以按照任意次序安装。
2.建议将六个组件安装在同一位置,对于重复警告,选择覆盖。
3.默认选择安装在C盘目录。
4.打开之后运行win32目录的安装脚本,例如:1.JDK安装文件:2.JDK主目录:3.配置环境变量3.1 JA V A_HOMED:\JDK63.2 Path%JA V A_HOME%\bin;D:\oracle\product\10.2.0\db_1\bin;%SystemRoot %\system32;%SystemRoot%;%SystemRoot%\System32\Wbem;D:\SVN\bin3.3 Classpath%JA V A_HOME%\lib\tools.jar;%JA V A_HOME%\lib\dt.jar;五.Jar文件复制。
1.将cognos的bcprov-jdk14-134.jar拷贝到JVM对应目录。
Cognex康耐视相机操作使用说明书
GOTO(int0);
END_IF
Lin(rcpe1);//走到codesys里输出的绝对位置(外部点形式,该位置是机器人当前位置加上相对偏移,端口号1)
BOOLEXTSet(boolfinishget,TRUE);//发送抓取完成标志
WaitTime(uint2);
WaitTime(uint0);//等待PLC处理时间,建议在300ms以上
bool0:=BOOLEXTRead(boolenableget);//读取抓取标志位,为TRUE则能抓取
BOOLEXTSet(boolphoto,FALSE);//关闭该端口,保证下次为高电平触发
IF(bool0=0)THEN//为true则可抓取,否则重新发送拍照命令
首先,用step机器人三点法示教出一个固定用户坐标系。用户坐标系的原点根据实际情况而定,一般选择流水线上一个固定位置参考点,该参考点要方便相机进行坐标转化标定。关于用户坐标系的标定,可参见新时达机器人操作使用说明书;
其次,进行相机坐标与实际位置坐标的标定转换。在完成第一步中的固定用户坐标系标定后,在该坐标系下选取工件上的三点,计算出这三点在用户坐标系的X、Y值(该步骤可通过机器人协助示教获得在用户坐标系下的位姿值)。在图像输入的“校准”模块中,按照2.1中的步骤完成相机坐标与实际位置坐标的校准参数制作转换;
BOOLEXTSet(boolbasepos,TRUE);//端口号为2,读取当前位置作为标准抓取位置
WaitTime(uint4);
BOOLEXTSet(boolbasepos,FALSE);//关闭该端口
/////以上为获得标准抓取位置需要的步骤
PTP(ap0);//回到安全点
- 1、下载文档前请自行甄别文档内容的完整性,平台不提供额外的编辑、内容补充、找答案等附加服务。
- 2、"仅部分预览"的文档,不可在线预览部分如存在完整性等问题,可反馈申请退款(可完整预览的文档不适用该条件!)。
- 3、如文档侵犯您的权益,请联系客服反馈,我们会尽快为您处理(人工客服工作时间:9:00-18:30)。
IBM Cognos Business IntelligenceVersion10.2.2Getting Started Installation GuideNoteBefore using this information and the product it supports,read the information in“Notices”on page31.Product InformationThis document applies to IBM Cognos Business Intelligence Version10.2.2and may also apply to subsequent releases.Licensed Materials-Property of IBM©Copyright IBM Corporation2005,2014.US Government Users Restricted Rights–Use,duplication or disclosure restricted by GSA ADP Schedule Contract with IBM Corp.Contents Introduction (v)Chapter1.Install IBM Cognos Business Intelligence on one computer (1)Using the Quick Setup option (1)System requirements (2)Installing the server components (3)Installing Framework Manager (4)Create a content store database (5)Creating a content store in IBM DB2 (5)Creating a content store in Microsoft SQL Server (6)Saving your settings and starting the IBM Cognos services (7)Confirming that Content Manager is running (7)Configure your web server (8)Use the CGI gateway on Microsoft Internet Information Services version7or later (8)Using the CGI gateway on Apache Server or IBM HTTP Server (10)Testing your access to the portal (10)Configuring Framework Manager on a64-bit computer (11)Chapter2.Installing the Cognos Business Intelligence samples (13)Creating the sample databases in IBM DB2 (13)Creating data source connections to the samples database in IBM DB2 (14)Creating the sample databases in Microsoft SQL Server (15)Creating data source connections to the samples database in Microsoft SQL Server (15)Importing the samples (16)Chapter3.Add components to your installation (19)Add an Application Tier Components instance (20)Set the server name for your existing instance (21)Install an Application Tier Components instance (22)Configure the Application Tier Components instance (22)Test your Application Tier Components instance (23)Add a web gateway (24)Install a web gateway (24)Configure the gateway (25)Configure your web server (25)Test your access to your second portal (28)Appendix.Accessibility features (29)Keyboard Shortcuts for the Installation Wizard (29)Notices (31)Index (35)©Copyright IBM Corp.2005,2014iiiiv IBM Cognos Business Intelligence Version10.2.2:Getting Started Installation GuideIntroductionThis document is intended for use with IBM®Cognos®Business Intelligence.Cognos BI is a Web-based business intelligence solution with integrated reporting,analysis,scorecarding,and event management features.This document provides the information you need to install and configure CognosBI on a Microsoft Windows operating system using a single-server installation withdefault settings.This installation is the quickest and easiest way to get started,andsuitable for setting up a test or evaluation environment.Additional tasks are provided to extend the single-server installation by addingcomponents to your installation.Further information on distributed installations,however,is provided in the IBM Cognos Business Intelligence Installation andConfiguration Guide.AudienceTo use this guide,you should be familiar with:v Some database conceptsv Basic Microsoft Windows operating system administration skillsv Web server configurationFinding informationTo find product documentation on the web,including all translateddocumentation,access IBM Knowledge Center(/support/knowledgecenter).Release Notes are published directly to IBM Knowledge Centerand include links to the latest technotes and APARs.You can also read PDF versions of the product online help files by clicking thePDF links at the top of each HTML page,or access the PDFs from the IBM Cognosproduct documentation web page(/support/docview.wss?uid=swg27042003).Accessibility featuresAccessibility features help users who have a physical disability,such as restrictedmobility or limited vision,to use information technology products.This producthas accessibility features.For information on these features,see“KeyboardShortcuts for the Installation Wizard”on page29.IBM Cognos HTML documentation has accessibility features.PDF documents aresupplemental and,as such,include no added accessibility features.Forward-looking statementsThis documentation describes the current functionality of the product.Referencesto items that are not currently available may be included.No implication of anyfuture availability should be inferred.Any such references are not a commitment,promise,or legal obligation to deliver any material,code,or functionality.The©Copyright IBM Corp.2005,2014vdevelopment,release,and timing of features or functionality remain at the solediscretion of IBM.Samples disclaimerThe Sample Outdoors Company,Great Outdoors Company,GO Sales,anyvariation of the Sample Outdoors or Great Outdoors names,and Planning Sampledepict fictitious business operations with sample data used to develop sampleapplications for IBM and IBM customers.These fictitious records include sampledata for sales transactions,product distribution,finance,and human resources.Any resemblance to actual names,addresses,contact numbers,or transactionvalues is coincidental.Other sample files may contain fictional data manually ormachine generated,factual data compiled from academic or public sources,or dataused with permission of the copyright holder,for use as sample data to developsample applications.Product names referenced may be the trademarks of theirrespective owners.Unauthorized duplication is prohibited.vi IBM Cognos Business Intelligence Version10.2.2:Getting Started Installation GuideChapter1.Install IBM Cognos Business Intelligence on one computerThis topic outlines the information that you need to install and configure IBMCognos Business Intelligence on a single computer with default settings.This typeof installation is suitable for a test or evaluation environment.This document provides you with the information you need to install Cognos BIunder the following conditions:v Installing on a single Microsoft Windows computer.v Using either the Quick Setup option,Cognos Content Database,IBM DB2®,orMicrosoft SQL Server as the content store.v Using Microsoft Internet Information Services(IIS),Apache Web Server,or IBMHTTP Server as the web server.v Using the default WebSphere®Liberty Profile as the application server.v Without enabling security.Note:The Quick Setup option is only available for64-bit installations.The remaining chapters provide information about installing the samples,andabout extending the single-server installation by adding components to yourinstallation.Additional information about customizing the installation,distributing thecomponents across multiple computers,with another database or applicationserver,or about upgrading an existing installation is provided in the IBM CognosBusiness Intelligence Installation and Configuration Guide.Using the Quick Setup optionThe Quick Setup option installs all components(application tier,gateway,ContentManager),installs and configures a servlet gateway,installs and configures IBMDB2®Advanced Workgroup Server Edition as the content store database,populatesContent Manager configuration information within Cognos Configuration,configures a personal data set,and starts all services.Before you beginThe Quick Setup option is available for a Windows64-bit operating system with atleast10GB of memory,and if DB2is not installed on the computer.Procedure1.Insert the IBM Cognos product disk or go to the location where the installationfiles were downloaded and extracted.To manually start the installation wizard,go to the operating system directoryand then double-click the issetup.exe file.2.Select the language to use for the installation.The language that you select determines the language of the user interface.Youcan change the language of the user interface to any of the installed languagesafter installation.©Copyright IBM Corp.2005,201413.Click Quick Setup to install the required components,IBM DB2AdvancedWorkgroup Server Edition,and a servlet gateway.This option is not availableon32-bit Windows installations or if DB2is already installed.This option isonly available on64-bit Windows environments.4.Click Next and follow the directions in the wizard to complete the installation.System requirementsUse the following tables to check the minimum hardware and softwarerequirements to install and run IBM Cognos Business Intelligence components onone computer.Additional resources may be required for distributed or productionenvironments.To review an up-to-date list of environments that are supported by IBM CognosBusiness Intelligence products,including information on operating systems,patches,browsers,web servers,directory servers,database servers,and applicationservers,see the IBM Software Product Compatibility Reports page(/support/docview.wss?uid=swg27042164).Table1.Hardware requirementsRequirement SpecificationOperating system Microsoft WindowsRAM Minimum10GB.Note:Memory settings depend on many factors,such as thelevel of activity expected on the server,the complexity of theIBM Cognos applications,the number of users and requests,and acceptable response times.Disk space A minimum of3.5GB of free space is required to install thesoftware and4GB of free space on the drive that containsthe temporary directory used by IBM Cognos components.For all databases,the size will increase over time.Ensure thatyou have sufficient disk space for future requirements.Table2.Software requirementsRequirement SpecificationWeb server A web server must be installed and started.If using theQuick Setup option(64-bit only),a servlet gateway isconfigured as part of the installation meaning there is noneed for a web server.2IBM Cognos Business Intelligence Version10.2.2:Getting Started Installation GuideTable2.Software requirements(continued)Requirement SpecificationDatabase The Quick Setup option(64-bit only)installs and configuresIBM DB2Advanced Workgroup Server Edition.This optionis not available if DB2is already installed.Cognos Content Database can be installed and configured asthe default content store database in a test orproof-of-concept system.If you do not use the Quick Setup option,or install theCognos Content Database component,you can use anotherdatabase,including your own instance of IBM DB2,Microsoft SQL Server,Oracle,Sybase,or Informix®.This document includes steps for using IBM DB2AdvancedWorkgroup Server Edition,Cognos Content Database,IBMDB2,and Microsoft SQL Server.For the other supporteddatabases,see the IBM Cognos Business Intelligence Installationand Configuration Guide.TCP/IP connectivity is required for all database types.Web browser For all web browsers,the following options must be enabled:v Cookiesv JavaScriptFor Microsoft Internet Explorer only,the following optionsmust be enabled:v Run ActiveX controls and plug-insv Script ActiveX controls marked safe for scriptingv Active scriptingv Allow META REFRESHInstalling the server componentsUse the installation wizard to copy all the components to your computer.If you are installing on a computer running32-bit Windows Vista,Windows7,orWindows2008operating system,the default installation location uses the ProgramFiles(x86)directory.If you install to this location,ensure that you run IBM CognosConfiguration as an Administrator.Alternatively,you can install the productoutside of the Program Files(x86)directory.For example,you can change theinstallation directory to something like C:\ibm\cognos\c10.Procedure1.Insert the IBM Cognos product disk or go to the location where the installationfiles were downloaded and extracted.To manually start the installation wizard,go to the operating system directoryand then double-click the issetup.exe file.2.Select the language to use for the installation.The language that you select determines the language of the user interface.Youcan change the language of the user interface to any of the installed languagesafter installation.Chapter1.Install IBM Cognos Business Intelligence on one computer33.Click Quick Setup to install and configure the required components,IBM DB2Advanced Workgroup Server Edition,a servlet gateway,and configure apersonal data set.This option is not available on32-bit Windows installationsor if DB2is already installed.This option is only available on64-bit Windowsenvironments.Proceed to step5.4.If you do not use the Quick Setup option,accept the defaults on theComponent Selection page to install all the required components.If you want to install the Cognos Content Database(Apache Derby),expandIBM Cognos Business Intelligence Server,and select Cognos ContentDatabase.If you do not install Cognos Content Database,you can use any supporteddatabase such as IBM DB2or Microsoft SQL Server for your content store.Forinformation about DB2,see“Creating a content store in IBM DB2”on page5.For information about Microsoft SQL Server,see“Creating a content store inMicrosoft SQL Server”on page6.For information about using Oracle,Informix,or Sybase as a content store,see the IBM Cognos Business Intelligence Installationand Configuration Guide.If you will also be installing the samples,you must have access to anotherdatabase,such as IBM DB2or Microsoft SQL Server.You cannot restore thesamples to the Cognos Content Database.5.Click Next and follow the directions in the wizard to complete the installation.6.When you are prompted about installing non-English product documentation,click OK to continue.Installing Framework ManagerTo install Framework Manager,use the installation wizard to copy all of thecomponents to a Microsoft Windows operating system computer.If you have installed the32-bit version of the IBM Cognos Business Intelligenceserver components,install Framework Manager to the same directory as the servercomponents.This means you will not have to configure Framework Managerseparately from the server components.If you have installed the64-bit version of the Cognos BI server components,youmust install Framework Manager to a different directory.The default installationlocations for32and64-bit components are different.If you have installed the64-bitversion of the server components,you will have to configure Framework Manager.Procedure1.Insert the disk for your IBM Cognos modeling product,and then open theinstallation menu.The Welcome page of the installation wizard appears.If the Welcome pagedoes not appear,in the win32directory on the disk,double-click issetup.exe.2.Select the language to use,and click Next.3.On the IBM License Agreement panel,select I Agree,and click Next.4.On the Installation Location panel,accept the default,and click Next.Important:If you installed the64-bit version of the IBM Cognos BI servercomponents,do not attempt the install Framework Manager to that samelocation.If you installed the32-bit version of the server components,thedefault location will be the same as the server location.4IBM Cognos Business Intelligence Version10.2.2:Getting Started Installation Guide5.On the Component Selection panel,accept the default,and click Next.6.On the Shortcut Folder panel,do one of the following:v If you have installed the32-bit version of the server components,you canaccept the default value in the Program Folder box,and click Next.v If you have installed the64-bit version of the server components,enter IBMCognos10Framework Manager in the Program Folder box,and click Next.7.On the Installation Summary panel,click Next and complete the installation.Create a content store databaseThe content store is a database that Content Manager uses to store globalconfiguration data,global settings(such as the language and currency formatsshown in the user interface),connections to data sources,and product-specificcontent.If you selected the Quick Setup installation,you do not need to create a contentstore database.A DB2Advanced Workgroup Server Edition database is created andpre-configured during the installation.Proceed to“Saving your settings andstarting the IBM Cognos services”on page7.If you selected Cognos Content Database during the installation,you do not needto create a content store database.A database is created and pre-configured duringthe installation.Proceed to“Saving your settings and starting the IBM Cognosservices”on page7.If you are using your own instance of IBM DB2,you create a script from IBMCognos Configuration which you use to create a suitable database for the contentstore.For more information,proceed to“Creating a content store in IBM DB2.”If you are using Microsoft SQL Server,you must create the database manually.Formore information,proceed to“Creating a content store in Microsoft SQL Server”on page6.Creating a content store in IBM DB2To use an IBM DB2database for your content store,you must copy two Java™Archive(jar)files,and then use IBM Cognos Configuration to create a script to usein the IBM DB2tools to create a suitable database for the content store.Before you beginYou must have DB2installed,and the database user account must exist.Procedure1.Copy the IBM DB2driver files to the IBM Cognos Business Intelligenceinstallation location.a.Copy the following files from DB2_installation\sqllib\java directory tothe c10_location\webapps\p2pd\WEB-INF\lib directory:v The universal driver file,db2jcc.jarv The license file,db2jcc_license_cu.jarIf you installed IBM Cognos BI to the default location,copy the files toC:\Program Files\ibm\cognos\c10\webapps\p2pd\WEB-INF\lib directory.2.Configure the content store database in IBM Cognos Configuration and createthe database script.Chapter1.Install IBM Cognos Business Intelligence on one computer5a.From the Start menu,click Programs then click IBM Cognos10then clickIBM Cognos Configuration.b.In the Explorer window,under Data Access,Content Manager,clickContent Store.c.In Database server and port number,enter the name of your computer andthe port number on which DB2is running.For example,localhost:50000.Where50000is the default port number that is used by IBM DB2.If you areusing a different port number,ensure you use that value.d.Click the Value field next to the User ID and password property and thenclick the edit icon.Type the appropriate values and click OK.e.In the Properties window,for the Database name property,type the namefor your content store database.Important:Do not use a name longer than8characters and use only letters,numbers,underscores,and hyphens in the name.f.Right-click Content Store,and click Generate DDL.g.Click Details to record the location of the generated DDL file.The DDL file that is named createDb.sql is created.The script is created inthe c10_location\configuration\schemas\content\db2directory.h.Click File then click Save to save your settings.3.Create the database in IBM DB2.a.Log in as the IBM DB2user.b.Click Start>IBM DB2>DB2COPY1(Default)>DB2Command Window-Administrator.c.Type db2-tvf path\createDb.sql,and press Enter.If the path includes spaces,ensure you use quotation marks around thepath.For example,enter:"C:\Program Files\ibm\cognos\c10\configuration\schemas\content\db2\createDb.sql"4.After the database is created,you can log back in as your Cognos user or yourregular user account.Creating a content store in Microsoft SQL ServerIf you are using Microsoft SQL Server,you must manually create the database touse as a content store database.Then you can set the connection properties to thedatabase in IBM Cognos Configuration.Procedure1.Create a database using your Microsoft SQL Server administration tools.a.Ensure that the collation sequence for the database is case insensitive.In a custom installation,you choose a collation sequence,which includescharacter sets and sort order,during the Microsoft SQL Server setup.In atypical installation,the installation uses the locale identified by theinstallation program for the collation.This setting cannot be changed later.b.Ensure that TCP/IP connectivity is used for Microsoft SQL Server.2.From the Start menu,click Programs then click IBM Cognos10then clickIBM Cognos Configuration.3.In the Explorer window,under Data Access,Content Manager,right-clickContent Store,and click Delete.6IBM Cognos Business Intelligence Version10.2.2:Getting Started Installation GuideThis removes the default content store properties,which are defaulted to usean IBM DB2database.4.Right-click Content Manager,and click New Resource then click Database.5.In the Name field,type a name for the resource.Such as Content Store.6.In the Type box,select the appropriate Microsoft SQL Server database type,and click OK.If you use Windows authentication for your Microsoft SQL Server database,select Microsoft SQL Server database(Windows authentication).If not,selectMicrosoft SQL Server database.7.In Database server and port number,enter the name of your computer andport number on which Microsoft SQL Server is running.For example,localhost:1433.The value1433is the default port number used by MicrosoftSQL Server.If you are using a different port number,ensure you use thatvalue.8.Click the Value field next to the User ID and password property and thenclick the edit button when it appears.Type the appropriate values and clickOK.9.In the Properties window,for the Database name property,type the name foryour content store database.10.Right-click the resource you added for the content store database,and clickTest.If the test is successful,Content Manager can create the required tables in thecontent store when you start the IBM Cognos service for the first time.If theconnection properties are not specified correctly,you cannot start the IBMCognos services.Saving your settings and starting the IBM Cognos servicesYou must save your configuration settings and start the IBM Cognos service beforeusers can access IBM Cognos Connection,the product portal.Procedure1.If you have not already started IBM Cognos Configuration,from the Startmenu,click Programs then click IBM Cognos10then click IBM CognosConfiguration.2.In IBM Cognos Configuration,click File then click Save to save yourconfiguration settings.3.Click Actions then click Start.It may take a few minutes for the IBM Cognos service to start.You will receive a warning during the Testing the mail server connectionprocess.Click OK and Continue to continue starting the services.A mail serverconnection is not required.If you selected the Quick Setup option,the DB2Advanced Workgroup ServerEdition service will also be started.If you have installed the Cognos Content Database component,the CognosContent Database service will also be started.Confirming that Content Manager is runningYou can confirm that Content Manager is running using a web browser.Chapter1.Install IBM Cognos Business Intelligence on one computer7Procedure1.Open a web browser.2.Type the Content Manager URI value from IBM Cognos Configuration,underEnvironment,in your Web browser address bar,and press Enter.For example,typehttp://localhost:9300/p2pd/servletlocalhost can be your computer name,or IP address,or localhost.9300is the default port number used by IBM Cognos components.ResultsThe State value should be Running.This indicates that your IBM Cognos serviceshave started,and that they have connected to the content store.If the State is not Running,ensure that you have entered the correct informationto connect to your content store database and that the services have been started inIBM Cognos Configuration.What to do nextAfter you verify that Content Manager is running,you can configure your Webserver to allow access to the portal from a web browser.Configure your web serverYou must configure your web server before users can connect to the IBM CognosBI portal.Use the CGI gateway on Microsoft Internet InformationServices version7or laterIf you are using Microsoft Internet Information Services(IIS)version7or later,usethe following task to configure the CGI gateway.Procedure1.In the Microsoft Windows Control Panel,click Programs>Programs andFeatures.If you are using Microsoft Windows8or2012Server,Programs and Featuresis available directly from the Control Panel.2.Click T urn Windows features on or off.3.If you are using Microsoft Windows2008Server,use the following steps:a.Click Server Manager>Roles>Web Server(IIS).b.Ensure that Common HTTP Features,or the features you require areenabled.c.If CGI is set to Not installed,select CGI and click Add Role Service.4.If you are using Microsoft Windows2012Server,use the following steps:a.In the Add Roles and Features Wizard,click Role-based or feature-basedinstallation,and click Next.b.Select your server,and click Next.c.Select Web Server(IIS),if it is not already installed,ensure that CommonHTTP Features is selected,and click Next until you get to the RoleServices section of the wizard.8IBM Cognos Business Intelligence Version10.2.2:Getting Started Installation Guided.Expand Application Development.e.Select CGI if it is not already selected,and click Next.f.Click Install.5.If you are using Microsoft Windows7or8,use the following steps:a.Select Internet Information Services if it is not already selected.b.Expand Internet Information Services>World Wide Web Services.c.Ensure that Common HTTP Features,or the features you require areenabled.d.Expand Application Development Features.e.If CGI is not selected,select CGI.f.Click OK.6.In the Internet Information Services(IIS)Manager console,underConnections,select your server name.v If you are using Microsoft Windows2012Server,in Server Manager,selectIIS,and then right-click your server name,and click Internet InformationServices(IIS)Manager.v If you are using Microsoft Windows2008Server,in Server Manager,expand Roles>Web Server(IIS),and then click Internet InformationServices(IIS)Manager.v If you are using Microsoft Windows8,from the Control Panel,clickAdministrative Tools to access the Internet Information Services(IIS)Manager console.v If you are using Microsoft Windows7,from the Control Panel,clickSystem and Security>Administrative Tools to access the InternetInformation Services(IIS)Manager console.7.Double-click ISAPI and CGI Restrictions.8.Under Actions,click Add.9.Enter the path to the cognos.cgi file.The file is in the c10_location\cgi-bindirectory.You must enter the full path,including the file name.If the path includesspaces,ensure you use quotation marks around the path.For example,enter:“C:\Program Files\ibm\cognos\c10\cgi-bin\cognos.cgi”10.Enter a Description,such as CognosCGI.11.Select Allow extension path to execute,and click OK.12.Under Connections,expand Sites,and under your website,add the virtualdirectories as shown in the table:Table3.Required virtual directoriesAlias Locationibmcognos c10_location/webcontentibmcognos/cgi-bin c10_location/cgi-bin13.Select the cgi-bin virtual directory that you created.14.Double-click Handler Mappings.15.Under Actions,click Add Module Mapping.a.In Request Path,type cognos.cgi.b.In Module,select CgiModule.c.Leave Executable(optional)blank.Chapter1.Install IBM Cognos Business Intelligence on one computer9。
