PublicCMS IntelliJ IDEA集成手册
idea 使用手册
1. 安装IntelliJ IDEA:-下载并安装最新版本的IntelliJ IDEA,根据你的操作系统选择合适的安装包。
2. 启动和配置:-启动IntelliJ IDEA 后,根据向导设置开发环境,选择主题、键盘布局等个性化配置。
3. 新建项目:-使用"File" -> "New" -> "Project" 创建新项目,选择项目类型(Java、Python、Web等),设置项目名称和位置。
4. 编辑和编码:-打开项目后,使用编辑器进行代码编写。
IntelliJ IDEA 提供代码补全、重构、导航等功能,可通过快捷键或右键菜单使用。
5. 运行和调试:-使用"Run" 或"Debug" 按钮运行或调试你的程序。
你可以设置断点、观察变量等。
6. 版本控制:-IntelliJ IDEA 集成了版本控制系统(如Git),可通过"VCS" 菜单进行代码提交、更新、查看历史等操作。
7. 插件和扩展:-安装并管理插件,扩展IntelliJ IDEA 的功能。
通过"Preferences" 或"Settings" 进行配置。
8. 快捷键:-熟悉一些常用的快捷键,提高开发效率。
例如,Ctrl + Space 可以进行代码补全。
9. 导航和查找:-使用导航功能(Ctrl+N、Ctrl+Shift+N)在项目中快速查找类、文件。
通过"Find" 菜单进行文本搜索。
10. 构建和部署:-使用"Build" 菜单执行项目构建操作。
部署项目时,可以配置运行和调试环境。
11. 学习和文档:-访问IntelliJ IDEA 的官方文档、社区和论坛,学习更多高级功能和技巧。
这是一个简要的指南,实际使用中你可能会发现更多有趣的功能和技巧。
JAVA集成开发环境----IntellijIDEA操作总结
JAVA集成开发环境----IntellijIDEA操作总结IDEA 全称 IntelliJ IDEA,是款优秀的 java语⾔开发的集成环境。
本⽂是对 IDEA 中常⽤配置的整理。
开始前需先准备环境,并激活。
本⽂基于:IntelliJ IDEA 2020.3.1(Ultimate Edition)注意IDEA 中没有⼯作空间 workspace 这个概念,IDEA 的设置分两类:默认配置 VS 当前项⽬配置默认配置:顶部导航栏 -> File -> New Projects Settings -> Settings for new projects / Structure for new projects当前项⽬配置:顶部导航栏 -> File -> Settings / Project Structure⼀. 项⽬结构配置File -> Project Structure)是 IDEA 中最重要的设置项,关乎到项⽬的运⾏1.1 Project Settings -> ProjectProject name:定义项⽬的名称;Project SDK:设置该项⽬使⽤的JDK,也可以在此处新添加其他版本的JDK;Project language level:这个和JDK的类似,区别在于,假如你设置了JDK1.8,却只⽤到1.6的特性,那么这⾥可以设置语⾔等级为1.6,这个是限定项⽬编译检查时最低要求的JDK特性;Project compiler output:项⽬中的默认编译输出总⽬录,实际上每个模块可以⾃⼰设置特殊的输出⽬录(Modules - (project) - Paths -Use module compile output path),所以这个设置有点鸡肋。
1.2 Project Settings -> ModulesIDEA 每个项⽬默认开⼀个窗⼝,即单⼦项⽬的形式。
JetBrains IntelliJ IDEA教程:从基础到高级功能说明书

iAbout the T utorialIntelliJ IDEA (hereafter referred as IntelliJ) is one of the powerful and most popular Integrated Development Environment (IDE) for Java. It is developed and maintained by JetBrains and available as community and ultimate edition. This feature rich IDE enables rapid development and helps in improving code quality. This tutorial starts with basic introduction and slowly deep dives into its advance features. Logically tutorial is divided into 2 parts. Absolute beginners can start using it by following first 4 chapters. However to use it more effectively one can refer remaining chapters.AudienceThis tutorial is targeted for absolute beginners as well as moderate users. Absolute beginners will get fair understanding about IntelliJ and moderate users will take their existing knowledge to next level.PrerequisitesThis tutorial assumes preliminary knowledge of software development process and Java programming language. Additionally reader should have basic understanding of computer system. Reader should be able to install, uninstall and configure software packages on his/her system.Later sections of tutorial discuss integration with build tools, unit testing frameworks, debugger, profiling, version control system and database. It is assumed that those tools are installed and configured on system and reader is familiar with those tools.Copyright & DisclaimerCopyright 2017 by Tutorials Point (I) Pvt. Ltd.All the content and graphics published in this e-book are the property of Tutorials Point (I) Pvt. Ltd. The user of this e-book is prohibited to reuse, retain, copy, distribute or republish any contents or a part of contents of this e-book in any manner without written consent of the publisher.We strive to update the contents of our website and tutorials as timely and as precisely as possible, however, the contents may contain inaccuracies or errors. Tutorials Point (I) Pvt. Ltd. provides no guarantee regarding the accuracy, timeliness or completeness of our website or its contents including this tutorial. If you discover any errors on our website or in this tutorial, please notify us at **************************iiT able of ContentsAbout the Tutorial (i)Audience (i)Prerequisites (i)Copyright & Disclaimer (i)Table of Contents (ii)1.INTELLIJ IDEA – INTRODUCTION (1)What is IDE and its benefits? (1)Features of IntelliJ (1)Comparison of ultimate and community edition (3)2.INTELLIJ IDEA – INSTALLATION AND CONFIGURATION (5)Installation on Windows (5)Installation on Linux (5)Configure IntelliJ (6)3.INTELLIJ IDEA – GETTING FAMILIAR (8)Visual elements (8)Working with plug-ins (9)Working with settings (10)Configuring JVM options and platform properties (11)4.INTELLIJ IDEA – CREATE FIRST JAVA PROJECT (12)Create project (12)Create package (13)iiiCreate Java class (13)Run Java application (14)5.INTELLIJ IDEA – DEEP DIVE (15)Understanding projects (15)Understanding modules (15)Understanding folders (16)Understanding libraries (17)Understanding facets (17)Artifacts (17)Importing existing project (18)Project formats (19)Comparison of directory and file based project format (21)6.INTELLIJ IDEA – DEEP DIVE INTO EDITOR (22)Visual elements of editor (22)Editor actions (25)Linting code (32)7.INTELLIJ IDEA – CODE REFACTORING (35)Rename (35)Replace code duplicates (36)Copy (37)Move (38)Safe delete (38)Change signature (39)Type migration (40)iv8.INTELLIJ IDEA – RUNNING PROJECTS (41)Create temporary configuration (41)Create permanent configuration (41)Create new configuration (42)Sharing the configuration (43)Run configuration (43)9.INTELLIJ IDEA – BUILD TOOLS (44)Creating maven project (44)Create Gradle Project (46)10.INTELLIJ IDEA – UNIT TESTING (47)Create unit test (47)Run unit test (48)11.INTELLIJ IDEA - DEBUGGING (50)Breakpoints (50)Step into (51)Step out (51)Step over (52)Resume program (53)Stop action (53)Smart step into (54)Inspecting variables (55)Evaluate expression (55)12.INTELLIJ IDEA - PROFILING (56)Introduction (56)vConfiguration (56)Monitoring application (57)Insights about threads (57)Sampling application (58)Profiling application (59)13.INTELLIJ IDEA – VERSION CONTROL (61)Git (61)Subverion (66)14.INTELLIJ IDEA - DATABASES (70)Create Database (70)Connect to database (70)Create table (71)Insert data (73)Retrieve Data (73)15.INTELLIJ IDEA – MIGRATING FROM NETBEANS (74)Import NetBeans project (74)IntelliJ vs. NetBeans terminology (74)Popular shortcuts (74)Debugger shortcuts (75)FAQs and Tips (75)16.INTELLIJ IDEA – MIGRATING FROM ECLIPSE (77)Import existing project (77)IntelliJ vs. Eclipse terminology (77)viDebugger shortcuts (78)FAQ and tips (78)1.IntelliJ is one of the powerful and most popular Integrated Development Environment (IDE) for Java. It is developed and maintained by JetBrains and available as community and ultimate edition. This feature rich IDE enables rapid development and helps in improving code quality.What is IDE and its benefits?IDE stands for Integrated Development Environment. It is a combination of multiple tools which makes software development process easier, robust and less error-prone. It has following benefits over plain text editor:∙Integration with useful tools like compiler, debugger, version control system, build tools, various frameworks, application profilers and so on.∙Supports code navigation, code completion, code refactoring and code generation features which boosts development process.∙Supports unit testing, integration testing and code coverage via plug-ins.∙Provides rich set of plug-ins to enhance IDE functionality further.Features of IntelliJDeep insight into code∙Smart code completionIt supports context based code completion. It gives a list of the most relevant symbols applicable in the current context.∙Chain code completionIt is advanced code completion feature which lists applicable symbols accessible via methods or getters in the current context.∙Static members completionIt allows you to easily use static methods or constants and automatically adds required import statements to avoid compilation error.78∙Detecting duplicatesIt finds duplicate code fragments on the fly and gives notification/suggestion about it to user.∙Inspections and quick-fixesWhenever IntelliJ detects that you're about to make a mistake, a little light bulb notification pops up on same line. Clicking it shows the suggestion list. Developer ergonomics∙Editor-centric environmentQuick pop-ups help in checking additional information without leaving the current context.∙Shortcuts for everythingIntelliJ IDEA has keyboard shortcuts for nearly everything, including rapid selection and switching between tool windows and many more.∙Inline debuggerInline debugger allows you to debug application in IDE itself. It makes development and debugging process seamless.Built-in developer tools∙Version controlIntelliJ support most of the popular version control system like Git, Subversion, Mercurial, CVS, Perforce, and TFS.∙Build toolsIntelliJ supports Java and other build tools like Maven, Gradle, Ant, Gant, SBT, NPM, Webpack, Grunt, and Gulp.∙Test runner and code coverageIntelliJ IDEA lets you perform unit testing with ease. The IDE includes test runners and coverage tools for major test frameworks, including JUnit, TestNG, Spock; Cucumber, ScalaTest, spec2, and Karma.9∙DecompilerIntelliJ comes with a built-in decompiler for Java classes. When you want to take a look inside a library that you don't have the source code for, you can do it without using any third-party plug-ins.∙TerminalIntelliJ provides built-in terminal. Depending on your platform, you can work with command line prompt, like PowerShell or Bash.∙Database toolsIntelliJ provides database tools which allows you to connect to live databases;run queries; browse and update data; and even manage your schemas in a visual interface from IDE itself.∙Application serverIntelliJ supports major application servers: Tomcat, JBoss, WebSphere, WebLogic, Glassfish, and many others.You can deploy your artifacts onto application servers and debug the deployed applications in IDE itself.∙Docker supportVia a separate plug-in, IntelliJ provides a dedicated tool window that lets you connect to locally running Docker machines.Comparison of ultimate and community edition102.Depending upon your requirements you can download community or ultimate edition. As name suggests community edition is absolutely free and we can use it for commercial development as well. However, ultimate edition is paid version and we can evaluate it freely for 30 day.Installation on Windows∙System requirementso It is compatible with windows 10/8/7/Vista/2003/XPo Minimum RAM requirement is 1 GB but 2 GB is recommended for seamless usageo It takes 300 MB of disk space for installation and addition 1 GB for cacheso For better visualization 1024x768 screen resolution is ecommended ∙Downloading and installationo DownloadingYou can download windows installer from their official website. Clickhere to go to downloads section, choose appropriate edition and click ondownload button.o InstallationLet us begin with installation followed by configuration steps.Installation of IntelliJ is similar to other software packages. Just doubleclick on installer and follow the on screen instructions to completeinstallation process.Installation on Linux∙System requirementso GNOME, KDE or XFCE desktop environmento Minimum RAM requirement is 1 GB but 2 GB is recommended for seamless usage1112o It requires 300 MB of disk space for installation and addition 1 GB for cacheso For better visualization 1024x768 screen resolution is ecommended Downloading and installationo DownloadingYou can download IntelliJ for Linux from their official website. Click hereto go to downloads section, choose appropriate edition and click ondownload button.o InstallationI have downloaded tar.gz bundle. Note that in my case bundle’s namewas ideaIC-2017.2.5.tar.gz it may change with edition/version.Please use appropriate bundle name.First extract it using following command:$ tar xvf ideaIC-2017.2.5.tar.gzIt will create new directory with idea-IC-172.4343.14name. Nowchange directory to idea-IC-172.4343.14/bin/ and execute idea.shshell script as shown below:$ cd idea-IC-172.4343.14/bin/$ ./idea.shFollow on-screen instructions to complete installation procedure.Configure IntelliJConfiguration steps are similar on both platforms. To begin configuration, launch IntelliJ application. Optionally you can import existing configuration from this wizard. Click on next button to continue.If you are using ultimate edition then it will pop-up license activation window. Select evaluate for free option and click on evaluate button as shown in below image.13Accept the license agreement to proceed and follow on screen instruction to start IntelliJ. You’ll see welcome screen of IntelliJ.Now it’s time to configure Java Development Kit(hereafter we’ll refer it as JDK) with IntelliJ. If JDK is not installed already then follow instruction from here.1.On welcome screen click on configure2.Select project defaults from drop-down list3.Select project structure option.4.Select SDKs option from platform settings menu5.Click on plus icon and select JDK option.6.Select JDK’s home directory and follow on-screen instruction to complete thisprocess.143.To leverage functionality of any tool one must be familiar with that tool and IntelliJ is not exception for that. This chapter gives overview about IntelliJ. Chapter begins with discussion about IDE’s visual elements, configuration settings and finally ends by discussing JVM and platform properties.Visual elementsOne of the important things about IDE is its visual elements. Identifying and understanding visual elements enables to you do action in quicker and easier manner. Below screen shows the main interface of IntelliJ.1.Menu barThe menu bar provides options to create new projects and other importantactions related to projects like code refactoring, builds, run, debug, versioncontrolling options and so on.2.Tool barTool bar provides to shortcut to compile, debug and run option. You cancustomize it according to your requirements.15163.Navigation barNavigation bar enables easier navigation within project. This feature comesreally handy as code base increases.4.Tools tabTools tab is shows on either side of the main window. From here you canaccess important tools like databases, Maven/Ant builds and so on.5.Project perspectiveProject perspective window shows various elements of projects likepackages, modules, classes, external libraries and so on.6.Editor windowThis is a place where developer spends most of his/her time. Editor windowallows you edit/write code with syntax highlighting and other useful features. At the bottom of the main window there is a status bar. It shows some additional attributes about file, like its format and encoding type. It also provides option to toggle read-only attribute of current file. You can also manage inspection level from here.Working with plug-insPlug-ins helps to extend functionality of IntelliJ. It provides large number of plug-ins ranging from databases, version controlling, profiling and this list goes on.To manage plug-ins:1.Go to File->Settings menu2.Select plug-ins tab from left side.173.This window lists all installed plug-ins. There is a check-box on right side ofeach plug-in name. Toggling that check-box enables/disables plug-ins.4.IntelliJ online plug-in repository is available here. To add/remove plug-inrepository just click on browse repository button and it will provide a way to do needful.5.In addition to this it allows offline plug-in installation. To do that downloadplug-in and select install plug-in from disk button and navigate to thedownload path.To perform other action on plug-ins like uninstalling, updating and sorting just right click on any plug-in. It’ll show drop down menu from which you can select one of the action.Working with settingsThis section provides some tips and trick to manage settings. It enables you to import, export and share IntelliJ settings.1.Export settingsIt allows exporting current settings as a jar file.1.Go to File->Export Settings.2.Export setting windows list the all available settings related to UI,debugger, SDK along with others.183.It provides check-box for selection. Once selection is done click on okbutton to save setting on local disk.2.Import settingsIt allows importing setting stored in jar file.1.Go to File->Import settings.2.Select setting jar by navigating folder structure3.Click on OK button.3.Sharing settingsIntelliJ IDEA allows you to share your IDE settings between different instances.This is particularly useful when you want to apply same settings within team or organization.Prerequisite for this is Settings Repository plug-in must be enabled. It installed and enabled by default. To ensure its status:1.Go to File->Settings->Plugins2.Search settings repository plug-inWe can store current setting on GitHub/Bitbucket and apply them on other instances. To store current setting:1.Go to File->Settings Repository2.type Git repository URL in upstream URL dialog box3.Click on overwrite remote button.4.To apply same settings on other instances just click on overwrite localbutton.Configuring JVM options and platform propertiesWe can configure JVM options by navigating to the Help->Edit Custom VM Options menu. Following are the some important JVM options we can set.o–server : Allows selection of the Java HotSpot Server VMo-Xms<size>: It sets initial Java heap size. Default value is 128 MBo-Xmx<size>: It sets maximum Java heap size. Default value is 750 MBo-Xss<size> : It sets Java thread stack sizeo–XX : It allows setting GC algorithm and other properties.Please refer Java’s official document to tweak JVM options.19End of ebook previewIf you liked what you saw…Buy it from our store @ https://。
idea使用教程详细

idea使用教程详细Idea是一款功能强大的集成开发环境(IDE),用于软件开发和编程。
下面我将从多个角度详细介绍Idea的使用教程。
1. 安装和设置:首先,你需要下载并安装Idea。
官方网站提供了不同操作系统的安装程序。
安装完成后,打开Idea并进行一些基本设置,如选择主题、键盘布局等。
2. 项目管理:在Idea中,你可以创建新项目或导入现有项目。
选择适当的项目类型和模板,设置项目名称和位置。
项目管理器窗口可以让你浏览和组织项目文件和目录。
3. 编辑和编码:在Idea中,你可以打开和编辑各种文件类型,如Java、Python、HTML等。
Idea提供了强大的代码编辑功能,包括自动完成、代码重构、代码导航等。
可以使用快捷键和代码模板提高编码效率。
4. 调试和测试:Idea提供了强大的调试功能,可以帮助你定位和修复代码中的错误。
你可以设置断点、单步执行代码、观察变量值等。
Idea还支持各种测试框架,如JUnit,可以运行和分析测试结果。
5. 版本控制:Idea集成了各种版本控制系统,如Git、SVN等。
你可以直接在Idea中进行代码提交、拉取、分支管理等操作。
版本控制工具窗口可以帮助你管理代码变更和解决冲突。
6. 插件和扩展:Idea支持各种插件和扩展,可以增强其功能和适应特定的开发需求。
你可以在插件市场中搜索和安装插件,如代码质量分析、数据库管理等。
7. 代码重构和优化:Idea提供了各种代码重构功能,如提取方法、重命名变量等。
内置的代码分析工具可以帮助你找出潜在的问题,并提供优化建议。
8. 构建和部署:Idea支持各种构建工具,如Maven和Gradle。
你可以配置构建脚本、运行构建任务,并查看构建输出。
Idea还提供了部署工具,可以将应用程序部署到服务器上。
9. 协作和团队开发:Idea支持团队协作,可以与其他开发人员共享代码和工程设置。
你可以使用版本控制系统进行代码协作,并通过内置的代码审查工具进行代码审查。
IntelliJIDEA上JFinal开发环境搭建手册

IntelliJ IDEA14.1上JFinal开发环境搭建手册目录一、新建项目 (2)二、项目参数配置 (5)1.新建Module (5)2.建Jetty运行模块 (7)(1)新建模块 (7)(2)导入类库 (9)3.建Tomcat运行模块 (18)(1)新建模块 (18)(2)导入类库 (21)三、修改运行配置 (27)1.创建Jetty运行配置 (27)2.创建tomcat运行配置 (30)四、添加源文件 (33)五、运行项目 (36)1.在jetty下运行 (36)2.在tomcat下运行 (38)六、项目实际部署 (39)JFinal官方的教程都是使用Eclipse进行开发的,而使用Intellij IDEA来做开发,不少地方和Eclipse区别还是很大的。
本文参考了网上不少文章,主要沿用了网友的内容,一步一步做了尝试后记录下来,感谢万能的互联网。
分别做了两个Module,分别使用Jetty和tomcat来运行。
均测试均可正常跑起来。
本文看起来虽然很长,但实际上步骤不多,为便于初学者了解Intellij IDEA,所以细节写的非常完善,每一步都有截图。
本文使用的开发环境是Intellij IDEA14.1.4版本。
JFinal是2.0版。
另:本文博客发布在/chixn/blog/471755。
一、新建项目新建一个项目,可以是空项目,也可以是连模块一起建的项目,本文为了演示Jetty和tomcat均能运行的效果,所以先建一个空项目,再分别建两个不同的module,以便区分。
如果项目和模块一起建,可以把Web Application选上,其他的默认就行。
因为我们要分别测试jetty和tomcat的效果,要建两个模块,所以先建一个空项目。
点击“Next”进入下一步。
输入项目名称和项目所在目录,点击“Finish”即可。
二、项目参数配置1.新建Module如果新建一个空项目,会立即出来一个Project Structure的配置窗口。
idea 中文手册
idea 中文手册引言概述:Idea是一款功能强大的集成开发环境(IDE),它为开发人员提供了丰富的工具和功能,以提高开发效率和代码质量。
本文将详细介绍Idea中文手册的内容,包括基本操作、高级功能、插件使用、调试技巧和性能优化等方面。
正文内容:1. 基本操作1.1 界面介绍:介绍Idea的主要界面元素,如菜单栏、工具栏、编辑器等,帮助用户快速熟悉Idea的布局。
1.2 项目管理:详细介绍如何创建、导入和管理项目,包括创建新项目、导入现有项目、添加依赖等操作。
1.3 代码编辑:介绍Idea强大的代码编辑功能,包括代码补全、代码重构、代码导航等,帮助开发人员提高编码效率。
1.4 版本控制:介绍如何使用Idea进行版本控制,包括Git、SVN等,帮助开发人员更好地管理代码。
1.5 调试功能:介绍Idea的调试功能,包括设置断点、查看变量值、单步调试等,帮助开发人员快速定位和解决问题。
2. 高级功能2.1 代码分析:介绍Idea的代码分析功能,包括代码错误检查、代码风格检查等,帮助开发人员提高代码质量。
2.2 重构工具:介绍Idea的重构工具,包括重命名、提取方法、提取变量等,帮助开发人员优化代码结构。
2.3 智能提示:介绍Idea的智能提示功能,包括自动补全、代码模板等,帮助开发人员快速编写代码。
2.4 代码生成:介绍Idea的代码生成功能,包括自动生成Getter和Setter、构造函数等,帮助开发人员减少重复劳动。
2.5 代码导航:介绍Idea的代码导航功能,包括查找引用、跳转到定义等,帮助开发人员快速浏览和修改代码。
3. 插件使用3.1 插件安装:介绍如何在Idea中安装和管理插件,包括官方插件库和第三方插件。
3.2 常用插件推荐:推荐一些常用的插件,如代码检查插件、代码自动补全插件等,帮助开发人员提高开发效率。
3.3 自定义插件开发:介绍如何开发自己的插件,包括插件开发环境搭建、插件开发流程等。
IntelliJ IDEA for Java 使用教程及界面介绍翻译
IntelliJ IDEA for Java 使用教程及界面介绍翻译IntelliJ IDEA for Java 使用教程及界面介绍IntelliJ IDEA 是一款功能强大的集成开发环境(IDE),专为 Java开发人员而设计。
它提供了许多方便的功能和工具,能够提高开发效率并简化代码编写过程。
在本教程中,我们将为您介绍 IntelliJ IDEA的使用方法以及主要界面特点。
1. 下载和安装首先,您需要从官方网站(请自行搜索“IntelliJ IDEA”)上下载适用于您操作系统的安装包。
安装过程相对简单,只需按照步骤进行操作即可。
2. 创建项目打开 IntelliJ IDEA 后,您将看到一个欢迎界面。
在此界面上,您可以选择创建新的项目或打开已有项目。
点击“Create New Project”按钮,然后按照向导的指示进行操作,定义项目的名称、位置和其他相关设置。
3. 主界面导览一旦您创建了项目,您将进入 IntelliJ IDEA 的主界面。
该界面通常由菜单栏、工具栏、项目导航栏、编辑区域和控制台组成。
4. 代码编辑在编辑区域,您可以编写和修改代码。
IntelliJ IDEA 提供了许多智能功能,如代码提示、自动补全和快速重构等,以帮助您更高效地编写代码。
通过使用快捷键,您可以快速执行各种操作。
5. 调试和运行IntelliJ IDEA 还集成了强大的调试功能。
您可以设置断点、监视变量和执行逐行调试等操作,以帮助您找出代码中的错误和问题。
此外,您可以通过 IDE 直接运行和测试您的程序,简化了开发和调试的过程。
6. 版本控制IntelliJ IDEA 集成了流行的版本控制系统,如 Git 和 SVN。
您可以轻松地管理和提交代码,查看文件差异,并与团队成员协同工作。
此外,IDE 还提供了一些强大的合并和冲突解决工具。
7. 插件和扩展性IntelliJ IDEA 支持丰富的插件生态系统,可以根据您的需求添加各种插件和扩展功能。
IntelliJ IDEA产品学习手册

IntelliJ IDEA 产品学习手册慧都科技2013-04-09联系方式:400-700-1020目录1.产品介绍 (2)2.特色功能 (2)3.与其他IDE相比的优势 (5)4.快捷键总结 (5)1.产品介绍IDEA 全称IntelliJ IDEA,是java语言开发的集成环境,IntelliJ在业界被公认为最好的java开发工具之一,尤其在智能代码助手、代码自动提示、重构、J2EE支持、Ant、JUnit、CVS整合、代码审查、创新的GUI设计等方面的功能可以说是超常的。
IDEA截图2.特色功能IDEA所提倡的是智能编码,是减少程序员的工作,那么IDEA具体又有哪些值得推崇呢?总结以下25点,希望能有个比较全面的介绍:●智能的选取在很多时候我们要选取某个方法,或某个循环或想一步一步从一个变量到整个类慢慢扩充着选取,IDEA就提供这种基于语法的选择,在默认设置中Ctrl+w,可以实现选取范围的不断扩充,这种方式在重构的时候尤其显得方便。
●丰富的导航模式IDEA提供了丰富的导航查看模式,例如ctrl+e显示最近打开过的文件,ctrl+n显示你希望显示的类名查找框(该框同样有智能补充功能,当你输入字母后IDEA将显示所有候选类名)。
在最基本的project试图中,你还可以选择多种的试图方式。
●历史记录功能不用通过版本管理服务器,单纯的IDEA就可以查看任何工程中文件的历史记录,但版本恢复时你可以很容易的将其恢复。
●JUnit的完美支持●对重构的优越支持IDEA是所有IDE中最早支持重构的,其优秀的重构能力一直是其主要卖点之一。
●编码辅助Java规范中提倡的tostring(),hashcode(),equals(),以及所有的get/set方法,你可以不用进行任何的输入就可以实现代码的自动生成,从而把你从无聊的基本方法编码中解放出来。
●灵活的排版功能基本所有的IDE都有重排版功能,但仅有IDEA的是人性的,因为她支持排版模式的定制,你可以根据不同的项目要求采用不同的排版方式。
IntelliJIDEA使用指南
IntelliJIDEA使用指南IntelliJ IDEA使用指南IntelliJ IDEA是一款强大的集成开发环境(IDE),被广泛应用于Java开发领域。
它提供了丰富的功能和工具,帮助开发人员提高编码效率和开发质量。
本文将为你介绍IntelliJ IDEA的基本使用方法和一些建议。
1. 安装与配置首先,从官方网站下载适合你操作系统的IntelliJ IDEA安装包。
安装完成后,根据提示进行配置,包括选择主题、键盘映射等个性化设置。
同时,确保Java开发包(JDK)已经正确安装并设置好环境变量。
2. 项目创建与导入在IntelliJ IDEA中创建或导入项目非常简便。
点击“File”菜单,选择“New”创建一个新项目或者点击“Open”导入现有项目,你可以选择从版本控制系统或本地文件系统导入。
3. 编辑与代码导航IntelliJ IDEA提供了强大的编辑器,支持代码高亮、智能补全和代码导航等功能。
你可以使用Ctrl + 点击快捷键快速地跳转到代码定义处,使用Ctrl + Shift + N快捷键搜索文件或类。
4. 代码调试与测试IntelliJ IDEA内置了调试器,可以帮助你定位代码中的问题。
你可以设置断点、观察表达式值并逐步执行代码。
另外,IntelliJ IDEA也提供了丰富的单元测试和集成测试支持,可以帮助你编写可靠的测试用例。
5. 版本控制与代码管理IntelliJ IDEA集成了流行的版本控制系统(如Git、SVN),你可以直接在IDE中进行代码提交、分支管理、合并等操作。
IDE还提供了一些代码重构功能,如重命名、提取方法等,帮助你保持代码的整洁与可维护性。
6. 插件与扩展IntelliJ IDEA支持众多插件,可以进一步扩展其功能。
在官方插件库中,你可以找到各种语言、框架和工具的插件,如Spring、Hibernate、Maven等。
安装插件只需点击菜单“Preferences”->“Plugins”,搜索并安装所需插件。
2021最新IntelliJIDEA详细配置步骤

2021最新IntelliJIDEA详细配置步骤最新 IntelliJ IDEA 2021 详细配置步骤演⽰IDEA的下载以及详细介绍(详细篇)1. 设置 JDK2. 统⼀编译器和编译版本3. 设置主题4. 安装主题5. 设置字体6. ⿏标滚轮修改字体⼤⼩7. 控制台字体8 .快捷键8.1 学习更多IDEA快捷键9. 关闭扁平化显⽰并隐藏空包10 .显⽰⽅法和属性11. ⾃动导包12. ⾏号和⽅法分隔符13. 忽略⼤⼩写字母14. 多⾏显⽰15. 快速打开最近⽂件16. 编码字符集17. ⾃动编译18. 代码显⽰⽅式19. 省电模式20. 项⽬打开⽅式21. 配置 Maven22. 设置历史记录显⽰条数23. 导出/导⼊配置23.1 导出配置23.2 导⼊配置24. 插件25. 关闭⾃动更新26. 注释格式27. 去除IDEA⾃带的.iml⽂件28. IDEA中配置MAVEN29. 波浪线提⽰警告清除配置30. 修改模板⽂件作为⼀名开发⼈员,第⼀肯定是选择⼀款趁⼿的开发利器,本⼈使⽤ Java 偏多,这⾥推荐使⽤ IntelliJ IDEA, 俗称神级开发⼯具,具体的安装过程就不过多赘述了,有需要了解的朋友可以参考博⽂:这⾥将⾃⼰ IDEA 的配置信息说明⼀下,⽅便⼤家查找。
2021版欢迎界⾯如在这⾥插⼊图⽚描述本⽂使⽤ IDEA 2020.3.2 2021年01⽉26⽇发布的版本,欢迎界⾯如下。
图⽚注:2020.3.3欢迎界⾯如下,内部配置界⾯与3.2相似在这⾥插⼊图⽚描述IDEA 新版本重新制作了欢迎界⾯,所有的配置项都可以直接在欢迎界⾯:Customize -> All settings…中进⾏设置,后续不再赘述。
图⽚注意:欢迎界⾯的Setting是对全局配置进⾏设置,在项⽬中配置的Settinge有可能为当前项⽬。
如果是打开项⽬的界⾯下,点击菜单:File -> Settings…进⾏设置(有可能为当前项⽬⽣效)。
idea开发工具使用手册

idea开发工具使用手册IDEA是一款集成开发环境(IDE),主要用于Java、Kotlin、Scala等语言的开发。
IDEA拥有智能的代码辅助、强大的重构、丰富的插件、灵活的配置等功能,被认为是最好的Java开发工具之一。
本手册将介绍IDEA的基本使用方法,包括安装、配置、创建项目、编写代码、运行调试、版本控制等方面。
一、安装和激活在使用IDEA之前,需要从官网1下载IDEA的安装包,根据自己的操作系统和需求,选择合适的版本。
IDEA分为社区版(Community)和旗舰版(Ultimate),社区版免费,但功能有限,旗舰版收费,但功能更全面。
如果需要使用旗舰版,可以申请学生或教师的免费许可证2,或者购买正版授权3。
下载好安装包后,双击运行,按照提示进行安装。
安装过程中,可以选择安装目录、创建桌面图标、关联文件类型等选项,也可以选择是否让IDEA自动下载一个Java运行环境(JRE),以便于运行IDEA和Java程序。
安装完成后,打开IDEA,会弹出一个欢迎界面,可以选择创建新项目、打开已有项目、导入项目、检出项目等操作。
如果是第一次使用IDEA,还需要进行一些初始设置,如选择主题、安装插件、配置快捷键等。
如果需要激活旗舰版,还需要输入激活码或登录账号,以验证授权。
二、配置和优化在使用IDEA时,可以根据自己的喜好和习惯,对IDEA进行各种配置和优化,以提高开发效率和体验。
IDEA的配置和优化主要通过设置(Settings)和首选项(Preferences)两个菜单进行,可以在IDEA的主界面或者欢迎界面找到这两个菜单,也可以使用快捷键Ctrl+Alt+S(Windows)或者Command+,(Mac)打开。
在设置和首选项中,可以对IDEA的各个方面进行调整,如编辑器、代码风格、编译器、运行环境、插件、版本控制等。
这里只介绍一些常用的配置和优化,更多的细节可以参考IDEA的官方文档4或者网上的教程5。
IntellijIDEA使用教程

IntellijIDEA使⽤教程⽬录1、前⾔最近在学习⼤数据,之前⽤到了Eclipse,最近因为写Scala所以⽤到了这款编译器IntelliJ IDEA。
出于学习的⽬的,顺便总结下,希望对你有所帮助~2、IntelliJ IDEA简介IDEA 全称 IntelliJ IDEA,是java编程语⾔开发的集成环境。
IntelliJ在业界被公认为最好的java开发⼯具,尤其在智能代码助⼿、代码⾃动提⽰、重构、J2EE⽀持、各类版本⼯具(git、svn等)、JUnit、CVS整合、代码分析、创新的GUI设计等⽅⾯的功能可以说是超常的。
IDEA是公司的产品,这家公司总部位于的⾸都,开发⼈员以严谨著称的东欧程序员为主。
它的旗舰版本还⽀持HTML,CSS,PHP,MySQL,Python等。
免费版只⽀持Python等少数语⾔3、环境准备教程说的很详细了,按照这个⼀步步来就能装好了。
4、新建项⽬页⾯简介1.打开软件2.选择第⼀个创建项⽬3.页⾯如下5、搭建普通Java项⽬简介选择Java项⽬,Next->Next->给项⽬起个名⼦,然后选择Finish整体介绍下5.1、右键项⽬功能介绍PS:(因为直接右键JavaGeneralObj⽂件夹,右键.idea和右键src⽂件显⽰的内容不⼀样,所以这⾥做了下整合)1.NewPS:新建项⽬⽤的,可以新建的内容如下:Module:在此项⽬下新加⼀个模块,⽐如Java,Scala模块。
File:在选择的项⽬下添加⼀个⽂件,可以是Text,也可以是其它⽂件Scratch File:临时⽂件,⽤来对⽂件进⾏临时处理,如JSON,XML格式化Directory:在选择的⽬录下新建⼀个⽬录Html File:创建Html的,可以创建Html5,Html4和XHtmlStylesheet:创建样式⽂件JavaScript File:创建JS⽂件TypeScript File:typescript是微软出的⼀种编程语⾔,是 JavaScript的超级,最终编译成JavaScriptpackage json.FIle:Node.js的描述⽂件CFML/CFC File:帮助⽂件CoffeeScript File:是⼀套JavaScript转译语⾔Kotlin Script:可以将⾥⾯内容转换为Java代码执⾏。
IntellijIDEA手册

使用IntelliJ IDEA开发Web项目一、打开IntelliJ IDEA 7.0.3 并新建一个工程文件:1、打开Intellij IDEA7.0.3,“File”——>“New Project”:2、“Next”:3、更改工程名字和存放路径,如以下例子:4、“Next”:5、这一步的操作是关联本机的jdk文件目录(第一次需要做,之后就不需要再设定了),找到自己本机里面的JAVA目录下的JDK的目录(如果找不到自己的JDK目录的,说明没有装JDK,那么可以先装JDK -7或者其他版本,然后再找到自己本地的JDK文件夹。
同时再装上JRE -7)。
JDK-7下载:/download.htmlJRE-7下载:/download.html6、因为我们要开发的是Web项目,所以勾选Web Application。
如果全部都不选,则新建一个纯项目工程。
到此为止,就应该新建了一个Web 的项目工程,并自动打开该工程。
二、开发Web项目(以一个例子说明):1、打开新建的项目后,把左边的文件夹都展开,然后把Index.jsp文件删除,等一下我们会新建一个Html的文件:2、双击打开web.xml,可以修改字体的大小,按下下图的设置按钮:3、我们在这里新建一个自己的样式,并命名,如:myfont:修改字体样式,比如:修改字体大小,比如:15 :4、设置工程的运行方式:在此,我们选择以Tomcat Server来打开项目:进行到这一步的时候,有可能没有安装Tomcat,那么就要先安装Tomcat(如Tomcat 7. 0):Tomcat 7.0下载:/download-70.cgi或.skycn./soft/58951.html(安装教程user.qzone.qq./529901956/blog/1270043200)按下Fix按钮:5、新建Class文件:给Class文件一个名字,如:ClassicServer :打开刚刚新建的Class文件之后,把预先准备好的代码复制进来(当然也可以自己写代码开发,这里作为一个例子,预先准备好了代码):ClassicServer代码:把代码复制进来之后,作为演示,我们在这里先把public class以下的代码选中并且按Ct rl+/(?)键以把这段代码转换为注释:把public class以上的代码选中并删去:此时,有一部分代码会变成红色,说明这部分代码运行的时候会出错,于是我们把鼠标光标放在红色的代码上面,按下Alt+Enter,即可自动修复错误代码:6、新建Html或者Xhtml文件,这里我们新建的是Html文件:输入Index,不用加后缀,它会自动添加后缀名:双击打开Index.html,把预先准备好的代码复制输入(作为演示):Index代码:<html><head><title></title></head><body>校验用户名是否存在的例子<br/><form action="ClassicServer" method="GET"> 用户名:<input type="text" name="name"/> <input type="submit" value="检验"/></form></body></html>切换到web.xml,手工输入以下蓝色区域的容,注意其中的ClassicServer要对应回Index. html里面的ClassicServer:7、切换到ClassicServer.java,再次选中public class以下的容,Ctrl+/(?)把代码恢复会代码模式:8、再次把鼠标光标放在红色的代码上面,按下Alt+Enter,即可自动修复错误代码:9、最后把项目部署到Tomcat Server上:点击绿色三角箭头按钮:点击Run按钮:按了Run按钮后,将会自动弹出一个页面显示出我们所做的web项目的容。
IntelliJIDEA使用教程(非常全面)
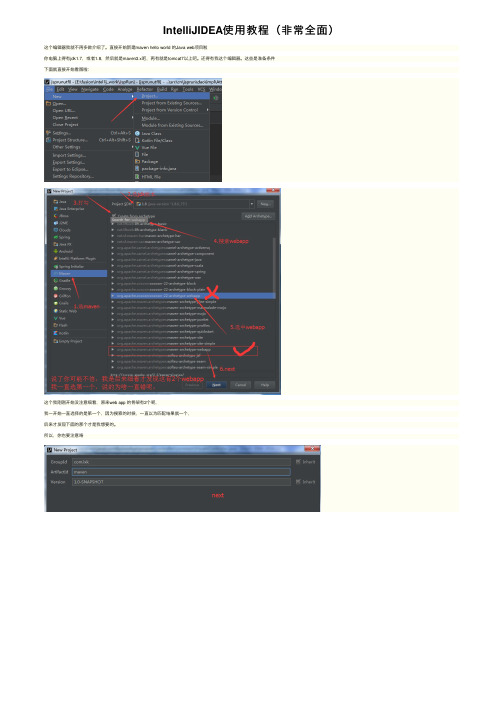
IntelliJIDEA使⽤教程(⾮常全⾯)这个编辑器我就不再多做介绍了。
直接开始新建maven hello world 的Java web项⽬啦你电脑上得有jdk1.7,或者1.8,然后就是maven3.x吧,再有就是tomcat7以上吧。
还得有我这个编辑器。
这些是准备条件下⾯就直接开始看图啦:这个我刚刚开始没注意细看,原来web app 的⾻架有2个呢,我⼀开始⼀直选择的是第⼀个,因为搜索的时候,⼀直以为匹配结果就⼀个,后来才发现下⾯的那个才是我想要的。
所以,你也要注意咯这个就是我有⼀篇⽂章说的,给⾃⼰的项⽬的本地仓库,默认是在c盘的.m2⽂件夹下,但是这很是占⽤c盘本来就不算⼤的系统盘的地⽅。
所以这⾥可以这么配置就可以把本地仓库移动到c盘之外的任意地⽅。
就这么做就可以啦。
另外使⽤的是国内的阿⾥的仓库。
下载速度快。
想知道细节的,可以看下下⾯的2个⽂章。
不想的也可以不看,跟着我搞,最后,也是OK的。
参考下⽂链接:1,这⼀⾏⾥⾯的按钮还是⽐较常⽤的。
注意,是点那个加号,再去配置的,⽽不是直接点下⾯的,注意哦。
⼥⼠们,先⽣们,attention please!!!估计有的⼩伙伴们到这个地⽅,哎,发现,我怎么就只有⼀个选项呀,artifact这个选项怎么没有呢?不要惊慌,⽅法⼀:先看⽂章最底部的更新内容,看看是不是因为安装的编辑器不是开发版,也就是说你安装的是免费版的,那可能就是少了下⾯的插件。
看看安装之后,是不是就可以搞定问题啦。
后经有同学反应,你搜索不到插件的,是因为你使⽤的阉割版的,建议安装专业版,也就是付费的,⽂章底部有截图的,我也附上我云盘的链接啦。
⽅法⼆:到这,你就可以添加了,或者直接点右下⾓的那个fix,估计⼀下就⾃动,给搞定了,继续吧。
更新完毕。
这个,没搞过web开发的⼩伙伴,可能不⼤好理解。
在 Java Web 开发中,⼀般更新了 Java ⽂件后要⼿动重启 Tomcat 服务器,才能⽣效,有印象没?我是真的遇到过,当时⽤的编辑器是eclipse,使⽤的服务器好像是jboss,浪费不少⽣命啊,你如上配置的话,不论是更新 class 类,css⽂件,html⽂件,js⽂件,还是更新 Spring 配置⽂件都能做到⽴马⽣效,⼤⼤提⾼开发效率。
idea gitee 集成用法
idea gitee 集成用法一、集成介绍idea是一款流行的集成开发环境(IDE),而Gitee则是知名的版本控制托管和代码协作平台。
通过将idea与Gitee进行集成,开发者可以更加便捷地管理代码、进行团队协作和版本控制。
二、集成步骤1. 注册并登录Gitee平台,创建一个新的仓库(repository)或获取已存在的仓库。
2. 在idea中打开项目,进入“项目”面板,选择“Gitee”作为存储库。
3. 在idea中,可以使用Gitee的版本控制功能,如commit、pull request等。
4. 在Gitee中,可以通过idea的界面查看和下载代码,参与pull request,实现高效的团队协作。
三、用法详解1. 在idea中打开项目后,进入“项目”面板,选择“Gitee”作为存储库。
如果还没有关联存储库,可以在此面板中点击“关联存储库”按钮进行关联。
2. 关联成功后,可以在“Gitee仓库”区域看到存储库的地址。
在编辑器中修改代码后,可以通过“提交”按钮将更改保存到存储库中。
3. 需要合并代码时,可以在idea中打开pull request,按照提示操作即可完成代码合并。
4. 在Gitee中,可以通过点击idea界面上的“查看代码”按钮,直接访问存储库中的代码。
同时,还可以参与pull request,与其他开发者进行协作。
5. 在使用过程中,需要注意保护代码的安全性,避免泄露重要信息。
同时,要遵守Gitee和idea的使用规定,不得进行违规操作。
四、进阶教程1. 学习使用idea的其他版本控制工具,如GitLab、GitHub等,以便在不同的平台上进行协作和版本控制。
2. 学习使用其他IDE(如Visual Studio Code、Sublime Text 等),了解它们与Gitee的集成方式,以便在不同的开发环境中进行代码管理。
3. 学习使用Git命令行工具,掌握基本的Git命令,以便在本地和远程仓库之间进行更灵活的代码管理和协作。
intellij idea相关解释编程中文-概述说明以及解释
intellij idea相关解释编程中文-概述说明以及解释1.引言1.1 概述IntelliJ IDEA是一款由JetBrains公司开发的集成开发环境(IDE),被广泛应用于Java编程以及其他编程语言的开发中。
它拥有强大的代码编辑、调试、测试和优化功能,让开发者能够更高效地完成项目。
在本文中,我们将对IntelliJ IDEA这款IDE进行详细的介绍,分享它的优点和主要功能,帮助读者更深入地了解这款工具的使用方法和技巧。
同时,我们也将展望未来,探讨IntelliJ IDEA在未来可能带来的发展和创新,以及对开发者的影响。
1.2 文章结构本文主要分为三个部分: 引言、正文和结论。
在引言部分,将介绍本文的概述、文章结构和目的。
引言部分旨在引起读者的兴趣,让读者对文章的主题有一个整体的把握。
在正文部分,将分为三个小节,分别是IntelliJ IDEA简介、IntelliJ IDEA 的优点和IntelliJ IDEA的主要功能。
在这一部分中,将详细介绍IntelliJIDEA这款编程工具的特点和功能,帮助读者更深入地了解该工具并学会如何使用它。
在结论部分,将总结整篇文章的内容,提出一些应用建议,并展望未来IntelliJ IDEA在编程领域的发展。
结论部分将为读者提供一个全面的思考和总结,以及对未来的一些展望和预测。
1.3 目的:本文旨在介绍IntelliJ IDEA这一优秀的集成开发环境,探讨其在编程领域中的重要作用和优点。
通过详细分析IntelliJ IDEA的特点和功能,帮助读者更好地了解并熟练运用这一工具,提高编程效率和质量。
同时,本文也旨在展示IntelliJ IDEA在未来的发展方向和应用前景,为读者提供参考和指导。
希望读者通过本文的阅读和理解,能够对IntelliJ IDEA有一个全面的认识,为自身的编程工作带来更多的便利和效益。
2.正文2.1 IntelliJ IDEA简介IntelliJ IDEA是一款由JetBrains开发的集成开发环境(IDE),是专为Java开发者设计的全功能IDE。
IntelliJIDEA使用教程
IntelliJIDEA使⽤教程在IDEA当中,Project和 Module是作为两个不同的概念,对项⽬结构是重要意义的eclipse和idea的区别IDEA⾥⾯的⼦⼯程要称为Module就是模块化的概念,作为聚合⼯程亦或普通的根⽬录,它称之为Project,⽽下⾯的⼦⼯程称为模块,每⼀个⼦模块之间可以相关联,也可以没有任何关联。
1.初始化步骤2.全局添加jdk(添加默认配置):File ->Other Settins -> Default Project Structure -> SDKs -> JDK3.全局添加maven(添加默认配置):File ->Other Settings -> Default Settings -> Build & Tools -> Maven4. 全局添加git/svn(添加默认配置):File ->Other Settings -> Default Settings -> Version Control -> Git5.全局⾃动导包和智能移除(添加默认配置):File ->Other Settings -> Default Settings -> Auto Import6.当前项⽬添加Tomcat:File -> Settings -> Deployment -> Application Servers -> Tomcat Server7.全局设置⾃动编译:File ->Other Settings -> Default Settings -> Auto Import开启⾃动编译之后,结合Ctrl+Shift+F9 会有热更新效果⾃动编译(Runtime)具体步骤:敲击 Ctrl + Shift + Alt + / 然后双击Shift搜索进⼊Registry ,找到compiler.automake.allow.when.app.running ,然后勾选上。
IntellijIDEA使用教程相关系列目录
IntellijIDEA使用教程相关系列目录技术活,该赏关注+一键三连(点赞,评论,收藏)再看,养成好习惯最近抽空整理了Intellij IDEA相关系列的文章,下面是idea相关系列的目录,方便查阅。
若文章有错误或纰漏,请不吝指正。
谢谢!idea相关系列目录内功心法(常用配置)安装和基本配置新安装IDEA推荐设置(先记录目录,有空补上)设置成eclipse风格Intellij IDEA:统一配置JDK版本编码统一UTF-8设置黑色主题,界面字体大小以及内容字体大小IDEA类和方法注释模板设置(非常详细)idea设置live template代码模板IDEA全局替换快捷键IDEA 设置显示:内存的使用情况和内存回收Intellj IDEA 新开项目设置默认maven版本带你深入了解IDEA的Project StructureIntellj IDEA 设置默认maven版本Intellj IDEA 设置默认maven版本(适用于2020版本以上)IDEA 热部署太热情不好(失去焦点就热部署)IDEA2020-2配置git,并从远程仓库获取代码分支酷炫武技(装X)Idea开发环境 maven项目在tomcat里运行Intellij IDEA使用Debug攻略IDEA(2021)最全常用快捷键《必须收藏》intelliJ IDEA 自动优化导入包IDEA 强大文件对比功能IDEA 误删文件恢复Intellij IDEA 强大的搜索能力clean和install Maven项目idea TODO功能使用IDEA terminal终端使用intellij idea中如何快速找到父类方法intellij idea生成JavaDocintellij idea中快速抽取方法Intellij IDEA查看maven所有jar包依赖关系IDEA快速恢复开发:导出配置和导入配置操作Intellij IDEA和eclipse代码格式一致的商业解决方案Intellij IDEA 查看所有断点Intellij IDEA 默认打开上次项目设置政治联姻(插件篇)IDEA Lombok插件的安装与使用,生成get方法和set方法IDEA设置酷炫界面透明度-Background Image Plus插件IDEA/eclipse集成阿里巴巴Java开发规约插件idea 懒人神器保存自动格式化 Save Action插件见招拆招IDEA 出现问题:PSI and index do not match 解决方案IDEA 出现问题:Error:java: Compilation failed: internal java compiler error解决方案IDEA 出现问题:pom.xml提示Element connectors is not allowed here 解决方案IDEA 出现问题:出现private field 'xxx' is never assigned警告解决方案IDEA 出现问题:方法注释在引用此方法时查看不到解决方案IDEA 出现问题:IDEA Shift+shift 万能搜索你也有失效的时候IDEA出现问题:*.properties文件中文乱码解决方案IDEA出现问题:Received fatal alert: protocol_version 解决方案IDEA java版本降级编译,解决JDK版本导致Unsupported major.minor version 52.0 errorIDEA出现问题:Idea中右边的maven projects窗口找不到解决方案IDEA出现问题:Unable to save settings: Failed to save settings. Please restart IntelliJ IDEA解决方案IDEA出现问题:idea启动tomcat 很慢解决方案IDEA出现问题:idea启动提示 failed to create jvm: error code -1 jvm path 很慢解决方案IDEA出现问题:修改jsp页面tomcat不生效解决方案IDEA 出现问题:Error running,Command line is too long. Shorten command line解决方案IDEA 出现问题:一直Build Output,cpu爆炸,出现错误点击进去又显示正常IDEA出现问题:断点不可用 No executable code foundIDEA 出现问题:报错unable to establish loopback connection 解决方案IDEA 出现问题:IDEA看不到编译后的target文件解决方案IDEA 出现问题:严重占用CPU 长时间在90~100%解决方案IDEA 出现问题:debugger启动tomcat 报错Address already in use: NET_Bind 解决方案IDEA 出现问题:idea 类明明在同一个包,但是无法import导入类IDEA 出现问题:tomcat热部署没反应解决方案未完待续。
IntelliJIDEA使用方法
面开始一步步的来创建一个web项目1.首先创建一个Project 也就是项目空间2.选择项目类型这里选Java Module 自定义工作空间名称和路径3.选择需要用到的框架组件这里只选了第一个Web Application > Finish4.创建完工作空间默认会是一个Module也就是一个项目但是不推荐使用该项目进展开发5.在该项目空间中添加新的工程选中工作空间右键Open Module Settings 或者是按下F4然后Finish 找到新建工程的web>WEB-INF下创建classes 和lib文件夹修改编译输出目录 Paths>Use module pile output path 转到自定义的classes 文件夹同样可以指定lib库目录添加>jars or directories 指向创建的lib文件夹弹出窗口选择jar directory接下来部署测试配置tomcat服务器点击图箭头方向那个下拉地方有个编辑服务器的弹出右侧窗口点击绿色的添加按钮 > 选择tomcat服务器 >local选择部署的应用启动测试...=============================================================================== ==========================================================================使用方法一=============================================================================== =============================================================================== ========打开IDEA,〔当第一次打开的时候出现的是一个欢迎页面,随便创建一个project来进入到IDEA的主界面〕,主界面显示如下:主界面由6个主要区域组成(图中红色数字标注的) 1.菜单和工具栏 2.导航条:编辑文件时帮助定位和导航项目中的文件 3.状态栏:显示当前项目,IDEA本身的状态,还有别的一些状态相关的一些信息 4.编辑器 5.工具窗口:辅助类窗口。
- 1、下载文档前请自行甄别文档内容的完整性,平台不提供额外的编辑、内容补充、找答案等附加服务。
- 2、"仅部分预览"的文档,不可在线预览部分如存在完整性等问题,可反馈申请退款(可完整预览的文档不适用该条件!)。
- 3、如文档侵犯您的权益,请联系客服反馈,我们会尽快为您处理(人工客服工作时间:9:00-18:30)。
Public CMS 2016
IntelliJ IDEA集成手册
目录
第一章环境准备 (2)
第二章导入工程 (3)
第三章部署PublicCMS (7)
第一章环境准备
事先准备tomcat7.0.57+、maven、java1.7+配置好环境
第二章导入工程
接下导入maven工程以idea为例
1.点击右下角import Project
2.根据目录找到maven包并点击ok
3.选择maven->next
4.不用选next
5.next
6.配置jdk 之前配置过就不用再设置
7.设置工程名,finish结束
第三章部署PublicCMS
1.File->setting->build,execution,deployment->application servers,点击加号添加tomcat路
径
2.主界面run->edit configuretions 点击左上角加号添加tomcat server
3.第一个界面基本不动,都是些配置,可以自行百度,这里就改了个最上面的名字
4.接下来在Name下有个Deployment点击,右边有个绿色的加号->artifact…,选择第一个
5.右边有个名字需要填一下是网址后缀例本网址为
localhost:8080/public_cms/admin为后台,点击ok保存
6.点run->run即可运行。
