html插入多个表格
html5循环表格
html5循环表格HTML5是一种用于创建网页和网页应用程序的标准语言。
作为HTML5的一部分,表格是网页中经常使用的元素之一。
在HTML5中,循环表格是一种可以通过代码自动生成数据行的表格。
本文将介绍HTML5循环表格的使用方法及其优势。
一、什么是HTML5循环表格是一种通过使用HTML和JavaScript代码来自动生成数据行的表格。
与传统的静态表格相比,循环表格可以动态地添加或删除行,使表格具有更强的灵活性和扩展性。
循环表格通常用于显示大量数据,例如商品列表、用户信息等。
二、HTML5循环表格的使用方法要创建一个循环表格,我们首先需要定义表格的基本结构,包括表头和表身。
下面是一个简单的HTML5循环表格的例子:```html<table><thead><tr><th>序号</th><th>姓名</th><th>年龄</th></tr></thead><tbody><!-- 这里是数据行 --></tbody></table>```在上面的代码中,`thead`元素代表表头,其中的`tr`元素表示表头的一行,`th`元素表示表头的每个单元格。
`tbody`元素用于包含表格的数据行。
接下来,我们可以使用JavaScript动态地生成数据行。
下面是一个使用JavaScript生成数据行的例子:```html<script>// 假设有一个包含学生信息的数组var students = [{ id: 1, name: '张三', age: 18 },{ id: 2, name: '李四', age: 19 },{ id: 3, name: '王五', age: 20 }];// 获取tbody元素var tbody = document.querySelector('tbody');// 遍历学生数组,并生成数据行students.forEach(function(student) {var tr = document.createElement('tr');tr.innerHTML = `<td>${student.id}</td><td>${}</td><td>${student.age}</td>`;tbody.appendChild(tr);});</script>```在上面的代码中,我们首先定义了一个包含学生信息的数组`students`。
hbuilder制作多个表格教程
hbuilder制作多个表格教程
1. 打开HBuilder,点击“新建项目”创建一个Web项目。
2. 在项目中创建一个HTML文件,命名为“index.html”。
3. 在HTML文件中添加表格标记“<table>”,并在其中添加多个“<tr>”和“<td>”标记以创建所需的表格。
4. 使用CSS样式对表格进行美化和布局。
5. 在HTML文件中引入jQuery库文件,以便使用jQuery插件来增强表格功能。
6. 在HTML文件中添加jQuery插件的引用,例如“<script
src="jquery.tablesorter.min.js"></script>”。
7. 在<script>标记中编写jQuery代码来实现表格的排序、过滤等功能。
8. 在HTML文件中引入Bootstrap库文件,以便使用Bootstrap 的表格样式和布局。
9. 在HTML文件中添加Bootstrap的表格标记“<table
class="table">”和约束类“<div class="table-responsive">”以实现响应式表格。
10. 使用Bootstrap的表格样式和约束类样式对表格进行美化和布局。
html datatables 添加编辑和删除列 使用方法
html datatables 添加编辑和删除列使用方法HTML DataTables 是一种流行的表格插件,可让普通的HTML表格具有强大的数据处理和显示功能。
本文将介绍如何在DataTables中添加编辑和删除列,以及相关使用方法。
一、HTML DataTables 简介HTML DataTables 是一个基于JavaScript的开源库,它可以轻松地将HTML表格转换为具有动态数据处理能力的交互式表格。
DataTables 具有多种功能,如排序、筛选、分页、显示/隐藏列等,使得数据展示更加灵活和高效。
二、添加编辑列的使用方法在DataTables中,可以通过为表格添加编辑列来实现对数据的增删改操作。
编辑列的添加方法如下:1.在初始化DataTables时,为列对象添加编辑属性:```javascriptvar table = $("#myTable").DataTable({columns: [{ data: "name", edit: true },{ data: "age", edit: true },{ data: "gender", edit: false }]});```2.针对特定列设置编辑模板:```javascriptvar editTemplate = {name: "<input type="text" class="form-control" placeholder="姓名">",age: "<input type="number" class="form-control" placeholder="年龄">",gender: "<select class="form-control"><option value="male">男</option><option value="female">女</option></select>"};table.columns().eq(1).editor(editTemplate);```3.添加编辑事件处理器:```javascripttable.on("edit", function (e, ctx) {console.log("编辑操作:", e, ctx);});```三、添加删除列的使用方法在DataTables中,可以通过为表格添加删除列来实现对数据的删除操作。
html表格设置
html表格设置容表格的定义定义表格:<TABLE 参数1 参数2 >……</TABLE>定义表行:<TR>定义单元格:<TD>表格边框的宽度:BORDER=边框宽度,边框宽度为象素值【使用范例】:定义一个一行一列的表格<table border=2><tr><td>第一列</td></tr></table>定义了一个一行一列的表格,表格内容为:“第一列”。
【使用范例】:定义一个一行两列的表格<table border=2><tr><td>第一列</td><td>第二列</td></tr></table>定义了一个一行两列的表格,表格第一列的内容为:“第一列”,表格第二列的内容为:“第二列”。
【使用范例】:定义一个两行一列的表格<table border=2><tr><td>第一行</td></tr><tr><td>第二行</td></tr></table>定义了一个两行一列的表格,表格第一列的内容为:“第一列”,表格第二列的内容为:“第二列”【使用范例】:定义一个两行两列的表格<table border=2><tr><td>第一行第一列</td><td>第一行第二列</td></tr><tr><td>第二行第一列</td><td>第二行第二列</td></tr></table>要定义多行多列表格依次类推。
HTML跨多行跨多列的表格
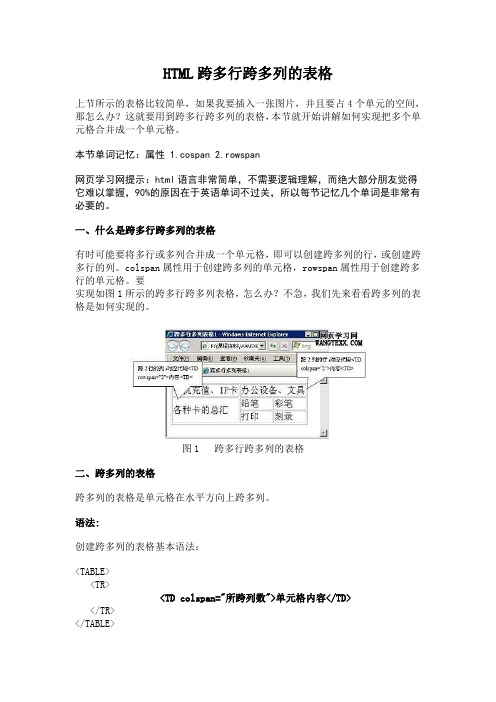
HTML跨多行跨多列的表格上节所示的表格比较简单,如果我要插入一张图片,并且要占4个单元的空间,那怎么办?这就要用到跨多行跨多列的表格,本节就开始讲解如何实现把多个单元格合并成一个单元格。
本节单词记忆:属性 1.cospan 2.rowspan网页学习网提示:html语言非常简单,不需要逻辑理解,而绝大部分朋友觉得它难以掌握,90%的原因在于英语单词不过关,所以每节记忆几个单词是非常有必要的。
一、什么是跨多行跨多列的表格有时可能要将多行或多列合并成一个单元格,即可以创建跨多列的行,或创建跨多行的列。
colspan属性用于创建跨多列的单元格,rowspan属性用于创建跨多行的单元格。
要实现如图1所示的跨多行跨多列表格,怎么办?不急,我们先来看看跨多列的表格是如何实现的。
图1 跨多行跨多列的表格二、跨多列的表格跨多列的表格是单元格在水平方向上跨多列。
语法:创建跨多列的表格基本语法:<TABLE><TR><TD colspan="所跨列数">单元格内容</TD></TR></TABLE>下面通过示例1来说明colspan这一属性的用法。
示例1:<HTML><HEAD><TITLE>跨多列的表格</TITLE></HEAD><BODY><TABLE border="2"><TR><TD colspan="3">学生成绩表</TD><!--设置单元格水平跨3列,3是单元格所跨列数,而不是像素数--></TR><TR><TD >英语</TD><TD >数学</TD><TD >语文</TD></TR><TR><TD >95</TD><TD>98</TD><TD>89</TD></TR></TABLE></BODY></HTML>这里,将第一行单元格在水平方向上所跨的列数设为3,因为表格共包括3列,所以第一行只有一个单元格,运行效果如图2所示。
html5表格嵌套表格

html5表格嵌套表格在HTML5中,可以使用表格来嵌套其他表格。
嵌套表格可以帮助我们更灵活地组织和展示复杂的数据。
下面我将从结构、语法和实际应用三个角度来介绍嵌套表格。
首先,让我们看一下嵌套表格的结构。
在HTML中,表格由`<table>`标签开始,然后是`<tr>`标签表示行,再接着是`<td>`标签表示单元格。
当我们要嵌套表格时,可以在一个单元格中再创建另一个表格,即在`<td>`标签中再使用`<table>`、`<tr>`和`<td>`标签来构建内部表格。
其次,让我们来看一下嵌套表格的语法。
下面是一个简单的示例,演示了如何在一个单元格中嵌套另一个表格:<table>。
<tr>。
<td>主表格单元格1</td>。
<td>主表格单元格2</td>。
</tr>。
<tr>。
<td colspan="2">。
<table>。
<tr>。
<td>嵌套表格单元格1</td>。
<td>嵌套表格单元格2</td>。
</tr>。
<tr>。
<td>嵌套表格单元格3</td>。
<td>嵌套表格单元格4</td>。
</tr>。
</table>。
</td>。
</tr>。
</table>。
在这个示例中,我们在一个单元格中嵌套了另一个表格,通过使用`<table>`、`<tr>`和`<td>`标签来构建内部表格。
最后,让我们来看一下嵌套表格的实际应用。
嵌套表格通常用于展示具有层次结构的数据,比如在展示组织架构、多级分类或者复杂的数据关系时会非常有用。
简述使用html创建表单的基本步骤
简述使用html创建表单的基本步骤创建表单是一种常见的网页设计需求,表单可以让用户输入数据或提交表单数据。
下面是创建HTML表单的基本步骤:步骤1:HTML标签在HTML中,表单需要使用<form>标签来创建。
该标签包含多个子标签,如<label>标签用于显示表单输入字段的名称</label>,<input>标签用于定义表单输入字段,<button>标签用于创建提交按钮。
例如:```<form><label for="name">姓名:</label><input type="text" id="name" name="name" required><button type="submit">提交</button></form>```步骤2:标签属性表单中的每个输入字段和提交按钮都需要指定属性,以便在服务器端正确地处理它们。
这些属性包括:- `<input>`标签的属性:type(输入类型),id(标识符),name(用于在服务器端查找属性值的名称),required(是否是必须的),value(输入值),pattern(正则表达式)。
- `<button>`标签的属性:type(提交类型),name(用于在服务器端查找属性值的名称),value(提交值),background(背景颜色),color(颜色),hover(hover 状态),优惠政策(是否在浏览器缓存中保留按钮)。
例如:```<form><label for="name">姓名:</label><input type="text" id="name" name="name" required><button type="submit" name="submit" value="提交">提交</button> </form>```步骤3:表单数据表单数据通常通过<input>标签中的type属性指定,例如:```<form><label for="name">姓名:</label><input type="text" id="name" name="name" required><input type="password" id="password" name="password" required> <input type="submit" value="提交"></form>```步骤4:提交表单数据当用户完成表单并单击提交按钮时,浏览器将向服务器发送表单数据。
第三课 HTML-表单3

Thiz科研集团 Thiz科研集团 王秋野 王秋野 wqy_root@ wqy_root@
表单
目的: 理解表单在网页中的作用 创建一个基本的表单 提供一个处理表单的方法 理解表单的格式化技术
表单
网络最好的特点之一是它用新的方法使新表单之间能够相 互传达信息。在线式表单是实现这种普通采用的信息传达 方法。例如,表单允许网站上的浏览者在站点上发表评 论,订购商品,将公告张贴到公告牌上 今天学习怎样创建表单,怎样在网站上有效的使用它们。 理解什么是表单 表单的根本目的是收集信息,当注册选举时,你要填写一 张表,注明姓名,地址,出生日期等。。这张表被收集并 处理。在线式表单也是同样的道理,它们也要被填写,收 集和处理。
表单
任何时候,当你想在页面最初被载入时缺省的设置一个被选择的单选框时,就应 该使用checked属性:
表单
选择菜单 当你想让用户从很长的选项列表中选择时,可以考虑使用一个选择菜 单来替代复选框或者单选按钮。选择菜单是列表,该列表被压缩成一 个或多个可视选项,这与你在其他应用软件的顶部所找到的菜单一 样。例如: 告诉浏览器,一次只作出3个可视选择,
表单
表单
用button标签来格式化 虽然input标签和button标签都可以建立一个基本的内部有文本的 灰色按钮,但是button标签有附加的格式化的可能性,不像input 标签没有结尾,button既有打开标签又有结束标签,这样,当你在 浏览时,你就可以在按钮上加上文本,图片,和其他的HTML。 例如,如果你在打开和关闭button标签之间加入img标签,那么当 浏览器浏览时,那张图片就会显示在按钮的中间。
表单
当页面 被浏览 时,用 户在输 入他们 的信息 之前就 不得不 擦去这 些用来 说明的 短语
一、(3)HTML表单与表格-综合应用
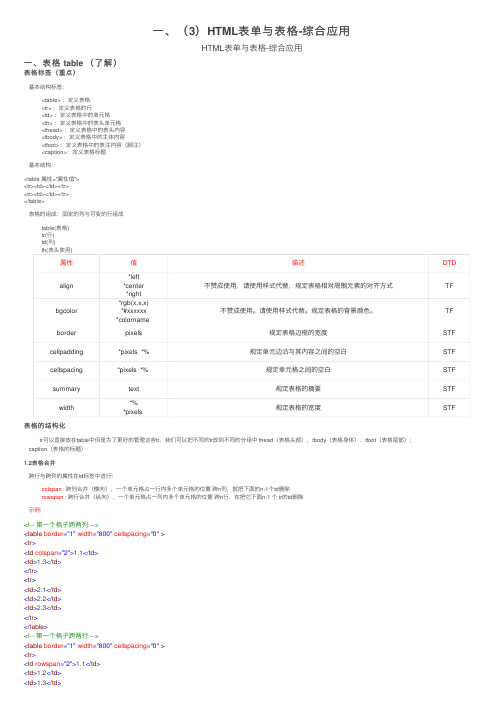
DTD TF
TF STF STF STF STF STF
</tr> <tr> <td>2.2</td> <td>2.3</td> </tr> </table>
注意事项:列的个数要一致 如果一个格子中没有内容,请尽量使用 ( 空格)补齐
1.3 常见问题 1.如果要完成跨行跨列,先做一个完整的表格。再一步一步的去完成跨行合并或跨列合并操作。 2.结构化后的表格需要去掉结构标签后,再做合并操作 3.注意需要合并的td起始位置,合并完成后必须清除同行或列多出来的td
<p>爱好: <input type="checkbox" name="hobbuy" value="唱歌" checked/>唱歌 <input type="checkbox" name="hobbuy" value="看书"/>看书 <input type="checkbox" name="hobbuy" value="学习"/>学习 <input type="checkbox" name="hobbuy" value="上网"/>上网
其它属性:
placeholder:定义输入框的提示文字 maxlength:设置文本框最多输入多少字符 readonly:只读(不可输入) disabled:禁用(不可输入) -> 不会提交这个表单元素的数据 checked:仅用于 radio/checkbox,作用是设置默认选中项
HTML编辑器操作
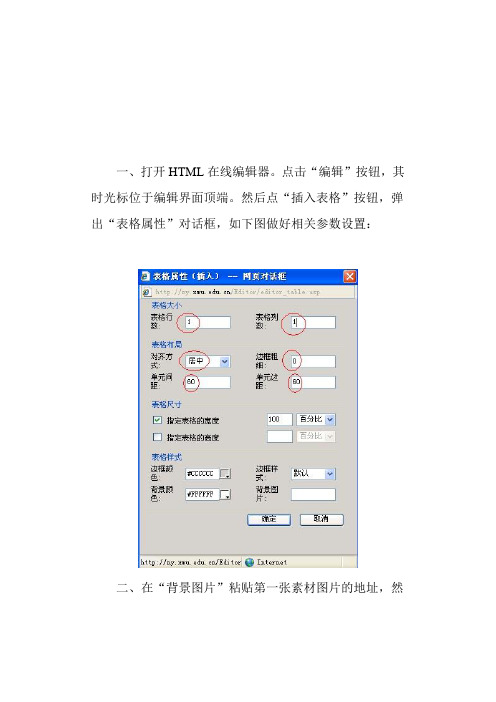
一、打开HTML在线编辑器。
点击“编辑”按钮,其时光标位于编辑界面顶端。
然后点“插入表格”按钮,弹出“表格属性”对话框,如下图做好相关参数设置:二、在“背景图片”粘贴第一张素材图片的地址,然后点“确定”。
其实第一层边框效果如下图:三、再次点击“编辑”按钮,将光标放于第一层效果的中间左端,然后点““插入表格”按钮,弹出“表格属性”对话框,设置行列均为1、对齐方工居中、边框粗细0、单元间距和边距均为15,在“背景图片”中粘贴第二张素材图片的地址,点“确定”。
效果如下图:四、再次点击“编辑”按钮,将光标放于第二层效果的中间左端,然后点““插入表格”按钮,弹出“表格属性”对话框,设置行列均为1、对齐方工居中、边框粗细0、单元间距和边距均为5,在“背景图片”中粘贴第三张素材图片的地址,点“确定”。
效果如下图:五、再次点击“编辑”按钮,将光标放于第三层效果的中间左端,然后点““插入表格”按钮,弹出“表格属性”对话框,设置行列均为1、对齐方工居中、边框粗细2、单元间距和边距均为8,在“背景图片”中粘贴第三张素材图片的地址,点“确定”。
最后效果如下图:此处写入日志边框不宜过多,不然影响打开速度,也会显得过于繁杂,以2——6层为宜。
六、其时边框已经做好,可以写日志了。
我们更进一步来制作,即再添加一个写日志的框格。
点击“编辑”按钮,将光标放于第一格日志框格之下的第一层图片左端。
如图:如果欲与第一个框格相距远一点,就按回车键下调,反之按退格上移;然后重复前面的三、四、五步做出第二个日志框格。
(其时可用原来的素材,也可以启用新的素材,做出两个不同的框格)最后效果即如本篇日志所用边框。
当然,你也可以做出三个、四个乃至更多的框格。
七、点击“源代码”按钮,复制代码进入你的空间写日志,在HTLM模式下将其粘贴,然后“返回”到“高级”模式即可写日志。
八、你也可以在边框中加入自己的名字,具体方法此处不再赘述,你可以转载我的边框,在HTML模式下将其中的“边关月欢迎你”换成你的名字或你想要的内容。
html table的用法
html table的用法引言概述:HTML表格是一种强大的工具,用于在网页上展示和组织数据。
它可以帮助开发者以清晰、结构化的方式呈现信息。
本文将详细介绍HTML表格的用法,包括创建表格、设置表格样式、合并单元格、添加标题和表格标题等。
正文内容:1. 创建表格1.1 使用<table>标签创建表格1.2 使用<tr>标签创建表格的行1.3 使用<td>标签创建表格的单元格1.4 使用<th>标签创建表格的表头2. 设置表格样式2.1 使用CSS样式设置表格的边框、背景色和字体样式2.2 使用CSS类设置表格的样式2.3 使用CSS伪类选择器设置表格的样式3. 合并单元格3.1 合并行3.2 合并列3.3 合并行和列4. 添加标题和表格标题4.1 使用<caption>标签添加表格标题4.2 使用<thead>、<tbody>和<tfoot>标签分组表格内容4.3 使用<th>标签创建表格的标题行5. 表格的其他用法5.1 设置表格的宽度和高度5.2 添加表格的边框和背景图片5.3 使用表格布局进行页面设计总结:通过本文的介绍,我们了解了HTML表格的基本用法。
我们学习了如何创建表格、设置表格样式、合并单元格以及添加标题和表格标题。
同时,我们还了解了一些其他的表格用法,如设置表格的宽度和高度,添加边框和背景图片,以及使用表格布局进行页面设计。
掌握这些技巧,我们可以更好地展示和组织数据,提升网页的可读性和用户体验。
html表格用法
html表格用法HTML表格用法什么是HTML表格?HTML表格是一种用于展示和组织数据的标记语言。
表格由一个或多个行和列组成,用于在网页上显示数据。
创建表格在HTML中,使用<table>元素来创建表格。
表格由行(<tr>)和单元格(<td>)组成。
下面是创建一个简单表格的代码示例:<table><tr><td>单元格1</td><td>单元格2</td><td>单元格3</td></tr><tr><td>单元格4</td><td>单元格5</td><td>单元格6</td></tr></table>合并单元格有时候我们希望将多个单元格合并成一个,可以使用colspan和rowspan属性来实现。
colspan属性用于跨列合并,rowspan属性用于跨行合并。
<table><tr><td colspan="2">跨两列单元格</td><td>单元格3</td></tr><tr><td>单元格4</td><td rowspan="2">跨两行单元格</td><td>单元格6</td></tr><tr><td>单元格7</td><td>单元格8</td></tr></table>表头和表体在表格中,可以使用<thead>、<tbody>和<tfoot>元素来分组不同部分的内容。
html表格布局实例
[html]表格布局之实例版| [<<][>>]前面我们讲了html表格的基础知识,今天我们通过一个实例让大家更清晰的了解下表格的用途。
例如:我们做一个简单的网站布局,代码如下:<table align="center" width="500" height="400" border=1bordercolor="#00ff99"><tbody><tr><td colspan="3" align="center">网站名称</td></tr><tr><td width="30%" height="25">网站标题</td><td colspan="2" align="right">搜索框</td></tr><tr><td width="30%">左边</td><td width="40%">中间</td><td>右边</td></tr><tr><td colspan="3" align="center">网站底部信息</td></tr></tbody></table>产生如下的表格:这是一张整体的表格,第一行和第四行分别跨度了三列,这里用colspan="3"来限制,而第二行的“搜索框”占用了两列的位置,用colspan="2"控制;align="center"是对表格内文字的对齐限制,center表示中间,right表示靠右,left靠左。
表格属性

熊燕帆
HTML超文本标识语言 表格(TABLE)标记--1
(1)<table> 元素:定义一个表格。这是每一个表格 必 须 的 元 素 ; 每 一 个 表 格 只 有 一 对 <table> 和 </table>。一张页面中可以有多个表格。 (2)<tr>元素:定义表格的行,一个表格可以有多行, 所以<tr>对于一个表格来说不是唯一的。 (3)<td>元素;定义表格的一个表格单元。每行可以 有不同数量的单元格,在<td>和</td>之间,将出现 表格的每一个单元格里的具体内容。 需要注意的是;上述的三个元素必须、而且只能够配对 使用。缺少任何一个元素,都无法定义出一个表格。
HTML超文本标识语言 表格(TABLE)标记--2
表格的基本语法
• <table>定义表格
<th>定义表头 </th> <tr>定义表行 <td>…</td>定义单元格 <td>…</td> </tr> </table>
HTML超文本标识语言 表格(TABLE)标记--3
表格元素的属性 --1
• 1、width属性:指定表格或某一个 表格单元格的宽度。单位可以是%或 者象素。 • 2、height属性:指定表格或某一个 表格单元格的高度。单位可以是%或 者象素。 • 3、border属性:表格边线粗细
HTML超文本标识语言 表格(TABLE)标记--2
表格元素的属性 --1
• 4、bordercolor属性:指定表格或 某一个单元格的边框颜色。 • 5 、 Bordercolorlight 属 性 : 亮 边 框的颜色 • 6 、 Bordercolordark 属 性 : 暗 边 框的颜色
freemarker对html里多行表格操作
freemarker对html⾥多⾏表格操作html中需⽣成⼀个表格,但表格⾏数不确定html<#list LIST as lender><tr><td>${!""}</td><td>${lender.idType!""}</td><td>${lender.idNum!""}<br><td>${lender.L1!""}<br><td>${lender.L2!""}<br><td>${lender.L3!""}<br><td>${lender.L4!""}<br><td>${lender.L5!""}<br><td>${lender.L6!""}<br><td>${lender.L7!""}<br><td>${lender.L8!""}<br><td>${lender.L9!""}<br></td></tr></#list>java代码List<LenderInfo> list = vo.getLenderList();List<Map<String, Object>> paramList = new ArrayList<>();if(list != null && vo.getLenderList().size() > 0) {for(int i = 1; i <= vo.getLenderList().size(); i++){Map<String, Object> paramMap = new HashMap<>();paramMap.put("name", list.get(i - 1).getName());paramMap.put("idType", list.get(i - 1).getIdType());paramMap.put("idNum", list.get(i - 1).getIdNum());BigDecimal lenderAmount = list.get(i - 1).getLenderAmount();String[] lenderAmountArr = moneyToArr(lenderAmount);m = 0;for (int j = 1; j < 10; j++) {if (lenderAmountArr.length + j == 9) {paramMap.put("L" + j, "¥");m = j;} else if (lenderAmountArr.length + j < 9) {paramMap.put("L" + j, "");} else {paramMap.put("L" + j, lenderAmountArr[j - m - 1]);}}paramList.add(paramMap);}}parameters.put("LIST", paramList);String t = tm.mergeFile(templateFileName, parameters);。
HtmlTable表格编辑(添加删除行,单元格)
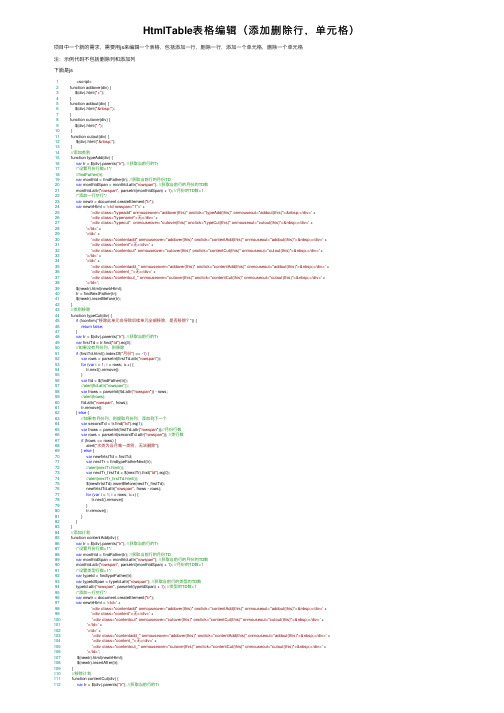
HtmlTable表格编辑(添加删除⾏,单元格)项⽬中⼀个新的需求,需要⽤js来编辑⼀个表格,包括添加⼀⾏,删除⼀⾏,添加⼀个单元格,删除⼀个单元格注:⽰例代码不包括删除列和添加列下⾯是js1 <script>2 function addover(div) {3 $(div).html("+");4 }5 function addout(div) {6 $(div).html(" ");7 }8 function cutover(div) {9 $(div).html("-");10 }11 function cutout(div) {12 $(div).html(" ");13 }14//添加类别15 function typeAdd(div) {16var tr = $(div).parents("tr"); //获取当前⾏的Tr17/*设置⽉份⾏数+1*/18//findFather(tr);19var monthtd = findFather(tr); //获取当前⾏的⽉份TD20var monthtdSpan = monthtd.attr("rowspan"); //获取当前⾏的⽉份的TD数21 monthtd.attr("rowspan", parseInt(monthtdSpan) + 1); //⽉份的TD数+122/*添加⼀⾏空⾏*/23var newtr = document.createElement("tr");24var newtrHtml = '<td rowspan="1">' +25'<div class="typeadd" onmouseover="addover(this)" onclick="typeAdd(this)" onmouseout="addout(this)"> </div>' +26'<div class="typename">⽆</div>' +27'<div class="typecut" onmouseover="cutover(this)" onclick="typeCut(this)" onmouseout="cutout(this)"> </div>' +28'</td>' +29'<td>' +30'<div class="contentadd" onmouseover="addover(this)" onclick="contentAdd(this)" onmouseout="addout(this)"> </div>' +31'<div class="content">⽆</div>' +32'<div class="contentcut" onmouseover="cutover(this)" onclick="contentCut(this)" onmouseout="cutout(this)"> </div>' +33'</td>' +34'<td>' +35'<div class="contentadd_" onmouseover="addover(this)" onclick="contentAdd(this)" onmouseout="addout(this)"> </div>' +36'<div class="content_">⽆</div>' +37'<div class="contentcut_" onmouseover="cutover(this)" onclick="contentCut(this)" onmouseout="cutout(this)"> </div>' +38'</td>';39 $(newtr).html(newtrHtml);40 tr = findNextFather(tr);41 $(newtr).insertBefore(tr);42 }43//类别移除44 function typeCut(div) {45if (!confirm("移除此单元会导致后续单元全部移除,是否移除?")) {46return false;47 }48var tr = $(div).parents("tr"); //获取当前⾏的Tr49var firstTd = tr.find("td").eq(0);50//如果没有⽉份列,则移除51if (firstTd.html().indexOf("⽉份") == -1) {52var rows = parseInt(firstTd.attr("rowspan"));53for (var i = 1; i < rows; i++) {54 tr.next().remove();55 }56var ftd = $(findFather(tr));57//alert(ftd.attr("rowspan"));58var frows = parseInt(ftd.attr("rowspan")) - rows;59//alert(frows);60 ftd.attr("rowspan", frows);61 tr.remove();62 } else {63//如果有⽉份列,则提取⽉份列,添加到下⼀个64var secondTd = tr.find("td").eq(1);65var frows = parseInt(firstTd.attr("rowspan"));//⽉份⾏数66var rows = parseInt(secondTd.attr("rowspan")); //类⾏数67if (frows == rows) {68 alert("次类为当⽉唯⼀类别,⽆法删除");69 } else {70var newfirtstTd = firstTd;71var nextTr = findtypeFatherNext(tr);72//alert(nextTr.html());73var nextTr_firstTd = $(nextTr).find("td").eq(0);74//alert(nextTr_firstTd.html());75 $(newfirtstTd).insertBefore(nextTr_firstTd);76 newfirtstTd.attr("rowspan", frows - rows);77for (var i = 1; i < rows; i++) {78 tr.next().remove()79 }80 tr.remove();81 }82 }83 }84//添加计划85 function contentAdd(div) {86var tr = $(div).parents("tr"); //获取当前⾏的Tr87/*设置⽉份⾏数+1*/88var monthtd = findFather(tr); //获取当前⾏的⽉份TD89var monthtdSpan = monthtd.attr("rowspan"); //获取当前⾏的⽉份的TD数90 monthtd.attr("rowspan", parseInt(monthtdSpan) + 1); //⽉份的TD数+191/*设置类型⾏数+1*/92var typetd = findtypeFather(tr);93var typetdSpan = typetd.attr("rowspan"); //获取当前⾏的类型的TD数94 typetd.attr("rowspan", parseInt(typetdSpan) + 1); //类型的TD数+195/*添加⼀⾏空⾏*/96var newtr = document.createElement("tr");97var newtrHtml = '<td>' +98'<div class="contentadd" onmouseover="addover(this)" onclick="contentAdd(this)" onmouseout="addout(this)"> </div>' +99'<div class="content">⽆</div>' +100'<div class="contentcut" onmouseover="cutover(this)" onclick="contentCut(this)" onmouseout="cutout(this)"> </div>' +101'</td>' +102'<td>' +103'<div class="contentadd_" onmouseover="addover(this)" onclick="contentAdd(this)" onmouseout="addout(this)"> </div>' +104'<div class="content_">⽆</div>' +105'<div class="contentcut_" onmouseover="cutover(this)" onclick="contentCut(this)" onmouseout="cutout(this)"> </div>' +106'</td>';107 $(newtr).html(newtrHtml);108 $(newtr).insertAfter(tr);109 }110//移除计划111 function contentCut(div) {112var tr = $(div).parents("tr"); //获取当前⾏的Tr113if (tr.find("td").eq(0).html().indexOf("typename") != -1) {114 alert("此单元⽆法移除,请移除上级单元");115 } else if (tr.find("td").eq(0).html().indexOf("⽆")==-1) {116 alert("此单元⽆法移除,请移除上级单元");117 } else if (tr.find("td").eq(0).html().indexOf("⽉份") != -1) {118 alert("此单元⽆法移除,请移除上级单元");119 } else {120/*设置⽉份⾏数+1*/121var monthtd = findFather(tr); //获取当前⾏的⽉份TD122var monthtdSpan = monthtd.attr("rowspan"); //获取当前⾏的⽉份的TD数123 monthtd.attr("rowspan", parseInt(monthtdSpan) - 1); //⽉份的TD数+1124/*设置类型⾏数+1*/125var typetd = findtypeFather(tr);126var typetdSpan = typetd.attr("rowspan"); //获取当前⾏的类型的TD数127 typetd.attr("rowspan", parseInt(typetdSpan) - 1); //类型的TD数+1128 tr.remove();129 }130 }131132//递归获取下⼀个⽬标TR133 function findNextFather(tr) {134var tr = $(tr).next();135if (tr.html().indexOf("typename") != -1) {136return tr;137 } else if (tr.html().indexOf("⽉份") != -1) {138return tr;139 } else {140return findNextFather(tr);141 }142 }143//递归获取上⼀个⽉份列144 function findFather(tr) {145//获取当前TR下的第⼀个TD146var monthtd = tr.find("td").eq(0);147//如果不包含"⽉份"关键字148if (monthtd.html().indexOf("⽉份") == -1) {149 tr = $(tr).prev(); //向上推⼀个TR150return findFather(tr);//传⼊151 } else {152return monthtd;153 }154 }155//递归获取上⼀个类型列156 function findtypeFather(tr) {157//获取当前TR下的第⼀个TD158var typetd = tr.find("td").eq(0);159if (typetd.html().indexOf("⽉份") != -1) {160return tr.find("td").eq(1);161 } else if (typetd.html().indexOf("typename") == -1) {162 tr = $(tr).prev(); //向上推⼀个TR163return findtypeFather(tr); //传⼊164 } else {165return typetd;166 }167 }168//递归获取下⼀个类型列169 function findtypeFatherNext(tr) {170//获取当前TR下的第⼀个TD171 tr = tr.next();172var typetd = tr.find("td").eq(0);173if (typetd.html().indexOf("typename") != -1) {174return tr;175 } else {176return findtypeFatherNext(tr);177 }178 }179 </script>⼀下是HTML代码1 <table class="FormTable">2 <thead>3 <tr>4 <td style="width:10%">⽉份</td>5 <td style="width:10%">类别</td>6 <td style="width:40%">护理部</td>7 <td style="width:40%">⼤科</td>8 </tr>9 </thead>10 <tbody>11 <tr>12 <td rowspan="1">⼀⽉份</td>13 <td rowspan="1">14 <div class="typeadd" onmouseover="addover(this)" onclick="typeAdd(this)" onmouseout="addout(this)"> </div>15 <div class="typename">⽆</div>16 <div class="typecut" onmouseover="cutover(this)" onclick="typeCut(this)" onmouseout="cutout(this)"> </div>17 </td>18 <td>19 <div class="contentadd" onmouseover="addover(this)" onclick="contentAdd(this)" onmouseout="addout(this)"> </div>20 <div class="content">⽆</div>21 <div class="contentcut" onmouseover="cutover(this)" onclick="contentCut(this)" onmouseout="cutout(this)"> </div>22 </td>23 <td>24 <div class="contentadd_" onmouseover="addover(this)" onclick="contentAdd(this)" onmouseout="addout(this)"> </div>25 <div class="content_">⽆</div>26 <div class="contentcut_" onmouseover="cutover(this)" onclick="contentCut(this)" onmouseout="cutout(this)"> </div>27 </td>28 </tr>29 <tr>30 <td rowspan="1">⼆⽉份</td>31 <td rowspan="1">32 <div class="typeadd" onmouseover="addover(this)" onclick="typeAdd(this)" onmouseout="addout(this)"> </div>33 <div class="typename">⽆</div>34 <div class="typecut" onmouseover="cutover(this)" onclick="typeCut(this)" onmouseout="cutout(this)"> </div>35 </td>36 <td>37 <div class="contentadd" onmouseover="addover(this)" onclick="contentAdd(this)" onmouseout="addout(this)"> </div>38 <div class="content">⽆</div>39 <div class="contentcut" onmouseover="cutover(this)" onclick="contentCut(this)" onmouseout="cutout(this)"> </div>40 </td>41 <td>42 <div class="contentadd_" onmouseover="addover(this)" onclick="contentAdd(this)" onmouseout="addout(this)"> </div>43 <div class="content_">⽆</div>44 <div class="contentcut_" onmouseover="cutover(this)" onclick="contentCut(this)" onmouseout="cutout(this)"> </div>45 </td>46 </tr>47 <tr>48 <td rowspan="1">三⽉份</td>49 <td rowspan="1">50 <div class="typeadd" onmouseover="addover(this)" onclick="typeAdd(this)" onmouseout="addout(this)"> </div>51 <div class="typename">⽆</div>52 <div class="typecut" onmouseover="cutover(this)" onclick="typeCut(this)" onmouseout="cutout(this)"> </div>53 </td>54 <td>55 <div class="contentadd" onmouseover="addover(this)" onclick="contentAdd(this)" onmouseout="addout(this)"> </div>56 <div class="content">⽆</div>57 <div class="contentcut" onmouseover="cutover(this)" onclick="contentCut(this)" onmouseout="cutout(this)"> </div>58 </td>59 <td>60 <div class="contentadd_" onmouseover="addover(this)" onclick="contentAdd(this)" onmouseout="addout(this)"> </div>61 <div class="content_">⽆</div>62 <div class="contentcut_" onmouseover="cutover(this)" onclick="contentCut(this)" onmouseout="cutout(this)"> </div>63 </td>64 </tr>65 <tr>66 <td rowspan="1">四⽉份</td>67 <td rowspan="1">68 <div class="typeadd" onmouseover="addover(this)" onclick="typeAdd(this)" onmouseout="addout(this)"> </div>69 <div class="typename">⽆</div>70 <div class="typecut" onmouseover="cutover(this)" onclick="typeCut(this)" onmouseout="cutout(this)"> </div>71 </td>72 <td>73 <div class="contentadd" onmouseover="addover(this)" onclick="contentAdd(this)" onmouseout="addout(this)"> </div>74 <div class="content">⽆</div>75 <div class="contentcut" onmouseover="cutover(this)" onclick="contentCut(this)" onmouseout="cutout(this)"> </div>76 </td>77 <td>78 <div class="contentadd_" onmouseover="addover(this)" onclick="contentAdd(this)" onmouseout="addout(this)"> </div>79 <div class="content_">⽆</div>80 <div class="contentcut_" onmouseover="cutover(this)" onclick="contentCut(this)" onmouseout="cutout(this)"> </div>81 </td>82 </tr>83 <tr>84 <td rowspan="1">五⽉份</td>85 <td rowspan="1">86 <div class="typeadd" onmouseover="addover(this)" onclick="typeAdd(this)" onmouseout="addout(this)"> </div>87 <div class="typename">⽆</div>88 <div class="typecut" onmouseover="cutover(this)" onclick="typeCut(this)" onmouseout="cutout(this)"> </div>89 </td>90 <td>91 <div class="contentadd" onmouseover="addover(this)" onclick="contentAdd(this)" onmouseout="addout(this)"> </div>92 <div class="content">⽆</div>93 <div class="contentcut" onmouseover="cutover(this)" onclick="contentCut(this)" onmouseout="cutout(this)"> </div>94 </td>95 <td>96 <div class="contentadd_" onmouseover="addover(this)" onclick="contentAdd(this)" onmouseout="addout(this)"> </div>97 <div class="content_">⽆</div>98 <div class="contentcut_" onmouseover="cutover(this)" onclick="contentCut(this)" onmouseout="cutout(this)"> </div>99 </td>100 </tr>101 <tr>102 <td rowspan="1">六⽉份</td>103 <td rowspan="1">104 <div class="typeadd" onmouseover="addover(this)" onclick="typeAdd(this)" onmouseout="addout(this)"> </div>105 <div class="typename">⽆</div>106 <div class="typecut" onmouseover="cutover(this)" onclick="typeCut(this)" onmouseout="cutout(this)"> </div>107 </td>108 <td>109 <div class="contentadd" onmouseover="addover(this)" onclick="contentAdd(this)" onmouseout="addout(this)"> </div> 110 <div class="content">⽆</div>111 <div class="contentcut" onmouseover="cutover(this)" onclick="contentCut(this)" onmouseout="cutout(this)"> </div> 112 </td>113 <td>114 <div class="contentadd_" onmouseover="addover(this)" onclick="contentAdd(this)" onmouseout="addout(this)"> </div> 115 <div class="content_">⽆</div>116 <div class="contentcut_" onmouseover="cutover(this)" onclick="contentCut(this)" onmouseout="cutout(this)"> </div> 117 </td>118 </tr>119 <tr>120 <td rowspan="1">七⽉份</td>121 <td rowspan="1">122 <div class="typeadd" onmouseover="addover(this)" onclick="typeAdd(this)" onmouseout="addout(this)"> </div>123 <div class="typename">⽆</div>124 <div class="typecut" onmouseover="cutover(this)" onclick="typeCut(this)" onmouseout="cutout(this)"> </div>125 </td>126 <td>127 <div class="contentadd" onmouseover="addover(this)" onclick="contentAdd(this)" onmouseout="addout(this)"> </div> 128 <div class="content">⽆</div>129 <div class="contentcut" onmouseover="cutover(this)" onclick="contentCut(this)" onmouseout="cutout(this)"> </div> 130 </td>131 <td>132 <div class="contentadd_" onmouseover="addover(this)" onclick="contentAdd(this)" onmouseout="addout(this)"> </div> 133 <div class="content_">⽆</div>134 <div class="contentcut_" onmouseover="cutover(this)" onclick="contentCut(this)" onmouseout="cutout(this)"> </div> 135 </td>136 </tr>137 <tr>138 <td rowspan="1">⼋⽉份</td>139 <td rowspan="1">140 <div class="typeadd" onmouseover="addover(this)" onclick="typeAdd(this)" onmouseout="addout(this)"> </div>141 <div class="typename">⽆</div>142 <div class="typecut" onmouseover="cutover(this)" onclick="typeCut(this)" onmouseout="cutout(this)"> </div>143 </td>144 <td>145 <div class="contentadd" onmouseover="addover(this)" onclick="contentAdd(this)" onmouseout="addout(this)"> </div> 146 <div class="content">⽆</div>147 <div class="contentcut" onmouseover="cutover(this)" onclick="contentCut(this)" onmouseout="cutout(this)"> </div> 148 </td>149 <td>150 <div class="contentadd_" onmouseover="addover(this)" onclick="contentAdd(this)" onmouseout="addout(this)"> </div> 151 <div class="content_">⽆</div>152 <div class="contentcut_" onmouseover="cutover(this)" onclick="contentCut(this)" onmouseout="cutout(this)"> </div> 153 </td>154 </tr>155 <tr>156 <td rowspan="1">九⽉份</td>157 <td rowspan="1">158 <div class="typeadd" onmouseover="addover(this)" onclick="typeAdd(this)" onmouseout="addout(this)"> </div>159 <div class="typename">⽆</div>160 <div class="typecut" onmouseover="cutover(this)" onclick="typeCut(this)" onmouseout="cutout(this)"> </div>161 </td>162 <td>163 <div class="contentadd" onmouseover="addover(this)" onclick="contentAdd(this)" onmouseout="addout(this)"> </div> 164 <div class="content">⽆</div>165 <div class="contentcut" onmouseover="cutover(this)" onclick="contentCut(this)" onmouseout="cutout(this)"> </div> 166 </td>167 <td>168 <div class="contentadd_" onmouseover="addover(this)" onclick="contentAdd(this)" onmouseout="addout(this)"> </div> 169 <div class="content_">⽆</div>170 <div class="contentcut_" onmouseover="cutover(this)" onclick="contentCut(this)" onmouseout="cutout(this)"> </div> 171 </td>172 </tr>173 <tr>174 <td rowspan="1">⼗⽉份</td>175 <td rowspan="1">176 <div class="typeadd" onmouseover="addover(this)" onclick="typeAdd(this)" onmouseout="addout(this)"> </div>177 <div class="typename">⽆</div>178 <div class="typecut" onmouseover="cutover(this)" onclick="typeCut(this)" onmouseout="cutout(this)"> </div>179 </td>180 <td>181 <div class="contentadd" onmouseover="addover(this)" onclick="contentAdd(this)" onmouseout="addout(this)"> </div> 182 <div class="content">⽆</div>183 <div class="contentcut" onmouseover="cutover(this)" onclick="contentCut(this)" onmouseout="cutout(this)"> </div> 184 </td>185 <td>186 <div class="contentadd_" onmouseover="addover(this)" onclick="contentAdd(this)" onmouseout="addout(this)"> </div> 187 <div class="content_">⽆</div>188 <div class="contentcut_" onmouseover="cutover(this)" onclick="contentCut(this)" onmouseout="cutout(this)"> </div> 189 </td>190 </tr>191 <tr>192 <td rowspan="1">⼗⼀⽉份</td>193 <td rowspan="1">194 <div class="typeadd" onmouseover="addover(this)" onclick="typeAdd(this)" onmouseout="addout(this)"> </div>195 <div class="typename">⽆</div>196 <div class="typecut" onmouseover="cutover(this)" onclick="typeCut(this)" onmouseout="cutout(this)"> </div>197 </td>198 <td>199 <div class="contentadd" onmouseover="addover(this)" onclick="contentAdd(this)" onmouseout="addout(this)"> </div> 200 <div class="content">⽆</div>201 <div class="contentcut" onmouseover="cutover(this)" onclick="contentCut(this)" onmouseout="cutout(this)"> </div> 202 </td>203 <td>204 <div class="contentadd_" onmouseover="addover(this)" onclick="contentAdd(this)" onmouseout="addout(this)"> </div> 205 <div class="content_">⽆</div>206 <div class="contentcut_" onmouseover="cutover(this)" onclick="contentCut(this)" onmouseout="cutout(this)"> </div> 207 </td>208 </tr>209 <tr>210 <td rowspan="1">⼗⼆⽉份</td>211 <td rowspan="1">212 <div class="typeadd" onmouseover="addover(this)" onclick="typeAdd(this)" onmouseout="addout(this)"> </div>213 <div class="typename">⽆</div>214 <div class="typecut" onmouseover="cutover(this)" onclick="typeCut(this)" onmouseout="cutout(this)"> </div>215 </td>216 <td>217 <div class="contentadd" onmouseover="addover(this)" onclick="contentAdd(this)" onmouseout="addout(this)"> </div> 218 <div class="content">⽆</div>219 <div class="contentcut" onmouseover="cutover(this)" onclick="contentCut(this)" onmouseout="cutout(this)"> </div> 220 </td>221 <td>222 <div class="contentadd_" onmouseover="addover(this)" onclick="contentAdd(this)" onmouseout="addout(this)"> </div> 223 <div class="content_">⽆</div>224 <div class="contentcut_" onmouseover="cutover(this)" onclick="contentCut(this)" onmouseout="cutout(this)"> </div> 225 </td>226 </tr>227 </tbody>228 </table>样式:1 .typeadd2 {3float:left;width:6%;4 }5 .typeadd:hover6 {7 background-color:#ccc;8 cursor:pointer;9 }10 .typecut11 {12float:left;width:6%;13 }14 .typecut:hover15 {16 background-color:#ccc;17 cursor:pointer;18 }19 .contentadd20 {21float:left;width:6%;22 }23 .contentadd:hover24 {25 background-color:#ccc;26 cursor:pointer;27 }28 .contentcut29 {30float:left;width:6%;31 }32 .contentcut:hover33 {34 background-color:#ccc;35 cursor:pointer;36 }37 .contentadd_38 {39float:left;width:6%;40 }41 .contentadd_:hover42 {43 background-color:#ccc;44 cursor:pointer;45 }46 .contentcut_47 {48float:left;width:6%;49 }50 .contentcut_:hover51 {52 background-color:#ccc;53 cursor:pointer;54 }55 .typename56 {57float:left;width: 88%;58 }59 .content60 {61float:left;width: 88%;62 }63 .content_64 {65float:left;width: 88%;66 }外链jquery1.7.1另外还有个外链css就不贴出来了简单的效果图如下。
html拆分合并表格

在HTML如果你想要拆分或合并表格,可以通过调整这些标签来实现。
拆分表格通常意味着将一个大的表格分成多个小的表格。
列2</td>
</tr> <tr> <td>行2,列1</td> <td>行新表格,行1,列1</td> <td>新表格,行1,列2</td> </tr> <tr> <td>新表格,行2,列1</td> <td>新表格,行2,
列2</td> </tr> </table> </table> ``` 合并表格则意味着将两个或更多的行或列组合在一起。
这可以通过使用`colspan`和`rowspan`属性来实现。
</td> </tr> <tr> <td colspan="2">合并两列</td> </tr> <tr> <td>列3</td> <td>列4</td> </tr> </table> ``` 请注意,以上代码仅为示例,实际使用时可能需要根据你的具体需求进行调整。
福建工程学院《网页设计——畅想未来-表格》
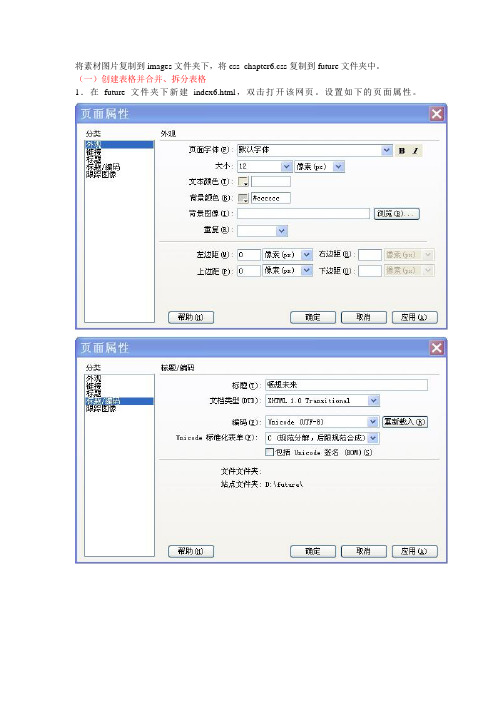
将素材图片复制到images文件夹下,将css_chapter6.css复制到future文件夹中。
(一)创建表格并合并、拆分表格1.在future文件夹下新建index6.html,双击打开该网页。
设置如下的页面属性。
2. 选择菜单栏中的“插入记录”—“表格”,插入如下的表格。
(也可用工具栏中的相关选项)。
3.按上述的方法插入1行3列,2行2列和3行1列的表格。
4.把上述创建的第三个表格(如下图所示),通过拆分和合并单元格制作出如下形式的表格。
步骤:选中第一列的单元格,将其合并为一个单元格,并调整合并后的列宽为120像素。
如下:将光标放在第2列、第1行的单元格中,将其拆分为两个单元格。
结果如下:(二)在表格中插入页面元素5.在第一个表格的第一行单元格中插入img6_1.jpg图片,如下所示。
在第一个表格的第二行单元格中插入一个内嵌的表格(导航条表格),相关参数如下:依次在该单元格中输入如下文字(可从txt6.txt中复制过来)并为导航条中相应的文本添加超链接。
如下图:6.在第二个表格中插入页面元素。
在第1个单元格中插入img6_login.gif图像,在第2个单元格中插入“用户登录”表格(由ex6_login.html提供),在第3个单元格中插入如下的表格并在该表格的第1个单元格中插入img6_inform.gif图像,在第2个单元格中添加相应的文本。
如下图。
7.在第三个表格中插入页面元素a.在第1列的单元格中插入如下的表格。
在第1行的单元格中插入img6_6.gif,在第2行的单元格中插入一个内嵌的表格,参数如下。
在其左侧的各个单元格中插入img6_icon.gif,在右侧的各个单元格中插入相应的文本(可从ex6_remenhuati.html中复制),结果如下。
b.在第1行的中间单元格中插入内嵌的如下参数的表格并在相应的单元格内插入文本和图像(img6_3.jpg和img6_7.jpg)仿照此过程在其在右侧单元格也制作出类似的嵌套表格,制作出未来都市和未来旅游栏目。
html表格表单总结
html表格表单总结HTML表格是用于展示和组织数据的一种标准结构。
HTML表格由一个或多个行(tr)组成,每行由一个或多个列(td)组成。
表格可以包含标题(th),用于标识每列的内容。
HTML表单是用于收集用户输入的一种标准结构。
HTML表单由一个或多个表单元素组成,如文本框、复选框、单选按钮、下拉列表等。
用户可以通过填写表单元素来提交数据。
总结起来,HTML表格和表单的主要特点和用途如下:1. 表格可以用于展示结构化数据,将数据按行列的形式呈现出来,便于阅读和比较。
2. 表格可以使用CSS进行样式美化,使其更加吸引人和易于理解。
3. 表格可以包含标题行,用于描述每列的内容。
4. 表格可以使用表头(thead)、表身(tbody)和表尾(tfoot)等标签进行分组,更好地组织表格。
5. 表单可以用于收集用户输入的数据,如登录信息、查询条件、用户注册等。
6. 表单元素可以用于不同类型的数据输入,如文本框用于输入文本、复选框用于选择多个选项、单选按钮用于选择一个选项等。
7. 表单可以使用属性和事件进行验证和处理用户输入,如必填字段、最大长度、格式验证等。
8. 表单可以使用提交按钮(input type="submit")将用户输入的数据发送给服务器。
9. 表单还可以通过使用select和option标签创建下拉列表,供用户选择。
10. 表单可以使用不同的方法(method)将数据提交给服务器,如GET和POST方法。
总之,HTML表格和表单是web开发中常用的工具,用于展示和收集数据,为用户提供更好的用户体验。
html的table用法
html的table用法HTML中的table标签是用来创建表格的。
它允许我们以行和列的形式组织和展示数据。
以下是一些关于HTML table用法的详细说明:1. 创建表格:使用table标签可以创建一个表格。
通过在table标签内部添加tr标签来创建行,再在tr标签内部添加td标签来创建列。
每个td标签代表一个单元格。
2. 表格标题:为表格添加标题可以使其更具可读性。
通过使用caption标签来添加表格标题。
caption标签应该放在table标签的开始与结束标签之间。
3. 表头单元格:通常,我们希望给表格的列或行添加头部,以标识它们的含义。
可以使用th标签来定义表头单元格。
一般将th标签放在tr标签中,作为开头的单元格。
4. 合并单元格:可以使用colspan和rowspan属性来合并单元格。
colspan属性用于水平合并单元格,表示该单元格要跨越的列数。
rowspan属性用于垂直合并单元格,表示该单元格要跨越的行数。
5. 样式和格式化:通过使用CSS可以为表格添加样式和格式化。
可以使用CSS选择器来选择特定的表格、行或单元格,并为它们应用样式。
6. 边框和间距:使用border属性设置表格的边框,可以设置边框的颜色、宽度和样式。
通过使用cellspacing属性设置单元格之间的间距。
7. 表格的访问性:为了提高表格的访问性,我们可以使用scope和id属性来为表头单元格提供标题。
通过使用HTML中的table标签,我们可以轻松地创建和组织数据,并以清晰直观的方式呈现给用户。
熟练掌握HTML table的用法,将使我们能够更好地设计和展示数据表格。
- 1、下载文档前请自行甄别文档内容的完整性,平台不提供额外的编辑、内容补充、找答案等附加服务。
- 2、"仅部分预览"的文档,不可在线预览部分如存在完整性等问题,可反馈申请退款(可完整预览的文档不适用该条件!)。
- 3、如文档侵犯您的权益,请联系客服反馈,我们会尽快为您处理(人工客服工作时间:9:00-18:30)。
竭诚为您提供优质文档/双击可除html插入多个表格
篇一:用html创建一个表格fe
插入一个表格
图书分类表
类别书名价格
计算机
web程序设计41
c#开发29
为学奋斗35
日期:20xx-03-08
篇二:html表格布局实例
[html]表格布局之实例版
|[>]
前面我们讲了html表格的基础知识,今天我们通过一个实例让大家更清晰的了解下表格的用途。
例如:我们做一个简单的网站布局,代码如下:
bordercolor="#00ff99">
网站名称
网站标题
搜索框
左边
中间
右边
网站底部信息
产生如下的表格:
这是一张整体的表格,第一行和第四行分别跨度了三列,这里用
colspan="3"来限制,而第二行的“搜索框”占用了两
列的位置,用colspan="2"控制;align="center"是对表格
内文字的对齐限制,center表示中间,right表示靠右,left 靠左。
表格的基础设置,可以参考:
[html]利用表格规划网站布局
[html]如何制作多行多列的表格
[html]设定表格的尺寸和边框
如果你现在可以根据自己的想法制作出一个表格了,那么你就是向自己制作模板迈近了一步。
^o^
表格布局现在仍然很多人在用,方便实在。
网页设计现有两种布局方法,一种即是表格布局,另一种是现在w3c极力推荐的css布局。
不过,就目前来说,由于xhtml并未完全占据主流,表格布局依然是大多数网页设计师的首选。
你所描述的问题属于表格的对齐问题,解决方式有以下几种:
如果两个表格的宽度不一致,那么选择默认的对齐方式,也即左对齐,在html中的标签和属性是:就能实现左边对齐。
你现在出现的问题有可能是第一个表格设置了对齐方式,
例如居中对齐,而第二个表格并没有设置对齐方式,所以默认为左对齐,这样就出现了上述问题。
我的一些表格布局的经验:
1、表格布局第一步:先插入一个表格,宽度是760-780px (记住,一定要用px,不要用百分比),高度不用设置,然后令这个表格居中。
以后所有的内容都限制在这个表格中。
2、熟练使用表格嵌套。
也就是说,在一个表格中再插入另一个表格。
举个例子,把你要设计的页面分成大的几个部分,然后利用表格的行数和列数来控制它们的布局,如果某一个单元格中的内容又要分成几部分,可以继续在这个单元格中插入表格,方法同上。
3、补充:表格的边框一定要为0,即table中的border 属性值为"0"。
也就是让表格在网页预览中不可见,这样才能实现表格布局的目的。
如何利用表格实现画中画,也就是页中页效果
网页的排版大多使用表格,利用一个表个单元可以嵌入一个网页,你知道吗?这样做有很多好处,比如你把经常更新的区域划分一个表格单元,然后在这个表
格单元中嵌入你想要更新的内容,今后更新主页只需上传这个被嵌套的页面就可以了,没有必要对首页进行更新,是不是很方便。
我写个最简单的例子代码:<html><head>
<title>范例</title>
<body>
<tableborder="1"width="100%">
<tr>
<td>
<
iFRamesrc="example.htm"width="300"heitht="100"></iFRame></td>
</tr>
</table>
</body>
</html>
插入被嵌入页的关键代码是:<
iFRamesrc="example.htm"width="300"heitht="100"></iFRame>。
example.htm是被嵌入的页面,标签<iFRame>还有一些可用的参数设置如下:marginwidth:网页中内容在表格右侧的预留宽度;例如:marginwidth="20",单位是pix,下同。
marginheight:网页中内容在表格顶部预留的高度;
hspace:网页右上角的的横坐标;
vspace:网页右上角的纵坐标;
frameborder:是否显示边缘;填"1"表示"是",填"0"表示"否"
scrolling:是否出现滚动条;填"1"表示"是",填"0"表示"否"
表格背景图片的一个技巧
大家都知道在一个较大的表格中放入背景图片,背景图片就会重复填充直到整个页面。
我们可以利用表格的这个特性来减小我们网页中图片的大小,比如下面的一个渐变图,你看上去像是一整张图片,它其实用的就是表格背景重复填充特性,而用的图片就是右边的那张,大小只有1.3k,在此如果要用一张大的图片是很不划算的。
你若要插入一根水平线,用这方法也很有效。
如何使鼠标指到表格,表格背景变色
这个特效用的是表格样式表,要达到此效果你只需在<td>代码中加入
onmouseout="this.style.backgroundcolor="""onmouseov er="this.style.backgroundcolor="#FFcccc"",例:
表格布局常见问题解答
发布时间:20xx-05-20
1、表格布满页面的问题
我们在很多地方看到为了使页面适应不同的分辨率,通
常将表格的大小按百分比设置。
刚开始学做网页的时候,我已经把表格的宽度设置为100%,但在浏览器上还是不能满屏显示,四周总有一圈空白,我曾对此感到迷惑不解,后来在论坛请教才知道这不是表格的错。
如果你用dreamweaver制作网页,这个问题很好解决,选择菜单modify-->pageproperties,在弹出的对话框里设置left、top为0就ok了!
2.表格的变形问题
网页在不同的屏幕分辨率、或改变窗口时常出现一些页面变形情况,这也是最另人恼火的事,怎么办呢秋实曾在天极网页陶吧撰文详细的阐述过这个问题,我们来看看他是怎么解决的。
a、因为表格排列设置而在不同分辨率下所出现的错位
这种变形情况是:
1、在800*600的分辨率下时,一切正常,而到了1024*800时,则多个表格或者有的居中,有的却
左排列或右排列,很难看,这是什么原因呢?
在解决这个问题之前,我们讲一下表格的排列。
表格有左、中、右三种排列方式,如果没特别进行设置,则默认为居左排列,不用说了,这就是问题之所在。
在800*600的分辨率下,表格恰好就有编辑区域那么宽,不容易察觉,而到了1024*800的时候,就出现的,解决的办法比较简单,即。
