WBase a C package to reduce tensor products of Lie algebra representations. Description and
编译tensflow:因为非法指令(吐核)
编译tensflow:因为⾮法指令(吐核)intel官⽹在linux(centos)上从源码安装tensorflow:来⾃官⽹:不推荐使⽤源代码构建 TensorFlow。
然⽽,如果上述指令因为 ISA 不受⽀持⽽⽆法运⾏,您随时可使⽤源代码进⾏构建。
使⽤源代码构建 TensorFlow 需要安装 Bazel,相关信息请参考安装 Bazel。
安装说明:运⾏ TensorFlow 源代码⽬录中的 "./configure执⾏以下命令创建 pip 程序包,以安装经过优化的 TensorFlow build。
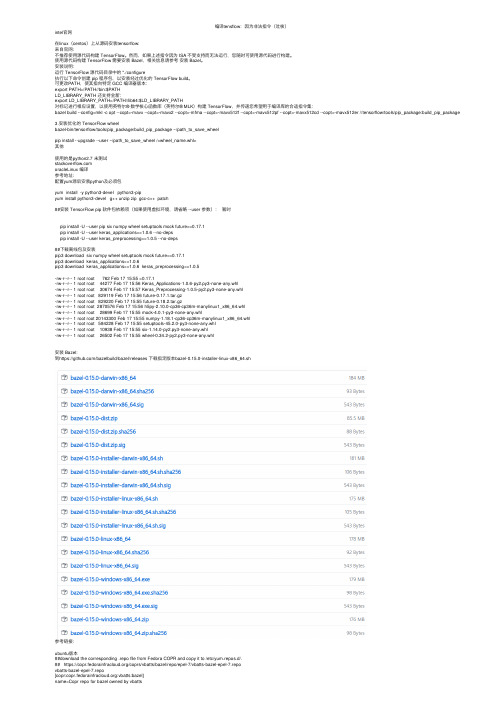
可更改PATH,使其指向特定 GCC 编译器版本:export PATH=/PATH//bin:$PATHLD_LIBRARY_PATH 还⽀持全新:export LD_LIBRARY_PATH=/PATH//lib64:$LD_LIBRARY_PATH对标记进⾏相应设置,以使⽤英特尔® 数学核⼼函数库(英特尔® MLK)构建 TensorFlow,并传递您希望⽤于编译库的合适指令集:bazel build --config=mkl -c opt --copt=-mavx --copt=-mavx2 --copt=-mfma --copt=-mavx512f --copt=-mavx512pf --copt=-mavx512cd --copt=-mavx512er //tensorflow/tools/pip_package:build_pip_package 3.安装优化的 TensorFlow wheelbazel-bin/tensorflow/tools/pip_package/build_pip_package ~/path_to_save_wheelpip install --upgrade --user ~/path_to_save_wheel /<wheel_name.whl>其他使⽤的是python2.7 未测试oracleLinux 编译参考地址:配置yum源后安装python及必须包yum install -y python3-devel python3-pipyum install python3-devel g++ unzip zip gcc-c++ patch##安装 TensorFlow pip 软件包依赖项(如果使⽤虚拟环境,请省略 --user 参数):暂时pip install -U --user pip six numpy wheel setuptools mock future>=0.17.1pip install -U --user keras_applications==1.0.6 --no-depspip install -U --user keras_preprocessing==1.0.5 --no-deps##下载离线包及安装pip3 download six numpy wheel setuptools mock future==0.17.1pip3 download keras_applications==1.0.6pip3 download keras_applications==1.0.6 keras_preprocessing==1.0.5-rw-r--r-- 1 root root 762 Feb 17 15:55 =0.17.1-rw-r--r-- 1 root root 44277 Feb 17 15:56 Keras_Applications-1.0.6-py2.py3-none-any.whl-rw-r--r-- 1 root root 30674 Feb 17 15:57 Keras_Preprocessing-1.0.5-py2.py3-none-any.whl-rw-r--r-- 1 root root 829119 Feb 17 15:56 future-0.17.1.tar.gz-rw-r--r-- 1 root root 829220 Feb 17 15:55 future-0.18.2.tar.gz-rw-r--r-- 1 root root 2870576 Feb 17 15:56 h5py-2.10.0-cp36-cp36m-manylinux1_x86_64.whl-rw-r--r-- 1 root root 28699 Feb 17 15:55 mock-4.0.1-py3-none-any.whl-rw-r--r-- 1 root root 20143300 Feb 17 15:55 numpy-1.18.1-cp36-cp36m-manylinux1_x86_64.whl-rw-r--r-- 1 root root 584228 Feb 17 15:55 setuptools-45.2.0-py3-none-any.whl-rw-r--r-- 1 root root 10938 Feb 17 15:55 six-1.14.0-py2.py3-none-any.whl-rw-r--r-- 1 root root 26502 Feb 17 15:55 wheel-0.34.2-py2.py3-none-any.whl安装 Bazel:到https:///bazelbuild/bazel/releases 下载指定版本bazel-0.15.0-installer-linux-x86_64.sh参考链接:ubuntu版本##download the corresponding .repo file from Fedora COPR and copy it to /etc/yum.repos.d/.## https:///coprs/vbatts/bazel/repo/epel-7/vbatts-bazel-epel-7.repovbatts-bazel-epel-7.repo[copr::vbatts:bazel]name=Copr repo for bazel owned by vbattsbaseurl=https:///results/vbatts/bazel/epel-7-$basearch/type=rpm-mdskip_if_unavailable=Truegpgcheck=1gpgkey=https:///results/vbatts/bazel/pubkey.gpgrepo_gpgcheck=0enabled=1enabled_metadata=1curl -o /etc/yum.repos.d/vbatts-bazel-epel-7.repo https:///coprs/vbatts/bazel/repo/epel-7/vbatts-bazel-epel-7.repo ##需要安装jdk1.8.x g++ unzip ziprpm -ivh jdk-8u221-linux-x64.rpm##Run the following command:##yum install bazel##需要使⽤⼆进制安装bazel yum 安装的版本太⾼chmod +x bazel-<version>-installer-linux-x86_64.sh./bazel-<version>-installer-linux-x86_64.sh --user--user flag installs Bazel to the $HOME/bin directory on your system and sets the .bazelrc path to $HOME/.bazelrc##设置环境变量export PATH="$PATH:$HOME/bin"##查看版本bazel versionBuild label: 0.15.0下载tensorflow源码或来源: tensflow版本分选择python 库选择:/usr/lib/python3.6/site-packages./configure 配置的选择:[root@wn10aimapap1001 tensorflow-1.10.0]# ./configureWARNING: --batch mode is deprecated. Please instead explicitly shut down your Bazel server using the command "bazel shutdown".You have bazel 0.15.0 installed.Please specify the location of python. [Default is /usr/bin/python]:Found possible Python library paths:/usr/lib/python2.7/site-packages/usr/lib64/python2.7/site-packagesPlease input the desired Python library path to use. Default is [/usr/lib/python2.7/site-packages]/usr/lib/python3.6/site-packagesDo you wish to build TensorFlow with jemalloc as malloc support? [Y/n]: nNo jemalloc as malloc support will be enabled for TensorFlow.Do you wish to build TensorFlow with Google Cloud Platform support? [Y/n]: nNo Google Cloud Platform support will be enabled for TensorFlow.Do you wish to build TensorFlow with Hadoop File System support? [Y/n]: nNo Hadoop File System support will be enabled for TensorFlow.Do you wish to build TensorFlow with Amazon AWS Platform support? [Y/n]: nNo Amazon AWS Platform support will be enabled for TensorFlow.Do you wish to build TensorFlow with Apache Kafka Platform support? [Y/n]: nNo Apache Kafka Platform support will be enabled for TensorFlow.Do you wish to build TensorFlow with XLA JIT support? [y/N]: nNo XLA JIT support will be enabled for TensorFlow.Do you wish to build TensorFlow with GDR support? [y/N]: nNo GDR support will be enabled for TensorFlow.Do you wish to build TensorFlow with VERBS support? [y/N]: nNo VERBS support will be enabled for TensorFlow.Do you wish to build TensorFlow with OpenCL SYCL support? [y/N]: nNo OpenCL SYCL support will be enabled for TensorFlow.Do you wish to build TensorFlow with CUDA support? [y/N]: nNo CUDA support will be enabled for TensorFlow.Do you wish to download a fresh release of clang? (Experimental) [y/N]: nClang will not be downloaded.Do you wish to build TensorFlow with MPI support? [y/N]: nNo MPI support will be enabled for TensorFlow.Please specify optimization flags to use during compilation when bazel option "--config=opt" is specified [Default is -march=native]:Would you like to interactively configure ./WORKSPACE for Android builds? [y/N]: nNot configuring the WORKSPACE for Android builds.Preconfigured Bazel build configs. You can use any of the below by adding "--config=<>" to your build command. See tools/bazel.rc for more details.--config=mkl # Build with MKL support.--config=monolithic # Config for mostly static monolithic build.Configuration finishedbazel编译报错解决⽰例:[root@wn10aimapap1001 tensorflow-1.10.0]# bazel build --config=opt //tensorflow/tools/pip_package:build_pip_packageStarting local Bazel server and connecting to it..................ERROR: in target '//external:cc_toolchain': no such package '@local_config_cc//': Traceback (most recent call last):File "/root/.cache/bazel/_bazel_xxxx/6922e28936bf9c1ce50ca7cdbe5953e3/external/bazel_tools/tools/cpp/cc_configure.bzl", line 56configure_unix_toolchain(repository_ctx, cpu_value, overriden...)File "/root/.cache/bazel/_bazel_xxxx/6922e28936bf9c1ce50ca7cdbe5953e3/external/bazel_tools/tools/cpp/unix_cc_configure.bzl", line 477, in configure_unix_toolchain _find_generic(repository_ctx, "gcc", "CC", overriden...)File "/root/.cache/bazel/_bazel_xxxx/6922e28936bf9c1ce50ca7cdbe5953e3/external/bazel_tools/tools/cpp/unix_cc_configure.bzl", line 459, in _find_genericauto_configure_fail(msg)File "/root/.cache/bazel/_bazel_xxxx/6922e28936bf9c1ce50ca7cdbe5953e3/external/bazel_tools/tools/cpp/lib_cc_configure.bzl", line 109, in auto_configure_failfail(("\n%sAuto-Configuration Error:%...)))Auto-Configuration Error: Cannot find gcc or CC; either correct your path or set the CC environment variableINFO: Elapsed time: 8.434sINFO: 0 processes.FAILED: Build did NOT complete successfully (2 packages loaded)##############################################################[root@wn10aimapap1001 tensorflow-1.10.0]# bazel build --config=opt //tensorflow/tools/pip_package:build_pip_packageERROR: /home/ap/xxxx/tensorflow-1.10.0/tensorflow/tools/pip_package/BUILD:123:1: no such package '@png_archive//': Traceback (most recent call last):File "/home/ap/xxxx/tensorflow-1.10.0/third_party/repo.bzl", line 99_apply_patch(ctx, ctx.attr.patch_file)File "/home/ap/xxxx/tensorflow-1.10.0/third_party/repo.bzl", line 64, in _apply_patchfail("patch command is not found, ple...")patch command is not found, please install it and referenced by '//tensorflow/tools/pip_package:licenses'ERROR: Analysis of target '//tensorflow/tools/pip_package:build_pip_package' failed; build aborted: no such package '@png_archive//': Traceback (most recent call last):File "/home/ap/xxxx/tensorflow-1.10.0/third_party/repo.bzl", line 99_apply_patch(ctx, ctx.attr.patch_file)File "/home/ap/xxxx/tensorflow-1.10.0/third_party/repo.bzl", line 64, in _apply_patchfail("patch command is not found, ple...")patch command is not found, please install itINFO: Elapsed time: 16.697sINFO: 0 processes.FAILED: Build did NOT complete successfully (79 packages loaded)currently loading: tensorflow/core#########################################################[root@wn10aimapap1001 tensorflow-1.10.0]# bazel build --config=opt //tensorflow/tools/pip_package:build_pip_packageERROR: /home/ap/xxxx/tensorflow-1.10.0/third_party/python_runtime/BUILD:5:1: no such package '@local_config_python//': Traceback (most recent call last):File "/home/ap/xxxx/tensorflow-1.10.0/third_party/py/python_configure.bzl", line 308_create_local_python_repository(repository_ctx)File "/home/ap/xxxx/tensorflow-1.10.0/third_party/py/python_configure.bzl", line 272, in _create_local_python_repository_get_numpy_include(repository_ctx, python_bin)File "/home/ap/xxxx/tensorflow-1.10.0/third_party/py/python_configure.bzl", line 256, in _get_numpy_include_execute(repository_ctx, [python_bin, "-c",..."], <2 more arguments>)File "/home/ap/xxxx/tensorflow-1.10.0/third_party/py/python_configure.bzl", line 55, in _execute_fail("\n".join([error_msg.strip() if ... ""]))File "/home/ap/xxxx/tensorflow-1.10.0/third_party/py/python_configure.bzl", line 28, in _failfail(("%sPython Configuration Error:%...)))Python Configuration Error: Problem getting numpy include path.Traceback (most recent call last):File "<string>", line 1, in <module>ImportError: No module named numpyIs numpy installed?and referenced by '//third_party/python_runtime:headers'ERROR: Analysis of target '//tensorflow/tools/pip_package:build_pip_package' failed; build aborted: Analysis failedINFO: Elapsed time: 5.363sINFO: 0 processes.FAILED: Build did NOT complete successfully (146 packages loaded)currently loading: tensorflow/core/kernelsFetching https://mirror.bazel.build//google/re2/archive/2018-04-01.tar.gz#######################ERROR: /root/.cache/bazel/_bazel_xxxx/6922e28936bf9c1ce50ca7cdbe5953e3/external/protobuf_archive/BUILD:260:1: C++ compilation of rule '@protobuf_archive//:js_embed' failed (Exit 1) gcc: error trying to exec 'cc1plus': execvp: No such file or directoryTarget //tensorflow/tools/pip_package:build_pip_package failed to buildUse --verbose_failures to see the command lines of failed build steps.##yum install gcc patchyum install gcc-c++复制python 的头⽂件到系统⽬录下cp /usr/include/python3.6m/* /usr/include/##多个python版本导致yum 下载问题bazel依赖bazel build 时需要更多的依赖,离线时安装⽐较⿇烦,参考如下离线源码安https:///s_sunnyy/article/details/86074114 装tensorflow:所有要下载的⽂件见: tensorflow 源代码根⽬录下WORKSPACEtensorflow/workspace.bzl### cd /home/ap/xxxx/tensorflow-1.10.0grep '"http' WORKSPACE"https://mirror.bazel.build//bazelbuild/rules_closure/archive/dbb96841cc0a5fb2664c37822803b06dab20c7d1.tar.gz","https:///bazelbuild/rules_closure/archive/dbb96841cc0a5fb2664c37822803b06dab20c7d1.tar.gz", # 2018-04-13"//models/inception_v1.zip","/models/inception_v1.zip","//models/object_detection/ssd_mobilenet_v1_android_export.zip","/models/object_detection/ssd_mobilenet_v1_android_export.zip","//models/mobile_multibox_v1a.zip","/models/mobile_multibox_v1a.zip","//models/stylize_v1.zip","/models/stylize_v1.zip","//models/speech_commands_v0.01.zip","/models/speech_commands_v0.01.zip",grep '"http' tensorflow/workspace.bzl"https://mirror.bazel.build//intel/mkl-dnn/releases/download/v0.14/mklml_lnx_2018.0.3.20180406.tgz","https:///intel/mkl-dnn/releases/download/v0.14/mklml_lnx_2018.0.3.20180406.tgz""https://mirror.bazel.build//intel/mkl-dnn/releases/download/v0.14/mklml_win_2018.0.3.20180406.zip","https:///intel/mkl-dnn/releases/download/v0.14/mklml_win_2018.0.3.20180406.zip""https://mirror.bazel.build//intel/mkl-dnn/releases/download/v0.14/mklml_mac_2018.0.3.20180406.tgz","https:///intel/mkl-dnn/releases/download/v0.14/mklml_mac_2018.0.3.20180406.tgz""https://mirror.bazel.build//intel/mkl-dnn/archive/v0.14.tar.gz","https:///intel/mkl-dnn/archive/v0.14.tar.gz","https://mirror.bazel.build//abseil/abseil-cpp/archive/9613678332c976568272c8f4a78631a29159271d.tar.gz","https:///abseil/abseil-cpp/archive/9613678332c976568272c8f4a78631a29159271d.tar.gz","https://mirror.bazel.build//eigen/eigen/get/fd6845384b86.tar.gz","https:///eigen/eigen/get/fd6845384b86.tar.gz","https://mirror.bazel.build//raspberrypi/tools/archive/0e906ebc527eab1cdbf7adabff5b474da9562e9f.tar.gz",# "https:///raspberrypi/tools/archive/0e906ebc527eab1cdbf7adabff5b474da9562e9f.tar.gz","https://mirror.bazel.build//hfp/libxsmm/archive/1.9.tar.gz","https:///hfp/libxsmm/archive/1.9.tar.gz","https://mirror.bazel.build//google/or-tools/archive/253f7955c6a1fd805408fba2e42ac6d45b312d15.tar.gz",# "https:///google/or-tools/archive/253f7955c6a1fd805408fba2e42ac6d45b312d15.tar.gz","https://mirror.bazel.build//google/re2/archive/2018-04-01.tar.gz","https:///google/re2/archive/2018-04-01.tar.gz","https://mirror.bazel.build//GoogleCloudPlatform/google-cloud-cpp/archive/f875700a023bdd706333cde45aee8758b272c357.tar.gz","https:///GoogleCloudPlatform/google-cloud-cpp/archive/f875700a023bdd706333cde45aee8758b272c357.tar.gz","https://mirror.bazel.build//googleapis/googleapis/archive/f81082ea1e2f85c43649bee26e0d9871d4b41cdb.zip","https:///googleapis/googleapis/archive/f81082ea1e2f85c43649bee26e0d9871d4b41cdb.zip","https://mirror.bazel.build//google/gemmlowp/archive/38ebac7b059e84692f53e5938f97a9943c120d98.zip","https:///google/gemmlowp/archive/38ebac7b059e84692f53e5938f97a9943c120d98.zip","https://mirror.bazel.build//google/farmhash/archive/816a4ae622e964763ca0862d9dbd19324a1eaf45.tar.gz","https:///google/farmhash/archive/816a4ae622e964763ca0862d9dbd19324a1eaf45.tar.gz","http://mirror.bazel.build//google/highwayhash/archive/fd3d9af80465e4383162e4a7c5e2f406e82dd968.tar.gz","https:///google/highwayhash/archive/fd3d9af80465e4383162e4a7c5e2f406e82dd968.tar.gz","https://mirror.bazel.build//pub/nasm/releasebuilds/2.13.03/nasm-2.13.03.tar.bz2","/repo/pkgs/nasm/nasm-2.13.03.tar.bz2/sha512/d7a6b4cee8dfd603d8d4c976e5287b5cc542fa0b466ff989b743276a6e28114e64289bf02a7819eca63142a5278aa6eed57773007e5f589e157 "/pub/nasm/releasebuilds/2.13.03/nasm-2.13.03.tar.bz2","https://mirror.bazel.build//libjpeg-turbo/libjpeg-turbo/archive/1.5.3.tar.gz","https:///libjpeg-turbo/libjpeg-turbo/archive/1.5.3.tar.gz","https://mirror.bazel.build//glennrp/libpng/archive/v1.6.34.tar.gz","https:///glennrp/libpng/archive/v1.6.34.tar.gz","https://mirror.bazel.build//2018/sqlite-amalgamation-3240000.zip","https:///2018/sqlite-amalgamation-3240000.zip","https://mirror.bazel.build//project/giflib/giflib-5.1.4.tar.gz","/project/giflib/giflib-5.1.4.tar.gz","https://mirror.bazel.build//packages/source/s/six/six-1.10.0.tar.gz","https:///packages/source/s/six/six-1.10.0.tar.gz","https://mirror.bazel.build//packages/d8/be/c4276b3199ec3feee2a88bc64810fbea8f26d961e0a4cd9c68387a9f35de/astor-0.6.2.tar.gz","https:///packages/d8/be/c4276b3199ec3feee2a88bc64810fbea8f26d961e0a4cd9c68387a9f35de/astor-0.6.2.tar.gz","https://mirror.bazel.build//packages/5c/78/ff794fcae2ce8aa6323e789d1f8b3b7765f601e7702726f430e814822b96/gast-0.2.0.tar.gz","https:///packages/5c/78/ff794fcae2ce8aa6323e789d1f8b3b7765f601e7702726f430e814822b96/gast-0.2.0.tar.gz","https://mirror.bazel.build//packages/8a/48/a76be51647d0eb9f10e2a4511bf3ffb8cc1e6b14e9e4fab46173aa79f981/termcolor-1.1.0.tar.gz","https:///packages/8a/48/a76be51647d0eb9f10e2a4511bf3ffb8cc1e6b14e9e4fab46173aa79f981/termcolor-1.1.0.tar.gz","https://mirror.bazel.build//abseil/abseil-py/archive/pypi-v0.2.2.tar.gz","https:///abseil/abseil-py/archive/pypi-v0.2.2.tar.gz","https://mirror.bazel.build//packages/bc/cc/3cdb0a02e7e96f6c70bd971bc8a90b8463fda83e264fa9c5c1c98ceabd81/backports.weakref-1.0rc1.tar.gz","https:///packages/bc/cc/3cdb0a02e7e96f6c70bd971bc8a90b8463fda83e264fa9c5c1c98ceabd81/backports.weakref-1.0rc1.tar.gz","https://mirror.bazel.build//2.7/_sources/license.txt","https:///2.7/_sources/license.txt","https://mirror.bazel.build//google/protobuf/archive/v3.6.0.tar.gz","https:///google/protobuf/archive/v3.6.0.tar.gz","https://mirror.bazel.build//google/protobuf/archive/v3.6.0.tar.gz","https:///google/protobuf/archive/v3.6.0.tar.gz","https://mirror.bazel.build//google/protobuf/archive/v3.6.0.tar.gz","https:///google/protobuf/archive/v3.6.0.tar.gz","https://mirror.bazel.build//google/nsync/archive/1.20.0.tar.gz","https:///google/nsync/archive/1.20.0.tar.gz","https://mirror.bazel.build//google/googletest/archive/9816b96a6ddc0430671693df90192bbee57108b6.zip","https:///google/googletest/archive/9816b96a6ddc0430671693df90192bbee57108b6.zip","https://mirror.bazel.build//gflags/gflags/archive/v2.2.1.tar.gz","https:///gflags/gflags/archive/v2.2.1.tar.gz","https://mirror.bazel.build//pub/pcre/pcre-8.42.tar.gz","/pub/pcre/pcre-8.42.tar.gz","https://mirror.bazel.build//project/swig/swig/swig-3.0.8/swig-3.0.8.tar.gz","/project/swig/swig/swig-3.0.8/swig-3.0.8.tar.gz","/project/swig/swig/swig-3.0.8/swig-3.0.8.tar.gz","https://mirror.bazel.build/curl.haxx.se/download/curl-7.60.0.tar.gz","https://curl.haxx.se/download/curl-7.60.0.tar.gz","https://mirror.bazel.build//grpc/grpc/archive/v1.13.0.tar.gz","https:///grpc/grpc/archive/v1.13.0.tar.gz","https://mirror.bazel.build//antirez/linenoise/archive/c894b9e59f02203dbe4e2be657572cf88c4230c3.tar.gz","https:///antirez/linenoise/archive/c894b9e59f02203dbe4e2be657572cf88c4230c3.tar.gz","https://mirror.bazel.build//llvm-mirror/llvm/archive/bd8c8d759852871609ba2e4e79868420f751949d.tar.gz","https:///llvm-mirror/llvm/archive/bd8c8d759852871609ba2e4e79868420f751949d.tar.gz","https://mirror.bazel.build//LMDB/lmdb/archive/LMDB_0.9.22.tar.gz","https:///LMDB/lmdb/archive/LMDB_0.9.22.tar.gz","https://mirror.bazel.build//open-source-parsers/jsoncpp/archive/1.8.4.tar.gz","https:///open-source-parsers/jsoncpp/archive/1.8.4.tar.gz","https://mirror.bazel.build//google/boringssl/archive/a0fb951d2a26a8ee746b52f3ba81ab011a0af778.tar.gz","https:///google/boringssl/archive/a0fb951d2a26a8ee746b52f3ba81ab011a0af778.tar.gz","https://mirror.bazel.build//zlib-1.2.11.tar.gz","https:///zlib-1.2.11.tar.gz","https://mirror.bazel.build/www.kurims.kyoto-u.ac.jp/~ooura/fft.tgz","http://www.kurims.kyoto-u.ac.jp/~ooura/fft.tgz","https://mirror.bazel.build//google/snappy/archive/1.1.7.tar.gz","https:///google/snappy/archive/1.1.7.tar.gz","https://mirror.bazel.build//nvidia/nccl/archive/03d856977ecbaac87e598c0c4bafca96761b9ac7.tar.gz","https:///nvidia/nccl/archive/03d856977ecbaac87e598c0c4bafca96761b9ac7.tar.gz","https://mirror.bazel.build//edenhill/librdkafka/archive/v0.11.4.tar.gz","https:///edenhill/librdkafka/archive/v0.11.4.tar.gz","https://mirror.bazel.build//aws/aws-sdk-cpp/archive/1.3.15.tar.gz","https:///aws/aws-sdk-cpp/archive/1.3.15.tar.gz","https://mirror.bazel.build//maven2/junit/junit/4.12/junit-4.12.jar","/maven2/junit/junit/4.12/junit-4.12.jar","/maven2/junit/junit/4.12/junit-4.12.jar","https://mirror.bazel.build//maven2/org/hamcrest/hamcrest-core/1.3/hamcrest-core-1.3.jar","/maven2/org/hamcrest/hamcrest-core/1.3/hamcrest-core-1.3.jar","/maven2/org/hamcrest/hamcrest-core/1.3/hamcrest-core-1.3.jar","https://mirror.bazel.build//jemalloc/jemalloc/archive/4.4.0.tar.gz","https:///jemalloc/jemalloc/archive/4.4.0.tar.gz","http://mirror.bazel.build//maven2/com/google/testing/compile/compile-testing/0.11/compile-testing-0.11.jar","/maven2/com/google/testing/compile/compile-testing/0.11/compile-testing-0.11.jar","http://mirror.bazel.build//maven2/com/google/truth/truth/0.32/truth-0.32.jar","/maven2/com/google/truth/truth/0.32/truth-0.32.jar","http://mirror.bazel.build//maven2/org/checkerframework/checker-qual/2.4.0/checker-qual-2.4.0.jar","/maven2/org/checkerframework/checker-qual/2.4.0/checker-qual-2.4.0.jar","http://mirror.bazel.build//maven2/com/squareup/javapoet/1.9.0/javapoet-1.9.0.jar","/maven2/com/squareup/javapoet/1.9.0/javapoet-1.9.0.jar","https://mirror.bazel.build//google/pprof/archive/c0fb62ec88c411cc91194465e54db2632845b650.tar.gz","https:///google/pprof/archive/c0fb62ec88c411cc91194465e54db2632845b650.tar.gz","https://mirror.bazel.build//NVlabs/cub/archive/1.8.0.zip","https:///NVlabs/cub/archive/1.8.0.zip","https://mirror.bazel.build//cython/cython/archive/0.28.4.tar.gz","https:///cython/cython/archive/0.28.4.tar.gz","https://mirror.bazel.build//bazelbuild/bazel-toolchains/archive/37acf1841ab1475c98a152cb9e446460c8ae29e1.tar.gz","https:///bazelbuild/bazel-toolchains/archive/37acf1841ab1475c98a152cb9e446460c8ae29e1.tar.gz","https://mirror.bazel.build//intel/ARM_NEON_2_x86_SSE/archive/0f77d9d182265259b135dad949230ecbf1a2633d.tar.gz","https:///intel/ARM_NEON_2_x86_SSE/archive/0f77d9d182265259b135dad949230ecbf1a2633d.tar.gz","https://mirror.bazel.build//google/flatbuffers/archive/v1.9.0.tar.gz","https:///google/flatbuffers/archive/v1.9.0.tar.gz","https:///google/double-conversion/archive/3992066a95b823efc8ccc1baf82a1cfc73f6e9b8.zip","https://mirror.bazel.build///models/tflite/mobilenet_v1_224_android_quant_2017_11_08.zip","https:////models/tflite/mobilenet_v1_224_android_quant_2017_11_08.zip","https://mirror.bazel.build///models/tflite/mobilenet_ssd_tflite_v1.zip","https:////models/tflite/mobilenet_ssd_tflite_v1.zip","https://mirror.bazel.build///models/tflite/coco_ssd_mobilenet_v1_0.75_quant_2018_06_29.zip","https:////models/tflite/coco_ssd_mobilenet_v1_0.75_quant_2018_06_29.zip","https://mirror.bazel.build///models/tflite/conv_actions_tflite.zip","https:////models/tflite/conv_actions_tflite.zip","https://mirror.bazel.build///models/tflite/smartreply_1.0_2017_11_01.zip","https:////models/tflite/smartreply_1.0_2017_11_01.zip""https://mirror.bazel.build///data/ovic.zip","https:////data/ovic.zip","https://mirror.bazel.build//bazelbuild/rules_android/archive/v0.1.1.zip","https:///bazelbuild/rules_android/archive/v0.1.1.zip",####未去重https://mirror.bazel.build//bazelbuild/rules_closure/archive/dbb96841cc0a5fb2664c37822803b06dab20c7d1.tar.gzhttps:///bazelbuild/rules_closure/archive/dbb96841cc0a5fb2664c37822803b06dab20c7d1.tar.gz//models/inception_v1.zip/models/inception_v1.zip//models/object_detection/ssd_mobilenet_v1_android_export.zip/models/object_detection/ssd_mobilenet_v1_android_export.zip//models/mobile_multibox_v1a.zip/models/mobile_multibox_v1a.zip//models/stylize_v1.zip/models/stylize_v1.zip//models/speech_commands_v0.01.zip/models/speech_commands_v0.01.ziphttps://mirror.bazel.build//intel/mkl-dnn/releases/download/v0.14/mklml_lnx_2018.0.3.20180406.tgzhttps:///intel/mkl-dnn/releases/download/v0.14/mklml_lnx_2018.0.3.20180406.tgzhttps://mirror.bazel.build//intel/mkl-dnn/releases/download/v0.14/mklml_win_2018.0.3.20180406.ziphttps:///intel/mkl-dnn/releases/download/v0.14/mklml_win_2018.0.3.20180406.ziphttps://mirror.bazel.build//intel/mkl-dnn/releases/download/v0.14/mklml_mac_2018.0.3.20180406.tgzhttps:///intel/mkl-dnn/releases/download/v0.14/mklml_mac_2018.0.3.20180406.tgzhttps://mirror.bazel.build//intel/mkl-dnn/archive/v0.14.tar.gzhttps:///intel/mkl-dnn/archive/v0.14.tar.gzhttps://mirror.bazel.build//abseil/abseil-cpp/archive/9613678332c976568272c8f4a78631a29159271d.tar.gzhttps:///abseil/abseil-cpp/archive/9613678332c976568272c8f4a78631a29159271d.tar.gzhttps://mirror.bazel.build//eigen/eigen/get/fd6845384b86.tar.gzhttps:///eigen/eigen/get/fd6845384b86.tar.gzhttps://mirror.bazel.build//raspberrypi/tools/archive/0e906ebc527eab1cdbf7adabff5b474da9562e9f.tar.gzhttps:///raspberrypi/tools/archive/0e906ebc527eab1cdbf7adabff5b474da9562e9f.tar.gzhttps://mirror.bazel.build//hfp/libxsmm/archive/1.9.tar.gzhttps:///hfp/libxsmm/archive/1.9.tar.gzhttps://mirror.bazel.build//google/or-tools/archive/253f7955c6a1fd805408fba2e42ac6d45b312d15.tar.gzhttps:///google/or-tools/archive/253f7955c6a1fd805408fba2e42ac6d45b312d15.tar.gzhttps://mirror.bazel.build//google/re2/archive/2018-04-01.tar.gzhttps:///google/re2/archive/2018-04-01.tar.gzhttps://mirror.bazel.build//GoogleCloudPlatform/google-cloud-cpp/archive/f875700a023bdd706333cde45aee8758b272c357.tar.gzhttps:///GoogleCloudPlatform/google-cloud-cpp/archive/f875700a023bdd706333cde45aee8758b272c357.tar.gzhttps://mirror.bazel.build//googleapis/googleapis/archive/f81082ea1e2f85c43649bee26e0d9871d4b41cdb.ziphttps:///googleapis/googleapis/archive/f81082ea1e2f85c43649bee26e0d9871d4b41cdb.ziphttps://mirror.bazel.build//google/gemmlowp/archive/38ebac7b059e84692f53e5938f97a9943c120d98.ziphttps:///google/gemmlowp/archive/38ebac7b059e84692f53e5938f97a9943c120d98.ziphttps://mirror.bazel.build//google/farmhash/archive/816a4ae622e964763ca0862d9dbd19324a1eaf45.tar.gzhttps:///google/farmhash/archive/816a4ae622e964763ca0862d9dbd19324a1eaf45.tar.gzhttp://mirror.bazel.build//google/highwayhash/archive/fd3d9af80465e4383162e4a7c5e2f406e82dd968.tar.gzhttps:///google/highwayhash/archive/fd3d9af80465e4383162e4a7c5e2f406e82dd968.tar.gzhttps://mirror.bazel.build//pub/nasm/releasebuilds/2.13.03/nasm-2.13.03.tar.bz2/repo/pkgs/nasm/nasm-2.13.03.tar.bz2/sha512/d7a6b4cee8dfd603d8d4c976e5287b5cc542fa0b466ff989b743276a6e28114e64289bf02a7819eca63142a5278aa6eed57773007e5f589e15768e645 /pub/nasm/releasebuilds/2.13.03/nasm-2.13.03.tar.bz2https://mirror.bazel.build//libjpeg-turbo/libjpeg-turbo/archive/1.5.3.tar.gzhttps:///libjpeg-turbo/libjpeg-turbo/archive/1.5.3.tar.gzhttps://mirror.bazel.build//glennrp/libpng/archive/v1.6.34.tar.gzhttps:///glennrp/libpng/archive/v1.6.34.tar.gzhttps://mirror.bazel.build//2018/sqlite-amalgamation-3240000.ziphttps:///2018/sqlite-amalgamation-3240000.ziphttps://mirror.bazel.build//project/giflib/giflib-5.1.4.tar.gz/project/giflib/giflib-5.1.4.tar.gzhttps://mirror.bazel.build//packages/source/s/six/six-1.10.0.tar.gzhttps:///packages/source/s/six/six-1.10.0.tar.gzhttps://mirror.bazel.build//packages/d8/be/c4276b3199ec3feee2a88bc64810fbea8f26d961e0a4cd9c68387a9f35de/astor-0.6.2.tar.gzhttps:///packages/d8/be/c4276b3199ec3feee2a88bc64810fbea8f26d961e0a4cd9c68387a9f35de/astor-0.6.2.tar.gzhttps://mirror.bazel.build//packages/5c/78/ff794fcae2ce8aa6323e789d1f8b3b7765f601e7702726f430e814822b96/gast-0.2.0.tar.gzhttps:///packages/5c/78/ff794fcae2ce8aa6323e789d1f8b3b7765f601e7702726f430e814822b96/gast-0.2.0.tar.gzhttps://mirror.bazel.build//packages/8a/48/a76be51647d0eb9f10e2a4511bf3ffb8cc1e6b14e9e4fab46173aa79f981/termcolor-1.1.0.tar.gzhttps:///packages/8a/48/a76be51647d0eb9f10e2a4511bf3ffb8cc1e6b14e9e4fab46173aa79f981/termcolor-1.1.0.tar.gzhttps://mirror.bazel.build//abseil/abseil-py/archive/pypi-v0.2.2.tar.gzhttps:///abseil/abseil-py/archive/pypi-v0.2.2.tar.gzhttps://mirror.bazel.build//packages/bc/cc/3cdb0a02e7e96f6c70bd971bc8a90b8463fda83e264fa9c5c1c98ceabd81/backports.weakref-1.0rc1.tar.gzhttps:///packages/bc/cc/3cdb0a02e7e96f6c70bd971bc8a90b8463fda83e264fa9c5c1c98ceabd81/backports.weakref-1.0rc1.tar.gzhttps://mirror.bazel.build//2.7/_sources/license.txthttps:///2.7/_sources/license.txthttps://mirror.bazel.build//google/protobuf/archive/v3.6.0.tar.gzhttps:///google/protobuf/archive/v3.6.0.tar.gzhttps://mirror.bazel.build//google/protobuf/archive/v3.6.0.tar.gzhttps:///google/protobuf/archive/v3.6.0.tar.gzhttps://mirror.bazel.build//google/protobuf/archive/v3.6.0.tar.gzhttps:///google/protobuf/archive/v3.6.0.tar.gzhttps://mirror.bazel.build//google/nsync/archive/1.20.0.tar.gzhttps:///google/nsync/archive/1.20.0.tar.gzhttps://mirror.bazel.build//google/googletest/archive/9816b96a6ddc0430671693df90192bbee57108b6.ziphttps:///google/googletest/archive/9816b96a6ddc0430671693df90192bbee57108b6.ziphttps://mirror.bazel.build//gflags/gflags/archive/v2.2.1.tar.gzhttps:///gflags/gflags/archive/v2.2.1.tar.gzhttps://mirror.bazel.build//pub/pcre/pcre-8.42.tar.gz/pub/pcre/pcre-8.42.tar.gzhttps://mirror.bazel.build//project/swig/swig/swig-3.0.8/swig-3.0.8.tar.gz/project/swig/swig/swig-3.0.8/swig-3.0.8.tar.gz/project/swig/swig/swig-3.0.8/swig-3.0.8.tar.gzhttps://mirror.bazel.build/curl.haxx.se/download/curl-7.60.0.tar.gzhttps://curl.haxx.se/download/curl-7.60.0.tar.gzhttps://mirror.bazel.build//grpc/grpc/archive/v1.13.0.tar.gzhttps:///grpc/grpc/archive/v1.13.0.tar.gzhttps://mirror.bazel.build//antirez/linenoise/archive/c894b9e59f02203dbe4e2be657572cf88c4230c3.tar.gzhttps:///antirez/linenoise/archive/c894b9e59f02203dbe4e2be657572cf88c4230c3.tar.gzhttps://mirror.bazel.build//llvm-mirror/llvm/archive/bd8c8d759852871609ba2e4e79868420f751949d.tar.gzhttps:///llvm-mirror/llvm/archive/bd8c8d759852871609ba2e4e79868420f751949d.tar.gzhttps://mirror.bazel.build//LMDB/lmdb/archive/LMDB_0.9.22.tar.gzhttps:///LMDB/lmdb/archive/LMDB_0.9.22.tar.gzhttps://mirror.bazel.build//open-source-parsers/jsoncpp/archive/1.8.4.tar.gzhttps:///open-source-parsers/jsoncpp/archive/1.8.4.tar.gzhttps://mirror.bazel.build//google/boringssl/archive/a0fb951d2a26a8ee746b52f3ba81ab011a0af778.tar.gzhttps:///google/boringssl/archive/a0fb951d2a26a8ee746b52f3ba81ab011a0af778.tar.gzhttps://mirror.bazel.build//zlib-1.2.11.tar.gzhttps:///zlib-1.2.11.tar.gzhttps://mirror.bazel.build/www.kurims.kyoto-u.ac.jp/~ooura/fft.tgzhttp://www.kurims.kyoto-u.ac.jp/~ooura/fft.tgzhttps://mirror.bazel.build//google/snappy/archive/1.1.7.tar.gzhttps:///google/snappy/archive/1.1.7.tar.gzhttps://mirror.bazel.build//nvidia/nccl/archive/03d856977ecbaac87e598c0c4bafca96761b9ac7.tar.gzhttps:///nvidia/nccl/archive/03d856977ecbaac87e598c0c4bafca96761b9ac7.tar.gzhttps://mirror.bazel.build//edenhill/librdkafka/archive/v0.11.4.tar.gzhttps:///edenhill/librdkafka/archive/v0.11.4.tar.gzhttps://mirror.bazel.build//aws/aws-sdk-cpp/archive/1.3.15.tar.gz。
Autodesk Nastran 2023 参考手册说明书
FILESPEC ............................................................................................................................................................ 13
DISPFILE ............................................................................................................................................................. 11
File Management Directives – Output File Specifications: .............................................................................. 5
BULKDATAFILE .................................................................................................................................................... 7
yolov5tensorrtint8调用代码 -回复

yolov5tensorrtint8调用代码-回复如何调用YOLOv5 TensorRT INT8 模型?TensorRT 是由NVIDIA 开发的一个高性能推理引擎,用于在GPU 上进行深度学习推理。
其中INT8 是一种量化技术,可以将神经网络的浮点数权重和激活值量化为整形表示,从而减少模型存储空间和计算资源消耗,提高推理速度。
YOLOv5 是一种非常流行的目标检测算法,可以在实时性要求较高的场景下实现准确的目标检测和跟踪。
在本文中,我们将详细介绍如何使用TensorRT 以及INT8 量化技术来调用YOLOv5 模型。
在开始之前,确保已经安装了以下软件和库:1. CUDA 和cuDNN:TensorRT 需要CUDA 和cuDNN 的支持。
根据你的GPU 型号,安装对应版本的CUDA 和cuDNN。
2. TensorRT:在NVIDIA Developer 网站上下载并安装TensorRT。
3. PyTorch 和TorchVision:YOLOv5 是基于PyTorch 框架训练的,因此需要安装PyTorch 和TorchVision。
接下来,我们将一步一步介绍如何调用YOLOv5 TensorRT INT8 模型。
第一步:下载YOLOv5 模型在GitHub 上下载YOLOv5 源代码:git clone第二步:将PyTorch 模型转换为ONNX 模型在YOLOv5 工程目录下运行以下命令将PyTorch 模型转换为ONNX 模型:python yolov5/export.py weights yolov5s.pt img 640 batch 1这将在`runs` 子目录中生成一个`yolov5s.onnx` 的模型文件。
第三步:将ONNX 模型转换为TensorRT 模型使用TensorRT 的ONNX Parser 将ONNX 模型转换为TensorRT模型:pythonimport tensorrt as trtimport pycuda.driver as cudaTRT_LOGGER = trt.Logger()def build_engine(onnx_file_path):with trt.Builder(TRT_LOGGER) as builder,builder.create_network() as network, trt.OnnxParser(network, TRT_LOGGER) as parser:builder.max_workspace_size = 1 << 30builder.max_batch_size = 1builder.fp16_mode = Falsebuilder.int8_mode = Truewith open(onnx_file_path, 'rb') as model:parser.parse(model.read())engine = builder.build_cuda_engine(network)return engineengine = build_engine('yolov5s.onnx')在上述代码中,我们首先创建了一个TensorRT 的Builder 对象,然后设置了一些Builder 的属性,例如最大工作空间大小、最大批次大小以及是否启用FP16 模式和INT8 模式。
NVIDIA 动态并行ISM文档说明书
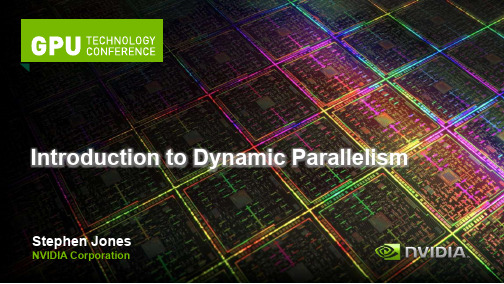
Introduction to Dynamic Parallelism Stephen JonesNVIDIA CorporationImproving ProgrammabilityDynamic Parallelism Occupancy Simplify CPU/GPU Divide Library Calls from Kernels Batching to Help Fill GPU Dynamic Load Balancing Data-Dependent ExecutionRecursive Parallel AlgorithmsWhat is Dynamic Parallelism?The ability to launch new grids from the GPUDynamicallySimultaneouslyIndependentlyCPU GPU CPU GPU Fermi: Only CPU can generate GPU work Kepler: GPU can generate work for itselfWhat Does It Mean?CPU GPU CPU GPU GPU as Co-ProcessorAutonomous, Dynamic ParallelismData-Dependent ParallelismComputationalPower allocated toregions of interestCUDA Today CUDA on KeplerDynamic Work GenerationInitial GridStatically assign conservativeworst-case gridDynamically assign performancewhere accuracy is requiredFixed GridCPU-Controlled Work Batching CPU programs limited by singlepoint of controlCan run at most 10s of threadsCPU is fully consumed withcontrolling launchesCPU Control Threaddgetf2 dgetf2 dgetf2CPU Control Threaddswap dswap dswap dtrsm dtrsm dtrsmdgemm dgemm dgemmCPU Control ThreadMultiple LU-Decomposition, Pre-KeplerCPU Control ThreadCPU Control ThreadBatching via Dynamic ParallelismMove top-level loops to GPURun thousands of independent tasksRelease CPU for other workCPU Control ThreadCPU Control ThreadGPU Control Threaddgetf2 dswap dtrsm dgemm GPU Control Thread dgetf2 dswap dtrsm dgemm GPU Control Threaddgetf2dswapdtrsmdgemmBatched LU-Decomposition, Kepler__device__ float buf[1024];__global__ void dynamic(float *data) {int tid = threadIdx.x; if(tid % 2)buf[tid/2] = data[tid]+data[tid+1]; __syncthreads();if(tid == 0) {launch<<< 128, 256 >>>(buf); cudaDeviceSynchronize(); }__syncthreads();cudaMemcpyAsync(data, buf, 1024); cudaDeviceSynchronize(); }Programming Model BasicsCode ExampleCUDA Runtime syntax & semantics__device__ float buf[1024];__global__ void dynamic(float *data) {int tid = threadIdx.x; if(tid % 2)buf[tid/2] = data[tid]+data[tid+1]; __syncthreads();if(tid == 0) {launch<<< 128, 256 >>>(buf); cudaDeviceSynchronize(); }__syncthreads();cudaMemcpyAsync(data, buf, 1024); cudaDeviceSynchronize(); }Code ExampleCUDA Runtime syntax & semanticsLaunch is per-thread__device__ float buf[1024];__global__ void dynamic(float *data) {int tid = threadIdx.x; if(tid % 2)buf[tid/2] = data[tid]+data[tid+1]; __syncthreads();if(tid == 0) {launch<<< 128, 256 >>>(buf); cudaDeviceSynchronize(); }__syncthreads();cudaMemcpyAsync(data, buf, 1024); cudaDeviceSynchronize(); }Code ExampleCUDA Runtime syntax & semanticsLaunch is per-threadSync includes all launches by any thread in the block__device__ float buf[1024];__global__ void dynamic(float *data) {int tid = threadIdx.x; if(tid % 2)buf[tid/2] = data[tid]+data[tid+1]; __syncthreads();if(tid == 0) {launch<<< 128, 256 >>>(buf); cudaDeviceSynchronize(); }__syncthreads();cudaMemcpyAsync(data, buf, 1024); cudaDeviceSynchronize(); }CUDA Runtime syntax & semanticsLaunch is per-threadSync includes all launches by any thread in the blockcudaDeviceSynchronize() does not imply syncthreadsCode Example__device__ float buf[1024];__global__ void dynamic(float *data) {int tid = threadIdx.x; if(tid % 2)buf[tid/2] = data[tid]+data[tid+1]; __syncthreads();if(tid == 0) {launch<<< 128, 256 >>>(buf); cudaDeviceSynchronize(); }__syncthreads();cudaMemcpyAsync(data, buf, 1024); cudaDeviceSynchronize(); }Code ExampleCUDA Runtime syntax & semanticsLaunch is per-threadSync includes all launches by any thread in the blockcudaDeviceSynchronize() does not imply syncthreadsAsynchronous launches only__device__ float buf[1024];__global__ void dynamic(float *data) {int tid = threadIdx.x; if(tid % 2)buf[tid/2] = data[tid]+data[tid+1]; __syncthreads();if(tid == 0) {launch<<< 128, 256 >>>(buf); cudaDeviceSynchronize(); }__syncthreads();cudaMemcpyAsync(data, buf, 1024); cudaDeviceSynchronize(); }Code ExampleCUDA Runtime syntax & semanticsLaunch is per-threadSync includes all launches by any thread in the blockcudaDeviceSynchronize() does not imply syncthreadsAsynchronous launches only(note bug in program, here!)__global__ void libraryCall(float *a,float *b, float *c) {// All threads generate datacreateData(a, b);__syncthreads();// Only one thread calls library if(threadIdx.x == 0) {cublasDgemm(a, b, c);cudaDeviceSynchronize();}// All threads wait for dtrsm__syncthreads();// Now continueconsumeData(c);} CPU launcheskernelPer-block datagenerationCall of 3rd partylibrary3rd party libraryexecutes launchParallel useof resultSimple example: QuicksortTypical divide-and-conquer algorithmRecursively partition-and-sort dataEntirely data-dependent executionNotoriously hard to do efficiently on Fermi3 2 6 3 9 14 25 1 8 7 9 2 58 3 2 6 3 9 1 4 2 5 1 8 7 9 2 58 2 1 2 1 2 36 3 94 5 8 7 9 5 8 3 6 3 4 5 8 7 58 1 2 2 2 3 3 4 1 5 6 7 8 8 9 95 eventually...Select pivot valueFor each element: retrieve valueRecurse sort into right-handsubsetStore left if value < pivotStore right if value >= pivotall done?Recurse sort into left-hand subset NoYes__global__ void qsort(int *data, int l, int r) {int pivot = data[0];int *lptr = data+l, *rptr = data+r;// Partition data around pivot valuepartition(data, l, r, lptr, rptr, pivot);// Launch next stage recursively if(l < (rptr-data))qsort<<< ... >>>(data, l, rptr-data); if(r > (lptr-data))qsort<<< ... >>>(data, lptr-data, r); }。
onnxruntime1.14 编译

标题: onnxruntime 1.14 编译一、介绍在深度学习领域,模型的部署是非常重要的一环。
而 onnxruntime 作为一个高性能的开源推理引擎,可以在多种评台上进行模型部署,因此备受关注。
随着 onnxruntime 1.14 版本的发布,为了更好地适应不同的硬件和系统环境,我们需要对其进行编译,以确保其在目标评台上的高效运行。
二、编译环境准备1. 操作系统:编译onnxruntime 1.14 时,推荐使用Ubuntu 18.04。
2. 硬件配置:推荐使用支持 AVX 指令集的 CPU,以提高推理性能。
3. 软件依赖:在开始编译之前,需要安装 CMake、Python 3、Ninja 和其他相关的开发工具。
三、下载源代码1. 在 GitHub 上下载 onnxruntime 1.14 的源代码,并解压到本地目录。
2. 进入源代码目录,可以看到其中包含了 onnxruntime 的 C++ 实现和 Python 包装器等相关文件。
四、编译步骤1. 创建一个 build 目录,用于存放编译生成的中间文件和最终的可执2. 在 build 目录内,执行以下命令生成编译配置文件:```cmake -Donnxruntime_DEV_MODE=ON -Donnxruntime_SKIP_CONTRIB_OPS=OFF -Donnxruntime_USE_CUDA=OFF -Donnxruntime_ENABLE_TR本人NING=OFF -DCMAKE_BUILD_TYPE=Release ..```这里需要说明的是,通过参数的设置,我们可以根据实际需求开启或禁用一些功能,以满足不同场景的部署要求。
3. 然后执行以下命令使用 Ninja 进行编译:```ninja```这一步会耗费一定时间,编译完成后,即可在 build 目录下找到生成的可执行文件。
五、测试与部署1. 在编译完成后,我们可以通过执行一些简单的测试,检验编译生成的 onnxruntime 是否能够正常工作。
斑马技术公司DS8108数字扫描仪产品参考指南说明书

MxGPU设置指南说明书

DISCLAIMERThe information contained herein is for informational purposes only, and is subject to change without notice. While every precaution has been taken in the preparation of this document, it may contain technical inaccuracies, omissions and typographical errors, and AMD is under no obligation to update or otherwise correct this information. Advanced Micro Devices, Inc. makes no representations or warranties with respect to the accuracy or completeness of the contents of this document, and assumes no liability of any kind, including the implied warranties of non-infringement, merchantability or fitness for particular purposes, with respect to the operation or use of AMD hardware, software or other products described herein. No license, including implied or arising by estoppel, to any intellectual property rights is granted by this document. Terms and limitations applicable to the purchase or use of AMD’s products are as set forth in a signed agreement between the parties or in AMD's Standard Terms and Conditions of Sale.©2016 Advanced Micro Devices, Inc. All rights reserved. AMD, the AMD arrow, FirePro, and combinations thereof are trademarks of Advanced Micro Devices, Inc. in the United States and/or other jurisdictions. OpenCL is a trademark of Apple, Inc. and used by permission of Khronos. PCIe and PCI Express are registered trademarks of the PCI-SIG Corporation. VMware is a registered trademark of VMware, Inc. in the United States and/or other jurisdictions. Other names are for informational purposes only and may be trademarks of their respective owners.Table of Contents1.Overview (4)2.Hardware and Software Requirements (4)2.1Hardware Requirements (4)2.1.1Host/Server (4)2.1.2Client (4)2.2Software Requirements (5)3.MxGPU Setup (6)3.1Programming SR-IOV Parameters for MxGPU (6)3.2VF Pass Through (8)3.3VF-to-VM Auto-Assignment (9)4.Appendix (11)4.1Host Server Configuration (11)4.2Manual Installation for GPUV Driver for VMware ESXi (13)4.2.1Upload GPUV Driver (13)4.2.2Install GPUV Driver (13)4.2.3Configure GPUV Driver (15)4.2.4Un-Install GPUV Driver (16)4.2.5Update GPUV Driver (17)1.OverviewThis setup guide details the advanced steps necessary to enable MxGPU on the AMD FirePro™ S7100X, S7150 and S7150x2 family of products. The guide uses VMware® products as an example setup. These products include VMware ESXi™ as a hypervisor, the VMware vSphere® client and VMware Horizon® View™. The basic setup steps for the VMware software is detailed in the companion document to this one.2.Hardware and Software RequirementsThe sections below lists the hardware and software that are required for setting up the VMware environment.2.1Hardware Requirements2.1.1Host/ServerGraphics Adapter: AMD FirePro™ S7100X, S7150, S7150x2 for MxGPU and/orpassthrough***note that the AMD FirePro™ S7000, S9000 and S9050 can be used for passthroughonlySupported Server Platforms:•Dell PowerEdge R730 Server•HPE ProLiant DL380 Gen9 Server•SuperMicro 1028GQ-TR ServerAdditional Hardware Requirements:•CPU: 2x4 and up•System memory: 32GB & up; more guest VMs require more system memory•Hard disk: 500G & up; more guest VMs require more HDD space•Network adapter: 1000M & up2.1.2ClientAny of the following client devices can be used to access the virtual machine once theseVMs are started on the host server:•Zero client (up to 4 connectors) with standard mouse/keyboard and monitor•Thin client with standard mouse/keyboard and monitor running Microsoft®Windows® Embedded OS•Laptop/Desktop with standard mouse/keyboard and monitor running withMicrosoft® Windows® 7 and up2.2 Software RequirementsProductType Install OnSectionVersion/Download LocationAMD FirePro™ VIB Driver Hypervisor Driver Host (Server) 3.1 /en-us/download/workstation?os=VMware%20vSphere%20ESXi%206.0#catalyst-pro AMD VIB Install Utility Script Host (Server) 3.1 /en-us/download/workstation?os=VMware%20vSphere%20ESXi%206.0#catalyst-pro PuTTYSSH client Host Admin. System / SSH Secure ShellSSH Client andDownload UtilityHost Admin. System3.1Table 1 : Required Software for Document(Links to non-AMD software provided as examples)3.MxGPU SetupThe following sections describe the steps necessary to enable MxGPU on the graphics adapter(s) in the host. Before proceeding, refer to the Appendix to ensure that the host system is enabled for virtualization and SR-IOV. Once virtualization capabilities are confirmed for the host system, follow the steps in the next two sections to program the graphics adapter(s) for SR-IOV functionality and to connect the virtual functions created to available virtual machines.3.1Programming SR-IOV Parameters for MxGPU1.Download and unzip the vib and MxGPU-Setup-Script-Installer.zip from Table 1.2.Copy script and vib file to the same directory (Example : /vmfs/volumes/datastore1)ing an SSH utility, log into the directory on the host and change the attribute of mxgpu-install.sh to be executable # chmod +x mxgpu-install.sh4.Run command: # sh mxgpu-install.sh to get a list of available commands5.Run command: # sh mxgpu-install.sh –i <amdgpuv…vib>•If a vib driver is specified, then that file will be used. If no vib driver is specified then the script assumes the latest amdgpuv driver in the current directory•The script will check for system compatibility before installing the driver•After confirming system compatibility, the script will display all available AMD adapters7.Next, the script will show three options: Auto/Hybrid/Manual.1)Auto: automatically creates a single config string for all available GPUs:•the script first prompts for the number of virtual machines desired (per GPU) and sets all settings accordingly (frame buffer, time slice, etc…)•next, the script prompts the user if they want to enable Predictable Performance, a feature that keeps performance fixed independent of active VMs•the settings are applied to all AMD GPU available on the bus•if a S7150X2 is detected, the script will add pciHole parameters to VMs• a reboot is required for the changes to take effect2)Hybrid: configure once and apply to all available GPUs:•the script first prompts for the number of virtual machines desired (per GPU) and sets all settings accordingly (frame buffer, time slice, etc…)•next, the script prompts the user if they want to enable Predictable Performance•the settings are applied to the selected AMD GPU; the process repeats for the next GPU•if a S7150X2 is detected, the script will add pciHole parameters to VMs• a reboot is required for the changes to take effect3)Manual: config GPU one by one:•the script prompts the user to enter VF number, FB size/VF, time slice•next, the script prompts the user if they want to enable Predictable Performance•the settings are applied to selected AMD GPU; the process repeats for the next GPU•if a S7150X2 is detected, the script will add pciHole parameters to VMs• a reboot is required for the changes to take effectFigure 1 : Screenshot of MxGPU Setup Script Installation FlowFor users who want to understand the individual steps required for vib installation and configuration,3.2VF Pass ThroughOnce the VFs (virtualfunctions) are set up, thenpassing through theses VFsfollows the same procedureas passing through a physicaldevice. To successfully passthrough the VFs, the physicaldevice CANNOT beconfigured as a passthroughdevice. If the physical deviceis being passed through tothe VM, then the GPUVdriver will not install properly.If that happens, the VFs willnot be enabled and no VFswill be shown.Once the VFs are enabled, they will be listed in the available device list for pass through, and the status of the PF will be changed to unavailable for pass through. No additional operation is needed to move VF into pass through device list.3.3VF-to-VM Auto-Assignment1.After rebooting the system and the VFs are populated on the device list, navigate to thedirectory containing the mxgpu-install.sh script2.Specify Eligible VMs for auto-assign in “vms.cfg” file•Note: If all registered VMs should be considered eligible, skip to step 43.Edit vms.cfg file to include VMs that should be considered for auto-assign•Use # vi vms.cfg to edit the configuration file•For help with using vi, an example can be found on the following VMware page: https:///selfservice/microsites/search.do?language=en_US&cmd=displayKC&externalId=1020302•Examples are provided in the vms.cfg configuration file on how to specify VMs should be considered eligible•Note: Make sure to delete the regular expression .* if you are specifying your own VMs4.Start the auto-assign option # sh mxgpu-install.sh –a5.Select the command to execute [assign|unassign|list|help]6.The assign command will continue if the number of eligible VMs does not exceed the number ofVFs7.Once the VM is powered on, a VF will appear in the Device Manager as a graphics device. Thegraphics driver can now be installedFigure 2 : Screenshot of the default contents of “vms.cfg” fileFigure 3 : Screenshot of Multi-Assign UsageFigure 4 : Screenshot of Multi-Assign “list” command after assigning VFs to VMs4.Appendix4.1Host Server ConfigurationTo enable the MxGPU feature, some basic virtualization capabilities need to be enabled in the SBIOS. These capabilities may be configured from the SBIOS configuration page during system bootup. Different system BIOS vendors will expose different capabilities differently. Some may have one control that enables a number of these capabilities. Some may expose controls for some capabilities while hardcoding others. The following settings, taken from an American Megatrends system BIOS, provides a list of the minimal set of capabilities that have to be enabled :Server CPU supports MMUServer chipset supports AMD IOMMU or Intel VT-dThe option “Intel VT for Directed I/O (VT-d)” should be enabledExample Path : IntelRCSetup → IIO Configuration → Intel(R) VT for Directed I/O (VT-d) → Intel VT for Directed I/O (VT-d)Server (SBIOS) support PCIe standard SR-IOVThe option “SR-IOV Support” should be enabled.Example Path : Advanced → PCI Subsystem Settings → SR-IOV SupportServer (SBIOS) support ARI (Alternative Routing ID)The option “ARI Forwarding” should be enabled.Example Path : Advanced → PCI Subsystem Settings → PCI Express GEN 2 Settings → ARI ForwardingServer (SBIOS and chipset (root port/bridge)) supports address space between 32bit and 40bitIf there is an “Above 4G Decoding” enable it.Example Path : Advanced → PCI Subsystem Settings → Above 4G DecodingServer (Chipset (root port / bridge)) supports more than 4G address spaceThere may be an option “MMIO High Size” for this function (default may be 256G).Example Path : IntelRCSetup → Common RefCode Configuration → MMIO High Size Examples on the next page demonstrate implementations from other system BIOS vendors.The following example showshow to enable SR-IOV on a Dell R730 platform.On some platforms, theSBIOS configuration page provides more options to control the virtualization behavior. One of these options is the ARI (alternative reroute interface) as shown below.In addition, some platformsalso provide controls to enable/disable SVM and/or IOMMU capability. These options must be enabled on the platform.4.2Manual Installation for GPUV Driver for VMware ESXi *note that the GPUV driver refers to the vib driver.4.2.1Upload GPUV Driver1.Download the GPUV driver to the administrator system from Table 1.2.Start SSH Secure File Transfer utility and connect to the host server.3.On the left (theadministratorsystem), navigate tothe directory wherethe GPUV driver issaved; on the right(the host system),navigate to/vmfs/volumes/datastore14.Right click on the GPUV driver file and select “Upload” to upload it to/vmfs/volumes/datastore1.4.2.2Install GPUV Driver1.In vSphere client, place system into maintenance mode2.Start SSH Secure Shell client, connect to host, run the following command:esxcli software vib install --no-sig-check -v /vmfs/volumes/datastore1/amdgpuv-<version>.vib ***note : the vib name is used as an example.You should seesomething this :3.In the vSphere client, exit maintenance mode4.In SSH Secure Shell client window, run the following command :esxcli system module set -m amdgpuv -e trueThis command makes theamdgpuv driver load on ESXiboot up.5.In vSphere client, reboot the server.4.2.3Configure GPUV Driver1.Find out the BDF (bus number, device number, and function number) of the SR-IOV adapter. InSSH Secure Shell client , type in command :lspciYou should see somethinglike in the picture. The BDFfor this adapter is 05.00.0 inthis example.2.In SSH Secure Shell client window run the following command to specify the setting for SR-IOVadapter:esxcfg-module –s “adapter1_conf=<bus>,<dev>,<func>,<num>,<fb>,<intv>” amdgpuvThe configuration is done through esxcfg-module command in the format of parameter as [bus, dev, func, num, fb, intv] to quickly set all VFs on one GPU to the same FB size and time slice.•bus – the bus number: in decimal value•dev – the device number: in decimal value•func – the function number•num – the number of enabled VFs•fb – the size of framebuffer for each VF•intv – the interval of VF switching.For example,•command: esxcfg-module -s "adapter1_conf=1,0,0,15,512,7000" amdgpuv Enables 15 virtual functions, each VF with 512M FB, and 7 millisecond time slice for*******************************.0•command: esxcfg-module -s "adapter1_conf=5,0,0,8,256,7000adapter2_conf=7,0,0,10,256,10000" amdgpuvEnable 8 VF, each VF has 256M FB and 7 millisecond time slice for adapter located @05:00.0Enable 10 VF, each VF has 256M FB and 10 millisecond time slice for adapter located @07:00.0•command: esxcfg-module -s "adapter1_conf=14,0,0,6,1024,7000adapter2_conf=130,0,0,4,1920,7000" amdgpuvEnable 6 VF, each VF has 1024M FB and 7 millisecond time slice for adapter located @0E:00.0Enable 4 VF, each VF has 1920M FB and 7 millisecond time slice for adapter located @82:00.0Note:1)Every time the command is executed, the previous configuration is overwritten. If the userwants to configure a newly added GPU, he needs to apply the previous parameterappending with new parameter in one command, otherwise the previous configuration for the existing GPU is lost.2)If you use lspci to find out the BDF of the GPU location, the value is in hex value instead ofdecimal value. In the last example, the first adapter is located at bus 14, but the lspci willshow as 0E:00.0; the second adapter is located at bus 130, the lspci will show as 82:00.0.3.In order to let the new configuration take effect, a server reboot is needed - in vSphere client,reboot the server.4.2.4Un-Install GPUV Driver1.Unload the GPUV driver by typing in command in SSH Secure Shell client :vmkload_mod -u amdgpuv2.In vSphere Client, set system to maintenance mode3.In SSH Secure Shell client type in command :esxcli software vib remove -n amdgpuv4.Start SSH Secure FileTransfer utility,connect to hostserver. On the right(the host system),navigate to/vmfs/volumes/datastore1, select theamdgpuv driver,right click, select“Delete”.5.In vSphere client, reboot the server.4.2.5Update GPUV Driver1.Follow the sequence in section 4.2.4 to remove the old driver.2.Follow the sequence in section 4.2.1 to download the new driver3.Follow the sequence in section4.2.2 to install the new driver4.Follow the sequence in section 4.2.3 to configure the new driver.。
nvpmodel指令 -回复

nvpmodel指令-回复nvpmodel是英伟达公司为Jetson平台提供的一款配置功耗模式的实用工具。
Jetson是英伟达针对嵌入式应用的计算平台系列,广泛应用于无人驾驶、智能机器人、无人机等领域。
nvpmodel工具通过更改系统的功耗模式,以实现动态平衡系统性能与功耗之间的关系。
下面将逐步介绍nvpmodel指令的用途、指令的基本用法以及常用的功耗模式。
首先,我们来了解一下nvpmodel指令的用途。
nvpmodel可以帮助用户在Jetson平台上灵活控制系统的功耗与性能表现。
在应用开发、调试和产品部署等阶段,nvpmodel能够有效地优化系统的功耗和性能,找到最佳平衡点。
通过调整功耗模式,我们可以控制CPU和GPU的工作频率、核数以及电压等参数,以满足不同应用场景的需求。
nvpmodel指令的基本用法如下所示:nvpmodel -qnvpmodel -m [model]其中,`-q`选项用于查询当前的功耗模式,返回当前模式的编号。
`-m`选项后跟着功耗模式的编号,用于设置特定的功耗模式。
在Jetson平台上,有多种功耗模式可供选择,常见的功耗模式包括:- `0`:最大性能模式,所有CPU和GPU核心均工作在最高频率,功耗较高。
- `1`:动态功耗模式,系统在满足性能要求的前提下,尽可能降低功耗。
- `2`:最大效能模式,所有CPU和GPU核心工作在较高频率,功耗略高。
- `3`:最低功耗模式,所有CPU和GPU核心工作在较低频率,功耗最低,适用于资源受限的应用场景。
接下来,我们将使用nvpmodel指令在Jetson平台上设置不同的功耗模式,以感受不同模式下系统的性能与功耗的表现。
第一步,我们先查询当前的功耗模式,可以使用以下指令:nvpmodel -q假设返回结果为`2`,表示当前模式为最大效能模式。
接下来,我们将尝试将功耗模式切换到最低功耗模式。
第二步,我们执行以下指令将功耗模式设置为最低功耗模式:nvpmodel -m 3执行后,系统将切换到最低功耗模式,所有CPU和GPU核心将工作在较低频率,功耗最低。
tesorflow显存管理代码

tesorflow显存管理代码在TensorFlow中,可以使用以下代码来管理显存:```pythonimport tensorflow as tf# 设置显存的使用方式config = tf.ConfigProto()config.gpu_options.allow_growth = Truesession = tf.Session(config=config)# 指定显存使用的设备with tf.device('/device:GPU:0'):# 构建你的TensorFlow模型# 释放显存资源tf.reset_default_graph()session.close()```上述代码中,`config.gpu_options.allow_growth = True`表示允许TensorFlow动态分配显存,以便有效利用显存资源。
如果显存不足,TensorFlow会按需分配显存,而不是一开始就占用全部显存。
通过`with tf.device('/device:GPU:0'):`语句,可以指定TensorFlow模型在GPU设备上运行。
`'/device:GPU:0'`表示使用GPU设备,`0`表示设备编号。
如果有多个GPU设备,可以使用`'/device:GPU:1'`、`'/device:GPU:2'`等来指定。
最后,通过`tf.reset_default_graph()`和`session.close()`语句来释放显存资源。
请注意,这仅仅是一个基本的显存管理示例。
在实际应用中,还可以使用更复杂的显存管理策略,例如设置显存的固定量、跨GPU计算等,具体取决于需求和硬件环境。
pytorch allreduce调用
pytorch allreduce调用PyTorch 本身并没有提供 allreduce 函数,但是可以通过 PyTorch 的分布式功能来进行 allreduce 操作。
在 PyTorch 中,可以使用 torch.distributed 模块来进行分布式训练,其中包括 allreduce 操作。
下面是一个简单的示例,演示如何在 PyTorch 中使用 allreduce 函数:pythonimport torchimport torch.distributed as dist# 初始化分布式环境dist.init_process_group(backend='nccl', init_method='tcp://127.0.0.1:29500', rank=0, world_size=1)# 创建一个 tensortensor = torch.tensor([1.0, 2.0, 3.0])# 进行 allreduce 操作dist.all_reduce(tensor)# 输出结果print(tensor) # 输出 [1., 2., 3.]在上面的示例中,首先使用 dist.init_process_group 函数初始化分布式环境,指定后端为 nccl,初始化方法为 TCP 连接,并且设置 rank 和 world_size 参数。
然后,创建一个 tensor,并使用 dist.all_reduce 函数对 tensor 进行 allreduce 操作。
最后,输出结果,可以看到经过 allreduce 操作后,每个进程中的 tensor 值都变成了所有进程中tensor 值之和。
需要注意的是,在进行分布式训练时,需要将数据分成多个小批次,并将每个小批次分配给不同的进程进行计算。
然后,使用 allreduce 操作将所有进程中的梯度进行聚合,从而进行参数更新。
因此,allreduce 操作在分布式训练中起着非常重要的作用。
tensor toolbox使用手册

tensor toolbox使用手册摘要:一、Tensor Toolbox简介1.Tensor Toolbox的定义与作用2.Tensor Toolbox的发展历程二、Tensor Toolbox的使用1.Tensor Toolbox的安装与配置2.Tensor Toolbox的基本操作3.Tensor Toolbox的高级功能三、Tensor Toolbox的应用领域1.机器学习2.深度学习3.数据挖掘四、Tensor Toolbox的优势与不足1.优势a.强大的计算能力b.丰富的API接口c.社区支持度高2.不足a.学习曲线较陡峭b.对硬件要求较高正文:Tensor Toolbox是一个强大的科学计算库,旨在为机器学习、深度学习和数据挖掘等领域提供高效的计算解决方案。
作为一个开源项目,Tensor Toolbox拥有活跃的社区支持和丰富的API接口,使得开发者可以轻松地实现各种复杂的计算任务。
一、Tensor Toolbox简介Tensor Toolbox是一个用于数值计算、线性代数和机器学习的Python 库。
它提供了丰富的工具和函数,可以方便地处理多维数组和张量,从而为深度学习和其他相关领域提供支持。
Tensor Toolbox的发展历程可以追溯到2015年,由Google的研究员发表的一篇论文。
从那时起,Tensor Toolbox 逐渐成为了深度学习领域的热门工具之一。
二、Tensor Toolbox的使用要使用Tensor Toolbox,首先需要安装Python和TensorFlow库。
安装完成后,可以通过Jupyter Notebook或Python脚本进行编程。
Tensor Toolbox的基本操作包括创建张量、矩阵运算、线性代数运算等。
此外,Tensor Toolbox还提供了诸如自动微分、梯度下降等高级功能,以满足深度学习等领域的需求。
三、Tensor Toolbox的应用领域Tensor Toolbox在机器学习、深度学习和数据挖掘等领域具有广泛的应用。
cudaexecutionprovider 参数
CUDA执行提供程序(CUDA Execution Provider)是Microsoft的深度学习框架ONNX Runtime中的一个重要组件,它为用户提供了在NVIDIA GPU上高效执行深度学习模型的能力。
在使用ONNX Runtime进行深度学习模型推断时,用户可以通过调整CUDA执行提供程序的参数来优化模型的执行性能和资源利用率。
本文将详细介绍CUDA执行提供程序的参数及其含义,帮助用户更好地了解和使用这一功能。
一、cudaexecutionprovider的参数列表1.1 device_id参数含义:指定要使用的GPU设备的ID。
参数类型:整数。
默认值:0。
示例:device_id=1。
1.2 arena_extend_strategy参数含义:指定GPU内存分配的策略。
参数类型:字符串,可选值为"kNextFibonacci"、"kSameAsRequested"、"kReturnDefault"。
默认值:"kNextFibonacci"。
示例:arena_extend_strategy="kSameAsRequested"。
1.3 do_copy_in_default_stream参数含义:指定是否在默认流中执行数据拷贝操作。
参数类型:布尔值,可选值为true、false。
默认值:false。
示例:do_copy_in_default_stream=true。
1.4 has_userpute_stream参数含义:指定是否有用户自定义的计算流。
参数类型:布尔值,可选值为true、false。
默认值:false。
示例:has_userpute_stream=true。
1.5 default_exec_stream_id参数含义:指定默认执行流的ID。
参数类型:整数。
默认值:0。
示例:default_exec_stream_id=1。
math_ops._bucketize函数 -回复
math_ops._bucketize函数-回复math_ops._bucketize函数是TensorFlow框架中的一个函数,用于将一个张量按照一组边界值划分成多个桶(buckets)。
在这篇文章中,我们将逐步探讨bucketize函数的定义、输入和输出、实际用例以及在神经网络中的应用。
一、定义math_ops._bucketize函数是TensorFlow中的一个内部函数,用于将一个张量根据给定的一组边界值划分成多个桶。
每个桶由两个连续边界值之间的区间定义。
二、输入和输出math_ops._bucketize函数有两个主要输入参数:input和boundaries。
- input:一个张量,表示要划分成桶的数据。
- boundaries:一个一维张量,表示桶的边界值。
该函数的输出是一个整数张量,与input相同的形状,表示每个元素所在的桶的索引。
三、用例让我们来看一个实际的例子来理解bucketize函数的用法。
假设我们有一个包含10个元素的一维张量input,如下所示:input = [0.5, 1.2, 2.3, 4.1, 3.5, 6.2, 8.7, 9.0, 7.1, 6.5]我们想将这个张量划分成三个桶,边界值分别为[2.0, 5.0]。
我们可以使用bucketize函数来完成这个任务。
import tensorflow as tf# 定义输入张量input = tf.constant([0.5, 1.2, 2.3, 4.1, 3.5, 6.2, 8.7, 9.0, 7.1, 6.5])# 定义边界值boundaries = tf.constant([2.0, 5.0])# 使用bucketize函数划分桶buckets = tf.math._bucketize(input, boundaries)# 打印输出print(buckets)输出结果为:[0 0 1 2 1 2 2 2 2 2]结果表示,input中的第一个元素0.5位于第一个桶(索引为0),第二个元素1.2也位于第一个桶,第三个元素2.3位于第二个桶,以此类推。
cudahostalloc zero copy
CudaHostAlloc zero copy技术是一种在CUDA编程中常用的高性能内存分配技术,它能够在主机和设备之间实现零拷贝传输,提高数据传输效率和加速计算速度。
下面将从技术原理、使用方法和优缺点等方面对CudaHostAlloc zero copy技术进行深入探讨。
一、技术原理1.1 CudaHostAlloc zero copy技术原理概述CudaHostAlloc zero copy技术是NVIDIA CUDA评台提供的一种高效内存分配和数据传输技术。
它采用了一种特殊的内存分配方式,使得主机端内存和设备端内存之间实现了零拷贝传输,避免了数据在主机和设备之间的复制,从而提高了数据传输的效率。
1.2 CudaHostAlloc zero copy技术实现原理CudaHostAlloc zero copy技术的实现主要依赖于PCIe总线和Unified Virtual Addressing(UVA)技术。
在使用CudaHostAlloc 函数进行内存分配时,会在主机端和设备端都映射同一块内存,然后通过PCIe总线进行直接访问和传输,从而实现了零拷贝传输。
二、使用方法2.1 CudaHostAlloc zero copy技术的使用步骤使用CudaHostAlloc zero copy技术进行高效内存分配和数据传输的步骤如下:(1)使用CudaHostAlloc函数在主机端分配内存;(2)将所分配的内存映射到设备端;(3)通过设备端直接访问和处理内存数据,实现零拷贝传输。
2.2 CudaHostAlloc zero copy技术的注意事项在使用CudaHostAlloc zero copy技术时需要注意以下几点:(1)确保设备端能够直接访问主机端内存;(2)避免频繁的主机端和设备端数据传输,以提高效率;(3)在进行内存分配时要考虑内存对齐和内存大小的问题。
三、优缺点分析3.1 CudaHostAlloc zero copy技术的优点CudaHostAlloc zero copy技术具有以下几个优点:(1)实现了主机端和设备端之间的零拷贝传输,提高了数据传输的效率;(2)减少了数据在主机和设备之间的复制,节省了内存和带宽资源;(3)简化了数据传输的流程,降低了编程的复杂度。
python的tensorboard使用示例 -回复

python的tensorboard使用示例-回复Python的TensorBoard使用示例TensorBoard是TensorFlow提供的一个强大的可视化工具,它可以帮助我们更好地理解和调试深度学习模型。
它提供了多种有用的功能,包括网络结构可视化、训练过程监控和嵌入式向量可视化等。
本文将详细介绍如何使用TensorBoard。
第一步:安装TensorBoard在使用TensorBoard之前,我们需要先安装它。
TensorBoard是通过TensorFlow的TensorBoard库提供的,因此通过以下命令安装TensorFlow即可自动安装TensorBoard:pythonpip install tensorflow安装完成后,我们可以使用以下命令检查TensorBoard是否成功安装:pythontensorboard version如果能够看到版本号,则说明TensorBoard已经成功安装。
第二步:准备数据和模型在介绍如何使用TensorBoard之前,我们需要准备一些数据和一个深度学习模型来演示。
这里以一个简单的分类任务为例,我们使用MNIST 手写数字数据集。
首先,我们需要下载和加载MNIST数据集:pythonimport tensorflow as tf加载MNIST数据集(x_train, y_train), (x_test, y_test) =tf.keras.datasets.mnist.load_data()接下来,我们需要对数据进行一些预处理,例如将像素值归一化,将标签进行独热编码等:python归一化x_train, x_test = x_train / 255.0, x_test / 255.0独热编码y_train = tf.keras.utils.to_categorical(y_train)y_test = tf.keras.utils.to_categorical(y_test)然后,我们可以定义一个简单的卷积神经网络模型:pythonmodel = tf.keras.models.Sequential([yers.Conv2D(32, (3, 3), activation='relu',input_shape=(28, 28, 1)),yers.MaxPooling2D((2, 2)),yers.Flatten(),yers.Dense(64, activation='relu'),yers.Dense(10, activation='softmax') ])第三步:使用TensorBoard回调函数TensorFlow提供了一个TensorBoard回调函数,可以将训练过程中的各种指标和图表信息保存下来,以便后续使用TensorBoard进行可视化展示。
bochs中文用户手册

Bochs的应用非常广泛.你想运行DOS游戏吗?或者是在Windows窗口系统中学习GNU/Linux? 或者逆向工程打印驱动?这一切都由您确定.
1.4 Bochs可以为我工作吗? Bochs是否可以工作取决于你的host硬件,host操作系统,guest操作系统,guest软件,以及参考文 档使用命令行的能力.Bochs没能提供GUI界面也没有安装向导.在安装guest操作系统时,不存 在辅助的恢复或者安装盘.Bochs只提供”虚拟硬件”平台,至于其他事情则必须由你自己搞定. Bochs可以运行于Windows,GNU/Linux,FreeBSD,OpenBSD,或者BeOS.如果您的平台是x86,你可 以从中选择任何一种操作系统.参考安装文档中关于你的平台的内容来了解Bochs对你的平 台的支持.如果最主要的因素是速度,你可能更希望使用Virtualization产品(Vmware,plex86)而 不是Bochs. 如果你的平台不是x86,那么Bochs就是为数不多的几个能够在非x86平台上运行x86软件的选 择之一.Bochs已经证实可以运行于如下操作系统中:Soliaris(Sparc),GNU/Linux(PowerPC/Alpha), MacOS(PowerPC),IRIX(MIPS),BeOS(PowerPC),Digital Unix(Alpha),以及AIX(PowerPC)中. 你还可以参考Bochs网站的测试状态网页来得到更多信息. 1.5 Bochs许可 Bochs的著作权归MandrakeSoft S.A.[1]所有,基于GNU LGPL[2]发布.下列信息出现于每个bochs 的源文件中:
cuda out of memory. 浮点数截断

cuda out of memory. 浮点数截断
当 CUDA 出现内存不足的情况时,通常会出现“CUDA out of memory”的错误。
这通常是由于要处理的数据量过大,超出了GPU的内存容量所致。
解决这个问题的方法有以下几种:
1. 减小输入数据规模:尝试减小输入数据的规模,可以通过降低图像分辨率、减少处理的帧数或者对输入数据进行降维等方式来减少内存占用。
2. 优化算法:优化算法以减少内存使用率。
有些算法可能存在内存占用较大的问题,可以尝试寻找更节省内存的算法或对现有算法进行优化。
3. 使用更大显存的GPU:如果条件允许,可以考虑使用具有更大显存的GPU来处理数据,以满足更高的内存需求。
至于提到的“浮点数截断”,这可能是指在数据处理过程中因为内存不足而导致浮点数运算时发生了精度丢失或截断,从而影响了计算结果的准确性。
避免这种情况的方法包括确保足够的内存供给、合理设计算法以减少对内存的需求、以及对数据进行适当的缩放和归一化处理等。
torch tensorboard 指标
torch tensorboard 指标Torch TensorBoard是一个用于可视化和监控PyTorch训练过程以及模型性能的工具。
它结合了TensorBoard和PyTorch的强大功能,为研究人员和开发人员提供了一个方便的平台,可以更好地了解他们的模型在训练期间的行为和性能。
本文将深入探讨Torch TensorBoard的各个方面,包括安装、基础用法、高级功能和最佳实践。
我们将介绍如何使用Torch TensorBoard记录训练损失和准确率,可视化模型结构和激活图,以及优化超参数的过程。
此外,我们还将介绍如何在多GPU训练中使用Torch TensorBoard,以及如何与其他PyTorch扩展库集成。
在开始之前,让我们先安装Torch TensorBoard。
可以通过以下命令在终端中安装它:```pip install torch-tensorboard```安装完成后,我们可以开始使用Torch TensorBoard了。
Torch TensorBoard的基础用法非常简单。
首先,我们需要导入必要的库:```pythonimport torchfrom torch.utils.tensorboard import SummaryWriter```接下来,我们可以创建一个`SummaryWriter`实例,该实例将用于记录训练过程中的指标和可视化数据:```pythonwriter = SummaryWriter(log_dir="./logs")```在这里,`log_dir`参数指定了保存TensorBoard日志文件的目录。
一旦创建了`SummaryWriter`对象,我们就可以使用其提供的方法来记录训练过程中的指标,如下所示:```pythonfor epoch in range(num_epochs):# 训练过程...# 记录训练损失writer.add_scalar("Loss/train", train_loss, global_step=epoch)# 记录训练准确率writer.add_scalar("Accuracy/train", train_accuracy,global_step=epoch)# 可视化模型权重writer.add_histogram("Model/weight", model.weight,global_step=epoch)# 可视化输入图像writer.add_image("Image/input", input_image,global_step=epoch)```在上面的示例中,我们使用`add_scalar`方法记录了每个训练周期的训练损失和准确率。
NVIDIA HPC Compilers Support Services Quick Start
DQ-10081-001-V001 | August 2020HPC Compiler Support Services Quick Start Guide provides minimal instructionsfor accessing NVIDIA® portals as well as downloading and installing the supported software. If you need complete instructions for installation and use of the software, please refer to the HPC SDK Installation Guide and HPC Compilers Documentation for your version of the HPC SDK software, or PGI Documentation for legacy PGI software. After your order for NVIDIA HPC Compiler Support Service is processed, youwill receive an order confirmation message from NVIDIA. This message contains information that you need for accessing NVIDIA Enterprise and Licensing Portalsand getting your NVIDIA software from the NVIDIA Licensing Portal. To log in to the NVIDIA Licensing Portal, you must have an NVIDIA Enterprise Account.1.1. Your Order Confirmation MessageAfter your order for NVIDIA HPC Compiler Support Services is processed, you will receive an order confirmation message to which your NVIDIA Entitlement Certificate is attached.Your NVIDIA Entitlement Certificate contains your order information.Your NVIDIA Entitlement Certificate also provides instructions for using the certificate.To get the support for your NVIDIA HPC Compiler Support Services , you must have an NVIDIA Enterprise Account.For a HPC Compiler Support Services renewal, you should already have an NVIDIAEnterprise AccountIf you do not have an account, follow the Register link in the instructions for using the certificate to create your account. For details, see the next section, Creating your NVIDIA Enterprise Account.If you already have an account, follow the Login link in the instructions for using the certificate to log in to the NVIDIA Enterprise Application Hub.1.2. Creating your NVIDIA Enterprise AccountIf you do not have an NVIDIA Enterprise Account, you must create an account to be able to log in to the NVIDIA Licensing Portal.If you already have an account, skip this task and go to Downloading Your NVIDIA HPCSDK or PGI Software.Before you begin, ensure that you have your order confirmation message.1.In the instructions for using your NVIDIA Entitlement Certificate, follow the Register link.2.Fill out the form on the NVIDIA Enterprise Account Registration page and click Register.A message confirming that an account has been created appears and an e-mail instructing you to set your NVIDIA password is sent to the e-mail address you provided.3.Open the e-mail instructing you to set your password and click SET PASSWORDAfter you have set your password during the initial registration process, you willbe able to log in to your account within 15 minutes. However, it may take up to 24business hours for your entitlement to appear in your account.For your account security, the SET PASSWORD link in this e-mail is set to expire in 24 hours.4.Enter and re-enter your new password, and click SUBMIT.A message confirming that your password has been set successfully appears.You will land on the Application Hub with access to both NVIDIA Licensing Portal and NVIDIA Enterprise Support Portal.2.1. Downloading Your NVIDIA HPC SDK or PGI SoftwareBefore you begin, ensure that you have your order confirmation message and have created an NVIDIA Enterprise Account.1.Visit the NVIDIA Enterprise Application Hub by following the Login link in the instructions for using your NVIDIA Entitlement Certificate or when prompted after setting the password for your NVIDIA Enterprise Account.2.When prompted, provide your e-mail address and password, and click LOGIN.3.On the NVIDIA APPLICATION HUB page that opens, click NVIDIA LICENSING PORTAL.The NVIDIA Licensing Portal dashboard page opens.Your entitlement might not appear on the NVIDIA Licensing Portal dashboard pageuntil 24 business hours after you set your password during the initial registrationprocess.4.In the left navigation pane of the NVIDIA Licensing Portal dashboard, click SOFTWARE DOWNLOADS.5.On the Product Download page that opens, follow the Download link for the release, platform, version and package type of NVIDIA software that you wish to use, for example, NVIDIA HPC SDK for Linux/x86-64 RPM version 20.7.If you don't see the release of NVIDIA HPC SDK or PGI software that you wish to use, click ALL A V AILABLE to see a list of all NVIDIA HPC SDK and PGI softwareavailable for download. The “Product” box can be used to select only HPC SDK (“HPC”) or PGI. Use the drop-down lists or the search box to further filter the software listed.For PGI software, the following archive versions are available:Linux x86-64: 10.2 to 20.4Linux OpenPOWER: 16.1 to 20.4Windows: 18.10 to 20.4 (command line only)The last PGI release was version 20.4. Product descriptions may not match those onthe legacy PGI website, but provided packages contain the most features available.Some older versions of PGI are no longer available to new customers and are notprovided here.6.When prompted to accept the license for the software that you are downloading, click AGREE & DOWNLOAD.7.When the browser asks what it should do with the file, select the option to save the file.8.For PGI software only, you will also need to download a License Key. This is not required for HPC SDK software.1.Navigate to the SOFTWARE DOWNLOADS page as described in step 4 above2.Search for “PGI License Key” and download the License File for your platform.This is a text file that contains instructions for use. Open with any text editor.3.Save this file for use after installing the PGI software as described in the nextsection.2.2. Installing Your NVIDIA HPC SDK or PGI Software1.HPC SDK Software1.Install per the instructions in the Installation Guide for your version available athttps:///hpc-sdk/.2.There are no License Files or License Servers to setup for the HPC SDK2.PGI Software1.Install per the instructions in the Installation Guide for your version available athttps:///hpc-sdk/pgi-compilers/, skipping any steps regardinginstallation of License Files or License Servers.2.After installation is complete, follow the instructions included within the LicenseFile from step 8 in section 2.1 above. This typically involves renaming the License File to “license.dat” for x86 platforms or “license.pgi” for OpenPOWER, andplacing it in the top level PGI installation directory, e.g., /opt/pgi, replacing any existing License File that may already exist.NoticeALL NVIDIA DESIGN SPECIFICATIONS, REFERENCE BOARDS, FILES, DRAWINGS, DIAGNOSTICS, LISTS, AND OTHER DOCUMENTS (TOGETHER AND SEPARATELY, "MATERIALS") ARE BEING PROVIDED "AS IS." NVIDIA MAKES NO WARRANTIES, EXPRESSED, IMPLIED, STATUTORY, OR OTHERWISE WITH RESPECT TO THE MATERIALS, AND EXPRESSLY DISCLAIMS ALL IMPLIED WARRANTIES OF NONINFRINGEMENT, MERCHANTABILITY, AND FITNESS FOR A PARTICULAR PURPOSE.Information furnished is believed to be accurate and reliable. However, NVIDIA Corporation assumes no responsibility for the consequences of use of such information or for any infringement of patents or other rights of third parties that may result from its use. No license is granted by implication of otherwise under any patent rights of NVIDIA Corporation. Specifications mentioned in this publication are subject to change without notice. This publication supersedes and replaces all other information previously supplied. NVIDIA Corporation products are not authorized as critical components in life support devices or systems without express written approval of NVIDIA Corporation.TrademarksNVIDIA, the NVIDIA logo, CUDA, CUDA-X, GPUDirect, HPC SDK, NGC, NVIDIA Volta, NVIDIA DGX, NVIDIA Nsight, NVLink, NVSwitch, and Tesla are trademarks and/or registered trademarks of NVIDIA Corporation in the U.S. and other countries. Other company and product names may be trademarks of the respective companies with which they are associated.Copyright© 2020 NVIDIA Corporation. All rights reserved.。
- 1、下载文档前请自行甄别文档内容的完整性,平台不提供额外的编辑、内容补充、找答案等附加服务。
- 2、"仅部分预览"的文档,不可在线预览部分如存在完整性等问题,可反馈申请退款(可完整预览的文档不适用该条件!)。
- 3、如文档侵犯您的权益,请联系客服反馈,我们会尽快为您处理(人工客服工作时间:9:00-18:30)。
a rXiv:h ep-th/95458v212A pr1995f cWorld Scientific Publishing Company WBase :a C package to reduce tensor products of Lie algebra representations.Description and new developments.∗Antonio Candiello Dipartimento di Fisica,Universit`a di Padova Istituto Nazionale di Fisica Nucleare,Sezione di Padova Padova,35131,Italy A non trivial application of a modern computer language (”C”)in a highly structured and object-oriented fashion is presented.The contest is that of Lie algebra representations (irreps),specifically the problem of reducing the products of irreps with the weight tree algorithm.The new WBase 2.0version with table-generation and Young tableaux display capabilities is introduced.1.Introduction Calculations in algebra representation theory,in particular decompositions of prod-ucts of irreps,are needed in several sectors of physics.The Dynkin approach to the representation theory 1is known by physicists thanks to its generality:all simple Lie algebras,included the exceptional ones,are described and manipulated in the same formal environment.In the Dynkin approach the algebras are described uniquely by the l ×l Cartan matrix,where l is the rank of the algebra.The irreps of a given algebra are identified by a unique highest weight vector of l positive integers.The purpouse of this contribution is to show the convenience of using modern computer programming techniques when applied to the Dynkin approach of algebra representation theory.Indeed,we have been able to construct a versatile algebra-manipulation package,named WBase ,2such that:1)WBase is a compact project,and the memory the Dynkin approach needs is used at best so that it works also on small computers;2)WBase is easily upgradable with features.With regard to the point 2)in this work we will describe the new features of the WBase V2.0version,a)the new table-generation routines;and b)the new Young-display support routines.The WBase V2.0now supports directly all Cartan algebras,both classical and exceptional.Algorithms more specialized but faster than the Dynkin one use the extended Young diagrams.In WBase V2.0we added the extended Young diagram display capability for the classical algebras in order to analize these alternative methods.2WBase:a C package to reduce tensor products...2.Dynkin’s approach to representation theory1A simple Lie algebra in the Cartan-Weyl basis is described by a set of l simultane-ously diagonalizable generators H i and by the other generators Eα,satisfying[H i,H j]=0i=1,...,l(1)[H i,Eα]=αi Eα,i=1,...,l;α=−d−l2;(2)l is the rank of the algebra,and the set of l-vectorsαi are the roots.It results that all roots can be constructed via linear combinations by a set of l roots,called simple roots.By the simple roots one then constructs the l×l Cartan matrix,which is the key to the classification of the Lie algebras,and it is known for all of them:the A n, B n,C n,D n series and the exceptional algebras G2,F4,E6,E7,E8.In the Dynkin approach the Cartan matrix is all we need to completely describe the algebra.This is at the basis of our package:the routine wstartup,given the name of the algebra, takes care of generating algorithmically the related Cartan matrix(called wcart in WBase).The metric G ij,which is related to the inverse of the Cartan matrix(called wmetr in WBase)introduces a scalar product in the space of weight vectors,which are l-uples of integer numbers.Each irrep in an algebra is uniquely classified by a weight vector,the highest weightΛwhose components are all positive integers(the Dynkin labels).The different states in an irrep in a given irrep are again described by a weight vector w;the full set of all states of a given irrep is thus described by a set of weight vectors,called the weight system.The dimension of an irrepΛcan be calculated with the help of the Weyl formula (encoded in the weyl function),dim(Λ)=pos.rootsα(Λ+δ,α)WBase:a C package to reduce tensor products (3)The computational heaviest part of the construction of the weight system is the computation of the degeneration of each weight vector.It is computed by the Freudenthal recursion formula(encoded in freud),which needs the degeneration of previous levels,2 pos.rootsα k>0deg(w+kα)(w+kα,α)deg(w)=--nextbody4WBase :a C package to reduce tensor products ...typedef struct tblock {struct tblock *next;char body[1];}wblock;This definition,as the wplace one,is used through casts that give form to unstruc-tured raw data as returned by the allocator balloc .Single blocks are released with a call to bfree ,linked blocks are released with a call to bsfree for the first of them.The structured form of the blocks,when casting with wplace and defining bsize and wsize ,is as follows:d l vect d l vect d l vect .........-d l vect d l vect d lvect .........nullWBase:a C package to reduce tensor products (5)entries of the weight system in base.The block list constructed by wsyst has to be deallocated with bsfree.wpdisp(hw1,hw2,mod)This function hides all the complexities of reducing products of irreps and of the underlying data structure,by giving to the standard output all the irreps in the product,from the highest to the lowest,according to the modality choosen by mod a. The product routines are also available as iteration functions(see below).User interface in WBase V2.0In thefile wmain.c it is implemented an ANSI C terminal-like interface with the user.A more sophisticated user interaction may be constructed taking thisfile as an example.Thanks to the new capabilities introduced in WBase V2.0,we had to add more options which are still one-letter options(for the details,refer directly to the source code).5.IteratorsOne of the standard conceptual device of the object-oriented technology is the iter-ator.The iterator hides the implementation details providing a consistent interface for moving through the data structure of the object considered.In WBase we in-troduced:1)the iterator needed to scan the wblock list which contains the weight tree and2)the iterator used to generate the wblock lists which contain the decom-posed irreps of a product.New in WBase V2.0is3)the table-generation iterator. Following is a short description of their use.Scanning through the wblock listIt is done through the pstart/pnext iterators:wplace*p;pcurr pc;for(p=pstart(base,&pc);p!=NULL;p=pnext(&pc))<do something with p>remembering that:p->vect gives the weight vector,p->deg its degeneration,and p->level the level of the vector within the weight system.To remove the last entry from the list one uses base=plast(p,base),with the just removed vector returned in the area pointed by p.Getting the irreps of the decomposition of productsThe iteration functions wpstart(base)/wpnext(base,b)that interface the con-struction of products return a wblock pointer to the full weight system of the reduced irrep.In order to display the weight tree of each irrep in the product of the two irreps with highest weight hw1and hw2the fragment of code is as follows: wblock*base,*b;base=bprod(wsyst(hw1),wsyst(hw2));for(b=wpstart(base);b!=NULL;b=wpnext(b,base))bdisp(b);6WBase:a C package to reduce tensor products...Generating irreps of increasing dimensionsThis is one of the main innovations of WBase V2.0that were only announced when wefirst introduced the package2.The table-generation procedure wsequence is used to produce increasing dimension irreps:wblock*b=NULL;wvect hw=walloc();int dim;while(b=wsequence(hw,b,maxdim,&dim))wfdisp(hw);wsequence provides to:1)allocate thefirst block when invoked with b=NULL the first time,2)allocate eventual subsequent blocks,to store the encountered highest weights hw,and3)deallocate all of them when maxdim is reached.In this last case it returns NULL.Like the other iteration procedures,wsequence has as an argument a specific iterator object(the wblock pointer b)which identify each irrep sequencing.It is then possible to nidificate multiple iterators to produce table of products.In the next version of WBase we will probably transform the algebra initializa-tion/destruction functions wstartup/wcleanup in iterators in order to extend the table-generation capabilities of WBase V2.0to multiple algebra tables.We will also probably switch to the C++language to provide a more consistent iteration in-terface across the different data structures.The operator overloading capabilities of the C++language will also simplify the interface of our package by unifying our list storage/remove functions(by overloading the+=and-=operators)and our input/output functions(by overloading the<<and>>operators).6.ConclusionsThe WBase package,in our opinion,represents a useful and self-contained demon-stration of the convenience of new object-oriented software technology when com-bined with the C powerful dynamic data allocation facilities.As a by-product,we obtained what we think can be a useful tool for not too heavy irrep-related necessi-ties of physicists.The Dynkin approach of Lie algebra representation theory helped us to maintain a unified and elegant structure to our package,however it must be noted that there are less general but faster algorithms3based on tensor and spinor manipulations useful in computing products of irreps.References1.R.Slansky,Phys.Rep.79,(1981)1.2. A.Candiello,m.81,(1994)248.3.G.R.E.Black,R.C.King and B.G.Wybourne,J.Phys.A16,(1983)1555.4. B.Stroustrup,The C++Programming Language,2nd Edition,(Addison-Wesley,Read-ing–Massachusets,1991).。
