FPS神器来袭:华硕电竞显示器PG278Q
AOC显示器Q27G3S用户手册说明书
Q27G3S安全 (1)标志惯例 (1)电源 (2)安装 (3)清洁 (4)其它 (5)设置 (6)物品清单 (6)安装支架和底座 (7)调整视角 (8)连接显示器 (9)Adaptive-Sync功能 (10)HDR (11)调节显示器 (12)热键 (12)OSD设定 (13)Luminance(明亮度) (14)Color Setup(颜色设置) (15)Picture Boost(窗口增亮) (16)OSD Setup(OSD设置) (17)Game Setting(游戏设置) (18)Extra(其它) (20)Exit(退出) (21)LED指示灯 (22)故障排除 (23)规格 (24)主要规格 (24)预设显示模式 (25)引脚分配 (26)即插即用 (27)安全标志惯例以下小节描述此文档中使用的标志惯例。
注释、注意和警告在本指南中,文本块可能带有图标并且以粗体或斜体打印。
这些文本块是注释、注意和警告,如下所示:注释:注意事项指示帮助你更好地使用你的计算机系统的重要信息。
注意:“注意”表示潜在的硬件损坏或数据丢失,并告诉您如何避免出现问题。
警告:“警告”表示存在潜在的人身伤害,并告诉您如何避免伤害的发生。
某些警告可能采用其它格式,也可能不带有图标。
在这种情况下,由相关的管制机构提供专门的警告表示方法。
显示器应使用铭牌上标示的电源规格。
如果您不能确定家里电源规格,请咨询供应商或当地电力公司。
显示器配备三项接地插头,一个插头具有第三个(接地)引脚。
这个引脚会只嵌入作为安全装置的接地电源插座。
如果插座不适合三线插头,那么请让电工安装正确的插座,或者使用转接器使得仪器安全接地。
请不要使接地插头的安全目的失效。
在雷雨天气或者当长期不用时请拔掉电源插头。
这可以保护显示器不会因为电压剧烈变化而遭到损坏。
请勿使电源插座和外接电源线过载。
过载可能会导致电击和火灾。
为了确保正确安全的操作,仅可将显示器与通过UL 认证的计算机配合使用,这些计算机的电源插座采用标准配置,电压标为交流 100-240V 之间、最小电流为 5A 。
TUF Gaming 显示器 VG259QM VG259QMY 系列 用户指南说明书
TUF Gaming 显示器VG259QM/VG259QMY 系列用户指南第一版 V12020 年 1 月版权所有 © 2020 ASUSTeK COMPUTER INC. 保留所有权利。
除了购买者出于备份目的而保留的文档外,未经 ASUSTeK COMPUTER INC.(以下称“ASUS”)明确书面许可,不得以任何形式或通过任何方式复制、传播、转录本手册的任何部分,包括其中介绍的产品和软件,也不得将其存储到检索系统中或翻译成任何语言。
在下列情况下,不能享受产品保修或维修服务:(1) 产品被修理、修改或改动,除非此类修理、修改或改动得到 ASUS 的书面授权;(2) 产品序列号损毁或缺失。
ASUS“按原样”提供本手册,不提供任何明示或隐含的担保,包括但不限于对于适销性或针对特定目的的适用性的隐含担保或条件。
无论在任何情况下,ASUS 及其董事成员、高级职员、员工或代理不对由于本手册或产品中存在任何缺陷或错误而导致的任何间接、特殊、偶然或必然损失(包括收益损失、业务损失、不能使用或数据丢失、业务中断等)承担任何责任,即使 ASUS 已被告知此类损失的可能性。
本手册中包含的规格和信息仅供一般性参考,可能会随时变更而无需另行通知,因此不应构成ASUS 的承诺。
ASUS 对本手册(包括其中介绍的产品和软件)中可能存在的任何错误不承担任何责任。
本手册中出现的产品名称和公司名称可能分别是或不是相应公司的注册商标或版权,仅用于标示或解释目的,无意侵犯其所有者的权益。
ii声明 (iv)安全信息 (v)保养和清洁 (vi)中国产品回收服务 (vii)第 1 章:产品介绍1.1 欢迎使用!...........................................................................1-11.2 物品清单 ..............................................................................1-11.3 显示器简介...........................................................................1-21.3.1 前部概览.................................................................1-21.3.2 后部概览.................................................................1-31.3.3 GamePlus 功能 ......................................................1-41.3.4 GameVisual 功能 ...................................................1-5第 2 章:设置2.1 安装显示器支撑臂/底座........................................................2-12.2 调整显示器...........................................................................2-22.3 连接线缆 ..............................................................................2-32.4 打开显示器电源....................................................................2-3第 3 章:一般说明3.1 OSD(屏幕显示)菜单 ........................................................3-13.1.1 如何重新配置..........................................................3-1功能介绍 ........................................................3-13.1.2 OSD3.2 规格摘要 ..............................................................................3-73.3 外形尺寸 ..............................................................................3-93.4 故障排除(常见问题).......................................................3-103.5 支持的运行模式..................................................................3-11iii联邦通信委员会声明本设备符合 FCC 规则第 15 部分的要求其操作符合以下两项条件:• 此设备不会产生有害干扰,并且• 此设备必须可以承受任何接收到的干扰,包括可能导致不正常操作的干扰。
27英寸4K+144 Hz高刷HKC PG271U高端MiniLED显示器

27英寸4K+144 Hz高刷HKC PG271U高端MiniLED显示器作者:曾巍奕来源:《计算机与网络》2022年第12期MiniLED近2年成为显示行业的热捧技术,正在快速向市场化量产推进,市场中不乏采用MiniLED的电视和显示器进入消费者视野,并且价格也有望继续下探。
近日,惠科集团旗下HKC推出了型号为PG271U的新品电竞MiniLED显示器,成为高端MiniLED显示器率先占领市场的探路先锋。
从产品定位来看,HKC PG271U是一款定位电竞的高端显示器,箱子外观明显标注“未来电竞显示器”字样,可以看出HKC对这款产品的期望相当具有野心。
一反电竞给人的黑红印象,这款显示器使用的居然是灰白色基调,颇有未来感,不仅显示器机身背板,连接支架、底座同样是灰白色。
电源线、19 V 11 A电源适配器以及附带的HDMI2.1线和DP1.4线则是纯白色的。
显示器无需工具即可快速安装,支持-5°~ -120°俯仰调节,但需要注意的是,支架被设计为杆式旋转结构,所以显示器的高低调节会同时让显示器进行前后运动,显示器调高时距离用户较远,调低时距离则较近。
显示器背部中央设计了一道弧形的RGB灯带,能够发出多种颜色和亮度的灯效,并支持自主调节,灯一亮,有电竞感那味了。
显示器缝隙连接紧密,做工精致,尤其是显示器灰白色部分的类肤涂层相当具有质感,用手直接触摸给人的感觉很舒服,符合高端产品的品控。
显示器配备了多达7个外接拓展接口,其中包括2个HDMI2.1显示接口,1个标准DP1.4高速显示接口,1个Type-C显示+充电接口,Type-C支持最高90 W PD协议反向充电。
另外3个接口分别为1个Type-B输入转2个Type-A USB 3.2输出口,1个3.5 mm音频输出口,接口的配置和丰富程度完全够绝大部分用户使用。
由于目前MiniLED技术发展限制,这阶段的MiniLED显示器的厚度不太可能做到太薄,所以显示器存在一定的背包感,但弧形的设计让最薄处表现尚可,不会有过厚的感知,从背面给人的第一感觉,科技感依然还是很强的。
VG278Q 用户手册说明书
用户手册版权所有© 2020 ASUSTeK COMPUTER INC.保留所有权利。
除了购买者出于备份目的而保留的文档外,未经 ASUSTeK COMPUTER INC.(以下简称“ASUS ”)明确书面许可,不得以任何形式或通过任何方式复制、传播、转录本手册的任何部分,包括其中介绍的产品和软件,也不得将其存储到检索系统中或翻译成任何语言。
在下列情况下,不能享受产品保修或维修服务:(1) 未获得ASUS 书面授权,而修理、修改或改动产品;(2) 产品序列号损毁或缺失。
ASUS “按原样”提供本手册,不提供任何明示或隐含的担保,包括但不限于对于适销性或针对特定目的的适用性的隐含担保或条件。
无论在任何情况下,ASUS 及其董事成员、高级职员、员工或代理不对由于本手册或产品中存在任何缺陷或错误而导致的任何间接、特殊、偶然或必然损失(包括收益损失、业务损失、不能使用或数据丢失、业务中断等)承担任何责任,即使 ASUS 已被告知此类损失的可能性。
本手册中包含的规格和信息仅供一般性参考,可能会随时变更而不另行通知,因此不应构成 ASUS 的承诺。
ASUS 对本手册(包括其中介绍的产品和软件)中可能存在的任何错误不承担任何责任。
本手册中出现的产品名称和公司名称可能分别是或不是相应公司的注册商标或版权,仅用于标示或解释目的,无意侵犯其所有者的权益。
声明...............................................................................................................iii 安全信息 .......................................................................................................iv 保养和清洁. (vi)1.1欢迎使用.........................................................................................1-11.2物品清单.........................................................................................1-11.3组装显示器 .....................................................................................1-21.4连接线缆.........................................................................................1-31.4.1 液晶显示器后部 ...............................................................1-31.5显示器简介 .....................................................................................1-41.5.1 使用控制按钮 .................................................................1-42.1调整显示器 .....................................................................................1-62.2 外形尺寸.........................................................................................2-12.3 卸下支撑臂/底座(VESA 壁挂安装时) ...........................2-23.1 OSD (屏幕显示)菜单...................................................................2-33.1.1 如何重新配置 ..................................................................2-33.1.2 OSD 功能介绍 .................................................................3-15.PIP/PBP 设置...............................................................................3-53.2规格 ................................................................................................3-93.3故障排除(常见问题) .................................................................3-103.4 支持的时序列表 ............................................................................3-11联邦通信委员会声明本设备符合 FCC 规则第 15 部分的要求。
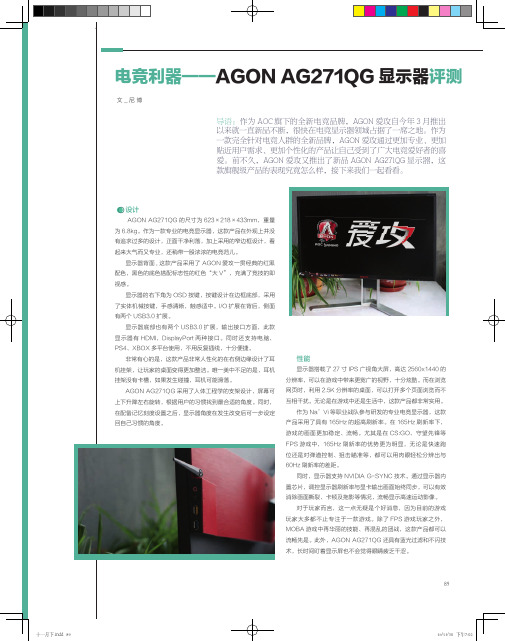
电竞利器——AGON AG271QG显示器评测
性能
显示器搭载了 27 寸 IPS 广视角大屏,高达 2560x1440 的 分辨率,可以在游戏中带来更宽广的视野,十分炫酷。而在浏览 网页时,利用 2.5K 分辨率的桌面,可以打开多个页面浏览而不 互相干扰。无论是在游戏中还是生活中,这款产品都非常实用。 作为 Na’Vi 等职业战队参与研发的专业电竞显示器,这款 产品采用了具有 165Hz 的超高刷新率。在 165Hz 刷新率下, 游戏的画面更加稳定、流畅。尤其是在 CS:GO、守望先锋等 FPS 游戏中,165Hz 刷新率的优势更为明显,无论是快速跑 位还是对弹道控制、狙击瞄准等,都可以用肉眼轻松分辨出与 60Hz 刷新率的差距。 同时,显示器支持 NVIDIA G-SYNC 技术。通过显示器内 置芯片,调控显示器刷新率与显卡输出画面始终同步,可以有效 消除画面撕裂、卡顿及拖影等情况,流畅显示高速运动影像。 对于玩家而言,这一点无疑是个好消息,因为目前的游戏 玩家大多都不止专注于一款游戏。除了 FPS 游戏玩家之外, MOBA 游戏中再华丽的技能、再混乱的团战,这款产品都可以 流畅先是。此外,AGON AG271QG 还具有蓝光过滤和不闪技 术,长时间盯着显示屏也不会觉得眼睛疲乏干涩。
总结
总体而言,AGON AG271QG 在各方面的 表现都达到了专业级的显示器水准。不过即便 如此,这款产品相比自家其他型号还是要贵了 不少,毕竟除了将刷新率提升到 165Hz 以外, 之前被较为诟病的色域、 视角问题, 现在解决了。 作 为 新 一 代 旗 舰 级 显 示 器,AGON AG271QG 解决了之前电竞显示器的硬伤。但 就价格而言,的确可以看出是定位于高端显示 器。 除 了 在 游 戏 中 拥 有 专 业 的 表 现 之 外, AGON AG271QG 在平时追剧看电影时也有着 不错的表现。虽然价格不菲,但如果经济条件 允许或是专业的电竞发烧友,这款产品绝对是 是非常值得推荐的。
华硕显示器说明书(型号:PG259QNR)
第二版2020 年 11 月版权所有 © 2020 ASUSTeK COMPUTER INC. 保留所有权利。
未经 ASUSTeK COMPUTER INC.(“ASUS”) 明确书面同意,不得以任何形式或通过任何方式复制、传播、转录本手册的任何部分,包括其中介绍的产品和软件,也不得存储到检索系统中或翻译成任何语言,购买者出于备份目的而保留的文档除外。
在下列情况下,不能享受产品保修或维修服务:(1) 产品被修理、修改或改动,除非此类修理、修改或改动得到 ASUS 的书面授权;(2) 产品序列号损毁或缺失。
ASUS“按原样”提供本手册,不提供任何明示或隐含的担保,包括但不限于对于适销性或针对特定目的的适用性的隐含担保或条件。
无论在任何情况下,ASUS 及其董事成员、高级职员、员工或代理不对由于本手册或产品中存在任何缺陷或错误而导致的任何间接、特殊、偶然或必然损失(包括收益损失、业务损失、不能使用或数据丢失、业务中断等)承担任何责任,即使 ASUS 已被告知此类损失的可能性。
本手册中包含的规格和信息仅供一般性参考,可能会随时变更而无需另行通知,因此不应构成 ASUS 的承诺。
ASUS 对本手册(包括其中介绍的产品和软件)中可能存在的任何错误不承担任何责任。
本手册中出现的产品名称和公司名称可能分别是或不是相应公司的注册商标或版权,仅用于标示或解释目的,无意侵犯其所有者的权益。
ii声明 ..... (iv)安全信息 (v)保养和清洁 (vi)中国产品回收服务 (vii)第 1 章:产品介绍1.1 欢迎使用! .....................................................................................1-11.2 物品清单.........................................................................................1-11.3 显示器简介 .....................................................................................1-21.3.1 前部概览/侧面概览 ........................................................1-21.3.2 后部概览..........................................................................1-3功能 ...............................................................1-41.3.3 GamePlus功能 ............................................................1-51.3.4 GameVisual1.3.5 G-SYNC HDR .................................................................1-5第 2 章:设置2.1 安装显示器支撑臂/底座 ................................................................2-12.2 使用 C 型夹(适用于 PG259QNR) ..............................................2-22.3 线缆管理.........................................................................................2-32.4 调整显示器 .....................................................................................2-32.5 卸下支撑臂(VESA 壁挂安装时) .................................................2-52.6 连接线缆.........................................................................................2-62.7 打开显示器电源 ..............................................................................2-6第 3 章:一般说明3.1 OSD(屏幕显示)菜单...................................................................3-13.1.1 如何重新配置 ..................................................................3-1功能介绍.................................................................3-23.1.2 OSD3.2 Aura ...............................................................................................3-83.3 规格摘要.........................................................................................3-93.4 外形尺寸.......................................................................................3-113.5 故障排除(常见问题) .................................................................3-12iiiiv联邦通信委员会声明本设备符合 FCC 规则第 15 部分的要求。
4K@144Hz与DSC技术加持ROG Strix XG27UQ电竞显示器

ROG Strix XG27UQ电竞显示器竞显示器4K@144Hz与DSC技术加持传承家族式外观设计近几年来,更新频率明显加快了许多,品非常丰富。
显示器,一致,仅有一些细微的差别。
XG27UQ就是一款传承了ROG家族式外观设计的产品,度的螺分ROG系列和TUF系列的重要标识之一。
在底座上依然设计有影灯效,更换的,疲劳。
与早期的ROG电竞显示器不同的是,XG27UQ除了在底座上配备有投影灯效外,Logo,配合其他支持华硕AURA SYNC灯效同步的硬件就能打造统一变换的灯效。
即便是单独使用,灯效就会自动在预设的颜色中进行切换。
中的“灯光效果”了灯效的可玩性。
背部设计有一个硕大的“败家之眼”Logo,支持AURA灯效同步传承近几更新频率品非常丰仅有XG27U 外观设计分ROG系在底与早XG2之眼”Lo 配合其他步的硬件即便是单模式,灯“灯了灯效的 接口部分采用了“2+2”的HDMI和DP接口组合 接 背部设计 背ROG Strix XG27UQ支持HDR,需要在Windows设置中开启。
通过对比可以看到在4K@144Hz下,“UFO”在运动时会更加连贯,没有出现明显脱节现象。
支持NVIDIA G-SYNC Compatible技术供更顺畅的游戏体验。
其技术原理是通过LED背光面板的快速 ROG Strix XG27UQ支持DSC显示流压缩技术,只需通过一根DisplayPort线即可实现4K@144Hz无损画质。
ROG Strix XG27UQ内置的ELMB技术示意ROG Strix XG27UQ内置了多项游戏功能让我们拭目以待。
ROG Strix XG27UQ的sRGB、AdobeRGB、DCI-P3色域覆盖面积分别达到了100%、84%、90%,色彩饱和度高。
ROG Strix XG27UQ的亮度值比较高,最高亮度达到了562.2cd/m2,远高于DisplayHDR 认证标准的400cd/m2。
ASUS PG279Q系列LCD监视器用户指南第二版九月2015年版权所有说明书
PG279Q series LCD MonitorUser GuideFirst EditionSeptember 2015Copyright © 2015 ASUSTeK COMPUTER INC. All Rights Reserved.No part of this manual, including the products and software described in it, may be reproduced,transmitted, transcribed, stored in a retrieval system, or translated into any language in any form or by any means, except documentation kept by the purchaser for backup purposes, without the express writtenpermission of ASUSTeK COMPUTER INC. (“ASUS”).Product warranty or service will not be extended if: (1) the product is repaired, modified or altered, unless such repair, modification of alteration is authorized in writing byASUS; or (2) the serial number of theproduct is defaced or missing.ASUS PROVIDES THIS MANUAL “AS IS” WITHOUT WARRANTY OF ANY KIND, EITHER EXPRESS OR IMPLIED, INCLUDING BUT NOT LIMITED TO THE IMPLIED WARRANTIES OR CONDITIONS OF MERCHANTABILITY OR FITNESS FOR A PARTICULAR PURPOSE. IN NO EVENT SHALL ASUS, ITS DIRECTORS, OFFICERS, EMPLOYEES OR AGENTS BE LIABLE FOR ANY INDIRECT, SPECIAL,INCIDENTAL, OR CONSEQUENTIAL DAMAGES (INCLUDING DAMAGES FOR LOSS OF PROFITS, LOSS OF BUSINESS, LOSS OF USE OR DATA, INTERRUPTION OF BUSINESS AND THE LIKE),EVEN IF ASUS HAS BEEN ADVISED OF THE POSSIBILITY OF SUCH DAMAGES ARISING FROMANY DEFECT OR ERROR IN THIS MANUAL OR PRODUCT.SPECIFICATIONS AND INFORMATION CONTAINED IN THIS MANUAL ARE FURNISHED FORINFORMATIONAL USE ONLY, AND ARE SUBJECT TO CHANGE AT ANY TIME WITHOUT NOTICE, AND SHOULD NOT BE CONSTRUED AS A COMMITMENT BY ASUS. ASUS ASSUMES NORESPONSIBILITY OR LIABILITY FOR ANY ERRORS OR INACCURACIES THAT MAY APPEAR INTHIS MANUAL, INCLUDING THE PRODUCTS AND SOFTWARE DESCRIBED IN IT.Products and corporate names appearing in this manual may or may not be registered trademarks orcopyrights of their respective companies, and are used only for identification or explanation nd to theowners’ benefit, without intent to infringe.iiContents Notices (iv)rmation (v)Care.&.Cleaning (vi)Takeback.Services (vii)Chapter.1:.....Product.introduction1.1.Welcome!.......................................................................................1-11.2.Package.contents..........................................................................1-11.3.1 Front view .......................................................................1-21.3.2 Back view ........................................................................1-31.3.3 GamePlus Function ........................................................1-41.3.4 TURBO Function (only for DisplayPort input) .................1-5 Chapter.2:.....Setup2.1.Adjusting.the.monitor...................................................................2-12.2.Detaching.the.arm.(for.VESA.wall.mount)..................................2-22.3.Connecting.the.cables..................................................................2-22.4.Turning.on.the.monitor.................................................................2-3 Chapter.3:.....General.instructions3.1.OSD.(On-Screen.Display).menu..................................................3-13.1.1 How to reconfigure ..........................................................3-13.1.2 OSD function introduction ...............................................3-13.2.Specifications.summary...............................................................3-63.3.Supported.operating.mode..........................................................3-8iiiNoticesmission.StatementThis device complies with Part 15 of the FCC Rules. Operation is subject to the following two conditions:• This device may not cause harmful interference, and• This device must accept any interference received including interference that may cause undesired operation.This equipment has been tested and found to comply with the limits for aClass B digital device, pursuant to Part 15 of the FCC Rules. These limits are designed to provide reasonable protection against harmful interference in a residential installation. This equipment generates, uses and can radiate radio frequency energy and, if not installed and used in accordance with manufacturer’s instructions, may cause harmful interference to radio communications. However, there is no guarantee that interference will not occur in a particular installation. If this equipment does cause harmful interference to radio or television reception, which can be determined by turning the equipment off and on, the user is encouraged to try to correct the interference by one or more of the following measures:• Reorient or relocate the receiving antenna.• Increase the separation between the equipment and receiver.• Connect the equipment to an outlet on a circuit different from that to which the receiver is connected.• Consult the dealer or an experienced radio/TV technician for help.The use of shielded cables for connection of the monitor to the graphics card isrequired to assure compliance with FCC regulations. Changes or modificationsto this unit not expressly approved by the party responsible for compliancecould void the user’s authority to operate this equipment.As an Energy Star® Partner, our company has determined that thisproduct meets the Energy Star® guidelines for energy efficiency.munications.StatementThis digital apparatus does not exceed the Class B limits for radio noise emissions from digital apparatus set out in the Radio Interference Regulations of theCanadian Department of Communications.This class B digital apparatus complies with Canadian ICES-003.This Class B digital apparatus meets all requirements of the Canadian Interference - Causing Equipment Regulations.Cet appareil numérique de la classe B respecte toutes les exigences du Réglementsur le matériel brouiller du Canada.ivvSafety information•Before setting up the monitor, carefully read all the documentation that came with the package. •To prevent fire or shock hazard, never expose the monitor to rain or moisture. •Never try to open the monitor cabinet. The dangerous high voltages inside the monitor may result in serious physical injury. •If the power supply is broken, do not try to fix it by yourself. Contact a qualified service technician or your retailer. • Before using the product, make sure all cables are correctly connected and the power cables are not damaged. If you detect any damage, contact your dealer immediately.• Slots and openings on the back or top of the cabinet are provided for ventilation. Do not block these slots. Never place this product near or over a radiator or heat source unless proper ventilation is provided.• The monitor should be operated only from the type of power source indicated on the label. If you are not sure of the type of power supply to your home, consult your dealer or local power company.• Use the appropriate power plug which complies with your local power standard. • Do not overload power strips and extention cords. Overloading can result in fire or electric shock.• Avoid dust, humidity, and temperature extremes. Do not place the monitor in any area where it may become wet. Place the monitor on a stable surface. • Unplug the unit during a lightning storm or if it will not be used for a long period of time. This will protect the monitor from damage due to power surges.• Never push objects or spill liquid of any kind into the slots on the monitor cabinet.• To ensure satisfactory operation, use the monitor only with UL listed computers which have appropriate configured receptacles marked between 100-240V AC.• If you encounter technical problems with the monitor, contact a qualified service technician or your retailer.•The adapter is only used for this monitor, do not use it for other purpose. Your device uses one of the following power supplies: - Manufacturer: Delta Electronics Inc., Model: ADP-90YD B / ADP-120RH BThis symbol of the crossed out wheeled bin indicates that the product (electrical, electronic equipment, and mercury-containing button cell battery) should not be placed in municipal waste. Please check local regulations for disposal ofelectronic products.AEEE.yönetmeliğine.uygundurviCare & Cleaning• Before you lift or reposition your monitor, it is better to disconnect the cables and power cord. Follow the correct lifting techniques when positioning the monitor. When lifting or carrying the monitor, grasp the edges of the monitor. Do not lift the display by the stand or the cord.• Cleaning. Turn your monitor off and unplug the power cord. Clean the monitor surface with a lint-free, non-abrasive cloth. Stubborn stains may be removed with a cloth dampened with mild cleaner.•Avoid using a cleaner containing alcohol or acetone. Use a cleaner intended for use with the monitor. Never spray cleaner directly on the screen, as it may drip inside the monitor and cause an electric shock. The.following.symptoms.are.normal.with.the.monitor:• The screen may flicker during the initial use due to the nature of the fluorescent light. Turn off the Power Switch and turn it on again to make sure that the flicker disappears.• You may find slightly uneven brightness on the screen depending on the desktop pattern you use.• When the same image is displayed for hours, an afterimage of the previous screen may remain after switching the image. The screen will recover slowly or you can turn off the Power Switch for hours.•When the screen becomes black or flashes, or cannot work anymore, contact your dealer or service center to fix it. Do not repair the screen by yourself!ed.in.this.guideWARNING: Information to prevent injury to yourself when trying tocomplete a task.CAUTION: Information to prevent damage to the components when tryingto complete a task.IMPORTANT: Information that you MUST follow to complete a task.NOTE: Tips and additional information to aid in completing a task.rmationRefer to the following sources for additional information and for product and software updates.1..ASUS.websitesThe ASUS websites worldwide provide updated information on ASUShardware and software products. Refer to 2..Optional.documentationYour product package may include optional documentation that may havebeen added by your dealer. These documents are not part of the standardpackage.Takeback ServicesASUS recycling and takeback programs come from our commitment to the highest standards for protecting our environment. We believe in providing solutions forour customers to be able to responsibly recycle our products, batteries and other components as well as the packaging materials.Please go to /english/Takeback.htm for detail recycling information in different region.viiviii1.1 Welcome!Thank you for purchasing the ASUS® LCD monitor!The latest widescreen LCD monitor from ASUS provides a broader, brighter and crystal-clear display, plus a host of features that enhance your viewing experience. With these features, you can enjoy the convenience and delightful visual experience that the monitor brings to you!1.2 Package contentsCheck your package for the following items:LCD monitorDriver and Manual discQuick start guideWarranty cardPower adapterPower cordDP cableHDMI cableUSB cableIf any of the above items is damaged or missing, contact your retailerimmediately.Select “ON” when you see the message “LIGHT IN MOTION ON/OFF” appearsif you want to turn on the red light on the base. Select “OFF” if you want it toturn off. If you disable this function but later wish to reactivate it, please usethe OSD menu to turn it on. The monitor is Energy Star 6.0 compatible when“LIGHT IN MOTION” is “OFF”.If no signal is detected for 120 seconds, the monitor automatically enters savingmode.It is recommended that you set the DisplayPort Deep Sleep and HDMI DeepSleep functions to “OFF”.1-1 ASUS PG279Q Series LCD Monitor1-2Chapter 1: Product introduction 1.3 Monitor introduction1.3.1.Front.view1.2. • Exits the OSD menu item.• Turns on the OSD menu when the monitor enters standby mode or displays the “NO SIGNAL“ message.3. button:• GamePlus hotkey. Move the press • Turns on the OSD menu when the monitor enters standby mode or displays the “NO SIGNAL“ message.4. button• TURBO hotkey. Press the button to select among different refresh rates. (Only for DisplayPort input)• Turns on the OSD menu when the monitor enters standby mode or displays the “NO SIGNAL“ message.5.• Turns the monitor on/off.The color definition of the power indicator is as the below table.•1.3.2.Back.viewRear.connectors1..DC-IN.port. This port connects the power cord.2..Earphone.jack. This port is only available when an HDMI/DisplayPort cableis connected.3..DisplayPort. This port is for connection for a DisplayPort compatible device.4..HDMI.port. This port is for connection with an HDMI compatible device.B.3.0.upstream.port. This port is for connection with a USB upstreamcable. The connection enables the USB ports on the monitor.B.3.0.downstream.ports. These ports are for connection with USBdevices, such as USB keyboard/mouse, USB flash drive, etc.7. For service personnel only.8..Kensington.lock.slot.9..Control.buttons.ASUS PG279Q Series LCD Monitor1-31.3.3.GamePlus.FunctionThe GamePlus function provides a toolkit and creates a better gaming environment for users when playing different types of games. In addition, Crosshair function is specially designed for new gamers or beginners interested in First Person Shooter (FPS) games.To active GamePlus:1. Press the GamePlus hotkey.2. Move the3. Press the) button or move thefunction you choose, and move thethrough the settings. Move the4. Highlight the desired setting and press thePress the button to inactivate it.1-4Chapter 1: Product introduction1.3.4.TURBO.Function.(only.for.DisplayPort.input)The TURBO function helps you select among different refresh rates in a convenient way.To active TURBO:Press the TURBO hotkey repeatedly to select.ASUS PG279Q Series LCD Monitor1-51-6Chapter 1: Product introduction2-1ASUS PG279Q Series LCD Monitor 2.1Adjusting the monitor• For optimal viewing, we recommend that you look at the full face of the monitor, then adjust the monitor to the angle that is most comfortable for you.• Hold the stand to prevent the monitor from falling when you change its angle.•The recommended adjusting angle is +20˚ to -5˚ (for tilt)/+60˚ to -60˚ (for swiveling/ +120 mm (for height adjustment)/90˚ (for portrait view).-5° ~ +20°It is normal that the monitor slightly shakes while you adjust the viewing angle.Pivoting.the.monitor 1. Lift the monitor to the highest position.2 Tilt the monitor to its maximum angle.3.Pivot the monitor clockwise to the angle you need.-5° ~ +20°It is normal that the monitor slightly shakes while you adjust the viewing angle.Figure 1Figure 2Figure 32-2Chapter 2: Setup2.2Detaching the arm (for VESA wall mount)The detachable arm of this monitor is specially designed for VESA wall mount. To detach the arm:1. Have the front of the monitor face down on a table.2.Loosen the four screws on the back of the monitor and remove the arm/base.We recommend that you cover the table surface with soft cloth to preventdamage to the monitor.2.3 Connecting the cablesConnect the cables as the following instructions:•.To.connect.the.power.cord :a. Connect the power adapter securely to the monitor’s DC input.b. Connect one end of the power cord to the power adapter and the otherend to a power outlet.•.To.connect.the.DisplayPort/HDMI.cable:a. Plug one end of the DisplayPort cable to the monitor’s DisplayPort/HDMIport.b. Connect the other end of the DisplayPort/HDMI cable to your computer'sDisplayPort port.•e.the.earphone: connect the end with plug type to the monitor’s earphone jack when an HDMI or DisplayPort signal is fed.•B.3.0.ports: Take the supplied USB 3.0 cable, and plug the smaller end (type B) of the USB upstream cable to the monitor’s USBupstream port, and the larger end (type A) to your computer’s USB 3.0 port.Make sure your computer is installed with the lastest Windows 7/Windows 8operating system. That will enable the USB ports on the monitor to work.2.4 Turning on the monitorASUS PG279Q Series LCD Monitor2-32-4Chapter 2: Setup3-1ASUS PG279Q Series LCD Monitor 3.1OSD (On-Screen Display) menu3.1.1.How.to.reconfigure1. Press the2.Move the ) button up/down to navigate through the functions. Highlight the desired function and press the (the function selected has a sub-menu, move the again to navigate through the sub-menu functions. Highlight the desired sub-menu function and press the right to activate it. 3. Move the function.4.To exit and save the OSD menu, press the button or move the ) left repeatedly until the OSD menu disappears. To adjust other functions, repeat steps 1-3.3.1.2.OSD.function.introduction1..Over.ClockingThis function allows you to adjust the refresh rate.• Select “ON” if you want to enable this function.3-2Chapter 3: General Instructions•.Max.Refresh.Rate : After activating this function, you can select one refresh rate to be displayed along with 60 Hz and 120 Hz when pressing the TURBO hotkey (Only for DisplayPort input).After reboot, test the new Max Refresh Rate by enabling it in the NVIDIAControl Panel. If you don’t see an image, disconnect the DP cable and use themonitor OSD to try again with a safer Max Refresh Rate.2..GameVisualThis function contains 6 sub-functions you can select for your preference. Each mode has the Reset selection, allowing you to maintain your setting or return to the preset mode.•.Scenery.Mode : This is the best choice for scenery photo displaying with GameVisual TM Video intelligence Technology.•.Racing.Mode : This is the best choice for racing game playing with GameVisual TM Video intelligence Technology.•.Cinema.Mode : This is the best choice for movie watching with GameVisual TM Video intelligence Technology.•.RTS/RPG.Mode : This is the best choice for Real-Time Strategy (RTS)/Role-Playing Game (RPG) playing with GameVisual TM Video intelligence Technology.•.FPS.Mode : This is the best choice for First Person Shooter game playing with GameVisual TM Video intelligence Technology.•.sRGB.Mode : This is the best choice for viewing photos and graphics from PCs.• In the Racing mode, the following function(s) are not user-configurable: Saturation.• In the sRGB mode, the following function(s) are not user-configurable: Saturation, Color Temp., Brightness, Contrast.3..Blue.Light.FilterIn this function, you can adjust the blue light filter level.•.Level.0:.No change.•.Level.1~4: The higher the level, the less blue light is scattered.When Blue Light Filter is activated,the default settings of Racing Modewill be automatically imported. Between Level 1 to Level 3, the Brightnessfunction is user-configurable. Level 4 is optimized setting. It is compliancewith TUV Low Blue Light Certification. The Brightness function is not user-configurable.4..ColorYou can adjust Brightness, Contrast, Saturation and Color temperature from this menu.•.Brightness: the adjusting range is from 0 to 100.•.Contrast: the adjusting range is from 0 to 100.•.Saturation: The adjusting range is from 0 to 100.•.Color.Temp.: contains 4 modes including Cool, Normal, Warm, and User Mode.5..Image.You can adjust OD and ULMB from this menu.•.OD: Improves the gray level response time of the LCD panel.•.ULMB.(Ultra Low Motion Blur) (only for DisplayPort input): Adjusts the level of motion blur reduction. This function is available when the refreshrate is 85Hz, 100Hz or 120Hz.6..Input.Select.In this function, you can select your desired input source.7..System.Setup.Allows you to adjust the system.•.Language: There are 21 languages for your selection, including English, French, German, Italian, Spanish, Dutch, Portuguese, Russian, Czech,Croatian, Polish, Romanian, Hungarian, Turkish, Simplified Chinese,Traditional Chinese, Japanese, Korean, Thai, Indonesia, Persian.•.OSD.Position: Adjusts the horizontal position (H-Position)/the vertical position (V-Position) of the OSD.•.Transparency: Adjusts the OSD background from opaque to transparent.•.OSD.Timeout: Adjusts the OSD timeout from 10 to 120 seconds.•.Keylock: To disable all function keys. Press over 5 seconds to cancel the key lock function.•.Information: Shows the monitor information.•.LIGHT.IN.MOTION: Select“ON” if you want to turn on the red light on the base.•.Sound:*.Volume: the adjusting range is from 0 to 100.*.Mute: toggles the monitor sound between on and off.•.All.Reset: “Yes” allows you to restore the default settings.•.DisplayPort.Deep.Sleep: puts the DisplayPort port into deep sleep.•.HDMI.Deep.Sleep: puts the HDMI port into deep sleep.In order to be Energy Star compliant, the default setting for DisplayPort DeepSleep and HDMI Deep Sleep is “On”.If the monitor cannot wake up after going into deep sleep, do one of thefollowings:3.2 Specifications summary*Specifications are subject to change without notice.3.3 Troubleshooting (FAQ)3.4 Supported operating modeHDMI inputNote:Do not support interlace.DisplayPort inputNote:Do not support interlace.G-SYNC (only for DisplayPort input) supported NVIDIA GPUs: GeForce GTX TITAN X, GeForce GTX 980 Ti, GeForce GTX 980, GeForce GTX 970, GeForce GTX 960, GeForce GTX TITAN Z, GeForce GTX TITAN Black, GeForce GTX TITAN, GeForce GTX 780 Ti, GeForce GTX 780, GeForce GTX 770, GeForce GTX 760, GeForce GTX 750 Ti, GeForce GTX 750, GeForce GTX 745 (OEM), GeForce GTX 690, GeForce GTX 680, GeForce GTX 670, GeForce GTX 660 Ti, GeForce GTX 660, GeForce GTX 650 Ti BOOST. For other GPUs, please contact the manufactures to see if they are compatible.DisplayPort.input--Over.clockingNote:.Do.not.support.interlace.Over.Clocking.supported.GPUs:.NVIDIA.Maxwell.GPU.Graphics.Card.like.GTX745,.GTX750,.GTX750. Ti,.GTX.960,.GTX970,.GTX980,.GTX980.Ti.and.GTX.Titan.X..For.other.GPUs,.please.contact.the. patible.The.monitor.is.purposely.supporting.the.NVIDIA.G-SYNC.technology.and.targeting.NVIDIA.graphics. solutions..Please.note.that.Over.Clocking.function/performance.depends.on.the.GPUs.or.contents.displayed.. ASUS.only.provides.this.function..The.performance.or.any.side.effect.after.activation.is.not. guaranteed...。
支持FreeSyncl 华硕MG279Q深度体验

弓 的主 要是消 除游 戏画 面中容 易出 角式 的设 量 而 是 采用 了普通 的栅栏 式 散 也得 以延续 。 按下 决捷键就 能打开 辅助 瞄 裂、 卡顿 、 延 迟现 象。 i ≯
鹰褰牙 鼹的背后底部是MG 2 7 9 Q ̄口 准功 能和计 时器 功能 , 不 管是对于 电竞 高
显示器—— MG2 7 9 0就是其 中之一! 其实 , 在今年 的台北Co mp u f e × 2 O 1 5 上, 我们就一 睹过MG2 7 9 Q的风采 , 而
本 期 我们将实际体验这款支持 F r e e S y n c 的 电竞 显 示 器 给 我 们 带来 的 快 感 。
“ o C om p
2 3
-1
¨ ¨ ¨ ¨ 帖 ¨ ¨ 啦 ¨ 0 I 8 0 %的N T S C色域覆盖范围已经达到 了一个中上的
水平
■ O . 7 6 的 △E 值表现 出色 ,甚至与一 些专业自
相 当 ,有 过 之 而 无不 及 。
2 e % 3 O % 4 0 % 5 0 % 6 0 % 7 0 % 8 0 % 9 0 % 1 0 0 %
墨 同 样 的 , MG2 7 { 色温 稳定 性 表现也
给力 ,曲线很平稳 。
一-.
口 一 一 一 。 圈 _ 一 一 一
_ I
,
e
自从N Vl DI A推 出G— S YNC同步技术以来 , 可以说为游戏 、 电竟显示 器的 发展增色 不少。 当然 , 作为NV l DI A的最
强对手, AMD也没闲着, 其推 出的F r e e S y n c 同步技术也开始全面应 用于各品牌显示器..
u 2 2
深度体 验
平价“超跑” “试驾”游戏悍将AS27UC-PRO电竞显示器

平价“超跑”“试驾”游戏悍将AS27UC-PRO电竞显示器作者:***来源:《微型计算机》2020年第03期相信经常关注电竞显示器的玩家对国内流传的“四大金刚”并不陌生,就算不清楚也有所耳闻。
所谓“四大金刚”其实是指显示器的硬件参数:144Hz及以上的刷新率、2.5K分辨率、G-SYNC技术、IPS面板。
在当时又正好有四款产品具备这样的参数要求,分别是华硕PG279Q、AOC AG271QG、掠夺者XB271HU bmiprz、优派XG2703-GS,这样“四大金刚”就开始流传开来。
以现在来看,这些参数虽然已经算不上顶级,但是也并不落伍,不过取而代之的是更高端的4K@144Hz电竞显示器。
在2018年,具备4K@144Hz的电竞显示器还只有ROG PG27UQ和acer Predator X27两款代表产品,价格更是高高在上,近两万元的售价着实不便宜,堪称电竞显示器中的“超跑”。
时隔一年,由于生产成本逐渐下降,4K@144Hz的电竞显示器开始多了起来,像我们本期体验的游戏悍将AS27UC-PRO就是其中之一,可以说是平价“超跑”。
电竞化的外观设计既然定位于电竞显示器,那么在外观上就要给人电竞的气息。
游戏悍将AS27UC-PRO的整体外观设计采用了黑色的外观,在底座上、支架提手上辅以红色进行点缀。
这种红黑式的配色,似乎有一种战斗的味道。
AS27UG-PRO的整体设计看上去比较清爽、干练,不像其他电竞显示器设计得很激进。
A827UC-PRO采用的是人体工学支架,支架支持上下升降和旋转调节,帮助玩家找到最适合自己的姿势。
同时,AS27UC-PRO也支持用户安装第三方支架,孔位规格为75mmx75mm。
接口方面,与很多显示器设计在底部不同的是,A827UC-PRO是设计在背部靠下方的位置。
它的HDMI和DisplayPort接口各配备有两个,并且还有一个USB Type-C接口以及3.5mm 音频输出接口接口。
4K@144Hz与DSC技术加持 ROG Strix XG27UQ电竞显示器
4K@144Hz与DSC技术加持ROG Strix XG27UQ电竞显示器作为电竞玩家,选择一款高性能的电竞显示器是非常重要的。
ROG Strix XG27UQ电竞显示器就是一款值得推荐的产品。
它采用了4K分辨率、144Hz刷新率和DSC技术,为用户带来了更加流畅、清晰的游戏体验。
ROG Strix XG27UQ采用27英寸的IPS面板,分辨率高达3840x2160,支持HDR,显示效果清晰细腻。
IPS面板具有更好的色彩还原性能、更广的可视角度和更好的色彩饱和度,让游戏画面更加绚丽。
而4K分辨率的显示效果更是进一步提升了游戏画面的细节和清晰度,让玩家在游戏中能够看到更多精彩的细节。
ROG Strix XG27UQ支持144Hz的刷新率,这意味着在游戏中画面的流畅度更高,反应更加敏捷,能够帮助玩家更好地把握游戏的节奏和时机。
尤其对于FPS游戏和竞技类游戏来说,144Hz的刷新率可以让玩家在激烈的游戏对战中更加快速地做出反应,取得更多的胜利。
ROG Strix XG27UQ还支持DSC技术,即Display Stream Compression,这项技术可以在不牺牲画质的情况下压缩显示信号,从而支持更高的分辨率和刷新率。
这意味着用户可以在使用ROG Strix XG27UQ时,不仅能够获得更高的4K分辨率和144Hz刷新率,还不用担心因为传输带宽不足而影响到画质。
这项技术的支持使得ROG Strix XG27UQ成为一款极为出色的电竞显示器。
ROG Strix XG27UQ还支持Adaptive-Sync技术,这意味着它可以与AMD FreeSync和NVIDIA G-SYNC技术兼容,有效地解决了显示器撕裂、卡顿等问题,让游戏画面更加顺畅。
而且,ROG Strix XG27UQ还搭载了ASUS专利的Shadow Boost技术,可以有效地提高游戏画面的暗部细节,让玩家在暗光环境下,也能够清晰地看见游戏中隐藏的细节,更好地把握游戏局势。
手机对比评测平台评测
手机对比评测平台评测华硕VG278H 华硕VG278H以3D Vision 2作为解决方案,眼镜的舒适度并不如预期般好,虽然镜框和鼻夹使用了更厚、更软的类肤材质,但还是有些重。
与第一代3D Vision眼镜对比,透过它所看到的画面亮度有小幅提升,但如果不是拿着两副眼镜对比,感受并不明显。
靠着27英寸的屏幕,VG278H所呈现的立体画面冲击力很强,可升降的支架很实用,但坐得太近会有偏头的情况,建议玩游戏时坐在距屏幕70cm开外。
VG 2 78 H是唯一一台在菜单中提供了“3 D LightBoost”选项的产品,它能在3D模式下提供更高的亮度。
但我们也注意到,VG278H 虽然在2D模式下的亮度很高,但在开启3D模式后亮度会降低不少。
由于另外两款采用3D Vision的显示器都没有出现这种情况,所以这是由于3D Vision 2造成的,还是样机的个体差异,《微型计算机》评测室之后还会联系更多支持3D Vision 2的显示器以求证。
3D游戏负载2D模式66.9fps3D模式36.4fps3D模式下画面的亮度变化不戴眼镜142cd/m2戴眼镜43cd/m2华硕VG278H测试成绩平均亮度428cd/m2平均黑场0.43cd/m2全开全关对比度995∶1ANSI对比度196∶1亮度不均匀性1.13NTSC色域80.77%优派V3D245优派V3D245虽然内置了3D Vision的接收器,但是它附带的是第一代3D Vision眼镜,显示器本身也不支持3D LightBoost。
V3D245的眼镜和VG278H提供的眼镜有同样的问题,有点夹头。
由于镜片偏小,如果用户戴了近视眼镜,再套上它的话就不够舒服了。
如果用户准备另外添置眼镜,不妨选择第二代产品,我们用VG278H上的第二代3D Vision眼镜在V3D245能正常使用。
进入游戏,V3D245所呈现的3D效果就立体感而言并不输给第二代眼镜。
虽然V3D245在2D显示下的亮度比VG278H低了很多,但在开启3D效果后,它的亮度下降幅度并不大,甚至比开启3D效果后的VG278H还要高。
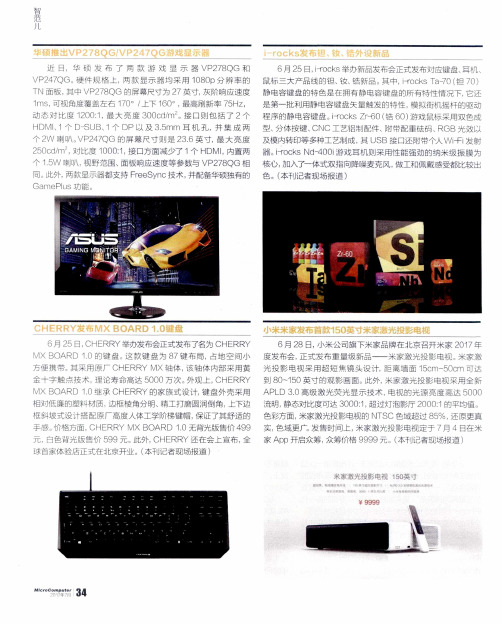
华硕推出VP278QG/VP247QG游戏显示器
GamePi us功 能
6月 2 5日, CHERR Y举力、 发布会正 式发布了名为 CHERR Y
ห้องสมุดไป่ตู้
6月 2 8日, 小米 公司旗 下米家 品牌在北京 {
MX BOARD 1 . 0的键 盘 。 这款键盘为 8 7键 布局 , 占地 空 间小 度发布会 , 正 式发布 重量级 新品—— 米 家激光 方便 携带 。 其采 用原 厂 CHE RR Y MX轴体 , 该 轴体 内部采 用黄 光 投 影电 视 采用 超 短 焦镜 头设 计, 距 离 墙面 1 金十字 触点 技术 , 理论 寿命高达 5 0 0 0万 次。 外观 上, CHE RRY 到8 0 ~ 1 5 0英寸 的观影 画面 。 此外, 米 家激 光拄
个2 W 喇叭。 VP 2 4 7 q ) G 的屏 幕 尺 寸则 是 2 3 . 6英寸, 最 大 亮 度 及模 内转 印等 多种工艺制成 , 其 US B接 口还附
2 5 0 c d / m , 对 比度 1 0 0 0 : 1 , 接 口方面减 少了 1个 HDM1 , 内置两 器。 H' o c k s N d - 4 0 0 i 游戏耳 机则 采用性 能强 劲
新一代电竞神器--华硕PG278Q显示器评测
新一代电竞神器--华硕PG278Q显示器评测佚名【摘要】专业的电竞显示器在FPS类游戏表现方面拥有足够多的优势:超高刷新率、极速响应时间等高性能都可以为玩家带来非凡的游戏体验。
不过,由于GPU 帧输出延迟无法与显示器刷新延迟保持同步,以往的电竞显示器很容易导致的画面撕裂、卡顿等问题。
然而华硕推出的PG278Q显示器则完美解决了这个问题,同时这款产品也堪称当今业内最强电竞显示器。
【期刊名称】《电子竞技》【年(卷),期】2015(000)008【总页数】2页(P34-35)【正文语种】中文专业的电竞显示器在FPS类游戏表现方面拥有足够多的优势:超高刷新率、极速响应时间等高性能都可以为玩家带来非凡的游戏体验。
不过,由于GPU帧输出延迟无法与显示器刷新延迟保持同步,以往的电竞显示器很容易导致的画面撕裂、卡顿等问题。
然而华硕推出的PG278Q显示器则完美解决了这个问题,同时这款产品也堪称当今业内最强电竞显示器。
华硕PG278Q电竞显示器作为华硕玩家国度ROG系列首款液晶显示器,同时也是业界最快的WQHD电竞液晶显示器,最高刷新率高达144Hz,响应时间仅为1毫秒,可呈现极致流畅无残影的生动画面,不错失任何精彩片刻。
作为一款王牌产品,华硕PG278Q打破以往圆润的外观设计,整体棱角分明,配有类似于跑车进气口般的散热孔和绚丽红色光圈,ROG标志如此抢眼,给人一种一战到底的冲动。
其外形采用人体工学设计,整体时尚、自然。
并支持丰富的俯仰、水平旋转、90垂直旋转、高低升降调节,以满足完全不同的应用需求,6毫米超窄边框的机身设计,便于建构多屏幕链接环绕的震撼场景,令玩家完美享受无与伦比的游戏情境。
华硕PG278Q采用27英寸液晶面板,画面分辨率为2560×1440,是业界最快的WQHD电竞液晶显示器。
相对于主流的全高清1080p,像素面积提升了约80%,可以带来更震撼的游戏视觉体验。
其最高刷新率高达144Hz,响应时间仅为1毫秒,细节表现如身临其境,更可呈现极致流畅、无残影的生动画面,让你不错失任何精彩瞬间。
游戏玩家的进阶之选,2K小金刚电竞显示器就选这几款

游戏玩家的进阶之选,2K小金刚电竞显示器就选这几款作者:来源:《电脑报》2021年第30期小金刚电竞显示器似乎并未受到元件涨价的影响,产品整体价格一直处于下降的趋势当中。
最新的1ms灰阶响应时间的产品也降到了2000元出头的价位上,现在就是入手2K小金刚电竞显示器的最佳时机。
参考价格:2299元选择LG 27GL830的难点在于贵200元还有一款27GL850,两者有什么区别呢?从参数来看,两款显示器采用的是同款27英寸Nano-IPS面板,分辨率为2560×1440,拥有98%的DCI-P3色域,比100% sRGB色域多35%的色彩范围,能够表现的色彩更多。
在大家关心的游戏参数方面,两款显示器都拥有1ms灰阶响应时间,144Hz刷新率,保證画面的流畅。
与此同时,27GL830和27GL850均支持Adaptive-Sync,并通过了NVIDIA的测试验证,保证对 G-Sync的兼容性,无论你使用的是A卡还是N卡都能减少画面撕裂卡顿,保证画面的流畅清晰。
经过多方对比并且通过咨询客服,终于发现27GL830和27GL850的不同之处在于接口:27GL850多提供了2个USB接口,仅此而已。
显然从性价比的角度考虑,更便宜的27GL830更值得选择。
参考价格:2299元Q27G2S/D是之前人气产品Q27G2S的升级版。
因为改用了群创的K7E面板,实现了原生1ms灰阶响应时间,减少游戏中的拖影、运动模糊,边缘更锐利。
与此同时产品的刷新率也从155Hz提升到了170Hz,画面更为流畅。
而且显示器通过了HDR400认证,在HDR模式下,最高亮度能够达到400cd/m2,可以在明亮或黑暗的场景中使得画面呈现出更多的内容细节。
当然K7E面板因为加入了一层滤光膜,在减少蓝光对人眼危害的同时,会对色域略有影响。
所以可以看到Q27G2S/D的sRGB色域只有126%。
其他方面,显示器依然有10bit色深、色彩精准度Delta E参考价格:2499元飞利浦猛腾275M1RZ采用了27英寸Nano-IPS面板,拥有2K分辨率、1ms灰阶响应时间、170Hz刷新率、通过HDR 400认证、130% sRGB色域以及400cd/m2最高亮度等参数,算是这个价位上产品的主流水准。
ROG StriX XG279Q电竞显示器
ROG StriX XG279Q电竞显示器作者:来源:《新潮电子》2020年第02期4499元从整个体验和测试来看,ROG Strix XG279Q不论是外在表现还是内在游戏功能和显示性能方面,表现是可圈可点的。
特別是高达170Hz刷新率、HDR功能、G-SYNC和ELMB-SYNC技术的加持,让XG279Q在游戏体验方面得到了很大的提升。
同时,得益于出色的调校,让XG279Q的色域覆盖面积更广色彩准确性也非常高。
当然,对于用户来说最关心的价格,目前电商网站售价在4499元左右,如果遇上促销活动,价格更低。
作为一款有“信仰”的电竞显示器来说,它的表现与其价格其实是相符的,值得一试。
海盗船iCUE LS100智能照明灯条249元起如今的电脑硬件,除了处理器不能发光之外,其他的外设产品都可发光了。
特別是支持RGB灯效的硬件,已经成了很多高端硬件的标配,加果不支持RGB灯效,似乎就配不上“高端”二字。
在这个“万般皆可RGB”的年代,还有什么是不能发光的?那可能就是你那台电脑桌了。
于是,美商海盗船发布了iCUE LS100智能照明灯条,让不能发光的产品也能发光,演绎一场光与影的艺术。
realme X505G手机2499元起5G的终端竞争比之前我们所经历的时代都更容易刺刀见红,产品的更迭和边际应用的获得感,让每个品牌都必然要进行全方位的布局考虑。
因此,realmeX50的意义就是继续保持战术大师的自我修养,在合理的价格策略和品质保障下,完成“真香定律”在2020年的高歌猛进。
realmle真我Buds Air耳机399元realme首款TWS耳机——“真我Buds Air耳机”是重点。
外观设计符合当下流行趋势,黑、白、黄三款配色十分新潮;搭载定制R1芯片,支持蓝牙5.0,声音延迟降低至业界最高水平之一的119 3ms;满电续航长达3小时,配合电池盒续航时间可达17小时,更支持无线充电。
realme真我Buds Air真无线耳机实力出色,价格亲民。
ASUS PG27AQ系列LCD显示器用户指南(第二版)2015年9月版权所有说明书

PG27AQ series LCD MonitorUser GuideFirst EditionSeptember 2015Copyright © 2015 ASUSTeK COMPUTER INC. All Rights Reserved.No part of this manual, including the products and software described in it, may be reproduced,transmitted, transcribed, stored in a retrieval system, or translated into any language in any form or by any means, except documentation kept by the purchaser for backup purposes, without the express writtenpermission of ASUSTeK COMPUTER INC. (“ASUS”).Product warranty or service will not be extended if: (1) the product is repaired, modified or altered, unless such repair, modification of alteration is authorized in writing byASUS; or (2) the serial number of theproduct is defaced or missing.ASUS PROVIDES THIS MANUAL “AS IS” WITHOUT WARRANTY OF ANY KIND, EITHER EXPRESS OR IMPLIED, INCLUDING BUT NOT LIMITED TO THE IMPLIED WARRANTIES OR CONDITIONS OF MERCHANTABILITY OR FITNESS FOR A PARTICULAR PURPOSE. IN NO EVENT SHALL ASUS, ITS DIRECTORS, OFFICERS, EMPLOYEES OR AGENTS BE LIABLE FOR ANY INDIRECT, SPECIAL,INCIDENTAL, OR CONSEQUENTIAL DAMAGES (INCLUDING DAMAGES FOR LOSS OF PROFITS, LOSS OF BUSINESS, LOSS OF USE OR DATA, INTERRUPTION OF BUSINESS AND THE LIKE),EVEN IF ASUS HAS BEEN ADVISED OF THE POSSIBILITY OF SUCH DAMAGES ARISING FROMANY DEFECT OR ERROR IN THIS MANUAL OR PRODUCT.SPECIFICATIONS AND INFORMATION CONTAINED IN THIS MANUAL ARE FURNISHED FORINFORMATIONAL USE ONLY, AND ARE SUBJECT TO CHANGE AT ANY TIME WITHOUT NOTICE, AND SHOULD NOT BE CONSTRUED AS A COMMITMENT BY ASUS. ASUS ASSUMES NORESPONSIBILITY OR LIABILITY FOR ANY ERRORS OR INACCURACIES THAT MAY APPEAR INTHIS MANUAL, INCLUDING THE PRODUCTS AND SOFTWARE DESCRIBED IN IT.Products and corporate names appearing in this manual may or may not be registered trademarks orcopyrights of their respective companies, and are used only for identification or explanation nd to theowners’ benefit, without intent to infringe.iiContents Notices (iv)rmation (v)Care.&.Cleaning (vi)Takeback.Services (vii)Chapter.1:.....Product.introduction1.1.Welcome!.......................................................................................1-11.2.Package.contents..........................................................................1-11.3.1 Front view .......................................................................1-21.3.2 Back view ........................................................................1-31.3.3 GamePlus Function ........................................................1-41.3.4 GameVisual Function ......................................................1-5 Chapter.2:.....Setup2.1.Adjusting.the.monitor...................................................................2-12.2.Detaching.the.arm.(for.VESA.wall.mount)..................................2-22.3.Connecting.the.cables..................................................................2-2 Chapter.3:.....General.instructions3.1.OSD.(On-Screen.Display).menu..................................................3-13.1.1 How to reconfigure ..........................................................3-13.1.2 OSD function introduction ...............................................3-13.2.Specifications.summary...............................................................3-53.3.Troubleshooting.(FAQ).................................................................3-63.4.Supported.operating.mode..........................................................3-7iiiivNoticesFederal Communications Commission StatementThis device complies with Part 15 of the FCC Rules. Operation is subject to the following two conditions:•This device may not cause harmful interference, and • This device must accept any interference received including interference that may cause undesired operation.This equipment has been tested and found to comply with the limits for a Class B digital device, pursuant to Part 15 of the FCC Rules. These limits are designed to provide reasonable protection against harmful interference in a residential installation. This equipment generates, uses and can radiate radio frequency energy and, if not installed and used in accordance with the instructions, may cause harmful interference to radio communications. However, there is no guarantee that interference will not occur in a particular installation. If this equipment does cause harmful interference to radio or television reception, which can be determined by turning the equipment off and on, the user is encouraged to try to correct the interference by one or more of the following measures:•Reorient or relocate the receiving antenna.•Increase the separation between the equipment and receiver.•Connect the equipment into an outlet on a circuit different from that to which the receiver is connected.• Consult the dealer or an experienced radio/TV technician for help.The use of shielded cables for connection of the monitor to the graphics card is required to assure compliance with FCC regulations. Changes or modifications to this unit not expressly approved by the party responsible for compliancecould void the user’s authority to operate this equipment.Canadian Department of Communications StatementThis digital apparatus does not exceed the Class B limits for radio noise emissions from digital apparatus set out in the Radio Interference Regulations of the Canadian Department of Communications.This class B digital apparatus complies with Canadian ICES-003.This Class B digital apparatus meets all requirements of the Canadian Interference - Causing Equipment Regulations.Cet appareil numérique de la classe B respecte toutes les exigences du Réglementsur le matériel brouiller du Canada.Safety information• Before setting up the monitor, carefully read all the documentation that came with the package.• To prevent fire or shock hazard, never expose the monitor to rain or moisture. • Never try to open the monitor cabinet. The dangerous high voltages inside the monitor may result in serious physical injury.• If the power supply is broken, do not try to fix it by yourself. Contact a qualified service technician or your retailer.• Before using the product, make sure all cables are correctly connected and the power cables are not damaged. If you detect any damage, contact your dealerimmediately.• Slots and openings on the back or top of the cabinet are provided for ventilation. Do not block these slots. Never place this product near or over aradiator or heat source unless proper ventilation is provided.• The monitor should be operated only from the type of power source indicated on the label. If you are not sure of the type of power supply to your home,consult your dealer or local power company.• Use the appropriate power plug which complies with your local power standard. • Do not overload power strips and extention cords. Overloading can result in fire or electric shock.• Avoid dust, humidity, and temperature extremes. Do not place the monitor in any area where it may become wet. Place the monitor on a stable surface.• Unplug the unit during a lightning storm or if it will not be used for a long period of time. This will protect the monitor from damage due to power surges.• Never push objects or spill liquid of any kind into the slots on the monitor cabinet.• To ensure satisfactory operation, use the monitor only with UL listed computers which have appropriate configured receptacles marked between100-240V AC.• If you encounter technical problems with the monitor, contact a qualified service technician or your retailer.• Adjustment of the volume control as well as the equalizer to other settings than the center position may increase the ear-/headphones output voltage andtherefore the sound pressure level.• The adapter is only used for this monitor, do not use it for other purpose.Your device uses one of the following power supplies:- Manufacturer: Delta Electronics Inc., Model: ADP-90YD BvviThis symbol of the crossed out wheeled bin indicates that the product (electrical, electronic equipment, and mercury-containing button cell battery) should not be placed in municipal waste. Please check local regulations for disposal ofelectronic products.AEEE yönetmeliğine uygundurCare & Cleaning• Before you lift or reposition your monitor, it is better to disconnect the cables and power cord. Follow the correct lifting techniques when positioning the monitor. When lifting or carrying the monitor, grasp the edges of the monitor. Do not lift the display by the stand or the cord.• Cleaning. Turn your monitor off and unplug the power cord. Clean the monitor surface with a lint-free, non-abrasive cloth. Stubborn stains may be removed with a cloth dampened with mild cleaner.•Avoid using a cleaner containing alcohol or acetone. Use a cleaner intended for use with the monitor. Never spray cleaner directly on the screen, as it may drip inside the monitor and cause an electric shock. The following symptoms are normal with the monitor:• The screen may flicker during the initial use due to the nature of the fluorescent light. Turn off the Power Switch and turn it on again to make sure that the flicker disappears.• You may find slightly uneven brightness on the screen depending on the desktop pattern you use.• When the same image is displayed for hours, an afterimage of the previous screen may remain after switching the image. The screen will recover slowly or you can turn off the Power Switch for hours.•When the screen becomes black or flashes, or cannot work anymore, contact your dealer or service center to fix it. Do not repair the screen by yourself!Conventions used in this guideWARNING: Information to prevent injury to yourself when trying tocomplete a task.CAUTION: Information to prevent damage to the components when tryingto complete a task.IMPORTANT: Information that you MUST follow to complete a task.NOTE: Tips and additional information to aid in completing a task.rmationRefer to the following sources for additional information and for product and software updates.1..ASUS.websitesThe ASUS websites worldwide provide updated information on ASUShardware and software products. Refer to 2..Optional.documentationYour product package may include optional documentation that may havebeen added by your dealer. These documents are not part of the standardpackage.Takeback ServicesASUS recycling and takeback programs come from our commitment to the highest standards for protecting our environment. We believe in providing solutions forour customers to be able to responsibly recycle our products, batteries and other components as well as the packaging materials.Please go to /english/Takeback.htm for detail recycling information in different region.viiviii1.1 Welcome!Thank you for purchasing the ASUS® LCD monitor!The latest widescreen LCD monitor from ASUS provides a broader, brighter and crystal-clear display, plus a host of features that enhance your viewing experience. With these features, you can enjoy the convenience and delightful visual experience that the monitor brings to you!1.2 Package contentsCheck your package for the following items:LCD monitorDriver and Manual discQuick start guideWarranty cardPower adapterPower cordDP cableHDMI cableUSB cableIf any of the above items is damaged or missing, contact your retailerimmediately.Select “ON” when you see the message “LIGHT IN MOTION ON/OFF” appearsif you want to turn on the red light on the base. Select “OFF” if you want it toturn off. If you disable this function but later wish to reactivate it, please use theOSD menu to turn it on.If no signal is detected for 120 seconds, the monitor automatically enters savingmode.It is recommended that you set the DisplayPort Deep Sleep and HDMI DeepSleep functions to “OFF”.1-1 ASUS PG27AQ Series LCD Monitor1.3 Monitor introduction1.3.1.Front.view1.2.• Exits the OSD menu item.• Turns on the OSD menu when the monitor enters standby mode ordisplays the “NO SIGNAL“ message.3. button:• GamePlus hotkey. Move the () button up/down to select andpress () to confirm the function needed.• Turns on the OSD menu when the monitor enters standby mode ordisplays the “NO SIGNAL“ message.4. button• GameVisual hotkey. This function contains 6 sub-functions you canselect for your preference.1-2Chapter 1: Product introduction• Turns on the OSD menu when the monitor enters standby mode ordisplays the “NO SIGNAL“ message.5.• Turns the monitor on/off.The color definition of the power indicator is as the below table.•1.3.2.Back.viewRear.connectors1..DC-IN.port. This port connects the power cord.2..Earphone.jack. This port is only available when an HDMI/DisplayPort cableis connected.3..DisplayPort. This port is for connection for a DisplayPort compatible device.4..HDMI.port. This port is for connection with an HDMI compatible device.B.3.0.upstream.port. This port is for connection with a USB upstreamcable. The connection enables the USB ports on the monitor.B.3.0.downstream.ports. These ports are for connection with USBdevices, such as USB keyboard/mouse, USB flash drive, etc.7. For service personnel only.8..Kensington.lock.slot.9..Control.buttons.ASUS PG27AQ Series LCD Monitor1-31.3.3.GamePlus.FunctionThe GamePlus function provides a toolkit and creates a better gaming environment for users when playing different types of games. In addition, Crosshair function is specially designed for new gamers or beginners interested in First Person Shooter (FPS) games.To active GamePlus:1. Press the GamePlus hotkey.2. Move the () button up/down to select among different functions.3. Press the () button right to confirm thethrough the settings. Move the4. Highlight the desired setting and press the () button to activate it.Press the button to inactivate it.1-4Chapter 1: Product introduction1-5ASUS PG27AQ Series LCD Monitor 1.3.4.GameVisual.FunctionThe GameVisual function helps you select among different picture modes in a convenient way.To active GameVisual:Press the GameVisual hotkey repeatedly to select.•.Scenery.Mode : This is the best choice for scenery photo displaying with GameVisual TM Video intelligence Technology.•.Racing.Mode : This is the best choice for racing game playing with GameVisual TM Video intelligence Technology.•.Cinema.Mode : This is the best choice for movie watching with GameVisual TM Video intelligence Technology.•.RTS/RPG.Mode : This is the best choice for Real-Time Strategy (RTS)/Role-Playing Game (RPG) playing with GameVisual TM Video intelligence Technology.•.FPS.Mode : This is the best choice for First Person Shooter game playing with GameVisual TM Video intelligence Technology.•.sRGB.Mode : This is the best choice for viewing photos and graphics from PCs.• In the Racing mode, the following function(s) are not user-configurable: Saturation.•In the sRGB mode, the following function(s) are not user-configurable:Saturation, Color Temp., Brightness, Contrast.1-6Chapter 1: Product introduction2-1ASUS PG27AQ Series LCD Monitor 2.1Adjusting the monitor• For optimal viewing, we recommend that you look at the full face of the monitor, then adjust the monitor to the angle that is most comfortable for you.• Hold the stand to prevent the monitor from falling when you change its angle.•The recommended adjusting angle is +20˚ to -5˚ (for tilt)/+60˚ to -60˚ (for swiveling/ +120 mm (for height adjustment)/90˚ (for portrait view).-5° ~ +20°It is normal that the monitor slightly shakes while you adjust the viewing angle.Pivoting.the.monitor 1. Lift the monitor to the highest position.2 Tilt the monitor to its maximum angle.3.Pivot the monitor clockwise to the angle you need.-5° ~ +20°It is normal that the monitor slightly shakes while you adjust the viewing angle.Figure 1Figure 2Figure 32-2Chapter 2: Setup2.2Detaching the arm (for VESA wall mount)The detachable arm of this monitor is specially designed for VESA wall mount. To detach the arm:1. Have the front of the monitor face down on a table.2.Loosen the four screws on the back of the monitor and remove the arm/base.We recommend that you cover the table surface with soft cloth to preventdamage to the monitor.2.3 Connecting the cablesConnect the cables as the following instructions:•.To.connect.the.power.cord :a. Connect the power adapter securely to the monitor’s DC input.b. Connect one end of the power cord to the power adapter and the otherend to a power outlet.• To connect the DisplayPort/HDMI cable:a. Plug one end of the DisplayPort/HDMI cable to the monitor’sDisplayPort/HDMI port.b. Connect the other end of the DisplayPort/HDMI cable to your computer'sDisplayPort/HDMI port.• To use the earphone: connect the end with plug type to the monitor’s earphone jack when an HDMI or DisplayPort signal is fed.• To use the USB 3.0 ports: Take the supplied USB 3.0 cable, and plug the smaller end (type B) of the USB upstream cable to the monitor’s USBupstream port, and the larger end (type A) to your computer’s USB 3.0 port.Make sure your computer is installed with the lastest Windows 7/Windows 8operating system. That will enable the USB ports on the monitor to work.2.4ASUS PG27AQ Series LCD Monitor2-32-4Chapter 2: Setup3-1ASUS PG27AQ Series LCD Monitor 3.1OSD (On-Screen Display) menu3.1.1.How.to.reconfigure1. Press the () button to activate the OSD menu.2.Move the() button up/down to navigate through the functions.Highlight the desired function and press the() button to activate it. Ifthe function selected has a sub-menu, move the () button up/down again to navigate through the sub-menu functions. Highlight the desired sub-menu function and press the () button or move the() buttonright to activate it. 3.Move the () button up/down to change the settings of the selectedfunction.4.To exit and save the OSD menu, press thebutton or move the() left repeatedly until the OSD menu disappears. To adjust other functions, repeat steps 1-3.3.1.2.OSD.function.introduction1..Blue.Light.FilterIn this function, you can adjust the blue light filter level.3-2Chapter 3: General Instructions• Level 0: No change.•Level 1~4: The higher the level, the less blue light is scattered. When Blue Light Filter is activated,the default settings of Racing Mode will be automatically imported. Between Level 1 to Level 3, the Brightness function is user-configurable. Level 4 is optimized setting. It is compliance with TUV Low Blue Light Certification. The Brightness function is not user-configurable.Please refer to the following to alleviate eye strains:•Users should take some time away from the display if working for long hours. It is advised to take short breaks (at least 5 mins) after around 1 hour of continuous working at the computer. Taking short and frequent breaks is more effective than a single longer break.• To minimize eye strain and dryness in your eyes, users should rest the eye periodically by focusing on objects that are far away.•Eye exercises can help to reduces eye strain. Repeat these exercisesoften. If eye strain continues please consult a physician. Eye exercises: (1) Repeating look up and down (2) Slowly roll your eyes (3) Move your eyes diagonal.•High energy blue light may lead to eye strain and AMD (Age-RelatedMacular Degeneration). Blue light Filter to reduce 70% (max.) harmful blue light to avoiding CVS (Computer Vision Syndrome).2. ColorYou can adjust Brightness, Contrast, Saturation and Color temperature fromthis menu.• • Contrast : the adjusting range is from 0 to 100.• Saturation : The adjusting range is from 0 to 100.•Color Temp.: contains 4 modes including Cool, Normal, Warm, and User Mode.3. ImageYou can adjust OD from this menu.• OD 4.Input SelectIn this function, you can select your desired input source.5. System SetupAllows you to adjust the system.•Language : There are 21 languages for your selection, including English, French, German, Italian, Spanish, Dutch, Portuguese, Russian, Czech, Croatian, Polish, Romanian, Hungarian, Turkish, Simplified Chinese, Traditional Chinese, Japanese, Korean, Thai, Indonesia, Persian. •OSD Position : Adjusts the horizontal position (H-Position)/the vertical position (V-Position) of the OSD.• Transparency: Adjusts the OSD background from opaque to transparent.• OSD Timeout: Adjusts the OSD timeout from 10 to 120 seconds.• Keylock: To disable all function keys. Press over 5 seconds to cancel the key lock function.• Information: Shows the monitor information.• LIGHT IN MOTION: Select“ON” if you want to turn on the red light on the base.• Sound:* Volume: the adjusting range is from 0 to 100.* Mute: toggles the monitor sound between on and off.• All Reset: “Yes” allows you to restore the default settings.• DisplayPort Deep Sleep: Puts the DisplayPort port into deep sleep.• HDMI Deep Sleep: Puts the HDMI port into deep sleep.If the monitor cannot wake up after going into deep sleep, do one of thefollowings:3.2 Specifications summary*Specifications are subject to change without notice.3.3 Troubleshooting (FAQ)3.4 Supported operating modeHDMI.inputNote:.Do.not.support.interlace.DisplayPort.inputNote:.Do.not.support.interlace.G-SYNC.(only.for.DisplayPort.input).supported.NVIDIA.GPUs:.GeForce.GTX.TITAN.X,.GeForce.GTX. 980.Ti,.GeForce.GTX.980,.GeForce.GTX.970,.GeForce.GTX.960,.GeForce.GTX.TITAN.Z,.GeForce. GTX.TITAN.Black,.GeForce.GTX.TITAN,.GeForce.GTX.780.Ti,.GeForce.GTX.780,.GeForce.GTX.770,. GeForce.GTX.760,.GeForce.GTX.750.Ti,.GeForce.GTX.750,.GeForce.GTX.745.(OEM),.GeForce.GTX. 690,.GeForce.GTX.680,.GeForce.GTX.670,.GeForce.GTX.660.Ti,.GeForce.GTX.660,.GeForce.GTX.650. Ti.BOOST..For.other.GPUs,patible.。
4K@144Hz与DSC技术加持 ROG Strix XG27UQ电竞显示器
4K@144Hz与DSC技术加持ROG Strix XG27UQ电竞显示器随着电竞行业的不断发展,对于显示器的需求也变得越来越苛刻。
高分辨率和高刷新率对于电竞选手来说已经不再是奢侈品,而是必备的硬件配备。
在这样的潮流下,ROG Strix XG27UQ电竞显示器应运而生。
这款显示器拥有着4K@144Hz的超高分辨率和刷新率,再加上DSC技术的加持,带来了极致的视觉体验和细腻的画面表现,成为了众多电竞玩家的心头好。
ROG Strix XG27UQ电竞显示器采用了27英寸的IPS面板屏幕,这种屏幕在色彩还原和视角方面都表现出色。
4K分辨率的输入信号可以被显示器自动放大,使得画面更为清晰细腻,在游戏中能够清晰的看到每一个细节,提升游戏体验。
IPS面板的广视角也使得玩家在观看比赛回放时能够享受到绝佳的画面效果。
而且,ROG Strix XG27UQ电竞显示器在刷新率方面也拥有领先的优势。
传统的4K显示器通常只能实现60Hz的刷新率,而这款显示器却达到了惊人的144Hz,这意味着在游戏中玩家可以获得更加流畅的画面和操作。
对于竞技类游戏来说,刷新率的提升意味着更快的画面更新和更快的反应速度,这对于竞技水平高的玩家来说是非常重要的。
除了4K@144Hz的超高分辨率和刷新率之外,ROG Strix XG27UQ电竞显示器还在显示技术方面进行了进一步的突破,采用了DSC(Display Stream Compression)技术。
DSC技术可以将4K分辨率的画面数据进行压缩,从而节省了带宽的使用,使得显示器可以通过单一的DisplayPort接口就能够实现4K@144Hz的输出。
这意味着用户在使用这款显示器的时候可以更加便捷地连接到电脑或者游戏主机,大大提升了使用的灵活性和便利性。
ROG Strix XG27UQ电竞显示器还支持了HDR技术,能够呈现更加真实的画面效果和更加细腻的色彩。
HDR技术的加持让显示器在画面对比度和色彩表现方面都有了质的提升,使得玩家在游戏中能够更加沉浸于绚丽的画面中。
强化升级 ROG Swift PG278QR电竞显示器
强化升级 ROG Swift PG278QR电竞显示器
黄兵
【期刊名称】《微型计算机》
【年(卷),期】2017(000)010
【摘要】三年前,ROG玩家国度推出首款电竞显示器——ROG Swift PG278Q。
也正是由于这款产品的推出,让国内很多显示器厂商开始将重点转移到电竞显示器上,像宏碁的高端电竞子品牌——Predator掠夺者就推出了多款高端电竞显示器,去年AOC的电竞子品牌AGON旗下也推出了众多高端电竞产品。
一时间,国内
的电竞显示器市场呈现出遍地开花的繁荣景象。
而时过两年,ROG玩家国度试图
再度复刻经典,推出了ROG Swift PG278QR电竞显示器。
【总页数】3页(P88-90)
【作者】黄兵
【作者单位】
【正文语种】中文
【中图分类】TP317.4
【相关文献】
1.地表王者ROG SWIFT PG27UQ电竞显示器 [J],
2.为电竞而生华硕ROG SWIFT PG278Q 电竞显示器解析 [J], 黄兵
3.AURA灯效加特 ROG SWIFT PG27VQ电竞显示器 [J], 黄兵
4.桌面“超跑”ROG SWIFT PG27UQ电竞显示器 [J], 黄兵(文/图)[1]
5.低延迟高刷新率 ROG Swift PG259QNR电竞显示器 [J], 黄兵(文/图)
因版权原因,仅展示原文概要,查看原文内容请购买。
ASUSVS278Q显示器1ms极速响应

ASUSVS278Q显示器1ms极速响应
佚名
【期刊名称】《微型计算机》
【年(卷),期】2013(000)010
【摘要】不可否认,大屏幕的显示器总能带给我们更好的视觉和娱乐体验,但讨厌的屏幕拖影问题却让许多游戏发烧友时时如鲠在喉。
为了解决屏幕拖影问题,华硕日前推出一款仅1ms响应时间的VS278Q显示器,以期给游戏玩家带来更顺畅的视觉体验效果。
【总页数】1页(P99-99)
【正文语种】中文
【中图分类】TP393.09
【相关文献】
1.四倍清晰度 1ms极速显示 AOC U2868PQU游戏新玩法 [J],
2.极速逼真体验——游戏液晶显示器导购 [J], 皮皮
3.1ms响应时间还是有拖影,怎么办?LCD反视觉残留技术即将登场 [J], Archangel
4.三星713N液晶显示器冷峻外形极速响应 [J], 边凯
5.戴尔发布E207WFP宽屏液晶显示器——5ms响应时间提供极速体验视频享受[J],
因版权原因,仅展示原文概要,查看原文内容请购买。
