谷歌MAP_V3 api说明文档
如何采用离线的 google map api 加载离线谷歌地图的方法
如何采用离线的 Google Map API 加载离线谷歌地图的方法注:文档中所提到的“GoogleMapAPIV3.rar”附件,请到水经注软件论坛下载。
一、下载示例数据这里以《水经注万能地图下载器》为你说明如何下载谷歌卫星地图。
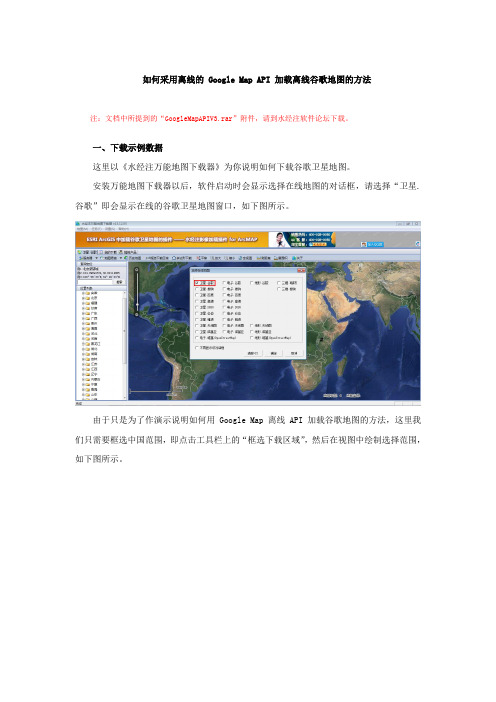
安装万能地图下载器以后,软件启动时会显示选择在线地图的对话框,请选择“卫星.谷歌”即会显示在线的谷歌卫星地图窗口,如下图所示。
由于只是为了作演示说明如何用 Google Map 离线 API 加载谷歌地图的方法,这里我们只需要框选中国范围,即点击工具栏上的“框选下载区域”,然后在视图中绘制选择范围,如下图所示。
下载即可,如下图所示。
点击“确定”按钮,开始下载卫星地图数据。
下载完成后导出瓦片数据,选择导出类型为“瓦片:Google Map”,保存路为“D:\Test”目录,如下图所示。
在对话框中点击“输出”按钮导出Google Map瓦片,如下图所示。
二、地图引擎部署第一步:将附件中的“GoogleMapAPIV3.rar”下载后解压到“D:\Test”目录。
第二步:将“D:\Test”目录中的“中国_GoogleMapTiles”重命名为“data”,如下图所示。
第三步:在浏览器中打开“D:\Test\GoogleMapAPIV3\Example_GoogleMapAPI.html”,如果操作无误,将会显示离线的卫星地图,如下图所示。
以上,即是如何用 Google Map 离线 API加载谷歌地图的方法,你可以根据实际需求对“D:\Test\GoogleMapAPIV3\Example_GoogleMapAPI.html”文件进行进一步开发。
注:文档中所提到的“GoogleMapAPIV3.rar”附件,请到水经注软件论坛下载。
下面是赠送的中秋节演讲辞,不需要的朋友可以下载后编辑删除!!!谢谢中秋佳节演讲词推荐中秋,怀一颗感恩之心》老师们,同学们:秋浓了,月圆了,又一个中秋要到了!本周日,农历的八月十五,我国的传统节日——中秋节。
SpagoBI开源BI平台_安装配置及使用说明v15
U
U
U
U
1.1 SPAGOBI介绍 ........................................................................................................................................... 6
审核日期
批准人 批准日期
第 2 页 共 142 页
SpagoBI-开源 BI 平台软件安装配置与使用说明
目
录
修订记录 .................................................................................................................................................................. 2
[ ] 初稿 [ ] 发布 [ √] 修订
编 撰: 编撰日期: 保密级别: 文档版本:
肖渺 ****-**-** 公开 1.5
【 SpagoBI 开源 BI 平台软件 】 【安装配置与使用说明】
2012 年 09 月
SpagoBI-开源 BI 平台软件安装配置与使用说明
修订记录
版本 0.5 0.6 0.7 0.8
2.2.1 Document配置 ................................................................................................................................... 23
U
U
水经注离线谷歌卫星地图加载服务中间件调用示例ForGoogleAPI
水经注离线谷歌卫星地图加载服务中间件调用示例ForGoogle API1.说明水经注离线谷歌卫星地图加载服务中间件可利用离线地图的.dat文件在本地建立服务端,并生成影像、标签、高程等服务地址,可以在Goo gle API中直接调用该服务地址,并将请求到的服务资源显示在前端,当请求的地图资源不存在可通过网络直接下载缺失的地图,并储存在.dat文件中。
2.实现2.1准备GoogleMa pAPIV3下载GoogleMap APIV3.rar。
在其目录下新建一个ht ml文件“RiverM apSer verSa mpleFor Google API.html”,如下图。
利用记事本打开“RiverM apSer verSa mpleFor Google API.html”并进行编辑,具体内容如下。
<!DOCTYP E html><html><head><meta http-equiv="Conten t-Type" conten t="text/html; charse t=utf-8" /><title>RiverM apSer verSa mpleFor Google API</title><link href="mapfil es/css/defaul t.css" rel="styles heet" type="text/css" /><script type="text/javasc ript" src="mapapi.js"></script><script>functi on tlen(len, mystr){mystr= String(mystr);var num = len - mystr.length;for (var i = 0; i <= num; i++){mystr= "0" + mystr;}return mystr;};functi on CoordM apTyp e(tileSi ze) {this.tileSi ze = tileSi ze;}CoordM apTyp e.protot ype.getTil e = functi on(coord, zoom, ownerD ocume nt) { var div = ownerD ocume nt.create Eleme nt('DIV');var ymax = 1 << zoom;var y = coord.y;y = tlen(5,y);var x = tlen(5,coord.x);zoom = tlen(1,zoom+1);div.innerH TML = y + "," + x + "," + zoom;div.style.width= this.tileSi ze.width+ 'px';div.style.height = this.tileSi ze.height + 'px';div.style.fontSi ze = '10';div.style.border Style = 'solid';div.style.border Width = '1px';div.style.border Color = '#AAAAAA';return div;};functi on LocalM apTyp e() {}LocalM apTyp e.protot ype.tileSi ze = new google.maps.Size(256, 256);LocalM apTyp e.protot ype.maxZoo m = 20;LocalM apTyp e.protot ype.minZoo m = 0;LocalM apTyp e.proto = "本地";LocalM apTyp e.prototype.alt = "显示本地地图";LocalM apTyp e.protot ype.getTil e = functi on(coord, zoom, ownerD ocume nt) { var img = ownerD ocume nt.create Eleme nt("img");img.style.width= this.tileSi ze.width+ "px";img.style.height = this.tileSi ze.height + "px";var ymax = 1 << zoom;var y = coord.y;y = tlen(5,y);var x = tlen(5,coord.x);zoom = tlen(1,zoom+1);var strURL = "http://127.0.0.1:1002/getDef inedI mage?" + "x=" + x + "&y=" + y + "&z=" + zoom;img.src = strURL;return img;};var localM apTyp e = new LocalM apTyp e();functi on initia lize() {var myLatl ng = new googltLng(30, 103);var myOpti ons = {center: myLatl ng,zoom: 4,street ViewC ontro l: false,mapTyp eCont rolOp tions: {m apTyp eIds: ["local", google.maps.MapTyp eId.ROADMA P] }};var map = new google.maps.Map(docume nt.getEle mentB yId("map_ca nvas"), myOpti ons);map.mapTyp es.set('local', localM apTyp e);map.setMap TypeI d('local');map.overla yMapT ypes.insert At(0, new CoordM apTyp e(new google.maps.Size(256, 256)));}</script></head><body onLoad="initia lize()"><div id="map_ca nvas" style="width: 640px; height: 480px;"></div></body></html>其中【strURL=”http://localh ost:1002/getDef inedI mage ?”】表示请求的是影像、地图、地形、标签、影像+标签、影像+地图、影像+地形或Dem。
谷歌地图 API
在onCreate中 初始化一个标记(addMarker) LatLng SuZhou = new LatLng(31.2653514, 120.7365586); DecimalFormat df = new DecimalFormat("#.00000"); String title = "经度:" + df.format(titude) + "\n 纬度:" + df.format(SuZhou.longitude); CameraPosition suzhou = new CameraPosition.Builder().target(SuZhou).zoom(15.5f).bearing(300).tilt(50).build(); //添加一个标记 mMap.addMarker(new MarkerOptions().position(SuZhou).title(title)); //使用动画定位在标记点 mMap.animateCamera(CameraUpdateFactory.newCameraPosition(suzhou));
完成以上操作还不能显示地图,还需如下操作:
首先需要把Google Play services的类库加载进来: 在 android-sdk的目录下 /extras/google/google_play_services/libproject/google-play-services_lib 把google-play-services_lib 拷贝出来。(防止影响android-sdk目录) 注意:google-play-services_lib 项目一定跟你自己创建的项目在同一目录 下,否则类库无法添加。 假如google-play-services_lib拷贝在workspace中的,在Eclipse里面选择: File > Import > Android > Existing Projects Into Workspace然后点击Next. 之后Browse..., 找到路径下的google-play-services_lib, 然后选择Finish。 如不在workspace下则选择Existing Android Code Into Workspace添加。 第二步是添加对这个库的引用: 在自己的项目上右键,选Properties,左边选Android,然后在下面的 Library里面Add刚才的google-play-services_lib。
泓格模块使用说明

有關 DCON Utility 版本資訊及它所支援的模組清單請至下列網址或者在公司提供的 CD 片上的路徑 參考相關的訊息 ftp:///pub/cd/8000cd/napdos/driver/dcon_utility/ CD:\ Napdos\Driver\DCON_Utility
DCON Utility 使用手冊 版本編號 V1.2
----- 2
DCON Utility 使用手冊 版本編號 V1.2
----- 3
第一章. 簡介
DCON Utility 的主要功能是為提供用戶以最簡單的方式搜尋網路上的模組,並提供簡單的操 作介面讓用戶對模組做設定及測試模組基本的 I/O 功能是否正常。 它能夠透過串列埠 (RS-232/485) 或者乙太網路介面 (使用虛擬 COM Port)去設定泓格公司 所設計的 i-7000 系列、i-87K 系列及 i-8000 系列的模組, 它目前不僅僅是支援 DCON 的通 訊協定,而且也同時能支援 Modbus RTU 通訊協定的模組(M-7K,M-87K),在不久的將來也會 支援 Modbus ASCII 協定的模組(M-87K)。 另一方面,DCON Utility 也支援 WinCon 8000 主機上面的 87K 系列模組的設定。
DCON Utility
使用手冊
2009 年 11 月出版 版本編號 1.2
ICP DAS, Co., LTD
பைடு நூலகம்
DCON Utility 使用手冊 版本編號 V1.2
----- 1
章節目錄
第一章. 簡介 ......................................................................................
mapv-three 用法 -回复

mapv-three 用法-回复mapvthree是一款功能强大的地图可视化工具,它可以帮助用户将地理数据转化为可视化的形式,以更直观、清晰地展现出来。
本文将深入探讨mapvthree的用法并详细介绍其一步一步的应用过程。
首先,我们需要了解mapvthree是什么以及它的基本特点。
mapvthree 是基于Three.js开发的地理信息可视化插件,它支持在web端直接渲染大规模地理数据。
它的主要特点包括高性能、可扩展性、易用性和丰富的可视化效果。
使用mapvthree,我们可以将不同的地理数据进行可视化展示,例如点状数据、线状数据和面状数据。
接下来,我们将详细介绍如何使用mapvthree 进行地理数据的可视化。
第一步是准备地理数据。
在开始之前,我们需要获取并准备好要展示的地理数据。
这些数据可以是经纬度信息、行政区划信息或其他与地理位置相关的数据。
我们可以从公开的数据源、自有的数据库或其他数据供应商那里获取这些数据,确保数据的准确性和完整性。
第二步是创建地图容器。
在继续之前,我们需要创建一个地图容器,它将承载我们的地理数据可视化。
我们可以选择在web页面中创建一个div 元素,并为其设置一个唯一的ID,作为地图容器的标识。
第三步是初始化地图。
使用mapvthree,我们需要在web页面中引入相关的JavaScript库和CSS样式。
通过创建一个地图实例,并将其绑定到地图容器上,我们可以初始化地图以准备数据的可视化展示。
第四步是加载地理数据。
在完成地图的初始化之后,我们需要将准备好的地理数据加载到地图中。
根据数据的类型和形式,我们可以选择使用相应的接口和方法来加载数据。
例如,如果我们要展示点状数据,我们可以使用`addPoint`方法将点的经纬度信息添加到地图上。
如果我们要展示线状数据,我们可以使用`addLine`方法将线的坐标信息添加到地图上。
第五步是配置可视化效果。
mapvthree提供了丰富的可视化效果配置选项,通过调整这些选项,我们可以改变地理数据的展示效果。
谷歌地图与开放式API和WEB墨卡托投影

从(E ,N)计算椭球面坐标( ,λ)的反投影公式为:
D ( N FN ) / R ( FN N ) / R
/ 2 2 atan(e D )
,e 是自然对数基底 2.7182818…
[( E FE ) / R] O
示例:
投影坐标参照系:WGS 84 / Pseudo-Mercator 椭球参数: WGS 84 a = 6378137.0 米 1/f = 298.2572236 投影参数: O 0°00′00″ N = 0.0 弧度 初始原点纬度 0°00′00″ E = 0.0 弧度 初始原点经度 λO 0.00 米 东伪偏移 FE 0.00 米 北伪偏移 FN 正投影计算: = 24°22′54.433″ N = 0.425542460 弧度 输入点坐标: 纬度 经度 λ = 100°20′00.000″ W = -1.751147016 弧度 投影结果: 东 E = -11169055.58 米 北 N = 2800000.00 米 以上投影点以北 10 km 处,网格点(-11169055.58m E,2810000.00m N)的反投影结果为: = -0.44056752 D = 0.426970023 弧度 = 24°27′48.889″ N 纬度 经度 λ = -1.751147016 弧度 = 100°20′00.000″ W 5
谷歌地图与开放式 API 和 WEB 墨卡托投影
1 谷歌地图与开放式 API
Google Maps API 已推出了第 3 版 (https:///maps/documentation/javascript/) , 如果想利用 Google Maps API 在地图上玩 GPS 经纬度坐标定位之类的游戏,在美国可以,在中国就 有问题。下面的 JavaScript 试图通过经纬度坐标在 Google 的街道地图(ROADMAP)上标出青岛颐 中体育场的中心位置。
Googlemap_API教程
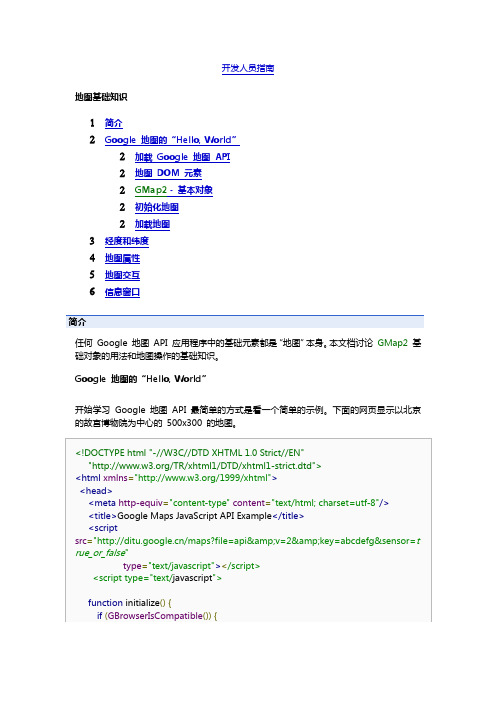
开发人员指南地图基础知识1简介2Google 地图的“Hello, World”2加载Google 地图API2地图DOM 元素2GMap2 - 基本对象2初始化地图2加载地图3经度和纬度4地图属性5地图交互6信息窗口简介任何Google 地图API 应用程序中的基础元素都是“地图”本身。
本文档讨论GMap2基础对象的用法和地图操作的基础知识。
Google 地图的“Hello, World”开始学习Google 地图API 最简单的方式是看一个简单的示例。
下面的网页显示以北京的故宫博物院为中心的500x300 的地图。
<!DOCTYPE html "-//W3C//DTD XHTML 1.0 Strict//EN""/TR/xhtml1/DTD/xhtml1-strict.dtd"><html xmlns="/1999/xhtml"><head><meta http-equiv="content-type"content="text/html; charset=utf-8"/><title>Google Maps JavaScript API Example</title><scriptsrc="/maps?file=api&v=2&key=abcdefg&sensor=t rue_or_false"type="text/javascript"></script><script type="text/javascript">function initialize(){if(GBrowserIsCompatible()){var map=new GMap2(document.getElementById("map_canvas"));map.setCenter(new GLatLng(39.9493,116.3975),13);}}</script></head><body onload="initialize()"onunload="GUnload()"><div id="map_canvas"style="width:500px;height:300px"></div></body></html>您可以查看此示例及下载、编辑和调试该示例,但必须将该文件中的密钥替换为您自己的Google 地图API 密钥。
高德地图API使用说明

使用AutoNavi MAP API 开发地图应用•为什么要使用AutoNavi MAP API•AutoNavi MAP API 概述•AutoNavi Android MAP API 与Google Android Map API 比较•如何使用AutoNavi MAP API如何实现坐标偏转如何创建MapView如何创建ItemizedOverlay如何创建PoiSearch如何创建Geocoder如何创建MyLocation•FAQ•技术支持(QQ群:122795260, 邮箱:mapservice@)为什么要使用AutoNavi MAP API因为商业上的原因,联想不能在中国市场发布的手机上预装Google相关的手机服务,包括Google地图API。
为了解决这一问题,我们和高德公司(AutoNavi)合作,在手机上预置了AutoNavi提供的多种基于位置的服务。
高德公司作为中国领先的导航电子地图内容和位置服务解决方案提供商,旗下的互联网MAP API()同样在业界具有良好的口碑。
可为客户提供跨平台、跨媒体的位置服务解决方案。
我们同时鼓励中国的开发者们,使用AutoNavi MAP API开发基于位置和地图应用程序,并且发布在中国市场中的联想手机上。
AutoNavi MAP API 概述AutoNavi MAP API是高德软件公司提供的调用地图的接口方法。
用户的应用程序可以通过AutoNavi MAP API提供的接口方法操作地图数据,实现位置相关或地图相关应用。
例如,通过调用AutoNavi MAP API,将地图数据整合到自己的应用中,可以将商户的地理位置信息在地图上进行标注,以很直观的形式展现给使用者。
AutoNavi MAP API还将添加自驾,公交及步行的线路规划API。
同时,还将加入对矢量地图的支持,大幅提高地图下载的速度。
在不久的将来,还会加入3D街区图和其他的个性化地理数据支持。
mapv-three 用法 -回复
mapv-three 用法-回复mapvthree 是一种全球定位系统(GPS)导航软件,它为用户提供了详细的地图和导航指引。
本文将逐步回答关于mapvthree 的用法,并介绍如何使用它进行导航、查找地点以及享受其它特色功能。
第一步:下载和安装mapvthree首先,前往您手机的应用商店(如App Store 或Google Play 商店),在搜索栏中输入“mapvthree”。
点击搜索按钮后,选择正确的应用程序并点击下载按钮。
下载完成后,点击安装,等待安装过程完成。
一旦安装完成,您就可以开始使用mapvthree 了。
第二步:创建个人账户在首次使用mapvthree 之前,您需要创建一个个人账户。
打开应用程序后,您会看到一个欢迎界面,上面提供了一个注册选项。
点击注册按钮,然后按照提示输入您的个人信息,如用户名、密码和电子邮件地址。
完成注册后,您将获得一个个人账户,可以登录并享受mapvthree 的全部功能。
第三步:导航和查找地点一旦您登录了个人账户,您可以开始使用mapvthree 的导航功能。
在主界面上,您会看到一个搜索栏和一个放大缩小按钮。
如果您想知道如何到达某个特定的地点,只需在搜索栏中输入该地点的名称或地址,然后点击搜索按钮。
mapvthree 将在地图上显示相关结果,您可以点击其中一个结果来获取具体的导航指引。
此外,您还可以使用导航功能来获取实时交通信息。
在搜索栏中输入您要前往的地点,然后点击搜索按钮。
在结果页面上,您会看到一个选项,允许您查看交通状况。
点击该选项后,mapvthree 将会显示出当前的交通流量情况,并提供实时路况导航。
这将帮助您避免拥堵,节省时间和燃料。
如果您想查找特定类型的地点,例如餐厅、酒店或购物中心,您可以使用mapvthree 的分类搜索功能。
点击主界面上的搜索栏,然后选择一个类别。
mapvthree 将会列出附近的所有相关地点,您可以点击其中一个来获取更多详情和导航指引。
关于googlemap收费

google map API使用条款10.9(c)及翻译google map API使用条款10.9 :(c) Dispatch, fleet management, business asset tracking, or similar enterprise applications (the Google Maps APIs can be used to track assets (such as cars, buses or other vehicles) as long as the tracking application is made available to the public without charge. For example, you may offer a free, public Maps API Implementation that displays real-time public transit or other transportation status information. If your Maps API Implementation is deployed internally or you are charging for use of your Maps API Implementation, please contact the Google Maps API Premier sales team for more information);翻译:(c)调度,车队管理,企业资产跟踪,或类似的企业应用程序(谷歌地图API 可以用来追踪资产(如汽车,巴士或其他车辆)。
只要跟踪应用程序向公众提供免费服务。
例如,你可以用API实现提供一个自由、公开地图,显示实时公共交通或其他交通状况信息。
如果您遇到为使用部署在内部的地图或地图API付费的情况,请联系谷歌地图API总理的销售团队获取更多信息。
Google maps javascript api v3 叠加层(Overlays)介绍+

Google maps javascript api v3 叠加层(Overlays )介绍叠加层是地图上与纬度/经度坐标绑定的对象,会随您拖动或缩放地图而移动。
叠加层表示的是“添加”到地图中以标明点、线、区域或对象集合的对象。
Google Maps API 包含以下几种叠加层:∙地图上的单个位置显示为标记。
标记有时可显示自定义的图标图片,此时标记通常被称为“图标”。
标记和图标是 Marker 类型的对象。
∙地图上的线显示为折线(表示一系列按顺序排列的位置)。
线是 Polyline 类型的对象。
∙地图上的不规则形状区域显示为 多边形,多边形类似于折线。
与折线相同的是,多边形也是由一系列按顺序排列的位置构成的;不同的是,多边形定义的是封闭区域。
∙地图图层可显示为叠加层地图类型。
您可以通过创建自定义地图类型以创建自己的图块集,该自定义地图类型可取代基本地图图块集,或作为叠加层显示在现有基本地图图块集之上。
∙信息窗口也是特殊类型的叠加层,用于在指定地图位置的一个弹出式气泡框内显示内容(通常是文字或图片)。
∙ 您还可以实现自己的自定义叠加层。
这些自定义叠加层会实现 OverlayView 接口。
[1].[代码] 添加叠加层 跳至 [1] [2] [3]?1 2 3 4 5 6 7 8 9 10 11 12 13 14 15var myLatlng = new tLng(-25.363882,131.044922);var myOptions = {zoom: 4,center: myLatlng,mapTypeId: google.maps.MapTypeId.ROADMAP,}var map = new google.maps.Map(document.getElementById("map_canvas"), myOptions);var marker = new google.maps.Marker({position: myLatlng,title:"Hello World!"});// To add the marker to the map, call setMap();marker.setMap(map);[2].[代码] 删除叠加层 跳至 [1] [2] [3]?1 2 3 4 5 6 7 8 9 10 11 12 13 14 15 16 17 18 19 20 21 22 23 24 25 26 27 28 var map;var markersArray = [];function initialize() {var haightAshbury = new tLng(37.7699298, -122.4469157);var mapOptions = {zoom: 12,center: haightAshbury,mapTypeId: google.maps.MapTypeId.TERRAIN};map = new google.maps.Map(document.getElementById("map_canvas"), mapOptions);google.maps.event.addListener(map, 'click', function(event) {addMarker(tLng);});}function addMarker(location) {marker = new google.maps.Marker({position: location,map: map});markersArray.push(marker);}// Removes the overlays from the map, but keeps them in the arrayfunction clearOverlays() {if (markersArray) {29 30 31 32 33 34 35 36 37 38 39 40 41 42 43 44 45 46 47 48 49 50 51 52 for (i in markersArray) {markersArray[i].setMap(null);}}}// Shows any overlays currently in the arrayfunction showOverlays() {if (markersArray) {for (i in markersArray) {markersArray[i].setMap(map);}}}// Deletes all markers in the array by removing references to themfunction deleteOverlays() {if (markersArray) {for (i in markersArray) {markersArray[i].setMap(null);}markersArray.length = 0;}}[3].[文件] overlay-remove.html ~ 2KB 下载(264) 跳至 [1] [2] [3]?1 2 3 4 5 6 7 8 9 10 11 12 13 14 15 16 17 18 19 20 21 22 23 24 25 26 27 28 29 30 31 32 33 34 35 36 37 38 39 40 <!DOCTYPE html><html><head><title>Google Maps JavaScript API v3 Example: Overlay Removal</title><link href="/apis/maps/documentation/javascript/examples/standard.css" rel="stylesheet" type="text/css" /><script type="text/javascript" src="/maps/api/js?sensor=false"></script> <script type="text/javascript">var map;var markersArray = [];function initialize() {var haightAshbury = new tLng(37.7699298, -122.4469157);var mapOptions = {zoom: 12,center: haightAshbury,mapTypeId: google.maps.MapTypeId.TERRAIN};map = new google.maps.Map(document.getElementById("map_canvas"),mapOptions);google.maps.event.addListener(map, 'click', function(event) {addMarker(tLng);});}function addMarker(location) {marker = new google.maps.Marker({position: location,map: map});markersArray.push(marker);}// Removes the overlays from the map, but keeps them in the arrayfunction clearOverlays() {if (markersArray) {for (i in markersArray) {markersArray[i].setMap(null); }414243444546474849505152535455565758596061626364656667686970 71}}// Shows any overlays currently in the arrayfunction showOverlays() {if (markersArray) {for (i in markersArray) {markersArray[i].setMap(map);}}}// Deletes all markers in the array by removing references to them function deleteOverlays() {if (markersArray) {for (i in markersArray) {markersArray[i].setMap(null);}markersArray.length = 0;}}</script></head><body onload="initialize();"><div><input onclick="clearOverlays();"type=button value="Clear Overlays"/><input onclick="showOverlays();"type=button value="Show All Overlays"/><input onclick="deleteOverlays();"type=button value="Delete Overlays"/> </div><div id="map_canvas"style="width:600px; height:500px"></div></body></html>。
Google Map API谷歌地图

地图控件与地图属性
• 控件概述 • 上的地图包含允许用户与地图交互的 UI 元素,这些元素称为“控件”。
– GLargeMapControl - 一个在 Google 地图上使用的大平移/缩放控件。默认 情况下显示在地图的左上角。 – GSmallMapControl - 一个在 Google 地图上使用的小一点的平移/缩放控件。 默认情况下显示在地图的左上角。 – GSmallZoomControl - 小型缩放控件(无平移控件),用于在 Google 地图 上显示行车路线的小地图弹出窗口。 – GScaleControl - 地图比例尺 – GMapTypeControl - 让用户切换地图类型(例如“地图”和“卫星”)的按钮 – GHierarchicalMapTypeControl - 用于放置多个地图类型选择器的一组精选 的嵌套按钮和菜单项。 – GOverviewMapControl - 位于屏幕一角的可折叠概览地图。
Google 地图 API
谷歌地图应用说明 Michael-Tian
内容概述
• • • • • • • • •
基础知识 正向标注 反向标注 任意多边形 自定义GMarker 地图控件与地图属性 空间数据类型 参考资料 Demo
基础知识
• Google 地图 API 概念 • Google 地图的“Hello, World”
– 随机生成 – 读XML文件
反向标注
• 从Marker到列表 • 从列表到Marker • 显示例图
任意多边形
• • • •
GPolyline 类 GLatLngBounds 类 矩形选择 可调的多边形 – 样式设置 – 顶点数据获取 • 不可调的多边形
自定义GMarker
谷歌地图API(GoogleMapsAPI)
谷歌地图API(GoogleMapsAPI)
最新的申请GoogleMapAPI,以前的方式似乎都不可以了。
近日Google已变更其MapAPI的申请方式,若您现在透过早先的方法申请APIKey应该会得到底下的讯息画面。
Google不再提供先前的申请APIKey方式
大意是Google不再提供该种方式申请APIKey,而是改由所谓的「APIConole」进行所有API的管理。
在GoogleMapAPI的部份,官方网站目前是建议使用新版本(v3)的API进行开发,若您仍希望继续使用v2的版本进行开发,您可能需要进行部份设定的修改,底下是设定的流程:
最新的申请GoogleMapAPI,以前的方式似乎都不可以了。
GoogleMapAPIv2设置
2.依据您的需求产生对应的GoogleMapAPIKey,若您是要继续采用v2版本的方式使用GoogleMapAPI,请选择「CreatenewBrowerKey」,之后将产生的Key依据过去的方式填入对应的位置即可。
最新的申请GoogleMapAPI,以前的方式似乎都不可以了。
注意V2版本对应的选项
需要注意的是:
1.依目前观察,已经在使用中的GoogleMapAPIKey是可以继续使用,并不会因为产生Key的方式改变而有所变更。
2.新的方式会统计并限制使用量(目前是限制每天25,000次查询),若超过用量则需给付相关费用才可继续使用。
Avago MPT3SAS Linux driver 的 README 文件说明书

Linux driver - Binary rpm/source rpm user guide and known limitationT A B L E O F C O N T E N T S1.OVERVIEW (2)2.D RIVER COMPILATION STEPS (2)3.OS S UPPORT M ATRIX (2)4.RELEASE CONTENTS (5)5.E RRATA/N OTES AND KNOWN LIMITATIONS (5)6.I NSTALL/R EMOVE/U PGRADE DRIVER PACKAGE (6)7.S TEPS TO GENERATE BINARY RPM FROM SOURCE RPM (7)8.NO TES (10)Page 1 of 141.OVERVIEWThis README covers Avago’s MPT3SAS Linux driver specific limitation and information. For any OS Distro specific limitation andinformation please check with OS Vendor support.2.D RIVER COMPILATION STEPSDriver source code is placed inside released driver package.Driver source tarball should be with name –mpt3sas-<driver_version>-src.tar.gz1) Untar driver source tarball-#tar -zxvf mpt3sas-<driver_version>-src.tar.gz2) Go to driver source directory-#cd mpt3sas3) To compile the driver for distro use the helper script"compile.sh" bundled inside source code-#./compile.sh4)To load and unload the driver for distro use the helper script“load.sh” and “uload.sh” bundled ins ide source code-#./load.sh#./uload.sh3.OS SUPPORT MATRIXFollowing are the List of supported Distro and their corresponding kernel flavors:####################################################################### SuSE:####################################################################### SLES12 SP1Gold (3.12.49-11) (default, xen)SLES12 SP2Gold (4.4.21-69) (default)SLES12 SP3Gold (4.4.73-5) (default)SLES12 SP4Gold (4.14.94-41) (default)SLES15 GMGold (4.12.14-23) (default)####################################################################### Red Hat, Cent OS, Oracle Enterprise Linux :#######################################################################Note: As the OS kernel is same for corresponding version of RHEL,OEL & CentOS so the driver binaries of RHEL will work for corresponding OEL & CentOS. Hence we will be providing unified binary support for RHEL,OEL & CentOS(i,e.,No separate binaries for OEL & CENTOS, will be provided instead corresponding RHEL binaries should be used).i686RHEL6Update 8 (2.6.32-642) (el6)Update 9 (2.6.32-696) (el6)Update 10(2.6.32-754) (el6)x86_64RHEL6Update 8 (2.6.32-642) (el6)Update 9 (2.6.32-696) (el6)Update 10(2.6.32-754) (el6)RHEL7Update 3 (3.10.0-514) (e17)Update 4 (3.10.0-693) (e17)Update 5 (3.10.0-862) (e17)Update 6 (3.10.0-957) (e17)####################################################################### Oracle Enterprise Linux:#######################################################################i686OEL6Update 8UEK (2.6.39-400.278.2) (el6uek)Update 9UEK (2.6.39-400.294.3) (el6uek)Update 10UEK (2.6.39-400.299.3) (el6uek)x86_64OEL6Update 8UEK (4.1.12-37.4.1) (el6uek)Update 9UEK (4.1.12-61.1.28) (el6uek)Update 10UEK (4.1.12-124.16.4) (el6uek)OEL7Update 4UEK (4.1.12-94.3.9) (el7uek)Update 5UEK (4.1.12-112.16.4) (el7uek)Update 6UEK (4.14.35-1818.3.3) (el7uek) Note:With respect to UEK kernels don’t confuse with driver rpm names. For example driver rpm name for UEKR3_U4 on oel6 OS is kmod-mpt3sas-DriverVersrion_oel6.6_UEKR3_U4-ReleseVersion.x86_64.rpm and one can assume that UEKR3_U4 kernel rpms needs to be installed only on OEL6.6 base OS, but that is not true, one can install these UEK3_U4 kernel rpms on any other OEL6 OS (e.g. OEL6.5 OS) and after booting into this UEKR3_U4 kernel, one can install the above driver rpm on this kernel.####################################################################### Citrix:####################################################################### Note:CitrixXenserver7.2 mpt3sas driver RPM will support bothCitrixXenServer7.6 and CitrixXenServer7.4 as well. Since kernel version is same from XenServer7.2 to XenServer7.6 (4.4.0+10) mpt3sas driver RPM “avago-mpt3sas” CitrixX en7.2 will work from XenServer 7.2 to 7.6.Citrix7.1 (4.4.0+2)Citrix7.2 (4.4.0+10)Citrix7.4 (4.4.0+10)Citrix7.6 (4.4.0+10)####################################################################### Ubuntu:####################################################################### i686Ubuntu16.04 (4.4.0-21-generic)x86_64Ubuntu16.04 (4.4.0-21-generic)Ubuntu18.04 (4.15.0-20-generic)4.RELEASE CONTENTS:For any queries on supported OS matrix, please refer above SECTION #3 contents. OS Support list in SECTION #3 list out test coverage executed by Avago. MPT3SAS driver is GPLv2 open source driver and source code level support is possible for many linux kernelversions. If you do not find binary level support for yourdistribution in release contents, please use source rpm method.For any distribution or supported kernel version, there can be three possible packages –-Driver update disk (Available under folder disks-xx)-Precompiled binary (kmod/kmp/rpms).(Available under folder rpms-xx)-Source rpm. (Available under folder rpms-xx)5.E RRATA/N OTES AND KNOWN LIMITATIONSa.Oracle Linux Installation errata:Installing Driver during Installing for UEK from CD:For UEK kernels, only the KMODs RPMs are provided, not the DUDs. The reasoning behind this is the OEL installation is using the native Red Hat kernels, not UEK. UEK kernel RPMS can be installed after the basic installation is completed. Please check with Oracle support team w.r.t UEK kernel installation process, limitation and other technical queries which is more of generic and not related to MR Drivers.b.RPM install dependency issues:If driver RPM installation fails with kABI checks dependency failure message, installing RPM package the user will need to use the "--nodeps" switch when installing the binary."Example: rpm -ivh --nodeps kmod-mpt3sas-vxxxxxx_UEK.xxx.rpm"If "rpm -ivh throw any dependency warning/error"RPM uses KMOD packaging dependency data to ensure the dependencies are met before installing the binary RPM.Red Hat maintains a whitelist of kernel symbols which RPM uses to validate against the KMOD binaries. Some symbols may be in the kernel but not on the whitelist which results in a failed binary RPM install. User can use the "--nodeps" switch when installing the binary to skip those whitelist symbol checks or any other dependency."c.Kernel crash observed on kernels with version >= 4.11.Kernel crash observed while creating a second RAID volume.Issue: Kernel gets crashed while creating 2nd RAID volume.Hence this issue has impact on IR card and not on IT card.Steps to Reproduce:>>Boot into OS/kernel with its inbox/out-of-box driver, after discoveringHBA and the devices connected to HBA successfully.>>Launch utility (Ex:SAS3IRCU) and create a RAID volume(RAID0/RAID1/RAID10).volume gets created successfully and will be listedfrom utility.>>Similarly try to create second RAID volume (RAID0/RAID1/RAID10), Kernelcrash is observed while creating second RAID volume.Expected: One should be able to create MAX 2 RAID volumeswith IR card at any point of time successfully , withoutany kernel crash.BZ link: Below link has complete details,https:///ubuntu/+source/linux/+bug/15813262.Kernel crash observed while unloading the driver keepingenclosure attached.Issue: Kernel gets crashed while unloading driver keepingenclosure attached. This issue impacts on both IT and IRcard.Steps to Reproduce:>>Boot into OS/kernel with its inbox/out-of-box driver, after discoveringHBA and enclosure with set of drives connected to HBA successfully.>>Try unloading driver “modprobe –r mpt3sas”, kernel crash is observed.Expected: Driver should unload successfully irrespective ofwhether enclosure is connected behind IT/IR card.Workaround S olution: As this issue is due to some “ses”module patch , user may have to unload “ses”(rmmod ses)module first followed by driver unload. Then driver unloadssuccessfully.BZ link: Below link has complete details,https:///bugzilla/show_bug.cgi BUG:155216.I NSTALL/R EMOVE/U PGRADE DRIVER PACKAGEThere are two packaging formats for binary rpms –1) RPM(RHEL/SLES/Fedora/OEL uses RPM package)2) DEB(Ubuntu/Debian uses DEB package) in which driver binary supportis provided. More info –https:///wiki/Deb_%28file_format%29Please note that after install/remove driver package, system needs to be rebooted to get intended driver loaded or manually remove module and insert (read man page “rmmod” and “modprobe” for more info)Whenever driver package is installed/uninstalled/upgraded, it is good practice to check output of command #modinfo mpt3sas.Output should always have updated driver version.Steps for Driver install/remove/upgrade for .rpm package1.To install driver RPM, type below command-# rpm –ivh <DRIVER_PACKAGE>.rpm2.To uninstall driver RPM, type below command to check installeddriver package name-# rpm –qa | grep mpt3sasOutput will give installed mpt3sas RPM packages.Now type # rpm –e <package to be uninstalled>3.To upgrade driver RPM, type below command-#rpm –Uvh <DRIVER_PACAKGE>.rpmSteps for Driver install/remove/upgrade for .deb package1.To install .deb package, execute following command,#dpkg -i <DRIVER_PACKAGE>.deb2.To verify the status of installed packages then type followingcommand#dpkg -s mpt3sas3.After installing mpt3sas driver, type below#modinfo mpt3sasIt should show the currently installed version of mpt3sas4.To use installed DEB driver loaded, restart the machine and typefollowing command to get currently loaded driver version- #cat /sys/modules/mpt3sas/versionThis version should be same as driver version of installed driver DEB package.5.To uninstall mpt3sas package, type below command-#dpkg -r mpt3sas6.Verify "modinfo mpt3sas" mpt3sas version should be in-boxversion.7.S TEPS TO GENERATE BINARY RPM FROM SOURCE RPMThere are three variant of source rpms available in this package –a.Source rpm which use kmodtool interface (RHEL based)/Packaging/KernelModules/Kmods2b.Source rpm which use kmp build interface (SLES based)https:///Kernel_Module_Packagesc.Source rpm which use generic build interface (Create initramfsinternally and does not depend upon any external tool)See NOTES section for sample naming convention used for these three flavor of source rpm.If user doesn’t know which source rpm is better for theirenvironment, we recommend trying #c (for any other distro other than Redhat/Novell)Quick search of “rpm –qa |grep kmod” can provide hint, if kmod tool support is available or not.To generate binary rpm from source rpm, user should havecompilation/build environment to create kernel module, utilities to build RPM(e.g. rpmbuild..).Install “kernel-devel” or “linux-headers”depending on distro for compilation environment. E.a system where user has yum repo configured, use below.# yum groupinstall “Development Tools”E.a on Ubuntu user can try installing below missing components.apt-get install rpmapt-get install makeapt-get install gccapt-get install alienExact commands to create build environment would be different across distros so this document is not right place to cover those details. Please refer OS vendor document if needed how to createbuild/compilation environment for specific OS distro.Below are steps to generate binary RPM from source RPM-1. Install source RPM using command <rpm>. Example below-#rpm -ivvh mpt3sas-<driver_version>.src.rpmInstalling above RPM will copy driver SPEC file to specificlocation (configured as part of rpm package. This path can bedifferent for each OS distribution.)To locate SPEC file, check output logs of above source RPMinstallation (see blue marked gives SPEC file location).e.g.[root@localhost tmp]# rpm -ivvvh mpt3sas-06.810.00.02-98.src.rpmD: ============== mpt3sas-06.810.00.02-98.src.rpm..Updating / installing...1:mpt3sas-06.810.00.02-98 ################################# [100%]D: ========== Directories not explicitly included in package:D: 0 /root/rpmbuild/SOURCES/D: 1 /root/rpmbuild/SPECS/D: ==========D: unknown 100755 1 ( 0, 0) 25/root/rpmbuild/SOURCES/Module.supported;55a756c8D: unknown 100644 1 ( 0, 0)120552/root/rpmbuild/SOURCES/mpt3sas-06.810.00.02.tar.gz;55a756c8D: unknown 100644 1 ( 0, 0) 6783/root/rpmbuild/SPECS/mpt3sas.spec;55a756c8GZDIO: 17 reads, 127888 total bytes in 0.000585 secsD: closed db index /var/lib/rpm/NameD: closed db index /var/lib/rpm/PackagesD: closed db environment /var/lib/rpm2. Go to directory where driver SPEC file is copied as part of #1.There must be SPEC file e.g. mpt3sas.spec/lsi-mpt3sas ormpt3sas.spec(driver SPEC file name could be different fordifferent distros, so check SPEC file with megaraid string in itsname).Check spec file name in above command. It provides the locationand spec filename.3. Build binary RPM from source RPM. Below is command to do same-#rpmbuild -ba <DRIVER_SPEC_FILE>For Fedora23 onwards:#rpmbuild –ba --define "debug_package %{nil}"<DRIVER_SPEC_FILE> (where “debug_package”(debuginfo) is mandatory on Fed ora23 and later versions)4. Binary RPMs will be available if #3 exits without any error. Goto directory where new binary RPM is generated.E.a Snippet of working case –--Wrote: /root/rpmbuild/SRPMS/mpt3sas-06.810.00.02-98.src.rpmWrote: /root/rpmbuild/RPMS/x86_64/mpt3sas-06.810.00.02-98.x86_64.rpmWrote: /root/rpmbuild/RPMS/x86_64/mpt3sas-debuginfo-06.810.00.02-98.x86_64.rpmExecuting(%clean): /bin/sh -e /var/tmp/rpm-tmp.ZbHbmH+ umask 022+ cd /root/rpmbuild/BUILD+ cd mpt3sas-06.810.00.02+ /usr/bin/rm -rf /root/rpmbuild/BUILDROOT/mpt3sas-06.810.00.02-98.x86_64+ exit 0--Step #5 is applicable only for deb package based OS distribution(Ubuntu/Debian).5. Create driver .deb package from binary RPM, Execute below commandto achieve the same-# alien -k --to-deb --scripts <GENRATED_DRIVER_RPM>Now, Install generated binary rpms using steps mentioned at“Install/Remove/Upgrade driver binary package”It is always recommended to verify initramfs image to confirm updated mpt3sas driver is packaged correctly before system reboot. Do not assume that latest driver is loaded after installing rpm generated from source rpm. See OS distribution specific documentation on how to verify initramfs image. E.a FC21 user guide link for reference.https:///en-US/Fedora/21/html/System_Administrators_Guide/sec-Verifying_the_Initial_RAM_Disk_Image.html#bh-Verifying_the_Initial_RAM_Disk_Image_and_Kernel_on_IBM_eServer_System_i8.NOTES1.In case of SuSE and similar OS distribution which use kmp tool forinitramfs, we recommend to edit file - /etc/sysconfig/kernel. Append <mpt3sas> before installing binary rpm.INITRD_MODULES="ata_piix ata_generic mpt3sas"2.If you see initramfs failure while rpm installation, try generatinginird manually. Just make sure that <modinfo mpt3sas> provide theexpected driver version.3.Do not try to install/upgrade from source rpm generated rpm binariesalong with pre-compiled binary provided by Avago. Naming convention as part of precompiled binary and source rpm based rpm differs, and that is reason user should stick with one method to avoidcompatibility issue.Source rpm is quickest method to deploy driver on many supported kernel versions, whereas precompiled binary is specific to kernel version or set of kernel versions.Example –Source rpm based binary will be generated in below format -kmp_rpm:lsi-mpt3sas-kmp-default-11.255.01.00_3.0.76_0.11-99.x86_64.rpmkmod_rpm:kmod-mpt3sas-11.255.01.00-61.x86_64.rpmgeneric_rpm:mpt3sas-11.255.01.00-98.x86_64.rpm4.On System with large number of CPU core and LSI’s SAS3 controllers,on repeated load and unload of mpt3sas driver module, if kernelfails to allocate the memory requested for higher queue depth, we can observe that the loading of mpt3sas module fails. Below messages will be logged to /var/log/messages,mpt3sas0: chain_lookup: __get_free_pages failedmpt3sas0: Reduce the module parameter max_queue_depth to a value lower than (“CURRENT_VALUE_OF_QUEUE_DEPTH”) and retry.The work-around for this issue is to load mpt3sas driver with module parameter max_queue_depth set to value less thanCURRENT_VALUE_OF_QUEUE_DEPTH.The max_queue_depth module parameter could be set as followsa. While loading the drivermodprobe mpt3sas max_queue_depth=NEW_VALUE_OF_QUEUE_DEPTH (if driverrpm is already installed)(Or)insmod mpt3sas.ko max_queue_depth=NEW_VALUE_OF_QUEUE_DEPTH (if you have a mpt3sas.ko file)b. If driver is in ramdisk, then in RHEL5/SLES/OEL5 OS, followingline has to be added in /etc/modprobe.conf and reboot the system options mpt3sas max_queue_depth=NEW_VALUE_OF_QUEUE_DEPTH(Or)Add below word at the end of kernel module parameters line in/boot/grub/menu.lst or /boot/grub/grub.conf file and reboot thesystemmpt3sas.max_queue_depth=NEW_VALUE_OF_QUEUE_DEPTH5.When Target Reset is issued using below command to DIF type2 drivepresent in the topology then kernel panic is observed on fewkernels.echo 4 > sys/class/scsi_host/host(number)/task_managementThe users can apply below patch if applicable otherwise can check with the kernel vendors for the appropriate patch/?l=linux-scsi&m=135186352200668&q=raw6.By default mpt3sas driver will disable DIX support(prot_mask =0x07),user can enable this feature by setting “prot_mask = 0x7f” module parameter while driver load.The “prot_mask” module parameter could be set as follows:a.While loading the drivermodprobe mpt3sas prot_mask=0x7f (if driver rpm is already installed) (Or)insmod mpt3sas.ko prot_mask=0x7f (if you have a mpt3sas.ko file)b. If driver is in ramdisk, then in RHEL/SLES/OEL OS, following linehas to be added in /etc/modprobe.conf and reboot the system options mpt3sas prot_mask=0x7f(Or)Add below word at the end of kernel module parameters line in/boot/grub/menu.lst or /boot/grub/grub.conf file and reboot thesystemmpt3sas.prot_mask=0x7f7.On some kernels when mq is enabled then the user may observe kernelpanic such as ‘NULL pointer dereference’, ‘protection fault’ etc.when user perform expander reset or driver unload operations. This is a kernel issue as ‘scsi_host_find_tag’ API is providing somestale requests pointers when driver loops from smid one to hba queue depth after some drives are removed and added back. Below patch will fix this issue,https:///lists/linux-scsi/msg126041.html-------------------------------------------------------------------- Special Notes for This Build:-------------------------------------------------------------------- 8.i) This release order will include binaries which compiled withretpolined GCC options,* On OS GA release for which retpoline was not supported andalso on retpoline patched kernels which are released post OSGA(RH 7.4/7.3/7.2, SLES12.x/11.x, OEL6.x/7.x) driver iscompiled with GCC options"-mindirect-branch=thunk-inline -mindirect-branch-register"* On OS GA release for which retpoline was supported(RHEL7.5), SLES15 BRCM doesn't add any extra retpoline GCC flags duringdriver compilation, since OS itself will add"-mindirect-branch=thunk-extern" GCC option by default.ii) Some information on driver binaries built for OS GAkernels(which were released before retpoline support):* Both driver RPMs and DUDs are compiled with GCC option:"-mindirect-branch=thunk-inline -mindirect-branch-register"They are safe from Spectre v2 vulnerabilities.* "modinfo mpt3sas.ko" will show "retpoline :Y" fordriver module built with retpoline support.* Retpoline kernels have "CONFIG_RETPOLINE=y" in kernel configfile.* Driver binaries (DUD and RPM) will work for both OS GA aswell as retpoline kernels.iii) SLES 15 OS installation with mpt3sas Driver:* While installing the SLES15 OS, If Broadcom's IT HBA is notattached to the system then mpt3sas.ko binary won't be part ofthe initrd image.* If user installs the driver rpm on this environment theninstalled mpt3sas.ko won't be part of initrd image.* So it recommended attaching the IT HBA card while installingthe SLES15 OS.iv) Installing rpm in OEL 6.10.There is an OS (Oracle Linux 6.10) issue found in one of the installer scripts "weak-modules".During driver installation updated initramfs with latestdriver is not getting generated. Due to this after rebootstill old driver is getting loaded.As a workaround, after installationregenerate new initramfs manually using below commands:a) First make a backup of the existing initramfs# cp /boot/initramfs-4.1.12-124.16.4.el6uek.x86_64.img/boot/initramfs-4.1.12-124.16.4.el6uek.x86_64.img.backb) Create new initramfs:# dracut -f。
Google地图使用API介绍
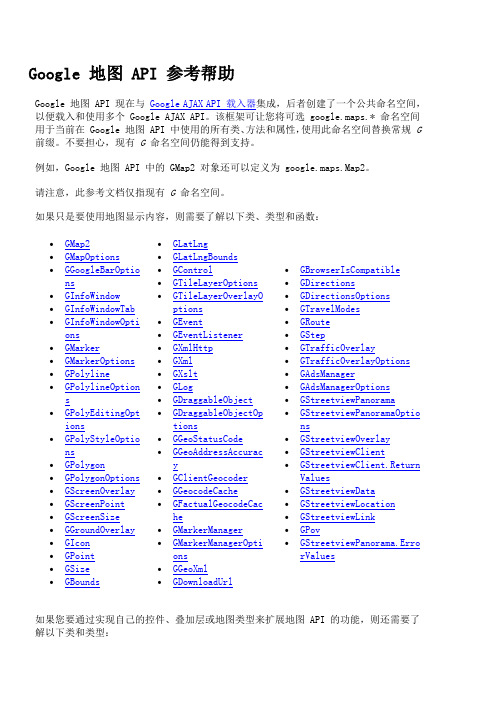
Google 地图 API 参考帮助Google 地图 API 现在与Google AJAX API 载入器集成,后者创建了一个公共命名空间,以便载入和使用多个 Google AJAX API。
该框架可让您将可选 google.maps.* 命名空间用于当前在 Google 地图 API 中使用的所有类、方法和属性,使用此命名空间替换常规G 前缀。
不要担心,现有G命名空间仍能得到支持。
例如,Google 地图 API 中的 GMap2 对象还可以定义为 google.maps.Map2。
请注意,此参考文档仅指现有G命名空间。
如果只是要使用地图显示内容,则需要了解以下类、类型和函数:∙GMap2∙GMapOptions∙GGoogleBarOptio ns∙GInfoWindow∙GInfoWindowTab ∙GInfoWindowOpti ons∙GMarker∙GMarkerOptions ∙GPolyline∙GPolylineOption s∙GPolyEditingOpt ions∙GPolyStyleOptio ns∙GPolygon∙GPolygonOptions ∙GScreenOverlay ∙GScreenPoint∙GScreenSize∙GGroundOverlay ∙GIcon∙GPoint∙GSize∙GBounds ∙GLatLng∙GLatLngBounds∙GControl∙GTileLayerOptions∙GTileLayerOverlayOptions∙GEvent∙GEventListener∙GXmlHttp∙GXml∙GXslt∙GLog∙GDraggableObject∙GDraggableObjectOptions∙GGeoStatusCode∙GGeoAddressAccuracy∙GClientGeocoder∙GGeocodeCache∙GFactualGeocodeCache∙GMarkerManager∙GMarkerManagerOptions∙GGeoXml∙GDownloadUrl∙GBrowserIsCompatible∙GDirections∙GDirectionsOptions∙GTravelModes∙GRoute∙GStep∙GTrafficOverlay∙GTrafficOverlayOptions∙GAdsManager∙GAdsManagerOptions∙GStreetviewPanorama∙GStreetviewPanoramaOptions∙GStreetviewOverlay∙GStreetviewClient∙GStreetviewClient.ReturnValues∙GStreetviewData∙GStreetviewLocation∙GStreetviewLink∙GPov∙GStreetviewPanorama.ErrorValues如果您要通过实现自己的控件、叠加层或地图类型来扩展地图 API 的功能,则还需要了解以下类和类型:∙GGoogleBarListingTypes∙GGoogleBarLinkTarg et∙GGoogleBarResultLi st∙GMapPane∙GOverlay∙GControl∙GControlPosition ∙GControlAnchor∙GMapTypeControl∙GMenuMapTypeControl∙GHierarchicalMapTypeControl∙GMapType∙GMapTypeOptions∙GLayer∙GTileLayer∙GTileLayerOverlay∙GCopyrightCollection∙GCopyright∙GProjection∙GMercatorProjection对GMap2类进行实例化以创建地图。
Google Map Api文档,免费Google地图API使用说明
你可以点这儿预览这个例子的效果,不过在你上传到自己的网站上运行之前,你必须把其中的"&key="之后的授权码换 成自己在Maps API key申请的授权码,否则看不到效果.本网站使用的范例中的授权码只能在域名上使用。
你可以看到,Google Maps使用了一个JavaScript文件(/maps?file=api&v=1) 这个文 件包含了你在自己的网页上显示Google地图的所有的函数和类. 想要在自己的网页上使用Google Maps API,你必须 在网页上通过script标签连接一个包含你申请的授权码的URL:
<script src="/maps?file=api&v=1&key=abcdefg" type="text/javascript"></script>
Google Maps API提供的最重要的类是GMap,它代表页面上的地图对象, 你可以根据需要在页面上使用多个GMap的实例 每个地图被包含在一个HTML 的容器(container) 里面,比如DIV 标签.
Google Map Api文档,免费Google地图API使用说明
Google Maps API可以让你在自己的网页之中嵌入免费的Google电子地图. 在此之前,你只需要 申请一个API授权码,而这是免费的.
因为Google Maps API是还在测试之中的程序,可能有些Bug,并且功能上也有一些欠缺. 你可以到Google Maps API讨论组给出你的意见.
Google Map Api文档,免费Google地图API使用说明
构造函数 属性 GEvent 静态方法 GXmlHttp 静态方法 GXml 静态方法 GXslt 静态方法 方法 GPoint 构造函数 属性 GSize 构造函数 属性 GBounds 构造函数 属性
第5章 Google地图API开发指南
第5章Google地图API开发指南Google Maps JavaScript API允许把Google地图嵌入到自己的网页内。
要使用这个API,首先需要申请一个API key(/apis/maps/signup.html)。
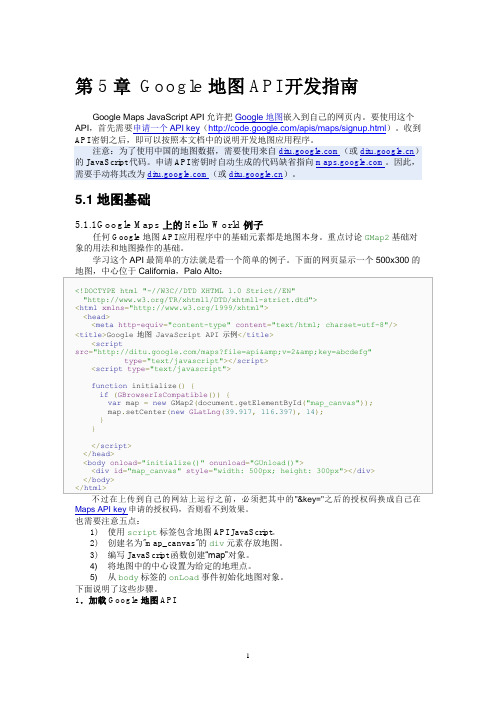
收到5.1地图基础5.1.1Google Maps上的Hello World例子任何Google地图API应用程序中的基础元素都是地图本身。
重点讨论GMap2基础对象的用法和地图操作的基础。
学习这个API最简单的方法就是看一个简单的例子。
下面的网页显示一个500x300的Maps API key申请的授权码,否则看不到效果。
也需要注意五点:1)使用script标签包含地图API JavaScript。
2)创建名为"map_canvas"的div元素存放地图。
3)编写JavaScript函数创建“map”对象。
4) 将地图中的中心设置为给定的地理点。
5) 从body标签的onLoad事件初始化地图对象。
下面说明了这些步骤。
1.加载Google地图API/maps?file=api&v=2&key=abcdefg用Google地图API所需所有符号和定义的JavaScript文件的位置。
页面必须包含指向此网址的script标签,使用注册获取API时收到的密钥。
此示例中,该密钥为“abcdefg”。
浏览器的文档对象模型(DOM)中获取此元素的引用执行此操作。
上述示例中,定义名为"map_canvas"的div,并使用样式属性设置其尺寸。
地图会自动使用容器尺寸调整自身的尺寸,除非使用构造函数中的GMapOptions为地图明确指定尺寸。
建此类的多个实例,每个对象将在页面上定义一个不同的地图。
)使用JavaScript new操作符创建此类的一个新实例。
当创建新的地图实例时,在页面中指定一个DOM节点(通常是div元素)作为地图的容器。
GoogleMapApi谷歌地图接口整理
GoogleMapApi⾕歌地图接⼝整理⼀:基本知识:1. 使⽤⾕歌地图 API 的第⼀步就是要注册⼀个 API 密钥,需要注重⼀下两点:1.假如使⽤ API 的页⾯还没有发布,只是在本地调试,可以不⽤密钥,随便⽤个字符串代替就可以了。
2.API 密钥只对⽹站⽬录或者域有效。
对不同域的⽹页,需要⽤这些域分别注册不同的密钥2.页⾯引⽤javascript⽂件<script src="/maps?file=api&hl=zh-CN&v=2&key=abcdefg" type="text/javascript"></script>:也可以⽤,假如你需要在地图上显⽰⼤陆以外的具体地图,就⽤ 2.file=api 这个是请求API 的JS ⽂件⽤的,固定的格式。
3.hl=zh-CN这个是在设定地图上除了地图图⽚以外的诸如控件名称、版权声明、使⽤提⽰等所需要显⽰⽂本的语⾔版本时候⽤的,假如没有指定这个参数就使⽤ API 的默认值,对 来说,默认是中⽂简体 默认的是英⽂。
4. v=2这个是⽤来指定需要导⼊的 API 类库的版本号,可以有四种设定⽅式:v=2.s 稳定版本,更新最慢,但是最可靠;v=2 当前版本(只⽤主版本号),更新速度和可靠性介于 s 和 x 之间v=2.x 最新版本,更新最快,包括最新功能,可能没有当前版本可靠;v=2.76 指定具体版本。
不建议使⽤。
注:⽬前⾕歌地图 API的主版本号是2,当API升级时旧版本只能继续使⽤⼀个⽉,所以要及时更改主版本号,版本号改变会在Google Code和Maps API讨论组发布相关信息5.key=abcdefg这个是设定你注册的 API 密钥.⼆:核⼼类:google地图API主要包括:地图类(GMap2)、标记类(GMarker)、标记选项类(GMarkerOptions)、折线类(GPolyline)、经纬度(GLatLng)、命名空间(GEvent)、坐标类(GPoint)、控件的⼤⼩类GSize、 interface(GControl)、地图类型类(GMapType)、地图上⾯的图标类(GIcon)、窗体类(GInfoWindow)、窗体选项类 GInfoWindowOptions)、接⼝GOverlay、枚举GMapPane等等注:标记和折线都是地图的覆盖物1.GMap2:地图类,下⾯实例化⼀张地图:var map= new GMap2(container: DOM_Div,opts: Options);构造函数的参数如下:参数是否必要值类型定义container 是 DOM_Div DOM元素,是个Divopts 可选 Options 构造函数选项GMap2包含的⽅法:1.设置状态的⽅法:enableDragging():设置地图可以被拖动。
- 1、下载文档前请自行甄别文档内容的完整性,平台不提供额外的编辑、内容补充、找答案等附加服务。
- 2、"仅部分预览"的文档,不可在线预览部分如存在完整性等问题,可反馈申请退款(可完整预览的文档不适用该条件!)。
- 3、如文档侵犯您的权益,请联系客服反馈,我们会尽快为您处理(人工客服工作时间:9:00-18:30)。
∙Google Maps JavaScript API V3 ∙Map:o MapOptionso MapTypeIdo MapTypeControlOptionso MapTypeControlStyleo NavigationControlOptionso NavigationControlStyleo ScaleControlOptionso ScaleControlStyleo ControlPositiono MapPaneso MapCanvasProjection∙Marker:o MarkerOptionso MarkerImageo MarkerShape∙Polyline:o PolylineOptions∙Polygon:o PolygonOptions∙InfoWindow:o InfoWindowOptions∙Geocoder:o GeocoderRequesto GeocoderStatuso GeocoderResulto GeocoderAddressComponento GeocoderGeometryo GeocoderLocationType∙DirectionsRenderer:o DirectionsRendererOptions∙DirectionsService:o DirectionsRequesto DirectionsTravelModeo DirectionsUnitSystemo DirectionsWaypointo DirectionsStatuso DirectionsResulto DirectionsRouteo DirectionsLego DirectionsStepo DirectionsDistanceo DirectionsDuration∙ElevationService:o LocationElevationRequesto PathElevationRequesto ElevationResulto ElevationStatus∙叠加层和地图类型:o OverlayViewo MapTypeo MapTypeRegistryo Projectiono ImageMapTypeo ImageMapTypeOptionso StyledMapTypeo StyledMapTypeOptionso MapTypeStyleo MapTypeStyleFeatureTypeo MapTypeStyleElementTypeo MapTypeStylero Rectangleo RectangleOptionso Circleo CircleOptionso GroundOverlayo GroundOverlayOptions∙图层:o BicyclingLayero FusionTablesLayero FusionTablesLayerOptionso FusionTablesMouseEvento FusionTablesCello KmlLayero KmlLayerOptionso KmlLayerMetadatao KmlMouseEvento KmlFeatureDatao KmlAuthoro TrafficLayer∙街景视图:o StreetViewPanoramao StreetViewPanoramaOptionso StreetViewAddressControlOptionso StreetViewLinko StreetViewPovo StreetViewPanoramaDatao StreetViewLocationo StreetViewTileDatao StreetViewServiceo StreetViewStatus∙事件:o MapsEventListenero事件o MouseEvent∙Base:o LatLngo LatLngBoundso Pointo Size∙MVC:o MVCObjecto MVCArray此类扩展了MVCObject。
构造函数构造函数说明Map(mapDiv:Node, opts?:MapOptions) 在指定的 HTML 容器中创建新的地图,该容器通常是一个 DIV 元素。
方法方法返回值说明fitBounds(bounds:LatLngBounds) None 设置地图,使其与指定范围相符。
getBounds() LatLngBounds 返回当前视口的纬度/经度范围。
如果还未启动地图(即 mapType 仍为 Null),或者没有设置中心和缩放,则结果为 Null。
getCenter() LatLng getDiv() Node getMapTypeId() MapTypeIdgetProjection() Projection 传回当前的Projection。
如果还未启动地图(即 mapType 仍为 Null),则结果为Null。
侦听projection_changed 并检查它的值以确保它的值不为 Null。
getStreetView() StreetViewPanorama 将默认StreetViewPanorama 范围传回到地图,该范围可能是嵌入在地图中的默认全景图,也可能是使用setStreetView() 设置的全景图。
对地图的streetViewControl 所做的更改将反映在此类范围全景图的显示中。
getZoom() numberpanBy(x:number, y:number) None 将地图中心移动一段指定的距离(以像素为单位)。
如果这段距离既小于地图的宽度,又小于地图的高度,那么移动的动画效果将会十分流畅。
请注意,地图坐标系的 x 值从西向东增加,y 值从北向南增加。
panTo(latLng:LatLng) None 将地图中心更改为指定的 LatLng。
如果更改幅度既小于地图的宽度,又小于地图的高度,那么移动的动画效果将会十分流畅。
panToBounds(latLngBounds:LatLngBounds) None 将地图平移所需的最小距离以包含指定的LatLngBounds。
范围在地图上的位置并不确定,除了尽可能多地显示范围。
范围将定位在由地图类型和导航控件限定的区域内部,但前提是它们出现在地图上。
如果范围大于地图,则地图会移动,以便包括范围的西北角。
如果地图位置的移动幅度既小于地图的宽度,又小于地图的高度,那么移动的动画效果将会十分流畅。
setCenter(latlng:LatLng )None setMapTypeId(mapTypeId:MapTypeId ) None setOptions(options:MapOptions )NonesetStreetView(panorama:StreetViewPanorama ) None将StreetViewPanorama 绑定到地图。
此全景图将覆盖默认StreetViewPanorama ,从而使地图可以绑定到地图外的外部全景图。
将全景图设置为 null 可将默认的嵌入式全景图绑定回到地图。
setZoom(zoom:number) None属性属性类型说明controlsArray.<MVCArray .<Node>>附加到地图的其他控件。
要在地图中添加控件,请将控件的 <div> 添加到与应渲染它的 ControlPosition 相对应的 MVCArray 中。
mapTypesMapTypeRegistry按字符串 ID 划分的 MapType 实例的注册表。
overlayMapTypes MVCArray .<MapType >要叠加的其他地图类型。
事件事件参数 说明bounds_changed None 当可视区域范围更改时会触发此事件。
center_changed None当地图中心属性更改时会触发此事件。
click MouseEvent 当用户点击地图(但不是点击标记或信息窗口)时会触发此事件。
dblclick MouseEvent 当用户双击地图时会触发此事件。
请注意,触发此事件前还会触发点击事件。
drag None 当用户拖动地图时会反复触发此事件。
dragend None 当用户停止拖动地图时会触发此事件。
dragstartNone当用户开始拖动地图时会触发此事件。
idle None 如果地图在平移或缩放之后变为闲置状态,则会触发此事件。
maptypeid_changed None 当 mapTypeId 属性更改时会触发此事件。
mousemove MouseEvent只要用户的鼠标在地图容器上移动,就会触发此事件。
mouseout MouseEvent当用户的鼠标从地图容器上退出时会触发此事件。
mouseover MouseEvent当用户的鼠标进入地图容器时会触发此事件。
projection_changed None 当投影更改时会触发此事件。
resize None 当 div 更改大小时,开发人员应在地图上触发此事件:google.maps.event.trigger(map, 'resize') 。
rightclick MouseEvent 在地图容器中触发 DOM contextmenu 事件时会触发此事件。
tilesloaded None 可见图块载入完成后会触发此事件。
zoom_changed None 当地图缩放属性更改时会触发此事件。
属性属性类型说明backgroundColor string 用作地图 div 的背景颜色。
当用户进行平移时,如果尚未载入图块,则显示此颜色。
仅在启动地图时,才能设置此选项。
center LatLng初始的地图中心。
必填。
disableDefaultUI boolean 启用/停用所有默认的用户界面。
该属性可以单独进行重写。
disableDoubleClickZoom boolean 启用/停用在双击时缩放并居中。
默认情况下处于启用状态。
draggable boolean 如果为 False,则禁止拖动地图。
默认情况下启用拖动。
draggableCursor string 要在可拖动对象上显示的光标的名称或网址。
draggingCursor string 要在拖动对象时显示的光标的名称或网址。
keyboardShortcuts boolean 如果为 False,则禁止通过键盘控制地图。
默认情况下启用键盘快捷键。
mapTypeControl boolean 地图类型控件的初始启用/停用状态。
