蓝牙打印机使用手册
便携蓝牙打印机随时随地打印
便携蓝牙打印机随时随地打印随着科技的不断进步,便携蓝牙打印机成为人们日常生活中的必备工具之一。
它具有小巧轻便、无线连接、高质量打印等特点,使得打印变得更加简便快捷。
本文将介绍便携蓝牙打印机的功能及优势,并探讨如何最大程度地利用便携蓝牙打印机随时随地进行打印。
一、便携蓝牙打印机的功能及优势便携蓝牙打印机在外观设计上体积小巧,轻便易携带,方便用户随时携带。
它使用蓝牙技术进行连接,无需与电脑或其他设备进行有线连接,大大提高了工作效率。
同时,便携蓝牙打印机具有高质量打印的特点,可以输出清晰、细腻的打印效果,满足用户对打印品质的需求。
便携蓝牙打印机还具备多种功能,如支持多种媒体打印(包括纸质照片、标签、发票等)、支持多种打印格式(包括文本、图片、二维码等)、支持多种打印方式(包括单面打印、双面打印、连续打印等)。
这些功能的存在使得便携蓝牙打印机能够在不同场景下满足用户的多样化需求。
二、如何最大程度地利用便携蓝牙打印机随时随地进行打印1. 利用手机进行打印现代人离不开手机,而便携蓝牙打印机正是与手机无线连接的利器。
只需安装相应的打印软件,将打印内容发送至蓝牙打印机,即可实现手机上的文档、照片等内容的打印。
这种方式方便快捷,使得打印可以在任何时间、任何地点进行。
2. 利用云端存储进行打印随着云计算技术的发展,人们可以将文档、照片等文件存储在云端,通过便携蓝牙打印机进行打印。
只需将需要打印的文件上传至云端,再通过蓝牙连接打印机进行打印操作。
这种方式实现了文件与打印机的无缝连接,打印变得更加智能化。
3. 利用便携蓝牙打印机的特殊功能除了打印文档和照片外,便携蓝牙打印机还可以打印标签、二维码等特殊内容。
在物流、零售等行业,这些特殊功能的应用非常广泛。
例如,可以使用便携蓝牙打印机打印快递单上的二维码,方便快递员进行跟踪与派送。
4. 注意打印质量和耐用性在使用便携蓝牙打印机进行打印时,我们需要关注打印质量和打印耐用性。
PC端录单功能蓝牙打印机设置
PC端录单功能蓝牙打印机设置
一、推荐使用谷歌浏览器,打印机设置
1、打开Google浏览器,点击右上角如下图标
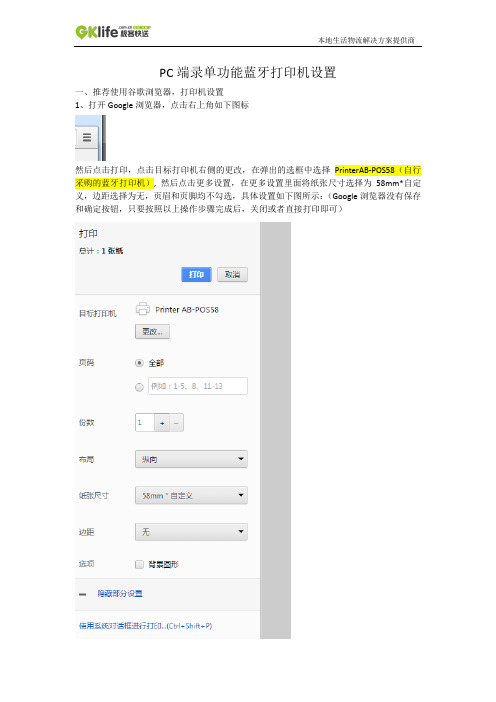
然后点击打印,点击目标打印机右侧的更改,在弹出的选框中选择PrinterAB-POS58(自行采购的蓝牙打印机), 然后点击更多设置,在更多设置里面将纸张尺寸选择为58mm*自定义,边距选择为无,页眉和页脚均不勾选,具体设置如下图所示:(Google浏览器没有保存和确定按钮,只要按照以上操作步骤完成后,关闭或者直接打印即可)
1.选择火狐浏览器右上角如下图标
选择打印进入之后点击页面设置,然后选择页边距和页眉/页脚,设置如下
2点击打印->弹出打印机选项框->选择右上角属性->进入后右下角点击高级->纸张规格选择58mm*自定义
1.点击右上角设置图标->将鼠标移到打印上面->选择页面设置,设置如下
2.
2.点击打印->弹出打印机选项框->进入后选择Printer AB-POS58然后点击首选项->选择高级->纸张规格选择58mm*自定义。
蓝牙打印机使用手册
蓝牙打印机使用手册蓝牙(Bluetooth):一种采用了全球通用的短距离无线连接技术,使用与微波相同的2.4GHz附近免付费、免申请的无线电频段,无需对准就能传输数据,传输距离小于10米。
蓝牙打印机就是通过这种设备配对蓝牙适配器进行数据传输,接收主机向打印机传送的数据并打印出来,蓝牙打印机默认的波特率为38400,8位数据位,1位停止位,没有奇偶校验,有数据流控制。
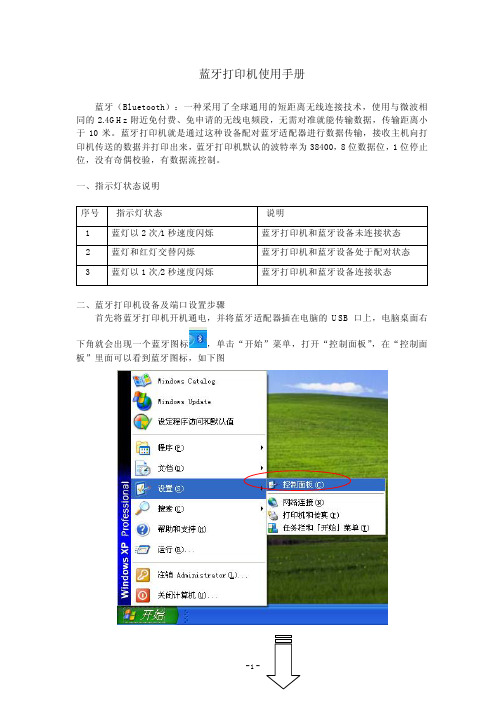
一、指示灯状态说明序号指示灯状态说明1 蓝灯以2次/1秒速度闪烁蓝牙打印机和蓝牙设备未连接状态2 蓝灯和红灯交替闪烁蓝牙打印机和蓝牙设备处于配对状态3 蓝灯以1次/2秒速度闪烁蓝牙打印机和蓝牙设备连接状态二、蓝牙打印机设备及端口设置步骤首先将蓝牙打印机开机通电,并将蓝牙适配器插在电脑的USB口上,电脑桌面右下角就会出现一个蓝牙图标双击“蓝牙图标”,打开Bluetooth设备,如图所示单击“添加”按钮,弹出“添加打开Bluetooth设备向导”单击“下一步”在此处勾选自动搜索到蓝牙打印机设备,双击击“Gprinter新设备图标”,出现如下图选择“让我选择自己的密钥”,默认密钥为“0000”如图所示单击“下一步”默认密钥:0000点击“完成”,将完成添加Bluetooth设备向导,接着出现下面图示单击“COM端口”按钮,如下图所示,电脑自动为蓝牙打印机分配一个“COM 3端口”此端口就是蓝牙打印机的连接端口。
其次,设置蓝牙打印机驱动端口。
单击“开始”菜单,打开“控制面板”,双击“打印机和传真”,可以看到装好的蓝牙打印机驱动,如图右键单击驱动“属性”=》“端口”,选择“COM 3端口选项”如图,单击“应用”,在“常规”选项里面单击“打印测试页”,并单击“确定”按钮完成端口配置,蓝牙打印机就会相应打出window测试页了。
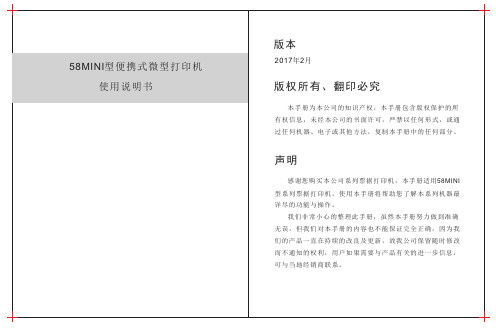
58MINI型便携式微型打印机 使用说明书
体积:102*78*46mm 重量:134g(含电池)充电:红灯充满:蓝灯重量:134g(含电池)充电:红灯充满:蓝灯9V9V充电:红灯充满:蓝灯9V纸仓切纸锯齿充电指示灯()报错指示灯电量显示灯开关按键走纸键模式键9V DC充电插槽USB 端口重量:192g(含电池)体积:107X75X51.5mm型号:58054.通信接口1. RS232(COM /串口):标准RS232串口通信协议。
2. USB :标准USB 通信协议。
3. 蓝牙2.0:通用蓝牙2.0通信协议。
4. 双模蓝牙:通用蓝牙2.0和蓝牙4.0协议。
纸拉出一小段至盒外,合上上盖。
用机器的刀口撕掉多余的纸卷。
将打印体积:1重量:型号:580充电:红灯充满:蓝灯未连接:灭连接:亮(绿)步:在安卓设备“桌面”找到“ ”图标,然后打开 点击“连接”,然后搜索蓝牙打印机,配对好密码(蓝连接成功后,屏幕会提示打开机连接设备连接成功,点击“打印测试页”,打印机将工作。
连接成功,如图所示选择搜索到的蓝牙名称BlueTooth Printer,输入配对码,默认是1234或者0000,点击确定连接成功,在编辑框中输入要打印测试的内容(中英文都可以)。
打开苹果手机蓝牙后,再打开刚下好的“POS-Printer”软件。
点击“选择打印机”后启动蓝牙,蓝牙启动成功,可看到电脑右下方显示 图标。
点击 图标,然后点“添加Bluetooth 设备”,进入下一画面, 勾选“我设备已经设置并且准备好,可以查找”,然后点“下一步” (如图)。
把蓝牙打印机打开(通电)。
如果电脑进入如图画面,说明电脑正在搜寻蓝牙设备,请等待。
选中“让我选择自己的密钥”,输入配对码”1234”,然后点“下一步”。
当出现如下画面,说明蓝牙打印机已经配对成功,请记住分配给COM(串行)端口。
、请详细阅读软件条款说明,选择接受并继续安装,如下图所示:、点击“下一步”操作之后出现如下图(客户可以修改驱动安装的路径也 可以选择默认的路径)、再点击“下一步”操作之后出现如下图,择“安装”,如果您的电脑装有杀毒软件等,出现阻止安装的窗口请允许此操作、等待安装完成之后出现如下界面,选择符合你的计算机的操作系统,然后 在选择打印机的型号(POS58系列打印机),如果您使用USB端口检测”会自动识别电脑USB接口,点击下一步继续安装,如下、点击开始安装,出现如下图所示的框,选择 安装 或者‘始终安装此驱动 程序软件’:1920请在端口列表中选择“COM1”→“配置端口”, 打印机出厂默认设置如下如果打印机打印一个正常的页面,那么它表明工作成功。
便携式蓝牙打印机MPT-III[说明书]
![便携式蓝牙打印机MPT-III[说明书]](https://img.taocdn.com/s3/m/471da3c058f5f61fb73666fb.png)
厦门普瑞特科技有限公司热敏便携收据打印机MPT-III 便携蓝牙打印机系列厦门普瑞特科技有限公司目录注意事项 (3)第一章产品简介 (4)1.1打印机外观 (4)1.2型号说明 (4)1.3附件 (5)第二章性能特点 (6)2.1打印性能 (6)2.2物理参数 (6)2.3环境参数 (6)2.3其他性能 (6)第三章使用方法 (7)3.1使用前的准备 (7)3.1.1 电池安装 (7)3.1.2 打印纸卷安装 (7)3.2基本功能使用 (7)3.2.1 开机 (7)3.2.2 关机 (8)3.2.3 自检 (8)3.2.4 走纸(手动进纸) (8)3.2.5 充电 (8)3.3打印连接及打印 (8)3.3.1 串口连接 (8)3.3.2 原始红外和IrDA连接 (8)3.3.3 蓝牙(Bluetooth) (9)3.4指示灯及蜂鸣信号说明 (9)第四章其他信息 (10)4.1打印机开发手册 (10)4.2预印刷黑标说明 (10)注意事项在使用打印机之前,请仔细阅读本章内容!安全注意事项本打印机只能使用本公司提供的专用电池和电源适配器,否则可能引起产品损坏,电池漏液、起火甚至爆炸。
不要将电池投入火中,不要将电池短路、拆散或加热,否则可能导致电池漏液、起火甚至爆炸。
电池中的液体具有腐蚀性,如果操作不慎导致电池漏液并将液体粘到皮肤或衣物上,请立即用清水洗掉,如不慎进入眼睛内,请立即用大量清水彻底冲洗眼睛并去看医生。
打印时或刚打印结束时不要开启纸仓盖,用手或身体的任何部位接触打印机芯,以免过高的温度导致烫伤。
使用注意事项打印机不可浸入水中,也不要将其长时间暴露在雨中,否则可能导致打印机损坏。
打印过程中不得打开纸仓盖,否则可能导致打印机工作不正常。
在使用串口打印时,在打印过程中不能将串口线拔下,否则可能导致打印数据不完整。
在使用红外方式打印时,在打印过程中要将主设备的红外窗口对准打印机的红外视窗,距离不能超过50厘米,角度不能超过30度,否则可能导致打印乱码或无法打印。
如何更改佳能打印机的USB蓝牙
编辑:oa161办公商城
事情您,会NeedCanon printerComputerShow MoreInstructions 1取下USB电缆连接。你不需要添加任何新的驱动程序,因为目前的打印机已经安装了从您的USB connection.2Click的桌面上的“开始”按钮,选择“运行”选项。会出现一个小窗口,你screen.3Type“bthprops.cpl”(不带引号),并单击“确定”。这将打开蓝牙设置window.4Click窗口中的“添加”,然后选择“我的设备已经设置并准备被发现。”点击“下一步”,电脑扫描附近任何蓝牙devices.5Choose佳能蓝牙打印机,从弹出的列表中,然后点击“下一步”。现在的打印机连接到您的电脑,你就可以开始使用它的无线连接。
蓝牙打印机协议手册_雅黑
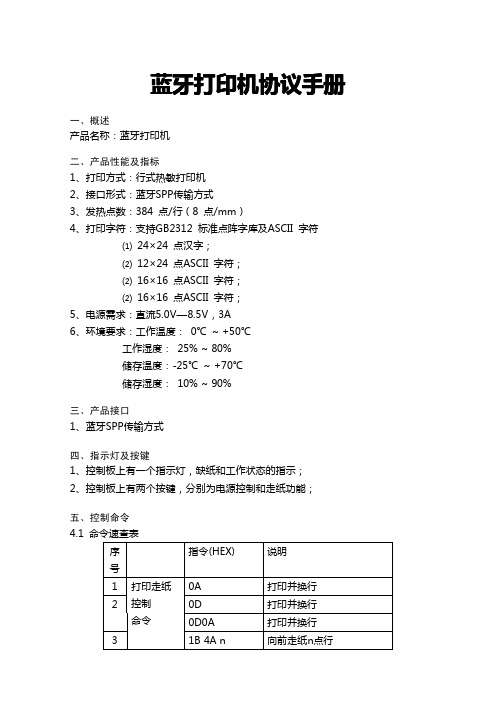
蓝牙打印机协议手册一、概述产品名称:蓝牙打印机二、产品性能及指标1、打印方式:行式热敏打印机2、接口形式:蓝牙SPP传输方式3、发热点数:384点/行(8点/mm)4、打印字符:支持GB2312标准点阵字库及ASCII字符⑴24×24点汉字;⑵12×24点ASCII字符;⑵16×16点ASCII字符;⑵16×16点ASCII字符;5、电源需求:直流5.0V—8.5V,3A6、环境要求:工作温度:0℃~+50℃工作湿度:25%~80%储存温度:-25℃~+70℃储存湿度:10%~90%三、产品接口1、蓝牙SPP传输方式四、指示灯及按键1、控制板上有一个指示灯,缺纸和工作状态的指示;2、控制板上有两个按键,分别为电源控制和走纸功能;五、控制命令4.1命令速查表序号指令(HEX)说明1打印走纸控制命令0A打印并换行20D打印并换行0D0A打印并换行31B4A n向前走纸n点行41B 4B n 向后走纸n点行5字体样式和段落样式命令61B 31n 设置行间距为n 点行71B 69n 允许/禁止反白打印81B 55n 设置字符倍宽91B 56n设置字符倍高1011121B 66n 打印n行空行13功能打印命令141B 2A 00…位图打印命令15其它命令1B 40打印机初始化161B 0404打印机状态查询171B 05n设置打印黑度18191B 21n 设置字体的大小201B 140恢复默认打印字体4.2命令详细说明■换行命令ASCII:LF 十进制:10十六进制:0A说明:打印机收到换行命令后,打印出换行命令前输入的所有可打印字符。
如果之前未输入可打印字符编码,打印机将空走纸一个字符行。
(只走纸不打印)■回车命令ASCII:CR十进制:13十六进制:0D说明:打印机收到回车命令后,打印出回车命令前输入的所有可打印字符。
如果之前未输入可打印字符编码,打印机将空走纸一个字符行。
蓝牙打印机协议手册雅黑
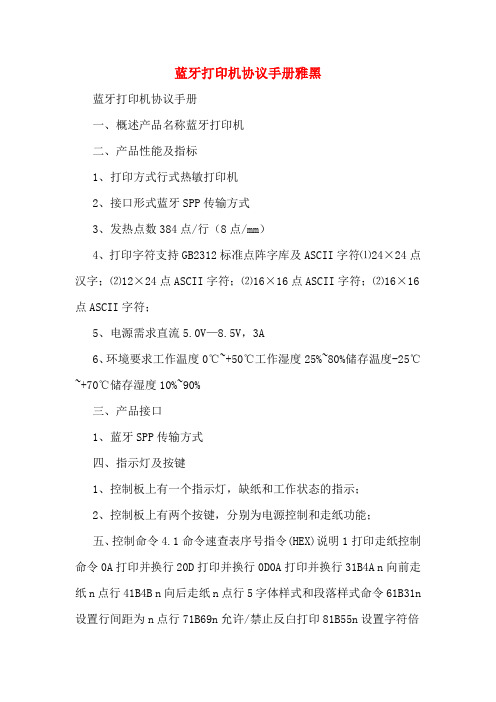
蓝牙打印机协议手册雅黑蓝牙打印机协议手册一、概述产品名称蓝牙打印机二、产品性能及指标1、打印方式行式热敏打印机2、接口形式蓝牙SPP传输方式3、发热点数384点/行(8点/mm)4、打印字符支持GB2312标准点阵字库及ASCII字符⑴24×24点汉字;⑵12×24点ASCII字符;⑵16×16点ASCII字符;⑵16×16点ASCII字符;5、电源需求直流5.0V—8.5V,3A6、环境要求工作温度0℃~+50℃工作湿度25%~80%储存温度-25℃~+70℃储存湿度10%~90%三、产品接口1、蓝牙SPP传输方式四、指示灯及按键1、控制板上有一个指示灯,缺纸和工作状态的指示;2、控制板上有两个按键,分别为电源控制和走纸功能;五、控制命令4.1命令速查表序号指令(HEX)说明1打印走纸控制命令0A打印并换行20D打印并换行0D0A打印并换行31B4A n向前走纸n点行41B4B n向后走纸n点行5字体样式和段落样式命令61B31n 设置行间距为n点行71B69n允许/禁止反白打印81B55n设置字符倍宽91B56n设置字符倍高1011121B66n打印n行空行13功能打印命令141B2A00…位图打印命令15其它命令1B40打印机初始化161B0404打印机状态查询171B05n设置打印黑度18191B21n设置字体的大小201B140恢复默认打印字体4.2命令详细说明■换行命令ASCII LF十进制10十六进制0A说明打印机收到换行命令后,打印出换行命令前输入的所有可打印字符。
如果之前未输入可打印字符编码,打印机将空走纸一个字符行。
(只走纸不打印)■回车命令ASCII CR十进制13十六进制0D说明打印机收到回车命令后,打印出回车命令前输入的所有可打印字符。
如果之前未输入可打印字符编码,打印机将空走纸一个字符行。
(只走纸不打印)注意“0D0A”组合使用时,只作一个换行符处理■向前走纸n点行ASCII ESCJ n十进制2774n十六进制1B4A n说明执行n点行空白走纸。
GAINSHA 80mm 迷你蓝牙便携式票据打印机用户手册说明书
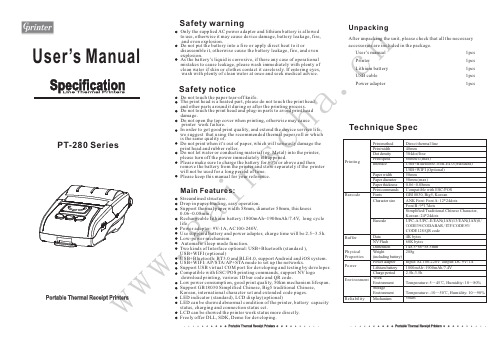
w ww.g i ns ch a.cnStreamlined structure.Drop in paper loading, easy operation.Support thermal paper width 58mm, diameter 50mm, thickness 0.06~0.08mm.Rechargeable lithium battery:1800mAh~1900mAh/7.4V, long cycle life.Power adapter: 9V-1A, AC100-240V.Use supplied battery and power adapter, charge time will be 2.5~3.5h.Low-power mechanism.Automatic sleep mode function.Two kinds of Interface optional: USB+Bluetooth (standard ), USB+WIFI (optional)USB+Bluetooth: BT3.0 and BLE4.0, support Android and iOS B+WIFI: AP/STA/AP+STA mode to set up the networks.Support USB virtual COM port for developing and testing by patible with ESC/POS printing commands, support NV logo download printing, various 1D bar code and QR code.Low power consumption, good print quality, 50km mechanism lifespan.Support GB18030 Simplified Chinese, Big5 traditional Chinese, Korean, international character set and extended code pages.LED indicator (standard), LCD display(optional)LED can be showed abnormal condition of the printer, battery capacity status, charging and connection status ect.LCD can be showed the printer work status more directly.Freely offer DLL, SDK, Demo for developing.Only the supplied AC power adapter and lithium battery is allowed to use, otherwise it may cause device damage, battery leakage, fire, and even explosion.Do not put the battery into a fire or apply direct heat to it ordisassemble it, otherwise cause the battery leakage, fire, and even explosion.As the battery’s liquid is corrosive, if there any case of operational mistakes to cause leakage, please wash immediately with plenty of clean water if skin or clothes contact it carelessly. If entering eyes,wash with plenty of clean water at once and seek medical advice.Do not touch the paper tear-off knife.The print head is a heated part, please do not touch the print head and other parts around it during or after the printing process.Do not touch the print head and plug-in parts to avoid print head damage.Do not open the top cover when printing, otherwise may cause printer work failure.In order to get good print quality, and extend the device service life, we suggest that using the recommended thermal paper roll or which is the same quality of.Do not print when it’s out of paper, which will seriously damage the print head and rubber roller.Do not let water or conducting material (eg. Metal) into the printer, please turn off the power immediately if happened.Please make sure to charge the battery for 60% or above and then remove the battery from the printer and store separately if the printer will not be used for a long period of time.Please keep this manual for your reference.Safety warningSafety noticeMain Features:After unpacking the unit, please check that all the necessaryaccessories are included in the package.Unpacking1pcs 1pcs 1pcs 1pcs 1pcsUser’s manualPrinterLithium batteryUSB cablePower adapterPT-280 SeriesTechnique SpecPrinting Barcode Buffer Physical Properties Power EnvironmentReliabilityPrint method Print width Dot density Print speed Interface Paper width Paper diameter Paper thickness Print commands FontsCharacter sizeBarcodeData NV Flash Dimension Weight(including battery)Power adapter Lithium battery Charge period WorkEnvironment StorageEnvironment MechanismDirect thermal line 48mm384dot/line 60mm/s (max)USB+Bluetooth3.0/BLE4.0 (Standard)USB+WIFI (Optional)58mm50mm (max)0.06~0.08mmCompatible with ESC/POS GB18030, Big5, KoreanANK Font: Font A: 12*24dots Font B: 9*17dotsSimplified/Traditional Chinese Character, Korean: 24*24dotsUPC-A/UPC-E/EAN(JAN)13/EAN(JAN)8/C ODE39/CODABAR /ITF/CODE93/CODE128/QR code 4K bytes 60K bytes148.5*86*58.5mm 288gInput: AC100-220V output: DC 9V/1A 1800mAh~1900mAh/7.4V 2.5h-3.5hTemperature: 5~45℃, Humidity: 10~80%Temperature: -10~50℃, Humidity: 10~90%50kmw ww .g ai ns c.cn Printer parts:1.Error indicator (red)2.Battery status indicator (Green)3.Status indicator (Blue)4.Power button5.Feed buttonPaper Roll Installation a .Open the top cover as shown in the picture.b .Install the paper roll correctly as shown in the picture.c .Pull the leading edge 5mm of the paper outside the slot.d .Close the top cover.Battery Installation1. Specified battery.2. Install the battery as the picture showing direction.3. Push the battery into the slot until you hear it snap in place .Battery ChargingIndicators, Beeper and Buttons:1. Turn off the printer power.2. Plug the supplied power adapter into the printer’s powerinput socket properly, and then connect AC power.3. Turn on the printer power and then it starts to charge.NOTE: Charge the battery must be in the state of power-on.PrinterInput: AC100-220V Output: DC9V/1A6.Function key button7.Power portB port9.HookStatusERROR indicator (Red)Battery status indicator (Green)STATUSindicator (Blue)Beeper OFF Blinking OFF OFFOFF ON ON ONOFF OFF OFF ONNo Yes No NoPrinter power off.Printer power on, but out of paper.Printer is powered on and in normal print mode.Bluetooth/WiFi connected.Long press the power button for 3 seconds. Note:The printer can not be printed without using battery.Printer power ON/OFF.Press the POWER button and FUNC b u t t o n s i m u l t a n e o u s l y, w a i t f o r t h e green lights light in turn, then release the POWER button firstly. the red light and blue light lights up in turn, after the blue light dims, release the FUNC button; red light dims, the printer motor will vibrate.Factory data resetTo feed paper manually, press the FEED button.Paper feedHexadecimal DumpingPress the FEED button and the POWER button simultaneously, wait for all thelights are bright, then release the POWER button firstly, wait for STATUS indicator (blue light) dims, then release the FEED button.Print Self-test page Press the FEED button and the POWER button simultaneously, wait for all the lights are bright, then release the POWER button firstly; after the blue light and red light dims in turn, then release the FEED button, meanwhile the printer prints out "Hexadecimal Dump" page, then printer is changed to Dump mode.Interface informationTurn the printer, press the function button.on。
蓝牙打印机_ESC_POS指令集
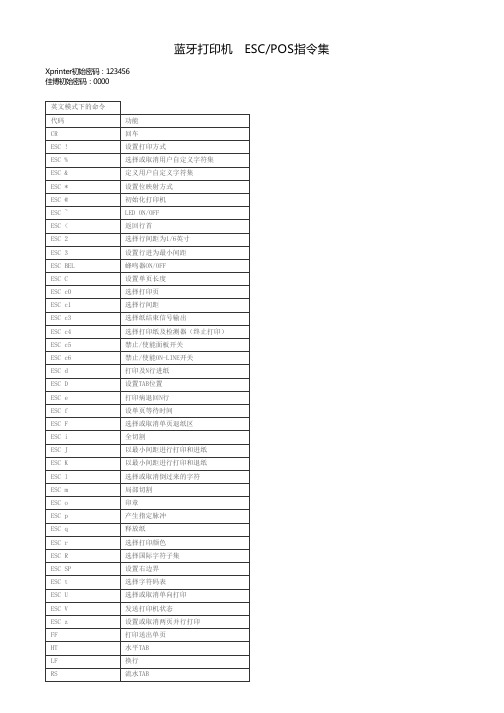
十进制: 27 69 0
十六进制: 1B 45 0
说明:
0 ≤ n ≤ 255
当n的LSB位是0,取消着重模式。
当n的LSB位是1,设置着重模式。
ESC G n
设置/取消重叠模式
格式: ASCII: ESC G NUL
十进制: 27 71 0
十六进制: 1B 47 0
当只有一个自定义字符时,取m=n。
a:自定义字符的水平方向的点数。
d1 d2……db:自定义字符的数据。每个字符 y×x个字节,m-n+1个自定义字符共有:
(y×x)×(m-n+1)个字节。
每个自定义字符数据的格式:
d1 d3 … d(y×x)×(m-n+1)-1
d2 d4 … d(y×x)×(m-n+1)
十进制: 09
十六进制: 09
说明:
打印位置进行到下一水平制表位置。
如果当前打印位置超过了最后一个水平制表位置,则HT命令不被执行。
水平制表位置由 ESC D命令设置。
LF
打印并换行
格式: ASCII: LF
十进制: 10
十六进制: 0A
ESC R n
选择国际字符集
格式: ASCII: ESC R n
十进制: 27 82 n
十六进制: 1B 52 n
说明:
ESC R用于选择11个不同国家的不同ASCII字符集。
n=0~10。默认值为0,选择U.S.A方式。
ESC U n
消除所有的水平制表位置
格式: ASCII: ESC D NULL
十进制: 27 68 0
十六进制: 1B 44 0
说明:
ESC D NUL命令消除所有的水平制表位置,之后再执行的HT命令将无效。
HP Smart Tank 532无线全功能打印机说明书
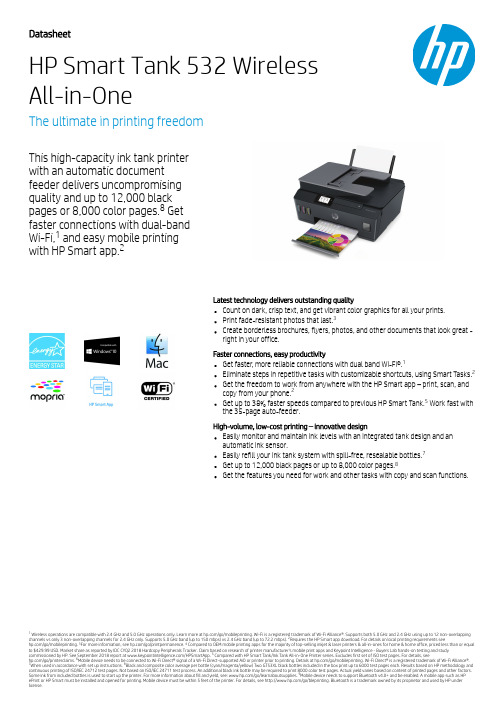
DatasheetHP Smart Tank 532 Wireless All-in-OneThe ultimate in printing freedomThis high-capacity ink tank printer with an automatic document feeder delivers uncompromising quality and up to 12,000 black pages or 8,000 color pages. Get faster connections with dual-band Wi-Fi, and easy mobile printingwith HP Smart test technology delivers outstanding qualityCount on dark, crisp text, and get vibrant color graphics for all your prints.Print fade-resistant photos that last.Create borderless brochures, flyers, photos, and other documents that look great -right in your office.Faster connections, easy productivityGet faster , more reliable connections with dual band Wi-Fi®.Eliminate steps in repetitive tasks with customizable shortcuts, using Smart Tasks.Get the freedom to work from anywhere with the HP Smart app – print, scan, and copy from your phone.Get up to 38% faster speeds compared to previous HP Smart Tank. Work fast with the 35-page auto-feeder.High-volume, low-cost printing – innovative designEasily monitor and maintain ink levels with an integrated tank design and an automatic ink sensor.Easily refill your ink tank system with spill-free, resealable bottles.Get up to 12,000 black pages or up to 8,000 color pages.Get the features you need for work and other tasks with copy and scan functions.Wireless operations are compatible with 2.4 GHz and 5.0 GHz operations only. Learn more at /go/mobileprinting. Wi-Fi is a registered trademark of Wi-Fi Alliance®. Supports both 5.0 GHz and 2.4 GHz using up to 12 non-overlapping channels vs only 3 non-overlapping channels for 2.4 GHz only. Supports 5.0 GHz band (up to 150 mbps) vs 2.4 GHz band (up to 72.2 mbps). Requires the HP Smart app download. For details on local printing requirements see/go/mobileprinting. For more information, see /go/printpermanence. Compared to OEM mobile printing apps for the majority of top-selling inkjet & laser printers & all-in-ones for home & home office, priced less than or equal to $429.99 USD. Market share as reported by IDC CYQ2 2018 Hardcopy Peripherals Tracker. Claim based on research of printer manufacturer’s mobile print apps and Keypoint Intelligence - Buyers Lab hands-on testing and study commissioned by HP. See September 2018 report at /HPSmartApp. Compared with HP Smart Tank/Ink Tank All-in-One Printer series. Excludes first set of ISO test pages. For details, see/go/printerclaims. Mobile device needs to be connected to Wi-Fi Direct® signal of a Wi-Fi Direct-supported AiO or printer prior to printing. Details at /go/mobileprinting. Wi-Fi Direct® is a registered trademark of Wi-Fi Alliance®.When used in accordance with set up instructions. Black and composite color average per bottle (cyan/magenta/yellow) Two GT53XL black bottles included in the box print up to 6000 test pages each. Results based on HP methodology and continuous printing of ISO/IEC 24712 test pages. Not based on ISO/IEC 24711 test process. An additional black ink bottle may be required to print 8000 color test pages. Actual yield varies based on content of printed pages and other factors.Some ink from included bottles is used to start up the printer. For more information about fill and yield, see: /go/learnaboutsupplies. Mobile device needs to support Bluetooth v4.0+ and be enabled. A mobile app such as HP ePrint or HP Smart must be installed and opened for printing. Mobile device must be within 5 feet of the printer. For details, see /go/bleprinting. Bluetooth is a trademark owned by its proprietor and used by HP under license.8123122578123456789Data sheet | HP Smart Tank 532 Wireless All-in-OneHP Smart Tank 532 Wireless All-in-One Technical specificationsFunctions / Multitasking supported Print, scan, copy, ADF , wireless / NoPrint speed Letter: Up to 11 ppm; Black (ISO): Up to 11 ppm; Color (ISO): Up to 5 ppm; First page out black: As fast as 14 sec; First Page Out Color: As fast as 21 sec; Black (draft): Up to 22 ppm; Color (draft): Up to 16 ppmPrint resolution Black (best): Up to 1200 x 1200 rendered dpi; Color (best): Up to 4800 x 1200 optimized dpi color (when printing from a computer and 1200 input dpi)Print technology HP Thermal InkjetPrint cartridges number 4 (1 each black bottle, set of 3 color bottles)Borderless printing Yes (up to 8.5 x 11 in, 210 x 297 mm)Standard print languages HP PCL 3 GUI Printer smart software featuresNoScan type / Technology Flatbed, ADF Contact Image Sensor (CIS)Scan resolution Hardware: Up to 1200 x 1200 dpi; Optical: Up to 1200 dpi Scan file format JPG, BMP , TIFF , PDF , RTF , TXT , PNG Scan input modes Front Panel Scan; Copy; HP Software; EWS Scan size maximum ADF: 216 x 356 mm; Flatbed: 216 x 297 mmScan speedUp to 3 ppm (200 ppi, color), Up to 5 ppm (200 ppi, mono)Scanner advanced features No Bit depth / Grayscale levels 24-bit/256Digital sending standard features Everyday scan (scan to PDF); HP Smart Tasks Copy speed Black (ISO): Up to 10 cpm; Color (ISO): Up to 2 cpmCopy resolutionBlack (text and graphics): Up to 600 dpi; Up to 600 dpi; Color (text and graphics): Up to 600 dpi Maximum number of copies Up to 99 copiesCopier settingsNumber of Copies, Resize, Quality, Lighter/Darker , Papersize, Papertype, ID Copy, Collate,Enhancement Fax smart software features NoFax Features Distinctive ring detection supported: NoStandard connectivity Hi-Speed USB 2.0, Wi-Fi, Bluetooth LE Network capabilities Yes (via Wi-Fi)Wireless capability Yes, built-in dual band Wi-Fi 802.11b/g/n, Wireless direct, BLEMobile printing capability HP Smart app; Apple AirPrint™; Fire™; Google Cloud Print 2.0; HP ePrint; Android printing;Mopria™-certifiedMemory Standard: 256 MB; Integrated memory; Maximum: 256 MB Processor speed 800 MHzDuty cycleMonthly, letter: Up to 1000 pagesRecommended monthly page volume400 to 800Media types supportedPlain Paper , HP Photo Papers, HP Matte Brochure or Professional Paper , HP MattePresentation Paper , HP Glossy Brochure or Professional Paper , Other Photo Inkjet Papers,Other Matte Inkjet Papers, Other Glossy Inkjet Papers, Inkjet Hagaki, Plain Paper , Thick, HP Tri-fold Brochure Paper , Glossy, Plain Paper , Light/RecycledMedia weight supported Plain paper: 60 to 90 g/m²; Envelopes: 75 to 90 g/m²; Cards: up to 200 g/m²; Photo paper: up to 300 g/m²Media sizes supported A4; B5; A6; DL envelope, legal Media Sizes Custom 76.2 x 127 mm to 215.9 x 355.6 mmPaper handlingInput Capacities: Up to 100 sheets Standard; Up to 10 envelopes; Up to 30 cards; Up to 100 sheets LegalOutput Capacities: Up to 30 sheets Standard Up to 10 envelopes Up to 30 cards Up to 30 sheets LegalDuplex Options: Manual (driver support provided)Envelope feeder: No Standard paper trays: 1Auto Document Feeder Capacity: Standard, Up to 35 sheetsWhat's in the box5HX16A HP Smart Tank 532 Wireless All-in-One; Two HP GT53XL 135-ml Black Original Ink Bottle; HP GT52 Cyan Original Ink Bottle; HP GT52 Magenta Original Ink Bottle; HP GT52 Yellow Original Ink Bottle; Ink caution flyer; Setup guide;Reference guide; Regulatory flyer; Warranty card, Power cord [For moreinformation about fill and yield, see /go/learnaboutsupplies]Replacement cartridges HP GT53 90-ml Black Original Ink Bottle 1VV22AL; HP GT52 Cyan Original InkBottle M0H54AL; HP GT52 Magenta Original Ink Bottle M0H55AL; HP GT52Yellow Original Ink Bottle M0H56AL; HP GT52 3-pack Cyan/Magenta/Yellow Original Ink Bottles X4E44AL. For more information about fill and yield, see /go/learnaboutsupplies Product dimensions W x d x h: 449 x 373 x 198 mm; Maximum: 449 x 605.65 x 258.7 mm Product weight 6.19 kgWarranty featuresOne year of 24/7 world-class technical support services through/support; One-year or 30,000 pages limited hardwarewarranty, whichever is earlier from the date of purchase; user replaceable parts have separate warranty periods Energy efficiency compliance ENERGY STAR® qualifiedControl panel 5.58 cm (2.2-inch) Touchscreen MGD (Mono graphics), power button, touch button (home, help, back)Display description 5.58 cm (2.2-inch) MGD (Mono Touchscreen)Software included HP Printer Software, HP Update, HP Photo CreationsCompatible operating systems Windows 10, 7; OS X v10.11 El Capitan, macOS Sierra v10.12 (previously OS X),macOS High Sierra v10.13, macOS Mojave v10.14Minimum system requirements PC: Windows 10, 7: 1 GHz 32-bit (x86) or 64-bit (x64) processor , 2 GB available hard disk space, Internet connection, USB port, Internet Explorer 8.; Mac: OS X v10.11 El Capitan and above, Internet AccessPower Power supply type: Internal built in; Power requirements: Input voltage 100 to 240 VAC (+/- 10%), 50/60 Hz (+/- 3 Hz). High voltage: Input voltage 200 to 240VAC (+/- 10%), 50/60 Hz (+/- 3Hz); Power consumption: 0.11 watts (manual-off), 3.72 watts (ready), 0.83 watts (sleep)AcousticsAcoustic power emissions: 6.4 B(A); Acoustic pressure emissions: 50 dB Operating environmentOperating temperature range: 5 to 40°C; Recommended operating temperature:15 to 30°C; Storage temperature range: -40 to 60°C; Non-operating humidity range: 5 to 90% RH (non-condensing); Operating humidity range: 15 to 80% RH (non-condensing); Recommended humidity operating range: 20 to 80% RH HP Service and Support optionsWith services, software, solutions and support from HP Total Care, you can use,protect and enjoy your HP technology; one-year technical support; one-year or 30,000 pages limited hardware warranty, whichever is earlier from the date of purchase; user replaceable parts have separate warranty periods; access to 24/7 world-class support services through /support; to improve your product experience, please take the time to register at .Learn more at Dimensions vary as per configuration Power requirements are based on the country/region where the printer is sold. Do not convert operating voltages. This will damage the printer and void the product warranty. Wireless performance is dependent upon physical environment and distance from the access point. Wireless operations are compatible with 2.4 GHz routers only; excludes wireless direct. Wireless direct may require driver or apps be installed and connected onwireless-enabled mobile device or PC. Wireless functionality may vary by computer and mobile operating systems, see . Print times and connection speeds may vary. AirPrint™ supports macOS Mojave, iOS 4.2 or later and requires the printer be connected to the same network as your macOS or iOS device. AirPrint, the AirPrint Logo and macOS are trademarks of Apple Inc. Windows is a trademark of the Microsoft group of companies. Speed specifications have been updated to reflect current industry testing methods. Either after first page or after first set of ISO test pages. For details see: /go/printerclaims Average based on ISO/IEC 24711 or HP testing methodology and continuous printing. Actual yield varies considerably based on content of printed pages and other factors. For details see /go/learnaboutsupplies© Copyright 2020 HP Development Company, L.P. The information contained herein is subject to change without notice. The only warranties for HP products and services are set forth in theexpress warranty statements accompanying such products and services. Nothing herein should be construed as constituting an additional warranty. HP shall not be liable for technical or editorial errors or omissions contained herein. © Copyright 2019 HP Development Company, L.P. The information contained herein is subject to change without notice. The only warranties for HP products and services are set forth in the express warranty statements accompanying such products and services. Nothing herein should be construed as constituting an additional warranty. HP shall not be liable for technical or editorial errors or omissions contained herein. ENERGY STAR and the ENERGY STAR logo are registered U.S. marks. Windows is a registered trademark of Microsoft Corporation. AirPrint, iPad, iPhone, and iPod touch are trademarks of Apple Inc., registered in the U.S. and other countries.4AA7-5751ENL , April 2020, R154362123456。
南京国春电气设备 蓝牙串口打印机模块 使用说明
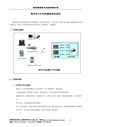
蓝牙串口打印机模块使用说明微型串口打印机内嵌蓝牙打印机模块,实现蓝牙设备、上位机PC、笔记本或PDA等通过蓝牙实现无线打印,原串口打印机无需关心蓝牙协议,应用简单,可靠稳定。
1、工作模式示意图:2、工作模式说明:A、打印机工作在从模式加电后,打印机蓝牙模块工作在从模式,处于等待配对、连接状态。
主端设备查找、配对蓝牙打印机,配对成功后,即可向蓝牙打印机发起连接。
连接成功后,主端设备串口(或虚拟串口)与蓝牙打印机UART口形成透明传输,可以开始打印。
打印完成,主端设备断开蓝牙链路。
串口打印机忙时,可通过RTS向蓝牙模块的CTS引脚发送高电平,蓝牙模块检测到CTS脚的高电平后,停止向打印机发送数据,直至打印机将CTS置低。
B、打印机工作在主模式打印机蓝牙模块预先绑定上位机蓝牙设备地址,双方PIN码一致。
加电后,打印机蓝牙模块工作在主模式,自动连接绑定的设备。
连接成功后,主端设备串口(或虚拟串口)与蓝牙打印机UART口形成透明传输,可以开始打印。
打印完成,可始终保持蓝牙链路,随时进行打印,如需断开蓝牙,关闭打印机模块电源。
串口打印机忙时,可通过打印机的BUSY脚向蓝牙模块的CTS引脚发送高电平,蓝牙模块检测到CTS脚的高电平后,停止向打印机发送数据,直至打印机将CTS置低。
C、灵活转换打印机工作模式用户可通过A T指令,灵活设定蓝牙打印机的工作模式、串口参数。
可定制专用的蓝牙模块功能,如:用拨码开关控制打印机工作模式。
可定制专用的蓝牙模块功能,如:用拨码开关控制打印机的串口参数。
可定制专用的蓝牙模块功能,如:用拨码开关控制蓝牙打印机是否可见,是否可被配对。
出厂默认参数:工作模式:从模式;串口参数:9600,N,8,1 ;设备名称:GuoChun ;PIN码:000000003、模块引脚定义和外形尺寸(单位:mil 100mil=2.54mm):图2:贴片式打印机模块引脚定义与外形尺寸(12.25mm×19.6mm)引脚描述PIN名称定义说明NO.1 GND GND Ground7 UART_TXD CMOS Output UART Data Output8 UART_RXD CMOS Input UART Data Input9 UART_CTS CMOS Input UART Clear To Send10 UART_RTS CMOS Output UART Request To Send12 GND GND Ground13 VCC Input Power Supply Input (2.7V~ 3.3V)14 GND GND Ground15 PIO5 输出信号看门狗输出信号,未建链800MS,建链后200MS18 SPI_MOSI CMOS Input 固件升级19 SPI_CSB CMOS Input 固件升级20 SPI_CLK CMOS Input 固件升级21 GND GND Ground22 SPI_MISO CMOS Output 固件升级23 RESET CMOS Input 复位(高电平)25 PIO9 输入信号断链控制(由低到高脉冲断链)28 PIO3 输出信号建链指示,高:未建链,低:已建链29 PIO2 输出信号建链指示,高:已建链,低:未建链33 GND GND Ground35 ANT ANT 天线输出36 GND GND Ground4、引脚说明:A、PIO功能引脚PIO2:建链指示输出:高电平(链路已经建立,串口透明,可以打印);低电平(链路没有建立,串口不透明,无法打印)。
蓝牙打印机匹配说明_适用于Hp iPAQ112机型
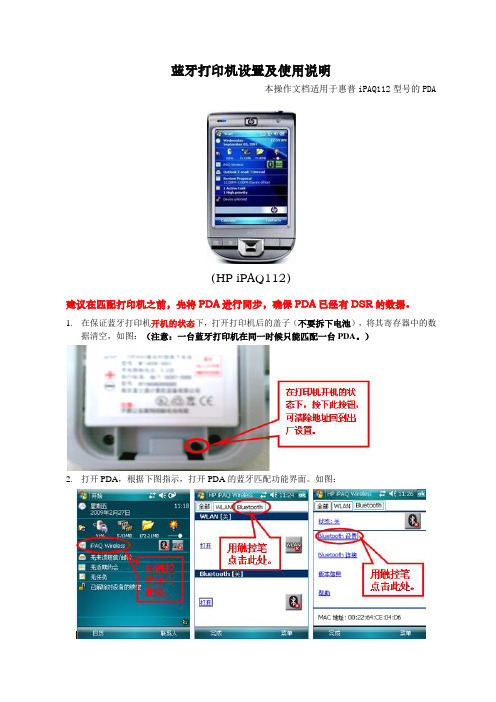
蓝牙打印机设置及使用说明本操作文档适用于惠普iPAQ112型号的PDA(HP iPAQ112)建议在匹配打印机之前,先将PDA进行同步,确保PDA已经有DSR的数据。
1.在保证蓝牙打印机开机的状态下,打开打印机后的盖子(不要拆下电池),将其寄存器中的数据清空,如图:(注意:一台蓝牙打印机在同一时候只能匹配一台PDA。
)2.打开PDA,根据下图指示,打开PDA的蓝牙匹配功能界面。
如图:3.如下图:先将蓝牙打开,然后跟着下图的步骤一步一步进行:PDA与蓝牙打印机进行配对——单击“Bluetooth管理器”→“新建”→“浏览Bluetooth设备”→选择“MPK1210”→在通行密钥中输入“1234”,默认的配对密码是:“1234”→选择“Bluetooth Serial Port”→单击“完成”,如图:点完“下一步”后,整个匹配工作就完成了。
但是接下来还需要对程序进行一个必要的配置:选择合适的打印端口!先要确保PDA已经同步有DSR的数据!4.打开PDA,登录到我们的操作系统中,在MyPAQ主界面中选择“打印设置”,再根据不同的PDA类型,选择合适的端口。
如下图:HP iPAQ112型号的PDA应选择“COM6”端口。
5.在“单据页面”点击打印即可和往常一样进行打印,如右图:(注意:当一台PDA匹配多个蓝牙设备后,打印时会让用户选择适当的设备,此时应选择“MPK1210”。
为了打印的时候更方便,建议PDA 不要和过多的蓝牙设备进行匹配。
)蓝牙打印机不像红外打印机有方向要求,在10米范围内,PDA无需对着蓝牙打印机都可以进行打印。
建议在每台PDA和打印机匹配好之后,进行一次测试打印,以确保匹配成功。
测试方法:可以让DSR进行一次拜访,并创建一个订单然后进行打印。
不过不要注册此订单,而且在结束拜访的时候,请去掉勾选“注册缺货,库存,分销数?”和“注册指标?”,这样就不会增加拜访数了。
手机蓝牙打印机教程
手机蓝牙打印机教程手机蓝牙打印机是一种把手机与打印机通过蓝牙连接起来的便携式设备,可以方便地将手机中的文件、照片或文档直接打印出来。
下面是一个手机蓝牙打印机的教程,以帮助您更好地了解和使用这一设备。
第一步:准备工作首先,您需要确保手机蓝牙打印机已经充好电,并且有足够的打印纸。
另外,查看您的手机蓝牙是否开启,如果没有,请前往手机设置中的蓝牙选项开启它。
第二步:配对设备在您的手机蓝牙打印机上找到配对按钮,在按下配对按钮后,打印机会发出蓝牙信号供您的手机搜索和配对。
打开手机蓝牙设置,搜索附近的设备并选择您的打印机。
一旦连接成功,手机和打印机之间将建立蓝牙连接。
第三步:选择文件打开您手机中希望打印的文件,可以是照片、文档或其他格式的文件。
选择并查看文件,确保它们是您想要打印的内容。
第四步:打印设置在您的手机上选择“打印”选项,这将打开打印设置页面。
在此页面上,您可以选择纸张大小、打印方向、打印品质等,根据您的需求进行调整。
第五步:打印文件一旦您对打印设置满意,点击“打印”按钮即可开始打印。
手机将发送打印文件的指令到蓝牙打印机,打印机会打印出您的文件。
第六步:查看打印结果等待片刻,您的打印机将完成打印任务。
取出打印出的文件,查看打印结果是否符合您的期望。
如果有任何问题,您可以检查打印设置或者重新执行打印操作。
总结:使用手机蓝牙打印机可以方便快捷地将手机中的文件打印出来。
只需要进行简单的配对和设置操作,即可实现打印功能。
希望这个教程能够帮助您更好地了解和使用手机蓝牙打印机,使您的打印工作更加便捷和高效。
便携式蓝牙打印机安全操作及保养规程
便携式蓝牙打印机安全操作及保养规程前言便携式蓝牙打印机是一种方便快捷的打印工具,它可以通过蓝牙连接手机或电脑,实现无线打印。
作为一种电子设备,便携式蓝牙打印机的安全操作和保养对于延长使用寿命和维护设备健康非常重要。
本文将详细介绍便携式蓝牙打印机的安全操作和保养规程。
安全操作电源安全便携式蓝牙打印机的电源需要使用充电器充电,并且在使用过程中需要注意以下几点:•使用原厂配套充电器充电,避免使用过充电器或者充电功率过大的充电器,否则将可能引起电池过载或者过热,缩短电池寿命。
•电池充满后应及时拔掉充电器,避免过充电状态对电池损伤。
•在电池电量过低时不要长时间使用打印机,以免电池损坏,影响使用寿命。
打印机安全便携式蓝牙打印机在使用过程中还需要注意以下安全事项:•避免在潮湿的环境下使用打印机,以免发生短路。
•避免在高温环境下使用打印机,以免损伤电池和设备。
•避免在有可能发生电波干扰的环境下使用,如:雷电天气或强电场环境中使用以及与大功率电器或设备靠近使用,以免影响打印机正常工作。
•在不使用打印机时尽量关闭打印机电源,以免长时间待机电池因自放电而损坏。
数据安全便携式蓝牙打印机可以通过蓝牙连接手机或电脑进行打印,数据传输时需要注意以下安全方面的规则性操作:•避免使用不可信的无线网络,以保证数据传输的安全。
•避免在公共场合使用便携式蓝牙打印机进行打印,以防资料泄露。
•在传输敏感信息时建议使用加密方式进行传输,避免信息泄露。
保养规程便携式蓝牙打印机保养的好坏直接影响设备使用寿命:打印头清洁定期对打印头进行清洁,可以避免打印不清晰,甚至无法打印的情况:•将打印头贴片取出,清除粘在贴纸上的灰尘或残胶。
•取出打印头,用干净的纸张轻轻擦拭打印头表面,或者使用清洁液清洁打印头。
•将打印头重新装到机器上,进行再次测试。
纸张及贴纸选用正确选用纸张及贴纸,不仅能优化打印效果,还能延长打印机使用寿命:•使用标准贴纸纸张,非贴纸纸张容易堵塞打印头。
蓝牙使用的正确流程是什么
蓝牙使用的正确流程是什么1. 准备工作在开始使用蓝牙设备之前,需要确保以下几个准备工作已经完成: - 确认设备是否支持蓝牙功能。
大部分现代设备都支持蓝牙,但也有一些老旧设备可能不支持或者功能有限。
- 打开设备的蓝牙功能。
在设备的设置界面中,可以找到蓝牙开关并将其打开。
2. 搜索设备在设备蓝牙功能开启后,需要搜索附近的蓝牙设备。
搜索设备的步骤通常如下所示: 1. 打开设备的蓝牙设置界面。
2. 点击搜索或扫描按钮,设备会开始搜索周围的蓝牙设备。
3. 等待搜索结果显示出来。
搜索结果通常以设备的名称或者蓝牙地址的形式呈现。
3. 连接设备一旦搜索到需要连接的设备,就需要进行连接的操作。
连接步骤如下: 1. 从搜索结果中选择要连接的设备。
通常,会显示设备的名称和蓝牙地址等信息。
2. 点击选择要连接的设备。
某些设备可能需要输入配对码或者进行其他验证操作。
3. 等待连接建立。
一旦连接建立成功,设备通常会显示为已连接状态。
4. 使用设备连接成功后,就可以开始使用蓝牙设备了。
具体的使用步骤取决于不同的设备类型。
下面是几个常见的蓝牙设备使用示例:4.1 蓝牙耳机使用蓝牙耳机的步骤如下: 1. 将蓝牙耳机配对到设备上。
2. 在设备的音频设置中选择蓝牙耳机作为音频输出设备。
3. 播放音频文件,声音将通过蓝牙耳机输出。
4.2 蓝牙键盘使用蓝牙键盘的步骤如下: 1. 将蓝牙键盘配对到设备上。
2. 打开需要输入文本的应用程序,如记事本或电子邮件应用程序。
3. 开始使用蓝牙键盘输入文本,键盘上的按键操作将在应用程序中显示出来。
4.3 蓝牙打印机使用蓝牙打印机的步骤如下: 1. 将蓝牙打印机配对到设备上。
2. 打开需要打印的文件或者内容。
3. 在应用程序中选择打印选项,并选择已配对的蓝牙打印机。
4. 确认打印设置,然后点击打印按钮。
5. 断开连接在使用完蓝牙设备后,可以断开与设备的连接。
断开连接的步骤如下: 1. 打开设备的蓝牙设置界面。
AXIS 5800+移动设备和AXIS 5810蓝牙打印指南说明书
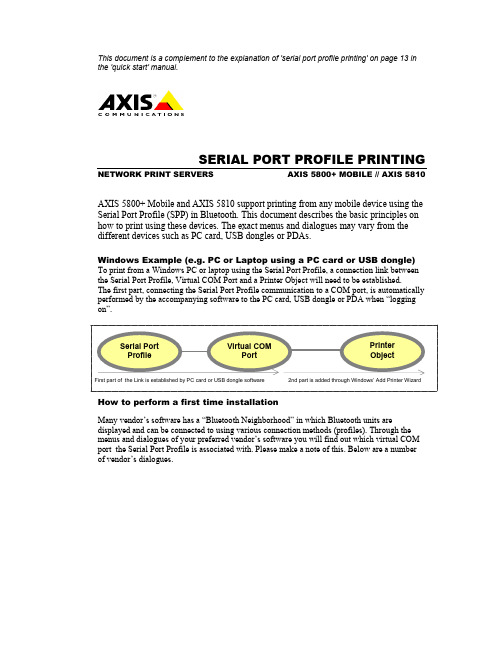
This document is a complement to the explanation of 'serial port profile printing' on page 13 inthe 'quick start' manual.SERIAL PORT PROFILE PRINTING NETWORK PRINT SERVERS AXIS 5800+ MOBILE // AXIS 5810 AXIS 5800+ Mobile and AXIS 5810 support printing from any mobile device using the Serial Port Profile (SPP) in Bluetooth. This document describes the basic principles on how to print using these devices. The exact menus and dialogues may vary from the different devices such as PC card, USB dongles or PDAs.Windows Example (e.g. PC or Laptop using a PC card or USB dongle)To print from a Windows PC or laptop using the Serial Port Profile, a connection link betweenthe Serial Port Profile, Virtual COM Port and a Printer Object will need to be established.The first part, connecting the Serial Port Profile communication to a COM port, is automatically performed by the accompanying software to the PC card, USB dongle or PDA when “logging on”.How to perform a first time installationMany vendor’s software has a “Bluetooth Neighborhood” in which Bluetooth units are displayed and can be connected to using various connection methods (profiles). Through the menus and dialogues of your preferred vendor’s software you will find out which virtual COM port the Serial Port Profile is associated with. Please make a note of this. Below are a numberof vendor’s dialogues.TDK Bluetooth Neighbourhood TDK Bluetooth Configuration ToolBluetooth Software Suite Bluetooth Neighbourhood Bluetooth Software Suite Configuration Tool3COM Bluetooth Neighbourhood 3COM COM port configuration tool3COM remote device selection dialogToshiba Bluetooth Service Center application Toshiba COM port dialogThe next step is to create a Printer Object. This is done in Windows through the standard “Add Printer Wizard”. Select to create a “Local Printer” and choose the same Printer Port as the COM port that you earlier made a note of from yourBluetooth Software. Go through the rest of the Wizard until you created name the printer object “AXIS Wireless Printer” to distinguish it from other wired printers. The installation is now ready.Note: Some applications will create the printer object automatically when installing the software. Check your printer folder after installation and check if a new object has been added.How to Print?To print, simply connect to AXIS 5800+ Mobile or AXIS 5810 by selecting a Serial Port Profile communication in your Bluetooth Neighbourhood and go to your application’s “File” and “Print” menu. Select the “AXIS Wireless Printer” you created and print. Most client applications require you to first establish a connection to the print server from the "Bluetooth Neighbourhood" or similar application. But in some instances, as for 3COM above, you will be presented a dialog allowing you to choose destination for each print job, after which the connection will be completed automatically.。
打印机使用

LPK130打印机操作说明为了方便各位合伙人对于LPK130打印机的实际操作,现将常见问题及注意事项整理如下:1. 安装打印纸时,请注意纸卷的方向(将纸卷上红色“喜来快递”字样正面朝向OPEN开关键,然后放入纸舱内),如果放反,将导致无法打印。
2. 待机状态下安装打印纸,打印机会将纸张自动定位,因而吐出一张空白面单。
若想避免纸张浪费,请在关机状态下,将首张面单边缘与割纸刀(OPEN键下方锯齿状刀片)仔细对齐,再开机时将不会出现走纸现象。
3. 打印机提供10米蓝牙通讯方式,出厂时蓝牙默认鉴权密码为“1234”。
4. 休眠中,打印机蓝牙功能正常工作,打印前无需手动唤醒。
5. 新购的打印纸请避免放在阳光下直射或高温的地方存储,保存时请不要撕开包装纸。
6. 操作时尽量保持机身平稳状态,避免出现卡纸。
个别纸卷因印刷问题,纸张出现棱条导致卡纸,此类情况极少出现,去掉单张面单后即可正常使用。
7. 发放打印机前,总部工作人员已将打印机基本设置调试完毕。
如在使用中打印机无法正常工作,请先尝试恢复出厂设置。
步骤:待机状态下,长按【设置键】5秒,短按【设置键】选择恢复出厂,按【出纸键】确认,设置成功。
8. 恢复出厂完毕后,请重新设置蓝牙可见性及定位模式。
蓝牙可见性:(1)待机状态下,长按【设置键】5秒,短按【设置键】选择打开蓝牙可见性,按【出纸键】确认,设置成功。
(2)待机状态下,长按【设置键】5秒,短按【设置键】选择蓝牙可见性设置,按【出纸键】确认,短按【设置键】选择一直可见,按【出纸键】确认,设置成功。
定位模式:待机状态下,长按【设置键】5秒,短按【设置键】选择定位模式,按【出纸键】,选择缝隙定位,按【出纸键】确认,设置成功。
9. 如果长时间存放打印机,请将电池取出单独存放。
日常维护及其他故障诊断,请仔细阅读用户手册。
- 1、下载文档前请自行甄别文档内容的完整性,平台不提供额外的编辑、内容补充、找答案等附加服务。
- 2、"仅部分预览"的文档,不可在线预览部分如存在完整性等问题,可反馈申请退款(可完整预览的文档不适用该条件!)。
- 3、如文档侵犯您的权益,请联系客服反馈,我们会尽快为您处理(人工客服工作时间:9:00-18:30)。
蓝牙打印机使用手册
蓝牙(Bluetooth):一种采用了全球通用的短距离无线连接技术,使用与微波相同的2.4GHz附近免付费、免申请的无线电频段,无需对准就能传输数据,传输距离小于10米。
蓝牙打印机就是通过这种设备配对蓝牙适配器进行数据传输,接收主机向打印机传送的数据并打印出来,蓝牙打印机默认的波特率为38400,8位数据位,1位停止位,没有奇偶校验,有数据流控制。
一、指示灯状态说明
序号指示灯状态说明
1 蓝灯以2次/1秒速度闪烁蓝牙打印机和蓝牙设备未连接状态
2 蓝灯和红灯交替闪烁蓝牙打印机和蓝牙设备处于配对状态
3 蓝灯以1次/2秒速度闪烁蓝牙打印机和蓝牙设备连接状态
二、蓝牙打印机设备及端口设置步骤
首先将蓝牙打印机开机通电,并将蓝牙适配器插在电脑的USB口上,电脑桌面右
下角就会出现一个蓝牙图标
双击“蓝牙图标”,打开Bluetooth设备,如图所示
单击“添加”按钮,弹出“添加打开Bluetooth设备向导”
单击“下一步”
在此处勾选
自动搜索到蓝牙打印机设备,双击击“Gprinter新设备图标”,出现如下图
选择“让我选择自己的密钥”,默认密钥为“0000”如图所示
单击“下一步”默认密钥:0000
点击“完成”,将完成添加Bluetooth设备向导,接着出现下面图示
单击“COM端口”按钮,如下图所示,电脑自动为蓝牙打印机分配一个“COM 3端口”此端口就是蓝牙打印机的连接端口。
其次,设置蓝牙打印机驱动端口。
单击“开始”菜单,打开“控制面板”,双击“打印机和传真”,可以看到装好的蓝牙打印机驱动,如图
右键单击驱动“属性”=》“端口”,选择“COM 3端口选项”如图,单击“应用”,在“常规”选项里面单击“打印测试页”,并单击“确定”按钮完成端口配置,蓝牙打印机就会相应打出window测试页了。
