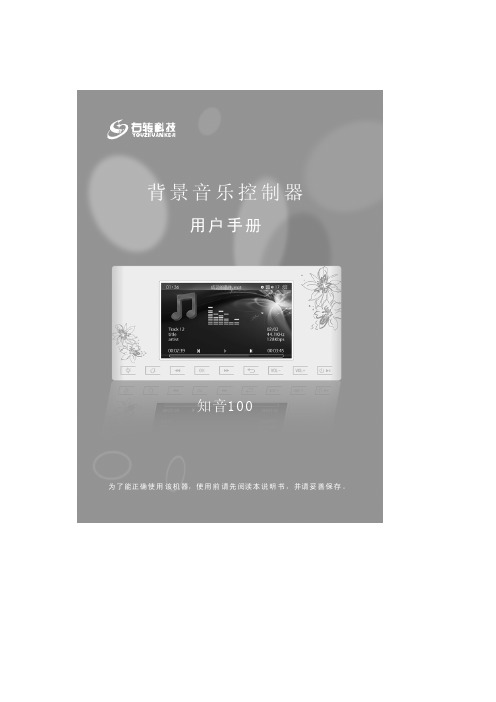
右转科技新一代家庭背景音乐控制器
知音100说明书
前言右转科技知音100目录右转科技安装及拆卸控制器1、拧开水晶面板底部螺丝2、打开水晶面板1、拔出与水晶面板的连接线2、取下水晶面板1、插好水晶面板的连接线2、盖好水晶面板并用螺丝固定水 晶面板12 34知音100控制器特点2、左右声道音频输出右转科技控制器输出线说明12345671、电源输入电源线:1-2平方毫米单股铜芯线。
音频线(两芯屏蔽线:俗称话筒线):RVVP2×0.5 RVVP2×0.75。
知音100控制器外观说明控制器面板触摸按键右转科技知音100控制器面板触摸按键遥控器右转科技知音100遥控器功能操作遥控器功能操作右转科技知音100开、关本机12345612本地磁盘:图标选定本地磁盘后按确认键进入子菜单按遥控右转科技界面显示说明播放音乐知音100播放音乐向键或面板 键选中要播放的歌曲,按确认键进行播放。
(播放地磁盘歌曲前首先要确定本地磁盘内是否有歌曲)。
在歌曲目录下按面板播放键或遥控器菜单键,会弹出复制菜单,按遥控上键选择复制(绿色表示选中)按确认键确认后返,13卡的状态下选择图标后按确认键进入子菜单,播放歌曲过程和本地磁盘SD 一样操作。
本机支持的卡和盘。
32GB SD U 3、播放USB:在插有USB的状态下选择USB外设图标后按确认键,稍等几秒钟会出现“正右转科技播放音乐知音100播放视频在播放视频状态下按确认键后会弹出多种功能选项。
当选择以前播放过没有播放完毕的视频文件时,会提示“是否从上次断点继续播放”。
当选择【是】会接上次继续播放。
电子书录音右转科技A UX知音100收音机、音源输入游戏功能附加功能右转科技知音100附加功能控制器设置视频输出右转科技简单故障排除右转科技知音100参数知音100播放图片保养。
家庭背景音乐之父

创业
2003年,茂哥开始发展团队核心人员一起创业;也是那一年,在一个偶然的机会下, 茂哥发现了智能家居的分支——家庭背景音乐在当时有着更好的市场机会与价值, 于是便审时度势地改变了计划,调整前进方向。 如今再谈到那个直接导致开创了一个新行业的偶然机会具体是什么的时候,茂哥陷入 了遥远的回忆中: 2003年1月,茂哥正在为某知名品牌服装总裁罗总做整套智能家居的方案设计与实施。
就这样,从硬件到软件,茂哥一个人完成了国内历史上首套中央背景音乐系统的研发, 首创了国内第一套内置音源、又能实现多房间独立控制的音响系统。时至今日,茂哥仍 清楚地记得第一批家庭背景音乐产品他做了5套样品,被问及只有一套的订单为什么要 做这么多套样品时,他笑着说,样品当然要多做些,每一套都要经过上千次测试,避免 一切可能出现的问题。 最终,这套由茂哥亲自操刀独立研发的家庭背景音乐系统受到了客户的大加赞赏。这是 家庭背景音乐行业的历史开端,而适逢其会地通过这件事发现了家庭背景音乐背后的市 场价值与潜力后,茂哥决定先着力开拓这个前所未乐市场发展至今已有16年历史,从2003年第一台家庭背景音乐系统的诞 生开始,就标志着背景音乐这个小众而又充满机遇的行业的诞生。经过最初几年的发 展,背景音乐系统生产厂家也如雨后春笋般蔓延开来。中间经过几轮残酷的市场洗牌 后,到目前剩下的能够叫得上名号的背景音乐品牌也就十家左右:悠达、泊声、澳斯 迪、音丽士、向往、右转等。随着智能家居行业的快速发展,背景音乐也完全融入了 整个智能家居的体系之中,成为智能家居系统一个非常重要的分支。背景音乐在整个 智能化市场的推动下,从小众开始逐步面向大众,很多线下实体品牌也开始启动线上 销售,品牌曝光度越来越大。从势不可挡的发展趋势来看,背景音乐将成为未来家居 生活主流的听音乐方式。
当时罗总在家里特地打造了一间茶室,他希望在品茶的时候能伴有悠扬的轻音乐,音乐 能很方便地就在茶室开启,同时在客厅也能共用这套音响系统,最好这两个空间的音乐 能独立地开启和关闭。罗总选了国内外很多知名品牌的音响,但都没有达到他想要的效 果。 茂哥,主动对罗总表示自己可以帮他做一套这样的音响系统:能够做到“随时随地听音 乐,在任意房间都很能方便地开启和关闭音乐,而且还可以选择音源,不需要来回跑到 音响设备台去操作,音乐也可以达到高保真立体声的效果。”
LifeSmart云起局域网直接控制向往背景音乐

LifeSmart云起局域网直接控制向往背景音乐一、功能采用云起AIB中的TCP指令传输模块,给向往背景音乐发送控制指令,控制背景音乐播放、停止等,也可以是控制播放内容及相应的播放设置,还可以是欢迎语等,灵活性较高。
二、用途例如:开门回家播放欢迎回家欢迎语,观影模式将背景音乐切换到外部输入或者蓝牙输入状态,直接将电视声音接入背景音乐,回家模式自动播放回家音乐,就餐模式播放就餐音乐,离家模式自动停止音乐,安防模式下触发报警播放指定音频文件等。
三、配置方法1、向往背景音乐主机准备对向往背景音乐进行IP和Mac地址绑定,给背景音乐主机一个固定的IP地址。
打开向往背景音乐设置界面,点检查更新页,可以看到当前IP地址,记录下来IP地址,点第三方对接,安装Halo对接服务插件。
2、LifeSmartAPP配置全屋智能模板分享 - 向往背景音乐控制,请复制这条信息后再打开LifeSmart. lifesmartapp://?cgy=aibt&cont=ApksAqtZEqEhKoU0Ear0OqPmEqStEaM8OqrpE8Ix1HyoV CtZ1FLtUCemKoM8EbunOqrlEqPlEa3hIdt&sign=hYKENKtQbnM8kY%2D%5FRUnhfP复制前面的模板代码,在APP中建立AIB智能,用智能来控制指令发送。
1、选择一个用于触发指令发送的状态指示开关(可选,主要用于在场景中调用该智能,因为目前场景还没有开放直接调用智能,需要用状态指示开关触发)。
2、选择同上开关用于复位。
3、将IP地址修改为向往背景音乐主机的IP地址。
4、触发后发送的控制指令(指令集合祥见下文)。
3、指令列表开始播放{"cmd":"control","params":{"playstate":"play"}}开始播放,音量50%,随机播放模式{"cmd":"control","params":{"volume":8,"mode":"random","playstate":"play"}} 停止播放{"cmd":"control","params":{"playstate":"pause"}}上一首{"cmd":"control","params":{"playstate":"prev"}}下一首{"cmd":"control","params":{"playstate":"next"}}随机播放模式{"cmd":"control","params":{"mode":"random"}}单曲播放模式{"cmd":"control","params":{"mode":"single"}}循环播放模式{"cmd":"control","params":{"mode":"cycle"}}顺序播放模式{"cmd":"control","params":{"mode":"list"}}设置音量静音true,取消静音false{"cmd":"control","params":{"mute":false}}百分比音量(0-15){"cmd":"control","params":{"volume":8}}模拟语音控制{"cmd":"voiceoper","params":{"content":"播放张杰的歌"}}欢迎语播报{"cmd":"voicespeak","params":{"content":"欢迎主人回家,你不知道我一个人在家都快闷死了"}}分区合并{"cmd":"tunnelmergecontrol","params":{"state":0}}分区分离{"cmd":"tunnelmergecontrol","params":{"state":1}}开机关机亮屏0息屏1{"cmd":"poweroper","params":{"value":0}} {"cmd":"poweroper","params":{"value":1}}切换播放音源{"cmd":"control","params":{"source":"local"}} {"cmd":"control","params":{"source":"bluetooth"}} {"cmd":"control","params":{"source":"linein"}}指定播放{"cmd":"specifyplay","params":{"songs":[{"filename":"43981.mp3","type":1,"p rogress":0}]}}//此种情况会播放HopeLauncher/.nomedia/下的音频(该路径歌曲不会被播放器加入播放列表,可用作存储报警铃等特殊音频),如果添加progress可以从指定进度开始播放{"cmd":"specifyplay","params":{"songs":[{"id":15330,"type":0,"progress":30} ]}}{"cmd":"specifyplay","params":{"songs":[{"thirdId":"migu123456","type":2,"p rogress":30}]}}四、注意事项实际测试先测试能否正常播放,指令写入后均需要以回车换行结尾,具体场景对接可自由发挥。
HDL 第三方产品手册说明书
第三方产品手册目录公司简介背景音乐系统遮阳系统环境控制系统012325262728333437394243465254596530050608111503监测环境系统092129安防系统31照明系统357寸迷你主机/4寸迷你主机中央主机扬声器Kaiterra墙内检测仪睿石mini检测仪协议开合电机蛇形帘天棚帘转弯器、弯轨系列轨道安装技术支持中央空调网关/HOMEKIT 迷你家居款轨道条形格栅灯系列条形泛光灯系列90°可调格栅灯系列磁吸轨道灯系列吊线灯系列格栅射灯系列射灯系列212嵌入式射灯室内被动红外入侵探测器(嵌入式) S-one 智能门锁背景音乐系统高品质的音乐,不仅仅在手机、在PC端、在随身听、电视、在播放器,它更在我们人居的每一个角落中响起,同步我们最爱的歌曲,更有最恰到好处的人工语音,提醒我们家中的状态。
03页码04页码4x20W双分区 全无损格式解码专业DSP音频处理喜马拉雅网络电台超远距离蓝牙播放HD全双工对讲通话安卓6.x,7寸IPS显示屏Airplay/DLNA/Qplay推送WIFI连接,无线掌控,互联互通超强的无线实时对讲、音乐控制4英寸全面屏设计音源:本地音乐、喜马拉雅、第三方音乐APP、蓝牙、DLNA、AUX 完美适配QQ音乐、酷狗音乐等热门第三方音乐APP 支持Micro SD卡、U盘读取播放音乐支持对讲、呼叫功能,可与多台DM839或DM858进行对讲、呼叫支持AUX输入和输出功能支持RS485控制支持WIFI连接拥有定时功能三种情景播放模式和自定义模式选择:Party、Sleep、Relax、Customize 支持门铃联动DM858极简风格UI 超全的曲库最精准的推荐最懂你的音乐伴侣只因云雀之声便知流水雀鸟之音温馨的呼叫通话你我之间只是一键的距离有我就是幸福一家DM839因为相信 所以相遇 追梦路上 无所畏惧 每一段拼搏旅程都彰显着不平凡4寸迷你主机独特的气场 豪华的气质 丰富节目源 8-72分区殿堂级音质 8-12区自由点播与推送无线DLNA推送全无损格式解码2x100W+14x30W在线升级APP全宅无线控制4分区每分区2x30W/8Ω100-240V / 50/60Hz交换机/“手拉手”级联支持无线控制备注:AM8300只配套AM8328使用中央主机AM8328它,天生的王者 它,无限的潜力 它,殿堂级音质流畅的线条,磨砂的表面 你是别墅的主人 它是你一生的伴侣分区扩展机AM830006页码AUX168II功率:20W/8Ω 喇叭单元:6.5"x1,1" x1 最大声压级:102±2dB 有效频率范围:60Hz-20,000Hz 灵敏度:89±2dB规格:97×Ø233mm 开孔尺寸:205-210mm 净重:1.6kgAUX167II功率:20W/8Ω 喇叭单元:5"x1,1"x1 最大声压级:102±2dB 有效频率范围:100Hz-20,000Hz 灵敏度:87±2dB规格:78×Ø205mm 开孔尺寸:180-185mm净重:0.55kgAUX521功率:10W/8Ω 喇叭单元:6.5"x1, 0.75"x1 最大声压级:103±2dB 有效频率范围:90Hz-18KHz 灵敏度:93±2dB规格:70×Ø190mm 开孔尺寸:168-172mm净重:1.0kgAUX644功率:15W/8Ω 喇叭单元:5"x1 最大声压级: 98±2dB 有效频率范围:150Hz-20kHz 灵敏度:86±2dB 规格:280×225×298mm 净重:3.6kg室外全天候防水甲醛、TVOC等环境指标更加在意。
FLAMMA 吉他综合效果器FX150 说明书

www.flShenzhenFlammaInnovationCo.,Ltd
目录
注意事项-----------------------------------------------------------------------------------------------------------01 性能概述-----------------------------------------------------------------------------------------------------------02 主面板说明----------------------------------------------------------------------------------------------------03-04 接口面板说明-------------------------------------------------------------------------------------- -----------05-06 应用场景连接说明------------------------------------------------------------------------------------ --------07-12 连接吉他功放后级+吉他箱体--------------------------------------------------------------------------------07 连接全频设备 - -----------------------------------------------------------------------------------------------08 全频+非全频设备混合连接 ----------------------------------------------------------------------------------09 连接吉他音箱的INPUT - -------------------------------------------------------------------------------------10 连接吉他音箱的FXLOOP------------------------------------------------------------------------------------11 四线接法 -----------------------------------------------------------------------------------------------------12 基本操作------------------------------------------------------------------------ ------------------------------13-19 开机 ----------------------------------------------------------------------------------------------------------13 主界面--------------------------------------------------------------------------------------------------------13 编辑界面-----------------------------------------------------------------------------------------------------14 选择预置音色--------------------------------------------------------------------------------------------15-17 编辑预置音色 ------------------------------------------------------------------------------------------------18 编辑效果链顺序----------------------------------------------------------------------------------------------19 预置音色保存------------------------------------------------------------------------------------------------19 调音器-------------------------------------------------------------------- -----------------------------------------20 LOOPER乐句循环功能--------------------------------------------------------------------------------------21-22
智能家庭背景音乐系统米悦M300控制器安装使用说明书

欢迎您使用米悦智能家庭背景音乐控制器为了顺利使用本产品,请您详细阅读本手册本手册可以让您快速了解本产品的施工布线、安装、使用本产品为小型定制安装类产品,需要专业的安装人员进行安装,如没有专业安装人员,请仔细阅读本手册后,再进行安装。
安装本产品之前请先将电源断开,带电安装将会对本产品造成永久性损坏本产品可以和Control4、快思聪等国际知名的智能家居系统完美对接,需要对接请联系厂方提供技术支持本产品具备在线升级功能,请尽量保持系统软件最新,更新系统后请恢复出厂设置本产品具体参数请查看本公司网站www.miyue.hk本公司免费技术支持电话400-606-0026施工布线注意事项:1.控制面板安装高度保持和开关水平,高度1.3米~1.4米之间;2.系统标配电源为全球通用电源,可安装在30厘米插座高度,强电插座旁边,方便取电;3.HDMI延长器为选配件,需要将视频输出到电视的时候选用,延长器和背景音乐控制器之间通过双六类网线连接;4.为了网络信号稳定,本公司建议使用网线联网5.音箱线建议选择50~100芯纯铜音箱线6.AUX音频输入和音频输出的音频线建议使用RVVP3*0.12高屏蔽话筒线7.为了便于后期安装,请使用本公司标配底盒预埋。
产品安装注意事项1.安装之前请保证电源处于断开状态,所有线路接好之后方可通电,带电安装有可能造成设备损坏;2.卡扣用平口起子轻撬即可分开前面板和后盖,后盖需要安装到国标146型预埋底盒内;3.绿色接线端子全部为可拆卸端子,请用平口螺丝刀轻撬,拆下后接线;4.网线请全部按照EIA/TIA-568B线序压制;5.5V、12V、GN D接口用于给控制面板供电,请按照标签指示连接到标配电源适配器上,不按标签指示接线将可能造成产品损坏;6.喇叭接口L+L-为左声道喇叭输出,请连接左声道喇叭,R+R-为右声道喇叭输出,请连接右声道喇叭;7.外接音频输入接口,用于外接其他播放器作为音源使用,音频输出接口用于将本系统内的音乐扩展其他功放;8.连接好所有线路后,请先固定好后壳,再将前面板盖上,请注意不要用力过猛造成排针弯曲,损坏;9.电源强电接入请直接将强电线拨开1厘米左右,直接插入连接器的圆孔内即可,红色为火线,黑色为零线,电源输出请按照标签指示和触摸面板对应连接;常见问题处理电源指示灯不亮请检查零线和火线连接是否连接正确;用万用表调整到 AC档750V测量零线火线之间是否有电压;如果零线火线之间有电压,请更换电源电源指示灯亮,但是控制面板不好开启1.请检查控制面板上5V12V是否准确,用万用表调整到DC档20V,测量接线图表上5V和GN D和 12V 和GN D之间的电压是否正确,如果连接错误请重新连接,错误的连接可能导致机器永久损坏;2.请检查前面面板和后面底板之间是否准确连接,插针是否有折断,弯曲的现象3.请检查电源和智能背景音乐控制面板之间连接线是否太细,太细将造成电流不够,本公司推荐电源线为RVV3*1.0多股软线无法联网请检查R J45接口是否按照568B顺序连接,交换机端顺序是否按照568B连接,用测线器测试线路通断。
西门子 NXGPro+ 控制系统手册_操作手册说明书
3.4
单元通讯的协议 ............................................................................................................ 36
3.5
NXGpro+ 高级安全 .......................................................................................................37
3.2
功率拓扑 ......................................................................................................................34
3.3
控制系统概述 ...............................................................................................................35
NXGPro+ 控制系统手册
NXGPro+ 控制系统手册
操作手册
AC
A5E50491925J
安全性信息
1
安全注意事项
2
控制系统简介
3
NXGPro+ 控制系统简介
4
硬件用户界面说明
5
参数配置/地址
6
运行控制系统
7
高级的操作功能
8
软件用户界面
9
运行软件
10
故障和报警检修
11
基于AT89S52智能家居背景音乐控制器的设计与实现

高校 理科 研 究
基于 A 8 S 2智雒家居背景音 乐控制器B i 计与实项 T95 "g , J
湖 南铁 道职 业技 术 学院 粟 慧龙 湖 南铁 路科 技职 业技 术 学院 韩 雪
[ 摘 要] 文章介 绍了以 AT 9 5 片机和 S 33电子音 量芯片为核心的智能 家居背景音 乐控制 器的 系统组成 , 8S 2单 C7 1 阐述 了其硬 件和 软件的设计实现 : 系统硬件 电路 的电子音量调节、 收音机等模 块电路均采 用 I I C接 口技术 , 极大 简化 了电路连接 , 节省 了系统硬 件资 源 ; 外 系统 还 具 有 L D 显 示 、 外遥 控 和 P 串行 功 能 , 大 的 方便 了用 户 的操 作 使 用 。 此 C 红 C 极 [ 关键词 ] 8 S 2单片机 S 3 3 智 能家居 背景音 乐控制器 I AT 9 5 C7 1 l C接 口技 术
单 片 机 P 2 3 部 中 断 0引 脚 )根 据 脉 冲 位 置 调 制 编 码 的 特 点 , 以使 3 (' b , 可 用单片机外部中断的边沿触 发方式 , 每一位编码的下降沿触发 中断 , 并 启用单片机定时功能 ,计 时 比较下降沿低 电平的脉冲脉宽度 即可识别 编 码 数 据 的 1 0, 和 实现 遥 控 信 号 的解 码 。
— — —
0 0 l 9 l 8 0 0 0 0 咖 帅 8 9 0 0
e
fj 0 雨 码 I辟 8 I| 户 户 8bs b
引导聘 1 嘲 协3 8 6惜
5 5啪 8 t 6 6m s o7 Biblioteka 譬 l 2 ms T
, 、 止{
1引 言 . 随着 生 活 水 平 的 不 断提 高 , 们 对 居 住 环 境 的 要 求 也 越 来 越 高 , 人 更 加 注重 家 庭 氛 围的 营 造 , 音 乐 系统 已被 广 泛 应 用 于 千 家 万 户 。 背 背景 但 景音 乐 控 制 器 的 选 择 给 人 们 带 来 一 些 问 题 ,市 面 上 的 控 制 器 要 么 价 格
右转 背景音乐播放器驱动用户手册.pdf说明书

右转背景音乐驱动用户手册Ø 驱动介绍驱动实现了右转背景音乐控制器与Control4智能系统的无缝对接,采用完整的网络通信控制,实现了Control4智能终端设备对控制器的集成控制,同时以列表形式显示不同音源的歌曲及其海报,为用户提供简单有效的家庭背景音乐解决方案。
设备支持SDDP 功能,在设备处于开机状态下,能够在加入工程时自动识别。
Note :此文档仅对右转背景音乐控制器在Control4智能系统内的操作设置进行描述,其本身系统参数、硬件连线请参考右转提供的产品手册。
Ø 驱动特性;;• 完整的网络通信;• 完整的歌曲播放控制及音量控制,设备状态及播放信息实时反馈; • 自由切换播放器不同的音源;• 列表形式显示播放器音源以及音源中的歌曲信息、海报;•完整的自定义播放列表控制功能;•驱动兼容Control4 OS2.6及以上•我们建议用户使用SDDP功能,使用该功能时确保播放器已经入网并且与Control4主机处于同一局域网,但是也可以手动在驱动识别窗口填入播放器的IP地址进行识别;•在此,我们强烈建议用户在实际现场安装使用之前,先遵循本文档中的使用说明,自行测试使用,从而熟悉右转背景音乐控制器在Control4智能系统内的操作设置,更好的为实施工程做好准备;Ø驱动配置Note:添加驱动之前,用户需要确认设备连线及网络配置已经可靠无误•添加设备用户访问网站下载相应的右转播放器驱动,打开Composer,点击Driver->Add Driver,将驱动添加至Control4驱动库中,添加方法有2种ü播放器默认支持SDDP服务,设备上电并进入与Control4相同的局域网后,Discovered页面显示播放器设备,用户只需双击驱动就可以添加设备进入工程中,并且自动完成识别;ü按照下图显示的分类选中设备加入工程中Device Type:Media Service,Manufacturer:inSona设备添加完成之后,在驱动识别窗口中填入播放器IP地址,进行识别;Note:可通过Tools —> Network Tools 查看设备网络状态•属性介绍下图为右转播放器驱动的属性üDebug Mode : 控制驱动日志输出üDriver Version : 驱动版本信息•Action命令说明üGetPlaylist: 获取自定义播放列表信息•Connections连接说明ü若用户需要将右转背景音乐控制器作为房间的音频终端,如下图进行连接,这样就够在Control4所有控制终端中查看播放器并进行正常操作;ü若用户需要使用控制器播放外部音源,只需将图中AUX连接与对应的外部音源驱动相连;•使用说明üUI介绍u完成上述Connection连接之后,刷新界面即可在终端设备中查看控制器设备,点击背景音乐图标之后,即可进入设备页面,总共包括3个标签栏,AudioSource(音源列表)、Playlist(自定义播放列表)、Setting(配置列表)u Audio Source标签,主页面显示控制器音源,包括本地音乐、USB、SD、我的收藏、AUX(外部音源)、BT(蓝牙)、DLNA,其中在点击AUX(外部音源)、BT(蓝牙)、DLNA等音源时,控制器只切换对应的音源,无列表及播放信息显示;其它音源均能显示歌曲列表及其海报(实际存在的音源,若无则不显示列表)界面右上角为控制命令,点击 即可显示全部支持命令,命令包括顺序播放、随机播放、单曲循环、循环播放;点击歌曲时,显示歌曲支持的控制命令,包括播放、查看信息、添加至自定义播放列表(由Setting中的ActivePlaylistId属性决定)u Playlist标签,主页面显示已添加的自定义播放列表,原始为默认列表(ID 为1)右上角为新建播放列表按键,点击之后,出现输入播放列表名称页面,用户输入之后,点击Submit,弹出提示信息;然后即可查看新增的播放列表点开播放列表后,查看列表中的歌曲右上角为控制命令,点击 即可显示全部支持命令,命令包括添加歌曲、循环播放、随机播放、重命名播放列表、删除播放列表点击列表中的歌曲时,显示歌曲支持的控制命令,包括播放、删除歌曲;u Setting页面,显示控制IP地址,网络状态,EQ模式配置,当前有效自定义播放列表ID;IP: 显示控制器IP地址;Status: 显示当前控制器网络状态;EQ Mode: 配置当前控制器的EQ模式,包括Normal(普通)、Classic(古典)、Jazz(爵士)、Rock(摇滚)、Pop(流行);ActivePlaylistId: 有效的列表ID,比如ActivePlaylistId值为1,歌曲将被添加至ID为1的“默认列表”Ø常见问题•驱动网络状态显示离线u查看右转音乐控制器网络状态是否在线;•列表获取无法显示u若用户发现Control4控制终端无法显示实际右转控制器中已存在的音源列表,请点击右转控制器屏幕中的同步按钮(按钮位置见右转使用手册)。
BR300 产品手册

智能家庭背景音乐硬盘播放系统Intelligent Whole-home Audio System产品手册MODEL:BR300深圳市金长智数码技术有限公司智能家庭背景音乐硬盘播放系统是专为家庭设计的具有世界最新数字视听技术的家庭休闲娱乐消费型电子产品。
家庭背景音乐系统是由一台智能主机、房间控制面板、遥控器和喇叭组成。
产品的主要目的是让家中不同人士根据自己的需求爱好点播个性化的音乐节目,并且实现在家中的不同区域独立点播,互不干扰。
这样您在家中的每一个角落如:客厅、卧室、书房、餐厅、厨房、浴室、阳台,屋顶露台等地方在任何时候都能聆听音乐。
让音乐缓慢而优美的流动舒缓您一天工作的紧张与疲劳,让家人在独立个性的空间里随意地享受音乐带来的美好生活。
产品五大特色1、BYRON百锐智能家庭背景音乐系统采用嵌入式设计:集成8个区域的功放阵列和先进的控制系统,每个区域可以自由选择4路音源。
系统还具有定时播放、自动静音、收音等功能,整个系统操作灵活方便。
2、首创内置大容量硬盘:智能主机里的硬盘可以存储海量的MP3、MP4和VCD歌曲。
满足不同爱好和不同年龄段人士的需求。
如:孩子可以在自己的房间一次听到整套的童话故事,儿歌,英语教材。
老人可以在自己的房间一次收听整部的京剧、戏曲节目。
所有这些您都不需要外接任何的设备,所有节目全部可以存放在硬盘中,并且可以预先点播设置好。
听的时候通过房间的控制面板打开就可以了。
非常的方便、简单和快速。
每个区域可以分别、随时、独立地播放歌曲,不受其他区域播放影响。
3、全彩液晶触摸屏全菜单式控制面板:一键化操作。
所有功能、设置和MP3歌曲点播都可以通过液晶面板显示和操作。
具备定时设置。
极大地提高了高级功能本地化操作的程度。
4、四路FM收音功能:外置专业级高灵敏度FM调谐器,可同时满足4个区域收听不同的广播节目。
5、背景音乐与卡拉OK功能合二为一:拥有BYRON百锐家庭背景音乐就等于同时拥有一台专业级的家庭卡拉OK点歌机。
飞利浦微型音乐系统 BTM2560 BTM2585 用户手册说明书

在以下网站上注册产品并获得支持:/support用户手册目录安全2注意32 您的微型音乐系统4产品简介4包装盒内物品4主装置概述5遥控器概述63 使用入门8连接扬声器8连接电源8准备遥控器9开机9设置时钟94 播放10从光盘播放10从 USB 播放10控制播放10跳选曲目10编排曲目11播放蓝牙装置的内容115 收听 FM 广播电台12调谐至电台12自动设定电台12手动设定电台13选择预设电台136 调整声音13选择预设音效13调整音量13静音137 其它功能14设置闹钟定时器14设定睡眠定时器14收听外接装置14为设备充电158 产品信息16规格16 USB 播放性能信息16支持的 MP3 光盘格式17 9 故障种类和处理方法17CN11 注意事项安全在使用此微型音乐系统之前,请阅读并理解所有说明。
如果设备因未遵守说明而损坏,则不适用保修条款。
此“闪电标志”表示设备中的未绝缘材料可能导致触电。
为了您家中每个人的安全,请勿卸下产品外盖。
“惊叹号”表示需要对某些功能多加注意,您应仔细阅读附带的说明书以防止出现操作和维护问题。
警告:切勿将本产品暴露在雨中或潮湿的环境中,也不要在产品上面放置装有液体的物体(如花瓶)。
注意:为防止触电,请完全插入插头。
(对于需要使用极化插头的区域:为防止触电,请将宽插片插入宽插槽。
)t务必在本产品周围留出足够的空间以便通风。
t仅使用制造商指定的附件/配件。
t电池使用注意事项 – 为防止电池泄漏而造成人身伤害、财产损失或装置损坏,请:t按照装置上标明的 + 极和 - 极正确安装所有电池。
t不可将电池(电池组或安装的电池)置于高温环境,如阳光直射处、明火或类似环境。
t若打算长期不用本装置,应取出电池。
t切勿将设备暴露在漏水或溅水环境下。
t不要将任何危险源放在本设备上(例如装有液体的物体、点燃的蜡烛)。
t将电源插头或产品耦合器用作断开设备时,该断开设备应可以随时使用。
CN 2注意如果用户未经的明确许可而擅自对此设备进行更改或修改,则可能导致其无权操作此设备。
MIYUE米悦 MY100 家庭背景音乐系统说明书
1、 触摸点播:精美外观设计,水晶镜面、简洁大气。3 寸 TFT,触摸按键操 作。 2、 hifi 标准音质:内置进口飞利浦数字功放,失真小、效率高、完美音质。 3、 USB 和 SD 卡即插既播放音乐。 4、 支持音乐格式有:MP3、WMA、APE、FLAC、OGG、AAC、AC3、DTS 等 音乐格式,支持 LRC 格式的歌词。 5、 音效模式:流行、平滑、爵士、重音、一般、摇滚等多种音效模式。 6、 播放模式:循环播放、顺序播放、随机播放、单曲循环。 7、 电子相册:JPG、BMP、GIF、PNG 等格式图片轻松浏览,可将喜爱图设
3.遥控器说明
享受音乐生活,感受炙热生命
3
WWW.MIYUE.HK
1. 静音 2. 待机 3. 选择 MP3 输入 4. 播放模式选择 5. EQ 选择 6. 导航菜单按钮 7. 设置 8. 返回 9. FM 收音机输入 10. 音量调节 11. 上一首、下一首 12. AUX 外接输入
享受音乐生活,感受炙热生命
MY-100 家庭背景音乐播放器
使用说明
目录
一.产品功能特点............................................................................................................... 1 二.产品说明 ...................................................................................................................... 2
(半分离状态) ③安装墙体螺丝,使后座和埋墙底盒固定。
Pyle PT8000CH 8通道家庭剧场音频源控制器电子辅助器手册说明书

8-Channel Home Theater Amplifier PT8000CHMulti-Zone Audio Source Control,Rack Mount Amp, 8000 WattRead through this user manual before using the product to ensure its correct use. Keep this manual for future reference.The PT8000CH contains the excellent performance and reliability that PYLEUSA products have been recognized for. The PT8000CH features the exibility needed for demanding custom installation applications. It is ideal for use in home theater, stereo, multi-room, multi-zone and commercial applications.For best performance, please carefully read the instructions in this manual.TABLE OF CONTENTSFeaturesFront Panel DiagramRear Panel DiagramSystem Design & Operation Considerations System Design ExamplesDiagram 4 - Multi Room InstallationDiagram 5 - Multi-Zone Installation #1Diagram 6 - Multi-Zone Installation #2Diagram 7- Home Theater/Multi-Room Installation Installation ConsiderationsInstallationOperationTroubleshootingSpeci cations3 4 4 6 8 9 10 11 12 13 14 18 19 212FEATURESAudiophile DesignSophisticated design and superior internal components result in outstanding sound quality, performance and long term reliability.Advanced ProtectionEach channel is individually protected. If the circuitry determines that a channel must be shutdown for protection, a rare occurrence, only the channel a ected will be turned o . The other channels will continue to play. Once conditions return to normal, the a ected channel will be turned back on and operate as normal. Flexible Input SelectionEach of the 8 channels can be assigned a variety of source inputs. A dedicated input can be assigned to each channel. Each channel can also be con gured to play common signals from the Bus or Auxiliary inputs. This provides the exibility needed in sophisticated custom audio installations.BridgingThe power output of adjacent channels can be combined to provide extra power when needed in certain areas. This is easliy accomplished by ipping a single switch. Individual Channel Level AdjustmentsEach channel has its own level adjustment. This allows the loudness of each speaker to be perfectly matched to its area.Multiple Power Modes and Output TriggerThere are three ways to turn the ampli er ON: constant, trigger and audio sense. This allows the ampli er to operate seamlessly as part of a sophisticated custom installation. A separate output trigger allows the ampli er to activate other components via voltage trigger.3DIAGRAM 1 FRONT PANEL1. POWER SWITCHMaster power switch. Turns o power to ampli er and Power Mode Circuitry.2. POWER OUTPUT LEVEL INDICATORThis is level meter which shows outputs levels of ch 1-2 ch 3-4 ch 5-6 & ch 7-8 condition on the operation. Therefore, you can see output condition thru this master indicator.DIAGRAM 2 REAR PANEL41-2. Main bus inputs allow outputs from receivers, CD players, TVs, or any stereoaudio sources to be ampli ed across all channels for easy multi-roomapplications. Auxiliary inputs allows an addition audio source to be played on any channel that is switched to AUX .3-4. Bus outputs allows the bus inputs to be sent to other ampli ers or a daisy chain without the need for “Y” cable splitters. Auxiliary output allows you to daisychain the input to other audio sources.5. Bridging switch allows you to easily double the power output by coupling two channels together.6. Level controls for each channel.7. Input Selection switch allows you to select between the common bus andauxiliary inputs or the individual channel input.8. One switch allows you to select which stereo Input channel will play through the speaker outputs: left, right, or left and right combined. lf switched to Left + Right, both input channels are combined.9. Gold plated individual channel inputs allow you to connect di erent audiosources to each channel.10. Line signal output11. Voltage Selector 110-220V12. The Power Mode switch is used to toggle between three di erent triggermethods to power up the ampli er.13. 12V output to turn on other devices when ampli er is powered up.Connect to projector screens, powered drapes, or other devices with voltage triggers.14. 12-15V A/C or D/C input to trigger power up with voltage from anotherdevice, such as a receiver.15. Speaker channel output binding posts.16. Speaker channel bridged mode binding.17. 3-Prong removable power plug.18. Fused AC5SYSTEM DESIGN & OPERATION CONSIDERATIONSTo best understand system design and operation of the PT8000CH, it is useful to understand the following terms and features as they relate to the PT8000CH. Multi-RoomA system design that plays the same source at the same time in all rooms.If a change is made in one room, the same changes takes place in all other rooms. For example, if a listener changes from CD to Tuner in the bedroom, the same change will be heard in the kitchen.Note: With the use of volume controls or speaker switchers the volume of each room can be controlled separately of the other rooms.Multi-ZoneA system design that allows di erent sources to be played in each room. A change in one room can be made without changing the other rooms. For example the CD player can be heard in the bedroom while the kitchen is playing the tuner. BridgingThe combining of 2 channels to create one mono channel. It is useful when more volume is needed in a particular area.SourceComponent, audio or video, that provides an audio signal. Examples are CD, VCR, DVD, tape deck and tuner. The source provides the audio information that is ampli ed by the PT8000CH.ChannelA distinct unit of the ampli er that provides output to one speaker. On thePT8000CH the input to each channel can be con gured to select from the BUS INPUT, the AUX INPUT or that channel’s unique CHANNEL INPUT. Two adjacent channels can be bridged to provide higher power to one speaker.Level ControlsAllows any of the channels to be adjusted independently to raise or lower the output of each channel. This may be used to control the speaker output in order to balance di erent rooms or areas of the system.6BUS* AUX* LINE SwitchAllows each channel to play a variety of di erent inputs. Depending on the switch position the channel ampli es the signal connected to the BUS input, the AUX input, or its own LINE input.R R + L L SwitchWhen either a BUS or AUX input is selected, this switch is used to direct the channel to play the left signal from the input “L” or the right signal from the input “R”, or a combined right and left signal from the input “R+L”.Bus InputAllows the signal from a source to be distributed to any of the 12 channels on the ampli er.Auxiliary InputsAllows the signal from a secondary source to be distributed to any of the 12 channels of the ampli er.Power Mode SelectionThere are three ways to turn the ampli er on and o . Use the following list to decide which mode will work best for your application. See Diagram 3 below. 1. ConstantUse this selection when you wish to manually turn the ampli er on and o byusing the front mounted power button.2. TriggerUse this selection if you wish the ampli er turn on when it receives voltage(12-15V A/C or D/C) from an external source and turn o once that voltage has stopped. Some components have voltage outputs that are designed for this use. In addition there are devices that can be used as part of an automated system that will provide voltage to enable the mode. The voltage source must beconnected to the trigger-input jack on the back of the ampli er.3. Audio SenseUse this selection when you want the ampli er to turn on when the ampli er’s main input receives an audio signal. At the moment that either the left or right input jacks receive a signal the ampli er is turned on. Once the signal stops the ampli er waits 3 minutes and then turns o .78DIAGRAM 3: POWER MODE SELECTIONSYSTEM DESIGN EXAMPLESThere are many ways to con gure the PT8000CH ampli er. The following pages contain some typical installation examples. Use these examples to generate ideas for your system design.Multi-Room Installation Example (Diagram 4)This illustrates the simplest use of the PT8000CH, distributing audio throughout the home. In this example only one source can be selected at a time, all pairs of speakers have the same audio signal available. The Input Selection switch is set to “BUS” on all channels. Adjacent channels are assigned left and right.Multi-Zone Example #1 (Diagram 5)This illustrates the simplest way to provide an audio signal to one area that is independent of the main audio signal. Zone 2 uses a CD player connected to just that Zone. The rest of the system operates Zone 1 and is connected to the preampli er/receiver. The Input Selection switch on channels 1-10 is set to “BUS” with adjacent channels assigned left and right. The Input Selection Switch on channels 11 and 12 are set to “LINE”.Multi-Zone Example #2 (Diagram 6)This illustrates the ability to listen to di erent audio signals in each zone, indepen-dent of every other zone. The system relies on a multi-zone preampli er or up to 6 independent preampli ers.The Input Selection switch on each channel is set to “LINE”12-15V AC/DC TRIGGER INPUT 12-15V AC/DCTRIGGER INPUT 12V CONTROL OUTPUTAUDIO SENSE CONSTANT2.1mm x 5.5mm Power Input Jack Mode Switch3.5mm Power Output JackHome Theater / Multi-Room Example (Diagram 7)This con guration allows the user to access the sources connected to a home theater receiver for use in a multi-room installation. It relies on the home theater receiver having a multi-room or similar output.The Input Selection switch on each channel is set to “BUS” with adjacent channels assigned left and right.DIAGRAM 4 MULTI ROOM INSTALLATION9 10DIAGRAM 5 MULTI ZONE INSTALLATION #1DIAGRAM 6 MULTI ZONE INSTALLATION #21112DIAGRAM 7 HOME THEATER/MULTI ROOM INSTALLATIONINSTALLATION CONSIDERATIONSDO:• Place the amplifier with the feet resting on a solid flat level surface.• Place the amplifier in a well-vented area to provide proper cooling. In areas thatlack proper ventilation, such as tight cabinets or racks, it may be necessary toinstall small fans to create air movement.DON’T:• Don’t block the ventilation holes on the top or bottom of the amplifier.Never place it on carpeting or similar material.• Don’t place the ampli er in any other position other than horizontal with the feet down. Never place on its side or resting on the back where the terminals arelocated.• Don’t the amplifier near heat sources, or in an area that it would be exposed tomoisture.YOU SHOULD KNOW• The power supply is very large and therefore may cause a hum to be heard insome components if they are placed very close to the ampli er.13INSTALLATIONCAUTION: All connections and switching must be done with the ampli er’s master power switch positioned to “o ”.Select the Power Mode SelectionRefer to the Power Mode Selection area under installation considerations to determine which setting to use to turn the ampli er on. Once you have determined which mode you will be using set the switches as outlined in the following chart:14Selecting Inputs (See Diagrams 8 & 9)Each channel is capable of delivering the source from many inputs. The three main inputs are BUS, AUX and LINE IN. The selection for these inputs is donevia the Input Selection switch, marked “BUS-AUX-LINE”. To select a source for each channel, follow the steps below:1. Select the desired source input. Set the Input Selection switch to BUS (will playsource connected to the BUS INPUT), AUX (will play source connected to theAUX INPUT) or LINE (will play source connected to the LINE IN).Diagram 8BUS.AUX.LINE2. The BUS and AUX inputs each have a left and right input. The left, right orcombined left and right signal from these may be selected via the switchmarked “R R+L L”. Select the side you want the channel to deliver. Selecting “R” ± will play the right channel of the selected input. Selecting “L” will play the leftchannel of the selected input. Selecting “R+L” will play the combined signals ofright and left.Diagram 9R R+L RSelecting Bridge Mode (See Diagram 10)Under normal operation, this should be left in the 8 ohm position. It is sometimes desirable to combine two channels into one through bridging. The output of the combined channels can then be used to power one speaker.To bridge two adjacent channels rst make sure that the Impedance Switch isin the 8ohm position. Next move the switch marked “BRIDGE” to the “ON” position.1516The speaker must be connected to the terminals immediately under the “BRIDGED” text as indicated in Diagram 10. All input selection and settings for the bridged channels will be done on the channel to the left.Do not connect more than one speaker to the outputs of the bridged channel.Control OutputThe 12V output jack on the back of the ampli er can be used to turn on a variety of components equipped to be activated when they receive a 12V DC output. Voltage is only delivered to the jack when the ampli er is “on” or active. When the ampli er turns o , the voltage ceases.Before connecting another device to the 12 output please make sure that the device can accept 12V DC at 150ma. To connect the output to another device you must access the output jack with a two-conductor plug that ts into the 3.5mm jack. Be aware that the tip of the plug will be (+). If you are unsure about using this feature please contact an authorized PYLEUSA dealer for assistance.Connecting the Speaker WiresCAUTION:Only make connections when the ampli er is turned o .Wires to speakerUsing Standard Connections (See Diagram 11)For best performance use high quality speaker cables. The banana plug outputs on the back of the ampli er allow for a variety of ways to connect your speakers to the ampli er.Diagram 11: Binding Post DetailOnly make connections when the ampli er is turned o . application.Audio OutputsSources connected to the “BUS” or “AUX” inputs can be forwarded to other components or ampli ers by connecting to the corresponding output sectionsto the right of each input section. By using standard audio patch cables, you can connect these outputs to the inputs of another ampli er. Up to 5 ampli ers canbe daisy-chained together.AC PowerPlug the socket of the AC cord supplied with the ampli er into the receptacle on the rear of the ampli er. Plug the 2 prong plug directly into a 120V 60Hz wall outlet. CAUTION: Do not plug the ampli er into the preampli er or receivers switched outlet. If you wish to have the ampli er turn on once the preampli er or receiveris activated, use one of the turn on modes, voltage or audio.Turn to tightenInsert Banana Plug17OPERATIONSee Diagram 1for the location of the following:Power SwitchThe switch marked “Power” on the front panel of the ampli er will turn o all ampli er circuitry no matter which turn on mode is selected.Refer to the “Power Mode Selection” section for further information.Active LEDWhen lit, the Active LED indicates that the ampli er is operating. Refer to the “Power Mode Selection” section of this manual for further information. Protection LEDsWhen lit the “Protection” LEDs located on the front of the ampli er indicate that either a fault in the wiring, the speaker, or the ampli er has caused the channels associated with the LED to shut down.Level Adjustment KnobsThe level adjustment knobs on the back panel of the ampli er can be used to adjust the level of each channel. There are many reasons for needing to adjust the level. You many wish to closely match other levels in the system, or you may wish to limit the volume level in an area, such as a child’s room.18TROUBLESHOOTINGThe ampli er is designed to function trouble-free. Most problems occur becauseof operating errors. If you have a problem please check the troubleshooting listrst. If the problem persists, contact your authorized dealer.19This product can expose you to a chemical or group of chemicals, which may include “Nickel Carbonate” which is known in the state of California to cause cancer, birth defects,or other reproductive harm. For more info, go to https:/// 20FEATURES:• Multi-Zone Audio Source Ampli er System• High-Powered & Distortion-Free Audio Distribution• 8-Channel Sound Processing Amp Design• Integrated 4-Channel Bridgeable (Bridge) Switches• Front Panel Color LED Graphic Audio Level Display• Independent Channel Rotary Level Control Knobs• Channel Con guration: Left/Right/Mono - Bus/AUX Input• Gold-Plated Audio/Speaker Connectors• 5-Way Speaker Binding Posts (Banana Plug) Outputs• Pass-Through Output for External Ampli er Linking (Daisy-Chaining)• Individual Channel Safety with Protection & Overload Circuitry• Master Power Button, ON/OFF• Universal Rack Mount Compatibility• Perfect for Home Theaters & Multi-Room Audio Control• Used in Home, O ce & Business ApplicationsWHAT’S IN THE BOX:• 8-Channel Ampli er• Power CableTECHNICAL SPECS:• MAX Power Output: 8-Ch. x 1000 Watt• RMS Power Output: 100W x 8-Ch @ 8Ohm• T.H.D.: <1%• Rack Mountable: 4U Rack Space• Power: 115/230V Switchable (DC 12-15V)• Dimension (W x D x H): 19.0'' x 19.3'' x 7.1''21Questions? Issues?We are here to help! Phone: (1) 718-535-1800Email: *******************。
朗科 C676 音乐精灵 说明书

UM07110102(C676).p651和™2UM07110102(C676).p6534左侧正面右侧背面显示屏播放/暂停键底侧迷你USB 接口UM07110102(C676).p6556UM07110102(C676).p657灵停止数据传输后,用鼠标左键点击电脑屏幕右下角的图标,系统将会弹出8UM07110102(C676).p659 :电池电量全满。
随着使用时间的增加,电池电量会减少。
:电池电量用完。
当电池处于低电时,该图标闪烁。
对音乐精灵强制充电。
智能充电技术可以延长电池的使用寿命。
在1在关机状态下长按键在停止状态下长按键暂停状态下长长按键10UM07110102(C676).p651112按/键选中菜单后,按UM07110102(C676).p6513开始播放请在歌曲停止或暂停时按键暂停播放请在歌曲播放过程中按键;停止播放请在歌曲播放或暂停时长按键个歌曲及录音文件的播放。
停止过程中按住/键歌曲选择:在歌曲播放停止过程中通过按/键调节音量:按/ 键复读:在歌曲播放过程中按14调频菜单下,显示屏显示如下图所示:收音:在收音过程中可以通过按/键或录音的过程中都可以通过按/ 键个预设电台。
自动搜台:在搜台状态下,按键乐精灵自动将其预存到相应的台号中。
手动搜台:在搜台模式下,您还可以进行手动搜台,按 /键切换到存台状态,按键切换到返回选项,按键本产品第一次进入调频菜单时,音乐精灵将自动搜索电台,并保存搜索到UM07110102(C676).p651516录音过程中,按键录音结束后,录音文件将根据已设置的录音文件格式自动命名并保存。
录音按/ 键按 / 键进入设置菜单,您可以对下列选项进行设置:“浏览播放”模式下,按键UM07110102(C676).p6517进入录音设置下,按 / 键按键l 择好后,按键声道:按MODE 设置录音声道为:立体声或单声道。
选择好后,按设置采样率。
采样率可被设置的值为:80。
- 1、下载文档前请自行甄别文档内容的完整性,平台不提供额外的编辑、内容补充、找答案等附加服务。
- 2、"仅部分预览"的文档,不可在线预览部分如存在完整性等问题,可反馈申请退款(可完整预览的文档不适用该条件!)。
- 3、如文档侵犯您的权益,请联系客服反馈,我们会尽快为您处理(人工客服工作时间:9:00-18:30)。
右转科技新一代家庭背景音乐控制器
知音100
☞知音100简介
知音100是一款具备极高性价比的家庭背景音乐控制器,功能强大、操作界面突破了既往的播放器桎梏,操作简单、高品位的音乐控制器。
知音100是一款高清播放器,能通吃网络最流行的RMVB格式电影,能广泛支持多种媒体格式的高清播放器。
知音100是一套嵌入式小型家庭影院,信号输出(可接有源低音炮)和背景音乐立体声配合高清输出接入高清电视组合成一套省钱省空间的简单家庭影院。
☞知音100功能介绍
◇音乐控制器面板灯光随音频炫彩!数字全彩高速4.3寸TFT显示屏!水晶面板触摸按键操作更显时尚、高贵品质!
◇音频格式:支持MP3、WMA、APE、FLAC、ACC、OGG、AC3、DTS音乐格式!
◇视频格式:RM/RMVB,MPEG-1/2/4、AVI、H.264(SD,HD)、CVBSI、DIVX、XVID、VOB、MOV、MKV等高清视频格式直接播放,无需转换,高画质播放,支持720P全高清片源!
◇色差分量高清输出:支持768P输出,输出可连接电视机!操作全界面输出到电视上。
◇电子相框:支持JPEG、BMP、GIF、PNG格式图片浏览(电子相框)!
◇音效功能:多种音效、摇滚、流行、古典、爵士、重低音!
◇录音留言:支持录音存储一键播放功能!
◇软件升级:支持软件升级功能!
◇5路音源选择:2路公共音源(布线输入)和4路本地音源(内置FM+内置1G 内存+外插SD卡+USB)!
◇音源输出功能:本产品上的音源可输出到别的分体式音乐控制器上,实现共享。
◇收音机功能:内置全数字自动调频收音机,30个电台存储!
◇存储卡功能:内置闪存卡,并可外插SD卡!
◇HOST USB:U盘直接播放功能!
◇时间显示:支持时钟、日历功能!.
◇多种循环播放模式:循环播放,顺序播放,随机播放,单曲循环,单曲播放设置功能!
◇三档定时开机功能!
◇三档定时关机功能!
◇音量调节:30级电子音量调节功能!
◇断电记忆功能:记忆上次关机前的状态!
◇红外遥控功能,提供多种快捷键及人性化操作!
☞知音100技术指标
◇电源:AC110V-AC220V 50HZ
◇输出功率:20W+20W
◇输入阻抗:47KΩ
◇输出阻抗:8Ω
◇总谐波失真:0.03%
◇频响20Hz-20KHz
◇FM收音机接收频率范围:87MHZ--108MHZ
◇内存卡容量:128MB-8GB
◇红外遥控距离:≤13M
◇产品尺寸:172*86*50MM(长*宽*厚)
☞知音100安装提醒
◇预埋172标准底盒!
◇线缆:本产品使用到的4种线材:电线、音频线、音响线、75-3同轴线。
电线:1-2平方毫米;音频线(两芯屏蔽线:俗称话筒线):RVVP2*0.5 RVVP2*0.75; 音响线(俗称金银线):RVH2*100 RVH2*200!色差分量高清输出线:75-3同轴线三条!
◇布线提醒:多个点(多个产品)时,布线采用并联方式,既可从线上并接,也可通过分线盒并接!。
