山特Mt1000-pro彩页
山特产品速查手册说明书

山特产品速查手册SANTAK PRODUCT QUICK REFERENCE 全面保护用心为安全目录Contents后备式UPSTG-E1000/500, TG1000/500, ET1100/550, K500/K1000 PRO, MT500/1000 PRO, TG-BOX 600/850在线式UPS城堡系列塔式C1-3K, 城堡系列塔式C6-10K, 城堡系列机架式C1-3kVA Rack,城堡系列机架式C6-10kVA Rack, 城堡系列3C3 Pro (20-200kVA),城堡系列3C3 Pro ISO (15 -100kVA)灵霄系列灵霄系列 PT 3000 (1-20kVA)模块式UPSARRAY 3A3 Pro 系列 (15kVA~150kVA), ARRAY 3A3 PT 系列 (25kVA~200kVA), ARRAY 3A3 PT 系列 (60kVA~600kVA)蓄电池山特城堡系列蓄电池, G系列胶体蓄电池, ARRAY系列蓄电池, 山特SBC-A电池柜微模块灵聚2.0微模块产品系列精密空调城堡 (SCC) 系列机房专用空调(5-20kW), 城堡 (SCC) 系列机房专用空调(25-50kW)配电机柜配电单元 (PDU)机柜S系列机柜3-11 12-22 23-26 27-30 31-35 36-3940 41-45472 | 山特产品速查手册山特后备式TG-E系列UPS⸺美观时尚的“设备守护神”。
TG-E500/1000 UPS功能强大,集智慧、安全、可靠于一身,提升消费者在产品品质、观感、质感方面的使用体验。
这款UPS针对中国市场电力环境优化设计,内置MCU控制单元,使用环保的ABS塑料,做工精美,有效的解决常见的电力问题:市电断电、电压下陷、浪涌。
TG-E500/1000小身段,大能量,守护个人和办公电脑、商务设备等硬件设备和数据的安全。
注:TG-E500/1000仅通过电商平台销售,购买请访问京东和天猫的授权旗舰店、专卖店。
美国山特MT500在线互动式UPS电源

MT500(A)/1000(A)在线互动式后备UPS电源
MT500(A) MT1000(A)
产品简介:
小巧身材在个人电脑配置和峰值功耗不断升级的背景下,为个人电脑和企业小型关键终端量身定制的大容量、高可靠、高性价比UPS产品。
可为用户个人电脑、POS机、税控机及其它微型终端设备提供周全可靠的电力保护。
智慧投资,信赖之选。
产品特点:
●全封闭,塑壳一体成型,简洁、紧凑、大方的机器外观;
●卓越的微处理器确保可靠运行;
●宽广的输入电压范围(140V~280V),适应于电力环境恶劣的地区;
●自动电压调节功能(AVR),稳定输出电压,保证用电设备安全稳定。
●超强的带载能力,满负载的情况下长期工作;
●完善的电池管理技术,自动调整电池的终止电压,延长电池寿命。
●支持冷启动功能,无市电的状态下直接启动UPS,满足应急需求;
●市电重启功能;
●输出模拟正弦波;
●可接发电机
产品参数:。
山特介绍册L-00008-09

永不妥协的品质
——山特成为市场领导者的基础
作为最早进入中国市场的 UPS 厂商,山特公司已通过 ISO9001 国际质量标准认证和 ISO14001 环境管理体系 认证,产品获得泰尔认证、国家广电总局入网认证等多 项行业认证。
不断创新的技术
——山特核心竞争力
设立于深圳的技术研发中心,具有世界一流的研发条件, 拥有 500 多位优秀的技术人员。强大的研发能力,保证 了山特产品的先进性和创新性。目前,世界上最高功率 密度的 UPS 产品由山特公司制造。山特还是全球首家 将 IGBT 功率元件及高频 PWM 技术引入 UPS 行业的 厂商。
山特 -04-
技术与研发
团队研发 实力
山特人以始终如一的不懈追求,领航于科技前沿,以市场为导 向,占据研发制高点。
山特在深圳、上海设立了两个研发中心,分别对UPS产品和专业前瞻性技术进行研究开发。400 多位由博士和研究生为骨干的高素质研发人员,雄厚的资金支持、一流的技术设备和IPD流程管 理保障,使山特在对核心技术的掌控、新产品的研发上,处于同行业领先的地位,保证了山特产 品的先进性、创新性、高可靠性和高适用性。
如今,在伊顿旗下三大UPS产品系列中, Powerware是大功率UPS的杰出代表,山特 (Santak)则在中小功率市场占有绝对优势,而 Pulsar在20kVA以下高端市场享有盛誉。
山特加入伊顿公司后,公司名称、产品、渠道、 服务承诺等均不发生改变。
山特现有公司标志
变为
。此变更
仅限于网站、彩页、广告等市场宣传资料上,机
强大的实力注定不朽的收获。山特公司在UPS核心专利技术保有、新产品开发能力等各方面处于 同业前列。
在专利方面,山特是无线并联技术、交流输出并联电源系统及其均流控制方法、不断电源模块并 机系统及其旁路切换方法等UPS核心技术的所有者。
美国山特(STPOWER)UPS用户手册
不间断电源系统-upsC6K(S)/C10K(S)/3C10KS/3C15KS/3C20KS 使用手册目录1.简介1.1系统及型号说明1.2常用符号说明1.3外观1.4产品规格与性能⏹一般规格⏹电气性能⏹工作环境2、安装说明2.1拆箱检验2.2输入、输出电源线及保护接地安装2.3长效性外接电池操作程序2.4并机操作3.操作与运行3.1操作3.2运行模式4.电池维护与保养5.处置电池注意事项6.故障排除附录一板指示灯说明附录二板等号显示与工作状态对应表附录三修保保证1.1系统及型号说明本系列UPS 是一种先进的在线式正弦波不间断供电系统,带有旁路维修开关,具有并联冗余的功能,可以为您的精密设备提供可靠、优质的交流电源,其适用范围很广,从电脑设备、通信系统到工业自动控制设备都可以使用。
由于它的在线式设计,不同于后备式UPS ,它对输入电压不断调整、滤波,在市电中断时,会无时间中断地从备用电池上提供后备电源。
在过载或逆变失败情况下,UPS 会转换到旁路状态,由市电供电。
若过载情况消除,UPS 会自动转回到逆变器供电状态。
本手册适用以下型号于CASTLE系列产品:(1)C6K/ C10K:内置电池的标准机型。
以下简称6K/ 10K(2)C6KS/ C10KS:可外接电池的长效机型。
以下简称6KS/ 10KS(3)3C10KS:三相输入单相输出可外接电池的长效机型。
以下简称三相10KS (4)3C15KS:三相输入单相输出,可外接电池的长效机型。
以下简称三相15KS (5)3C20KS:三相输入单相输出,可外接电池的长效机型。
以下简称三相20KS 以上任意一种机型,又分标准版和专业版两种供用户选择,专业版相对标准版增加了EPO开关、手动旁路维护开关。
1.2常用符号说明符号及其含义符号含义符号含义提示注意保护接地高压危险报警消除│打开主机过载指示O 关闭主机电池较热待机或关闭主机循环交流勿与杂物一同放置直流1.3 前后面板示意图前面板1.4产品规格与性能2.1拆包检验(1)打开包装,包装内应有:UPS一台UPS使用手册一本若是6KS,还带有一条UPS至电池柜的电池连接线(2)检查UPS是否在运输过程中损坏,如发现损坏或部件缺少,请勿开机,立即通知承运商和经销商。
山特塔式1-3K(S) UPS说明书

感谢您使用山特产品!请严格遵守本手册和机器上的所有警告及操作说明,并妥善保管本手册。
在没有阅读完所有的安全说明和操作说明以前,请不要操作本机。
严正声明监管码声明为了切实保障您的用电安全,帮助您购买到真正的山特UPS,请注意以下事项:1.认准山特注册商标:、。
2.山特电子(深圳)有限公司在中国从未以任何形式授权委托其它公司生产UPS。
3.山特所有产品机身上均贴有“电子监管码”(“电子监管码”是国家质检总局为打击假货推行的一种产品身份识别码)。
4.消费者可以通过以下途径对产品电子监管码进行查验,并可通过“中国产品质量电子监管网”平台进行投诉、举报。
查询方式:网站查询:登陆(中国产品质量电子监管网),输入监管码进行查询。
电话查询:95001111(未开通地区可拨打114)。
短信查询:将监管码发送至106695001111(移动、联通均可)。
如有疑问,可以拨打电话95001111或登陆 点击“消费者通道”进行举报投诉。
版权声明山特公司致力于技术创新,不断提供更好的产品和服务满足客户需求,对产品设计、技术规格的更新,恕不另行通知,产品以实物为准。
请到山特网站下载最新版本的产品说明书。
版权所有 ©2013-2014 山特电子(深圳)有限公司。
安全注意事项操作安全1.在使用本产品前,请仔细阅读“安全注意事项”,以确保正确和安全的使用。
并请妥善保存说明书。
2.操作时,请注意所有警示标记,并按要求进行操作。
3.避免在阳光直接照射、雨淋或在潮湿的环境使用本设备。
4.本设备不能安装在靠近热源区域,或有电暖炉、热炉等类似的设备附近。
5.放置UPS时,在其四周要留有安全距离,保证通风。
安装时,请参照说明书。
6.清洁时,请使用干燥的物品进行擦拭。
7.若遇火警,请正确使用干粉灭火器进行灭火。
若使用液体灭火器会有触电危险。
电气安全1.上电前,请确认已正确接地,并检查接线和电池极性的连接正确。
2.当UPS需要移动或重新接线时,应将交流输入电源断开,并保证UPS完全停机,否则输出端仍可能带电,有触电的危险。
Monster Power Center Pro 1000说明书
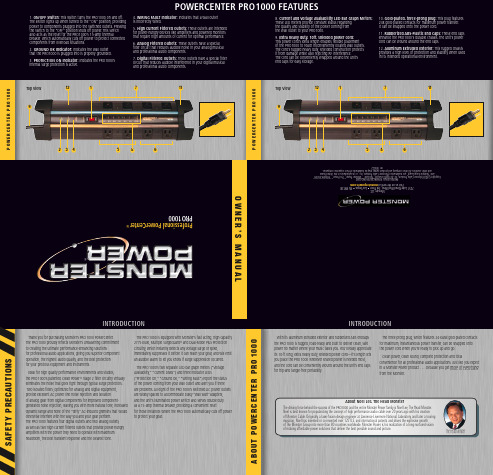
S A F E T Y P R E C A U T I O N SWith its aluminum extruded exterior and rubberized ABS endcaps the PRO 1000 is rugged, road-ready and built to deliver clean, safe power no matter where your music takes you. You’ll really appreciate its 10-ft long, extra heavy duty, shielded power cord—it’s length lets you place the PRO 1000 wherever shared power is needed most, and the cord can be conveniently wound around the unit’s end caps for trip-and tangle-free portability.The three-prong plug, which features 24-karat gold-plated contacts for maximum, instantaneous power transfer, can be snapped onto the power cord when you’re ready to pick up and go.Clean power, clean sound, complete protection and totalconvenience for all professional audio applications. Just like you expect in a Monster Power product . . . because you get more of everything from the Monster.P O W E R C E N T E R P R O 1000P O W E R C E N T E R P R O 1000A B O U T P O W E R C E N T E R P R O 1000INTRODUCTIONPOWERCENTER PRO 1000 FEATURES1. ON/OFF Switch: This switch turns the PRO 1000 on and off. The switch lights up when turned to the “ON” position, providing power to components plugged into the switched outlets. Pressing the switch to the “OFF” position shuts off power. This switch also acts as the reset for the PRO 1000’s 15-amp thermalbreaker, which automatically cuts off power to protect connected components from overload situations.2. GROUND OK Indicator: Indicates the wall outlet that the PRO 1000 is plugged into is properly grounded.3. PROTECTION ON Indicator: Indicates the PRO 1000’s internal surge protection is active.4. WIRING FAULT Indicator: Indicates that a wall outlet is incorrectly wired.5. High Current Filtered Outlets: These outlets are intended for power-hungry devices like amplifiers and powered monitors that require high amounts of current for optimal performance.6. Analog Filtered Outlets: These outlets have a special filter circuit that reduces audible noise in your analog musical and professional audio components.7. Digital Filtered Outlets: These outlets have a special filter circuit that reduces audible interference in your digital musical and professional audio components.8. Current and Voltage Availability LED Bar Graph Meters: These LED meters provide constant status regarding the quality and stability of the power coming from the wall outlet to your PRO 1000. 9. Extra heavy duty, 10ft. shielded power cord: This power cord’s extra length enables flexible placement of the PRO 1000 to reach inconveniently located wall outlets. The cord’s rugged heavy duty, shielded construction protects it from damage while also rejecting RF interference. The cord can be conveniently wrapped around the unit’s end caps for easy storage.10. Gold-plated, three-prong plug: This plug features 24k gold-plated contacts for maximum power transfer. It can be snapped onto the power cord.11. Rubberized ABS-Plastic End Caps: These end caps enhance the PRO 1000’s durable chassis. The unit’s power cord can be wound around the end caps.12. Aluminum Extruded Exterior: This rugged chassis provides a high level of protection and stability when used in its intended operational environment.®INTRODUCTIONThank you for purchasing Monster’s PRO 1000 PowerCenter. The PRO 1000 proudly reflects Monster’s unwavering commitment to creating the ultimate performance-enhancing solutionsfor professional audio applications, giving you superior component operation, the highest audio quality, and the best protection for your precious equipment and instruments.Ideal for high quality performance environments and studios,the PRO 1000’s patented Clean Power ™ Stage 2 filter circuitry virtually eliminates the noise that goes right through typical surge protectors. Two isolated filters, optimized for analog and digital equipment, provide excellent AC power line noise rejection and isolation of analog gear from digital components for improved component-generated noise rejection, leaving you with more natural tone, increased dynamic range and none of the “dirty” AC-induced gremlins that would otherwise interfere with the way you and your gear perform.The PRO 1000 features four digital outlets and two analog outlets, as well as two high-current filtered outlets that provide power-hungry amplifiers with the power they need to operate with maximum headroom, the best transient response and the clearest tone.The PRO 1000 is equipped with Monster’s fast acting, high-capacity 2775 Joule, Multiple SurgeGuard ™ and Dual-Mode Plus Protection Circuitry, which instantly detects any voltage surge or spike,immediately suppresses it before it can reach your gear, and will emit an audible alarm to let you know if surge suppression occurred.The PRO 1000’s two separate LED bar graph meters (“Voltage Availability,” “Current Draw”) and three indicator LEDs(“Protection On,” “Ground OK,” “Wiring Fault”) report the status of the power coming from your wall outlet and alert you if there are problems. All eight of the PRO 1000’s switched AC power outlets are widely spaced to accommodate bulky “wall wart”adapters, and the unit’s illuminated power switch also serves double duty as a 15-amp thermal breaker, providing a convenient resetfor those instances where the PRO 1000 automatically cuts off power to protect your gear.About Noel Lee, The Head MonsterThe driving force behind the success of the PRO 1000 and the entire Monster Power family is Noel Lee, The Head Monster. Noel is best known for popularizing the concept of high performance audio cable over 20 years ago with his creation of Monster Cable. Originally a laser-fusion design engineer at Lawrence Livermore National Laboratory and later a touring musician, Noel has invented or co-invented over 125 U.S. and international patents and drives the explosive growth of The Monster Group into more than 80 countries worldwide. Monster Power is his realization of a long-nurtured vision of making affordable power solutions that deliver the best possible sound and picture.The Head MonsterTop View1257643211198Top View1257643211198I N S T R U C T I O N SI N S T R U C T I O N SHOOK-UP GUIDEP R O B L E M S A N D S O L U T I O N S-PLEASE READ AND OBSERVE THE FOLLOWING SAFETY POINTS AT ALL TIMES• Analog Filtered OutletsMost analog components, like foot pedals and tube preamps, create audible noise that can easily interfere with your signal. These two outlets have a special filter circuit that reduces audible noise in your analog musical and professional audio components.I N S T R U C T I O N SHOOK-UP GUIDEHOOK-UP GUIDEI N S T R U C T I O N SI N S T R U C T I O N SPROBLEM – The PRO 1000 is not receiving power.Possible Cause #1The PRO 1000 is not turned on.Possible Solutions• Press the PRO 1000 switch into the “ON” position.• Make sure the PRO 1000’s AC power plug is plugged into a properly grounded 120V wall outlet.• In some venues or studios a wall switch may need to be thrown to make the wall outlet come alive. Try turning on the light switches located near the wall outlet that should be powering the PRO 1000.Possible Cause #2Too many devices are connected, causing an overload, throwingthe Thermal Circuit Breaker. Please note: The total power consumption on all the components powered by the PRO 1000 should not exceed 1800 watts.Possible Solutions• Press the PRO 1000’s combination ON/Off/Thermal Circuit Breaker switch into reset. Please allow 10 minutes from the timethe Circuit Breaker is initially thrown before attempting to reset. If you reset too soon, the breaker will prematurely sense power overload and not allow the unit to operate.Possible Cause #3The PRO 1000 power cord is plugged into an outlet on the back of one of your components and the component is not turned on.Possible Solutions• Turn the component power on.NOTE: For the best possible performance, plug the PRO 1000 into a wall outlet, not an outlet on another component.PROBLEM – The PRO 1000 is not providing power to the other components.Possible Cause #1The component is plugged into a switched outlet and the PRO 1000 has not been turned on.Possible Solutions• Turn the PRO 1000 on.Possible Cause #2PRO 1000 is plugged into a switched outlet on a component that is not turned on.Possible Solution• Turn on the component.NOTE: For best possible performance, plug the PRO 1000 into a wall outlet, not an outlet on another component.PROBLEM – Speakers, monitors or headphones emit a humming or buzzing noise.Possible CauseThe PRO 1000 is sharing AC power with equipment that is not properly grounded.Possible Solution• Connect your PRO 1000 to a dedicated outlet.• High Current Filtered OutletsThese outlets are intended for power-hungry amplifiers, powered subwoofers and other similar devices that require high amounts of current for optimal performance. Other components will function as intended if connected to these outlets, but devices requiring high current will operate best when plugged into these outlets.• Digital Filtered OutletsWhile digital components like multi-effect units and computers don’t generate the noises you might associate with analog equipment, their reliance upon clock frequencies and their vulnerability to different bands of noise can create equally problematic interference for your signal. These digital filtered outlets have a special filter circuit that reduces audible interference in your digital musical and professional audio components.TROUBLESHOOTINGANALOG EFFECT PEDALPOWERCENTER PRO 1000AMPLIFIERDIGITAL SIGNAL PROCESSOROutlet Hook-upBecause certain components don’t need continuous power, or shouldn’t be powered continuously, all of the PRO 1000’s outlets are “switched.” This means the components you plug into the PRO 1000 won’t receive power until your unit is turned on.The PRO 1000’s outlets are grouped into three different sections according to specific filter circuitry that is used to eliminate noise and optimize performance for particular types of components. When connecting your gear to the PRO 1000, please select an outlet within the group whose label most closely reflects the type of component you want to use. The diagram below shows one possible set of power connections, using the different filters for maximum benefit.EXAMPLE:WARNING – Power SourcesDo not plug your Monster POWERCENTER into a power outlet that differs from the source indicated for safe use on the Monster POWERCENTER. If you don’t know the type of electrical power that is supplied to your home, please consult your local power company.WARNING – Grounding and PolarizationA. Your Monster POWERCENTER has a three-wire grounding-type AC plug (a three-prong plug). This plug is designed to be inserted into a grounding-type outlet only. If this plug doesn’t fit directly into your outlet, do not attempt to force it into the outlet. Instead, reverse the plug and reinsert it. If this doesn’t work, contact a local electrician to install the proper polarized outlet. Never attempt to dismantle the plug in any way (or to alter an extension cord) to make it fit into a two-prong outlet. Do not attempt to defeat the grounding feature by using a 3-to-2-prong adapter. Instead, call a local electrician to install a properly grounded outlet.B. If you use rooftop devices such as satellite dishes, antennas, or any other component with wire that connects to your Monster POWERCENTER, be sure the wire(s) is properly grounded. This protects against voltage surges and static charges. Do not place any part of an antenna near overhead power lines, or any other power circuit. Do not touch any power line or power circuit. Doing so may cause you severe physical injury and possibly result in death.WARNING – Storm PrecautionsIn the event of a lightning storm, immediately disconnect your Monster POWERCENTER from its power source. After you’ve done this, it’s not necessary to disconnect any components from your Monster POWERCENTER.WARNING – No User Serviceable Parts InsideIf, for any reason, your Monster POWERCENTER is not operating properly, do not remove any part of the unit (cover, etc.) for repair. Unplug the unit and consult this owner ’s manual for warranty and service information.WARNING – Exposure To HeatDo not expose your Monster POWERCENTER to direct sunlight or place it near wall heaters, space heaters, or any enclosed space prone to temperature increase (e.g., car).WARNING – Liquid: Avoiding Electrical ShocksDo not operate your Monster POWERCENTER if liquid of any kind is spilled onto or inside the unit. Do not operate your Monster POWERCENTER near rain or water that’s spilled or openly exposed (e.g., kitchen or bathroom sink).WARNING – Power Cord SafetyA. When routing your Monster POWERCENTER AC power cord, do not place it nearheavy foot traffic areas (e.g., hallways, doorways, and kitchen floors). Do not create a trip hazard with the power cord.B. If your power cord’s protective jacket begins to rip or fray, exposing the internal wiring, shielding, etc., disconnect it from the power source and discontinue use of the Monster POWERCENTER immediately. Please see warranty information.WARNING – Proper CleaningIn general, the only cleaning necessary for your Monster POWERCENTER is a light dusting. Unplug your component from the wall socket before cleaning it. Do not use any type of liquid or aerosol cleaners.WARNING – Medical ConditionsThe Monster POWERCENTER is not designed for use with any medical equipment.。
SANTAK-山特中小UPS使用说明指南
SANTAK-山特中小UPS使用说明指南1.一台后备式500VA机器,其工作正常,但输出用表测发现其值为175V,为什么不是220V?假设UPS是工作在逆变状态,由于后备式机器输出的是方波,当客户使用的是平均值万用表时棗该表视方波为失真较大的正弦波处理而不准,故只有175V。
必须用带有真均方根值(TURE RMS)标志的万用表测量,才能测试出实际的输出电压。
故机器属正常工作。
2.后备式是采用何种方式进行高压保护的?①.市电电压超过UPS的输入范围上限后,将自动转电池状态②.在市电工作时,如果瞬间电压超过机器规格,则机内突波吸收元件会起保护作用。
3. UPS电池放电时能否消除报警声?大部分机种只需按测试键或开机键一下即可。
具体为:只需重复按开机键(ON键)一次即可消音的有棗城堡系列(C系列);需按TEST/静音键消音的有棗K750S/1050S、M500W/1000W、N系列;而TG系列、Pro系列、MT系列、K500、K1000等机种则无法实现。
4.我使用的K500VA机器现无法正常工作,机器一直鸣叫,且红灯亮,是否机器故障?我有电子技术基础,能否提供一份电路图。
只有经过培训、考试合格并认证的代理维修人员才可维修UPS,所以不能提供维修线路图。
如有维修需求,可以先留下联系电话,再由当地服务站或授权维修代理商与之联络。
5.TG500相比K500有哪些改进?(1)、TG500除保留K500的主要功能外,采用SMD(表面贴片)技术和在线机所使用的40KHZ高频技术,创下UPS后备机技术革新的里程碑;(2)、TG500外壳采用全塑流线型设计,体积小、外型美观,为一次成型。
(3)、由于在接发电机性能方面进行了优化,故TG500较K500而言,可适应更多品牌的发电机。
6.TG500有无防雷击功能?抗高频干扰能力如何?TG系列UPS具有良好的抗高压、抗高频能力,可防止高压浪涌(雷击电压)通过UPS进入计算机等设备,从而保护您的计算机系统。
山特说明书
1#~10# led 指示灯:1# 故障指示灯: ups 出现告警或者故障时亮,呈红色。
2#~6# 负载电池容量指示灯:表示负载容量或电池容量,在市电模式下仅表示负载容量,在电池模式下仅表示电池容量。
7# 旁路指示灯: ups 经旁路为负载供电,旁路指示灯亮,呈橙色。
8# 市电指示灯: ups 接通市电后,市电指示灯亮,呈绿色。
9# 逆变指示灯:市电进入 ups电源后经逆变处理后为负载供电,逆变指示灯亮,呈绿色。
10# 电池指示灯:市电异常,由电池为负载供电,电池指示灯亮,呈橙色。
11#~12# 负载电池容量指示图:11# 负载容量指示图标,从右到左对应 6# → 2# 指示灯点亮个数增多,负载容量递增。
12# 电池容量指示图标,从左到右对应 2# → 6# 指示灯点亮个数增多,电池容量递增。
按键:13# 开关机:控制 ups 的开启和关断。
14# 功能键:静音(旁路和电池模式下长按 2 秒以上);电池自检(市电模式下长按 2 秒以上)。
山特ups电源参数顺序:自上而下,红灯为1号灯,黄灯为2号灯,依次类推至6号灯故障含义:1-2号灯亮,并伴有长鸣超载1-3号灯亮,并伴有长鸣充电器故障1-4号灯亮,并伴有长鸣 bus电压异常1-5号灯亮,并伴有长鸣逆变异常1-6号灯亮,并伴有长鸣温度过高1-2-5灯亮,并伴有长鸣输出短路1-2-6灯亮,并伴有长鸣风扇故障或辅助电源故障不知道你那个是什么牌子的我的是第一个绿灯交流输入灯第二个红灯电瓶逆变灯第三个橙色电瓶充电或过载灯最后一个没亮过是提示要更换电池了充满电会自动断开一般为8-10 闲置不用时一个月充一次电尽量空冲(不带负载)三个月放一次电然后再充1. 电源线连接方法和注意事项ups电源的输入插座要与市电连接,输出插座可经接线板与计算机和显示器连接。
对于apc的ups电源,其输出电源分两部分:一部分是稳压加电池输出,用于接计算机主机;另一部分是稳压输出,用于在电压不稳的地区接显示器,打印机和其它设备。
Aputure MT Pro产品说明书

MT Pro Product ManualEnglishIntroductionThank you for purchasing the Aputure® MT Pro.Aputure MT Pro is a full spectrum mini LED tube light for cinematographers andlighting professionals. Featuring total color and pixel control in a compact form factor, the MT Pro is your new filmmaking paintbrush.Granting you true creative freedom, the MT Pro utilizes advanced wireless connectivity with our innovative Sidus Link mobile app and the industry-standard Lumenradio CRMX for wireless DMX adjustability.Meet the MT Pro. All the color you need in the palm of your hand.IMPORTANT SAFETY INSTRUCTIONSWhen using this unit, basic safety precautions should always be followed, including the following:1. Read and understand all instructions before using.2. Close supervision is necessary when any fixture is used by or near children. Do not leave the fixtureunattended while in use.3. Care must be taken as burns can occur from touching hot surfaces.4. Do not operate the fixture if a cord is damaged, or if the fixture has been dropped or damaged, until it has been examined by qualified service personnel.5. Let the lighting fixture cool completely before storing. Unplug the power cable from lighting fixture beforestoring and store the cable at assigned space of the carrying case.6. To reduce the risk of electric shock, do not immerse this fixture in water or any other liquids.7.Toreducetheriskoffireorelectricshock,*******************************************************the lighting fixture to qualified service personnel when service or repair is required. Incorrect reassemblymay cause electric shock when the lighting fixture i s in use.8. The use of any accessory attachment not recommended by the manufacturer may increase the risk of fire,electric shock, or injury to any persons operating the fixture.9. Please do not place the LED lighting fixture near any flammable object.10. Only use a dry microfiber cloth to clean the product.11. Please do not use the light fixture in wet condition on account of electric shock may be caused.12. Please have the product checked by an authorized service personnel agent if the product has a problem.Any malfunctions caused by unauthorized disassembly are not covered by the warranty. The user may payfor maintenance.13. We recommend only using the original Aputure cable accessories. Please note that any malfunctions acaused by using unauthorized accessories are not covered by the warranty. The user may pay formaintenance.14. This product is certified by RoHS, CE, KC, PSE, and FCC. Please operate the product in full compliance withrelevant country's standards. Any malfunctions caused by incorrect use are not covered by warranty. Theuser may pay for maintenance.15. The instructions and information in this manual are based on thorough, controlled company testingprocedures. Further notice will not be given if the design or specifications change.SAVE THESE INSTRUCTIONSFCC Compliance StatementIf this equipment does cause harmful interference to radio or television reception, which can be determined by turning the equipment off and on, the user is encouraged to try reorient or relocate the receiving antenna.1. Increase the separation between the equipment and receiver.2. Connect the equipment to an outlet on a different circuit than the receiver is connected to.3. Consult the dealer or an experienced radio/TV technician for helpRF Warning Statement:This device has been evaluated to meet general RF exposure requirements.* You can find a detailed user guide for this device on our website .Components ListPlease make sure all accessories listed below are found before using. If not, contact your seller immediately.Type-C Charging Cable 1m (1 pc)Carrying Case (1 pc)Desktop Tripod (1 pc)* The illustrations in the manual are only diagrams for reference. Due to the continuous development of new versions of the product, if there are any differences between the product and the user manual diagrams,please refer to the product itself.Installations1. Magnets2. Desktop TripodHorizontal InstallationVertical InstallationOperationsAs the light is charging, the on-screen battery level indicator will animate to show the battery's status. After the * Please use the included USB-C cable to charge MT Pro. Using a different cable won’t guarantee optimal charging.* Supports 5V/2A charging via charger or power banks.* Charging rate will slow down when the light is powered on. Turn the light off for optimal charging.3. Manual Control 3.1 UI IntroducingCurrent mode Battery level Battery remaining time Wireless connection status3.2 MenuPress MENU to access the system menu, rotate and press the control wheel to select CCT / HSI / RGB / FX /Custom FX / DMX Setting / CRMX Setting / BT Setting / Language / Factory Reset / Product Info / Screensaver / Exit .3.4 HSIPress MENU to access the system menu, rotate and press the control wheel to select HSI mode.INT (Intensity): 0.0 - 100.0 %HUE (Hue): 0.1 - 360.0°SAT (Saturation): 0.0 - 100.0 %CCT (Correlated Color Temp.): 2000 K - 10000 K3.5 RGB Press MENU to access the system menu, rotate and press the control wheel to select RGB mode.INT(Intensity): 0.0 - 100.0 %R (Red): 0.0 - 100.0 %G (Green): 0.0 - 100.0 %B(Blue): 0.0 - 100.0 %3.6 FX Press MENU to access the system menu, rotate and press the control wheel to select FX mode.3.6.1 System FX Press the control wheel to select system FX, rotate and press the control wheel to selectPaparazzi II / LightningIII / TV IV / Fire III / Faulty Bulb III / Pulsing III / Cop car III / Party Lights II/ Fireworks II.* Please refer to page 12-14 for detailed parameter info3.3 CCTPress MENU to access the system menu, rotate and press the control wheel to select CCT mode.INT (Intensity): 0.0 - 100.0 %CCT (Correlated Color Temp.): 2000 K - 10000 KG/M (Green / Magenta adjustment): -1.0 - +1.03.6.2 Pixel FXPress the control wheel to select system FX, rotate and press the control wheel to select Color Fade / ColorCycle / One Pixel Chase / Two Pixel Chase / Three Pixel Chase / Rainbow / Pixel Fire.3.7 Custom FXPress MENU to access the system menu, rotate and press the control wheel to select Custom FX. You can choose to enter Picker FX or Music FX. Each type can save 10 custom FXs. In the name of each FX, "NO FX"means unsaved FX, and "Untitled" means saved FX.3.8 DMX SettingPress MENU to access the system menu, rotate and press the control wheel to select DMX Setting.DMX Address: Choose the DMX address of MT Pro, press and hold the control wheel for 2 seconds to lock/unlock the DMX address (Prevent accidental touch to exit DMX mode)DMX Profiles: Rotate the control wheel and press to choose DMX profile.DMX Loss Behavior:1. Hold Last Setting: After DMX signal is lost, remember the last control setting.2. Black Out: when the DMX signal is lost, it will be Black out3. Fade To Black: after DMX signal is lost, it will fade to Black in 60 seconds4. Hold 2min & Fade Out: After the DMX signal is lost, keep the last control setting for two minutes, and thenFade to Black within 60 seconds* The fade-out time decreases as the percentage of brightness decreases. When the brightness output is 100%, the fade-out time is 60 seconds, which decreases in sequence.* If the signal is reconnected, the DMX console will continue to maintain the signal output as same as before.* Please refer to page 12 - 14 for detailed parameter info3.9 CRMX SettingPress MENU to access the system menu, rotate and press the control wheel to select CRMX Setting mode. CRMX Status: When CRMX Status is ON, it will continuously search for a pairable signal in the background to connect.Unpair: Unpair will disconnects the currently established connection so that other signal transmitters can be paired.3.10 BT SettingPress MENU to access the system menu, rotate and press the control wheel to select BT Setting mode.BT Status: Rotate and press the control wheel to turn on/off Bluetooth.BT Reset: Reset the MT Pro Bluetooth connection, and your mobile phone or tablet will be able to connect to and control the light with Sidus Link App.BT UID: See the Bluetooth Unique Identifier.3.11 LanguagePress MENU to access the system menu, rotate and press the control wheel to select Language, Rotate and press the control wheel to select English or Simplified Chinese.3.12 Factory ResetPress MENU to access the system menu, rotate and press the control wheel to select Factory Reset. Factory Setting:Light Mode: Intensity 50%, CCT 5600K;Language: English;BT Status: ON;DMX: Address 001, Profile CCT&RGB, Hold Last Setting.YES NO3.13 Product InfoPress MENU to access the system menu, rotate and press the control wheel to select Product Info to see Firmware Version / Hardware Version.3.14 ScreensaverPress MENU to access the system menu, rotate and press the control wheel to select Screensaver mode. You.can choose to turn the screensaver on after 30/60/120 minutes or turn it off3.15 ExitPress MENU to access the system menu, rotate and press the control wheel to select Exit. It will go back to the previous interface.4. Wired DMX Control4.1 Connect to a standard DMX controllerDaisy chaining multiple lights over DMX* USB-C to 5-Pin XLR In & Out adapter sold separately.4.2 DMX Interface InfoSignal CommonData 2+ (Optional Secondary Data Link)Data 2- (Optional Secondary Data Link)Data 1+ (Primary Data Link)Data 1- (Primary Data Link)Signal CommonData 2+ (Optional Secondary Data Link)Data 2- (Optional Secondary Data Link)Data 1+ (Primary Data Link)Data 1- (Primary Data Link)4.3 DMX ProfileThe MT Pro offers a variety of DMX modes. Please find a detailed overview of all DMX modes in the document, DMX Chart is available for free download on the Aputure official website https://.5. Using the Sidus Link APPYou can download the Sidus Link app from the iOS App Store or Google Play Store for enhancing the functionality of the light. Please visit Sidus.link/app/help for more details regarding how to use the app to control your Aputure lights.Sidus.link/app/helpGet Sidus Link App SpecificationsPower InputCRI TLCI CQS CCT Range Weight Control Methods9W 9598962000 - 10000 K 391 g / 0.86 lbs7.5W 3.7 V / 4200 mAh 100%: 2 hours 2 hours(USB DC 5 V / 2 A)-10°C - +45°CPower Output Battery Battery Runtime Charging time Operating Temperature Dimensions (L x W x H)Sidus Link APP , DMX,CRMX, On-board40 x 35 x 300 mm / 1.57 x 1.38 x 11.81 inPhotometricsCCT 2700K 3200K 5600K 6500K 7500K 10000KRGB Distance0.5m1m0.5m1m0.5m1m0.5m1m0.5m1m0.5m1m0.5m1m0.5m1m0.5m1mFabric Grid471 lux / 43fc128 lux / 11fc476 lux / 44fc129 lux / 11fc523 lux / 48fc142 lux / 13fc549 lux / 51fc149 lux / 13fc515 lux / 47fc140 lux / 13fc460 lux / 42fc125 lux / 11fc142 lux / 13fc37 lux / 3fc225 lux / 20fc61 lux / 5fc48 lux / 4fc12 lux / 1fcBare Bulb526 lux / 48fc143 lux / 13fc532 lux / 49fc144 lux / 13fc585 lux / 54fc159 lux / 14fc614 lux / 57fc167 lux / 15fc577 lux / 53fc157 lux / 14fc514 lux / 47fc139 lux / 12fc151 lux / 14fc42 lux / 3fc253 lux / 23fc70 lux / 6fc56 lux / 5fc18 lux / 1fc* This data is based on average brightness measurements, there will be slight variations between lights.Detailed Parameters of FX Control System FXINT CCTG/M Intervals Status 0% - 100%2000 K - 10000 K-1.0 - +1.0[ 0.2S - 1.0S ] - [ 2.0S - 18.0S ] Stop / LoopPaparazzi ⅡINT Mode Intervals Status 0% - 100%CCTHSI[ 1.5S - 3.0S ] - [ 2.6S - 30.0S ] Stop / Trigger /LoopLightning Ⅲ2000 K - 10000 K1 - 360°G/M -1.0 - +1.0SAT 0 - 100 %CCT 2000 K - 10000 KINTModeIntervalsStatus0% - 100%CCTRangeHSIRange[ 0.5S - 2S ] - [ 5.0S - 15.0S ]Stop / LoopTV Ⅲ[ 2000 K - 9900 K ] -[ 2100 K - 10000 K ][ 0° - 359° ] - [ 1° - 360 °]G/M -1.0 - +1.0SAT 0 - 100 %CCT 2000 K - 10000 KINTModeFRQStatus0% - 100%CCTRangeHSIRange60 - 240 /minStop / LoopFire Ⅲ[ 1400 K - 9900 K ] -[ 1800 K - 10000 K ][ 0° - 359° ] - [ 1° - 360 °]G/M -1.0 - +1.0SAT 0 - 100 %CCT 2000 K - 10000 KINTModeIntervalsStatus0% - 100%CCTHSI[ 0.3S - 1.8S ] - [ 1.8S - 7.5S ]Stop / LoopFaulty Bulb Ⅲ2000 K - 10000 K1 - 360°G/M -1.0 - +1.0SAT 0 - 100 %CCT 2000 K - 10000 KINTModePlusesStatus0% - 100%CCTHSI10 - 200 /minStop / LoopPulsing Ⅲ2000 K - 10000 K1 - 360°G/M -1.0 - +1.0SAT 0 - 100 %CCT 2000 K - 10000 KPixel FX INTColorsFRQStatus0% - 100%R / B / R+B / B+W /R+B+WSingle / Double / Quad / Quint / Quint all / CycleStop / LoopCop Car ⅢINT SAT Speed Status 0% - 100%0 - 100%1 - 60S Stop / LoopParty Light ⅡINT Mode Intervals Status 0% - 100%CCT / HUE / CCT+HUE [ 0.5S - 9S ] - [ 2.0S - 11.0S ] Stop / LoopFirework ⅡINT Color No Color 1 Color 2 Color 3 Color 4 Speed Move Status 0% - 100%1 /2 /3 / 4Black /HUE: 30° / 60° / 90° / 120° / 150° / 180° / 210° / 240° / 270° / 300° / 300° /360° /CCT: 2500K 3200K / 4300K / 5600K / 6500K / 7500K1 - 640 cm/sLeft / RightPlay / Pause / StopColor FadeINT Color No Color 1 Color 2 Color 3 Color 4 Transfer Speed Move Status 0% - 100%1 /2 /3 / 4Black /HUE: 30° / 60° / 90° / 120° / 150° / 180° / 210° / 240° / 270° / 300° / 300° / 360° /CCT: 2500K 3200K / 4300K / 5600K / 6500K / 7500KStep / Smooth0.1 - 10.0SLeft / RightPlay / Pause / StopColor CyclePixel INT Bkgd INT Pixel Size Departure Color 1 Color 2 Blackground Speed Move Status 0% - 100%0% - 100%S / M / L1 Way /2 WayBlack (Blackground Only )/HUE: 30° / 60° / 90° / 120° / 150° / 180° / 210° / 240° / 270° / 300° / 300° / 360° /CCT: 2500K 3200K / 4300K / 5600K / 6500K / 7500K1 - 640 cm/sLeft / Right / Loop (1 Way) Bounce / Cross (2 Way)Play / Pause / StopOne Pixel ChasePixel INT Bkgd INT Pixel Size Departure Color 1 Color 2 Color 3 Color 4 Blackground Speed Move Status 0% - 100%0% - 100%S / M / L1 Way /2 WayBlack (Blackground Only )/HUE: 30° / 60° / 90° / 120° / 150° / 180° / 210° / 240° / 270° / 300° / 300° /360° /CCT: 2500K 3200K / 4300K / 5600K / 6500K / 7500K1 - 640 cm/sLeft / Right / Loop (1 Way) Bounce / Cross (2 Way)Play / Pause / StopTwo Pixel ChasePixel INT Bkgd INT Pixel Size Departure Color 1 Color 2 Color 3 Color 4 Color 5 Color 6 Blackground Speed Move Status 0% - 100%0% - 100%S / M / L1 Way /2 WayBlack (Blackground Only )/HUE: 30° / 60° / 90° / 120° / 150° / 180° / 210° / 240° / 270° / 300° / 300° /360° /CCT: 2500K 3200K / 4300K / 5600K / 6500K / 7500K1 - 640 cm/sLeft / Right / Loop (1 Way) Bounce / Cross (2 Way)Play / Pause / StopThree Pixel ChaseINT Speed Move Status 0% - 100%1 - 640 cm/sLeft / RightPlay / Pause / StopRainbowINT Range Bkgd INT Fire 1 BlackgroundFrequency Move Status [ 0% - 75% ] - [ 25% - 100% ]0% - 100%Black /HUE: 30° / 60° / 90° / 120° / 150° / 180° / 210° / 240° / 270° / 300° / 300° /360° /CCT: 2500K 3200K / 4300K / 5600K / 6500K / 7500K1 - 10 HzHorizontal / VerticalPlay / Pause / StopPixel Fire。
系统部署方案

广州金辉肇庆恒大文化旅游城劳务实名制系统实施方案一、系统部署方案1、系统整体架构系统架构说明及部署要求:1)软件部署在阿里云,公司、项目终端通过网络获取数据;2)项目部硬件控制台通过互联网与软件传输数据;3)现场硬件通过局域网与硬件控制台连接,数据自动上传下载;二、门区硬件部署方案1、门区布置说明:门禁设置位置在正对马路的门楼处,用于施工工人考勤。
共设置四台闸机,采用IC卡刷卡考勤,本门区设置液晶屏,用于展示现场刷卡数据以及监控工人刷卡行。
三、网络部署要求:项目各门区之间需架设成局域网,由项目部自行架设,建议架设方案:由项目部交换机与门禁处交换机通过普通超五类网线连接,以提供广域网网络1)施工生产区围挡封闭,将生活区与施工区分开,设置进入施工区专用工人通道;2)现场按部署方案进行建设通道,预留硬件安装位和走线管槽;3)项目网络带宽不低于2M,通过网线连接不能超过100米;1、现场现状描述:门禁系统的门区距离项目部大概2公里的距离,地磅安装在门区与项目部中间,目前还没有做场地硬化。
2、建议部署方案2.1网桥利:两个路由器组成一个大网络,两个路由器lan(局限网)内的电脑设备可以互访,但是网上邻居访问方式有时不能正常使用;可以针对路由器2上的电脑设备做进一步的权限限制与上网行为管理,方便企业做个性化的网络管理。
弊:两个路由器组成一个大网络,两个路由器lan(局限网)内的电脑设备可以互访,但是网上邻居访问方式有时不能正常使用;可以针对路由器2上的电脑设备做进一步的权限限制与上网行为管理,方便企业做个性化的网络管理。
2.2 光纤利:传输频带极宽,通信容量很大;由于光纤衰减小,无中继设备,故传输距离远;串扰小,信号传输质量高;光纤抗电磁干扰,保密性好;光纤尺寸小,重量轻,便于传输和铺设;耐化学腐蚀;光纤是石英玻璃拉制成形,原材料来源丰富,并节约了大量有色金属。
弊:光纤弯曲半径不宜过小;光纤的切断和连接操作技术复杂;分路、耦合麻烦。
电算实训室设备招标参数

4、输出功率:60W,蓝牙输出音量高于100 db〔含〕。音量在间隔 音箱5米时高于70 db;
5、灵敏度:91±3 dB。喇叭为6寸低音、1寸高音各1个;
6、输入接口:双路立体声RCA插孔1个,麦克风插孔2个;
7、输出接口:双路立体声RCA插孔*1,为麦克风及立体声RCA混音输出;
集成网络同传功能,同传速度不低于900M/分钟,能自动分配IP和机器名,可远程修改硬盘复原参数,远程指定启动分区,远程开关机;支持增量同传、断点续传功能,硬盘保护功能,BIOS参数同传/正版资产集中管理系统,可以监控整个电脑教室的PC硬件配置明细
管理软件:提供原厂同一品牌远程管理软件,实现如下功能:
财政金融系会计电算实训室设备配置清单一
编号
设备名称
数量
单位
参考品牌型号
技术参数及性能
1
台式电脑(学活力〕
60
台
联想启天
M73Байду номын сангаас0或同档次其它品牌
Intel Core i3550/Intel H57主板/4GDDR3 1333/SATA2500G/集成声卡/集成100M网卡/抗菌防水键盘/光电鼠标/19寸宽频LCD显示器/310w电源/标准键盘、鼠标
8
UPS不连续电源
1
台
山特MT1000L-pro
备用时间:半载≥30分钟/负载功能:一套PC加打印机/密闭式铅酸蓄电池/网络保护端口:RJ45/RJ11;通讯端口:DB-9P
9
以太网交换机
3
台
TP-LINK
TL-SG1024T或同档次其它品牌
24口10/100M自适应RJ45接口; 10/100/1000Mbps自适应以太网端口;支持网络标准:IEEE 802.3,IEEE 802.3u,IEEE 802.3ab,IEEE 802.3x;全/半双工自适应;提供两个优化端口为UPLINK端口, 有效进步无盘启动速度, 保障网游,视频流畅;电源电压:100-240VAC ;长*宽*高:约440×180×44 mml(附交换机机柜,壁装、带风扇、线排,大小为可放置三台交换机即可〕
山特MultiPower(MT)系列电源
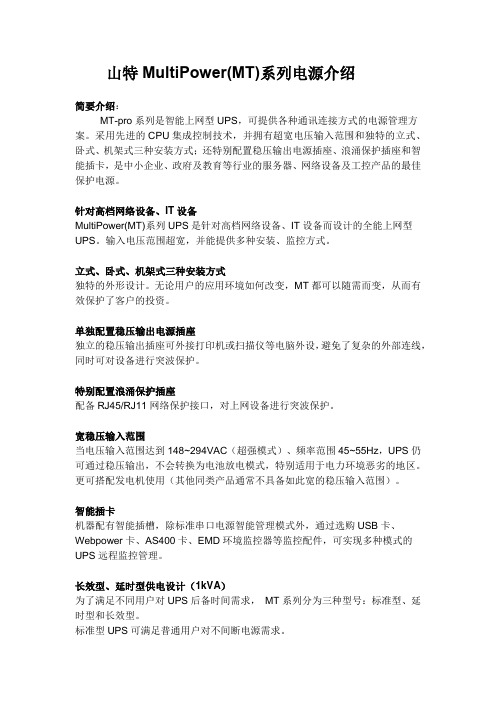
山特MultiPower(MT)系列电源介绍简要介绍:MT-pro系列是智能上网型UPS,可提供各种通讯连接方式的电源管理方案。
采用先进的CPU集成控制技术,并拥有超宽电压输入范围和独特的立式、卧式、机架式三种安装方式;还特别配置稳压输出电源插座、浪涌保护插座和智能插卡,是中小企业、政府及教育等行业的服务器、网络设备及工控产品的最佳保护电源。
针对高档网络设备、IT设备MultiPower(MT)系列UPS是针对高档网络设备、IT设备而设计的全能上网型UPS。
输入电压范围超宽,并能提供多种安装、监控方式。
立式、卧式、机架式三种安装方式独特的外形设计。
无论用户的应用环境如何改变,MT都可以随需而变,从而有效保护了客户的投资。
单独配置稳压输出电源插座独立的稳压输出插座可外接打印机或扫描仪等电脑外设,避免了复杂的外部连线,同时可对设备进行突波保护。
特别配置浪涌保护插座配备RJ45/RJ11网络保护接口,对上网设备进行突波保护。
宽稳压输入范围当电压输入范围达到148~294VAC(超强模式)、频率范围45~55Hz,UPS仍可通过稳压输出,不会转换为电池放电模式,特别适用于电力环境恶劣的地区。
更可搭配发电机使用(其他同类产品通常不具备如此宽的稳压输入范围)。
智能插卡机器配有智能插槽,除标准串口电源智能管理模式外,通过选购USB卡、Webpower卡、AS400卡、EMD环境监控器等监控配件,可实现多种模式的UPS远程监控管理。
长效型、延时型供电设计(1kVA)为了满足不同用户对UPS后备时间需求,MT系列分为三种型号:标准型、延时型和长效型。
标准型UPS可满足普通用户对不间断电源需求。
延时型UPS配有山特原装电池箱,可提供更长的后备时间,适合电力环境恶劣的地区使用。
长效型UPS可外接电池箱,特别适合长时间供电不足的地区使用。
技术参数参考资料:山特UPS电源()。
DPtech Scanner1000 系列产品彩页

Scanner1000系列具备如下特点:⏹ 闭环管理流程,提供全方位漏洞管理⏹ 全面精确的Web 安全分析,确保应用层漏洞防护⏹ 自动补丁管理,及时解决潜在风险⏹ 漏洞库自动更新,持续安全防护 信息技术飞速发展,网络应用日益复杂和多元化,利用漏洞攻击的网络安全事件日趋严重,权威机构统计95%以上的攻击事件都利用了未及时修补的漏洞,让用户蒙受巨大的社会、经济损失,漏洞俨然已经成为危害互联网安全的罪魁祸首之一。
因受应用层技术复杂、更新快等因素限制,传统产品主要针对操作系统漏洞进行扫描,针对应用级漏洞,如Web 应用、SSL 加密等漏洞管理效果不佳,并且在漏洞管理上过于单一,不具备漏洞预先通告、定期评估、漏洞自动修补等重要功能,无法从根本上避免攻击产生。
因此,只有从技术本源入手,采用完整、有效和持续的漏洞扫描管理系统才能有效地避免攻击威胁。
DPtech Scanner1000漏洞扫描系统可提供漏洞通告、关联检测、自动修复、资产风险管理、漏洞审计多维度闭环管理功能,通过高性能的多核硬件平台,可实现对网络中各种资产进行全方位、高效的漏洞管理。
DPtech Scanner1000漏洞扫描系统采用“智能关联扫描引擎”技术,通过多种扫描方法关联校验的方式对漏洞进行扫描,且对漏洞特征库进行持续不断的升级,从而确保漏洞判断准确无误。
支持对终端、服务器、路由/交换设备、操作系统(Windows/Linux/Unix )、应用服务等进行漏洞管理,具有覆盖2-7层漏洞检测和自动修补等技术,尤其针对Web 应用系统进行代码级检测,消除XSS 跨站脚本、SQL 注入、网页挂马等漏洞威胁,且支持对SSL 加密应用的漏洞管理。
DPtech Scanner1000 系列产品是目前业界性能最高、漏洞检测最全面、功能最丰富的漏洞扫描系统,能够满足各种应用环境的部署与管理需求,目前已成为漏洞管理的首选产品。
产品概述 产品系列DPtech Scanner1000漏洞扫描系统【 】 产品彩页 DPtech Scanner1000 Scanner1000-MSScanner1000-GS[键入文字]产品规格 产品型号 Scanner1000-MS Scanner1000-GS 可扫描网络资产 终端设备、服务器、路由/交换设备、操作系统(Windows/Linux/Unix )、应用服务、数据库 Web 漏洞扫描Web 服务器检测、插件检测、配置检测、注入攻击漏洞检测、注射攻击漏洞检测、远程文件检索漏洞检测、文件上传检测、FORM 弱口令检测、数据窃取检测、GOOGLE-HACK 检测、中间人攻击检测、Web 2.0 AJAX 注入检测、Cookies 注入检测、弱口令扫描 设备漏洞扫描 SMTP/POP3、FTP 、SNMP 、端口扫描、弱口令扫描 网页木马检测支持各种类型木马检测、木马分析、木马溯源 扫描方式 定时扫描、手动扫描 扫描对象 支持多个域名/IP 设置扫描对象、支持多个扫描对象扫描、支持SSL 扫描 网络爬虫扫描深度可设、预定义用户登录参数、提供交互式用户登录参数设置、支持并发扫描 漏洞修复 补丁管理、与微软WSUS 联动系统管理 ICP 备案提醒 被扫描的网站ICP 备案是否到期,以及到期提醒支持HTTPS 支持HTTPS 网站的漏洞扫描多服务器支持支持多服务器、多端口扫描 报表分析 扫描结果对比、漏洞报告、统计分析、报表导出。
山特UPS电源
山特UPS电源一、UPS电源:全称Uninterruotible power system ,就是不间断电源,储能装置,稳压稳频。
解决电力的断电、低电压、高电压、突波、杂讯。
以结构分类分为三种:后备式、在线式、线上互动式。
按容量区分为:小型ups:10KV A以下。
中型ups:10KV A以上,100KVA以下。
大型ups:100KVA以上。
以备用时间分类:标时机(内置电池)长时机(外接电池组)以外形分类:立式机架式模块式二、电网中经常对电脑、精密仪器产生干扰或破坏电源问题,主要有:1.电涌:输出电压有效值高于110%,持续时间达一个或数个周期。
主要是在电网上连接的大型电气设备关机时,电网因突然卸载产生的高压。
2.高压尖脉冲:峰值高达6000V,持续时间从万分之一秒到二分之一周期(10ms)的电压。
这主要由于雷击,电弧放电,静态放电或大型电气设备开关操作产生。
3.暂态过电压:峰值高达20000V,但持续时间介于百分之一秒至万分之一秒的脉冲电压。
产生原因及可能造成的破坏类似于高压尖脉冲。
解决方法有区别。
4.电压下降:市电电压介于额定值的80%-85%之间的低压状态,并且持续时间打一个指数个周期。
大型设备开机,大型电动机启动,大型电力变压器接入都可能造成该问题。
5.电线噪声:指射频干扰和电磁干扰以及其他各种高频干扰。
马达的运行,继电器的动作,马达控制器的工作,广播发射,微波辐射,以及雷电风暴等,都会引起电线噪声干扰。
6.频率偏移:指市频率的变化超过3HZ以上。
主要有应急发动机的不稳定运行,或由频率不稳定的电源供电所致。
7.持续低电压:市电电压低于有效额定值,且持续时间较长。
产生原因包括:大型设备启动和应用,主电力线切换,启动大型电动机,线路过载。
8.市电中断:市电中断且至少持续两个周期至数小时的情况。
产生原因:线路上的断路器跳闸,市电供应中断,电网故障。
三、山特UPS:1.后备式UPS:(1)通过输入滤波器滤除大部分干扰。
UPS配置表(按负载百分比计算)

标准配置时间50%负载备用时间(分)80%负载备用时间(分)100%负载备用时间(分) 1小时24AH x 1组78min38AH x 1组75min38AH x 1组52min 2小时38AH x 1组147min38AH x 2组166min38AH x 2组141min 4小时38AH x 2组274min65AH x 2组245min100AH x 2组272min 6小时24AH x 4组344min65AH x 3组406min100AH x 3组445min 8小时65AH x 2组460min65AH x 4组553min100AH x 4组574min标准配置时间50%负载备用时间(分)80%负载备用时间(分)100%负载备用时间(分) 1小时24AH x 1组110min24AH x 1组54min38AH x 1组80min 2小时38AH x 1组166min24AH x 2组141min65AH x1组141min 4小时65AH x 1组247min100AH x 1组231min65AH x 2组252min 6小时100AH x 1组359min38AH x 3组326min100AH x 2组372min 8小时24AH x 4组450min100AH x2组489min38AH x 5组483min 10小时24AH x 6组642min38AH x 5组577min100AH x 3组568min 12小时38AH x 4组786min100AH x 3组770min65AH x 5组768min标准配置时间50%负载备用时间(分)80%负载备用时间(分)100%负载备用时间(分) 1小时////24AH x 1组57min 2小时24AH x 1组151min24AH x 1组84min38AH x 1组124min 4小时38AH x 1组231min24AH x 3组263min100AH x 1组245min 6小时65AH x 1组365min24AH x 4组374min38AH x 3组366min 8小时100AH x 1组530min65AH x 2组487min100AH x 2组519min 10小时24AH x 4组587min38AH x 4组620min38AH x 5组600min 12小时38AH x 3组833min65AH x 3组784min100AH x 3组843min标准配置时间50%负载备用时间(分)80%负载备用时间(分)100%负载备用时间(分) 1小时24AH x 1组89min38AH x 1组98min38AH x 1组60min 2小时38AH x 1组153min24AH x 2组127min65AH x 1组128min 4小时38AH x 2组289min65AH x 2组277min100AH x 2组299min 6小时24AH x 4组381min100AH x 2组431min65AH x 3组350min 8小时38AH x 3组496min65AH x 3组479min100AH x 3组519min 10小时38AH x 4组635min100AH x 3组626min65AH x 5组626min 12小时65AH x 3组799min38AH x 7组779min100AH x 4组707min标准配置时间50%负载备用时间(分)80%负载备用时间(分)100%负载备用时间(分) 1小时//24AH x 1组65min24AH x 1组53min 2小时24AH x 1组133min38AH x 1组139min65AH x 1组160min 4小时65AH x 1组288min100AH x 1组270min100AH x 1组221min 6小时24AH x 3组393min65AH x 2组422min100AH x 2组470min 8小时100AH x 1组456min100AH x 2组568min65AH x 3组517min 10小时65AH x 2组687min65AH x 3组642min65AH x 4组720min 12小时65AH x 2组687min38AH x 5组740min100AH x 3组723min。
智能电源SMART1000RM2U:Tripp Lite智能Pro线性互动UPS商品说明书
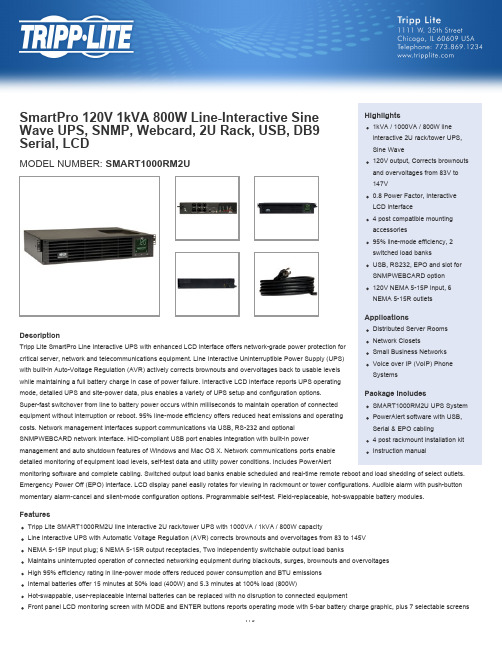
SmartPro 120V 1kVA 800W Line-Interactive Sine Wave UPS, SNMP, Webcard, 2U Rack, USB, DB9 Serial, LCD Highlights1kVA / 1000VA / 800W lineinteractive 2U rack/tower UPS, Sine Waveof detailed UPS and site power informationLCD interface also supports a number of advanced user setup and operating preferencesShips with 4 post rackmount installation hardware; Optional 2POSTRMKITWM enables 2 post rackmount/wallmount installation; Optional 2-9USTAND enables tower placementBuilt-in USB, RS-232 and optional SNMPWEBCARD accessory monitoring optionsHID-compliant USB port enables integration with built-in power management and auto shutdown features of Windows and Mac OS XIncluded PowerAlert UPS monitoring software; Built-in Emergency Power Off (EPO) interface with cableSpecificationsOUTPUTOutput Volt Amp Capacity (VA)1000Output kVA Capacity (kVA) 1.0Output Watt Capacity (Watts)800Power Factor0.8Nominal Output Voltage(s)120VSupportedFrequency Compatibility60 HzOutput Voltage Regulation (Line-21%, +8%Mode)Output Voltage Regulation (Battery+/- 5%Mode)Output Receptacles(6) 5-15RLoad Management Receptacles Two switchable two-outlet 5-15R load banksOutput AC Waveform (AC Mode)Sine waveOutput AC Waveform (Battery Mode)Pure Sine waveINPUTRated input current (Maximum Load)9.2ANominal Input Voltage(s) Supported120V ACUPS Input Connection Type5-15PInput Circuit Breakers15AUPS Input Cord Length (ft.)10UPS Input Cord Length (m)3Recommended Electrical Service15A 120VInput Phase Single-PhaseBATTERYFull Load Runtime (min.) 5.3 min. (800w)Half Load Runtime (min.)15 min. (400w)DC System Voltage (VDC)24Battery Recharge Rate (IncludedBatteries)Less than 4 hours from 10% to 90% (typical, full load discharge)Internal UPS Replacement BatteryCartridgeSee Tripp Lite UPS Replacement battery selectorBattery Access Front panel battery access doorBattery Replacement Description Hot-swappable, user replaceable batteriesVOLTAGE REGULATIONVoltage Regulation Description Automatic voltage regulation (AVR) maintains line power operation with an input voltage range of 83 to 147 Overvoltage Correction Input voltages between 128 and 147 are reduced by 12%Undervoltage Correction Input voltages between 83 and 107 are boosted by 14%LEDS ALARMS & SWITCHESFront Panel LCD Display Front panel LCD information and configuration screen offers detailed UPS and site power status and operating data, plus configuration of voltage, operating mode, alarm function and a variety of additional options (see manual for detailed LCD configuration and monitoring options)Audible Alarm Audible alarm indicates UPS startup, power-failure, low-battery, overload, UPS fault and remote shutdown conditionsAlarm Cancel Operation Power-fail alarm can be temporarily silenced using alarm-cancel switch; silent mode alarm configuration optionavailableSwitches 3 pushbutton switches control OFF / ON power status, MODE selection and MUTE / ENTER control functions SURGE / NOISE SUPPRESSIONUPS AC Suppression Joule Rating570UPS AC Suppression ResponseTimeInstantaneousEMI / RFI AC Noise Suppression YesPHYSICALIncluded Mounting AccessoryDescription4 post rackmount installation accessories includedInstallation Form Factors Supportedwith Optional Accessories2 post rackmount (2POSTRMKITWM); Wallmount (2POSTRMKITWM); Tower (2-9USTAND)Primary Form Factor RackmountUPS Power Module Dimensions(hwd, in.)3.5 x 17.5 x 12.5UPS Power Module Dimensions(hwd, cm)8.9 x 44.4 x 31.75Rack Height (U Spaces)2UPS Power Module Weight (lbs.)35.4UPS Power Module Weight (kg)16.1UPS Shipping Dimensions (hwd / in.)9 x 24 x 20.2UPS Shipping Dimensions (hwd /22.9 x 61 x 51.4cm)Shipping Weight (lbs.)46.4Shipping Weight (kg)21.1Cooling Method FanUPS Housing Material SteelENVIRONMENTALOperating Temperature Range+32 to +104 degrees Fahrenheit / 0 to +40 degrees CelsiusStorage Temperature Range+5 to +122 degrees Fahrenheit / -15 to +50 degrees CelsiusRelative Humidity0 to 95%, non-condensingAC Mode BTU / Hr. (Full Load)134AC Mode Efficiency Rating (100%95%Load)COMMUNICATIONSCommunications Interface USB; DB9 Serial; EPO (emergency power off); Slot for SNMP/Web interfaceNetwork Monitoring Port Description Supports detailed monitoring of UPS and site power conditionsPowerAlert Software IncludedCommunications Cable USB and DB9 cabling includedWatchDog Compatibility Supports Watchdog application, OS and hard-reboot restart options for remote applicationsNetwork UPS Tools Compatibility NUT compatible. See the full list of Tripp Lite NUT compatible UPS systems at/stable-hcl.html?manufacturer=Tripp LiteLINE / BATTERY TRANSFERTransfer Time 4 milliseconds (AC to battery), 2 milliseconds (Battery to AC)Low Voltage Transfer to Battery83Power (Setpoint)High Voltage Transfer to Battery147Power (Setpoint)SPECIAL FEATURESGrounding Lug Back panel grounding lugCold Start (Startup in Battery ModeCold-start operation supportedDuring a Power Failure)High Availability UPS Features Hot swappable batteriesGreen Energy-Saving Features Individually controllable load banksCERTIFICATIONSUPS Certifications Tested to UL1778 (USA); Tested to CSA (Canada); Tested to NOM (Mexico); Meets FCC Part 15 Category B (EMI) WARRANTYProduct Warranty Period (Worldwide)2-year warranty, 3 year with registration. Note: Registration is required for 3-year warranty.Connected Equipment Insurance$250,000 Ultimate Lifetime Insurance(U.S., Canada & Puerto Rico)© 2015 Tripp Lite. All rights reserved. All trademarks are the sole property of their respective owners. Tripp Lite has a policy of continuous improvement.Specifications are subject to change without notice. Photos may differ slightly from final products.。
