FortiGate放过OSPF协议配置方法
fortigate 简易设置手册
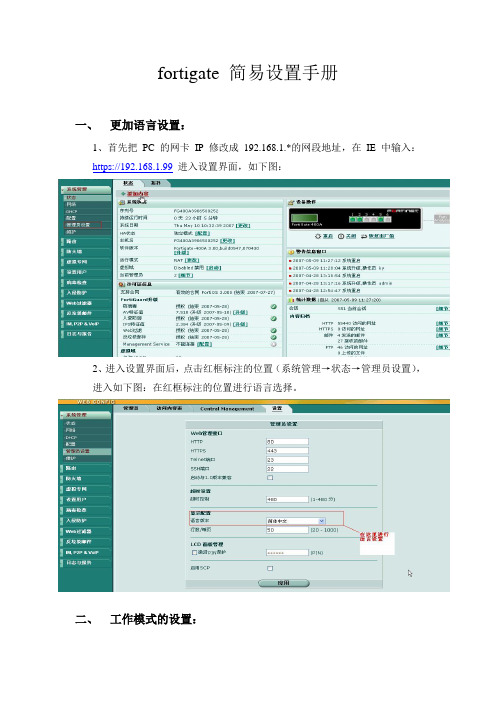
fortigate 简易设置手册一、更加语言设置:1、首先把PC的网卡IP修改成192.168.1.*的网段地址,在IE中输入:https://192.168.1.99进入设置界面,如下图:2、进入设置界面后,点击红框标注的位置(系统管理→状态→管理员设置),进入如下图:在红框标注的位置进行语言选择。
二、工作模式的设置:Fortigate防火墙可以工作在以下几种模式:路由/NAT模式、透明模式;要修改工作模式可在下图标注处进行更改,然后设置相应的IP地址和掩码等。
三、网络接口的设置:在系统管理→点击网络,就出现如下图所示,在下图所指的各个接口,您可以自已定义各个接口IP地址。
点击编辑按钮,进入如下图所示:在下图地址模式中,在LAN口上根据自已需要进行IP地址的设置,接着在管理访问中指定管理访问方式。
在WAN口上,如果是采用路由/NAT模式可有两种方式:1、采用静态IP的方式:如下图:在红框标注的地方,选中自定义,输入ISP商给你的IP地址、网关、掩码。
在管理访问的红框中,指定您要通过哪种方式进行远程管理。
如果你从ISP商获得多个IP的话,你可以在如下图中输入进去。
在如下图红框标注的地方,输入IP地址和掩码以及管理访问方式,点击ADD 即可。
注: 采用静态IP地址的方式,一定要加一条静态路由,否则就不能上网。
如下图:2、如采用ADSL拨号的方式,如下图:当你选中PPOE就会出现如下图所示的界面:在红框标注的地址模式中,输入ADSL用户和口令,同时勾选上‘从服务器上重新获得网关‘和改变内部DNS。
在管理访问方式中根据自已的需要,选中相应的管理方式,对于MTU值一般情况下都采用默认值就行了.四、防火墙的设置:防火墙的设置,首先要规化地址和地址池,如下图:输入你要过滤和保护的地址和地址段。
点击上图标注处进入地址设置栏,首先从类型中选择你要的地址类型,然后根据所选的类型输入IP地址或地址段以及网络接口。
接着就是计划时间表和保护内容列表的设置,其中保护内容列表包括有病毒过滤、网址过滤、内容过滤、防入侵等。
OSPF协议的配置

OSPF协议的配置1.配置ospf的stub区域【 quidway】ospf [process-id]【 quidway】area area-id【 quidway】stub [no-summary]配置当前区域为STUB区域Stub命令只有当在ABR上配置时,可选参数no-summary 才能对该区域起作用(所有连接到stub区域的路由器必须使用stub命令将该区域配置成stub区域2.配置ospf的Nssa区域【 quidway】ospf [process-id]【 quidway】area area-id【 quidway】nssa [default-route-advertise|no-import-route|no-summary]配置一个区域为NSSA区域,所有连接到NSSA区域的路由器使用NSSA命令将该区域配置为NSSA属性3.配置ospf的虚连接【 quidway】ospf [process-id]【 quidway】area area-id【 quidway】vlink-peer router-id连接到对方的router-id4.配置ospf的网络类型介绍:OSPF根据类型分为四种,由于NBMA网络必须是全连接通的,所有网络中任意两台路由器之间都必须可达,很多情况下,这个要求无法满足,这时需要修改网络类型,如果部分路由器之间没有直接可达的链路时,应将接口配置成P2MP方式,如果路由器在NBMA 网络中只有一个对端,可以将接口类型改为P2P方式【 quidway】interface interface-type interface-number【 quidway】ospf network-type {broadcast|nbma|p2mp|p2p}配置ospf接口的网络类型5.配置ospf的路由聚合【 quidway】ospf [process-id]【 quidway】area area-id【 quidway】abr(asbr)-summary ip-address mask配置abr和asbr的路由聚合6.配置过滤ospf接收的路由【Quidway】ospf【Quidway】area area-id【Quidway】filter-policy acl-number import(基于ACL过滤学到的路由信息) 【Quidway】filter-policy gateway ip-prefix-name import(基于目的地址前缀过滤邻居发布路由信息)7.配置ospf引入缺省路由【Quidway】ospf【Quidway】default-route-advertise[always][cost cost][type type][route- Policy route-policy-name]使用这个命令配置always参数时,可以强制OSPF引入一条缺省路由,否则必须本地有缺省路由才可以引入。
FortiGate最常见配置

实例
财务地址段定义:
其他地址段定义:
实例
第一条默认路由:
第二条默认路由:
实例
配置:
• 添加策略路由
– – – – – – – 防火墙-->策略路由-->新建 进入接口中选择Internal 源地址/掩码中输入192.168.1.0/255.255.255.128 目的地址/掩码使用默认值0.0.0.0/0.0.0.0 流出接口选择WAN1 目的端口使用默认值0 按上述操作步骤再建一条源地址为192.168.1.128/25的策略路由 ,流出接口选择WAN2
Internet接入。
配置: • 系统管理-->网络-->接口(接口参数配置)
– 外网接口参数配置
• 选择接口地址模式为自定义 • 在IP地址/掩码栏中输入222.1.2.3/255.255.255.0
– 内网接口参数配置
• 选择接口地址模式为自定义 • 在IP地址/掩码栏中输入192.168.1.1/255.255.255.0
• 系统管理-->路由-->静态(路由配置)
– 修改默认路由的网关为222.1.2.1 – 在设备中选择连接公网的接口
• 系统管理-->防火墙-->策略(策略配置)
– 系统默认已有一条没有任何限制的策略可用
外网接口参数配置:
表态路由配置:
策略配置:
故障排除
• • • • • 检查本地PC机的IP地址、掩码、网关、DNS设置是否正确 检查公网线路连接是否正确 检查防火墙的外网指示灯工作是否正常 检查防火墙内、外网络接参数设置是否正确 检查防火墙策略设置是否正确
地址/端口控制
• 配置过程 • 实例 • 故障排除
FortiGate防火墙常用配置命令(可编辑修改word版)
FortiGate 常用配置命令一、命令结构config Configure object. 对策略,对象等进行配置get Get dynamic and system information. 查看相关关对象的参数信息show Show configuration. 查看配置文件diagnose Diagnose facility. 诊断命令execute Execute static commands. 常用的工具命令,如ping exit Exit the CLI. 退出二、常用命令1、配置接口地址:FortiGate # config system interfaceFortiGate (interface) # edit lanFortiGate (lan) # set ip 192.168.100.99/24FortiGate (lan) # end2、配置静态路由FortiGate (static) # edit 1FortiGate (1) # set device wan1FortiGate (1) # set dst 10.0.0.0 255.0.0.0FortiGate (1) # set gateway 192.168.57.1FortiGate (1) # end3、配置默认路由FortiGate (1) # set gateway 192.168.57.1FortiGate (1) # set device wan1FortiGate (1) # end4、添加地址FortiGate # config firewall addressFortiGate (address) # edit clientnetnew entry 'clientnet' addedFortiGate (clientnet) # set subnet 192.168.1.0 255.255.255.0 FortiGate (clientnet) # end5、添加 ip 池FortiGate (ippool) # edit nat-poolnew entry 'nat-pool' addedFortiGate (nat-pool) # set startip 100.100.100.1FortiGate (nat-pool) # set endip 100.100.100.100FortiGate (nat-pool) # end6、添加虚拟 ipFortiGate # config firewall vipFortiGate (vip) # edit webservernew entry 'webserver' addedFortiGate (webserver) # set extip 202.0.0.167FortiGate (webserver) # set extintf wan1FortiGate (webserver) # set mappedip 192.168.0.168 FortiGate (webserver) # end7、配置上网策略FortiGate # config firewall policyFortiGate (policy) # edit 1FortiGate (1)#set srcintf internal //源接口FortiGate (1)#set dstintf wan1 //目的接口FortiGate (1)#set srcaddr all //源地址FortiGate (1)#set dstaddr all //目的地址FortiGate (1)#set action accept //动作FortiGate (1)#set schedule always //时间FortiGate (1)#set service ALL //服务FortiGate (1)#set logtraffic disable //日志开关FortiGate (1)#set nat enable //开启 natend8、配置映射策略FortiGate # config firewall policyFortiGate (policy) #edit 2FortiGate (2)#set srcintf wan1 //源接口FortiGate (2)#set dstintf internal //目的接口FortiGate (2)#set srcaddr all //源地址FortiGate (2)#set dstaddr FortiGate1 //目的地址,虚拟 ip 映射,事先添加好的FortiGate (2)#set action accept //动作FortiGate (2)#set schedule always //时间FortiGate (2)#set service ALL //服务FortiGate (2)#set logtraffic all //日志开关end9、把 internal 交换接口修改为路由口确保关于 internal 口的路由、dhcp、防火墙策略都删除FortiGate # config system globalFortiGate (global) # set internal-switch-mode interfaceFortiGate (global) #end重启1、查看主机名,管理端口FortiGate # show system global2、查看系统状态信息,当前资源信息FortiGate # get system performance status3、查看应用流量统计FortiGate # get system performance firewall statistics4、查看 arp 表FortiGate # get system arp5、查看 arp 丰富信息FortiGate # diagnose ip arp list6、清楚 arp 缓存FortiGate # execute clear system arp table7、查看当前会话表FortiGate # diagnose sys session stat 或 FortiGate # diagnose sys session full- stat;8、查看会话列表FortiGate # diagnose sys session list9、查看物理接口状态FortiGate # get system interface physical10、查看默认路由配置FortiGate # show router static11、查看路由表中的静态路由FortiGate # get router info routing-table static12、查看 ospf 相关配置FortiGate # show router ospf13、查看全局路由表FortiGate # get router info routing-table all1、查看 HA 状态FortiGate # get system ha status2、查看主备机是否同步FortiGate # diagnose sys ha showcsum3.诊断命令:FortiGate # diagnose debug application ike -1execute 命令:FortiGate #execute ping 8.8.8.8 //常规 ping 操作FortiGate #execute ping-options source 192.168.1.200 //指定 ping 数据包的源地址 192.168.1.200FortiGate #execute ping 8.8.8.8 //继续输入 ping 的目标地址,即可通过 192.168.1.200 的源地址执行 ping 操作FortiGate #execute traceroute 8.8.8.8FortiGate #execute telnet 2.2.2.2 //进行 telnet 访问FortiGate #execute ssh 2.2.2.2 //进行 ssh 访问FortiGate #execute factoryreset //恢复出厂设置FortiGate #execute reboot //重启设备FortiGate #execute shutdown //关闭设备。
Fortinet OSPF配置指南说明书
Integrating Fortinet into an OSPF NetworkVersion 1.0Date 10/11/04Product FortiOS 2.8Description This technical note describes the configuration stepsnecessary to integrate Fortinet into an OSPF network. Author Jason ClarkSend comments regarding this document to *******************ContentsIntroduction.......Configuration.....Validation...System Resources...Secure OSPF Configuration...Appendix.......References....... IntroductionOSPF is a link state routing protocol based on the SPF (shortest path first) algorithm.Hence each router maintains a link state database which defines the topology of theAutonomous System. An autonomous system is comprised of a group of areasconnected to a backbone.Fortinet can participate within OSPF areas, as well as act as an ABR or ASBR. Thereare four required configuration steps in order to enable OSPF support within a Fortigateplatform. This document covers these four requirements; router id, area, network, andinterfaces. We will also touch on some best practices for securing OSPF.This technical note assumes a basic understanding of the OSPF protocol. Foradditional OSPF information please review RFC 2328. ConfigurationThere are a number of configurable OSPF options within FortiOS 2.8. OSPF settings are currently configurable via the FortiOS command line interface. This section covers therequired configurable parameters for enabling OSPF. The four parameters discussed are as follows:Router IDAreaNetworkOSPF InterfaceRouter IDBy default Fortinet does not create a Router ID value. Thus, this must be manuallyconfigured. The Router ID should be a 32-bit number that uniquely identifies aparticipating router with a routing domain or Autonomous System. A Router ID of 0.0.0.0is not allowed as this value is used during the designated router and BDR elections.Perform the following steps to configure the router idEnter OSPF router configuration modeconfigure router ospf <enter>From the ospf# prompt, set the 32-bit router id.set router-id ip address <enter>Type end to save changesExampleconfigure router ospfset router-id 192.168.1.99endAREARouting devices in an OSPF Autonomous System are organized into groupings referredto as areas. All routers within an area maintain link state databases for their specific area.An area id of 0 or 0.0.0.0 indicates the backbone area. There must be a backbone forwhich areas can connect to. Virtual links can be used for areas that do not have aconnection to the backbone. A maximum of 20 areas is allowed across all models.Perform the following steps to specify the area for with the Fortigate will participate in.Enter OSPF router configuration modeconfigure router ospf <enter>From the ospf# prompt enter the area sub menuconfigure area <enter>From the area# prompt create the area IDedit area ID <enter>Type end to save changesExampleconfigure router ospfconfigure areaedit 0.0.0.0endNote: Within the area menu, you have the option to configure additional parameters such as area type, authentication, and filtering. Some of these optional parameters will becovered later in this document.NetworkWithin a Fortigate the network command specifies networks and interfaces belonging to an Area. Multiple networks can be assigned to a single physical network. A maximum of 100 networks is allowed is across all models.Perform the following steps assign a network interface(s) to an area.Enter OSPF router configuration modeconfigure router ospf <enter>Enter the network configuration submenuconfigure network <enter>Create a network entry ID in the form of an integeredit integer <enter>Create subnet/supernetset prefix IP Subnet Mask <enter>Attach network to specific area.set area area_id <enter>Type end to save changes.Note: Multiple networks can be defined by creating additional ID Integers.OSPF InterfaceTo apply your OSPF configuration, you must specify an interface name, IP address, as well as a physical interface. Within the OSPF interface configuration you also have the ability to configure additional parameters that will help determine link state information.Such parameters include cost, priority, and status, among others. Descriptions of these optional parameters can be found in the Fortigate 2.8 CLI reference guide.Perform the following steps to apply an OSPF configuration to a specific interface(s)Enter OSPF router configuration modeconfigure router ospf <enter>Enter interface configuration modeconfigure ospf-interface <enter>Create a descriptive interface nameedit interface name <enter>Specify a physical interfaceset interface interface name <enter>Note: Interface_name must be a configured physical interfaceType end to save changes.Exampleconfigure router ospfconfigure ospf-interfaceedit internalset interface internalendValidationFortiOS offers various commands to validate and verify OSPF configuration. We willcover multiple verification options.To validate that OSPF is enabled on a specific interface we will use the followingcommandget router info ospf interface <enter>The output should be as followswan2 is down, line protocol is downOSPF not enabled on this interfacewan1 is up, line protocol is upOSPF not enabled on this interfacedmz is up, line protocol is upOSPF not enabled on this interfaceinternal is up, line protocol is upInternet Address 192.168.1.99/24, Area 0.0.0.0, MTU 1500Router ID 192.168.1.99, Network Type BROADCAST, Cost:10Transmit Delay is 1 sec, State DR, Priority 1Designated Router (ID) 192.168.1.99, InterfaceAddress 192.168.1.99No backup designated router on this networkTimer intervals configured, Hello 10, Dead 40, Wait 40, Retransmit 5Hello due in 00:00:08Neighbor Count is 1, Adjacent neighbor count is 1Crypt Sequence Number is 0Hello received 81 sent 81, DD received 8 sent 3S-Req received 0 sent 3, LS-Upd received 4 sent 2LS-Ack received 2 sent 3, Discarded 0root is up, line protocol is upOSPF not enabled on this interfaceppp0 is up, line protocol is upOSPF not enabled on this interfaceThe above output tells us that OSPF is enabled on the internal interface and this deviceis acting as the Designated Router. We also see that our adjacent neighbor count is 1.To view our OSPF neighbors use the following commandget router info ospf neighbor <enter>The output should be as followsNeighbor ID Pri State Dead Time Address Interface 192.168.1.32 0 Full 00:00:38 192.168.1.32 internalTo view the current OSPF routing entries use the followingget router info ospf route <enter>The output should be as followsOSPF process 1:Codes: C - connected, D - Discard, O - OSPF, IA - OSPFinter area N1 - OSPF NSSA external type 1, N2 - OSPF NSSAexternal type 2 E1 - OSPF external type 1, E2 - OSPFexternal type 2E1 0.0.0.0/0 [12] via 192.168.1.99, port1E1 10.33.3.1/32 [11] via 192.168.1.99, port1O 192.168.1.0/24 [10] is directly connected, port1, area 0E1 192.168.102.0/24 [11] via 192.168.1.99, port1The OSPF routing table may also be viewed from the Web UI as shown belowSystem Resources There are two main system resource factors to keep in mind when implementing a Fortigate into your OSPF network. The first is memory as OSPF utilizes system memory to store routing information. The size of an OSPF LSA is a minimum of 32 bytes, although is typically around 64 bytes. The second resource factor is CPU utilization. The SPF algorithm uses CPU cycles to generate routing entries when link state changes. By default a Fortigate will perform an SPF calculation 5 seconds after receiving new routing information. When integrating a Fortigate into an OSPF network proper sizing is critical as FortiOS utilizes memory and CPU for additional functions. Additional parameters can be tuned to ensure optimum resource utilization. Some of these parameters will be covered below.SPF TimersFortinet allows for the configuration of SPF delay time and SPF hold time as discussedbelow.The SPF delay_integer specifies the delay after a routing update is received until the SPF calculation is performed. The SPF hold_integer specifies the time between SPFcalculations. The default in seconds is 5 for the delay_integer and 10 for the hold_integer.If the OSPF routing environment permits, you can increase the delay and frequency inwhich SPF calculations are performed.To adjust these values, perform the followingEnter OSPF router configuration modeconfigure router ospf <enter>Configure values where the first number is the delay integer and the second is the holdintegerset spf-timers delay_integer hold_integer <enter> Exampleconfigure router ospfset spf-timers 60 3600endDatabase OverflowDatabase overflow configuration can provide relief from unnecessary or sudden floodingof LSA s. While database overflow state cannot validate the quality of an LSA it can limitthe database usage. Additional information on the database overflow state can be foundin RFC 1765.To enable database overflow follow the steps belowEnter ospf router configuration modeConfigure router ospf <enter>Enable database overflowSet database-overflow enable <enter>Set the number of external LSA s that can be stored in a link state database beforeentering the overflow state. A valid integer is between 0 and 4294967294.Set database-overflow-max-lsas integer <enter> Type end to save changesExampleconfigure router ospfset database-overflow enableset database-overflow-max-lsas 5000endendStub AreaConfiguring your Fortigate to participate in a stub area can also reduce the size of the database as well as the number of SPF calculations. Stub areas reject the flooding of external LSA s into the area.For Fortigate stub area configuration follow the below stepsEnter ospf router configurationconfigure router ospf <enter>Enter area configurationconfigure area <enter>Edit desired areaedit area area_id <enter>Set area typeset type stub <enter>Examplec onfigure router ospfconfigure areaedit 0.0.0.0set type stubendendSecure OSPF ConfigurationOSPF is not an inherently secure routing protocol, thus there are some security issues that should be discussed. OSPF is not only vulnerable to malicious activity, butadministrator mis-configurations as well.BroadcastingThe default OSPF behavior within a Fortigate is to broadcast LSA updates via multicast.With broadcast mode enabled mis-configurations in routing can be propagatedthroughout a routing domain. Adjacent devices configured to broadcast can introduce possible malicious route injections.FortiOS offers multiple network types per OSPF interface including broadcast, non-broadcast, point-to-point, and point-to-multipoint. For our purposes, we will cover thesteps necessary to configure non-broadcast mode.Enter OSPF router configuration modeconfigure router ospf <enter>Enter interface configuration modeconfigure ospf-interface <enter>Edit the ospf interfaceedit interface name <enter>Set the network-type to non-broadcastset network-type non-broadcast <enter>Now that non-broadcast is enabled, we must configure our adjacent neighbors.The following steps are required to configure adjacent neighborsEnter OSPF router configuration modeconfigure router ospf <enter>Enter the neighbor configuration sub categoryconfigure neighbor <enter>Create a neighbor entry ID in the form of an integeredit integer <enter>Specify the IP address of the neighbor routerset ip IP address <enter>Type end to save changesExampleconfigure router ospfconfigure ospf-interfaceedit internalset network-type non-broadcastendconfigure neighboredit 1set ip 192.168.1.32endendAuthenticationBy default authentication is not required to receive routing updates into the link statedatabase. This introduces obvious vulnerabilities such as unauthorized route injectionsand spoofed routing devices.To enable authentication for an interface follow the below stepsEnter OSPF router configuration modeconfigure router ospf <enter>Enter the OSPF interface sub categoryconfigure ospf-interface <enter>Edit the desired OSPF interfaceedit Interface_name <enter>Set authentication typeset authentication md5 <enter>Create an md5 entry and key to be used for authenticationset md5-key integer_id md5_key <enter>Type end to save changes.Exampleconfigure router ospfconfigure ospf-interfaceedit internalset authentication md5set md5-key 1 fortinetendendAccess ListsAlthough a Fortigate employs stateful inspection firewall functionality, firewall rules arenot applied to OSPF routing updates destined for itself. Fortinet does however providethe ability to create access lists to control source and destination routing communication.To configure OSPF access lists follow the steps below.Enter the access list configuration sub menuconfigure router access-list <enter>Create a descriptive access list nameedit access_list_name <enter>Enter the rule configuration sub menuconfigure rule <enter>Create access rule number in the form of an integeredit integer_id <enter>Specify access list action as permit or denyset action permit | deny <enter>Specify network or IP that the action will apply toset prefix network number <enter>Type end to save changesOnce the access list has been created it is now necessary to apply it to the OSPF area Enter OSPF router configuration modeconfigure router ospf <enter>From the ospf# prompt enter the area sub menuconfigure area <enter>From the area# prompt create the area IDedit area ID <enter>Enter the filter list sub menuconfigure filter-list <enter>Create a new filter list in the form of an integeredit integer_id <enter>Specify the direction in which the access list will be appliedset direction in | out <enter>Specify access list to be appliedset list access_list_number <enter>Type end to save changesExampleconfigure router access-listedit OSPF_ACLconfigure ruleedit 1set action permitset prefix 192.168.1.0 255.255.255.0endconfigure router ospfconfigure areaedit 0.0.0.0configure filter-listedit 1set direction inset list ospfendendASBRIt is not recommended to configure your Fortigate platform as an ASBR (AutonomousSystem Border Router). ASBR s are used to receive and distribute external routinginformation. An ASBR will flood external LSA s throughout non-stub areas. Typicallyonly a single ASBR exists for a single Autonomous System. The implication of this is that routing updates cannot be verified against other ASBR s. This is in contrast to thebehavior of ABR s where multiple border routers may exist and perform an inherentvalidation of routing updates.When configuring a Fortigate as an ASBR is absolutely necessary, enabling databaseoverflow can help with the flooding of excess routes. Additional information on database overflow can be found in RFC 1765.To configure database overflow parameters follow the below stepsEnter ospf router configuration modeconfigure router ospf <enter>Enable database overflowset database-overflow enable <enter>Set the number of external LSA s that can be stored in a link state database beforeentering the overflow state. A valid integer is between 0 and 4294967294.set database-overflow-max-lsas integer <enter> Type end to save changesExampleconfigure router ospfset database-overflow enableset database-overflow-max-lsas 5000endendAppendixExtreme Configurationconfigure ospf add vlan vlan_192 area 0.0.0.0configure ospf vlan_192 authentication encrypted md5 1enable ospf export direct cost 10 type ase-type-1 tag 0enable ospfCisco Configurationrouter ospf 1network 192.168.1.0 255.255.255.0 area 0router-id 192.168.1.32FortiOS 2.8 Configurationconfigure router ospfset abr-type standardconfigure areaedit 0.0.0.0nextendset default-information-originate alwaysconfigure networkedit 1set prefix 192.168.1.0 255.255.255.0set area 0.0.0.0nextendconfigure ospf-interfaceedit "port1"set interface "port1"set ip 192.168.1.61nextendconfigure redistribute "connected"set status enableendconfigure redistribute "static"set status enableendconfigure redistribute "rip"set status enableendset router-id 192.168.1.61endReferencesFortigate 2.8 MR5 Command Line Reference GuideRFC 1765RFC 2328。
fortinet飞塔防火墙配置
Fortinet产品家族fortinet 的产品家族涵盖了完备的网络安全解决方案包括邮件,日志,报告,网络管理,安全性管理以及fortigate 统一安全性威胁管理系统的既有软件也有硬件设备的产品。
更多fortinet产品信息,详见/products.FortiGuard服务订制fortiguard 服务定制是全球fortinet安全专家团队建立,更新并管理的安全服务。
fortinet安全专家们确保最新的攻击在对您的资源损害或感染终端用户使用设备之前就能够被检测到并阻止。
fortiguard服务均以最新的安全技术构建,以最低的运行成本考虑设计。
fortiguard 服务订制包括:1、fortiguard 反病毒服务2、 fortiguard 入侵防护(ips)服务3、 fortiguard 网页过滤服务4、fortiguard 垃圾邮件过滤服务5、fortiguard premier伙伴服务并可获得在线病毒扫描与病毒信息查看服务。
FortiClientforticlient 主机安全软件为使用微软操作系统的桌面与便携电脑用户提供了安全的网络环境。
forticlient的功能包括:1、建立与远程网络的vpn连接2、病毒实时防护3、防止修改windows注册表4、病毒扫描forticlient还提供了无人值守的安装模式,管理员能够有效的将预先配置的forticlient分配到几个用户的计算机。
FortiMailfortimail安全信息平台针对邮件流量提供了强大且灵活的启发式扫描与报告功能。
fortimail 单元在检测与屏蔽恶意附件例如dcc(distributed checksum clearinghouse)与bayesian扫描方面具有可靠的高性能。
在fortinet卓越的fortios 与fortiasic技术的支持下,fortimail反病毒技术深入扩展到全部的内容检测功能,能够检测到最新的邮件威胁。
FortiGate 防火墙常用配置命令
FortiGate 常用配置命令一、命令结构config Configure object. 对策略,对象等进行配置get Get dynamic and system information. 查看相关关对象的参数信息show Show configuration. 查看配置文件diagnose Diagnose facility. 诊断命令execute Execute static commands. 常用的工具命令,如ping exit Exit the CLI. 退出二、常用命令1、配置接口地址:FortiGate # config system interfaceFortiGate (interface) # edit lanFortiGate (lan) # set ip 192.168.100.99/24FortiGate (lan) # end2、配置静态路由FortiGate (static) # edit 1FortiGate (1) # set device wan1FortiGate (1) # set dst 10.0.0.0 255.0.0.0FortiGate (1) # set gateway 192.168.57.1FortiGate (1) # end3、配置默认路由FortiGate (1) # set gateway 192.168.57.1FortiGate (1) # set device wan1FortiGate (1) # end4、添加地址FortiGate # config firewall addressFortiGate (address) # edit clientnetnew entry 'clientnet' addedFortiGate (clientnet) # set subnet 192.168.1.0 255.255.255.0 FortiGate (clientnet) # end5、添加ip池FortiGate (ippool) # edit nat-poolnew entry 'nat-pool' addedFortiGate (nat-pool) # set startip 100.100.100.1FortiGate (nat-pool) # set endip 100.100.100.100FortiGate (nat-pool) # end6、添加虚拟ipFortiGate # config firewall vipFortiGate (vip) # edit webservernew entry 'webserver' addedFortiGate (webserver) # set extip 202.0.0.167FortiGate (webserver) # set extintf wan1FortiGate (webserver) # set mappedip 192.168.0.168 FortiGate (webserver) # end7、配置上网策略FortiGate # config firewall policyFortiGate (policy) # edit 1FortiGate (1)#set srcintf internal //源接口FortiGate (1)#set dstintf wan1 //目的接口FortiGate (1)#set srcaddr all //源地址FortiGate (1)#set dstaddr all //目的地址FortiGate (1)#set action accept //动作FortiGate (1)#set schedule always //时间FortiGate (1)#set service ALL //服务FortiGate (1)#set logtraffic disable //日志开关FortiGate (1)#set nat enable //开启natend8、配置映射策略FortiGate # config firewall policyFortiGate (policy) #edit 2FortiGate (2)#set srcintf wan1 //源接口FortiGate (2)#set dstintf internal //目的接口FortiGate (2)#set srcaddr all //源地址FortiGate (2)#set dstaddr FortiGate1 //目的地址,虚拟ip映射,事先添加好的FortiGate (2)#set action accept //动作FortiGate (2)#set schedule always //时间FortiGate (2)#set service ALL //服务FortiGate (2)#set logtraffic all //日志开关end9、把internal交换接口修改为路由口确保关于internal口的路由、dhcp、防火墙策略都删除FortiGate # config system globalFortiGate (global) # set internal-switch-mode interfaceFortiGate (global) #end重启--------------------------------------1、查看主机名,管理端口FortiGate # show system global2、查看系统状态信息,当前资源信息FortiGate # get system performance status3、查看应用流量统计FortiGate # get system performance firewall statistics4、查看arp表FortiGate # get system arp5、查看arp丰富信息FortiGate # diagnose ip arp list6、清楚arp缓存FortiGate # execute clear system arp table7、查看当前会话表FortiGate # diagnose sys session stat 或FortiGate # diagnose sys session full-stat;8、查看会话列表FortiGate # diagnose sys session list9、查看物理接口状态FortiGate # get system interface physical10、查看默认路由配置FortiGate # show router static11、查看路由表中的静态路由FortiGate # get router info routing-table static12、查看ospf相关配置FortiGate # show router ospf13、查看全局路由表FortiGate # get router info routing-table all-----------------------------------------------1、查看HA状态FortiGate # get system ha status2、查看主备机是否同步FortiGate # diagnose sys ha showcsum---------------------------------------------------3.诊断命令:FortiGate # diagnose debug application ike -1---------------------------------------------------execute 命令:FortiGate #execute ping 8.8.8.8 //常规ping操作FortiGate #execute ping-options source 192.168.1.200 //指定ping数据包的源地址192.168.1.200FortiGate #execute ping 8.8.8.8 //继续输入ping 的目标地址,即可通过192.168.1.200的源地址执行ping操作FortiGate #execute traceroute 8.8.8.8FortiGate #execute telnet 2.2.2.2 //进行telnet访问FortiGate #execute ssh 2.2.2.2 //进行ssh 访问FortiGate #execute factoryreset //恢复出厂设置FortiGate #execute reboot //重启设备FortiGate #execute shutdown //关闭设备。
设置FortiGate动态路由协议OSPF
设置FortiGate动态路由协议OSPF本文档针对所有FortiGate设备的动态路由协议OSPF配置进行说明。
环境介绍:本文使用FortiGate400A做演示。
本文支持的系统版本为FortiOS v2.8及更高。
OSPF :链路状态路由协议,采用多播更新,收敛快,适用于大中型网络。
FortiGate设备支持OSPF版本2,参见RFC2328。
步骤一:设置路由器ID路由器ID:唯一标识FortiGate设备的IP地址,可以任意设置。
如果不填,默认选择最大接口IP。
(点击放大)步骤二:创建区域,在各个区中点击新建区:用32位IP地址唯一标识一个区,区0.0.0.0为主干区域类型:FortiGate设备支持普通(regular)区域,NSSA区域,Stub区域认证:FortiGate设备支持明文和MD5认证,认证对该区域有效(点击放大)步骤三:发布网络,在各个网络中点击新建IP/掩码:宣告网路地址和掩码区域:选择该网络所在区域(点击放大)步骤四:发布接口,在各个接口中点击新建名称:自定义接口名称接口:选择要宣告的接口,路由更新会通过该接口发布出去IP:该宣告接口IP认证:FortiGate设备支持明文和MD5认证,认证对该接口有效Hello/Dead时间:定义该接口OSPF Hello/Dead时间,如果接口间时间不一致则不能建立邻居,即收不到对方路由(点击放大)步骤五:高级选项缺省信息:让FortiGate设备产生一条OSPF缺省路由经常:路由表中必须有静态缺省路由才能在OSPF中产生缺省路由总是:任何情况都可以在OSPF中产生缺省路由重发布:FortiGate设备支持将直连、静态、RIP和BGP重发布进OSPF距离:指重发布进OSPF路由的度量值(点击放大)步骤六:验证在另外一台FortiGate中可以看到该OSPF路由,选择路由----当前路由(点击放大)。
FortiGate最常见配置

• 配置:
– – 系统管理-->网络-->接口 外网接口参数配置
• 选择接口地址模式为PPPoE • 输入用户名和密码 • MTU设置为1492
–
内网接口参数配置
• 选择接口地址模式为自定义 • 在IP地址/掩码栏中输入192.168.1.1/255.255.255.0
外网接口参数配置:
内网接口参数配置:
实例
策略配置:
故障排除
• 地址范围是否定义正确 • 协议类型选择是否正确 • 端口是否定义正确
• 是否将要控制的服务添加到组中
• 策略中的源地址和目的地址是否选择正确 • 策略中的服务是否选择正确 • 策略中的模式是否选择正确
备份与负载均衡
配置过程
备份与负载均衡
实例 故障排除
配置过程
• 接口配置(操作步骤见共享上网部分) • 若要对服务进行分流控制,则要在防火墙菜单中服务下面定制服务 • 若要针对内部网络的IP地址进行分流控制,则要在防火墙菜单中地址下面 定义地址段 • 策略配置
– 宽带线路2:
• IP:192.168.10.147 • 掩码:255.255.255.0 • 网关:192.168.10.1
实例
• 要求:
– 财务部单独使用一条宽带线路,市场、技术等其他部门共同 使用另一条宽带线路,实现数据分流,以保证带宽利用
实例
配置:
• 接口配置(操作步骤见共享上网部分,只是要在配置时将PING服务器打开,并输 入一个有效的公网IP地址)
FortiGate培训讲义
2005.09.23
FortiGate培训讲义
共享上网
PPPoE
共享上网
DHCP
静态
FortiGate防火墙配置经验

• 每条策略加上注释
比如谁是请求者和授权者等
• 如果可能不要用端口范围作服务
认证审核每个服务端口,避免留出漏洞
• 推荐定义引用组 • 定义VIP时要特别小心
VIP采用了ARP代理的方法,而且定义 后马上生效。 *13
• 最后一条是全deny的防火墙策略 • 总之防火墙策略的定义越细越安全
• 禁用词汇过滤对性能影响较大 • 适用中国用户的DNSBL
[conf spamfilter dnsbl]
• 优先启用FortiGuard Antispam服务
此服务识别垃圾邮件的准确率高
Fortinet Confidential
• 改变fortiguard的ttl值
set webfilter-cache-ttl [conf sys fortiguard ] Set antispam-cache-ttl [conf sys fortiguard ]
• 改变DNS缓存的条数
Set dns-cache-limit [conf sys dns]
• 将用得最多或最重要的防火墙策略尽量靠前 防火墙策略是至上而下执行的
• 只开启那些必要的流量日志 流量日志会降低系统性能
• 只开启那些必须的应用层协议检查 应用层检查对系统性能是敏感的
• 最小化发送系统告警信息 如果已经配置了syslog或FAZ日志,尽可能不要配置SNMP或Email告警
• AV/IPS特征库更新间隔为4或6小时 • 精简保护内容表数量
• 只启用相关的IPS/DoS特征集
不要启用无关的IPS特征集 DoS的阀值应根据业务季特征作相应调整
• IP-protocol *14
MR5之前, IPS缺省只检测TCP/UDP/ICMP协 议
飞塔防火墙fortigate的show命令显示相关配置

飞塔防火墙fortigate的show命令显示相关配置,而使用get命令显示实时状态show full-configuration显示当前完全配置show system global ?查看主机名,管理端口显示结果如下config system globalset admin-sport 10443set admintimeout 480set hostname "VPN-FT3016-02"set language simchset optimize antivirusset sslvpn-sport 443set timezone 55endshow system interface ?查看接口配置显示结果如下edit "internal"set vdom "root"set ipset allowaccess ping https ssh snmp http telnetset dns-query recursiveset type physicalnextget system inter physical查看物理接口状态,,如果不加physical参数可以显示逻辑vpn接口的状态==[port1]mode: staticipstatus: upspeed: 100Mbps Duplex: Full==[port2]mode: staticipstatus: upspeed: 1000Mbps Duplex: Fullshow router static ?查看默认路由的配置显示结果如下config router staticedit 1set device "wan1"nextendget router info routing-table static?查看路由表中的静态路由HuaiAnshow router ospf 查看ospf 的相关配置show system dns ?查看dns的相关配置显示结果如下config system dnsendget router info routing-table all 显示全局路由表(相当于cisco的show ip routing)VPN-FT3016# get router info routing-table allCodes: K - kernel, C - connected, S - static, R - RIP, B - BGP? ? ? O - OSPF, IA - OSPF inter area? ? ? N1 - OSPF NSSA external type 1, N2 - OSPF NSSA external type 2? ? ? E1 - OSPF external type 1, E2 - OSPF external type 2? ? ? i - IS-IS, L1 - IS-IS level-1, L2 - IS-IS level-2, ia - IS-IS inter area? ? ? * - candidate defaultget router info ospf neighbor 查看ospf邻居建立关系(相当于cisco的show ip ospf nei)。
(完整word版)ospf路由协议的配置
ospf路由协议的配置路由协议ospf的配置一、Ospf简介:OSPF(Open Shortest Path First )为IETF OSPF 工作组开发的一种基于链路状态的内部网关路由协议。
OSPF专为IP 开发的路由协议,直接运行在IP 层上面,协议号为89,采用组播方式进行OSPF包交换,组播地址为224.0.0.5 (全部OSPF路由器)和224.0.0.6 (指定路由器)。
链路状态算法是一种与哈夫曼向量算法(距离向量算法)完全不同的算法,应用哈夫曼向量算法的传统路由协议为RIP,而OSPF 路由协议是链路状态算法的典型实现。
与RIP 路由协议对比,OSPF 除了算法上的不同,还引入了路由更新认证、VLSMs(可变长子网掩码)、路由聚合等新概念。
即使RIPv2 做了很大的改善,可以支持路由更新认证、可变长子网掩码等特性,但是RIP 协议还是存在两个致命弱点:1 )收敛速度慢;2 )网络规模受限制,最大跳数不超过16跳。
OSPF的出现克服了RIP 的弱点,使得IGP 协议也可以胜任中大型、较复杂的网络环境。
OSPF路由协议利用链路状态算法建立和计算到每个目标网络的最短路径,该算法本身较复杂,以下简单地、概括性地描述了链路状态算法工作的总体过程:a 初始化阶段,路由器将产生链路状态通告,该链路状态通告包含了该路由器全部链路状态;b 所有路由器通过组播的方式交换链路状态信息,每台路由器接收到链路状态更新报文时,将拷贝一份到本地数据库,然后再传播给其它路由器;c 当每台路由器都有一份完整的链路状态数据库时,路由器应用Dijkstra算法针对所有目标网络计算最短路径树,结果内容包括:目标网络、下一跳地址、花费,是IP路由表的关键部分。
如果没有链路花费、网络增删变化,OSPF将会十分安静,如果网络发生了任何变化,OSPF通过链路状态进行通告,但只通告变化的链路状态,变化涉及到的路由器将重新及运行Dijkstra算法,生成新的最短路径树。
路由器OSPF协议配置命令
路由器OSPF协议配置命令
1、核心路由器(CE)的配置过程
首先,定义OSPF区域编号(Area ID)和进程ID(Process ID)。
在Router OSPF下配置进程ID(Process ID)和区域编号(Area ID):
router ospf 1
router-id x.x.x.x
其中x.x.x.x代表核心路由器(CE)的全球唯一性IP地址。
接下来,在每个接口(Interface)下输入如下指令:
其中x/x代表接口的IP地址,x代表进程ID(Process ID),x代表区域编号(Area ID)。
再接着,带有静态路由(Static Route)的接口下添加路径(Route):
其中x.x.x.x代表路由表(Routing Table)中带有路由(Route)的IP地址,
x.x.x.x代表COST。
最后,确认路由更新是否能够通过OSPF区域(OSPF Area)进行传输:
# 配置FTP服务器
ip classless
ospf network point-to-multipoint
注意:不要忘记开启OSPF路由(OSPF routing)功能。
FortiGate防火墙常用配置命令(最新整理)
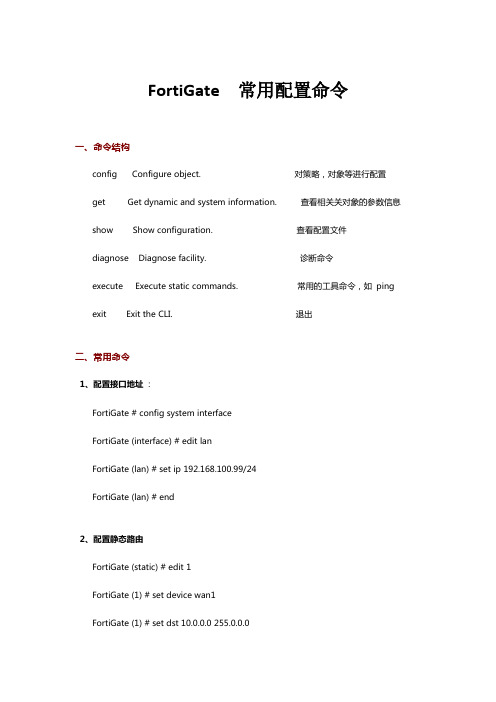
FortiGate 常用配置命令一、命令结构config Configure object. 对策略,对象等进行配置 get Get dynamic and system information. 查看相关关对象的参数信息 show Show configuration. 查看配置文件diagnose Diagnose facility. 诊断命令execute Execute static commands. 常用的工具命令,如ping exit Exit the CLI. 退出二、常用命令1、配置接口地址:FortiGate # config system interfaceFortiGate (interface) # edit lanFortiGate (lan) # set ip 192.168.100.99/24FortiGate (lan) # end2、配置静态路由FortiGate (static) # edit 1FortiGate (1) # set device wan1FortiGate (1) # set dst 10.0.0.0 255.0.0.0FortiGate (1) # set gateway 192.168.57.1FortiGate (1) # end3、配置默认路由FortiGate (1) # set gateway 192.168.57.1FortiGate (1) # set device wan1FortiGate (1) # end4、添加地址FortiGate # config firewall addressFortiGate (address) # edit clientnetnew entry 'clientnet' addedFortiGate (clientnet) # set subnet 192.168.1.0 255.255.255.0 FortiGate (clientnet) # end5、添加ip池FortiGate (ippool) # edit nat-poolnew entry 'nat-pool' addedFortiGate (nat-pool) # set startip 100.100.100.1FortiGate (nat-pool) # set endip 100.100.100.100FortiGate (nat-pool) # end6、添加虚拟ipFortiGate # config firewall vipFortiGate (vip) # edit webservernew entry 'webserver' addedFortiGate (webserver) # set extip 202.0.0.167FortiGate (webserver) # set extintf wan1FortiGate (webserver) # set mappedip 192.168.0.168 FortiGate (webserver) # end7、配置上网策略FortiGate # config firewall policyFortiGate (policy) # edit 1FortiGate (1)#set srcintf internal //源接口FortiGate (1)#set dstintf wan1 //目的接口FortiGate (1)#set srcaddr all //源地址FortiGate (1)#set dstaddr all //目的地址FortiGate (1)#set action accept //动作FortiGate (1)#set schedule always //时间FortiGate (1)#set service ALL //服务FortiGate (1)#set logtraffic disable //日志开关FortiGate (1)#set nat enable //开启natend8、配置映射策略FortiGate # config firewall policyFortiGate (policy) #edit 2FortiGate (2)#set srcintf wan1 //源接口FortiGate (2)#set dstintf internal //目的接口FortiGate (2)#set srcaddr all //源地址FortiGate (2)#set dstaddr FortiGate1 //目的地址,虚拟ip映射,事先添加好的 FortiGate (2)#set action accept //动作FortiGate (2)#set schedule always //时间FortiGate (2)#set service ALL //服务FortiGate (2)#set logtraffic all //日志开关end9、把internal交换接口修改为路由口确保关于internal口的路由、dhcp、防火墙策略都删除FortiGate # config system globalFortiGate (global) # set internal-switch-mode interfaceFortiGate (global) #end重启--------------------------------------1、查看主机名,管理端口FortiGate # show system global2、查看系统状态信息,当前资源信息FortiGate # get system performance status3、查看应用流量统计FortiGate # get system performance firewall statistics4、查看arp表FortiGate # get system arp5、查看arp丰富信息FortiGate # diagnose ip arp list6、清楚arp缓存FortiGate # execute clear system arp table7、查看当前会话表FortiGate # diagnose sys session stat 或FortiGate # diagnose sys session full-stat;8、查看会话列表FortiGate # diagnose sys session list9、查看物理接口状态FortiGate # get system interface physical10、查看默认路由配置FortiGate # show router static11、查看路由表中的静态路由FortiGate # get router info routing-table static12、查看ospf相关配置FortiGate # show router ospf13、查看全局路由表FortiGate # get router info routing-table all-----------------------------------------------1、查看HA状态FortiGate # get system ha status2、查看主备机是否同步FortiGate # diagnose sys ha showcsum---------------------------------------------------3.诊断命令:FortiGate # diagnose debug application ike -1---------------------------------------------------execute 命令:FortiGate #execute ping 8.8.8.8 //常规ping操作FortiGate #execute ping-options source 192.168.1.200 //指定ping数据包的源地址192.168.1.200FortiGate #execute ping 8.8.8.8 //继续输入ping的目标地址,即可通过192.168.1.200的源地址执行ping操作FortiGate #execute traceroute 8.8.8.8 FortiGate #execute telnet 2.2.2.2 //进行telnet访问 FortiGate #execute ssh 2.2.2.2 //进行ssh 访问 FortiGate #execute factoryreset //恢复出厂设置 FortiGate #execute reboot //重启设备FortiGate #execute shutdown //关闭设备。
飞塔防火墙fortigate的show命令显示相关配置
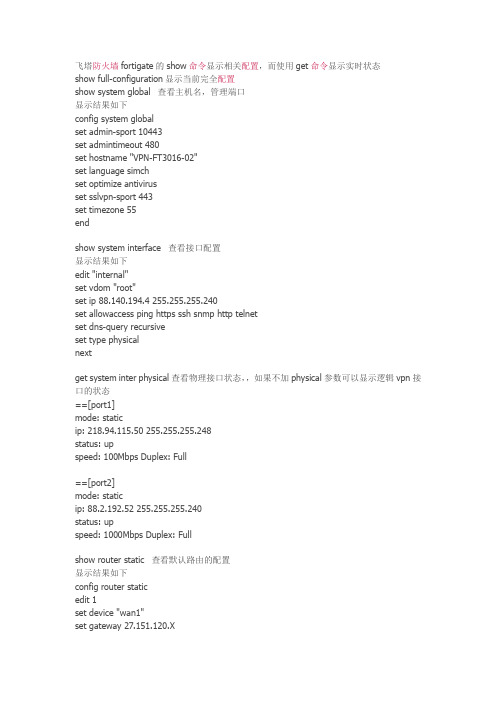
飞塔防火墙fortigate的show命令显示相关配置,而使用get命令显示实时状态show full-configuration显示当前完全配置show system global 查看主机名,管理端口显示结果如下config system globalset admin-sport 10443set admintimeout 480set hostname "VPN-FT3016-02"set language simchset optimize antivirusset sslvpn-sport 443set timezone 55endshow system interface 查看接口配置显示结果如下edit "internal"set vdom "root"set ip 88.140.194.4 255.255.255.240set allowaccess ping https ssh snmp http telnetset dns-query recursiveset type physicalnextget system inter physical查看物理接口状态,,如果不加physical参数可以显示逻辑vpn接口的状态==[port1]mode: staticip: 218.94.115.50 255.255.255.248status: upspeed: 100Mbps Duplex: Full==[port2]mode: staticip: 88.2.192.52 255.255.255.240status: upspeed: 1000Mbps Duplex: Fullshow router static 查看默认路由的配置显示结果如下config router staticedit 1set device "wan1"set gateway 27.151.120.Xnextendget router info routing-table static查看路由表中的静态路由S* 0.0.0.0/0 [10/0] via 218.94.115.49, port1S 66.72.0.0/16 [120/0] via 88.0.195.130, HuaiAnshow router ospf 查看ospf 的相关配置show system dns 查看dns的相关配置显示结果如下config system dnsset primary 208.91.112.53set secondary 208.91.112.52endget router info routing-table all 显示全局路由表(相当于cisco的show ip routing)VPN-FT3016# get router info routing-table allCodes: K - kernel, C - connected, S - static, R - RIP, B - BGPO - OSPF, IA - OSPF inter areaN1 - OSPF NSSA external type 1, N2 - OSPF NSSA external type 2E1 - OSPF external type 1, E2 - OSPF external type 2i - IS-IS, L1 - IS-IS level-1, L2 - IS-IS level-2, ia - IS-IS inter area* - candidate defaultS* 0.0.0.0/0 [10/0] via 218.94.115.49, port1O 1.1.1.1/32 [110/2] via 88.2.192.50, port2, 07w2d23hO 2.2.2.2/32 [110/2] via 88.2.192.81, port4, 07w2d23hO E1 10.100.10.0/23 [110/22] via 88.2.192.50, port2, 07w2d23hO E1 10.100.20.0/23 [110/22] via 88.2.192.50, port2, 07w2d23hO E1 10.254.1.0/24 [110/21] via 88.2.192.50, port2, 07w2d23h[110/21] via 88.2.192.81, port4, 07w2d23hO E1 10.254.2.0/24 [110/21] via 88.2.192.50, port2, 07w2d23h[110/21] via 88.2.192.81, port4, 07w2d23hO 10.254.133.0/24 [110/2] via 88.2.192.50, port2, 07w2d23hO E1 30.40.1.0/24 [110/21] via 88.2.192.50, port2, 07w2d23hO E1 30.40.2.0/24 [110/21] via 88.2.192.50, port2, 07w2d23hO 66.0.32.0/24 [110/2] via 88.2.192.50, port2, 07w2d23h[110/2] via 88.2.192.81, port4, 07w2d23hget router info ospf neighbor 查看ospf邻居建立关系(相当于cisco的show ip ospf nei)。
OSPF配置步骤

前言: 本文主要介绍了园区网中OSPF规划要点和部署OSPF的主要配置,对于OSPF协议原理和技术细节没有过多的阐述,适用于对于OSPF协议原理有一定了解的渠道工程师和网络维护人员。
保持OSPF数据库的稳定性:Router-id的选择
层次化的网络设计:OSPF区域的规划
非骨干区域内部路由器的路由表项优化:特殊区域的使用
骨干区域路由器的路由表项优化:非骨干区域IP子网规划和路由汇总
OSPF默认路由的引入和选路优化:重分布静态和cost调整
OSPF网络基本安全:阻止发往用户的OSPF报文
非骨干区域内部路由器的路由表项优化:特殊区域的使用
骨干区域路由器的路由表项优化:非骨干区域IP子网规划和路由汇总
OSPF默认路由的引入和选路优化:重分布静态和cost调整
OSPF网络的基本安全:阻止发往用户的OSPF报文
enable
conf t
router ospf 110 //启用进程号为110的OSPF
router-id *.*.*.* // 配置router ID号OSPF中用来识别路由器的
no au //关闭自动汇总
net 12.12.12.0 0.0.0.255 area 0 //把12.12.12.0/24网段宣告进OSPF中,并且激活该网段上的接口。
OSPF博大精深,太多太多配置了都。
譬如
OSPF的验证,分为区域验证,链路验证,虚链路验证
建立虚链路,建立TUNNEL 口
手工汇总,修改AD值,
修改接口的COST值,
OSPF的特殊区域如:STUB ,totally stub, nssa ,TOTALLY NSSA
路由的重分发。
飞塔防火墙OSPF配置
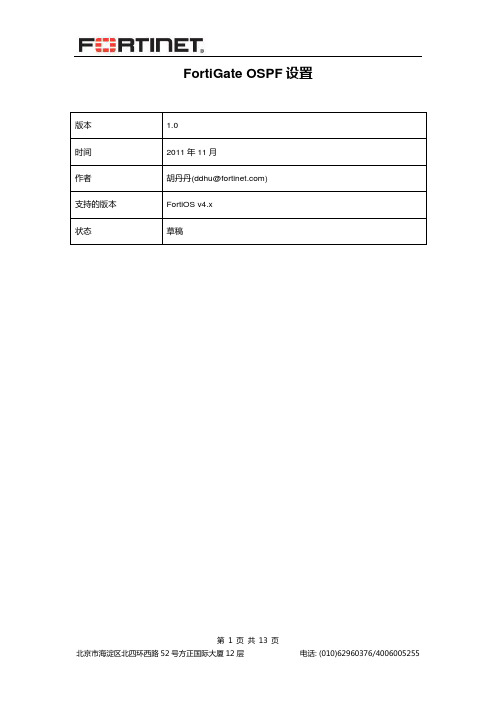
FortiGate OSPF设置目录1.目的 (3)2.环境介绍 (3)3.OSPF介绍 (4)3.1 DR与BDR选举 (4)3.2 OSPF邻居建立过程 (5)3.3 LSA的类型 (6)3.4 OSPF的区域 (7)4.FortiGate OSPF配置 (8)4.1 GateA配置 (8)4.2 GateB配置 (8)4.3 GateC配置 (8)4.4 配置完成后各个Gate路由表 (9)4.5 通过命令查看OSPF状态 (9)5.OSPF路由重发布 (10)6.Total stub与T otal NSSA (11)7.OSPF的Troubleshooting (12)8.参考 (13)1.目的本文档针对FortiGate的OSPF动态路由协议说明。
OSPF路由协议是一种典型的链路状态(Link-state)的路由协议,一般用于同一个路由域内。
在这里,路由域是指一个自治系统,即AS,它是指一组通过统一的路由政策或路由协议互相交换路由信息的网络。
在这个AS中,所有的OSPF路由器都维护一个相同的描述这个AS结构的数据库,该数据库中存放的是路由域中相应链路的状态信息,OSPF路由器正是通过这个数据库计算出其OSPF路由表的。
作为一种链路状态的路由协议,OSPF将链路状态广播数据LSA(Link State Advertisement)传送给在某一区域内的所有路由器。
2.环境介绍本文使用4台FortiGate进行说明, 本文使用的系统版本为FortiOS v4.0MR2 Patch8。
Router Router ID Role Interface IP AreaGateA 0.0.0.10 Area 0 DR 192.168.118.234 area0,area1GateB 0.0.0.9 Area 0 BDR 192.168.118.235 area0,area2area0,area3 GateC 0.0.0.8 Area 0 DRother 192.168.118.233/172.16.3.1GateD 0.0.0.7 Area 3 DR 172.16.3.2 area33.OSPF介绍3.1 DR与BDR选举DR--指定路由器,BDR--备份指定路由器。
如何配置FortiGate BGP路由聚合-FGT、路由、配置说明
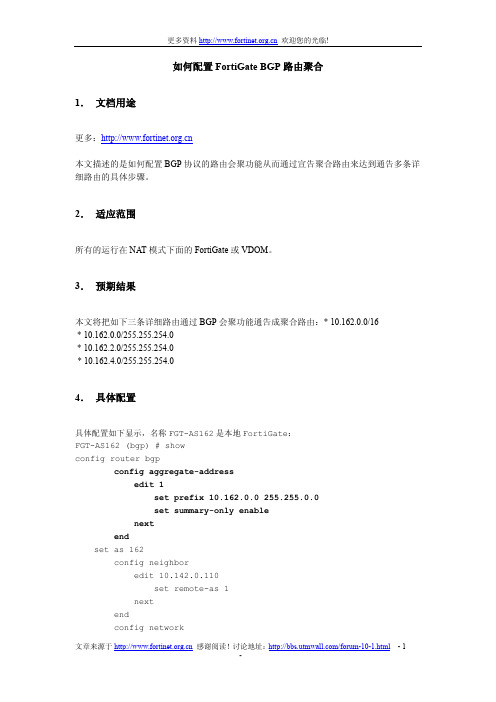
如何配置FortiGate BGP路由聚合1.文档用途更多:本文描述的是如何配置BGP协议的路由会聚功能从而通过宣告聚合路由来达到通告多条详细路由的具体步骤。
2.适应范围所有的运行在NAT模式下面的FortiGate或VDOM。
3.预期结果本文将把如下三条详细路由通过BGP会聚功能通告成聚合路由:* 10.162.0.0/16* 10.162.0.0/255.255.254.0* 10.162.2.0/255.255.254.0* 10.162.4.0/255.255.254.04.具体配置具体配置如下显示,名称FGT-AS162是本地FortiGate:FGT-AS162 (bgp) # showconfig router bgpconfig aggregate-addressedit 1set prefix 10.162.0.0 255.255.0.0set summary-only enablenextendset as 162config neighboredit 10.142.0.110set remote-as 1nextendconfig networkedit 1set prefix 10.162.0.0 255.255.254.0 nextedit 2set prefix 10.162.2.0 255.255.254.0 nextedit 3set prefix 10.162.4.0 255.255.254.0 nextendconfig redistribute "connected"endconfig redistribute "rip"endconfig redistribute "ospf"endconfig redistribute "static"endset router-id 10.142.0.114end5.配置验证名称FGT_ISP是模拟的ISP边界路由器:FGT-AS162启用了BGP路由聚合功能我们将用到如下4条关于路由的CLI命令:# get router info bgp summary# get router info bgp neighbors# get router info bgp network# get router info routing-table all5.1 在FGT-AS162上验证FGT-AS162 # get router info routing-table allCodes: K - kernel, C - connected, S - static, R - RIP, B - BGPO - OSPF, IA - OSPF inter areaN1 - OSPF NSSA external type 1, N2 - OSPF NSSA external type 2E1 - OSPF external type 1, E2 - OSPF external type 2i - IS-IS, L1 - IS-IS level-1, L2 - IS-IS level-2, ia - IS-IS inter area* - candidate defaultS* 0.0.0.0/0 [10/0] via 192.168.183.254, port1B 1.1.1.1/32 [20/0] via 10.142.0.110, port2, 01:03:29C 10.142.0.0/23 is directly connected, port2B 10.160.0.0/23 [20/0] via 10.142.0.110, port2, 00:02:07B 10.162.0.0/16 [20/0] is a summary, Null, 00:12:16C 10.162.0.0/23 is directly connected, port3C 10.162.2.0/23 is directly connected, port5C 10.162.4.0/23 is directly connected, port6B 192.168.0.0/16 [20/0] via 10.142.0.110, port2, 01:03:29B 192.168.0.0/21 [20/0] via 10.142.0.205, port2, 01:03:29B 192.168.168.0/24 [20/0] via 10.142.0.110, port2, 01:03:29C 192.168.182.0/23 is directly connected, port1可以看到上面路由表里面有条“null”的路由可以避免路由环路产生FGT-AS162 # get router info bgp networkBGP table version is 9, local router ID is 10.142.0.114Status codes: s suppressed, d damped, h history, * valid, > best, i - internal, S StaleOrigin codes: i - IGP, e - EGP, ? - incompleteNetwork Next Hop Metric LocPrf Weight Path*> 1.1.1.1/32 10.142.0.110 0 0 1 ?*> 10.160.0.0/23 10.142.0.110 0 0 1 i*> 10.162.0.0/16 0.0.0.0 32768 i <<<< 这就是将要通过BGP宣告出去的路由s> 10.162.0.0/23 0.0.0.0 100 32768 is> 10.162.2.0/23 0.0.0.0 100 32768 is> 10.162.4.0/23 0.0.0.0 100 32768 i*> 192.168.0.0/16 10.142.0.110 0 0 1 ?*> 192.168.0.0/21 10.142.0.205 0 0 1 2 i*> 192.168.168.0 10.142.0.110 0 0 1 ?Total number of prefixes 9可以看到BGP摘要路由下面有三条路由有's' 标记,指的是摘要路由来源于这3条详细路由。
