proFTPd 配置参考
proftpd配置

proftpd的简单配置(1)安装.tar.gz版本的ProFTPD# tar -zxvf proftpd-1.2.6.tar.gz 解开临时目录中压缩文件# cd proftpd-1.2.6 切换到解开的目录下# ./configure 执行配置设定文件# make 编译ProFTPD相关文件# make install 将ProFTPD安装至系统上(2)其主要文件的安装位置;proftpd、ftpshut 执行文件:/usr/local/sbin;ftpcount、ftpwho 执行文件:/usr/local/bin;proftpd.conf 说明文件:/usr/local/etc;man page 说明文件:/usr/local/man(3)Red Hat Linux 6.x : 以inetd启动ProFTPD1.修改 /usr/local/etc/proftpd.conf请先将proftpd.conf设定文件中的Server Type改成以inetd方式启动:Server Type inetd2.修改 /etc/inetd.conf如果您的/etc/inetd.conf设定文件中已经启动其他FTP服务器的设定,请先取消或设定。
然后在此文件中加上这一行:ftp stream tcp nowait root /usr/sbin/tcpd /usr/local/sbin/proftpd3.要求inetd程序重新读取设定文件# /etc/rc.d/init.d/inet reload(4)确认ProFTPD是否已经启动由于FTP服务器默认的通信端口号码为21,所以可以利用telnet指令登入第21号通信端口,来测试ProFTPD是否已经启动:# telnet localhost 21 登入本机的第21号通信端口(5)修改设定文件(/usr/local/etc/proftpd.conf)设定FTP服务器的名称ServerName “FLAG FTP server”设定当登入FTP服务器时,所要显示的主机名称。
proftpd+mysql 安装配置详细文档
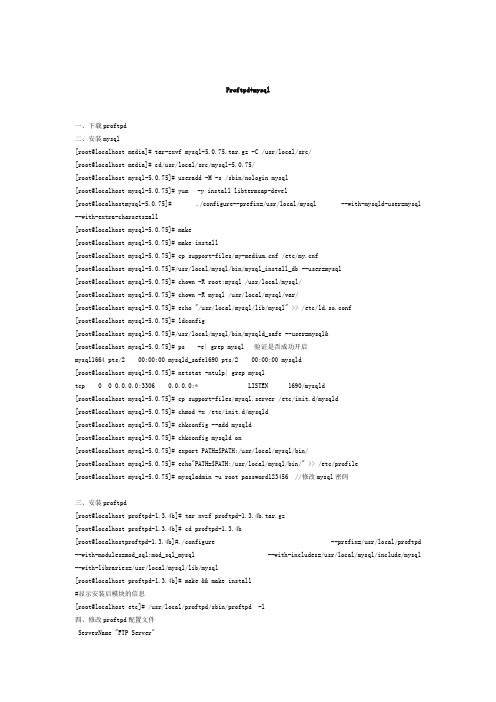
Proftpd+mysql一、下载proftpd二、安装mysql[root@localhost media]# tar-zxvf mysql-5.0.75.tar.gz -C /usr/local/src/[root@localhost media]# cd/usr/local/src/mysql-5.0.75/[root@localhost mysql-5.0.75]# useradd -M -s /sbin/nologin mysql[root@localhost mysql-5.0.75]# yum -y install libtermcap-devel[root@localhostmysql-5.0.75]# ./configure--prefix=/usr/local/mysql --with-mysqld-user=mysql --with-extra-charsets=all[root@localhost mysql-5.0.75]# make[root@localhost mysql-5.0.75]# make install[root@localhost mysql-5.0.75]# cp support-files/f /etc/f[root@localhost mysql-5.0.75]#/usr/local/mysql/bin/mysql_install_db --user=mysql[root@localhost mysql-5.0.75]# chown -R root:mysql /usr/local/mysql/[root@localhost mysql-5.0.75]# chown -R mysql /usr/local/mysql/var/[root@localhost mysql-5.0.75]# echo "/usr/local/mysql/lib/mysql" >> /etc/ld.so.conf[root@localhost mysql-5.0.75]# ldconfig[root@localhost mysql-5.0.75]#/usr/local/mysql/bin/mysqld_safe --user=mysql&[root@localhost mysql-5.0.75]# ps -e| grep mysql 验证是否成功开启mysql1664 pts/2 00:00:00 mysqld_safe1690 pts/2 00:00:00 mysqld[root@localhost mysql-5.0.75]# netstat -ntulp| grep mysqltcp 0 0 0.0.0.0:3306 0.0.0.0:* LISTEN 1690/mysqld[root@localhost mysql-5.0.75]# cp support-files/mysql.server /etc/init.d/mysqld[root@localhost mysql-5.0.75]# chmod +x /etc/init.d/mysqld[root@localhost mysql-5.0.75]# chkconfig --add mysqld[root@localhost mysql-5.0.75]# chkconfig mysqld on[root@localhost mysql-5.0.75]# export PATH=$PATH:/usr/local/mysql/bin/[root@localhost mysql-5.0.75]# echo"PATH=$PATH:/usr/local/mysql/bin/" >> /etc/profile[root@localhost mysql-5.0.75]# mysqladmin -u root password123456 //修改mysql密码三、安装proftpd[root@localhost proftpd-1.3.4b]# tar xvzf proftpd-1.3.4b.tar.gz[root@localhost proftpd-1.3.4b]# cd proftpd-1.3.4b[root@localhostproftpd-1.3.4b]#./configure --prefix=/usr/local/proftpd --with-modules=mod_sql:mod_sql_mysql --with-includes=/usr/local/mysql/include/mysql --with-libraries=/usr/local/mysql/lib/mysql[root@localhost proftpd-1.3.4b]# make && make install#显示安装后模块的信息[root@localhost etc]# /usr/local/proftpd/sbin/proftpd -l四、修改proftpd配置文件ServerName "FTP Server"ServerType standaloneDefaultServer onServerIdent off# Port 21 is the standard FTP port.Port 21# Umask 022 is a good standard umask to prevent new dirs and files# from being group and world writable.Umask 022MaxLoginAttempts 3TimeoutLogin 120TimeoutIdle 600TimeoutNoTransfer 900TimeoutStalled 3600MaxClients 100MaxClientsPerHost 5AllowOverwrite noAllowStoreRestart onUseReverseDNS off#指定是否必须为FTP用户指定一个系统shell,off表示不用指定,on表示必须指定。
ProFTPD服务器配置过程
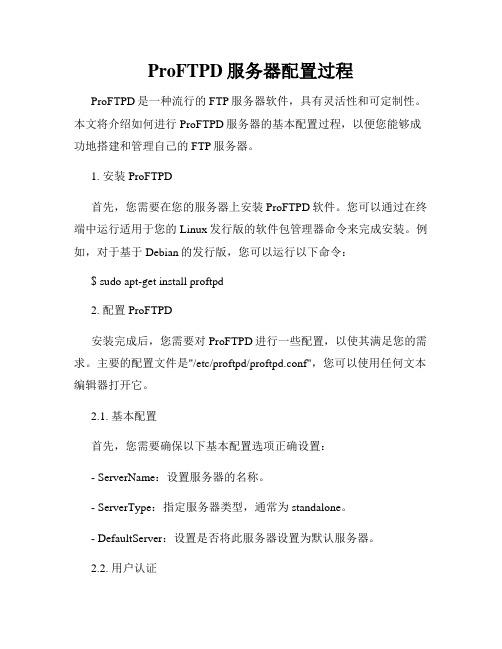
ProFTPD服务器配置过程ProFTPD是一种流行的FTP服务器软件,具有灵活性和可定制性。
本文将介绍如何进行ProFTPD服务器的基本配置过程,以便您能够成功地搭建和管理自己的FTP服务器。
1. 安装ProFTPD首先,您需要在您的服务器上安装ProFTPD软件。
您可以通过在终端中运行适用于您的Linux发行版的软件包管理器命令来完成安装。
例如,对于基于Debian的发行版,您可以运行以下命令:$ sudo apt-get install proftpd2. 配置ProFTPD安装完成后,您需要对ProFTPD进行一些配置,以使其满足您的需求。
主要的配置文件是"/etc/proftpd/proftpd.conf",您可以使用任何文本编辑器打开它。
2.1. 基本配置首先,您需要确保以下基本配置选项正确设置:- ServerName:设置服务器的名称。
- ServerType:指定服务器类型,通常为standalone。
- DefaultServer:设置是否将此服务器设置为默认服务器。
2.2. 用户认证ProFTPD支持多种用户认证方法。
您可以根据需要选择以下一种或多种认证方法:- AuthOrder:指定用户认证的顺序。
常见的选项包括mod_sql、mod_ldap和mod_auth_pam。
- SQLBackend:如果使用SQL作为用户数据库,您需要设置此选项,并提供相关的数据库连接信息。
2.3. 文件传输设置您可以配置ProFTPD以最大程度地满足您的文件传输需求:- DefaultRoot:指定用户的默认根目录路径。
- AllowStoreRestart:启用断点续传功能。
- PassivePorts:指定被动模式用于数据传输的端口范围。
3. 启动ProFTPD完成配置后,您需要启动ProFTPD服务。
运行以下命令:$ sudo service proftpd start如果一切设置正确,您应该能够在FTP客户端中通过服务器的IP地址连接到ProFTPD服务器了。
proftpd中主动模式(port)与被动模式(PASV)
proftpd中主动模式(port)与被动模式(PASV)查看⽂章proftpd中主动模式(port)与被动模式(PASV)2011-11-12 11:11以下是从英⽂⽂档翻译过来的>>处理防⽕墙和其他⽹络连接问题时最常见的⼀个难题是主动FTP与被动FTP的区别以及如何完美地⽀持它们。
幸运地是,本⽂能够帮助你清除在防⽕墙环境中如何⽀持FTP这个问题上的⼀些混乱。
本⽂也许不像题⽬声称的那样是⼀个权威解释,但我已经听到了很多好的反馈意见,也看到了本⽂在许多地⽅被引⽤,知道了很多⼈都认为它很有⽤。
虽然我⼀直在找寻改进的⽅法,但如果你发现某个地⽅讲的不够清楚,需要更多的解释,请告诉我!最近的修改是增加了主动FTP和被动FTP会话中命令的例⼦。
这些会话的例⼦应该对更好地理解问题有所帮助。
例⼦中还提供了⾮常棒的图例来解释FTP会话过程的步骤。
现在,正题开始了...基础 基础 FTP是仅基于TCP的服务,不⽀持UDP。
与众不同的是FTP使⽤2个端⼝,⼀个数据端⼝和⼀个命令端⼝(也可叫做控制端⼝)。
通常来说这两个端⼝是21-命令端⼝和20-数据端⼝。
但当我们发现根据(FTP⼯作)⽅式的不同数据端⼝并不总是20时,混乱产⽣了。
主动FTP 主动 主动⽅式的FTP是这样的:客户端从⼀个任意的⾮特权端⼝N(N>;1024)连接到FTP服务器的命令端⼝,也就是21端⼝。
然后客户端开始监听端⼝N+1,并发送FTP命令“port N+1”到FTP服务器。
接着服务器会从它⾃⼰的数据端⼝(20)连接到客户端指定的数据端⼝(N+1)。
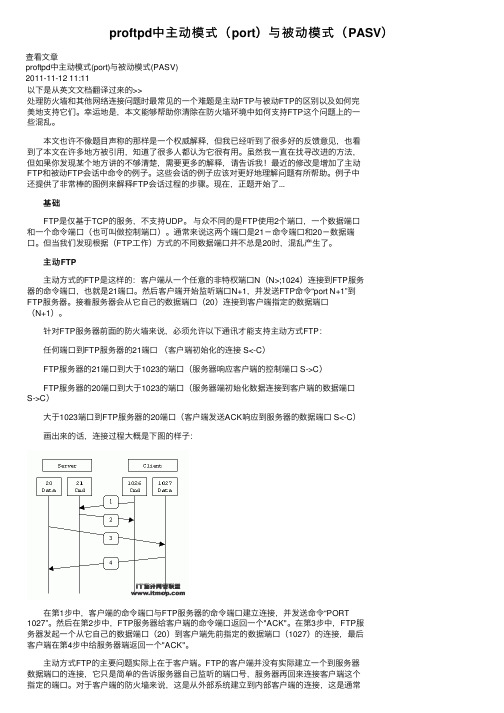
针对FTP服务器前⾯的防⽕墙来说,必须允许以下通讯才能⽀持主动⽅式FTP: 任何端⼝到FTP服务器的21端⼝(客户端初始化的连接 S<-C) FTP服务器的21端⼝到⼤于1023的端⼝(服务器响应客户端的控制端⼝ S->C) FTP服务器的20端⼝到⼤于1023的端⼝(服务器端初始化数据连接到客户端的数据端⼝S->C) ⼤于1023端⼝到FTP服务器的20端⼝(客户端发送ACK响应到服务器的数据端⼝ S<-C) 画出来的话,连接过程⼤概是下图的样⼦: 在第1步中,客户端的命令端⼝与FTP服务器的命令端⼝建⽴连接,并发送命令“PORT 1027”。
AIX下proftpd的安装及配置

AIX自带的ftpd 控制功能很弱,proftpd是长期以来传统上AIX全功能FTP服务器的标准选择1. 测试环境◆服务器:IBM 7043-150(俗称43P150)∙ ∙●CPU:PowerPC_604e 375MHz,1个∙ ∙●内存:512MB∙ ∙●AIX 5.3◆proftpd:∙ ∙●来源:AIX Toolbox for Linux∙ ∙●版本:1.2.82. 文件集准备及安装2.1. 文件集准备准备好如下两个文件集:◆coreutils-5.2.1-2.aix5.1.ppc.rpm◆proftpd-1.2.8-1.aix5.1.ppc.rpm获取来源可以有两种选择:◆AIX Toolbox for Linux光盘;◆AIX Toolbox for Linux按字排序的各文件集下载:/servers/aix/products/aixos/linux/download.html2.2. 安装◆安装以root身份进行;◆建立一个目录,将两个文件集复制到其中,此目录中不要有其他文件集;◆切换当前目录到此目录;◆执行:geninstall -I "a -cgNQqwXY -J" -Z -d .3. 配置、检查和inetd模式3.1. 配置以下配置修改目的主要是让配置结果尽量符合缺省AIX FTP的效果,解除了一些限制,请视您的需要决定各修改项目采用与否。
3.1.1. 修改/etc/proftpd.conf其他设置项目请参考官方文档:/docs/directives/linked/by-name.html3.1.2. 修改/etc/ftpusersproftpd安装时将自动生成/etc/ftpusers,把系统所有的用户都写入了这个文件,导致任何用户不能使用FTP。
将此文件改名。
3.2. 检查◆执行proftpd -t检查/etc/proftpd.conf文件语法是否有误◆停止AIX缺省的FTP服务:stopsrc -t ftp◆执行proftpd -n -d9,使proftpd以前台诊断模式运行◆另开一个登录窗口,执行ftp localhost,并下载一个小文件进行测试◆如果有问题请按照proftpd前台屏幕显示或/etc/proftpd.conf中定义的日志文件内容进行问题排除◆完成后在protfpd前台窗口中按Ctrl+C关闭proftpd服务3.3. 将proftpd配置为inetd模式为避免操作中的麻烦,请勿采用网上其他文章一般使用的直接编辑inetd.conf的方式,而用smit来进行◆启动AIX缺省FTP:startsrc -t ftp,这一步的目的是让下述修改中能出现FTP项目,否则FTP项目将不出现无法修改◆执行smitty chinetdconf,选择ftp项目◆将Service Program PATH Name内容由/usr/sbin/ftpd改为/usr/sbin/proftpd◆将Service Program Command Line ARGUMENTS内容由ftpd改为proftpd,如果你希望日志中有尽量多的细节供查看FTP操作历史或进行错误诊断,请修改为:-nd9 proftpd◆修改/etc/proftpd.conf,将ServerType从standalone修改为inetd◆重启FTP服务:stopsrc -t ftp; startsrc -t ftp◆执行ftp localhost,并下载一个小文件进行测试。
Linux下Proftp1.2.4的安装设置网络服务器-电脑资料

Linux下Proftp1.2.4的安装设置网络服务器-电脑资料关于ProFtpd的安装以这个版本为例proftpd-1.2.4.tar.gz安装方法:./configure --prefix=/usr/local --enable-shadowmake (如果是双 CPU 建议采用 make -j3)make install或者简单一点./configuremakemake install配置方法:然后你可以发现 ProFTPD 安装在 /usr/local 下,"proftpd" 可以在/usr/local/sbin/目录下找到,配置文件 proftpd.conf 位于:/usr/local/etc/编辑/usr/local/etc/proftpd.conf,找到“Group xxxxxx”改为“Group nobody”要锁定用户在自己的本身的目录下,请在proftpd.conf文件里加上一句:DefaultRoot~FTP服务器相关命令1、ftpshut:关闭FTP服务,并在/etc下生成文件shutmsg,。
要重新开放FTP服务,把/etc/shutmsg删除。
2、ftpcout:FTP服务器在线人数信息显示。
3、ftpwho:FTP服务器在线人员名单。
几个文件的功能及路径/usr/local/sbin/proftpd 执行程序/usr/local/etc/proftpd.conf 设置文件/usr/local/var/proftpd.pid proftpd做为一个服务的ID号设定proftpd.conf文件,起动服务cd /etc/rc.d/rc3.dln -s /usr/local/sbin/proftpd S99proftpd或者修改/etc/rc.d/rc.local加上下面这句/usr/local/sbin/proftpd start在proftpd环境下如何设定虚拟主机?可以通过指令:VirtualHost来实现,一个最简单的例子:ServerName "virtual FTP server"若你仅仅希望通过匿名访问某个虚拟主机,则使用如下! 的指令:Serv erName "virtual FTP server"DenyAllUser privateGroup privateAllowAll这样192.168.2.35的这台主机则仅仅允许匿名登录。
Linux下FTP服务器proftpd安装与配置指南

知道这些参数,我们就可以写出一个友好的欢迎语
vi /home/kaoyan/welcome.msg
欢迎您%U, 这是Frank的测试FTP服务器;
目前时间是:%T;
本服务器最多允许%M个用户连接数;
目前服务器上已有%N个用户连接数;
目前你所在的目录是%C;
# ftpshut -l 20 -d 10 +30 "FTP Server Will shutdown at time"
其实ftpshut就是产生/etc/shutmsg ,你只要删除这个文件ftp又可以重新服务,或者直接
# ftpshut -R
/usr/local/proftpd/bin/ftpwho:可以用来察看目前有多少人使用 proftpd 这个服务。简单的语法直接下达 ftpwho 即可,如下所示:
--with-includes=/usr/local/mysql/include/mysql \
--with-libraries=/usr/local/mysql/lib/mysql \
--with-modules=mod_sql:mod_sql_mysql:mod_quotatab:mod_quotatab_sql:mod_ratio
# make
# make install
设置自启动
# cp contrib/dist/rpm/proftpd.init.d /etc/rc.d/init.d/proftpd
# chmod 755 /etc/rc.d/init.d/proftpd
# chkconfig --level 0123456 proftpd on
proftpd配置
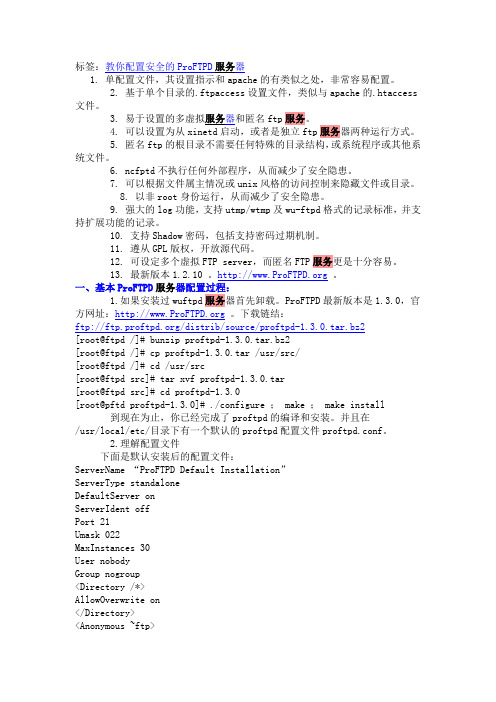
标签:教你配置安全的ProFTPD服务器1. 单配置文件,其设置指示和apache的有类似之处,非常容易配置。
2. 基于单个目录的.ftpaccess设置文件,类似与apache的.htaccess文件。
3. 易于设置的多虚拟服务器和匿名ftp服务。
4. 可以设置为从xinetd启动,或者是独立ftp服务器两种运行方式。
5. 匿名ftp的根目录不需要任何特殊的目录结构,或系统程序或其他系统文件。
6. ncfptd不执行任何外部程序,从而减少了安全隐患。
7. 可以根据文件属主情况或unix风格的访问控制来隐藏文件或目录。
8. 以非root身份运行,从而减少了安全隐患。
9. 强大的log功能,支持utmp/wtmp及wu-ftpd格式的记录标准,并支持扩展功能的记录。
10. 支持Shadow密码,包括支持密码过期机制。
11. 遵从GPL版权,开放源代码。
12. 可设定多个虚拟FTP server,而匿名FTP服务更是十分容易。
13. 最新版本1.2.10 。
一、基本ProFTPD服务器配置过程:1.如果安装过wuftpd服务器首先卸载。
ProFTPD最新版本是1.3.0,官方网址:。
下载链结:ftp:///distrib/source/proftpd-1.3.0.tar.bz2[root@ftpd /]# bunzip proftpd-1.3.0.tar.bz2[root@ftpd /]# cp proftpd-1.3.0.tar /usr/src/[root@ftpd /]# cd /usr/src[root@ftpd src]# tar xvf proftpd-1.3.0.tar[root@ftpd src]# cd proftpd-1.3.0[root@pftd proftpd-1.3.0]# ./configure ; make ; make install 到现在为止,你已经完成了proftpd的编译和安装。
CentOS 5.x编译安装配置ProFTPd与添加MySQL虚拟用户
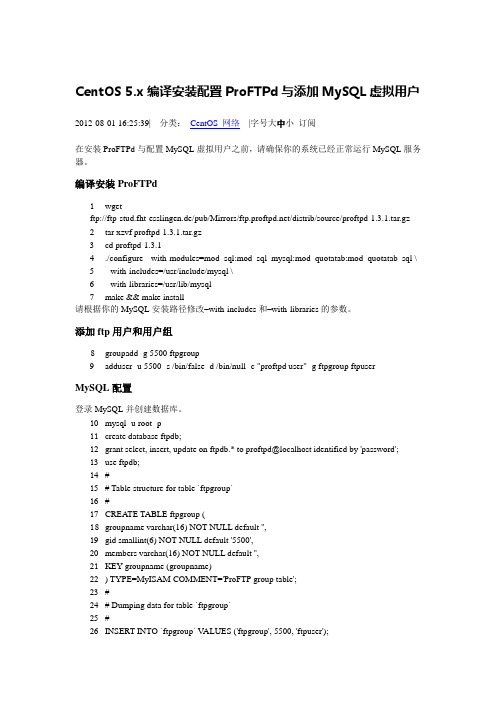
CentOS 5.x编译安装配置ProFTPd与添加MySQL虚拟用户2012-08-01 16:25:39| 分类:CentOS 网络|字号大中小订阅在安装ProFTPd与配置MySQL虚拟用户之前,请确保你的系统已经正常运行MySQL服务器。
编译安装ProFTPd1wgetftp://ftp-stud.fht-esslingen.de/pub/Mirrors//distrib/source/proftpd-1.3.1.tar.gz 2tar xzvf proftpd-1.3.1.tar.gz3cd proftpd-1.3.14./configure --with-modules=mod_sql:mod_sql_mysql:mod_quotatab:mod_quotatab_sql \5--with-includes=/usr/include/mysql \6--with-libraries=/usr/lib/mysql7make && make install请根据你的MySQL安装路径修改–with-includes和–with-libraries的参数。
添加ftp用户和用户组8groupadd -g 5500 ftpgroup9adduser -u 5500 -s /bin/false -d /bin/null -c "proftpd user" -g ftpgroup ftpuserMySQL配置登录MySQL并创建数据库。
10mysql -u root -p11create database ftpdb;12grant select, insert, update on ftpdb.* to proftpd@localhost identified by 'password';13use ftpdb;14#15# Table structure for table `ftpgroup`16#17CREATE TABLE ftpgroup (18groupname varchar(16) NOT NULL default '',19gid smallint(6) NOT NULL default '5500',20members varchar(16) NOT NULL default '',21KEY groupname (groupname)22) TYPE=MyISAM COMMENT='ProFTP group table';23#24# Dumping data for table `ftpgroup`25#26INSERT INTO `ftpgroup` V ALUES ('ftpgroup', 5500, 'ftpuser');27INSERT INTO `ftpgroup` V ALUES ('ftpgroup', 5500, 'ftpguest');28CREATE TABLE `ftpquotatallies` (29`name` varchar(30) NOT NULL default '',30`quota_type` enum('user','group','class','all') NOT NULL default 'user',31`bytes_in_used` float NOT NULL default '0',32`bytes_out_used` float NOT NULL default '0',33`bytes_xfer_used` float NOT NULL default '0',34`files_in_used` int(10) unsigned NOT NULL default '0',35`files_out_used` int(10) unsigned NOT NULL default '0',36`files_xfer_used` int(10) unsigned NOT NULL default '0'37) TYPE=MyISAM;38# --------------------------------------------------------39#40# Table structure for table `ftpuser`41#42CREATE TABLE ftpuser (43id int(10) unsigned NOT NULL auto_increment,44userid varchar(32) NOT NULL default '',45passwd varchar(32) NOT NULL default '',46uid smallint(6) NOT NULL default '5500',47gid smallint(6) NOT NULL default '5500',48homedir varchar(255) NOT NULL default '',49shell varchar(16) NOT NULL default '/sbin/nologin',50count int(11) NOT NULL default '0',51accessed datetime NOT NULL default '0000-00-00 00:00:00',52modified datetime NOT NULL default '0000-00-00 00:00:00',53PRIMARY KEY (id),54UNIQUE KEY userid (userid)55) TYPE=MyISAM COMMENT='ProFTP user table';56INSERT INTO `ftpuser` V ALUES (1, 'testaccount', 'ftppasswd', 5500, 5500, '/home/', '/sbin/nologin',0,'','');57exit;proftpd配置文件要目录下建proftpd.conf配置文件,请在下面的代码修改好MySQL数据库登录信息。
最简单易用的proftpd安装配置
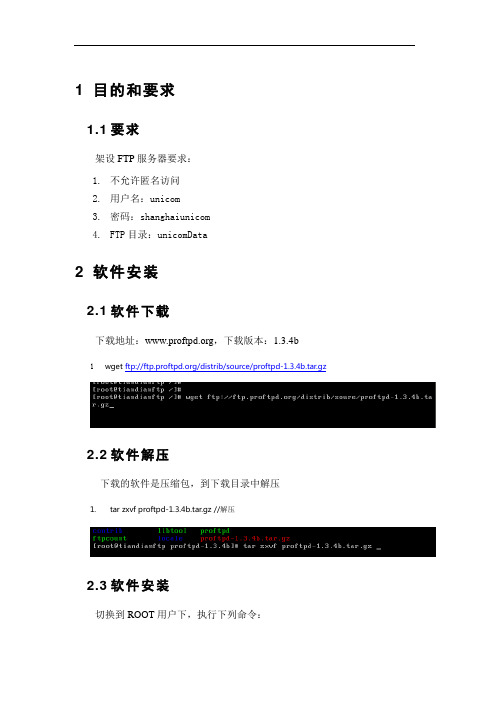
1 目的和要求1.1 要求架设FTP服务器要求:1.不允许匿名访问2.用户名:unicom3.密码:shanghaiunicom4.FTP目录:unicomData2 软件安装2.1 软件下载下载地址:,下载版本:1.3.4bwget ftp:///distrib/source/proftpd-1.3.4b.tar.gz2.2 软件解压下载的软件是压缩包,到下载目录中解压1.tar zxvf proftpd-1.3.4b.tar.gz //解压2.3 软件安装切换到ROOT用户下,执行下列命令:1.su2.cd proftpd-1.3.4b3. ./configure --sysconfdir=/etc 配置文件目录/etc4.make && make install3 建立ftp专用帐号新建专用帐号,用户名:unicom,密码:shanghaiunicom。
1.mkdir -p /home/ftp/2.groupadd unicomeradd unicom -g unicom -d /home/ftp/unicomData -s /sbin/nologin //设置/home/ftp/unicomData目录为ftp的目录4.passwd unicom //设置unicom用户的密码shanghaiunicom5.chown unicom.unicom /home/ftp/unicomData //设置unicomData目录unicom用户可写4 proftpd配置4.1 修改配置文件proftpd的配置文件路径:/etc/proftpd.conf1.vi /etc/proftpd.conf //打开proftpd.conf具体配置文件内容如下:# This is a basic ProFTPD configuration file (rename it to# 'proftpd.conf' for actual use. It establishes a single server# and a single anonymous login. It assumes that you have a user/group# "nobody" and "ftp" for normal operation and anon.ServerName "ProFTPD Default Installation" ServerType standaloneDefaultServer on# Port 21 is the standard FTP port.Port 21# Don't use IPv6 support by default.UseIPv6 off# Umask 022 is a good standard umask to prevent new dirs and files # from being group and world writable.Umask 022# To prevent DoS attacks, set the maximum number of child processes # to 30. If you need to allow more than 30 concurrent connections # at once, simply increase this value. Note that this ONLY works# in standalone mode, in inetd mode you should use an inetd server# that allows you to limit maximum number of processes per service # (such as xinetd).MaxInstances 30# Set the user and group under which the server will run.User unicomGroup unicom# To cause every FTP user to be "jailed" (chrooted) into their home# directory, uncomment this line.#DefaultRoot ~# Normally, we want files to be overwriteable.AllowOverwrite on# Bar use of SITE CHMOD by default<Limit SITE_CHMOD>DenyAll</Limit># A basic anonymous configuration, no upload directories. If you do not # want anonymous users, simply delete this entire <Anonymous> section. <Anonymous ~ftp>User ftpGroup ftp# We want clients to be able to login with "anonymous" as well as "ftp" UserAlias anonymous ftp# Limit the maximum number of anonymous loginsMaxClients 10# We want 'welcome.msg' displayed at login, and '.message' displayed # in each newly chdired directory.DisplayLogin welcome.msgDisplayChdir .message# Limit WRITE everywhere in the anonymous chroot<Limit WRITE>DenyAll</Limit></Anonymous>SystemLog /var/log/proftpd.log#日志文件修改User和Group为unicom,编辑完以后按Esc,然后输入:wq保存。
ftp服务器配置
FTP服务器配置FTP(File Transfer Protocol,文件传输协议)是一种用于在计算机之间进行文件传输的协议。
配置FTP服务器是在服务器上设置并管理FTP服务,允许用户通过FTP客户端连接服务器并进行文件传输。
本文将介绍如何在常见的Linux操作系统下配置FTP服务器,并提供基本的配置示例。
1. 安装FTP服务器软件首先,我们需要在服务器上安装FTP服务器软件。
根据操作系统的不同,可以选择不同的FTP服务器软件。
在本文中,我们将以ProFTPD为例进行配置。
Ubuntu/Debian在Ubuntu或Debian中,可以通过以下命令安装ProFTPD:sudo apt-get updatesudo apt-get install proftpdCentOS/RHEL在CentOS或RHEL中,可以通过以下命令安装ProFTPD:sudo yum updatesudo yum install proftpd2. 配置ProFTPD安装完成后,需要对ProFTPD进行一些基本配置。
2.1 打开配置文件使用文本编辑器打开ProFTPD的主配置文件/etc/proftpd/proftpd.conf:sudo vi /etc/proftpd/proftpd.conf2.2 配置监听端口找到以下行,并将端口设置为适合您的需求:Port 212.3 配置被动模式在ProFTPD的配置文件中,默认情况下不允许被动模式(Passive Mode)连接。
如果您需要允许被动模式连接,可以取消以下行的注释:# Use passive mode by default#<IfModule mod_tls.c># PassivePorts 49152 65534#</IfModule>2.4 配置用户权限您可以在ProFTPD配置文件的末尾添加以下行来配置用户权限:# User and group permissionsUserOwner usernameGroupOwner groupname将username替换为您想要将FTP目录的拥有者设置为的用户名,将groupname替换为您想要将FTP目录的组拥有者设置为的组名。
Pure-ftpd.conf配置详解
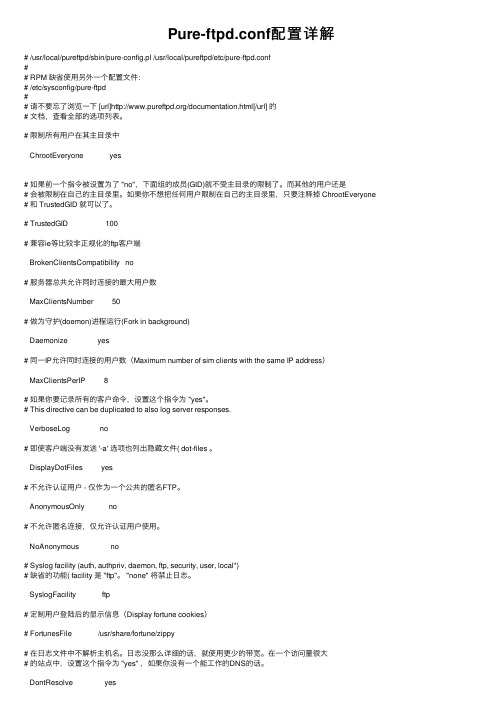
Pure-ftpd.conf配置详解# /usr/local/pureftpd/sbin/pure-config.pl /usr/local/pureftpd/etc/pure-ftpd.conf## RPM 缺省使⽤另外⼀个配置⽂件:# /etc/sysconfig/pure-ftpd## 请不要忘了浏览⼀下 [url]/documentation.html[/url] 的# ⽂档,查看全部的选项列表。
# 限制所有⽤户在其主⽬录中ChrootEveryone yes# 如果前⼀个指令被设置为了 "no",下⾯组的成员(GID)就不受主⽬录的限制了。
⽽其他的⽤户还是# 会被限制在⾃⼰的主⽬录⾥。
如果你不想把任何⽤户限制在⾃⼰的主⽬录⾥,只要注释掉 ChrootEveryone # 和 TrustedGID 就可以了。
# TrustedGID 100# 兼容ie等⽐较⾮正规化的ftp客户端BrokenClientsCompatibility no# 服务器总共允许同时连接的最⼤⽤户数MaxClientsNumber 50# 做为守护(doemon)进程运⾏(Fork in background)Daemonize yes# 同⼀IP允许同时连接的⽤户数(Maximum number of sim clients with the same IP address)MaxClientsPerIP 8# 如果你要记录所有的客户命令,设置这个指令为 "yes"。
# This directive can be duplicated to also log server responses.VerboseLog no# 即使客户端没有发送 '-a' 选项也列出隐藏⽂件( dot-files 。
DisplayDotFiles yes# 不允许认证⽤户 - 仅作为⼀个公共的匿名FTP。
一个proftp权限配置问题

一个proftpd权限配置问题最近有人问我关于proftpd的权限配置问题,由于不熟悉proftpd,所以没有立即解决。
后来找时间研究了一下,得到了解决方法,现共享出来。
一、权限需求描述每个部门有自己的文件夹,只有本部门经理、本部门员工和总经理访问,并且所有用户都能上传和下载文件,但只有部门经理和总经理有删除权限。
(大致是这样的一个要求)实现过程如下:二、proftpd安装1.操作系统环境:RHEL5.42.proftpd版本: 1.3.03.安装过程#tar proftpd-1.3.0.tar.bz2#cd proftpd-1.3.0#./configure –prefix=/usr/local/proftpd#make#make install三、创建ftp目录、用户、组,并分配权限1.创建所需目录#mkdir -p /ftpdata/pub这个目录是所有本地用户登录的根目录#mkdir /ftpdata/pub/jsb这个目录是技术部的目录,只允许技术部和总经理访问#mkdir /ftpdata/pub/cwb这个目录是财务部目录,只允许财务部和总经理访问我就以这两个部门为例,配置proftpd的朋友,可以根据自己公司的实际情况做一些调整。
下面创建用户和组2.创建用户和组#groupadd jsb创建技术部组#groupadd cwb创建财务部组#useradd –G jsb,cwb zjl创建总经理使用的账号,同时加入技术部组和财务部组#useradd -G jsb jsjl创建技术部经理账号,加入技术部组#useradd -G jsb jsyg1创建技术部员工1账号,加入技术部组#useradd -G jsb jsyg2创建技术部员工2账号,加入技术部组#useradd –G cwb cwjl创建财务部经理账号,加入财务部组#useradd –G cwb cwyg1创建财务部员工1账号,加入财务部组#useradd –G cwb cwyg2创建财务部员工2账号,加入财务部组#echo 123 | passwd zjl –stdin#echo 123 | passwd jsjl --stdin#echo 123 | passwd jsyg1 --stdin#echo 123 | passwd jsyg2 –stdin#echo 123 | passwd cwjl --stdin#echo 123 | passwd cwyg1 --stdin#echo 123 | passwd cwyg2 –stdin我把这7个用户的密码都设置为1233.设置目录属主、属组和权限#chown zjl /ftpdata/pub总经理对这个目录有写权限(只有总经理可以在这个目录创建新目录)#chown jsjl:jsb /ftpdata/pub/jsb#chmod 770 /ftpdata/pub/jsb#chmod g+s /ftpdata/pub/jsb把/ftpdata/pub/jsb的属主改为jsjl,属组改为jsb,属主和属组有读写执行权限,其他用户没有权限,所有在这个目录及子目录里创建的文件,属组都为jsb#chown cwjl:cwb /ftpdata/pub/cwb#chmod 770 /ftpdata/pub/cwb#chmod g+s /ftpdata/pub/cwb把/ftpdata/pub/cwb的属主改为cwjl,属组改为cwb,属主和属组有读写执行权限,其他用户没有权限,所有在这个目录创建的文件,属组都为cwb四、修改proftpd配置文件,并启动服务#vi /usr/local/proftpd/etc/proftpd.conf把“#DefaultRoot ~”改为“DefaultRoot /ftpdata/pub”,即打开注释,并把登录位置改为/ftpdata/pub把“Umask 022”改为“Umask 007”,即上传的文件,属主和属组有全部权限,其他用户没有权限添加如下配置<Directory /ftpdata/pub/jsb><Limit DELE>AllowUser jsjlAllowUser zjlDenyALL</Limit></Directory><Directory /ftpdata/pub/cwb><Limit DELE>AllowUser cwjlAllowUser zjlDenyAll</Limit></Directory>注释了从<Anonymous ~ftp> 至</Anonymous>所有行,意思是禁止匿名用户登录。
proftpd配置

proftpd配置(通过mysql认证)1.安装proftpd,cd /usr/local/ftp/proftpd && make config(确定mysql被选中) && make install clean2.修改配置文件,ee /usr/local/etc/proftpd.conf 修改之后的代码如下:ServerName "linefuture ftp server"ServerType standaloneDefaultServer onScoreboardFile /var/run/proftpd.scoreboardPort 21Umask 022MaxInstances 150User nobodyGroup nogroupAllowRetrieveRestart onAllowStoreRestart onDefaultRoot ~AllowOverwrite onSQLAuthTypes BackendSQLAuthenticate users* groups*SQLConnectInfo proftpd@localhost root 8050233SQLUserInfo ftpuser userid passwd uid gid homedir shellSQLGroupInfo ftpgroup groupname gid membersRequireValidShell offSQLHomedirOnDemand on3.创建数据库,sql如下:CREATE TABLE `ftpgroup` (`groupname` varchar(16) NOT NULL default '',`gid` smallint(6) NOT NULL default '2621',`members` varchar(16) NOT NULL default '',KEY `groupname` (`groupname`)) ENGINE=MyISAM DEFAULT CHARSET=utf8 COMMENT='ProFTP group table';INSERT INTO `ftpgroup` VALUES ('ftp', 5500, 'ftp');(在/etc/master.passwd里可以查看ftpuser的groupid,我的是5500,下面的uid是2002)CREATE TABLE `ftpuser` (`id` int(10) unsigned NOT NULL auto_increment,`userid` varchar(32) NOT NULL default '',`passwd` varchar(41) NOT NULL,`uid` smallint(6) NOT NULL default '2002',`gid` smallint(6) NOT NULL default '5500',`homedir` varchar(255) NOT NULL default '',`shell` varchar(16) NOT NULL default '/sbin/nologin',PRIMARY KEY (`id`)) ENGINE=MyISAM DEFAULT CHARSET=utf8 COMMENT='ProFTP user table' AUTO_INCREMENT=9 ;INSERT INTO `ftpuser` VALUES (1, 'ftp', PASSWORD('passwd'), 2002, 5500, '/home/ftpuser', '/sbin/nologin');。
proftpd完全手册

手工安装Proftpd提供了多种安装格式,包括源代码方式、RPM方式、deb方式(debian软件包)等。
本文主要讨论源代码方式的安装1取得 proftpd是其公司网站上有大量资料,到ftp:///pub/proftpd/或ftp:///可以下载最新的*.tar.gz2安装 proftpd2.1解开文件#tar zxvf proftpd-1.2.0rc3.tar.gz#cd proftpd-1.2.0rc32.2设定安装到/www/protpd目录中#./configure--prefix=/www/proftpd --enable-shadow#make#make install3设定3.1几个文件的功能及路径/www/proftpd/sbin/proftpd执行程序/www/proftpd/etc/proftpd.conf设置文件/www/proftpd/var/proftpd.pid proftpd做为一个服务的ID号3.2设定proftpd.conf文件,起动服务3.2.1做为一个服务起动在默认的"/www/proftpd/etc/proftpd.conf/"文件中有一行文字"ServerType standalone",指定"/www/proftpd/sbin/proftpd"以一个服务的方式来工作,可以放"/www/proftpd/sbin/proftpd"到"/etc/rc.d/rc.local"文件中,以便开机起动.3.2.2放到inetd.conf中起动也可以改变"ServerType standalone"为"ServerType inetd",并修改"/etc/inetd.conf"中的ftp stream tcp nowait root/usr/sbin/in.ftpd in.ftpd改变为ftp stream tcp nowait root /www/proftpd/sbin/proftpd proftpd当然也可以改为ftp stream tcp nowait root/usr/sbin/tcpd /www/proftpd/sbin/proftpd注意做为服务器设定可以直接执行 /www/proftpd/sbin/proftpd起动服务如果放在 inetd.conf文件中,就是修改完后 killall-HUP inetd3.3proftpd.con的一个简单设定及说明(proftpd文件解压后,/doc目录内有proftpd.conf的说明)#服务器的名称ServerName"ProFTPD Default Installation"#服务器的服务方法(系统服务/inetd连接)ServerType standalone/inetdServerType standalone#默认服务DefaultServer on#服务器使用的port号码Port 21#proftpd在做为服务时的用户名和组名User nobodyGroup ftp#根目录设定,可以用/home也可用~,可以使用户不能向上到根目录下DefaultRoot~#目录的权力〈Directory/*>AllowOverwrite on〈/Directory>#其本anonymous用户定义〈Anonymous~ftp>User ftpGroup ftpUserAlias anonymous ftpMaxClients10DisplayLogin welcome.msgDisplayFirstChdir.message#注意最好加上以下这一行RequireValidShell no#设定为只读〈Limit WRITE>DenyAll〈/Limit>〈/Anonymous>如果你熟悉 Apache 的 httpd.conf 的配置的话, proftpd.conf 的配置十分简单。
linux 下一些配置说明

一、proftp开启与配置默认安装redflag 4.1 DC Server后,则自动安装了ProFTPD服务器程序。
只需开启其服务即可。
1. 第一种方法:命令行开启开启proftpd[root@/root]# service proftpd start,第二种方法:在控制面板→服务→proftpd右键点击开启。
开启后按默认proftpd设置,其中,只有upload文件夹内可上传文件。
2. 手工配置方法,配置文件/etc/proftpd.conf ,可vi 编辑此文件,具体内容含义见《附录》。
3.可安装第三张盘中ftp服务器管理工具,在图形界面管理。
二、开启telnet服务1. telnet 就是挂在xinetd底下的一支服务而已,开启telnet使用 vi 修改 /etc/xinetd.d/telnet 这个档案,只要将 disable (取消的意思) 变成no ,也就是不取消,亦即是开启啦。
2. 设定完开启之后,自然就是要激活,在命令行输入 [root@/root]service xinetd reload,或在控制面板→服务→xinetd右键击重启3. root不能直接以 telnet 连接上主机问题, telnet 只是利用 PAM 模块来管制 root 的登入而已,因此,如果你确定你的环境够安全(例如你的主机并没有连上 Internet ),并且想要开放 root 以 telnet 登入 Linux 主机的话,请修改vi /etc/pam.d/login 这个文件的第二行注释即可:auth required /lib/security/pam_securetty.so ←将这一行加上#注解掉4. telnet登录数:修改vi /etc/xinetd.conf 中intances 参数,其中默认为60。
附录:1. proftpd的基本配置吧,其实大家如果熟悉apache的配置的话,你会发现proftpd的设置基本都是类似的,它的配置基本格式是#全局设置设置项目1 参数1设置项目2 参数2#某个目录的设置<Directory "路径名">......</Directory>#关于匿名用户的设置<Anonymous "匿名登陆的目录">......<Limit 限制动作>......</Limit></Anonymous>我们用到的比较多的可能是Limit的使用,Limit大致有以下动作,基本能覆盖全部的权限了,大家灵活使用就是了。
- 1、下载文档前请自行甄别文档内容的完整性,平台不提供额外的编辑、内容补充、找答案等附加服务。
- 2、"仅部分预览"的文档,不可在线预览部分如存在完整性等问题,可反馈申请退款(可完整预览的文档不适用该条件!)。
- 3、如文档侵犯您的权益,请联系客服反馈,我们会尽快为您处理(人工客服工作时间:9:00-18:30)。
/usr/local/bin/mysql_install_db
chgrp -R mysql /usr/local/var/
chown -R mysql /usr/local/var/
The next command we'll issue will start up the database server so it'll be ready for your every command (well atleast SQL-statements, if not mow your lawn or clean your room - too bad - someone should issue a bugfix for this.). The default superuser is in MySQL as in most of the *nix'es called root, and MySQL the default root-password is blank - we can't do that now can we and that's why we run the second command (substitute "<database_password>" for a password of your own choice - just remember it when you see me refer to it at a later time).
Drop out to console or open up a terminal, and the locate the directory you downloaded the source-code to (you know! - that tarball thingamajiggy). Other than that just do as I tell you:
>>Installing MySQL
This section is dedicated to installing the MySQL-server on your system - installing it is well documented elsewhere and there are a few ways of doing it depending on the operating system/distribution you are using at this moment. I have documented here a generic description for installing the server, and you can skip to that section by clicking one of the links below.
tar xfvz mysql-4.0.20.tar.gz
cd mysql-4.0.20
./configure
make
The code should now be compiling, and don't worry about not catching the meaning of the text that whirles by on your screen (simply worry about it suddenly stopping complaining about some or other error - it is rare however since the MySQL-developers really seem to know their stuff). Now would also be the perfect time to get some coffee (if you're using a really slow computer, >500Mhz, consider takeout as well). When you get back, and if it all seems to have finished without errors - switch to root (give the command "su" and type in your root-password).
They install the database server and set up the system so that the database can read from and write to its files (note to yourself: databases are located in "/usr/local/var" and it is this directory you'll make backups of when the time comes - if ever). If you're simply updating your previous self-compiled MySQL-server you should skip thos last two commands.
mysqladmin -u root password <database_password>
>>Installing MySQL from source
The first part of the installation is simply the installation of the MySQL- database server. To make sure that we have available the libraries we need in order to compile proFTPd with MySQL-support we also compile MySQL from source as well (Not even sure there are binaries of proFTPd available with SQL-support already built in - being a Slackware user I hardly care anyway).
>>Installing MySQL from source
>>Installing MySQL on FreeBSD using ports
>>Installing MySQL on Mandrake
>>Installing MySQL on Debian
After you've finished installing MySQL and started the server it's very important that you change the super-user's default password in order to maintain your servers integrity. The default superuser is in MySQL as in most of the *nix'es called root, and MySQL the default root-password is blank - we can't have that, now can we? ,- and that's why you should execute the following command (substitute "<database_password>" for a password of your own choice - just remember it when you need it at a later time).
The first thing you need to do is actually fetching the source-code from MySQL's homepage (which can be found at "/downloads/"). Don't get intimidated by the sheer ammount of different files and versions available for downloads - what you're looking is the stable production release (at the time of writing that version number is 4.0). Just click that and go on to the next page. Scroll down to the bottom of this page and you'll come to the section named "Source Downloads" and fetch the Tarball from a mirror close to your location (store this file at a location you know how to find via console and have write access to - "~" is usually my choice). With that done we'll be getting to the meatier stuff in few moments, but now we'll pause for commercials (just kidding) - I hate commercials.