GNS3模拟Juniper精编版
GNS3模拟器Dynamips使用说明书讲解

GNS3教程Version 0.5:目录译序 (3)GNS3 图形化网络模拟器 (4)Windows用户的GNS3 Quick Start Guide (6)Step 1:下载GNS3 (6)Step 2:安装GNS3 (7)Step 3:配置IOS (8)创建简单的网络拓扑 (9)GNS3 的主界面 (13)创建复杂的网络拓扑 (14)在网路拓扑中添加PC (17)使用PuTTY或TeraTerm等终端程序 (23)使用软件WinTabber来组织多个Telnent窗口 (24)内存和利用率问题 (25)IOS映像文件的解压缩 (27)Frame Relay、ATM、Ethernet交换设备 (27)分组捕获 (28)保存和load网络拓扑 (29)Client/Server和Multi-Server模式 (30)Console工作区和Dynagen命令 (30)PIX防火墙仿真 (30)GNS3 的图标管理 (30)相关资源 (31)Dynamips 作为一款十分优秀的 Cisco 路由器模拟软件,实验模拟效果远比Boson NetSim 更加真实可信。
Boson NetSim 是对IOS 命令行的模拟,而Dynamips是通过在计算机中构建运行IOS 的虚拟机来真正运行IOS 实现对Cisco 路由器的模拟。
Gynagen 是一种基本文本的Dynamips 前端系统,初学者使用Dynamips 时总是感觉存在一定程度的不便和困难。
当前,如果对Dynamips 非常熟悉,无须任何前端系统就可以很好地进行相关网络模拟。
就像一个用户可以在命令行中实现在图形界面中完成的所有任务一样。
GNS3 的推出在一定程度上解决了Dynamips 不如Boson NetSim 易用的问题,受到了Dynamips 初学者的欢迎。
Dynamips 的图形化前端系统除了GNS3 外,还有GynamipsGUI。
但GNS3 除了像GynamipsGUI 能够可视化地设计实验网络拓扑外,还可以直接利用GNS3 完成相关的模拟实验。
Juniper模拟器使用入门

VSRX
Scale vRAM Required/Instance
VMware & KVM 2GB
Performance1 Firewall (UDP 1514B puts)
vCPUs Required/Instance
2
Firewall (IMIX)
Max vNICs/Instance
10
Firewall Ramp Rate (TCP)
Max Zones
128
Firewall Latency (512B UDP)
Max Address Books
128
Firewall IPv6 (UDP 512B pkts)
Max Policies
10240
NAT (UDP 1514B pkts)
Max Policies with Count
128
DSCP-V6
• Classification & Basic rewrite functionality for inet-
precedence
• MF/BA classifiers • Policers (2 color) • EXP rewrite
VSRX
Full Stateful Firewall SRX 运行在VM里面:支持VMware, KVM and Contrail and integrated automated management functionality HA 支持 active/active and active/passive modes,;
虚拟MX
vPFE
ASIC 转发芯片
TRIO
x86
PLAT Forwarding Engine) – 包转发引擎(主要由包转发芯 片组成) TRIO – Juniper自研包转发芯片
鸿鹄论坛_GNS3模拟 Linux Microcore,PIX,Juniper,ASA,IPS
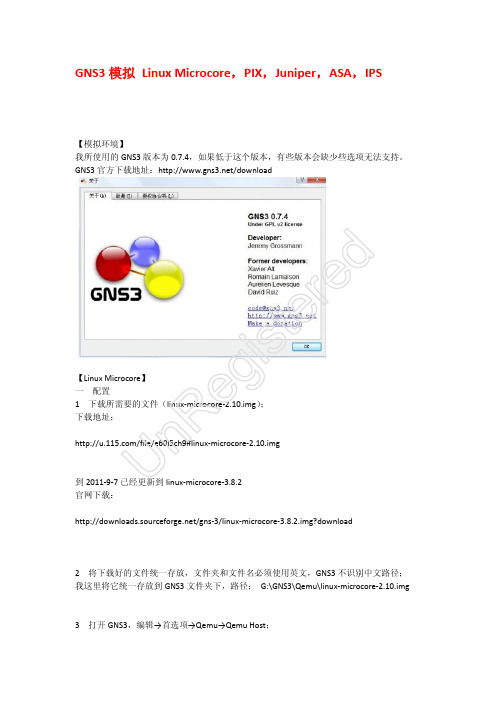
GNS3模拟 Linux Microcore ,PIX ,Juniper ,ASA ,IPS【模拟环境】我所使用的GNS3版本为0.7.4,如果低于这个版本,有些版本会缺少些选项无法支持。
GNS3官方下载地址:/download【Linux Microcore 】 一、配置1、下载所需要的文件(linux-microcore-2.10.img ); 下载地址:/file/e60l5ch9#linux-microcore-2.10.img到2011-9-7已经更新到linux-microcore-3.8.2 官网下载:/gns-3/linux-microcore-3.8.2.img?download2、将下载好的文件统一存放,文件夹和文件名必须使用英文,GNS3不识别中文路径; 我这里将它统一存放到GNS3文件夹下,路径: G:\GNS3\Qemu\linux-microcore-2.10.img3、打开GNS3,编辑→首选项→Qemu→Qemu Host ;Un Re gi st er ed按以下内容输入:Identifier name :Linux-MicroCore-2.10(自己填写名称,但不能是中文)Binary image :G:\GNS3\Qemu\linux-microcore-2.10.img (image 路径,就是第2步的路径) RAM :128(内存,默认是128)Number of NICs :6(网卡数量,默认是6) NIC model :e1000(网卡类型,默认是e1000) Qemu Options :-no-acpi (手动输入,默认为空)这个版本显示Qemu 窗口,不能telnet ,目前linux-microcore-3.8.2.img 可以telnet 了。
需要的可以去gns3官网下载;高级用户:root 高级密码:root 普通用户:tc切换用户命令: su root/tclinux-microcore-3.8.2版本设置: Identifier name :linux-microcore-3.8.2Binary image :G:\GNS3\Qemu\linux-microcore-3.8.2.img RAM :128(内存,默认是128) Number of NICs :6 NIC model :e1000Qemu Options :-no-acpi console=ttyS0,38400n8 -vnc :1(可telnet 登陆,去掉-vnc :1后,运行时显示Qemu 控制台)Qemu 窗口为Linux 的控制台,默认是登陆的是普通模式 控制台修改用户密码:sudopasswd root //修改root 用户密码 su root //切换用户为roottelnet 密码修改先用tc 登陆,再修改root 密码用户密码:tc 高级用户:root高级用户密码:root(官网发布的密码,但一直提示不正确)输入完后,点击保存,下面列表中会出现,然后点Apply (应用)/OK (确定),这样Linux Microcore 2.10就配置完成。
juniper安全网关系统配置模版

系统升级
升级完成
系统时间设置
• 进入SSG系统后首先同步防火墙时间
点击
系统时间设置
• 点击Sync Clock With Client > Yes
注意查看虚线上的时间是否准确!!!
DNS基本设置
自定义命名
配置本地电信 DNS地址
管理员密码修改
管理员密码修改
缺省帐号:netscreen 缺省密码:netscreen
安全网关设备初始化
选择第三行
安全网关设备初始化
登陆界面
帐号:netscreen 密码:netscreen
系统升级
升级Screen OS 菜单
选择Scrห้องสมุดไป่ตู้en OS
搜索本地 Screen OS文件
系统升级
点击确定. 此过程需要等候 几分钟;在此过程内不做任 何操作,直到WebUI弹出重
新登陆界面
Juniper STSiGt安l e全o网f 关Pr系es统e配nt置at模i 版on
Name
调试安全网关前准备
Juniper防火墙常用管理方式: • 通过Web浏览器方式管理。推荐使用IE浏览器进行登录管理,需要知道防火墙对
应端口的管理I P 地址; • 命令行方式。支持通过Console端口超级终端连接和Telnet防火墙管理I P 地址连
接两种命令行登录管理模式。
• 配置步骤: 1,先更改控制终端IP地址为192.168.1.X / 24 (X=192.168.1.1/24除外的地址). 2,打开Web浏览器,输入: 3,跳跃过初始化防火墙步骤. 选择第三行,点击next. 4,缺省登陆帐号: netscreen 密码:netscreen.
GNS3模拟Juniper

ONT v1.0—9
Juniper的基本操作
root# cli root@> cli> configure root@# set system host-name Juniper 配置路由器的名字为router1 root@# set interfaces em0 unit 0 family inet address 192.168.1.3/24 root@# set system root-authentication plain-text-password #设置明文密码 New password: Retype password: #输入并且确认密码,要求字母和数字。 root@# commit 应用指令
GNS3模拟Juniper
GNS3 Simulation Juniper
讲者:张洋
学前必读:GNS3的基本操作
1 GNS3对路由器和交换机的模拟
2 GNS3与虚拟机的桥接
主题:GNS3模拟Juniper
GNS3模拟Juniper的操作
GNS3与虚拟机的桥接
Juniper的组网
在GNS3上加载Juniper的系统文件
ONT v1.0—7
在GNS3上加载Juniper的系统文件
5、Juniper的启动界面
© 2006 Cisco Systems, Inc. All rights reserved.
ONT v1Βιβλιοθήκη 0—8在GNS3上加载Juniper的系统文件
6、Juniper的操作界面
© 2006 Cisco Systems, Inc. All rights reserved.
ONT v1.0—12
ONT v1.0—5
在GNS3上加载Juniper的系统文件
juniper防火墙测试模版

NETSCREEN设备测试报告单节点测试在每一个节点完成设备安装之后,集成公司的现场工程师将和用户下属机构的技术人员一起进行该节点的测试验收和割接工作。
这样,用户下属机构的工程技术人员可以接手该节点的工作,并且可以迅速将该节点并入整个数据通信运行之中。
·单节点测试验收在完成设备安装之后,集成公司将为用户提供一整套设备测试程序。
该测试程序不但用于设备验收测试,而且做为系统初验的附属工程技术文件。
·单节点割接进行系统割接的技术重点是为了保证在割接时不会影响到已经使用的通讯网路系统的正常运行、以及不会对原数据网络带宽产生虚占用。
集成公司的现场工程师将会对可能发生的技术问题予以充分考虑和技术准备,并会及时解决在单节点割接时可能会发生的技术问题。
一旦该节点成功地并入整个网络系统工程之中,该节点将被认为完成的节点初验。
一旦整个合同中的所有节点完成割接,整个系统工程将开始系统初验,而后整个系统进入系统的试运行阶段。
单节点测试验收清单式样单节点测试验收清单合同号:__________________________系统设备安装地:,系统设备型号:。
产品序列号:遗留问题说明:用户代表签字:供应商代表签字:时间:时间:系统测试系统设备测试1. 电源:检查NetScreen设备的电源是否能正常工作。
具有两个电源模块的设备,正常时分担负载,当有某个电源模块损坏时,仍可正常工作。
2. 端口状态指示:每个功能模块端口均有状态指示灯,分别显示有正常接入及数据输入输出。
分别对各端口连接设备,可通过状态指示观察是否工作正常。
3. 在线配置:NetScreen的每个网络设备都有Console口,用户可通过Console口以终端的方式访问该设备。
可通过控制端口在工作状态下,实时配置各种参数并观察端口状态。
同时,可以支持远程基于浏览器方式下的图形化管理工作。
系统设备功能测试系统基本配置最终用户:测试产品型号:测试产品序列号:产品部署地点:测试平台:PC机从NetScreen设备console口接入或工作站远程登录用户代表签字:供应商代表签字:时间:时间:系统地址翻译功能NPAT最终用户:测试产品型号:测试产品序列号:产品部署地点:用户代表签字:供应商代表签字:时间:时间:系统地址翻译功能MAP IP最终用户:测试产品型号:测试产品序列号:产品部署地点:用户代表签字:供应商代表签字:时间:时间:系统过滤策略功能( Firewall)最终用户:测试产品型号:测试产品序列号:产品部署地点:用户代表签字:供应商代表签字:时间:时间:系统路由功能( Routing)最终用户:测试产品型号:测试产品序列号:产品部署地点:用户代表签字:供应商代表签字:时间:时间:双机HA备份测试测试对象:NetScreen设备测试目的:测试NetScreen设备双机热备份功能,防止单点失效。
gns3的使用GNS3教程版本(原创)by逐渐变黑

GNS3介绍GNS3是一款优秀的具有图形化界面可以运行在多平台(包括Windows, Linu x, and MacOS等)的网络虚拟软件。
Cisco网络设备管理员或是想要通过CCNA,C CNP,CCIE等Cisco认证考试的相关人士可以通过它来完成相关的实验模拟操作。
同时它也可以用于虚拟体验Cisco网际操作系统IOS或者是检验将要在真实的路由器上部署实施的相关配置。
简单说来它是dynamips的一个图形前端,相比直接使用dynamips这样的虚拟软件要更容易上手和更具有可操作性。
安装和设置!GNS3我们可以在他的官方网站上下载()。
本教程是用官方最新的版本(GNS3-0.7RC1-win32-all-in-one)下面我们开始安装GNS3。
安装这个软件很简单我们只要点Next就可以了他的插件都是选择上的我们不要改变因为都要用到。
如果你以前WinPCAP那么这里我想说的就是安装的时候会跳出卸载之前的版本的提示,我们按提示做就可以!我们看下GNS3的安装界面。
如图(1-1):(图1-1)经上面的步骤我们装好GNS3。
这个时候GNS3只是装好根本不能用的!我们要对他进行设置。
我们打开GNS3。
我特别要介绍的就是这第一次打开GNS3跳出来的样子。
如图(1-2):图中的1说的是设置下。
2说的是加载下IOS系统!第一:我们先一步一步来做先来设置GNS3其实对GNS3的设置很简单!我们只要2步就可以用起GNS3呢。
由于GNS3是英文的,但是他本身提供简单中文转变我们按下Ctrl+Shift+P 就可以呼出如图(1-3):图1-3我们可以在图1-3上设置我们要的语言了。
设置如图(1-4)图1-4选择要的语言点ok就可以了。
下面我们在做一步很重要的设置我们在图(1-3)的基础上点Dynamips如图(1-5):图1-5别的设置我们全部默认就可以了。
第二:现在我们来加载IOS系统。
快捷键是Ctrl+Shift+I 当我们按下快捷就可以见到图(1-6)图1-6图(1-7)是我加好的IOS的样子。
(完整版)juniper策略路由做法

(完整版)juniper策略路由做法Juniper策略路由做法环境:网关在交换机上,接口连接服务器,接口配置为2层接口。
要求特定的地址发出的包走特定的链路。
实现方法有两个,juniper技术工程师张强给的方案是在2层上做转发,小波哥的方案是把三层转发应用到vlan下。
张强:set interfaces xe-0/1/3 unit 0 family inet address 117.143.111.254/30 出口地址set interfaces vlan unit 3508 family inet address 115.239.254.49/28 PBL vlan地址set interfaces ge-0/0/5 unit 0 family ethernet-switching port-mode trunkset interfaces ge-0/0/5 unit 0 family ethernet-switching vlan members 2set interfaces ge-0/0/5 unit 0 family ethernet-switching vlan members 3508 下联接口配置set firewall family ethernet-switching filter fil term 1 from source-address 115.239.254.48/28 创建2层数据流匹配set firewall family ethernet-switching filter fil term 1 then interface xe-0/1/3.0 创建2层数据流动作set interfaces ge-0/0/1 unit 0 family ethernet-switching filter input 策略应用到接口这个方案在接口入方向匹配数据包,直接从接口扔出去。
gns3的配置

第3章GNS3用法3.2 GNS3安装登录/download网站,下载最新版的GNS3软件,注意,目前最新版的GNS3软件是version 0.8.2。
安装不住如下。
1、选择GNS3安装程序(如下图),双击图标,启动安装过程。
2、在出现的界面上选择“next”(如下图)。
3、在许可证协议界面选择“I Agree”(如下图)。
4、接下来设置开始菜单文件夹名,默认名字为GNS3,不做修改,并选择“Next”。
5、在出现“组件选择”窗口,选择所有组件,并点击“Next”。
6、接下来选择程序的安装目标,不做修改,选择“Install”,开始安装程序。
7、在安装过程中,如果计算机已经安装了Winpcap程序和WireShark程序,可以选择不安装,也可以选择重新安装。
安装进度如下图。
8、随着安装进度条的进行,程序安装完成,出现如下界面,点击“Finish”完成安装。
启动GNS3,显示界面如下。
下面对GNS3的界面做一个简要介绍。
1、菜单栏菜单栏中有文件(File)、编辑(Edit)、视图(View)、控制(Control)、设备(Device)、标注(Annotate)和帮助(Help)菜单。
如下图。
(1)文件菜单包括新建拓扑(New blank Topology)、打开(Open)、保存(Save)、新建项目(New blank Project)、保存项目(Save Projectt as)等菜单项。
(2)编辑菜单包括撤销(undo)与恢复(redo)、选择所有设备(Select all)等菜单项以及软件环境配置菜单如参数配置(preferences)和IOS配置(IOS Images and Hypervisors)。
(4)视图菜单包括设备图标的放大(zoom in)、缩小(zoom out)菜单项、设备名称隐藏(Hide Hostname)和显示接口标签(Show Interface labels)等开关菜单项工具栏的显示、隐藏开关等菜单项。
模拟器之GNS3完全安装及使用教学教程(关联Wireshark,xShell和VM)收藏一篇就够
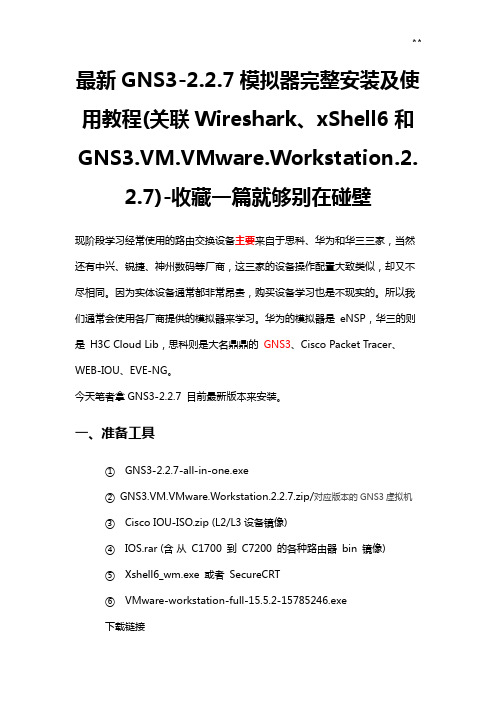
最新GNS3-2.2.7模拟器完整安装及使用教程(关联Wireshark、xShell6和GNS3.VM.VMware.Workstation.2.2.7)-收藏一篇就够别在碰壁现阶段学习经常使用的路由交换设备主要来自于思科、华为和华三三家,当然还有中兴、锐捷、神州数码等厂商,这三家的设备操作配置大致类似,却又不尽相同。
因为实体设备通常都非常昂贵,购买设备学习也是不现实的。
所以我们通常会使用各厂商提供的模拟器来学习。
华为的模拟器是eNSP,华三的则是H3C Cloud Lib,思科则是大名鼎鼎的GNS3、Cisco Packet Tracer、WEB-IOU、EVE-NG。
今天笔者拿GNS3-2.2.7 目前最新版本来安装。
一、准备工具①GNS3-2.2.7-all-in-one.exe②GNS3.VM.VMware.Workstation.2.2.7.zip/对应版本的GNS3虚拟机③Cisco IOU-ISO.zip (L2/L3设备镜像)④IOS.rar (含从C1700 到C7200 的各种路由器bin 镜像)⑤Xshell6_wm.exe 或者SecureCRT⑥VMware-workstation-full-15.5.2-15785246.exe下载链接VMware-workstation-full-15.5.2-15785246链接:https:///s/1k3UKDc6NRbl8DtgCNxG4AA提取码:bolqGNS3链接:https:///s/1NDxi-l5i4YtP6nzzmpGebg提取码:te21二、GNS3软件介绍GNS3是一款具有图形化界面可以运行在多平台(包括Windows, Linux, and MacOS等)试的相关人士可以通过它来完成相关的实验模拟操作。
同时它也可以用于虚拟体验Cisco网三、软件安装3.1 安装GNS3-2.2.7-all-in-one.exe双击GNS3-2.2.7-all-in-one.exe(需要连网,安装需要依赖的组件,当然知道怎么安装组件的也可以不用连网)安装包含Wireshark点击I Agree点击Next选择Custom,注意Tools的选择注意:Tools:选择安装的位置安装过程中会弹出依赖的组件,点击Next点击I Agree点击Next点击Finish其他组件安装步骤一样输入邮箱点击Next选择No,下一步。
GNS3模拟一个中小型企业网络(有详细配置)

GNS3使用的是dinamips,没有交换机的IOS,本实验中,模拟二、三层交换机都是使用C3640+NM-16ESW模块。
注意:1、如果只是模拟二层交换机,一定要记住SW1(config)#no ip routing //关闭路由功能2、无法设置IP问题端口设置IP出现这个错误% IP addresses may not be configured on L2 links.需要从二层交换端口切换到三层交换端口SW2(config-if)#no switchport这里设置IP主要是连接路由器,但我遇到过用这个命令居然会提示命令不完整SW2(config-if)#no switchport% Incomplete command.我测试后,原来是我用的IOS版本低了,换成124版本的就没有这个问题了。
用到的IOS下载地址:c3640-ik9o3s-mz.124-13b 点击下载c7200-jk9o3s-mz.124-17 点击下载网络拓扑:设计的总公司还有两个出口:电信(R_Tele)和联通(R_Uni),一个驻外办事处(R_Part)。
电信(R_Tele),提供外网连接,实现nat转换和流量控制联通(R_Uni)实现与驻外办事处(R_Part)VPN连接。
汇聚层(L3Switch)实现DHCP。
详细配置:核心交换机Core_A:version 12.4service timestamps debug datetime msec service timestamps log datetime msec no service password-encryption!hostname Core_A!boot-start-markerboot-end-marker!!no aaa new-modelmemory-size iomem 5!!ip cefno ip domain lookupip domain name lab.localinterface Loopback0ip address 5.5.5.5 255.255.255.0!interface Port-channel1!interface FastEthernet0/0no switchportip address 172.16.59.1 255.255.255.0 !interface FastEthernet0/1no switchportip address 172.16.55.2 255.255.255.0 !interface FastEthernet0/2no switchportip address 172.16.58.2 255.255.255.0 !interface FastEthernet0/3no switchportip address 172.16.61.1 255.255.255.0 !interface FastEthernet0/4no switchportip address 172.16.63.1 255.255.255.0 !interface FastEthernet0/5no switchportip address 172.16.53.2 255.255.255.0 !interface FastEthernet0/6!interface FastEthernet0/7!interface FastEthernet0/8!interface FastEthernet0/9!interface FastEthernet0/10!interface FastEthernet0/11!interface FastEthernet0/12!interface FastEthernet0/13!interface FastEthernet0/14!interface FastEthernet0/15!interface Vlan1no ip addressshutdown!interface Vlan101ip address 172.16.200.1 255.255.255.0 !router ospf 100log-adjacency-changesnetwork 172.16.53.0 0.0.0.255 area 0 network 172.16.55.0 0.0.0.255 area 0 network 172.16.58.0 0.0.0.255 area 0 network 172.16.59.0 0.0.0.255 area 0 network 172.16.61.0 0.0.0.255 area 0 network 172.16.63.0 0.0.0.255 area 0 network 172.16.200.0 0.0.0.255 area 0 !no ip http serverno ip http secure-server!ip route 0.0.0.0 0.0.0.0 172.16.61.2ip route 0.0.0.0 0.0.0.0 172.16.63.2 115 !!control-plane!!line con 0exec-timeout 0 0privilege level 15logging synchronousline aux 0exec-timeout 0 0privilege level 15logging synchronousline vty 0 4login!!end核心交换机Core_B:version 12.4service timestamps debug datetime msec service timestamps log datetime msec no service password-encryption!hostname Core_B!boot-start-markerboot-end-marker!!no aaa new-modelmemory-size iomem 5!!ip cefno ip domain lookupip domain name lab.local!!!interface Loopback0ip address 4.4.4.4 255.255.255.0!interface FastEthernet0/0no switchportip address 172.16.59.2 255.255.255.0 !interface FastEthernet0/1no switchportip address 172.16.56.2 255.255.255.0 !interface FastEthernet0/2no switchportip address 172.16.57.2 255.255.255.0 !interface FastEthernet0/3no switchportip address 172.16.60.1 255.255.255.0 !interface FastEthernet0/4no switchportip address 172.16.64.1 255.255.255.0 !interface FastEthernet0/5no switchportip address 172.16.54.2 255.255.255.0 !interface FastEthernet0/6!interface FastEthernet0/7!interface FastEthernet0/8!interface FastEthernet0/9!interface FastEthernet0/10!interface FastEthernet0/11!interface FastEthernet0/12!interface FastEthernet0/13!interface FastEthernet0/14!interface FastEthernet0/15!interface Vlan1no ip addressshutdown!router ospf 100log-adjacency-changesnetwork 172.16.54.0 0.0.0.255 area 0 network 172.16.56.0 0.0.0.255 area 0 network 172.16.57.0 0.0.0.255 area 0 network 172.16.59.0 0.0.0.255 area 0 network 172.16.60.0 0.0.0.255 area 0 network 172.16.64.0 0.0.0.255 area 0 !router ospf 10log-adjacency-changes!no ip http serverno ip http secure-server!ip route 0.0.0.0 0.0.0.0 172.16.64.2ip route 0.0.0.0 0.0.0.0 172.16.60.2 115 !!control-plane!line con 0exec-timeout 0 0privilege level 15logging synchronousline aux 0exec-timeout 0 0privilege level 15logging synchronousline vty 0 4login!!End汇聚层配置:L3Switch_1:version 12.4service timestamps debug datetime msec service timestamps log datetime msec no service password-encryption!hostname L3Switch_1!boot-start-markerboot-end-marker!!no aaa new-modelmemory-size iomem 5!!ip cefno ip domain lookupip domain name lab.localno ip dhcp use vrf connected!ip dhcp pool DHCP_120network 172.16.12.0 255.255.255.0default-router 172.16.12.1dns-server 172.16.200.11!ip dhcp pool DHCP_160network 172.16.16.0 255.255.255.0default-router 172.16.16.1dns-server 172.16.200.11!!interface Loopback0ip address 1.1.1.1 255.255.255.0!interface FastEthernet0/0shutdown!interface FastEthernet0/1no switchportip address 172.16.55.1 255.255.255.0 !interface FastEthernet0/2no switchportip address 172.16.57.1 255.255.255.0 !interface FastEthernet0/3 switchport mode trunk!interface FastEthernet0/4 switchport mode trunk!interface FastEthernet0/5!interface FastEthernet0/6!interface FastEthernet0/7!interface FastEthernet0/8!interface FastEthernet0/9!interface FastEthernet0/10!interface FastEthernet0/11!interface FastEthernet0/12!interface FastEthernet0/13!interface FastEthernet0/14!interface FastEthernet0/15!interface Vlan1no ip addressshutdown!interface Vlan120ip address 172.16.12.1 255.255.255.0 !interface Vlan160ip address 172.16.16.1 255.255.255.0 !router ospf 100log-adjacency-changesnetwork 172.16.12.0 0.0.0.255 area 0 network 172.16.16.0 0.0.0.255 area 0 network 172.16.55.0 0.0.0.255 area 0 network 172.16.57.0 0.0.0.255 area 0 !no ip http serverno ip http secure-server!ip route 0.0.0.0 0.0.0.0 172.16.61.2!!control-plane!!dial-peer cor custom!line con 0exec-timeout 0 0privilege level 15logging synchronousline aux 0exec-timeout 0 0privilege level 15logging synchronousline vty 0 4login!!endL3Switch_2:version 12.4service timestamps debug datetime msec service timestamps log datetime msec no service password-encryption!hostname L3Switch_2!boot-start-markerboot-end-marker!!no aaa new-modelmemory-size iomem 5!!ip cefno ip domain lookupip domain name lab.localno ip dhcp use vrf connected!ip dhcp pool DHCP_10network 172.16.1.0 255.255.255.0default-router 172.16.1.1dns-server 172.16.200.11!ip dhcp pool DHCP_40network 172.16.4.0 255.255.255.0default-router 172.16.4.1dns-server 172.16.200.11!!interface Loopback0ip address 2.2.2.2 255.255.255.0!interface FastEthernet0/0!interface FastEthernet0/1no switchportip address 172.16.56.1 255.255.255.0 !interface FastEthernet0/2no switchportip address 172.16.58.1 255.255.255.0 !interface FastEthernet0/3 switchport mode trunk!interface FastEthernet0/4 switchport mode trunk!interface FastEthernet0/5!interface FastEthernet0/6!interface FastEthernet0/7!interface FastEthernet0/8!interface FastEthernet0/9!interface FastEthernet0/10!interface FastEthernet0/11!interface FastEthernet0/12!interface FastEthernet0/13!interface FastEthernet0/14!interface FastEthernet0/15!interface Vlan1no ip addressshutdown!interface Vlan10ip address 172.16.1.1 255.255.255.0 !interface Vlan40ip address 172.16.4.1 255.255.255.0!router ospf 100log-adjacency-changesnetwork 172.16.1.0 0.0.0.255 area 0 network 172.16.4.0 0.0.0.255 area 0 network 172.16.56.0 0.0.0.255 area 0 network 172.16.58.0 0.0.0.255 area 0 !no ip http serverno ip http secure-server!ip route 0.0.0.0 0.0.0.0 172.16.60.2!!control-plane!!line con 0exec-timeout 0 0privilege level 15logging synchronousline aux 0exec-timeout 0 0privilege level 15logging synchronousline vty 0 4login!!endL3Switch_3:version 12.4service timestamps debug datetime msec service timestamps log datetime msec no service password-encryption!hostname L3Switch_3!boot-start-markerboot-end-marker!!no aaa new-modelmemory-size iomem 5!!ip cefno ip domain lookupip domain name lab.localno ip dhcp use vrf connected!ip dhcp pool DHCP_80network 172.16.8.0 255.255.255.0default-router 172.16.8.1dns-server 172.16.200.11!ip dhcp pool DHCP_100network 172.16.10.0 255.255.255.0default-router 172.16.10.1dns-server 172.16.200.11!!interface Loopback0ip address 3.3.3.3 255.255.255.0!interface FastEthernet0/0!interface FastEthernet0/1no switchportip address 172.16.53.1 255.255.255.0 !interface FastEthernet0/2no switchportip address 172.16.54.1 255.255.255.0!interface FastEthernet0/3 switchport mode trunk!interface FastEthernet0/4 switchport mode trunk!interface FastEthernet0/5!interface FastEthernet0/6!interface FastEthernet0/7!interface FastEthernet0/8!interface FastEthernet0/9!interface FastEthernet0/10!interface FastEthernet0/11!interface FastEthernet0/12!interface FastEthernet0/13!interface FastEthernet0/14!interface FastEthernet0/15!interface Vlan1no ip addressshutdown!interface Vlan80ip address 172.16.8.1 255.255.255.0 !interface Vlan100ip address 172.16.10.1 255.255.255.0 !router ospf 100log-adjacency-changesnetwork 172.16.8.0 0.0.0.255 area 0 network 172.16.10.0 0.0.0.255 area 0 network 172.16.53.0 0.0.0.255 area 0network 172.16.54.0 0.0.0.255 area 0 !no ip http serverno ip http secure-server!ip route 0.0.0.0 0.0.0.0 172.16.61.2!!control-plane!!line con 0exec-timeout 0 0privilege level 15logging synchronousline aux 0exec-timeout 0 0privilege level 15logging synchronousline vty 0 4login!!end接入层配置:L2Switch_1:version 12.4service timestamps debug datetime msec service timestamps log datetime msec no service password-encryption!hostname L2Switch_1!boot-start-markerboot-end-marker!!no aaa new-modelmemory-size iomem 5no ip routing!!no ip cefno ip domain lookupip domain name lab.local!!!interface FastEthernet0/0switchport mode trunk!interface FastEthernet0/1switchport access vlan 160!interface FastEthernet0/2switchport access vlan 160!interface FastEthernet0/3switchport access vlan 160!interface FastEthernet0/4switchport access vlan 160!interface FastEthernet0/5switchport access vlan 160!interface FastEthernet0/6switchport access vlan 160 !interface FastEthernet0/7 switchport access vlan 160 !interface FastEthernet0/8 switchport access vlan 160 !interface FastEthernet0/9 switchport access vlan 160 !interface FastEthernet0/10 switchport access vlan 160 !interface FastEthernet0/11 switchport access vlan 160 !interface FastEthernet0/12 switchport access vlan 160 !interface FastEthernet0/13 switchport access vlan 160 !interface FastEthernet0/14 switchport access vlan 160 !interface FastEthernet0/15 switchport access vlan 160 !interface Vlan1no ip addressno ip route-cache shutdown!interface Vlan160no ip address!no ip http serverno ip http secure-server!!!!control-plane!!line con 0exec-timeout 0 0 privilege level 15 logging synchronous line aux 0exec-timeout 0 0 privilege level 15 logging synchronous line vty 0 4login!!endL2Switch_2:version 12.4service timestamps debug datetime msec service timestamps log datetime msec no service password-encryption!hostname L2Switch_2!boot-start-markerboot-end-marker!!no aaa new-modelmemory-size iomem 5no ip routing!!no ip cefno ip domain lookupip domain name lab.local!interface FastEthernet0/0switchport mode trunk!interface FastEthernet0/1switchport access vlan 120!interface FastEthernet0/2switchport access vlan 120!interface FastEthernet0/3switchport access vlan 120!interface FastEthernet0/4switchport access vlan 120!interface FastEthernet0/5switchport access vlan 120!interface FastEthernet0/6switchport access vlan 120!interface FastEthernet0/7switchport access vlan 120!interface FastEthernet0/8 switchport access vlan 120 !interface FastEthernet0/9 switchport access vlan 120 !interface FastEthernet0/10 switchport access vlan 120 !interface FastEthernet0/11 switchport access vlan 120 !interface FastEthernet0/12 switchport access vlan 120 !interface FastEthernet0/13 switchport access vlan 120 !interface FastEthernet0/14 switchport access vlan 120 !interface FastEthernet0/15 switchport access vlan 120 !interface Vlan1no ip addressno ip route-cache shutdown!interface Vlan120no ip addressno ip route-cache!no ip http serverno ip http secure-server!!control-plane!line con 0exec-timeout 0 0 privilege level 15 logging synchronousline aux 0exec-timeout 0 0 privilege level 15 logging synchronous line vty 0 4login!!endL2Switch_3:!version 12.4service timestamps debug datetime msec service timestamps log datetime msec no service password-encryption!hostname L2Switch_3!boot-start-markerboot-end-marker!no aaa new-modelmemory-size iomem 5!ip cefno ip domain lookupip domain name lab.local!interface FastEthernet0/0switchport mode trunk!interface FastEthernet0/1switchport access vlan 40!interface FastEthernet0/2switchport access vlan 40!interface FastEthernet0/3switchport access vlan 40!interface FastEthernet0/4switchport access vlan 40!interface FastEthernet0/5switchport access vlan 40!interface FastEthernet0/6switchport access vlan 40!interface FastEthernet0/7switchport access vlan 40!interface FastEthernet0/8switchport access vlan 40 !interface FastEthernet0/9 switchport access vlan 40 !interface FastEthernet0/10 switchport access vlan 40 !interface FastEthernet0/11 switchport access vlan 40 !interface FastEthernet0/12 switchport access vlan 40 !interface FastEthernet0/13 switchport access vlan 40 !interface FastEthernet0/14 switchport access vlan 40 !interface FastEthernet0/15 switchport access vlan 40 !interface Vlan1no ip address!no ip http serverno ip http secure-server!control-plane!line con 0exec-timeout 0 0 privilege level 15 logging synchronous line aux 0exec-timeout 0 0 privilege level 15 logging synchronous line vty 0 4loginendL2Switch_4:version 12.4service timestamps debug datetime msec service timestamps log datetime msec no service password-encryption!hostname L2Switch_4!boot-start-markerboot-end-marker!!no aaa new-modelmemory-size iomem 5!!ip cefno ip domain lookupip domain name lab.local!interface FastEthernet0/0switchport mode trunk!interface FastEthernet0/1switchport access vlan 10!interface FastEthernet0/2switchport access vlan 10!interface FastEthernet0/3switchport access vlan 10!interface FastEthernet0/4switchport access vlan 10!interface FastEthernet0/5switchport access vlan 10!interface FastEthernet0/6switchport access vlan 10!interface FastEthernet0/7switchport access vlan 10!interface FastEthernet0/8 switchport access vlan 10 !interface FastEthernet0/9 switchport access vlan 10 !interface FastEthernet0/10 switchport access vlan 10 !interface FastEthernet0/11 switchport access vlan 10 !interface FastEthernet0/12 switchport access vlan 10 !interface FastEthernet0/13 switchport access vlan 10 !interface FastEthernet0/14 switchport access vlan 10 !interface FastEthernet0/15 switchport access vlan 10 !interface Vlan1no ip address!no ip http serverno ip http secure-server!control-plane!line con 0exec-timeout 0 0 privilege level 15 logging synchronous line aux 0exec-timeout 0 0 privilege level 15 logging synchronous line vty 0 4loginendL2Switch_5:version 12.4service timestamps debug datetime msec service timestamps log datetime msec no service password-encryption!hostname L2Switch_5!boot-start-markerboot-end-marker!no aaa new-modelmemory-size iomem 5no ip routing!no ip cefno ip domain lookupip domain name lab.local!interface FastEthernet0/0switchport mode trunk!interface FastEthernet0/1switchport access vlan 80!interface FastEthernet0/2switchport access vlan 80!interface FastEthernet0/3switchport access vlan 80!interface FastEthernet0/4switchport access vlan 80!interface FastEthernet0/5switchport access vlan 80!interface FastEthernet0/6switchport access vlan 80!interface FastEthernet0/7switchport access vlan 80!interface FastEthernet0/8 switchport access vlan 80 !interface FastEthernet0/9 switchport access vlan 80 !interface FastEthernet0/10 switchport access vlan 80 !interface FastEthernet0/11 switchport access vlan 80 !interface FastEthernet0/12 switchport access vlan 80 !interface FastEthernet0/13 switchport access vlan 80 !interface FastEthernet0/14 switchport access vlan 80 !interface FastEthernet0/15 switchport access vlan 80 !interface Vlan1no ip addressno ip route-cache!no ip http serverno ip http secure-server!control-plane!line con 0exec-timeout 0 0 privilege level 15 logging synchronous line aux 0exec-timeout 0 0 privilege level 15 logging synchronous line vty 0 4loginEndL2Switch_6:version 12.4service timestamps debug datetime msec service timestamps log datetime msec no service password-encryption!hostname L2Switch_6!boot-start-markerboot-end-marker!no aaa new-modelmemory-size iomem 5no ip routing!no ip cefno ip domain lookupip domain name lab.local!interface FastEthernet0/0switchport mode trunk!interface FastEthernet0/1switchport access vlan 100!interface FastEthernet0/2switchport access vlan 100!interface FastEthernet0/3switchport access vlan 100!interface FastEthernet0/4switchport access vlan 100!interface FastEthernet0/5switchport access vlan 100!interface FastEthernet0/6switchport access vlan 100!interface FastEthernet0/7switchport access vlan 100!interface FastEthernet0/8switchport access vlan 100 !interface FastEthernet0/9 switchport access vlan 100 !interface FastEthernet0/10 switchport access vlan 100 !interface FastEthernet0/11 switchport access vlan 100 !interface FastEthernet0/12 switchport access vlan 100 !interface FastEthernet0/13 switchport access vlan 100 !interface FastEthernet0/14 switchport access vlan 100 !interface FastEthernet0/15 switchport access vlan 100 !interface Vlan1no ip addressno ip route-cache!no ip http serverno ip http secure-server!control-plane!line con 0exec-timeout 0 0 privilege level 15 logging synchronousline aux 0exec-timeout 0 0 privilege level 15 logging synchronousline vty 0 4loginEndR_Telecon:说明:电信出口,提供外网连接,实现nat转换和流量控制upgrade fpd autoversion 12.4service timestamps debug datetime msecservice timestamps log datetime msecno service password-encryption!hostname R_Telecon!boot-start-markerboot-end-marker!logging message-counter syslog!no aaa new-modelip source-routeip cef!no ip domain lookupip domain name lab.localno ipv6 cef!multilink bundle-name authenticated!memory-size iomem 0archivelog confighidekeys!class-map match-all 1match access-group 11class-map match-all 2match access-group 22class-map match-all 3match access-group 33!policy-map FlowControlclass 1bandwidth 2000class 2bandwidth 4000class 3bandwidth 8000interface FastEthernet0/0ip address 172.16.61.2 255.255.255.0ip nat insideip virtual-reassemblyduplex autospeed auto!interface FastEthernet0/1ip address 172.16.64.2 255.255.255.0ip nat insideip virtual-reassemblyduplex autospeed auto!interface FastEthernet1/0ip address 192.168.137.2 255.255.255.0ip nat outsideip virtual-reassemblyduplex half!ip forward-protocol ndip route 0.0.0.0 0.0.0.0 192.168.137.1ip route 172.16.0.0 255.255.0.0 172.16.61.1ip route 172.16.0.0 255.255.0.0 172.16.64.1 115no ip http serverno ip http secure-server!ip nat pool Out_Pool 192.168.137.5 192.168.137.10 netmask 255.255.255.0 ip nat inside source list 100 pool Out_Pool overload!access-list 11 permit 172.16.1.0 0.0.0.255access-list 22 permit 172.16.4.0 0.0.0.255access-list 33 permit 172.16.12.0 0.0.0.255access-list 100 permit ip 172.16.0.0 0.0.255.255 any!control-plane!mgcp fax t38 ecm!gatekeepershutdown!!line con 0exec-timeout 0 0 privilege level 15 logging synchronous stopbits 1line aux 0exec-timeout 0 0 privilege level 15 logging synchronous stopbits 1line vty 0 4login!endR_Unicom:%说明:联通出口路由,实现与其他办事处(R_Part)的VPN连接以及流量控制upgrade fpd autoversion 12.4service timestamps debug datetime msecservice timestamps log datetime msecno service password-encryption!hostname R_Unicom!boot-start-markerboot-end-marker!logging message-counter syslog!no aaa new-modelip source-routeip cef!no ip domain lookupip domain name lab.localno ipv6 cef!multilink bundle-name authenticated!memory-size iomem 0archivelog confighidekeys!!crypto isakmp policy 10hash md5authentication pre-sharecrypto isakmp key 1002 address 111.1.1.1!!crypto ipsec transform-set Tran esp-des!crypto map Map 100 ipsec-isakmpset peer 111.1.1.1set transform-set Tranmatch address 111!!!!class-map match-all 1match access-group 11class-map match-all 2match access-group 22class-map match-all 3match access-group 33!!policy-map FlowControlclass 1bandwidth 2000class 2bandwidth 4000class 3bandwidth 8000!!!!!interface Tunnel0ip address 172.16.70.1 255.255.255.0 tunnel source Serial1/0tunnel destination 111.1.1.1!interface FastEthernet0/0ip address 172.16.60.2 255.255.255.0 ip nat insideip virtual-reassemblyduplex autospeed auto!interface FastEthernet0/1ip address 172.16.63.2 255.255.255.0 duplex autospeed auto!interface Serial1/0ip address 222.2.2.2 255.255.255.0ip nat outsideip virtual-reassemblyserial restart-delay 0crypto map Map!interface Serial1/1no ip addressshutdownserial restart-delay 0!interface Serial1/2no ip addressshutdownserial restart-delay 0!interface Serial1/3no ip addressshutdownserial restart-delay 0!interface Serial1/4no ip addressshutdownserial restart-delay 0!interface Serial1/5no ip addressshutdownserial restart-delay 0!interface Serial1/6no ip addressshutdownserial restart-delay 0!interface Serial1/7no ip addressshutdownserial restart-delay 0!router ospf 1router-id 6.6.6.6log-adjacency-changesnetwork 172.16.60.0 0.0.0.255 area 0network 172.16.70.0 0.0.0.255 area 0!ip forward-protocol ndip route 0.0.0.0 0.0.0.0 222.2.2.1ip route 172.16.0.0 255.255.0.0 172.16.60.1no ip http serverno ip http secure-server!!ip nat pool Out_pool 222.2.2.5 222.2.2.10 netmask 255.255.255.0 ip nat inside source list 100 pool Out_pool overload!access-list 11 permit 172.16.1.0 0.0.0.255access-list 22 permit 172.16.4.0 0.0.0.255access-list 33 permit 172.16.12.0 0.0.0.255access-list 100 permit ip 172.16.0.0 0.0.255.255 anyaccess-list 111 permit gre host 222.2.2.2 host 111.1.1.1!!control-plane!!!mgcp fax t38 ecm!gatekeepershutdown!!line con 0exec-timeout 0 0privilege level 15logging synchronousstopbits 1line aux 0exec-timeout 0 0privilege level 15logging synchronousstopbits 1line vty 0 4login!endR_Part:%说明:驻外办事路由器,实现与总公司VPN连接。
GNS3完全使用手册
切记,相关文件夹最好全部中文,要不会提示“can’t set up hyversion port 7200类似错误”GNS3 完全使用手册软件介绍:Cisco网络模拟器----GNS3 v0.6.1 all-in-one终端仿真程序-------SecureCRT V6.2.0.195GNS3 简介:GNS3是基于Dynamips的图形界面模拟器,可以为Cisco网络工程师、管理员、Cisco 证书考生提供近乎完美的实验环境。
GNS3 v0.6.1 all-in-one软件包包含了WinPCAP 4.0.2、Dynamips 0.2.8 RC2、Pemuwrapper 0.2.3、GNS3 0.6.1(注:不包含IOS)。
该软件提供了图形化的界面,用户可以之方便地搭建各种拓扑图,而且安装调试更加方便!GNS3项目是免费开源的自由的程序,适用于多种操作系统,包括Windows,Linux和MacOS X。
GNS3 v0.6.1现在发布,包括以下新功能和改善......用户可修改工作区大小;可以绘制矩形和椭圆;自动为接口名称创建标签;多重联线(不重叠);快照功能;Windows平台版提供了物理网卡列表直接绑定功能;所有工作区可以导出为图片(JPEG,PNG...);拓扑摘要面板增加“展开所有”和“缩小所有”功能(由beduev贡献);注解、矩形和椭圆可以旋转;在Windows平台下,用户可以通过命令行加载指定的gns3.ini配置文件,例如:gns3.exe --configdir新增塞尔维亚语言此外,本版本修改了之前的很多bug。
至于虚拟PC模拟功能,不能在这个版本囊括。
作者表示已经找到了在Dynamips直接整合的办法,请耐心等待。
安装过程:安装过程相当简单,直接“NEXT”就可以了,如下图所示:到此,GNS3的安装已全部完成。
设置向导:安装完成后,打开GNS3软件,第一次打开GNS3,会出现设置向导,设置具体步骤如下:1、设置“Dynamips”:在设置向导界面中,选择“STEP1”,如下图所示:此时,进入到“Perferences”设置,习惯用中文的,可在“General”----“Language”处,选上“简体中文(cn)”。
GNS3模拟Cisco+ipsec+vpn配置实例
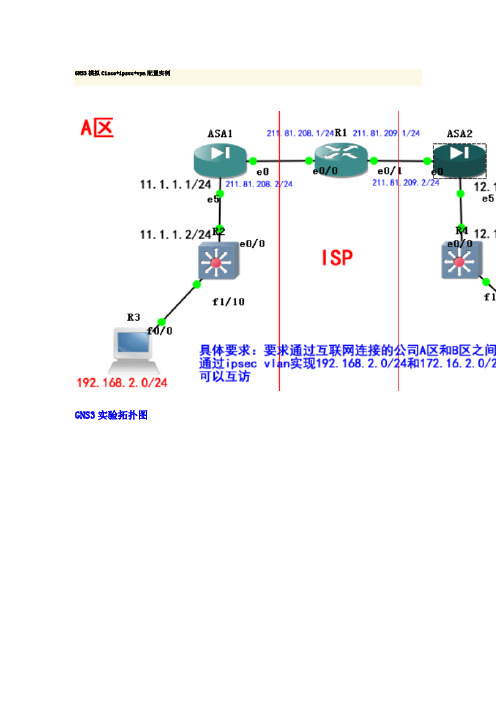
GNS3模拟Cisco+ipsec+vpn配置实例GNS3实验拓扑图R1配置说明:R1只需要按照图在接口上配置好ip地址。
!version 12.4!hostname R1!interface FastEthernet0/0ip address 211.81.208.1 255.255.255.0duplex autospeed auto!interface FastEthernet0/1ip address 211.81.209.1 255.255.255.0duplex autospeed auto!endR2配置说明:R2在这里使用的是c3660-telco-mz.124-15.T5.bin的IOS,再在slot1插槽上加上NM-16ESW模块模拟交换机;R3同R2模拟交换机。
!version 12.4!hostname R2!interface FastEthernet0/0ip address 11.1.1.2 255.255.255.0duplex autospeed auto!interface FastEthernet1/10switchport access vlan 2!interface Vlan1no ip address!interface Vlan2ip address 192.168.2.1 255.255.255.0 !ip route 0.0.0.0 0.0.0.0 11.1.1.1!endR3配置说明!version 12.4!hostname R3!interface FastEthernet0/0ip address 12.1.1.2 255.255.255.0duplex autospeed auto!interface FastEthernet1/10switchport access vlan 2!interface Vlan1no ip address!interface Vlan2ip address 172.16.2.1 255.255.255.0 !ip route 0.0.0.0 0.0.0.0 12.1.1.1!endASA1配置说明:ASA Version 8.0(2)!hostname asa1enable password 8Ry2YjIyt7RRXU24 encryptednames!interface Ethernet0/0nameif outsidesecurity-level 0ip address 211.81.208.2 255.255.255.0!interface Ethernet0/5nameif insidesecurity-level 100ip address 11.1.1.1 255.255.255.0!access-list icmp extended permit icmp any anyaccess-list nonat extended permit ip 192.168.2.0 255.255.255.0172.16.2.0 255.255.255.0access-list vpn extended permit ip 192.168.2.0 255.255.255.0 172.16.2.0 255.255.255.0global (outside) 1 interfacenat (inside) 0 access-list nonatnat (inside) 1 0.0.0.0 0.0.0.0access-group icmp in interface outsideroute outside 0.0.0.0 0.0.0.0 211.81.208.1 1route inside 192.168.2.0 255.255.255.0 11.1.1.2 1crypto ipsec transform-set set esp-des esp-md5-hmaccrypto map map 111 match address vpncrypto map map 111 set peer 211.81.209.2crypto map map 111 set transform-set setcrypto map map interface outsidecrypto isakmp enable outsidecrypto isakmp policy 11authentication pre-shareencryption 3deshash shagroup 2lifetime 86400crypto isakmp policy 65535authentication pre-shareencryption 3desgroup 2lifetime 86400!tunnel-group 211.81.209.2 type ipsec-l2ltunnel-group 211.81.209.2 ipsec-attributespre-shared-key *: endASA2配置说明asa2# sh run: Saved:ASA Version 8.0(2)!hostname asa2enable password 8Ry2YjIyt7RRXU24 encryptednames!interface Ethernet0/0nameif outsidesecurity-level 0ip address 211.81.209.2 255.255.255.0!interface Ethernet0/1shutdownno nameifno security-levelno ip address!interface Ethernet0/5nameif insidesecurity-level 100ip address 12.1.1.1 255.255.255.0!access-list icmp extended permit icmp any anyaccess-list nonat extended permit ip 172.16.2.0 255.255.255.0192.168.2.0 255.255.255.0access-list vpn extended permit ip 172.16.2.0 255.255.255.0 192.168.2.0 255.255.255.0global (outside) 1 interfacenat (inside) 0 access-list nonatnat (inside) 1 0.0.0.0 0.0.0.0access-group icmp in interface outsideroute outside 0.0.0.0 0.0.0.0 211.81.209.1 1route inside 172.16.2.0 255.255.255.0 12.1.1.2 1crypto ipsec transform-set set esp-des esp-md5-hmac crypto map map 111 match address vpncrypto map map 111 set peer 211.81.208.2crypto map map 111 set transform-set setcrypto map map interface outsidecrypto isakmp enable outsidecrypto isakmp policy 11authentication pre-shareencryption 3deshash shagroup 2lifetime 86400crypto isakmp policy 65535authentication pre-shareencryption 3deshash shagroup 2lifetime 86400!!tunnel-group 211.81.208.2 type ipsec-l2ltunnel-group 211.81.208.2 ipsec-attributespre-shared-key *: end配置过程详细:ASA1配置详细:1.端口基础配置asa1(config)# interface ethernet 0/5asa1(config-if)# nameif insideINFO: Security level for "inside" set to 100 by default. asa1(config-if)# security-level 100asa1(config-if)# ip address 11.1.1.1 255.255.255.0asa1(config-if)# no shutdownasa1(config-if)# interface ethernet 0/0asa1(config-if)# nameif outsideINFO: Security level for "outside" set to 0 by default. asa1(config-if)# security-level 0asa1(config-if)# ip address 211.81.208.2 255.255.255.0asa1(config-if)# no shutdown2.ASA NAT 相关asa1(config)# nat (inside) 1 0 0asa1(config)# global (outside) 1 interfaceINFO: outside interface address added to PAT pool3.ASA 路由asa1(config)# route outside 0.0.0.0 0.0.0.0 211.81.208.1asa1(config)# route inside 192.168.2.0 255.255.255.0 11.1.1.24.ASA做acl允许外部pingasa1(config)# access-list icmp extended permit icmp any anyasa1(config)# access-group icmp in interface outsideB区配置同A区,将相应地址更改!!IPSEC VPN 配置ASA1(此处仅列出asa1的相关配置步骤,asa2配置见ASA2配置说明)1.定义从A区到B区要走vpn的流量,并且不做natasa1(config)# access-list nonat extended permit ip 192.168.2.0 255.255.255.0 172.16.2.0 255.255.255.0asa1(config)# nat (inside) 0 access-list nonat2.启用isakmpasa1(config)# crypto isakmp enable outside3.配置阶段一策略asa1(config)# crypto isakmp policy 11asa1(config-isakmp-policy)# authentication pre-shareasa1(config-isakmp-policy)# encryption 3desasa1(config-isakmp-policy)# hash shaasa1(config-isakmp-policy)# group 2asa1(config-isakmp-policy)# lifetime 864004.配置IPSEC VPN类型为LAN TO LANasa1(config)# tunnel-group 211.81.209.2 type ipsec-l2l5.配置阶段一需要使用的预共享密钥asa1(config)# tunnel-group 211.81.209.2 ipsec-attributesasa1(config-tunnel-ipsec)# pre-shared-key xunshi6.配置需要走vpn的流量asa1(config)# access-list vpn extended permit ip 192.168.2.0255.255.255.0 172.16.2.0 255.255.255.07.配置阶段二策略变换集asa1(config)# crypto ipsec transform-set set esp-des esp-md5-hmac8.配置阶段二的相关mapasa1(config)# crypto map map 111 match address vpnasa1(config)# crypto map map 111 set peer 211.81.209.2asa1(config)# crypto map map 111 set transform-set setasa1(config)# crypto map map interface outside测试:R2#ping 172.16.2.1 source 192.168.2.1Type escape sequence to abort.Sending 5, 100-byte ICMP Echos to 172.16.2.1, timeout is 2 seconds: Packet sent with a source address of 192.168.2.1!!!!!Success rate is 100 percent (5/5), round-trip min/avg/max = 120/138/168 msR2#R3#ping 192.168.2.1 source 172.16.2.1Type escape sequence to abort.Sending 5, 100-byte ICMP Echos to 192.168.2.1, timeout is 2 seconds: Packet sent with a source address of 172.16.2.1!!!!!Success rate is 100 percent (5/5), round-trip min/avg/max = 52/115/228 msR3#。
gns3教程

基于GNS3的整套网络模拟环境教程目 录0.前言 (2)1.什么是gns3 (2)2.gns3的安装 (2)2.1 需要软件 (2)2.2 软件安装 (3)3.gns3的基本设置 (6)3.1 配置Dynampis安装目录 (6)3.2 配置IOS (8)3.3 新建工程 (9)3.4 组建网络 (11)3.5 运行网络 (15)4.gns3参数说明 (17)5.gns3其他使用技巧 (17)5.1使用SecureCRT作为Telnet工具 (17)5.2四种模拟PC的方法 (23)5.3模拟以太网交换机 (26)5.4模拟帧中继交换机 (27)5.5 组建分布式网络 (28)6.网络组建示例 (28)6.1以太网交换机实验 (28)6.2静态路由实验 (28)7.附录 (28)7.1 新建网卡 (28)7.2 VPCS的使用方法 (38)8.致谢 (39)0.前言用户名:dynamips_study,密码:ds789456123[ios]subject本教程图片清晰,如果用100%视图看不清图片文字,请用200%查看。
1.什么是gns3GNS3是基于Dynamips的图形化网络模拟工具。
该工具提供了图形化的拓扑配置界面,可以通过拖拉的方式组建网络拓扑而不需任何的net脚本或者Dynamips命令,使用方便,功能全面。
GNS3配置后产生.net文件,可以通过GNS3内置的Dynamips-Dynagen直接运行该文件,也可以单独使用Dynagen运行该文件。
GNS3的官方网站为:2.gns3的安装2.1 需要软件1. Winpcap 4.0:/2. Dynamips-Dynagen套装:/。
选择对应操作系统的版本,在xp上我们选择的版本是Dynagen 0.11.0 and Dynamips 0.2.8-RC2 Windows XP installer,url如下:/project/showfiles.php?group_id=160317&package_id=19 2619&release_id=5936333.SecureCRT.v5.2或以上4.GNS3:/download基于windows的GNS3有两种安装版本:GNS3 v0.5 all-in-one.exe (includes Dynamips, Pemu and WinPCAP 4.0.2)GNS3 v0.5 binary.rar如果是all-in-one系列,则包括了1、2项,不需要再下载。
juniper模拟器安装详细方法
家稍微摸索一下,自行完成olive的安装应该不难。
因为这个论坛的FTP和帖子已提供了olive安装所需的足够的文件和资料。
我这里稍微系统地讲讲olive的安装顺序和注意事项,希望能帮到一些初学者。
当然啦,安装方法有很多,我这里不可能面面俱到。
如果有不恰当或错误的地方,也请大家及时指出。
多谢了!1、准备工作1)PC的配置最低要求:Pentium CPU/64M内存/1GB IDE硬盘/Intel EtherExpress Pro 10/100M 网卡说明:Intel EtherExpress网卡有基于三种芯片的,分别是Intel82557、82558和82559。
这三种都可以,要看你的PC支持程度。
在二手市场上,Intel网卡价格分别是25/35/80元左右。
hehe,具体的价格视乎你的进货渠道和侃价水平。
如果在广州的二手市场,按照这个配置(Pentium MMX166/64M/2GB/2*Intel 82558)买一台IBM GL系列的二手机,价格大约在400元以内,最好主板支持多几个PCI插槽。
安装时,必须有一个显示器和键盘,在olive安装完必之后可以不用;最好再自备一条Cisco的Console,可接到notebook上用超级终端连接olive机器COM1口。
可以采用1.44M的软盘或光驱安装,如果你的PC比较旧,不支持光碟启动,那只能用软盘安装了,准备两张空白的1.44MB软盘就够了。
2)FreeBSD操作系统:如果你打算安装JunOS5.x版本,推荐采用FreeBSD 4.x版本。
建议到ftp:///pub/FreeBSD/releases/i386/ISO-IMAGES 下载FreeBSD 4.x的mini版本ISO文件。
根据我的实际测试,在FreeBSD 4.72和4.8上安装junos 5.2/5.5/5.6都顺利通过。
如果采用光驱启动安装,你还得采用刻录工具把这个ISO文件刻录到光碟上。
GNS3 1
GNS3 1.3.2虚拟机说明下载地址: /cAWQ4XsM7qiSw 提取码38ce 请下载第五版如需GNS3 1.3.2最新安装文件及VM请至群共享下载(128528818)!注意:本虚拟机全部软件资源来自互联网,仅供内部学习,研究,交流使用。
若用于商业盈利,生产环境等用途,请自觉购买对应软件授权。
本虚拟机作者不承担包括但不限于版权相关之任何法律责任。
对于该虚拟机中任何软件的激活,破解等行为,均属于用户个人行为,与虚拟机作者无关。
以下是虚拟机说明:1,Ubuntu15.04已经正式发布,经过本人慎重选型,决定选用Lubuntu 15.04作为本次GNS3虚拟机的操作系统,该系统桌面基于LXDE,轻量级,反应速度快,且界面类似Windows,更符合用户习惯。
为提高用户体验,我安装了libreoffice,gimp,VLC播放器,gedit等软件,方便用户在虚拟机内查看文档,编辑配置文件,甚至播放视频。
GNS3升级至1.3.2,该版本修复了大量Bugs,同样作为1.3系列版本,服务端允许多客户端连接,可以单机双开,当部署为HUB-SPOKE型实验环境时,可以由一台性能较强的服务器运行GNS3服务端,而配置一般的PC运行GNS3客户端。
甚至可将服务端部署至云端!该版本仍然没有添加VMware的支持。
感兴趣的朋友可以到GNS3官网查看更详细的Changelog,以及开发团队对未来计划。
2,本虚拟机同样可作为类似IOUVM的服务端提供多客户端登录,15.04版的Ubuntu已经使用systemd代替sysinit,本虚拟机已将gns3server加入systemd启动脚本,随系统启自动运行。
若用户没这个需求,可执行sudosystemctl disable gns3server.service,该命令永久关闭gns3server自动启动。
客户端可添加IOU设备,亦可添加下列任何虚拟设备,可通过浏览器登录”http://你的IP:8000”上传镜像或拷贝路径。
Juniper模拟器使用指南

第7页 共11页
2009-11-6 15:28
Juniper模拟器使用指南 - AnyService - 51CTO技术博客
family inet { address 192.168.22.201/24; } family mpls; } } lo0 { unit 0 { family inet { address 202.1.1.1/32; } } } } routing-options { static {
该图是一个还未启动的JUNOS,可以看到上面的一些Devices,比如内存,硬 盘,网卡以及串口(Serial)和CPU,都是可以编辑的,这里我们对Serial进行 编辑,使其能够和NPTP软件设置的映射关联起来。双击Serial图标,弹出 [Serial port]的对话框,设置其中的[Connection]部分,采用[Use named pipe]方式,并将named pipe设置为和NPTP软件中一致的named pipe,如下 图所示。
第8页 共11页
2009-11-6 15:28
Juniper模拟器使用指南 - AnyService - 51CTO技术博客
primary lsp2; } path lsp1 { 192.168.23.203 loose; } path lsp2 { 192.168.23.202 strict; } interface em0.0 {
第3页 共11页
2009-11-6 5:28
Juniper模拟器使用指南 - AnyService - 51CTO技术博客
/135910/37859
JUNOS使用
JUNOS的配置模式:按我的理解JUNOS有三种模式 @% 操作系统模式,处于FreeBSD操作系统,可以使用常用的FreeBSD相关命 令,比如ls、pwd、cd等等,通过命令cli可以进入用户模式; > 用户模式,经过JUNOS封装的系统,可以进行一些简单的命令配置和所有信 息显示,类似于我司路由器的config t之前的模式,使用configure命令可以进 入配置模式; # 配置模式,在此模式下对路由器进行配置,类似于我司路由器的config t之后 的模式。 JUNOS的命令风格: JUNOS的命令风格在业界很特别,仅与Alcatel的命令风格略有相似之处。这里 只作简单的介绍,具体的使用希望大家钻研。 JUNOS采用edit、set、delete、show、run show和commit来完成主体功能 的配置。值得注意的是,在完成了某项功能的配置之后,只有使用commit命令 提交成功之后,该配置才会生效,在commit提交之后,系统会对提交的配置进 行合法性检查,只有通过合法性检查才算提交成功,否则系统会给出错误信息。 合法性检查仅检查配置的合法性,并不检查配置的准确性与正确性,请注意。
- 1、下载文档前请自行甄别文档内容的完整性,平台不提供额外的编辑、内容补充、找答案等附加服务。
- 2、"仅部分预览"的文档,不可在线预览部分如存在完整性等问题,可反馈申请退款(可完整预览的文档不适用该条件!)。
- 3、如文档侵犯您的权益,请联系客服反馈,我们会尽快为您处理(人工客服工作时间:9:00-18:30)。
GNS3 Simulation Juniper
讲者:张洋
学前必读:GNS3的基本操作
1 GNS3对路由器和交换机的模拟 2 GNS3与虚拟机的桥接
主题:GNS3模拟Juniper
GNS3模拟Juniper的操作 GNS3与虚拟机的桥接 Juniper的组网
在GNS3上加载Juniper的系统文件
ONT v1.0—7
在GNS3上加载Juniper的系统文件
5、Juniper的启动界面
© 2006 Cisco Systems, Inc. All rights reserved.
ONT v1.0—8
在GNS3上加载Juniper的系统文件
6、Juniper的操作界面
© 2006 Cisco Systems, Inc. All rights reserved.
1、进入Juniper的配置界面
© 2006 Cisco Systems, Inc. All rights reserved.
ONT v1.0—4
在GNS3上加载Juniper的系统文件
2、配置Juniper的系统文件和模块
名字
内存 接口的个数 接口的类型
系统文件的路径
© 2006 Cisco Systems, Inc. All rights reserved.
© 2006 Cisco Systems, Inc. All rights reserved.
ONT v1.0—10
DEMO:Juniper的基本调试和组网
© 2006 Cisco Systems, Inc. All rights reserved.
ONT v1. Cisco Systems, Inc. All rights reserved.
ONT v1.0—5
在GNS3上加载Juniper的系统文件
3、拉动设备进入GNS3界面
© 2006 Cisco Systems, Inc. All rights reserved.
ONT v1.0—6
在GNS3上加载Juniper的系统文件
4、启动Juniper
© 2006 Cisco Systems, Inc. All rights reserved.
ONT v1.0—12
ONT v1.0—9
Juniper的基本操作
root# cli root@> cli> configure root@# set system host-name Juniper 配置路由器的名字为router1 root@# set interfaces em0 unit 0 family inet address 192.168.1.3/24 root@# set system root-authentication plain-text-password #设置明文密码 New password: Retype password: #输入并且确认密码,要求字母和数字。 root@# commit 应用指令
