CDS测试_OT490设置
CDS软件使用
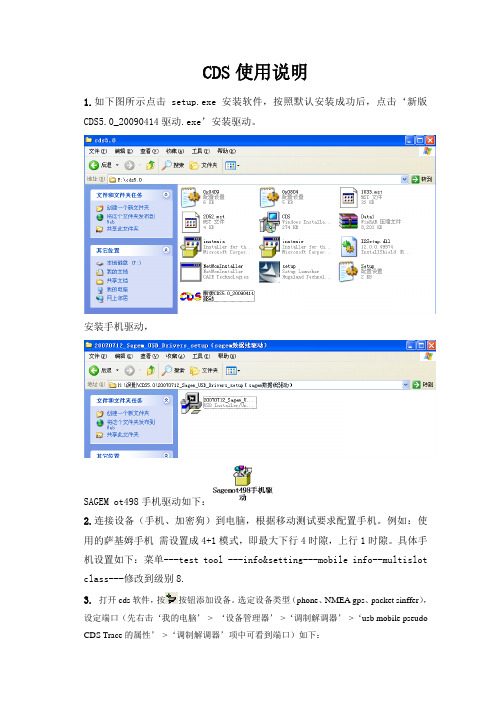
CDS使用说明1.如下图所示点击setup.exe安装软件,按照默认安装成功后,点击‘新版CDS5.0_20090414驱动.exe’安装驱动。
安装手机驱动,SAGEM ot498手机驱动如下:2.连接设备(手机、加密狗)到电脑,根据移动测试要求配置手机。
例如:使用的萨基姆手机需设置成4+1模式,即最大下行4时隙,上行1时隙。
具体手机设置如下:菜单---test tool ---info&setting---mobile info--multislot class---修改到级别8.3. 打开cds软件,按按钮添加设备。
选定设备类型(phone、NMEA gps、packet sinffer),设定端口(先右击‘我的电脑’-> ‘设备管理器’->‘调制解调器’->‘usb mobile pseudo CDS Trace的属性’->‘调制解调器’项中可看到端口)如下:设备连接配置完成后,点击测试列表中的按钮添加测试项目。
如下图:4.测试模板配置1.添加测试项目,测试项目的顺序如下图所示:1.1ping测试项目配置根据移动测试要求,配置上述参数。
2.2 Attach测试项目配置如无特殊要求,以上默认值不更改2.3 PDP测试项目配置参数Apn一般cmnet以上默认值不更改2.4 FTP测试项目配置根据测试要求配置各项参数,特别注意服务器文件路径不包括ip地址部分。
如:/export/home/test/8M.rar5.按按钮连接设备,点击按钮,保存并命名log文件,点击启动自动测试。
测试结束时,点击按钮停止log自动测试,点击按钮停止log录制并保存。
其它说明:1.如果测试过程中遇到异常情况中止log数据,再次测试前应重新启动CDS测试软件。
6. 报告生成1.进入cds软件,点击菜单栏‘报告’中的‘生成报告’项,进入生成报告窗口。
如下:2.按‘添加日志’按钮,选取log文件。
操作手册OT490教学文案
目录一、 SAGEM OT490简介二、使用OT490直接进行测试1、测试菜单详述三、使用法国SAGEM公司OT DRIVE PC及WELLPHONE进行CQT测试1、硬件要求2、软件安装3、软件使用说明4、其他四、使用法国SAGEM公司OT DRIVE PC及WELLPHONE进行数据业务测试一、SAGEM OT490简介SAGEM OT490是一种用于E-GPRS网络测试,并可实时显示移动网络服务小区和6个相邻小区数据的专用测试工具。
使用者可根据具体情况,进行特定的测试,即对任一信道或任一网络参数进行测试。
同时,可通过数据接口与PC机连接,使用后台分析软件对测试数据进行分析。
SAGEM OT490是网络运营管理者和网络维护人员日常必备的网络测试工具。
SAGEM OT490用于E-GPRS及(GSM900/DCS1800/PCS1900 )网络测试。
在OT290的基础上又增加了几项主要功能,例如:测试EDGE网络,手机内部增加了JAVA开放平台,Micro SD卡存储,蓝牙GPS,视频及语音输出等功能,所有这些都使得手机成为一部便携式的路测设备。
二、使用OT490直接进行测试在介绍菜单之前,先看一下手机几个特殊按键:Volume/Zoom: 调节音量大小Camera: 一键开启照相机Central SoftKey: 中心键,使所有的选择生效Left/Right softkey: 左右键,和显示在屏幕左右方的功能关联下面是SAGEM OT490 网络测试操作步骤:1、测试菜单详述操作按键:按特定中心键,进入矩阵菜单,它显示OT490的功能界面,并直接指向测试菜单,如下图:点击“选择”进入各个测试菜单:TEST TOOL 1 Trace(跟踪信息)2 Forcing(强制功能)3 Scaning (扫频功能)4 Trace storage (跟踪信息存储)5Infos&Settings (设置功能)若需退出主菜单,按‘back’键进入主菜单以后,按▲键或▼键,可选择某一项功能注释:☆在测试菜单中,ACTIVE表示该项功能被激活,IN ACTIVE表示某项功能没有被激活。
CDS操作使用手册

CDS操作手册目录一.CDS简介: (3)二.CDS软件设备应用设置: (3)三.CDS软件的安装流程: (4)四.电脑拨网络设置: (4)1.CDS 测试要用到三种拨号网络:分别是cmnet;cmwap;k800. (4)五.测试文件选择: (8)六.测试规范和注意事项: (8)1.电脑设置要求 (8)(1).测试前要关闭电脑的防火墙和电脑的自动更新。
(8)(2).服务中必须禁用DNS;DHCP;SSDP这三项服务: (8)2.在测试过程中应注意的事项: (9)(1).手机的设置是否正确,这要根据测试具体情况来确定。
(9)(2).在测试过程中如何看抓包信令。
(9)七.抓包窗口的添加: (13)八.测试过程遇到异常事件如何处理: (13)(1).测试过程中任何事情都有可能发生下面就涉及一些经常发生的案例: (13)1.测试中如果遇到手机拨号网络拨不上去应该咋办? (13)2.如果在测试后观察抓包信息发现有异常DNS和IP,该如何处理? (13)3.如果在做MMS业务时,发现不能做下去或者是只有上传没有下载如何解决?.13 4.如果出现手机断开连接应该如何做? (13)5.如果测试中,发现抓包窗口不起作用如何解决? (13)6.如果出现不上面的问题,而且自己不能独立解决,你可以请教其他人。
(13)一.CDS简介:CDS软件是在河北移动中兴项目上初次测试数据业务的应用软件,它具有强大的功能可以准确的测试出网络存在的问题。
测试业务总共十四项,必须熟悉掌握这是十四项的功能以及作用。
他们分别是1: PS Attach2: PDP Activate3: Ping4: Ftp Download5: Wap Logon6: Wap Logon7: Wap Page8: Wap Downloa(图)9: Wap Downloa(铃)10: Kjava Download11: MMS P2P12: SMS P2P13: Fetion Logon14: Fetion SMS具体请参照CDS操作说明:。
联想 ThinkPad T490s设置指南
Printed in China PN:SP40Y99558设置指南T490s初始设置打开包装*ThinkPad EthernetExtension AdapterGen 2*Lenovo HDMI to VGAAdapter*Lenovo USB-C toDisplayPort Adapter*Lenovo USB-C toVGA Adapter* 适用于特定型号概述56789111217181913101514163342313222212023* 1. 红外摄像头* 2. ThinkShutter* 3. 麦克风* 4. 摄像头* 5. 多点触控式屏幕6. 电源按钮7. 安全锁插槽8. Always On USB 3.1 接口Gen 19. TrackPoint 指点杆* 10. 指纹读取器* 11. 智能卡插槽* 12. 银色型号的 NFC 标签13. Nano-SIM 卡和 microSD 卡插槽14. 轨迹板* 15. 黑色型号的 NFC 标志16. TrackPoint® 按键17. 音频接口18. HDMI™ 接口19. USB 3.1 接口 Gen 120. 扩展坞接口21. 以太网扩展接口 Gen 222. Thunderbolt™ 3 接口(USB-C)23. USB-C™ 接口(USB 3.1 Gen 1)* 适用于特定型号请阅读《用户指南》中的 USB 传输速率声明。
请参阅《安全与保修指南》以访问《用户指南》。
客户更换部件(CRU)• 交流电源适配器• 电源线• 底盖组合件• M.2 固态驱动器• M.2 固态驱动器支架• Nano-SIM 卡和 microSD 卡托* • 无线 WWAN 卡*适用于特定型号请参阅《用户指南》了解 CRU 定义。
电子手册1111111111第三版(2019 年 12 月)© Copyright Lenovo 2019.有限权利声明:如果数据或软件依照美国总务署(GSA)合同提供,则其使用、复制或披露将受到GS-35F-05925 号合同的约束。
CDS软件使用

TD-LTE路测工具CDS介绍一、工作模式和状态CDS软件集成了路测需要的前、后台所有功能,主要工作于两种模式:数据采集模式、数据分析模式。
两种工作模式之间需要通过“空闲”状态进行过渡。
如下图所示(注意:连接设备采集数据前必须先关闭已打开的日志文件,打开日志文件进行回放或分析前必须先断开不实际设备的连接。
)工作状态 Idle (空闲) 状态:当测试软件启动,但没有不测试设备进行通讯,也没有打开日志文件时处于的Idle状态。
Connected(连接)状态:此状态软件采集设备上报的数据并通过测试视图实时显示,但测试数据不会记录到日志文件中。
Recording(录制)状态:此状态不Connected状态的区别在于采集的数据同时会被记录到指定的日志文件中。
LogOpened(日志打开)状态:当用户打开一个或多个测试日志,但没有对日志文件进行其他操作时,软件处于LogOpened状态。
ReplayPause(回放暂停)状态:当用户打开测试日志文件后,且没有处于动态回放时则为此状态。
此时所有视图的显示不回放进度区间指示保持同步。
Replaying(普通回放)状态:当用户打开了日志文件后,点击“回放”按钮进入此状态,此时软件动态显示采集的测试数据。
FastReplaying(快速回放)状态:当用户打开了日志文件后,点击“快速回放”按钮进入此状态。
在此时数据将以数十倍于采集速度进行快速回放,用户可以使用“+”和“-”按钮来调节回放的速度。
二、CDS文件管理CDS使用两种专用的文件格式:日志文件(.log)和工作区文件(.wks)和日志文件用途:此文件用来保存采集的测试数据,用户可打开日志文件进行回放和后处理工作。
CDS支持用户同时打开多个日志文件,并可随时在打开的多个文件中进行切换回放工作区文件用途:此文件用来保存用户对CDS的配置信息,用户可根据需求建立多个工作区文件来快速恢复使用场景。
可存储三类配置信息:1、硬件配置2、自动测试计划配置3、视图配置三、CDS界面整体介绍CDS用户界面可以分为操作界面和视图界面两个部分:操作界面:图中蓝色箭头部分,包括标题栏、工具栏、导航栏以及资源管理器,大部分的CDS配置和控制操作从此部分收起。
Dell Precision 490 工作站用户指南说明书
Dell Precision™ 490 工作站用户指南注、注意和警告缩写词和缩略词有关缩写词和缩略词的完整列表,请参阅词汇表。
如果您购买的是 Dell™ n Series 计算机,则本说明文件中有关 Microsoft ® Windows ® 操作系统的所有参考信息均不适用。
本说明文件中的信息如有更改,恕不另行通知。
© 2006 Dell Inc.。
版权所有,翻印必究。
未经 Dell Inc. 书面许可,严禁以任何形式进行复制。
本文中使用的商标:D e l l 、D E L L 徽标、Inspiron 、Dell Precision 、Dimension 、OptiPlex 、Latitude 、Dell TravelLite 、PowerEdge 、PowerVault 、StrikeZone 、PowerApp 和 Dell OpenManage 是 Dell Inc. 的商标;I n t e l 、Pentium 、SpeedStep 、X e o n 和 Celeron 是 Intel 公司的注册商标;Microsoft 和 Windows 是 Microsoft 公司的注册商标;Bluetooth 是 Bluetooth SIG, Inc. 拥有的注册商标,并授权 Dell Inc. 使用;能源之星是美国环保局的注册商标。
本说明文件中述及的其它商标和产品名称是指拥有相应商标和产品名称的公司或其制造的产品。
Dell Inc. 对其它公司的商标和产品名称不拥有任何所有权。
型号:D C T A2006 年 8 月 P/N KD769 修订版 A 01关于计算机的信息 计算机概览 复制 CD 和 DVD 高级功能 开始之前卸下主机盖和前面板 机箱防盗开关 内存 驱动器在塔式和台式计算机模式之间转换 插卡安装扬声器(可选) 处理器电池I/O 面板 系统板 电源设备装回前面板和主机盖 有助于解决问题的工具 解决问题 清洁计算机Microsoft ® Windows ® XP 的特性 获得帮助 词汇表注:注表示可以帮助您更好地使用计算机的重要信息。
cds测试软件使用及测试步骤
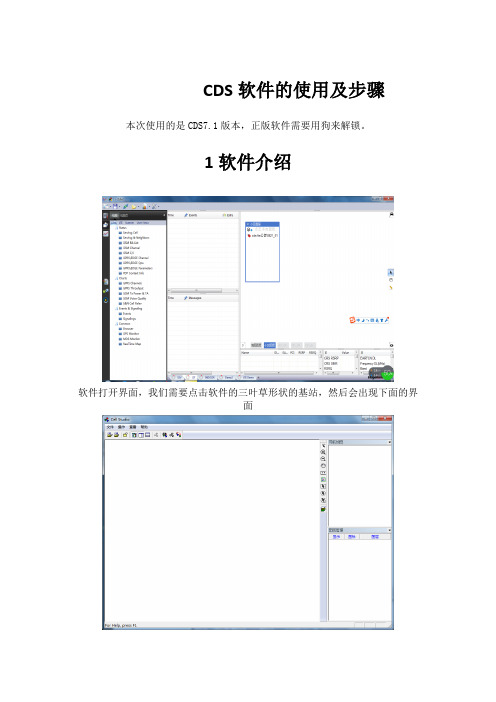
CDS软件的使用及步骤本次使用的是CDS7.1版本,正版软件需要用狗来解锁。
1软件介绍软件打开界面,我们需要点击软件的三叶草形状的基站,然后会出现下面的界面然后点击“文件“下面的csu出现这个画面这个是将工参导入,点击打开小区文件会让你选择工参,(一般都放在桌面上,首次需要导入,以后就不需要的,除非工参更新)选择好工参以后会出现下面的情况将ENB ID ENB NAME 小区号点上点击导入会出现导入成功,然后点击cdb会出现以下界面打击打开然后点击第五个“创建小区图层”点击“生成图层”并“保存模板”然后关闭即可。
然后点击上面一排菜单的工具一栏选择第一个“小区数据选择”出现该界面将工参激活确定即可。
然后点击设备,将gps和测试机连接好,再点击“连接/断开设备”.连接完成之后再下图的右面就会有gps信号(前提在能搜到卫星的情况下)在右侧小区图层小窗口上点击+号添加工参将工参打上对号即可关闭。
这时右面就会出现小区所在位置。
配合测试的软件还有FileZilla Client这个下载软件,这个大家都知道怎么用,我就不详细介绍了,到每个地区所用的服务器不同,这个去地势都会给。
以上连接成功后就可以测试了.2Log录制的介绍从上图可以看见dt indoor 一个是切换一个是室分Dt界面在右上角可以看见经纬度(每次都需要采集经纬度,本次没有搜到卫星,未能显示)Indoor界面这两个见面都能看见小区名称rsrpsinr等一些相关数据(我的截图是在屋里gps没信号所以没显示小区名称)在用户家里录log的时候在indoor界面的右侧竖排第三个点击导入一张白图(事先准备好的)箭头标注的即是。
导入白图之后点击log录制的图标(上面带+号的)点击之后出现一下界面,这个界面是让你起名并将long保存在什么位置。
点击保存之后log就开始录了,这时我们点击右面一列的第四个,然后再白板上打点,并在用户家里走动(测量信号的不同地方的好坏,打点只需打一个正方形即可,每个角点一下,一共点5下,两个点之间需要一段时间,根据你的速度而定)先面试点5个点的图这时可以点击log的图标停止了。
CDS参数设置详细说明(逐步逐项进行设置)
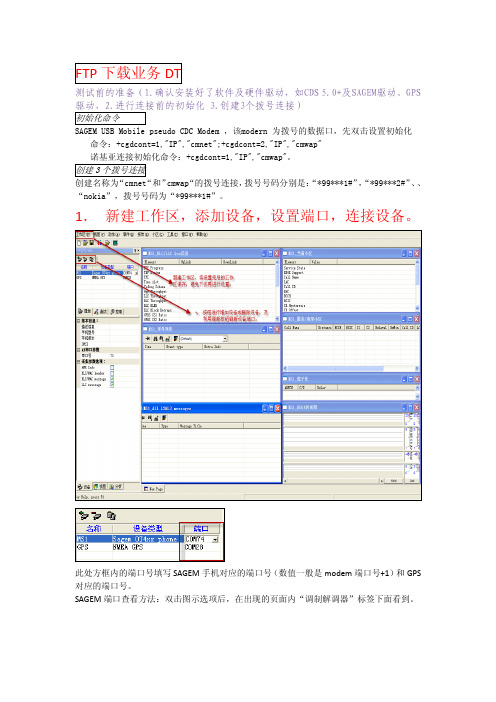
测试前的准备(1.确认安装好了软件及硬件驱动,如CDS 5.0+及SAGEM驱动、GPS 驱动,2.进行连接前的初始化 3.创建3个拨号连接)SAGEM USB Mobile pseudo CDC Modem ,该modern 为拨号的数据口,先双击设置初始化命令:+cgdcont=1,"IP","cmnet";+cgdcont=2,"IP","cmwap"诺基亚连接初始化命令:+cgdcont=1,"IP","cmwap"。
创建名称为“cmnet“和”cmwap“的拨号连接,拨号号码分别是:“*99***1#”,“*99***2#”、、“nokia”,拨号号码为“*99***1#”。
1.新建工作区,添加设备,设置端口,连接设备。
此处方框内的端口号填写SAGEM手机对应的端口号(数值一般是modem端口号+1)和GPS 对应的端口号。
SAGEM端口查看方法:双击图示选项后,在出现的页面内“调制解调器”标签下面看到。
双击后出现的页面:GPS的端口号,直接在“端口”选项内查看,是一个串口号。
AT串口参数会自动设置2. 测试项目设置进行DT时,需要设置如下参数:1)增加测试项目“FTP download“2).双击进行详细设置。
WAP 页面登陆,页面刷新,图铃下载设置1)增加测试项目:wap logon ,wap page ,wap download;2)wap logon详细设置4)wap download 详细设置,双击“wap download“进行设置:注意设置图铃下载详细地址1.添加设备,设置端口,设置测试项目:测试项目共14项,设置方法分布是:1)Fetion logon2)Fetion SMS3)PS Attach4)PDP Activate5)Ping67) WAP logon协议1协议28)WAP page9)WAP Download WAP协议1Wap协议210)Kjava Download11)SMS P2P12) MMS P2P模板参考:CDS 5.0 手册:(1)初始化命令SAGEM USB Mobile pseudo CDC Modem ,该modern 为拨号的数据口,先双击设置初始化命令:+cgdcont=1,"IP","cmnet";+cgdcont=2,"IP","cmwap"诺基亚连接初始化命令:+cgdcont=1,"IP","cmwap"。
Dell Precision 工作站 490 使用者指南说明书
Dell Precision™ 工作站 490 使用者指南註、注意事項和警示縮寫和簡寫用語若要獲得縮寫和簡寫用語的完整清單,請參閱詞彙表。
如果您購買的是 Dell™ n Series 電腦,則本文件中關於 Microsoft ® Windows ® 作業系統的所有參考均不適用。
本文中的資訊如有變更,恕不另行通知。
© 2006 D e l l I n c.。
版權所有,翻印必究。
未經 Dell Inc. 的書面許可,不得以任何形式進行複製。
本文中使用的商標:D e l l 、D E L L 徽標、I n s p i r o n 、D e l l P r e c i s i o n 、D i m e n s i o n 、O p t i P l e x 、L a t i t u d e 、D e l l T r a v e l L i t e 、Po w e r E d g e 、P o w e r V a u l t 、S t r i k e Z o n e 、P o w e r A p p 和 Dell OpenManage 是 Dell Inc. 的商標;I n t e l 、P e n t i u m 、SpeedStep 、X e o n 和 Celeron 是 Intel Corporation 的註冊商標;M i c r o s o f t 和 W i n d o w s 是 Microsoft Corporation 的註冊商標;B l u e t o o t h 是 Bluetooth SIG, Inc. 擁有的註冊商標,並授權給 Dell Inc. 使用;ENERGY STAR 是美國環境保護署的註冊商標。
本文件中述及的其他商標和商業名稱是指擁有相應商標和名稱的公司實體或其產品。
Dell Inc. 對其他公司的商標和產品名稱不擁有任何專利權。
D C T A 型2006 年 8 月 P /N K D 769 R e v. A 01關於您電腦的資訊 關於您的電腦 複製 CD 和 DVD 進階功能 開始之前卸下機箱蓋和前面板 外殼侵入切換開關 記憶體 磁碟機在直立型和桌上型模式之間變更 插卡安裝喇叭 (可選) 處理器電池 I/O 面板 主機板電源供應器裝回前面板與機箱蓋 協助解決問題的工具 解決問題 清潔您的電腦Microsoft ® Windows ® XP 的功能 獲得幫助 詞彙表註:「註」表示可以幫助您更有效地使用電腦的重要資訊。
CD0中文手册

刖言图示拒绝承诺The CELL-DYN3200系列血液学系统,是由雅培诊断,雅培实验室(位于5440Patrick He nry Drive, San ta Clara, CA 95054, U.S.A)生产的。
本手册中的相关信息,请直接向上述地址进行垂询。
注意:有关仪器方面的问题,请直接向雅培血液学客户支持中心垂询。
(仅限于在美国的客户。
)商标声明BJC-600e是佳能有限公司的商标。
佳能是佳能有限公司的注册商标。
CELL-DYN是雅培实验室的注册商标。
CELL-DYN HemCal是雅培实验室的注册商标。
Epson是精工爱普森有限公司的注册商标。
Hemogard是Becton Dickinson 及其公司的注册商标。
MAPSS是雅培实验室的注册商标。
MICROLINE是日本冲电气美国有限公司的注册商标。
Millipore是Millipore公司的注册商标。
OKIDATA日本冲电气美国有限公司的注册商标。
Retic-RITE是雅培实验室的注册商标。
Sarstedt是德国Walter Sarstedt Gerate 公司的注册商标。
Technicon H?3 是Miles有限公司的注册商标。
TEFLON是E.I. DuPont de Nemours 有限公司的注册商标。
TYGON 是Norton Performanee Plastics 的注册商标。
VACUTAINER 是Becton Dickinson 及其公司的注册商标。
Venojectll是Terumo医疗公司的注册商标。
Westgard是Westgard Quality 公司的注册商标。
符号下列符号用于CELL-DYN标签,包括仪器,试剂,校准品,质控品以及手册。
请注意警告与注意符号在本手册第8部分:危险中。
仪器/电源概述AC INPUTBUSYCOM1C OM~2_______ F AULT _________FREQUENCY"FUSEFUSESHSSLNSTALLATION DISKK EYBOARDL INE FREQ SELECTINE VOLTAGE 交流电输入临时,通信端口 1 通信端口 2 故障频率保险丝保险丝高速持续连接安装磁盘键盘线路频率选择线路电压」NE VOLTAGESELECT线路电压选择L PT 1 主并行打印机端口LPT2 备用并行打印机端口MAX POWER 最大电源MODEL 型号PERISTALTIC PUMP 蠕动泵试剂说明CN-FREE HGB/NOC LYSEDILUENT 无氰化物血红蛋白/有核激光计数细胞溶解稀释液DILUENT/SHEATH |EN?YMATICCLEANERCONCENTRATE 稀释液/鞘液酶清洗液浓度有效期其它仪器标签以下为粘贴在CELL-DYN 3200系统上的标签:现有的CELL-DYN用户仪器拥有CE标志,符合欧洲电磁符合性(及低电EMC )以压方面的要求,拥有以下标签:激光器标签,前面板如何使用本手册概述本操作手册对使用与维护CELL-DYN 3200系统进行了完整的说明。
CDS测试具体操作文档

按钮保存测试LOG 。
输入服务器地址、用户名及密码
2、打开 FTP下载\上传软件。 FTP 服务器 : 地址:116.113.84.254 用户名:nmunicom12 密码:nmimunokia721 3、点击编辑->设置->传输->最大同时传输设为10
7
测试操作流程6
4、连接服务器进行CQT FTP下载业务 FTP下载测试方法: a.在服务器中选择3个以上文件大小大于1G的文件 b.文件保持时选择覆盖、总是使用该操作
9
测试操作流程8
打开电脑“运行”->输入“CMD”出现DOS操作界面:输入“Ping –t 116.113.84.254 –n 100” 注意点:a.采用32 bytes包PING指定服务器先ping100次后,取平均值。 b.运行结束后截图并保存为如:March14 09_36_54_SSV_机房1_PING
5、打开 NETmeter流量监控软件,待FTP下 载速率稳定(5S)之后,点击NetMETER统计开 始按钮,计时一分钟,点击结束按钮之后,停 止记录LOG,记录FTP下载速率的峰值和平均值, 并截图保存(命名“March14 09_36_54_SSV_机 房1_DL FTP ”),截图时将计时器、小区PCI, 下行MCS等级、MAC 速率等一起包括进去。
图标
软件下载:
2
地 址 : / 用 户 名: chinacomm_nmg_lte@ 密 码 : CHINACOMM_NMG
测试操作流程1
插上狗打开CDS7.1软件窗口
3
测试操作流程2
点击 按钮,插 入测试卡托或者手机, 点击 会显示右边 界面信息,选择添加 卡托或者手机类型。
-n 5 代表是ping 5次操作 需要记录平均时长7ms(15ms)
CDS软件测试操作说明

CDS 测试操作说明(以5.0为例)目录一、软件安装 (3)二、设备连接 (4)三、测试步骤和测试方法 (17)四、数据回放 (30)五、生成统计报告 (36)一、软件安装1. 硬件要求1. 计算机应保证 1.2G 以上主频,256M 以上内存2.重新安装 Window XP SP1 或 SP2 操作系统,不能安装与测试无关的其它软件,尤其是网络相关软件。
3.将系统中的任何与网络通讯相关的程序关闭,如 MSN 等。
4.关闭 Windows 的自动更新功能,在我的电脑上右键点击选择“属性”,在弹出的对话框中的“自动更新”栏中去除自更新功能。
5. Sagem 手机为 OT490 或 OT498,串口速率为 115200(默认不用设置),自由双频模式, 3+1时隙。
6.商用手机使用 Nokia6230、7610 或 N70,以及 DUK-2 数据线7.为 Sagem 手机添加 Modem 并建立两个拨号网络:Sagem cmnet 和 Sagem cmwap 并手动验证拨号连接可以使用。
详细方法参见 Sagem 调制解调器与拨号配制说明。
2. 安装步骤及注意事项1. 安装 Nokia 调制解调器并建立 Nokia cmwap 拨号连接,注意 APN 必须设置为 cmwap。
2.安装 CDS4.0 测试软件。
3.全部安装成功后使用 Windows 的系统还原功能创建一个还原点,已防止将来系统被病毒感染等异常情况后快速恢复系统。
单击“开始、所有程序、系统工具、系统还原”,在弹出的对话框中选择“创建一个还原点”,然后根据提示操作。
如果需要进行系统还原前,注意应将已测试的日志文件备份出来。
或将系统做 GHOST 备份。
二、设备连接1. SAGEM 手机设置设置手机支持网络版本1. 按▲或▼键,选择 Test tool, 按 Select 键;2. 按▲或▼键,选择 Info & settings, 按 Select 键;3. 按▲或▼键,选择 Release, 按 OK 键;4. 按▲或▼键,选择 Release 97, 按 OK 键;如果测试 EDGE 则选择Release 4设置手机的时隙配置1. 按▲或▼键,选择 Test tool, 按 Select 键;2. 按▲或▼键,选择 Info & settings, 按 Select 键;3. 按▲或▼键,选择 Mobile info, 按 Select 键;4. 按▲或▼键,选择 Multislot classes, 按 Select 键;5. 按 Modify 设置 GPRS multislot class [4(3+1)] 和E-GPRS multislot class[8(4+1)]时隙关闭彩信自动提取:1.按▲或▼键,选择短信息, 按选择键;2.按▲或▼键,选择选项, 按选择键;3.按▲或▼键,选择多媒体信息, 按选择键;4.按▲或▼键,选择高级设定, 按选择键;5.按▲或▼键,进入忽略 MMS, 选项选择.SMS 消息模式选择1. 按▲或▼键,选择 Test tool, 按 Select 键;2.按▲或▼键,选择 Info&Settings, 按 Select 键;3.按▲或▼键, 选择 GPRS settings , 按 Select 键;4. 按▲或▼键, 选择 SMS mode , 按 Select 键;5. 按▲或▼键,选择 GSM only , 按 Select 键;SAGEM OT490 连接设置1. 按▲或▼键,选择 Connectivity, 按 Select 键;2.按▲或▼键,选择 Info&Settings, 按 Select 键;3.按▲或▼键, 选择 USB Mode , 按 Select 键;4. 按▲或▼键, 选择 Modem , 按 Validate 键;2. SAGEM 手机连接及设置打开 sagem 数据线驱动程序 20070131_Sagem_USB_Drivers_setup 双击安装如图:插入 SAGEM OT490 、498 的 USB 数据线,等系统发现硬件以后点击下一步下一步重新拔插数据线,系统将自动安装驱动完成!打开‘设备管理器’安装后会自动添加两个调制解调器,分别做为trace 和Modem 的用途双击 Sagem USB Mobile pseudo CDC Trace 调制解调器,在‘属性’的‘调制解调器’里面查看端口,该端口就是 CDS4.0 软件在连接 SAGEM 手机所用的端口。
CDS4.0安装设置

Hugeland CDS4.0 操作手册一.系统要求 (2)1.计算机硬件要求 (2)2.CDS系统软件要求 (2)二.软件安装 (3)三.硬件安装 (4)1.硬件设备介绍 (4)2.硬件设备连接 (5)四.设置SAGEM拨号网络 (12)1.SAGEM290手机设置 (12)2.查看调制解调器: (13)2.建立拨号网络: (15)(1).添加拨号网络 (15)(2).更改拨号网络属性 (17)(3).创建另一个拨号连接 (19)五.商用手机的拨号设置 (21)一.系统要求1.计算机硬件要求¾测试手机:1)GSM 手机:Sagem OT-76、OT160、OT2602)GPRS手机:Sagem OT-96、OT190、OT290、OT490、OT498¾笔记本计算机:1)最低配置:PIII 500M \ RAM128M \ 10G硬盘 \ 4M显存2)推荐配置:P4 2.0G \ RAM512M \ 30G硬盘 \ 32M显存¾USB口扩展设备:( 可选)*USB 1转4 设备¾GPS:*支持NMEA 0183 2.0 协议,推荐型号:GARMIN 12XLC:注:一般GPS在接口设置里面选择NMEA 波特率为4800¾加密狗:由惠捷朗公司提供¾便携测试背包(选件):*惠捷朗公司定制测试背包,可包含两部手机及其它测试硬件,方便进行测试。
¾商用GPRS手机及数据连线(选件):*用于SMS点到点测试及MMS点到点测试,如N70等。
2.CDS系统软件要求¾操作系统:*Windows2000,Windows XP (中、英文均可)¾Excel2000或以上办公软件¾CDS4.0测试软件包附:红外口设置关闭,防火墙、杀毒软件均关闭。
二.软件安装1.CDS4.0主程序和加密狗驱动的安装:运行 CDS4.0主程序 目录中的setup安装程序,按照安装程序的提示来完成(安装时不要插加密狗)。
CDS测试流程
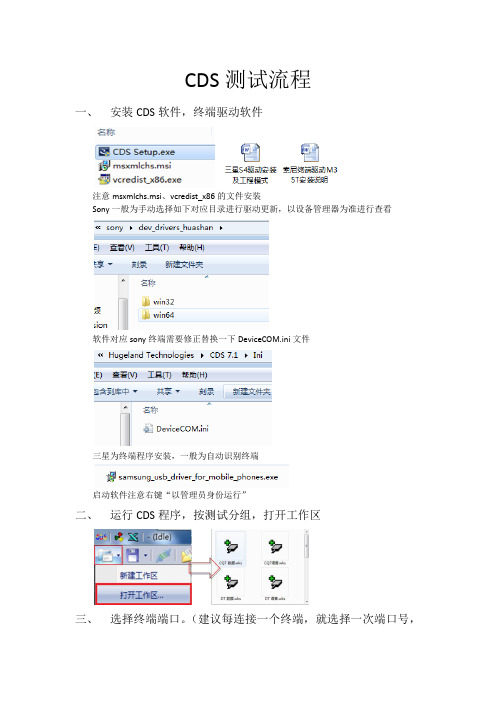
CDS测试流程一、安装CDS软件,终端驱动软件注意msxmlchs.msi、vcredist_x86的文件安装Sony一般为手动选择如下对应目录进行驱动更新,以设备管理器为准进行查看软件对应sony终端需要修正替换一下DeviceCOM.ini文件三星为终端程序安装,一般为自动识别终端启动软件注意右键“以管理员身份运行”二、运行CDS程序,按测试分组,打开工作区三、选择终端端口。
(建议每连接一个终端,就选择一次端口号,同时保存工作区。
这样在后面测试过程中,就不再需要选择)。
数据业务测试:使用1、3、4号端口语音业务测试:使用1、2、3号端口1.注意添加设备类型对应Qualcomm,还是His,或者其他2.通过软件控制UE进行attach、dettach,根据信令窗口能够输出对应信令流程,判别端口是否正确四、修改ftp上传、下载、语音和短信业务属性3.ftp上传、下载服务器地址(一般选择所在地对应省市服务器)。
4.被叫号码。
将所有Voice CALL选项改成索尼终端的号码5.短彩信配置:将短信中心号码修改成USIM卡所在地的短信中心号码。
将短、彩信的接收端号码修改成索尼手机号码6.邮件设置:填写用户自己的139邮箱7.完成配置后,连接设备,正常连接后,终端属性信息应显示如下。
若不是此种显示,就断开连接重新选择端口号进行重新连接五、测试中,若事件窗口出现no device message,或者听到CDS软件的告警音,则表示终端异常。
此时请停止CDS测试,重新插拔手机,连接好后,继续测试六、注意log录入及命名保存七、注意注:测试过程中若更换手机则要更改端口;更换sim卡需修改被叫号码及短信中心号码;更换ftp服务器地址。
CDS50安装使用说明-14页文档资料
CDS快速使用说明一.测试工具的准备工作 (2)1.1.测试准备分步走 (2)1.2.SAGEM手机设置 (2)1.3.SAGEM手机连接及设置 (3)1.4.商用手机连接及设置 (4)1.5.SAGEM手机和商用手机拨号建立 (5)(1).添加拨号网络 (5)(2).更改拨号网络属性 (6)(3).创建SAGEM另一个拨号连接 (6)(4).创建Nokia cmwap拨号 (7)二.CDS测试设置 (8)三.CQT测试项目配置 (8)四.DT 测试项目配置 (10)五.视图和分析 (11)5.1.视图管理 (11)5.2.分析插件管理 (12)(1)地理分析:Google Earth (13)(2)地理分析:MapX (13)(3)数据时间图 (13)(4)统计:IE数据 (13)(5)统计:事件 (13)六. 报告生成 (14)第 1 页一.测试工具的准备工作1.1.测试准备分步走1.计算机应保证1.2G以上主频,256M以上内存2.重新安装Window XP SP1或SP2操作系统,不能安装与测试无关的其它软件,尤其是网络相关软件。
3.将系统中的任何与网络通讯相关的程序关闭,如MSN QQ等。
4.关闭Windows的自动更新功能,在我的电脑上右键点击选择“属性”,在弹出的对话框中的“自动更新”栏中去除自动更新功能。
5.关闭所有防火墙,如下图:6.Sagem手机为OT490或OT498,串口速率为115200(默认不用设置),自由双频模式,(3+1)或(4+1)时隙7.商用手机使用Nokia6230、7610(GPRS)或N70(EDGE),以及DUK-2数据线8.为Sagem手机添加Modem并建立两个拨号网络:Sagem cmnet和Sagem cmwap并手动验证拨号连接可以使用。
详细方法参见Sagem调制解调器与拨号配制说明。
9.安装Nokia调制解调器并建立Nokia cmwap拨号连接,注意APN必须设置为cmwap10.安装CDS测试软件11.全部安装成功后使用Windows的系统还原功能创建一个还原点,已防止将来系统被病毒感染等异常情况后快速恢复系统。
戴尔 Precision Workstation 490 快速参考指南.pdf_1700883226
Dell Precision™ Workstation 490 Quick Reference GuideModel DCTAw w w.d e l l.c o m|s u p p o r t.d e l l.c o mNotes, Notices, and CautionsNOTE: A NOTE indicates important information that helps you make better use of your computer.NOTICE: A NOTICE indicates either potential damage to hardware or loss of data and tells you how to avoid the problem.CAUTION: A CAUTION indicates a potential for property damage, personal injury, or death. Abbreviations and AcronymsFor a complete list of abbreviations and acronyms, see the Glossary in your User’s Guide.If you purchased a Dell™ n Series computer, any references in this document to Microsoft® Windows®operating systems are not applicable.____________________Information in this document is subject to change without notice.©2006Dell Inc.All rights reserved.Reproduction in any manner whatsoever without the written permission of Dell Inc.is strictly forbidden.Trademarks used in this text: Dell, the DELL logo and Dell Precision are trademarks of Dell Inc.; Intel, Xeon, and Pentium are registered trademarks of Intel Corporation; Microsoft and Windows are registered trademarks of Microsoft Corporation.Other trademarks and trade names may be used in this document to refer to either the entities claiming the marks and names or their products. Dell Inc. disclaims any proprietary interest in trademarks and trade names other than its own.Model DCTAJanuary 2006P/N MD506Rev. A00ContentsFinding Information (5)Setting Up Your Computer (Tower Orientation) (9)Setting Up Your Computer (Desktop Orientation) (14)About Your Computer (19)Front View (Tower Orientation) (19)Back View (Tower Orientation) (21)Back Panel Connectors (22)Front View (Desktop Orientation) (24)Back View (Desktop Orientation) (25)Inside View (26)Inside View – Hard Drive Bay Rotated Out (27)System Board Components (28)Cable Colors (29)Locating Your User’s Guide (29)Removing the Computer Cover (30)Caring for Your Computer (32)Solving Problems (32)Troubleshooting Tips (32)Resolving Software and Hardware Incompatibilities (32)Using Microsoft® Windows® XP System Restore (33)Using the Last Known Good Configuration (34)Dell Diagnostics (35)Before You Start Testing (36)Beep Codes (36)Error Messages (38)Diagnostic Lights (38)Diagnostic Light Codes Before POST (38)Diagnostic Light Codes During POST (40)Frequently Asked Questions (43)Index (45)Contents34ContentsQuick Reference Guide 5Finding InformationNOTE: Some features or media may be optional and may not ship with your computer. Some features or media may not be available in certain countries.NOTE: Additional information may ship with your computer.What Are You Looking For?Find It Here •A diagnostic program for my computer •Drivers for my computer •My computer documentation •My device documentation •Desktop System Software (DSS)Drivers and Utilities CD (also known as Resource CD)Documentation and drivers are already installed on your computer. Y ou can use the CD to reinstall drivers, run the Dell Diagnostics, or access your documentation. Readme files may be included on your CD to provide last-minute updates about technical changes to your computer or advanced technical-reference material for technicians or experienced users.NOTE: Drivers and documentation updates can be found at .•How to set up my computer •How to care for my computer •Basic troubleshooting information •How to run the Dell Diagnostics •Error codes and diagnostic lights •How to remove and install parts •How to open my computer coverQuick Reference Guide NOTE: This document is available as a PDF at .6Quick Reference Guide •W arranty information•Terms and Conditions (U.S. only)•Safety instructions•Regulatory information•Ergonomics information•End User License AgreementDell™ Product Information Guide •How to remove and replace parts•Specifications•How to configure system settings•How to troubleshoot and solve problemsUser’s Guide Microsoft ®Windows ® XP Help and Support Center 1Click the Start button and click Help and Support 2Click User’s and system guides and click User’s Guide The User’s Guide is also available on the Drivers and Utilities CD.•Service T ag and Express Service Code•Microsoft Windows License LabelService Tag and Microsoft ® Windows ® License These labels are located on your computer.•Use the Service T ag to identify your computer when you use or contact technical support.•Enter the Express Service Code to direct your call when contacting technical support.What Are You Looking For?Find It Here•Solutions — Troubleshooting hints and tips, articles from technicians, and online courses, frequently asked questions•Community — Online discussion with otherDell customers•Upgrades — Upgrade information for components, such as memory, the hard drive, and the operating system•Customer Care — Contact information, service call and order status, warranty, and repair information •Service and support — Service call status and support history, service contract, online discussions with technical support•Reference — Computer documentation, details on my computer configuration, product specifications, and white papers•Downloads — Certified drivers, patches, and software updates•Desktop System Software (DSS)— If you reinstall the operating system for your computer, you should reinstall the DSS utility prior to installing any of the drivers. DSS provides critical updates for your operating system and support for Dell™ 3.5-inch USB floppy drives, optical drives, and USB devices. DSS is necessary for correct operation of your Dell computer. The software automatically detects your computer and operating system and installs the updates appropriate for your configuration.Dell Support Website — NOTE: Select your region or business segment to view the appropriate support site.NOTE: Corporate, government, and education customers can also use the customized Dell Premier support website at . The website may not be available in all regions.•How to use Windows XP•How to work with programs and files •Documentation for devices (such as modem)Windows Help and Support Center1Click the Start button and click Help and Support.2T ype a word or phrase that describes your problem and click the arrow icon.3Click the topic that describes your problem.4Follow the instructions on the screen.What Are You Looking For?Find It HereQuick Reference Guide7•How to reinstall my operating system Operating System CDThe operating system isalready installed on yourcomputer. To reinstallyour operating system, usethe Operating System CD.See your User’s Guide forinstructions. After youreinstall your operatingsystem, use the Drivers andUtilities CD (Resource CD)to reinstall drivers for thedevices that came with your computer. Y our operatingsystem product key label is located on your computer.NOTE: The color of your CD varies based on the operatingsystem you ordered.NOTE: The Operating System CD may be optional and maynot ship with your computer.•How to use Linux•E-mail discussions with users of Dell Precision™ products and the Linux operating system •Additional information regarding Linux and my Dell Precision computer Dell Supported Linux Sites••/mailman/listinfo/linux-precisionWhat Are You Looking For?Find It Here8Quick Reference GuideQuick Reference Guide 9Setting Up Your Computer (Tower Orientation)CAUTION: Before you begin any of the procedures in this section, follow the safety instructions in the Product Information Guide.Y ou must complete all steps to properly set up your computer.1Connect the keyboard and the mouse.2 NOTICE: Do not connect a modem cable to the network adapter. Voltage from telephone communications can damage the network adapter.NOTE: If your computer has a network card installed, connect the network cable to the card.Connect the modem or the network cable.10Quick Reference Guide 3Depending on your graphics card, you can connect your monitor in various ways.NOTE: You may need to use the provided adapter or cable to connect your monitor to the computer.Connect the monitor.The dual-monitor cable is color-coded; the blue connector is for the primary monitor, and the blackconnector is for the second monitor. To enable dual-monitor support, both monitors must be attached to the computer when you start the computer.For single- and dual-monitor capable cards with a single connector One VGA adapter:graphics card and you want to connect your computer to a VGA monitor.Dual VGA Y cable adapter:Use the appropriate Y cable when your graphics card has a single connector and you want to connect your computer to one or two VGA monitors.Dual DVI Y cable adapter:Use the appropriate Y cable when your graphics card has a single connector and you want to connect your computer to one or two DVI monitors.For dual-monitor capable cards with one DVI connector and one VGA connector For dual-monitor capable cards with two DVI connectors T wo DVI connectors:Use the DVI connectors to connect your computer to one or two DVI monitors.T wo DVI connectors with one VGA adapter:Use the VGA adapter to connect a VGA monitor to one of the DVI connectors on your computer T wo DVI connectors with two VGA adapters:Use two VGA adapters to connect twoVGA monitors to the DVI connectors on your computer.4NOTE: If yourcomputer has a sound card installed, connect the speakers to the card.Connect the speakers.Before you install any devices or software that did not come with your computer, read the documentation that came with the software or device or contact the vendor to verify that the software or device is compatible with your computer and operating system. Y ou have now completed the setup for your tower computer.Setting Up Your Computer (Desktop Orientation)CAUTION: Before you begin any of the procedures in this section, follow the safety instructions in theProduct Information Guide.Y ou must complete all steps to properly set up your computer.6Install additional software or devices.1Connect the keyboard and the mouse.NOTICE: Do not connect a modem cable to the network adapter. Voltage fromtelephone communications can damage the network adapter.2NOTE: If your computer has a network card installed, connect the network cable to the card.Connect the modem or the network cable.3Connect the monitor.Depending on your graphics card, you can connect your monitor in various ways.NOTE: You may need to use theprovided adapter or cable to connect your monitor to the computer.The dual-monitor cable is color-coded; the blue connector is for the primary monitor, and the blackconnector is for the second monitor. To enable dual-monitor support, both monitors must be attached to the computer when you start your computer.For single- and dual-monitor capable cards with a single connector VGA adapter:Use the VGA adapter when you have a single monitor graphics card and you want to connect your computer to a VGA monitor.Dual VGA Y cable adapter:Use the appropriate Y cable when your graphics card has a single connector and you want to connect your computer to one or two VGA monitors.Dual DVI Y cable adapter:Use the appropriate Y cable when your graphics card has a single connector and you want to connect your computer to one or two DVI monitors.For dual-monitor capable cards with one DVI connector and one VGA connector For dual-monitor capable cards with two DVI connectors T wo DVI connectors:Use the DVI connector(s) to connect your computer to one or two DVI monitors.T wo DVI connectors with one VGA adapter:Use the VGA adapter to connect a VGA monitor to one of the DVI connectors on your computer.T wo DVI connectors with two VGA adapters:VGA monitors to the DVI connectors on your computer.NOTE: Before you install any devices or software that did not come with your computer, read the documentation that came with the software or device or contact the vendor to verify that the software or device is compatible with your computer and operating system.Y ou have now completed the setup for your desktop computer.45Connect the power cables and turn on the computer and monitor.6Install additional software or devices.About Your ComputerFront View (Tower Orientation)1upper 5.25-inch drive bay Holds a CD/DVD drive.2lower 5.25-inch drive bay Y ou can use this bay for an optional CD/DVD drive.3FlexBay Y ou can use this bay for an optional third hard drive (SATA or SAS), a floppydrive or Media Card Reader.4hard-drive activity light The hard drive light is on when the computer reads data from or writes data tothe hard drive. The light might also be on when a device such as your CD playeris operating.5IEEE 1394 connector (optional)Use the optional IEEE 1394 connector for high-speed data devices such as digital video cameras and external storage devices.6USB 2.0 connectors (2)Use the front USB connectors for devices that you connect occasionally, such asflash memory keys or cameras, or for bootable USB devices (see "System Setup"in your User’s Guide for more information on booting to a USB device).It is recommended that you use the back USB connectors for devices thattypically remain connected, such as printers and keyboards.7Dell™ rotatable badge To rotate the Dell badge for tower-to-desktop conversion; remove the frontpanel, turn it over, and rotate the plastic handle behind the badge.8power button Press to turn on the computer.NOTICE: To avoid losing data, do not use the power button to turn off the computer.Instead, perform an operating system shutdown.NOTE: The power button can also be used to wake the system or to place it into apower-saving state. See "Power Management" in your User’s Guide formore information.9power light The power light illuminates and blinks or remains solid to indicate differentstates:•No light — The computer is turned off.•Steady green — The computer is in a normal operating state.•Blinking green — The computer is in a power-saving state.•Blinking or solid amber — See "Power Problems" in your User’s Guide.To exit from a power-saving state, press the power button or use the keyboard orthe mouse if it is configured as a wake device in the Windows Device Manager.For more information about sleep states and exiting from a power-saving state,see your User’s Guide.See "Diagnostic Lights" on page38 for a description of light codes that can helpyou troubleshoot problems with your computer.10headphone connector Use the headphone connector to attach headphones.11microphone connector Use the microphone connector to attach a personal computer microphone forvoice or musical input into a sound or telephony program.12network link light The network link light is on when a good connection exists between a 10-Mbps,100-Mbps, or 1000-Mbps (or 1-Gbps) network and the computer.13diagnostic lights (4)Use these lights to help you troubleshoot a computer problem based on thediagnostic code. For more information, see "Diagnostic Lights" on page38.Back View (Tower Orientation)1power connector Insert the power cable.2card slots Access connectors for any installed PCI, PCI-X, or PCI Express cards.NOTE: The center four slots support full-length cards: one PCI-X slot, one PCIExpress x8 slot (wired as x4), one PCI Express x16 slot, and one PCI slot); and the topand bottom slots support half-length cards: one PCI-X slot and one PCI Express x8slot (wired as x4).3back panel connectors Plug serial, USB, and other devices into the appropriate connectors.Back Panel Connectors1parallel connector Connect a parallel device, such as a printer, to the parallel connector. If you have aUSB printer, plug it into a USB connector.NOTE: The integrated parallel connector is automatically disabled if the computerdetects an installed card containing a parallel connector configured to the sameaddress. For more information, see your User’s Guide.2line-out/ headphone connector Use the green line-out connector to attach headphones and most speakers with integrated amplifiers.On computers with a sound card, use the connector on the card.3PS/2 mouse connector Plug a standard mouse into the green mouse connector. T urn off the computerand any attached devices before you connect a mouse to the computer. If youhave a USB mouse, plug it into a USB connector.If your computer is running the Microsoft® Windows® XP operating system, thenecessary mouse drivers have been installed on your hard drive.4link integrity light•Green — A good connection exists between a 10-Mbps network andthe computer.•Orange — A good connection exists between a 100-Mbps network andthe computer.•Yellow — A good connection exists between a 1000-Mbps (or 1-Gbps) networkand the computer.•Off — The computer is not detecting a physical connection to the network.5network adapter connector To attach your computer to a network or broadband device, connect one end of a network cable to either a network jack or your network or broadband device. Connect the other end of the network cable to the network adapter connector on your computer. A click indicates that the network cable has beensecurely attached.NOTE: Do not plug a telephone cable into the network connector.On computers with an additional network connector card, use the connectors on the card and on the back of the computer when setting up multiple network connections (such as a separate intra- and extranet).It is recommended that you use Category 5 wiring and connectors for your network. If you must use Category 3 wiring, force the network speed to 10 Mbps to ensure reliable operation.6network activity light Flashes a yellow light when the computer is transmitting or receiving networkdata. A high volume of network traffic may make this light appear to be in asteady "on" state.7USB 2.0 connectors (5)It is recommended that you use the front USB connectors for devices that youconnect occasionally, such as flash memory keys or cameras, or for bootableUSB devices.Use the back USB connectors for devices that typically remain connected, such asprinters and keyboards.8PS/2 keyboard connector If you have a standard keyboard, plug it into the purple keyboard connector. If youhave a USB keyboard, plug it into a USB connector.9line-in connector Use the blue line-in connector to attach a record/playback device such as acassette player, CD player, or VCR.On computers with a sound card, use the connector on the card.10serial connector Connect a serial device, such as a handheld device, to the serial port. If necessary,the address for this port can be modified through system setup. See yourUser’s Guide for more information.11serial connector Connect a serial device, such as a handheld device, to the serial port. If necessary,the address for this port can be modified through system setup. See yourUser’s Guide for more information.Front View (Desktop Orientation)1upper 5.25-inch drive bay Holds a CD/DVD drive.2lower 5.25-inch drive bay Y ou can use the bay for an optional CD/DVD drive, or a SATA hard drive. 3FlexBay Y ou can use the bay for a floppy drive, or a Media Card Reader.4IEEE 1394 connector (optional)Use the optional IEEE 1394 connector for high-speed data devices such as digital video cameras and external storage devices.5USB 2.0 connectors (2)Use the front USB connectors for devices that you connect occasionally, such asflash memory keys or cameras, or for bootable USB devices (see "System Setup" inyour User’s Guide for more information on booting to a USB device).It is recommended that you use the back USB connectors for devices thattypically remain connected, such as printers and keyboards.6hard-drive activity light The hard drive light is on when the computer reads data from or writes data tothe hard drive. The light might also be on when a device such as your CD playeris operating.7Dell™ rotatable badge To rotate the Dell badge for tower-to-desktop conversion; remove the front panel,turn it over, and rotate the plastic handle behind the badge.8power button Press to turn on the computer.NOTICE: To avoid losing data, do not use the power button to turn off the computer.Instead, perform an operating system shutdown.NOTE: The power button can also be used to wake the system or to place it into apower-saving state. See your User’s Guide for more information.Back View (Desktop Orientation)9power lightThe power light illuminates and blinks or remains solid to indicate different states:•No light — The computer is turned off.•Steady green — The computer is in a normal operating state.•Blinking green — The computer is in a power-saving state.•Blinking or solid amber — See "Power Problems" in your User’s Guide .To exit from a power-saving state, press the power button or use the keyboard or the mouse if it is configured as a wake device in the Windows Device Manager. For more information about sleep states and exiting from a power-saving state, see your User’s Guide .See "Diagnostic Lights" on page 38 for a description of light codes that can help you troubleshoot problems with your computer.10headphone connector Use the headphone connector to attach headphones.11microphone connector Use the microphone connector to attach a personal computer microphone for voice or musical input into a sound or telephony program.12network link light The network link light is on when a good connection exists between a 10-Mbps, 100-Mbps, or 1000-Mbps (or 1-Gbps) network and the computer.13diagnostic lights (4)Use these lights to help you troubleshoot a computer problem based on the diagnostic code. For more information, see "Diagnostic Lights" on page 38.1back panel connectors Plug serial, USB, and other devices into the appropriate connector .2card slotsAccess connectors for any installed PCI, PCI-X, or PCI Express cards.NOTE: The slot farthest to the left and the two slots on the right support half-length cards: one PCI Express x8 slot (wired as x4) and two PCI-X slots. The center three slots support full-length cards: one PCI Express x16 slot, one PCI Express x8 slot (wired as x4) and one PCI slot.3power connectorInsert the power cable.Inside ViewInside View – Hard Drive Bay Rotated OutSystem Board ComponentsCable ColorsLocating Your User’s GuideY our User’s Guide contains additional information about your computer such as:•Technical specifications•Information for changing the orientation of your computer from a desktop to a tower •Front and back views of your computer, including all of the available connectors•Inside views of your computer, including a detailed graphic of the system board and the connectors •Instructions for cleaning your computer•Information on software features, such as Legacy Select Technology control, using a password, and system setup options1primary processor connector (CPU_0)15Flexbay connector (USB)2secondary processor connector (CPU_1)16SATA connectors (SATA_2, SATA_1, SATA_0)3front fan connector (FAN_FRONT)17floppy drive (DSKT)4card cage fan (FAN_CCAG)18front panel connector (FRONTPANEL)5internal speaker connector (INT_SPKR)19PCI-X card slot (SLOT6_PCIX)6power connector (POWER2) 20PCI-X card slot (SLOT5_PCIX)7IDE drive connector (IDE)21chassis intrusion header (INTRUDER)8standby power light (AUX_PWR)22PCI card slot (SLOT4_PCI)9password jumper (PSWD)23PCI-Express x8 card slot, wired as x4 (SLOT3_PCIE)10auxiliary hard-drive LED connector (AUX_LED)24PCI-Express x16 card slot (SLOT2_PCIE)11RTC reset jumper (RTCRST)25PCI-Express x8 card slot, wired as x4 (SLOT1_PCIE)12battery socket (BATTERY))26memory module connectors (DIMM_1-8)13main power connector (POWER1)27memory fan connector (FAN_MEM)14SATA connectors (SATA_4, SATA_3)DeviceColor SATA Hard drive blue cable Floppy drive black pull-tab CD/DVD drive orange pull-tab front panelyellow pull-tab•Tips and information for using the Microsoft Windows XP operating system•Instructions for removing and installing parts, including memory, cards, drives, the microprocessor, and the battery•Information for troubleshooting various computer problems•Instructions for using the Dell Diagnostics and reinstalling drivers•Information on how to contact DellY ou can access the User’s Guide from your hard drive or the Dell Support website at . Removing the Computer CoverCAUTION: Before you begin any of the procedures in this section, follow the safety instructions in theProduct Information Guide.CAUTION: To guard against electrical shock, always unplug your computer from the electrical outlet before removing the cover.NOTICE: To prevent static damage to components inside your computer, discharge static electricity from your body before you touch any of your computer’s electronic components. You can do so by touching an unpainted metal surface on the computer.1Follow the procedures in "Before Y ou Begin" in your User’s Guide.NOTICE: Opening the computer cover while the computer is running could result in a shutdown without warning and a loss of data in open programs. The computer cooling system cannot function properly while the coveris removed.2If you have installed a security cable, remove it from the security cable slot.NOTICE: Ensure that sufficient space exists to support the removed cover—at least 30 cm (1 ft) of desk top space.NOTICE: Ensure that you are working on a level, protected surface to avoid scratching either the computer or the surface on which it is resting.3Lay your computer on a flat surface with the cover facing up.4 NOTE: 56Grip the sides of the computer cover and pivot the cover up, using the hinges as leverage points.7Release the cover from the hinge tabs and set it aside in a secure location.NOTICE: The computer cooling system cannot function properly while the computer cover is not installed. Do not attempt to boot the computer before replacing the computer cover.1Caring for Your ComputerTo help maintain your computer, follow these suggestions:•To avoid losing or corrupting data, never turn off your computer when the hard drive light is on.•Schedule regular virus scans using virus software.•Manage hard drive space by periodically deleting unnecessary files and defragmenting the drive.•Back up files on a regular basis.•Periodically clean your monitor screen, mouse, and keyboard (see your User’s Guide for more information). Solving ProblemsTroubleshooting TipsPerform the following checks when you troubleshoot your computer:•If you added or removed a part before the problem started, review the installation procedures and ensure that the part is correctly installed.•If a peripheral device does not work, ensure that the device is properly connected.•If an error message appears on the screen, write down the exact message. The message may help technical support personnel diagnose and fix the problem(s).•If an error message occurs in a program, see the program’s documentation.•If the recommended action in the troubleshooting section is to see a section in your User’s Guide, go to (on another computer if necessary) to access your User’s Guide.Resolving Software and Hardware IncompatibilitiesIf a device is either not detected during the operating system setup or is detected but incorrectly configured, you can use the Hardware Troubleshooter to resolve the incompatibility.To resolve incompatibilities using the Hardware Troubleshooter:1Click the Start button and click Help and Support.2T ype hardware troubleshooter in the Search field and click the arrow to start the search.3Click Hardware Troubleshooter in the Search Results list.4In the Hardware Troubleshooter list, click I need to resolve a hardware conflict on my computer, and click Next.。
t490 电池 阈值
t490 电池阈值T490电池阈值随着移动办公的普及,笔记本电脑的使用频率越来越高。
然而,随着使用时间的增加,电池容量逐渐下降成为了一个普遍存在的问题。
为了更好地管理电池的使用,ThinkPad T490采用了电池阈值功能,帮助用户延长电池寿命,同时提供更好的使用体验。
电池阈值是指在一定的电量范围内,用户可以设置电池开始充电和停止充电的阈值。
通过合理设置电池阈值,可以最大程度地延长电池的使用寿命。
在ThinkPad T490中,用户可以通过预装的Lenovo Vantage应用程序进行设置和管理。
我们来了解一下电池阈值的原理。
当电池充电到一定的阈值上限时,电池充电会自动停止,以避免过充。
同样地,当电池放电到一定的阈值下限时,电池充电会自动开始,以避免电池过度放电。
通过设置适当的上下限,可以避免电池长时间处于满充或过度放电的状态,从而减少电池的寿命损耗。
在设置电池阈值时,用户可以根据自己的使用习惯和需求进行调整。
一般来说,如果用户经常使用电源适配器供电,可以将上限设置得稍低一些,如80%左右。
这样可以减少充电次数,延长电池的使用寿命。
而如果用户经常使用电池供电,可以将上限设置得稍高一些,如90%左右。
这样可以提供更长的续航时间,满足用户的移动办公需求。
除了上下限的设置,ThinkPad T490还提供了一些智能的电池保护功能。
例如,当用户长时间不使用电池时,系统会自动将电池充电至一定的阈值,然后停止充电,以减少电池的寿命损耗。
此外,当用户电源适配器供电时,系统也会自动停止充电,以避免过充现象的发生。
通过合理设置电池阈值,用户可以延长电池的使用寿命,并提高笔记本电脑的使用体验。
使用ThinkPad T490的电池阈值功能,用户可以轻松地管理电池充放电状态,避免了频繁充电和放电对电池寿命的损害。
同时,用户可以根据自己的使用需求,灵活调整电池阈值,以满足不同场景下的续航和性能需求。
电池阈值是ThinkPad T490提供的一项实用功能,可以帮助用户延长电池寿命,提高使用体验。
- 1、下载文档前请自行甄别文档内容的完整性,平台不提供额外的编辑、内容补充、找答案等附加服务。
- 2、"仅部分预览"的文档,不可在线预览部分如存在完整性等问题,可反馈申请退款(可完整预览的文档不适用该条件!)。
- 3、如文档侵犯您的权益,请联系客服反馈,我们会尽快为您处理(人工客服工作时间:9:00-18:30)。
附录二:设置Sagem 拨号网络(SAGEM OT 490)
1.SAGEM OT 490手机设置
开机进入Menu
✧速率设置:
1.按▲或▼键,选择Connectivity, 按Select键;
2.按▲或▼键,选择(Option)Serial Speed, 按Select键;
3.按▲或▼键,选择115200, 按OK键;
✧USB连接设置:
1.按▲或▼键,选择Connectivity, 按Select键;
2. 按▲或▼键,选择USB Mode, 按Select键;
3. 按▲或▼键,选择(Device type)Modem, 按OK键;
✧关闭彩信自动提取:
1.按▲或▼键,选择Messages, 按 Select 键;
2.按▲或▼键,选择Options, 按Select键;
3.按▲或▼键,选择 (Message)MMS, 按OK 键;
4.按▲或▼键,选择 Advanced settings, 按 Select键;
5. 按▲或▼键,选择MMS ignore ,按Select键;
6. 按▲或▼键,选择(MMS ignore)Yes,按OK。
✧选择手机支持的网络
1.按▲或▼键,选择 Test tool, 按 Select 键;
2.按▲或▼键,选择 infos & Settings, 按 Select 键;
3.按▲或▼键,选择 Release, 按 Select键;
4.按▲或▼键,选择 Release 97, 按 OK键;
5. 手机将自动重启。
2.Sagem OT490手机驱动安装及设置
1.在Sagem OT490 附带的光盘中找到SagemDriver文件夹中的驱动,如20060418_Sagem_USB_Drivers_setup_3_04_05安装按照提示一步步安装直到完成,中间会提示检测设备连接。
(注:先将Sagem OT490 硬件连接到PC上,发现新硬件可以先不安装驱
动)。
2.刷新一下硬件改动,发现新硬件,自动安装驱动。
此时可以在‘控制面板’->‘电话和调制解调器’看到Sagem USB Pseudo CDC Moderm 及Sagem USB Pseudo CDC Trace 以及各自的端口号。
如下图:
3.选中第一个Moderm 调制解调器,打开属性:首先确认最大端口数率为115200;其次输入‘额外的初始化命令’(+cgdcont=1,"IP","cmnet";+cgdcont=2,"IP","cmwap")如图:
在‘诊断’->‘查询调制解调器’查询一下,上图情况为成功,若失败会弹出提示,如图:
3.拨号连接的建立
(1).添加拨号网络
首先在“控制面板”中选择“网络连接”,然后选择“创建一个新连接”,如图
在第一个界面中选择“下一步”,在下一个界面中选择“连接到Internet(C)”,然后选择“下一步”,如图
选择“手动设置我的连接”,在下一个界面中选择“用拨号调制解调器连接”,如图
选择刚才为Sagem 手机建立的调制解调器,并设置一个拨号网络的名称,如“cmnet ”
.
设置拨号的号码,如果是激活cmnet ,则设置为“*99***1#”。
在下一个界面只需要设置“任何用户”即可,最后一个界面选择“完成”如图。
(2).更改拨号网络属性
添加了拨号网络后需要更改其属性才能使用。
在添加的拨号网络上鼠标右键单击,在弹出的菜单中选择“属性”。
在弹出的“常规”栏中选择“配置”按键,在弹出的对话框中设置最高速度(应与手机以及Modem设置相同),推荐为115200。
将硬件功能中的选项全部去掉。
如图
图
在属性的“网络”栏中选择“设置”按键,将“PPP设置”的所有选项都去掉。
如图
(3).创建另一个拨号连接
进行测试时需要建立两个拨号网络,分别激活“cmnet”和“cmwap”,用户可按照上述方法建立另一个cmwap拨号网络,区别之处在于将拨号号码设置位“*99***2#”,另外拨号连接的名称要不同为cmwap。
也可以创建副本来建立连接
具体超作:
在cmnet拨号上点右键,创建副本,然后更改成cmwap
更改拨号“电话号码”即可如图
4-2-15 拨号,完成更改并测试该连接的可用性。
