Build ubuntu16.04 on AM572x
Ubuntu16.04LTS设置屏幕分辨率并永久保存所设置的分辨率

Ubuntu16.04LTS设置屏幕分辨率并永久保存所设置的分辨率⼀、问题:1.新装完Ubuntu 16.04 LTS后,进⼊系统打开命令⾏窗⼝,界⾯的分辨率显⽰是最⼩的:2.进⼊System settings-->Displays 设置屏幕分辨率显⽰“Unknown display”,选择后⽆反应,并且屏幕⼤⼩不会改变,⽆法通过设置改变屏幕分辨率:⼆、解决⽅法:1.通过命令 “xrandr ” 查看当前的分辨率,带*号的为当前分辨率:2.上图中我要使⽤1280X768的分辨率,输⼊“cvt 1280 768”命令,查询⼀下768P分辨率的有效扫描频率,如下图所⽰:3.然后使⽤xrandr 创建新的mode,模式为"xrandr --newmode后⾯跟刚刚cvt产⽣的modeline信息"。
⽐如 "xrandr --newmode"1280x768_60.00" 79.50 1280 1344 1472 1664 768 771 781 798 -hsync +vsync" 命令新建⼀种输出分辨率,如下图:4.我们要把新建的输出分辨率添加到当前输出设备上,模式为”xrandr --addmode后⾯第⼀个参数是xrandr显⽰出来的列表中,你要更改⽬标输出的设备名称,这⾥因为我是虚拟机安装的,所以为Virtual1。
如果是直接接显⽰器的,可能是VGA或者其他什么的"。
命令为“xrandr --addmode Virtual1 "1280x768_60.00" ”,如下图:5.最后,把当前分辨率设置为刚添加的1080P分辨率,命令为“xrandr --output Virtual1 --mode "1280x768_60.00" ”,如下图:6.接下来最重要的操作,因为此设置当前会话有效,重启就恢复初始设置了,需要配置⽂件搞⼀下,命令为“sudo getit .profile”,然后输⼊登录密码如下图:7.在配置⽂件profile末尾加上之前添加新分辨率的命令就⾏了,如下图:8.最后重启系统,使⽤“xrandr”命令查看当前的屏幕分辨率已经成为我们设置的模式了,如下图:总结:最后在最新的版本Ubuntu 18.04 LTS可以通过设置屏幕分辨率来解决,设置永久有效。
Ubuntu16.04无损分区大小调整工具Gparted
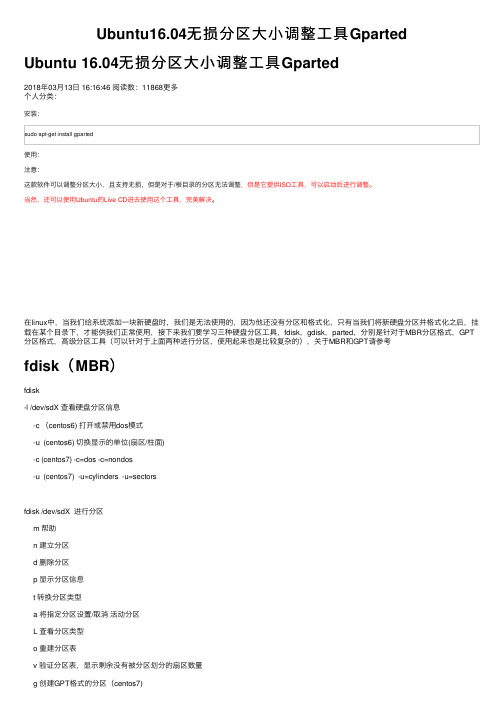
Ubuntu16.04⽆损分区⼤⼩调整⼯具GpartedUbuntu 16.04⽆损分区⼤⼩调整⼯具Gparted2018年03⽉13⽇ 16:16:46 阅读数:11868更多个⼈分类:安装:sudo apt-get install gparted使⽤:注意:这款软件可以调整分区⼤⼩,且⽀持⽆损,但是对于/根⽬录的分区⽆法调整,但是它提供ISO⼯具,可以启动后进⾏调整。
当然,还可以使⽤Ubuntu的Live CD进去使⽤这个⼯具,完美解决。
在linux中,当我们给系统添加⼀块新硬盘时,我们是⽆法使⽤的,因为他还没有分区和格式化,只有当我们将新硬盘分区并格式化之后,挂载在某个⽬录下,才能供我们正常使⽤,接下来我们要学习三种硬盘分区⼯具,fdisk,gdisk,parted,分别是针对于MBR分区格式,GPT 分区格式,⾼级分区⼯具(可以针对于上⾯两种进⾏分区,使⽤起来也是⽐较复杂的),关于MBR和GPT请参考fdisk(MBR)fdisk-l /dev/sdX 查看硬盘分区信息-c (centos6) 打开或禁⽤dos模式-u (centos6) 切换显⽰的单位(扇区/柱⾯)-c (centos7) -c=dos -c=nondos-u (centos7) -u=cylinders -u=sectorsfdisk /dev/sdX 进⾏分区m 帮助n 建⽴分区d 删除分区p 显⽰分区信息t 转换分区类型a 将指定分区设置/取消活动分区L 查看分区类型o 重建分区表v 验证分区表,显⽰剩余没有被分区划分的扇区数量g 创建GPT格式的分区(centos7)q 退出不保存,不保存,所有的修改都不⽣效w 退出并保存[root@CT6 ~]# fdisk -l /dev/sdbWARNING: GPT (GUID Partition Table) detected on '/dev/sdb'! The util fdisk doesn't support GPT. Use GNU Parted. Disk /dev/sdb: 536.9 GB, 536870912000 bytes -------------------------硬盘⼤⼩255 heads, 63 sectors/track, 65270 cylinders ------------------------磁头数,每磁道扇区数,柱⾯数Units = cylinders of 16065 * 512 = 8225280 bytes --------------------每柱⾯⼤⼩Sector size (logical/physical): 512 bytes / 512 bytes ---------------扇区⼤⼩I/O size (minimum/optimal): 512 bytes / 512 bytesDisk identifier: 0x00000000 -----------------------------------------未分区磁盘[root@CT6 ~]# fdisk /dev/sdb --------------------------磁盘分区WARNING: GPT (GUID Partition Table) detected on '/dev/sdb'! The util fdisk doesn't support GPT. Use GNU Parted. Device contains neither a valid DOS partition table, nor Sun, SGI or OSF disklabelBuilding a new DOS disklabel with disk identifier 0x52ce01ab.Changes will remain in memory only, until you decide to write them.After that, of course, the previous content won't be recoverable.Warning: invalid flag 0x0000 of partition table 4 will be corrected by w(rite)WARNING: DOS-compatible mode is deprecated. It's strongly recommended toswitch off the mode (command 'c') and change display units tosectors (command 'u').Command (m for help): m ------------------------查看帮助Command actiona toggle a bootable flagb edit bsd disklabelc toggle the dos compatibility flagd delete a partitionl list known partition typesm print this menun add a new partitiono create a new empty DOS partition tablep print the partition tableq quit without saving changess create a new empty Sun disklabelt change a partition's system idu change display/entry unitsv verify the partition tablew write table to disk and exitx extra functionality (experts only)Command (m for help):Command (m for help): n ------------------------------添加⼀个分区Command actione extendedp primary partition (1-4)p ---------------------------------------------添加主分区Partition number (1-4): 1 ----------------------------磁盘编号1,即:sdb1First cylinder (1-65270, default 1): -------------------开始位置,不填写,默认就⾏Using default value 1Last cylinder, +cylinders or +size{K,M,G} (1-65270, default 65270): +20G -----------填写⼤⼩Command (m for help): p --------------------------------查看刚刚的分区Disk /dev/sdb: 536.9 GB, 536870912000 bytes255 heads, 63 sectors/track, 65270 cylindersUnits = cylinders of 16065 * 512 = 8225280 bytesSector size (logical/physical): 512 bytes / 512 bytesI/O size (minimum/optimal): 512 bytes / 512 bytesDisk identifier: 0x52ce01abDevice Boot Start End Blocks Id System/dev/sdb1 1 2612 20980858+ 83 Linux -----------------创建了⼀个分区Command (m for help): l ------------------查看可⽤的分区类型0 Empty 24 NEC DOS 81 Minix / old Lin bf Solaris1 FAT12 39 Plan 9 82 Linux swap / So c1 DRDOS/sec (FAT-2 XENIX root 3c PartitionMagic 83 Linux c4 DRDOS/sec (FAT-3 XENIX usr 40 Venix 80286 84 OS/2 hidden C: c6 DRDOS/sec (FAT-4 FAT16 <32M 41 PPC PReP Boot 85 Linux extended c7 Syrinx5 Extended 42 SFS 86 NTFS volume set da Non-FS data6 FAT16 4d QNX4.x 87 NTFS volume set db CP/M / CTOS / .7 HPFS/NTFS 4e QNX4.x 2nd part 88 Linux plaintext de Dell Utility8 AIX 4f QNX4.x 3rd part 8e Linux LVM df BootIt9 AIX bootable 50 OnTrack DM 93 Amoeba e1 DOS accessa OS/2 Boot Manag 51 OnTrack DM6 Aux 94 Amoeba BBT e3 DOS R/Ob W95 FAT32 52 CP/M 9f BSD/OS e4 SpeedStorc W95 FAT32 (LBA) 53 OnTrack DM6 Aux a0 IBM Thinkpad hi eb BeOS fse W95 FAT16 (LBA) 54 OnTrackDM6 a5 FreeBSD ee GPTf W95 Ext'd (LBA) 55 EZ-Drive a6 OpenBSD ef EFI (FAT-12/16/10 OPUS 56 Golden Bow a7 NeXTSTEP f0 Linux/PA-RISC b11 Hidden FAT12 5c Priam Edisk a8 Darwin UFS f1 SpeedStor12 Compaq diagnost 61 SpeedStor a9 NetBSD f4 SpeedStor14 Hidden FAT16 <3 63 GNU HURD or Sys ab Darwin boot f2 DOS secondary16 Hidden FAT16 64 Novell Netware af HFS / HFS+ fb VMware VMFS17 Hidden HPFS/NTF 65 Novell Netware b7 BSDI fs fc VMware VMKCORE18 AST SmartSleep 70 DiskSecure Mult b8 BSDI swap fd Linux raid auto1b Hidden W95 FAT3 75 PC/IX bb Boot Wizard hid fe LANstep1c Hidden W95 FAT3 80 Old Minix be Solaris boot ff BBT1e Hidden W95 FAT1Command (m for help):Command (m for help): w -----------------------保存并退出The partition table has been altered!Calling ioctl() to re-read partition table.Syncing disks.gdisk(GPT)gdisk-l /dev/sdX 查看分区信息gdisk(?|m) 帮助n 建⽴分区d 删除分区c 更改分区名字 I 显⽰分区的详细信息p 显⽰分区信息t转换分区类型a 将指定分区设置/取消活动分区l 查看分区类型o 重建分区表v 验证分区表,显⽰剩余没有被分区划分的扇区数量q 退出不保存,不保存,所有的修改都不⽣效w 退出并保存gdisk时⽤来创建GPT分区的,我们可以看到,gdisk和fdisk的开头是有些不同的。
Ubuntu16.04修改内核启动
Ubuntu16.04修改内核启动 写这篇⽂章⼀是为了对遇到同样问题的⼈提供⼀个参考,⼆来也是为了⾃⼰便于总结和查阅。
希望⼤神勿喷。
好了,废话不多说了,转⼊正题。
前⼏天给⾃⼰的电脑装了个Ubuntu16.04LTS,⾃⼰顺⼿就把⾥边的软件什么的升级了⼀下。
不知怎么地把内核升级到了4.8.0-26-generic,然后电脑就USB⽼出⽑病(在开机之前插上优盘的话可以读出优盘,开机后插上就没反应,但USB可以有电)。
⽿机也不能⽤了,喇叭也没声⾳。
⾃⼰也不懂怎么回事,就各种百度,Google。
⽹上好多⼈说是内核和硬件不兼容,⼀般把显卡驱动卸载了就好了。
我试了⼀下没有成功。
后来注意到开机的时候提⽰Failed to start Load Kernel Modules。
然后就转战内核⽅向。
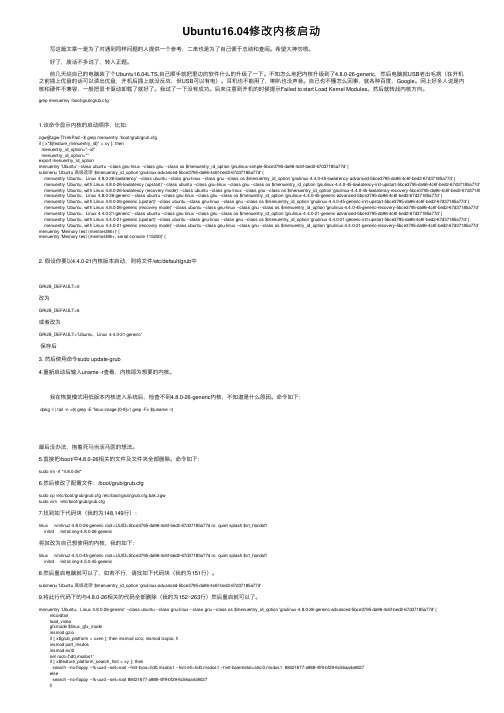
grep menuentry /boot/grub/grub.cfg1.该命令显⽰内核的启动顺序,⽐如:zgw@zgw-ThinkPad:~$ grep menuentry /boot/grub/grub.cfgif [ x"${feature_menuentry_id}" = xy ]; thenmenuentry_id_option="--id"menuentry_id_option=""export menuentry_id_optionmenuentry 'Ubuntu' --class ubuntu --class gnu-linux --class gnu --class os $menuentry_id_option 'gnulinux-simple-5bce3795-da96-4c6f-bed2-67d37185a77d' {submenu 'Ubuntu ⾼级选项' $menuentry_id_option 'gnulinux-advanced-5bce3795-da96-4c6f-bed2-67d37185a77d' {menuentry 'Ubuntu,Linux 4.8.0-26-lowlatency' --class ubuntu --class gnu-linux --class gnu --class os $menuentry_id_option 'gnulinux-4.4.0-45-lowlatency-advanced-5bce3795-da96-4c6f-bed2-67d37185a77d' {menuentry 'Ubuntu, with Linux 4.8.0-26-lowlatency (upstart)' --class ubuntu --class gnu-linux --class gnu --class os $menuentry_id_option 'gnulinux-4.4.0-45-lowlatency-init-upstart-5bce3795-da96-4c6f-bed2-67d37185a77d'menuentry 'Ubuntu, with Linux 4.8.0-26-lowlatency (recovery mode)' --class ubuntu --class gnu-linux --class gnu --class os $menuentry_id_option 'gnulinux-4.4.0-45-lowlatency-recovery-5bce3795-da96-4c6f-bed2-67d37185a77d' menuentry 'Ubuntu,Linux 4.8.0-26-generic' --class ubuntu --class gnu-linux --class gnu --class os $menuentry_id_option 'gnulinux-4.4.0-45-generic-advanced-5bce3795-da96-4c6f-bed2-67d37185a77d' {menuentry 'Ubuntu, with Linux 4.8.0-26-generic (upstart)' --class ubuntu --class gnu-linux --class gnu --class os $menuentry_id_option 'gnulinux-4.4.0-45-generic-init-upstart-5bce3795-da96-4c6f-bed2-67d37185a77d' {menuentry 'Ubuntu, with Linux 4.8.0-26-generic (recovery mode)' --class ubuntu --class gnu-linux --class gnu --class os $menuentry_id_option 'gnulinux-4.4.0-45-generic-recovery-5bce3795-da96-4c6f-bed2-67d37185a77d' {menuentry 'Ubuntu,Linux 4.4.0-21-generic' --class ubuntu --class gnu-linux --class gnu --class os $menuentry_id_option 'gnulinux-4.4.0-21-generic-advanced-5bce3795-da96-4c6f-bed2-67d37185a77d' {menuentry 'Ubuntu, with Linux 4.4.0-21-generic (upstart)' --class ubuntu --class gnu-linux --class gnu --class os $menuentry_id_option 'gnulinux-4.4.0-21-generic-init-upstart-5bce3795-da96-4c6f-bed2-67d37185a77d' {menuentry 'Ubuntu, with Linux 4.4.0-21-generic (recovery mode)' --class ubuntu --class gnu-linux --class gnu --class os $menuentry_id_option 'gnulinux-4.4.0-21-generic-recovery-5bce3795-da96-4c6f-bed2-67d37185a77d' { menuentry 'Memory test (memtest86+)' {menuentry 'Memory test (memtest86+, serial console 115200)' {2. 假设你要以4.4.0-21内核版本启动,则将⽂件/etc/default/grub中 GRUB_DEFAULT=0改为GRUB_DEFAULT=6或者改为GRUB_DEFAULT=”Ubuntu,Linux 4.4.0-21-generic“保存后3. 然后使⽤命令sudo update-grub4.重新启动后输⼊uname -r查看,内核即为想要的内核。
Ubuntu16.04显卡型号查询命令
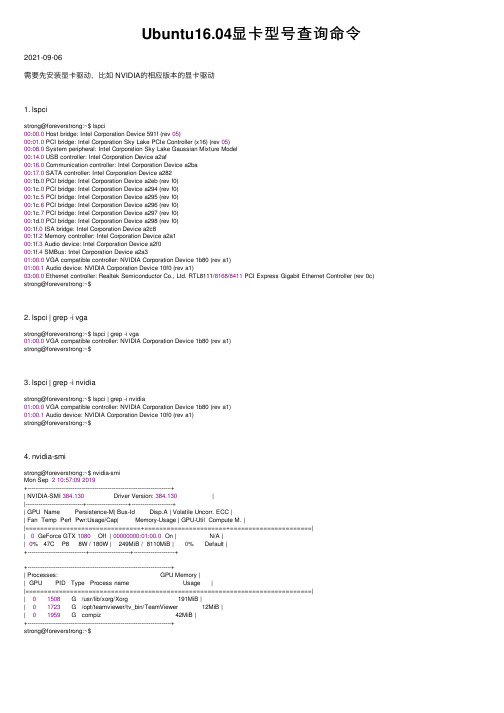
Ubuntu16.04显卡型号查询命令2021-09-06需要先安装显卡驱动,⽐如 NVIDIA的相应版本的显卡驱动1. lspcistrong@foreverstrong:~$ lspci00:00.0 Host bridge: Intel Corporation Device 591f (rev 05)00:01.0 PCI bridge: Intel Corporation Sky Lake PCIe Controller (x16) (rev 05)00:08.0 System peripheral: Intel Corporation Sky Lake Gaussian Mixture Model00:14.0 USB controller: Intel Corporation Device a2af00:16.0 Communication controller: Intel Corporation Device a2ba00:17.0 SATA controller: Intel Corporation Device a28200:1b.0 PCI bridge: Intel Corporation Device a2eb (rev f0)00:1c.0 PCI bridge: Intel Corporation Device a294 (rev f0)00:1c.5 PCI bridge: Intel Corporation Device a295 (rev f0)00:1c.6 PCI bridge: Intel Corporation Device a296 (rev f0)00:1c.7 PCI bridge: Intel Corporation Device a297 (rev f0)00:1d.0 PCI bridge: Intel Corporation Device a298 (rev f0)00:1f.0 ISA bridge: Intel Corporation Device a2c800:1f.2 Memory controller: Intel Corporation Device a2a100:1f.3 Audio device: Intel Corporation Device a2f000:1f.4 SMBus: Intel Corporation Device a2a301:00.0 VGA compatible controller: NVIDIA Corporation Device 1b80 (rev a1)01:00.1 Audio device: NVIDIA Corporation Device 10f0 (rev a1)03:00.0 Ethernet controller: Realtek Semiconductor Co., Ltd. RTL8111/8168/8411 PCI Express Gigabit Ethernet Controller (rev 0c) strong@foreverstrong:~$2. lspci | grep -i vgastrong@foreverstrong:~$ lspci | grep -i vga01:00.0 VGA compatible controller: NVIDIA Corporation Device 1b80 (rev a1)strong@foreverstrong:~$3. lspci | grep -i nvidiastrong@foreverstrong:~$ lspci | grep -i nvidia01:00.0 VGA compatible controller: NVIDIA Corporation Device 1b80 (rev a1)01:00.1 Audio device: NVIDIA Corporation Device 10f0 (rev a1)strong@foreverstrong:~$4. nvidia-smistrong@foreverstrong:~$ nvidia-smiMon Sep 210:57:092019+-----------------------------------------------------------------------------+| NVIDIA-SMI 384.130 Driver Version: 384.130 ||-------------------------------+----------------------+----------------------+| GPU Name Persistence-M| Bus-Id Disp.A | Volatile Uncorr. ECC || Fan Temp Perf Pwr:Usage/Cap| Memory-Usage | GPU-Util Compute M. ||===============================+======================+======================|| 0 GeForce GTX 1080 Off | 00000000:01:00.0 On | N/A || 0% 47C P8 8W / 180W | 249MiB / 8110MiB | 0% Default |+-------------------------------+----------------------+----------------------++-----------------------------------------------------------------------------+| Processes: GPU Memory || GPU PID Type Process name Usage ||=============================================================================|| 01508 G /usr/lib/xorg/Xorg 191MiB || 01723 G /opt/teamviewer/tv_bin/TeamViewer 12MiB || 01959 G compiz 42MiB |+-----------------------------------------------------------------------------+strong@foreverstrong:~$。
Ubuntu16.04环境上安装常用软件的方法
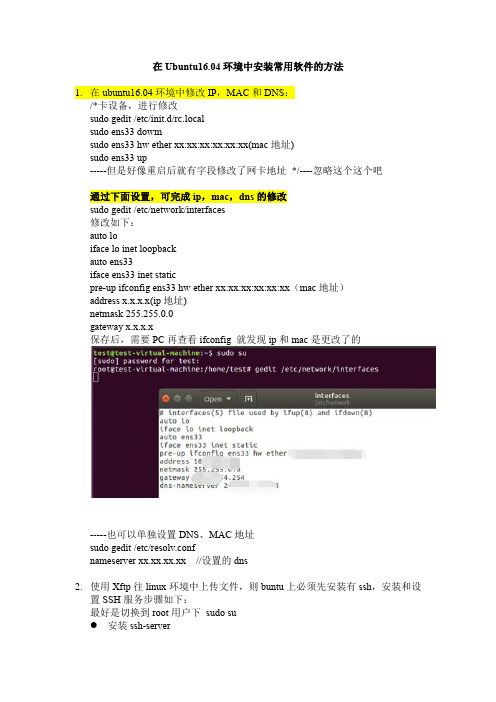
在Ubuntu16.04环境中安装常用软件的方法1.在ubuntu16.04环境中修改IP,MAC和DNS:/*卡设备,进行修改sudo gedit /etc/init.d/rc.localsudo ens33 dowmsudo ens33 hw ether xx:xx:xx:xx:xx:xx(mac地址)sudo ens33 up-----但是好像重启后就有字段修改了网卡地址*/----忽略这个这个吧通过下面设置,可完成ip,mac,dns的修改sudo gedit /etc/network/interfaces修改如下:auto loiface lo inet loopbackauto ens33iface ens33 inet staticpre-up ifconfig ens33 hw ether xx:xx:xx:xx:xx:xx(mac地址)address x.x.x.x(ip地址)netmask 255.255.0.0gateway x.x.x.x保存后,需要PC再查看ifconfig 就发现ip和mac是更改了的-----也可以单独设置DNS、MAC地址sudo gedit /etc/resolv.confnameserver xx.xx.xx.xx//设置的dns2.使用Xftp往linux环境中上传文件,则buntu上必须先安装有ssh,安装和设置SSH服务步骤如下:最好是切换到root用户下sudo su安装ssh-serversudo apt-get install openssh-server●安装ssh-clientsudo apt-get install openssh-client●确认sshserver是否安装ps –e|grep ssh/etc/init.d/ssh start●扩展配置SSH默认服务端口为22,用户可以自已定义成其他端口,如222,需要修改的配置文件为:gedit /etc/ssh/sshd_config把里面的Port参数修改成222即可然后重启SSH服务:sudo/etc/init.d/ssh restart3.在本机安装Xshell,连接Ubuntu中的linux●确保Ubuntu可以联网●ssh服务启动了●打开xshell,新建连接●在【用户身份验证】下,输入自己linux操作系统下的普通用户名和密码,之后【确认】-【连接】4.连接xftp设置设置如下报错提示“找不到匹配的outgoing encryption算法”●原因,是ssh登录本地终端缓存了相关的安全确认信息,远端的服务升级后,其对应的加密算法均作了升级、修改,而本地的缓存安全信息并无更新,导致无法正常登录,提示:“找不到匹配的outgoing encryption算法”解决措施1:打开某个会话的属性(在某个会话上右键-属性)选中aes192-ctr aes128-ctr aes256-ctr●正常连通5.安装软件Emacs24安装步骤如下:1.确保一个干净的安装,请按照下面的步骤:(若安装了老版本的emacs,删除)sudo apt-get updatesudo apt-get installsudo apt-get purge emacs emacs-snapshot-common emacs-snapshot-bin-common emacs-snapshot emacs-snapshot-el emacs-snapshot-gtk emacs23 emacs23-bin-common emacs23-common emacs23-el emacs23-nox emacs23-lucid auctex apel emacs24 emacs24-bin-common emacs24-common emacs24-common-non-dfsg emacs24-el2.添加PPAsudo add-apt-repository ppa:cassou/emacssudo apt-get update3.安装sudo apt-get install emacs-snapshot-el emacs-snapshot-gtk emacs-snapshotsudo apt-get install emacs24 emacs24-el emacs24-common-non-dfsg6.安装Vimsudo apt-get install vim安装完成后,在命令行中敲入vi,tab键,可以查看显示有vim命令修改vim配置,输入命令:sudo vim /etc/vim/vimrcInstall Vim on Ubuntu16.04sudo add-apt-repository ppa:jonathonf/vimsudo apt updatesudo apt install vimremove Vim8.0sudo apt remove vimsudo add-apt-respository –remove ppa:jonathonf/vim7.安装wps2016●首先在wps上下载linux的deb安装包;●安装配置环境sudo apt-get updatesudo apt-get install libc6-i386sudo apt-get install ia32-libs(在64环境中安装不上这个,所以死活安装的wps有问题,不能使用)最后发现不能在ubuntu-64环境中安装beta的安装包,重新下载Alpha包●开始安装sudo dpkg –i wps-office*.deb(安装包路径和名称)●若有依赖故障修复依赖sudo apt-get install –f卸载wps●若是在Ubuntu Software Center安装,直接在center中卸载;●自己下载的deb安装,使用sudo apt-get autoremove software-name;●一次性卸载干净就使用sudo apt-get autoremove--purge software-name(所欲配置都卸载干净)8.安装jEdit软件。
安装Ubuntu16.04后要做的事(总结)

安装Ubuntu16.04后要做的事(总结)Ubuntu 16.04发布了,带来了很多新特性,同样也依然带着很多不习惯的东西,所以装完系统后还要进⾏⼀系列的优化。
1.删除libreofficelibreoffice虽然是开源的,但是Java写出来的office执⾏效率实在不敢恭维,装完系统后果断删掉sudo apt-get remove libreoffice-common2.删除Amazon的链接sudo apt-get remove unity-webapps-common3.删掉基本不⽤的⾃带软件(⽤的时候再装也来得及)sudo apt-get remove thunderbird totem rhythmbox empathy brasero simple-scan gnome-mahjongg aisleriot gnome-mines cheese transmission-common gnome-orca webbrowser-app gnome-sudoku landscape-client-ui-install sudo apt-get remove onboard deja-dup这样系统就基本上⼲净了。
4.安装Vim居然默认没有集成Vim神器,只能⼿动安装了。
sudo apt-get install vim5.设置时间使⽤UTCsudo vim /etc/default/rcS将UTC=no改为UTC=yes6.安装Chrome然后sudo apt-get install libappindicator1 libindicator7sudo dpkg -i google-chrome-stable_current_amd64.debsudo apt-get -f install这样以后就可以apt安装和更新chrome浏览器了。
7.安装搜狗输⼊法vim /etc/apt/sources.list.d/ubuntukylin.list⽂件,加⼊ubuntu kylin的apt源deb :10006/ubuntukylin trusty main然后sudo apt-get updatesudo apt-get install sogoupinyin这样就可以apt安装和更新搜狗输⼊法了。
Linux系统下Ubuntu 16.04 LTS 32bit 英文版的RT-Thread开发环境搭建

Linux系统下Ubuntu 16.04 LTS 32bit 英文版的RT-Thread开发环境搭建1. 搭建步骤com1.1. 下载交叉编译工具cd ~1.2. 解压缩交叉编译工具tar -xzf xtensa-esp32-elf-linux32-1.22.0-61-gab8375a-5.2.0.tar.gz1.3. 安装必要的软件sudo apt-get install git wget make libncu1.4. 获取代码cd ~git clonehttps://github/BernardXiong/1.5. 修改工程中交叉编译工具的路径修改~/rtthread-esp-idf/rtconfig.py中exec_path的路径为:注路径中的ss为linux当前用户的用户名1.6. 编译首先修改个Makefile中的一个小错误,python 那行命令路径需要修改:pythonesp-idf-port/esp-idf/components/esptool_py/esptool/esptool.py --chip esp32elf2image --flash_mode "dio" --flash_freq "40m"--flash_size "4MB" -ortthread.bin rtthread-esp32.elfcd ~/rtthread-esp-idf1.7. 下载1) 由于Linux下普通用户无权限直接操作/dev/ttyUSB0,首先给当前用户加入相应的权限,以便后边烧写时不需要使用sudo权限:sudo usermod -aG dialout ss注:ss为linux当前用户的用户名python esp-idf-port/esp-idf/components/esptool_py/esptool/esptool.py--chip esp32 --port /dev/ttyUSB0 --baud 115200 --before"default_reset" --after "hard_reset" write_flash -z--flash_mode "dio" --flash_freq "40m" --flash_size detect0x1000 bootloader.bin 0x10000 rtthread.bin 0x8000 parchmod a+xburn_flash.batcd ~/rtthread-esp-idf(波特率:115200)2. 其他说明 2.1. Linux64bit、Windows及macos的交叉编译工具具体见https://github/BernardXiong/rtthread-esp-idf,里边有其他系统交叉编译工具的下载路径。
虚拟机安装Ubuntu16.04系统实操教程详尽步骤vmwareESXi亲测通过
虚拟机安装Ubuntu16.04系统实操教程详尽步骤vmwareESXi亲测通过1 Ubuntu 16.04系统安装要求Ubuntu 16.04 LTS下载最新版本的Ubuntu,适⽤于台式机和笔记本电脑。
LTS代表长期⽀持,这意味着有五年免费安全和维护更新的保证。
Ubuntu 16.04 LTS发⾏版推荐的系统要求:2 GHz双核处理器或更⾼版本2 GB系统内存25 GB的可⽤硬盘驱动器空间⽤于安装媒体的DVD驱动器或USB端⼝均可访问Internet1.1 vmware创建虚拟机点击 "Create / Register VM"显⽰弹窗"New virtual machine",选择"Create a new virtual machine",选择"Next"输⼊虚拟机名称,系统类别,系统版本选择存储作为虚拟磁盘⾃定义配置CPU,内存,镜像⽂件注意:CD/DVD Drive 1选择对应的镜像⽂件ubuntu-16.04.6-server-amd64.iso点击"Finish",完成虚拟机的创建1.2 安装Ubuntu1604系统点击完成后,会回到主界⾯看到对应的名称为"MyUbuntu1604"的虚拟机点击"Power on",开始启动虚拟机选择语⾔安装系统暂时不⽤配置⽹络设置磁盘分区安装系统及相关依赖包Ubuntu 16.04系统开始启动1.3 配置Ubuntu1604系统的root⽤户登录编辑⽂件vim /etc/ssh/sshd_config重启sshdsystemctl restart sshd修改root⽤户密码1.4 配置Ubuntu1604系统的⽹络为静态IP启动⽹卡ifup ens160使⽤xhell连接,可以联⽹。
在ubuntu16.04上编译安卓5.1的过程
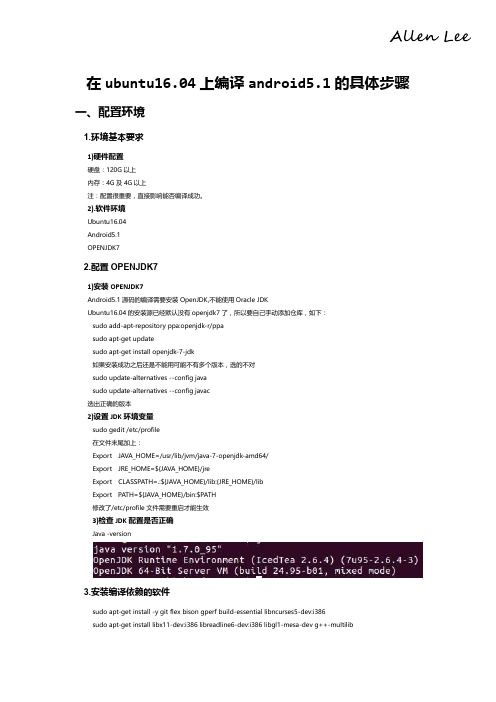
sudo apt-get install tofrodos python-markdown libxml2-utils xsltproc zlib1g-dev:i386 sudo apt-get install dpkg-dev libsdl1.2-dev libesd0-dev sudo apt-get install git-core gnupg flex bison gperf build-essential sudo apt-get install zip curl zlib1g-dev gcc-multilib g++-multilib sudo apt-get install libc6-dev-i386 sudo apt-get install lib32ncurses5-dev x11proto-core-dev libx11-dev sudo apt-get install lib32z-dev ccache sudo apt-get install libgl1-mesa-dev libxml2-utils xsltproc unzip m4 注:Ubuntu 版本不同,依赖的软件也不一样。
sudo add-apt-repository ppa:ubuntu-toolchain-r/test sudo apt-get update sudo apt-get install gcc-4.7 g++-4.7 g++-4.7-multilib gcc-4.7-multilib
2)Ubuntu16.04 环境下,推荐安装 make-3.8 版本
2)设置 JDK 环境变量
sudo gedit /etc/profile 在文件末尾加上: Export JAVA_HOME=/usr/lib/jvm/java-7-openjdk-amd64/ Export JRE_HOME=${JAVA_HOME}/jre Export CLASSPATH=.:${JAVA_HOME}/lib:{JRE_HOME}/lib Export PATH=${JAVA_HOME}/bin:$PATH 修改了/etc/profile 文件需要重启才能生效
Windows系统下安装VirtualBox及安装Ubuntu16.04的详细教程

Windows系统下安装VirtualBox及安装Ubuntu16.04的详细教程1.软件介绍VirtualBoxVirtualBox 是⼀款免费的开源虚拟机软件,所谓虚拟机软件,就是能够提供各种模拟的硬件环境,并且在其上安装各种操作系统,⽬前⽀持Window,Linux,Mac OS X. 其下载地址可以点击。
点击链接后,因为是要在window下安装,可以参考下⾯,直接点击红框部分的链接下载widnow版的VirtualBox下载好了后,直接双击打开,类似下⾯的图⽂步骤直接不停点击下⼀步安装即可UbuntuUbuntu,中⽂称呼“乌班图“,是⼀个开源Linux操作系统,是基于Linux内核开发,⽀持x86、amd64(即x64)和ppc架构。
其下载地址可以点击。
打开上⾯的链接后,可以看到如下的链接我们这⾥是下载16.04的版本,上⾯标注了三个红框的链接都是能下载16.04的版本的,有可能你点第⼀个链接还是没法下载,有可能需要翻墙,此时你再尝试第⼆个或者第三个链接,根据你电脑⽀持的cpu位数选择,现在⼤部分的电脑都直接⽀持64-bit的,如果你是点击的第三个链接,将会进⼊到下⾯的页⾯搜索china,可以点击下⾯的任何⼀个链接就能完成下载了,下载下来的⽂件是⼀个.iso格式的,直接双击是没法打开的,下⾯会告诉怎么安装Ubuntu。
2.实际操作开启VirtualBox⽀持64位系统有的电脑尽管⽀持64位,但是默认没有开启virtualBox的64位的⽀持,所以需要到Bios中打开Virtualization,可以参考。
将Ubuntu 安装到VirtualBox中双击打开刚才安装好的VirtualBox,然后点击“新建”注意上图红框的部分,按照实际情况设置,其中内存默认情况,不要超过你电脑内存的⼀半。
⽂件⼤⼩就是创建的虚拟机的⼤⼩,到时会⽤来存放各种⽂件,通常配置个10-20GB⾜够了创建好了后,点击完成,然后回到VirtualBox界⾯,双击刚才创建好的虚拟机选择刚才下载好的Ubuntu⽂件之后就开始进⼊Ubuntu的安装过程,直接参考下⾯的截图⼀步步操作即可:这⾥需要给Ubuntu配置下⽤户名,密码。
Ubuntu16.04下的modules模块编译加载

Ubuntu16.04下的modules模块编译加载⼀、⾸先编写对应的驱动程序的相关内容:(最简单的hello.c程序)1 #include<linux/init.h>2 #include<linux/module.h>3 MODULE_LICENSE("Dual BSD/GPL");4 MODULE_AUTHOR("MDAXIA");56static int __init hello_init(void)7 {8 printk(KERN_ALERT "Hello world!\n");9return0;10 }11static void __exit hello_exit(void)12 {13 printk(KERN_ALERT "Goodbye,cruel world!");14 }15 module_init(hello_init);16 module_exit(hello_exit);⼆、编写对应Makefile⽂件:(注意事项Makefile,⾸字母⼤写M)1 ifeq ($(KERNELRELEASE),)2 KDIR:=/lib/modules/$(shell uname -r)/build3 PWD:=$(shell pwd)4 modules:5 $(MAKE) -C $(KDIR) M=$(PWD) modules6 modules_install:7 $(MAKE) -C $(KDIR) M=$(PWD) modules_install8 clean:9 rm -rf *.o *.ko .depend *.mod.o *.mod.c Module.* modules.*10 .PHONY:modules modules_install clean11else12 obj-m :=hello.o13 endif三、使⽤make指令对程序进⾏编译⽣成⽬标⽂件hello.kosudo make使⽤的是sudo make的指令来保证运⾏和⽂件的执⾏权限等等,编译的结果如下所⽰:这⾥成功⽣成了我们需要的.ko⽂件使⽤sudo make clean命令来清除相关的中间⽂件以及⽬标⽂件:sudo make clean这样就清除了所有的⽂件了~四、安装加载模块,需要的是root权限:sudo insmod ./hello.ko这⾥的路径变了⼀下,是因为我的Ubuntu16.04的实体主机加载模块的时候,需要数字签名,但是数字签名之后还是不能正确的加载,之后就在我的虚拟机Ubuntu16.04上实验了⼀下,这样居然成功了,因此路径有所改变,但是驱动成功加载了。
ubuntu16.04搭建软路由

ubuntu16.04搭建软路由Ubuntu16以下可以使⽤,18使⽤netplan进⾏⽹络管理,⽅法不同开启ubuntu核⼼转发在/etc/sysctl.conf写⼊net.ipv4.ip_forward=1sysctl -p使其⽣效配置dns服务apt-get update && apt-get install -y dnsmasqvim /etc/dnsmasq.conf配置dhcp服务apt install isc-dhcp-server vlanvim /etc/default/isc-dhcp-servervim /etc/dhcp/dhcpd.confservice isc-dhcp-server restart/etc/default/isc-dhcp-server参考:# Defaults for isc-dhcp-server initscript# sourced by /etc/init.d/isc-dhcp-server# installed at /etc/default/isc-dhcp-server by the maintainer scripts## This is a POSIX shell fragment## Path to dhcpd's config file (default: /etc/dhcp/dhcpd.conf).#DHCPD_CONF=/etc/dhcp/dhcpd.conf# Path to dhcpd's PID file (default: /var/run/dhcpd.pid).#DHCPD_PID=/var/run/dhcpd.pid# Additional options to start dhcpd with.# Don't use options -cf or -pf here; use DHCPD_CONF/ DHCPD_PID instead#OPTIONS=""# On what interfaces should the DHCP server (dhcpd) serve DHCP requests?# Separate multiple interfaces with spaces, e.g. "eth0 eth1".INTERFACES="vlan10 vlan11 vlan12 vlan13"/etc/dhcp/dhcpd.conf参考default-lease-time 3600;max-lease-time 21600;authoritative;subnet 192.168.66.0 netmask 255.255.0.0 {interface vlan10;option routers 192.168.66.1;option subnet-mask 255.255.255.0;range 192.168.66.128 192.168.66.254;}host demo {hardware ethernet 00:1c:39:dd:1f:08;fixed-address 192.168.66.16;}subnet 10.101.0.0 netmask 255.255.255.0 {interface vlan11;option routers 10.101.0.1;option subnet-mask 255.255.255.0;range 10.101.0.100 10.101.0.254;}subnet 10.201.0.0 netmask 255.255.255.0 {interface vlan12;option routers 10.201.0.1;option subnet-mask 255.255.255.0;range 10.201.0.100 10.201.0.254;}subnet 10.105.0.0 netmask 255.255.255.0 {interface vlan13;option routers 10.105.0.1;option subnet-mask 255.255.255.0;range 10.105.0.100 10.105.0.254;}配置⽹卡vlaneth0⽤于配置内部⽹络即laneth1⽤于连接公⽹即wanvim /etc/network/interfaces.d/eth0配置参考:auto vlan10iface vlan10 inet staticaddress 192.168.66.1netmask 255.255.255.0mtu 1500vlan_raw_device eth0auto vlan11iface vlan11 inet staticaddress 10.101.0.1netmask 255.255.255.0mtu 1500vlan_raw_device eth0auto vlan12iface vlan12 inet staticaddress 10.201.0.1netmask 255.255.255.0mtu 1500vlan_raw_device eth0auto vlan13iface vlan13 inet staticaddress 10.105.0.1netmask 255.255.255.0mtu 1500vlan_raw_device eth0eth1:vim /etc/network/interfaces.d/eth1auto eth1iface eth1 inet dhcp配置iptables开启snat,将内部数据转发到公⽹iptables -t nat -A POSTROUTING -o eth1 -j MASQUERADE其他⽤途:nat端⼝转发10.6.10.157为eth1的ip,192.168.66.11:443为内部地址端⼝iptables -t nat -A PREROUTING -d 10.6.10.157 -p tcp --dport 8001 -j DNAT --to 192.168.66.11:443⽹络转发限制-s是源地址(source)-d是⽬标地址(destination)iptables -A FORWARD -s 192.168.128.0/17 -d 192.168.66.16 -j ACCEPTiptables -A FORWARD -s 10.11.0.0/24 -d 10.105.0.0/24 -j DROP流量抓取tcpdump -i eth0 -s0 -G 3600 -w '%Y-%m-%d_%H:%M.pcap'esxi流量抓取nohup pktcap-uw --switchport 33554434 -G 60 -o '%Y-%m-%d_%H:%M.pcap' &配合esxi超好⽤。
虚拟机中安装Ubuntu1604使用注意事项

虚拟机中安装Ubuntu1604使用注意事项在虚拟机中安装Ubuntu 16.04是一种非常常见和方便的方法来熟悉和学习Linux操作系统。
然而,在安装过程中,有一些注意事项需要考虑,以确保顺利完成安装并优化虚拟机的性能。
以下是在安装Ubuntu 16.04时需要注意的一些重要事项。
1.选择合适的硬件:在选择虚拟机的硬件配置时,务必考虑您计算机的硬件能力和虚拟机需要的资源。
确保分配足够的RAM、处理器和硬盘空间。
推荐为Ubuntu 16.04分配至少2GB的RAM和2个处理器核心。
4.创建合适的虚拟机:在虚拟机软件中创建一个新的虚拟机时,确保选择正确的操作系统类型和版本。
选择Linux作为操作系统类型,并选择Ubuntu 16.04作为版本。
此外,根据您的需要,调整虚拟机的硬件配置,如内存、处理器和硬盘空间等。
5.分配适当的硬盘空间:虚拟机需要一定的硬盘空间来安装操作系统和应用程序。
确保为虚拟机分配足够的硬盘空间,以避免在安装或运行过程中出现空间不足的问题。
推荐分配至少20GB的硬盘空间。
6.启用虚拟化技术:在主机操作系统中,确保已启用虚拟化技术,如Intel的VT-x或AMD的AMD-V。
虚拟化技术可以提高虚拟机的性能和相容性。
7.安装增强功能:在启动Ubuntu 16.04虚拟机后,安装增强功能可提供更好的虚拟机性能和功能。
增强功能包括驱动程序、图形加速和共享文件夹等。
您可以从虚拟机软件的菜单中选择安装增强功能。
8.更新和升级软件包:在安装过程中,确保更新和升级Ubuntu 16.04上的软件包。
这可以帮助您获取最新的安全补丁和新功能。
在Ubuntu 16.04中,您可以使用以下命令更新软件包:sudo apt updatesudo apt upgrade9.配置网络设置:为了让虚拟机能够连接到Internet,必须正确配置网络设置。
如果您的虚拟机使用桥接模式,请确保您的网络适配器连接到正确的网络接口。
Ubuntu16.04ROS环境配置

Ubuntu16.04ROS环境配置最近新⼊职⼀家公司,是搞智能⽆⼈驾驶的,⽤的操作系统是Ubuntu和ros,之前没接触过ros系统,既然公司⽤那就必须的学习啊,话不多说先装它⼀个ros玩玩...1. Ubuntu 安装 ROS Kinetic1.1Configure your Ubuntu repositories(配置您的Ubuntu存储库)在系统设置中,找到软件与更新,将如下⼏个都勾选,允许其从互联⽹下载。
1.2 Setup your sources.list(设置你的计算机以接受中的软件).$ sudo sh -c 'echo "deb /ros/ubuntu $(lsb_release -sc) main" > /etc/apt/sources.list.d/ros-latest.list'1.3 Set up your keys$ sudo apt-key adv --keyserver hkp://:80 --recv-key 421C365BD9FF1F717815A3895523BAEEB01FA116Executing: /tmp/tmp.NItfnqYQnV/gpg.1.sh --keyserverhkp://:80--recv-key421C365BD9FF1F717815A3895523BAEEB01FA116gpg: requesting key B01FA116 from hkp server gpg: key B01FA116: public key "ROS Builder <rosbuild@>" importedgpg: Total number processed: 1gpg: imported: 11.4 Installation$ sudo apt-get update$ sudo apt-get install ros-kinetic-desktop-full安装过程中如果出现如下的错误,删除就可以.# 错误E: Could not get lock /var/lib/dpkg/lock - open (11 Resource temporarily unavailable)E: Unable to lock the administration directory (/var/lib/dpkg/), is another process using it?#执⾏如下命令解决sudo rm /var/cache/apt/archives/locksudo rm /var/lib/dpkg/lock1.5 Initialize rosdep(初始化rosdep)$ sudo rosdep init$ rosdep update1.6 Environment setup(配置环境)$ echo "source /opt/ros/kinetic/setup.bash" >> ~/.bashrc$ source ~/.bashrc1.7 Dependencies for building packages(安装building package的依赖)$ sudo apt-get install python-rosinstall python-rosinstall-generator python-wstool build-essential1.8测试ROS安装是否成功1> 打开Termial,输⼊以下命令,初始化ROS环境:$ roscore2> 打开新的Termial,输⼊以下命令,弹出⼀个⼩乌龟窗⼝如下图:$ rosrun turtlesim turtlesim_node3> 打开新的Termial,输⼊以下命令,可以在Termial中通过⽅向键控制⼩乌龟的移动,如果不能控制,请选中turtle_teleop_key所在的终端窗⼝以确保你的按键输⼊能够被捕获。
Ubuntu16.04安装docker

Ubuntu16.04安装docker1.docker⽀持以下Ubuntu操作系统: Ubuntu Xenial 16.04[LTS] Ubuntu Trusty 14.04[LTS] Ubuntu Precise 12.04[LTS]2.前置需求 不管你是Ubuntu的哪个版本,Docker需要64的操作系统。
此外你的kernel内核⾄少要在3.10版本之上。
最近的3.10⼩版本或者最新的维护版本也是可以接受的。
kernel3.10版本之前的系统缺少⼀些特性来运⾏docker容器。
这些旧版本有些已知的bugs会导致数据丢失并且在⼀定条件下会频繁的故障。
检查你当前的kernel版本,打开终端,输⼊ uname -r 注意:如果你之前使⽤APT安装过docker,为了新版本的docker仓库,确保你更新了APT源。
3.更新你的apt源 Docker的APT仓库包含1.7.1以及更⾼的版本。
通过设置APT使⽤来⾃docker仓库的包。
1)登陆机器,⽤户必须使⽤sudo或者root权限。
2)打开终端 3)更新包信息,确保APT能使⽤https⽅式⼯作,并且CA证书已安装了 sudo apt-get update sudo apt-get install apt-transport-https ca-certificates 出现这个问题可能是有另⼀个程序正在运⾏,导致资源被锁不可⽤。
⽽导致资源被锁的原因可能是上次运⾏安装或更新没有正常完成,解决办法就是删掉。
sudo rm /var/cache/apt/archives/lock sudo rm /var/lib/dpkg/lock 4)添加⼀个新的GPG密钥 sudo apt-key adv --keyserver hkp://:80 --recv-keys 58118E89F3A912897C070ADBF76221572C52609D 5)找到合适你的Ubuntu操作系统的键,这个键决定APT将搜索哪个包。
Ubuntu添加删除用户HowtoAddandDeleteUsersonUbuntu16.04

Ubuntu添加删除⽤户HowtoAddandDeleteUsersonUbuntu16.04IntroductionOne of the most basic tasks that you should know how to do on a fresh Linux server is add and remove users. When you create a new system, you are often (such as on DigitalOcean Droplets) only given the root account by default.While running as the root user gives you a lot of power and flexibility, it is also dangerous and can be destructive. It is almost always a better idea to add an additional, unprivileged user to do common tasks. You also should create additional accounts for any other users you may have on your system. Each user should have a different account.You can still acquire administrator privileges when you need them through a mechanism called sudo. In this guide we will cover how to create user accounts, assign sudo privileges, and delete users.How To Add a UserIf you are signed in as the root user, you can create a new user at any time by typing:adduser newuserIf you are signed in as a non-root user who has been given sudo privileges, as demonstrated , you can add a new user by typing:sudo adduser newuserEither way, you will be asked a series of questions. The procedure will be:Assign and confirm a password for the new userEnter any additional information about the new user. This is entirely optional and can be skipped by hitting Enter if you don't wish to utilize these fields.Finally, you'll be asked to confirm that the information you provided was correct. Enter Y to continue.Your new user is now ready for use! You can now log in using the password you set up.Note: Continue if you need your new user to have access to administrative functionality.How To Grant a User Sudo PrivilegesIf your new user should have the ability to execute commands with root (administrative) privileges, you will need to give the new user access to sudo. Let's examine two approaches to this problem: Adding the user to a pre-defined sudo user group, and specifying privileges on a per-user basis in sudo's configuration.Add the New User to the Sudo GroupBy default, sudo on Ubuntu 16.04 systems is configured to extend full privileges to any user in the sudo group.You can see what groups your new user is in with the groups command:groups newuserOutputnewuser : newuserBy default, a new user is only in their own group, which is created at the time of account creation, and shares a name with the user. In order to add the user to a new group, we can use the usermod command:usermod -aG sudo newuserThe -aG option here tells usermod to add the user to the listed groups.Test Your User's Sudo PrivilegesNow, your new user is able to execute commands with administrative privileges.When signed in as the new user, you can execute commands as your regular user by typing commands as normal:some_commandYou can execute the same command with administrative privileges by typing sudo ahead of the command:sudo some_commandYou will be prompted to enter the password of the regular user account you are signed in as.Specifying Explicit User Privileges in /etc/sudoersAs an alternative to putting your user in the sudo group, you can use the visudo command, which opens a configuration filecalled /etc/sudoers in the system's default editor, and explicitly specify privileges on a per-user basis.Using visudo is the only recommended way to make changes to /etc/sudoers, because it locks the file against multiple simultaneous edits and performs a sanity check on its contents before overwriting the file. This helps to prevent a situation where you misconfigure sudo and are prevented from fixing the problem because you have lost sudo privileges.If you are currently signed in as root, type:visudoIf you are signed in using a non-root user with sudo privileges, type:sudo visudoTraditionally, visudo opened /etc/sudoers in the vi editor, which can be confusing for inexperienced users. By default on new Ubuntu installations, it should instead use nano, which provides a more familiar text editing experience. Use the arrow keys to move the cursor, and search for the line that looks like this:/etc/sudoersroot ALL=(ALL:ALL) ALLBelow this line, copy the format you see here, changing only the word "root" to reference the new user that you would like to give sudo privileges to:/etc/sudoersroot ALL=(ALL:ALL) ALLnewuser ALL=(ALL:ALL) ALLYou should add a new line like this for each user that should be given full sudo privileges. When you are finished, you can save and close the file by hitting Ctrl-X, followed by Y, and then Enter to confirm.How To Delete a UserIn the event that you no longer need a user, it is best to delete the old account.You can delete the user itself, without deleting any of their files, by typing this as root:deluser newuserIf you are signed in as another non-root user with sudo privileges, you could instead type:sudo deluser newuserIf, instead, you want to delete the user's home directory when the user is deleted, you can issue the following command as root:deluser --remove-home newuserIf you're running this as a non-root user with sudo privileges, you would instead type:sudo deluser --remove-home newuserIf you had previously configured sudo privileges for the user you deleted, you may want to remove the relevant line again by typing: visudoOr use this if you are a non-root user with sudo privileges:sudo visudoroot ALL=(ALL:ALL) ALLnewuser ALL=(ALL:ALL) ALL # DELETE THIS LINEThis will prevent a new user created with the same name from being accidentally given sudo privileges.ConclusionYou should now have a fairly good handle on how to add and remove users from your Ubuntu 16.04 system. Effective user management will allow you to separate users and give them only the access that they are required to do their job.For more information about how to configure sudo, check out our guide on here.来源:。
Ubuntu16.04ServerEdition英文版安装教程

Ubuntu16.04ServerEdition英⽂版安装教程Ubuntu Server 16.04, also named Xenial Xerus, has been released by Canonical and it’s now ready for installation.The details about this new LTS version can be found on the previous article: .This topic will guide you on how you can install Ubuntu 16.04 Server Edition with Long Time Support on your machine.If you’re looking for Desktop Edition, read our previous article:Requirements Ubuntu 16.04 Server ISO Image Install Ubuntu 16.04 Server Edition1. On the first step visit the above link and download the latest version of Ubuntu Server ISO image on your computer. Once the image download completes, burn it to a CD or create a bootable USB disk using Unbootin (for BIOS machines) or Rufus (for UEFI machines).2. Place the bootable media intro the appropriate drive, start-up the machine and instruct the BIOS/UEFI by pressing a special function key (F2, F11, F12) to boot-up from the inserted USB/CD drive.In a few seconds you will be presented with the first screen of Ubuntu installer. Select your language to perform the installation and hit Enter key to move to the next screen.Choose Ubuntu 16.04 Server Installation Language3. Next, select the first option, Install Ubuntu Server and press Enter key to continue.Install Ubuntu 16.04 Server4. Select the language you with to install the system and press Enter again to continue further.Select Language for Ubuntu 16.04 Server5. On the next series of screen choose your physical location from the presented list. If your location is different than the ones offered on the first screen, select other and hit Enter key, then select the location based on your continent and country. ThisChoose Location for Ubuntu 16.04 ServerSelect Area Location6. Assign the locales and keyboard settings for your system as illustrated below and hit Enter to continue the installation setup.Configure Locales7. The installer will load a series of additional components required for the next steps and will automatically configure your network settings in case you have a DHCP server on the LAN.Because this installation is intended for a server it’s a good idea to for your network interface.To do this you can interrupt the automatic network configuration process by pressing on Cancel or once the installer reaches hostname phase you can hit on Go Back and choose to Configure network manually.Set Ubuntu 16.04 HostnameConfigure Network Manually8. Enter your network settings accordingly (IP Address, netmask, gateway and at least two DNS nameservers) as illustrated on the below images.Set Static IP Address on Ubuntu 16.04Configure Network Gateway for Ubuntu 16.049. On the next step setup a descriptive hostname for your machine and a domain (not necessary required) and hit on Continue to move to the next screen. This step concludes the network settings.Set Ubuntu 16.04 Server HostnameSet Ubuntu 16.04 Domain Name10. On this step the installer prompts you to setup a username and a password for your system. This username will be granted by the system with sudo powers, so, technically, this user will be the supreme administrator next to root account (which is disabled by default).Thus, choose an inspired username, maybe hard to guess for security reasons, with a strong password and hit on Continue. Choose not to encrypt your home directory and press Enter to continue further.Setup User and Password11. Next, the installer will automatically set your clock based on the physical location configured earlier. In case the location is correctly chosen hit on Yes to continue to disk partition layout.Configure System Clock12. On the next step you can choose the method that will be used to slice up your disk. For instance, if you need to create custom partition scheme (such as /home, /var, /boot etc) choose Manual method.For a general purpose server you can stick to Guided with LVM method as illustrated below, which automatically creates the partitions on your behalf.Select Partition Method13. Next, select the disk that will be used by the installer to create partitions and press Enter key.Select Disk Partition14. Answer with Yes at the next screen in order to commit changes to disk with LVM scheme and hit on Continue to use the entire disk space for guided partitions.Add Disk Partition SizeConfirm Disk Partition Changes15. Finally, approve for the last time the changes to be written to disk by pressing on Yes and the installation will now begin. From this step on all the changes will be committed to disk.Confirm Disk Partition ChangesInstalling Ubuntu 16.04 Server16. In case your system is behind a proxy or a firewall use the next screen to bypass the network restrictions, otherwise just leave it black and hit on Continue.Configure System Package Manager17. Next, the installer will configure apt repositories and will install the selected software. After it finishes the installation tasksa new screen will appear which will ask you how to manage the upgrade process. Select No automatic updates for now (you will manually select what updates are necessary) and hit Enter key to continue.Manage Ubuntu 16.04 Upgrades18. On the next step you will be asked to select what software to install. Select only standard system utilities and OpenSSH server (if you require remote access) by pressing the spacebar key and hit on Continue.System Software Selection19. Once the installer finishes installing the software, a new screen will prompt you whether to install the Grub boot loader to hard disk MBR (first 512 byte sector). Obviously without the GRUB you can’t boot up your system after restart, so hit on Yes to continue with the installation.Install Grub Boot Loader20. Finally, after the boot loader is written to Hard Disk MBR, the installation process finishes. Hit on Continue to reboot the machine and remove the installation media.Finish Ubuntu 16.04 Server Installation21. After reboot, login to your system console using the credentials configured during the installation process and you’re good to go on production with your server.Ubuntu 16.04 Server Login PromptThat’s all! Keep in mind that this version of Ubuntu has official maintenance support from Canonical until 2021 for hardware, bugs, software and security updates.。
Ubuntu16.04下hadoop的安装与配置(伪分布式环境)
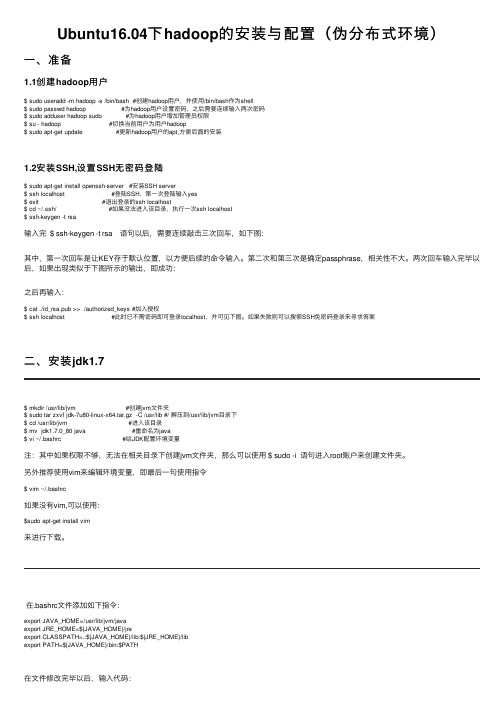
Ubuntu16.04下hadoop的安装与配置(伪分布式环境)⼀、准备1.1创建hadoop⽤户$ sudo useradd -m hadoop -s /bin/bash #创建hadoop⽤户,并使⽤/bin/bash作为shell$ sudo passwd hadoop #为hadoop⽤户设置密码,之后需要连续输⼊两次密码$ sudo adduser hadoop sudo #为hadoop⽤户增加管理员权限$ su - hadoop #切换当前⽤户为⽤户hadoop$ sudo apt-get update #更新hadoop⽤户的apt,⽅便后⾯的安装1.2安装SSH,设置SSH⽆密码登陆$ sudo apt-get install openssh-server #安装SSH server$ ssh localhost #登陆SSH,第⼀次登陆输⼊yes$ exit #退出登录的ssh localhost$ cd ~/.ssh/ #如果没法进⼊该⽬录,执⾏⼀次ssh localhost$ ssh-keygen -t rsa 输⼊完 $ ssh-keygen -t rsa 语句以后,需要连续敲击三次回车,如下图:其中,第⼀次回车是让KEY存于默认位置,以⽅便后续的命令输⼊。
第⼆次和第三次是确定passphrase,相关性不⼤。
两次回车输⼊完毕以后,如果出现类似于下图所⽰的输出,即成功:之后再输⼊:$ cat ./id_rsa.pub >> ./authorized_keys #加⼊授权$ ssh localhost #此时已不需密码即可登录localhost,并可见下图。
如果失败则可以搜索SSH免密码登录来寻求答案⼆、安装jdk1.7$ mkdir /usr/lib/jvm #创建jvm⽂件夹$ sudo tar zxvf jdk-7u80-linux-x64.tar.gz -C /usr/lib #/ 解压到/usr/lib/jvm⽬录下$ cd /usr/lib/jvm #进⼊该⽬录$ mv jdk1.7.0_80 java #重命名为java$ vi ~/.bashrc #给JDK配置环境变量注:其中如果权限不够,⽆法在相关⽬录下创建jvm⽂件夹,那么可以使⽤ $ sudo -i 语句进⼊root账户来创建⽂件夹。
Ubuntu16.04系统重装
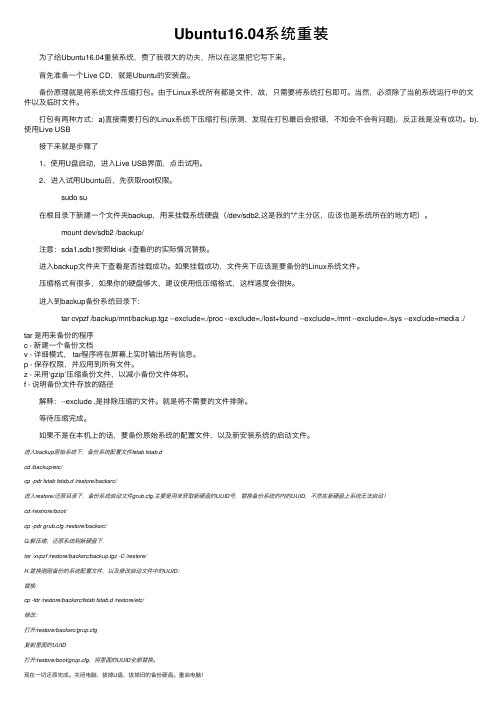
Ubuntu16.04系统重装 为了给Ubuntu16.04重装系统,费了我很⼤的功夫,所以在这⾥把它写下来。
⾸先准备⼀个Live CD,就是Ubuntu的安装盘。
备份原理就是将系统⽂件压缩打包。
由于Linux系统所有都是⽂件,故,只需要将系统打包即可。
当然,必须除了当前系统运⾏中的⽂件以及临时⽂件。
打包有两种⽅式:a)直接需要打包的Linux系统下压缩打包(亲测,发现在打包最后会报错,不知会不会有问题),反正我是没有成功。
b).使⽤Live USB 接下来就是步骤了 1、使⽤U盘启动,进⼊Live USB界⾯,点击试⽤。
2、进⼊试⽤Ubuntu后,先获取root权限。
sudo su 在根⽬录下新建⼀个⽂件夹backup,⽤来挂载系统硬盘(/dev/sdb2,这是我的"/"主分区,应该也是系统所在的地⽅吧)。
mount dev/sdb2 /backup/ 注意:sda1,sdb1按照fdisk -l查看的的实际情况替换。
进⼊backup⽂件夹下查看是否挂载成功。
如果挂载成功,⽂件夹下应该是要备份的Linux系统⽂件。
压缩格式有很多,如果你的硬盘够⼤,建议使⽤低压缩格式,这样速度会很快。
进⼊到backup备份系统⽬录下: tar cvpzf /backup/mnt/backup.tgz --exclude=./proc --exclude=./lost+found --exclude=./mnt --exclude=./sys --exclude=media ./tar 是⽤来备份的程序c - 新建⼀个备份⽂档v - 详细模式, tar程序将在屏幕上实时输出所有信息。
p - 保存权限,并应⽤到所有⽂件。
z - 采⽤‘gzip’压缩备份⽂件,以减⼩备份⽂件体积。
f - 说明备份⽂件存放的路径 解释:--exclude ,是排除压缩的⽂件。
就是将不需要的⽂件排除。
在Ubuntu16.04安装与使用Docker的教程详解

在Ubuntu16.04安装与使⽤Docker的教程详解介绍Docker是⼀个应⽤程序,它使得在容器中运⾏应⽤程序进程变得简单和容易,这类应⽤程序就像虚拟机,只有更便携,更加资源友好,更依赖于主机操作系统。
有关详细介绍Docker容器的不同组件,请Docker⽣态系统:介绍公共组件。
在Ubuntu 16.04上安装Docker有两种⽅法。
⼀种⽅法包括将其安装在操作系统的现有安装上。
其他涉及纺了⼀个名为⼯具的服务器Docker机即⾃动安装Docker就可以了。
在本教程中,您将学习如何在现有安装的Ubuntu 16.04上安装和使⽤它。
先决条件要遵循本教程,您需要以下内容:64位Ubuntu 16.04 Droplet使⽤sudo特权的⾮root⽤户初始设置指南的Ubuntu 16.04将介绍如何设置起来。
)注意:Docker需要的Ubuntu 64位版本,以及⼀个内核版本等于或⼤于3.10以上。
默认的64位Ubuntu 16.04 Droplet满⾜这些要求。
本教程中的所有命令都应以⾮root⽤户⾝份运⾏。
如果需要该命令的root访问权限,它会在前⾯加sudo 。
初始设置指南的Ubuntu 16.04解释了如何添加⽤户,并给他们sudo访问。
第1步 – 安装Docker官⽅Ubuntu 16.04存储库中提供的Docker安装包可能不是最新版本。
要获得最新和最好的版本,请从官⽅Docker仓库安装Docker。
本节向您展⽰如何做到这⼀点。
但⾸先,让我们更新包数据库:sudo apt-get update现在让我们安装Docker。
将官⽅Docker资源库的GPG密钥添加到系统:sudo apt-key adv --keyserver hkp://:80 --recv-keys 58118E89F3A912897C070ADBF76221572C52609D将Docker存储库添加到APT源:echo "deb https:///repo ubuntu-xenial main" | sudo tee /etc/apt/sources.list.d/docker.list使⽤新添加的软件包中的Docker软件包更新软件包数据库:sudo apt-get update确保你将要从Docker repo⽽不是默认的Ubuntu 16.04 repo安装:apt-cache policy docker-engine您应该看到类似以下的输出:apt-cache策略的输出docker-enginedocker-engine:Installed: (none)Candidate: 1.11.1-0~xenialVersion table:1.11.1-0~xenial 500500 https:///repo ubuntu-xenial/main amd64 Packages1.11.0-0~xenial 500500 https:///repo ubuntu-xenial/main amd64 Packages请注意, docker-engine没有安装,但安装的候选⼈是从Docker库中的Ubuntu 16.04。
- 1、下载文档前请自行甄别文档内容的完整性,平台不提供额外的编辑、内容补充、找答案等附加服务。
- 2、"仅部分预览"的文档,不可在线预览部分如存在完整性等问题,可反馈申请退款(可完整预览的文档不适用该条件!)。
- 3、如文档侵犯您的权益,请联系客服反馈,我们会尽快为您处理(人工客服工作时间:9:00-18:30)。
环境与条件硬件条件:TI AM572x EVM IDK软件条件:Ubuntu 14.04搭建Ubuntu16.04在AM572x平台一 构建ubuntu rootfs1. 新建一个文件夹在~目录下,用来储存我们制作的rootfsmkdir~/ubuntu-rootfs&&cd ubuntu-rootfs2.下载ubuntu-core3.解压该文件,注意用sudo现在可以移除ubuntu-base-16.04-core-armhf.tar.gz 文件4.由于我们要chroot,所以需要能够在chroot环境执行armhf版本的binary,所以我们要接触Linux的binfmt机制和qemu static解释器sudo apt-get install qemu-user-staticsudo cp/usr/bin/qemu-user-static./usr/bin5.复制本教程提供的source.list文件到~/ubuntu-rootfs/etc/apt/sudo cp…/source.list~/ubuntu-rootfs/etc/apt/6.复制本教程提供的ch-mount.sh文件到~目录或 vim~/ch-mount.sh插入以下内容:#!/bin/bash#function mnt() {echo "MOUNTING"sudo mount -t proc /proc ${2}procsudo mount -t sysfs /sys ${2}syssudo mount -o bind /dev ${2}devsudo mount -o bind /dev/pts ${2}dev/ptssudo chroot ${2}}function umnt() {echo "UNMOUNTING"sudo umount ${2}procsudo umount ${2}syssudo umount ${2}dev/ptssudo umount ${2}dev}if [ "$1" == "-m" ] && [ -n "$2" ] ;thenmnt $1 $2elif [ "$1" == "-u" ] && [ -n "$2" ];thenumnt $1 $2elseecho ""echo "Either 1'st, 2'nd or both parameters were missing"echo ""echo "1'st parameter can be one of these: -m(mount) OR -u(umount)"echo "2'nd parameter is the full path of rootfs directory(with trailing '/')"echo ""echo "For example: ch-mount -m /media/sdcard/"echo ""echo 1st parameter : ${1}echo 2nd parameter : ${2}fi7. 先将本机的dns配置复制到目标rootfs,后面联网时会用到sudo cp-b/etc/resolv.conf~/ubuntu-rootfs/etc/resolv.conf8.使用ch-mount.sh挂载 rootfs的proc,sys,dev,dev/pts 并 chroot返回主目录cd~sudo bash ch-mount.sh-m ubuntu-rootfs/你会发现现在用户为root用户,并且现在挂载的是我们自己的ubuntu rootfs系统。
9.现在更新源apt-get update&&apt-get upgrade这是更新完毕的界面,它提示我们可以用dpkg-reconfgure tzdata来更新时区,没关系,这个我们后面会操作,继续。
10.添加新的用户adduser pi&&addgroup pi adm&&addgroup pi sudo&& addgroup pi audio提示我们输入用户名的密码,我这里设置为123456,后面直接按Enter跳过即可。
OK,继续。
11.设置新的host nameecho'ubuntu-arm'>/etc/hostname12.设置host entryecho'127.0.0.1localhost'>/etc/hostsecho'127.0.1.1ubuntu-arm'>/etc/hosts13.为了能顺利root登录,并且使用sudo,我们这里需要多一些操作1)修改密码passwd root同样,我这里root的密码还是123456。
2)修改/etc/sudoers里面的内容,在root行下加上这句:user ALL=(ALL:ALL) ALL由于需要编辑,所以我们这里安装个vim编辑器apt-get install vim(黄色部分代表如果无法执行也没关系)14.安装所需要的包#language-pack-en-base 英文翻译的mo文件# sudo sudo命令# ssh ssh的client和server# net-tools ifconfig,netstat,route,arp等# ethtool ethtool命令,显示、修改以太网设置#wireless-tools iwconfig等,显示、修改无线设置# ifupdown ifup,ifdown等工具#network-manager Network Manager服务和框架,高级网络管理# iputils-ping ping和ping6# rsyslog 系统log服务#bash-completion bash命令行补全# htop htop工具,交互式进程查看器apt-get install sudo ssh net-tools ethtool wireless-tools ifupdown network-manager iputils-ping rsyslog bash-completion htop注:如果下载过程中出现问题,如找不到包,就使用原来的ubuntu-core自带的source.list,然后vim source.list把里面的deb-src 前的注释去掉,保存退出,然后 apt-get update更新下源。
15.配置X 被任何人使用dpkg-reconfgure x11-common16允许/etc/resolv.conf 自动更新DNSdpkg-reconfgure resolvconf(选择 ‘Yes’)如果提示resolvconf不存在,则apt-get install resolvconf.17.设置时区dpkg-reconfgure tzdata(选择Asia–Chongqing)18. 退出并取消挂载exitsudo bash ch-mount.sh-u ubuntu-rootfs/19.AM572x SDK 中自带的 firmware 和 modules 文件夹到rootfs的相应位置 (.../代表你所放SDK文件夹的目录)sudo cp-rf…/ti-processor-sdk-linux-rt-am57xx-evm-04.00.00.04/targetNFS/lib/frmware~/ubuntu-rootfs/lib/sudo cp-rf…/ti-processor-sdk-linux-rt-am57xx-evm-04.00.00.04/targetNFS/lib/modules~/ubuntu-rootfs/lib/20.使能串口登录,这样才可以在minicom中进入登录界面cd~/ubuntu-rootfs/etc/init/vim ttyS2.conf添加以下内容:start on stopped rc or RUNLEVEL=[12345]stop on runlevel[!12345]respawnexec/sbin/getty-L115200ttyS2vt102保存退出在rc.local中打开ttyS2串口cd~/ubuntu-rootfs/etc/vim rc.local在exit 0前添加一句:sudo start ttyS221.为了能让rootfs正常启动 我们还需要复制 Linux kernel 到相应目录下sudo cp…/ti-processor-sdk-linux-rt-am57xx-evm-04.00.00.04/targetNFS/boot/* ~/ubuntu-rootfs/boot/二 烧录SD卡到目前为止,ubuntu rootfs就制作完成了,使用TI 提供的SD卡烧录指导(原文档地址:/index.php/Processor_SDK_Linux_create_SD_card_script? keyMatch=SD%20card&tisearch=Search-EN)来烧录我们的boot,linux kernel ,ubuntu rootfs 到SD卡上(注意:这里需要用到官方提供的SD卡,否则无法正常启动kernel)由于原文档内容过多,这里提供快速烧录指南:1. 把SD卡插入电脑,执行create-sdcard.sh 脚本文件sudo…/ti-processor-sdk-linux-rt-am57xx-evm-04.00.00.04/bin/create-sdcard.sh2.选择SD卡:13.选择要分区的数目:24.分区完毕,是否继续:y5.选择预先编译好的image文件类型(默认还是自定义),由于我们这里自己制作了rootfs,故选择自定义:26.选择boot 路径:.../ti-processor-sdk-linux-rt-am57xx-evm-04.00.00.04/board-support/prebuilt-images:y7.选择 root 分区:2:~(你的主目录)/ubuntu-rootfs/boot:y:~/ubuntu-rootfs-1604/:y8.开始烧录...等烧录完成,我们就可以把SD卡插入主板,然后启动我们的AM572x了。
