1.03固件升级说明
SINAMICS S210 固件更新指南说明书
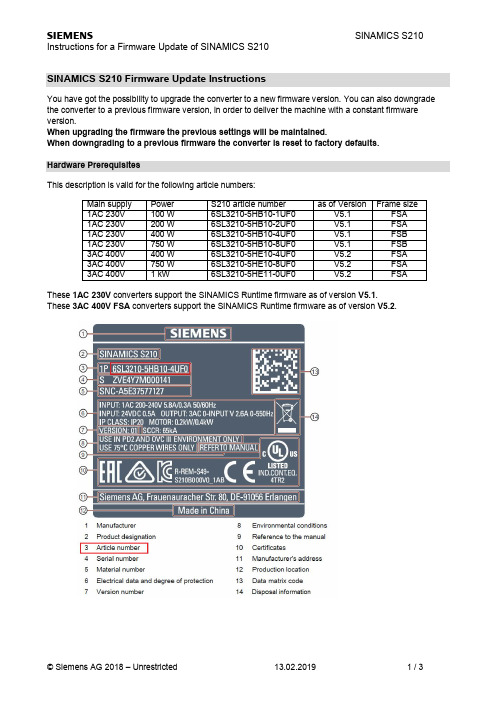
SINAMICS S210 Firmware Update InstructionsYou have got the possibility to upgrade the converter to a new firmware version. You can also downgrade the converter to a previous firmware version, in order to deliver the machine with a constant firmware version.When upgrading the firmware the previous settings will be maintained.When downgrading to a previous firmware the converter is reset to factory defaults.Hardware PrerequisitesThis description is valid for the following article numbers:Main supply Power S210 article number as of Version Frame size1AC 230V100 W6SL3210-5HB10-1UF0V5.1FSA1AC 230V200 W6SL3210-5HB10-2UF0V5.1FSA1AC 230V400 W6SL3210-5HB10-4UF0V5.1FSB1AC 230V750 W6SL3210-5HB10-8UF0V5.1FSB3AC 400V400 W6SL3210-5HE10-4UF0V5.2FSA3AC 400V750 W6SL3210-5HE10-8UF0V5.2FSA3AC 400V 1 kW6SL3210-5HE11-0UF0V5.2FSA These1AC 230V converters support the SINAMICS Runtime firmware as of version V5.1.These3AC 400V FSA converters support the SINAMICS Runtime firmware as of version V5.2.Memory cards for the Firmware UpdateA SD-memory card is required for the firmware update.Either you can use a memory card which is already plugged into the converter or a new memory card. Alternatively you can order a memory card with software on which the desired firmware is already installed.Card type Article numberEmpty SD-Card6SL3054-4AG00-2AA0SD-Card with Firmware V5.16SL3054-4FB00-2BA0SD-Card with Firmware V5.1 SP1 6SL3054-4FB10-2BA0SD-Card with Firmware V5.1 SP16SL3054-4FB10-2BA0-Z F01with Extended Safety LicenseSD-Card with Firmware V5.26SL3054-4FC00-2BA0SD-Card with Firmware V5.26SL3054-4FC00-2BA0-Z F01with Extended Safety LicenseThese SD-Cards can also be used to store the licenses for functions which require licensing. (e. g. Extended Safety License). It is not possible to use standard SD-card for this purpose.NoteThe integrated card reader only supports SD-cards up to a memory capacity of 2 GB.SDHC- or SDXC-cards are not supported.Preparing the SD-card for the Firmware UpdateIn order to install the software on the SD-card a SD-card reader is required in the PC/PG.If you are using a SD-card with preinstalled firmware then you can directly proceed with the firmware update. Backup of the SD-cardIf you like to install software on a SD-card which is already plugged into the converter, then switch the converter off and eject the SD-card.Before installing new software on this SD-card it is absolutely necessary to save all directories/files of the SD-card on your PC/PG. This especially applies to the installed licenses (directory KEYS, if available). Preparing the SD-cardAfter backing up the SD-card content on the PC/PG you can delete all files from the memory card (if a directory KEYS exists it does not need to be deleted).Extract the ZIP-file with the firmware which you like to install onto the SD-card.Copy the directory KEYS from the backup on your PC/PG back onto the SD-card (in case the directory KEYS was available and has been deleted before).Firmware UpdateAttention:Please do not turn off the power supply of the converter during the update process and do not disconnect the motor (if it is connected)!Doing so could lead to faulty components.Please proceed as follows to perform a Firmware-Upgrade or –Downgrade:1. Switch the converter off.2. Insert the prepared SD-card into the converter and turn the converter on.3. The new firmware will be installed – this can take up to 5 minutes and more.The update has finished when both LEDs are blinking red synchronously every second.4. Switch the converter off and remove the memory card as needed.5. Switch the converter back on. The firmware of the connected DriveCliq-components will be updated.This requires and additional power off/on (RDY-LED is blinking fast in yellow; refer to alarmmessages in the webserver).6. Verify that the new firmware version was installed correctly. The firmware version is displayed on theHome page of the webserver below the converter symbol.7. Commission the converter if necessary.8. In case the memory card shall remain plugged into the converter, save the parameters in thewebserver so that the actual configuration is stored on the memory card as well.Extract LED-StatesPlease find further information concerning the LED states in the manual.Interesting Links:SINAMICS S210 Firmwarehttps:///cs/de/en/view/109744577SINAMICS S210 PROFINET GSDMLhttps:///cs/de/en/view/109752524。
手机OTA升级操作指导说明书
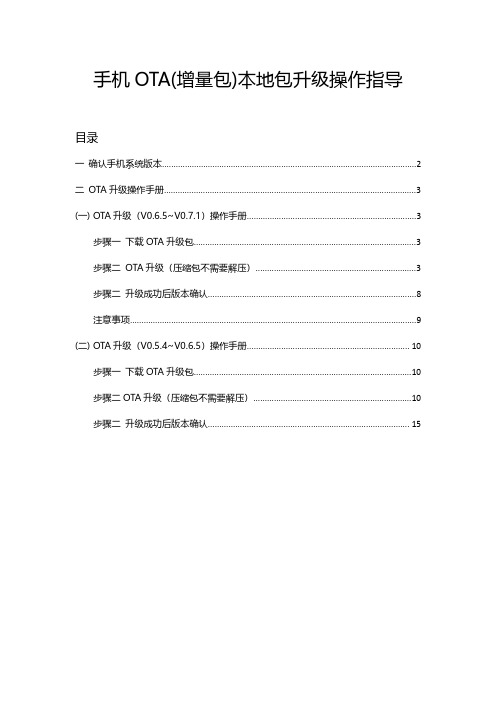
手机OTA(增量包)本地包升级操作指导目录一确认手机系统版本 (2)二OTA升级操作手册 (3)(一)OTA升级(V0.6.5~V0.7.1)操作手册 (3)步骤一下载OTA升级包 (3)步骤二OTA升级(压缩包不需要解压) (3)步骤二升级成功后版本确认 (8)注意事项 (9)(二)OTA升级(V0.5.4~V0.6.5)操作手册 (10)步骤一下载OTA升级包 (10)步骤二OTA升级(压缩包不需要解压) (10)步骤二升级成功后版本确认 (15)一确认手机系统版本手机拨号键*#6776#下拉至最后查看OTA Version1.若版本号为PDEM10_11.D.01_001_202108022150,表示为最新版本,无需进行升级操作2.若版本号为PDEM10_11.D.01_001_202106121902,参考【OTA升级(V0.6.5~V0.7.1)操作手册】3.若版本号为PDEM10_11.D.01_001_202105101815,表示需要进行两次升级首先参考【OTA升级(V0.5.4~V0.6.5)操作手册】升级手机系统版本到PDEM10_11.D.01_001_202106121902再参考【OTA升级(V0.6.5~V0.7.1)操作手册】4.若版本号为PDEM30_11_A.01_001_202104081724,表示该版本不支持升级操作(如要升级请联系技术人员将手机寄回升级)二OTA升级操作手册(一)OTA升级(V0.6.5~V0.7.1)操作手册步骤一下载OTA升级包1.进入开发者网站V0.7.1版本,找到升级指导书下的OTA升级包链接下载注意:OTA升级包如上图(0.6.5-0.7.1ota.zip)仅支持V0.6.5升级到V0.7.1版本步骤二OTA升级(压缩包不需要解压)1.将OTA增量升级包使用adb push命令导入到手机根目录或新建一oplus_ota_local目录将OTA包导入到oplus_ota_local下:注意:1.OTA升级包不要解压直接将压缩包导入到手机;2.注意OTA包电脑端存放的路径不要有中文,否则容易导致导入的包不完整或出错;2.OTA包导入完成后,进入文件管理器中查看导入包的大小是否与电脑端一致,格式是否为zip格式,如下图:或3.手机连接电脑,执行adb命令:adb reboot recovery,手机进入recovery模式:4.选择语言后进入ColorOS恢复模式界面,选择安装升级文件:5.在安装升级文件界面点击从手机存储安装6.选择导入的OTA包,弹出确认弹框7.弹出确认弹框后,点击确定后进入升级过程:8.升级成功后弹出安装成功的提示弹框,点击重启,手机自动重启:步骤二升级成功后版本确认1.重启后,拨号键*#6776#确认手机系统版本是否升级成功若版本号为PDEM10_11.D.01_001_202108022150,则表示系统升级成功2.确认OppoXR版本是否升级成功手机-->设置-->应用管理-->应用列表-->OppoXR-->应用信息-->查看版本号若版本号为:版本OPPO_XR_202108021519,则表示OppoXR升级成功注意:OTA升级后若OppoXR版本不是OPPO_XR_202108021519,则OppoXR升级有问题。
理光常用操作
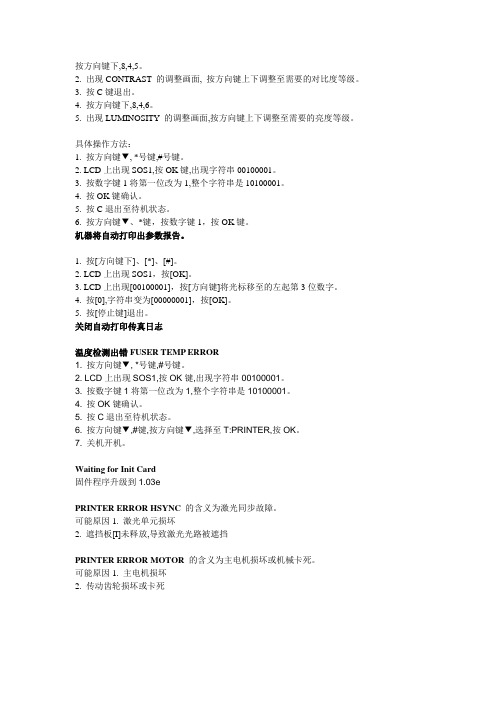
按方向键下,8,4,5。
2. 出现CONTRAST 的调整画面, 按方向键上下调整至需要的对比度等级。
3. 按C键退出。
4. 按方向键下,8,4,6。
5. 出现LUMINOSITY 的调整画面,按方向键上下调整至需要的亮度等级。
具体操作方法:1. 按方向键▼, *号键,#号键。
2. LCD上出现SOS1,按OK键,出现字符串00100001。
3. 按数字键1将第一位改为1,整个字符串是10100001。
4. 按OK键确认。
5. 按C退出至待机状态。
6. 按方向键▼、*键,按数字键1,按OK键。
机器将自动打印出参数报告。
1. 按[方向键下]、[*]、[#]。
2. LCD上出现SOS1,按[OK]。
3. LCD上出现[00100001],按[方向键]将光标移至的左起第3位数字。
4. 按[0],字符串变为[00000001],按[OK]。
5. 按[停止键]退出。
关闭自动打印传真日志温度检测出错FUSER TEMP ERROR1. 按方向键▼, *号键,#号键。
2. LCD上出现SOS1,按OK键,出现字符串00100001。
3. 按数字键1将第一位改为1,整个字符串是10100001。
4. 按OK键确认。
5. 按C退出至待机状态。
6. 按方向键▼,#键,按方向键▼,选择至T:PRINTER,按OK。
7. 关机开机。
Waiting for Init Card固件程序升级到1.03ePRINTER ERROR HSYNC的含义为激光同步故障。
可能原因1. 激光单元损坏2. 遮挡板[I]未释放,导致激光光路被遮挡PRINTER ERROR MOTOR 的含义为主电机损坏或机械卡死。
可能原因1. 主电机损坏2. 传动齿轮损坏或卡死快捷操作步骤:▼21-SETUP/DATE/TIME进入此菜单可以修改机器的时间和日期。
快捷操作步骤:▼54-PRINT/SETUP耗材的剩余量电平调快捷操作步骤:▼80-ADVANCED FCT/CALIBRATION当复印/扫描质量不令人满意时,执行此操作。
浪潮英信服务器NF5280M4用户手册V1.0
4 BMC 设置 ........................................................................................................................ 50 4.1 简介................................................................................................................... 50 4.2 功能模块............................................................................................................ 51 4.3 Web 界面介绍 ................................................................................................... 52 4.4 远程控制............................................................................................................ 56 4.5 电源和散热 ........................................................................................................ 57 4.6 BMC 设置.......................................................................................................... 59 4.7 日志................................................................................................................... 62 4.8 故障诊断............................................................................................................ 64 4.9 系统维护............................................................................................................ 65 4.10 命令行功能介绍............................................................................................... 66 4.11 时区表 ............................................................................................................. 71
NXP MCU端FOTA工程SBL及SFW的固件升级说明书

1简介随着 NXP 的 MCU 端 FOTA 工程 SBL 及 SFW 的发布,填补了目前 NXP 在RT 系列芯片上 FOTA 的空缺。
本篇应用笔记将会介绍在 SFW 中实现的两种本地固件升级方式,分别是 SD 卡和U 盘升级。
2SFW 简介SFW 是由 NXP EP 事业部的 i.MXRT 系列芯片的系统及应用小组推出的一个搭配 SBL 工程使用的 application 实例,主要起到的作用是演示如何通过本地的 SD 卡及 U 盘,远程的阿里云或AWS 云平台配合SBL 进行固件升级。
SFW 是基于 FreeRTOS 创建并开发的,它与 SBL 一起执行完整的 FOTA 流程。
SFW 中创建了两个高优先级的打印任务,作为SFW 中的实际应用,分别以 1 秒的频率打印Hello world 。
再根据menuconfig [1]中配置的宏来创建 SD 卡升级任务,U 盘升级任务和 AWS 云或阿里云升级任务。
3固件升级流程SFW 是作为SBL 配套的固件应用而开发的,所以SFW 中最基础的部分是通过各种方式接收新固件并写入flash 的功能。
由于SBL 支持Swap 和Remap 两种模式的固件更新,而这两种模式对写入地址的要求不同,所以SFW 也区分了Swap 与Remap 两种模式。
Swap 模式下,SFW 固件更新任务的基本流程如图 1所示。
目录1简介.................................................12SFW 简介........................................13固件升级流程...................................13.1U 盘升级任务...............................33.2SD 卡升级任务 (44)参考资料..........................................45修订记录..........................................4[1]SBL 及 SFW 项目中的一个图形化配置工具,具体参考 SBL 及 SFW 用户指南。
ANDROID SDK V1.3.1版本说明
福州瑞芯微电子有限公司RK2808_ANDROID-SDK_V1.3.1_010316 版本说明 (1)1修改记录 (2)1.1内核 (2)1.2Android (2)2功能配置说明 (3)2.1 内核 (3)2.1.1 内核配置方法 (3)2.1.2具体功能配置: (3)2.2 Android (4)3. 源码编译 (5)3.1 内核 (5)3.2 Android (5)3.2.1编译前预处理 (5)3.2.2编译Android代码 (6)3.2.3编译后处理(烧写) (6)1.1内核l加入Atheros AR6102驱动支持l为适应HDMI,更改了scu,timer。
l更新SD卡部分l解决二级睡眠无法唤醒l加入HDMI支持l加入触摸屏校正支持(XPT2046)l加入camera支持l初始化时将DSP频率从500MHZ更改为550MHZl加入TvOut支持1.2 Androidl加入HDMI支持l解决DSP解析图片出错的问题l录音优化l解决G-sensor的BUGl增加容量标签,将格式化与未格式化的分区分开l更新camera相关函数,照片保存在FLASH中l解决优盘拔出后导致USB无MOUNT窗口,更正flash-优盘拔插状态l加入触摸屏校正l解决MAC地址读取错误l改进bmp图像解码流程l加入wlan_loader 固件来支持Atheros AR6102 WLAN driverl更新录音程序。
l加入USB模式选择功能l加入WCDMA模式支持。
l加入TvOut支持l修正USB挂载与卸载操作逻辑l更新vold2.1 内核2.1.1 内核配置方法内核通过源码根目录下的.config实现功能配置,可选的config 文件放在arch/arm/configs 目录下:l rk2808sdk_slave.config 为SDK的USB SLAVE ONLY配置l rk2808sdk_host.config 为SDK的USB HOST ONLY配置l rk2808sdk_host_slave.config 为SDK的USB 的SLAVE和HOST配置系统默认的CONFIG为USB SLAVE ONLY配置,要更换CONFIG 文件后要用完成以下步骤后才能编译:l make cleanl cp arch/arm/config/….. .configl make menuconfig最后编译即可。
尼康D70相机固件升级方法图文详解

尼康D70相机固件升级方法图文详解尼康D70相机固件升级方法图文详解2010-04-04 23:42尼康D70相机固件升级方法图文详解D70固件升级:如果您认为自己无法成功执行更新,请让尼康服务代表帮助您执行此更新。
D70具有两套固件:A和B。
此更新程序仅用于更新B固件。
特别说明:如果在更新期间中断电源或操作相机控制器,可能会导致D70损坏。
在更新期间,切勿关闭相机电源、拔下或断开电源、或操作相机控制器。
如果更新失败且相机无法使用,请将D70送交尼康授权的服务代表进行检查。
准备过程:要为D70升级固件,您需要:一部D70数码相机,一条UC-E4 USB接线或一个CF卡读卡器。
下列一种电源:一只EH-5 AC适配器,一块完全充电的EN-EL3充电电池,一张已经在D70中格式化的尼康认可的记忆卡(请勿使用Microdrive卡)。
尼康D70数码摄影操作指南检查D70的当前固件版本:打开相机电源。
按MENU键并在设定菜单中选择Firmware Ver.(固件版本)。
将会显示两种固件版本(A和B)。
确认B版本是1.02或更低。
关闭相机电源。
下载并解压缩新固件在硬盘上创建新文件夹,并根据需要为其命名。
将鼠标光标放在桌面上的空白处并点击鼠标右键。
选择New(新建)Folder(文件夹)以在桌面上创建新文件夹。
根据需要为文件夹命名。
将文件"firmware_v103.zip"下载至新文件夹。
将鼠标光标放在下载网站的firmware_v103.zip链接上并点击鼠标右键。
选择目标另存为并选择在步骤3-1中创建的文件夹。
文件"firmware_v103.zip"将下载至新文件夹。
执行"firmware_v103.zip"以解压缩固件更新。
双击新文件夹中的firmware_v103.zip图标。
将显示一个如以下右图所示的安装对话框。
点击Browse.并选择在步骤3-1中创建的文件夹。
电脑固件升级指南确保硬件安全和稳定性
电脑固件升级指南确保硬件安全和稳定性电脑固件升级指南随着科技的不断进步和硬件设备的不断更新,保持电脑硬件安全和稳定性变得愈发重要。
固件,作为硬件设备的基本系统软件,也需要定期升级以保持最新的功能和性能优化。
本文将为您提供电脑固件升级的指南,帮助您确保硬件的安全和稳定性。
一、了解固件升级的必要性固件是硬件设备运行的基础,它负责管理系统和设备之间的通信和交互。
固件升级可以提供以下几个方面的好处:1. 修复漏洞和安全性问题:固件升级可以解决已知的漏洞和安全性问题,提供更高级别的硬件安全保护,避免潜在的风险。
2. 改善性能和兼容性:固件升级通常会增加新的功能和改善设备的性能,同时提升设备的兼容性,使其能够更好地适应新的软件或硬件环境。
3. 修复稳定性问题:固件升级可以修复设备的稳定性问题,避免由于固件错误引起的系统崩溃或设备失效。
二、了解电脑固件的类型在进行固件升级之前,首先要了解自己电脑的固件类型。
目前,常见的电脑固件类型有以下几种:BIOS(基本输入输出系统)、UEFI (统一可扩展固件接口)、固件(固态硬盘固件升级)等。
不同的电脑品牌和型号可能采用不同类型的固件,因此需要在升级之前明确电脑的固件类型。
三、确定固件升级方法1. 确定固件版本:在进行固件升级之前,先要确定当前电脑所使用的固件版本。
通常可以通过以下几种方式来查看:a. BIOS/UEFI设置界面:在电脑开机时,按下相应的键(通常是DEL或F2)进入BIOS/UEFI设置界面,然后找到固件版本信息,通常可以在主界面或系统信息中找到。
b. 系统信息工具:在Windows系统中,可以使用系统信息工具(System Information)查看固件版本。
在开始菜单中搜索“系统信息”,然后打开该工具,在左侧导航栏中选择“固件(BIOS)”或“固件(UEFI)”,即可查看到固件版本。
2. 下载正确的固件升级程序:在确定了固件类型和版本之后,需要到电脑品牌的官方网站上下载正确的固件升级程序。
Q8n-4K 产品版本号1.03 固件更新指南说明书
Q8n-4K Firmware Update GuideCopyright(C) 2022 ZOOM CORPORATION. All Rights Reserved.Proper display is not possible on grayscale devices.Introduction■Item to prepare■Firmware update process1. Download the firmware update file.2. Extract the ZIP file.3. Copy the extracted firmware update file to a microSD card.4. Update the firmware.5. Confirm that the firmware has been updated correctly.Q8n-4KWindows or macOS computerwith Internet accessmicroSD cardSupported recording media microSDHC: 4 GB – 32 GB microSDXC: 64 GB – 512 GBAlways format microSD cards on the Q8n-4K after purchasing them new or using them witha different device.Updating the FirmwareThis guide explains firmware update to version 1.03 as an example.1.Download the firmware update file.Download the ZIP file that contains the firmware update file from the Q8n-4K download page.On Windows2.Extract the ZIP fileSelect the folder that contains the downloaded ZIP file. Click ① “Compressed Folder Tools” and then click ② “Extract all”. This extracts the ZIP file.3.Copy the firmware update file to a microSD card.Copy the “Q8N4K_FW.BIN” file to a microSD card.Firmware update file Copy the firmware update fileto a microSD card.On macOS2. Extract the ZIP file.After downloading, open the ① “Downloads” folder which appears at the right end of the Dock by default. Then, click ②. Downloaded files will be shown.3. Copy the firmware update file to a microSD card.Copy the “Q8N4K_FW.BIN” file to a microSD card.Copy the firmware update file to a microSD card.The following procedures are the same on both Windows and macOS.4.Charge the battery enough or connect an AC adapter.NOTEThe firmware update is not possible if the remaining battery power is low.5.Insert the microSD card into the Q8n-4K.6.Turn the power on while pressing7.Press to select “YES✓”.This opens a final confirmation screen.Firmware update? Ver.1.02Ver.1.038.Press to select “YES✓”.After updating, the Completion Screen opens.NOTEDuring the firmware update, do not turn the power off or remove the microSD card.9.After the firmware update completes, turn the power off.NOTEIn the unlikely event that firmware update should fail, follow the procedures from the beginning again to update the firmware.Confirming that the firmware has been updated correctlyCheck the firmware versions used by the Q8n-4K.1.Presson the Recording Screen.The SETTINGS Screen opens.2.Press on the SETTINGS Screen.3. Check the firmware version.・Copying or reprinting this manual in part or in whole without permission is prohibited.・Windows® is a trademark or registered trademark of Microsoft® Corporation.・macOS® is a trademark or registered trademark of Apple Inc.・microSDXC logos are trademarks.・Other product names, registered trademarks and company names in this document are the property of their respective companies.・All trademarks and registered trademarks in this document are for identification purposes only and are not intended to infringe on the copyrights of their respective owners.・The illustrations in these instructions might differ from actual screens.©2022 ZOOM CORPORATION Z2I-4745-01。
1.03固件升级说明
一卡一密固件程序升级说明将POS 固件程序从1.04升级回1.03,具体的操作步骤如下:升级大体分三个大的步骤:加载固件升级程序、升级固件程序、升级新的应用程序。
一.加载固件升级程序1.通过用系统采集程序测试后,确保所有的POS机都处于开机状态且联网正常,然后将采集程序关闭。
2.运行\支持擦除flash升级工具\ 文件夹内的程序IAPUpdate(支持擦出flash).exe,点击“添加”按钮,选择端口号、波特率(强烈建议波特率选择9600)、窗机地址号,擦除FLASH 可以不选择, 然后点击‘确定’按钮;按照上述操作逐一添加需要升级的窗机。
3.点击“打开”按钮,选择升级文件“IAP0000m.hex”,点击“确定”按钮。
4.点击“开始升级”按钮,程序自动将所选择的机器芯片程序升级。
5.升级完成后,看一下POS机的升级结果,升级成功的POS机显示“LOAD-XXX”。
如果有升级不成功的机器POS,把该台POS 机重新启动,按上述操作重新升级。
6.所有的POS都确保升级成功后,关闭IAPUpdate(支持擦出flash).exe。
二.升级固件程序1.运行程序IAPUpdate2.0.exe,点击“添加”按钮,选择端口号、波特率(强烈建议波特率选择9600)、窗机地址号,然后点击‘确定’按钮;按照上述操作逐一添加需要升级的窗机。
2.点击“打开”按钮,选择升级文件“IAP_103.hex”,点击“确定”按钮。
3.点击“开始升级”按钮,程序自动将所选择的机器芯片程序升级。
4.升级完成后,看一下POS机的升级结果,升级成功的POS机第一排显示“XXX-LOAD”,第二排显示“VER 1.03”。
如果有升级不成功的机器POS,把该台POS机重新启动,按上述操作重新升级。
5.在升级的过程中不能断电,否则有可能出现芯片升级坏的可能;三.升级新的应用程序1.运行IAPUpdate3.0.1.exe,点击“添加”按钮,选择端口号、波特率(强烈建议波特率选择9600)、窗机地址号,然后点击‘确定’按钮;按照上述操作逐一添加需要升级的窗机。
海盗船固态硬盘1.3.3固件升级官方说明文件(中英对照版)
Corsair Force Series 3 / Force GT Firmware Update Instructions 海盗船Force Series 3 / Force GT固件更新说明Here is the Force Series 3 and Force GT 1.3.3 firmware update. Please read the following before you attempt to update your firmware.这里是部队的Force Series 3和Force GT 1.3.3固件更新。
您尝试更新固件前,请仔细阅读以下。
IMPORTANT NOTES BEFORE BEGINNING YOUR UPDATE开始之前您的更新的重要注意事项If you are stable and do not have issues, we suggest that you do not flash your firmware.如果是稳定的,没有问题,我们建议您不要刷新固件。
This update is intended to not be destructive. However, we strongly urge that you back up any important data before beginning this procedure.虽然此更新是不具有破坏性。
但我们还是强烈建议您在开始此过程之前备份所有重要数据。
Be sure to download the correct update file for your drive. Many complaints we have seen were the result of downloading the wrong file for your drive.请务必为您的驱动器下载正确的更新文件。
我们看到很多投诉,为您的驱动器下载错误的文件的结果。
E103-W11的OTA升级技术
什么是OTA升级?如何制作OTA升级包?一、什么是OTA?OTA为空中下载技术(Over The Air),是通过移动通信的空中接口实现对移动终端设备及SIM 卡数据进行远程管理的技术,空中接口可以采用WAP、GPRS、CDMA1X及短消息技术等,而它的升级则是通过无线网络下载、升级设备所需要的更新(比如问题修复、版本更新等),不用通过有线连接来下载、升级,可直接通过无线环境下载、升级。
二、E103-W11的OTA升级模式有哪些?压缩升级模式压缩升级是指对需要升级的固件进行压缩处理,减少网络传输而占用的资源,可以支持较大版本的固件。
差分升级模式差分升级需要在比较新老固件后,形成差分包;而差分包通常会很小,可以极大地减少传输资源,因此,可支持特大固件版本。
A/B升级模式A/B升级模式也称为全量升级模式,支持双版本,分别放在两个版本分区中。
A/B升级不会压缩新固件,因此,A/B升级的两个版本分区的大小应各为Flash中主版本的一半。
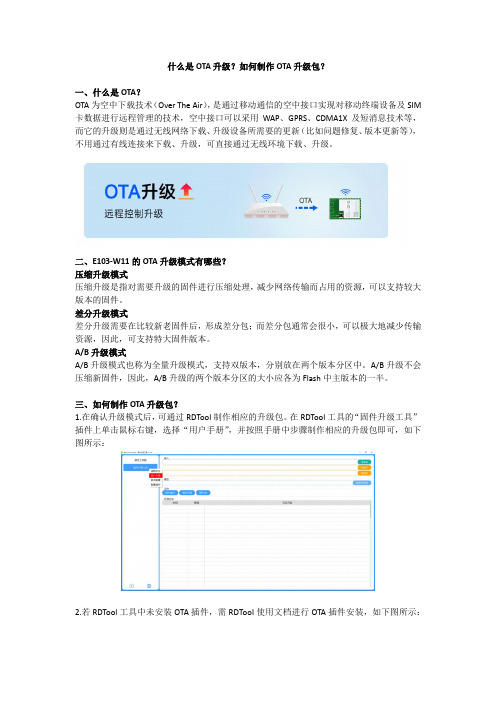
三、如何制作OTA升级包?1.在确认升级模式后,可通过RDTool制作相应的升级包。
在RDTool工具的“固件升级工具”插件上单击鼠标右键,选择“用户手册”,并按照手册中步骤制作相应的升级包即可,如下图所示:2.若RDTool工具中未安装OTA插件,需RDTool使用文档进行OTA插件安装,如下图所示:3.升级包制作完成后将其储存在云端,调用OTA API完成升级。
四、OTA升级的优势和劣势有哪些?OTA升级应用领域较广,如我们生活中常见的手机系统升级也是应用该技术,OTA升级可以直接在手机中在线完成,只需借助移动网络或Wi-Fi网络即可,且升级无需备份数据。
而针对我们的Wi-Fi模块而言通常用A/B升级模式来进行升级,一个区固定用于烧录,一个区用于OTA升级,比较简单,且升级失败时回到上一个版本,而不是回到第一个版本。
当然,OTA升级有优点就有缺点,例如压缩升级模式和差分升级模式都是单固件分区升级,在升级过程中不能被中断;如果在升级过程发生断电等情况,只能重新上电后从升级点处继续升级。
傲天AC1.3版本升级指导手册与回退指引-04.28

傲天AC 1.3版本升级指导手册目录1.升级注意事项 (4)1.1 版本对应情况 (4)1.2 备份当前配置文件 (4)1.2.1 备份到本地 (4)1.2.2备份配置到ftp server (4)2.升级流程和方式 (5)2.1 升级流程图 (5)2.2 ftp工具上传方式升级 (5)2.3 http协议web页面升级 (6)3.升级准备 (6)3.1 查看当前运行版本 (6)3.2 查看运行状态 (6)3.3 搭建升级环境 (7)3.4 获取所需软件版本 (7)3.5 备份flash中重要数据 (7)3.6 1.2版本升级到1.3版本的注意事项 (7)4.升级操作 (8)4.1 web页面上传 (8)4.2 ftp上传版本文件 (10)5.升级后验证 (10)5.1启动过程查看加载的版本文件名 (10)5.2查看当前运行的版本 (10)6.版本回退 (11)6.1 启动过程回退版本 (11)6.2 系统运行状态下回退版本 (12)7. 1.2版本升级1.3版本配置变动 (12)7.1 DHCP变动 (12)7.1.1 1.2版本DHCP (12)7.1.2 1.3版本DHCP (12)7.2 认证变动 (13)7.2.1 1.2版本认证 (13)7.2.2 1.3版本认证 (15)7.3 SNMP变动 (18)7.3.1 1.2版本SNMP (18)7.3.2 1.3版本SNMP (18)7.4 网管开关变动 (19)7.4.1 1.2网管开关 (19)7.4.2 1.3网管开关 (20)8. 1.3版本试点计划安排 (22)AC部分1.升级注意事项1.1 版本对应情况对于AC,所有型号产品通用一个系统软件,升级前确定当前运行的版本号,以防升级后出现故障,回退时知道退哪个版本。
查看当前运行版本的命令如下:SYSTEM# show system boot_imgThe current boot file is auteware 1.3.10 (Build 5786)1.2 备份当前配置文件1.2.1 备份到本地登录AC的web页面,点击系统管理→导出配置文件,如下图1.2.2备份配置到ftp server格式如下upload configure ftp SERVER USENAME PASSWORD FILENAME例如SYSTEM# upload configure ftp 192.168.1.1 admin admin config.bak2.升级流程和方式2.1 升级流程图2.2 ftp工具上传方式升级如下图连接2.3 http协议web页面升级如下连接图3.升级准备升级前检查表3.1 查看当前运行版本使用命令show system boot_img查看当前运行版本# show system boot_imgThe current boot file is auteware 1.2.12 (Build 3046sp5) 3.2 查看运行状态使用命令show system environment查看运行状态# show system environment+---------+---------+-------------------+| | | TEMPERA TURE || FAN | POWER +---------+---------+| | | CORE | SURFACE |+---------+---------+---------+---------+| normal | normal | 68 | 38 |+---------+---------+---------+---------+3.3 搭建升级环境条件允许最好搭建测试环境测试,以防升级失败3.4 获取所需软件版本通过我们售后工程师或客户经理,获取所需版本,为确定版本的完整性,最好md5软件校验,或者上传到AC上后用md5校验,具体命令SYSTEM# md5 auteware 1.3.10 (Build 5783)MD5 (AW1.2.9.2651.X7X5.IMG)= 44c5af67687a17c9133ddfbd82f949a33.5 备份flash中重要数据Flash中的重要配置文件一定要在升级之前备份,用户可以通过FTP或TFTP方式将需要备份的文件下载到PC上,在版本升级完成后可以将备份的文件重新加载到Flash中。
戴尔系统更新版本 1.3 用户指南说明书
Dell System Update Version 1.3 User’s GuideNotes, cautions, and warningsNOTE: A NOTE indicates important information that helps you make better use of your product.CAUTION: A CAUTION indicates either potential damage to hardware or loss of data and tells you how to avoid the problem.WARNING: A WARNING indicates a potential for property damage, personal injury, or death.© 2016 Dell Inc. or its subsidiaries. All rights reserved. This product is protected by U.S. and international copyright and intellectual property laws. Dell and the Dell logo are trademarks of Dell Inc. in the United States and/or other jurisdictions. All other marks and names mentioned herein may be trademarks of their respective companies.2016 - 08Rev. A00Contents1 Overview (4)What is new in this release (4)Transitioning from DLR to DSU (4)Other documents you might need (5)2 Prerequisites for installing the Dell System Update (6)Supported hardware and operating system (6)Supported hardware (6)Supported operating system (6)3 Installing OpenManage Server Administrator (7)4 Updating the system using Dell System Update (8)DSU Outputs and Options (9)5 Sample Commands (11)Sample Config file (11)Command to create bootable non-interactive DSU ISO (11)Command to create bootable interactive DSU ISO (11)Selected updates to with using existing bootable ISO (11)DSU to use with custom offline repository created with Dell Repository Manager (11)6 Troubleshooting Dell System Update (12)The repository setup is fine, however OMSA (srvadmin) is failing to install (12)The repository setup is fine, OMSA (srvadmin) installed but won’t start or you can’t get to it (12)Repository conflicts for updates having different version (12)7 Frequently asked questions (13)How many commands do I need to execute to update my system? (13)Can I execute those three commands in any order? (13)Can I update the inventory of the system using DSU? (13)Can I use the catalog location option and point it at catalog.cab on the FTP site? (13)What is an option? (13)How can I select an update in the given list? (13)How can I cancel an update already selected in the given list? (13)After I select the required updates, how to start the update process? (14)Can I select more than one update? (14)How will I come to know whether an update is selected or not? (14)Can I select all updates at the same time? (14)Can I cancel all updates at the same time? (14)Can I select multiple updates at the same time? (14)DSU Inventory displays update for a component that is installed is newer than what is available (14)31 OverviewDell System Update (DSU) is an improved version of Dell OpenManage Linux Repository (DLR) to distribute Dell updates for Linux systems. The DSU distributes:•OpenManage Server Administrator•BIOS and firmware updates for different serversDSU extensively uses Yum and Zypper.•Yellowdog Updater, Modified (Yum)Yum is an open source command line package management utility used for Linux operating systems. Yum primarily helps to do automatic updates, package and dependency management, mainly for RedHat Package Manager (RPM) based distributions.Yum has a command line interface and it is implemented in the Python programming language. Yum is mostly used to update and manage Red Hat Enterprise Linux systems. Yum has a great informational output and syntax.•ZypperZypper is used for installing, removing, updating, and querying software packages of local and remote networked media. It has been extensively used for the openSUSE operating systems. It is a package management engine that powers Linux applications like Yet another Setup Tool (YaST). Zypper can download several update packages, and install them at once. Zypper is one of the fastest and powerful package manager for the Linux environment.What is new in this releaseThis release of Dell System Update (DSU) supports the following new features:•New feature options added to configure and display are:–--input-inventory-file=<FILE>–--output-inventory-xml=<FILE>NOTE: The option dsu --collect-inventory=<FILE> has been replaced with dsu --input-inventory-file=<FILE> from this release of DSU.For more information, see Updating the system using DSUTransitioning from DLR to DSUCurrently, customers can get all the updates for their systems through DLR. However, DSU provides a better customer experience for getting the latest updates for their systems.Table 1. Design differences between DSU and DLR4Other documents you might needIn addition to this guide, you can access the following guides available at /support/manuals.•Dell Systems Management - OpenManage Software Support Matrix•Dell OpenManage Server Administrator Installation Guide*•Dell OpenManage Server Administrator User’s Guide** This guide is also found on the Dell Systems Management Tools and Documentation DVD.52 Prerequisites for installing the Dell System Update This section lists the specific prerequisites for installing the DSU.Supported hardware and operating systemThis section describes the list of supported hardware and operating systems.Supported hardwareFor more information on supported hardware, see /repo/hardware/omsa.html#Supported_Hardware. Supported operating systemFor more information on supported operation system, see /repo/hardware/omsa.html#Supported_Operating_Systems.Community distros like Fedora and openSUSE are not tested with this repository. Since most of the kernel drivers in this repository are in Dynamic Kernel Module Support (DKMS) format, community distros may work.63 Installing OpenManage Server AdministratorYou can install OpenManage Server Administrator using one of the following commands:•yumyum install srvadmin-all•zypperzypper install srvadmin-allNOTE: OMSA does not support installation on unsupported systems. If you receive a message like 'the system is not supported' while installing, it means the system is not supported and the installation fails. This is most common on SC-class systems, as OMSA is completely unsupported on these systems.NOTE: To use a 64–bit package on a 32-bit Dell package installed (srvadmin-dell_ie) on the system, uninstall the 32-bit packages and install the 64-bit package. New installations help installing the architecture of OMSA that matches your operating system.74 Updating the system using Dell System UpdateFor a list of CLI options for systems running DSU, a description of each option, and the command syntax see the following table: Table 2. CLI Options: Usage8DSU Outputs and OptionsFollowing are the DSU outputs and options:9[ ]represents components which are not selected[*] represents components which are selected[-] represents component already at repository version (cannot be selected) Choose: q to Quit without updateChoose: c to Commit and apply updatesChoose: <number> to Select/Deselect updatesChoose: a to Select AllChoose: n to Select None105 Sample CommandsThe following are some of the sample options with DSU:Sample Config fileTo point to a repository hosted at http://192.168.10.11/16.08.00/, the config XML file is:<DSUConfig><Repository Type="YUM"><RepoLocation IP="192.168.10.11" Directory="16.08.00"/></Repository></DSUConfig>Command to create bootable non-interactive DSU ISOdsu --non-interactive --destination-type=ISO --destination-location=/root/home/output.iso --config=/root/home/config.xmlCommand to create bootable interactive DSU ISOdsu --destination-type=ISO --destination-location=/root/home/output.isoSelected updates to with using existing bootable ISOdsu --destination-type=CBD --destination-location=/root/home/outdirectory --bootable-log-location=/var/log/bootmsg.logDSU to use with custom offline repository created with Dell Repository Managerdsu --source-type=PDK --source=/mnt/DRM_REPO/6 Troubleshooting Dell System UpdateThe repository setup is fine, however OMSA (srvadmin) is failing to installEven though DSU does not block OMSA installation or upgrade on any server, OMSA is supported only for certain Linux distributions and PowerEdge server models. For more details on supported OS and server, check the latest OMSA documentation. DSU supports upgrade of OMSA (srvadmin), where an OMSA version is already installed in the system. A fresh installation of OMSA can be performed directly with YUM commands from same DSU repository as mentioned in “Installing OpenManage Server Administrator using DSU” section.Yum-based systems:In some circumstances, yum caches incorrect repository metadata. Run yum clean all to remove old metadata, and retry.Up2date can also cache incorrect metadata at times. To remove old metadata, run rm -f /var/spool/up2date/*. You should be able to safely remove all the files under /var/spool/up2date/ at any time and up2date automatically downloads what it needs.Ifyoustillhaveproblems,****************************************************.Ensuretoincludethefollowinginformation:•Subject line should mention the repository you are having problems with•Linux Distribution, arch, version, and patchlevel: eg. RHEL 6 x86_64 Update 9•Dell system model and system id•Error output from any commandsThe repository setup is fine, OMSA (srvadmin) installed but won’t start or you can’t get to itHave you started the services? Use the srvadmin-services.sh script to start them:# srvadmin-services.sh startIf you get a message like:Starting ipmi driver: [FAILED]Then you need to make sure that the openipmi service is enabled and started:# chkconfig openipmi onFor detailed information about OMSA trouble shooting, please check OpenManage Server Administration Manuals. Repository conflicts for updates having different versionDSU will point to incorrect updates if multiple repositories are configured which contains different versions of similar packages.It is advised to disable other repositories in such cases.7 Frequently asked questionsThis section lists some frequently asked questions about Dell System Update.How many commands do I need to execute to update my system?There are 3 commands. You should execute them in the order. For more information see Updating the system using DSU.Can I execute those three commands in any order?We recommend you to follow the order while executing the commands. For more information see Updating the system using DSU. Can I update the inventory of the system using DSU?Yes, you can update the inventory file of the system using DSU. For more information see Updating the system using DSU. Can I use the catalog location option and point it at catalog.cab on the FTP site?No, catalog supports only XML format and not CAB format.What is an option?It is the way to inform DSU to perform related tasks for the available features .There are several options that you can select – any valid key from the given list of updates (these key appears in front of each update)c -- commit – after selecting the required updates, use commit option to start the update.q – quit – it closes DSU.a – to select all the updates.n – to deselect all the updates.How can I select an update in the given list?Provide the number shown in front of the update as an option, it gets selected (if already not selected).How can I cancel an update already selected in the given list?It works like a toggle button. For example, say if update number 7 is already selected (an asterisk (*) is there in front of 7th update in the list), and now if you choose 7 as an option, it gets cancelled.After I select the required updates, how to start the update process? Provide c option to start the update procedure.Can I select more than one update?Yes, you can select more than one update at a time. You can provide update numbers one by one as an option to select multiple updates.How will I come to know whether an update is selected or not?An asterisk (*) appears in front of every selected update.Can I select all updates at the same time?Yes, you can select all updates at a time. Select option a and press enter, all the updates get selected.Can I cancel all updates at the same time?Yes, you can cancel all updates at a time. Select option n and press enter, all updates will get deselected.Can I select multiple updates at the same time?No, you cannot select multiple updates (less than selecting all updates) in one shot option. But you can select multiple updates by providing numbers one by one.DSU Inventory displays update for a component that is installed is newer than what is available.DSU Linux Repository is refreshed on a monthly basis, at the next refresh of the DSU Linux Repository the newer version will be carried.。
MiiNePort E1 Series 固件更新说明书
Firmware for MiiNePort E1 Series Release NotesSupported Operating SystemsNotesChangesApplicable ProductsBugs Fixed• Prevents XSS attacks on web server.• Extended challenge ID to 64 bytes for security purposes.• Supports CSRF token on webpage for security purposes.• Enhanced web login security and supports 5 users logged in simultaneously.• Enabled default password for login.• Supports encrypted import/export.• Removed the echo server (port 7) function.• The "sysDescr" default value is set to the model name.• SCM client connections support TCP client mode.• In MCSC mode, MiiNePort may stop sending continuous data when using a slow baudrate.• Console showed DIO state error when DIO mode was set to input.• In Real COM mode, opening a port caused RX malfunctions while the port was receiving data.• In Real COM mode, the data port connection counter would be incorrect when only the command port was connected and a command timeout notification occurred.• Data would not be completely sent to the serial port when the TCP connection closed immediately after data was transmitted from host.EnhancementsN/AMiiNePort E1-T, MiiNePort E1-H-T, MiiNePort E1-ST, MiiNePort E1, MiiNePort E1-H• Supports SCM client connections in MCSC mode.• In TCP client, for the manual connection option in connection control, both the IP and domain name can be entered from serial.New FeaturesN/A• This version also support MiiNePort E1-SDK, MiiNePort E1-H-SDK, and MiiNePort E1-ST (w/o module)Supported Operating SystemsNotesChangesApplicable ProductsBugs Fixed• If MiiNePort receives a ARP request from another host for which an ARP entry already exists, the hardware address in the ARP entry will be updated accordingly.• RFC1213-MIB "Get Next" of sysServices will get ifIndex instead of ifNumber.EnhancementsN/AMiiNePort E1, MiiNePort E1-H, MiiNePort E1-T, MiiNePort E1-H-T, MiiNePort E1-ST• Supports MiiNePort SDK firmware.New FeaturesN/A• This version also support MiiNePort E1-SDK, MiiNePort E1-H-SDK, and MiiNePort E1-ST (w/o module)Supported Operating SystemsNotesChangesApplicable ProductsBugs FixedN/A• In Real COM mode, the alive check mechanism would not work properly.• In Windows 7 with IE8, images on the webpage may be missing.• TCP retransmission may happen immediately.EnhancementsN/AMiiNePort E1, MiiNePort E1-H, MiiNePort E1-T, MiiNePort E1-H-T, MiiNePort E1-STN/ANew FeaturesN/A• This version also support MiiNePort E1-SDK, MiiNePort E1-H-SDK, and MiiNePort E1-ST (w/o module)Supported Operating SystemsNotesChangesApplicable ProductsBugs FixedN/A• In Real COM mode, the MiiNePort E1 would reboot when users closed the port.EnhancementsN/AMiiNePort E1, MiiNePort E1-H, MiiNePort E1-T, MiiNePort E1-H-T, MiiNePort E1-STN/ANew FeaturesN/A• This version also support MiiNePort E1-SDK, MiiNePort E1-H-SDK, and MiiNePort E1-ST (w/o module)Supported Operating SystemsNotesChangesApplicable ProductsBugs Fixed• Changed the filename of configuration file for the AutoCFG process. The file name for MiiNePort E1is "MiiNePortE1.txt", for MiiNePort E1-H is "MiiNePortE1-H.txt". If the MiiNePort E1 cannot get the "MiiNePortE1.txt" file, it will try to get the "MiiNePortE1.cfg" file.• In the web console, when changing the OP mode to MCSC and submitting immediately, the OP mode would be unchanged.• Setting "Match bytes" as 2 byte by NECI command lost efficacy.• The device name would be cleared after changing miscellaneous settings from the web console.• Doing a firmware upgrade from the web console would fail occasionally.• DHCP would fail occasionally.• The gratuitous ARP period value limit range was not matched between the telnet console and web console.EnhancementsN/AMiiNePort E1, MiiNePort E1-H, MiiNePort E1-T, MiiNePort E1-H-T, MiiNePort E1-ST• Supports MiiNePort E1-H, MiiNePort E1-H-T.• When DHCP or BOOTP server does not respond properly, the Fault LED (right side of the RJ45jack) will blink amber every 0.5 seconds.New FeaturesN/A• This version also support MiiNePort E1-SDK, MiiNePort E1-H-SDK, and MiiNePort E1-ST (w/o module)Supported Operating SystemsNotesChangesApplicable ProductsBugs FixedN/A• Setting the destination port for UDP mode using the web console did not work.• The destination port for TCP Client mode only accepted 4 digits in the telnet console.• ExTrigger reset-to-default functionality sometimes failed to reset IP settings when AutoIP/AutoCfg was enabled.• The text "Configuration Tool" in the web/telnet console should be plural.• MiiNePort would continue trying to connect to peer host in TCP Client mode even if serial command mode was triggered.• Invalid destination port numbers for UDP mode could be set through the web console.• Destinations for UDP mode would be cleared when the settings of other operation modes were changed through the web console.• Destination 2-4 for UDP mode should be cleared when configuring UDP mode using simple view through the web console.• "Configuration Tools Settings OK" would be incorrectly shown after configuring Auto Configuration through the web console.• Reset-to-default via NECI did not work.• Data 0x00 would trigger serial command mode when it was set to trigger by break signal.• Retrieving MAC addresses in serial command mode returned unrecognized information.• For configuration of serial command mode SW trigger characters, the exported configuration file did not include the second and third trigger characters.• Connecting to a non-existing host caused delays for all other packets.EnhancementsN/AMiiNePort E1, MiiNePort E1-H, MiiNePort E1-T, MiiNePort E1-H-T, MiiNePort E1-STN/ANew FeaturesN/A• This version also support MiiNePort E1-SDK, MiiNePort E1-H-SDK, and MiiNePort E1-ST (w/o module)。
RICOH GR DIGITALⅢ固件升级 说明书
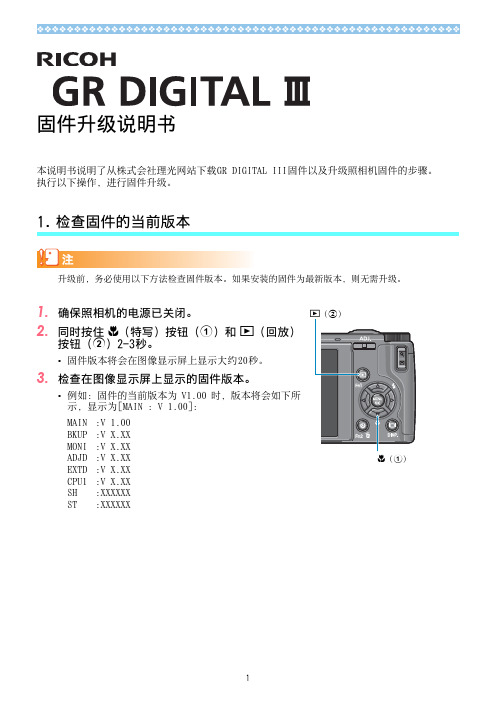
固件升级说明书本说明书说明了从株式会社理光网站下载GR DIGITAL III固件以及升级照相机固件的步骤。
执行以下操作,进行固件升级。
检查固件的当前版本1.CPU1:V X.XXSH:XXXXXXST:XXXXXX2.解压固件1.从株式会社理光网站下载固件。
2.双击下载的文件或者右键单击文件并选择[打开]。
•将会出现一个对话框。
3.单击[确定]。
•将会创建文件夹[GR DIGITAL 3 Update],而固件会被解压至文件夹[Firmware relX.XX (X.XX 为版本号)]。
检查[glaunch3](固件文件)和[glaunch8](调整值文件)是否在文件夹[Firmware relX.XX]中。
3.将固件复制到SD记忆卡上有两种方法可将固件复制到SD记忆卡上。
•在照相机上插入一张SD 记忆卡,用附带的USB 连接线连接照相机和电脑,然后将固件复制到SD 记忆卡上。
•使用卡片阅读器或卡片写入器将固件复制到SD记忆卡上(需要卡片阅读器或卡片写入器)。
通过USB连接线连接照相机和电脑来复制固件1.如果您的Windows PC上安装了DC 软件,请确认未启动DL-10。
2.如果正在使用DL-10,请在任务栏中使用右键单击DL-10,然后单击[退出]。
•如果任务栏中没有显示DL-10图标,则无需执行步骤2。
3.为照相机装上一个有足够电量的电池。
4.在照相机上插入SD记忆卡,并开启电源。
5.在显示的照相机设定菜单标签中选择[格式化〔存储卡〕],然后按下$按钮。
Windows操作系统Macintosh操作系统glaunch3glaunch8glaunch3glaunch86.选择[是],然后按下MENU/OK按钮。
•SD记忆卡被格式化。
对记录图像的存储卡进行格式化后,所有内容将会消失。
格式化存储卡前,将那些您不想删除的图像保存至您的电脑上。
7.关闭照相机,并用附带的USB连接线连接照相机和电脑。
【K3固件升级】1.03版本升级险些出错
【K3固件升级】1.03版本升级险些出错
【K3固件升级】1.03版本升级步骤已经简化,前两个版本没研究过,今天升级1.03版本,显示内容简化了,险些出错固件升级步骤
一、先点击页面下载按键,下载固件包。
固件压缩包中含有一个bin后缀的固件文件。
二、准备好空白的,格式化后的SD/SDHC存储卡(32MB 或以上)。
三、把下载的bin后缀的固件文件复制到SD/SDHC存储卡中。
复制方式1、可以通过USB接线(型号 I-USB107)直接连接相机和电脑,把固件升级软件复制到SD/SDHC存储卡中。
复制方式2、可以通过使用读卡器把固件升级软件从电脑复制到SD/SDHC存储卡中。
四、请把相机电池充电到满电状态。
五、把SD/SDHC存储卡插入相机,盖上盖板。
六、打开相机的同时按下菜单(MENU)按键,相机屏幕中央显示“升级相机固件”,下面显示“开始”“取消”“确认”。
上面显示原版本号---更新版本号。
七、按动方向控制键选择"开始",并按下“ok"按键确认。
八、相机屏幕中显示“NOW LOADING”,表示固件已开始升级。
升级期间请不要关闭电源,整个升级时间大约持续90~150秒。
九、当屏幕左下角显示“COMPLETE”文字时,表明升级已经结束,请关闭相机电源。
注意----升级过程中相机屏幕只显示“NOW LOADING”(加载),不像过去没有别的字母出现了。
IC1说明书

3456D-Controller IC系列主机是D-Controls智能家居系统中专用的中心服务器。
它包含完整的KNX通信系统,通过TCP/IP方式与KNX总线进行交互通信,能够让KNX系统迅速接入局域网和Internet,实现KNX系统的远程控制与管理。
用户可以使用D-Controls App(iPad、iPhone、Android等)智能终端,通过D-Controller系列主机实现控制灯光、窗帘、影音、中央空调、地暖、安防、监控、电梯、家用电器等等设备;同时可以实时监控各个设备运行状态。
D-Controls KNX IC1(Version 1.03)一、前言三、包装清单四、硬件接口说明五、系统连接方式七、安装施工后使用。
安装电气施工1.1 为了您的安全,请严格遵守在使用前,请仔细阅读《为了您的安全,请严格遵守》,然后再安装。
能因实际情况不同而导致严重后果。
在安装完成之后,试运行,确认是否有异常情况,并依据本说明书对客户说明使用方法。
【符号的意思】• 本公司致力于不断地对产品进行改进,如有变化恕不另行通知。
• 本公司不提供将产品改作它用的服务。
• 未经过允许,本手册的任何部分均不得擅自复制。
现场安装需要购置的物料清单:1)9~32V 电源适配器一个;2)KNX/EIB通讯线;3)网线(以太网线);4)无线路由器(如有必要可能还需要网络交换机 、AP热点等WIFI无线网络设备)。
随机件名称IC1数量11:KNX接口(红黑端子)2:9~32V取电接口(黄白端子)3:POW(电源指示灯)4:SYS(系统运行指示灯)5:KNX(KNX通讯指示灯)6:COM(串口指示灯)7:NET(网络通讯指示灯)8:RESET 恢复出厂设置键9:Ethernet 100M base-T RJ45 网口安装场所选定:1)请不要将本产品安装在潮湿的地方;2)本产品只能安装在雨淋不到的地方;3)禁止安装在高温场所;4)禁止安装在儿童接触的场所;5)禁止安装在干扰强的场所;6)禁止安装在户外;7)标准模数化35mm标准DIN导轨安装;8)与强电模块不要安装在同一箱体内。
奥迪固件升级说明MMI Update-CN
2. 升级的重要说明注意:Æ 每次升级后必须重新启动MMI系统,并检查是否还有控制单元需要进行升级。
必须进行这个检查,因为有些控制单元在第二次试时才能进行这个升级过程。
Æ 疏忽大意可能导致硬件损坏!Æ 升级CD不要留在车内! 请检查您要用于升级的软件的完整性。
您需要: 1张MMI-升级-CD (其备件号请参见相应的TPL或行动说明)。
1. 必须保证蓄电池的静态电压不低于12.5V。
2. 让发动机运行1分钟,之后马上按这个说明执行升级过程。
3. 为了保证在整个软件升级过程中都能有稳定的车载电压,请接上充电器。
4. 关闭车内和车附近的高电磁辐射装置(比如移动电话和无绳固定电话)。
5. 蓝牙电话手持话机 (出厂时就安装了的 BTA)必须接通。
6. 不允许同时在使用VAS-检测仪进行诊断工作7. 点火开关可以一直保持关闭状态。
8. 关闭车上所有非必须的用电器(自动/白天行车灯,空调等),在整个升级过程中这些用电器应都处于关闭状态。
9. 为保证升级过程顺利进行,车上的CD光驱内不得有其他的CD盘片(音频CD,使用说明书CD等)。
10. 必须遵守规定的升级步骤! 说明:本说明中所拷贝的屏幕图只是具有指导意义,图中显示的文字信息可能与您实际遇到的文字不一致。
如果在MMI软件升级中出现了问题,请查阅Audi Servicenet,具体路径是“Technik Produktbetreuung Elektrik Multi MediaInterface (MMI)- MMI High ,那里有故障源的说明。
3. 执行通用的升级过程1. 接通MMI。
2. 取出CD换碟机/CD播放器中的所有CD盘片。
3. 将MMI升级CD文字面朝上放入CD换碟机的第一个槽内或单碟CD光驱中。
4. 至少等2分钟,让系统对MMI升级CD进行分析并准备升级。
5. 通过相应功能按钮激活收音机(RADIO)菜单。
6. 相继按下SETUP和RETURN按钮并将这两个按钮同时按住约5秒钟,直至显示屏突然跳变。
影驰固态硬盘固件升级教程
1、本升级教程仅针对将系列1.03版本固件的固态硬盘升级,其他1.00~1.02版本暂不支持。
2、虽然更新固件不会清除您固态硬盘上的数据,但还是建议用户在更新固件前把自己重要的数据先备份好。
3、建议用户完整地查看完整个升级教程来判断是否需要升级固件。
4、升级固件软件分为两个版本。
Galaxy Toolbox 1.19Galaxy Toolbox 1.205、下一面详细列举各个型号所对应版本版本,用户根据自己的型号升级固件。
黑将256:GX0256MX103虎将120:GX0120MT103-A1Galaxy Toolbox 1.19Galaxy Toolbox 1.20黄金战将240:GX0240ML105-G 黄金战将120:GX0120ML105-G 战将240:GX0240ML103战将120:GX0120ML103战将60:GX0060ML1031、从官方网站下载Galaxy SSD A.1.19.rar 文件解压。
2、找到Galaxy SSD A.1.19.exe执行双击(部分Win7/8用户需右击以管理员身份运行)3、勾选虎将120GB(Galaxy GX0120MT103-A1)后点击右下角的,提示框会提示用户关闭其他程序后,按OK开始升级。
本升级教程(拿虎将120GB作为例子)仅针对1.03版本固件的SSD固态硬盘,其他将系列型号SSD,切勿进行以下操作,否则造成任何损失(数据掉失),影驰均不负责。
4、软件显示starting update. Update in progress.代表固态硬盘正在升级当中,建议用户不要采用任何操作,耐心等待升级完成。
5、当软件弹出下图信息,建议用户根据提示关闭或重新启动计算机,否则可能会出现无法识别或者识别错误的情况。
6、使用CrystalDiskInfo查询得到,固件版本已经显示为1.067、左图是1.03固件的性能,右图是1.06固件的性能,1.06的固件主要提升SEQ 读的速度。
- 1、下载文档前请自行甄别文档内容的完整性,平台不提供额外的编辑、内容补充、找答案等附加服务。
- 2、"仅部分预览"的文档,不可在线预览部分如存在完整性等问题,可反馈申请退款(可完整预览的文档不适用该条件!)。
- 3、如文档侵犯您的权益,请联系客服反馈,我们会尽快为您处理(人工客服工作时间:9:00-18:30)。
一卡一密固件程序升级说明将POS 固件程序从1.04升级回1.03,具体的操作步骤如下:
升级大体分三个大的步骤:加载固件升级程序、升级固件程序、升级新的应用程序。
一.加载固件升级程序
1.通过用系统采集程序测试后,确保所有的POS机都处于开机状态且联网正常,然后将采集程序关闭。
2.运行\支持擦除flash升级工具\ 文件夹内的程序IAPUpdate(支持擦出flash).exe,点击“添加”按钮,选择端口号、波特率(强烈建议波特率选择9600)、窗机地址号,擦除FLASH 可以不选择, 然后点击‘确定’按钮;按照上述操作逐一添加需要升级的窗机。
3.点击“打开”按钮,选择升级文件“IAP0000m.hex”,点击“确定”按钮。
4.点击“开始升级”按钮,程序自动将所选择的机器芯片程序升级。
5.升级完成后,看一下POS机的升级结果,升级成功的POS机显示“LOAD-XXX”。
如果有升级不成功的机器POS,把该台POS 机重新启动,按上述操作重新升级。
6.所有的POS都确保升级成功后,关闭IAPUpdate(支持擦出flash).exe。
二.升级固件程序
1.运行程序IAPUpdate2.0.exe,点击“添加”按钮,选择端口号、波特率(强烈建议波特率选择9600)、窗机地址号,然后点击‘确
定’按钮;按照上述操作逐一添加需要升级的窗机。
2.点击“打开”按钮,选择升级文件“IAP_103.hex”,点击“确定”按钮。
3.点击“开始升级”按钮,程序自动将所选择的机器芯片程序升级。
4.升级完成后,看一下POS机的升级结果,升级成功的POS机第一排显示“XXX-LOAD”,第二排显示“VER 1.03”。
如果有升级不成功的机器POS,把该台POS机重新启动,按上述操作重新升级。
5.在升级的过程中不能断电,否则有可能出现芯片升级坏的可能;三.升级新的应用程序
1.运行IAPUpdate3.0.exe,点击“添加”按钮,选择端口号、波特率(强烈建议波特率选择9600)、窗机地址号,然后点击‘确定’按钮;按照上述操作逐一添加需要升级的窗机。
(如果第二大步骤中是一次所有的POS机都升级成功,POS的端口和POS机的机器号都没有变,可以省略此步骤。
)
2.点击“打开”按钮,选择升级文件“****.hex”(其中“*”表示不同的升级文件名,以字母C开头的为出纳机程序文件,Y开头的为营业机程序文件),点击“确定”按钮。
3.点击“开始升级”按钮,程序自动将所选择的机器芯片程序升级。
4.升级完成后,看一下POS机的升级结果,升级成功的POS机将显示时间。
如果有升级不成功的机器POS,把该台POS机重新启动,按上述操作重新升级。
