NIIT Intel_VTune中文PPT9
Intel VTune Profiler用户手册说明书

Get Started with Energy AnalysisGet Started with Energy AnalysisContentsChapter 1: Get Started with Energy Analysis 2Get Started with Energy Analysis 1Energy Analysis with Intel® SoC WatchUse Intel® SoC Watch to perform energy analysis on a Linux*, Windows*, or Android* system running on Intel® architecture. Study power consumption in the system and identify behaviors that waste energy. Intel SoC Watch generates a summary text report or you can import results into Intel® VTune™ Profiler.Get the ToolsIntel® SoC Watch is available in VTune Profiler, which you can download with the Intel® oneAPI Base Toolkit.WorkflowsYou perform energy analysis by examining a summary report of data collected on the target system. See if the system is using energy-efficient, low power states. If results are not optimal, you may need additional examination of the data on a timeline as well as correlating metrics to determine a cause.There are two workflows for energy analysis:The next few sections describe the steps involved in Option 1 to perform data collection on a target system using Intel SoC Watch.Step 1: Install Intel SoC Watch on Target SystemThe Installation section of the Intel SoC Watch Release Notes (for your preferred target operating system) contains detailed instructions for instruction and configuration (if necessary).Download Intel® oneAPI Base Toolkit and install Intel® VTune™ Profiler, which contains Intel SoC Watch.The Installation section of the Intel SoC Watch Release Notes (for your preferred target operating system) contains detailed instructions for instruction and configuration (if necessary).3•Intel SoC Watch for Windows Release Notes •Intel SoC Watch for Linux Release Notes •Intel SoC Watch for Android Release NotesFind release notes and an OS-specific user guide in the documentation\en\socwatch directory after you install Intel ® VTune ™ Profiler.Step 2: Collect Data1.Open a command prompt with administrative/root privileges on the target system where Intel SoC Watch was installed.2.Enter the command below to capture CPU time in low power states over a 60-second period.socwatch -t 60 -f cpu-cstate -m -o results/testStep 3: View ResultsWhen collection completes, a message appears with the location of the result files. In this example, the summary report is located in the current directory in the results/test.csv file.1.Open the test.csv file using a spreadsheet viewer (such as Microsoft Excel*) or a text viewer (such as vi/vim or Microsoft Wordpad*).NOTESome text viewers give better column alignment than others.2.Review the tables in the report file. A partial set of tables is shown in the example report below.Example report:Example report interpretation : When reading C-State tables, a higher C-State number means lowerpower consumption. C0 indicates high energy consumption and C7 or C10 is the lowest energy consumption.Looking at the table in the example report, the system spent 93.65% of the collection time in the package-level C2 state while the cores were in C7, their lowest state. An area for further exploration would be what prevented the package from going into its lowest energy state.1Get Started with Energy Analysis4Get Started with Energy Analysis 1 Next StepsAfter running a basic collection on a target system, consider one of these steps:•Learn about additional data that you can collect on the target system. Run the help command: socwatch -h. The Intel SoC Watch User's Guide has a list of all provided metrics. Some metrics may not besupported on your platform.•Define a scenario you want to analyze for energy use. For example:•System idle scenario, where the system is not in use during the collection time and is expected to drop its energy use to the lowest possible. Use a longer collection period (several minutes) to give thesystem time to transition to deep sleep or hibernation.•Active workload, such as video or audio playback. Start both an activity and collection for a predetermined time or let the collection run until manually stopped. Use the help command to learn about Intel SoC Watch options that allow launching a workload, delaying a collection start, and running for indefinite time.•Generate a trace file (*.pwr) to import and view in Intel® VTune™ Profiler. Add the -r vtune option to the command line. For more information, see https:///en-us/energy-analysis-user-guide-intel-energy-analysis.Additional ResourcesLegal InformationIntel, the Intel logo, Intel Atom, Intel Core, Intel Xeon Phi, VTune and Xeon are trademarks of Intel Corporation in the U.S. and/or other countries.*Other names and brands may be claimed as the property of others.Microsoft, Windows, and the Windows logo are trademarks, or registered trademarks of Microsoft Corporation in the United States and/or other countries.51 Get Started with Energy AnalysisCopyright © Intel Corporation.This software and the related documents are Intel copyrighted materials, and your use of them is governed by the express license under which they were provided to you (License). Unless the License provides otherwise, you may not use, modify, copy, publish, distribute, disclose or transmit this software or the related documents without Intel's prior written permission.This software and the related documents are provided as is, with no express or implied warranties, other than those that are expressly stated in the License.6。
intel vtune profiler 用法
intel vtune profiler 用法**一、简介**Intel VTune Profiler是一款强大的性能分析工具,可以帮助开发人员深入了解应用程序的性能瓶颈,优化代码性能,提高系统整体性能。
本指南将详细介绍如何使用VTune Profiler进行性能分析。
**二、安装与配置**1. 首先,确保你的计算机上已经安装了支持的Intel VTune版本。
VTune Profiler支持多种操作系统,包括Windows和Linux。
2. 下载并安装VTune Profiler,按照安装向导的提示进行操作。
3. 配置VTune Profiler的采集参数。
这些参数包括要采集的性能数据的范围、采样频率等。
根据需要选择合适的参数。
**三、使用方法**1. 打开需要分析的应用程序,并启动VTune Profiler。
2. 将应用程序与VTune Profiler进行连接,以便能够捕获应用程序的性能数据。
3. 启动性能分析,等待应用程序运行完毕。
4. 分析捕获到的性能数据。
VTune Profiler提供了丰富的图表和统计信息,帮助你了解应用程序的瓶颈和优化点。
5. 定位性能瓶颈。
通过查看数据,可以找到CPU占用率高、等待时间长的函数或代码段,这些通常是性能瓶颈所在。
6. 优化代码。
根据分析结果,对瓶颈代码进行优化,例如改进算法、减少不必要的循环、优化内存使用等。
7. 重复步骤3-6,直到应用程序的性能得到显著提升。
**四、高级功能**VTune Profiler还提供了许多高级功能,帮助你更深入地分析性能数据:1. 多线程采样:支持同时捕获多个线程的性能数据,适用于分析复杂的多线程应用程序。
2. 事件跟踪:可以设置特定事件的发生条件,以便在发生特定操作时收集性能数据。
3. 内存分析工具:VTune Profiler提供了内存泄漏检测、内存分配分析等功能,帮助开发人员解决内存相关问题。
4. 报告生成:VTune Profiler可以生成多种格式的报告,包括Excel、PDF等,方便用户分析和分享性能数据。
linux vtune 用法
目前Intel VTune Profiler并不支持Linux操作系统。
Intel VTune Profiler是一款功能强大的性能分析工具,用于分析和优化应用程序在Intel架构上的性能。
然而,目前该工具仅支持Windows和macOS操作系统,不支持Linux。
对于Linux系统,Intel提供了另一款性能分析工具称为"Intel VTune Amplifier"。
它是专门为Linux系统设计的性能分析工具,可以帮助开发人员分析和优化在Linux平台上运行的应用程序的性能。
以下是Intel VTune Amplifier的基本使用方法:
1. 安装Intel VTune Amplifier:首先需要从Intel官方网站下载并安装Intel VTune Amplifier 工具。
2. 创建性能分析项目:使用Intel VTune Amplifier创建一个新的性能分析项目,选择要分析的应用程序和性能分析的类型。
3. 运行性能分析:启动性能分析器并运行应用程序,使其在性能分析器下执行。
4. 分析性能数据:收集应用程序的性能数据后,使用Intel VTune Amplifier分析这些数据,以便查看应用程序的性能瓶颈和优化建议。
5. 优化应用程序:根据分析结果,对应用程序进行优化,以提高其性能。
需要注意的是,Intel VTune Amplifier提供了丰富的性能分析功能,包括CPU利用率、内存访问、多线程并发性能等方面的分析,开发人员可以根据具体的需求选择合适的分析方法和工具。
希望以上信息能够帮助您更好地了解在Linux系统上使用Intel性能分析工具的方法。
NIIT Intel_VTune中文PPT1
用Intel VTune进行代码优化和性能调优 使用照管安装来安装 Windows XP Professional 进行代码优化和性能调优 了解应用程序优化 应用程序的性能依赖于:
源代码 算法 编译器 计算机架构
应用程序优化是在给定硬件和网络资源的限制内获取应用程 序最佳性能的过程. 通过有效地使用可用资源,可提高应用程序的性能.
需要对以下应用程序进行重点优化:
客户机/服务器应用程序 数据库依赖应用程序 科学应用程序 线程应用程序
Ver. 1.0
张共24张 第4张共 张 张共
用Intel VTune进行代码优化和性能调优 使用照管安装来安装 Windows XP Professional 进行代码优化和性能调优 了解应用程序优化( 了解应用程序优化(续) 客户机/服务器应用程序:
用Intel VTune进行代码优化和性能调优 使用照管安装来安装 Windows XP Professional 进行代码优化和性能调优 为什么会有这个模块? 为什么会有这个模块?
随着高端处理的出现,处理能力低的并且内存小的计算机变 得过时了.即使升级硬件也不能大幅度提高性能.因此,代 码调优已成为获得应用最佳性能的有效方法. 代码调优涉及优化目标平台上可用资源的利用,源代码,或 算法.它涉及用 Profiler 来分析代码,使用性能分析器/监视 器来分析资源的使用. 本模块研究影响应用性能的不同因素和方面.它涉及如何使 用工具来改进应用性能.
要收集性能相关数据,您可以:
使用计时函数来计算执行时间 使用秒表功能来测量执行时间 使用性能分析工具
Ver. 1.0
张共24张 第15张共 张 张共
用Intel VTune进行代码优化和性能调优 使用照管安装来安装 Windows XP Professional 进行代码优化和性能调优 了解应用程序优化过程(续 了解应用程序优化过程 续) 分析性能相关数据以确定:
NIIT-Intel-VTune中文PPT4
第11张共18张
使 用用In照te管l 安VT装u来ne安进装行W代n码do优w化s X和P性Pr能of调es优sional 使用采样(续)
采样时序视图显示数据收集期间运行的线程。 它显示根据时间对单个事件收集的样本。
下表显示了 VTune 性能分析器提供的各种向导。
名称 快速性能分析(QPA)向导
说明
它使您可以快速地分析应用程序性能。这个向导使您可以创建由采样 、计数器监视器、以及调用关系图收集器的任意组合而组成的活动。
完成设置向导
它可让您同时创建活动并配置多个收集器。该向导提示您仅输入基本 参数的值并对其它参数使用默认值。
Ver. 1.0
第8张共18张
使 用用In照te管l 安VT装u来ne安进装行W代in码do优w化s X和P性Pr能of调es优sional 使用采样
采样是收集一组数据以进行分析并用统计格式表示所分析的 数据的过程。
采样使您能够:
确定热点
► 确定瓶颈 ►
热点是执行时间很长的代码部分 。
它消耗大量处理器时间。
使 用用In照te管l 安VT装u来ne安进装行W代in码do优w化s X和P性Pr能of调es优sional 目标
在本单元中,您将学习:
了解 VTune 性能分析器的功能 通过采样来了解应用程序中的热点和瓶颈
Ver. 1.0
第1张共18张
使 用用In照te管l 安VT装u来ne安进装行W代in码do优w化s X和P性Pr能of调es优sional
Ver. 1.0
第4张共18张
使 用用In照te管l 安VT装u来ne安进装行W代in码do优w化s X和P性Pr能of调es优sional VTune 用户界面操作(续)
计算机组装及维护第09讲

(4) 4声道环绕:如果只摆两个音箱,那么再怎么“环 绕”,也都能感觉到明显的失真。要想准确地营造“现 场感”,必须利用多个音箱,把它们分别摆在你的前后。
(5) 杜比多声道环绕音效:能够提供更为逼真的回放效果 和高质量的3D音效。
第七章 声卡和网卡
扬声器
扬声器是音箱中最重要的配件,它的性能的 好坏决定音箱的优劣,其技术指标可以说是能很 大部分代表音箱的技术指标。按工作原理来分, 扬声器可分为电动势、电磁式、压电陶瓷式、电 容式和离子式等,但其中使用最多的是电动势的 纸盆扬声器。按扬声器的放音频率来划分,又可 分为全频带扬声器、低频扬声器、高频扬声器和 中频扬声器。除此之外还有所谓的平板扬声器, 折环式扬声器等分类。
●线性输出端口,标记为“Line Out”。它用于外接音 箱功放或带功放的音箱。
●第二个线性输出端口,一般用于连接四声道以上的 后端音箱。
●话筒输入端口,标记为“Mic In”。它用于连接麦克 风(话筒),可以将自己的歌声录下来实现基本的“卡 拉OK功能”。
2020/12/7
10
CCUTSOFT
计算机组装与维护
规范,与AC’97有许多共通之处,某种程度上可以说是
AC’97的增强版,但并不能向下兼容AC’97标准。它在
AC’97的基础上提供了全新的连接总线,支持更高品质的
音频以及更多的功能。与AC’97音频解决方案相类似,
HD Audio同样是一种软硬混合的音频规范,集成在ICH6
芯片中(除去Codec部分)。与现行的AC’97相比,HD
2020/12/7
NIIT Intel_VTune中文PPT11
您需要通过执行以下步骤启动远程数据收集:
启动目标系统上的远程代理 启动目标系统上的 DCOM (分布式组件对象模型) 组件 启动为其收集远程性能数据的控制系统 指定在其运行远程应用程序的目标系统
Ver. 1.0
张共18张 第5张共 张 张共
使用Intel VTune进行代码优化和性能调优 使用 使用照管安装来安装 Windows XP Professional 进行代码优化和性能调优 收集性能数据(续 收集性能数据 续) 启动目标系统上的远程代理:
远程代理:
是一小组文件,其中包含数据收集器的一个子集. 将要为其收集远程数据的计算机连接到将分析所收集数据的计算机 .
启动目标系统上的远程代理时,您需要选择用于登录到控制系 统的帐户. 一旦在目标系统上启动了远程代理,您需要重新启动系统.
Ver. 1.0
张共18张 第6张共 张 张共
使用Intel VTune进行代码优化和性能调优 使用 使用照管安装来安装 Windows XP Professional 进行代码优化和性能调优 收集性能数据(续 收集性能数据 续) 启动目标系统上的 DCOM 组件:
收集远程应用程序的性能数据 使用VTune分析远程性能数据
Ver. 1.0
张共18张 第1张共 张 张共
使用Intel VTune进行代码优化和性能调优 使用 使用照管安装来安装 Windows XP Professional 进行代码优化和性能调优 收集远程应用程序的性能数据
对于远程应用程序来说,测量远程系统的性能不是一件容易 的任务. VTune 性能环境使用户能够:
在远程数据收集中,从中收集数据的计算机称为远程代理系统 或目标系统. 对所收集数据进行分析的计算机称为控制系统. 使用 VTune 性能分析器,您可以在若干个远程代理系统上执行 远程数据收集,每个代理程序运行不同的受支持操作系统. 支持使用 VTune 来执行远程数据收集的操作系统包括 Windows ,Linux 和 Windows CE.
IntelliTools IT-VCM模块说明书
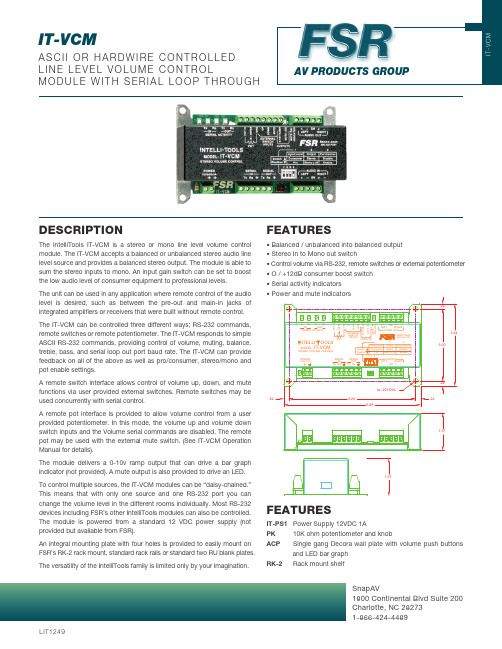
DESCRIPTIONLIT1249T he IntelliT ools IT -VCM is a stereo or mono line level volume control module. The IT-VCM accepts a balanced or unbalanced stereo audio line level source and provides a balanced stereo output. The module is able to sum the stereo inputs to mono. An input gain switch can be set to boost the low audio level of consumer equipment to professional levels.The unit can be used in any application where remote control of the audio level is desired, such as between the pre-out and main-in jacks of integrated ampli ers or receivers that were built without remote control.The IT-VCM can be controlled three different ways; RS-232 commands, remote switches or remote potentiometer. The IT-VCM responds to simple ASCII RS-232 commands, providing control of volume, muting, balance, treble, bass, and serial loop out port baud rate. The IT-VCM can provide feedback on all of the above as well as pro/consumer, stereo/mono and pot enable settings.A remote switch interface allows control of volume up, down, and mute functions via user provided external switches. Remote switches may be used concurrently with serial control.A remote pot interface is provided to allow volume control from a user provided potentiometer. In this mode, the volume up and volume down switch inputs and the Volume serial commands are disabled. The remote pot may be used with the external mute switch. (See IT-VCM Operation Manual for details).T he module delivers a 0-10v ramp output that can drive a bar graph indicator (not provided). A mute output is also provided to drive an LED.To control multiple sources, the IT-VCM modules can be “daisy-chained.” T his means that with only one source and one RS-232 port you can change the volume level in the different rooms individually. Most RS-232 devices including FSR’s other IntelliTools modules can also be controlled.T he module is powered from a standard 12 VDC power supply (not provided but available from FSR).An integral mounting plate with four holes is provided to easily mount on FSR’s RK-2 rack mount, standard rack rails or standard two RU blank plates.The versatility of the IntelliTools family is limited only by your imagination.FEATURES• Balanced / unbalanced into balanced output • Stereo In to Mono out switch• Control volume via RS-232, remote switches or external potentiometer • O / +12dB consumer boost switch• Serial activity indicators FEATURESIT-PS1 Power Supply 12VDC 1A PK 10K ohm potentiometer and knob ACP Single gang Decora wall plate with volume push buttonsand LED bar graphRK-2 Rack mount shelfIT-VCMA S C I I O R H A R D W I R E C O N T R O L L E D L I N E L E V E L V O L U M E C O N T R O LM O D U L E W I T H S E R I A L L O O P T H R O U G HSnapAV1800 Continental Blvd Suite 200Charlotte, NC 28273 1-866-424-4489AV PRODUCTS GROUPORCONTROLLED DEVICEMADE INTHE USA TYPICAL APPLICATIONSPECIFICATIONS• Home Theater• Audio Source Muting• Audio level status• Remote volume controlMultiple serial controlled devices can bedaisy chained together through a serial loopthough port without sacrificing a control porton the control system.Conditions unless noted:NOTES: *Must enable “Pot Control” mode switch to use pot. Volume Up/Down switches and serial control of volume are disabled when pot is enabled. Serial port can be used to quiry pot level setting. Mute switch is still active when pot is enabled.Settings retention All current settings are saved in non-volatile flash memory upon power loss. Settings include: Volume, Bass, Treble, Balance, Mute.Volume = - 10dB, Bass = 0dB, Treble = 0dB, Balance = Center,Mode = Stereo Pro 0dBm = 1mW into 600 ohm; 0.775 VrmsIT-VCMSpecifications are subject to change without notice. SnapAV1800 Continental Blvd Suite 200Charlotte, NC 282731-866-424-4489。
VTune Amplifier XE基本使用说明
Intel® VTune™ Amplifier XE使用说明VTune Amplifier XE Tutorials,即为VTune一、Amplifer XE能做什么?VTune Amplifier XE 可以帮助你分析算法选择,标识出你的应用程序怎样更好的利用可用的硬件资源。
使用VTune Amplifier XE 可以定位或者决定如下内容:1、在你的程序中或者整个系统中时间消耗最多的函数;2、没有有效利用处理器时间的代码片段;3、优化串行和线程化性能的最好代码片段;4、影响程序性能的同步对象;5、程序的I/O操作是否花费很多时间,以及在哪里、为什么花费时间;6、不同的同步方法,不同的线程数量或者不同算法对于性能的影响;7、线程活跃性和变迁;8、代码中硬件相关的瓶颈;VTune Amplifier XE Tutorials向导告诉你如何使用VTune Amplifier XE 分析一个样本程序的性能,只需要指定软件和硬件相关的代码。
可以提供如下功能:1、寻找热点;2、分析锁和等待;3、标识硬件问题;二、基本操作在安装有VS2005或以上版本的系统中安装VTune Amplifier XE ,安装中选择整合到VS*选项。
安装完成后在VS的工具栏会有几个图标,是VTune Amplifier XE的功能图标,如下图:在项目的邮件菜单中会出现一个选项,如下图展开后选择菜单New Analysis,即可进入如下界面选择一个分析类型,这里选择热点分析(Hotspots)点击Start即可开始。
开始后,会自动生成前面选择的工程,启动程序,开始收集数据,收集过程中可以点击右侧的Stop 按钮,停止收集工作,否则将会一直进行运行直到程序退出。
停止收集后,将会自动进行分析。
分析完毕就可以看到结果了。
如下图三、算法分析功能说明轻量级热点分析(Lightweight Hotspots)确定最消耗时间的代码。
VNTI9_Users_Manual中文版

版权声明:本站几乎所有资源均搜集于网络,仅供学习参考,不得进行任何商业用途,否则产生的一切后 果将由使用者本人承担! 本站仅仅提供一个观摩学习与交流的平台, 将不保证所提供资源的完 整性,也不对任何资源负法律责任。
所有资源请在下载后 24 小时内删除。
如果您觉得满意, 请购买正版,以便更好支持您所喜欢的软件或书籍!☆☆☆☆☆生物秀[]☆☆☆☆☆中国生物科学论坛[/bbs/]☆☆☆☆☆生物秀下载频道[/Soft/]生物秀——倾力打造最大最专业的生物资源下载平台!■■■ 选择生物秀,我秀我精彩!!■■■欢迎到生物秀论坛(中国生物科学论坛)的相关资源、软件版块参与讨论,共享您的资源,获 取更多资源或帮助。
Vector NTI User's Manual前言(INTRODUCTION) (3)第一章 DISPLAY WINDOWS (4)一. 顯示DNA序列及圖形 (5)二. 顯示蛋白質序列的方式 (10)第二章 MOLECULE OPERATIONS (13)一. 對P BR322’S 的常用資料(GENERAL DATA)進行編輯 (13)三. 插入新的序列片段 (15)四. 編輯TC(R) 圖示 (16)五. 刪除P2_P標示,並加入新的序列特徵標示 (17)六. 修改M Y P BR322的起始座標 (18)第三章 GRAPHICAL REPRESENTATION (19)一. 爲P BR322圖形建立一個展示視窗 (19)二. 修改圖形的自動排列設置 (19)三. 修改圖形的編碼區信號(CDS SIGNALS)設置 (19)四. 打開圖片編輯方式 (20)五. 修改TC(R)圖形 (20)六. 加入註解注釋 (22)七. 將P BR322 分子顯示結果保存到文檔文件中 (22)第四章 BLAST SEARCH AND BLAST VIEWER (24)一. 簡介 (24)二. BLAST 搜尋視窗 (24)三. BLAST S EARCH R ESULTS (28)四. S A VING BLAST S EARCH R ESULTS (29)第五章 ALIGNX (31)一. 開啟與執行: (31)二. 參數設定與調整: (35)三. 資料輸出與列印 (39)第六章 ALIGNX-BLOCKS (40)一. 開啟與執行: (40)二. 參數設定與調整: (42)三. 資料輸出與列印 (44)第七章 BIOPLOT (45)一. 開啟與執行: (45)二. 資料輸出與列印 (49)第八章 CONTIGEXPRESS (50)一. I NTRODUCTION (50)二. P ROJECT E XPLORER (50)三. W ORKING IN F RAGMENT W INDOW (54)四. W ORKING IN THE C ONTIG W INDOW (60)第九章 MISCELLANEOUS VECTOR NTI TOOLS (63)一. I NTRODUCTION (63)二. P UB M ED/E NTREZ S EARCH (63)三. C ITATION V IEWER (66)附記:如何執行反安裝 (69)- 2 -前言(Introduction)程式附帶的資料庫(Vector NTI database)包括:DNA/RNA序列、蛋白質序列、限制酶、寡核苷酸、電泳marker。
Intel软件工具VTune使用说明
Intel软件⼯具VTune使⽤说明0.概述VTune 是Intel ⼀个⽐较强⼤的性能分析软件。
主要包括三个⼩⼯具:(1 )Performance Analyzer :性能分析,找到软件性能⽐较热的部分,⼀般也就是性能瓶颈的关键点,帮助我们收集数据发现问题,⾄于Analyzer 这个功能,有点⼤⾔不惭了,还得靠各位⼤家⾃⼰分析了,当然个⼈认为这⼀点会是Intel 下⼀步强化该⼯具的重点。
(2 )Intel Threading Checker :⽤于查找线程错误, 能够检测资源竞争、线程死锁等问题. ⼤家程序在并⾏化后,可以通过Threading Checker 检测⼀下有没有多线程相关的错误。
(3)Intel Threading Profiler:线程性能检测⼯具,多线程化有可能会有负载⽐平衡, 同步开销过⼤等等线程相关的性能问题。
该⼯具可以帮你发现每⼀个线程每⼀时刻的状态。
可以简单认为该⼯具是如下的使⽤顺序:(发现可以多线程的代码瓶颈)---进⾏并⾏等编码阶段---(发现多线程中错误部分)---改正代码bug阶段---(发现多线程中有待提⾼的瓶颈部分)---优化代码性能阶段。
可以看出这套软件针对代码并⾏的实现有点服务到家的感觉,核⼼思想就是:”找茬”。
另外推荐⼀个配套的⼯具,就是Intel C++ 编译器,可以集成到VS2005或者命令⾏下,配套使⽤应该会⼀些更好的效果,传说中对Intel 的C++ 编译器好像都是赞不绝⼝的,⽽且都是⾃家的东西,Intel肯定不会亏待它的。
还有⼀个⽹上推荐的东西,直接粘贴过来,没有了解过,不好多加评论:Intel MKL 函数库,提供了VML 函数, 这些函数可以对超越函数(sin, cos, exp, log等)进⾏优化。
此外友情提⽰⼀下,如果你使⽤的是AMD的CPU芯⽚,并⼀⼼决定以后继续使⽤它的话,建议同学你就不⽤往下看了,理由就不告诉你了^_^本⽂章主要是对VTune 的⼀个初级使⽤的⼼得总结,有什么不对的⼤家多扔板砖,算是⼀个抛砖引⽟的作⽤吧,欢迎⼤家⼀起总结完善!1.Intel Performance Analyzer对于该⼯具使⽤⽐较简单,不过直接说⼀下,软件名称是性能分析,实际上只是对软件操作进⾏时间上的总结和统计,⽤户⾃⼰需要根据数据进⾏分析,总体来说,该性能分析⼯具同IBM 的性能分析⼯具⼤致⼀样,个⼈认为还不如IBM 的好⽤的,呵呵。
VTune使用文档
VTune使用文档1. Vtune功能介绍:Intel VTune性能分析器通过采集、分析程序的源代码,结合系统相关的性能数据,帮助程序员查找软件程序上的性能瓶颈。
VTune的主要功能:z采样(Sampling):VTune能够寻找程序中的热点区域——最耗时间的模块、函数、代码行和汇编指令,并提供进程、线程、模块、函数以及代码等各种性能分析视图,并以图像化界面具体的显示出来。
z调用关系图(Call Graph):通过程序的调用关系图,可以看到:(1) 程序函数级的框架结构(2) 某个函数被特定区域调用的次数(3) 每个函数消耗的时间(4) 处于关键路径上的函数z计数器监控器(Counter Monitor):利用计数器监控器,用户可以在运行期间轻松的跟踪系统活动和资源消耗,帮助检测和发现系统级的性能问题。
z调优助手(Tuning Assistant):Intel调优助手利用丰富的知识库分辨性能问题,自动推荐代码的改进办法,帮助提高开发者的工作效率。
主要体现在以下几个方面:(1) 算法改进(2) 处理器瓶颈以及改进(3) 采样向导的增强(4) 超线程2. VTune使用说明2.1 VTune采样实验(1)启动Intel VTune性能分析器,运行界面如图2-1所示。
图2-1(2)选择New Project按钮,建立新的工程,执行界面如图2-2所示。
图2-2(3)选择Sampling Wizard按钮,选择采样向导,出现如图2-3所示界面。
图2-3(4)选择文件类型,在我们的系统环境下选择第一项“Window/Window CE/Linux Profiling ”,出现如图2-4所示界面。
图2-4(5)在Application To Launch 对话框中选择待分析的文件(我们以C:\Program Files(x86)\Intel\VTune\Examples\ VTuneDemo.exe 为例),点击Finish按钮,可以看到VTune分析器对程序的分析结果,如图2-5所示为对系统中各个Module的分析结果,从中可以看到各个Module的Clocktick,Instructions Reyired和CPI性能。
英特尔软件开发工具介绍——IntelR VTune可视化性能分析器
英特尔软件开发工具介绍——IntelR VTune可视化性能分析
器
高奕;毕鹏
【期刊名称】《程序员》
【年(卷),期】2004(000)010
【摘要】在上期文章中,我们介绍了如何运用Intel编译器通过提高程序编译后执行效率来提升程序性能。
然而,提高软件性能不仅可以从提高编译执行代码入手,更多时候需要分析程序性能,找出性能瓶颈着重进行优化。
Intel VTune可视化性能分析器便是Intel为众多开发者们提供的专门针对寻找软硬件性能瓶颈的一款分析工具。
【总页数】1页(P117)
【作者】高奕;毕鹏
【作者单位】无
【正文语种】中文
【中图分类】TP311.52
【相关文献】
1.英特尔助力Linux平台运转Vtune性能分析器 [J],
2.优秀Linux开发工具奖获奖产品——英特尔Vtune性能分析器 [J],
3.英特尔(R)黑带软件开发计划——连接英特尔(R)大学合作计划与软件开发的纽带[J], 穆丽虹;沈海
4.利用英特尔软件开发工具释放IA架构上程序的最佳性能 [J], 高源奕
5.英特尔针对Windows Server 2003推出VTune性能分析器7.0版本 [J],因版权原因,仅展示原文概要,查看原文内容请购买。
IntelectIFC和IntelectTENS产品说明书

ContentsChapter Page 1INTRODUCTION1.1General information . . . . . . . . . . . . . . . . . . . . . . . . . . . . . . . . . . . . . . . . . . . . . . . . . . . . . . . . . . . . . . . . . . . . . . .1 1.2 Cautions . . . . . . . . . . . . . . . . . . . . . . . . . . . . . . . . . . . . . . . . . . . . . . . . . . . . . . . . . . . . . . . . . . . . . . . . . . . . . . . . .1 1.3Indications for use . . . . . . . . . . . . . . . . . . . . . . . . . . . . . . . . . . . . . . . . . . . . . . . . . . . . . . . . . . . . . . . . . . . . . . . . .1 1.4Warnings . . . . . . . . . . . . . . . . . . . . . . . . . . . . . . . . . . . . . . . . . . . . . . . . . . . . . . . . . . . . . . . . . . . . . . . . . . . . . . .1-2 1.5Precautions . . . . . . . . . . . . . . . . . . . . . . . . . . . . . . . . . . . . . . . . . . . . . . . . . . . . . . . . . . . . . . . . . . . . . . . . . . . . .2-3 1.6 Adverse Reactions . . . . . . . . . . . . . . . . . . . . . . . . . . . . . . . . . . . . . . . . . . . . . . . . . . . . . . . . . . . . . . . . . . . . . . . . .32PRODUCT DESCRIPTIONS . . . . . . . . . . . . . . . . . . . . . . . . . . . . . . . . . . . . . . . . . . . . . . . . . . . . .4-63STIMULATION MODES . . . . . . . . . . . . . . . . . . . . . . . . . . . . . . . . . . . . . . . . . . . . . . . . . . . . . . . . .7-84INSTRUCTIONS FOR USE4.1Check Battery . . . . . . . . . . . . . . . . . . . . . . . . . . . . . . . . . . . . . . . . . . . . . . . . . . . . . . . . . . . . . . . . . . . . . . . . . . . .9 4.2Connect electrodes to lead wires . . . . . . . . . . . . . . . . . . . . . . . . . . . . . . . . . . . . . . . . . . . . . . . . . . . . . . . . . . . . .9 4.3Connect lead wires to unit . . . . . . . . . . . . . . . . . . . . . . . . . . . . . . . . . . . . . . . . . . . . . . . . . . . . . . . . . . . . . . . . .10 4.4Place electrodes on skin . . . . . . . . . . . . . . . . . . . . . . . . . . . . . . . . . . . . . . . . . . . . . . . . . . . . . . . . . . . . . . . . . . .11 4.5Select the electrode numbers . . . . . . . . . . . . . . . . . . . . . . . . . . . . . . . . . . . . . . . . . . . . . . . . . . . . . . . . . . . . . . .11Chapter Page 4.6 Select the mode . . . . . . . . . . . . . . . . . . . . . . . . . . . . . . . . . . . . . . . . . . . . . . . . . . . . . . . . . . . . . . . . . . . . . . . . .11 4.7Adjust the Rate . . . . . . . . . . . . . . . . . . . . . . . . . . . . . . . . . . . . . . . . . . . . . . . . . . . . . . . . . . . . . . . . . . . . . . . . . .12 4.8 Adjust Channel Amplitude . . . . . . . . . . . . . . . . . . . . . . . . . . . . . . . . . . . . . . . . . . . . . . . . . . . . . . . . . . . . . . . . .12 4.9 T urn Unit Off . . . . . . . . . . . . . . . . . . . . . . . . . . . . . . . . . . . . . . . . . . . . . . . . . . . . . . . . . . . . . . . . . . . . . . . . . . . .12 4.10 Portability . . . . . . . . . . . . . . . . . . . . . . . . . . . . . . . . . . . . . . . . . . . . . . . . . . . . . . . . . . . . . . . . . . . . . . . . . . . . . . .13 4.11 Battery . . . . . . . . . . . . . . . . . . . . . . . . . . . . . . . . . . . . . . . . . . . . . . . . . . . . . . . . . . . . . . . . . . . . . . . . . . . . . . . . .13 4.12 Care of Electrodes . . . . . . . . . . . . . . . . . . . . . . . . . . . . . . . . . . . . . . . . . . . . . . . . . . . . . . . . . . . . . . . . . . . . . . . .14 4.13 Care of Electrode Cords . . . . . . . . . . . . . . . . . . . . . . . . . . . . . . . . . . . . . . . . . . . . . . . . . . . . . . . . . . . . . . . . . . .145HANDLING AND STORAGE . . . . . . . . . . . . . . . . . . . . . . . . . . . . . . . . . . . . . . . . . . . . . . . . . . . . .156SPECIFICATION . . . . . . . . . . . . . . . . . . . . . . . . . . . . . . . . . . . . . . . . . . . . . . . . . . . . . . . . . . . . . . . .157ACCESSORIES . . . . . . . . . . . . . . . . . . . . . . . . . . . . . . . . . . . . . . . . . . . . . . . . . . . . . . . . . . . . . . . . .168TROUBLESHOOTING . . . . . . . . . . . . . . . . . . . . . . . . . . . . . . . . . . . . . . . . . . . . . . . . . . . . . . . . . . .179WARRANTY . . . . . . . . . . . . . . . . . . . . . . . . . . . . . . . . . . . . . . . . . . . . . . . . . . . . . . . . . . . . . . . . . . .181. INTRODUCTION1.1 General information:This interferential (IFC) device is a lightweight and portable medical device which can help to reduce pain and discomfort. It utilizes the low electric-current to stimulate muscle nerves to achieve the symptomatic relief of chronic intractable pain, post-traumatic pain, and post-surgical pain.1.2 CautionsFederal law (USA) restricts this device to sale by or on the order of practitioners licensed by the State in which they practice to use or order the use of the device.1.3 Indications for use:This device is used in symptomatic relief of chronic intractable pain, post-traumatic and post-surgical pain.1.4 Warnings:1.4.1 The long-term effects of chronic electrical stimulation are unknown.1.4.2 Stimulation should not be applied over the carotid sinus nerves, particularly in patients with a knownsensitivity to the carotid sinus reflex.1.4.3 Stimulation should not be applied over the neck or mouth. Severe spasm of the laryngeal and pharyngealmuscles may occur and the contractions may be strong enough to close the airway or cause difficulty inbreathing.1.4.4 Stimulation should not be applied transthoracically in that the introduction of electrical current into theheart may cause cardiac arrhythmias.11.4.5 Stimulation should not be applied over swollen, infected, or inflamed areas or skin eruptions, e.g., phlebitis,thrombophlebitis, varicose veins, etc.1.4.6 Stimulation should not be applied over, or in proximity to, cancerous lesions.1.4.7 For external use only.1.4.8 Do not use IFC on the eye area.1.4.9 This device should be used only under the continued supervision of a licensed medical practitioner.1.4.10 Safety of IFC devices for use during pregnancy or delivery has not been established.1.4.11 Electronic equipment such as ECG monitors and ECG alarms may not operate properly when IFC is in use.1.4.12 Apply the electrodes to clean, dry, and unbroken skin only.1.4.13 This device should not be used while driving, operating machinery, or during any activity in whichinvoluntary muscle contractions may put the user at undue risk of injury.1.4.14 This device should be kept out of the reach of children.1.4.15 Keep electrodes separate during treatment. Electrodes in contact with each other could result in improperstimulation or skin burns.1.5 Precautions:1.5.1 Caution should be used for patients with suspected or diagnosed heart problems.1.5.2 Caution should be used for patients with suspected or diagnosed epilepsy.21.5.3 Caution should be used in the presence of the following:(a)When there is a tendency to hemorrhage following acute trauma or fracture(b)Following recent surgical procedures when muscle contraction may disrupt the healing process.(c)Over the menstruating or pregnant uterus(d)Over areas of the skin which lack normal sensation.1.5.4 Some patients may experience skin irritation or hypersensitivity due to the electrical stimulation orelectrical conductive medium. The irritation can usually be reduced by using an alternate conductivemedium, or alternate electrode placement.1.5.5 Electrode placement and stimulation settings should be based on the guidance of the prescribingpractitioner.1.5.6 This device should be used only with the leads and electrodes recommended for use by the manufacturer.1.5.7 Isolated cases of skin irritation may occur at the site of the electrode placement following long-termapplication.1.5.8 Effectiveness is highly dependent upon patient selection by a person qualified in the management of painpatients.1.5.9 If the stimulation levels are uncomfortable or become uncomfortable, reduce the stimulation amplitude to acomfortable level and contact your physician if problems persist.1.6 Adverse Reactions:1.6.1 Possible skin irritation or electrode burn under the electrodes may occur.1.6.2 Possible allergic skin reaction to tape or gel may occur.34A panel covers the controls. Y our medical professional may ask to set these controls for you and request you leave the cover in place.Amplitude Control:It controls the "INTENSITY" level of stimulating pulses. The control located at the right top of the unit regulates the amplitude, or intensity, of the stimulation and is the ON/OFF CONTROL. The power indicator will light up with green color when the unit is working.Caution: If the stimulation levels are uncomfortable or become uncomfortable, reduce the stimulation intensity to a comfortable level and contact your physician if problems persist.Rate ControlAdjust Frequency from 1 Hz to 150 Hz by turning the control. The control is located at the left top of the unit. Electrode SwitchT o select for using two electrode pads or four electrode pads.Mode SelectorSet C, 1/1, 8/8, 10/10 mode56789NOTE: Always read this instruction manual before use.PREPARATION FOR USE4.1 Check Battery:Insert a fresh 9V alkaline or rechargeable battery into the battery compartment. Makesure that you are installing the battery properly. The battery is inserted in the casing onthe foot of the stimulator unit.BE SURE TO MATCH THE POSITIVE AND NEGATIVE ENDS OF THEBATTERY TO THE MARKINGS IN THE BATTERY COMPARTMENT OFUNIT .CONNECTING THE STIMULATOR4.2 Connect electrodes to lead wires:Insert the lead wire connector into electrodes connector (standard 0.08 inch femaleconnection).MAKE SURE THAT NO BARE METAL OF THE PINS IS EXPOSEDCaution: Always use the electrodes with the requirements of the EN60601-1 and EN60601-2, such as withCE mark, or which are legally marketed in the US under 510(K) procedure.4. INSTRUCTIONS FOR USEAngle"L"-shapeplugSelf-adhesiveElectrodes Pads104.4 Place electrodes on skin:Apply electrodes to the exact site indicated by your physician following the instruction included with the electrodes labeling. Before applying electrodes, be sure the skin surface over which electrodes are placed is thoroughly cleaned and dried. Make sure the electrodes are placed firmly to skin and make good contact between the skin and the electrodes. Place the electrodes over the skin; attach them properly, firmly and evenly. ADJUSTING THE CONTROLS4.5 Select the electrode numbersShift to the left when applying one pair of electrodes (the "two electrodes" position). Shift the switch to the right when applying two pairs of electrodes (the "four electrodes" position). No stimulation is delivered from "Channel 1" when one pair of electrodes is utilized and the electrode switch is set in the "two electrodes" position.4.6 Select the mode:Shift "MODE" switch to set the stimulation mode recommended by your physician or therapist. For details about stimulating sequences, refer to Sec. 3 "Stimulation Modes ".114.7 Adjust the Rate:The rate is adjustable 1~150Hz.T urn Rate Control to adjust Rate to the setting recommended by your medicalprofessional.4.8 Adjust Channel Amplitude:T urn Amplitude knob clockwise. Slowly turn the Amplitude control until you reach thesetting recommended by your prescribing medical practitioner.Caution: If the stimulation levels are uncomfortable or become uncomfortable, reduce the stimulationintensity to a comfortable level and contact your physician if problems persist.4.9 T urn Unit Off:T urn Channel Amplitude control to OFF. Unplug the electrode lead wires, grasping themby the plug, not the cord. If treatment will be resumed shortly, the electrodes may be left on the skin. When the electrodes are removed, clean the skin thoroughly with mild soap and water. If there is skin irritation, consult your medical professional.12CARE AND MAINTENANCE4.10 Portability:Y our unit is portable and may be clipped to a belt, shirt pocket, bra or other clothing.4.11 Battery:T o replace the battery, open the lid cover and extract the battery. Replace it with a 9 V alkaline or similar rechargeable battery. Make sure you insert the battery correctly.13144.12 Care of Electrodes:T o avoid skin irritation and ensure good contact with skin, clean silicone rubber electrodes with soap and water frequently. The electrodes must be dried completely before using.✽If you are using self-adhesive electrodes, disregard this procedure.✽Always use the electrodes with the requirements of the EN60601-1 and EN60601-2, such as with C E mark, or which are legally marketed in the US under 510(K) procedure.4.13 Care of Electrode cords:Clean the electrode cords by wiping them with damp cloth. Coating them lightly with talcum powder will reduce tangles and prolong the life.5. HANDLING AND STORAGEKeep this device in the carrying case and store at room temperature.6. SPECIFICATIONransportation Humidity Range*All values have10% tolerance.7. ACCESSORIESSelf-Adhesive Electrodes 4 PCS.9 V Battery 1 PC.Lead Wires 2 PCS.Instruction Manual 1 PC. ArrayAC Adapter 1 PC.168. TROUBLESHOOTING17•The power indicator lights up, butunit does not function properly.•"On" and "Battery Light" are dim.•None of indicators light up.1. Check all control settings. Are they set to values prescribed byyour medical professional?2. Are electrodes in proper position?3. Check lead wires. Be sure allconnectors are firmly sealed.4. Replace cord set with another tocheck for broken wires.1. Replace battery with a new one.1. Replace battery with a new one.If your unit does not seem to operate correctly, refer to the chart below to determine what may be wrong. If none of these measures correct the problem, the unit should be serviced.9. WARRANTY* Unit: One year (12 months) from the date of the original consumer purchase.* Accessories (consisting of lead wire, AC adapter, electrodes, carrying case, and belt clip): 90 days from the date of original consumer purchase.T o obtain service from Chattanooga Group or the selling dealer under this warranty, a written claim must be made within the warranty period to Chattanooga Group or the selling dealer.Chattanooga Group shall not be held liable in any event for incidental or consequential damages. Some states do notallow exclusion or limitation of incidental or consequential damages so the above limitation or exclusion may notapply to you.18。
POWER9技术架构及方案介绍

40000000
20000000
0
Xeon 6130
POWER9 Sforza
10000 5000 0
512K seq read and write 1.1X
(2*SSD+10HDD)
Xeon 6130 POWER9 Sforza
512K seqwrite
512K seqread
4K Data.… 128K 512K
高速计费服务方案 费率计算及数据存储 FP5280G2: Sforza 22core *2 512G 通行效率提
升32%
地理信息分析方案 省级地理信息共享及分析 FP5280G2 :Sforza 22core *2 256G 地图切片
处理效率提升50%
通讯计费服务方案 运营商统一计费业务 FP5290G2: Lagrange 22core *2 1T 性能等同
POWER9架构六大性能优势
4X
单核线程数 8:2
2.7X
单处理器内存容量 4TB : 1.5TB
3.3X
7X
L3高速缓存 120MB : 38.5MB
2X
内存带宽 230GB/s : 120GB/s
处理器互连带宽 150GB/s x 6 : 41.6GB/s x 3
2X
IO总线带宽 192GB/s: 96GB/s
2.6x 1.8x
更大内存存储容量 单处理器带宽
POWER9 with NVLink vs x86 Xeon
9.5x4
CPU-GPU 加速带宽
全新POWER9处理器架构
云和虚拟化创新
• 工作频率视负载量而变
最新的 I/O 子系统
• PCIe Gen4
- 1、下载文档前请自行甄别文档内容的完整性,平台不提供额外的编辑、内容补充、找答案等附加服务。
- 2、"仅部分预览"的文档,不可在线预览部分如存在完整性等问题,可反馈申请退款(可完整预览的文档不适用该条件!)。
- 3、如文档侵犯您的权益,请联系客服反馈,我们会尽快为您处理(人工客服工作时间:9:00-18:30)。
并发 并行
并发指一个或多个线程同时运行. 在此情况下,处理器在应用程序执行期 间会从一个线程切换到其它线程. 并行指同时执行多个任务. 在多处理器系统上运பைடு நூலகம்的多线程应用程 序中,线程并行执行.
Ver. 1.0
张共17张 第6张共 张 张共
用Intel VTune进行代码优化和性能调优 使用照管安装来安装 Windows XP Professional 进行代码优化和性能调优 用线程设计应用程序 为应用程序划分线程的最佳时间为应用程序的设计阶段. 在设计阶段,您可以重新设置所有数据和代码的结构以便于 划分线程.
提高性能 更好地利用资源 更简单得通信
Ver. 1.0
张共17张 第5张共 张 张共
用Intel VTune进行代码优化和性能调优 使用照管安装来安装 Windows XP Professional 进行代码优化和性能调优 了解多线程的好处(续 了解多线程的好处 续) 多线程应用程序中的两种固有情况是:
线程使您能够提高应用程序的性能. 将程序细分为逻辑块或各个任务并确定逻辑块或任务之间的依 赖性的过程称为分解. 在多线程应用程序中,您需要考虑线程交互期间可能引起的复 杂性.这些复杂性包括:
竞争条件 关键区域 互斥 同步 死锁
Ver. 1.0
张共17张 第17张共 张 张共
�
将程序分解为逻辑块或个单独的任务. 了解任务之间的依赖性.
有两种类型的分解方法:
任务分解 数据分解
指根据程序执行的功能来分解该程序的 过程. 这又称为功能分解. 在此情况下,您可以向程序中的独立功 能指派单独的线程. 指通过对不同数据重复执行相同操作的 方式来分解应用程序的过程.
Ver. 1.0
张共17张 第11张共 张 张共
Ver. 1.0
张共17张 第8张共 张 张共
用Intel VTune进行代码优化和性能调优 使用照管安装来安装 Windows XP Professional 进行代码优化和性能调优 用线程设计应用程序(续 用线程设计应用程序 续) 应用程序的性能取决于各种因素,如应用程序的速度和系统 资源利用率.
这可减少应用程序开发期间的总工作量.
可以对包含多个独立活动的程序重新设计,以将每个活动定 义为单独的线程. 这使您能够将工作分成简单的独立活动,并提高应用程序的功
能和性能.
Ver. 1.0
张共17张 第7张共 张 张共
用Intel VTune进行代码优化和性能调优 使用照管安装来安装 Windows XP Professional 进行代码优化和性能调优 用线程设计应用程序(续 用线程设计应用程序 续) 您可以通过向应用程序的不同功能指派不同的线程来增加应 用程序的功能. 通过为每个函数指派单独的线程,所有函数都可以彼此独立 地执行. 此方法提高了应用程序的效率,因为划分线程要比在一系列 代码中切换函数更容易.
并行执行多个任务 更好地利用系统资源 提高应用程序速度
Ver. 1.0
张共17张 第2张共 张 张共
用Intel VTune进行代码优化和性能调优 使用照管安装来安装 Windows XP Professional 进行代码优化和性能调优 了解多线程的好处(续 了解多线程的好处 续) 线程是程序中有顺序的控制流. 它是在程序内执行的一个指令序列. 每个程序都至少包含一个称为主线程的线程. 主线程负责初始化程序.
在单处理器系统上运行多线程应用程序能更好地利用系统资源 . 在多处理器系统上运行多线程应用程序能更好地利用系统资源 和提高应用程序运行速度.
Ver. 1.0
张共17张 第9张共 张 张共
用Intel VTune进行代码优化和性能调优 使用照管安装来安装 Windows XP Professional 进行代码优化和性能调优 小问题 使用线程会如何提高应用程序的功能?
答案:
线程通过向不同的功能指派不同的线程来提高应用程序的功能 .这可以使您更轻松地控制应用程序内的多个功能执行.
Ver. 1.0
张共17张 第10张共 张 张共
用Intel VTune进行代码优化和性能调优 使用照管安装来安装 Windows XP Professional 进行代码优化和性能调优 用线程设计应用程序(续 用线程设计应用程序 续) 数据分解是指以下过程:
Ver. 1.0
张共17张 第3张共 张 张共
用Intel VTune进行代码优化和性能调优 使用照管安装来安装 Windows XP Professional 进行代码优化和性能调优 小问题 什么是线程?
答案:
线程是程序中有顺序的控制流.
Ver. 1.0
张共17张 第4张共 张 张共
用Intel VTune进行代码优化和性能调优 使用照管安装来安装 Windows XP Professional 进行代码优化和性能调优 了解多线程的好处(续 了解多线程的好处 续) 线程的主要好处是:
用Intel VTune进行代码优化和性能调优 使用照管安装来安装 Windows XP Professional 进行代码优化和性能调优 目标 在本单元中,您将学习:
了解多线程的优势 用线程设计应用程序
Ver. 1.0
张共17张 第1张共 张 张共
用Intel VTune进行代码优化和性能调优 使用照管安装来安装 Windows XP Professional 进行代码优化和性能调优 确定多线程的好处 多线程通过以下方式提高应用程序的性能:
Ver. 1.0
张共17张 第13张共 张 张共
用Intel VTune进行代码优化和性能调优 使用照管安装来安装 Windows XP Professional 进行代码优化和性能调优 活动: 活动:分析死锁期间的处理器活动 问题陈述:
John 使用 C# 开发了一段代码,通过该代码,可锁定两个资源 .但是,过了一段时间,应用程序停止.他想要使用 VTune 的 计数器监视器功能分析系统的处理器利用率.帮助 John 完成此 任务.
1. 使用计数器监视器配置向导配置计数器监视器. 2. 分析系统的处理器利用率.
Ver. 1.0
张共17张 第15张共 张 张共
用Intel VTune进行代码优化和性能调优 使用照管安装来安装 Windows XP Professional 进行代码优化和性能调优 小结 在本单元中,您学习了:
您可以通过在应用程序中使用多个线程来大大提高应用程序的 速度. 线程是程序中有顺序的控制流. 以下是线程的主要优势:
用Intel VTune进行代码优化和性能调优 使用照管安装来安装 Windows XP Professional 进行代码优化和性能调优 了解多线程应用程序的复杂性
在多线程应用程序中,您需要考虑在线程交互期间可能引起 的各种复杂度.这些复杂性包括:
竞争条件 关键区域 互斥 同步 死锁
当程序输出取决于线程到达特定代码块 的先后顺序时,会发生竞争条件. 竞争条件会使程序的每次执行得出不同 的结果. 关键区域是指访问共享变量的应用程序 部分. 互斥 在指定时间只允许一个线 程在关键区域内执行. 当一个线程在关键区域中执行访问共享 资源的代码时,任何其它想要进入关键 区域的线程必须等待访问该区域. 同步控制线程执行的相对顺序并解决线 程之间发生的任何冲突. 同步基于监视的概念. 死锁指线程等待永远不可能发生的条件 的情况. 死锁中断应用程序的执行,防止它继续 运行.
Ver. 1.0
张共17张 第12张共 张 张共
用Intel VTune进行代码优化和性能调优 使用照管安装来安装 Windows XP Professional 进行代码优化和性能调优 小问题 列出多线程应用程序中涉及的复杂度.
答案:
多线程应用程序中涉及的复杂度如下所示:
竞争条件 关键区域 互斥 同步 死锁
Ver. 1.0
张共17张 第14张共 张 张共
用Intel VTune进行代码优化和性能调优 使用照管安装来安装 Windows XP Professional 进行代码优化和性能调优 活动:分析死锁期间的处理器活动( 活动:分析死锁期间的处理器活动(续) 解决方案
要分析应用程序的性能,您需要执行以下任务:
提高性能 更好地利用资源 简化通信
在多线程应用程序中,线程可以并发或并行运行. 您可以通过向应用程序的不同功能指派不同的线程来增加应用 程序的功能.这些函数可能或不会互相依赖.
Ver. 1.0
张共17张 第16张共 张 张共
用Intel VTune进行代码优化和性能调优 使用照管安装来安装 Windows XP Professional 进行代码优化和性能调优 小结(续 小结 续)
