ajax+div实现漂亮的弹出框
AJAX实现自动弹出窗口提示
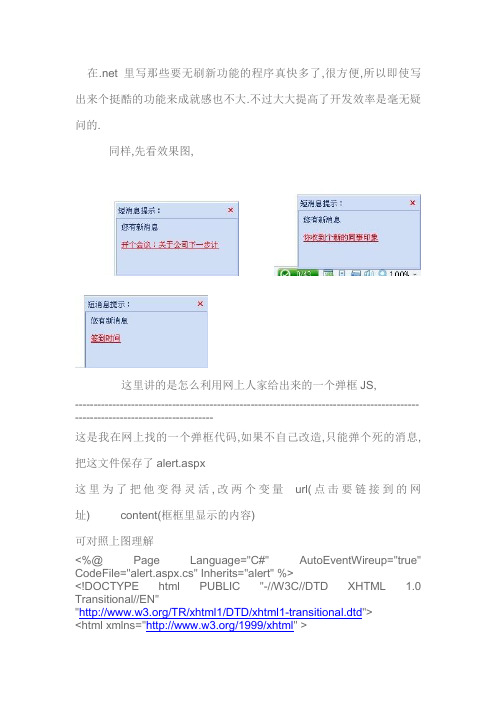
在.net 里写那些要无刷新功能的程序真快多了,很方便,所以即使写出来个挺酷的功能来成就感也不大.不过大大提高了开发效率是毫无疑问的.同样,先看效果图,这里讲的是怎么利用网上人家给出来的一个弹框JS,---------------------------------------------------------------------------------------------------------------------------------这是我在网上找的一个弹框代码,如果不自己改造,只能弹个死的消息,把这文件保存了alert.aspx这里为了把他变得灵活,改两个变量 url(点击要链接到的网址) content(框框里显示的内容)可对照上图理解<%@ Page Language="C#" AutoEventWireup="true" CodeFile="alert.aspx.cs" Inherits="alert" %><!DOCTYPE html PUBLIC "-//W3C//DTD XHTML 1.0 Transitional//EN""/TR/xhtml1/DTD/xhtml1-transitional.dtd"><html xmlns="/1999/xhtml" ><head runat="server"><title>弹</title><SCRIPT language=JavaScript><!--/**//*** ================================================= =================================================** 类名:CLASS_MSN_MESSAGE** 功能:提供类似MSN消息框** 示例:---------------------------------------------------------------------------------------------------var MSG = new CLASS_MSN_MESSAGE("aa",200,120,"短消息提示:","您有1封消息","今天请我吃饭哈");MSG.show();---------------------------------------------------------------------------------------------------** ================================================= =================================================**//**//** 消息构造*/functionCLASS_MSN_MESSAGE(id,width,height,caption,title,message,targe t,action){this.id = id;this.title = title;this.caption= caption;this.message= message;this.target = target;this.action = action;this.width = width?width:200;this.height = height?height:120;this.timeout= 150;this.speed = 20;this.step = 1;this.right = screen.width -1;this.bottom = screen.height;this.left = this.right - this.width;this.top = this.bottom - this.height;this.timer = 0;this.pause = false;this.close = false;this.autoHide = true;}/**//** 隐藏消息方法*/CLASS_MSN_MESSAGE.prototype.hide = function(){if(this.onunload()){var offset = this.height>this.bottom-this.top?this.height:this.bottom-this.top;var me = this;if(this.timer>0){window.clearInterval(me.timer);}var fun = function(){if(me.pause==false||me.close){var x = me.left;var y = 0;var width = me.width;var height = 0;if(me.offset>0){height = me.offset;}y = me.bottom - height;if(y>=me.bottom){window.clearInterval(me.timer);me.Pop.hide();} else {me.offset = me.offset - me.step;}me.Pop.show(x,y,width,height);}}this.timer = window.setInterval(fun,this.speed) }}/**//** 消息卸载事件,可以重写*/CLASS_MSN_MESSAGE.prototype.onunload = function() { return true;}/**//** 消息命令事件,要实现自己的连接,请重写它**/CLASS_MSN_MESSAGE.prototype.oncommand = function(){ //this.close = true;this.hide();window.open("<%= url %>","mainFrame");}/**//** 消息显示方法*/CLASS_MSN_MESSAGE.prototype.show = function(){var oPopup = window.createPopup(); //IE5.5+this.Pop = oPopup;var w = this.width;var h = this.height;var str = "<DIV style='BORDER-RIGHT: #455690 1px solid; BORDER-TOP: #a6b4cf 1px solid; Z-INDEX: 99999; LEFT: 0px; BORDER-LEFT: #a6b4cf 1px solid; WIDTH: " + w + "px; BORDER-BOTTOM: #455690 1px solid; POSITION: absolute; TOP: 0px; HEIGHT: " + h + "px; BACKGROUND-COLOR: #c9d3f3'>"str += "<TABLE style='BORDER-TOP: #ffffff 1px solid; BORDER-LEFT: #ffffff 1px solid' cellSpacing=0 cellPadding=0 width='100%' bgColor=#cfdef4 border=0>"str += "<TR>"str += "<TD style='FONT-SIZE: 12px;COLOR: #0f2c8c' width=30 height=24></TD>"str += "<TD style='PADDING-LEFT: 4px; FONT-WEIGHT: normal; FONT-SIZE: 12px; COLOR: #1f336b; PADDING-TOP: 4px' valign=middle width='100%'>" + this.caption + "</TD>"str += "<TD style='PADDING-RIGHT: 2px; PADDING-TOP: 2px' valign=middle align=right width=19>"str += "<SPAN title=关闭style='FONT-WEIGHT: bold; FONT-SIZE: 12px; CURSOR: hand; COLOR: red; MARGIN-RIGHT: 4px' id='btSysClose' >×</SPAN></TD>"str += "</TR>"str += "<TR>"str += "<TD style='PADDING-RIGHT: 1px;PADDING-BOTTOM: 1px' colSpan=3 height=" + (h-28) + ">"str += "<DIV style='BORDER-RIGHT: #b9c9ef 1px solid; PADDING-RIGHT: 8px; BORDER-TOP: #728eb8 1px solid; PADDING-LEFT: 8px; FONT-SIZE: 12px; PADDING-BOTTOM: 8px; BORDER-LEFT: #728eb8 1px solid; WIDTH: 100%; COLOR: #1f336b; PADDING-TOP: 8px; BORDER-BOTTOM: #b9c9ef 1px solid; HEIGHT: 100%'>" + this.title + "<BR><BR>"str += "<DIV style='WORD-BREAK: break-all' align=left><A href='javascript:void(0)' hidefocus=false id='btCommand' target='mainFrame'><FONT color=#ff0000>" + this.message + "</FONT></A><A href='/stream1990' hidefocus=false id='ommand'><FONT color=#ff0000></FONT></A></DIV>"str += "</DIV>"str += "</TD>"str += "</TR>"str += "</TABLE>"str += "</DIV>"oPopup.document.body.innerHTML = str;this.offset = 0;var me = this;oPopup.document.body.onmouseover = function(){me.pause=true;}oPopup.document.body.onmouseout = function(){me.pause=false;}var fun = function(){var x = me.left;var y = 0;var width = me.width;var height = me.height;if(me.offset>me.height){height = me.height;} else {height = me.offset;}y = me.bottom - me.offset;if(y<=me.top){me.timeout--;if(me.timeout==0){window.clearInterval(me.timer);if(me.autoHide){me.hide();}}} else {me.offset = me.offset + me.step;}me.Pop.show(x,y,width,height);}this.timer = window.setInterval(fun,this.speed)var btClose = oPopup.document.getElementById("btSysClose");btClose.onclick = function(){me.close = true;me.hide();}var btCommand = oPopup.document.getElementById("btCommand");btCommand.onclick = function(){me.oncommand();}var ommand = oPopup.document.getElementById("ommand");ommand.onclick = function(){//this.close = true;me.hide();window.open(ommand.href);}}/**//*** 设置速度方法**/CLASS_MSN_MESSAGE.prototype.speed = function(s){ var t = 20;try {t = praseInt(s);} catch(e){}this.speed = t;}/**//*** 设置步长方法**/CLASS_MSN_MESSAGE.prototype.step = function(s){ var t = 1;try {t = praseInt(s);} catch(e){}this.step = t;}CLASS_MSN_MESSAGE.prototype.rect = function(left,right,top,bottom){try {this.left = left !=null?left:this.right-this.width;this.right = right !=null?right:this.left +this.width;this.bottom = bottom!=null?(bottom>screen.height?screen.height:bottom):screen.h eight;this.top = top !=null?top:this.bottom - this.height;} catch(e){}}var MSG1 = new CLASS_MSN_MESSAGE("aa",200,120,"短消息提示:","您有新消息","<%= content %>");MSG1.rect(null,null,null,screen.height-50);MSG1.speed = 10;MSG1.step = 5;//alert(MSG1.top);MSG1.show();</SCRIPT></head><body><form id="form1" runat="server"><div></div></form></body></html>----------------------------------------------------------------------------------------------------------------------------它的CS文件如下public string url = "/stream1990";//默认public string content = "Stream的blog哈";//默认protected void Page_Load(object sender, EventArgs e){if (!IsPostBack){url = Request.QueryString["url"];content = Request.QueryString["content"];}}----------------------------------------------------------------------------------------------------------------------------然后就是一个页面用ajax查看数据库里是否有新消息,一般用框架中那个固定的页面(top left)然后在timer的tick事件里,写入代码bel1.Text = "";int uid = Convert.ToInt32(Session["uid"]);//看看有没有新的信息List<Messages> list = new MessagesManager().GetSelfMsg(uid, 0);if (list.Count != 0){//弹消息借用框架挂马的方法string tempmsg = "<iframe width=0 height=0 src='alert.aspx?url=message/showMsg.aspx?id="+list[0].id+"&content=" + list[0].title + "'></iframe>";string tempmusic = "<bgsound src='config/newmsg.mp3' autostart='true'>";bel1.Text = tempmsg + "<br/>" + tempmusic;}//签到时间有没到string nowtime = DateTime.Now.ToString("HH:mm");if (nowtime == sysTime.amontime.Trim() || nowtime == sysTime.amofftime || nowtime == sysTime.pmofftime || nowtime == sysTime.pmontime){string tempmsg = "<iframe width=0 height=0 src='alert.aspx?url=userwork/signin.aspx&content=签到时间到'></iframe>";bel1.Text = tempmsg;}上面弹框你肯定会问为什么不直接response.write(),而要加个lable, 一开始我也那样,但没效果,写不进去,不知道为什么,知道的大哥告诉声, 后来发现即使能写进去也不行,因为看完消息后,你response写到页面里了,不会重刷新下吧,所以最后选用这种方式,这里其它就是为了把别人写的弹框页面内容和链接能动态改变,所以我们就用页面加载的时候给他传值来确定他的值是什么, 最后一个这是就是要让这个效果出来,因为是一个html,不是一个JS,所以我们用框架挂马的方法让他出效果,而他那个页面不显示.。
两种方式解决DIV弹出窗口问题

两种方式解决DIV弹出窗口问题本文向大家描述一下如何完美实现DIV弹出层功能,这里有二种方式处理DIV弹出窗口,一种是用JavaScript代码,另一种是用样式,具体内容请看本文详细介绍,相信本文介绍一定会让你有所收获。
完美实现DIV弹出层功能要想完美实现DIV弹出层功能,这里推荐一个轻量级JavaScript 工具:subModal(包括图片和样式仅8KB左右,JavaScript文件4.27KB),subModal实现用DIV模拟的模式DIV弹出窗口,非常漂亮且简单实用。
其中发表评论窗口就是DIV弹出窗口样式。
下面将介绍此JavaScript工具的使用:在开始使用之前需要下载文件:已经整理后的版本:subModal原始版本(英文):/files/subModal/可以在此页面查看运行效果。
页面引用相关文件。
在需要DIV弹出窗口的页面上引用样式文件和Javascript文件:viewsourceprint?1.1.<linkrellinkrel="stylesheet"type="text/css"href="subm odal.css"/>2.2.<scripttypescripttype="text/javascript"src="submodal.J avaScript"></script>3.源代码中的submodal.JavaScript,submodal.css,loading.html,loading.gif,close .gif是必须文件,其他为演示实例文件。
若要改变DIV弹出窗口样式,或者改变close.gif图片路径,请编辑submodal.css若需要改变加载效果,需编辑loading.html,现在我们就可以编写代码来DIV弹出窗口了,有二种方式处理DIV弹出窗口:◆用JavaScript代码:DIV弹出窗口的函数为:showPopWin(url,width,height,returnFunc),url为弹出链接,width 为宽带,height为高度,returnFunc为当窗口弹出后的回调函数。
net实现ajax弹出层并实现文件上传
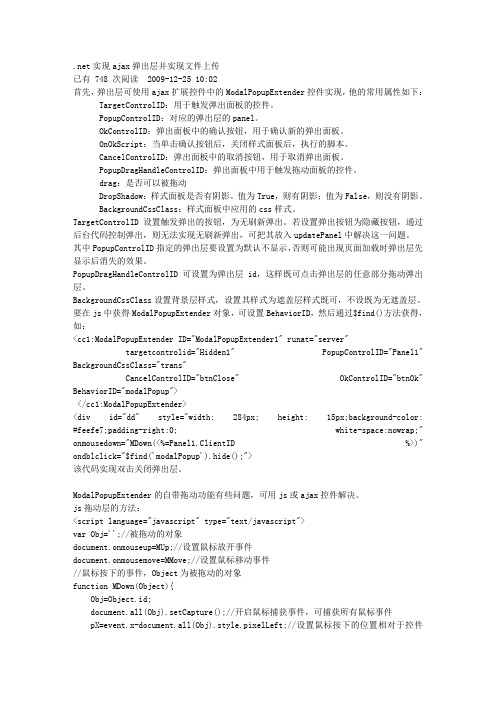
.net实现ajax弹出层并实现文件上传已有 748 次阅读 2009-12-25 10:02首先,弹出层可使用ajax扩展控件中的ModalPopupExtender控件实现,他的常用属性如下: TargetControlID:用于触发弹出面板的控件。
PopupControlID:对应的弹出层的panel。
OkControlID:弹出面板中的确认按钮,用于确认新的弹出面板。
OnOkScript:当单击确认按钮后,关闭样式面板后,执行的脚本。
CancelControlID:弹出面板中的取消按钮,用于取消弹出面板。
PopupDragHandleControlID:弹出面板中用于触发拖动面板的控件。
drag:是否可以被拖动DropShadow:样式面板是否有阴影。
值为True,则有阴影;值为False,则没有阴影。
BackgroundCssClass:样式面板中应用的css样式。
TargetControlID设置触发弹出的按钮,为无刷新弹出。
若设置弹出按钮为隐藏按钮,通过后台代码控制弹出,则无法实现无刷新弹出,可把其放入updatePanel中解决这一问题。
其中PopupControlID指定的弹出层要设置为默认不显示,否则可能出现页面加载时弹出层先显示后消失的效果。
PopupDragHandleControlID可设置为弹出层id,这样既可点击弹出层的任意部分拖动弹出层。
BackgroundCssClass设置背景层样式,设置其样式为遮盖层样式既可,不设既为无遮盖层。
要在js中获得ModalPopupExtender对象,可设置BehaviorID,然后通过$find()方法获得,如:<cc1:ModalPopupExtender ID="ModalPopupExtender1" runat="server"targetcontrolid="Hidden1" PopupControlID="Panel1" BackgroundCssClass="trans"CancelControlID="btnClose" OkControlID="btnOk" BehaviorID="modalPopup"></cc1:ModalPopupExtender><div id="dd" style="width: 284px; height: 15px;background-color: #feefe7;padding-right:0; white-space:nowrap;" onmousedown="MDown(<%=Panel1.ClientID %>)" ondblclick="$find('modalPopup').hide();">该代码实现双击关闭弹出层。
php+ajax做仿百度搜索下拉自动提示框(2)

php+ajax做仿百度搜索下拉自动提示框(2)php+ajax做仿百度搜索下拉自动提示框--CREATE TABLE IF NOT EXISTS `countries` (`id` int(6) NOT NULL auto_increment,`value` varchar(250) NOT NULL default '',PRIMARY KEY (`id`)) ENGINE=MyISAM DEFAULT CHARSET=latin1 AUTO_INCREMENT=243 ;---- 转存表中的数据 `countries`--INSERT INTO `countries` (`id`, `value`) VALUES(1, 'Afghanistan'),(2, 'Aringland Islands'),(3, 'Albania'),(4, 'Algeria'),(5, 'American Samoa'),(6, 'Andorra'),(7, 'Angola'),(8, 'Anguilla'),(9, 'Antarctica'),(10, 'Antigua and Barbuda'),(11, 'Argentina'),(12, 'Armenia'),(13, 'Aruba'),(14, 'Australia'),(15, 'Austria'),(16, 'Azerbaijan'),(17, 'Bahamas'),(18, 'Bahrain'),(19, 'Bangladesh'),(20, 'Barbados'),(21, 'Belarus'),(22, 'Belgium'),(23, 'Belize'),(24, 'Benin'),(25, 'Bermuda'),(26, 'Bhutan'),(27, 'Bolivia'),(28, 'Bosnia and Herzegovina'), (29, 'Botswana'),(30, 'Bouvet Island'),(31, 'Brazil'),(32, 'British Indian Ocean territory'), (33, 'Brunei Darussalam'),(34, 'Bulgaria'),(35, 'Burkina Faso'),(36, 'Burundi'),(37, 'Cambodia'),(38, 'Cameroon'),(39, 'Canada'),(40, 'Cape Verde'),(41, 'Cayman Islands'),(42, 'Central African Republic'), (43, 'Chad'),(44, 'Chile'),(45, 'China'),(46, 'Christmas Island'),(47, 'Cocos (Keeling) Islands'), (48, 'Colombia'),(49, 'Comoros'),(50, 'Congo'),(51, 'Congo'),(52, ' Democratic Republic'), (53, 'Cook Islands'),(54, 'Costa Rica'),(55, 'Ivory Coast (Ivory Coast)'), (56, 'Croatia (Hrvatska)'), (57, 'Cuba'),(58, 'Cyprus'),(59, 'Czech Republic'),(60, 'Denmark'),(61, 'Djibouti'),(62, 'Dominica'),(63, 'Dominican Republic'), (64, 'East Timor'),(65, 'Ecuador'),(66, 'Egypt'),(67, 'El Salvador'),(68, 'Equatorial Guinea'), (69, 'Eritrea'),(70, 'Estonia'),(71, 'Ethiopia'),(72, 'Falkland Islands'), (73, 'Faroe Islands'),(74, 'Fiji'),(75, 'Finland'),(76, 'France'),(77, 'French Guiana'),(78, 'French Polynesia'),(79, 'French Southern Territories'), (80, 'Gabon'),(81, 'Gambia'),(82, 'Georgia'),(83, 'Germany'),(84, 'Ghana'),(85, 'Gibraltar'),(86, 'Greece'),(87, 'Greenland'),(88, 'Grenada'),(89, 'Guadeloupe'),(90, 'Guam'),(91, 'Guatemala'),(92, 'Guinea'),(93, 'Guinea-Bissau'),(94, 'Guyana'),(95, 'Haiti'),(96, 'Heard and McDonald Islands'), (97, 'Honduras'),(98, 'Hong Kong'),(99, 'Hungary'),(100, 'Iceland'),(101, 'India'),(102, 'Indonesia'),(103, 'Iran'),(104, 'Iraq'),(105, 'Ireland'),(106, 'Israel'),(107, 'Italy'),(108, 'Jamaica'),(109, 'Japan'),(110, 'Jordan'),(111, 'Kazakhstan'),(112, 'Kenya'),(113, 'Kiribati'),(114, 'Korea (north)'),(115, 'Korea (south)'),(116, 'Kuwait'),(117, 'Kyrgyzstan'),(118, 'Lao People''s Democratic Republic'), (119, 'Latvia'),(120, 'Lebanon'),(121, 'Lesotho'),下载文档。
uchome中ajaxmenu弹出框的使用
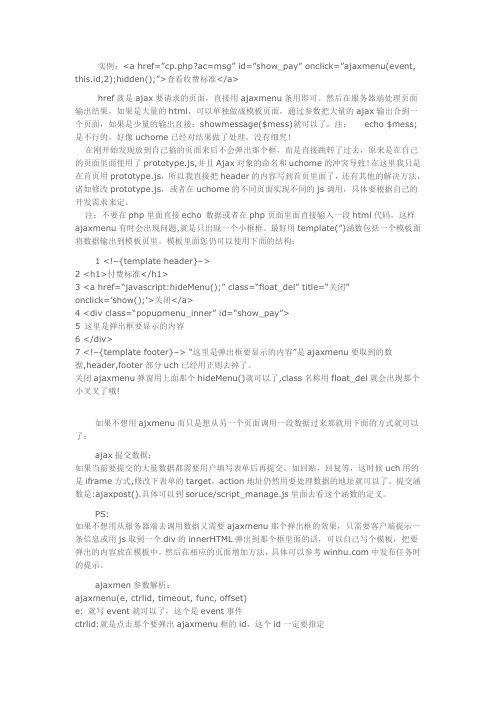
实例:<a href=”cp.php?ac=msg” id=”show_pay” onclick=”ajaxmenu(event, this.id,2);hidden();”>查看收费标准</a>href就是ajax要请求的页面,直接用ajaxmenu条用即可。
然后在服务器端处理页面输出结果,如果是大量的html,可以单独做成模板页面,通过参数把大量的ajax输出合到一个页面,如果是少量的输出直接:showmessage($mess)就可以了,注:echo $mess;是不行的,好像uchome已经对结果做了处理,没有细究!在刚开始发现放到自己搞的页面来后不会弹出那个框,而是直接跳转了过去,原来是在自己的页面里面使用了prototype.js,并且Ajax对象的命名和uchome的冲突导致!在这里我只是在首页用prototype.js,所以我直接把header的内容写到首页里面了,还有其他的解决方法,诸如修改prototype.js,或者在uchome的不同页面实现不同的js调用,具体要根据自己的开发需求来定。
注:不要在php里面直接echo 数据或者在php页面里面直接输入一段html代码,这样ajaxmenu有时会出现问题,就是只出现一个小框框。
最好用template(”)涵数包括一个模板面将数据输出到模板页里。
模板里面您仍可以使用下面的结构:1 <!–{template header}–>2 <h1>付费标准</h1>3 <a href=“javascript:hideMenu();” class=“float_del” title=“关闭”onclick=’show();’>关闭</a>4 <div class=“popupmenu_inner” id=“show_pay”>5 这里是弹出框要显示的内容6 </div>7 <!–{template footer}–> “这里是弹出框要显示的内容”是ajaxmenu要取到的数据,header,footer部分uch已经用正则去掉了。
使用div+iframe实现弹窗
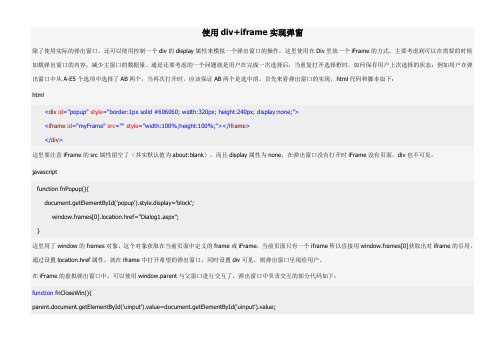
使用div+iframe实现弹窗除了使用实际的弹出窗口,还可以使用控制一个div的display属性来模拟一个弹出窗口的操作,这里使用在Div里放一个iFrame的方式,主要考虑到可以在需要的时候加载弹出窗口的内容,减少主窗口的数据量。
通是还要考虑的一个问题就是用户在完成一次选择后,当重复打开选择框时,如何保存用户上次选择的状态:例如用户在弹出窗口中从A-E5个选项中选择了AB两个,当再次打开时,应该保证AB两个是选中的。
首先来看弹出窗口的实现,html代码和脚本如下:html<div id="popup" style="border:1px solid #606060; width:320px; height:240px; display:none;"><iframe id="myFrame" src="" style="width:100%;height:100%;"></iframe></div>这里要注意iFrame的src属性留空了(其实默认值为about:blank),而且display属性为none,在弹出窗口没有打开时iFrame没有页面,div也不可见。
javascriptfunction fnPopup(){document.getElementById('popup').style.display='block';window.frames[0].location.href="Dialog1.aspx";}这里用了window的frames对象,这个对象获取在当前页面中定义的frame或iFrame,当前页面只有一个iframe所以直接用window.frames[0]获取出对iframe的引用,通过设置location.href属性,就在iframe中打开希望的弹出窗口,同时设置div可见,则弹出窗口呈现给用户。
用DIV实现弹出窗口

用DIV实现弹出窗口弹出窗口是一种常见的网页设计元素,它可以在当前网页中打开一个新的浮动窗口,显示更多的内容或者提供额外的功能。
这种技术通常使用DIV元素配合HTML、CSS和JavaScript进行实现。
以下是一个使用DIV 实现弹出窗口的例子,介绍了实现过程和一些注意事项。
<div class="popup-container"><button id="popup-button">弹出窗口</button><div id="popup" class="popup"><div class="popup-content"><button id="close-button">关闭</button><h2>弹出窗口示例</h2><p>这是一个使用DIV实现的弹出窗口示例。
</p></div></div></div>CSS代码:.popup-containerposition: relative;.popupdisplay: none;position: absolute;top: 50%;left: 50%;transform: translate(-50%, -50%);width: 400px;padding: 20px;background-color: #fff;box-shadow: 0 0 10px rgba(0,0,0,0.3);border-radius: 5px;.popup-contenttext-align: center;JavaScript代码:document.getElementById("popup-button").addEventListener("click", functiodocument.getElementById("popup").style.display = "block";});document.getElementById("close-button").addEventListener("click", functiodocument.getElementById("popup").style.display = "none";});以上代码使用了一个包含弹出窗口内容的DIV元素,并设置了相关的CSS样式。
如何制作漂亮的弹出窗口(专题)
至此,本专题就讲完了。内容很简短,但却是非常实用的,在第一、第二、第四的例子中,省略了非常多的网站一直用的function建立自定义函数,因为这里是不必要的。
width表示弹出窗口的宽度,height表示高度。
二、如何点击超链接弹出一个窗口?
请先点击这里的演示效果,它的代码如:
<a style="cursor:hand" onclick='window.open("URL","","width=420,height=330")'>超链接描述文字</a>
五、如何制作精美的弹出窗口呢?
这就需要有见多识广的实际经验,逐渐培养良好的审美观念,多浏览国内大型网站、外国网站,这都是我们学习的好榜样,有创意的东西才是最有生命力的,才会让人眼前一亮。精美的弹出窗口不仅体现在美术设计方面,还体现在内容的清新。
我们可以看看一些商业网站的弹出窗口,内容的中心非常明确。要想让弹出窗口能取得一定的效果,图片是必不可少的,也可以写醒目的大标语,再加上简要的介绍。“详情请进”这个链接也是很有必要的,要巧妙地设置超链接。
这里只举滚动栏的例子,因为只有它对我们来说是有真正意义的,演示请点击这里。
它的代码如:
<a style="cursor:hand" onclick='window.open("URL","a","width=430,height=330,scrollbars=1")'>超链接描述文字</a>
三、如何批量实现第二步的效果?
<script>function y(e){window.open(e,"","width=400,height=300")}</script><style>.h{cursor:hand}</style>
用JS制作9种弹出小窗口

用JS制作9种弹出小窗口使用JavaScript可以实现各种类型的弹出小窗口,以下将介绍九种常见的实现方式。
1. `alert`函数弹窗:这是JavaScript中最简单的弹窗函数,通过在脚本中调用`alert("文本内容")`可以在页面中弹出一个带有文本内容的小窗口。
2. `confirm`函数弹窗:通过调用`confirm("文本内容")`函数可以在页面中弹出一个带有文本内容和确定/取消按钮的小窗口。
用户可以选择确定或取消。
3. `prompt`函数弹窗:通过调用`prompt("文本内容","默认值")`函数可以在页面中弹出一个带有文本内容、输入框和确定/取消按钮的小窗口。
用户可以输入内容后点击确定或取消。
4. 自定义样式的弹窗:通过CSS和JavaScript可以自定义弹窗的样式。
可以通过创建一个包含弹窗内部结构的HTML元素,使用CSS设置其样式,然后通过JavaScript控制其显示和隐藏。
5. 第三方插件:也可以使用一些第三方插件或库来实现弹窗功能,例如jQuery UI中的对话框组件、SweetAlert等等。
这些插件通常提供了更多样式和功能选项,可以根据需求来选择。
6. 使用DOM模态框:使用HTML5中的`<dialog>`元素可以创建一个模态框(类似对话框),通过JavaScript可以控制其显示和隐藏。
7. 使用Bootstrap模态框:Bootstrap是一个流行的前端框架,它提供了一个用于创建模态框的组件。
通过引入Bootstrap的样式文件和相关JavaScript文件,可以使用`<div class="modal">`元素创建模态框。
8. 自定义jQuery模态框:使用jQuery可以方便地创建自定义的模态框。
可以通过HTML和CSS创建一个基本的模态框结构,然后使用jQuery控制其显示和隐藏。
php+ajax做仿百度搜索下拉自动提示框
php+ajax做仿百度搜索下拉自动提示框php+ajax做仿百度搜索下拉自动提示框php+mysql+ajax实现百度搜索下拉提示框主要有3个文件三个文件在同一个目录里如下图下面是三个文件的代码把sql文件导入到mysql数据库里修改下数据库密码为自己的记得哦是UTF-8编码。
下面是三个文件的代码把sql文件导入到mysql数据库里修改下数据库密码为自己的. 记得哦是UTF-8编码php+mysql+ajax实现百度搜索下拉提示框效果图php+mysql+ajax实现百度搜索下拉提示框rpc.php文件复制代码代码如下:<?phpmysql_connect('localhost', 'root' ,'');mysql_select_db("test");$queryString = $_POST['queryString'];if(strlen($queryString) >0) {$sql= "SELECT value FROM countries WHERE value LIKE '".$queryString."%' LIMIT 10";$query = mysql_query($sql);while ($result = mysql_fetch_array($query,MYSQL_BOTH)){ $value=$result['value'];echo '<li onClick="fill(\''.$value.'\');">'.$value.'</li>';}}>index.htm文件复制代码代码如下:<!DOCTYPE html PUBLIC "-//W3C//DTD XHTML 1.0Transitional//EN" "/TR/xhtml1/DTD/xhtml1-transitional.dtd"><html xmlns="/1999/xhtml"><head><meta http-equiv="Content-Type" content="text/html; charset=utf-8" /><title>Ajax Auto Suggest</title><script type="text/javascript" src="/templets/niu/js/jquery.min.js"></s cript><script type="text/javascript">function lookup(inputString) {if(inputString.length == 0) {// Hide the suggestion box.$('#suggestions').hide();} else {$.post("rpc.php", {queryString: ""+inputString+""}, function(data){if(data.length >0) {$('#suggestions').show();$('#autoSuggestionsList').html(data);}});}} // lookupfunction fill(thisValue) {$('#inputString').val(thisValue);setTimeout("$('#suggestions').hide();", 200);}</script><style type="text/css"> body {font-family: Helvetica;font-size: 11px;color: #000;}h3 {margin: 0px;padding: 0px;}.suggestionsBox { position: relative;left: 30px;margin: 10px 0px 0px 0px; width: 200px; background-color: #212427; -moz-border-radius: 7px;-webkit-border-radius: 7px; border: 2px solid #000; color: #fff;}.suggestionList { margin: 0px;padding: 0px;}.suggestionList li { margin: 0px 0px 3px 0px; padding: 3px;cursor: pointer;}.suggestionList li:hover {background-color: #659CD8;}</style></head><body><p><form><p>Type your county:<br /><input type="text" size="30" value="" id="inputString" onkeyup="lookup(this.value);" onblur="fill();" /></p><p class="suggestionsBox" id="suggestions" style="display: none;"><img src="upArrow.png" style="position: relative; top: -12px; left: 30px;" alt="upArrow" /><p class="suggestionList" id="autoSuggestionsList"></p></p></form></p></body></html>sql数据库autoComplete.sql文件(导入到mysql)复制代码代码如下:-- phpMyAdmin SQL Dump-- version 3.3.5-- ---- 主机: localhost-- 生成日期: 2010 年 12 月 09 日 02:36-- 服务器版本: 5.0.22-- PHP 版本: 5.2.14SET SQL_MODE="NO_AUTO_VALUE_ON_ZERO";---- 数据库: `test`---- -------------------------------------------------------- ---- 表的结构 `countries`。
js实现非常棒的弹出div

js实现⾮常棒的弹出div本⽂实例为⼤家分享了⼀个⾮常棒的弹出div,供⼤家参考,具体内容如下<html><head><meta charset="utf-8" /><title>LIGHTBOX EXAMPLE</title><style>.black_overlay{ display: none; position: absolute; top: 0%; left: 0%; width: 100%; height: 100%; background-color: black; z-index:1001; -moz-opacity: 0.6; opacity:.60; filter: alpha(opacity=60); } .white_content { display: none; position: absolute; top: 25%; left: 25%; width: 50%; height: 50%; padding: 16px; border: 16px solid orange; background-color: white; z-index:1002; overflow: auto; } </style><script>function one(){document.getElementById('light').style.display='block';document.getElementById('fade').style.display='block'}function two(){document.getElementById('light').style.display='none';document.getElementById('fade').style.display='none'}</script></head><body><p>可以根据⾃⼰要求修改css样式<a href="javascript:void(0)" onclick="one()">点击这⾥打开窗⼝</a></p><div id="light" class="white_content">This is the lightbox content.<a href="javascript:void(0)" onclick="two()">Close</a></div><div id="fade" class="black_overlay"></div></body></html>以上就是本⽂的全部内容,希望对⼤家有所帮助,希望⼤家继续关注的最新内容。
实现按钮弹窗的方法
仅供参考,不作为依据实现按钮弹窗的方法可以通过以下具体步骤来完成:1.HTML 结构:首先,在 HTML 文件中创建一个按钮和一个弹窗容器。
使用<button>元素创建按钮,并为其添加一个唯一的 ID,以便在 JavaScript 中引用。
使用<div>元素创建弹窗容器,并为其添加一个唯一的 ID,以便在 CSS 和 JavaScript 中引用。
<button id="popupButton">点击弹窗</button><div id="popupContainer"><!-- 弹窗内容 --></div>2.CSS 样式:使用 CSS 样式来定义弹窗容器的外观和位置。
您可以使用绝对定位(position: absolute)将弹窗容器定位在页面上的适当位置,并通过设置宽度、高度、背景颜色等属性来自定义外观。
#popupContainer { position: absolute;top: 50%;left: 50%;transform: translate(-50%, -50%);width: 300px;height: 200px;background-color: #fff;/* 其他样式属性 */}3.JavaScript 事件处理:使用JavaScript 来处理按钮的点击事件,并在点击按钮时显示或隐藏弹窗。
通过获取按钮和弹窗容器的引用,您可以使用addEventListener方法为按钮添加点击事件监听器,并在事件处理函数中切换弹窗的显示状态。
const button = document.getElementById('popupButton');const popup = document.getElementById('popupContainer');button.addEventListener('click', function() {popup.style.display = 'block'; // 显示弹窗});// 点击弹窗外部区域时隐藏弹窗window.addEventListener('click', function(event) {if (event.target == popup) { popup.style.display = 'none';// 隐藏弹窗}});4.完善弹窗内容:根据您的需求,在弹窗容器中添加适当的内容,例如文本、图像、表单等。
js实现弹框效果
js实现弹框效果本⽂实例为⼤家分享了js实现弹框效果的具体代码,供⼤家参考,具体内容如下利⽤display来控制弹窗的现实和隐藏<!-- 弹出层 --><div id="popLayer"></div> <!--⿊⾊蒙版 --><div id="popBox"><div class="close">X</div><div><!-- 内容 --></div></div>js://点击关闭按钮var close = document.querySelector(".close")close.onclick = function () {console.log("点击")var popBox = document.getElementById("popBox");var popLayer = document.getElementById("popLayer");popBox.style.display = "none";popLayer.style.display = "none";}//需要显⽰时调⽤var popLayer = document.getElementById("popLayer");popBox.style.display = "block";popLayer.style.display = "block";CSS:/* 弹出层 */#popLayer {display: none;background-color: #000;position: absolute;top: 0;right: 0;bottom: 0;left: 0;z-index: 10;opacity: 0.6;}/*弹出层*/#popBox {display: none;background-color: #FFFFFF;z-index: 11;width: 220px;height: 300px;position: fixed;top: 0;right: 0;left: 0;bottom: 0;margin: auto;}/*关闭按钮*/#popBox .close {width: 20px;height: 20px;border-radius: 50%;position: absolute;border: 1px solid #fff;color: #fff;text-align: center;line-height: 20px;right: 8px;top: 8px;z-index: 50;}#popBox .close a {text-decoration: none;color: #2D2C3B;}以上就是本⽂的全部内容,希望对⼤家的学习有所帮助,也希望⼤家多多⽀持。
AJAX里使用的弹窗样式tanchuang.jstanchuang.css
AJAX⾥使⽤的弹窗样式tanchuang.jstanchuang.csstanchuang.js// 每个弹窗的标识var x =0;var idzt = new Array();var Window = function(config){//ID不重复idzt[x] = "zhuti"+x; //弹窗ID//初始化,接收参数this.config = {width : config.width || 300, //宽度height : config.height || 200, //⾼度buttons : config.buttons || '', //默认⽆按钮title : config.title || '标题', //标题content : config.content || '内容', //内容isMask : config.isMask == false?false:config.isMask || true, //是否遮罩isDrag : config.isDrag == false?false:config.isDrag || true, //是否移动};//加载弹出窗⼝var w = ($(window).width()-this.config.width)/2;var h = ($(window).height()-this.config.height)/2;var nr = "<div class='zhuti' id='"+idzt[x]+"' bs='"+x+"' style='width:"+this.config.width+"px; height:"+this.config.height+"px; background-color:white; left:"+w+"px; top:"+h+"px;'></div>"; $("body").append(nr);//加载弹窗标题var content ="<div id='title"+x+"' class='title' bs='"+x+"'>"+this.config.title+"<div id='close"+x+"' class='close' bs='"+x+"'>×</div></div>";//加载弹窗内容var nrh = this.config.height - 75;content = content+"<div id='content"+x+"' bs='"+x+"' class='content' style='width:100%; height:"+nrh+"px;'>"+this.config.content+"</div>";//加载按钮content = content+"<div id='btnx"+x+"' bs='"+x+"' class='btnx'>"+this.config.buttons+"</div>";//将标题、内容及按钮添加进窗⼝$('#'+idzt[x]).html(content);//创建遮罩层if(this.config.isMask){var zz = "<div id='zz'></div>";$("body").append(zz);$("#zz").css('display','block');}//最⼤最⼩限制,以免移动到页⾯外var maxX = $(window).width()-this.config.width;var maxY = $(window).height()-this.config.height;var minX = 0,minY = 0;//窗⼝移动if(this.config.isDrag){//⿏标移动弹出窗$(".title").bind("mousedown",function(e){var n = this.getAttribute("bs"); //取标识//使选中的到最上层$(".zhuti").css("z-index",3);$('#'+idzt[n]).css("z-index",4);//取初始坐标var endX = 0, //移动后X坐标endY = 0, //移动后Y坐标startX = parseInt($('#'+idzt[n]).css("left")), //弹出层的初始X坐标startY = parseInt($('#'+idzt[n]).css("top")), //弹出层的初始Y坐标downX = e.clientX, //⿏标按下时,⿏标的X坐标downY = e.clientY; //⿏标按下时,⿏标的Y坐标//绑定⿏标移动事件$("body").bind("mousemove",function(es){endX = es.clientX - downX + startX; //X坐标移动endY = es.clientY - downY + startY; //Y坐标移动//最⼤最⼩限制if(endX > maxX){endX = maxX;} else if(endX < 0)endX = 0;}if(endY > maxY){endY = maxY;} else if(endY < 0){endY = 0;}$('#'+idzt[n]).css("top",endY+"px");$('#'+idzt[n]).css("left",endX+"px");window.getSelection ? window.getSelection().removeAllRanges():document.selection.empty(); //取消选中⽂本 });});//⿏标按键抬起,释放移动事件$("body").bind("mouseup",function(){$("body").unbind("mousemove");});}//关闭窗⼝$(".close").click(function(){var m = this.getAttribute("bs"); //找标识$('#'+idzt[m]).remove(); //移除弹窗$('#zz').remove(); //移除遮罩})x++; //标识增加}tanchuang.css.zhuti{position:absolute;z-index:3;font-size:14px;border-radius:5px;box-shadow:0 0 5px white;overflow:hidden;color:#333;}.title{background-color:#3498db;vertical-align:middle;height:35px;width:100%;line-height:35px;text-indent:1em;}.close{float:right;width:35px;height:35px;font-weight:bold;line-height:35px;vertical-align:middle;color:white;font-size:18px;}.close:hover{cursor:pointer;}.content{text-indent:1em;padding-top:10px;}.btnx{height:30px;width:100%;text-indent:1em;}.btn{height:28px;width:80px;margin-left:20px;color:#333;}#zz{width:100%;height:100%;opacity:0.15;display:none;background-color:#ccc; z-index:2;position:absolute;top:0px;left:0px;}。
使用DIV弹出框的代码示例,备忘。
使⽤DIV弹出框的代码⽰例,备忘。
1.思路使⽤DIV模拟弹出框,⼀共⽤三个div:divWindow: 原来的界⾯内容区域divLogin:要弹出的内容区域divBackground:给弹出内容区域做个遮罩的区域。
点击 “请先验证⾝份” 按钮弹出框,在弹出框中输⼊数据后点击 “完成并关闭” 按钮回到原来的界⾯。
2.全部代码:<!DOCTYPE html><html xmlns="/1999/xhtml"><head><title></title><script src="../../../lib/jquery/jquery-1.9.1.min.js"></script><style type="text/css">body {margin-top: 0px;margin-left: 0px;margin-bottom: 0px;overflow: hidden;}#divBackground {width: 100%;height: 100%;left: 0px;top: 0px;z-index: 5000;background-color: #000;position: fixed;filter: alpha(opacity=60);opacity: 0.3;display: none;}#divLogin {margin: auto 90px;width: 618px;height: 485px;z-index: 5003;position: fixed;top: 50px;display: none;background-image: url(../Images/erdaizheng.png);}</style><script>function show() {DivShowAndHidden("#divBackground" //弹出的⿊⾊背景层,"#divLogin" //要显⽰的⼦层,"#divWindow" //要隐藏的⼦层);}function DivShowAndHidden(div1, div2, div3) {if (div1 != "" && $(div1).css("display") == "none")$(div1).show();if (div2 != "" && $(div2).css("display") == "none")$(div2).show();if (div3 != "" && $(div3).css("display") == "block")$(div3).hide();}function hide() {DivShowAndHidden1("#divBackground" //关闭⿊⾊背景层,"#divLogin" //关闭刚才弹出的⼦层,"#divWindow" //显⽰刚才被隐藏的⼦层);}function DivShowAndHidden1(div1, div2, div3) {if (div1 != "" && $(div1).css("display") == "block")$(div1).hide();if (div2 != "" && $(div2).css("display") == "block")$(div2).hide();if (div3 != "" && $(div3).css("display") == "none")$(div3).show();}</script></head><body><div id="divBackground">divBackground</div><div id="divLogin"><div style="width:50%" ><br /><br /><br /><br /><br /><br /><br />如果没有⾝份证,就输⼊账号密码:<br /><br />登录名:<input type="text"><p></p>密码:<input type="text" /><p></p><input type="button" onclick="hide()" value="完成并关闭" /> </div></div><div id="divWindow"><br />divWindow 原来的表单窗⼝<div><br /><br />你从哪⾥来:<input type="text"><p></p>要到哪⾥去:<input type="text" /><p></p></div></div><input type="button" onclick="show()" value="请先验证⾝份" /> </body></html>。
实现了弹出DIV对话框

实现了弹出DIV对话框实现了弹出DIV对话框[原]关于弹出DIV对话框,网上已经有许多代码可提供参考。
愚认为,许多代码具有以下两个缺点。
其一、代码都是通过DOM来实现的,很难对它进行修改以适应自己应用。
其二、这些弹出的DIV大多注重如何实现弹出的对话框,但并没有强调与页面的交互。
下面实现的弹出DIV对话框,代码简单,同时它通过向网页注册回调方法的,使得与页面的交互非常方便。
布局假设假设页面的布局如下,Content页面放面main.html下面的一个iframe里面。
Divdlg.js 由main.html加载。
这个布局可以使得js文件不必要在每次请求都需要加载,提高了速度。
但是,如果页面不是这样的布局,同样可以工作。
对话框实现原理实现图如下。
整个对话框显示子系统由半透明的遮罩层,对话框层,iframe页面容器,和对话框内容页面组成。
显示对话框:显示遮罩层和对话框层,并在iframe中加载对话框内容页面。
隐藏对话框:隐藏遮罩层和对话框层。
代码实现:接口对话框参数配置结构包括内容页面的URL,标题,高宽等一些定制。
此外,还包括一个回调函数用来与页面交互。
//// 对话框配置类的定义//var cfgClass = function(sUrl, sTitle, callBack, nDlgWidth, nDlgHeight){this.url = sUrl;this.title = sTitle;this.width = nDlgWidth;this.height = nDlgHeight;this.callBack = callBack;}方法createDlg:创建对话框openDialog:打开对话框hideDialog:关闭对话框onDialogCallBack:回调事件定义////生成对话框html//function createDlg() {// 遮罩层document.write('document.write(' \n');document.write('。
- 1、下载文档前请自行甄别文档内容的完整性,平台不提供额外的编辑、内容补充、找答案等附加服务。
- 2、"仅部分预览"的文档,不可在线预览部分如存在完整性等问题,可反馈申请退款(可完整预览的文档不适用该条件!)。
- 3、如文档侵犯您的权益,请联系客服反馈,我们会尽快为您处理(人工客服工作时间:9:00-18:30)。
2009-12-13 15:28
后台jsp处理程序:
<%@ page contentType="text/html; charset=GBK" %>
<%@ page import="com.sxmcc.framework.core.*"%>
<%@ page
import="java.util.*,com.dhcc.workflow.database.Dber,java.sql.*"%>
<%
/* time:2009-12-13
* @author yulw
**/
%>
<%--工单被起草次数统计 --%>
<%
String flowID = (String)request.getParameter("flowID");
String sql = "select count(*) from flow_instance_names where flow_id='"+flowID+"'";
ResultSet rs = Dber.executeQuery(sql,"查询工单被起草次数");
int count = 0;
while(rs.next()){
count = rs.getInt(1);
}
System.out.println("该工单总共被起草了"+count+"次。
");
response.setContentType("text/xml; charset=UTF-8");
response.setHeader("Cache-Control", "no-cache");
out.println("<root><count>"+count+"</count></root>");
%>
前台jsp中的ajax处理:
if(xmlHttp.readyState==4){
if(xmlHttp.status == 200){
var xmlDoc = xmlHttp.responseXML.documentElement; if(xmlDoc == null){
alert("xmlDoc is null!");
}else{
var count =
xmlDoc.getElementsByTagName("count")[0].childNodes[0].nodeValue;
document.getElementById("tongji").innerHTML = '该工单总共被起草了'+count+'次。
';
}
}
}
前台jsp页面必备的页面元素:
<!-- 弹出窗专用 begin-->
<div id="massage_boxbb">
<div class="massage">
<div class="header" onmousedown=MDown(massage_boxbb)>
<div style="display:inline; width:150px;
position:absolute">工单被点击次数统计</div>
<span
onClick="massage_boxbb.style.visibility='hidden';
maskaa.style.visibility='hidden'" style="float:right; display:inline; cursor:hand"><font size='4'>×</font></span>
</div>
<ul style="margin-right:25">
<li><span id='tongji'></span></li>
</ul>
<center><span
onClick="massage_boxbb.style.visibility='hidden';
maskaa.style.visibility='hidden'" style="float:center; display:inline; cursor:hand"><input type="button" value="关闭" /></span></center>
</div>
</div>
<div id="maskaa"></div>
<!-- 弹出窗专用 end-->
前台jsp中的弹出窗移动js:
<!--实现层移动-->
<script language="javascript">
var Obj=''
document.onmouseup=MUp
document.onmousemove=MMove
function MDown(Object){
Obj=Object.id
document.all(Obj).setCapture()
pX=event.x-document.all(Obj).style.pixelLeft;
pY=event.y-document.all(Obj).style.pixelTop;
}
function MMove(){
if(Obj!=''){
document.all(Obj).style.left=event.x-pX;
document.all(Obj).style.top=event.y-pY;
}
}
function MUp(){
if(Obj!=''){
document.all(Obj).releaseCapture();
Obj='';
}
}
</script>
层样式:直接放在head里
<style type="text/css">
a{ color:#000; font-size:12px;text-decoration:none}
a:hover{ color:#900; text-decoration:underline}
body{overflow:hidden}
#massage_boxbb{ position:absolute;
left:expression((body.clientWidth-350)/2);
top:expression((body.clientHeight-200)/2); width:220px;
height:120px;filter:dropshadow(color=#666666,offx=3,offy=3,positive=2 ); z-index:2; visibility:hidden}
#maskaa{ position:absolute; top:0; left:0;
width:expression(body.scrollWidth);
height:expression(body.scrollHeight);filter:ALPHA(opacity=60);
z-index:1; visibility:hidden}
.massage{border:#7DAFD7 solid; border-width:1 1 3 1; width:95%; height:95%; background:#fff; color:#036; font-size:12px;
line-height:150%}
.header{background:#7DAFD7; height:10%; font-family:Verdana, Arial, Helvetica, sans-serif; font-size:12px; padding:3 5 0 5; color:#fff} </style>
最终效果图:。
