新建 YAESU FT-7800R工程模式调整方法
八重洲YAESU VX—7R 快捷设置
八重洲YAESU VX—7R 快捷设置性能参数: 频率覆盖: 接收0.5-999Mhz 发射50/144/430业余波段双VFO同时接收,V-V/U-U/V-U/Gen-HamYAESU VX—7R功能设置设置模式 VX—7R的设置模式可以对本机的大量参数进行设定,请按照下面的步骤进行:1、按黄色【MON\F】键,再按【0\SET】键进入设置模式2、旋转顶部的【DIAL】旋纽,选择需要设置的菜单项目3、通过按压【MAIN】、【SUB】键调整或选择所需要调整的菜单的参数4、设置完成后,按发射键【PTT】确定并退出设置模式注意:有些菜单的激活需要在调整参数前按【BAND\BND DN】键进入“我的菜单”快捷键设置“我的菜单”键允许你快捷地调出某个菜单选项,【TX\PO\LK】键担当了这个角色。
1、开机时按住【TX\PO\LK】键,这个过程是切换本键的作用,即在“互联网连接”和“我的菜单”之间切换。
2、调你想指派给【TX\PO\LK】快捷键的菜单。
3、按下【TX\PO\LK】键0.5秒,设置完成。
一般设置发射功率调整按『Mon\F』键、再按『TX PO LK』键。
50MHz / 144 MHz / 430 MHz 时,L1-0.03W、L2-1W、L3-2.5W、屏幕无显示时-5W; (50 MHz\AM时1W;222 MHz\FM时L1-0.03W,L2-0.3W)锁或开键盘长按『TX PO LK』键锁或开键盘。
锁键盘后屏幕有锁的图标主复位操作按住『4』、『BAND』、『V/M』键不放,关机、再开机后再按『Mon\F』键(复位后所有记忆被清除,需要重新设置)隐藏存储频道长按『F』,然后用『DAIL』转到要隐藏的频道上,再按『V/M』执行开启及关闭发射响声短按『TX PO LK』键 LCD显示图标不同,有图标响,无图标不响自动发射黄色『Mon\F』键、『4』键自动搜索黄色『Mon\F』键、『1』键视方式不同而不同,可以是频道搜索或频率搜索频率设定按『V/M』键,(屏幕显示VFO状态),直接输入频率。
Yaesu 8800R 8900R 快速设置频道方法(非标频差设置方法)
Yaesu 8800R 8900R 快速设置频道方法(非标频差设置方法)8800R和8900R都是双显,双守机器。
设置频率最好在主工作机处操作(也就是左边屏幕部分)8800R设置和8900R差不多。
可以参考首先要关闭8800R 8900R的自动中继频差功能。
1.短按主机中间那个没有标注英文的键(其实是SET键),旋转主工作机部分的(DIAL键)选择2号菜单。
按(DIAL键)并旋转选择OFF,长按(DIAL键),进行储存并退出菜单。
一.直通频率的储存方法:1.在频道模式下(指开机后,屏幕上有频道号显示的状态),短按(V/M 键)1次,进入VFO模式(频率模式)。
2.将手咪上的lock键解开,用手咪输入频率,输入频率之后,按(LOW 键)调整合适的功率。
3.长按主机中间那个没有标注英文的键(其实是SET键),屏幕上频道号跳动。
按手咪顶部的(UP)或(DWN键),选择合适的频道号,长按(SET键),进行储存。
4.当屏幕上显示“。
”时,按发射键一次。
5.短按v/m键,退回到频率模式。
完成。
二.中继频率的储存方法(适合标准频差以及非标准频差):1.按上述直通频率的储存方法存入下行频率。
2.在VFO模式下,输入上行频率。
3.长按(SET键),屏幕上频道号闪烁,按手咪顶部的(UP)或(DWN键),选择下行频率储存的频道号,长按发射键,同时长按(SET键),存入上行频率。
4.短按(v/m键)回到频道模式。
(以下操作一定要在频道模式下操纵) 《屏幕上显示下行频率,和-+符号,按手咪后,出现上行频率,松手咪后,返回显示下行频率》5.短按(SET 键)进入机器主菜单。
6.用左边大旋钮(DIAL键)选择40号菜单,短按 (DIAL键)进入40号菜单,用(DIAL键)旋转选择 ENC ,短按(DIAL键),回到主菜单。
7.用(DIAL键)旋钮选择39号菜单,短按(DIAL键)进入39号菜单,用(DIAL键)旋转选择合适的哑音值,长按(DIAL键),储存并退出菜单。
YAESU(八重洲)FT-7800快速设置信道频率方法(非标准频差)
YAESU(八重洲)FT-7800快速设置信道频率方法(非标准频差)
一.直通频率的储存方法:
1.进入VFO模式(频率模式),用手咪输入频率。
2.长按手咪P2键,屏幕上频道号跳动,选择合适的频道号。
3.长按P2键,进行储存。
当屏幕上显示“----”时,按发射键一次。
4.短按V/M键,退回到频率模式。
完成。
二.中继频率的储存方法(适合标准频差以及非标准频差):
1.在VFO模式下,输入上行频率。
2.长按P2键,屏幕上频道号闪烁,选择下行频率储存的频道号,长按发射键,同时长按P2键,存入上行频率。
三、储存哑音及发射功率
1.短按v/m键回到频道模式。
(屏幕上显示下行频率,和-+符号,按手咪后,出现上行频率,松手咪后,返回显示下行频率)
2.长按 BANDSET 键进入机器主菜单。
用大旋钮选择42号菜单,短按 BANDSET键进入42号菜单,用大旋钮选择 ENC ,短按 BANDSET 键,回到主菜单。
选择44号菜单,短按 BANDSET ,用大旋钮选择合适的哑音值,短按 BANDSET 键,回到主菜单。
3.按发射键一次。
按 LOW 选择合适的功率后。
4.长按P2键。
屏幕桑频道号闪烁,选择第2步确定的频道号,长按P2键,屏幕上出现 “------”,按发射键一次。
5.按V/M键,回到频道模式。
完成。
(BG9ACZ整理)。
八重洲7800说明书(YAESU7800manual)
八重洲7800说明书(YAESU 7800 manual)YAESU FT-7800R basic operationsNow YAESU FT-7800R some basic functions, methods of operation announced, convenient for everyone to operate.Set frequency1. set on host(1) turn on the power(2) press the (V/M.MW) key to enter the VFO (frequency) state;(3) the short press (BAND.SET) key sets the frequency bands you will use, such as 144 or 430 or 850 segments;(4) rotate the channel knob to set the frequency you want to use, and press the (MHz.PRI) button to adjust the frequency directly to display the digits before the decimal point.2. set it directly with your hand (MH-48, hand, MIC)(1) turn on the power;(2) press the (V/M.MW) key to enter the VFO (frequency) state;(3) direct the number of frequencies you want to use with the numeric key on your hand.Two. Set sub audioAccording to the 1. key (BAND.SET) for more than a second, enter the menu, with a rotating knob to select the menu itemforty-fourth channel TN FRQ, press (BAND.SET) key to enter this option, you need to use the value selection of sub channel rotary knob, and then press the button (BAND.SET) for more than a second, exit menu.2. click (TONE.HM/RV) button, ENC display, 3 seconds after the automatic return frequency display, the screen will display the ENC small, subsonic.Three. Setting frequency difference1. the elimination of the default sound. According to the sub station (BAND.SET) key for more than a second, enter the menu, with a rotating knob to select channel fourth ARS menu, press (BAND.SET) key to enter this option, by rotating the knob to select the OFF channel, and then press the button (BAND.SET) for more than a second, exit menu.2. set the frequency difference value. According to the (BAND.SET) key for more than a second, enter the menu, with a rotating knob to select channel thirty-ninth SHIFT menu, press (BAND.SET) key to enter this option, you need to select the difference frequency value of the rotary knob channel (BAND.SET), and then press the button for a second or more. Exit menu.3.. According to the activation of difference frequency (BAND.SET) key seconds into the operation menu, by rotating theknob to select the menu item to channel thirty-third RPT.MOD, press (BAND.SET) key to enter the options, select + or - the choice of frequency difference or differential frequency channel with rotary knob, and then press a button (BAND.SET) second, exit menu. The difference frequency setting is complete.Four. Storage frequencyAccording to the above 1. steps you need to choose a good memory frequency, difference frequency value, sub threshold value;2. press the (V/M.MW) key for more than one second, the number in the upper left corner of the screen will bounce, and use the rotating channel knob to select the number of channels you need to store;Choose a good 3. channel digital press (V/M.MW) key, the screen will display a horizontal row of intermittent, the rotary knob to select the channel channel name you need to store, select English letters or numbers, such as the need to store, press PTT button to skip the microphone in hand, frequency storage is completed.Five. Adjust transmit power1. on the host to adjust the short press (LOW.ACC) key, you can choose large, medium, 1, medium, 2, small files output power, 3 seconds later will automatically return the frequency display.2., with the hand adjust the transmission power of short, press the hand on the (P4) key, you can choose big, medium, 1, medium, 2, small.The four gear output power will automatically return to the frequency display after 3 seconds.Six. Use of reverse frequency function.In 1. with the difference frequency, different frequency transceiver relay station, you can use this forwarding function in direct contact with other users without repeater relay station.2. press the (TONE.HM/RV) key for more than one second, the screen will set the transmit / receive frequency inversion, that is, the original transmission frequency, with the original frequency of transmission.Seven use of search function1. set on host(1) turn on the power(2) press the (V/M.MW) key to enter the VFO (frequency) state;(3) the short press (BAND.SET) key sets the frequency bands you will use, such as 144 or 430 or 850 segments;(4) according to the (SCAN.SEL) key for a second or so, thescreen will display the BAND, then press (SCAN.SEL) key, enter the search, it will automatically stop the search to the frequency of the signal, if you do not have other operations, will continue to search after a few seconds, such as the need to stop at this frequency. Stop searching by hand microphone button PTT, such as the need to reverse the counterclockwise rotation of a rotating channel search button.3. search with your hand(1) press the top (DWN) key of the hand microphone for one second and then release to search the current display frequency; press the top (UP) key of the hand microphone for a second and then release it to the current display frequency. The stop mode is the same as the previous oneFront panel control knob and switch1 volume control knob (vol)Turn clockwise to increase the volume.2 the squelch control (SQL)Squelch level settings. The signal or noise exceeds the squelch level, can be received. Turn the knob clockwise to the spot where the noise is just gone (the busy indicator on the screen goes out), which makes the machine most sensitive to weak signals.3 super channel button (1-5)Press and hold any key for 2 seconds, and all data in the current machine will be stored in the specified super channel group.4 [mhz (PRI)] keyIn VFO mode, press this key to tune the machine in 1MHz step frequency.In channel mode, press this button to tune the machine in step 10.Hold this button for 0.5 seconds for dual frequency wait function (dual frequency monitor function).5 [tone (hm/rv)] keyPress this key to change the mute mode between the ENC (CTCSS encoding), the ENC Dec (CTCSS mute) or the DCS (DCS mute).Press and hold this key for 0.5 seconds to change the transmit receive frequency (such as turntable) during differential frequency operation6 [low (ACC)] keyPress this button to select transmit power (low, mid2, mid1, high).Press this button for 0.5 seconds to call the weather forecast channel. You can edit the hold down function for other functions,as in the sections concerned.7 [band (set)] keyIn VFO mode, press this button to change the operating band in the following order:144mhz, 250MHz, 350MHz, 430mhz, 850mhz, 144mhz...In the channel mode, press this button to enter the storage tuning function.Press this button for 0.5 seconds to enter the menu setting.8 [v/m (MW)] keyPress this button,Select frequency control mode between VFO, channels and common channelsHold this key for 0.5 seconds and store the VFO data on the channel.9 [scan (SEL)] keyPress this button to enter the scan.Hold this key for 0.5 seconds, select scan mode.10 [s.sch (Arts)] keyPress this key to enter the smart search.Hold this key for 0.5 seconds and enter arts.11 tuning knob (DIAL)This knob with 20 stalls is the tuning knob of this unit. It is used in most tuning, channel selection, and function settings.12 power switch (PWR)Hold this button for 0.5 seconds, switch the radio station.13 * keyPress this button to access the internet.Press and hold this key for 0.5 seconds to display the entered Internet function number.Advanced functional operationsLocking functionTo avoid misoperation, the ft-7800r has several keyboard locking options:LK key: lock all panel and keypad buttons (not including [ptt] switches)LK dial: the [dial] button on the locking panelLK k+d: lock the [dial] button and button (including the key on the hand microphone)LK PTT: lock the [ptt] switchLK p+k: lock the [ptt] switch and button (including the key on the hand microphone)LK p+d: lock the [ptt] switch and the [dial] buttonLK all: all of the above key lockLK off: unlock functionLocking method:1, hold [band (set)] key 0.5 seconds, enter menu setting2, rotate the [dial] button, select menu number 21 (lock)3 press the [band (set)] key, and then rotate the [dial] button to select in the list of locking methods above4, after the selection, press [band (set)] key to set the machine, and then press [band (set)] key, 0.5 seconds to quit the menu, enter the normal operation5, to cancel the keyboard lock, select LK off in step 3"Keyboard toneKeyboard tone is key to operation.Turn off the keyboard tone:1, hold [band (set) key for 0.5 seconds to enter the menu2, rotate the [dial] button, select menu number 5 (deep)3 press the [band (set)] key, and then rotate the [dial] button to change the setting to off4, press [band (set)] key, set the machine, and then press [band (set)] key, 0.5 seconds Exit menu, enter normal operation.Open the keyboard sound, just select the key or key+sc in the third stepKey: press any key to have keyboard soundKey+sc: press a key to have a keyboard tone, or when the scan stops.Screen brightness adjustmentThe special design of the ft-7800r screen illumination can greatly reduce the influence on the night driving sight of the driver while providing good supervision.The screen brightness is four files, which can be adjusted manually according to the following operation:1, hold [band (set)] key 0.5 seconds into the menu2, rotate the [dial] button, select menu number 11 (dimmer)3 press the [band (set)] key, and then rotate the [dial] button, select the appropriate brightness, set dim1, DIM2, dim3 or dim off (not lighting)4, press [band (set)] key, set the machine, and then press [band (set)] key, 0.5 seconds Exit menu, enter normal operation.RF squelchSpecial RF squelch function can be used to set the squelch level, only when the signal strength of the s table to a specified value to open squelch.According to the operation set RF squelch:1, hold [band (set) key for 0.5 seconds to enter the menu2, rotate the [dial] button, select menu number 32 (rfsql)3, according to [band (set)] button, then turn the [dial] button, select the open squelch signal intensity (off, S-2, S-3, S-4, S-5, S-6, S-7, S-8, S-9 or s-full)4, press [band (set)] key, set the machine, and then press [band (set)] key, 0.5 seconds Exit menu, enter normal operation5, and finally turn the [sql] button clockwiseChannel step selectionFt-7800r frequency synthesizer can provide5/10/12.5/15/20/25/50/100khz and automatic step frequency (auto) at work frequency and so on. Ft-7800r factory sets an automatic step frequency (auto) for each channel, which meets most requirements. However, you can also change the step frequency according to the following steps:1, hold [band (set) key for 0.5 seconds to enter the menu2, rotate the [dial] button, select the RX mod (menu 35)3 press the [band (set)] key, and then rotate the [dial] button to select the desired receive modeAuto: select the default mode of the bandFM: FMAm: am4, press [band (set)] key, set the machine, and then press [band (set)] key, 0.5 seconds Exit menu, enter normal operationATTENTION: unless it's necessary, you'd better choose the default mode, which is convenient and quick. Mode changes and frequency information are stored together with the channel if changes are made to a particular channel or site.Transfer station operationA relay station is usually built on a hill or place high in order to extend the communication distance of a low power handheld or mobile machine. Some of the features of ft-7800r make the turntable easy to operate and interesting.Transit frequency differenceFt-7800r factory, according to the habits of countries, set the frequency difference of each band.The 144mhz segment is 600kHz, and the 70cm segment is 1.6mhz, 7.6mhz, and 5MHz (American version)Depending on the operating band, the transit frequency difference can be lower (-) or upper (+). When the frequency difference function is started, the display is displayed above the screen.Automatic transit frequency difference (ARS)Ft-7800r has a convenient automatic transfer frequency difference function, this function enables the machine to automatically set the transit frequency difference according to the received frequency.If the ARS function does not work, you can turn it off.Open ARS1, hold [band (set) key for 0.5 seconds to enter the menu2, rotate the [dial] button, select menu number 4 (ARS)3 press the [band (set)] key, and then rotate the [dial] button to change the setting to on4, press [band (set)] key storage settings, and then press [band (set)] key, 0.5 seconds Exit menu, enter normal operationWhen the frequency offset is turned on, the transmit receive frequency can be temporarily exchanged by holding the [tone (hm/rv)] key for 0.5 seconds. With this feature, the transmit frequency can be displayed without firing, and the signal intensity at the relay uplink frequency is detected (to determine whether there is a relay station nearby)Manual transfer frequency differenceIf the automatic transfer frequency difference is closed, or a frequency difference is different from the direction of the automatic transfer frequency difference, the direction of the frequency difference can be manually set. Method is as follows:1, hold [band (set) key for 0.5 seconds to enter the menu2, rotate the [dial] button, select the RPT mod (menu 33)3, press the [band (set)] key, and then rotate the [dial] button, in rpt-, rpt+, RPT, off choose between the required frequency difference4, press [band (set)] key storage settings, and then press [band (set)] key, 0.5 seconds Exit menu, enter normal operationChange default frequency offsetIf you travel to another area, you can change the default transit frequency to suit the local conditions. Method is as follows:1, hold [band (set) key for 0.5 seconds to enter the menu 2, rotate the [dial] button, select menu Number 39 (shift)3, press the [band (set)] key, and then rotate the [dial] button, select the new transit frequency difference, the frequency difference must be 50KHz multiples4, press [band (set)] key storage settings, and then press [band (set)] key, 0.5 seconds Exit menu, enter normal operationATTENTION: if you want to set a nonstandard frequency difference, do not use this menu item to change the default transit frequency difference. Transmit and receive frequencies shall be entered separately, as shown in the relevant sections.Dual frequency watchFt-7800r scan function includes dual channel scan function, it makes you in VFO, channel, common channel or weather forecast operation, every other period of time to the specified channel on the watch, if the received signal will open squelch level stays on the specified channel in the specified channel, and according to the 37 menu (scan the original set) decided to continue the operation state of the way.Following is the method of entering dual frequency listening:VFO dual frequency monitoring1, tune out the channel being prepared for listening2, now make ft-7800r work under VFO3, hold the [mhz (PRI) key for 0.5 seconds, into the VFO dual frequency listening mode, at this time, the screen still shows VFO frequency, but every 5 seconds will be monitored channel to listen to4, hold the [mhz (PRI) key for 0.5 seconds and cancel the VFO monitor mode to enter the normal VFO operationChannel dual frequency monitoring1, will be prepared to listen to the frequency of the channel 12, now make ft-7800r work on another channel3, hold the [mhz (PRI) key for 0.5 seconds, into the channel dual frequency listening mode, at this time the screen still shows the frequency of the current channel, but every 5 seconds will be to listen to the channel (channel 1) monitor4, hold [mhz (PRI)] key 1 second, cancel the channel dual frequency monitor mode into normal channel operationATTENTION: when you enter the channel group function, ft-7800r will channel the channel group lower than the current channel as the listening channelCommon channel dual frequency monitoring1, tune out the monitored channel2, now make ft-7800r work on a common channel3, hold [mhz (PRI) key for 0.5 seconds, into the common channel monitor mode, at this time the screen still shows the frequency of the common channel, but every 5 seconds, ft-7800r will be listening to listen to the channel4, hold [mhz (PRI)] key 0.5 seconds, cancel the common channel dual frequency monitor mode into normal common channel operationWx (weather forecast) dual frequency monitoring1, tune out the monitored channel2 hold the [low (ACC) key for 0.5 seconds to make ft-7800r entera Wx channel3, hold the [mhz (PRI) key for 0.5 seconds, into the Wx dual frequency listening mode, at this time the screen still shows the frequency of the Wx channel, but every 5 seconds, ft-7800r will be listening to listen to the channel4, hold the [mhz (PRI) key for 0.5 seconds and cancel the Wx dual frequency listening mode to enter the normal Wx channel operationSwitch to monitor channel modeIn dual frequency listening, a special feature enables you to switch to the monitored channel immediately without waiting for a signal to appear on the listening channel. If this function is enabled and the dual frequency monitoring is in progress, the [ptt] switch will be switched to the monitored channel as soon as the microphone is pressed:1, press [band (set)] key to save settings, hold [mhz (PRI)] key 0.5 seconds, quit normal operation2, to close this function, as long as the third step, select "rvt.off""3, hold [band (set) key for 0.5 seconds to enter the menu4. Turn the [dial] button and select menu number 34 (pri.rvt)5 press the [band (set)] key, and then turn the [dial] button to change the setting to (rvt.on)。
中继设置与频道存储-八重洲YAESUFT-7800
中继设置与频道存储-⼋重洲YAESUFT-7800 YAESUFT-7800简易操作1.按⼿咪P2键键⽴⼀个新的频率。
2.输⼊下⾏频率439.625。
3.长按主机⾯板上的“BANDSET”键进⼊菜单。
4.设置频差⽅向。
旋转旋钮到33项点"BANDSET"键进⼊,旋转旋钮调出下差(减号)。
5.设置频差值。
点“BANDSET”键返回菜单,旋转旋钮找到39项,点“BANDSET”键进⼊,将频差调成5。
6.设置哑⾳模式。
点“BANDSET”键返回菜单,旋转旋钮找到42项,点“BANDSET”键进⼊,旋转旋钮选ENC(打开哑⾳)。
7.设置哑⾳值。
点“BANDSET”键返回菜单,旋转旋钮找到44项,点“BANDSET”键进⼊,将哑⾳调成88.5。
8.保存频道。
点“BANDSET”键返回,长按⼿咪P2键保存频道。
说明书操作——⾃动中继频差(ARS):打开或关闭。
1.按住[BANDSET]键0.5秒进⼊菜单。
2.旋转[DIAL]钮,选择4#菜单(ARS)。
3.按[BANDSET]键,旋转[DIAL]钮,选择⾃动中转频差(ARS)开(ON)或关(OFF)。
4.按[BANDSET]键存储设置,再按[BANDSET]键0.5秒退出菜单进⼊正常操作。
——⼿动设置中转频差的⽅向与频率1.按住[BANDSET]键0.5秒进⼊菜单。
2.旋转[DIAL]调谐旋钮,选择33#菜单(RPTMOD)。
3.按[BANDSET]键,旋转[DIAL]调谐旋钮,在RPT-(下差)、RPT+(上差)、RPTOFF(关闭)之间选择,确定频差⽅向。
4.按[BANDSET]键存储设置,返回菜单界⾯。
5.⽤[DIAL]调谐旋钮,选择39#菜单(SGIFT)。
6.短按[BANDSET]键,进⼊频差(SHIFT)调整,旋转调谐[DIAL]旋钮设置中转频差值。
7.短按[BANDSET]键存储设置,按住[BANDSET]键0.5秒退出菜单模式进⼊正常操作。
YAESU FT-60R简易操作说明Microsoft Word 文档
YAESU FT-60R简易操作说明YAESU FT-60R简易操作说明1.先按〔F/W〕键,然后再按〔0 SET〕键即可选择需设定之功能(共计56项)。
2.转动旋钮调整各项功能数值。
3.再按一下〔F/W〕键,即可进入各项目内修改设定值,转动旋钮后即可修改其内容。
4.按PTT发射键后跳出设定模式,回到正常操作状态。
项目功能说明选择项目备註(原出厂值)01APO 设定自动关机时间。
关/30分鐘-12 小时原设定值為关02AR BEP 选择通讯范围自动侦测功能之警告声响模式。
IN RANGE/ALWAYS/OFF 原设定值為IN RA NGE03AR INT 选择通讯范围自动侦测功能之侦测时间间隔。
15 SEC/25 SEC 原设定值為25 秒04ARS 开啟/关闭收发频率自动差频。
开/关原设定值為开05BCLO 开啟/关闭接收频率禁止发射功能。
开/关原设定值為关06BEEP 开啟/关闭按键”嗶”声。
KEY+SC/KEY/关原设定值為开07BELL 选择CTCSS振铃次数。
关/1/3/5/8/连续原设定值為关08BSY.LED 开啟/关闭静噪开啟时之忙碌指示灯开/关开09CLK..SFT 原厂设定。
开/关原设定值為关,勿变动10CWID 操作ARTS时开啟/关闭CW ID。
开/关原设定值关11CW WRT 设定及啟动CW ID12DC VLT 显示直流供电电压13DCS.COD 设定DCS码104 DCS码原设定值02314DCS.N/R 开啟/关闭转换DCS解码T/RX N,RX R,TX R,T/RX R 原设定值T/RX N15DT DLY 设定DTMF自动拨号延迟时间50MS/100MS/250MS/450MS/750MS/1000MS 原设定值1000MS16DT SPD 设定DTMF自动拨号传送速度50MS/100MS 原设定值50MS17DT WRT 程式化DTMF自动拨号18EAI 开啟/关闭紧急自动ID INT.1M-INT.50M/CON.1M-CON.50M/关原设定值关19EDG.BEP 经由旋钮选择频率时开啟/关闭频带声响关/开原设定值关20EMG S 紧急功能啟动时选择警铃设定EMG.BEP/EMG.LMP/EMG.B+L/EMG.CWT/EMG.C+B/EMG.C+L/EMG.ALL/OFF 原设定值EMG.C+L21I NET 选择网际网路连结模式INT.OFF/INT.COD/INT.MEM 原设定值INT.OFF22INT CD 支援WIRE功能选择DTMF存取码CODE0-CODE9 原设定值CODE023INT MR 支援非WIRE时选择记忆登录DTMF存取码D1-D9 原设定值D124LAMP 选择LED指示灯及按键之照明方式。
八重洲FT7800HQ-编程
差频方向+-
菜单编号:33
差频率
菜单编号:39
发射输出功率
短按LOWACC
亚音频率
菜单编号:44: CT 9:DCS
发射亚音
短按TONE/HM/RV:显示:ENC
信道删除
先进入信道模式:长按VM转动DILA控制旋钮选择要删除的信道:短按SCANSEL键:删除注意:1信道删除不了
信道存储
长按V/M+转动DILA控制旋钮选择所需的信道短VM存入
FT7900R调频使用说明书
频率:TX: V:137—174:U:420—470
工作电压:13.8V;发射电流:13A
*进入菜单
1:长按:BAND/SET(英文按键第四个)进入
2:转动DILA控制旋钮选择所需的菜单编号
3:按BAND/SET进入
4:转动DILA控制旋钮选择
5:按BAND/SET确认
6:长按BAND/SET退出
MHZ/PRI
频率前几位号码输入(英文按键第一个)
TONE/HM/RV
重复打开关闭亚音值(英文按键第二个)
LOWACC
功率选择(英文按键第三个)
BAND/SET
短按:频段切换长按:进入菜单(英文按键第四个)
V/M
短按:频率信道号转换长按:进入存储(英文按键第五个)
频率信道模式转换
短按V/M转换
步进频率
手把手教你深度玩转网件R7800路由器
手把手教你深度玩转网件R7800路由器网件夜鹰X4S AC2600智能WiFi路由器拥有最高160MHz, MU-MIMO和四流技术,以更快的速度同时传送信号到多个设备,以160MHz的带宽传输原画质4K内容视频流,终极WiFi速度高达2.53Gbps,还拥有强劲的1.7GHz双核处理器512M内存以及动态QoS,通过优先程序和设备更流畅地传输视频流和游戏。
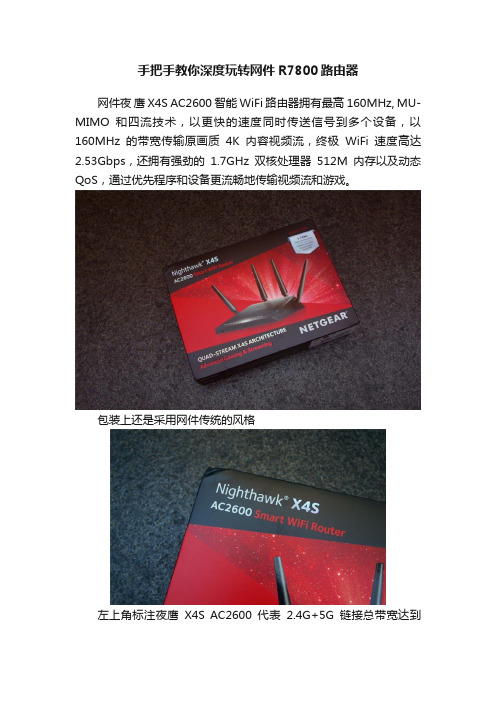
包装上还是采用网件传统的风格左上角标注夜鹰X4S AC2600代表2.4G+5G链接总带宽达到2.6Gbps左下角标注QUAD-STREAM代表支持四流。
右上角的盾牌标识着1.7G,表示5G最高支持1.7Gbps带宽。
背面也是网件传统风格的印刷下方标注支持MU-MIMO一侧是大大的NETGEAR字样一侧是产品型号标注准确的产品型号标注为R7800-100NAS,产地中国产品的左侧面标注着产品的具体参数其中扩展功能为1个ESATA接口和2个USB3.0接口内置环保盒包装路由器主体看起来沿用了R7000的模具,做了小幅改动拿掉路由器主体下面一层是四根天线,一根网线和电源适配器。
全家福第二章、外观R7800的外观如果不是四根天线IPEX接口的存在,你很难和R7000区分开,因为实在太像了。
R7800的指示灯区右侧有一个IPEX天线接口和一个ESATA接口,大面积采用镂空的散热孔设计。
左侧有一个IPEX天线接口和2个USB3.0接口,大面积采用镂空的散热孔设计。
后侧是接口IO区域,从左往右分别是LED开关、RESET、IPEX 天线接口、1WAN5LAN的RJ45网口、IPEX天线接口、电源接口和开关机。
机器的底部是密密麻麻的散热孔设计底部的铭牌处标明了产品型号,接口类型,FCC认证,以及WIFI 的默认登录帐号密码。
四根天线组成4X4 MU-MIMO的天线阵列整体观非常的大气左下右下左上右上电源适配器是19 V, 3.16 A点亮路由器后的指示灯效果。
教你如何进入工程模式调大小I听筒音量
教你如何进入工程模式调大小I听筒音量教你如何进入工程模式调大小I听筒音量!本人用的奥运心机版I458,使用一段时间后发现什么都好,就是听筒的音量太小,在噪杂一点的环境下就听不清楚了琢磨了很久终于找到方法调大听筒音量,发出来给大家分享!待机模式下按键输入:*#0228# 会进入工程模式摁3下返回键,会回到根目录选择8再选择1,出现如下菜单选择第一项HANDSET RX VOL,就能看到这个界面就是我们需要修改的地方,从左至右可以看到0-9 10组数字,对应听筒音量的10个级别,我们只需要修改最大的那组数值即可大家可以看到这个界面上显示的是Handset_Rx vol,Read mode,表示这个是读模式,当你需要修改某项数值时,只需要输入相对应项前的那位数字,这里我们需要修改的是最大那一项,所以我们输入9,这是界面又有变化细心的朋友可以看的出最上面一行变成的Handset_Rx vol,Write mode,对,这时已经变成了写入模式,跟着你只需要输入你想要修改的数值即可建议不要改的太大,600或800都可以,1000的话感觉会有点爆音输入600,然后按OK键,大家可以根据需要自己修改相应的值,经过测试输入值只能是按200的倍数递增或递减才有效果,也就是说只能输入600,800,1000这类值,300、500、700就不行现在可以看到,修改已经成功了,到此已经大功告成,直接摁挂机键退出即可,不需要重启马上就能试出效果,硬格机也不会改变!本人只在I458国行奥运心机上测试过,其他版本没有条件测试,期待大家的测试结果大家要注意的是,工程模式是很危险的,错误的修改会对机器会造成致命的损坏!当然通过正确方法修改,是能够完善很多功能的,希望有高手能发掘出更多的功能!!高速大家输入负数的方法:先输入数字,再摁*字键。
YAESU FTM 10R说明书照译(22-38页)
YAESUFTM10R说明书P221、按住POWER键两秒钟开机。
开机后LCD显示两秒钟电压。
然后显示工作频率。
2、按上侧键,转换工作波段:键:2m业余波段(H-V)->430MHZ业余波段(H-U)->FM广播波段->AM广播波段->WX 波段->音频输入->记忆组(GRP)->2m业余波段(H-V)顺序相反。
P233、旋转DIAL旋钮调谐频率预编程的步骤。
顺时针旋转的转盘旋钮频率增加;逆时针旋转降低频率。
4、按住一个前面板键一秒后(1MHZ数字闪烁)。
然后旋转DIAL旋钮按步进1MHz变化。
此功能能够快速调谐。
5、按键直到拨号盘左侧LED红色,液晶显示屏上显示音量,表盘旋钮是音量旋钮。
6、旋转旋钮调节听筒音量。
顺时针旋转提高音音量。
发送1、按下前面板按键来切换波段操作到144MHz或430MHZ。
2、调整到正确频率,按PTT(PushtoTalk),对着麦克风(前面板的左上角)用正常音量和语速说话。
3、如果离开面壳风超过3英尺远,可能会发送不清晰。
P24前面板键,和键启用以下功能操作:按键激活按键激活扫描。
为了听到所有信道的通话,而采用的一种收建议:当一个以上的功能并没有出现在名单中,这是因为功能没有分配到前面板/键。
请确保菜单“F14功能键模式”设置为“FNC”或“FNC+MSG”。
P25AFDUALFUNCTIONAF的双重功能“AF双守”的功能,可以监控您所需的业余频段同时接收AM,FM广播或音频输入。
你可以通过改变菜单项“F2AFDUAL”选择:AM调幅广播,FM调频广播,CLUB俱乐部通道或外部线路输入,;(出厂默认是AM调幅广播接收)。
1.所需的业余频段的信道选择的ftm-10rVFO或记忆存储。
2、按前面板是键选择“AFDUAL”.3.按键激活AF双守功能。
O首先通过设置所需的VFO或记忆通道步#1以上,然后开始“AFDUAL”功能,无论是业余的信号和调幅广播站都接收到。
阿尔法路由器怎么设置
阿尔法路由器怎么设置篇一:阿尔法路由器设置方法我没用过长城宽带。
看看这个能帮上你吗?接触过宽带路由器的用户,大抵都了解宽带路由器上的端口有WAN口和LAN 口之分。
宽带路由器在工作过程中有这样一个特点:从LAN到WAN方向上的数据流默认不受限制通过路由器,从WAN到LAN方向上默认不能通过。
(注:无线宽带路由器的无线接入部分从属于LAN的范围)也就是说,默认情况从局域网内电脑上发出的数据包进入路由器的LAN口,可以顺利通过路由器从WAN口被发出,但是从WAN这一端主动过来的数据包进入WAN口以后,路由器默认是不让那些数据包通过的。
本文档主要描述当局域网内有多台宽带路由器的时候,能够怎样配置参数来实现我们的目的?第一步:假设您有一条ADSL宽带线,经过TL-R460宽带路由器实现了四台电脑共享上网,网络连接示意如下:宽带线〈—〉ADSL MODEM〈—〉(WAN口)R460(LAN口)〈—〉电脑A第二步:由于某些原因,您购买了TL-WR541G无线宽带路由器,想要网络能够提供无线接入功能,这时候必定是从R460的LAN口引出一根网线连接WR541G,那么应该连接WR541G的WAN口呢?还是连结WR541G的LAN口?网络连接示意有如下两种:R460(LAN口)〈—〉(WAN口)WR541G(无线)〈—〉电脑BR460(LAN口)〈—〉(LAN口)WR541G(无线)〈—〉电脑B上面这两种连结都可以,经过参数配置电脑B都可以最终经过R460上网。
接下来我们就上面两种连结WR541G的方式,配置WR541G和电脑B,最终使电脑B实现无线上网。
这里假设R460的LAN口采用默认的IP地址192.168.1.1 。
1)R460(LAN口)〈—〉(WAN口)WR541G(无线)〈—〉电脑B 这种连接方式下需要给WR541的WAN口配置如下参数就可以了:IP地址192.168.1.X (X取自然数范围2—254)子网掩码255.255.255.0默认网关192.168.1.1为什么是上面这样的参数呢?因为对于WR541G 来说R460的LAN口IP地址就是它的默认网关地址!但是在配置WAN口之前,需要先更改WR541G的LAN口的IP地址,因为WR541G 的LAN口默认IP地址默认也是192.168.1.1 要避免冲突。
如何设置TL-WDR7800映射服务器到外网
如何设置TL-WDR7800映射服务器到外网
你知道如何设置TL-WDR7800映射服务器到外网吗?下面是店铺整理的一些如何设置TL-WDR7800映射服务器到外网的相关资料,供你参考。
如何设置TL-WDR7800映射服务器到外网的解决方法:
使用路由器后,Internet用户无法访问到局域网内的主机,因此不能访问内网搭建的Web、FTP、Mail等服务器。
虚拟服务器功能可以实现将内网的服务器映射到Internet,从而实现服务器对外开放。
本文指导TL-WDR7800的虚拟服务器功能应用和设置方法。
某小型企业需要将网页服务器对外网开放,通过虚拟服务器功能实现该需求。
用户网络参数如下:
服务器类型外部端口内部端口
WEB服务器808080
对外开放端口:Internet用户访问服务器使用的端口。
注意:以上参数仅供本文指导参考,请以实际为准。
登录路由器管理界面,点击应用管理,进入应用中心,如下图:找到虚拟服务器,点击进入,如下:
1、点击添加
点击添加。
2、添加映射参数
输入需要映射的服务器的参数,如下:
外部端口:外部端口为对外开放端口,即Internet访问服务器使用的端口。
添加之后列表如下:
至此,虚拟服务器规则设置完成。
根据以上设置,通过浏览器访问网页服务器,访问形式如下:
注意:具体的访问形式以实际服务器要求为准。
如果您的宽带并非静态IP地址,可以在动态DNS 中申请域名账号并在路由器中登录该账号,登录后使用您的域名和开放的端口号访
问服务器。
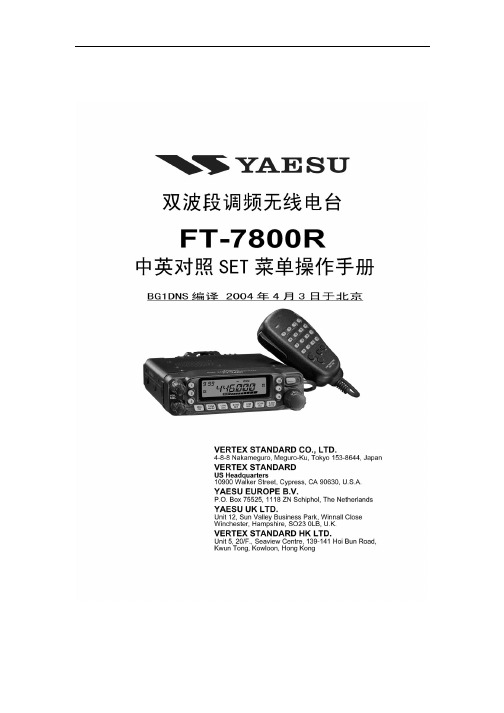
YAESU FT-7800R 中英对照SET菜单操作手册
目 录中英对照SET菜单手册 (2)自动模式下各波段的预设参数 (18)基本操作举例 (19)中英对照SET菜单手册Menu #1 [APO]菜单#1[APO]Function: Selects the Automatic Power Off time (time before power goes off).功能:选择自动关机时间(关机前的延时时间)Available Values: OFF/0.5 H - 12.0 H in 0.5 hour multiples.选项:关闭(不自动关机)/ 0.5小时至12小时以每半小时为步进值Default: OFF (Disables the APO feature)默认值:关闭(自动关机功能无效)Menu #2 [AR BEP]菜单#2[AR BEP]Function: Selects the ARTS beep mode.功能:选择自动可通联提示音模式Available Values: INRANG/ALWAYS/OFF选项:在可通联范围内 / 持续提示 / 关闭Default: INRANG默认值:在可通联范围内INRANG: Activates the ARTS feature; a high tone beep will sound when the transceiver first detects that you are within range, and a low beep will sound when the other station goes out of range.在可通联范围内:自动可通联提示功能被激活;当本机首次进入可通联范围内是以一声高音蜂鸣音提示,当其他电台脱离可通联范围时本机发出一声低音蜂鸣音提示。
ALWAYS: Activates the ARTS feature; a high tone beep will sound every time a polling transmission is received from the other station, and a low beep will sound once when the other station goes out of range.持续提示:自动可通联提示功能被激活;本机每次接收到其他电台的发射信号时发出一声高音蜂鸣音提示,当其他电台脱离可通联范围是本机发出一声低音蜂鸣音提示。
新建 YAESU FT-7800R工程模式调整方法

YAESU FT-7800R工程模式调整方法
来源:本站作者:BH7JEG 时间:2007-07-15 Tag:点击:
一台对讲机功能始终是有限的,很多动手能力强的HAM都想发机器的性能发挥到极至,
FT-7800R你就可以尝试一下。
同时按住 MHz/PRI 键和超级频道5键,然后按开机键,此时屏幕上显示SETRST,且开机声音也不一样.这时放开3个键.
从左往右依次按屏幕下方的功能键: MHz/PRI, TONE/HM/RV, LOW ACC, BAND SET, V/M MW, SCAN SEL, S.SCH ARTS. 不要去理会屏幕上出现的东西 .
发现出来新东西了——REFxxH之类的,这就进入了工程模式啦。
进入方法和8900R差不多,设置过程要一直按着那个原子能按钮(如上图)。
YAESU(八重洲)FT-7800快速设置信道频率方法(非标准频差)
YAESU(八重洲)FT-7800快速设置信道频率方法(非标准频
差)
YAESU(八重洲)FT-7800快速设置信道频率方法(非标准频差)
一.直通频率的储存方法:
1.进入VFO模式(频率模式),用手咪输入频率。
2.长按手咪P2键,屏幕上频道号跳动,选择合适的频道号。
3.长按P2键,进行储存。
当屏幕上显示“----”时,按发射键一次。
4.短按V/M键,退回到频率模式。
完成。
二.中继频率的储存方法(适合标准频差以及非标准频差):
1.在VFO模式下,输入上行频率。
2.长按P2键,屏幕上频道号闪烁,选择下行频率储存的频道号,长按发射键,同时长按P2键,存入上行频率。
三、储存哑音及发射功率
1.短按v/m键回到频道模式。
(屏幕上显示下行频率,和-+符号,按手咪后,出现上行频率,松手咪后,返回显示下行频率)
2.长按 BANDSET 键进入机器主菜单。
用大旋钮选择42号菜单,短按BANDSET键进入42号菜单,用大旋钮选择ENC ,短按BANDSET 键,回到主菜单。
选择44号菜单,短按 BANDSET ,用大旋钮选择合适的哑音值,短按 BANDSET 键,回到主菜单。
3.按发射键一次。
按 LOW 选择合适的功率后。
4.长按P2键。
屏幕桑频道号闪烁,选择第2步确定的频道号,长按P2键,屏幕上出现“------”,按发射键一次。
5.按V/M键,回到频道模式。
完成。
(BG9ACZ整理)。
自己动手维修YAESU 八重洲FT-7800不开机故障

自己动手维修YAESU 八重洲FT-7800不开机故障自从网购回来美国GERCOM 宽频收音机之后,自己的FT-7800开机次数明显减少了,大部分要监听的频率存到了宽频收音机里面,因为它的扫描速度的确是快多了。
FT-7800差不多有1个月没开过机了,今天是正月初五,外面鞭炮轰鸣,估计频率上也应该热闹,顺手接上维修电源,电源设置到13V 5A位置,接上车台打开电源居然屏幕无显示,顺便扫一眼维修电源,坏了,维修电源显示5A 2.5v,凭借多年的维修经验,一定是车台电源部分短路了,赶紧关掉维修电源,冷静回忆一下,最近一段时间的确也没操作这个FT-7800,难道就这么突然坏掉了?赶紧找出维修工具,二话不说拆开了机器,第一次拆7800,很简单,打开上盖仔细观察内部,没有发现短路爆炸的痕迹,但是能明显的问道一股烧焦的糊味。
这下可以明显的断定某个零件“挂了”。
再次仔细观察整个PCB,还是找不到烧坏零件,用万用表测量DC 电源线,发现已经短路了,怪不得维修电源显示5A 2.5V呢,还好我的维修电源可以承受短路电流,否则整个房间要跳闸了!赶紧上网找FT-7800的维修手册,下载一个研究,仔细观察电源部分,用万用表这量量那测测,(此处省略300字)发现有一个二极管有点烧糊的味道,维修手册上是D1033 英文是SURGE ABSORBER英文都还给老师了赶紧请金山词霸出马,翻译过来是叫冲击压力吸收器[过压,电涌]吸收器,避雷器,具体型号是P6KA18,继续百度一下原来这个叫瞬变二极管,估计是是这个烧了,怎么烧的也不知道,难就先拆下来再说吧。
仔细看看PCB上面有21颗螺丝,有点晕太多了,在仔细看看光拆螺丝还不行,还要把天线座焊下来,工程有点大了,灵机一动,一个螺丝也不拆了,直接把那个二极管用尖嘴钳子夹碎得了,正好留下两条腿,可以把新的原件直接焊在上面,多省事啊。
说干就干,拿出我的美国CROSSMAN尖嘴钳,小心翼翼的把这个二极管夹碎,用时3分钟搞定。
YAESUFTM
YAESUFTM友情提示:用過YAESU FTM-350R的HAM,设置YAESU FTM-400DR/DE自不在话下,本文主要针对没有用过前者的HAM,所有图片均来自YAESU官方电子版说明书,...•友情提示:12. 选择菜单【15 BEACON TX】,【AUTO】设置为ON,【INTERVAL】设置信标发射间隔,然后按“DISP/SETUP”保存退出;13. 选择菜单【14 BEACON STATUS TEXT】,设置信标所带文字注释,可以定义5条文字信息,这个功能比较人性,您可以提前定义不同的文字信息,当电台在不同的位置时,选择不同的文本即可。
一定要记着将【SELECT】设置为“ON”,否则不会显示注释信息;14. 我们先选择【TEXT 1】(【TEXT 1 - 5】设置相同),有三个选项可以选择。
【NONE】是纯固定文字信息;【FREQUENCY】是可以在注释上显示您的A-BAND工作频率,类似咱们用office里常说的“宏定义”,在频率的后面也可以加入文字注释;【FREQ & SQL & SHIFT】该选项不只能在注视中显示您的频率,连静噪、差频都可以显示,这个主要是上中继的设置,方便其它HAM可以与你取得联系。
显示效果见下图BH1LYB的台站信息:15. 以上设置全部完成后,通过按“DISP/SETUP”保存退出到频率主界面,屏幕右上方会有“APRS”字样,如果是在室外或者窗户边上,屏幕上会有GPS坐标开启,一但GPS定位,电台就会在B信道按照预先设置的发射规则进行信标的发射(按照时间间隔、按照智能信标)。
16. 可以通过轻按屏幕右侧“F/MW”按钮打开系统菜单,通过菜单项【BEACON】打开和关闭APRS?信标自动发射功能(屏幕上方在时间的左侧有圆点代表功能打开)。
它的旁边【BEACON TX】是APRS?信标手动发射功能,如果点选该功能后,屏幕提示“ERROR,TX ERROR”,说明您的GPS未定位(如果上文第4步,【26 MY POSITION SET】设置的为“MANUAL”,看一下您的【27MY POSITION】选项中的经纬度有没有设置,如果没有设置,也会提示发射错误)。
电台说明书
YAESU FT-60常用使用说明用了60R一个多月时间,好奇心驱使,想研究一下菜单功能,没有中文说明书,只能靠7800R的说明书及上网搜集的资料,整理了一些个人认为常用的功能设置,由于自己是新HAM,玩对讲机才两个多月时间,希望老前辈们不要见笑,也希望给同是使用60R的朋友可以参考。
1、常用频道设置(第36号菜单):每个波段有一个常用频道,通过按一下常用频道快捷调出最喜欢的频率,常用频道的设置方法如下:1)将菜单36设为HOME;2)在频率状态下设置好哑音\频差\功率等;3)按 F/W 键一秒,再按 HM/RV 键。
调出方法为按 HM/RV 键,此时在屏幕上将显示一个 H,在U段的常用频道还可以做为紧急呼叫频率。
2、频道删除:长按F/W键,不要存入,旋到你要删的频道,按HM/RV删除。
3、设置连续发射时间(第51号菜单):1)按F/W再按SET进入设置菜单;2)选择51号菜单(TOT);3)旋转DIAL选择连续发射时间,1-30分钟可选;4)按F/W确认保存。
用耳机的朋友建议设置一下,因为如果插头稍松出一点就会造成机子长发,后果可想而知。
4、更改左侧边中间按键功能(第26号菜单):1)按F/W再按SET进入设置菜单;2)选择26号菜单再F/W;3)旋转DIAL选择:MONI:打开静噪;T-Call:发出一个1750HZ的单音;4)按F/W确认保存;5、自定义按键7(P1)8(P2):出厂时,[7(P1)]和[8(P2)]按键已经指配了缺省值,如果希望指配其它的设置模式选项给其中之一或这两个键,可以自行设置。
重新指配这两个键的设置模式项的方法如下:1)按[F/W]键,然后按[0( )SET]键进入设置模式;2)旋转DIAL旋钮,选择一个你希望指配给该按键的设置模式项;3)按下并保持住[7(P1)]或[8(P2)]一秒钟,将会把你选择的设置模式项指配给[7(P1)]或[8(P2)]键。
下列的设置模式项不能指配给[7(P1)]和[8(P2)]键设置模式项11:CW WRT我自己就将显示电压设置为P2,因为这是经常要查看的。
- 1、下载文档前请自行甄别文档内容的完整性,平台不提供额外的编辑、内容补充、找答案等附加服务。
- 2、"仅部分预览"的文档,不可在线预览部分如存在完整性等问题,可反馈申请退款(可完整预览的文档不适用该条件!)。
- 3、如文档侵犯您的权益,请联系客服反馈,我们会尽快为您处理(人工客服工作时间:9:00-18:30)。
YAESU FT-7800R工程模式调整方法
来源:本站作者:BH7JEG 时间:2007-07-15 Tag:点击:
一台对讲机功能始终是有限的,很多动手能力强的HAM都想发机器的性能发挥到极至,
FT-7800R你就可以尝试一下。
同时按住 MHz/PRI 键和超级频道5键,然后按开机键,此时屏幕上显示SETRST,且开机声音也不一样.这时放开3个键.
从左往右依次按屏幕下方的功能键: MHz/PRI, TONE/HM/RV, LOW ACC, BAND SET, V/M MW, SCAN SEL, S.SCH ARTS. 不要去理会屏幕上出现的东西 .
发现出来新东西了——REFxxH之类的,这就进入了工程模式啦。
进入方法和8900R差不多,设置过程要一直按着那个原子能按钮(如上图)。
