onetouch说明书
Maxtor OneTouch USB 网络硬盘与 Linksys 网络存储链接用户手册说明书
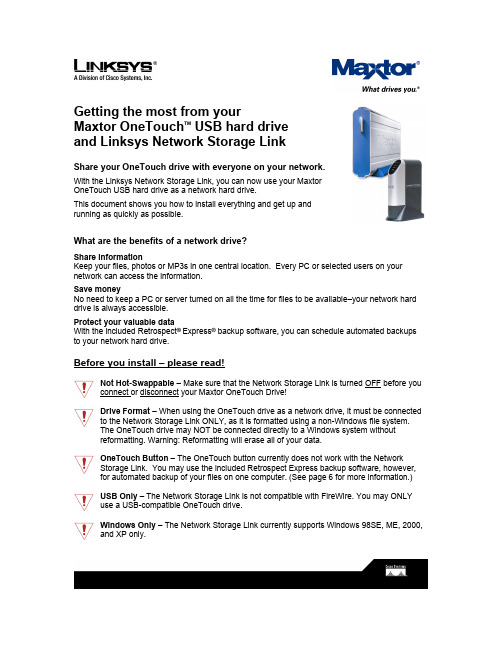
Getting the most from yourMaxtor OneTouch TM USB hard driveand Linksys Network Storage LinkShare your OneTouch drive with everyone on your network.With the Linksys Network Storage Link, you can now use your MaxtorOneTouch USB hard drive as a network hard drive.This document shows you how to install everything and get up andrunning as quickly as possible.What are the benefits of a network drive?Share informationKeep your files, photos or MP3s in one central location. Every PC or selected users on your network can access the information.Save moneyNo need to keep a PC or server turned on all the time for files to be available–your network hard drive is always accessible.Protect your valuable dataWith the included Retrospect®Express® backup software, you can schedule automated backups to your network hard drive.Before you install – please read!Not Hot-Swappable – Make sure that the Network Storage Link is turned OFF before you connect or disconnect your Maxtor OneTouch Drive!Drive Format – When using the OneTouch drive as a network drive, it must be connected to the Network Storage Link ONLY, as it is formatted using a non-Windows file system.The OneTouch drive may NOT be connected directly to a Windows system withoutreformatting. Warning: Reformatting will erase all of your data.OneTouch Button – The OneTouch button currently does not work with the NetworkStorage Link. You may use the included Retrospect Express backup software, however, for automated backup of your files on one computer. (See page 6 for more information.)USB Only – The Network Storage Link is not compatible with FireWire. You may ONLYuse a USB-compatible OneTouch drive.Windows Only – The Network Storage Link currently supports Windows 98SE, ME, 2000, and XP only.Installing the Network Storage Link and OneTouch Drive Connecting the Network Storage Link to Your Network1. Connect one end of an Ethernet cable tothe Ethernet port on the back of theNetwork Storage Link.2. Connect the other end of the Ethernetcable to your router.Figure 1. Connecting the Ethernet cable Connecting the OneTouch Drive to the Network Storage Link Important – Make sure that the Network Storage Link is turned OFF before you connector disconnect your Maxtor OneTouch drive!3. Connect one end of the included USBcable to your OneTouch drive.4. Connect the other end of the USBcable to the Disk 1 port on the NetworkStorage Link.Note: You can only connect up to twoFigure 2. Connecting the USB cable drives. Do NOT connect additional drivesusing a USB hub.Powering Up the OneTouch Drive5. Connect the round female connector fromthe power adaptor to the drive’s powerconnector6. Connect the two-pin female connector onthe power cord to the power adaptor.Figure 3. Connecting the power7. Connect the standard 3-pin electrical plug to an AC power outlet (preferably asurge-protected outlet).8. Turn on the OneTouch drive using the switch on its back panel.Powering Up the Network Storage Link9. Connect one end of the power adaptor to the back of the Network Storage Link.10. Connect the other end of the power adaptor to an AC power outlet (preferably asurge-protected outlet).11. Turn on the Network Storage Link by pressing its front panel button.The Network Storage Link may take up to three minutes to completely power up.During this time, the Ready/Status light will flash. When the Ready/Status light stops flashing and remains solid green, the Network Storage Link is ready for use.Note: For more information about the lights on the Network Storage Link, see Chapter 3:“Connecting the Storage Link,” in the Linksys User Guide.Installing the Linksys Software12. Insert the Setup Wizard CD into your computer.The Linksys Main Menu screen should appear after a few seconds.Note: If the main menu does not appear, see Chapter 4: “Setting Up the Storage Link,” in the Linksys User Guide.13. Click Setup.The Linksys software will search for the Network Storage Link connected to your network.When your Network Storage Link is found, the message: “Network Storage Link(s) Have Been Found!” will appear at the top of the screen and an icon and the name of your Storage Link will appear in the Selection Column.On the right side of the screen, you will see the IP Address of your Network Storage Link.14. Write down this IP Address. You will need it later to use your networked OneTouch drive. Note: If your Network Storage Link is not found, try clicking Search Again. If it is still not found, see Appendix A: “Troubleshooting” in the Linksys User Guide.Once your Storage Link is found, the next step is to format your OneTouch drive.Keep the Linksys setup screen open and proceed to the next section.Formatting the OneTouch Drive15. On the left side of the Linksys setupscreen, double-click the icon for your NetworkStorage Link.Figure 4. Network Storage Link IconA web browser will open and the Home page for your Network Storage Link will appear.Note: If your web browser does not automatically open, follow the steps in Chapter 6:”Configuring the Storage Link,” in the Linksys User Guide.Note: If you receive a “page cannot be displayed” message, you may need to change the IP address (URL) of your Network Storage Link. See Chapter 4: “Setting Up the Storage Link,” in the Linksys User Guide, for information about changing the Network Storage Link’s settings. If you change the IP address of your Network Storage Link, be sure to write down the new number,as you will need it to use your networked OneTouch drive after formatting.16. Click Administration.A window will open, asking you to enter your user name and password.17. Enter admin for both user name and password and click OK.The LAN page will appear.18. Click Advanced.The Groups page will appear.19. Click Disk.The Disk page will appear.20. Click Format Disk 1.Note: If your drive is connected to the Disk 2 port on the Network Storage Link, click Format Disk 2.The formatting process may take 15 to 30 minutes, depending on the size of your OneTouch Drive.Once it is finished, the message: “Formatted” will appear.21. Close your web browser and click No at the bottom of the Linksys Setup Screen. Note: For more information about the Linksys Web Utility, see Chapter 6: “Configuring the Storage Link,” in the Linksys User Guide.Using Your Networked OneTouch DriveTo use your networked OneTouch Drive, follow these steps:1. On the desktop, right-click the icon for yourcomputer and choose Map Network Drive.Figure 5. Mapping a Network DriveThe Map Network Drive windowwill appear.2. In the Folder (or Path) box enter theIP address of your Network StorageLink,followed by Disk 1 using thisformat:\\IP address\Disk 1.For example: \\192.168.1.77\Disk 1Note: Make sure there is a spacebetween “Disk” and “1” in the IP address.Note: If you changed the IP address inFigure 6. Entering IP Address of Network Storage Linkthe “Formatting the OneTouch Drive”section on page 3, be sure to enter thataddress here.Note: Reconnect at logon is automatically selected. This means that every time you logon in the future, you will automatically be connected to your OneTouch drive. You will find it alongside your computer’s main disks (C and D, for example) in the My Computer window.3. Click Finish.Windows will search the available networks for your Network Storage Link and a window will open displaying the contents of the Disk 1 directory on your OneTouch drive.Note: Two directories are automatically created for you on your OneTouch Drive. The Admin 1 directory is set up for only the administrator to use and will require a User ID and Password to be entered by any user accessing it from a computer other than the administrator’s. The Disk 1 directory, however, does not require a User ID or Password. You may create password-protected directories for additional users. See Chapter 6: “Configuring the Storage Link” in the Linksys User Guide for more information.Your OneTouch drive is now ready for use as a networked drive. You may drag and drop files to it, just like a normal hard drive.Network Backup SoftwareYour OneTouch drive includes Retrospect Express backup software, for easy, automated backup of your important files. If you would like to backup files from a computer on your network, follow the steps outlined in the next section.Note: You may only install the Retrospect Express software on one computer. However, you may purchase additional copies of Retrospect by going to: .Retrospect Software Installation:1. Go to Chapter 2: ‘Installing Your Drive’ in the Maxtor OneTouch User’s Guide.2. Find the Installing the Software section for your operating system.Your options are: Windows 2000 and XP or Windows 98SE and ME3. Follow the installation steps, choosing the Full Installation option.Note: When you have completed the software installation, do not proceed to the “Connecting the Drive” or “Setting up the Maxtor OneTouch Feature” sections.For step-by-step directions on how to back up your entire computer system using Retrospect, see the following section.Automated Network Backup Using Retrospect1. Open Retrospect.2. On the left side of the screen, click the + signnext to Automate and then click EasyScript.The EasyScript welcome windowwill appear.3. Click Next.The next window will ask you to choose yourbackup media.4. Select Disks and click Next.Figure 7. EasyScriptThe next window will ask you how many backup sets you want.5. Select I want one Backup Set for everything and click Next.The next window will ask you how often you would like to back up.6. Choose either Once a week or Every weekday and click Next.If you chose Once a week, you will choose the day and the start time.If you chose Every weekday, you will choose only the start time.7. Make your choice(s) and click Next.The Backup Summary window will appear showing the backup options you have chosen. The Start the first backup now checkbox is checked, which means your first backup will start when you click Finish.Note: It is recommended that you start your first backup now, because you will choose the source and destination of your backup, the first time you do it. If you choose not to start your first backup now, you will need to be at your computer for the first scheduled backup to choose the source and destination of your backup.8. Click Finish.If you chose the “Start the first backup now” option, Retrospect will scan your drive and the Backup Set window will appear. You will now choose the disk where your backup files willbe stored.9. Double-click My Network Places.The Adding Network Volume window will appear.10. Click Advanced.A window will open, asking you to enter the UNC path for the volume.11. Enter the IP address of your Network Storage Link,followed by Disk 1 usingthis format:\\IP address\Disk 1. For example: \\192.168.1.77\Disk 1Note: If you changed the IP address in the “Formatting Your Drive” section on page 3, be sure to enter that address here.12. Click OK.Disk 1 will now appear under My Network Places in the Backup Set window.13. Select Disk 1 and click Proceed.The Add New Member window will appear to confirm your backup destination.14. Click OK.The backup will now start.Note: Your entire computer system (including all of its drives) will automatically be backed up. Depending on the size of your system and the speed of your network, this process may take as much as several hours. For example, on a home wireless network of less than 10 megabits per second, a 10 gigabyte backup would take over three hours.If you wish to change the specific items that are backed up or learn how to restore files from a backup, see the Retrospect online help in the Retrospect Express software.When the backup is finished, you will see the message: “Execution completed successfully.”Congratulations. You have completed your first backup. Future backups will take place automatically on the days and times that you selected, as long as the computer, OneTouch drive and Network Storage Link are turned on.。
Maxtor OneTouch 用户手册说明书
EXTERNAL HARD DRIVE Maxtor OneTouchUser’s GuideP/N: 20246100WarrantyMaxtor’s warranty obligations are limited to the terms set forth: Maxtor warrants only to the original consumer purchaser that new Maxtor products will be free from defects in material and workmanship for 1 year from the date of original purchase.For a replacement product, the warranty on the replacement device is the remainder of the warranty on the original device or 90 days, whichever is longer. If you discover a defect, Maxtor will, at its option, repair or replace the product at no charge to you, provided you return it during the warranty period, with transportation charges prepaid, to Maxtor in Ireland, Singapore or the USA. Products must be properly packaged in Maxtor packaging or Maxtor approved packaging to obtain warranty service. Before returning a Maxtor product, please contact Maxtor at: +353 1 204 1111 (in Europe) or 1-800-2MAXTOR (in U.S.) to obtain a Return Material Authorization (RMA) number. A copy of the receipt or a bill of sale bearing the appropriate Maxtor serial number and model number may be required for warranty service. The warranty applies only to the Maxtor products that can be identified by the Maxtor trademark, trade name, serial number or logo affixed to them. Maxtor does not warrant any product that is not manufactured by, for or with permission from Maxtor.This warranty is not applicable to: Abnormal wear and tear; Abuse, unreasonable use, mistreatment, or neglect; Damage caused during installation of the Product; Damage caused by the equipment or system with which the product is used; Damage caused by modification or repair not made or authorized by Maxtor; Product whose Maxtor Serial Number has been removed or defaced; Damage caused by liquids in the product case; Damage to the products’ interface or power connectors; Damage caused by use of non-Maxtor packaging; Damage caused by improper or improperly used packaging; Products that are determined to be stolen. THIS WARRANTY AND REMEDIES SET FORTH ABOVE ARE EXCLUSIVE AND IN LIEU OF ALL OTHERS, WHETHER ORAL OR WRITTEN, EXPRESSED OR IMPLIED. MAXTOR SPECIFICALLY DISCLAIMS ANY AND ALL IMPLIED WARRANTIES, INCLUDING, WITHOUT LIMITATION, WARRANTIES OF MERCHANTABILITY AND FITNESS FOR A PARTICULAR PURPOSE AND AGAINST INFRINGEMENT.Additionally, Maxtor does not warrant that the installation software for Macintosh OS and Windows OS will meet your requirements nor the performance or results that the operation of the program will be uninterrupted or error free. No Maxtor dealer, agent or employee is authorized to make any modification, extension or addition to this warranty.MAXTOR IS NOT RESPONSIBLE FOR SPECIAL, INCIDENTAL, INDIRECT OR CONSEQUENTIAL DAMAGES RESULTING FROM ANY BREACH OF WARRANTY, OR UNDER ANY OTHER LEGAL THEORY, INCLUDING BUT NOT LIMITED TO LOSS OF DATA, LOSS OF PROFITS, DOWNTIME, GOODWILL, DAMAGE OR REPLACEMENT OF EQUIPMENT AND PROPERTY, AND ANY COSTS OF RECOVERING, PROGRAMMING OR REPRODUCING ANY PROGRAM OR DATA STORED IN OR USED WITH MAXTOR DISK DRIVES OR MAXTOR PRODUCTS CONTAINING MAXTOR DISK DRIVES or any software product distributed therewith.Some states/jurisdictions do not allow the exclusion or limitation of incidental or consequential damages or exclusions of implied warranties, so the above limitations or exclusions may not apply to you. This warranty gives youspecific legal rights, and you may also have other rights that vary from jurisdiction to jurisdiction.Changes are periodically made to the information herein – which will be incorporated in revised editions of the publication. Maxtor may make changes or improvements in the product(s) described in this publication at any time and without notice. This product tested to comply with FCC standards for home or office use.Contents1 Introduction . . . . . . . . . . . . . . . . . . . . . . . . . . . . . . . . . . . . . . . . . . . . . . . . . 1Maxtor OneTouch™ Drive Components. . . . . . . . . . . . . . . . . . . . . . . . . . . . . 2 System Requirements . . . . . . . . . . . . . . . . . . . . . . . . . . . . . . . . . . . . . . . 3 Handling Precautions. . . . . . . . . . . . . . . . . . . . . . . . . . . . . . . . . . . . . . . . 4 About this Guide. . . . . . . . . . . . . . . . . . . . . . . . . . . . . . . . . . . . . . . . . . . 4 Where to Go for Help. . . . . . . . . . . . . . . . . . . . . . . . . . . . . . . . . . . . . . . . 4 2 Installing Your Drive. . . . . . . . . . . . . . . . . . . . . . . . . . . . . . . . . . . . . 6Select Your Operating System. . . . . . . . . . . . . . . . . . . . . . . . . . . . . . . . . . . . . . . . . . . . . 6 Formatting Your Drive for Windows. . . . . . . . . . . . . . . . . . . . . . . . . . . . . . 34 Installing Drivers Only . . . . . . . . . . . . . . . . . . . . . . . . . . . . . . . . . . . . . . 35 3 Using Your Drive . . . . . . . . . . . . . . . . . . . . . . . . . . . . . . . . . . . . . . . . . . . . . . . . . . . 37Connecting and Disconnecting the Drive. . . . . . . . . . . . . . . . . . . . . . . . . . . . . . . . . . . . 37 What is Maxtor OneTouch? . . . . . . . . . . . . . . . . . . . . . . . . . . . . . . . . . . . . . . . . . . . . . . 39 Using Retrospect® . . . . . . . . . . . . . . . . . . . . . . . . . . . . . . . . . . . . . . . . 40 Changing your Maxtor OneTouch script. . . . . . . . . . . . . . . . . . . . . . . . . . . . . . . . . . . . . 41 Using the Maxtor OneTouch Utility . . . . . . . . . . . . . . . . . . . . . . . . . . . . . . . . . . . . . . . . 42 Installing Applications on your Drive. . . . . . . . . . . . . . . . . . . . . . . . . . . . . . . . . . . . . . . . 46 Editing Video. . . . . . . . . . . . . . . . . . . . . . . . . . . . . . . . . . . . . . . . . . . . . . . . . . . . . . . . . . 47 Moving Data Between Two Systems. . . . . . . . . . . . . . . . . . . . . . . . . . . . . . . . . . . . . . . 47 Playing Games . . . . . . . . . . . . . . . . . . . . . . . . . . . . . . . . . . . . . . . . . . . . . . . . . . . . . . . . 47 Storing Audio . . . . . . . . . . . . . . . . . . . . . . . . . . . . . . . . . . . . . . . . . . . . . . . . . . . . . . . . . 48 Adding Rubber Feet to Your OneTouch Drive . . . . . . . . . . . . . . . . . . . . . . . . . . . . . . . . 48 Using Large Capacity Drives with Windows. . . . . . . . . . . . . . . . . . . . . . . . . . . . . . . . . . 49 Using Security Lock . . . . . . . . . . . . . . . . . . . . . . . . . . . . . . . . . . . . . . . . . . . . . . . . . . . . 504 Backing Up Your System . . . . . . . . . . . . . . . . . . . . . . . . . . . . . . . . . . . . . . . . . . 515 Disaster Recovery . . . . . . . . . . . . . . . . . . . . . . . . . . . . . . . . . . . . . . . . . . . . . . . . . . 596 Troubleshooting and FAQs . . . . . . . . . . . . . . . . . . . . . . . . . . . . . . 657 Glossary . . . . . . . . . . . . . . . . . . . . . . . . . . . . . . . . . . . . . . . . . . . . . . . . . . . . . . . . . . . . 72 Index. . . . . . . . . . . . . . . . . . . . . . . . . . . . . . . . . . . . . . . . . . . . . . . . . . . . . . . . . . . . . . . . 74 Maxtor Product Warranty. . . . . . . . . . . . . . . . . . . . . . . . . . . . . . inside front coverUser’s Guide Vertical StandIf the icon is not displayed, you need to install the 1394 Storage While connected to the internet, go to the MicrosoftSupport web site at .Select the drive to copy your files from and click Next.The Step 2 screen will appear.Choose the type of files to copy:Just Documents copies only documents you have created, including your favorite files, bookmarks, and cookies. This selection is ideal for most users.Applications and Documents copies application files inThe actual information in this window will vary depending on the model and capacity of your drive.6.Select the Erase tab at the top of the window.Select Mac OS Extended from the Volume Formatdrop-down list.Enter a name for your drive in the Name field.Select the check box next to Install Mac OS 9 DriversThis will allow your disk to be recognized if you start your system in Mac OS 9. (If you will never use this drive with OS 9, you can leave this unchecked).Click Erase to continue.The Erase Disk window appears to confirm the Erase process. Click Erase to start the formatting process.Select the drive to copy your files from and click Next.The Step 2 screen will appear.Choose the type of files to copy:Just Documents copies only documents you have created, including your favorite files, bookmarks, and cookies. This selection is ideal for most users.Applications and Documents copies application files in addition to documents. This selection allows you to restore an‘This disk is unreadable by this Computer.’Enter a Name for your drive and select Mac OS Extended from the Format drop-down menu.Click Initialize.Enter a Name for your drive and select from the Format drop-down menu. Click Initialize.1.Your registration information is collected and maintained accordingto the Dantz and Maxtor privacy policies located on their respective web sites.If you choose to E-mail the information, make sure you areconnected to the Internet.If you choose to print the information, you can fax the form to Dantz Corporation at +1 925 253 9099.Using Your Drive。
Maxtor OneTouch USB驱动程序手动安装说明说明书
Subject: OneTouch_USB.EXE – Manual Installation of Maxtor OneTouch, USB Drivers for Windows 98SE. Summary: Graphical Procedure for manually installing Maxtor OneTouch USB Drivers for use with Microsoft Windows 98SE (Second Edition).1. Download OneTouch_usb.exe from this web site.2. Extract OneTouch_usb.exe to the computer that the Maxtor OneTouch drive is connected to. Upon extraction, theOneTouch_USB directory will be created on your system.Suggestion: Extract the OneTouch_usb.exe to the Desktop of the computer that you will connect the Maxtor OneTouch drive to.3. Shut down your computer and connect the Maxtor OneTouch drive to an available USB interface on your computer.Once connected, apply power to the system.4. After Windows 98SE starts, the Add New Hardware Wizard box will appear.Click the Next > button to continue.5. On the next page, select "Search for the best driver for your device..." and click the Next > button to continue.6. On the next page, check the "Specify a location:" checkbox and click on the Browse... button.7. In the Browse for Folder Window, locate the OneTouch_USB directory and click the OK button.8. Click on the Next > button to accept the selection of the driver.NOTE: The path identified in the image will vary depending on the location of the file. At this point the Maxtor OneTouch software driver will load on your Windows 98SE computer.9. Click Next > again…10. To complete the installation, click on the Finish button and restart your Windows 98SE computer.11. At this point the Safely Remove Devices Icon will appear in the TaskBar.12. When finished, the Add New Hardware Wizard will appear for a second time. Repeat Steps 1-9 to install theStorage Adapter Bridge Module.。
OneTouch AT 10G网络助手用户手册说明书
软件版本v6.5.1发布于01/2018©2018 NETSCOUT SYSTEMS, Inc. 保留所有权利。
所有产品名称都是其各自公司的商标。
OneTouch ™ AT 10G 网络助手用户手册法律声明本产品必须按照《最终用户许可协议》使用,该协议通过以下网址http:///legal/terms-and-conditions/ 提供,或在发货时随产品一同提供。
在适用情况下,使用本产品时还必须遵守 NETSCOUT SYSTEMS, INC. 与产品购买方签订并执行的合法协议(统称为“协议”)。
政府使用和权利限制说明:适用于美国地区政府(以下称“政府”)合同或政府转包合同,客户将提供按照本协议售出或交付的产品和文件,包括任何技术资料(统称为“资料”)以供政府使用。
根据《联邦采购条例》(“FAR”)2.101 及其附录或其他文件的定义,这些资料为商业资料,均适用“权利限制”条款。
所有资料完全为自费编制。
资料的使用、复制、发布、修改、转让或披露(统称为“使用”)均受本协议条款约束;如果提供给政府民事机构使用,还受 FAR 52.227-14 规定的约束;如果提供给政府军事机构使用,还受《国防联邦采购条例附录》(“DFARS”)252.227-7015 规定的约束;或在适用情况下,资料的使用还受其他相关政府组织的类似采购条例及修订版本的约束。
资料的使用受本协议条款的约束,而且根据 DFARS 第 227.7202 部分和 FAR 第 12.212 部分规定,资料的使用还受NETSCOUT 商业性质的《最终用户许可协议》规定约束。
除本文件中规定的情况外,禁止将资料用于其他用途。
本产品可能包含第三方技术。
NETSCOUT 可能仅许可将这类第三方技术和文件(以下称“第三方资料”)用于本产品。
如果本产品包含第三方资料,或者如果您有机会将本产品与第三方资料(NETSCOUT 在相关文件中所指明的资料)结合使用,那么 NETSCOUT 将根据本产品应用程序光盘中“Read Me(自述)”或“About(关于)”文件内所包含的第三方适用条款和条件提供或允许使用此类第三方资料。
MAXTOR ONETOUCH TM III MINI EDITION 可攜式儲存解決方案说明书
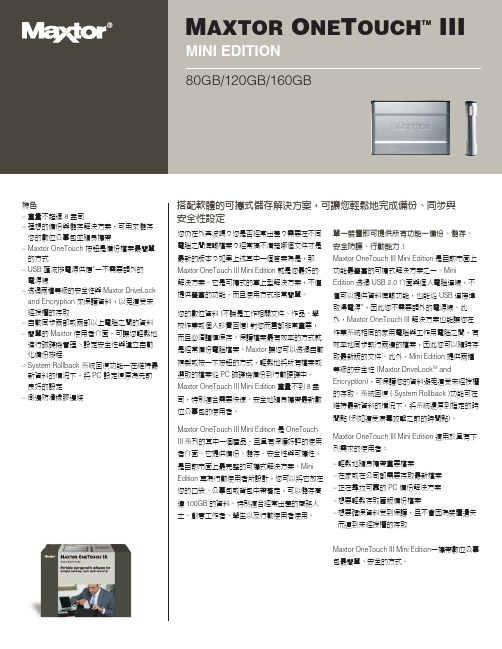
sional 或 XP Home Edition – 128MB (建議使用 256MB) RAM 或更多
(視作業系統需求而定) – 網際網路連線 (用於系統更新)
包含 – 外接式硬碟機 – USB Y 型連接線 – 快速入門指南 – 已預先載入的軟體與使用手冊 – Maxtor 1 年有限保固
如有支援問題或想要取得其他資訊, 請撥打 1-800-2MAXTOR 或造訪 我們的服務與支援部門會為您提供所有 Maxtor 產品的支 援。
磁碟機儲存容量計算方式:1 GB 表示 1,000,000,000 個位元組。視作業環境而定,可存取空間可能會有差異。搜尋時間僅為特定情況下測得的結果,在不同的系統設 定中可能會有差異。以上規格若有變更,恕不另行通知。檔案容量圖是由 Jon Peddie Research 提供。如需詳細資訊,請造訪 /capacity.html。
搭配軟體的可攜式儲存解決方案,可讓您輕鬆地完成備份、同步與 安全性設定
?經常搞不清楚哪個文件才是 最新的版本?如果上述其中一個答案為是,那 Maxtor OneTouch III Mini Edition 就是您最好的 解決方案。它是可攜式的掌上型解決方案,不僅 提供豐富的功能,而且使用方式非常簡單。
規格 容量 (料號 ) ྼყආ˸̨ᝄબᛆ˾理ਠ˴މ 80 GB (HDMAR33E080) 120 GB (HDMAR33E120) 160 GB (HDMAR33E160) 硬碟機: 2.5 英吋 ATA
轉速 5400 RPM
整合介面 USB 2.0 (向下相容 USB 1.1)
快取緩衝區 8MB
服務項目包括: – 24 小時的線上疑難排解工具與電子郵件回覆 – Maxtor 對客戶整體滿意度的承諾 – 產品支援代表服務時間
One Touch SSD 快速移动硬盘参数及说明书
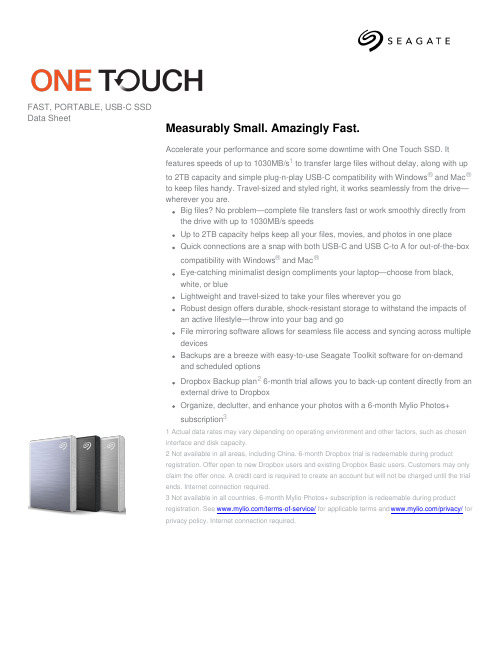
FAST, PORTABLE, USB-C SSDData SheetMeasurably Small. Amazingly Fast.Accelerate your performance and score some downtime with One Touch SSD. Itfeatures speeds of up to 1030MB/s1 to transfer large files without delay, along with upto 2TB capacity and simple plug-n-play USB-C compatibility with Windows® and Mac®to keep files handy. Travel-sized and styled right, it works seamlessly from the drive—wherever you are.Big files? No problem—complete file transfers fast or work smoothly directly fromthe drive with up to 1030MB/s speedsUp to 2TB capacity helps keep all your files, movies, and photos in one placeQuick connections are a snap with both USB-C and USB C-to A for out-of-the-boxcompatibility with Windows® and Mac®Eye-catching minimalist design compliments your laptop—choose from black,white, or blueLightweight and travel-sized to take your files wherever you goRobust design offers durable, shock-resistant storage to withstand the impacts ofan active lifestyle—throw into your bag and goFile mirroring software allows for seamless file access and syncing across multipledevicesBackups are a breeze with easy-to-use Seagate Toolkit software for on-demandand scheduled optionsDropbox Backup plan2 6-month trial allows you to back-up content directly from anexternal drive to DropboxOrganize, declutter, and enhance your photos with a 6-month Mylio Photos+subscription31 Actual data rates may vary depending on operating environment and other factors, such as choseninterface and disk capacity.2 Not available in all areas, including China. 6-month Dropbox trial is redeemable during productregistration. Offer open to new Dropbox users and existing Dropbox Basic users. Customers may onlyclaim the offer once. A credit card is required to create an account but will not be charged until the trialends. Internet connection required.3 Not available in all countries. 6-month Mylio Photos+ subscription is redeemable during productregistration. See /terms-of-service/ for applicable terms and /privacy/ forprivacy policy. Internet connection required.FAST, PORTABLE, USB-C SSDSpecificationsRetail Packaging Product Dimensions Box Dimensions Master Carton Dimensions Pallet Dimensions Length (in/mm)0.417in/10.6mm 1.28in/32.5mm 5.591in/142mm47.992in/1219mm Width (in/mm) 1.969in/50mm 4.114in/104.5mm 4.528in/115mm40in/1016mm Depth (in/mm) 2.756in/70mm 5.787in/147mm 6.614in/168mm44.921in/1141mm Weight (lb/kg)0.099lb/0.045kg0.317lb/0.144kg 1.473lb/0.668kg658.212lb/298.56kg QuantitiesBoxes per Master Carton4Master Cartons per Pallet420Pallet Layers6System RequirementsCompatible with most Windows and macOS systems. Visit /os for details1,2What's IncludedSeagate® One Touch SSDUSB-C cableUSB C-to-A cableQuick start guideDownlodable Toolkit Software with Sync Plus 6-Month Mylio Photos+ subscription36-Month Dropbox Backup Plan4Region Model Number Capacity Color Limited Warranty(years)UPC Code EAN Code Multi-Pack UPC WW STKG500400500GB Black3763649160831366061904060510763649160838 WW STKG500401500GB Silver3763649160848366061904061210763649160845 WW STKG500402500GB Blue3763649160855366061904062910763649160852 WW STKG10004001TB Black3763649160862366061904063610763649160869 WW STKG10004011TB Silver3763649160879366061904064310763649160876 WW STKG10004021TB Blue3763649160886366061904065010763649160883 WW STKG20004002TB Black3763649160893366061904066710763649160890 WW STKG20004012TB Silver3763649160909366061904067410763649160906 WW STKG20004022TB Blue37636491609163660619040681107636491609131 Reformatting for use with Time Machine® may be required.2 Compatibility may vary depending on user’s hardware configuration and operating system.3 Not available in all countries. 6-month Mylio Photos+ subscription is redeemable during product registration. See /terms-of-service/ for applicable terms and/privacy/ for privacy policy. Internet connection required.4 Not available in all areas, including China. 6-month Dropbox trial is redeemable during product registration. Offer open to new Dropbox users and existing Dropbox Basic users. Customers may only claim the offer once. A credit card is required to create an account but will not be charged until the trial ends. Internet connection required. © 2023 Seagate Technology LLC. All rights reserved. Seagate, Seagate Technology, and the Spiral logo are registered trademarks of Seagate Technology LLC in the United States and/or other countries. The backup arrow design is either a trademark or registered trademark of Seagate Technology LLC or one of its affiliated companies in the United States and/or other countries. Adobe and Creative Cloud are either registered trademarks or trademarks of Adobe Systems Incorporated in the United States and/or other countries. All other trademarks or registered trademarks are the property of their respective owners. When referring to drive capacity, one gigabyte, or GB, equals one billion bytes and one terabyte, or TB, equals one trillion bytes. Your computer’s operating system may use a different standard of measurement and report a lower capacity. In addition, some of the listed capacity is used for formatting and other functions, and thus will not be available for data storage. Actual data rates may vary depending on operating environment and other factors, such as chosen interface and drive capacity. Complying with all applicable copyright laws is the responsibility of the user. Seagate reserves the right to change, without notice, product offerings or specifications. DS2020.5-2308WW。
一触即发W800快捷指南说明书
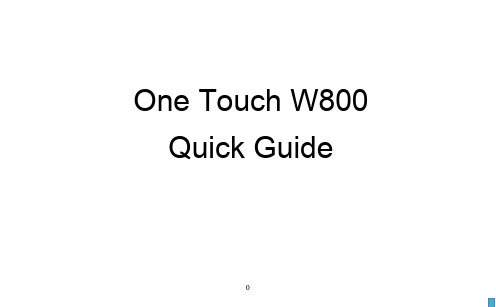
One Touch W800 Quick GuideContentsSafety and use (2)1. Overview (4)1.1Contents inside this package (4)1.2Getting to Know Your Modem (4)1.3How to start your modem (5)1.4LED Indicates (5)1.5Connect in WiFi mode (6)2. Quick Setup (7)3. Certification (7)Safety and useWe recommend that you read this chapter carefully before using this device. TCT Mobile disclaims any liability for damage, which may result as a consequence of improper use of this device or of use contrary to the instructions contained herein.Do not switch on your device when the device is prohibited or when the device use may cause interferenceor danger.Follow the rules or regulations in hospitals and health care facilities. Switch off your device near medicalapparatus.Switch off your device in an aircraft. The device may cause interference to control signals of the aircraft.Switch off your device near high-precision electronic devices. The device may affect the performance ofthese devices.Do not attempt to disassemble your device or its accessories. Only qualified personnel are allowed to serviceor repair the device.Do not place your device or its accessories in containers with strong electromagnetic field.Do not place magnetic storage media near your device. Radiation from the device may erase the informationstored on them.Do not put your device in a high-temperature place or use it in a place with flammable gas such as a gasstation.Keep your device and its accessories away from children. Do not allow children to use your device withoutguidance.Use approved chargers onlyObserve the laws or regulations on device use. Respect others’ privacy and legal rights when using yourdevice.Do not allow the modem to be exposed to adverse weather or environmental conditions (moisture, humidity, rain, infiltration of liquids, dust, sea air, etc). The manufacturer’s recommended operating temperature range is -10°C to +50°C.This product meets applicable national SAR limits of 2.0W/kg. The specific maximum SAR values can be found in the Certification section of this user guide1. OverviewOne touch W800 is a portable wireless WiFi dongle, can provide a simple way to share 4G with any WiFi embedded device or PC.1.1 Contents inside this package●One touch W800● USB cable● Quick start guide● USB charger (Optional)● Power bank and Micro USB cable (Optional)1.2Getting to Know Your ModemNumber Description1 USB interface2 WiFi LED3 Network LED4 SIM/USIM Card Slot5 Micro-SD Card Slot1.3 How to start your modemNote: you can get detail using guide information in User Manual. Recommend to use the USB Y cable to ensure the power supply1.4 LED IndicatesThe description for the LED as bellow:LED TYPE LED Indicator Description (state)Network LED Lilac Light constant for seconds Power supply finished Orange Light Fast Flashing(5Hz) Network Searching Constant Orange Light Out of orderRed Light Slow Flashing (1Hz) Registering into LTE Network Constant Red Light Registered to LTE Network Green Light Slow Flashing (1Hz) Registering into 3G networkInsert SIM card and micro SD Card Into device Plug into Computer orCharger/ or Power BankAuto installation, Ready!Let’s GOConstant Green Light Registered to 3G network Blue Light Slow Flashing (1Hz) Registering into 2G network Constant Blue Light Registered to 2G networkWIFI LED Constant Blue light WiFi open Blue Light close WiFi close Blue Light Slow Flashing (Continuation5 s)Receive SMS1.5 Connect in WiFi modeSSID:locate the SSID information on the sticker on the SIM card cover.WiFi key: last eight digits of IMEI(if have default key).Step 1: Use the WiFi manager on the WiFi embedded device to select network name (SSID).◆From a Windows PC: Right-click Wireless network connection on the task bar, and select View Available Networks. ChooseSSID from the list of available networks.◆From a Mac computer: Select System Preferences -> Network->Airport. Click “Advanced” to choose SSID from the list of available networks.◆From an iOS device: Settings->WiFi. Choose SSID from the available Networks.◆From an Android device: Settings->Wireless controls->WiFi settings. Choose SSID from the available Networks.Step 2: Enter the WiFi key when prompted for a security key.2. Quick SetupOpen the browser, and input the address http://192.168.1.1 to access the login page.The main screen will displayDefault Login password: adminLogin and Click "Quick Setup" to configure the basic settings, include Admin password, WiFi Setting●Admin password: Set the password for login●WiFi settings: set the SSID and WiFi key.SSID: the network name of this device.WiFi key: password for WiFi connection.3. CertificationWEEE ApprovalThe USB-Modem is in compliance with the essential requirements and other relevant provisions of the Waste Electrical and Electronic Equipment Directive 2002/96/EC (WEEE Directive).RoHs ApprovalThe USB-Modem is in compliance with the restriction of the use of certain hazardous substances in electrical and electronic equipment Directive 2002/95/EC (RoHs Directive).Radio WavesProof of compliance with international standards (ICNIRP) or with European Directive 1999/5/EC (R&TTE) is required of all modem models before they can be put on the market. The protection of the health and safety for the user and any other person is an essential requirement of these standards or this directive.THIS DEVICE MEETS INTERNATIONAL GUIDELINES FOR EXPOSURE TO RADIO WAVES.This device is a radio transmitter and receiver. It is designed not to exceed the limits for exposure to radio waves (radio frequency electromagnetic fields) recommended by international guidelines. The guidelines were developed by an independent scientific organization (ICNIRP) and include a substantial safety margin designed to assure the safety of all persons, regardless of age and health.The radio wave exposure guidelines use a unit of measurement known as the Specific Absorption Rate, or SAR. The SAR limit for mobile devices is 2 W/kg.Tests for SAR are conducted using standard operating positions with the device transmitting at its highest certified power level in all tested frequency bands. The highest SAR values under the ICNIRP guidelines for this device model are:Maximum SAR for this model and conditions under which it wasrecorded.Body-worn SAR GSM1800 1.076During use, the actual SAR values for this device are usually well below the values stated above. This is because, for purposes of system efficiency and to minimize interference on the network, the operating power of your mobile device is automatically decreased when full power is not needed for the call. The lower the power output of the device, the lower its SAR value.Body-worn SAR testing has been carried out at a separation distance of 5mm. To meet RF exposure guidelines during body-worn operation, the device should be positioned at least this distance away from the body. If you are not using an approved accessory ensure that whatever product is used is free of any metal and that it positions the phone the indicated distance away from the body.The World Health Organization has stated that present scientific information does not indicate the need for any special precautions for the use of mobile devices. They recommend that if you are interested in further reducing your exposure then you can easily do so by limiting your usage or keep the device away from the head and body.Additional information about electromagnetic fields and public health are available on the following site: http://www.who.int/peh-emfThis device is equipped with a built-in antenna. For optimal operation, you should avoid touching it or degrading it.For more information you can go to This equipment is in compliance with the essential requirements and other relevant provisions of Directive 1999/5/EC. The entire copy of the Declaration of Conformity for your telephone can be obtained through our Website: Address: Room 1910-12A, Tower 3, China HK City, 33 Canton Road, Tsimshatsui, Kowloon, Hong KongAlcatel is a trademark of Alcatel-Lucent used under license by TCT Mobile Limited.All rights reserved © 2013-2014 TCT Mobile Limited.10。
Maxtor OneTouch III USB 2.0 快速使用指南说明书
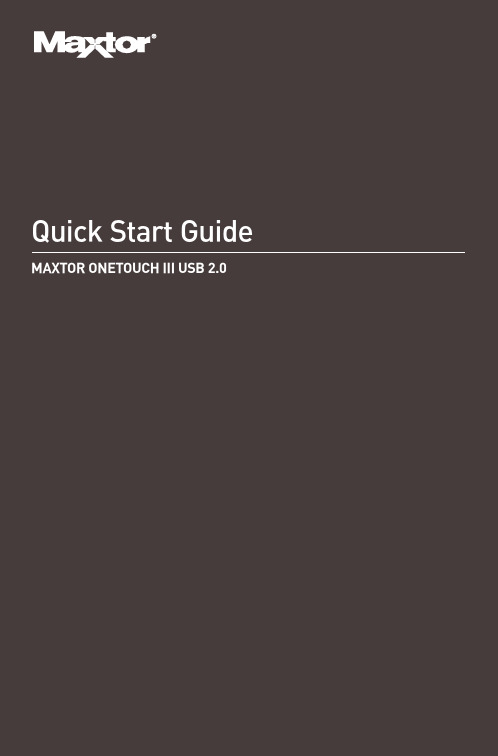
Windows 2000 and Windows XP InstallationStep 1. Install the OneTouch SoftwareYou must have Administrative Privileges.Refer to chapter 3 of the User’s Guide formore information.1.Insert the Install CD.2.Wait for the Maxtor screen to appear.3.Follow the on-screen instructions to installthe software. Refer to chapter 2 of theUser’s Guide for more information.4.After completing installation, eject the CD.Do not remove the CD until all steps of theinstallation are complete.Step 2. Connect the OneTouch III1.Plug in the power adapter.2.Turn the power switch on.3.Connect a USB 2.0 cable from the OneTouch IIIto the corresponding port on your computer.Refer to chapter 2 of the User’s Guide formore information.Allow up to 2 minutes for your computer torecognize the Maxtor OneTouch III.Step 3. Set up the OneTouch Feature1.Push the button on the front of your drive.The Maxtor OneTouch Manager will open tothe Backup Settings menu. Follow the on-screeninstructions to configure your backup.Your installation is complete!You may now back up your computer:– Perform a backup at any time by pressing theOneTouch button, or– Right-click on the Maxtor icon in the SystemTray and select Back up now, or– Allow Maxtor Backup to automatically run atthe next scheduled backup time.Refer to chapter 3 of the User’s Guide for moreinformation on:–Restoring Your Files–System Rollback–SyncOneTouch ButtonLimited Warranty StatementM a x t o r's w a r r a n t y o b l i g a t i o n s a r e l i m i t e d t o t h e t e r m s s e t f o r t h b e l o w.Please note that Maxtor reserves the right to update from time to time the warranty terms provided for new purchases of Maxtor products, and to establish the effective date of those updated warranty terms. Please refer to for the then current form of Limited Warranty Statement for Maxtor brand products.Please note that Maxtor products are distributed outside the United States and Canada through local authorized distributors and resellers (“Resellers”). These Resellers generally offer a consumer warranty, and associated warranty services, to consumer purchasers. Maxtor recommends that consumers in these jurisdictions first contact the Reseller from whom they purchased the Maxtor product for all issues with regard to product defects and the applicable product warranty.Maxtor warrants to the original consumer purchaser (“you”) that new Maxtor disk drive products (“New Products”) will be free from defects in material and workmanship for the Standard Warranty Period for the relevant New Product. The Standard Warranty Period for the various New Products marketed by Maxtor and for the geographies in which they are sold is detailed on .The warranty period on replacements for New Products is the remainder of the warranty on the original New Product or 90 days from the date of shipment of the replacement product, whichever is longer.In addition to the New Products, Maxtor may from time to time sell refurbished disk drive products which are not new and which have been reconditioned to Maxtor’s standards for refurbished products (“Refurbished Products”). Unless a warranty period (“Refurbished Warranty Period”) is designated by Maxtor for the specific Refurbished Product either on or on the product packaging (as applied by Maxtor), Refurbished Products are provided strictly on an “AS IS” basis and Maxtor disclaims any and all warranties or conditions whatsoever for Refurbished Products.To the extent that Maxtor so designates a warranty period for the Refurbished Product, Maxtor warrants to the original consumer purchaser that the Refurbished Product will be free from defects in material and workmanship for the associated Refurbished Warranty Period.New Products and Refurbished Products are together referred to as “Products.” The start of the Standard Warranty Period or Refurbished Warranty Period (together referred to as the “Warranty Period”), as the case may be, is the documented date of your purchase of the Product from Maxtor or Maxtor’s authorized reseller. In the absence of a documented purchase date, the start of the Warranty Period will be deemed the date of original shipment by Maxtor from its point of new or refurbish manufacture, as the case may be, to Maxtor’s customer.The Products are manufactured from parts and components that are new or equivalent to new in accordance with industry standards.If you discover a defect in material or workmanship during the Warranty Period, and Maxtor agrees that the defect exists, Maxtor will, at its option, repair or replace the Product at no charge to you, provided it is returned during the applicable Warranty Period, with transportation charges prepaid, to the facility designated by Maxtor. The Product must be properly packaged in Maxtor or Maxtor-approved packaging, with the Return Material Authorization clearly displayed on the outside of the packaging, to obtain warranty service. Products that fail within the first 30 days after purchase will be replaced with a new Product. Maxtor may require proper proof of purchase documentation prior to issuing the replacement Product.If Maxtor elects to repair a Product, Maxtor owns all parts removed from the repaired Product. Maxtor uses new and reconditioned parts made by various manufacturers in conjunction with warranty repairs and replacement Products. Repair parts or replacement Products may, at Maxtor's option, include an equal or better model or features.Maxtor has no responsibility whatsoever with regard to any content or data on returned Products.To request warranty service and before returning a Product to Maxtor, please contact the Maxtor Service Center. Refer to the Maxtor Installation Guide or for your online guide to find the appropriate telephone number for obtaining customer assistance within your jurisdiction and the proper address for shipping authorized returns. Once the Maxtor Service Center determines that a repair is required, Maxtor will issue an RMA number. A copy of your receipt or bill of sale bearing the name and location of Maxtor’s authorized reseller and the Maxtor serial number and model number of the Product in which the defect has been reported may be required as a proof of your purchase for warranty service. Note that, as an alternative, Maxtor offers an online warranty return option for certain Products through .You are responsible for saving or backing up data contained in any Product returned to Maxtor in conjunction with warranty or any other services. Maxtor shall have no responsibility for such data whatsoever and shall have no liability arising out of any damage to, or loss or disclosure of, such data.This limited warranty applies only to the Maxtor products that can be identified by the original, unaltered Maxtor trademark, trade name or logo affixed to them. Maxtor does not warrant any product that is not manufactured by, for, or with permission from Maxtor, or which is not otherwise distributed by Maxtor under the Maxtor brand.This warranty does not cover any of the following conditions:–Abuse, unreasonable use, mistreatment, or neglect–Unusual physical or electrical stress or power fluctuations–Damage caused during installation of the Product–Damage or capacity/performance/operational resetting caused by the equipment or system with which the Product is used–Damage caused by modification or repair not made or authorized by Maxtor–Products whose Maxtor Serial Number and/or Material Number label have been removed, torn or defaced–Damage caused by use of non-Maxtor packaging–Damage caused by improper or improperly used packaging–Damage caused by lack of ESD protection–Products that are determined to be stolen.Further, this limited warranty is void if the Product cover, or any label or seal on the Product, is removed or damaged.Maxtor owns all parts removed from the repaired Products. Maxtor uses new and reconditioned parts in performing warranty repairs and building replacement products.FAILURE TO COMPLETE AND RETURN ANY MAXTOR PRODUCT REGISTRATION FORM WILL NOT DIMINISH YOUR WARRANTY RIGHTS. Certain Products include software or firmware as a component (“Software”). Maxtor or its suppliers retain all rights of ownership in such Software and any use of the Software is subject to the license agreement provided by Maxtor accompanying such Software. If no license is provided by Maxtor, you are granted the limited right to use the Software as required for the operation of the Product and no other rights are granted whatsoever. Certain Software is licensed under the GNU General Public License Agreement (“GPL Software”). EXCEPT AS OTHERWISE PROVIDED BY MAXTOR IN A WRITTEN LICENSE AGREEMENT, SOFTWARE IS OFFERED “AS IS”AND MAXTOR GRANTS NO WARRANTIES OF ANY KIND, EXPRESS OR IMPLIED, BY STATUTE, COMMUNICATIONS OR OTHERWISE WITH REGARD TO THE SOFTWARE. MAXTOR SPECIFICALLY DISCLAIMS ANY IMPLIED WARRANTIES OF MERCHANTABILITY, FITNESS FOR A PARTICULAR PURPOSE OR NONINFRINGEMENT WITH RESPECT TO THE SOFTWARE. Please note that Maxtor makes the source code for the GPL software available through .TO THE MAXIMUM EXTENT PERMITTED BY LAW, THIS WARRANTY AND THE REMEDIES SET FORTH ABOVE ARE EXCLUSIVE AND IN LIEU OF ALL OTHERS, WHETHER ORAL OR WRITTEN, EXPRESSED, IMPLIED OR STATUTORY. OTHER THAN AS EXPRESSLY SET FORTH HEREIN, MAXTOR SPECIFICALLY DISCLAIMS TO THE MAXIMUM EXTENT PERMITTED BY LAW ANY AND ALL REPRESENTATIONS, WARRANTIES AND CONDITIONS AS TO THE PRODUCTS, SERVICES, OR ANY OTHER MATTER WHATSOEVER. IN PARTICULAR, BUT WITHOUT LIMITING THE GENERALITY OF THE FOREGOING, MAXTOR SPECIFICALLY DISCLAIMS ANY AND ALL IMPLIED OR DEEMED WARRANTIES AND CONDITIONS OF SATISFACTORY QUALITY, MERCHANTABILITY, FITNESS FOR A PARTICULAR PURPOSE, PERFORMANCE IN A SKILLFUL AND WORKMANLIKE MANNER, AND NON-INFRINGEMENT OF THIRD PARTY RIGHTS OR ANY OTHER WARRANTY ARISING FROM A COURSE OF DEALING OR USAGE OF TRADE. THIS LIMITED WARRANTY DOES NOT APPLY TO, AND MAXTOR MAKES NO WARRANTY TO YOU WITH REGARD TO, PRODUCTS ORIGINALLY SOLD AS AN INTEGRATED COMPONENT OF A SYSTEM NOT SUPPLIED BY MAXTOR, OR PRODUCTS PROVIDED UNDER A THIRD PARTY LEASING OR SERVICE ARRANGEMENT. No Maxtor distributor, reseller, dealer, agent or employee is authorized to make any modification, extension or addition to this warranty.MAXTOR IS NOT RESPONSIBLE OR LIABLE FOR ANY INDIRECT, UNFORESEEABLE, SPECIAL, INCIDENTAL OR CONSEQUENTIAL DAMAGES HOWEVER CAUSED AND WHETHER OR NOT MAXTOR WAS ADVISED OF THE POSSIBILITY OF SUCH DAMAGES, INCLUDING BUT NOT LIMITED TO, COSTS OF PROCUREMENT OF SUBSTITUTE GOODS, LOSS OF DATA OR PROGRAMS, LOST PROFITS, DOWNTIME, GOODWILL, DAMAGE OR REPLACEMENT OF EQUIPMENT AND PROPERTY, AND ANY COSTS OF RECOVERING, PROGRAMMING OR REPRODUCING ANY PROGRAM OR DATA STORED IN OR USED WITH MAXTOR PRODUCTS OR ANY OTHER DAMAGES ARISING OUT OF THE PURCHASE, USE OR PERFORMANCE OF THE PRODUCT. Maxtor is not, and cannot be, responsible for any losses or damages arising out of any loss of, or any inability to access, data as a result from the failure of a Product, and accordingly you bear this risk. The allocation of risk under this limitation of liability is reflected in the purchase price of the Product. This limitation of liability, however, will not apply to claims for death or personal injury caused by the negligence of Maxtor or its associated companies, officers, representatives or agents.Some jurisdictions do not allow the exclusion or limitation of incidental or consequential damages or exclusions of implied or deemed conditions or warranties, so the above limitations or exclusions may not apply to you. This warranty gives you specific legal rights, and you may also have other rights that vary from jurisdiction to jurisdiction. By way of example, if a Product is purchased from Maxtor or Maxtor's authorized reseller by you in Europe, Africa or the Middle East, you may have additional warranty rights which are explained at .Please note that you are expressly not permitted to use the Products in conjunction with the operation of nuclear facilities, aircraft navigation, aircraft communication, aircraft flight control, aircraft air traffic control systems, weapons devices or systems, or in any devices or systems in which a malfunction (including, without limitation, software related delay or failure) would result in foreseeable risk of injury or death to the operator of the device or system, or to others.This Statement of Limited Warranty shall be exclusively interpreted in accordance with the English language with the meaning of its terms. Should any provisions of this Limited Warranty be declared invalid by any court of competent jurisdiction, the balance of this Limited Warranty will remain in full force and effect. In addition, should a translation of this Limited Warranty deviate from the English language version, only the English language version shall apply and be binding.。
Fluke Networks OneTouch AT Network Tester配置指南说明书
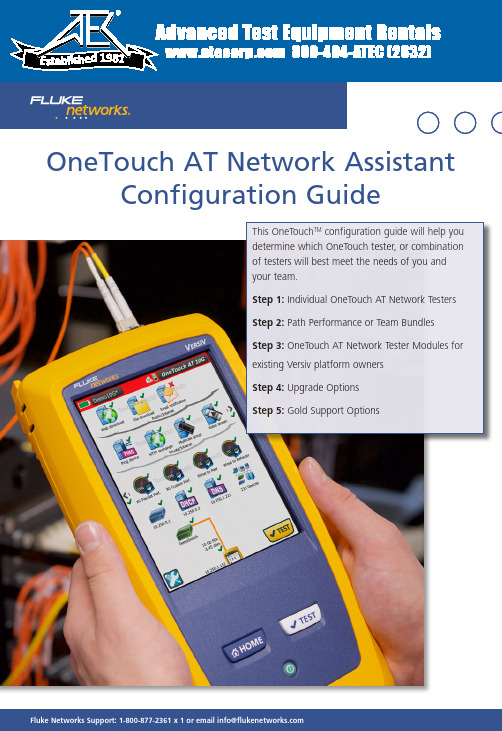
For more product information and to see our complete line of Fluke Networks Solutions, visit us at FlukeNetworksSupport:*********************************************OneTouch AT Network Assistant Configuration GuideThis OneTouch TM configuration guide will help you determine which OneTouch tester, or combination of testers will best meet the needs of you andyour team.Step 1: Individual OneTouch AT Network Testers Step 2: Path Performance or Team Bundles Step 3: OneTouch AT Network Tester Modules for existing Versiv platform owners Step 4: Upgrade OptionsStep 5: Gold Support OptionsAdvanced Test Equipment Rentals 800-404-ATEC (2832)®E s t a b l i s he d 1981For more product information and to see our complete line of Fluke Networks Solutions, visit us at Configure your OneTouch AT Network TesterIf you are looking for networks testing (Copper/Fire/wireless) start at step 1.If you are looking to do throughput testing, packet capture, or SLA verifications skip to step 2. For a side-by-side specification comparison of each OneTouch please see the next page.For more product information and to see our complete line of Fluke Networks Solutions, visit us at1Requires peer or reflector: OneTouch AT, OneTouch AT 10G or LinkRunner AT 2000 (not included)2Requires peer: OptiView XG 10G tablet (not included)3Optional accessory (not included)For more product information and to see our complete line of Fluke Networks Solutions, visit us at The Wired Performance tests measure network path performance end-to-end. A test instrument is required at each end of the link under test. The OneTouch AT 10G tester will be located at one end. There are options for the test instrument to be located at the other end of thelink to measure the path performance and verify SLA compliance. For a detailed comparison chart, see the next page.For more product information and to see our complete line of Fluke Networks Solutions, visit us at Local testerOneTouch AT or OneTouch AT 10G OneTouch AT or OneTouch AT 10G Optiview XG Remote end-point LinkRunner AT 2000OneTouch AT or OneTouch AT 10GOneTouch AT 10G 1Wired rate is < 1 Gbps Wi-Fi rate < 600 Mbps ••1 traffic stream••IETF RFC 2544 test method ••Round trip results •Bi-directional results ••Frame loss, latency, jitter •••< 10 Gbps rate •< 4 traffic streams •ITU Y .1564 test method•Throughput, requested rate, information rate •Class of service testing, traffic policing•1OneTouch AT 10G serves as both 10G end-point and 1G controllerOneTouch ATOneTouch ATOROneTouch AT 10GOneTouch AT 10GOptiView XGLinkRunner ATFor throughput testing, packet capture, or SLA verification connect your favorite OneTouch AT with one of the devices pictured on the right. This table will help you decide which pair of instruments will best meet your needs. The local device running the tests is listed on the top row and the reflector, or end-point device is listed in the second row.For more product information and to see our complete line of Fluke Networks Solutions, visit us at For more product information and to see our complete line of Fluke Networks Solutions, visit us at If you already own an OneTouch AT G2 there are 2 upgrade options.For more product information and to see our complete line of Fluke Networks Solutions, visit us at What do you get with Gold Support for your OneTouch AT Network Assistant?•Gold Cloud Service - Save multiple OneTouch AT trending sessions on the OneTouch AT Cloud Service server. Use the Cloud Service to view and analyze AutoTest results uploaded to the cloud via the Trending feature. The analytics are useful for troubleshooting intermittent problems, identifying potential network, service or application vulnerabilities, and identifying performance bottlenecks. The Cloud Service can also be used for remote control of the OneTouch for packet captures or updating a remote unit.•Repairs and loaner equipment - If your OneTouch should fail, we’ll deliver a loaner unit via next business day delivery to keep you up and running. We’ll repair your OneTouch and replace defective or faulty accessories at no charge, with first on bench priority, and return it to you - all shipping paid by Fluke Networks • Software upgrades - You’ll receive all software upgrades free•Access to live 24 x 7 technical support - Gold Support includes direct, immediate telephone access to our world-class Technical Assistance Center (TAC), direct access only available to Gold Members. •Accessory Replacement - The normal warranty on accessories is 90 days, but parts and accessories including the OneTouch battery will be replaced free of charge with Gold Support once qualified as defective by our technical assistance center.• OneTouch Gold Support Members Online Training - Gold Support Members have access to exclusive on-line training modules.•Member Only promotions- Your membership qualifies you for Members Only promotions and programs.For more product information and to see our complete line of Fluke Networks Solutions, visit us at Fluke NetworksP.O. Box 777, Everett, WA USA 98206-0777Fluke Networks operates in more than 50 countries worldwide. To find your local office contact details, go to /contact .©2015 Fluke Corporation.Printed in U.S.A. 8/2015。
One Touch Hub 数据手册说明书
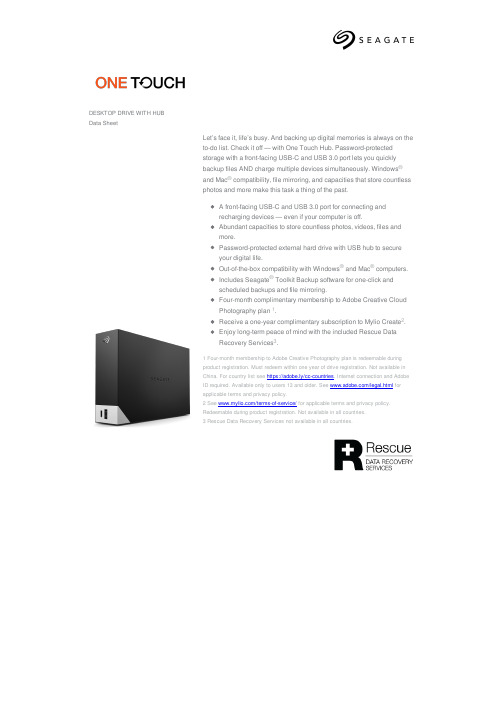
DESKTOP DRIVE WITH HUBData SheetLet’s face it, life’s busy. And backing up digital memories is always on theto-do list. Check it off — with One Touch Hub. Password-protectedstorage with a front-facing USB-C and USB 3.0 port lets you quicklybackup files AND charge multiple devices simultaneously. Windowsand Mac® compatibility, file mirroring, and capacities that store countlessphotos and more make this task a thing of the past.A front-facing USB-C and USB 3.0 port for connecting andrecharging devices — even if your computer is off.Abundant capacities to store countless photos, videos, files andmore.Password-protected external hard drive with USB hub to secureyour digital life.Out-of-the-box compatibility with WindowsIncludes Seagate® Toolkit Backup software for one-click andscheduled backups and file mirroring.DESKTOP DRIVE WITH HUBSpecifications 4 TB - 16 TBRetail Packaging Product Dimensions Box Dimensions Pallet DimensionsLength (in/mm)7.814 in/198.5 mm9.173 in/233 mm47.992 in/1,219 mmWidth (in/mm) 5.114 in/129.9 mm8.740 in/222 mm40 in/1016 mmDepth (in/mm) 1.783 in/45.3 mm 3.070 in/78 mm45.66 in/1160 mmWeight (lb/kg) 2.733 lb/1.24 kg 3.28 lb/1.49 kg890.711 lb/404.02 kg QuantitiesBoxes per Master Carton4Master Cartons per Pallet60Pallet Layers4Specifications 18 TB - 20 TBRetail Packaging Product Dimensions Box Dimensions Pallet DimensionsLength (in/mm)7.814 in/198.5 mm9.173 in/233 mm47.992 in/1,219 mmWidth (in/mm) 5.114 in/129.9 mm8.740 in/222 mm40 in/1016 mmDepth (in/mm) 1.783 in/45.3 mm 3.66 in/93 mm45.66 in/1160 mmWeight (lb/kg) 2.755 lb/1.25 kg 3.240 lb/1.47 kg714.95 lb/324.3 kg QuantitiesBoxes per Master Carton4Master Cartons per Pallet48Pallet Layers418-inch (45.72 cm) USB 3.0 cable & 18W power adapterfour months Adobe Creative Cloud Photography planMulti-Pack UPC Notes10763649169428Includes Rescue310763649169435Includes Rescue310763649169442Includes Rescue310763649169459Includes Rescue310763649169466Includes Rescue310763649169473Includes Rescue310763649169480Includes Rescue310763649174774Includes Rescue310763649174514Includes Rescue310763649169428Includes Rescue310763649169435Includes Rescue310763649169442Includes Rescue310763649169459Includes Rescue310763649169466Includes Rescue310763649169473Includes Rescue310763649169480Includes Rescue310763649174774Includes Rescue310763649174514Includes Rescue310763649169428Includes Rescue310763649169435Includes Rescue310763649169442Includes Rescue310763649169459Includes Rescue310763649169466Includes Rescue310763649169473Includes Rescue310763649169480Includes Rescue310763649174774Includes Rescue3。
优瑞咖啡机说明书
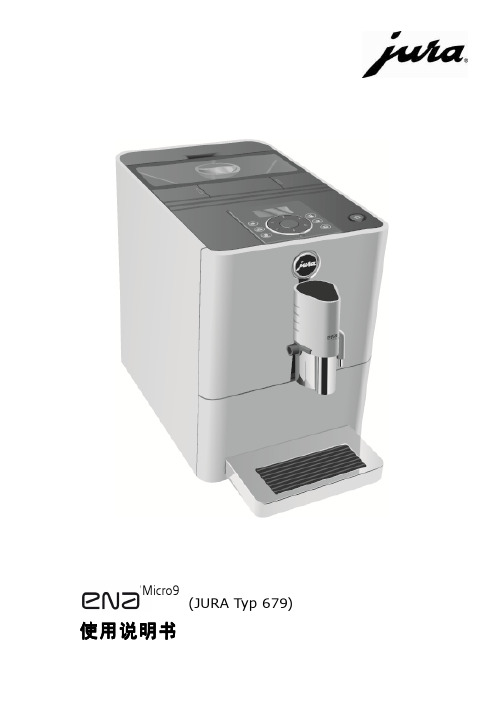
1 水箱
2 3
电源线(咖啡机后部) 奶管
4 5
粉废水渣盘盒
6 咖啡豆槽盖
7 8
热水喷嘴 可调节高度的咖啡喷嘴
9 咖啡杯托盘(废水盘盖)
7
ENA Micro 9 One Touch
1 咖啡粉槽盖
2 咖啡粉槽
3 显示屏
4c 5 6 7
保卡养布键基诺键 拿铁玛琪雅朵键 旋钮状态显示
8
5
符号含义
警告
J 注意
请严格遵守注意与警告事项:
注意 警告
– –
有可能造成轻度伤害 有可能造成重大伤害
注 意 请注意所述环境因素会导致机器损伤
符号 ► 请立即执行所述操作
E 帮助您使用机器的提示
显示屏 ESPRESSO
ENA Micro 9 One Touch
6
ENA Micro 9 One Touch
■ 使用过程中,请勿将手或电源线接触被加热的部件
■ 请勿使用去污粉或利器擦拭机器
请勿
■ 请勿在磨豆器或粉槽中加入速溶咖啡及其他混有如可可粉等的混合
物,会导致咖啡机冲煮系统损坏
■ 请勿在豆槽中加入经过特殊处理的(如加味、加糖)的咖啡豆,如有
疑问请致电当地经销商
■ 豆槽中只可加入咖啡豆,切勿加入其它如:巧克力豆、大米、坚果、
2 制作咖啡 ……………………………………………………………………………………………………………………… 12
意式,美式咖啡 ………………………………………………………………………………………………………………… 13 拿铁玛琪雅朵,卡布基诺 ………………………………………………………………………………………………… 13 预设咖啡水量 …………………………………………………………………………………………………………………… 13 用咖啡粉做咖啡 ……………………………………………………………………………………………………………… 14 热水 ……………………………………………………………………………………………………………………………… 14
优瑞咖啡机说明书

饮品参数设置 …………………………………………………………………………………………………………………… 15 水硬度设置 …………………………………………………………………………………………………………………… 15 省电模式 ………………………………………………………………………………………………………………………… 16 自动关机设置 ………………………………………………………………………………………………………………… 16 润湿 ………………………………………………………………………………………………………………………………… 16
电源时,请先关闭机器上的所有开关,然后再拔下电源插头 ■ 请勿与其它电器共同使用一路电源 ■ 当使用蒸汽功能时,请注意安全
a. 配置的短电源线可避免长电源线可能导致的缠绕或迁绊,ENA Micro 9 One Touch 配置的是三芯插头
b. 需要时也可使用接线板来延长电源线 c. 当使用接线板时,请:
运输/清空系统 ………………………………………………………………………………………………………………… 24 回收处理 ………………………………………………………………………………………………………………………… 24
9 技术参数 ……………………………………………………………………………………………………………………… 24 10 授权维修中心 ……………………………………………………………………………………………………………… 24
4
ENA Micro 9 One Touch
水量表示单位 ………………………………………………………………………………………………………………… 17 语言 ………………………………………………………………………………………………………………………………… 17
Nikon One-Touch 产品说明书

Reverse-Galilean Albada-type bright-frame viewfinder; 0.42x(at W) or O.79x (at T) magnification automatically selected and set by motor; approx. 85% (W) or 86.5% (T) frame coverage; - 1 dioptry
11
II.
12
Nikon Tele-Touch Deluxe
Nikon Tele-Touch Deluxe
Product number: Type of camera:
Picture format: Lens:
Lens cover: Filter: Shooting distance: Film speed setting:
EV6.4 to EV17 (f/2.8 at 1111 sec. to f/16 at 1/500 sec.) with ISO 100 film
Automatic for OX-coded films ; set to ISO 100 for non-OX
ISO 64 to 1600
Auto film loading with film automatically advanced to first frame
24mm x 36mm (standard 35mm format)
Nikon 35mm f/2 .8 lens; 4 elements in 3 groups
46mm dia. threaded mount provided at front of lens
OneTouch AT Network Assistant用户指南说明书
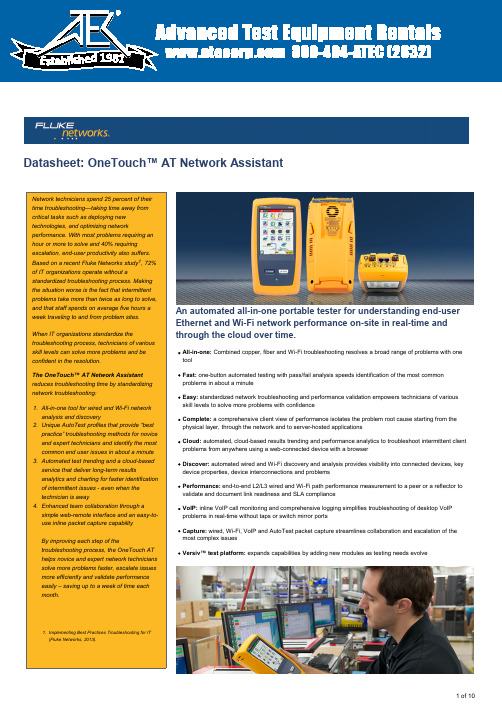
1981An automated all-in-one portable tester for understanding end-user1 of 10Figure 1. The AutoTest provides a comprehensivemeasurement of network performance from the enduser point-of-view, from cable to services andapplicationsMost network trouble tickets start where a client device is connected to the network—where the device could be a PC, tablet, smart phone, IP phone, printer, POS terminal, industrial equipment controller, a medical imager etc. Troubleshoot common issues—or prove that the network is not the cause—by emulating the client deviceComprehensive testing from the patch cable to the cloudThe cause of a network problem can be elusive. Identify the root cause of a problem by measuring and analyzing the performance of the critical network elements: the network cabling, the delivery of Power over Ethernet (PoE), the connection to the nearest switch, the connection to the nearest access point, and the performance of key2 of 10Figure 2. Trending automatically runs the AutoTestFigure 3. Cloud Service enables analysis of results over time to troubleshoot intermittent problemsrepeatedly and uploads results to the cloud3 of 10Figure 4. Remotely control the OneTouch AT andaccess saved files using a PC, laptop, tablet orsmart phone Figure 5. Detailed breakdown of network serviceperformance4 of 10Figure 6. Detailed breakdown of network-hosted application performance Figure 7. Group tests by hosting location – local,intranet, internetFigure 8. End-to-end path performancemeasurement validates link readiness and SLAcompliance5 of 10Connect the OneTouch AT inline between an IP phone and the network for real-time troubleshooting and analysis. The VoIP analysis test reveals issues related to PoE,DHCP, TFTP, SIP, and SCCP. The test provides visibility into unencrypted SIP and SCCP traffic to debug VoIP phone problems and quantify the quality of a VoIP call.Simultaneous capture of the VoIP conversation is optional.Capture wired, Wi-Fi, VoIP and AutoTest traffic when a packet-level view is required to solve a complex network or application issue. Filter the traffic to capture what is most important. Export the capture file to a PC for decoding and analysis using protocol analysis software. Capture wired traffic on a single port, on two ports aggregated,or inline between a client device and the network. Inline capture avoids the complexity, time and cost associated with standalone taps or configuring switch mirror ports.Capture Wi-Fi traffic by channel and mode (20 MHz or 40 MHz+).Figure 9. Analyze copper and fiber networks with automated device discovery, comprehensive sorts and deep-dive analysis tools.Figure 10. Visibility into Wi-Fi networks, access points, clients and channelsFigure 11. Inline VoIP analysis simplifiestroubleshooting of desktop VoIP problems in real-time without TAPs or switch mirror portsFigure 12. Capture packets to solve complex issues6 of 10Figure 13. Setup Wizard simplifies creation ofAutoTest profilesThe OneTouch AT is engineered specifically for network support professionals on the go. Useful test and management tools include a web browser, Telnet/SSH client,cable toner, webcam support and optional fiber optic connector inspection camera. The durable platform provides years of reliable operation in tough environments.Expand testing capabilities by adding new modules to the Versiv platform as testing needs evolve. Available modules include DSX-5000 CableAnalyzer™, CertiFiber® ProProtect your investment with Gold Support. Gold Support benefits include Gold Cloud Service, software upgrades and MIB updates, unlimited priority repair service with loaner units, annual factory performance verification, free accessory replacement and 24x7 technical support with priority members-only access numbers.7 of 108 of 109 of 1010 of 10。
马特尔一个触 OneTouch 功能安装指南说明书
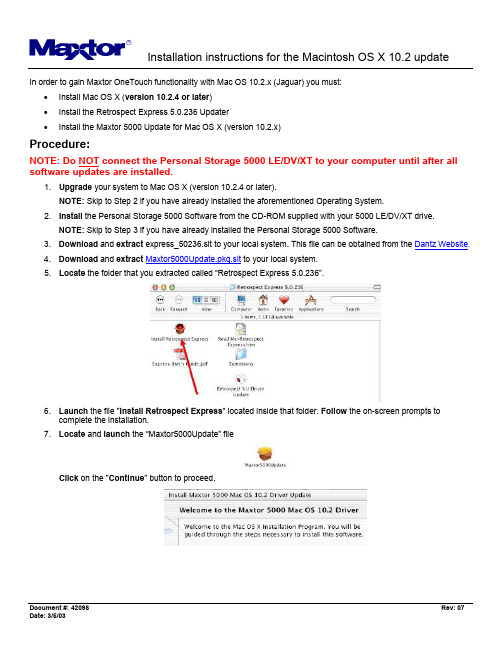
In order to gain Maxtor OneTouch functionality with Mac OS 10.2.x (Jaguar) you must:• Install Mac OS X (version 10.2.4 or later)• Install the Retrospect Express 5.0.236 Updater• Install the Maxtor 5000 Update for Mac OS X (version 10.2.x)Procedure:NOTE: Do NOT connect the Personal Storage 5000 LE/DV/XT to your computer until after all software updates are installed.1. Upgrade your system to Mac OS X (version 10.2.4 or later).NOTE: Skip to Step 2 if you have already installed the aforementioned Operating System.2. Install the Personal Storage 5000 Software from the CD-ROM supplied with your 5000 LE/DV/XT drive.NOTE: Skip to Step 3 if you have already installed the Personal Storage 5000 Software.3. Download and extract express_50236.sit to your local system. This file can be obtained from the Dantz Website.4. Download and extract Maxtor5000Update.pkg.sit to your local system.5. Locate the folder that you extracted called “Retrospect Express 5.0.236”.6. Launch the file "Install Retrospect Express" located inside that folder. Follow the on-screen prompts tocomplete the installation.7. Locate and launch the “Maxtor5000Update” fileClick on the "Continue" button to proceed.8. Select a destination drive and click on the "Continue" button.9. Follow the remaining on-screen prompts to complete the installation10. At this point the installation will Process and Optimize. When finished, click on the "Restart" button.11. Connect your Personal Storage 5000 LE/DV/XT unit to you Macintosh System.NOTE: Reference the Personal Storage 5000 User's Guide for proper connection/installation instructions: • Step 2. Connecting the Drive (see page 7)• Step 3. Setting Up the Maxtor OneTouch Feature (see page 11)Additional Information:1. OneTouch button can interrupt an Immediate Duplicate operation.Pressing the Maxtor OneTouch button during the scanning phase of an Immediate Duplicate operation will hang that operation in favor of the Maxtor script that was created with the Wizard. This only happens during thescanning phase and does not seem to happen with any other immediate operations. The Maxtor script will run without issues, but after it has completed the user is left with Retrospect in a state where the ImmediateDuplicate's "scanning" dialog box is left in the application's foreground, leaving the Directory window visible butinaccessible. The Stop button in this window has no effect, and the user must quit the application and re-launch it to regain to access the Directory window.2. Maxtor Wizard will crash the Application if previous script was just deleted.If a user deletes a Maxtor OneTouch script from Automate Scripts and then immediately presses the button to launch the Wizard, the Retrospect Express application will "go away" as soon as the Next button in the first window of the Wizard is pressed. After the crash the user can simply press the button again and the Maxtor Wizard will launch and function normally. As a historical note, the previous Maxtor release had a known issue where, under OS X 10.1.5, the OneTouch button only worked if Retrospect Express was not already running. With the new Maxtor drivers for OS X 10.2 under Jaguar the button now works with Retrospect Express already running.3. The Maxtor Wizard/OneTouch script will always run if the application is launched from a non-boot drive.The default install location is the Applications directory of the boot volume. If the Express application directory (the "Retrospect Express 5.0" folder and all of its contents) is copied to another partition or another hard drive and launched from that location by double-clicking the Retrospect Express icon the application behaves as if the button was pressed. The Maxtor Wizard will open if there is no Maxtor OneTouch script or if there is a script, it will run.。
Maxtor OneTouch 80 GB个人外部硬盘说明书
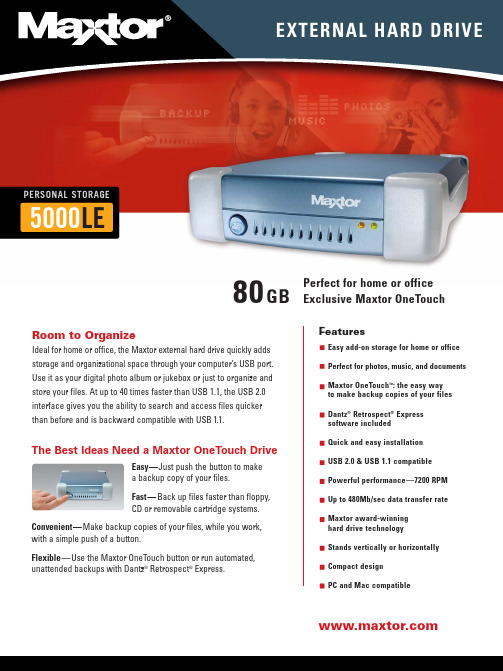
5000LEFeaturesEasy add-on storage for home or officePerfect for photos, music, and documentsMaxtor OneTouch™: the easy wayto make backup copies of your filesDantz®Retrospect®Expresssoftware includedQuick and easy installationUSB 2.0 & USB 1.1 compatiblePowerful performance—7200 RPMUp to 480Mb/sec data transfer rateMaxtor award-winninghard drive technologyStands vertically or horizontallyCompact designPC and Mac compatibleRoom to OrganizeIdeal for home or office, the Maxtor external hard drive quickly addsstorage and organizational space through your computer’s USB port.Use it as your digital photo album or jukebox or just to organize andstore your files. At up to 40 times faster than USB 1.1, the USB 2.0interface gives you the ability to search and access files quickerthan before and is backward compatible with USB1.1.Perfect for home or officeExclusive Maxtor OneTouch80GBPERSONAL STORAGEEXTERNAL HARD DRIVEThe Best Ideas Need a Maxtor OneTouch DriveEasy—Just push the button to makea backup copy of your files.Fast—Back up files faster than floppy,CD or removable cartridge systems.Convenient—Make backup copies of your files, while you work,with a simple push of a button.Flexible—Use the Maxtor OneTouch button or run automated,unattended backups with Dantz®Retrospect®Express.SPECIFICATIONSModel Number•80GB Maxtor Personal Storage 5000LE—R01J080Drive Configuration•Hard Drive: Maxtor DiamondMax ®with Ultra ATA 133 interface •RPM: 7200•Cache Buffer: 2 MBIntegrated Interface •USB 2.0 and 1.1 compliant•External 4-pin connector with hot-plug capability •Supports data transfer rates up to 480 Mb/sec Performance•Average seek time: < 10 ms •Sustained transfer rate(maximum) USB2—34 MB/sec Environmental Specifications •Operating Temperature: 5º C to 40º C Physical Specifications•Dimensions: 1 5/8 x 6 x 8 5/8 inches (41 x 152 x 219 mm)•Weight: 2 lbs, 11 oz (1.22 Kgrams)Power Requirements•AC Input Voltage: 100–240 VAC •Input Frequency: 47–63 Hz AC© 2003 Maxtor Corporation. Maxtor and DiamondMax are registered trademarks of Maxtor Corporation. Maxtor Personal Storage and Maxtor OneTouch are trademarks of Maxtor Corporation. Dantz, the Dantz logo, and Retrospect are registered trademarks of Dantz Development Corporation. (Dantz Development Corporation: U.S. patents 5,150,473 and 5,966,730. Other patents pending.) Mac and the Mac logo are trademarks of Apple Computer, Inc., registered in the U.S. and other countries. The USB-IF logos are trademarks of Universal Serial Bus Implementers Forum, Inc. Microsoft, Windows and the Windows logo are either registered trademarks or trademarks of Microsoft Corporation in the United States and/or other countries. Other trademarks are the property of their respective holders. Actual product may vary from photo shown. Product specifications are subject to change without notice. Maxtor Corporation, 500 McCarthy Boulevard, Milpitas, CA 95035. . DS-PS5000LE-2/03v2-CL-GI -4KWindows System Requirements•Pentium II-class equivalent processor or later •Windows ®98SE, Me, 2000 Professional, or XP •CD-ROM drive•32 MB RAM or more as required by Windows •Available USB 1.1 or 2.0 port•Internet connection (for system updates)For faster operation, upgrade from USB 1.1 to high-speed USB 2.0with a Maxtor USB 2.0 PCI Card for Windows. Available at in North America .Macintosh System Requirements•iMac ®, Power Macintosh ®G3 (Blue and White), or later model•Mac OS 9.1 or higher or Mac OS X version 10.1.2 or higher, including Jaguar •CD-ROM drive•32 MB RAM or more as required by Mac OS •Available USB 1.1 or 2.0 port•Internet connection (for system updates)For support or information, call us at 1-800-2MAXTOR or visit us at A megabyte means 1,000,000 bytes. A gigabyte means 1,000,000,000bytes. Total accessible capacity varies depending on operating environment.A patent is pending on the Maxtor OneTouch™ drive.5000LEPERSONAL STORAGEPerfect for Home or OfficeEach 20GB of storage can store up to: 20 hours of compressed digital video, or 5,000 four-minute MP3 tunes, or 2,000 high-resolution compressed digital photos, or 50 video games.Maxtor OneTouchWith the Maxtor OneTouch drive, you can easily make backup copies of your files on your schedule—not the network’s. Ideal for the laptop user on the go.ConvenientVirtually all computers have a USB port—making this one of the easiest ways to add storage to almost any system. By saving your files on a hard drive, you can access and update them faster and easier than any other storage method.Kit Includes•Maxtor Personal Storage ™5000 drive •USB Cable•External AC power adapter •Vertical stand•Installation software CD - Dantz Retrospect Express- Maxtor Personal Storage 5000 drivers •User’s guideStand upright to save space123。
Maxtor OneTouch外置硬盘用户手册 Windows版说明书
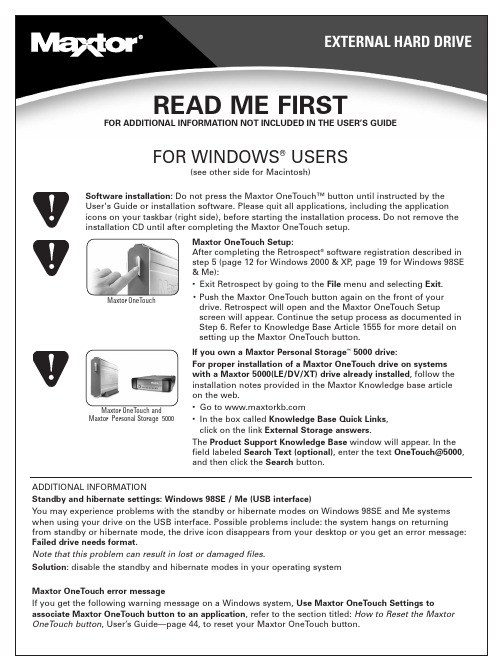
• Push the Maxtor OneTouch button again on the front of your drive. Retrospect will open and the Maxtor OneTouch Setup screen will appear. Continue the setup process as documented in Step 6. Refer to Knowledge Base Article 1555 for more detail on setting up the Maxtor OneTouch button.
பைடு நூலகம்
• Go to
Maxtor OneTouch and Maxtor Personal Storage 5000
• In the box called Knowledge Base Quick Links, click on the link External Storage answers.
Follow all of the other steps as documented in the User’s Guide.
Copyright ©2003 Maxtor Corporation. All rights reserved. Maxtor is a registered trademark of Maxtor Corporation. Maxtor Personal Storage and Maxtor OneTouch are trademarks of Maxtor Corporation. Retrospect is a registered trademark of Dantz Development Corporation. Mac and the Mac logo are trademarks of Apple Computer, Inc., registered in the U. S. and other countries. Microsoft, Windows and the Windows logo are either registered trademarks or trademarks of Microsoft Corporation in the United States and/or other countries. Other trademarks are the property of their respective holders. Specifications subject to change without notice. Maxtor Corporation, 500 McCarthy Boulevard, Milpitas, CA 95035 8/03 P/N: 20247100
- 1、下载文档前请自行甄别文档内容的完整性,平台不提供额外的编辑、内容补充、找答案等附加服务。
- 2、"仅部分预览"的文档,不可在线预览部分如存在完整性等问题,可反馈申请退款(可完整预览的文档不适用该条件!)。
- 3、如文档侵犯您的权益,请联系客服反馈,我们会尽快为您处理(人工客服工作时间:9:00-18:30)。
Onetouch 驱动说明书
一开始安装
双击光盘或硬盘上的setup.exe文件开始安装。
先安装驱动必须的资源包
选择安装路径,默认在C盘Program files\Onetouch 文件夹下
选择安装方式有两种方式完全安装和定制安装,默认选择完全安装
安装完成后双击桌面上的LeadingTouchSetup进入校正程序
二驱动设置及功能介绍
2.1 触摸屏管理界面
语言栏:可以切换语言,目前有中文和英文两种界面
触摸屏:所有识别到的触摸屏都将显示在这个框体内,选择需要校正的触摸屏后点击设置进行进一步的设置工作
串口管理:如果是COM口触摸屏那么需要选择串口管理,选择触摸屏连接的Com口后再进行下一步设置(注意:COM口触摸屏无法被自动识别,用户必须手动选择COM口后点击”添加设备”如下图)
版本驱动程序版本信息
2.2 触摸屏设置
识别:显示当前触摸屏对应的显示器
自定义:可以自定义校正范围,拖动左边的边角以及右边的边角来确定校准范围。
4点校准:进行4点校准,声波及红外屏适用
9点校准:进行9点校准,四线、五线、电容屏适用
25点校准:进行25点线性校准,四线、五线、电容屏适用
选择自定义、4点校准、9点校准、25点校准后点击校准按钮开始校准触摸屏
请用手指点击屏幕上出现的红点中心部位,按住不放大约2-3秒,直到靶心跳转到下一个位置或者听见beep声再松开手指,点击下一位置的靶心直到完成校准即可。
校准完成后,可以选择
重新校准(快捷键”空格键”),校正后鼠标位置和手指点击位置对应不上请选择这个选项再次校准
划线测试(快捷键””回车键),进行划线测试。
详细介绍请参阅下一部分
退出(快捷键”Esc”),退出校准程序。
2.3 触摸屏设置-调整
边界调整:由于安装或屏体线性原因可能有时边角区域触摸异常
可以调整边角的缩放距离大小来适应当前屏体。
触摸模式:
Normal:普通模式,可以进行划线、双击、单击、拖拽图标的动作
Click On Touch:点击时触摸,当手指接触触摸屏时触发触摸动作
Click On Release: 释放时触摸,当手指离开触摸屏时触发触摸动作
Click On Touch No Move:点击时触摸不能移动,当手指接触触摸屏时触发触摸动作,不能划线拖拽图标
Click On Release No Move:释放时触摸不能移动,当手指离开触摸屏时触摸触摸动作,不能划线以及拖拽图标
2.4 触摸屏设置-按键
按键切换
启用自动右键切换功能:
自动范围:点击桌面10毫米以内范围
自动时间:当点击桌面不动1000毫秒后就会自动触发鼠标右键功能,可以通过拖拽标尺条来改变这一时间长度
以上两个条件同时成立才能触发自动鼠标右键功能。
双击设置
双击范围:50像素以内的区域进行点击都被视为同一个点点击
双击时间:600毫秒以内的两次点击都被判定为同一点的两次点击
当您感觉双击图标或程序不能正常打开,请将该选项的标尺栏向右拖拽。
2.5 触摸屏设置-高级功能
启用触摸屏:可以通过这个选项启动\禁用触摸屏
启用固定触摸: 将10毫米范围内的触摸都判定为一个点
启用划线连续功能:为手写输入以及画图设置的功能
连续范围:20毫米划线断线都将被驱动程序算法修正
连续时间:100毫秒内的断线都将被驱动程序算法修正启动划线平滑:划线时驱动程序将通过算法使画出的线条柔顺平滑
2.6 触摸屏设置-声音
触摸时发声:点击触摸屏时计算机发出声音
释放时发声:手指离开触摸屏时发出声音,这两个选项同时只能选择一个2.7 触摸屏设置-信息
控制卡型号
显示当前控制卡的类型
三卸载驱动程序
1可以从开始\程序\Leadingtouch\Uninstall卸载LeadingtouchTouch 驱动程序
2 或者从控制面板选择Onetouch Driver for Windows------删除
3 再次运行安装程序可以进行卸载。
