ORACLE数据库启动过程祥解
Oracle SPARC T4-2服务器初始启动和引导指南说明书
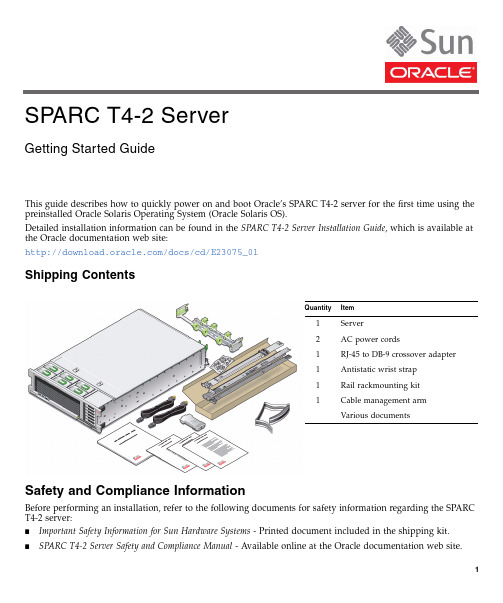
This guide describes how to quickly power on and boot Oracle’s SPARC T4-2server for the first time using the preinstalled Oracle Solaris Operating System (Oracle Solaris OS).Detailed installation information can be found in the SPARC T4-2Server Installation Guide ,which is available at the Oracle documentation web site:/docs/cd/E23075_01Shipping ContentsSafety and Compliance InformationBefore performing an installation,refer to the following documents for safety information regarding the SPARC T4-2server:■Important Safety Information for Sun Hardware Systems -Printed document included in the shipping kit.■SPARC T4-2Server Safety and Compliance Manual -Available online at the Oracle documentation web site.QuantityItem1Server2AC power cords1RJ-45to DB-9crossover adapter 1Antistatic wrist strap 1Rail rackmounting kit 1Cable management arm Various documentsSPARC T4-2 ServerGetting Started Guide▼Install Optional ComponentsBefore installing the server into the rack,you must first install any optional components that you ordered with the server,such as DIMMs and PCIe cards.Refer to the SPARC T4-2Server Service Manual for instructions on installing optional components.▼Prepare to Install the ServerSetting up the server for the first time takes about45to75minutes.Plan for additional time if you are also installing optional hardware and rackmounting kits.Caution–Do not apply power until instructed to do so.–This system includes a service processor (SP)that is used to configure and boot the host server.To properly configure the host server and view SP messages,do not apply AC power to the server until the SP and host networking connections are made,as described in this guide.1.Choose the best way to set up the server for your environment.The instructions in this guide work for any networking environment and require a terminal device for connecting to a serial port.If you have a networking environment running DHCP,you can configure your system using the Ethernet management port by following the instructions in the installation guide.2.Obtain a terminal device.You configure the server through the SP using the built-in serial and network management ports,not through a graphical interface and keyboard.To communicate with the SP,you need a terminal device,which can be a terminal,a terminal server,or a laptop running terminal emulation software.3.Gather your configuration information.Refer to the installation guide for a checklist.▼Install the ServerFor quick installation and configuration,follow these steps.For more detailed information,refer to the complete online product documentation set.1.Confirm that you received all the parts needed for setting up the server.See“Shipping Contents”for details.2.Place the server in its intended location.For rackmounting instructions,refer to the installation guide.3.Connect a serial cable between the server’s SER MGT port and a terminal device.This connection provides the initial communication with the SP.Set up the server to communicate using9600baud,8bit,no parity,1stop bit.For DTE-to-DTEcommunication,use the supplied RJ-45crossover adapters with a standard RJ-45cable to set up a null modem configuration so that the transmit and receive signals are crossed over.FIGURE1Server Connections4.(Optional)Connect an Ethernet cable between the server’s NET MGT port and the network to whichfuture connections to the SP and host will be made.Configure the system for the first time through the SER MGT port.After the initial configuration,you can set up communication between the SP and host through this Ethernet interface.5.Connect an Ethernet cable between one of the server’s NET ports and the network to which the serverwill communicate.6.Connect the power cords to the power supplies and to separate power sources.If your server is equipped with two power supplies,connect them to separate power sources to provide power redundancy.The system can operate with one power connection,but having only one power source reduces the redundancy.When the power cords are connected,the SP initializes and the power supply LEDs illuminate.After a few minutes,the SP login prompt displays on the terminal device.At this time,the host is not initialized or powered on.7.At the terminal device,log in to the SP as root with a password of changeme .After a brief delay,the Oracle Integrated Lights Out Manager (Oracle ILOM)prompt (->)is displayed.For optimal security,change the root password.Refer to the Oracle ILOM documentation for more information about administration tasks such as changing passwords,adding accounts,and setting account privileges.Note –By default,the SP is configured to use DHCP to obtain an IP address.If instead you plan to assign astatic IP address to the SP,refer to the installation guide for instructions.8.Power on the server and redirect the host output to display on the serial terminal device.The server initialization takes approximately 20minutes to complete.9.When prompted,follow the onscreen instructions and type the configuration information for your system.If you are not sure how to respond,accept the default and make changes later when the Oracle Solaris OS is running.After you confirm the configuration information,the server reboots and displays the Oracle Solaris login prompt.10.Log in to the server.Use the following commands to display information about the system:■showrev –Displays the host name and system architecture e the -a option to display the patches that are installed.■psrinfo –Displays information about the number and status of the processors and cores in the host.Refer to the Oracle Solaris OS man pages and documentation for more details about these commands.▼Check for Latest Patches and FirmwareLater versions of OS patches and server firmware might be available for your server.Some server features are enabled only when certain versions of patches or firmware are installed.Refer to the SPARC T4-2Server Product Notes for details about required versions and patches.For updates,go to the My Oracle Support web site:https://SUNSP00144FAC732F login:root Password:changeme . . .->->start /SYSAre you sure you want to start /SYS (y/n)?y ->start /HOST/consoleAre you sure you want to start /HOST/CONSOLE (y/n)?y Serial console started.. . .Related DocumentationFeedbackProvide feedback on this document at:/goto/docfeedbackSupport and AccessibilityDocumentationLinksAll Oracle products /documentationSPARC T4-2server /docs/cd/E23075_01Oracle ILOM/docs/cd/E19860-01Oracle Solaris and other system software/technetwork/indexes/documentation/#sys_swDescriptionLinksAccess electronic support through My Oracle Support.https:// For hearing impaired:/accessibility/support.html Learn about Oracle’s commitment to accessibility./us/corporate/accessibilityCopyright©2011,Oracle and/or its affiliates.All rights reserved. Copyright©2011,Oracle et/ou ses affiliés.Tous droits réservés.Part Number: E23081-02Mfg. Number: 7015567November 2011。
oracle 数据库实例的配置方式

oracle 数据库实例的配置方式Oracle数据库是目前全球应用最广泛的关系型数据库之一,其强大的性能和可靠性使得它成为许多企业和组织首选的数据库管理系统。
在使用Oracle数据库之前,需要进行实例的配置,本文将详细介绍Oracle数据库实例的配置方式。
首先,我们需要理解什么是Oracle数据库实例。
Oracle数据库实例是由Oracle数据库软件创建和管理的一个独立运行环境,它包含了操作数据库所需的所有进程和内存结构。
每个Oracle数据库可以同时运行多个实例,每个实例和一个特定的数据库相关联。
接下来,我们将一步一步回答如何配置Oracle数据库实例。
第一步:安装Oracle数据库软件在配置Oracle数据库实例之前,我们需要先安装Oracle数据库软件。
Oracle提供了开发者和企业版两种版本的数据库软件,可以根据实际需求选择合适的版本。
安装过程中需要指定安装目录、数据库实例名称以及数据库系统标识符(SID) 等信息。
第二步:创建初始化参数文件在安装完成后,我们需要创建一个初始化参数文件,它用于描述数据库实例的初始配置参数。
参数文件通常以文本形式存在,并包含了一系列参数和值,用于控制数据库的各个方面。
参数文件通常命名为initSID.ora,其中SID为数据库实例名称。
参数文件中的参数可以分为两类:静态参数和动态参数。
静态参数在启动数据库实例之前必须使用参数文件进行配置,并且只能通过重新启动数据库实例来改变。
而动态参数可以在数据库实例运行过程中通过SQL语句来修改,无需重新启动数据库实例。
第三步:启动数据库实例配置完成参数文件后,我们可以使用Oracle提供的实用程序来启动数据库实例。
在Windows操作系统中,可以使用“OracleServiceSID”服务来启动数据库实例,其中SID为数据库实例名称。
在Linux和UNIX操作系统中,可以使用“sqlplus”命令来连接到数据库实例,并通过“startup”命令来启动数据库实例。
ORACLE数据库启动过程分析

表 示 数 据 库 启 动 实 例 , 不 安 装 数 据 库 ,不 打 开 数 据 库 。 增 加 文 件 打 开 。所 以 . 果 数 据库 安 装 失败 。 由 于 控 制 文 件 读 取 错 如 是 N MO N O U T选 项 只 用 于 数 据 库 的 控 制 文 件 全 部 损 坏 .需 要 重 新 误 引起 的 . 要 检 测 控 制 文件 是否 正 确 。 需
21 0 0年第 8期
福 建 电
脑
11 6
O A L R C E数 据 库启 动 过 程分 析
张 春 玉
(民航 东 北地 区空 中交 通 管 理局 气 象 中心 辽 宁 沈 阳 10 4 10 3)
【 摘
要】 :本文对 ORA L C E数据库 系统 的启动过程 的详 细分析 , 以及相关配置文件 的设 置, 通过数据库启动 失败 情况
20() 不 断 地 总 结 经 验 , 断 地 进 行 自我 设 计 , 断 地 调 整 学 习进 度 。 息 .0 5 2 . 不 不 [ 朱青 菊. 4 J 综合性 网络 多媒 体英语 课 件设 计初探 U】 . 成都 大 学学报 , 不 断 地 改 进学 习方 法 , 断 的 提 高 自主 学 习 的 质量 。 不
一
次完成 。 中途 不 能 退 出 . 不能 返 回重 作 。” 也 目标 测 试 ” 标 可 题
参考文献 :
以选 用 配 参 考 答 案 的练 习 模 式 , 复 练 习 , 面训 练 ; 可 以选 [ ] 反 全 也 1 华汉 芬. 关于 多媒体课 件制 作的 几点 建议 【 . J 宁波教 育 学院 学报 , ] 择 不 配 答 案 的 测 试 形式 , 面 检 测学 习效 果 。 目标测 试 ” 全 ” 配有 自 2 0 ( ) 052. 动计 分 功 能 . 接 显 现 学 习水 平 和 学 习质 量 。 测 结果 及 时 向学 [] 直 检 2 张艳 慧. 关于多媒体课件制作的探 讨U . ] 河北北方学院学报 , 0 () 2 53. 0 3赵 应用 多媒体技 术辅助 大学英语 教 学的探 索[]中国科技 信 J. 生 提 供 自 己在 不 同 阶段 的学 习情 况 .便 于 学 生 在 其 学 习 过 程 中 【 ] 建 军.
Oracle设置DB、监听和EM开机启动的方法
Oracle设置DB、监听和EM开机启动的⽅法⼀、Windows系统Oracle提供了随操作系统启动⽽启动的功能,在Windows和Linux中,分别有不同的设置⽅法。
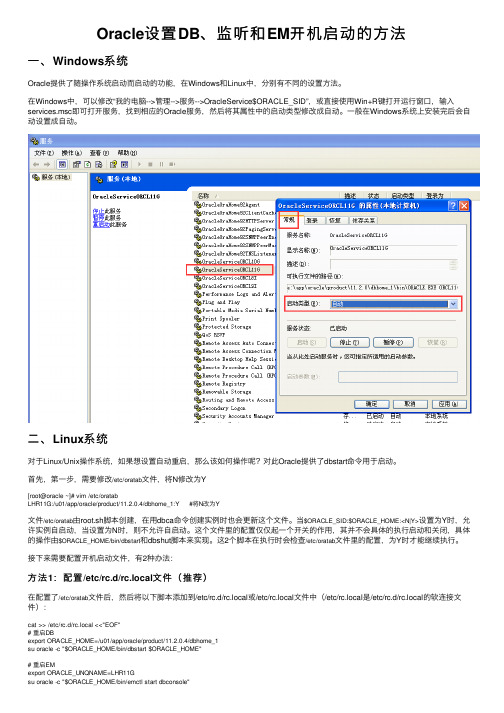
在Windows中,可以修改“我的电脑-->管理-->服务-->OracleService$ORACLE_SID”,或直接使⽤Win+R键打开运⾏窗⼝,输⼊services.msc即可打开服务,找到相应的Oracle服务,然后将其属性中的启动类型修改成⾃动。
⼀般在Windows系统上安装完后会⾃动设置成⾃动。
⼆、Linux系统对于Linux/Unix操作系统,如果想设置⾃动重启,那么该如何操作呢?对此Oracle提供了dbstart命令⽤于启动。
⾸先,第⼀步,需要修改/etc/oratab⽂件,将N修改为Y[root@oracle ~]# vim /etc/oratabLHR11G:/u01/app/oracle/product/11.2.0.4/dbhome_1:Y #将N改为Y⽂件/etc/oratab由root.sh脚本创建,在⽤dbca命令创建实例时也会更新这个⽂件。
当$ORACLE_SID:$ORACLE_HOME:<N|Y>设置为Y时,允许实例⾃启动,当设置为N时,则不允许⾃启动。
这个⽂件⾥的配置仅仅起⼀个开关的作⽤,其并不会具体的执⾏启动和关闭,具体的操作由$ORACLE_HOME/bin/dbstart和dbshut脚本来实现。
这2个脚本在执⾏时会检查/etc/oratab⽂件⾥的配置,为Y时才能继续执⾏。
接下来需要配置开机启动⽂件,有2种办法:⽅法1:配置/etc/rc.d/rc.local⽂件(推荐)在配置了/etc/oratab⽂件后,然后将以下脚本添加到/etc/rc.d/rc.local或/etc/rc.local⽂件中(/etc/rc.local是/etc/rc.d/rc.local的软连接⽂件):cat >> /etc/rc.d/rc.local <<"EOF"# 重启DBexport ORACLE_HOME=/u01/app/oracle/product/11.2.0.4/dbhome_1su oracle -c "$ORACLE_HOME/bin/dbstart $ORACLE_HOME"# 重启EMexport ORACLE_UNQNAME=LHR11Gsu oracle -c "$ORACLE_HOME/bin/emctl start dbconsole"该⽅法需要注意以下问题:1、若环境中没有创建EM,则可以不⽤添加ORACLE_UNQNAME和emctl这2⾏2、从Oracle 12c开始,由于EMDE(Enterprise Manager Database Express)替代了原有的EMDC(Enterprise Manager Database Control),所以,不再单独设置EM相关内容,只需要配置DB即可,例如:cat >> /etc/rc.d/rc.local <<"EOF"# 重启DBexport ORACLE_HOME=/u01/app/oracle/product/12.1.0.2/dbhome_1su oracle -c "$ORACLE_HOME/bin/dbstart $ORACLE_HOME"EOF3、在CentOS 7中,/etc/rc.d/rc.local的权限被降低了,所以需要执⾏如下命令赋予其可执⾏权限:chmod +x /etc/rc.d/rc.local最后就可以重启OS做测试⼯作了。
Oracle数据库启动过程研究与实践

Oracle数据库启动过程研究与实践摘要:分析了Oracle数据库启动过程,阐述了导致Oracle数据库启动故障的不同原因,模拟了各种故障,提出了故障的处理过程,使读者对Oracle数据库启动过程有更深入的了解。
关键词:Oracle;数据库;启动0引言Oracle数据库是当前应用最广泛的大型数据库管理系统,它在各个领域的使用不断增长。
了解Oracle的启动过程,就可以在Oracle启动发生故障时,快速定位,准确判断,从而快速解决问题。
1Oracle的启动过程如图1所示,ORACLE的启动过程分为3个阶段:启动数据库实例、装载数据库、打开数据库。
在每个阶段所作的工作包括:启动实例(nomount):Oracle读取参数文件,以确定初始化参数的值。
然后,系统便会分配SGA,并启动后台进程。
装载数据库(mount):Oracle读取控制文件,并检查数据文件的一致性,通过口令文件实现对用户身份认证。
打开数据库(open):根据控制文件找到数据文件、日志文件、检查点信息等重要文件,进行检查点及完整性检查。
在此状态下,用户可以访问数据库。
图1ORACLE的启动过程2Oracle启动异常时的分析处理2.1Oracle启动异常的原因分析根据Oracle数据库启动过程的分析,Oracle数据库启动失败的原因可能如下:①启动实例失败:参数文件不存在,系统配置(内核参数等)存在问题,应检查是否分配了足够的系统资源;②装载失败:控制文件读取错误,需要逐一检测所有控制文件是否正确。
口令文件读取错误,需要检查或重建口令文件;③打开失败:数据文件或日志文件损坏或不一致,需要进行恢复。
2.2Oracle启动异常的模拟及错误现象以下范例在Oracle11g中验证,$Oracle_home是C:\\app\\Administrator\\product\\11.2.0\\dbhome_1 目录,$Oracle_base是C:\\app\\Administrator目录,数据库的SID为ORCL。
Oracle T5-2服务器维护手册
Oracle T5-2服务器维护手册一、启动、关闭数据库1、启动实例的各种模式1)启动实例,装载并打开数据库这是最普通的数据库操作,意味着某个实例已经启动并且数据库也已经装载并打开。
这种模式允许任何一个有效的用户连接到数据库,并执行典型的数据访问操作。
启动实例接着从默认的服务器参数文件位置读取初始化参数,然后通过STARTUP命令来装载和打开数据库: SQL STARTUP2)启动实例,不挂载数据库启动实例而不用装载数据库,通常只在整个数据库创建过程中使用该模式:SQL STARTUP NOMOUNT3)启动实例,并装载数据库可以启动实例并装载数据库,但不打开数据库。
该模式允许执行特定的维护操作,例:如在下面的任务中必须装载数据库而不打开数据库。
X重命名数据文件X添加取消或重命名重做日志文件X允许和禁止重做日志存档选项X执行完整的数据为恢复操作SQLSTARTUP MOUNT4)在启动过程中限制访问数据库可以在受限制的模式下启动实例并装载和打开数据库,以便只有管理人员而不是一般的数据库用户可以利用数据库。
当需要完成以下一种任务时,使用这种数据库启动模式:X执行数据库数据的导入或导出操作X执行数据库装载操作用SQL XLoaderX暂时阻止一般的用户使用数据X在某个移植过程和升级操作过程中SQL STARTUP RESTRICT5)强制实例启动-慎用在一些特殊环境下,可能会在启动数据库实例的时候遇到一些问题。
一般不要迫使数据库启动,除非存在以下情形:用SHUTDOWNNORMAL、SHUTDOWNIMMEDIATE、SHUTDOWNTRANSACTIONAL命令不能关闭当前的实例时。
X在启动实例的时候遇到一些问题时。
SQL STARTUP FORCE6)启动实例, 装载数据库, 并启动完整的介质恢复过程如果知道需要介质恢复过程,就可以启动实例并为其装载数据库,以及通过使用带RECOVER选项的STARTUP命令的方法来自动启动恢复过程。
oracle数据库运行机制和基本原理

Oracle数据库是一种关系型数据库管理系统,它采用了客户/服务器模式,可以在各种不同的评台上运行。
其运行机制和基本原理是数据库领域的重要内容,我们将通过以下几个方面来详细介绍。
1. Oracle数据库的体系结构Oracle数据库的体系结构包括实例和数据库。
实例是由一个或多个进程组成,负责处理客户端的请求和管理数据库的物理结构;数据库是由数据文件组成,用来存储数据和控制文件。
实例和数据库之间通过监听器进行通信,客户端通过监听器访问数据库。
2. Oracle数据库的运行原理Oracle数据库的运行原理包括数据库的启动和关闭过程。
数据库的启动过程包括加载实例和数据库文件、分配内存、打开数据库并监听客户端请求;数据库的关闭过程包括关闭实例和数据库文件、释放内存、关闭数据库并停止监听器。
3. Oracle数据库的存储结构Oracle数据库的存储结构包括内存结构和磁盘结构。
内存结构包括数据库SGA和PGA,SGA用来存储数据库的共享数据和控制信息,PGA用来存储客户端的私有数据;磁盘结构包括数据文件、控制文件和日志文件,数据文件用来存储数据库的数据,控制文件用来记录数据库的元数据,日志文件用来记录数据库的事务日志。
4. Oracle数据库的并发控制Oracle数据库的并发控制包括锁和多版本并发控制。
锁是用来控制对共享资源的并发访问,包括共享锁、排他锁和意向锁;多版本并发控制是一种乐观并发控制方式,每个事务都有自己的版本,可以并发访问相同的数据,不会相互影响。
5. Oracle数据库的恢复机制Oracle数据库的恢复机制包括日志文件和闪回技术。
日志文件用来记录数据库的操作,包括重做日志和撤销日志,可以用来恢复数据库的状态;闪回技术可以回滚数据库到历史状态,包括闪回查询和闪回表。
通过以上内容的介绍,我们对于Oracle数据库的运行机制和基本原理有了一定的了解。
Oracle数据库作为一种成熟的关系型数据库管理系统,其运行机制和基本原理对于数据库管理员和开发人员来说是非常重要的,可以帮助他们更好地理解、管理和优化数据库。
oracle数据库服务器安装教程
oracle数据库服务器安装教程Oracle是一种非常流行的关系数据库管理系统,常用于大型企业和组织的数据存储和管理。
在安装Oracle数据库服务器之前,需要准备好以下工作:1. 下载Oracle数据库软件:访问Oracle官方网站并下载适用于您操作系统的Oracle数据库软件。
2. 检查系统要求:在安装Oracle数据库服务器之前,确保您的操作系统满足Oracle的系统要求。
例如,适合您计算机运行的操作系统版本和硬件要求。
3. 解压安装文件:将下载的数据库软件文件解压到指定的目录中。
一旦准备好了上述工作,您可以按照以下步骤开始安装Oracle 数据库服务器:1. 打开解压后的安装文件夹,并运行安装程序。
2. 在安装向导中选择“创建和配置数据库”选项。
3. 在下一个界面上,选择“单机数据库安装”。
4. 在“选择安装类型”页面上,选择“自定义安装”,这将允许您选择安装过程中的详细选项。
5. 在“系统类别”页面上,选择适用于您的操作系统的选项(32位或64位)。
6. 在“选择数据库版本”页面上,选择您要安装的Oracle数据库版本。
7. 在“选择产品语言”页面上,选择您希望Oracle数据库使用的语言。
8. 在“选择数据库配置”页面上,选择“创建和配置数据库”。
9. 在“选择数据库操作类型”页面上,选择“新建数据库”。
10. 在“命名标识符和密码管理”页面上,设置您的数据库名、全局数据库名和管理员用户密码。
11. 在“指定数据库文件位置”页面上,选择数据库文件和日志文件的存储位置。
12. 在“配置监听器”页面上,选择是否要创建和配置监听器。
13. 在“创建数据库”页面上,选择是否要创建示例数据库。
14. 在“更改默认认证设置”页面上,选择是否要更改默认的身份验证设置。
15. 在“安装选项”页面上,选择是否启用自动内存管理和自动存储管理。
16. 在“请求的配置信息”页面上,提供必要的配置信息。
17. 在“安装”页面上,验证您的配置信息,并单击“安装”按钮开始安装过程。
Linux服务器下oracle数据库启动服务操作步骤

Linux服务器下oracle数据库启动服务操作步骤⼀、在Linux下启动Oracle1.登录到Linux服务器,切换到oracle⽤户权限(命令是:# su –l oracle)2.进⼊sqlplus界⾯(命令是:$ sqlplus /nolog 或 sqlplus / as sysdba)原本的画⾯会变为SQL>接着请输⼊SQL>conn / as sysdba ;输⼊SQL> startup (作⽤:启动数据库实例)另外停⽌数据库的指令如下:SQL> shutdown immediate1 [oracle@localhost ~]$ sqlplus / as sysdba --进⼊sqlplus界⾯23 SQL*Plus: Release 11.2.0.1.0 Production on Thu Mar 1710:48:08202245 Copyright (c) 1982, 2009, Oracle. All rights reserved.67 Connected to an idle instance.89 SQL> quit10 Disconnected11 [oracle@localhost ~]$ sqlplus /nolog --进⼊sqlplus界⾯1213 SQL*Plus: Release 11.2.0.1.0 Production on Thu Mar 1710:48:4220221415 Copyright (c) 1982, 2009, Oracle. All rights reserved.1617 SQL> conn / as sysdba --sysdba登录18 Connected to an idle instance.19 SQL> startup --启动数据库实例20 ORACLE instance started.2122 Total System Global Area 1068937216 bytes23 Fixed Size 2220200 bytes24 Variable Size 281022296 bytes25 Database Buffers 780140544 bytes26 Redo Buffers 5554176 bytes27 Database mounted.28 Database opened.29 SQL> shutdown immediate --关闭数据库实例3031 Database closed.32 Database dismounted.333435 ORACLE instance shut down.36 SQL>quit --退出⼆、检查Oracle 数据库是否启动回到终端机模式,输⼊:ps -ef|grep ora_ (作⽤是:查看是否有Oracle的进程,如果有,⼤多数情况说明启动了。
Oracle Sun Fire X4170 M2和X4270 M2服务器初始启动和引导的最小步骤说明

This guide describes the minimum steps you must perform to power on and boot your server for the first time.Detailed installation information can be found in the Sun Fire X4170M2and X4270M2Servers Installation Guide ,which is available at Oracle’s documentation web sites for the individual servers.Refer to the section“Documentation for This Product”at the end of this document for a list of documentation for your system.ContentsOracle’s Sun Fire X4170M2and X4270M2Servers are shipped with safety documentation and the components that you ordered for your configuration.Optional components or rack installation equipment might be packaged and shipped separately.Documentation and Media KitThe Documentation and Media Kit is an orderable option for your system.It contains installationdocumentation,the Tools and Drivers DVD,the Oracle Hardware Installation Assistant CD,and the Oracle Validation Test Suite CD.You can order the Documentation and Media Kit at any time,using the following marketing part number:X5935A.You also can download the documentation and software that are included in the Documentation and Media Kit.■For documentation,go to:■For Sun Fire X4170M2–/pls/topic/lookup?ctx=E19762-01■For Sun Fire X4270M2–/pls/topic/lookup?ctx=E19245-01■For software,go to:■For Sun Fire X4170M2–/goto/x4170m2■For Sun Fire X4270M2–/goto/x4270m2Safety and Compliance InformationBefore performing an installation,refer to the following documents for safety information:■Important Safety Information for Sun Hardware Systems –Printed document included in the ship kit.■Sun Fire X4170M2and X4270M2Servers Safety and Compliance Guide –Online at the documentation web site.Sun Fire X4170 M2 and X4270 M2ServersGetting Started Guide▼Install Optional ComponentsBefore installing the server into the rack,you must first install any optional components that you ordered with the server and that were not factory installed.Refer to the Sun Fire X4170M2Server Service Manual and the Sun Fire X4270M2Server Service Manual for the instructions on installing optional components.▼Mount the System in a RackFor rackmounting instructions,refer to the documents included with the rail kit,the service label on the server,and to the Sun Fire X4170M2and X4270M2Servers Installation Guide .▼Connect the Cables and Apply Standby Power to the Server1.Connect a serial cable between the server’s SER MGT port (FIGURE 1)and a serial terminal device.This connection provides your initial communication with the service processor (SP).The terminal device must be set up to communicate using 9600baud,8bit,no parity,1stop bit.A null modem configuration is needed,meaning the transmit and receive signals are reversed (crossed over)for DTE to DTEcommunications.You can use the supplied RJ-45crossover adapter with a standard RJ-45cable to achieve the null modem configuration.(FIGURE 1shows the Sun Fire X4170M2Server.The locations of the back panel connectors and ports are the same on the Sun Fire X4270M2Server.)FIGURE 1Back Panel of Server (Server Connections)2.(Optional)Connect an Ethernet cable between the server’s NET MGT port and the network to whichfuture connections to the SP will be made.After the initial configuration of the system using the SER MGT port,communication with the SP is usually performed through this Ethernet interface.3.Connect an Ethernet cable between one of the server’s NET ports (NET 0,1,2,or 3)and the network towhich the server will communicate.4.Connect the server power cords to AC power outlets and,to enhance redundancy,to separate powersources.When standby power is applied,the SP initializes and the Power/OK LED flashes in Standby Blink pattern (0.1seconds on,2.9seconds off)(see FIGURE 2and FIGURE 3).Note that the server is not initialized orpowered on yet.For more information on connectivity options,refer to the Sun Fire X4170M2and X4270M2Figure Legend1AC power connectors4Gigabit Ethernet ports NET 0,1,2,3(Intel)2Serial management (SER MGT)/RJ-45serial port 5USB 2.0ports (0,1)3Service processor network management (NET MGT)port6HD15video connector (analogVGA)At this point,standby power is supplied only to the SP and power supply fans.Do not apply main power to the rest of the server until you are ready to install an operating system.In standby power mode,the Power/OK LED flashes in Standby Blink (0.1seconds on,2.9seconds off).FIGURE 2shows the Sun Fire X4170M2Server.FIGURE 3shows the Sun Fire X4270M2Server with twelve 3.5-inch drives;the front panel controls on the Sun Fire X4270M2Server with twenty-four 2.5-inch drives (not shown)support the same functions.FIGURE 2Sun Fire X4170M2Server Front Panel ControlsFIGURE 3Sun Fire X4270M2Server Front Panel ControlsConnecting to Oracle ILOMYou can start,boot,and manage the server using the Oracle Integrated Lights Out Manager (Oracle ILOM)software that runs on the server’s SP.There are two methods for connecting to Oracle ILOM:■Connect to Oracle ILOM using a serial connection (SER MGT port)See “Connect to Oracle ILOM Using a Serial Connection”for instructions.■Connect to Oracle ILOM using an Ethernet connection (NET MGT port)See the Sun Fire X4170M2and X4270M2Servers Installation Guide for instructions.To connect via an Ethernet connection,you must know the IP address of the server SP.In a typical configuration,you will accept the IP address assigned by the DHCP server or IPv6router.If you are not using DHCP or an IPv6router,or if you need to assign the server SP a static IP address for any other reason,refer to the Oracle Integrated Lights Out Manager (ILOM)3.0Documentation Library for instructions.Figure Legend1Power/OK LED 2Power ButtonFigure Legend1Power Button 2Power/OKLED▼Connect to Oracle ILOM Using a Serial Connection1.Connect a terminal device to the server.See Step1in“Connect the Cables and Apply Standby Power to the Server”.2.Press Enter on the terminal device to create a connection between the terminal device and the OracleILOM SP.The Oracle ILOM login prompt appears.3.Log in to the Oracle ILOM CLI using the root user account and the root password,changeme.The Oracle ILOM CLI prompt appears(->).You can now start,configure,and manage the server using Oracle ILOM.▼Apply Main Power to the ServerCaution–Do not operate the server without all fans,component heatsinks,air baffles,and the cover installed.Severe damage to server components can occur if the server is operated without adequatecooling mechanisms.1.Verify that the power cords have been connected(FIGURE1)and that standby power is on.2.Press and release the recessed Power button on the front panel(FIGURE2and FIGURE3).When main power is applied to the full server,the Power/OK LED lights and blinks while BIOS initializes.The Power/OK LED lights steady green when the system is loading an OS.3.Continue with initial software setup tasks,as described in the Sun Fire X4170M2and X4270M2ServersInstallation Guide.▼Upgrade FirmwareIt is highly recommended that you use the Oracle Hardware Installation Assistant to upgrade system BIOS and Oracle Integrated Lights Out Manager(Oracle ILOM)firmware.The Oracle Hardware Installation Assistant is easy to use and available in the Documentation and Media Kit,or online at:For more information,refer to the documentation for the version of Oracle Hardware Installation Assistant supported for your server at:/pls/topic/lookup?ctx=hiaFor instructions on upgrading system BIOS and Oracle ILOM firmware without using Oracle Hardware Installation Assistant,go to the Oracle ILOM3.0Documentation Library at:/pls/topic/lookup?ctx=ilom30All firmware and drivers are located on the Tools and Drivers DVD,which is part of the Documentation and Media Kit.You also can download the software on the Tools and Drivers DVD from the Oracle software download sites(see links in the following table).▼Set Up the Platform Operating System and Driver SoftwareYou can configure the preinstalled or supported operating system(OS)for your server.The following table provides additional references for installing an operating system,system device drivers,firmware,and patches.At the product web site (/goto/x4170m2or/goto/x4270m2),use the links to navigate to the information you need.▼For Technical SupportFor techincal support,see /us/corporate/contact/index.htmlFor information on a software service plan,see /support/premier/index.html If you need service for your system,you might be asked for your hardware serial number.To find the serial number of your system,use the Oracle ILOM command show /SYS ,or see your Installation Guide or Service Manual for information about where to find the serial number label for your system.Operating system:Read the Sun Fire X4170M2and X4270M2document:For installation information,go to:For latest tools,drivers,firmware,and the OracleHardware Installation Assistant,go to:For patch information,go to:Preinstalled Oracle Solaris or Oracle VMInstallation Guide•http:///goto/x4170m2•http:///goto/x4270m2•http://support.orac •See the Sun Fire X4170M2and X4270M2Servers Product Notes •http://Oracle SolarisInstallation Guide for Linux,Virtual Machine Software,and OracleSolaris Operating Systems•http:///goto/x4170m2•http:///goto/x4270m2Virtual Machine Software•http:///virtualization/•http:///•http:///virtualization/•http://downloads.vmware .com/Windows•Windows or Linux:Oracle Hardware Installation Assistant 2.5Users Guide for x86Servers•Windows:Installation Guide for Windows Operating Systems •Linux:Installation Guide for Linux,Virtual Machine Software,and Oracle SolarisOperating Systems•http:// •http:///goto/x4170m2•http:///goto/x4270m2Windows or Linux:Use the Oracle Hardware Installation Assistant for automaticfirmware update and driver installationhttp://update.microsoft .com/Linux•Red Hat:https:///apps/download/•SUSE:http://download.novell .com/index.jspDocumentation for This ProductThe following table lists the documentation and the approximate order of tasks that you might perform when installing a system.For the most up-to-date English and translated versions of some of the documents,go to the Oracle documentation site■For Sun Fire X4170M2–/pls/topic/lookup?ctx=E19762-01■For Sun Fire X4270M2–/pls/topic/lookup?ctx=E19245-01Task DocumentReview safety information.Sun Fire X4170M2and X4270M2Servers Safety andCompliance GuideImportant Safety Information for Sun Hardware Systems Review known issues and workarounds.Sun Fire X4170M2and X4270M2Servers ProductNotesInstall rack hardware.Cable and power on server.Connect to service processor.Configure preinstalled Oracle Solaris OS.Sun Fire X4170M2and X4270M2Servers Installation GuideInstall and configure the Oracle Solaris,Linux,Windows OS,or install virtual machine software such as Oracle VM or VMware.Sun Fire X4170M2and X4270M2Servers Installation Guide for Linux,Virtual Machine software,and Oracle Solaris Operating SystemsSun Fire X4170M2and X4270M2Servers Installation Guide for Windows Operating SystemsOracle Hardware Installation Assistant2.5Users Guide for x86ServersManage server accounts,monitor alerts,set remote access andredirection,and view component status and event logs.Oracle ILOM3.0DocumentationCustomize BIOS settings and RAID settings.Remove and replace hardware components.Troubleshoot and isolate server problems.•Sun Fire X4170M2Server Service Manual •Sun Fire X4270M2Server Service ManualDiagnose system issues.Sun x64Servers Diagnostics GuideCopyright©2010,2011,2012Oracle and/or its affiliates.Copyright©2010,2011,2012Oracle et/ou ses affiliés.Part No. E27118-02, Rev. AJanuary 2012。
ORACLE的启动过程
ORACLE的启动过程
oracle数据库启动过程分为三个步骤:nomount,mount,open
(1)nomount
命令 STARTUP NOMOUNT
这个阶段,ORACLE进程读取初始参数⽂件(PFILE或SPFILE),查看ORACLE数据库的参数如何配置,包括内存参数配置(SGA与PGA)等参数配置,同时ORACLE的进程也启动(DBWn,LGWR,SMON,PMON)等后台进程。
内存和进程构成ORACLE INSTANCE,ORACLE INSTANCE启动成功就进⼊NOMOUNT
(2)MOUNT
命令 STARTUP MOUNT ,NOMOUNT变成MOUNT是命令 ALTER DATABASE MOUNT
启动到这个阶段时,会打开和读取控制⽂件,控制⽂件是⼆进制⽂件,记录着Oracle的重要信息,例如,数据⽂件的路径等。
这个阶段,Oracle确定数据⽂件的位置,但是还没有打开这些⽂件,⼀旦数据⽂件的路径被定位后,数据库开始进⼊下⼀阶段。
在这⼀阶段可以把数据库从⾮归档模式设置为归档模式,等⼀些维护。
(3) OPEN
命令为STARTUP,从MOUNT状态转OPEN ALTER DATABASE OPEN
这个阶段,Oracle会读取所有的数据⽂件,并且确定这些数据⽂件是⼀致的(consistent)。
Oracle 11gr2 软件安装和数据库创建步骤详解
Oracle 11gr2 软件安装和数据库创建步骤详解本文是一篇step-by-step 文档,演示了如何安装oracle 数据库软件以及使用DBCA创建数据库。
同时,我们对每一步的功能,注意事项和容易犯的错误都进行了描述。
希望对大家了解数据库安装过程有所帮助。
安装数据库软件Start The Installer请参考各平台对应的安装手册,在满足安装前提条件下运行如下命令来启动数据库安装:$ /media/database/runInstallerConfigure Security Updatess本步骤可以选择提供您的My Oracle Support email来接收Oracle安全通知,安装产品和初始化Oracle配置管理器。
●EMAIL:填写您的My Oracle Support email或者用户名●I wish to receive security update via My Oracle Support. 该项选中则表明您期望通过My Oracle Support来接收安全更新。
推荐选项:如果您有My Oracle Support账户,建议填写您的EMAIL和密码来接收Oracle安全更新;否则您可以跳过该步骤。
如果您跳过该步骤,会弹出一个警告:点击Yes来确认您的选择:Download Software Updates从Oracle11.2.0.2开始,您可以使用软件更新选项来动态下载和应用最新的软件更新,该步骤可以为本次的安装选择软件更新,比如推荐的更新,PSU或者其他推荐的补丁:该步骤有3个选项:●Use My Oracle Support credentials for download: 该选项指的是在线下载更新,需要您的主机能连上My Oracle Support网站,并且需要提供您的My Oracle Support账户和密码●Use pre-download software update: 该选项适用于您已经将所需的软件更新下载到本地,您可以直接指定本地的已经下载了软件更新的路径。
oracle database数据库创建操作步骤

创建Oracle数据库的操作步骤如下:
1. 安装Oracle数据库软件:首先需要下载并安装Oracle数据库软件。
根据操作系统的不同,选择相应的版本进行安装。
2. 创建数据库实例:在安装完成后,需要创建一个数据库实例。
数据库实例是一个运行在计算机上的Oracle数据库的副本,它包含了数据库的数据和元数据。
3. 配置数据库参数:在创建数据库实例后,需要对数据库进行配置。
配置包括设置数据库的名称、字符集、内存分配等参数。
4. 创建表空间:表空间是数据库中存储数据的逻辑结构,用于管理数据库中的表、索引等对象。
可以创建多个表空间来管理不同类型的数据。
5. 创建用户:在Oracle数据库中,用户是访问和管理数据库的主体。
可以创建多个用户,并为每个用户分配不同的权限。
6. 创建表和索引:在数据库中创建表和索引来存储和管理数据。
可以使用SQL语句或者图形化工具来创建表和索引。
7. 导入数据:如果有现有的数据需要导入到数据库中,可以使用Oracle提供的工具或者SQL语句来进行数据导入。
8. 运行数据库:完成以上步骤后,可以启动数据库实例,并开始使用数据库。
以上是创建Oracle数据库的基本步骤,具体的操作可以根据实际需求和情况进行调整。
{"code":0,"msg":"请求出现异常","data":{}}。
oracle10G 数据库名、实例名、ORACLE_SID详解

数据库名、实例名、数据库域名、全局数据库名、服务名,这是几个令很多初学者容易混淆的概念。
相信很多初学者都与我一样被标题上这些个概念搞得一头雾水。
我们现在就来把它们弄个明白。
一、数据库名什么是数据库名?数据库名就是一个数据库的标识,就像人的身份证号一样。
他用参数DB_NAME表示,如果一台机器上装了多全数据库,那么每一个数据库都有一个数据库名。
在数据库安装或创建完成之后,参数DB_NAME被写入参数文件之中。
格式如下:DB_NAME=orcl在创建数据库时就应考虑好数据库名,并且在创建完数据库之后,数据库名不宜修改,即使要修改也会很麻烦。
因为,数据库名还被写入控制文件中,控制文件是以二进制型式存储的,用户无法修改控制文件的内容。
假设用户修改了参数文件中的数据库名,即修改DB_NAME 的值。
但是在Oracle启动时,由于参数文件中的DB_NAME与控制文件中的数据库名不一致,导致数据库启动失败,将返回ORA-01103错误。
数据库名的作用数据库名是在安装数据库、创建新的数据库、创建数据库控制文件、修改数据结构、备份与恢复数据库时都需要使用到的。
有很多Oracle安装文件目录是与数据库名相关的,如:跟踪文件目录:winnt: /home/app/oracle/product/10.1.0/admin/DB_NAME/bdump/...另外,在创建数据时,careate database命令中的数据库名也要与参数文件中DB_NAME参数的值一致,否则将产生错误。
同样,修改数据库结构的语句alter database,当然也要指出要修改的数据库的名称。
如果控制文件损坏或丢失,数据库将不能加载,这时要重新创建控制文件,方法是以nomount方式启动实例,然后以create controlfile命令创建控制文件,当然这个命令中也是指指DB_NAME。
还有在备份或恢复数据库时,都需要用到数据库名。
总之,数据库名很重要,要准确理解它的作用。
Oracle启动数据库的步骤
Oracle启动数据库的步骤由于实例是Oracle用来管理数据库的一个实体,在启动数据库时将在内存中创建与该数据库所对应的实例。
Oracle数据库的完整启动过程分为如下3个步骤:●创建并启动与数据库对应的实例。
在启动实例时,将为实例创建一系列后台进程和服务进程,并且在内存中创建SGA区等内存结构。
在实例启动的过程中只会使用到初始化参数文件,数据库是否存在对实例的启动并没有影响。
如果初始化参数设置有误,实例将无法启动。
●为实例加载数据库。
加载数据库时实例将打开数据库的控制文件,从控制文件中获取数据库名称、数据文件的位置和名称等关于数据库物理结构的信息,为打开数据库做好准备。
如果控制文件损坏,则实例将无法加载数据库。
在加载数据库阶段,实例并不会打开数据库的物理文件——数据文件和重做日志文件。
●将数据库设置为打开状态。
打开数据库时,实例将打开所有处于联机状态的数据文件和重做日志文件。
如果在控制文件中列的任何一个数据文件或重做日志文件无法正常打开,数据库将返回错误信息,这时需要进行数据库恢复。
只有将数据库置为打开状态后,数据库才处于正常运行状态,这时普通用户才能够访问数据库。
在很多情况下,启动数据库时并不是直接完成上述3个步骤,而是逐步完成的,然后执行必要的管理操作,最后再使数据库进入正常运行状态。
例如,如果需要重新命名数据库中的某个数据文件,而数据库当前正处于正常启动状态,可能还会有用户正在访问该数据文件中的数据,因此无法对数据文件进行更改。
这时必须将数据库关闭,并进入到加载状态,但不打开状态,这样将断开所有用户的连接,然后再对数据文件进行重命名。
完成操作后再重新打开数据库供用户使用。
因此,数据库管理需要根据不同的情况决定以不同的方式启动数据库,并且还需要在各种启动状态之间进行切换。
在启动实例之前,首先需要启动SQL*Plus并连接到Oracle。
具体步骤如下:(1)在命令提示符窗口中输入如下命令,以不连接数据库的方式启动SQL*Plus:C:\>sqlplus /nologSQL*Plus: Release 11.1.0.6.0 - Production on 星期三3月12 16:17:01 2008Copyright (c) 1982, 2007, Oracle. All rights reserved.(2)以SYSDBA身份连接到Oracle。
oracle12c创建数据库实例
oracle12c创建数据库实例标题:Oracle12c创建数据库实例一、引言在当今信息化时代,数据库的应用已经成为企业和个人处理大数据的基础设施。
Oracle12c作为一款成熟的数据库管理系统,其创建数据库实例的过程显得尤为重要。
本文将为您详细介绍如何高效地创建Oracle12c数据库实例。
二、准备工作在正式创建数据库实例之前,我们需要做一些准备工作。
首先,确保我们已经安装了Oracle12c的软件,并拥有相应的权限。
其次,为数据库实例选择一个合适的位置,并清楚地设置好操作系统环境变量。
最后,确保我们有明确的数据库实例创建需求和目标。
三、创建数据库实例的步骤1. 启动Oracle Universal Installer(OUI):通过启动OUI工具,我们可以开始创建数据库实例的过程。
在OUI界面中选择“Create and Configure a Database”选项。
2. 选择数据库类型:在数据库类型的选择界面,我们需要根据实际需求选择合适的数据库类型。
例如,我们可以选择“GeneralPurpose/Transaction Processing”来创建一个通用型的数据库实例。
3. 设置数据库标识和密码:根据实际需求,设置数据库的全局数据库名称和管理员密码。
这些设置将成为数据库实例的重要标识。
4. 确定区域和字符集:为了满足不同地区和语言的需求,我们需要设置合适的区域和字符集。
一般情况下,根据实际应用场景选择UTF8字符集即可。
5. 设置内存和数据库文件位置:根据实际硬件资源和存储空间的情况,设置合理的内存大小和数据库文件的位置。
6. 进行安全设置:在数据库实例创建的过程中,我们需要设置一些安全选项,如要求填写安全更新说明、选择是否启用密码文件等。
7. 进行备份和恢复设置:在创建数据库实例的过程中,我们需要考虑到数据的备份和恢复策略。
可以选择启用自动备份和恢复选项,以保证数据的安全性。
8. 进行数据库验证:在所有设置完成后,我们需要进行数据库的验证。
Oracle启动中,startupnomount、startupmount有什么差别?

在用于处理的方法上要多考虑效率问题任何ifwhile的使用都会增加复杂度这个地方用正则在试用trim方法比较好如果觉得我说的不是对的也请指教大家tupmount有什么差别?
Oracle启动中,startup nomount、 startup mount 有什么差别?
- 1、下载文档前请自行甄别文档内容的完整性,平台不提供额外的编辑、内容补充、找答案等附加服务。
- 2、"仅部分预览"的文档,不可在线预览部分如存在完整性等问题,可反馈申请退款(可完整预览的文档不适用该条件!)。
- 3、如文档侵犯您的权益,请联系客服反馈,我们会尽快为您处理(人工客服工作时间:9:00-18:30)。
ORACLE数据库启动过程祥解及错误排除
本文目的
在ORACLE数据库管理中,启动数据库遇到问题较多。
而且多数ORACLE的使用者在数据库启动过程中遇到错误提示,无从下手使用了错误的方法修改数据库的相关文件,而从造成了不必要的数据损失。
通过本文使读者对ORACLE数据库的启动过程有一个较为详细的了解,遇到启动过程的错误不至于手忙脚乱造成更大的损失。
一、数据库启动方法
1、UNIX平台数据库启动方法
使用oracle用户登录服务器
$>sqlplus ‘/ as sysdba’(使用sys用户登录数据库)
Sql>(系统提示连接到一个没有启动的实例)
Sql>startup(正常启动数据库)
2、WINDOWS平台数据库启动方法
使用手工方式启动数据库。
➢打开DOS窗口
➢C:\>ordim –startup –sid ora9i(其中ora9i为实例的名称)
在WINDOWS平台启动ORACLE时经常遇到如下错误:
以上错误是由于,没有启动ORACLE数据库在WINDOWS平台中的服务。
正确启动过程如下:
(DESCRIPTION=(ADDRESS=(PROTOCOL=tcp)(HOST=dba)(PORT=1521)) )正在连接到
(DESCRIPTION=(ADDRESS=(PROTOCOL=IPC)(KEY=EXTPROC0))) LISTENER 的STATUS
------------------------
别名LISTENER
版本TNSLSNR for 32-bit Windows: Version 9.2.0.1.0 - Produc
tion
启动日期28-7月-2006 22:24:16
正常运行时间0 天0 小时0 分 4 秒
跟踪级别off
安全性OFF
SNMP OFF
监听器参数文件c:\oracle\ora92\network\admin\listener.ora 监听器日志文件c:\oracle\ora92\network\log\listener.log
监听端点概要...
(DESCRIPTION=(ADDRESS=(PROTOCOL=ipc)(PIPENAME=\\.\pipe\EXT PROC0ipc)))
(DESCRIPTION=(ADDRESS=(PROTOCOL=tcp)(HOST=dba)(PORT=1521)) )
服务摘要..
服务"PLSExtProc" 包含 1 个例程。
例程"PLSExtProc", 状态UNKNOWN, 包含此服务的 1 个处理程序...
服务"oracle" 包含 1 个例程。
例程"ora9i", 状态UNKNOWN, 包含此服务的1 个处理程序...
命令执行成功
C:\>sqlplus "/ as sysdba"
SQL*Plus: Release 9.2.0.1.0 - Production on 星期五7月28 22:24:47 2006
Copyright (c) 1982, 2002, Oracle Corporation. All rights reserved.
连接到:
Oracle9i Enterprise Edition Release 9.2.0.1.0 - Production
With the Partitioning, OLAP and Oracle Data Mining options
JServer Release 9.2.0.1.0 - Production
SQL> select status from v$instance;
STATUS
------------
OPEN
使用WINDOWS系统提供的服务的功能启动数据库。
在WIDDOWS服务中选中ora9i的服务,选择启动。
启动画面如下:
当数据库启动正常后。
可以使用sqlplus命令连接到数据库
中。
WINDOWS平台数据库的监听器的启动,可以使使用lsnrctl start命令直接进行启动。
二、数据库启动经历过程
本章节主要以ORACLE数据库在UNIX平台启动过程,作为主要介绍对象。
1、数据库启动的四个阶段
数据库处于SHUTDOWN状态
在此种状态,数据库处于静止状态。
不能接受外界数据请求。
使用操作系统命令ps –ef|grep oracle开不到任何数据库进程的存在。
