asus华硕 WiFi-b无线网卡 用户手册
ASUS ROG GT-AC2900 AiMesh 路由器说明书

AiMesh Supported-Works with ASUS AiMesh compatible routers tocreate a powerful, flexible, seamless whole-home Wi-Fi system.Front-line Network Security–Lifetime free AiProtection Pro,powered by Trend Micro™, protects all connected devices frominternet threats.Aura RGB Lighting–Multiple effects for a stylish vibe and reflect thestatus of your network.True Gigabit Wi-Fi speed -160MHz bandwidth support deliveringtransfer speeds over 1 Gbps.GeForce NOW is a cloud gaming service that turns your non-gaming system into apowerful gaming rig, and connects you to over 400 top games, like PUBG andFortnite on popular PC game stores like Steam and Uplay.GeForce NOW recommended routers ensure up to 90% of Wi-Fi bandwidth isdedicated to gaming and undergo rigorous testing to deliver the best possibleexperience and lowest latency for cloud gaming.ROG First is a new feature of the ROG GameFirst V network accelerationsoftware for ROG motherboards, laptops and desktops* that ensuresseamless operation with ROG routers, resulting in smoother online gamingperformance with shorter ping times and minimized lag.ROG GT-AC2900 features triple-level game acceleration to boost game traffic every step of the way —from your device to the game server. You’ll experience lower ping times and reduced latency for a better online gaming experience.ASUS Router App allowing you to setup your router, manage network traffic, diagnose connection issues and evenupdate firmware, all without needing to boot up a PC.•ROG Rapture GT-AC2900 Dual-band Gaming Router •RJ-45 cable •Power adapter •Warranty card •Quick start guide •Screwdriver •Wireless Type : 802.11 ac/n/g/a/b •Wireless Speed : 2.4GHz up to 750 Mbps / 5GHz up to 2167Mbps •Wired Connectivity : 4 x LAN, 1 x WAN gigabit Ethernet ports •USB Ports : 1 x USB 3.0(USB 3.1 Gen 1) , 1 x USB 2.0•Warranty : 3 years (varies by regions)Scan to check full specsGT-AC2900 is able to connect to multiple MU-MIMO-compatible clients at each device's maximum speed simultaneously, unlike standard single-user MIMO where individual devices have to wait for sequential transmissions.NitroQAM ™ (1024-QAM) technology delivers the ultimate 5GHz quad-stream (4x4)speeds of up to 2167Mbps, giving GT-AC2900 combined total speed of 2917Mbps.GT-AC2900 top-of-the-line 1.8GHz 64bit dual-core processor brings its computationalcapability to the next level, enabling USB data transfers of up to 110MB/s and routerdownload/upload speeds (WAN-LAN throughput) of up to 1600Mbps. RangeBoostsignificantly improves mid-to long-distance Wi-Fi coverage.ConnectivityNetwork Standard Product Segment CoverageData RateAntennaTransmit/Receive MemoryEncryptionFirewall & Access ControlManagementWAN Connection TypeButtonPorts IEEE 802.11a, IEEE 802.11b, IEEE 802.11g, IEEE 802.11n, IEEE 802.11ac, IPv4, IPv6AC2900 ultimate AC performance: 750+2167 MbpsVery large homes802.11a : 6,9,12,18,24,36,48,54 Mbps802.11b : 1, 2, 5.5, 11 Mbps802.11g : 6,9,12,18,24,36,48,54 Mbps802.11n : up to 600 Mbps802.11ac: up to1734 Mbps1024QAM(2.4GHz): up to 750 Mbps1024QAM (5GHz): up to 2167 MbpsExternal antenna x 3, Internal antenna x 1MIMO technology2.4 GHz 3x 35 GHz 4 x4256 MB Flash512 MB RAM64-bit WEP, 128-bit WEP, WPA2-PSK, WPA-PSK, WPA-Enterprise ,WPA2-Enterprise , Radius with 802.1x, WPS supportFirewall:SPI intrusion detection, DoS protectionAccess control:Parental control, Network service filter, URL filter, Port filterUPnP, IGMP v1/v2/v3, DNS Proxy, DHCP, SNMP, NTP Client, DDNS, Port Trigger, Virtual Server, DMZ, System Event LogInternet connection type : Automatic IP, Static IP, PPPoE(MPPE supported), PPTP, L2TPBoost key, LED on/off, Power, Wireless on/off, WPS, ResetRJ45 for 10/100/1000 BaseT for WAN x 1, RJ45 for 10/100/1000/Gigabits BaseT for LAN x 4USB 3.0 x 1USB 2.0 x 1FeaturesLED Indicator Power Supply Dimensions WeightColorPackage Contents Operation modeROG Gaming CenterGeForce Now QoSLink AggregationSmart ConnectTraffic AnalyzerGame BoostGame IPSGamer Private Network®Open NATGame RadarWi-Fi RadarParental ControlGuest Network : 2.4 GHz x 3, 5 GHz-1 x 3, 5 GHz-2 x 3VPN server : IPSec Pass-Through, PPTP Pass-Through, L2TP Pass-Through, PPTP Server, OpenVPN Server, IPSec ServerVPN client : PPTP client, L2TP client, OpenVPN clientMac OS BackupEnhanced media server (AiPlayer app compatible)-Image : Jpeg-Audio : mp3, wma, wav, pcm, mp4, lpcm, ogg-Video : asf, avi, divx, mpeg, mpg, ts, vob, wmv, mkv, movAiCloud personal cloud service3G/4G data sharingPrinter Server-Multifunctional printer support (Windows only)-LPR protocol supportDownload Master-Support bt, nzb, http, ed2k-Support encryption, DHT, PEX and magnet link-Upload and download bandwidth control-Download schedulingAiDisk file server-Samba and FTP server with account managementDual WANIPTV supportRoaming AssistWAN x 1 / Wireless 2.4GHz x 1/ Wireless 5GHz x 1AC Input : 110V~240V(50~60Hz) / DC Output : 19V with max. 1.75A current 221*169*111~ mm (WxDxH)780gBlackGT-AC2900 ROG Rapture Gaming RouterRJ-45 CablePower AdapterScrewdriverQuick Start GuideWarranty CardWireless router mode, Access point mode, Media Bridge mode。
华硕(ASUS)高性能无线路由器产品说明书

Indoor AP for high deterministic performance (voice, video, data), high density.
Persistent RF analysis by multifunction third radio 802.11b/g/n/ax radio (2.4 GHz) 802.11a/n/ac/ax radio (5 GHz) 802.11a/b/g/n/ac multifunction radio BLE Internal/External antenna 1 x 100M/1G Ethernet + 1 x 100M/1G/2.5G/5G Ethernet Console USB 2.4 Gbps / 574 Mbps 4x4:4 (5GHz) / 2x2 (2.4GHz) 20/40/80/160 MHz PoE+ PoE (reduced functionality) DC Power Yes Yes Yes Yes Yes AP-C230, AP-C230E
Persistent RF analysis by dedicated multifunction radio.
Indoor tri-band AP for highest deterministic performance (voice, video, data) for critical, highdensity networks.
Ports Max Data Rate Spatial Streams Channel Width Power Dedicated WIPS Mesh LTE Interference Mitigation Trusted Platform Module WiFi Alliance Certification SKU
无线网卡设置详解

无线网卡设置详解无线网卡设置,从设备管理器的网卡属性进入“高级”页,或者从网上邻居的无线网络连接属性进入网卡的“配置”项,再进入“高级”页。
以下各项不一定所有无线网卡型号都有。
802.11n 信道宽度 (2.4 GHz)设定高吞吐量信道宽度设置以获取最佳性能。
将信道宽度设为自动或20Mhz。
自动为默认设置。
如果802.11n 信道受限制,则使用20MHz。
注意:此项设置仅当无线适配器是以下之一时方可用:Intel(R) WiMAX/WiFi Link 5350Intel(R) WiMAX/WiFi Link 5150Intel(R) WiFi Link 5300Intel(R) WiFi Link 5100802.11n 信道宽度 (5.2 GHz)设定高吞吐量信道宽度设置以获取最佳性能。
将信道宽度设为自动或20Mhz。
自动为默认设置。
如果802.11n 信道受限制,则使用20MHz。
注意:此项设置仅当无线适配器是以下之一时方可用:Intel(R) WiMAX/WiFi Link 5350Intel(R) WiMAX/WiFi Link 5150Intel(R) WiFi Link 5300Intel(R) WiFi Link 5100Intel(R) Wireless WiFi Link 4965AGN802.11n 模式802.11n 标准在先前的802.11 标准基础上添加了多输入多输出(MIMO)。
MIMO 增加数据吞吐量以提高传输速率。
选择启用或禁用设置适配器的 802.11n 模式。
“启用”为默认设置。
注意:此项设置仅当无线适配器是以下之一时方可用:Intel(R) WiMAX/WiFi Link 5350Intel(R) WiMAX/WiFi Link 5150Intel(R) WiFi Link 5300Intel(R) WiFi Link 5100Intel(R) Wireless WiFi Link 4965AGN注意:要使 802.11n 连接上的传输速率高于 54 Mbps,必须选择WPA2-AES 安全性。
EW-7611UCB无线+蓝牙二合一USB无线网络卡安装指南说明书
EW-7611UCB无线+蓝牙二合一USB无线网络卡I. Windows 即插即用设定I-1. Wi-Fi 无线网络设定I-1-1. 插入网络卡 将装置插入计算机的USB 接端口。
I-1-2. W i-Fi 即插即用1. 如果您的操作系统,对此装置支持即插即用,无线网络图标 就会显示在Windows 的任务栏上,若无线网络图标没有出现,请参考III. 常见问题FAQ -> Q1。
2. 点击无线网络图标,以显示可用的无线网络, 依照操作系统的不同,无线网络的图标可能会有所差异。
I-1-3. 联机到无线网络选择您的无线网络名称 (SSID),点选 "联机",若需要的话在弹跳窗口上输入网络联机密码,完成联机。
插入网络卡 即插即用 联机网络I-2. Bluetooth 蓝牙设定I-2-1. 插入网络卡Windows 操作系统:在将本装置插入到计算机之前,请将计算机上既有的蓝牙装置都先关闭。
(请参考 III. 常见问题FAQ -> Q2)macOS 操作系统:本装置只支持Wi-Fi 联机,不支持蓝牙。
I-2-2. Bluetooth 蓝牙即插即用如果您的操作系统,对此装置支持即插即用,那么蓝牙的图标 ,就会显示在Windows 的任务栏上, 如果蓝牙图标没有出现, 请参考III. 常见问题FAQ -> Q4。
I-2-3. 联机蓝牙装置鼠标双击蓝牙图标 ,选择“新增蓝牙或其他装置”,从装置列表中选择要联机的设备,并依照指示完成蓝牙配对。
插入网络卡 即插即用 联机蓝牙装置II. Windows & Mac 安装驱动程序设定II-1. 插入网络卡Windows 操作系统:在将本装置插入到计算机之前,请将计算机上既有的蓝牙装置都先关闭。
(请参考 III. 常见问题FAQ -> Q2)macOS 操作系统:本装置只支持Wi-Fi 联机,不支持蓝牙。
II-2. 下载及安装驱动程序1. 联机到以下网址,在网页搜寻栏输入机种型号,并下载适当的驱动程序。
华硕(ASUS)笔记本电脑产品说明书.pdf_1719189475.492568

++)
/DUJH/&'5HDGV $LU9HORFLW\DQG 7HPSHUDWXUH 6LPXOWDQHRXVO\
5HFRUGV0LQDQG0D[ 5HDGLQJZLWK5HFDOO
'DWD+ROG)XQFWLRQ
7KH++)LVDQHFRQRPLFDO VROXWLRQIRUDQ\DLUIORZDSSOLFDWLRQ VXFKDVDLUFRQGLWLRQLQJDQGKHDWLQJ V\VWHPVZLQGVSHHGVEDODQFLQJ DQGHQYLURQPHQWDOWHVWLQJ7KH SRUWDEOH++)SURYLGHVIDVW
0RGHO1R ++)
3ULFH
'HVFULSWLRQ 0HWDOYDQHDQ6RIWZDUHDQGFDEOH
++)53
5HSODFHPHQWSUREHIRU++)
&RPHVFRPSOHWHZLWKRSHUDWRUҋVPDQXDOKDUGFDUU\LQJFDVHDQG9EDWWHU\ 2UGHULQJ([DPSOH++)PHWDOYDQHDQHPRPHWHU
UDSLGDQGSUHFLVHPHDVXUHPHQWV 7KHPLFURSURFHVVRUFLUFXLWDVVXUHV WKHPD[LPXPSRVVLEOHDFFXUDF\ DQGSURYLGHVVSHFLDOIXQFWLRQV DQGIHDWXUHV
0HDVXUHPHQW PV NPK IWPLQ
$FFXUDF\ GLJLW GLJLW IWPLQ GLJLW GLJLW
华硕(ASUS)智能路由器产品说明书

The Clare -branded Add-on switch is required for Multi-Switch 3-way or 4-way installations.Connecting the traveler terminal of this switch to a standard, non-Clare -branded switch will cause damage or result in improper function. If this switch is a part of a 3-way or 4-way multi-switch installation, do not connect the traveler wire or apply power until Clare -branded Add-on switches are correctly installed. For more information on 3-Way or 4-Way installations, view the manual or quick-start guide that comes with the Clare Add-on switch.This device supports Association Command Class (3 Groups)• Association Group 1 supports Lifeline, Switch Multilevel Report• Association Group 2 supports Basic Set and is controlled by pressing the On or Off button with the local load• Association Group 3 supports Basic Set and is controlled by double pressing the On or Off button • Each Association Group supports 5 total nodesZ-WAVE INTEROPERABILITYThis product can be included and operated in any Z-Wave network with other Z-Wave certified devices from other manufacturers and/or other applications. All non-battery operated nodes within the network will act as repeaters regardless of vendor to increase reliability of the network.SPECIFICATIONS ZW4002Power: 120 VAC, 60 Hz. | Signal (Frequency): 908.4/916 MHz.Maximum Loads: 2.5A No more than two identical fans to the switch. Not to exceed 2.5 Amp resistive load. CONTROLS FAN MOTOR ONLY. For use only with split capacitor or shaded pole ceiling fan motors.Range: Up to 150 feet line of sight between the Wireless Controller and the closest Z-Wave receiver module. Operating Temperature Range: 32-104° F (0-40° C)For indoor use only.Specifications subject to change without notice due to continuing product improvementWarrantyClare Controls offers a two (2) year limited warranty on original Clare Controls components, from the date of shipment from Clare Controls. To view complete limited warranty details, including limitations and exclusions, visit /warranty.All brand names shown are trademarks of their respective owners. DOC ID 2010Rev 01DOC ID 2010Rev 01。
Aolynk WUB320g 54M USB无线网卡 用户手册(V1.00)

声明
Copyright © 2006 杭州华为三康技术有限公司 版权所有,保留一切权利。
非经本公司书面许可,任何单位和个人不得擅自摘抄、复制本书内容的部分或 全部,并不得以任何形式传播。
H3C、Aolynk、
、IRF、H3Care、
、Neocean、
2 安装 ........................................................................................................................................ 3 2.1 装箱清单................................................................................................................................ 3 2.2 系统需求................................................................................................................................ 3 2.3 安装无线网卡 ........................................................................................................................ 3 2.4 安装驱动和配置程序 ............................................................................................................. 4
华硕 笔记本电脑 用户手册说明书

目录版权和商标声明 ............................................................................................................1-4修订 ..............................................................................................................................1-4FCC-B 频道干扰声明....................................................................................................1-5FCC 规定......................................................................................................................1-5CE 规定 ........................................................................................................................1-6电池规范 .......................................................................................................................1-6WEEE 声明...................................................................................................................1-6化学物质法规................................................................................................................1-7升级和保修 ..................................................................................................................1-7购买备件 .......................................................................................................................1-7安全指南 .......................................................................................................................1-8产品中有害物质的名称及含量.....................................................................................1-10MSI 特殊功能 .............................................................................................................1-11简介 ...............................................................................................2-1打开包装 .......................................................................................................................2-2产品检视 .......................................................................................................................2-3顶盖开启检视图 .......................................................................................................2-3前端检视图 ..............................................................................................................2-5右端检视图 ..............................................................................................................2-6左端检视图 ..............................................................................................................2-7后端检视图 ..............................................................................................................2-8底部检视图 ..............................................................................................................2-9如何使用键盘..............................................................................................................2-11Windows 键 ...........................................................................................................2-11快速启动按键.........................................................................................................2-12开启或关闭触摸板..................................................................................................2-13进入睡眠模式.........................................................................................................2-13切换显示器 ............................................................................................................2-13使用多个监视器 .....................................................................................................2-13调整显示器的亮度 .................................................................................................2-14调整扬声器的音量..................................................................................................2-14调整键盘背光 LED 灯的亮度(选择性配置) ........................................................2-14应用程序:True Color (选择性配置) ......................................................................2-15产品规格 .....................................................................................................................2-16使用者手册如何使用入门 .................................................................................3-1开始使用笔记本电脑 .....................................................................................................3-2如何舒适地使用笔记本电脑 ..........................................................................................3-3如何使用电源供应器 .....................................................................................................3-4电源适配器 ..............................................................................................................3-4电池 .........................................................................................................................3-4如何在 Windows 10 下设置一个电源计划设定 .............................................................3-6选择或自定义电源计划 ............................................................................................3-6创建自己的电源计划 ................................................................................................3-9如何使用触摸板 .........................................................................................................3-11了解一般硬盘和固态硬盘............................................................................................3-12了解 M.2 固态硬盘插槽...............................................................................................3-12如何连接 Internet........................................................................................................3-13无线网络 ................................................................................................................3-13有线网络 ................................................................................................................3-15如何设置蓝牙连接.......................................................................................................3-20开启蓝牙连接.........................................................................................................3-20如何连接外部装置.......................................................................................................3-23视频:如何使用 RAID 功能 ........................................................................................3-24如何在 BIOS 中选择 Boot Mode.................................................................................3-25视频:如何在 MSI 笔记本电脑上恢复 Windows 10 操作系统.....................................3-26视频:如何使用 MSI 一键安装 ..................................................................................3-27版权和商标声明Copyright © 微星科技股份有限公司所有。
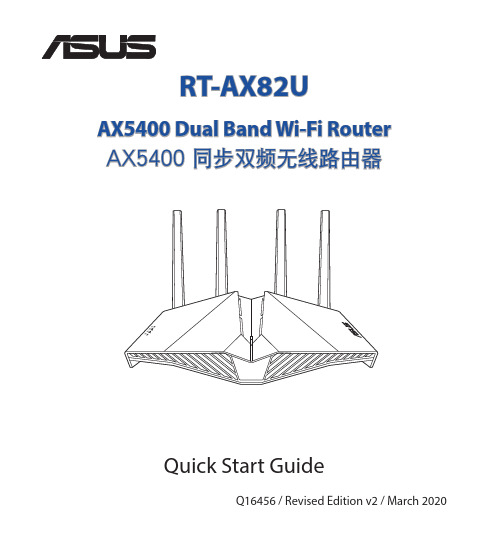
ASUS RT-AX82U AX5400 Dual Band Wi-Fi 路由器用户手册说明书
RT-AX82UAX5400 Dual Band Wi-Fi RouterAX5400 同步双頻無線路由器Quick Start GuideQ16456 / Revised Edition v2 / March 2020Table of contentsPackage contents (3)A quick look at RT-AX82U (3)Position your wireless router (4)Preparing your modem (5)Setting up your RT-AX82U (6)A. Wired connection (6)B. Wireless connection (6)FAQ (8)Networks Global Hotline Information (61)This QSG contains these languages:English繁體中文簡體中文Português do BrasilFrançaisBahasa Indonesia한국어Bahasa MalaysiaPortuguêsEspañolไทยTiếng ViệtE A quick look at RT-AX82UPackage contentsRT-AX82U Wireless Router AC adapter Network cable (RJ-45)Quick Start GuidePosition your wireless routerFor optimal wireless transmission between the wireless router and connected wireless devices, ensure that you:• Place the wireless router in a centralized area for a maximum wireless coverage for the network devices.• Keep the wireless router away from metal obstructions and away from direct sunlight.• Keep the wireless router away from 802.11g or 20MHz only Wi-Fi devices,2.4GHz computer peripherals, Bluetooth devices, cordless phones, transformers,heavy-duty motors, fluorescent lights, microwave ovens, refrigerators, and other industrial equipment to prevent signal interference or loss.• Always update to the latest firmware. Visit the ASUS website at to get the latest firmware updates.• To ensure the best wireless signal, orient the four non-detachable antennas as shown i n the drawings below.NOTES:• Use only the adapter that came with your package. Using otheradapters may damage the device.• Specifications:DC Power adapter DC Output: +19V with 1.75A currentOperating Temperature0~40o C Storage0~70o COperating Humidity50~90%Storage20~90%45E n g l i s hPreparing your modem1. U nplug the power cable/DSL modem. If it has abattery backup, remove the battery.NOTE: If you are using DSL for Internet, you will need your username/password from your Internet Service Provider (ISP) to properly configure the router.2. C onnect your modem to the router with thebundled network cable.3. Power on your cable/DSL modem.4. C heck your cable/DSL modem LED lights to ensurethe connection is active.Unplug6Setting up your RT-AX82UYou can set up your router via wired or wireless connection.A. Wired connection1. P lug your router into a power outletand power it on. Connect the network cable from your computer to a LAN port on your router.2. T he web GUI launches automatically when you open a web browser. If it doesnot auto-launch, enter .3.Set up a password for your router to prevent unauthorized access.B. Wireless connection1. P lug your router into a power outletand power it on.7E n g l i s h2. C onnect to the network with SSID shown on the product label on the back sideof the router. For better network security, change to a unique SSID and assign a password.ASUS routerASUS_XXWi-Fi Name (SSID):ASUS_XX* XX refers to the last two digits of 2.4GHz MAC address. You can find it on the label on the back of your router.3. You can choose either the web GUI or ASUS Router app to set up your router.a. Web GUI Setup• O nce connected, the web GUI launches automatically when you open aweb browser. If it does not auto-launch, enter .•Set up a password for your router to prevent unauthorized access.8b. App SetupD ownload ASUS Router App to set up yourrouter via your mobile devices.•T urn on Wi-Fi on your mobile devicesand connect to your router’s network.•F ollow ASUS Router App setupinstructions to complete the setup.ASUS RouterASUSRouterRemembering your wireless router settings• Remember your wireless settings as you complete the router setup.Router Name:Password:2.4 GHz network SSID:Password:5GHz network SSID:Password:FAQ1. W here can I find more information about the wireless router?• Online FAQ site: https:///support/faq• Technical support site: https:///support• C ustomer hotline: refer to the Support Hotline section in this Quick Start Guide• Y ou can get the user manual online at https:///support。
网卡使用说明书

目录Ⅰ产品信息 (1)Ⅱ无线上网卡自动安装指南 (2)Ⅲ无线上网卡使用说明 (4)(一)主界面 (4)(二)功能使用 (4)Ⅳ无线上网卡卸载 (9)Ⅴ主要指标和规格 (10)Ⅵ基本功能 (12)Ⅶ故障排除指南 (12)Ⅷ常见拨号故障指南 (14)Ⅸ维护保养指南 (16)Ⅰ产品信息彰显自我随e生活移动办公:您可随时随地收发E-mail,或者召开电话会议,与公司和合作伙伴保持联系;也可以浏览网站,获得最新资料。
随身理财:您可以随时得到最新的证券交易信息,还可连接网上银行和证券公司,进行在线交易。
在线生活:您可随时与网友聊天;收看实时新闻或娱乐节目;也可以在线预定机票、宾馆,或者到网上商城购物。
精心设计性能卓越多信道: CDMA 的最高传输速度可达153.6k,实际上网速度相当于GPRS的3-4倍。
多频段: CDMA使用800Mhz,可以提供更好的空间覆盖和深度覆盖,资源使用更优。
操作简便功能丰富快速安装:对于各类计算机,附带的应用软件组件可以帮助您快速安装、配置和管理无线上网卡。
多系统支持:其设计和应用软件可轻易支持Windows2000/ XP(中、英、繁)等常见的操作系统,满足不同用户的要求。
支持热插拔:您可随时安装或取下无线上网卡,而无需重新启动操作系统。
Ⅱ.AnyCom龙卡自动安装指南1、放入光盘,选取对应安装驱动。
2.、按照安装程序提示进行操作,选择“安装驱动”3、按照提示插入上网卡,4、系统提示安装成功,点击“完成”,结束上网卡的驱动安装。
5、软件安装,选择“我接受”6、选择安装路径7、软件安装进行。
8、安装完毕Ⅲ AnyCom龙卡使用说明(一)主界面简化友好的人机界面使不具任何电脑知识的消费者也可简单易学,轻松实现全部的手机功能!下方从左到右依次为:短消息,通话,上网,电话本,设置(二)功能使用1、上网单击“开始”→“上网”将看到如右图的网络主界面。
通过这个窗口,可以进入拨号程序。
单击“拨号”,可以接入因特网。
TL-WN821N-USB无线网卡说明书
附录
规格参数 ........................................................................................................ 35
TL-WN821N/TL-WN822N/TL-WN823N
TP-LINK 300M 无线 USB 网卡
第六章 第七章
7.1 7.2
无线网络状态查看 ..................................................................................... 32 软件卸载 ................................................................................................... 33
1.1 产品特性
遵循 IEEE 802.11b、IEEE 802.11g、IEEE 802.11n 标准; 支持 802.1x 协议,支持 WPA-PSK/WPA2-PSK,WPA/WPA2 高级安全机制,及 WEP 加密; 无线传输速率最高可达 300Mbps,可根据网络环境自动调整无线速率; TL-WN822N 支持 Mini USB 接口,TL-WN821N/TL-WN823N 支持 USB 2.0 接口; 支持三种工作模式:点对点模式(Ad hoc)、基础结构模式(Infrastructure)和模拟 AP 模式 (SoftAP); 当处于 Infrastructure 组网模式下,在各 AP(Access Point)之间支持无线漫游功能; 具有良好的抗干扰能力; 配置简单并提供检测信息; 支持 Windows XP、Windows 7、Windows 8 和 Windows 8.1 操作系统; TL-WN822N 采用外置全向天线,TL-WN821N/TL-WN823N 为内置天线; 采用 MIMO 技术,多根天线同时发送或接收数据。
TP-LINK 无线USB网卡 快速说明书

您期望向导做什么? 自动安装软件(推荐)(I) 从列表或指定位置安装(高级)(S)
要继续,请单击“下一步”。
< 上一步(B) 下一步(N)>
取消
Windows Vista
2 软件安装
软件安装过程在Windows 7/Vista/XP下基本相同,在此以Windows XP系统为例。如果您拥有支持QSS/WPS的无线路由器(或无线AP),可以在完成软件安装后直接参考附录 QSS快速安全连接,与无线网络建立安全连接。
声明 Copyright © 2011 深圳市普联技术有限公司 版权所有,保留所有权利
未经深圳市普联技术有限公司明确书面许可,任何单位或个人不得擅自仿制、复制、誊抄或转译本书部分或全部内容。 不得以任何形式或任何方式(电子、机械、影印、录制或其他可能的方式)进行商品传播或用于任何商业、赢利目的。
为深圳市普联技术有限公司注册商标。本文档提及的其他所有商标或注册商标,由各自的所有人拥有。本手册所提到的产品规格和资 讯仅供参考,如有内容更新,恕不另行通知。除非有特殊约定,本手册仅作为使用指导,本手册中的所有陈述、信息等均不构成任何形式的担保。
输入密码。密码必须和路由器或 AP 上设置的密码相同。点击 继续。
附录 QSS快速安全连接 网卡安装完成后,您可以使用QSS功能直接与支持QSS或WPS功能的无线路由器(或无线AP)建立安全连接。
1 按下路由器上的“QSS 快速安全按钮 ”。
2 2分钟内按下网卡上的“QSS 快速安全 按钮 ”2 到 3 秒后松开。
1 面,点击 “ 自动安装 ”。
无线网卡安装向导
欢迎使用TP-LINK无线网卡 本向导将指引您更快捷、方便地安装无线网卡程序
3 选择无线网络安装项目,推荐保持默认选择。 点击“ 下一步 ”继续安装。
华硕RT-N10+无线路由设置指引
RT-N10+无线路由设置指引
产品简述:
1、支持ADSL2+宽带协议;
2、提供5个以太网接口,支持宽带共享上网;
3、提供WIFI无线功能,最高支持802.11n无线传输协议;
一、设备连接:
1、使用网线连接电脑网卡与RT-N10+的“WLAN口”;
2、将电源适配器(电源)连接到供电接口;
3、设备线缆连接完成后按下设备顶上的电源开关给设备上电
1)首次使用路由器,无线路由器上电,用一网线将路由器LAN端口与PC/NB网
口相联,开启Internet Explore,出现如下画面
2)选择工作模式“IP分享模式”(即路由器或网关模式),点下一步,开始自动侦测WAN连接类型
3)自动侦测出WAN端宽带连接类型为(ADSL),需要输入帐号用户名称及密码
4)请在提示框内输入ADSL帐号的用户名称及密码,点击应用目前所有设置
5)路由器进行设置保存、拨号连接测试
6)WAN端宽带连接OK,出现如下无线网络设置图示
7)请在相关提示框内输入无线SSID及无线加密密钥,点击完成
SSID-1名称设置,ChinaNet-后缀部分按用户固话号码后四位设置(后缀部分客户有个性要求的按照客户要求设置)。
8)保存、应用无线设置,并给出当前无线网络连接参数及状况
9)开启无线网卡,搜索无线网络,可以看到RTN10plus 已出现无线网络列表中
10)选中RTN10plus,点击“连接”,可看到无线网络连接进程及“已连接上”
备注:
亦可在第八步时选择“到高级设置页面”进入管理页面进行其他相关设置,如下示:
第11页。
无线网卡 使用方法

无线网卡使用方法无线网卡是一种用来接收和发送无线信号的硬件设备,它可以将电脑或其他设备连接到无线网络中,并实现无线上网功能。
无线网卡通常是一个外置设备,可以插入到电脑的USB口或扩展槽中,也有一些设备是内置的,集成在笔记本电脑或手机中。
使用无线网卡进行无线上网的方法有以下几步:1. 获取无线网卡:首先需要购买一款适合自己设备的无线网卡,无线网卡一般都会带有说明书和驱动光盘。
2. 插入无线网卡:将无线网卡插入到电脑的USB口或扩展槽中。
如果是笔记本电脑或手机内置的无线网卡,则无需插入外部设备。
3. 安装驱动程序:如果无线网卡是外置设备,那么需要安装相应的驱动程序。
可以将驱动光盘插入电脑,按照说明书上的步骤进行安装;或者直接从无线网卡的制造商网站上下载最新的驱动程序进行安装。
4. 连接到无线网络:打开电脑的网络设置,点击无线网络连接图标,选择要连接的无线网络名称(也称为SSID)。
5. 输入密码:如果无线网络需要密码才能连接,那么在连接时会弹出密码输入框,输入正确的密码后点击连接,即可连接到无线网络。
6. 设置网络属性:在成功连接到无线网络后,可以进一步设置网络属性,例如设置IP地址、子网掩码、默认网关等。
7. 测试连接:连接成功后,打开浏览器,尝试访问网页进行上网测试。
如果能够正常访问网页,则代表无线网卡连接成功,可以正常上网。
在使用无线网卡过程中,还有一些注意事项需要注意:1. 适配无线信号:无线网卡的工作频率和无线信号频率需要相互适配。
例如,如果你购买的无线网卡是2.4GHz的,那么你只能连接到2.4GHz的无线网络,无法连接到5GHz的无线网络。
2. 信号强度:无线信号的强度会影响连接速度和稳定性。
如果信号强度较弱,可以尝试靠近路由器,或者更换位置来改善信号强度。
3. 安全性设置:为了保护个人隐私和网络安全,建议设置无线网络的加密方式和密码,以防止未经授权的人员连接到你的网络。
4. 软件升级:为了获得更好的使用体验和性能,可以定期检查无线网卡的制造商网站,下载并安装最新的驱动程序和软件升级。
华硕WiFiAccess Point产品说明书
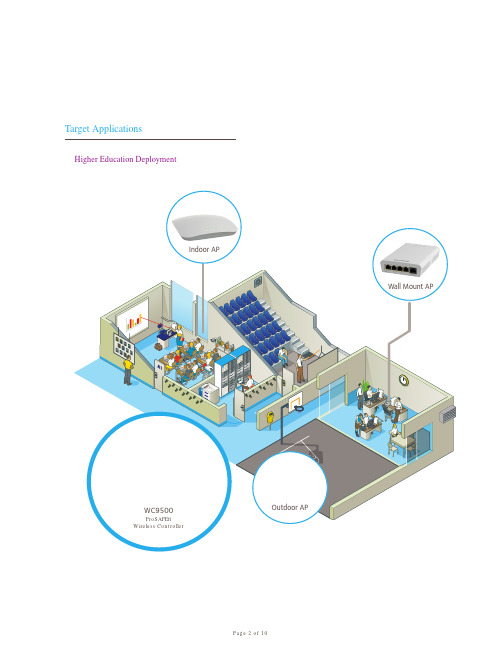
The NETGEAR WC9500 High Capacity Wireless Controller supports rapid mobility across VLANs and subnets including 802.11i preauthentication and fast roaming support (FRS). Seamless L2 and L3 roaming provides support for latency-sensitive applications such as video, audio and voice over wireless. WiFi Multimedia (WMM) advanced prioritization extends WiFi s high-quality end-user experience to voice applications (VoWiFi).
WAC730
Description
Part Numbers
WAC720 WNDAP660
Typical Deployment
Product Image (Front)
Product Image (Back)
WNDAP620
WNDAP360
WNDAP350 WNAP320 WNAP210 WN370 WND930
Page 3 of 10
Features
Scalable Architecture
The NETGEAR WC9500 High Capacity Controller supports up to 200 APs and is upgradable in 10, 50, 100, or 200 APs via so ware licenses. Stackable up to three controllers, a WC9500 High Capacity Controller stack can support up to 600 access points with a single interface. The WC9500 o ers redundancy for always-on reliability.
华硕RT-N12系列无线路由器使用手册

用戶手冊RT-N12 系列C7901第一版2012 年 12 月發行版權說明©ASUSTeK Computer Inc. All rights reserved. 華碩電腦股份有限公司保留所有權利。
本用戶手冊包括但不限於其所包含的所有信息都受到著作權法的保護,未經華碩電腦股份有限公司(以下簡稱“華碩”)許可,不得有任何仿造、複製、摘抄、轉譯、發行等行為或為其它利用。
免責聲明本用戶手冊是以“現狀”及“以目前明示的條件下”的狀態提供給您。
在法律允許的範圍內,華碩就本用戶手冊,不提供任何明示或默示的擔保及保證,包括但不限於商業暢銷性、特定目的適用性、未侵害任何他人權利及任何使用本用戶手冊或無法使用本用戶手冊的保證,且華碩對因使用本用戶手冊而獲取的結果或通過本用戶手冊所獲得任何信息的準確性或可靠性不提供擔保及保證。
用戶應自行承擔使用本用戶手冊的所有風險。
用戶明確瞭解並同意華碩、華碩的被授權人及董事、管理層、員工、代理商、關聯企業皆無須為您因本用戶手冊、或因使用本用戶手冊、或因不可歸責于華碩的原因而無法使用本用戶手冊或其任何部分而可能產生的衍生、附帶、直接、間接、特別、懲罰或任何其它損失(包括但不限於利益損失、業務中斷、資料遺失或其它金錢損失)負責,不論華碩是否被告知發生上述損失之可能性。
由於部分國家或地區可能不允許責任的全部免除或對上述損失的責任限制,所以上述限制或排除條款可能對您不適用。
用戶知悉華碩有權隨時修改本用戶手冊。
本產品規格或驅動程序一經改變,本用戶手冊將會隨之更新。
本用戶手冊更新的詳細說明請您訪問華碩的客戶服務網http:// ,或是直接與華碩電腦客戶關懷中心 400-620-6655 聯繫。
對於本用戶手冊中提及的第三方產品名稱或內容,其所有權及知識產權都為各產品或內容所有人所有且受現行知識產權相關法律及國際條約的保護。
當下列兩種情況發生時,本產品將不再受到華碩的保修及服務:(1) 本產品曾經過非華碩授權的維修、規格更改、零件替換或其它未經過華碩授權的行為。
Edimax无线网卡安装指南说明书
1.檢查產品型號請檢查產品本體或彩盒包裝上的產品型號,是否一致。
2. 確認配件請確認包裝內附配件。
實際內容物請依據實際產品的彩盒標示為主。
3. 安裝硬體將USB 無線網路卡插在電腦的USB 埠。
當無線網路卡插在電腦上時,通常會出現如下對話框,此時,請您點選“取消”,取消此操作步驟。
A. Windows XP 環境B. Windows 7環境由此處開始C. Windows 8環境:大多數可相容的硬體設備不會出現任何對話視窗。
4. 安裝驅動程式請將Edimax 安裝光碟插入您電腦的光碟機,依照您個人的作業系統來選擇光碟內的資料夾並且進行安裝步驟。
資料夾顯示內容如下:A. MAC OS資料夾請按您的MAC OS的版本,將正確的壓縮檔案複製到您的APPLE電腦,解壓縮後直接安裝驅動程式到您的APPLE電腦。
B. Windows Driver資料夾在Windows Driver資料夾中,有分開「Windows 8」與「WindowsXP_Vista_7」,由於Windows 8與其他微軟的Windows作業系統有很大差異,所以特別設立另一個資料夾。
Windows 8在「Windows 8」資料夾會找到"EDIMAX WLAN.exe" 這個檔案,請直接點擊執行安裝驅動程式。
Windows XP_Vista_7在「Windows XP_Vista_7」資料夾,會找到"Setup.exe" 這個檔案,請直接點擊執行安裝驅動程式。
5. Windows 7啟用Wireless Utility若您使用微軟Windows 7以前的作業系統,在光碟片安裝成功後,會產生一個Wireless LAN Utility,如下畫面。
透過常用工具的標籤頁面,選擇常用項目。
如「可用網路」可以用來搜尋基地台與連線基地台。
A. 選擇『可用網路』B. 正確設定『無線網路內容』C. 完成以上步驟,網路金鑰輸入正確,即可在「一般」標籤頁面看到您的無線連線狀況。
COMFAST设置教程

C O M F A S T设置教程-CAL-FENGHAI-(2020YEAR-YICAI)_JINGBIAN一、? ? ? ? ?版权声明二、产品概述三、硬件安装:四、驱动安装:五、网络连接设置:六、无线发射(软AP设置):七、手动设置网络共享:1. “本地连接”共享设置:2. “无线网络连接”共享设置:3. “宽带连接”共享设置:八、常见问题解答:一产品概述首先感谢您购买COMFAST产品。
该网卡适用于台式机以及笔记本电脑进行无线连接,能够为您提供方便、快捷的无线上网方式。
该网卡支持自动检测功能,能够自动调整速率,无线传输速率最高可达150Mbps.支持WPA-PSK/WPA2-PSK,WPA/WPA2高级安全机制,支持WEP加密,能够为您的无线网络连接提供安全保障。
为了了解产品的安装及其配置使用过程,请先仔细阅读该用户手册。
产品特性:符合IEEE802.11b/g/n标准,最高可达到150Mbps传输率;支持Soft AP(软AP)功能;支持PSP、WII、NDS连接Internet及Xlink Kai支持网络高清播放器(支持AML8626H、Telechips8901、Sigma8655等方案)支持USB2.0 A型接口,即插即用,支持64/128位WEP数据加密;支持WPA/WPA-PSK、WPA2/WPA2-PSK安全机制;支持无线漫游(Roaming)技术,保证高效的无线连接;●支持Windows98/MAC OS/WINCE /Linux/ Windows 2000/Windows XP/Vista / Win7操作系统;●提供简单易用的用户管理软件,轻松配置无线客户端;●提供两种工作模式:集中控制式(Infrastructure)和对等式(Ad-Hoc);安全警示:✍为了保证产品正常工作,请注意防水;✍不要将本产品放置潮湿的环境中,例如:浴室内;✍防止其它有害物质的侵害,例如:酸、碱;✍如果出现故障,必须由授权的专业人员进行维修,请不要自行打开;✍请不要将本产品真接曝晒在太阳或其它热源之下,设备的外壳和电子器件可能会减少寿命。
- 1、下载文档前请自行甄别文档内容的完整性,平台不提供额外的编辑、内容补充、找答案等附加服务。
- 2、"仅部分预览"的文档,不可在线预览部分如存在完整性等问题,可反馈申请退款(可完整预览的文档不适用该条件!)。
- 3、如文档侵犯您的权益,请联系客服反馈,我们会尽快为您处理(人工客服工作时间:9:00-18:30)。
®WiFi-b Card802.11b™C1414 1 2003 9Checklist© 2003PCB 1.22 1.24 ... PCB BIOSii1.1 1.2 1.3 1.4 1.5....................................................................................... 1-2 ....................................................................................................... 1-2 ....................................................................................................... 1-2 ............................................................................................... 1-3 ....................................................................................................... 1-3....................................................................................................... 2-2 WiFi-b™ .................................................................................. 2-2 2.3 ............................................................................................... 2-3 2.4 WiFi-b™ ....................................................................................... 2-4 2.5 ....................................................................................................... 2-4 2.1 2.2............................................................................................... 3-3 3.1.1 ................................. 3-3 3.1.2 Windows® XP ................................ 3-2 3.1.3 ................................................................. 3-2 3.2 ....................................................................................................... 3-3 3.2.1 WiFi-b™ ........................................................ 3-3 3.2.2 Station .............................................................................. 3-3 3.2.3 My Configuration ................................................... 3-5 3.1 3.3 Internet 3.3.1 3.3.2 3.3.3 (ICS) ....................................................................... 3-10 ................................................... 3-10 ................................................... 3-14 ........................................................... 3-15iiiFeaturesSafeguards....................................................................................................... 4-2 4.1.1 ......................................................................... 4-2 4.2 ....................................................................................... 4-2 4.2.1 Wireless LAN Card Settings .................... 4-3 4.2.2 ................................................................................. 4-9 4.2.3 Change Mode ................................................... 4-9 4.2.4 Preferences ..................................................... 4-10 4.2.5 ....................................................................... 4-10 4.3 ..................................................................................... 4-10 4.4 Wireless Settings WiFi-b™ .................................. 4-11 4.1 (Soft AP) .................................................... 4-13 4.5 Internet Connection Sharing (ICS) .............................................................. 4-16 4.5.1 ....................................... 4-16 4.5.2 ................... 4-17 4.6 Network Bridge ................................................................... 4-19 4.4.1 Station 4.4.2 (STA) ................................................................. 4-11A.1 A.1..................................................................................................... A-2 ............................................................................................................. A-6ivBEIJING HUAWEI COMPUTER CO., LTDMarketing Info8 86-10-65542792 info@ F 13 BTechnical Support800-820-6655 86-21-54421515 86-10-65542792 tsd@ 86-10-65542784ASUSTeK COMPUTER INC.(Marketing Info150 886-2-2894-3447 886-2-2890-7798 info@ 886-2-2890-7698 )Technical Support0800-093-456 AM9:00 PM9:00 AM9:00 PM6:00ASUS COMPUTER INTERNATIONALMarketing Info44370 Nobel Drive, Fremont , CA 94538, USATechnical Support+1-502-933-8713 +1-502-995-0883 tsd@ +1-510-608-4555 tmdl@ASUS COMPUTER GmbHMarketing InfoHarkort Str. 25, D-40880 Ratingen, Germany/Technical Support49-2102-95990 49-2102-959910 49-2102-959911 www.asuscom.de/support49-2102-95990 49-2102-959911 www.asuscom.de www.asuscom.de/salesvWiFi-bTM• WiFi-b TM LED ••• Wi-FiTM • IEEE802.11bviWiFi-b™IEEE 802.11b (DSSS) 11Mbps 5.5Mbps 2Mbps 1Mbps Wi-Fi (Infrastructure) 2.4 GHz ~ 2.5 GHz 64-bit/128-bit WEP (Soft Access Point) Windows® XP 11Mbps 11Mbps Station 31 100 ft(30 ) 1000 ft(300 ) (Ad Hoc)Windows 98SE/ME/2000/XP Windows® XPviiviiiWiFi-bTM LED1.1WiFi-bTMWiFi-b™ (WLAN) WiFi-b ™ Wi-Fi IEEE 802.11b1.2WiFi-b™ WiFi-b™ WiFi-b™WiFi-b™( )WiFi-b™1.3WiFi-b™ (DSSS) 2.4GHzWiFi-b™• • • • • ) 31 ( Windows XP 100 ft (30 ) 11Mbps 5.5Mbps 2Mbps 1Mbps (WEP) 1000 ft (300 )1-2WiFi-b™• •infrastructure WiFi-b ™ Ad Hoc WiFi-b™ Windows® 98SE/ME/2000/XP *1.4WiFi-b™1.5WiFi-b™WiFi-b™ WiFi-b™ WiFi-b™ WiFi-b™1-31-4WiFi-b™2.1Wi-Fi Intel Pentium™ 4 64MB Windows® 98SE/2000/ME/XP AMD K7/K8P4C800 P4C800 Deluxe P4P800 P4P800 Deluxe P4C800-E Deluxe P4P8X P4P800S P4P800S-E Deluxe P4S800 P4S800D P4S800D Deluxe K8V A7V600 A7N8X-EP4P800 Deluxe/P4C800 Deluxe/P4P800/P4C800/P4C800-E DeluxeBIOS BIOS 3Com WiFi-b™V.046 Wi-Fi PCI PCIWi-FiPCI2.2WiFi-b™Wi-FiPCIWiFi-b™ 1. 2. 3. 4. Wi-Fi Wi-Fi2-2WiFi-b™5.Wi-Fi Wi-Fi6. 7. 9. 8. WiFi-b™WiFi-b™2.32-32.4WiFi-b™Station (STA) WiFi-b™ WiFi-b™ (Software Access AccessWiFi-b™ Point Soft AP) STA Soft AP Point2.5WiFi-b ™WiFi-b ™ (Soft AP) Connection Sharing ICS)Internet WiFi-b™ IP- Internet(InternetADSL WiFi-b™WiFi-b™ (Soft AP) (Network Bridge)WiFi-b™ IP ADSL WiFi-b™- Internet(ICS)12ADSL WiFi-b™2-4WiFi-b™WiFi-b™WiFi-b™ ADSL(Soft AP)-BridgeIP1 2ADSL WiFi-b™ 3WiFi-b™WiFi-b™(Soft AP)IPADSLBridgeADSL WiFi-b™ 3IPIP2-5WiFi-b™(Soft AP)WiFi-b™ WiFi-b ™-BridgeADSL IP2 WiFi-b™ 1 ADSL3IP IPWiFi-b™Station(STA)Station WiFi-b™ IP-12ADSLWiFi-b™ 32-6WiFi-b™3.13.1.1WiFi-b™ 1. 2. WiFi-b ™Setup.exe Windows® 98SE/ME3.1.2 Windows® XPWireless Option Windows XP® XP ™ WiFi-b WiFi-b™3.1.3/ PDF: EXIT3-2WiFi-b™3.23.2.1 WiFi-b™Station STA(Soft AP)(Ad Hoc)3.2.33.2.2 StationWiFi-b™StationWiFi-b™TCP/IP(WEP)WEP4-6WEPWiFi-b™WEPWiFi-b™WEPIPIP3.2.3Windows ®98SE/ME/2000TCP/IPWindows ®XP WiFi-b™I C STCP/IP(W E P)() SSID()WEP4-6\WEPWEPWEP WiFi-b™SSIDWEPS o f tA PInternet (ICS) 3-103.3 InternetStationTCP/IP3.2.2 Station(SSID)(SSID)(SSID)(WEP)WEPWEP4-6\WEPWEPWEP WiFi-b™TCP/IPIPIP2.3.3.1ICS Internet 3.3Internet(ICS)Internet(ICS)ICS1.1.Windows®ISP2.1.2.WiFi-b™3.()(WiFi-b ™)4.Internet7.5.6.4-198.9.10.Windows ® XP3-13ICS 1. (ISP) IPIP ICS2.3. ICS2103.3.2ICS (DSL) (cable modem) (LAN):1.3-14WiFi-b™2. 2 3-14 103-113.3.3ISDN ICS 1.Windows ® ISP2.3. 2 3-14 103-113-153-16WiFi-b™Control Center WiFi-b™4.1Control Center Control Center4.1.1access pointStationInfrastructure (WiFi-b™ )Ad-Hoc(WiFi-b™Wi-Fi)(Soft AP)WiFi-b™ (Soft AP)4.24-2WiFi-b™4.2.1Wireless LAN Card SettingsWireless LAN Card SettingsASUS WiFi-b™ Wireless LAN Card Settings\WiFib™ MAC address SSID-SSID (Service Set Identifier) SSID SSID MAC ASUS WiFi-b™ MAC Address Disable Radio WiFi-b ™ ASUS WiFi-b™ ASUS WiFi-b™ ASUS WiFi-b™ WiFi-b™4-3SSID & Survey4-8SSIDSite\throughput frame Errors\ IPIP IP DNS Windows Internet Naming Service (WINS) IP DHCP IP DHCP IP Ping IP WiFi-b ™ WiFi-b ™ Ping ping TCP/IPDHCPWiFi-b™4-4WiFi-b™\ PingPing Ping 1. 2. IP Address IP ping count Timeout( ping ) Ping ping Ping ping roundtrip time ) Stop Stop ping -3.\Infrastructure Ad Hoc Wi-Fi4-5SSID-SSID SSID null string Ad HocSSIDChannel Ad Hoc Data Rate PS ModeInfrastructureWiFi-b™-Fully Auto 11 5.5 2WiFi-b™ 1 MbpsWiFi-b™ CAM (Constantly Awake mode) MAX_PSP (Maximum Power Savings) Fast_PSP (Fast power-saving mode) Others -\WiFi-b™ W E P ( W i r e d Equivalent Privacy ) WEP ( ASCII character bit ) hexadecimal digit WEP64-bit 12864-bit 10 16 5 ASCII 128-bit 26 16 13 ASCII 64-bit 40-bit WEP ™ WiFi-b 24-bit 40-bit (10 16 104-bit 128-bit )4-6WiFi-b™A~F) 1364-bit 5 ASCII ASCIIKey 1~ Key 4 128-bit 6410 16 Key 1~ Key 4(0~9 a~f 26 16- Passphrase Key 1~Key 4WiFi-b™\WiFi-b™\ Soft APSoft AP Internet Connection Sharing Soft AP WiFi-b™ Internet ICS) Windows® XPSoft AP/STA WiFi-b™ ) AP-(Ad Hoc Station Soft WiFi-b™ Soft APInternet-4-16 WiFi-b™4-194-7-ICSInternet Sharing) ICS Internet Connection4.4.2(Soft AP)\BSSID MAC address SSID set identifier) CH Direct sequence Channel RSSI - RSSI(Received Signal Strength Indicator) dBm Type Infrastructure WEP AP STA Ad Hoc (On) (Off) WEP WiFi-b ™ IEEE SSID (service4-8WiFi-b™WiFi-b ™ WiFi-WiFi-b™ Wireless Settings WiFi-b™ Wireless Settings4.2.2Control Center Wireless Settings4.2.3Change ModeChange Mode (Soft AP) WiFi-b™ Station (STA)4-13 AP)WiFi-b ™ (Soft4-94.2.44.2.5About4.3– – & – 18 – Windows® XP WiFi-b ™ WiFi-b ™WiFi-b™Station Mode (STA)4-10WiFi-b™4.4Wireless SettingsWireless Settings (Soft AP) WiFi-b™ STA™WiFi-bTMStation (STA) WiFiWiFi-b Soft AP Soft APb™Wi-Fi Windows XP®4.4.1 Station(STA)WiFi-b™ Station (STA)Windows® 98SE/ME/20001. Windows Wireless Settings 2. 3. RSSI RSSI4. Infrastructure 5. b™ WiFi-b™ (SSID) WiFi(SSID) (SSID)(SSID)null string4-116. WiFi-b™WEPWEP 4-6ONOFF) WEP7.WiFi-b™Windows® XPWiFi-b™ Station (STA)Wireless Settings1. Windows W i r e l e s s Settings 2. Soft AP Station4-12WiFi-b™3.APStation4. WiFi-b™2 STA71.2. ModeStation3. WiFi-b™2 STA74.4.2WiFi-b ™ WiFi-b™(Soft AP)(Soft AP) 31 Soft APWiFi-b™ Windows® XPIEEE 802.11b Windows® 98SE/ME/2000/XP4-13WiFi-b™WiFi-b™(Soft AP)soft AP :Wireless Settings1. Windows Wireless Settings 2. Soft AP Soft AP3.1.2. ModeStation3. Soft AP4-14WiFi-b™Soft APSoft AP MAC MAC MAC address MAC address AID ID Power Saving Mode Wireless SettingsEvent Log4-154.5Internet(ICS)Internet Windows XP®WiFi-b™ Soft AP Connection Sharing ICS) ICS WiFi-b™(InternetICS ICS4.5.1ICS :1. Soft AP Soft AP 2. Internet 3. Internet4.5.InternetInfrastructure SSID WEPSTA (station)4-16WiFi-b™。
