ruckus胖ap配置方法
锐捷胖AP配置(多个无线信号配置)
锐捷胖AP配置(多个无线信号配置)管理地址在VLAN2,分创建不同的SSID对应VLAN3、VLAN4,连接AP的交换机接口模式配置为Trunk,并允许相应的VLAN通过ap-mode fathostname AP01data-plane wireless-broadcast enablevlan 2vlan 3vlan 4exitinterface GigabitEthernet 0/1encapsulation dot1Q 1exitinterface GigabitEthernet 0/1.2encapsulation dot1Q 2exitinterface GigabitEthernet 0/1.3encapsulation dot1Q 3exitinterface GigabitEthernet 0/1.4encapsulation dot1Q 4exitdot11 wlan 3vlan 3broadcast-ssidssid RG-AP3220v3dot11 wlan 4vlan 4broadcast-ssidssid RG-AP3220v4exitinterface Dot11radio 1/0.3 encapsulation dot1Q 3 mac-mode fatexitinterface Dot11radio 1/0.4 encapsulation dot1Q 4 mac-mode fatexitinterface Dot11radio 1/0 channel 11wlan-id 3wlan-id 4mac-mode fatexitinterface Dot11radio 2/0.3 encapsulation dot1Q 3 mac-mode fatexitinterface Dot11radio 2/0.4 encapsulation dot1Q 4 mac-mode fat##5GHz模式互不干扰的信道为149、153、157、161、165 interface Dot11radio 2/0channel 161wlan-id 3wlan-id 4mac-mode fatexit##BVI的id要与wlan-id相对应interface BVI 2ip address 172.16.2.20 255.255.255.0exitinterface BVI 3ip address dhcpexitinterface BVI 4ip address dhcpexitip route 0.0.0.0 0.0.0.0 172.16.2.254##wlansec的id要与wlan-id相对应wlansec 3security rsn enablesecurity rsn ciphers aes enablesecurity rsn akm psk enablesecurity rsn akm psk set-key ascii abcd1234exitwlansec 4security rsn enablesecurity rsn ciphers aes enablesecurity rsn akm psk enablesecurity rsn akm psk set-key ascii abcd1234 exitusername mzw privilege 15 password abcd1234 line vty 0 4transport input alllogin localexitendwrite瘦AP模式默认密码:Consle进入用户模式 ruijie用户模式进入特权模式 apdebug胖AP模式默认密码:Consle进入用户模式 admin用户模式进入特权模式无密码。
Cisco_胖AP_的基本设定
Cisco 胖AP 的基本設定(Autonomous AP Basic Config)雖然Cisco的胖AP比市售的胖AP貴的許多,但市場上還是可以看見很多將Cisco的Thin AP更改為胖AP單用的狀況,原因是因為:不想常去"重開就會好"特別是需要一直放著提供無線服務的環境,不得不佩服它的技術。
下面針對胖AP的CLI基本設定做介紹(第一次有GUI的速度慢到讓我想學CLI),幫助大家快速設定這個胖子...(笑)Part 1. 快速讓胖AP可用:Step.1設定802.11的無線SSID:ap#config tap(config)#dot11 ssid MySSIDap(config-ssid)#authentication openap(config-ssid)#guest-mode設定的同時,也必需指令驗證方式,我們先用開放驗證(open)方式讓它通就好。
而guest-mode是讓SSID進行廣播,可以方便初始化的連線,為了安全可以不用設定(Client端需要指定好SSID才能連線)Step.2 指定無線訊號的SSID與開啟無線通訊:下面是一顆1131AG的AP,所以有兩個協定802.11a與802.11g,分別在dot11Radio 0與dot11Radio 1,預設是關閉的,需要進去介面打開:ap(config)#int dot11Radio 0ap(config-if)#ssid MySSIDap(config-if)#no shutdownap(config)#int dot11Radio 1ap(config-if)#ssid MySSIDap(config-if)#no shutdownStep.3 設定BVI:如果是DHCP的環境是可以略過這個步驟,因為預設會自已抓好,Fat AP是靠BVI(Bridge Virtual Interface)來讓實體網路與無線網路通訊,所以必需設定一個實體環境的IP給它:ap(config-if)#int bvi 1ap(config-if)#ip addr dhcp或是以手動指定IP:ap(config-if)#int bvi 1ap(config-if)#ip addr 192.168.1.3 255.255.255.0搞定!!把自已的電腦利用無線連看看!!Part 2. 常用基本設定:ARP Cache:AP的運作就像Hub一樣,廣播是它們必做的事,開啟Arp-Cache,可以加快效能(雖然感受不到),當AP收到一個ARP封包,會比對Cache裡的資料,如果不在Cache就不廣播把封包丟掉,以減少廣播封包。
胖AP使用指南

图 2-2 定义黑白名名单
(2)启用接入控制 如图 2-3 所示,在对应 wifi 中,启用黑白名单。 注意:①当启用白名单时,仅允许白名单内的用户接入该无线网络 ②当启用黑名单时,仅限制黑名单内的用户接入该无线网络
图 2-3 启用黑白名单认证
8
2.1.3 隐藏 SSID
基于安全性考虑,在实际运用过程中,可能需要将 wifi 隐藏。APF1.0 支持 隐藏 SSID 功能。如图 2-4 所示,启用隐藏 SSID,确认生效后,该 wifi 对终端不 可见。
如图 1-5 所示,默认 DHCP 地址池为 192.168.100.2/24-192.168.100.254/24, 根据实际情况更改当前配置。 地址池网关为 LAN 口地址, 且不分配。 默认 DHCP 地支持仅分配给无线终端。
图 1-5 DHCP 配置
5
1.5 创建 WIFI
如图 1-6 所示,点击【网络配置】【无线网络】 ,点击【新增】 。创建 SSID、 选择认证方式,点击保存。 注意:认证方式的选择详见功能配置。
2015 年 9 月 28 日
目录
1 上网设置 ............................................................................................................3 1.1 登陆 AP ....................................................................................................3 1.2 设置 WAN ................................................................................................4 1.3 设置 LAN .................................................................................................5 1.4 设置 DHCP ..............................................................................................5 1.5 创建 WIFI ................................................................................................6 1.6 关闭管理 wifi ...........................................................................................6 2 功能配置 ............................................................................................................7 2.1 网络安全 ..................................................................................................7 2.2 无线设置 ..................................................................................................9 2.3 射频优化 ................................................................................................10 2.4 流控设置 ................................................................................................12 3 系统维护 ..........................................................................................................14 3.1 管理员设置 ............................................................................................14 3.2 胖瘦切换 ................................................................................................14 3.3 版本升级 ................................................................................................14
H3C无线胖AP设置
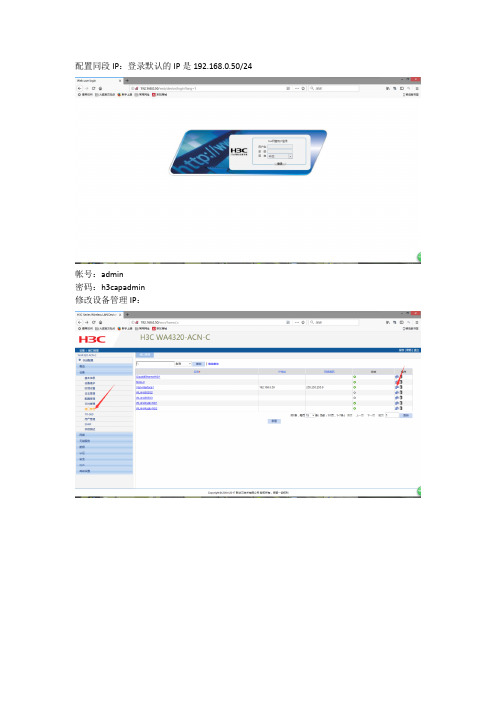
配置同段IP:登录默认的IP是192.168.0.50/24
帐号:admin
密码:h3capadmin
修改设备管理IP:
无线服务配置:
桥接上行密码模式
设置完后点击确定
绑定射频
勾选并开启无线
之后就可以看到发出来的信号了:
这种设置的模式相当于共享交换机接口出来,也就是说DHCP是在交换机或上层设备分配的,而不是像家用路由器一样自己分配IP。
如果需要类似家用路由器那种模式请按照下面配置:
AP自己分配IP并做NAT 手动修改管理IP或者通过DHCP获取:
如果手动配置需要配置网关:
新建一个vlan:
配置vlanIP:
配置DHCP:
配置无线服务,其他和上面的配置一样:
创建ACL:
配置NAT:。
廋AP-胖AP
瘦AP(FIT AP)、胖AP(FAT AP)(2011-08-19 00:04:20)背景概述传统的WLAN网络都是为企业或家庭内少量移动用户的接入而组建的,这类网络典型的组网方式是采用FAT AP+有线交换机的分布式WLAN组网模式,由AP 来完成用户的无线接入、用户权限认证、用户安全策略实施,对WLAN网络设备的管理也是分布式的。
随着WLAN技术的成熟和应用的普及,越来越多的学校开始大规模部署WLAN网络,接入的用户数和无线设备的规模都在成倍增长,网络中心负责老师在建设和维护无线校园网络时发现采用传统的WLAN组网和管理模式已经很难适应现有的无线校园网络规模。
目前在无线校园网络的建设和维护中遇到的主要问题有:1、 WLAN建网时需要对成百上千的AP进行逐一配置:网管IP地址、SSID 和加密认证方式等无线业务参数、信道和发射功率等射频参数、ACL和QOS等服务策略,很容易因误配置而造成配置不一致。
2、为了管理AP,需要维护大量AP的IP地址和设备的映射关系,每新增加一批AP设备都需要进行地址关系维护。
3、接入AP的边缘网络需要更改VLAN、ACL等配置以适应无线用户的接入,为了能够支持用户的无缝漫游,需要在边缘网络上配置所有无线用户可能使用的VLAN和ACL。
4、察看网络运行状况和用户统计时需要逐一登录到AP设备才能完成察看。
在线更改服务策略和安全策略设定时也需要逐一登录到AP设备才能完成设定。
5、升级AP软件无法自动完成,维护人员需要手动逐一对设备进行软件升级,费时费力6、 AP设备的丢失意味着网络配置的丢失,在发现设备丢失前,网络存在入侵隐患,在发现设备丢失后又需要全网重配置。
随着建网、组网问题的不断出现,一种全新的WLAN网络架构-无线控制器+FIT AP集中式WLAN管理模式应运而生。
无线控制器+FIT AP控制架构对设备的功能进行了重新划分,其中无线控制器负责无线网络的接入控制,转发和统计、AP的配置监控、漫游管理、AP的网管代理、安全控制;FIT AP负责802.11报文的加解密、802.11的PHY功能、接受无线控制器的管理、RF空口的统计等简单功能。
胖AP做出口上网配置
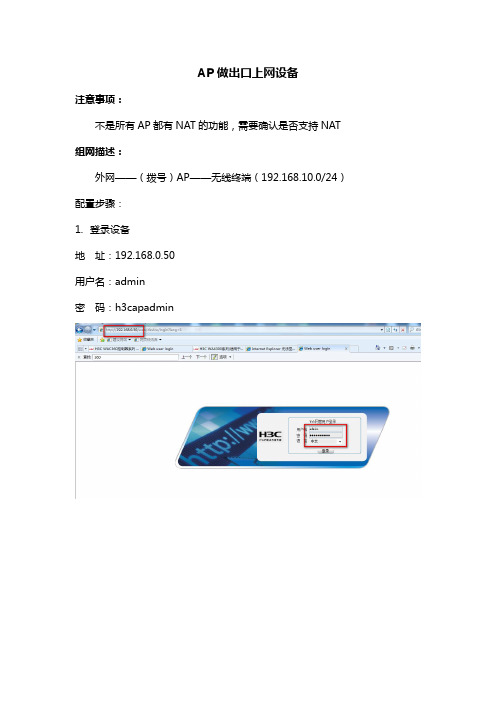
AP做出口上网设备注意事项:不是所有AP都有NAT的功能,需要确认是否支持NAT 组网描述:外网——(拨号)AP——无线终端(192.168.10.0/24)配置步骤:1.登录设备地址:192.168.0.50用户名:admin密码:h3capadmin2.新建无线网段vlan2 网络——vlan,新建3.新建interface vlan 2,地址192.168.10.1设备——端口管理,新建4.创建dhcp服务器,为无线终端分配地址网络——DHCP,运营商给了DNS地址就填写运营商给的DNS,没给就填写网关5.配置上网,以拨号为例(静态ip直接修改interface vlan 1地址即可)网络——PPPoE6.创建acl QoS——ACL IPv47.配置NAT,以拨号为例(静态ip接口选择vlan-interface1,其他不变)8.配置默认路由,以拨号为例(静态ip下一跳输入外网网关即可)9.创建无线服务,其所属vlan修改为2无线服务——接入服务10.配置完成后不要忘记保存配置完成后,无线终端通过ssid 123连接并获得192.168.10.0网段地址上网命令行信息:<WAP722E>dis cu#version 5.20, Release 1508#sysname WAP722E#domain default enable system #telnet server enable#port-security enable#password-recovery enable#undo attack-defense tcp fragment enable #acl number 2000rule 0 permit#vlan 1#vlan 2#domain systemaccess-limit disablestate activeidle-cut disableself-service-url disable#dhcp server ip-pool vlan2network 192.168.10.0 mask 255.255.255.0 gateway-list 192.168.10.1dns-list 192.168.10.1expired day 0 hour 2user-group systemgroup-attribute allow-guest#local-user adminpassword cipher $c$3$jvHusdA/+2jovz+k0/tBMlWA+oeoRoUCoxGYKJo= authorization-attribute level 3service-type telnetservice-type web#wlanrrmdot11a mandatory-rate 6 12 24dot11a supported-rate 9 18 36 48 54dot11b mandatory-rate 1 2dot11b supported-rate 5.5 11dot11g mandatory-rate 1 2 5.5 11dot11g supported-rate 6 9 12 18 24 36 48 54#wlan service-template 1 clearssid H3Cservice-template enablewlan service-template 2 cryptossid 123cipher-suiteccmpsecurity-iersnservice-template enable#cwmpundocwmp enable#interface Dialer10nat outbound 2000link-protocolpppppp chap user 123ppp chap password cipher $c$3$gj+V0+H4CkHE6N7cXOi3Il67a1CL5Q==ppp pap local-user 123 password cipher $c$3$4OwWg8nN4s0B8kG11cbg30MOnycEwA==pppipcpdns requestip address ppp-negotiatedialer user pppoeclientdialer-group 10dialer bundle 10#interface NULL0#interface Vlan-interface1pppoe-client dial-bundle-number 10 ip address 192.168.0.50 255.255.255.0 #interface Vlan-interface2ip address 192.168.10.1 255.255.255.0 #interface GigabitEthernet1/0/1#interface GigabitEthernet1/0/2#interface WLAN-BSS32port link-type hybridport hybrid vlan 1 untagged#interface WLAN-BSS33port link-type hybridport hybrid vlan 1 untagged#interface WLAN-BSS34port link-type hybridport hybrid vlan 1 to 2 untaggedport hybrid pvidvlan 2port-security port-mode pskport-securitytx-key-type 11keyport-securitypreshared-key pass-phrase cipher $c$3$XoS+0NX77ZaNCdol742GHh9EuwtRdxRqgxdt#interface WLAN-BSS35port link-type hybridport hybrid vlan 1 to 2 untaggedport hybrid pvidvlan 2port-security port-mode pskport-securitytx-key-type 11keyport-securitypreshared-key pass-phrase cipher $c$3$XoS+0NX77ZaNCdol742GHh9EuwtRdxRqgxdt#interface WLAN-Radio1/0/1service-template 2 interface wlan-bss 34 #interface WLAN-Radio1/0/2service-template 1 interface wlan-bss 33 service-template 2 interface wlan-bss 35 #ip route-static 0.0.0.0 0.0.0.0 Dialer10#dhcp enable#dialer-rule 10 ip permit#arp-snooping enable#load xml-configuration#load tr069-configuration#user-interface con 0user-interfacevty 0 4authentication-mode scheme#return。
思科AP胖瘦转换方法

思科AP胖瘦转换方法首先准备好工具:putty(或者CRT用于控制AP),3CDaemon (用于tftp服务器),IOS镜像文件,网线,电脑。
1.电脑连接console线,查看AP内置升级IOS的名字1.1查看COM口号1.2连接putty1.3 将电脑用console线插入APconsole –按住AP mode键-上电(继续按住mode持续20秒以上)此时putty显示:flashfs[0]: 3 files, 2 directoriesflashfs[0]: 0 orphaned files, 0 orphaned directoriesflashfs[0]: Total bytes: 15998976flashfs[0]: Bytes used: 1867776flashfs[0]: Bytes available: 14131200flashfs[0]: flashfs fsck took 26 seconds.Base ethernet MAC Address: 00:1d:a1:ff:3c:dcInitializing ethernet port 0...Reset ethernet port 0...Reset done!ethernet link up, 100 mbps, full-duplexEthernet port 0 initialized: link is upbutton is pressed, wait for button to be released...看到上面wait的提示后,松开mode键button pressed for 29 secondsprocess_config_recovery: set IP address and config to default 10.0.0.1process_config_recovery: image recoveryimage_recovery: Download default IOS tar image tftp://255.255.255.255/c1240-k9w7-tar.default (从这里可以看出,在这个状态下,ap把自己的以太口设置为10.0.0.1的ip地址,然后广播去找tftp服务器下的c1240-k9w7-tar.default镜像文件)此时看到AP的IOS文件为c1240-k9w7-tar.default2.将下载好的IOS文件例如:ap1g2-k9w8-tar.152-4.JB6 或者ap1g2-k9w8-tar.153-3.JC直接改名为以上得到的XXXX-K9W7-TAR.default 的名字(以实际情况更改)2.1 设置本地连接IP地址为:10.0.0.2 将AP网口与本地连接直连2.2设置3CDaemon 存放路径将已经改好的.default 文件放入该目录3. 断电AP 按住mode键开启AP电源等待20秒以上松开mode 键重复以下的情况:flashfs[0]: 3 files, 2 directoriesflashfs[0]: 0 orphaned files, 0 orphaned directoriesflashfs[0]: Total bytes: 15998976flashfs[0]: Bytes used: 1867776flashfs[0]: Bytes available: 14131200flashfs[0]: flashfs fsck took 26 seconds.Base ethernet MAC Address: 00:1d:a1:ff:3c:dcInitializing ethernet port 0...Reset ethernet port 0...Reset done!ethernet link up, 100 mbps, full-duplexEthernet port 0 initialized: link is upbutton is pressed, wait for button to be released...看到上面wait的提示后,松开mode键button pressed for 29 secondsprocess_config_recovery: set IP address and config to default 10.0.0.1process_config_recovery: image recoveryimage_recovery: Download default IOS tar image tftp://255.255.255.255/c1240-k9w7-tar.defaultexaminingimage... ………………………………………………………………………………………………………..当看到以上的情况出现说明升级已经开始了AP IOS升级失败可能原因1. POE交换机接AP的端口和接tftp server的端口必须在同一vlan;2. 笔记本电脑防火墙保持关闭;3. Tftp server软件运行异常;4.需要按住MODE键启动AP后,提示松开MODE键后打开TFTP 软件;升级结束后可以尝试键入conf t 查看是否为瘦AP 瘦AP没有conf t 模式胖ap 可以默认账号密码应该都是Cisco或者cisco此方法适用于胖转瘦瘦转胖。
华为无线AP胖模式配置

华为无线AP胖模式配置拓扑图配置过程路由配置<Huawei>sys[Huawei]dhcp enable[Huawei]dns proxy enable[Huawei]dns server 114.114.114.114配置静态路由,所有IP下一跳(外网网关)[Huawei]ip route-static 0.0.0.0 0.0.0.0 192.168.1.254创建及配置访问控制列表[Huawei]acl number 2001[Huawei-acl-basic-2001]rule 1 permit source 172.16.1.0 0.0.0.255互联网配置[Huawei]interface GigabitEthernet 0/0/0[Huawei-GigabitEthernet0/0/0]ip address 192.168.3.213 255.255.252.0互联网端口执行acl 2001访问控制列表内容[Huawei-GigabitEthernet0/0/0]nat outbound 2001内网配置[Huawei]interface GigabitEthernet 0/0/1[Huawei-GigabitEthernet0/0/1]ip address 172.16.1.1 255.255.255.0[Huawei-GigabitEthernet0/0/1]dhcp select interface[Huawei-GigabitEthernet0/0/1]dhcp server dns-list 114.114.114.114AP配置默认管理IP:169.254.1.1web管理:https://169.254.1.1用户名:admin密码:****************系统视图<Huawei>sys添加BSS[Huawei]interface Wlan-Bss 0[Huawei-Wlan-Bss0]q[Huawei]interface Wlan-Bss 1[Huawei-Wlan-Bss1]q进入wlan视图[Huawei]wlan创建WMM模板[Huawei-wlan-view]wmm-profile name WMM_MB[Huawei-wlan-wmm-prof-WMM_MB]q创建流量模板[Huawei-wlan-view]traffic-profile name LL_MB[Huawei-wlan-traffic-prof-LL_MB]q创建安全模板[Huawei-wlan-view]security-profile name AQ_MB[Huawei-wlan-sec-prof-AQ_MB]q创建服务集2.4G[Huawei-wlan-view]service-set name fwj_2.4G加入BSS 0[Huawei-wlan-service-set-fwj_2.4G]wlan-bss 0设定SSID名称[Huawei-wlan-service-set-fwj_2.4G]ssid wifi_2.4G用户隔离[Huawei-wlan-service-set-fwj_2.4G]user-isolate加入流量模板[Huawei-wlan-service-set-fwj_2.4G]traffic-profile name LL_MB加入安全模板[Huawei-wlan-service-set-fwj_2.4G]security-profile name AQ_MB退到wlan视图[Huawei-wlan-service-set-fwj_2.4G]q创建服务集5G[Huawei-wlan-view]service-set name fwj_5G加入BSS 1[Huawei-wlan-service-set-fwj_5G]wlan-bss 1设定SSID名称[Huawei-wlan-service-set-fwj_5G]ssid wifi_5G用户隔离[Huawei-wlan-service-set-fwj_5G]user-isolate加入流量模板[Huawei-wlan-service-set-fwj_5G]traffic-profile name LL_MB 加入安全模板[Huawei-wlan-service-set-fwj_5G]security-profile name AQ_MB退到wlan视图[Huawei-wlan-service-set-fwj_5G]q创建射频模板[Huawei-wlan-view]radio-profile name SP_MB加入WMM模板[Huawei-wlan-radio-prof-SP_MB]wmm-profile name WMM_MB退到系统视图[Huawei-wlan-radio-prof-SP_MB]q[Huawei-wlan-view]q进入射频端口(2.4G)[Huawei]interface Wlan-Radio 0/0/0加入射频模板[Huawei-Wlan-Radio0/0/0]radio-profile name SP_MB 加入服务集2.4G[Huawei-Wlan-Radio0/0/0]service-set name fwj_2.4G [Huawei-Wlan-Radio0/0/0]q进入射频端口(5G)[Huawei]interface Wlan-Radio 0/0/1加入射频模板[Huawei-Wlan-Radio0/0/1]radio-profile name SP_MB 加入服务集5G[Huawei-Wlan-Radio0/0/1]service-set name fwj_5G。
Ruckus Unleashed AP 802.1x 认证配置示例

Ruckus Unleashed AP 802.1X认证 SSID配置示例1.组网需求某企业购买了几台Ruckus Unleashed AP、路由器和交换机等网络设备,路由器供出口Internet接入功能,交换机提供有线网络接入和AP接入功能,Unleashed AP 提供无线网络接入功能。
为保证无线网络安全,该企业WIFI用户采用802.1X认证方式接入网络。
2.配置思路1.Unleashed AP 初始化配置;2.配置802.1x认证方式SSID;3.配置本地802.1x用户。
3.配置步骤3.1Unleashed AP 初始化配置a)电脑有线网卡配置IP为:192.168.0.X(X为192.168.0.2~254任一地址)b)用非IE内核浏览器登录:https://192.168.0.1,c)Unleashed AP 支持中文,喜欢中文用户可选中文,国内用户可选国家代码为中文。
d)一般多AP场景,AP工作在非网关模式,DHCP由其它设备实现(如出口网关、路由器或者交换机),IP地址建议配置为手动模式,方便管理。
本文按非网关模式配置。
少量AP场景,AP可选网关模式,由Ap来实现出口路由器功能,WAN IP 地址可以根据出场景需要配置,可手动、DHCP或者PPPOE拨号e)配置无线信号名称即 SSID 和密码,密码不能有空格,最少8位最多64位字符。
f)配置Unleashed AP管理帐号和密码,可选密码恢复配置,如果密码恢复配置没选而且忘记密码,也可以直接按AP后面的Reset或者 Reset hard按钮恢复出厂设置。
g)点击“完成”,初始化配置结束,AP会重新启动。
不要断开电源或重启AP,不要刷新浏览器或点击浏览器的"回退"按钮h)配置完成后,其它AP只要接入到同一网段,都会自动接入到Unleashed系统里面,不需要做其它配置,建议在Unleashed系统里将Ap管理IP 配置为手动以方便以后登录管理。
cisco胖apssid设置

cisco胖ap ssid设置记得尚在学校的时候,老师曾经问过小编“cisco 胖ap ssid怎么设置?”小编当时真是百愁莫展啊,?店铺整理了相关资料,供您参考。
配置思路如下:1、创建SSID2、在dot11Radio 0接口调用3、创建dot11Radio 0.*子接口4、创建GigabitEthernet0.*子接口注意:AP连接的交换机端口的模式需要设置为Trunk.配置完的结果如下,Cisco的配置可直接拷贝到配置模式下执行。
可以直接拷贝以下的信息按你的需求修改。
Test_AP#sh runBuilding configuration...Current configuration : 8208 bytes!version 12.4no service padservice timestamps debug datetime msecservice timestamps log datetime msecservice password-encryption!hostname Test_AP!logging rate-limit console 9enable secret 5 $1$9JRr$7xB04nUsXesZ.p08rypkE/!no aaa new-model!!dot11 syslogdot11 vlan-name T est_WLAN_100 vlan 100 dot11 vlan-name T est_WLAN_101 vlan 101 dot11 vlan-name T est_WLAN_102 vlan 102 dot11 vlan-name T est_WLAN_103 vlan 103 dot11 vlan-name T est_WLAN_104 vlan 104 dot11 vlan-name T est_WLAN_105 vlan 105 dot11 vlan-name T est_WLAN_106 vlan 106 dot11 vlan-name T est_WLAN_107 vlan 107 dot11 vlan-name T est_WLAN_108 vlan 108!dot11 ssid Test_WLAN_100vlan 100authentication openauthentication key-management wpa version 2 mbssid guest-modewpa-psk ascii 7 06291C3B1C1F594953!dot11 ssid Test_WLAN_101vlan 101authentication openauthentication key-management wpa version 2 mbssid guest-modewpa-psk ascii 7 002B001C540A5B575D!dot11 ssid Test_WLAN_102vlan 102authentication openauthentication key-management wpa version 2 mbssid guest-modewpa-psk ascii 7 143801115C557A797D!dot11 ssid Test_WLAN_103vlan 103authentication openauthentication key-management wpa version 2 mbssid guest-modewpa-psk ascii 7 05241515711D1E5B4A!dot11 ssid Test_WLAN_104vlan 104authentication openauthentication key-management wpa version 2 mbssid guest-modewpa-psk ascii 7 143801115C557A7F75!dot11 ssid Test_WLAN_105vlan 105authentication openauthentication key-management wpa version 2 mbssid guest-modewpa-psk ascii 7 080E5F54594855424A!dot11 ssid Test_WLAN_106vlan 106authentication openauthentication key-management wpa version 2 mbssid guest-modewpa-psk ascii 7 080E5F545948554143!dot11 ssid Test_WLAN_107vlan 107authentication openauthentication key-management wpa version 2 mbssid guest-modewpa-psk ascii 7 153D1816547B7B737A!dot11 ssid Test_WLAN_108vlan 108authentication openauthentication key-management wpa version 2 mbssid guest-modewpa-psk ascii 7 032B4811565E711418!power inline negotiation prestandard source !!username Cisco password 7 1531021F0725!!bridge irb!!interface Dot11Radio0no ip addressno ip route-cache!encryption vlan 100 mode ciphers aes-ccm tkip !encryption vlan 101 mode ciphers aes-ccm tkipencryption vlan 102 mode ciphers aes-ccm tkip !encryption vlan 103 mode ciphers aes-ccm tkip !encryption vlan 104 mode ciphers aes-ccm tkip !encryption vlan 105 mode ciphers aes-ccm tkip !encryption vlan 106 mode ciphers aes-ccm tkip !encryption vlan 107 mode ciphers aes-ccm tkip !encryption vlan 108 mode ciphers aes-ccm tkip !ssid Test_WLAN_100!ssid Test_WLAN_101!ssid Test_WLAN_102!ssid Test_WLAN_103!ssid Test_WLAN_104!ssid Test_WLAN_105!ssid Test_WLAN_106!ssid Test_WLAN_107ssid Test_WLAN_108!antenna gain 0mbssidstation-role rootbridge-group 1bridge-group 1 subscriber-loop-control bridge-group 1 block-unknown-source no bridge-group 1 source-learningno bridge-group 1 unicast-flooding bridge-group 1 spanning-disabled!interface Dot11Radio0.100 encapsulation dot1Q 100no ip route-cachebridge-group 100bridge-group 100 subscriber-loop-control bridge-group 100 block-unknown-source no bridge-group 100 source-learningno bridge-group 100 unicast-flooding bridge-group 100 spanning-disabled!interface Dot11Radio0.101 encapsulation dot1Q 101no ip route-cachebridge-group 101bridge-group 101 subscriber-loop-control bridge-group 101 block-unknown-source no bridge-group 101 source-learningbridge-group 101 spanning-disabled!interface Dot11Radio0.102 encapsulation dot1Q 102no ip route-cachebridge-group 102bridge-group 102 subscriber-loop-control bridge-group 102 block-unknown-source no bridge-group 102 source-learningno bridge-group 102 unicast-flooding bridge-group 102 spanning-disabled!interface Dot11Radio0.103 encapsulation dot1Q 103no ip route-cachebridge-group 103bridge-group 103 subscriber-loop-control bridge-group 103 block-unknown-source no bridge-group 103 source-learningno bridge-group 103 unicast-flooding bridge-group 103 spanning-disabled!interface Dot11Radio0.104 encapsulation dot1Q 104no ip route-cachebridge-group 104bridge-group 104 subscriber-loop-control bridge-group 104 block-unknown-source no bridge-group 104 source-learningbridge-group 104 spanning-disabled!interface Dot11Radio0.105 encapsulation dot1Q 105no ip route-cachebridge-group 105bridge-group 105 subscriber-loop-control bridge-group 105 block-unknown-source no bridge-group 105 source-learningno bridge-group 105 unicast-flooding bridge-group 105 spanning-disabled!interface Dot11Radio0.106 encapsulation dot1Q 106no ip route-cachebridge-group 106bridge-group 106 subscriber-loop-control bridge-group 106 block-unknown-source no bridge-group 106 source-learningno bridge-group 106 unicast-flooding bridge-group 106 spanning-disabled!interface Dot11Radio0.107 encapsulation dot1Q 107no ip route-cachebridge-group 107bridge-group 107 subscriber-loop-control bridge-group 107 block-unknown-source no bridge-group 107 source-learningbridge-group 107 spanning-disabled!interface Dot11Radio0.108 encapsulation dot1Q 108no ip route-cachebridge-group 108bridge-group 108 subscriber-loop-control bridge-group 108 block-unknown-source no bridge-group 108 source-learningno bridge-group 108 unicast-flooding bridge-group 108 spanning-disabled!interface Dot11Radio1no ip addressno ip route-cacheshutdownantenna gain 0no dfs band blockchannel dfsstation-role rootno keepalivebridge-group 1bridge-group 1 subscriber-loop-control bridge-group 1 block-unknown-source no bridge-group 1 source-learningno bridge-group 1 unicast-flooding bridge-group 1 spanning-disabled!interface GigabitEthernet0no ip addressno ip route-cacheduplex autospeed autono keepalivebridge-group 1no bridge-group 1 source-learning bridge-group 1 spanning-disabled !interface GigabitEthernet0.100 encapsulation dot1Q 100no ip route-cachebridge-group 100no bridge-group 100 source-learning bridge-group 100 spanning-disabled !interface GigabitEthernet0.101 encapsulation dot1Q 101no ip route-cachebridge-group 101no bridge-group 101 source-learning bridge-group 101 spanning-disabled !interface GigabitEthernet0.102 encapsulation dot1Q 102no ip route-cachebridge-group 102no bridge-group 102 source-learning bridge-group 102 spanning-disabled !interface GigabitEthernet0.103 encapsulation dot1Q 103no ip route-cachebridge-group 103no bridge-group 103 source-learning bridge-group 103 spanning-disabled !interface GigabitEthernet0.104 encapsulation dot1Q 104no ip route-cachebridge-group 104no bridge-group 104 source-learning bridge-group 104 spanning-disabled !interface GigabitEthernet0.105 encapsulation dot1Q 105no ip route-cachebridge-group 105no bridge-group 105 source-learning bridge-group 105 spanning-disabled !interface GigabitEthernet0.106 encapsulation dot1Q 106no ip route-cachebridge-group 106no bridge-group 106 source-learning bridge-group 106 spanning-disabled !interface GigabitEthernet0.107 encapsulation dot1Q 107no ip route-cachebridge-group 107no bridge-group 107 source-learningbridge-group 107 spanning-disabled!interface GigabitEthernet0.108encapsulation dot1Q 108no ip route-cachebridge-group 108no bridge-group 108 source-learningbridge-group 108 spanning-disabled!interface BVI1ip address 192.168.10.100 255.255.255.0no ip route-cache!ip http serverno ip http secure-serverip http help-path /warp/public/779/smbiz/prodconfig/help/ eagbridge 1 route ip!!!line con 0line vty 0 4login local!endTest_AP#以上就是小编为大家带来cisco 胖ap ssid设置教程方法介绍。
项目9-胖AP无线局域网配置[18页]
![项目9-胖AP无线局域网配置[18页]](https://img.taocdn.com/s3/m/df91016449649b6648d747cd.png)
项目9 胖AP无线局域网配置
9.2 相关知识
1.AP3220设备
RG-AP3220 无线局域网接入设备(简 称AP3220)具有内置天线的无线接入点 产品。RG-AP3220 包含2 个无线射频 口、1 个支持POE 功能的以太网接口、 一个console 端口,一个外接电源适配 器的电源插座。
(6)将WLAN映射到dot11radio接口上的 命令格式如下:
16
项目9 胖AP无线局域网配置
示例:将射频卡接口dot11radio 1/0,封装 VLAN 10,并关联无线局域网WLAN 1 Ruijie(config)#interface dot11radio 1/0 Ruijie(config-if)#encapsulation dot1q 10 Ruijie(config-if)#wlan-id 1
(3)创建WLAN
11
项目9 胖AP无线局域网配置
示例:创建一个编号为10的WLAN。 Rujie(config)#dot11 wlan 10 Ruijie(dot11-wlan-config)#
12
项目9 胖AP无线局域网配置
(4)在AP的WLAN配置模式下,设置 SSID名称命令格式如下:
13
9
项目9 胖AP无线局域网配置
示例:在Fa0/0.20子端口上封装 802.1Q, VLANID 为 10。 Ruijie(config)# interface fastEthernet 0/0.20 Ruijie(config-subif)# encapsulation dot1Q 10
10
项目9 胖AP无线局域网配置
项目9 胖AP无线局域网配置
示例:为无线局域网wlan1配置SSID为ap1 Rujie(config)#dot11 wlan 1 Ruijie(dot11-wlan-config)#ssid ap1
ruckus虚拟控制器AP无线开局配置

o 忽略浏览器的证书提示。
11
RUCKUS PROPRIETARY AND CONFIDENTIAL
配置流程----创建AP会启动创建进程;
o Local Upgrade可用于
Unleashed版本升级、与其 他普通版本切换。
12
o 通过Web 界面进行管理 o 后续版本增加CLI、SNMP和FM管理
配置流程----更新至Unleashed版本
o AP默认IP地址192.168.0.1; o 默认帐号:super/sp-admin; o 将AP手动更新至200.X版本;
o 采用9U1-RXXX-WW00下单时AP默认为
200.X版本,无需手动更新。
Major Minor Internal Use
简单的部署流程
AP上电开机 • •
连接到开放 的WLAN
通过DNS登 陆到AP
向导模式配 置Master AP
自动选择备份AP(无需设置) 成员AP自动发现&自动加入
• Unleashed AP 仅会发现 Unleashed Master AP
功能介绍
15
RUCKUS PROPRIETARY AND CONFIDENTIAL
配置流程----无线基础设置
o 完成最基本的SSID设置; o 高级功能可在进入菜单后 设置。
16
RUCKUS PROPRIETARY AND CONFIDENTIAL
配置流程----管理员帐户
o 设定管理员帐户及密码;
17
配置流程----配置系统名称
o 填入系统名称,选择国家代码;
14
RUCKUS PROPRIETARY AND CONFIDENTIAL
胖AP做出口上网配置演示教学

胖A P做出口上网配置AP做出口上网设备注意事项:不是所有AP都有NAT的功能,需要确认是否支持NAT 组网描述:外网——(拨号)AP——无线终端(192.168.10.0/24)配置步骤:1.登录设备地址:192.168.0.50用户名:admin密码:h3capadmin2.新建无线网段vlan2 网络——vlan,新建3.新建interface vlan 2,地址192.168.10.1设备——端口管理,新建4.创建dhcp服务器,为无线终端分配地址网络——DHCP,运营商给了DNS地址就填写运营商给的DNS,没给就填写网关5.配置上网,以拨号为例(静态ip直接修改interface vlan 1地址即可)网络——PPPoE6.创建aclQoS——ACL IPv47.配置NAT,以拨号为例(静态ip接口选择vlan-interface1,其他不变)8.配置默认路由,以拨号为例(静态ip下一跳输入外网网关即可)9.创建无线服务,其所属vlan修改为2无线服务——接入服务10.配置完成后不要忘记保存配置完成后,无线终端通过ssid 123连接并获得192.168.10.0网段地址上网命令行信息:<WAP722E>dis cu#version 5.20, Release 1508#sysname WAP722E#domain default enable system#telnet server enable#port-security enable#password-recovery enable#undo attack-defense tcp fragment enable #acl number 2000rule 0 permit#vlan 1#vlan 2#domain systemaccess-limit disablestate activeidle-cut disableself-service-url disable#dhcp server ip-pool vlan2network 192.168.10.0 mask 255.255.255.0gateway-list 192.168.10.1dns-list 192.168.10.1expired day 0 hour 2#user-group systemgroup-attribute allow-guest#local-user adminpassword cipher$c$3$jvHusdA/+2jovz+k0/tBMlWA+oeoRoUCoxGYKJo= authorization-attribute level 3service-type telnetservice-type web#wlan rrmdot11a mandatory-rate 6 12 24dot11a supported-rate 9 18 36 48 54dot11b mandatory-rate 1 2dot11b supported-rate 5.5 11dot11g mandatory-rate 1 2 5.5 11dot11g supported-rate 6 9 12 18 24 36 48 54 #wlan service-template 1 clearssid H3Cservice-template enable#wlan service-template 2 cryptossid 123cipher-suite ccmpsecurity-ie rsnservice-template enable#cwmpundo cwmp enable#interface Dialer10nat outbound 2000link-protocol pppppp chap user 123ppp chap password cipher$c$3$gj+V0+H4CkHE6N7cXOi3Il67a1CL5Q==ppp pap local-user 123 password cipher$c$3$4OwWg8nN4s0B8kG11cbg30MOnycEwA== ppp ipcp dns requestip address ppp-negotiatedialer user pppoeclientdialer-group 10dialer bundle 10#interface NULL0#interface Vlan-interface1pppoe-client dial-bundle-number 10ip address 192.168.0.50 255.255.255.0#interface Vlan-interface2ip address 192.168.10.1 255.255.255.0#interface GigabitEthernet1/0/1#interface GigabitEthernet1/0/2#interface WLAN-BSS32port link-type hybridport hybrid vlan 1 untagged#interface WLAN-BSS33port link-type hybridport hybrid vlan 1 untagged#interface WLAN-BSS34port link-type hybridport hybrid vlan 1 to 2 untaggedport hybrid pvid vlan 2port-security port-mode pskport-security tx-key-type 11keyport-security preshared-key pass-phrase cipher $c$3$XoS+0NX77ZaNCdol742GHh9EuwtRdxRqgxdt#interface WLAN-BSS35port link-type hybridport hybrid vlan 1 to 2 untaggedport hybrid pvid vlan 2port-security port-mode pskport-security tx-key-type 11keyport-security preshared-key pass-phrase cipher $c$3$XoS+0NX77ZaNCdol742GHh9Euwt RdxRqgxdt#interface WLAN-Radio1/0/1service-template 2 interface wlan-bss 34#interface WLAN-Radio1/0/2service-template 1 interface wlan-bss 33service-template 2 interface wlan-bss 35#ip route-static 0.0.0.0 0.0.0.0 Dialer10#dhcp enable#dialer-rule 10 ip permit#arp-snooping enable#load xml-configuration#load tr069-configuration#user-interface con 0user-interface vty 0 4authentication-mode scheme #return。
ZTE胖AP流程图

登陆192。
168。
0。
228 对设备进行设置
password
点击基本设置
点击无线设定
点击安全配置文件
点击确认后无线连接可能会被断开,需手工回到第二步,手工连接一次,这次ESSID为ChinaNet 了,表示刚才的设置成功。
继续进入安全配置文件对porfile8进行设置,SSID改为本机的MAC地址后六位。
注意不要
广播此SSID名称
理-重启
此时采用WIRELESMON软件进行检测:
CHINA 因可以正常PPPOE拨号进行上网业务,而无法登陆WEB页面进行设备操控。
连接本机MAC地址则可进行WEB登陆来管理AP设备,连接本机MAC地址示意图如下
步骤:
再次看左上角连接SSID,并确认这个时候就可以对AP设备进行操作了。
无线AP (Ruckus)参数配置

Ruckus AP ZF7343/ZF7962/ZF7982快速配置手册一、配置前,准备工作:1、将AP正常供电,将AP的以太网口与笔记本电脑或台式机的以太网口通过以太网线进行连接2、将笔记本电脑的IP地址设置为 192.168.0.XX(XX为除1~255之间的任一数值,1与255除外)。
设置好后,在电脑的CLI下执行Ping 192.168.0.1 确认能够ping 通。
如下图所示:IP地址配置 ping包测试3、在浏览器上输入:“https:\\192.168.0.1”并确认。
系统会自动导入到AP的登陆界面。
如下图所示:4、输入默认的用户名/密码“super/sp-admin”(在每个设备的底部也都有提示)后点击login 进入AP的配置界面。
二、配置步骤如下:1、登录进入配置界面后,在左侧竖列菜单中,点击Radio 2.4G。
2、点击Radio 2.4G后,将会出现如下的界面,然后在水平菜单条中点击common项。
在country code 的下拉框中选择“Reserved 1”选项,选择后将提示AP将重新启动,如下图所示,点击OK,设备自动重启。
3、重启完毕后,再此登陆此配置界面,显示如下:。
4、在Channel的下拉框中选择1~11中任一信道(建议测试的时候,信道设置固定状态,不要设置成自动模式,在无特殊情况下,在1,6,11这三个信道中选择),点击“update settings”配置将立即保存并生效。
最后配置结果效果如下图:5、在左侧竖列菜单中,点选“Local Subnets”配置选单,出现如下配置界面。
选择Enabled Subnet和Enabled DHCP Server。
设置DHCP起始IP地址,DHCP池选最大数,以及Access VLAN 默认情况下设置为1。
点击“update settings”配置将立即保存并生效。
最终效果图如下:6、在在左侧竖列菜单中,再此选Radio 2.4G,点选“Wireless1”配置选单,出现如下配置界面。
胖AP基本配置-电脑资料

胖AP基本配置-电脑资料configdot11 wlan 1vlan 1ssid testexitint g0/1en d 1exitint d 1/0en d 1wlan-id 1exitint bvi 1ip add 10.1.1.1 255.255.255.0endwr如果需要多个wlan 那么则需要在射频子接口来配置Ruijie(config)# sh runBuilding configuration...Current configuration : 2877 bytes!version RGOS 10.4(1T13), Release(128463)(Mon JAN 5 08:57:05 CST 2009 -ngcf65)!!!!nfppno nd-guard enable!!!vlan 1!vlan 4!!no service password-encryption service dhcpip fragment-quota 200!ip dhcp excluded-address 4.1.1.1 4.1.1.99 !ip dhcp pool web_stanetwork 4.1.1.0 255.255.255.0dns-server 192.168.58.110default-router 4.1.1.1!!!!!!!http redirect port 8081no logging on!!!!!wids!!dot11 wlan 1vlan 4broadcast-ssidssid chenguanglei-fat!!!link-check enable!!interface GigabitEthernet 0/1encapsulation dot1Q 4!interface Dot11radio 1/0encapsulation dot1Q 4wlan-qos trust dot11ewlan-qos svp-map-ac best-effortapsd enablewmm edca-radio voice aifsn 1 cwmin 2 cwmax 3 txop 47wmm edca-radio video aifsn 1 cwmin 3 cwmax 4 txop 94wmm edca-radio best-effort aifsn 3 cwmin 4 cwmax 6 txop 0 wmm edca-radio back-ground aifsn 7 cwmin 4 cwmax 10 txop 0wmm edca-client voice aifsn 2 cwmin 2 cwmax 3 txop 47wmm edca-client voice cac optionalwmm edca-client video aifsn 2 cwmin 3 cwmax 4 txop 94wmm edca-client video cac optionalwmm edca-client best-effort aifsn 3 cwmin 4 cwmax 10 txop 0wmm edca-client back-ground aifsn 7 cwmin 4 cwmax 10 txop 0wmm enablestation-role root-apmac-mode fatmcast_rate 54no short-preambleslottime shortchan-width 20radio-type 802.11bchannel 13speed-mode autoloadblance 60coverage-rssi 10country-code CNampdu enableno short-gi enable chan-width 20short-gi enable chan-width 40wlan-id 1!interface Dot11radio 2/0no ip proxy-arpwlan-qos trust dot11ewlan-qos svp-map-ac best-effortapsd enablewmm edca-radio voice aifsn 1 cwmin 2 cwmax 3 txop 47wmm edca-radio video aifsn 1 cwmin 3 cwmax 4 txop 94wmm edca-radio best-effort aifsn 3 cwmin 4 cwmax 6 txop 0 wmm edca-radio back-ground aifsn 7 cwmin 4 cwmax 10 txop 0wmm edca-client voice aifsn 2 cwmin 2 cwmax 3 txop 47wmm edca-client voice cac optionalwmm edca-client video aifsn 2 cwmin 3 cwmax 4 txop 94wmm edca-client video cac optionalwmm edca-client best-effort aifsn 3 cwmin 4 cwmax 10 txop 0wmm edca-client back-ground aifsn 7 cwmin 4 cwmax 10 txop 0wmm enablestation-role root-apmac-mode fatmcast_rate 54no short-preambleslottime shortchan-width 20radio-type 802.11achannel 149speed-mode autoloadblance 60coverage-rssi 10country-code CNampdu enableno short-gi enable chan-width 20short-gi enable chan-width 40!interface BVI 4no ip proxy-arpip address 4.1.1.11 255.255.255.0 !!!!!ip route 0.0.0.0 0.0.0.0 4.1.1.1!!snmp-server community key rw line con 0password ruijieline vty 0privilege level 15loginpassword ruijieline vty 1 4loginpassword ruijie!。
【VIP专享】胖AP使用WEB配置说明书

阿德利亚胖AP(MSR1000-510)使用WEB配置说明手册(MSR1000-510.W1)一硬件连接及相关参数设置方式一使用交叉线连接使用交叉线将PC机和胖AP连接起来,对PC机的以太网口做如图1-1的设置。
图 1-1打开IE浏览器,在网页地址栏中输入:http://192.168.219.1,回车,得到页面如图1-2所示。
输入用户名:root,密码:public即可进入WEB配置界面,如图1-3所示。
图 1-2图 1-3方式二使用无线网络连接使用前提是无线网络能收到隐藏信号并能够手动连接。
将AP 设备接上电源后,对该以太网口做如图2-1的设置。
图 2-1对无线网卡手动连接界面做如图2-2的配置。
SSID为AzaleaDeault。
连接后界面如图2-3所示。
图 2-2图 2-3打开IE浏览器,在网页地址栏中输入:http://192.168.219.1,回车,得到页面如图2-4所示。
输入用户名:root,密码:public即可进入WEB配置界面,如图2-5所示。
图 2-4图 2-5方式三使用交换机或路由器连接使用普通网线将PC机和AP设备连接在交换机和路由器上,对PC机的以太网口做如图3-1的设置。
图 3-1打开IE浏览器,在网页地址栏中输入:http://192.168.219.1,回车,得到页面如图3-2所示。
输入用户名:root,密码:public即可进入WEB配置界面,如图3-3所示。
图 3-2图 3-3二设备的WEB配置请参照文件夹中的MSR系列WEB界面配置手册AOS-v4.0.pdf 文件来进行配置。
锐捷无线AP胖模式(FAT)配置案例

锐捷⽆线AP胖模式(FAT)配置案例锐捷⽆线AP胖模式(FAT)配置案例⼀、AP trunk 模式1.创建vlan10 vlan20 vlan30AP(config)#vlan 10 创建vlan10AP(config-vlan)#vlan 20 创建vlan20AP(config-vlan)#vlan 30 创建vlan302.创建wlan:10 20 30 联vlan 10 20 30AP(config)#dot11 wlan 10 创建⽆线⽹络wlan 10AP(dot11-wlan-config)#vlan 10 关联vlan10AP(dot11-wlan-config)#broadcast-ssid 将ssid名称⼴播AP(dot11-wlan-config)#ssid ap10 配置ssid⼴播标识名称为ap10AP(dot11-wlan-config)#exit 退出AP(config)#dot11 wlan 20 创建⽆线⽹络wlan 20AP(dot11-wlan-config)#vlan 20 关联vlan20AP(dot11-wlan-config)#broadcast-ssid 将ssid名称⼴播AP(dot11-wlan-config)#ssid ap20 配置ssid⼴播标识名称为ap20AP(dot11-wlan-config)#exit 退出AP(config)#dot11 wlan 30 创建⽆线⽹络wlan 30AP(dot11-wlan-config)#vlan 30 关联vlan30AP(dot11-wlan-config)#broadcast-ssid 将ssid名称⼴播AP(dot11-wlan-config)#ssid ap30 配置ssid⼴播标识名称为ap30AP(dot11-wlan-config)#exit 退出3.创建⼦接⼝并封装AP(config)#interface gigabitEthernet 0/1.10创建千兆以太⽹接⼝G0/1的⼦接⼝G0/1.10AP(config-subif)#encapsulation dot1Q 10 封装802.1q协议,并把该端⼝关联到vlan10 AP(config-subif)#exit 退出AP(config)#interface gigabitEthernet 0/1.20创建千兆以太⽹接⼝G0/1的⼦接⼝G0/1.20AP(config-subif)#encapsulation dot1Q 20 封装802.1q协议,并把该端⼝关联到vlan20 AP(config-subif)#exit 退出AP(config)#interface gigabitEthernet 0/1.30 创建千兆以太⽹接⼝G0/1的⼦接⼝G0/1.30 AP(config-subif)#encapsulationdot1Q 30 封装802.1q协议,并把该端⼝关联到vlan30 AP(config-subif)#exit 退出4.⼴播信道封装协议关联wlanAP(config)#interface dot11radio 1/0 进⼊dot11radio1/ 0⽆线信道接⼝AP(config-if-Dot11radio 1/0)#mac-mode fat 设置模式为胖(FAT)模式AP(config-if-Dot11radio 1/0)#radio-type 802.11b设置⽆线⽹络协议类型为802.11bAP(config-if-Dot11radio 1/0)#wlan-id 10 关联wlan-id 10(即wlan 10)AP(config-if-Dot11radio 1/0)#wlan-id 20 关联wlan-id 20(即wlan 20)AP(config-if-Dot11radio 1/0)#wlan-id 30 关联wlan-id 30(即wlan 30)AP(config-if-Dot11radio 1/0)#exit 退出AP(config)#interface dot11radio 2/0 进⼊dot11radio2/ 0⽆线信道接⼝AP(config-if-Dot11radio 2/0)#mac-mode fat 设置模式为胖(FAT)模式AP(config-if-Dot11radio 2/0)#radio-type 802.11a 设置⽆线⽹络协议类型为802.11aAP(config-if-Dot11radio 2/0)#wlan-id 10 关联wlan10-id 10AP(config-if-Dot11radio 2/0)#wlan-id 20 关联wlan20-id 20AP(config-if-Dot11radio 2/0)#wlan-id 30 关联wlan30-id 30AP(config-if-Dot11radio 2/0)#exit 退出5.⼴播⼦接⼝封装:模式mac-mode fatAP(config)#interface dot11radio 1/0.10 进⼊⽆线信道接⼝1/0⼦接⼝dot11radio1/0.10 AP(config-subif)#encapsulation dot1Q 10 封装802.1q协议,并把该接⼝关联到vlan 10 AP(config-subif)#mac-mode fat 设置模式为胖(FAT)模式AP(config-subif)#exit 退出AP(config)#interface dot11radio 1/0.20 进⼊⽆线信道接⼝1/0⼦接⼝dot11radio1/0.20AP(config-subif)#encapsulation dot1Q 20 封装802.1q协议,并把该接⼝关联到vlan 20 AP(config-subif)#mac-mode fat 设置模式为胖(FAT)模式AP(config-subif)#exit 退出AP(config)#interface dot11radio 1/0.30 进⼊⽆线信道接⼝1/0⼦接⼝dot11radio1/0.30 AP(config-subif)#encapsulation dot1Q 30 封装802.1q协议,并把该接⼝关联到vlan 30 AP(config-subif)#mac-mode fat 设置模式为胖(FAT)模式AP(config-subif)#exit 退出AP(config)#interface dot11radio 2/0.10 进⼊⽆线信道接⼝2/0⼦接⼝dot11radio2/0.10AP(config-subif)#encapsulation dot1Q 10 封装802.1q协议,并把该接⼝关联到vlan 10 AP(config-subif)#mac-mode fat 设置模式为胖(FAT)模式AP(config-subif)#exit 退出AP(config)#interface dot11radio 2/0.20 进⼊⽆线信道接⼝2/0⼦接⼝dot11radio2/0.20AP(config-subif)#encapsulation dot1Q 20 封装802.1q协议,并把该接⼝关联到vlan 20 AP(config-subif)#mac-mode fat 设置模式为胖(FAT)模式AP(config-subif)#exit 退出AP(config)#interface dot11radio 2/0.30 进⼊⽆线信道接⼝2/0⼦接⼝dot11radio2/0.30AP(config-subif)#encapsulation dot1Q 30 封装802.1q协议,并把该接⼝关联到vlan 30 AP(config-subif)#mac-mode fat 设置模式为胖(FAT)模式AP(config-subif)#exit 退出6. 设置bvi 和dhcpAP(config)#interface bvi 10 进⼊bvi 10虚接⼝AP(config-if-BVI 10)#ip add 192.168.1.253 255.255.255.0 设置vlan 10⽹桥的IP地址(⽹关)AP(config)#interface bvi 20 进⼊bvi 10虚接⼝AP(config-if-BVI 20)#ip add 192.168.2.253 255.255.255.0设置vlan20⽹桥的IP地址(⽹关)AP(config)#interface bvi 30 进⼊bvi 30 虚接⼝AP(config-if-BVI 30)#ip add 192.168.3.253 255.255.255.0设置vlan 30⽹桥的IP地址(⽹关)AP(config)#service dhcp 开启dhcp功能AP(config)#ip dhcp pool 10 建⽴名为10的dhcp地址池AP(dhcp-config)#network 192.168.1.0 255.255.255.0 发布192.168.10.0⽹段的DHCPAP(dhcp-config)#default-router 192.168.1.254 设置默认⽹关AP(dhcp-config)#dns-server 61.130.254.34 湖州电信DNSAP(dhcp-config)#exit 退出AP(config)#ip dhc p pool 20 建⽴名为20的dhcp地址池AP(dhcp-config)#network 192.168.2.0 255.255.255.0 发布192.168.20.0⽹段的DHCP AP(dhcp-config)#default-router 192.168.2.254 设置默认⽹关AP(dhcp-config)#dns-server 61.130.254.34 湖州电信DNSAP(dhcp-config)#exit 退出AP(config)#ip dhcp pool 30 建⽴名为30的dhcp地址池AP(dhcp-config)#network 192.168.3.0 255.255.255.0 发布192.168.30.0⽹段的DHCP AP(dhcp-config)#default-router 192.168.3.254 设置默认⽹关AP(dhcp-config)#dns-server 61.130.254.34 湖州电信DNSAP(dhcp-config)#exit 退出⼆、Ap vlan模式1.创建vlan10AP(config)#vlan 10 创建vlan102.创建wlan 10 关联vlan 10AP(config)#dot11 wlan 10 创建⽆线⽹络wlan 10AP(dot11-wlan-config)#vlan 10 关联vlan10AP(dot11-wlan-config)#broadcast-ssid 将ssid名称⼴播AP(dot11-wlan-config)#ssid ap 配置ssid⼴播标识名称为apAP(dot11-wlan-config)#exit 退出3.创建接⼝并封装AP(config)#interface gigabitEthernet 0/1 进⼊接⼝以太⽹0/1AP(config-if-GigabitEthernet 0/1)#encapsulation dot1Q 10 封装802.1q协议,并把该接⼝关联到vlan10AP(config)#exit4.⼴播信道封装协议关联wlan10AP(config)#interface dot11radio 1/0 进⼊1/0⽆线信道接⼝AP(config-if-Dot11radio 1/0)#mac-mode fat 设置模式为胖(FAT)模式AP(config-if-Dot11radio 1/0)#wlan-id 10 关联wlan-id 10(即wlan 10)AP(config-if-Dot11radio 1/0)#radio-type 802.11b 设置⽆线⽹络协议类型为802.11bAP(config-if-Dot11radio 1/0)#exit 退出5. 设置bvi 和dhcpAP(config)#interface bvi 10 进⼊bvi 10虚接⼝AP(config-if-BVI 10)#ip add 192.168.1.253 255.255.255.0 设置vlan 10⽹桥的IP地址(⽹关)AP(config-if-BVI 10)#exit 退出AP(config)#service dhcp 开启dhcpAP(config)#ip dhcp pool 10 建⽴名为10的dhcp地址池AP(dhcp-config)#network 192.168.1.0 255.255.255.0 发布192.168.1.0⽹段的dhcpAP(dhcp-config)#default-router 192.168.10.254 设置默认⽹关AP(dhcp-config)#dns-server 61.130.254.34 湖州电信DNS地址AP(config)#ip dhcp excluded-address 192.168.10.253 192.168.10.254设置排除地址三、AP时间⽇期设置AP#clock set 9:21:20 4 22 2011 (时:分:秒⽉⽇年)四、AP Telnet配置AP(config)#enable password 0 123456 设置enable密码AP(config)#line vty 0 4 ⽤户数量为4AP(config-line)#password 0 123456 设置telnet密码AP(config-line)#exit 退出五、AP Web模式配置AP(config)#enable service web-server 开启webAP(config)#username abc password 0 123456 (配置⽤户名abc ,明⽂密码123456)六、AP⽆线⽹络加密配置配置WEP加密⽅式及密钥AP(config)#wlansec 10AP(wlansec)#security static-wep-key authentication share-key 配置WEP加密⽅式及密钥AP(wlansec)#security static-wep-key encryption 40 ascii 1 12345 配置WEP密钥加密⽅式为40位ASCII1,密码为12345配置WPA2加密⽅式及密钥AP (config)#wlansec 10AP(wlansec)#security rsn enable 启⽤rsn加密AP(wlansec)#security rsn ciphers aes enable 启⽤aes加密⽅式或AP(wlansec)#security rsn akm psk enable 启⽤psk加密⽅式AP(wlansec)#security rsn akm psk set-key ascii 12345678 配置rsn密钥加密⽅式为ASCII1,密码为12345678配置WPA加密⽅式及密钥AP (config)#wlansec 10Ruijie(wlansec)#security wpa enable 启⽤wpa加密Ruijie(wlansec)#security wpa ciphers aes enable 启⽤aes加密⽅式或Ruijie(wlansec)#security wpa akm psk enable 启⽤psk加密⽅式Ruijie(wlansec)#security wpa akm psk set-key ascii 12345678 配置wpa密钥加密⽅式为ASCII1,密码为12345678。
- 1、下载文档前请自行甄别文档内容的完整性,平台不提供额外的编辑、内容补充、找答案等附加服务。
- 2、"仅部分预览"的文档,不可在线预览部分如存在完整性等问题,可反馈申请退款(可完整预览的文档不适用该条件!)。
- 3、如文档侵犯您的权益,请联系客服反馈,我们会尽快为您处理(人工客服工作时间:9:00-18:30)。
启用DHCP Server功能,配置 分配的起始IP和IP地址数量。
输入此网段的VLAN ID,因为AP 管理VLAN的ID是1,这里要设置 成其它的号码。如果还有其它 网段,VLAN ID不能相同
注意:开启此选项后AP的工作模式即变为NAT模式。 如果AP只作为无线透传模式,不需要由AP给终端分配IP地址,不需要开 启配置此项
6、配置2.4G频段SSID与无线参数
选择Wireless 1,配置第1个SSID。 如果有多个SSID,再依次选择其它 的Wireless进行设置。
选择Configuration > Radio 2.4G
无线默认是关闭的,需要开启
自定议SSID名称 这里可以针对每客 户端做速率限制, 也可以配置ACL
4、启用AP DHCP Server和NAT等功能
AP最多和支持4个不同的网段,即可开 启4个DHCP地址池。如果只需要1个网 段,只需要启用local subnet 1。在这里 配置此网段的网关地址
选择Configuration > Local Subnets
配置该网段的IP地址和子网掩 码,Local IP Address地址即为该 IP地址段的网关地址
5、启用2.4G频段
选择Common
选择Configuration > Radio 2.4G 在胖AP模式下,建议指定一 个固定的Channel,以免个别 终端不支持802.11h自动切换 会断线。其它参数根据需求修 改,无特别需要选择默认即可。 相邻AP的Channel不能相同, 否则有同频干扰
3、更改AP管理IP地址(WAN口IP地址)设置
AP默认为DHCP自动获取IP地址,如 果没有DHCP Server,则AP默默IP地 址为192.168.0.1。如需要默认IP地址, 选择Static IP进行修改
选择Configuration > Internet
修改IP信息
DNS信息需要添写正确, 否则网页错误
7、启用5G频段
选择Common
选择Configuration > Radio 5G 在胖AP模式下,建议指定一 个固定的Channel,以免个别 终端不支持802.11h自动切换 会断线。其它参数根据需求修 改,无特别需要选择默认即可。 相邻AP的Channel不能相同, 否则有同频干扰
8、配置5G频段SSID与无线参数
选择Configuration > Radio 5G
配置方法与2.4G相 同(本PPT第6页)
9、升级方法(可选)
升级过程中不能拔 网线,不能手工重 启AP,不能Reset AP
10、排错信息收集方法
如有故障,在AP可 以登陆的情况下, 必须提供supportinfo,才能提交厂 商技术支持申请
AP透传模式不需要修 改此项,默认即可; 当AP工作模式为NAT 模式,需要为终端分 配IP地址时,修改为 Local Subnet NAT and Route to WAN选项
绑定到相应的 Subnet,即选择相 应的DHCP地址池。 该选项同样为AP工 作模式为NAT模式时 启用。
注意:开启认证加密方式, 建议选择WPA-PSK或者 WPA2-PSK,算法建议选择 AES,TKIP算法会限制客户 端连接数量最大为26个
1、登陆AP设备、输入管理员名称和密码
点击继续浏览后, 出现登陆界面
2、更改AP设备名称、管理员登陆名称和密码
更改设备名称,还 可以在下面添加位 置描述,GPS参数
选择ቤተ መጻሕፍቲ ባይዱonfiguration > Device
更改登陆用户名和 密码。默认用户名 super,密码spadmin
最后按Update Settings按钮保存更 改(下同)
