精陶喷墨机说明书
喷绘机器宝典操作讲解

1.安全说明本章对热升华显色系统的安装、操作人员需了解的警告用语以及粘贴在热升华显色系统上的注意事项和警告标签做出说明* 在热升华显色系统的安装和操作过程中,请务必遵从本手册的指导和警告1.1警告、注意和参考本操作手册中的警报显示内容和热升华显色系统粘贴的警告标签按照其危险程度(事故等级)的优先顺序分为以下三级。
请理解以下警告用语的含义并遵从本手册的内容(指示)警告含义用于如不避免则有可能导致死亡或严重伤害等危险的情况用于如不避免则有可能导致轻度或中度疾病、或造成本产品完全或部分损坏等危险的情况○参○考用于特定注意事项以及需要强调的信息1.2重要的安全说明为了保证热升华显色系统的安全使用,以下是必须遵从的通用注意事项。
◎不要将热升华显色系统安装在以下可能导致绘图仪损坏或者可能造成热升华显色系统跌落或可能被意外碰落的地方:- 1 -不稳固的地面倾斜的地方可传导其它机械振动的地方◎不要踩踏热升华显色系统,且勿将重物放在热升华显色系统之上。
否则可能导致热升华显色系统损坏、跌落或被意外碰落。
◎不要用毯子或桌布等遮盖热升华显色系统,且勿封闭通风孔。
如果封闭通风孔,热升华显色系统内部可能会聚积热量并可能导致火灾。
◎不要将热升华显色系统安装在湿度大、灰尘多的场所,则可能会导致触电和火灾。
◎不要使用破损的电源线,否则可能会导致触电和火灾。
◎不要用湿手插拔电源插头,可能会导致触电。
◎不要将地线连接到下列地方:燃气管线存在起火和爆炸的危险。
电话线和避雷针的地线被闪电击中时可能会有强电流通过。
水管和水龙头如果金属管线中间接有塑料管,则可能导致接地不起作用。
- 2 -◎若有异物或水等液体进入热升华显色系统,此时请勿使用热升华显色系统。
否则可能会导致触电和火灾。
应立即关闭,将电源线与电源插座分离,并联系当地的经销商。
◎要按照操作手册中的指示连接各种电线。
错误的接线可能会导致火灾。
◎要直接从电源插座向打印机供电。
不要在同一插座上使用复杂的多个插头。
Brother EcoTank ET-2720 3-in-1 墨水喷气机说明书
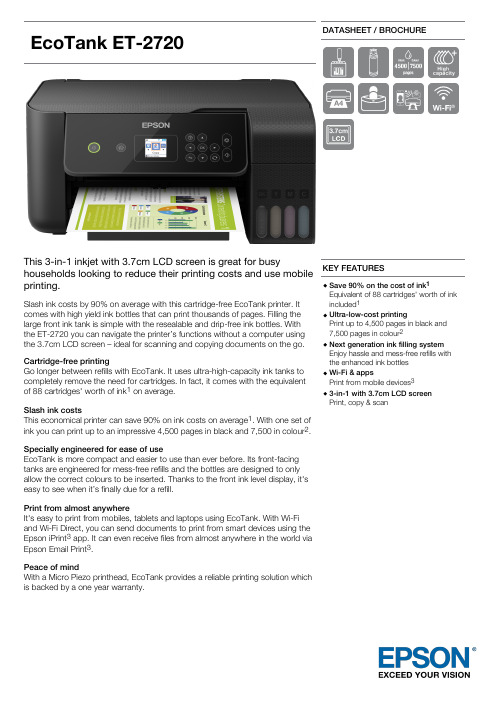
EcoTankET-2720DATASHEET / BROCHUREThis 3-in-1 inkjet with 3.7cm LCD screen is great for busyhouseholds looking to reduce their printing costs and use mobileprinting.Slash ink costs by 90% on average with this cartridge-free EcoTank printer. Itcomes with high yield ink bottles that can print thousands of pages. Filling the large front ink tank is simple with the resealable and drip-free ink bottles. With the ET-2720 you can navigate the printer’s functions without a computer using the 3.7cm LCD screen – ideal for scanning and copying documents on the go.Cartridge-free printingGo longer between refills with EcoTank. It uses ultra-high-capacity ink tanks to completely remove the need for cartridges. In fact, it comes with the equivalent of 88 cartridges' worth of ink 1 on average.Slash ink costsThis economical printer can save 90% on ink costs on average 1. With one set of ink you can print up to an impressive 4,500 pages in black and 7,500 in colour 2.Specially engineered for ease of useEcoTank is more compact and easier to use than ever before. Its front-facing tanks are engineered for mess-free refills and the bottles are designed to only allow the correct colours to be inserted. Thanks to the front ink level display, it's easy to see when it’s finally due for a refill.Print from almost anywhereIt's easy to print from mobiles, tablets and laptops using EcoTank. With Wi-Fi and Wi-Fi Direct, you can send documents to print from smart devices using the Epson iPrint 3 app. It can even receive files from almost anywhere in the world via Epson Email Print 3.Peace of mindWith a Micro Piezo printhead, EcoTank provides a reliable printing solution which is backed by a one year warranty.KEY FEATURESSave 90% on the cost of ink 1Equivalent of 88 cartridges' worth of ink included 1Ultra-low-cost printingPrint up to 4,500 pages in black and 7,500 pages in colour 2Next generation ink filling system Enjoy hassle and mess-free refills with the enhanced ink bottles Wi-Fi & appsPrint from mobile devices 33-in-1 with 3.7cm LCD screen Print, copy & scanPRODUCT SPECIFICATIONSTECHNOLOGY Printing Method Epson Micro Piezo™ print head Minimum Droplet Size 3 pl Ink Technology Dye InkPrinting Resolution 5.760 x 1.440 dpiNozzle Configuration 180 Nozzles black, 59 Nozzles per colour ApplicationHomeAll-in-One Functions Print, Scan, CopyPRINTPrinting Speed ISO/IEC 2473410 pages/min Monochrome, 5 pages/min Colour Maximum Printing Speed 33 pages/min Monochrome (plain paper), 15 pages/min Colour (plain paper)ColoursBlack, Cyan, Yellow, MagentaFirst Page Out from ReadyMonochrome 10 Seconds, Colour 16 Seconds For detailed information on printing speeds please visit http://www.epson.eu/testing.SCANScanning Resolution 1.200 dpi x 2.400 dpi (Horizontal x Vertical)Scanner typeContact image sensor (CIS)PAPER / MEDIA HANDLING Number of paper trays 1Paper Formats A4, A5, A6, B6, Letter, Legal, Executive, B5, 10 x 15 cm, 13 x 18 cm, C6 (Envelope), DL (Envelope), No. 10 (Envelope)DuplexManualMedia Handling Borderless print (up to 10 x 15cm), Manual duplex GENERAL Energy Use 12 W (standalone copying, ISO/IEC 24712 pattern), 0,7 W (sleep mode), 4,3 W (Ready), 0,2 W (Power off)Product dimensions 375 x 347 x 179 mm (Width x Depth x Height)Product weight 4 kgCompatible Operating SystemsMac OS X 10.6.8 or later, Windows 10, Windows 7, Windows 7 x64, Windows 8 (32/64 bit), Windows 8.1, Windows 8.1 x64 Edition, Windows Server 2008 R2, Windows Server 2012 R2, Windows Server 2016, Windows Vista, Windows Vista x64, Windows XP SP3, Windows XP Professional x64 Edition SP2WLAN SecurityWEP 64 Bit, WEP 128 Bit, WPA PSK (TKIP), WPA2 PSK (AES)Mobile and Cloud printing services Epson Connect (iPrint, Email Print, Remote Print Driver), Apple AirPrint, Google Cloud Print ColourBlackOTHER FEATURES LCD screen Type: Colour, Diagonal: 3,7 cm OTHER Warranty12 months Carry in, 30.000 pages Optional warranty extension available LOGISTICS INFORMATIONSKU C11CH42402EAN code 8715946665146Country of OriginPhilippinesEcoTank ET-2720WHAT'S IN THE BOX4 x 65ml individual ink bottles (Bk,C,Y,M)Main unit Power cable Setup guideWarranty documentINK CARTRIDGE COMPATIBILITY104104104104INK BOTTLE YIELD DATAIncluded 3.600 pages* 6.500 pages*Replacement4.500 pages*7.500 pages** Quoted yields are extrapolated based on Epson original methodology from the print simulation of Test Patterns provided in ISO/IEC 24712 with replacement sets of ink. Quoted yields are NOT based on ISO/IEC 24711. Quoted yields may vary depending on the images that you areprinting, the paper type that you are using, the frequency of your prints and environmental conditions such as temperature. During the initial printer setup, a certain amount of ink is used to fill the print head's nozzles,therefore the yield of the initial bundled set can be lower.1. Average number of cartridges required /savingsachieved printing the same number of pages using the ink bottles included within the EcoTank range, excludinghardware price. Comparison made on the average of the A4EcoTank range versus the average of the top 10 best selling models in Western Europe, in the period January 2017– December 2017, as tracked by GfK. Printing costs calculated on the proportion of Standard and XL cartridges as tracked by GfK for the same reference period for the Western European market, using average retail prices. Ink cartridge yields as communicated by the manufacturer’s websites.2. Quoted yields are extrapolated based on Epson original methodology from the print simulation of Test Patterns provided in ISO/IEC 24712 based on the replacement ink bottles. Quoted yields are NOT based on ISO/IEC 24711.Quoted yields may vary depending on the images that you are printing, the paper type that you are using, the frequency of your prints and environmental conditions such as temperature. During the initial printer setup, a certain amount of ink is used to fill the print head's nozzles,therefore the yield of the initial bundled set can be lower.3. 3.Requires a wireless connection to the internet. For more information, supported languages and devices please visit www.epsonconnect.euEpson Deutschland GmbH Otto-Hahn-Str. 4 D-40670 MeerbuschEpson in ÖsterreichInfo-Line: 01 253 49 78 333 www.epson.at。
喷码机使用说明
喷码机使用说明Company Document number:WUUT-WUUY-WBBGB-BWYTT-1982GT第一章使用条件与注意事项环境温度 0-45℃环境湿度 10-90%RH(非结露)额定电压 220±15%V AC 接地良好额定功率 150W注意事项!墨水及稀释(溶)剂为易燃品,喷码机、墨水和稀释(溶)剂放置应确保附近无明火,并备有干粉灭火器。
!喷码机内有高压,进行检查电路时应切断电源,以防触电!墨水和稀释(溶)剂为刺激性物品,如溅入眼睛或口内,请立即用清水冲洗或及时就诊。
!及时向墨水罐内添加墨水,及时向稀释(溶)剂罐内添加稀释(溶)剂。
!喷码机应可靠接地以保证人身安全!机器使用过程中应水平放置。
机器长期停用时应将墨水全部排出,用清洗剂将墨路进行清洗,方可进行长期停放。
第二章机器结构图喷码机示意图喷头之架:支撑、定位、固定喷头。
喉管:连接主机和喷头的螺旋管,里面包含导线和墨水循环管路。
YX-9100型喷码机有主机和喷头(如图)两大部分组成。
1)主机:主机上舱内部部件如图,主机正面部件如图,主机背面部件见图,主机下舱部件见图,图主机上舱图风扇:给主机散热。
单片机板:控制喷码机,并对喷码机的各种参数进行自动的调整,使喷码机稳定的工作。
电脑主板:与硬盘、显示屏组成电脑,通过windows系统来调控单片机板。
硬盘:和电脑主板、显示屏组成电脑,存储编辑信息。
触摸屏显示器:和硬盘、显示屏组成电脑,显示操作界面,进行编辑各种喷印信息。
图主机背面图总电源:喷码机供电开关;严禁在电脑未关闭的情况下关闭此开关(断电情况例外)。
USB接口:连接外部信息,可以提取U盘信息并对其内容喷印。
光电接口:连接光电开关。
电脑开关:启动windows系统.同步器接口:连接同步器和编码器。
电源线:喷码机电源连接线。
图主机下舱图主电源:为喷码机输出所需要的电压。
电磁阀:协调墨路的各项功能;稀释剂罐:盛放喷码机专用稀释(溶)剂。
喷涂专用设备使用说明书

喷涂专用设备使用说明书1. 适用范围本产品为水性液体橡胶涂料专用双组份隔膜式无气喷涂机,主要用于防水行业进行液体橡胶涂料喷涂施工。
由于它是一种特殊专用泵,不可随便使用。
2.主要技术参数A组分 B组分最大压力30bar最大压力30bar最大流量 30L/min 最大流量 20L/min3.使用方法3.1 使用前基本要求1)发动机燃料:90#以上无铅汽油,(加入量见发动机说明书);2)发动机机油:32#机油(加入量见发动机说明书);3)泵体润滑油:30#耐磨液压油,新机加入量A组分及B组分各加入0.3L; 4)检查确认A、B组分泵体顶盖蓄压保持≥0.7MPa;5)确认整机是否根据安装要求安装,并以放置牢固,整机螺丝一定要拧紧,不可有松动;6)准备30目不锈钢丝网布,以过滤A、B组分的液体料。
3.2 安装1)将两个组份的吸入软管分别插入喷涂机前接口板的吸入接头上,用卡箍抱紧。
新机已经使用,吸入管不得交叉混用,以免两个组份混合,造成泵体损毁;2)将双色高压管分别接入喷涂机前接口板的输出接头上,其中红管接A 组分,兰管接B组分,随后,将双色管分别与喷枪进行连接,左为A组分,右为B组分;3)将喷嘴装入喷嘴的螺母中,垫上垫圈,拧紧固定在喷枪上,喷枪嘴左大(A)料,右小(B)料;4)打开A、B组分位于调压手柄处设入准备投入使用的输出管道的球阀;5)关闭A、B组分位于调压手柄处未使用输出管道的球阀;3.3启动及操作1)将压力调节阀逆时针调制最小;2) 将吸入管放入涂料桶,放泄管放入废料桶;3)启动发动机,转速保持在全速的1/3处;4)吸入涂料,排除管道内的空气;5)将放泄管放入涂料桶,调高转速和加大压力;6)开启喷枪至正常喷涂;7)依据喷嘴大小调整喷枪前段连接端头,使两个组分的喷雾交叉混合于喷涂点(注意应先松开喷嘴螺母,调整喷嘴角度使喷雾可行),交叉点离喷嘴15~20公分。
注意:(1)从进口自吸能力来考虑,当进口里有空气时,那么泵在启动时,输出压力或流量从小到大逐渐加大,如果泵在启动前,里面已充满液体,则可以随便启动。
陶瓷喷墨印花机的使用与维护

陶瓷喷墨印花机的使用与维护第一篇:陶瓷喷墨印花机的使用与维护陶瓷喷墨印花机的使用与维护陶瓷喷墨印花是在纸张喷墨打印的基础上发展起来的,因此,喷墨打印机在使用中一些操作要点和要注意的问题在喷墨印花中也可以参考应用,与纸张喷墨相比,由于瓷砖坯体表面的特殊性,印花效果要求各项色牢度,使得纸张喷墨与陶瓷坯体印花存在差异,而陶瓷喷墨印花存在的问题会更多。
一、喷墨印花机的组成1.瓷砖输送机构:它主要由电机(一般是伺服电机,也有用普通电机加编码的)、减速机、从动辊筒、送砖皮带(一般是平皮带),送砖平台等组成。
这里要说明的是,在皮带的选择方面,除了如辊筒印花机皮带的高精度、高强度、耐温性、耐疲劳等性能要求外。
由于喷墨机所用的墨水是由多组分的有机溶剂加无机色粉组成,要尽量选用抗溶剂能力强、范围宽的皮带(特别是表层)。
否则会因为皮带表面的变形而影响精度,或者降低皮带的使用寿命2.喷头系统:喷头是目前陶瓷喷墨打印机最核心、所占成本最高、最重要、技术含量最高的部件。
由于数码喷绘技术在陶瓷喷墨机出现前已经在其他行业应用多年。
所以国际上喷头的品类是很多很常见的,广告画、标语机、写真机、办公用的喷墨机等都有使用。
但由于陶瓷墨水的特殊性(之前的一般是有机墨水,密度低,分散性好)和陶瓷喷墨机的工作环境较恶劣,所以不是所有喷头都适用于陶瓷喷墨机。
喷头的安装方式也有两种,其一是将所有喷头安装在同一个安装板上,其二是将每个颜色的喷头分别安装在独立的安装板上,而且该安装板可以独立拉出皮带外,以方便喷头作人工清洁。
3.供墨系统:陶瓷喷墨机供墨系统的作用是给喷头提供持续、稳定均质的墨水,确保喷头工作的持续稳定。
它与辊筒印花机的供釉系统有相似的地方。
它一般由储存机搅拌桶、抽墨泵、外循环泵、墨盒、一级和二级过滤器,负压系统、恒温系统等组成。
这些设置,主要是因为喷头的孔径是很小的(微米级),为了喷射稳定,墨水的粘度必须恒定,陶瓷墨水的溶剂与溶质的比重差别很大易沉淀等原因。
喷墨绘图仪操作手册
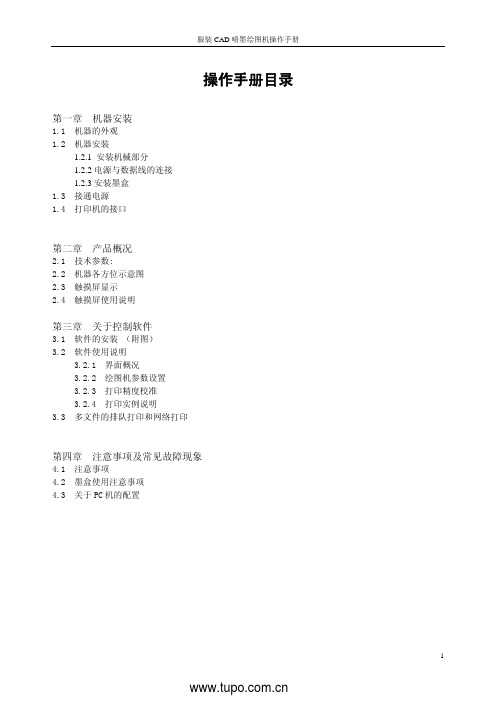
操作手册目录第一章机器安装1.1 机器的外观1.2 机器安装1.2.1 安装机械部分1.2.2电源与数据线的连接1.2.3安装墨盒1.3 接通电源1.4 打印机的接口第二章 产品概况2.1 技术参数:2.2 机器各方位示意图2.3 触摸屏显示2.4 触摸屏使用说明第三章关于控制软件3.1 软件的安装 (附图)3.2 软件使用说明3.2.1 界面概况3.2.2 绘图机参数设置3.2.3 打印精度校准3.2.4 打印实例说明3.3 多文件的排队打印和网络打印第四章注意事项及常见故障现象4.1 注意事项4.2 墨盒使用注意事项4.3 关于PC机的配置欢迎您选购本公司的喷墨绘图机产品。
在使用本产品前请详细阅读以下的使用说明第一章机器安装1.1 绘图仪外观:正面效果图侧面效果图1.2 机器的安装:1.2.1 安装机械部分:1)首先将支架的横梁与支架左右两侧分别通过2颗螺钉固定(如图所示),注意支架横梁的方向,横梁中间部位带有传感器的窗口向前,接线部位向右,装有电机的机腿为右侧。
a、左侧连接b、右侧连接c、支架传感器2)支架固定好后,插入传感器连线(如图):a、插入传感器接线b、接好传感器接线后3)支架组装好后的整体效果图:4)支架组装好后,将绘图仪机头放到支架上进行连接并插好支架电机电源连线,注意分别对应好机器底部与支架两侧的两个固定孔位(如图所示)a、固定左侧b、固定右侧注意:绘图机的送纸传感器是感光元器件,对光线较为敏感,所以不要将绘图机放置在强光直射的位置。
尤其是机器右侧腿后面的传感器,不要暴露在很亮的光线下。
1.2.2 电源与网络数据线的连接:1)将随机配送的电源线一端接入220V电源,另一端插入绘图仪右侧背面的电源接口。
2)将随机配送的网络数据打印线分别插入电脑及绘图仪的网络接口。
1.2.3 安装墨盒:将随机配送的墨盒插入绘图仪的墨盒仓中,注意墨盒一定要到位并注意安装顺序,分三步放入墨盒仓中(如图所示):1、将墨盒放入仓中2、用压条压住墨盒卡点3、放下墨盒压条4、单喷机墨盒装好后的效果图1.3 接通电源:注意本机应使用三项220V电源,并要求接地良好,以防损坏机器电路部分。
喷涂机操作说明书

2-1 主要操作面板
1. 急停按钮: 警急情况下按下此按钮,机器所有动作处于停止状态,步进电机处释放状态,待故 障排除后放右解除。
2. 电源启动: 按下此按钮,启动机器内部电源。
3. 照明按钮: 按下此按钮,启动机器照明电源。
4. 抽风按钮: 按下此按钮,启动机器抽风电源。
5. UV 灯按钮: 按下此按钮,启动机器 UV 灯检测电源。
或曝露在高温度的环境中,如非必要,请避免使用机器内部插座,以免造成非预期 的影响。 欲进行机器维修动作进,请先确定机器安全,并放置警告标志,使第三者不至于错 误操作,才可进行。 本手册没有记载而用户在操作和使用中仍有不了解或需更详细资料请与本公司服 务部门联络。
word 版 整理
范文 范例 指导 参考
1-5 运行,与后面功能健一至。
word 版 整理
范文 范例 指导 参考
2.程序文件调用。 3.G 代码祥细参数显示,并随着 G 代码的详变化而上下自动切换。
图形窗口显示区,将编辑好的 G 代码通过坐标及线条的方式显示在该区域内,在 行过程中,会有光标靶点跟踪显示。 4. G 代码运行速度选择,选择数字为步进电机的运行频率,请根据实际运行情况调 节。 5.喷胶产量计数。 6. 记录每片产量的运行时间,便于监控及计算实际运行产量。 7.公司名称标示。 8.显示 X,Y,Z,U 四轴当前位置。距离单位为毫米。
1-3-1 阵列按钮:
将当前 G 代码进行矩形阵列,请按上面的提示框分别输入行数,列 数,行间距(mm), 列间距(mm),最后点击确定健,根据提示重新 保存,然后通过文件按钮重新导入及可。
1-4 设置
点击设置,弹出下拉式菜单,包含以下内容,1 系统参数:3-2 详细介绍。2 涂胶参数,3-3 详细介绍
瓷砖喷墨机以及使用photo-shop调图的基础知识

瓷砖喷墨机以及使用photo-shop调图的基础知识喷墨机以及使用photo shop调图的基础知识一、喷墨机操作步骤及基本知识:以3#窑希望喷墨机为例,其使用步骤如下:1、将需要打印的文件拷至喷墨机中,文件存储路径:c:/program files/xenia technology ltd/xenia9000 printer/image;2、将文件拷至喷墨机后,进入打印程序界面,按ABORT键停止打印,待指示灯由绿变红后按FILE键 ,找到刚才拷入的文件,双击并确定将其导入到程序中,等图片切换好后点击PRINTER键更改打印模式,完成后按 PRINT键,待指示灯变绿后即可过砖打图。
[基本流程为:ABORT(停止)---FILE(换图)---PRINTER(更改模式)---PRINT(打印)];3、现希望喷墨机共有三种打印模式,在程序界面中点击printer键即可进入更改模式界面:a. Normal(普通模式):此模式是根据图片大小将文件完整打印出来,使用该模式时不需要修改参数。
例如:一副图长度3米,而900规格砖长度为0.995米,若使用普通模式打印,那么900规格砖打完之后剩下的2.005米图将会打印在皮带上,直到图片内容全部打印完为止,而不会根据砖的尺寸而停止打印。
此模式一般用于中试。
b. Splitting(分隔模式):此模式会根据预先设定好的参数打印出固定尺寸的图片,并且会严格按照顺序分割图片。
例如一张图片长度为3米,参数设置长度为1米,那么过砖的时候第一片砖的打印内容为图片的0-1米的内容,以此类推,第二片砖的打印内容为1-2米的内容,第三片砖的打印内容为图片的2-3米的内容。
打印完一个周期后,会从头开始进行另一个周期,如此往复。
注意:1.用此模式打印对图片大小有严格的尺寸要求,如果没算好则会出现图片花纹走位及白边的情况; 2.此模式的图片要在图片末尾处预留10cm的空白区域;3.使用此模式需要修改参数,点击Settings即可进入参数修改界面,900规格砖参数设置为:图片尺寸995,图片间隔995。
喷绘机操作规程

行业资料:________ 喷绘机操作规程单位:______________________部门:______________________日期:______年_____月_____日第1 页共6 页喷绘机操作规程第一条开机顺序:先开前三个开关,再打开打印软件。
然后打开35V 电源跟其它开关。
(送布开关:往上为放车体,往下为放布,中间为停)第二条关机顺序:从后往前依次关闭。
第三条上布时布的两边最好压在两个压轮之间。
把布挣平,拉紧,抬起压杆。
第四条轨道定期加润滑油,地线定期浇盐水第五条冬天室内温度最好不低于20摄氏度,室内湿度不低于40% 第六条保持室内清洁,以免灰尘堵塞喷头第七条光栅定期擦拭第八条严禁更改系统时间第九条不能连续打开两次打印软件第十条须打开软件后在打开35v电源开关第十一条冲洗喷头以后一定要保证喷头电路部分的干燥,如果有电路部分有液体或不干燥容易烧掉喷头跟喷头控制板第十二条每次工作完以后都要对喷头进行保养维护(使用保鲜膜与面巾纸包喷头)第十三条Photoshop的模式必须设为CMYK,存储为TIFF格式第十四条在机器工作的时候,其它机器严禁访问本机,否则容易出现乱码现象第十五条机器电路所有部分不能带电插拔第十六条机器两边的急停开关不能随意乱动第十七条使用吸尘器清洗喷头时要竖着清洗,不要来回摩擦清洗第 2 页共 6 页第十八条打雷时最好关闭机器断电喷蜡机的安全操作及维护1ㄝ打开机床电源或从Dos重新进入T6x软件之前一定要检查工作台,确定工作台上没有东西,手柄已回位。
2ㄝ机器在进入T6x软件时喷咀需归位一次,千万不要在机器没有完成归位之前在机器上进行任何操作,一定要等到机器归位元完成,软件画面在萤幕全部出现。
3ㄝ机床运行时不能有异响,有异响或噪声时请检查运动件是否有松动。
4ㄝ进入T6x软件後请立即检查机器的状态,按F3键滚动STATUSWINDOW,查看温度及其他的状态是否正常。
5ㄝ在清洁铣刀时,勿用手去接触铣刀,以免造成伤害,在机器上操作时,严禁其他人去操作键盘,以免造成机器损坏和人员的伤害。
Encore LT手动粉末喷涂系统中文操作手册

触发器开关更换 移去开关 安装开关
控制器维修 后面板部件
振动器马达更换
零件 介绍 系统零件编号 喷枪零件 喷枪选件
其他喷枪选件 平头喷嘴 锥形喷嘴与导流板 十字喷嘴 图案调节器套件 控制器零件 接地前面板和内部控制柜 接地前面板和内部控制柜零件清单 后面板零件 后面板零件清单 分歧座配件 系统部件和零件 粉末软管和空气管道 系统选件
© 2011 诺信公司
介绍
说明
2-1
第2节
说明
参见图 2-1。本手册包括了所有型号的 Encore LT 手动粉末喷涂系统: ● 带有振动箱进料器的可移动系统 ● 带有进料斗的可移动系统 ● 轨装系统 ● 壁装系统
图 2-1
带有料斗的可移动系统
Encore LT 可移动手动粉末喷涂系统
© 2011 诺信公司
适用指令:
2006/42/EC − 机械指令 2004/108/EEC − EMC指令 94/9/EC − ATEX指令
遵循标准:
EN/ISO12100-1(2003) EN60204-1(2006)
EN60079-0(2009)
EN50050(2006)
EN60079-31(2009) EN50177(2009)
不按照设备随附文件的要求使用诺信设备,会导致人员受伤,或财产 损失。 设备的非预期用途包括: ● 使用非相容材料 ● 进行非授权改进 ● 将安全护罩或联锁装置拆卸或设为旁路 ● 使用非兼容零件或受损零件 ● 使用未经批准的辅助设备 ● 超过最大额定值条件下操作设备
确保所有设备均经检定和核准,适合所用环境。如果不按指导进行安 装、操作与维护,诺信设备所获得的任何核准均将无效。 所有阶段的设备安装必须符合联邦、州和当地的法规。
喷墨机操作技术培训资料

注意:喷头务必完全干燥后,再启动喷码机,否 则会出现充电故障或发生超高压跳闸故障
56
故障分析-诊断屏幕
墨水压力
机箱温度 粘度设定值
墨水液位检测 稀释液液位检测
混合缸墨水温度
喷头温度 相位检测值
粘度实际检测值
混合缸液位检测
粘度腔液位检测
57
故障分析-喷印运行提醒图标
65
故障分析-运行正常,但不喷印
确定已选定信息,检查喷印延时。选择喷印信息和参数 查看已选定的电眼电平和同步器模式。喷码机喷印设置 查看产品传感器(电眼)和同步器是否连接和运行。 每当产品经过电眼时,电眼检测背面的指示灯应闪烁
2.分裂电压(调制电压):充分良好的墨点分裂保 证良好的充电,也 就是保证了喷印质量。 3. 墨水粘度:不同的墨水有不同的运行粘度,粘度值是由墨水温度,运 行压力等综合参数结合而对应设定的一组曲线的对应值。粘度值正确与 否决定墨点分裂的好坏,直接影响喷印质量。粘度的控制和调节由墨水 系统和控制电路共同完成。
避免直接关电源停机,即使意外,也要重新开机再进入停机程序。 在开机或关机过程中,如果按 F 1 后5秒钟内又按 F 1 ,则自动退回原操作过程
如果机器每天都正常工作,则关机时可直接按 F 1 ,等关机过程结束后,关 电源即可。
24
选择喷印信息
• 选择喷印信息功能键F 2
25
喷印信息菜单
26
新建(编辑)喷印信息
48
喷头结构及墨线调节
墨线在回收槽上下位 置的调节 用内六角扳手将上下调 节螺丝松开一圈 用一字批塞入该位置, 顺时针旋转,墨线将 移至回收槽的上边( 正视喷头);相反会 移至下边。
49
flashforge waxjet
Industrial grade 3D printer 工业级3D打印机WaxJet® 400/410 Facility Requirements Guide设施要求指南Note: Please read this User Guide carefully before operating the product.Please keep this Guide properly for future reference.注意:使用本产品时,请您先仔细阅读本产品使用说明书,再正确操作。
请妥善保管本手册,以便日后查阅。
This guide is only applicable to FLASHFORGE WaxJet® 400/410 3D printerContentsContents 1 . About2 . Abstract3. Common Signs4. WaxJet Professional Printing System5. Receipt Preparation6. Facility Guide6.1 AC Voltage & Request of Work Current6.2 Protection Power Source / Uninterruptible power supply 6.3 Client Workstations 6.4 Network Interface 6.5 Unpacking6.6 Package Size and Weight 6.7 Mobility6.8 The working environment of the 3D printer system after unboxing 6.9 Freezer6.10 Material Storage6.11 Material Cabinet Placement7. Operation Environment7.1 Air-conditioning 7.2 Humidity 7.3 Lighting7.4 Vibration and Shock 7.5 Noise8. Liability LimitationPreliminary Preparation for 3D Printer System-------------------------------------------------------------------------------------------------------------- 01------------------------------------------------------------------------------------------------------------ 02-------------------------------------------------------------------------------------------------------- 02--------------------------------------------------------------------------------------------- 02------------------------------------------------------- 03------------------------------------------------------------------------------------ 03----------------------------------------------------------------------------------------------- 0304 0404 050505050606 0606------------------------------------------------------------------------------ 070707070707-------------------------------------------------------------------------------------- 07---------------------------------------------- 081. AboutThe overall facility requirements included in this document cover the requirements for on-site installation of the Waxjet 400 / 410 printer.Hot surface hazard:There is a hot surface around this sign or behind the manhole. Please avoid touching. Hot surfaces can cause burns or fire. Make sure the surface being cool before touching. The manhole is only for maintenance, and only certified service staff or trained maintenance staff are allowed to open.Keep fingers away from sharps:Placing fingers in front of sharps can cause serious injuries.Hand in warning:This sign indicates that there are dangeroushazards of gears or moving parts near or behind the access cover.The manhole cover is only for maintenance and only authorized maintenance staff are allowed to open.Wear gloves:Please wear appropriate gloves as required. In case of burns, wear heat resistant gloves when contact with hot surfaces.Wear glasses:In case of possible leakage or splashing of component materials, wear protective glasses with side shields to protect eyes.Electric shock hazard:There will be a high voltage near this sign or behind the manhole. High voltage electricity can cause severe burns, death, or fire. The manhole is for maintenance only, and only certified service staff or trained maintenance staff are allowed to open.Note:used to indicate important information rather than critical information.The contents includes:Description of software and hardware, component materials, network components and related documents contained in the WaxJet® 400/410.Working environment requirements, which includes safe and high efficient working space, electrical and other requirements.An attached checklist to ensure that the facility requirements for installing the 3D printer system have been met.2. AbstractThis guide provides important information concerning the installation of the Waxjet 400 / 410 printer. It also works as a guidance for the rapid and convenient installation and operation of 3D printer systems.3. Common SignsWaxJet® 400/410 3D Printer is one of the series products named Flashforge MJP .A forklift or a similar lifting equipment is required to unload the 3D printer system packing box from the truck and move it to the unpacking location. (a forklift is not a must when transporting it to the installation site after unpacking.)Network connection.Power socket: a special power supply line is required for 3D printer system.The storage cabinet: to store additional materials out of 3D printer system and other consumables.At least one networked server or CAD/CAM/CAE end stations, which should meet the all requirements of client workstation.4. WaxJet Professional Printing SystemSpace planning: The socket must be near to the 3D printer system for convenient and immediate use for end users.An extra 110 or 220 VAC socket is recommended for maintenance: the location of 3D printer system is required to be equipped with a standard wall-type outlet (e.g. 86 large-three-hole socket 25A) or a power supply equipment (e.g. UPS power supply) to power the 3D printer system.A complete package of WaxJet® 400/410 professional printing system includes the following components and materials.5. Receipt PreparationPlease arrange the following items before the printer arrives so that the WaxJet® 400/410 Printer can be installed quickly.6. Facility GuideThis section deals with the site selection, site preparation and facility preparation during the receipt and installation of the WaxJet® 400/410 printer.Please discuss with Flashforge certified partners about the appropriate installation location. Before installation, please consider:WaxJet® 400/410 Printer Electric Demands:Two build plate (in one box)A CableA Purified Power SupplyA scraper Two part material boxs Two support material boxsA set allen wrenchA box of rubber gloves An After-salesService CardclothAn InstructionAn USB StickPlease make sure that the following are ready:Note: please keep well the transit case, ramp, bracket and other hardwares for convenient transportation of the Waxjet 400 / 410 printer in the future. The design of the transit case make it easier for quick and easy packaging and unpacking. Pleasecontact Flashforge Customer Support for shipping instructions.Request of Power Supply Space PlanningThe working space of 3D printer system MobilityClient Software Workstation requirementNetwork Interface Material StorageMaterial Bottles Placement Weight & Size of the PrinterAccessories Required for Post-Processing6.1 AC Voltage & Request of Work CurrentPower Input Range:AC200-240,50HZ,4KW.All WaxJet® 400/410 Printer needs the ground connections, which protects users to a certain extent (almost insulation).Please conform to local national standards when install the WaxJet® 400/410 Printer.6.2 Protection Power Source / Uninterruptible power supplyMany customers require an UPS (uninterruptible power supply) and a generator to solve the problems regarding the AC power. The UPS is to maintain AC power via the energy of a rechargeable battery for a limited period of time. An UPS is adequate for a short-term power failure, and an additional battery pack can be added to enhance the AC power when needed. For a long-term power failure, an UPS and an available generator are needed. The UPS is able to ensure the supply of stable voltage, thus avoiding extra interrup-tions.The WaxJet® 400/410 Printer has passed the test of the following UPS:It has been recognized that there exists a huge gap between customer needs and facilities. Thus customers are encouraged to contact the above UPS manufacturers to customize power protection solutions based on their own needs and site conditions.6.3 Client WorkstationsBefore printing, the data file must be set up as wjs format to be saved, exported, or submitted through the network. The WaxJetPrint client software can be installed in selected user workstations, making it more convenient for users to select, preview and submit print jobs and manage print queues. For more information about sending files to your 3D printer system, see WaxJet® 400/410 user guide. Before installing the software, make sure that the selected workstation matches the following minimum specifications. Although the WaxJet® 400/410 client software can function on computers with slightly lower performance, only the recommended minimumconfiguration can ensure its normal operation. It is suggested that the workstation should be equipped with further enhanced functions as recommended to maximize the performance. The workstation with a superior processor and extra memories is the best choice.System requirements:Note: The disassembly, assembly or connection of any components in the goods must be performed with the assistance of a qualified Flashforge customer support engineer or a certified partner. The Flashforge is not responsible for any damage,defect or incompleteness of the system caused by unpacking executed by other personnels.An Ethernet connection is required for the WaxJet® 400/410 printer to transfer print jobs from the workstation to the printer.Please set up and start the installed TCP / IP network. The RJ45 Ethernet network connection must be installed, tested and operated at the receipt location for each printer to come. DHCP or an assigned static IP address is also allowed. The DHCP server can automatical -ly generate the IP address; or, the network administrator can assign a permanent IP address to each printer that is to be connected to the network.Please write down the IP address here:6.4 Network InterfaceA forklift is required to convey the 3D printer system in the transit truck. Please provide an available forklift for Flashforge Customer Support Engineers (CSE) or distributors during installation. The unloading ramp can be placed as the figure shows below. Please put the disassembled container board in a convenient place for convenient transportation of the Waxjet 400 / 410 printer in the future. Based on the size of the container, there must be at least 5.54 meters of space for pallets, ramps and printers; and the unpacking area is about 2.12 × 5.54 meters.6.5 UnpackingThe WaxJet® 400/410 is equipped with four casters and four leveling feet. Lock the casters at the right point and adjust the leveling feet if you want to make the printer horizontal6.7 Mobility6.6 Package Size and WeightNote: do not store the used box with surplus materials in an inclined way. Use storage box with side gasket. Do not let the mouth of the box touch the ground. Meanwhile, the exhaust valve must be kept open during storage if the temperature of the used box taken out from the feeding bin is still high. If the material box under high temperature is not well ventilated,the wax will cool down and shrink, and the bottom of the box may become so flat to be loaded into the feeding bin again.It is suggested to reserve at least 30cm free space on the back and both sides of the 3D Printer to ensure air circulation, and 40cm free space shall be reserved in front of the 3D Printer to open the MDM. It is also recommended to free up 91cm space in front of or behind the printer for maintenance. The free space in the rear facilitates the maintenance staff for the back of the printer; the free space ahead allows the printer be moved away from the wall for the back.6.8 The working environment of the 3D printer system after unboxingA freezer is recommended (optional) to simplify the disassembly process. If the freezer is added to the post-processing equipments, make sure the freezer is large enough to accommodate a maximum modeling volume of 12 x 6 x 8 inches (L x W x H). Any freezer that meets the capacity requirements is okay.6.9 FreezerFFWJ1100 part materials and FFMS3100 support materials shall be stored in a cabinet close to the printer for easy access. Storage cabinets are recommended to prevent long-term exposure of components and materials to external UV light sources, such asdaylight, overhead lighting or other UV sources. The storage temperature of the material shall not exceed the specified maximum of 35 ° C (95 ° F). FFWJ1100 part materials shall be away from strong oxidant, such as hydrogen peroxide, bromine or chromic acid.Please refer to the Globally Harmonized System / Material Safety Data Sheet (GHS / MSDS) for details about safety precautions,supplementary, storage and disposal requirements regarding FFWJ1100 part materials and FFMS3100 support materials. Two copies of GHS / MSDS documentation shall be retained by the facility manager (or staff of the equivalent rank) of the organization for easy access by staffs. Please contact the local distributors for SDS information about structural and support materials.6.10 Material StorageWhen disposing the used material cabinets, local and other current laws and regulations for such materials must be followed. Please read the GHS / SDS for FFWJ1100 part materials before the printer is shipped and discuss with the facility manager about the material disposal or recycling method.6.11 Material Cabinet Placement7. Operation EnvironmentThe 3D printer can perform best if being placed in an environment required by the document. Each 3D printer have passed the operation test in the factory. Thus there will be 2 full cabinets of part materials and 2 full cabinets of supporting materials.7.1 Air-conditioningSome internal electronic components and printing materials of the WaxJet® 400/410 printer are sensitive to room temperature and humidity to some extent. In addition, the forming process is also sensitive to temperature under some limitations. The optimum operating temperature ranges from 18-24 °C (64-75 °F), and the maximum temperature shall not exceed 28 °C (82 °F). The air condi-tioning system in the operating environment shall own 2.0kw heat dissipation capacity or be able to meet the temperature require-ments. Please make sure that any air conditioning outlets are not in the right front of the 3D printer. It is recommended to place the machine in a room with four air turnover cycles per hour.7.2 HumidityWith relative humidity of 30% to 70%.7.3 LightingLighting is required for normal areas when operating and maintaining the printer system. A fluorescent lamp or a LED is the best choice for indoor lighting. Please do not place the printer next to a window that may be exposed to sunlight.7.4 Vibration and ShockThe printer contains many precise mechanical and sensor systems, which makes it very sensitive to vibration when printing. To maximize printing quality and accuracy, please keep the equipment away from heavy machinery and any strong vibration or impact source (such as the external wall close to the train track or airport).7.5 Noise< 70 dBa8. Liability LimitationIn any case, the Flashforge won't be held responsible for losses or damages caused in any way or based on any principle of imputa-tion. The losses referred to here includes loss of interest, repair costs or other special, accidental, derivative or indirect losses arising from this document. This liability limitation is also applicable even the possible loss has been further noticed to the Flashforge or its certified partners or representatives. These contents are subject to change by Flashforge at any time without notice.@Copyright 2020 Zhejiang Flashforge 3D Technology CO.,LTD. All Rights Reserved.Preliminary Preparation for 3D Printer SystemPlease review this list with the network administrator, IT department, facility manager, or other person in charge of the organization. After each item being completed, check marks shall be added accordingly. After completing all items, please photocopy this page and fax or send the electronic file to the Flashforge or its authorized distributor.Please fill in the information below (print if you need a copy):Please tick in front of the corresponding items after completion.The final installation location has been selected. The actual location where the WaxJet® 400/410 printer is placed has been selected. Please check for compliance with the standards in this guide.If requested by the shipper, the method of unloading the container from the shipper's truck (forklift is a need) should be prepared in advance so that the container can be transported to the unpacking site.The operating system is compatible with the workstation configurations, and the minimum standards in the "Client Workstation" section has been achieved.Network connection is installed. The RJ45 (UTP , female connector) Ethernet network connection must be installed, tested and operated at the receipt location for each 3D printer system to be installed.The TCP/IP agreement has been installed and started up.DCHP or static IP .Special material cabinets have been selected.Local and other current laws and regulations have been followed when dealing with printing materials.A static IP address has been assigned to each 3D printer system ordered. A permanent IP address has been assigned to each 3D printer system that will be connected to the network (which is to be done by the network administrator).Write the IP address here:Each IP address has been tested and Ping test can be performed. A temporary connection with a network resource (such as the workstation or the 3D printer system) can be established, and a ping can be performed at the another workstation in the network.Each 3D printer system has been provided with a corresponding regulated power supply to improve the stability of power supply voltage. Model: JJW-1000VA precision purified regulated power work.Uninterruptible power supply provided (battery backup in active state).Note: The Flashforge is not responsible for the installation of the WaxJet® 400/410 client software to the user's work platform unless otherwise agreed in advance. Users are requested to ensure that a working platform that meets the needs of the client software and local network communication of the printer is prepared before receiving the 3D printer system.Company Name:Contact ( full name ):E-Mail:Tel ( area code ):Fax Date:I confirm that the installation site has met the requirements listed in the WaxJet® 400/410 facility requirements guide beforeinstallation. I agree that once the printer is installed, any specifications listed in the manual shall not be modified without consultation with Flashforge customer service representatives or its certified partners. Modification without consultation with Flashforge will result in invalidation of warranty.Customer Signature:Date:目录目录一、关于二、设施要求指南概要三、手册常见标志四、WaxJet专业打印系统五、收货准备六、设施指南6.1 交流电压与电流要求 6.2 保护电源/不间断电源 6.3 客户端工作站要求 6.4 网络接口 6.5 拆除货箱 6.6 装箱尺寸与重量 6.7 设备可移动性6.8 拆箱后 3D 打印机系统的周围接触区 6.9 冷冻柜 6.10 材料存储 6.11 材料盒处置七、操作环境7.1 空气调节 7.2 湿度 7.3 照明 7.4 振动与冲击 7.5 噪音八、责任限制3D打印机系统前期准备事项清单---------------------------------------------------------------------------------------------------------------------- 10---------------------------------------------------------------------------------------------------------------- 11------------------------------------------------------------------------------------------ 11------------------------------------------------------------------------------------------------- 11------------------------------------------------------------------------------------- 12-------------------------------------------------------------------------------------------------------- 12-------------------------------------------------------------------------------------------------------- 1213 1313 1414141415151515--------------------------------------------------------------------------------------------------------- 161616161616--------------------------------------------------------------------------------------------------------- 16--------------------------------------------------------------------------- 17一、关于本文档所包括的总体设施要求,涵盖 WaxJet® 400/410 打印机上门安装所需要的全部要求。
陶瓷喷墨打印墨水安全技术说明书

陶瓷喷墨打印墨水安全技术说明书第一部分化学品名称化学品中文名称:陶瓷喷墨打印墨水化学品英文名称:ceramic jet ink第二部分成分/组成信息第三部分危险性概述危险性类别:可燃液体,有挥发性,有毒性。
侵入途径:吸入、食入、经皮吸收。
健康危害:吸入本品蒸气后,导致呼吸道刺激及肝肾损害。
蒸气对眼有刺激性。
皮肤接触可致皮炎。
燃爆危险:可燃,具刺激性。
第四部分急救措施皮肤接触:立即用足量流动的冷水冲洗,至少15分钟,脱去受沾染的衣服和鞋子。
眼睛接触:立即用足量流动的冷水冲洗,持续冲洗15分钟,立即与医生联系。
吸入:过量吸入,迅速脱离现场至空气新鲜处。
如感到呼吸困难,立即就医。
误食:误食即立即用大量清水灌入,催吐,同时送就近医院急救。
第五部分消防措施危险特性:遇明火、高热可燃。
与氧化剂可发生反应。
在空气中或在阳光照射下容易生成爆炸性的过氧化物。
其蒸气比空气重,能在较低处扩散到相当远的地方,遇火源会着火回燃。
若遇高热,容器内压增大,有开裂和爆炸的危险。
有害燃烧产物:一氧化碳、二氧化碳。
灭火方法及灭火剂:消防人员须佩戴防毒面具、穿全身消防服,在上风向灭火。
尽可能将容器从火场移至空旷处。
喷水保持火场容器冷却,直至灭火结束。
处在火场中的容器若已变色或从安全泄压装置中产生声音,必须马上撤离。
灭火剂:雾状水、泡沫、干粉、二氧化碳、砂土。
第六部分泄漏应急处理泄漏处置:迅速撤离泄漏污染区人员至安全区,并进行隔离,严格限制出入。
切断火源。
建议应急处理人员戴自给正压式呼吸器,穿防毒服。
尽可能切断泄漏源。
防止流入下水道、排洪沟等限制性空间。
小量泄漏:用砂土、蛭石或其它惰性材料吸收。
也可以用大量水冲洗,洗水稀释后放入废水系统。
大量泄漏:构筑围堤或挖坑收容。
用泵转移至槽车或专用收集器内,回收或运至废物处理场所处置。
第七部分操作处置与储存操作注意事项:搬动时要轻装轻卸,防止静电和泄漏,防止包装及容器损坏;操作时戴好防护眼镜和手套。
Motorcraft 喷头喷墨器 清洗器说明书
• Conectar a bomba de gasolina a la manguera de vacío. Encender el motor y verificar las conexiones para evitar fugas.
HT-FOR-LIAE Rev.: 02
/MX Pág.: 2/2
MA19579
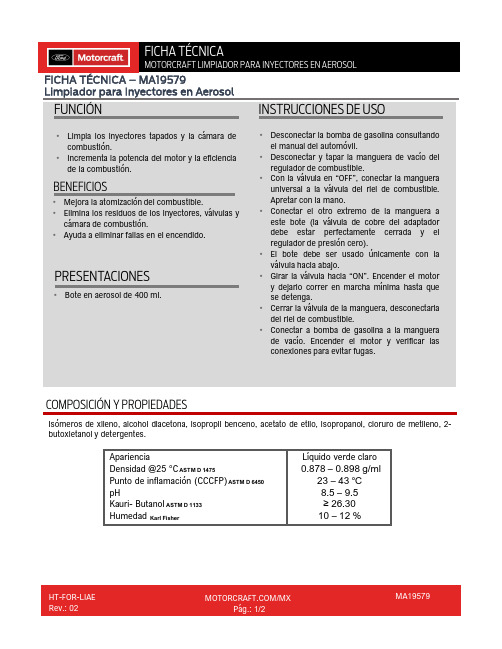
FICHA TÉCNICA
MOTORCRAFT LIMPIADOR PARA INYECTORES EN AEROSOL
FICHA TÉCNICA – MA19579 Limpiador para Inyectores en sol
FUNCIÓN
INSTRUCCIONES DE USO
• Limpia los inyectores tapados y la cámara de combustión.
• Desconectar y tapar la manguera de vacío del regulador de combustible.
• Con la válvula en “OFF”, conectar la manguera universal a la válvula del riel de combustible. Apretar con la mano.
FICHA TÉCNICA – MA19579 Limpiador para Inyectores en Aerosol
PFURENCCAIÓUNCIONES
PRIEMSEERNOTSACAIUOXNIELSIOS
墨打机说明书.pdf_1701928871.0961525

®®Limited warrantyInk cartridges (6)(SureColor P6570D/P6570DE/P6570E/P8570D) Initial ink supply units (ink packs) are not included with SureColorUsing the Touchscreen11106543219871Accesses printer settings 2Feeds or cuts media3T urns on or off the printer’s interior light4Switches the screen view to display additional information 5Displays maintenance settings6Displays the network connection status 7Displays the printer’s status8Opens platen to remove jammed paper 9Displays the Help menu10Displays network folder options 11Selects paper size and type settingsProduct SupportUser’s GuideWindows ®: Click the icon on your desktop or Apps screen to access the online User’s Guide .Mac: Click the icon in Applications/Epson Software/Guide to access the onlineUser’s Guide .If you don’t have a User’s Guide icon, go to the Epson website, as described in “Epson technical support.”Epson technical supportVisit /support (U.S.), http://epson.ca/support (Canada), or /support (Caribbean) and search for your product to download software and utilities, view manuals, get FAQs and troubleshooting advice, or contact Epson.Epson provides technical support and information on the installation, configuration, and operation of professional printing products through the Epson Preferred SMLimited Warranty Plan. Dial (888) 377-6611, 7 a.m. to 4 p.m., Pacific Time, Monday through Friday. Days and hours of support are subject to change without notice. Before you call, make sure you have your:• Printer serial number: ________________________________________• Proof of purchase and date: ____________________________________Note: If you experience difficulty with the toll-free line, call (562) 276-1305.RecyclingEpson offers a recycling program for end of life hardware, ink packs, and ink cartridges. Please go to /recycle (U.S.) orhttp://epson.ca/recycle (Canada) for information on how to return your products for proper disposal.Need Ink?You can purchase ink from an Epson authorized reseller. To find the nearest reseller, call 800-GO-EPSON (800-463-7766).SureColor P6570D/P6570DE/P6570E/P8570Dreplacement ink cartridgesSureColor P8570DL ink packsOptions and replacement partsOptionPart Number Replacement Printer Cutter Blade C13S210117Maintenance BoxC13S210115Borderless Maintenance Box C13S210116Cleaning Stick C13S090013SSD UnitC12C936671Additional Roll Feed Spindle (44")(SureColor P8570D/P8570DL)C12C936171Additional Roll Feed Spindle (24")(SureColor P6570D/P6570DE/P6570E)C12C937711EPSON, Epson Smart Panel, and SureColor are registered trademarks and the EPSON logo is aregistered logomark of Seiko Epson Corporation. Epson Preferred is a service mark of Epson America, Inc.Mac is a trademark of Apple Inc., registered in the U.S. and other countries.Android and Google Play are trademarks of Google LLC.Microsoft and Windows are trademarks of the Microsoft group of companies.General Notice: Other product names used herein are for identification purposes only and may be trademarks of their respective owners. Epson disclaims any and all rights in those marks.This information is subject to change without notice.© 2023 Epson America, Inc., 5/23Printed in U.S.A.CPD-61137R1。
- 1、下载文档前请自行甄别文档内容的完整性,平台不提供额外的编辑、内容补充、找答案等附加服务。
- 2、"仅部分预览"的文档,不可在线预览部分如存在完整性等问题,可反馈申请退款(可完整预览的文档不适用该条件!)。
- 3、如文档侵犯您的权益,请联系客服反馈,我们会尽快为您处理(人工客服工作时间:9:00-18:30)。
精陶喷墨机说明书
本机采用PLC控制,触摸屏操作,适用于锻造行业,用于摸具喷洒石墨乳(脱模剂)。
本机分2部份:
罐体,罐体采用不锈钢制成,壁厚3mm,氩弧焊接抛光,特点是防腐防锈,易清理,整成寿命10年以上。
配有气动马达,双叶轮搅拌,调节气压量即可调节搅拌速度。
并配有调压表,调解罐内压力大小,正常使用值3~4个压力;压力表,范围1~10KG。
泄压阀,整定压力5KG。
注墨口,排气阀,排污阀。
4个地脚轮。
2万向,2刹车。
灌体可以独立拆下。
机械手部分,由伺服电机驱动,PLC 控制,触摸屏操作。
2个电磁阀,1个气动阀,配电箱1套,喷洒距离次数可按产品需求设定,双面喷枪2把,高度可以调节240mm,设有4个福马轮,随时可以动,方便更换模具。