Z通信管理机用户手册完整版
三星Xchange for Samsung 统一通信管理器用户手册说明书
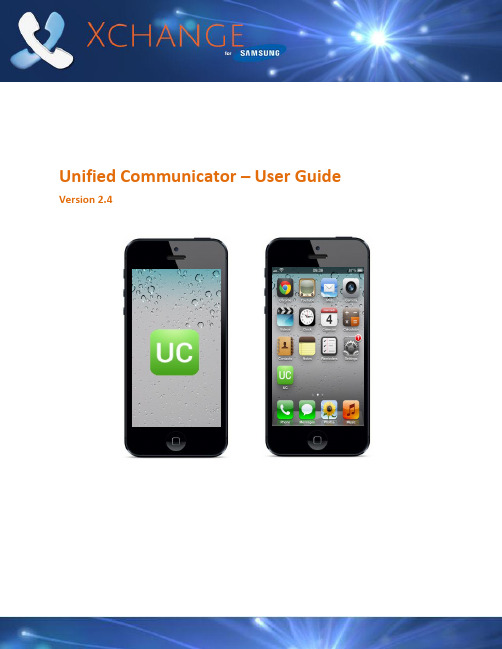
Unified Communicator – User Guide Version 2.4ContentsIntroduction (3)Welcome to Unified Communicator (3)Apple Basics/Glossary (3)Getting Started - Installation & Configuration (4)Pre-requisites & Server Configuration (4)Xchange Server Configuration (4)Provisioning (4)GSM (4)Client Installation (4)Client Configuration (4)Welcome Screen & Server Configuration Menu (5)Dial Through settings (6)A Quick Tour (7)Presence Icons (7)Presence Screen (7)Making Calls (8)Make calls from Unified Communicator (8)Using Dial Through dialing (9)Using Dial Direct (DDI/DID) dialing (9)Receiving Calls (9)Availability Status (10)Using Deskphone Mode (10)Searching the Address Book (12)Using the Call History (12)Features Connectivity Requirements (13)Feature Configuration Dependencies (13)IntroductionWelcome to Unified CommunicatorUnified Communicator is an application for Apple mobile devices that extends the power of your Samsung telephone system to your mobile device.Apple Basics/GlossaryNew to iOS or UC? Here are a few of the basic operations and features explained.Tap Hold DragTouch the mobile device’s screen in the area of interest for a second or two until the expected action occurs.Touch the mobile device’s screen briefly in the area of interest. While touching the mobile device’sscreen, move your finger in thedirection you want the screen or iconto scroll or move. Home ButtonDouble Press - Pressing the home button twice will bring up the multitasking bar where you can access apps and settings; it provides another option to re-open Unified Communicator if it runs in the background.App StoreThis is from where you can download the Unified Communicator onto your mobile device. It can be accessed via a web browser or through the app which is usually already installed by default on your iOS mobile device.Mobex (Mobile Extension)This is the term used where a user has a virtual extension number which, when dialed, rings the user’s mobile phone. It is often grouped (or twinned) with a standard deskphone such that when the deskphone rings the mobile phone also rings. This functionality can often be configured in different ways and the features described in this document may have a dependency on this configuration. In some instances the deskphone extension is also the virtual extension.ExtensionsXchange can display a complete list of extensions that you can choose to contact a specificExtensions are the telephone lines and physical devices that calls are made and received on; they tend not to move and are represented in Xchange by circle icons that look like these -.Getting Started - Installation & ConfigurationPre-requisites & Server ConfigurationXchange Server ConfigurationPlease refer to the Xchange Server Installation Guide for pre-requisites and setup information relating to Unified Communicator.ProvisioningUnified Communicator user configurations can be pre-configured on the server so that the end user need only enter the IP address of the Xchange server after installing the app on the phone. The server recognizes the user’s mobile device and automatically provisions user parameters. Note: manual set up is also available – see Xchange Server Installation Guide for more details.GSMUnified Communicator uses the dialer presented by the iOS (normally a GSM dialer) on your mobile device to make and receive calls – it does not install an IP phone.Client InstallationUnified Communicator can be downloaded from the App Store. The easiestway to find it is to search for “Unified Communicator”. Installation from hereon is simple; just click on Free App -> Install App , you will then be asked toenter your Apple ID and password. Once the credentials have been accepted,UC app will be automatically downloaded and installed on your mobile device.Client ConfigurationBefore you can get started making calls with Unified Communicator, you need toconfigure the client, so launch the app by tapping the shortcut that has been placed inyour iPhone® Applications menu.Note: Unified Communicator requires Xchange server 2.3.15or later. Compatible iOS Versions: iOS 5.0 or later (note: iPad 1 is not supported).Welcome Screen & Server Configuration MenuWhen Unified Communicator opens for the first time, you will be presented withthe Welcome screen. Tap the text box, then enter your Xchange Server’s IPaddress (note: if your administrator has given you a TCP port number then youshould add you this to the IP address separated by a colon (:) e.g.192.155.123.1:12345). Tap the Next button once the details are entered and thenUnified Communicator will check to see if your system administrator haspreconfigured your settings.If they have preconfigured your settings, the UC app shouldsuccessful connect to the server and take you straight toyour client menu, (you can skip the rest of this section too).If your settings have not been preconfigured, you will see a screen giving you twooptions. Tapping Refresh will cause Unified Communicator to check again foryour preconfigured settings; use this if you have contacted your systemadministrator asking them to setup your settings. To configure UnifiedCommunicator yourself, tap Manual setup to open the Settings menu.In the Settings menu you can access the first group of settings we need to configure. Tap on the options in the Connection section to enter the following details:Server address: The details you entered on the Welcome screen should already be in place here. If not, enter the IP address of your Xchange server. To use a specific port number, append it to the IP address using a colon e.g. 192.0.2.1:12345. You must append TCP port 21051 (default), orthe port number provided by your administrator, to the public IP address asexplained above.Deskphone extension: Enter the extension number that represents yourdeskphone on the phone system. This may be the same as your mobile extension.Mobile extension: Enter the extension number that represents your mobiledevice on the phone system. This may be the same as your deskphone extensionbut is more often a different virtual extension number. This can be left blank if thedevice is only used in deskphone mode.Tap on the options in the Login section to enter the following detailsUsername: Enter the username given to you by your administrator. This should match the username which is set up in your Xchange Server user settings.Password: The password you need to enter here is your Xchange Server User password that is set in your User record in Xchange Server.Click on your device’s “Done” button to save your settings and return to the main menu. At this point Unified Communicator is configured to connect to and communicate with Xchange Server but you also need to configure the Dial Through settings to make full use of Unified Communicator.Preconfigured SettingsIf your mobile client settings have been preconfigured by your System Administrator then the login options will be greyed out and unavailable for editing.Switch to another ServerTo change the server your mobile device is registered with, click on the option which displays your current Xchange Server’s IP Address, replace it for the new Xchange Server IP Address. If your mobile client settings have been previously pre-configured on the new server then your client will automatically refresh the login and configuration settings and connect to the new server. If however, your device hasn’t been previously preconfigured you will have to follow the steps mentioned in the Welcome Screen & Server Configuration Menu section for the manual configuration.Dial Through settingsUnified Communicator can use the Dial Through (also known as Direct InwardSystem Access –DISA) or Auto Attendant configuration capability of thetelephone system to allow the UC user dial extension numbers or any externalnumbers from their mobile phones via their office telephone system.Always Dial Through:When dialing an external number, the mobile phone usercan decide whether to dial an external number directly through GSM or via theSamsung telephone system. The preferred method of dialing out is controlledby toggle button (slide your finger across the slider button to turn it ON or OFF).Tap on each option in the Dial Through Settings section and enter the followingdetails:Dial Through number: Enter the pilot number for your DISA / Auto-attendant system. Enter the entire DDI/DID number to dial; entering only the last half of the DDI/DID number will not work.Pause character: Enter the character used by your telephone system to indicate a pause e.g., (a comma).Trunk access: Enter the code used by your telephone system’s Dial Through to access an outside line e.g.9 is common.External number length : Enter the number of digits an external telephone number would be expected to have i.e. a telephone number with fewer digits than the value entered here will be considered an internal number by Unified Communicator.Fast Dial : Enabling Fast Dial will significantly reduce the connection times that are normally associated with Dial Through dialing; this feature requires Wi-Fi/3G or better (slide your finger across the toggle button to turn it ON or OFF).Click your device’s “Done” button to save your settings and go back to the previous menu. At this point Unified Communicator is configured to connect to and communicate with Xchange Server as well as make and receive Dial Through calls.A Quick TourPresence IconsThe Presence icons indicate the call status and availability of you and your co-workers.Presence Screen The Presencescreendisplaysthelist of extensions that has been downloadedfrom the telephone server. The list can be split into departments as they arestored on Xchange Server. Groups can be expanded and contracted by simplytapping on them.You can create a group of Favorites by holding and tapping on the user andselecting ‘Add to favorites ’. If the user already exists in the group you can alwaysremove it by holding and tapping on the ‘Removefrom favorites’ option. Favorites group will always bedisplayed at the top of the Presence Screen. (Adding orremoving users from the Favorites does not affect thecontent of the other groups).No callRinging Offline Do not disturbDirectory ScreenYou can search the Xchange shared directory on your mobile device from this screen. Type in your search terms, tap the Search button () and tap to dial the number.Call History ScreenThis screen lists the calls received with Unified Communicator by the user. Tapping on any of the entries gives you the call options. Note: this feature requires WiFi/3G data connection or better. See section using the Call History chapter for full details.Making CallsMake calls from Unified CommunicatorIf you see a number in the Address Book or on the Presence Screen thatyou would like to call, just tap on it and the Actions menu will provide you with two options; 1. Call the number using Dial Through(Dial Through must be set-up, see Dial Trough settings above) or 2. Call using Dial Direct option (assuming that DDI/DID for the extension has been preconfigured on the Xchange Server). Tap on one of the preferred dialing methods and the call will be made.Note: Calls to internal numbers automatically goes using Dial Through.Using Dial Through dialingDial Through uses DISA or Auto-Attendant capability of the Samsung telephonesystem to route calls from your mobile device through the telephone system. Tosetup Dial Through, go to Dial Through Settings, enter the phone number specifiedby your Samsung telephone system administrator and turn onthe Always Dial Through option. Once this is setup, the UnifiedCommunicator mobile client will route calls through your officetelephone system. Please note that Unified Communicator willautomatically recognize numbers of a certain length as internalnumbers and will use the Dial Through option regardless of theAlways Dial Through setting (Assuming DISA or Auto-Attendantis set up the extension number dialed does not require a DID/DDI number to beassociated with it). Dependent upon the system configuration, Fast Dial canincrease the speed of the connection time when using Dial Through.Using Dial Direct (DDI/DID) dialingIf a DDI/DID number is associated with an extension, you can also dial the DDI/DID number directly by pressing Dial Direct (DDI/DID) instead of Dial Through. This option requires the DDI/DID number to be preconfigured against the extension on the Xchange Server. For more information please contact your Samsung Telephone System administrator.Receiving CallsWhen correctly licensed and configured, a Samsung telephone system can be set up to call both a user’s extension number and mobile phone simultaneously. This is known as twinning or mobile extension (Mobex for short).Sometimes it isn’t going to be approp riate for incoming calls to your office-based extension to be passed on to your mobile device e.g. You might be at your desk right next to your office extension so passing the call to your mobile device would be a little pointless.At times like this, you can block incoming calls from being passed on to your mobile device or you can reroute those calls to another extension or to an entirely different number.The Availability settings can be found by pressing your own Extension on the main menu.To block the incoming call, turn on the Do Not Disturb option which can be found also on the Availability screen.Availability StatusBy tapping on extension (e.g. 2323 Mike Jefferson) you will be presented withthe Availability screen where you can configure your individual settings:Do Not Disturb (slide your finger across the toggle button to turn it ON or OFF).Forward Calls (slide your finger across the toggle button to turn it ON or OFF –if this is the first time you use this option you will have to provide Destinationphone number to whom you would like to forward your calls).Status allows you to change your current availability toAvailable, Busy or Out of the Office.Also the Absencemessage option allows you to provide more information toyour colleagues at work.Using Deskphone ModeSometimes it would be really useful if your deskphone had a dedicatedtouchscreen that not only controlled your deskphone but linked to yourcontact information as well so that you could look up contacts and dial themwith a single tap. Well, putting Unified Communicator into Deskphone modeenables it to control an adjacent device e.g. your deskphone. So it is like yourmobile device has been turned into a detached touchscreen for yourdeskphone that can access the shared Xchange directory and pass data from itto your deskphone.W hat this means is that you won’t actually be making Dial Through callsthrough your mobile device but using your device to select which number tocall on your deskphone.For example, you could use Unified Communicator on your mobile phone tosearch for contacts but use your deskphone to actually make the call i.e. use the convenience of the mobile device to search for a number and the tariff rate of the deskphone. Deskphone mode will force any call made from Unified Communicator to call from your deskphone.Also, with tablet devices replacing PCs for many day-to-day tasks in many office workplaces around the world, running unified communicator in Deskphone mode on your tablet allows you to make calls from your deskphone in the same way you would use Xchange Client on your PC (bringing all the advantages of click to dial to your tablet device).Of course, calls to your mobile number will still come through as normal and all of the other functions and features of your mobile device will continue to work alongside deskphone mode.When you are in deskphone mode, the app looks the same as when it’s not in deskphone mode. The screens in Unified communicator all still work in the same way too so, when you tap on a Directory search result, a call is placed to that contact but it is made directly on your deskphone rather than through your mobile device.Enabling or Switching between Deskphone Mode and Mobile Mode by clicking thephone/house icon (shown below) located at the top of the main window andselecting the mode you require from the menu.As a mode of example you can see below the extensions associated to Mike Jefferson:Settings ScreenThis screen allows you to setup your Server IP Address with your mobile extensionand login credentials as well as preferences for your Presence Screen display like“Enhanced Presence”, group extensions by Departments b y simply sliding the “ONor OFF” button or sort the extensions either by Name or Number.Unified Communicator detects the Language of the iOS on your iPhone® if however,your language preferences differs from those set by the UC app you can easilychange them by selecting the pereferred language from t he ‘Language” list.The option “Clear Settings” will delete the current client configuration , pleaseconsult with your administrator before chosing this option.Searching the Address BookJust because you are out of the office doesn’t mean you are out of touchwith all of your office contacts anymore. Unified Communicator’s Address Book is not just the same as your office-based shared Address Book – it is your office-based shared Xchange Address Book.So when you enter all or part of a name or number into the search box and tap the Search button, Unified Communicator remotely searches the Xchange Address Book back in the office and delivers the search results direct to your mobile device.To call any of the numbers listed in the search results, simply tap on them. If there are more results than can fit on the screen simultaneously, drag the screen up to see more results.Using the Call HistoryThe Call History is your mobile device’s log ex cept that it only shows thecall activity made through Unified Communicator so it is ideal for times when you need a more narrow list of call activity than the log on your device.Callers with records in your shared Xchange directory are clearly identified by their name and you can see which direction the call was made in i.e. incoming or outgoing; the red arrow indicates incoming and the blue arrow indicates outgoing.To call any of the listed numbers, just tap on one.Scroll through the list by dragging the screen up if there are too many calls to see onscreen simultaneously.Note: this feature requires a Wi-Fi/3G data connection or better.Features Connectivity RequirementsWarning: Your mobile provider may charge you for data services used from your mobile deviceFeature Configuration DependenciesThe availability of certain features is dependent upon the configuration of the Samsung telephone system. These include:features may require additional licenses to be installed on the Samsung telephone system. Please check with your system maintainer。
培训材料通讯管理机的使用说明

确保输入的用户名和密码正确,避免因登录失败而影响后续操作。
通讯录管理
总结词
通讯录管理是通讯管理机的重要功能之一,方便用户管理 和维护联系人信息。
详细描述
通讯录管理包括添加联系人、编辑联系人信息、删除联系人以及 查找联系人等功能。用户可以根据需要灵活使用这些功能,以便
更好地管理和维护联系人信息。
确连接到网络。
02
详细描述
检查网络连接是否正常,包括网 线、路由器、交换机等网络设备
。
04
详细描述
遇到网络故障时,可尝试检查网 络设置、重启网络设备等措施, 以恢复网络连接的正常运行。
05
设备维护与保养
日常维护
每日检查设备运行
状态
检查通讯管理机是否正常工作, 包括显示屏、按键、连接线等部 件是否正常。
培训材料通讯管理机 的使用说明
目录
• 设备简介 • 设备安装与连接 • 通讯管理机的使用方法 • 常见问题与解决方案 • 设备维护与保养
01
设备简介
设备概述
01
通讯管理机是一种用于管理通讯 设备的设备,它可以管理各种不 同类型的通讯设备,如交换机、 路由器、服务器等。
02
通讯管理机的主要功能是提供统 一的界面,方便用户对通讯设备 进行配置、监控和管理。
保持设备清洁
定期清洁设备外壳表面,确保无 灰尘、污垢等影响设备散热和外 观的杂物。
记录设备运行日志
详细记录设备的运行状态、故障 排除情况等信息,以便及时发现 和解决问题。
定期保养
定期更新软件
根据设备制造商的推荐,定期更新通讯管理 机的操作系统、驱动程序等软件,以确保设 备正常运行和安全性。
检查硬件连接
通信管理机用户手册
目录1.概述PowerSA-C104t通信管理机是为满足工业自动化需求所设计,具有体积小、低耗电、无风扇、宽温运行、高抗干扰性等特性,是一款真正的工业级产品。
该设备广泛应用于电力系统、石油、化工、水处理、工厂自动化、交通等工业控制领域。
PowerSA-C104t通信管理机应用于采集智能设备分散、监视采集数据量少的小型规模的监控系统中,可实现实时数据的综合处理功能、通信管理、数据网关、数据转发、规约转换、前置处理等各种角色等功能,可以作为功能子站、间隔层,通过层层级联实现数据的分类别、分方向传送。
主要特点采用嵌入式实时操作系统Linux为平台;采用高性能高可靠性嵌入式低功耗硬件平台,使产品的稳定性和宽温运行得到可靠保证;高品质的工业级元件,高水准的电气设计,高密度集成的电路结构,使装置拥有优异的电气隔离和电磁屏蔽表现,极大提高了装置的抗干扰性能与可靠性保障;与智能采集装置、继电保护具有相同等级的EMC;内置丰富规约库IEC 870-5-101、102、103、104, CDT、MODBUS SPABUS SC1801 COURIER DL645 及国内外各主要电力厂家各设备通讯规约,根据现场需求进行特殊规约的开发;单个串口通过RS485总线方式连接多台IED设备;装置的工作电源输入电压为交直流85~264V,可广泛适用于各种供电环境;宽温运行:运行温度-25℃~70℃导轨安装方式,造型美观,组屏方便;主要功能1)PowerSA-C104t通信处理机的可满足不同的应用功能;可以为不同的后台SCADA系统、电力保护装置、各种智能设备、不同的管理系统等提供包含以太网、标准RS232、标准RS485等不同通信接口的综合数据通信处理功能,2)具有USB接口,可直接连接打印机,实时打印相关报警信息等,可作为实时报警打印服务处理中心,弥补了国外保护不具备打印的功能。
(该功能仅PowerSA-C104tp具有)3)实现通信管理、数据网关、数据转发、规约转换、前置处理等各种角色;可以按需组合成分布网络、分层级联灵活通信处理方案。
PMC-1380-Z智能通信管理机说明书_V1.1_20100928
PMC-1380-Z82X/92X系列智能通信管理机使用说明书( V1.1 版)目录1. 前言 (1)2. 简介 (1)2.1. 硬件介绍 (1)2.1.1. PMC-1380-Z82X系列装置的规格型号及主要选型如下: (1)2.1.2. PMC-1380-Z92X系列装置的基本规格 (2)2.2. 技术参数 (2)3. 安装与设置 (4)3.1. PMC-1380-Z821外观与尺寸 (4)3.1.1. 前面板 (4)3.1.2. 背板端子 (4)3.2. PMC-1380-Z823外观与尺寸 (4)3.2.1. 前面板 (4)3.2.2. 背板端子 (5)3.3. PMC-1380-Z825外观与尺寸 (5)3.3.1. 前面板 (5)3.3.2. 背板端子 (5)3.4. PMC-1380-Z82X系列外形尺寸图 (6)3.5. 硬件安装及设计 (6)3.5.1. 串口接口 (6)3.5.2. DI/DO (7)3.5.3. 电源板接口 (8)3.5.4. VGA接口 (8)3.5.5. 以太网口 (9)3.5.6. 键盘、鼠标接口 (9)3.5.7. PC/104接口 (9)3.5.8. USB接口 (10)3.5.9. 并口 (11)4. 寄存器配置信息 (12)4.1 串口 (12)4.2 数字量输入、输出 (12)4.3 功能指示灯 (12)5. 软件平台 (13)附录1:手册变更信息 (13)1. 前言随着计算机及电子技术的不断进步和发展,目前越来越多的发电、配电及用电用户希望能提高自动化水平,使用高度自动化的智能化管理和控制系统。
而通信控制单元是所有系统和现场的智能设备相互连接的枢纽,在自动化系统中起着不可替代的作用。
PMC-1380-Z82X/92X系列通信管理机广泛应用于电力、楼宇、化工等各个行业,被大多数系统集成商和自动化公司、研究所采用,是一款具有极高性价比,且运行稳定可靠的装置。
通讯管理机使用手册

文档编号:P S-T X-001-V6. 6PowerSys1600系列通信管理机《用户手册》上海华立软件系统有限公司2011年7月关于本手册●内容简介PowerSys1600系列通信管理机专门针对电力系统、电气化铁路、城市地铁等高可靠性应用场合设计的新一代网络通信平台式产品。
采用工业控制领域广泛应用的Linux系统平台和PowerSys核心模块。
此系列是嵌入式、低功耗、无硬盘的通信管理机。
各章节的内容如下:第1章PS1600系列通信管理机介绍第2章通信管理机维护第3章平台系统介绍第4章功能配置说明第5章特殊功能●声明本手册由上海华立软件系统有限公司负责编写,解释权归上海华立软件系统有限公司所有,任何个人和单位不得擅自复制、抄袭或修改。
PowerSys是上海华立软件系统有限公司在中国已经登记注册的产品系列号标志,任何个人和单位不得擅自使用。
目录第1章PS1600系列通信管理机介绍本章简介:对PS1600通信管理机的介绍。
1.1通讯管理机型号说明声明:由于产品的不断改进和完善,以上技术参数以产品说明书为准。
在订货前请核对产品规格,此选型指南仅供参考。
详细信息请致电1.2外观介绍插口描述:注:调试口连接速率:115200bps。
第2章通信管理机维护2.1维护口的连接通过设备清单内提供的串口连接线将通信控制器的串口与维护笔记本的串口连接起来,在笔记本上打开超级终端,串口设置如下:波特率:115200数据位:8停止位:1校验位:无流控制:无2.2根文件系统上传在笔记本上通过超级终端操作如下:在提示符下输入reboot命令或重启通信管理机;执行完第1步操作后,不断点击空格键,直到出现 vivi> 提示符在vivi>提示符下输入命令:vivi>load flash root x在vivi 出现提示信息$$$$...之后,在超级终端的菜单栏里选择“传送->发送文件”,在弹出的窗口中选择xmodem 协议,并选择烧写文件路径(文件名一般为root.cramfs)。
通信管理机说明书

列出CAN设备YY原码
在维护栏中→鼠标右键点击[GSPS800_CAN_ZZSCADA]→[CAN卡YY原始数据],这里YY指遥测、遥信、遥脉中的任何一种
CAN设备YY
某一CAN设备YY的列表
在维护栏中→双击某一CAN设备下的YY分支,这里YY指YC、YX、YM中的任何一种。
报警记录
1
该CPU卡 集成显卡、集成网卡
CPU
赛扬Ⅲ 1G 图拉丁(带风扇)
1
内存
SDRAM 256MB(单条)
1
硬盘
40G(5400转)
1
光驱
普通CD-ROM
1
多串口卡
MOXA(摩莎)
CP-118U(带1→8转换头)
或
CP-134(带1→4转换头)
1~2
根据工程需要配置1~2块
CAN卡
CAN卡(PCI/ISA接口)
1~2
根据工程需要配置1~2块,ISA接口CAN卡要求总线缓冲器U8、U9、U10配置型号为SN74AHC245N的芯片,不能配置型号为SN74HC245N或SN74AHCT245N的芯片;如果通过音响板+喇叭方式报警需要配置带两个音响驱动继电器的CAN卡
键盘+鼠标(选配)
不限
?
一般工程不配置,如果是没有监控后台只有通信机的工程,必须配置.
内存: 256MB及以上
硬盘可用空间: 100MB及以上
操作系统: Windows 2000 Pro/Server,Windows XP Home/Pro(推荐①),Windows 2003
注①: Windows XP Pro版具有远程桌面功能,可以通过监控后台计算机对通信机进行远程维护,从而通信机可以不必配置显示器和键盘鼠标.
通讯管理机使用手册
通讯管理机使用手册通讯管理机使用手册目录1.产品概述1.1 产品介绍1.2 主要功能1.3 技术规格2.基本操作2.1 系统启动与关闭2.2 界面及功能介绍2.3 按键操作说明3.通讯设置3.1 网络配置3.2 通讯协议设置3.3 数据传输配置4.通讯功能4.1 通信管理4.2 短信功能4.3 方式功能4.4 邮件功能5.安全设置5.1 用户权限管理5.2 密码设置5.3 安全日志管理6.故障排除6.1 常见问题及解决方法6.2 联系客服1.产品概述1.1 产品介绍通讯管理机是一种多功能综合设备,可以用于数据传输,短信通信,方式通信和邮件通信等功能。
本手册将详细介绍通讯管理机的使用方法和技术规格。
1.2 主要功能通讯管理机具有以下主要功能:- 数据传输功能:可通过串口或网络与其他设备进行数据传输。
- 短信通信功能:可发送和接收短信。
- 方式通信功能:可拨打方式和接听方式。
- 邮件通信功能:可发送和接收邮件。
1.3 技术规格通讯管理机的技术规格如下:- 处理器:- 存储容量:- 支持网络:- 支持通讯协议:2.基本操作2.1 系统启动与关闭- 系统启动:按下电源按钮,等待系统启动完成。
- 系统关闭:在操作界面选择关机选项,等待系统关闭提示后,按下电源按钮关闭设备。
2.2 界面及功能介绍通讯管理机界面包含以下主要元素:- 主菜单:显示在屏幕上方,包含各项功能选项。
- 侧边栏:显示在屏幕左侧,可以切换不同的界面。
- 内容区域:显示当前界面的详细内容和操作选项。
2.3 按键操作说明通讯管理机的按键操作如下:- 方向键:用于在界面中移动光标。
- 确认键:用于确认选项或执行操作。
- 返回键:用于返回上一级菜单或取消操作。
- 数字键:用于输入数字或字符。
3.通讯设置3.1 网络配置在通讯管理机中设置网络配置,包括以下内容:- IP地质:设置通讯管理机的IP地质。
- 子网掩码:设置子网掩码以确定网络范围。
- 网关地质:设置网络的网关地质。
DMP501Z通信管理机用户手册

DMP501Z通信管理机(V1.0/V2.0/V2.1/V2.2/V2.3/V3.0)用户手册南京力导保护控制系统有限公司2002.3前言在变电站综合自动化系统中,出于复杂性和重要性的考虑,保护单元节点不会设置太多的通信端口和通信功能.考虑到变电站智能设备的接入和远动规约的实现以及多媒体多协议之间交换数据和信息的需要,一般会设置专门的通信单元节点,该单元在系统通信网络构成方面起主导地位,称之为通信管理机(网关).DMP501Z是完成上述功能的节点机,在该单元上集中了使用不同介质和不同协议的多个通信端口,实现了协议转换和现场设备的互连。
本手册的主要目的是帮助用户和现场服务人员了解DMP501Z通信管理机的硬件组成和软件结构及其主要功能.手册简单列举了DMP501Z的系统菜单,阐述了它与DMP5XX节点之间的网络配置,并对DMP501Z的相关组件作了简要介绍.手册的附录部分列出了DMP501Z 特有的远动协议和调试接口.目录前言一、功能概述二、性能指标三、硬件组成3.1.基本配置3.1.1 电源模件3.1.2 开入开出模件3.1.3 液晶显示模件3.1.4 CPU模件3.2.扩展部件四、软件结构4.1.软件层次结构4.2.软件结构4.3.消息机制4.4.程序流程图4.4.1 引导程序(BIO)4.4.2 系统监控程序(SYS)4.4.3 用户进程4.5.系统数据库4.5.1 系统库4.5.2 用户数据库五、系统配置及网络结构5.1.单管理机单网络配置5.2.单管理机双网络配置5.3.多管理机单网络配置5.4.多管理机双网络配置5.5.通信网络的连接六、使用说明6.1.一般术语6.2.键盘布局及按键功能6.2.1 面板布局6.2.2 键盘功能6.3.系统层次菜单6.3.1 一级设置菜单6.3.2 二级设置子菜单6.4.系统工具6.4.1系统自诊断6.4.2.通道测试6.4.3电表地址设置6.4.4通信设备接口测试6.4.5事件记录及操作记录6.4.6 传动试验6.4.7系统组态七、调试说明7.1.通电前检查项目7.2.通电检查7.3.系统联调7.4.运行后注意事项八、常见问题及解决8.1.一般性故障及排除8.2.软件故障九、技术支持及软件升级十、声明十一、外形及安装十二、定货须知附录一系统数据库附录二 CAN总线简介附录三 DMP5.0远动通信规约附录四 SIM1.0调试接口附录五 IAP文件服务器简介附录六客户意见反馈表一.功能概述DMP500Z是以Intel第四代单片微机Intel80296SA为核心构成的新一代通讯管理装置,是变电站综合自动化系统信息管理和流通的中枢。
CBZ-6001Z通讯管理机使用说明
CBZ-6000变电站综合自动化系统CBZ-6001Z通讯管理装置技术使用说明书上海继电器有限公司2003年10月一.功能概述CBZ-6000通讯管理装置型号为CBZ-6001Z,是由先进的微处理器构成的通讯装置,是变电站综合自动化系统信息管理和流通的中枢。
具有如下功能:a.装置具有6路RS-232口,2路CAN网接口,1路RS-485接口。
b.提供当地及远动通讯口。
c.提供与变电站其他智能装置通信口。
d.具有事故总信号、预告总信号出口。
e.具有对两个主变档位的遥测、遥调功能。
f.负责对各单元装置的巡检、校时。
二.主要技术指标1.额定工作电压220V(70%-130%)2.功率消耗不大于8W3.允许环境温度正常工作温度:-10℃~55℃极限工作温度:-25℃~75℃4.通讯速度:●通过CAN网口与保护测控单元通讯速率1250Kbps,通讯距离2km左右●与当地监控或远方调度。
波特率可通过跳线设置为150、300、600、1200、2400、4800、9600。
三.机箱结构装置为IEC标准6U机箱,外形及安装开孔尺寸见附图1。
装置可分散安装于开关柜,也可集中与其它保护测控装置组屏安装。
四.程序结构1.根据对时间要求的不同,总管理机的监控程序被分为三大块:1.1 软件终端服务程序这一部分服务程序1.667ms被调用一次,所有对时间敏感的服务程序均存放于此,如通信端口物理层驱动程序、校时子程序、ms处理子程序,软件延时计数器服务程序等。
1.2通信服务主程序这一部分服务程序10s左右被调用一次,所有对时间要求较高的服务程序均放于此,如通信端口数据链路层服务程序、通信服务主程序、时间处理程序等。
1.3主程序这一部分服务程序1s左右被调用一次,所有对时间要求不高的服务程序均存放于此,如显示数据刷新程序、年处理程序、通信端口出错处理程序等。
其他服务程序被放置在上述三个不同的部分,并相互配合协调工作流程图。
根据对时间要求的不同,总管理机的监控程序被分为三大块,由此管理机的信息处理流程也相应的分成三块:1) 主程序这一部分服务程序1S左右被调用一次,所有对时间要求不高的服务程序均存放于此。
通信管理机用户手册

目录1.概述PowerSA-C104t通信管理机是为满足工业自动化需求所设计,具有体积小、低耗电、无风扇、宽温运行、高抗干扰性等特性,是一款真正的工业级产品。
该设备广泛应用于电力系统、石油、化工、水处理、工厂自动化、交通等工业控制领域。
PowerSA-C104t通信管理机应用于采集智能设备分散、监视采集数据量少的小型规模的监控系统中,可实现实时数据的综合处理功能、通信管理、数据网关、数据转发、规约转换、前置处理等各种角色等功能,可以作为功能子站、间隔层,通过层层级联实现数据的分类别、分方向传送。
主要特点采用嵌入式实时操作系统Linux为平台;采用高性能高可靠性嵌入式低功耗硬件平台,使产品的稳定性和宽温运行得到可靠保证;高品质的工业级元件,高水准的电气设计,高密度集成的电路结构,使装置拥有优异的电气隔离和电磁屏蔽表现,极大提高了装置的抗干扰性能与可靠性保障;与智能采集装置、继电保护具有相同等级的EMC;内置丰富规约库IEC 870-5-101、102、103、104, CDT、MODBUS SPABUS SC1801 COURIER DL645 及国内外各主要电力厂家各设备通讯规约,根据现场需求进行特殊规约的开发;单个串口通过RS485总线方式连接多台IED设备;装置的工作电源输入电压为交直流85~264V,可广泛适用于各种供电环境;宽温运行:运行温度-25℃~70℃导轨安装方式,造型美观,组屏方便;主要功能1)PowerSA-C104t通信处理机的可满足不同的应用功能;可以为不同的后台SCADA系统、电力保护装置、各种智能设备、不同的管理系统等提供包含以太网、标准RS232、标准RS485等不同通信接口的综合数据通信处理功能,2)具有USB接口,可直接连接打印机,实时打印相关报警信息等,可作为实时报警打印服务处理中心,弥补了国外保护不具备打印的功能。
(该功能仅PowerSA-C104tp具有)3)实现通信管理、数据网关、数据转发、规约转换、前置处理等各种角色;可以按需组合成分布网络、分层级联灵活通信处理方案。
(企业管理手册)通讯管理机使用手册

(企业管理手册)通讯管理机使用手册上海华立软件系统有限公司文档编号:PS-TX-001-V6.6PowerSys1600系列通信管理机《用户手册》上海华立软件系统XX公司2011年7月关于本手册●内容简介PowerSys1600系列通信管理机专门针对电力系统、电气化铁路、城市地铁等高可靠性应用场合设计的新壹代网络通信平台式产品。
采用工业控制领域广泛应用的Linux系统平台和PowerSys核心模块。
此系列是嵌入式、低功耗、无硬盘的通信管理机。
各章节的内容如下:第1章PS1600系列通信管理机介绍第2章通信管理机维护第3章平台系统介绍第4章功能配置说明第5章特殊功能●声明本手册由上海华立软件系统XX公司负责编写,解释权归上海华立软件系统XX公司所有,任何个人和单位不得擅自复制、抄袭或修改。
PowerSys是上海华立软件系统XX公司于中国已经登记注册的产品系列号标志,任何个人和单位不得擅自使用。
目录第1章PS1600系列通信管理机介绍11.1通讯管理机型号说明11.2外观介绍1第2章通信管理机维护32.1维护口的连接32.2根文件系统上传32.3应用系统设置32.3.1IP地址设置:32.3.2FTP设置32.4对时设置4第3章应用系统介绍53.1应用程序各级子目录文件简表53.1.1/prog 目录下的文件53.1.2/prog/powersys目录下的文件53.1.3/prog/powersys/bin53.1.4/prog/powersys/config63.1.5/prog/powersys/bat63.1.6/prog /powersys/config/sys63.2环境变量6上海华立软件系统有限公司Ⅱ3.3应用程序自启动63.4应用系统配置文件63.4.1node.ini63.4.2rdbcfg.xml63.4.3server.ini7第4章数据库配置(DBUI)104.1DBUI简介104.1.1启动方法104.1.2表关系示意图114.2RTU通道配置124.2.1通讯组124.2.2逻辑RTU参数124.2.3通道参数134.2.4通讯组功能配置134.2.5RTU对象地址映射144.2.6RTU转发地址映射144.3应用功能配置154.3.1遥控功能配置154.3.2逻辑运算配置154.3.3逻辑输出配置(该功能仅用于MODBUS规约)164.3.4根据遥信变位生成SOE174.3.5根据SOE设置遥信值174.3.6对时设置174.4特殊规约的配置:174.4.1Modbus 规约配置174.4.2GE F650保护装置MODBUS规约配置194.4.3西门子直流保护规约的配置204.4.4GE SNP规约214.5通信管理机系统RTU的配置214.5.1遥信配置224.5.2远方就地配置224.5.3系统RTU对逻辑遥信点的遥控22第5章特殊功能235.1遥信合成功能235.2遥信逻辑输出功能235.2.1Modbus规约235.2.2SNP规约24附录A 数据库字典25A.1通讯组表25A.2逻辑RTU参数25A.3通道参数27A.4101配置表29A.5采集对象逻辑地址表30A.6RTU功能配置30A.7YK参数表30A.8RTU对象地址映射表31A.9RTU转发对象地址映射表32A.10RTU对象地址分组表32A.11逻辑运算表33A.12YX输出表33附录B 遥控权限的判断流程34附录C客户端固定端口号配置方法35第1章PS1600系列通信管理机介绍本章简介:对PS1600通信管理机的介绍。
通信管理机说明书
HZ300嵌入式通讯管理机使用说明书一概序:HZ300 采用Intel x86处理器,配备VGA接口,6个以太网口,4个光隔RS-232串口(可选RS-422模块),8个光隔485串口,CF卡插槽和USB接口。
HZ300采用19英寸、1U高度的坚固结构设计,是工业应用的理想解决方案。
特别适用于电力,交通,石油和天然气等需要19英寸机架计算机解决方案的自动控制领域。
该产品的所有串口具备2KV光电隔离保护,可以保证在上述苛刻的工业环境中实现稳定可靠的通信。
HZ300预装WinXP Embedded操作系统,为开发应用软件提供了友好的环境,确保程序员可以迅速开发出无bug的程序,同时减少开发费用。
详细规格:› Intel赛扬M 1 GHz处理器,前端总线频率400 MHz› 1个200-pin DDR2 SODIMM接口,支持DDR2 400,最高可达1GB(内建512 MB)› 6个10/100 Mbps以太网口› 1个CF卡插槽,1个用于扩展存储空间的IDE ATA-150接头› 高速USB 2.0接口› 4 个光隔RS-232串口(可选RS-422串口),8个光隔RS-485 串口› 串口速度50 bps~921.6 Kbps,支持非标准波特率› 支持Embedded Linux,WinCE 6.0,或WinXPe platform› 19英寸机架安装,1U高度› 100/240 V交直流电源输入› 无风扇设计二硬件安装:2.1 产品外观:正面示意图及背面示意图如下2.2 尺寸图:2.3 硬件原理图:2.4 机架安装DA-681支持机架安装,步骤如下:2.5 连接电源:HZ300提供了方便的电源连接方式,用螺丝刀取出螺丝,把电源线连接到对应的螺丝上。
HZ300的电源连接详细信息请参考下图。
完成后,打开开关按钮运行系统,开机大约30-60s,开机的速度取决于操作系统。
2.6 重启按钮:按重启按钮会提升热启动效率。
通信管理机使用说明书
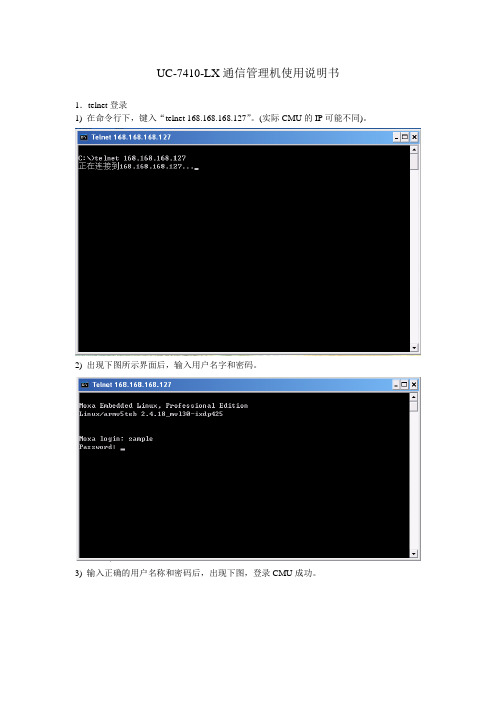
UC-7410-LX通信管理机使用说明书1.telnet登录1) 在命令行下,键入“telnet 168.168.168.127”。
(实际CMU的IP可能不同)。
2) 出现下图所示界面后,输入用户名字和密码。
3) 输入正确的用户名称和密码后,出现下图,登录CMU成功。
2.查看CMU的IP设置查看IP,键入“ifconfig”,如上图。
图中ixp0代表LAN1,IP是192.168.3.127,ixp1代表LAN2,IP是168.168.168.127。
3.修改IP1) 用CuteFTP下载文件/etc/network/interface2) 编辑文件interface,如下部分,写入要设置的IP。
3) 用CuteFTP上传文件interface到/etc/network/interface,并覆盖原文件。
4) 在telnet中键入命令“reboot”,系统重新启动后,IP设置生效。
注意:最好一个端口一个端口改,如果IP找不到,可以从另一个口telnet登录。
4.复制应用程序1) 应用程序说明2) 在telnet中输入命令“cd /root”,“mkdir cmu”,“cd cmu”,“mkdir sample”。
3) 上传文件1)中的应用程序及配置文件到/root/cmu目录中。
4) 在telnet中输入命令“chmod +x iec103c iec104s”,改写文件属性为“可执行”5) 启动应用程序, 输入命令“./ iec103c & ./ iec104s &”。
5.自动运行应用程序1) 下载文件/etc/rc.d/rc.local2) 编辑文件rc.local, 加入以下内容rm -f /tmp/*cd /root/cmu./ iec104s &3) 上传文件rc.local 到/etc/rc.d/rc.local,并覆盖原文件,系统启动后,自动运行4个应用程序。
Z通信管理机用户手册

DMP501Z通信管理机(V1.0/V2.0/V2.1/V2.2/V2.3/V3.0)用户手册南京力导保护控制系统有限公司2002.3前言在变电站综合自动化系统中,出于复杂性和重要性的考虑,保护单元节点不会设置太多的通信端口和通信功能.考虑到变电站智能设备的接入和远动规约的实现以及多媒体多协议之间交换数据和信息的需要,一般会设置专门的通信单元节点,该单元在系统通信网络构成方面起主导地位,称之为通信管理机(网关).DMP501Z是完成上述功能的节点机,在该单元上集中了使用不同介质和不同协议的多个通信端口,实现了协议转换和现场设备的互连。
本手册的主要目的是帮助用户和现场服务人员了解DMP501Z通信管理机的硬件组成和软件结构及其主要功能.手册简单列举了DMP501Z的系统菜单,阐述了它与DMP5XX节点之间的网络配置,并对DMP501Z的相关组件作了简要介绍.手册的附录部分列出了DMP501Z特有的远动协议和调试接口.目录前言一、功能概述二、性能指标三、硬件组成3.1.基本配置3.1.1 电源模件3.1.2 开入开出模件3.1.3 液晶显示模件3.1.4 CPU模件3.2.扩展部件四、软件结构4.1.软件层次结构4.2.软件结构4.3.消息机制4.4.程序流程图4.4.1 引导程序(BIO)4.4.2 系统监控程序(SYS)4.4.3 用户进程4.5.系统数据库4.5.1 系统库4.5.2 用户数据库五、系统配置及网络结构5.1.单管理机单网络配置5.2.单管理机双网络配置5.3.多管理机单网络配置5.4.多管理机双网络配置5.5.通信网络的连接六、使用说明6.1.一般术语6.2.键盘布局及按键功能6.2.1 面板布局6.2.2 键盘功能6.3.系统层次菜单6.3.1 一级设置菜单6.3.2 二级设置子菜单6.4.系统工具6.4.1系统自诊断6.4.2.通道测试6.4.3电表地址设置6.4.6 传动试验6.4.7系统组态七、调试说明7.1.通电前检查项目7.2.通电检查7.3.系统联调7.4.运行后注意事项八、常见问题及解决8.1.一般性故障及排除8.2.软件故障九、技术支持及软件升级十、声明十一、外形及安装十二、定货须知附录一系统数据库附录二 CAN总线简介附录三 DMP5.0远动通信规约附录四 SIM1.0调试接口附录五 IAP文件服务器简介附录六客户意见反馈表一.功能概述DMP500Z是以Intel第四代单片微机Intel80296SA为核心构成的新一代通讯管理装置,是变电站综合自动化系统信息管理和流通的中枢。
通讯管理机调试人员使用手册
珠海万力达电气股份有限公司通讯管理机调试大纲前言适用范围M G L J-300L型通讯管理机硬件部分一、上电前硬件安装检测1.主板元器件是否全部装好□是□否2.主板是否有虚焊□有□无3.面板元器件是否全部装好□是□否4.面板是否有虚焊□有□无5.背板元器件是否全部装好□是□否6.背板是否有虚焊□有□无7.主板电池是否装好□是□否8.PC104CPU板是否插好□是□否9.PC104板是否有DOC电子盘□是□否10.CSD/CAN卡是否插好□是□否11.检查主板和面板之间的连接是否正确□是□否12.检查主板与后板之间的连接是否正确□是□否13.装上整个机箱后查看机箱是否能正常安装□是□否14.RS485/ RS232转换设置:(出厂时8路RS485、2路RS232)16、确认DOC上已经安装有Linux系统,并且能够正常运行起来。
DOC的Linux系统的安装方法参见附录。
二、上电检测1.电源指示灯POWER/RUN是否常亮□是□否2.查看管理机能否正常启动□是□否3.接上网络线使其连入网络查看面板指示灯ETHER是否不停的闪烁ETH1 □是□否 ETH2 □是□否4.通过网络配置各个端口,然后连接设备测试通道通讯正常与否,通讯正常表现为COM 口和CAN口分别对应的指示等会根据发送和接收交换显示不同的颜色,不正常则表示为对应端口指示灯不亮或者常亮(COM口不是为不亮,CAN口表现为常亮或者不亮)软件部分一、适用人员本公司MGLJ-300L通讯管理机调试人员。
二、功能MGLJ-300L通讯管理机的配置文件(和)以及应用程序(run和CAN驱动)的上传和下载。
三、需要的文件及工具文件:1、、(通道、RTU及转发等的配置文件,工程部提供)2、run (管理机运行主程序,MGLJ-300L开发小组提供)3、(CAN驱动,MGLJ-10K开发小组提供)工具:1、配置文件生成程序2、通讯管理机监控程序3、(FTP上传下载工具)4、带网卡的计算机(一台)5、两台计算机之间网络通讯的直连线6、telnet (远方访问MGLJ-10K,可以查看、运行管理机,计算机操作系统自带)四、软件设置步骤(一)生成配置文件、(二)传配置文件(三)通过监控通讯管理机运行情况五、软件及通讯设置MGLJ-300L 型通讯管理机内含标准协议有:部颁CDT 、MODBUS 、DL645、IEC870-5-101、IEC870-5-102、IEC870-5-103、TCP/IP Socket 、WLD2100、WLD2000_485、WLD2000_CAN 、WLD94、GZDW_WLD94等。
- 1、下载文档前请自行甄别文档内容的完整性,平台不提供额外的编辑、内容补充、找答案等附加服务。
- 2、"仅部分预览"的文档,不可在线预览部分如存在完整性等问题,可反馈申请退款(可完整预览的文档不适用该条件!)。
- 3、如文档侵犯您的权益,请联系客服反馈,我们会尽快为您处理(人工客服工作时间:9:00-18:30)。
Z通信管理机用户手册 HEN system office room 【HEN16H-HENS2AHENS8Q8-HENH1688】DMP501Z通信管理机()用户手册南京力导保护控制系统有限公司前言在变电站综合自动化系统中,出于复杂性和重要性的考虑,保护单元节点不会设置太多的通信端口和通信功能.考虑到变电站智能设备的接入和远动规约的实现以及多媒体多协议之间交换数据和信息的需要,一般会设置专门的通信单元节点,该单元在系统通信网络构成方面起主导地位,称之为通信管理机(网关).DMP501Z是完成上述功能的节点机,在该单元上集中了使用不同介质和不同协议的多个通信端口,实现了协议转换和现场设备的互连。
本手册的主要目的是帮助用户和现场服务人员了解DMP501Z通信管理机的硬件组成和软件结构及其主要功能.手册简单列举了DMP501Z的系统菜单,阐述了它与DMP5XX节点之间的网络配置,并对DMP501Z的相关组件作了简要介绍.手册的附录部分列出了DMP501Z特有的远动协议和调试接口.目录前言一、功能概述二、性能指标三、硬件组成3.1.基本配置电源模件开入开出模件液晶显示模件CPU模件3.2.扩展部件四、软件结构4.1.软件层次结构4.2.软件结构4.3.消息机制4.4.程序流程图引导程序(BIO)系统监控程序(SYS)用户进程4.5.系统数据库系统库用户数据库五、系统配置及网络结构5.1.单管理机单网络配置5.2.单管理机双网络配置5.3.多管理机单网络配置5.4.多管理机双网络配置5.5.通信网络的连接六、使用说明6.1.一般术语6.2.键盘布局及按键功能面板布局键盘功能6.3.系统层次菜单一级设置菜单二级设置子菜单6.4.系统工具系统自诊断通道测试电表地址设置传动试验系统组态七、调试说明7.1.通电前检查项目7.2.通电检查7.3.系统联调7.4.运行后注意事项八、常见问题及解决8.1.一般性故障及排除8.2.软件故障九、技术支持及软件升级十、声明十一、外形及安装十二、定货须知附录一系统数据库附录二 CAN总线简介附录三远动通信规约附录四调试接口附录五 IAP文件服务器简介附录六客户意见反馈表一.功能概述DMP500Z是以Intel第四代单片微机Intel80296SA为核心构成的新一代通讯管理装置,是变电站综合自动化系统信息管理和流通的中枢。
具有如下功能:1)装置具有10路RS-232口,2路RS-485接口,1路CAN网接口。
2)扩展配置支持同步串行数据传输,增加8路RS232C端口,2路RS422接口3)扩展配置可具备本地打印功能,提供1路FSK信号,一个Modem接口4)扩展配置可具备网络功能,提供10M/100M以太网接口和光纤接口5)扩展配置可具备远程在线诊断功能,能够检测装置软硬件故障6)扩展配置可提供双网功能,并支持路由选择.7)提供当地及远动通讯口。
8)提供与变电站其他智能装置通信口。
9)具有事故总信号、预告总信号出口。
10)具有对两个主变档位的遥测、遥调功能。
11)负责各单元装置的数据采集和数据转发。
12)多机热备用功能。
通常情况下,一机执行通讯管理功能,其余管理机处于备用状态,当运行的一机发生故障时,备用机自动通入运行。
13)通信端口参数现场设置功能。
可调节9个通讯端口的波特率、校验方式、流控制方式,支持硬件流控制和软件流控制.14)实时数据就地显示。
可在液晶面板上的“实时数据”一项观察16M存储区内的所有实时数据,使程序运行透明化。
15)面板直接发送报文功能。
超越以前只能由监控系统通过通讯管理机转发报文的极限,可从液晶面板上直接编辑报文并发送到各个保护装置。
16) 远动协议现场配置功能。
可在面板上直接设定各个通讯端口与所接数字化装置正确通信的协议。
17) 应用程序本地下载和远程在线升级功能。
18) 通道诊断功能.产生伪随机码,测试数据流的时延和误码.19) 错误捕获机制能够捕捉代码错误和误操作,作出操作失败记录.20) 可靠性高,平均无故障工作时间长.二.主要技术指标额定工作电压220V AC/DC(70%-130%)功率消耗不大于8W允许环境温度正常工作温度:-10℃~55℃极限工作温度:-25℃~75℃抗电强度: 2500AC 60S平均无故障工作时间:MTBF>5000h通讯速度:●通过CAN网口与保护测控单元通讯速率1250KBS,通讯距离2KM左右,可接入110个单元节点●通过485备网与保护测控单元连接,速率9600bps,通讯距离1km,可接入128个单元节点。
●每路RS-232口的通讯速率均可通过液晶面板进行调节。
波特率可按用户需要设置为300、600、1200、2400、4800、9600、19200、38400 。
远动规约● DL/T634-1997(IEC60870-5-101传输规约)● DL/T667-1999(IEC60870-5-103传输规约)● DL/T451-1991循环式远动规约●南京力导监控规约调试接口●南京力导仿真调试规约三、硬件组成DMP501型通讯管理机是基于Intel第四代单片微机80296SA、CPLD及高性能的通信控制器设计而成,配合周边接口模件实现了对DMP5xx系列保护/测控节点机的组网和数据采集。
它主要由下列模件组成:电源模件、CPU模件、开入开出模件、背板模件、液晶显示模件,可扩展通信部件、通道测试模件。
结构上采用全封闭金属机箱,各模件之间有金属屏蔽板,减少电磁干扰的影响。
DMP501Z通讯管理机的配置如图3-1所示。
. 基本配置DMP501Z CPU主板和背板采用单端他激控制方式,交直流兼容,输出提供短路保护和过压保护。
模块输出两组±5V,±12V,+24V,各组电压均不共地,且采用浮地方式,同外壳不相连。
由红色LED灯指示运行状态。
电源模件结构如图3-2所示。
由于电源滤波器、开关变压器和控制回路的精心设计使得电源模块的电磁辐射很小,稳定性和可靠性也得到很好的保证。
通信扩展模块为DMP501Z提供了两个RS485/422接口、CAN总线驱动器和一个调试RS232接口(对应端子为TX12和RX12及RTS12)。
经过增强驱动的CAN 总线可以直接驱动110个节点,485总线可以直接驱动128个节点。
调试232接口为现场监视485总线上的数据流提供了便利。
模块布局图如图3-3所示。
图3-2 开关电源模块结构示意图图中,红色的指示灯HL501和HL503分别表示CAN总线和485口0的发送指示灯,而HL502和HL504则分别表示CAN总线和485口0的接收指示灯。
跳线SA501则用来选择将485口0或485口1连接至调试232口。
当跳线位于0位时可监视485口0,位于1位时监视485口1。
图3-3 通信扩展模块布局示意图开入开出模件完成开入量采集和遥控出口。
接在220V系统中的开关量信号,经光电隔离后转换成TTL电平输入到CPU组件板。
开出的控制信号经光电隔离后输出至开入开出模件控制继电器动作。
DMP501Z通信管理机的开入开出模件提供事故总信号和预告总信号继电器节点各一对,出口继电器的节点容量为250V。
装置还另提供六对继电器节点,这六对节点通常用于调整变压器分接头位置。
DMP501Z一共可以采集16路开入量,其中一个用于检测信号复归按纽的状态。
一般情况下,主变分接头位置是通过DMP501Z的开入开出板采集的。
在开入量不够的情况下,DMP501Z通过开关量编码器将主变档位遥信位置编码成BCD码输入。
缺省情况下,DMP501Z把主变分接头位置转换成遥测量上送,根据用户需求可同时上送遥信位置。
液晶显示模件该模件为整个装置的人机接口模件,装有大屏幕液晶显示器及键盘,完成人机之间的对话。
.CPU模件该模件是整个装置的核心部分,采用高速先进的80C296SA处理器,处理频率最高可达50MHZ,可寻址6M字节空间,存储空间和代码执行时间不再是约束程序的瓶颈,为增加程序的可靠性而增加的代码将不会影响速度和性能。
功能强大的通讯控制处理器件TL16C754,一次可连续写入64个字节的数据,且具有强大的流控制功能,提供了对打印机和调制解调器的有力支持。
它的运用,一方面使软件的开销大大减少,提高了编程的效率,另一方面也为与更加先进的智能设备通讯提供了硬件上的各种支持。
CPU组件的原理框图如下图3-5所示。
CPU组件的布局如图3-6所示,组件采用了两片Flash存储器,一片加载引导程序,一片加载用户程序。
在引导程序的支持下实现了IAP(In Application Program)。
本地下载时将下载电缆接入RJ11接口X301,实现用户程序升级,有关下载用户程序的方法参照《IAP文件服务器用户手册》。
图中共有四个跳线器,其作用如下:X103—无条件下载选择,跳线跳至PROG端时可以无条件下载用户程序,在此情况下,用户程序不会被调度执行,通常在用户程序发生致命的错误时使用,此时可强行更新用户程序。
跳线在另一位置时为有条件下载模式,其条件是用户程序不能有致命的错误使系统包括引导程序不能正常运行。
在这种情况下,编程之后约两分钟或系统复位后,用户程序被调度执行。
如果需要重新编程可在此下载用户程序。
X101—CPU 运行速率选择,X101的两个跳线均跳至1时,系统运行在50MHz ,图3-5 CPU 组件原理示意图不跳线或跳线在0位置时,系统运行在12MHz ,其他时候运行在25MHz ,出厂时预置在50MHz ,建议终端用户不要更改该跳线。
X102—在线仿真允许,跳线器在ONCE 位置时,CPU 停止工作进入在线仿真模式,出厂时禁止在线仿真,建议终端用户不要修改。
X302—为串行口配置跳线,缺省或跳线在0位时,各个通信端口相互独立。
跳线位置在1时,外部端口4、5、6、7均被配置到通信端口4,即由通信控制器的4#端口控制外部的四个端口,从而实现以RS232电平一拖四,在这种状态下,通信控制器的5、6、7端口无法再用,处于空闲状态。
跳线器在其他位置时可分别把端口5、6或端口5重新配置到端口4。
通常该跳线由技术人员设定。
图3-6 CPU模件布局示意图在CPU组件上有两组共16个指示灯,他们用来指示通信端口的工作状态,从指示灯闪烁的状况可以初步断定通信链路的物理连接状况。
其中对发送组,若从上到下顺序,依次为端口0—端口7的发送指示灯,而对接收来说,从上到下依次是端口0—端口7的接收指示灯。
当某端口有数据发送或接收到数据时,相应的指示灯的将会闪烁。
指示灯闪烁的时间和频率与收发数据量和通信速率有关。
. 扩展部件当DMP501Z的基本配置不能满足要求时,用户可以购置扩充部件来增强功能或接口,有关扩充部件的技术条件本手册不再列出,请在申购时另行索取。
