英语字帖打印版教学文案
英语练字字帖范文
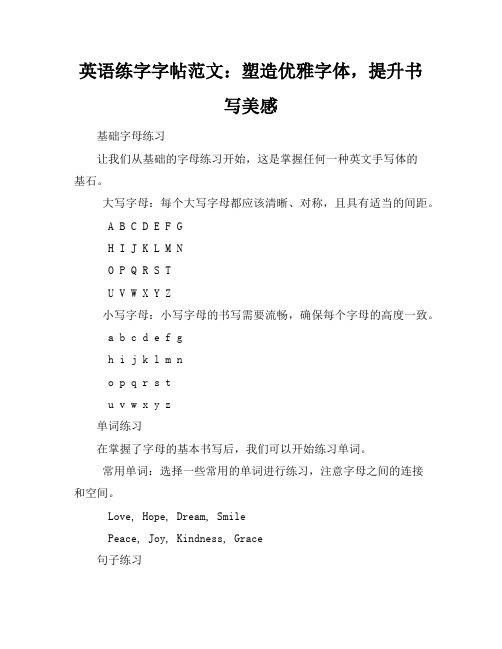
英语练字字帖范文:塑造优雅字体,提升书写美感基础字母练习让我们从基础的字母练习开始,这是掌握任何一种英文手写体的基石。
大写字母:每个大写字母都应该清晰、对称,且具有适当的间距。
A B C D E F GH I J K L M NO P Q R S TU V W X Y Z小写字母:小写字母的书写需要流畅,确保每个字母的高度一致。
a b c d e f gh i j k l m no p q r s tu v w x y z单词练习在掌握了字母的基本书写后,我们可以开始练习单词。
常用单词:选择一些常用的单词进行练习,注意字母之间的连接和空间。
Love, Hope, Dream, SmilePeace, Joy, Kindness, Grace句子练习句子练习可以帮助您更好地理解字与字之间的节奏和平衡。
简单句子:从简单的句子开始,逐步增加难度。
The future depends on what you do today.A journey of a thousand miles begins with a single step.段落练习进行段落练习,这有助于您在书写长文本时保持风格的一致性。
经典段落:选择一段经典文学作品中的段落进行练习。
To be, or not to be: that is the question.Whether 'tis nobler in the mind to sufferThe slings and arrows of outrageous fortune,Or to take arms against a sea of troublesAnd opposing end them.观察:仔细观察每个字母的形状和结构。
模仿:尽量模仿字帖中的字体样式。
耐心:练字需要时间和耐心,不要急于求成。
享受:享受书写的过程,感受每一个笔画的韵律。
通过这份字帖范文的练习,您将逐渐提升英文书写的艺术性和美感。
最全-英语英文书法手写字帖大合集电子教案

最全-英语英文书法手写字帖大合集使用英文书法字帖:意大利体1•手写印刷体(楷书)① 宽松式写法 ABC E F 6 H I 」K L M-忖:~6—P~b R S T U V~ W~sX Y Z才 p f gnlr 「寸二Jc _. I m.② 紧凑式M 写法 _ ________ ■一 :―_ _-ru. ------------------------------------------------------------------------------------------------------------------------------------------------------- ------------ --- 一 r-BBMV - : wan ar 斤迪一匸0 —旷尸卡H 」一^J UM MG 卡 Pk —$ Tr —fr 卅 X —JL 壬 u-v ff x-i pzzz③左斜式(- HF )写法n TT~ p-~£| 1JT :J StS —X 齐 zII ' 0匚D 2 FEW \ W七乂N G P Q R -£ T D Y④右斜式(10。
)写法斤芳CT—E F 6 // / ~mITS P廿石孑丁〃 1/处%Q b工d_" g h i寸匕—~7r~ q p q 厂5 十p—v /v x 乡z2.意大利体(行书)■■■ '' ■■ ■■・—I ■ i ■■ k— | ・・“ ‘■ ■ ■・「・■ —•—*~& P 0「5 T U 1/ V F^F 壬3.圆体(草书)①基本写法f e 扭卷士ynzzaL”比乎沪_______________________________ . -- ― _ - 一―― ■■ ■•—• ■- ■②装饰性写法(欧式草书)③变格位写法④法文写法0 甘CrtK讦七#Z⑤混成写法(规格要求:六线五格,斜度要求:30° ~35。
四年级上册册英语字帖人教版可打印

四年级上册册英语字帖人教版可打印全文共3篇示例,供读者参考篇1My English Handwriting Practice BookI love my English handwriting practice book! It's so cool and helps me practice writing all the letters and words we're learning in English class. The book has lots of different exercises to trace the letters and words. It makes practicing writing fun!At the start of the book, it has all the uppercase and lowercase letters. We trace over the dotted letter outlines to practice forming the letters properly. It's important to make the letters just right. My teacher says the way we write the letters now will stick with us, so we have to practice good habits.The letter tracing pages have arrows showing the direction to draw the pencil to shape each letter. It takes a bit of concentration, but I'm getting better each time I practice. The tricky ones for me are lowercase b, d, p and q because they have curved lines and you have to remember which way to draw the curve.After all the single letter practices, the book has us trace two and three letter words. These feel easier because we've practiced all the individual letters already. Still, you have to remember to leave a small space between each letter in a word.Then we move on to longer and longer words, up to words with 6 or 7 letters! Some of those are hard to trace without making a mistake. When I mess up, I try to trace over it again neatly. My teacher says not to scratch out my mistakes because that can tear the paper.The really long words toward the back of the book are extremely challenging. I have to say each letter sound slowly in my head as I write them. Words like "interesting," "geography," and "cucumber" require serious concentration! But doing all this tracing is helping me become a better writer.In addition to letter and word tracing, the book has us practice writing full sentences and even short paragraphs. We trace over the given sentences and paragraphs while saying each word out loud to ourselves. It's fun to practice writing sentences I've learned like "The brown dog ran home" and "Cats like to play with toys."For the paragraphs, we trace over each full line, going from top to bottom. The paragraphs have some new vocabulary butalso re-use words we've practiced before. By tracing the full paragraphs, I'm getting better at fitting longer passages on the line nicely without cramming letters at the end.My favorite pages are the fun activity worksheets at the very end of the book. One has me writing words for animals next to their pictures. Another prompts me to write a few sentences about my family members. These make handwriting practice entertaining!Overall, this handwriting book has been extremely helpful for improving my English writing abilities. My letters are becoming much neater, and I'm getting faster at recalling how to shape each one correctly. Tracing the words and sentences has expanded my vocabulary too. Pretty soon I'll need a new, harder handwriting book to keep progressing!Writing is just as important in English as any other subject. The more I practice good handwriting habits, the better writer I'll become. This book is giving me a strong foundation to build my English writing skills upon. Maybe one day I'll be able to write beautiful cursive! But for now, I'll keep tracing away, getting a little better each day. Thanks to handwriting practice books like this, my English writing will keep improving and improving. Writing is fun!篇2My English Handwriting BookHi there! My name is Emily and I'm a 4th grader. This year, we're using this really cool English handwriting book called the "PEP Edition" at school. It's awesome because the whole book can be printed out, so we don't have to write in a regular book. Instead, we get fresh new pages to practice our handwriting every day!When I first saw the handwriting book, I was a little nervous because it looked like a lot of work. But my English teacher, Mrs. Roberts, showed us how fun and easy it is to use. The book has different sections for each unit we learn, and we start by tracing over the new words and letters. It's kind of like connect-the-dots, but with letters instead of numbers.After we trace the words a few times, we move on to copying them on the line below. This part is a little trickier because we have to write the words completely by ourselves, without any guides. But Mrs. Roberts says that's how we'll really learn and improve our handwriting.My favorite part of the handwriting book is the space at the bottom of each page for "free writing." Once we've practiced thenew words, we can write anything we want in that space – stories, poems, jokes, you name it! I usually write about my day or something funny that happened. Sometimes I'll even try to use the new words we just learned.The really cool thing about having printable pages is that we can take them home and keep practicing. My mom hangs my best pages on the fridge so I can see how much neater my writing is getting. She says she's so proud of me for working hard on my English handwriting.Another great thing about the PEP handwriting book is that it has loads of colorful pictures and illustrations. They make the book feel really fun and not just like boring writing practice. There are cute little characters that pop up here and there, and each unit has a different theme with matching pictures. One unit篇3My English Handwriting Practice BookI really like my new English handwriting practice book for 4th grade! It's the PEP edition, which stands for People's Education Press. The cover is green and it has a picture of a pencil on the front. Inside there are lots of pages with rows of letters, words, and sentences for me to carefully copy in my best handwriting.The book starts off with all the letters of the alphabet, both capital and lowercase. First there are rows of just the letter A in capital and lowercase forms for me to trace and copy over and over. Then the same for the letter B, and so on through all 26 letters. Tracing and rewriting the letters so many times really helps me memorize their shapes and how to write them properly.After all the single letters, the book has sections for practicing writing combinations of letters that make up common letter patterns and sounds. Things like blends like "st", "spr", "fr", and digraphs like "th", "sh", "ch". Practicing these letter combinations helps me get ready to write whole words correctly.The next part of the book focuses on writing individual words, both basic vocabulary words and some more challenging ones. The words come with strokes showing you the proper way to write each letter in the word. I have to be really careful to follow the stroke orders.Some of the vocabulary words are things like "cat", "dog", "jump", "apple", and "friend". Pretty simple for a 4th grader like me. But then there are harder words too like "butterfly", "elephant", "transportation", and "telephone". The longer words with more complicated letter combinations are a good challenge for practicing my handwriting skills.In addition to vocabulary words, this section also has some shorter phrases and simple sentences for me to write out multiple times. Stuff like "I have a dog", "The sun is hot", "We go to school", etc. Writing complete sentences gets me ready for the longer passages at the end of the book.My favorite part is the cursive writing section! I just started learning cursive this year in 4th grade. The book has all the lowercase and capital cursive letters for me to trace and then rows to copy over and over. Cursive is a little trickier than print handwriting, so I need to practice it a lot to get it looking nice and neat with all the letters connected together.After the individual cursive letters, this part of the book has cursive words and phrases to copy as well. It's kind of likere-learning how to write words I already know, but in cursive form. Things like my name, basic vocabulary words, and short sentences. I feel really accomplished when I can finally write fluidly in cursive!Towards the end, the book has longer passages and paragraphs for handwriting practice. Some are adapted from stories and articles, while others are just generic sample passages. They use a mix of vocabulary words I've practiced, both in print and cursive. Copying longer paragraphs is excellentfor developing skills like spacing between words, using periods and capitals properly, and handwriting endurance.Neat handwriting is an important skill, so I'm really glad we get to use this handwriting practice book in our 4th grade English class. It makes doing all those repetitive tracing and copying exercises somewhat more interesting and purposeful than just doing them in a regular notebook. The book iswell-organized for systematically practicing all the basic handwriting components - letters, blends, words, sentences, paragraphs, and cursive too. By the end of 4th grade, my handwriting should look very neat and legible thanks to this workbook!。
译林三年级英语练字帖打印
译林三年级英语练字帖打印全文共四篇示例,供读者参考第一篇示例:译林三年级英语练字帖是为三年级学生设计的一套英语练字材料,旨在帮助学生提高英语书写能力和字母认知能力。
这套练字帖打印文件包括了包括大小写字母、单词、短语等各种内容,能够满足不同难度的学生需求。
这套练字帖的设计风格简洁明了,每一页都有一个或多个单词或短语,并附有对应的汉语翻译。
学生只需要按照提示写出对应的英文字母或单词,这样既可以训练书写能力,又可以帮助学生巩固基础知识。
在练字帖中,除了英文字母和单词的练习外,还包括了一些有趣的图片和图形,可以帮助学生更好地理解和记忆英语单词。
练字帖中还附有一些写字规范和笔画顺序的指导,帮助学生正确掌握书写技巧。
对于三年级的学生而言,在学习英语的练习书写是非常重要的。
通过练字帖的练习,学生不仅可以提高英语书写能力,还能够培养耐心和细心的习惯。
练字帖也可以帮助学生巩固所学知识,提高记忆力和理解能力。
译林三年级英语练字帖是一套非常实用和有效的学习材料,能够帮助学生在轻松的氛围中提高英语书写能力,是值得推荐的学习资源。
希望广大学生和家长都能够重视练字的重要性,通过不断的练习,提高英语书写水平,更好地掌握英语知识。
第二篇示例:译林三年级英语练字帖是一套专门为三年级学生设计的英语书写练习材料。
该练字帖旨在帮助学生提高英语书写能力,培养他们对英语字母和单词的认知,同时也可以锻炼学生的手写技巧。
今天我们就来详细介绍一下译林三年级英语练字帖。
译林三年级英语练字帖的内容包括了英语字母和单词的书写练习。
学生可以通过在练字帖上跟随指示,按照规定的书写顺序和笔画练习写英语字母和单词。
这样有助于学生掌握英语字母的形状和书写规范,提高他们的书写准确性和速度。
通过写单词的练习,学生也可以逐渐认识和记忆更多的英语词汇,拓展他们的词汇量。
译林三年级英语练字帖注重学生的字形美观和书写规范。
在练字帖上,每个字母和单词都有相应的书写顺序和笔画要求,学生需要按照这些要求一笔一画地书写,力求字形工整、规范。
英文字母书写字帖范文打印
英文字母书写字帖范文打印Title: English Alphabet Writing Workbook.Introduction:Welcome to our English Alphabet Writing Workbook! This workbook is designed to help you master the art of writing the English alphabet in a neat, legible, and consistent manner. Through practice and repetition, you will improve your handwriting skills and gain confidence in expressing yourself through written communication.Section 1: The Basics.Before we dive into the individual letters, it's important to understand the basics of English handwriting. This section covers essential elements like penmanship techniques, paper selection, and posture.Penmanship Techniques:Holding the Pen: Hold the pen firmly between your thumb and first two fingers, with the point of the pen resting on the paper. Avoid gripping the pen too tightly or too loosely.Stroke Length: Vary the length of your strokes to create a balance between large and small letters. Long strokes should be smooth and controlled, while short strokes should be precise and crisp.Letter Formation: Form each letter from the top-left corner of the letterbox, following the correct strokes and curves. Pay attention to the order of strokes and the direction of each stroke.Paper Selection:Choose a smooth, absorbent paper that is easy on the eyes and comfortable to write on. Avoid papers that are too shiny or too matte, as they can affect the appearance of your handwriting.Posture:Sit upright with your feet flat on the floor and your shoulders relaxed. Place your paper on a flat surface in front of you, and adjust the angle of your hand and wrist to maintain a comfortable writing position.Section 2: The Alphabet.Now let's move on to the individual letters of the English alphabet. Each letter is presented with a clear diagram, stroke-by-stroke instructions, and practice exercises.A: Begin with a vertical stroke, then add a horizontal stroke at the top. Make sure the horizontal stroke is level and extends slightly beyond the vertical stroke on both sides.B: Start with a vertical stroke, followed by a horizontal stroke at the top. Then, add a curved strokeconnecting the two. Make sure the curved stroke is smooth and extends beyond the vertical stroke on the right side.C: Draw a large curved stroke that starts at the top-left corner of the letterbox and ends at the bottom-right corner. Make sure the curve is smooth and symmetrical.D: Begin with a vertical stroke, then add a curved stroke on the top-right side. The curved stroke should extend beyond the vertical stroke on the right side and curve back towards the left.E: Draw a vertical stroke, followed by a horizontal stroke at the top. Then, add three short horizontal strokes below the main horizontal stroke. Make sure the spaces between the strokes are equal.F: Start with a vertical stroke, followed by a horizontal stroke at the top. Then, add two shorthorizontal strokes below the main horizontal stroke. The second horizontal stroke should be slightly longer than the first.G: Draw a large curved stroke that starts at the top-left corner of the letterbox and ends at the bottom-right corner. Add a small horizontal stroke at the bottom of the curved stroke to close the letter.H: Begin with two vertical strokes that are parallel and touch at the top. Make sure the strokes are equal in length and spacing.I: Draw a tall vertical stroke that is straight and slightly thinner at the top.J: Start with a vertical stroke that curves slightly towards the right at the bottom. Then, add a hook-shaped stroke at the top-right corner of the letterbox to form the dot of the letter.K: Begin with a vertical stroke, followed by a diagonal stroke that curves towards the left. Make sure the diagonal stroke extends beyond the vertical stroke on the left side and curves back towards the right.L: Draw a vertical stroke that is straight and slightly thinner at the top. The stroke should extend all the way to the bottom-right corner of the letterbox.M: Start with two parallel vertical strokes that are wider at the top and narrower at the bottom. The strokes should curve slightly towards each other in the middle.N: Begin with a vertical stroke, followed by a diagonal stroke that curves towards the left. The diagonal stroke should be parallel to the vertical stroke and slightly longer.O: Draw a large curved stroke that starts at the top-left corner of the letterbox and ends at the bottom-right corner. Make sure the curve is smooth and symmetrical.P: Start with a vertical stroke, followed by a curved stroke on the top-right side. The curved stroke should extend beyond the vertical stroke on the right side and curve back towards the left. Add a small horizontal strokeat the bottom of the vertical stroke to close the letter.Q: Draw a large curved stroke that starts at the top-left corner of the letterbox and ends at the bottom-right corner. Add a small tail-shaped stroke at the bottom-right corner to form the tail of the letter.R: Begin with a vertical stroke, followed by a curved stroke on the top-right side. The curved stroke should extend beyond the vertical stroke on the right side and curve back towards the left. Add a small diagonal stroke at the bottom-right corner to form the leg of the letter.S: Draw a curved stroke that starts at the top-left corner of the letterbox and curves down towards the right. Then, add a smaller curved stroke at the bottom that curves up towards the left. Make sure the curves are smooth and symmetrical.T: Begin with a vertical stroke that is straight and slightly thinner at the top. Add a short horizontal stroke at the top of the vertical stroke to form the crossbar.U: Draw two parallel curved strokes that are wider at the top and narrower at the bottom. The strokes should curve slightly towards each other in the middle.V: Start with two diagonal strokes that curve towards each other in the middle. Make sure the strokes are equalin length and spacing.W: Begin with two parallel diagonal strokes that curve towards each other in the middle. Add a third diagonal stroke that is shorter and curves towards the left between the other two strokes.X: Draw two diagonal strokes that cross each other in the middle. Make sure the strokes are equal in length and spacing.Y: Start with a diagonal stroke that curves towards the right. Then, add a shorter diagonal stroke that curves towards the left and extends beyond the first stroke on the left side.Z: Draw a zigzag stroke that starts at the top-left corner of the letterbox and ends at the bottom-right corner. Make sure the zigzag is smooth and symmetrical.Section 3: Practice Exercises.To巩固 your learning and improve your handwriting skills, we have included a series of practice exercises in this workbook. These exercises include tracing letters, writing letters in the correct order, and copying sample sentences. Practice regularly and consistently to achieve better results.Conclusion:Congratulations on completing our English Alphabet Writing Workbook! We hope that this workbook has helped you improve your handwriting skills and gain confidence in expressing yourself through written communication. Keep practicing and remember to have fun while writing!。
英文字母字帖描红打印
英文字母字帖描红打印英文字母是从我们小学就开始学习的,它是基础中的基础,熟练掌握英文字母的写法和发音对于后面的英语学习有很大的帮助。
因为字母书写规范,要求字母形状要标准,大小要一致,书写速度要快,这些都要求我们能够准确地掌握英文字母的书写规范。
下面将给大家介绍一些常用的英文字母字帖描红,帮助大家更好地掌握英文字母的书写规范。
首先,从字母“A”开始,它是全英语字母表中的第一个字母,也是我们学习英语的第一个字母,因此掌握它的书写非常重要。
写“A”字母时,要尽可能地让它看起来像一个标准的“V”字形,上下两个角度准确相等,没有一边比另一边长或短,这样的“A”字母才能符合书写规范。
此外,“A”字母的“小写形式”还需要注意,它的书写和大写形式基本相同,只是形状更小,结构更简单,因此在书写时要注意稳定手势,慢慢操练,才能达到书写规范。
接下来是字母“B”,它看起来像个“8”的形状,但是书写时需要注意要将两个圆圈搭配得当,确保左边的圆圈略微大一些,右边的圆圈略微小一些,然后在两个圆圈之间添加一条直线,这才是符合规范的“B”字母。
不过,注意在书写时要控制好笔画的粗细,保证书写的效果干净、整齐。
再来看看字母“C”,它看起来像个“月亮”形状,书写时需要注意两个角度的相等和两个圆弧的贴合,使得整个字母看起来轻盈而优雅。
同时,需要注意“C”字母的横线和竖线的比例,这样才能让“C”字母看起来更加匀称。
需要强调的是,“C”字母需要一气呵成的书写,并且笔画清晰、稳健,这才能达到规范要求。
字母“D”看起来像个“反向的B”字母,两个圆形之间需要采用一个类似反向标点符号的竖线将两个圆圈连起来。
此外,“D”字母在书写时需要略微放松手腕,让笔画流畅、自然,同时注意横线、竖线的比例,使得字母看起来更加匀称。
字母“E”和字母“F”看起来非常相似,因此在书写时需要注意两者的区分,避免写错。
对于“E”字母,需要注意两个横线的长度相等,而且需要与竖线平行,不能太斜,否则影响整个字母的匀称性。
英文字母字帖描红打印

英文字母字帖描红打印1. 字母 A 的描红写法:字母 A 的写法相对简单,先画一个向下的斜线,再加一条横线连接到顶部,形成一个带上横杠的 V 字形。
接着,在 A 的左下方再作一条水平线连接到 V 字形左侧,即可完成字母 A的书写。
2. 字母 B 的描红写法:首先,在纸上画出一个小圆圈,接着向下拉一条向右的弯曲线,由于 B 的右侧有一条长直线,所以需重新作一条向上的弯曲线,并从小圆圈位置去连接。
最后,在 B 的底部作一条水平线来完成该字母的书写。
3. 字母 C 的描红写法:书写 C 时,先作一个大环形,再在环形最右边作一条向左的小弯曲线,即可完成此字母。
重点是要掌握好环形的大小和方向,可以多次练习以获得稳定的笔画。
4. 字母 D 的描红写法:D 的硬笔书写首先要画一个小圆圈,再向右拉出一条弯曲的线,之后向下拉出一条直线,再从左下角拉回一条向上的线与圆圈相连,即可书写出完整的 D 字母。
5. 字母 E 的描红写法:E 的写法相对简单,首先画出一个竖直的长条,再在其右侧横向画一条线,中间再用横线分开,形成 E 的基本形态,需要注意的是,两侧的横线需要与竖线相连。
6. 字母 F 的描红写法:书写 F 时,需要先画一个竖直的长条,再在其中间横向画一条线,但与 E 不同的是,F 的横线只连接长条左侧的竖条,右侧则遗留出一段空隙。
7. 字母 G 的描红写法:G 的书写必须先画一个大环,再接一条弯曲向下的线作为右侧的边,再向左拉一条曲线,再从左侧拉回一条向上的线,最后再从环形下面带出一条线连接到弯曲线。
常见问题是环形的大小不一致,书写时应该注意保持住环形大小的稳定。
六年级英语字帖打印
六年級英语字帖打印六年级英语字帖打印一、选择合适的字帖六年级英语字帖打印,首先需要选择适合的字帖。
在选择字帖时,我们要考虑字帖的教学内容是否符合六年级英语的学习要求。
可以根据学科教材的内容和教学进度来决定字帖的选择,以便帮助学生巩固英语基础知识。
二、确认打印格式和要求在打印英语字帖之前,需要确认打印格式和要求。
我们要确定字体的大小、样式和排版方式,以确保打印出的字帖清晰可读。
此外,还要注意打印纸的质量和大小,选择适合的打印机设置,以获得最佳的打印效果。
三、准备打印材料和工具在进行英语字帖打印之前,要准备好打印所需的材料和工具。
首先,我们需要准备好电脑、打印机和打印纸。
其次,要确保打印机连接正常,墨盒有足够的墨水,并且打印机的驱动程序已经安装好。
最后,还要准备好待打印的字帖文件,在电脑上进行必要的编辑和调整。
四、打印前的调试和预览在进行英语字帖打印之前,需要进行打印前的调试和预览。
我们可以通过打印预览功能来查看字帖的打印效果,确认是否符合要求。
如果打印出来的字迹模糊或排版不正确,就需要对打印设置进行调整或修改字帖文件,以确保打印结果的质量和准确性。
五、开始打印字帖一切准备就绪后,可以开始打印英语字帖了。
在打印过程中,要确保打印机和电脑的正常运作,并注意打印过程中的任何异常情况及时处理。
打印完成后,可以检查打印结果,确认字帖的质量和完整性。
六、保存和整理打印结果完成字帖打印后,我们需要保存和整理打印结果。
可以将打印的字帖装订成册,方便学生使用和保管。
同时,要将打印的字帖与学科教材进行对照,帮助学生巩固所学知识,并及时纠正写字错误,提高英语写作水平。
以上是六年级英语字帖打印的相关内容。
通过正确选择字帖、确认打印格式和要求、准备打印材料和工具、调试预览、开始打印字帖以及保存和整理打印结果这些步骤,我们可以顺利完成英语字帖的打印任务,为学生提供良好的学习资源和学习环境。
希望这篇文档能够对你有所帮助!。
英文字母字帖描红打印
英文字母字帖描红打印
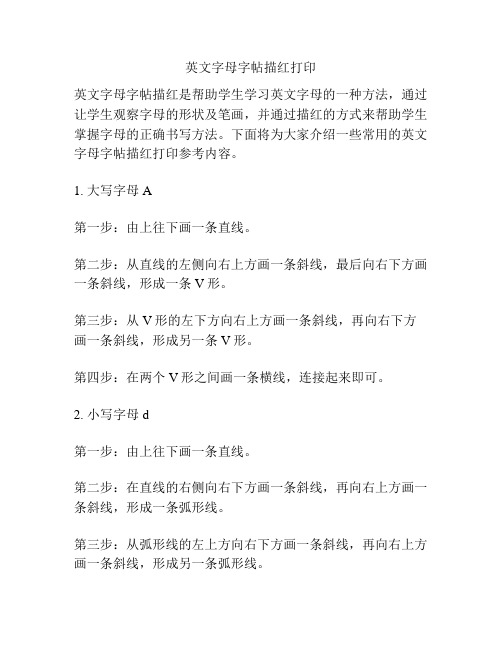
英文字母字帖描红是帮助学生学习英文字母的一种方法,通过让学生观察字母的形状及笔画,并通过描红的方式来帮助学生掌握字母的正确书写方法。
下面将为大家介绍一些常用的英文字母字帖描红打印参考内容。
1. 大写字母A
第一步:由上往下画一条直线。
第二步:从直线的左侧向右上方画一条斜线,最后向右下方画一条斜线,形成一条V形。
第三步:从V形的左下方向右上方画一条斜线,再向右下方画一条斜线,形成另一条V形。
第四步:在两个V形之间画一条横线,连接起来即可。
2. 小写字母d
第一步:由上往下画一条直线。
第二步:在直线的右侧向右下方画一条斜线,再向右上方画一条斜线,形成一条弧形线。
第三步:从弧形线的左上方向右下方画一条斜线,再向右上方画一条斜线,形成另一条弧形线。
第四步:在两条弧形线之间画一条垂直于直线的小横线,连接起来即可。
3. 大写字母Z
第一步:由上往下画一条竖线。
第二步:从竖线的左侧向右上方画一条斜线,再向右下方画一条斜线,形成一条V形。
第三步:从V形的右侧向右上方画一条斜线,再向右下方画
一条斜线,形成另一条V形。
第四步:在两条V形之间画一条横线,连接起来即可。
以上就是一些常用的英文字母字帖描红打印内容,通过这些参考内容,学生可以更好地掌握英文字母的正确书写方法。
同时,在学习英文字母的过程中,也应注重练习字母的连写,提高书写水平和速度。