arduino语言
Arduino编程语言
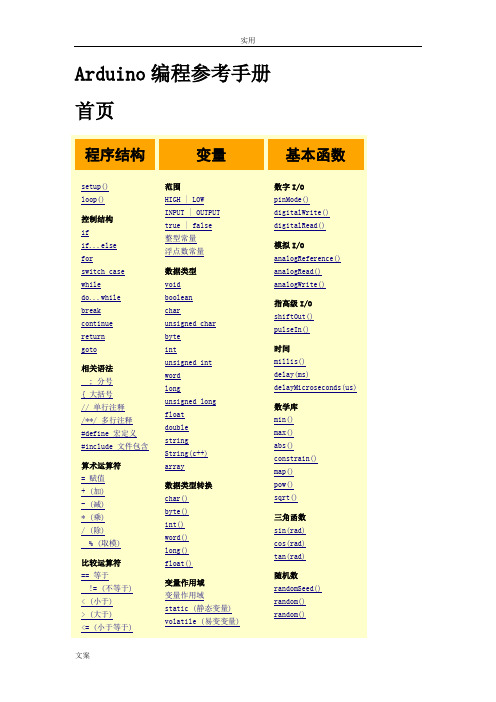
Arduino编程参考手册首页程序结构(本节直译自Arduino官网最新Reference)在Arduino中, 标准的程序入口main函数在内部被定义, 用户只需要关心以下两个函数:setup()当Arduino板起动时setup()函数会被调用。
用它来初始化变量,引脚模式,开始使用某个库,等等。
该函数在Arduino板的每次上电和复位时只运行一次。
loop()在创建setup函数,该函数初始化和设置初始值,loop()函数所做事的正如其名,连续循环,允许你的程序改变状态和响应事件。
可以用它来实时控制arduino板。
示例:控制语句ifif,用于与比较运算符结合使用,测试是否已达到某些条件,例如一个输入数据在某个范围之外。
使用格式如下:该程序测试value是否大于50。
如果是,程序将执行特定的动作。
换句话说,如果圆括号中的语句为真,大括号中的语句就会执行。
如果不是,程序将跳过这段代码。
大括号可以被省略,如果这么做,下一行(以分号结尾)将成为唯一的条件语句。
圆括号中要被计算的语句需要一个或多个操作符。
if...else与基本的if语句相比,由于允许多个测试组合在一起,if/else可以使用更多的控制流。
例如,可以测试一个模拟量输入,如果输入值小于500,则采取一个动作,而如果输入值大于或等于500,则采取另一个动作。
代码看起来像是这样:else中可以进行另一个if测试,这样多个相互独立的测试就可以同时进行。
每一个测试一个接一个地执行直到遇到一个测试为真为止。
当发现一个测试条件为真时,与其关联的代码块就会执行,然后程序将跳到完整的if/else结构的下一行。
如果没有一个测试被验证为真。
缺省的else语句块,如果存在的话,将被设为默认行为,并执行。
注意:一个else if语句块可能有或者没有终止else语句块,同理。
每个else if分支允许有无限多个。
另外一种表达互斥分支测试的方式,是使用switch case语句。
Arduino编程语言参考大全
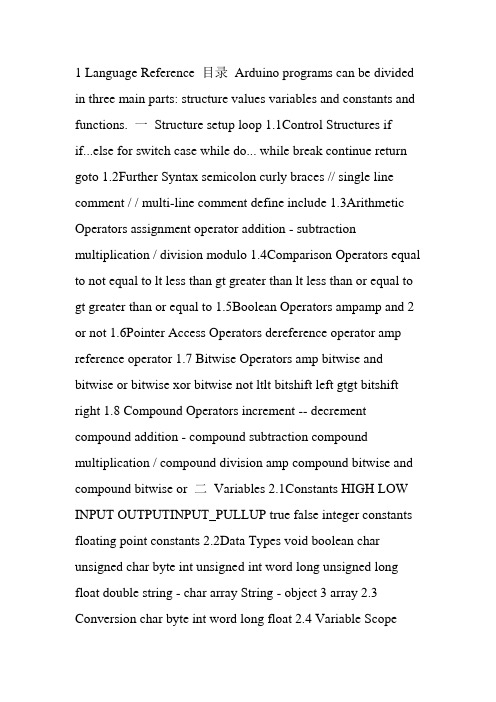
1 Language Reference 目录Arduino programs can be divided in three main parts: structure values variables and constants and functions. 一Structure setup loop 1.1Control Structures if if...else for switch case while do... while break continue return goto 1.2Further Syntax semicolon curly braces // single line comment / / multi-line comment define include 1.3Arithmetic Operators assignment operator addition - subtraction multiplication / division modulo 1.4Comparison Operators equal to not equal to lt less than gt greater than lt less than or equal to gt greater than or equal to 1.5Boolean Operators ampamp and2 or not 1.6Pointer Access Operators dereference operator amp reference operator 1.7 Bitwise Operators amp bitwise and bitwise or bitwise xor bitwise not ltlt bitshift left gtgt bitshift right 1.8 Compound Operators increment -- decrement compound addition - compound subtraction compound multiplication / compound division amp compound bitwise and compound bitwise or 二Variables 2.1Constants HIGH LOW INPUT OUTPUTINPUT_PULLUP true false integer constants floating point constants 2.2Data Types void boolean char unsigned char byte int unsigned int word long unsigned long float double string - char array String - object3 array 2.3 Conversion char byte int word long float 2.4 Variable Scopeamp Qualifiers variable scope static volatile const 2.5 Utilities sizeof 三Functions 3.1Digital I/O pinMode digitalWrite digitalRead 3.2 Analog I/O analogReference analogRead analogWrite - PWM 3.3 Advanced I/O tone noTone shiftOut shiftIn pulseIn 3.4 Time millis micros delay delayMicroseconds 3.5 Math min max abs constrain map pow sqrt 4 3.6 Trigonometry sin cos tan 3.7 Random Numbers randomSeed random 3.8 Bits and Bytes lowByte highByte bitRead bitWrite bitSet bitClear bit 3.9 External Interrupts attachInterrupt detachInterrupt 3.10 Interrupts interrupts noInterrupts 3.11 Communication Serial Stream 3.12 Leonardo Specific Keyboard Mouse Looking for something else See the libraries page for interfacing with particular types of hardware. Try the list of community-contributed code. The Arduino language is based on C/C. It links against AVR Libc and allows the use of any of its functions see its user manual for details. 5 Structure setup loop setup The setup function is called when a sketch starts. Use it to initialize variables pin modes start using libraries etc. The setup function will only run once after each powerup or reset of the Arduino board. Example int buttonPin 3 void setupSerial.begin9600 pinModebuttonPin INPUT void loop // ... loop After creating a setup function which initializes and sets theinitial values the loop function does precisely what its name suggests and loops consecutively allowing your program to change and respond. Use it to actively control the Arduino board. Example int buttonPin 3 // setup initializes serial and the button pin void setup beginSerial9600 pinModebuttonPin INPUT // loop checks the button pin each time // and will send serial if it is pressed 6 void loop if digitalReadbuttonPin HIGH serialWriteH else serialWriteL delay1000 Control Structures if if...else for switch case while do... while break continue return goto if conditional and lt gt comparison operators if which is used in conjunction with a comparison operator tests whether a certain condition has been reached such as an input being abovea certain number. The format for an if test is: if someVariable gt50 // do something here The program tests to see if someVariable is greater than 50. If it is the program takes a particular action. Put another way if the statement in parentheses is true the statements inside the brackets are run. If not the program skips over the code. 7 The brackets may be omitted after an if statement. If this is done the next line defined by the semicolon becomes the only conditional statement. if x gt 120 digitalWriteLEDpin HIGH if x gt 120 digitalWriteLEDpin HIGH if x gt 120 digitalWriteLEDpin HIGH if x gt 120digitalWriteLEDpin1 HIGH digitalWriteLEDpin2 HIGH // all are correct The statements being evaluated inside the parentheses require the use of one or more operators: Comparison Operators: x y x is equal to y x y x is not equal to y x lt y x is less than y x gt y x is greater than y x lt y x is less than or equal to y x gt y x is greater than or equal to y Warning: Beware of accidentally using the single equal sign e.g. if x 10 . The single equal sign is the assignment operator and sets x to 10 puts the value 10 into the variable x. Instead use the double equal sign e.g. if x 10 which is the comparison operator and tests whether x is equal to 10 or not. The latter statement is only true if x equals 10 but the former statement will always be true. This is because C evaluates the statement if x10 as follows: 10 is assigned to x remember that the single equal sign is the assignment operator so x now contains 10. Then the if conditional evaluates 10 which always evaluates to TRUE since any non-zero number evaluates to TRUE. Consequently if x 10 will always evaluate to TRUE which is not the desired result when using an if statement. Additionally the variable x will be set to 10 which is also not a desired action. if can also be part of a branching control structure using the if...else construction. Reference Home if / else if/else allows greater control over theflow of code than the basic if statement by allowing multiple tests to be grouped together. For example an analog input could be tested and one action taken if the input was less than 500 and another action taken if the input was 500 or greater. The code would look like this: 8 if pinFiveInput lt 500 // action A else // action B else can proceed another if test so that multiple mutually exclusive tests can be run at the same time. Each test will proceed to the next one until a true test is encountered. When a true test is found its associated block of code is run and the program then skips to the line following the entire if/else construction. If no test proves to be true the default else block is executed if one is present and sets the default behavior. Note that an else if block may be used with or without a terminating else block and vice versa. An unlimited number of such else if branches is allowed. if pinFiveInput lt 500 // do Thing A else if pinFiveInput gt 1000 // do Thing B else // do Thing C Another way to express branching mutually exclusive tests is with the switch case statement. for statements Desciption The for statement is used to repeat a block of statements enclosed in curly braces. An increment counter is usually used to increment and terminate the loop. The for statement is useful for any repetitive operation and is often used in combination with arraysto operate on collections of data/pins. There are three parts to the for loop header: for initialization condition increment//statements 9 The initialization happens first and exactly once. Each time through the loop the condition is tested if its true the statement block and the increment is executed then the condition is tested again. When the condition becomes false the loop ends. Example // Dim an LED using a PWM pin int PWMpin 10 // LED in series with 470 ohm resistor on pin 10 void setup // no setup needed void loop for int i0 i lt 255 i analogWritePWMpin i delay10 Coding Tips The C for loop is much more flexible than for loops found in some other computer languages including BASIC. Any or all of the three header elements may be omitted although the semicolons are required. Also the statements for initialization condition and increment can be any valid C statements with unrelated variables and use any C datatypes including floats. These types of unusual for statements may provide solutions to some rare programming problems. For example using a multiplication in the increment line will generate a logarithmic progression: forint x 2 x lt 100 x x 1.5 printlnx 10 Generates: 23469131928426394 Another example fade an LED up and down with one for loop: void loop int x 1 for int i 0 i gt -1 i i x analogWritePWMpin i if i 255 x -1 //switch direction at peak delay10 switch / case statements Like if statements switch...case controls the flow of programs by allowing programmers to specify different code that should be executed in various conditions. In particular a switch statement compares the value of a variable to the values specified in case statements. When a case statement is found whose value matches that of the variable the code in that case statement is run. The break keyword exits the switch statement and is typically used at the end of each case. Without a break statement the switch statement will continue executing the following expressions quotfalling-throughquot until a break or the end of the switch statement is reached. Example switch var case 1: //do something when var equals 1 break case 2: //do something when var equals 2 break default: // if nothing else matches do the default // default is optional Syntax switch var case label: // statements break case label: // statements break default: 11 // statements Parameters var: the variable whose value to compare to the various cases label: a value to compare the variable to while loops Description while loops will loop continuously and infinitely until the expression inside the parenthesis becomes false. Something must change the tested variable or the while loop will never exit. This could be in your code such as anincremented variable or an external condition such as testing a sensor. Syntax whileexpression // statements Parameters expression - a boolean C statement that evaluates to true or false Example var 0 whilevar lt 200 // do something repetitive 200 times var do - while The do loop works in the same manner as the while loop with the exception that the condition is tested at the end of the loop so the do loop will always run at least once. do // statement block while test condition Example do delay50 // wait for sensors to stabilize x readSensors // check the sensors while x lt 100 12 break break is used to exit from a do for or while loop bypassing the normal loop condition. It is also used to exit from a switch statement. Example for x 0 x lt 255 x digitalWritePWMpin x sens analogReadsensorPin if sens gt threshold // bail out on sensor detect x 0 break delay50 continue The continue statement skips the rest of the current iteration of a loop do for or while. It continues by checking the conditional expression of the loop and proceeding with any subsequent iterations. Example for x 0 x lt 255 x if x gt 40 ampamp x lt 120 // create jump in values continue digitalWritePWMpin x delay50 return Terminate a function and return a value from a function to the calling function if desired. Syntax: return return value // both forms are valid Parameters value: any variable or constanttype Examples: A function to compare a sensor input to a threshold 13 int checkSensor if analogRead0 gt 400 return 1 else return 0 The return keyword is handy to test a section of code without having to quotcomment outquot large sections of possibly buggy code. void loop // brilliant code idea to test here return // the rest of a dysfunctional sketch here // this code will never be executed goto Transfers program flow to a labeled point in the program Syntax label: goto label // sends program flow to the label Tip The use of goto is discouraged in C programming and some authors of C programming books claim that the goto statement is never necessary but used judiciously it can simplify certain programs. The reason that many programmers frown upon the use of goto is that with the unrestrained use of goto statements it is easy to create a program with undefined program flow which can never be debugged. With that said there are instances where a goto statement can come in handy and simplify coding. One of these situations is to break out of deeply nested for loops or if logic blocks on a certain condition. Example forbyte r 0 r lt 255 r forbyte g 255 g gt -1 g-- forbyte b 0 b lt 255 b if analogRead0 gt 250 goto bailout // more statements ... bailout: 14 Further Syntax semicolon curly braces // single line comment / / multi-linecomment define include semicolon Used to end a statement. Example int a 13 Tip Forgetting to end a line in a semicolon will result in a compiler error. The error text may be obvious and refer to a missing semicolon or it may not. If an impenetrable or seemingly illogical compiler error comes up one of the first things to check is a missing semicolon in the immediate vicinity preceding the line at which the compiler complained Curly Braces Curly braces also referred to as just quotbracesquot or as quotcurly bracketsquot are a major part of the C programming language. They are used in several different constructs outlined below and this can sometimes be confusing for beginners. An opening curly brace quotquot must always be followed by a closing curly brace quotquot. This is a condition that is often referred to as the braces being balanced. The Arduino IDE integrated development environment includes a convenient feature to check the balance of curly braces. Just select a brace or even click the insertion point immediately following a brace and its logical companion will be highlighted. At present this feature is slightly buggy as the IDE will often find incorrectly a brace in text that has been quotcommented out.quot 15 Beginning programmers and programmers coming to C from the BASIC language often find using braces confusing or daunting.After all the same curly braces replace the RETURN statement in a subroutine function the ENDIF statement in a conditional and the NEXT statement in a FOR loop. Because the use of the curly brace is so varied it is good programming practice to type the closing brace immediately after typing the opening brace when inserting a construct which requires curly braces. Then insert some carriage returns between your braces and begin inserting statements. Your braces and your attitude will never become unbalanced. Unbalanced braces can often lead to cryptic impenetrable compiler errors that can sometimes be hard to track down in a large program. Because of their varied usages braces are also incredibly important to the syntax of a program and moving a brace one or two lines will often dramatically affect the meaning of a program. The main uses of curly braces Functions void myfunctiondatatype argument statementss Loops while boolean expression statements do statements while boolean expression for initialisation termination condition incrementing expr statements Conditional statements if boolean expression statements else if boolean expression statements else 16 statements Comments Comments are lines in the program that are used to inform yourself or others about the way the program works. The.。
arduino语法
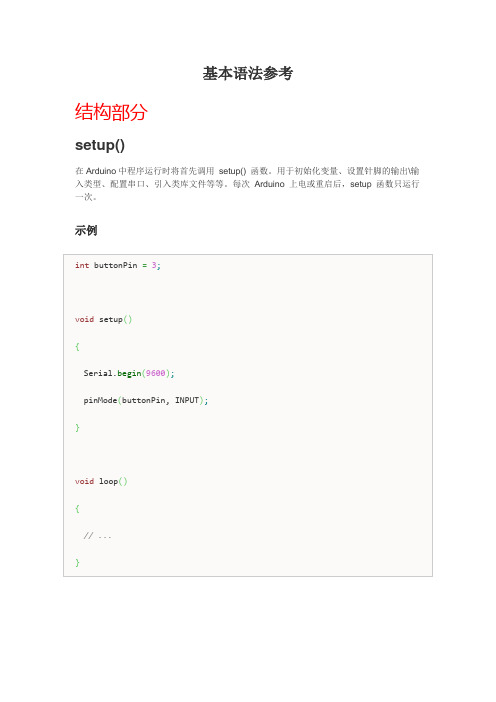
基本语法参考结构部分setup()在Arduino中程序运行时将首先调用setup() 函数。
用于初始化变量、设置针脚的输出\输入类型、配置串口、引入类库文件等等。
每次Arduino 上电或重启后,setup 函数只运行一次。
示例loop()在setup()函数中初始化和定义了变量,然后执行loop() 函数。
顾名思义,该函数在程序运行过程中不断的循环,根据一些反馈,相应改变执行情况。
通过该函数动态控制Arduino 主控板。
示例控制部分if(条件判断语句)和==、!=、<、>(比较运算符)if 语句与比较运算符一起用于检测某个条件是否达成,如某输入值是否在特定值之上等。
if 语句的语法是:本程序测试someVariable 变量的值是否大于50。
当大于50 时,执行一些语句。
换句话说,只要if 后面括号里的结果(称之为测试表达式)为真,则执行大括号中的语句(称之为执行语句块);若为假,则跳过大括号中的语句。
if 语句后的大括号可以省略。
若省略大括号,则只有一条语句(以分号结尾)成为执行语句。
在小括号里求值的表达式,需要以下操作符:比较运算操作符:警告:注意使用赋值运算符的情况(如if (x = 10))。
一个“=”表示的是赋值运算符,作用是将x 的值设为10(将值10 放入x 变量的内存中)。
两个“=”表示的是比较运算符(如if (x == 10)),用于测试x 和10 是否相等。
后面这个语句只有x 是10 时才为真,而前面赋值的那个语句则永远为真。
这是因为C 语言按以下规则进行运算if (x=10):10 赋值给x(只要非0 的数赋值的语句,其赋值表达式的值永远为真),因此x 现在值为10。
此时if 的测试表达式值为10,该值永远为真,因为非0 值永远为真。
所以,if (x = 10) 将永远为真,这就不是我们运行if 所期待的结果。
另外,x 被赋值为10,这也不是我们所期待的结果。
基于Arduino的嵌入式系统入门与实践-Arduino的编程语言
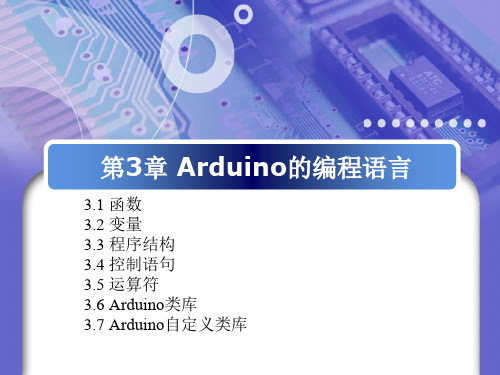
(1) delay() 功能:延时一段时间(单位为ms)。 语法格式:delay(ms)。 参数说明:ms:延时的毫秒数 (unsigned long型)。 返回值:无。
2
3.1 函数
例子:下面代码中,LED灯亮灭时间间隔是1秒钟。
int ledPin = 13;
// LED 连到 13引脚
20
3.1 函数
n 4 随机函数
(1)random() 功能:随机函数,产生伪随机数。 语法格式:random(max)和random(min, max)。 参数说明:min:随机数的下限值,可选;max:随机数的 上限值。 返回值:在min 和 max-1 (long类型)之间的随机数。
random() 不是真正的随机数发生器,每次程序执行时, 产生的序列是一样的。
19
3.1 函数
(13)isWhitespace() 功能:判断字符是否是空格、走纸('\f')、换行('\n')、回车('\ 水平制表符('\t')、垂直制表符 ('\v')。 语法格式:isWhitespace (thisChar)。 参数说明:thisChar:变量(char类型)。 返回值:如果字符是空格、走纸('\f')、换行('\n')、回车('\r' 水平制表符('\t')、垂直制表符 ('\v'),返回真;否则返回假。
y = map(x, 0, 255, 0, 1000); //将0~255映射为0~1000。 上下限也可以是负数。
9
3.1 函数
(4)max() 功能:计算两个数中的较大值。 语法格式:max(x, y)。 参数说明:x:第一个数据;y:第二个数据。 返回值:两个数中的较大者,二者可以为任意数据类型。 (5)min() 功能:计算两个数中的较小值。 语法格式:min(x, y)。 参数说明:x:第一个数据;y:第二个数据,二者可以为任 意数据类型。 返回值:两个数中的较小者。
Arduino语言
Arduino语言是建立在C/C++基础上的,其实也就是基础的C语言,Arduino语言只不过把AVR单片机(微控制器)相关的一些参数设置都函数化,不用我们去了解他的底层,让我们不了解AVR单片机(微控制器)的朋友也能轻松上手。
在与Arduino DIYER接触的这段时间里,发现有些朋友对Arduino语言还是比较难入手,那么这里我就简单的注释一下Arduino语言(本人也是半罐子水,有错的地方还请各位指正)。
/*************基础C语言*************/关键字:ifif...elseforswitch casewhiledo... whilebreakcontinuereturngoto语法符号:;{}///* */运算符:=+-*/%==!=<><=>=&&||!++--+=-=*=/=数据类型:boolean 布尔类型charbyte 字节类型intunsigned int longunsigned long floatdoublestringarrayvoid数据类型转换:char()byte()int()long()float()常量:HIGH | LOW 表示数字IO口的电平,HIGH 表示高电平(1),LOW 表示低电平(0)。
INPUT | OUTPUT 表示数字IO口的方向,INPUT 表示输入(高阻态),OUTPUT 表示输出(AVR能提供5V电压40mA电流)。
true | false true 表示真(1),false表示假(0)。
/******************************************/以上为基础c语言的关键字和符号,有c语言基础的都应该了解其含义,这里也不作过多的解释。
/*************Arduino 语言*************/结构void setup() 初始化变量,管脚模式,调用库函数等void loop() 连续执行函数内的语句功能数字I/OpinMode(pin, mode) 数字IO口输入输出模式定义函数,pin表示为0~13,mode表示为INPUT或OUTPUT。
arduino语法
大体语法参考结构部份setup()在Arduino中程序运行时将第一挪用setup() 函数。
用于初始化变量、设置针脚的输出\输入类型、配置串口、引入类库文件等等。
每次Arduino 上电或重启后,setup 函数只运行一次。
例如loop()在函数中初始化和概念了变量,然后执行loop() 函数。
顾名思义,该函数在程序运行进程中不断的循环,依照一些反馈,相应改变执行情形。
通过该函数动态操纵Arduino 主控板。
例如.whil edo…while循环与循环运行的方式是相近的,只是它的条件判定是在每一个循环的最后,因此那个语句至少会被运行一次,然后才被终止。
扩展语法; 分号用于表示一句代码的终止。
例子:提示在每一行忘记利用分号作为结尾,将致使一个编译错误。
错误提示可能会清楚的指向缺少分号的那行,也可能可不能。
若是弹出一个令人费解或看似不合逻辑的编译器错误,第一件事确实是在错误周围检查是不是缺少分号。
{}大括号大括号(也称为“括号”或“大括号”)是C编程语言中的一个重要组成部份。
它们被用来区分几个不同的结构,下面列出的,有时可能使初学者混乱。
左大括号“{”必需与一个右大括号“}”形成闭合。
这是一个常常被称为括号平稳的条件。
在Arduino IDE(集成开发环境)中有一个方便的功能来检查大括号是不是平稳。
只需选择一个括号,乃至单击紧接括号的插入点,就能够明白那个括号的“伴侣括号”。
目前此功能略微有些错误,因为IDE会常常会以为在注释中的括号是不正确的。
关于初学者,和由BASIC语言转向学习C语言的程序员,常常不清楚如何利用括号。
毕竟,大括号还会在“return函数”、“endif条件句”和“loop函数”中被利用到。
由于大括号被用在不同的地址,这有一种专门好的编程适应以幸免错误:输入一个大括号后,同时也输入另一个大括号以达到平稳。
然后在你的括号之间输入回车,然后再插入语句。
如此一来,你的括号就可不能变得不平稳了。
Arduino语言
~~~~~~~~~~~~~~~~~~~~~~~~~~~~~~~~~~~~~~~~~~~~~~~~~~~~~~~~~~~~~~~~~~~~~~~~~ ~~~~~~~~~~~~~~~~~~~~~~~Arduino语言是建立在C/C++基础上的,其基础是C语言,Arduino语言只不过把AVR 单片机(微控制器)相关的一些参数设置都函数化,不用我们去了解他的底层,让不了解AVR单片机(微控制器)的朋友也能轻松上手。
~~~~~~~~~~~~~~~~~~~~~~~~~~~~~~~~~~~~~~~~~~~~~~~~~~~~~~~~~~~~~~~~~~~~~~~~~ ~~~~~~~~~~~~~~~~~~~~~~~基础C语言~~~~~~~~~~~~~~~~~~~~~~~~~~~~~~~~~~~~~~~~~~~~~~~~~~~~~~~~~~~~~~~~~~~~~~~~~ ~~~~~~~~~~~~~~~~~~~~~~~关键字:∙if 条件选择语句∙if...else条件选择语句∙for for 循环语句∙switch case并行多分支选择∙while循环语句∙do... while循环语句∙break强制跳出循环∙continue继续∙return 返回∙goto无条件转移变量的作用范围(作用域):作用范围与该变量在哪儿声明有关,大致分为如下两种。
1、全局变量:若在程序开头的声明区或者是在没有大括号限制的声明区,所声明的变量的作用域为整个程序。
2、局部变量:若在大括号内的声明区所声明的变量,其作用域将受限于大括号。
若在主程序与各函数中都声明了相同名称的变量,则离开主程序或函数,该变量将自动消失。
~~~~~~~~~~~~~~~~~~~~~~~~~~~~~~~~~~~~~~~~~~~~~~~~~~~~~~~~~~~~~~~~~~ ~~~~~~~~语法符号:∙;每个语句和数据定义的最后必须有一个分号。
∙{}大括号内的内容是函数体,即{......}。
arduino语法
2.4 Arduino语法——变量和常量加载第一个程序后,要想写出一个完整的程序,需要了解和掌握Arduino语言,本节将对Arduino语言做一个初步讲解,首先介绍变量和常量。
2.4.1 变量变量来源于数学,是计算机语言中能储存计算结果或者能表示某些值的一种抽象概念。
通俗来说可以认为是给一个值命名。
当定义一个变量时,必须指定变量的类型。
如果要变量全是整数,这种变量称为整型(int),那么如果要定义一个名为LED的变量值为11,变量应该这样声明:int led 11;一般变量的声明方法为类型名+变量名+变量初始化值。
变量名的写法约定为首字母小写,如果是单词组合则中间每个单词的首字母都应该大写,例如ledPin、ledCount等,一般把这种拼写方式称为小鹿拼写法(pumpy case)或者骆驼拼写法(camel case)。
变量的作用范围又称为作用域,变量的作用范围与该变量在哪儿声明有关,大致分为如下两种。
(1)全局变量:若在程序开头的声明区或是在没有大括号限制的声明区,所声明的变量作用域为整个程序。
即整个程序都可以使用这个变量代表的值或范围,不局限于某个括号范围内。
(2)局部变量:若在大括号内的声明区所声明的变量,其作用域将局限于大括号内。
若在主程序与各函数中都声明了相同名称的变量,当离开主程序或函数时,该局部变量将自动消失。
使用变量还有一个好处,就是可以避免使用魔数。
在一些程序代码中,代码中出现但没有解释的数字常量或字符串称为魔数(magic number)或魔字符串(magic string)。
魔数的出现使得程序的可阅读性降低了很多,而且难以进行维护。
如果在某个程序中使用了魔数,那么在几个月(或几年)后将很可能不知道它的含义是什么。
为了避免魔数的出现,通常会使用多个单词组成的变量来解释该变量代表的值,而不是随意给变量取名。
同时,理论上一个常数的出现应该对其做必要地注释,以方便阅读和维护。
在修改程序时,只需修改变量的值,而不是在程序中反复查找令人头痛的“魔数”。
Arduino语言
Arduino语言Arduino使用C/C++编写程序,虽然C++兼容C语言,但这是两种语言,C语言是一种面向过程的编程语言,C++是一种面向对象的编程语言。
早期的Arduino核心库使用C语言编写,后来引进了面向对象的思想,目前最新的Arduino核心库采用C与C++混合编写而成。
通常我们说的Arduino语言,是指Arduino核心库文件提供的各种应用程序编程接口(Application Programming Interface,简称API)的集合。
这些API是对更底层的单片机支持库进行二次封装所形成的。
例如,使用AVR单片机的Arduino的核心库是对AVR-Libc(基于GCC的AVR支持库)的二次封装。
传统开发方式中,你需要厘清每个寄存器的意义及之间的关系,然后通过配置多个寄存器来达到目的。
而在Arduino中,使用了清楚明了的API替代繁杂的寄存器配置过程,如以下代码:[C++] 纯文本查看复制代码?代码001 002pinMode(13,OUTPUT); digitalWrite(13,HIGH);pinMode(13,OUTPUT)即是设置引脚的模式,这里设定了13脚为输出模式;而digitalWrite(13,HIGH) 是让13脚输出高电平数字信号。
这些封装好的API,使得程序中的语句更容易被理解,我们不用理会单片机中繁杂的寄存器配置,就能直观的控制Arduino,增强程序的可读性的同时,也提高了开发效率。
在上一章我们已经看到第一个Arduino程序Blink,如果你使用过C/C++语言,你会发现Arduino的程序结构与传统的C/C++结构的不同——Arduino程序中没有main函数。
其实并不是Arduino没有main函数,而是main函数的定义隐藏在了Arduino 的核心库文件中。
Arduino开发一般不直接操作main函数,而是使用Setup和loop这个两个函数。
第二章 Arduino语言基础

2.3、常用电子元件
在学习 Arduino的过程中,会使用到许多电子元件。通过搭配不同 的元件即可制作出自己的 Arduino作品。这里对常见的元件进行简 单的介绍。 ①电阻 电阻是对电流起阻碍作用的元件,在电路中的使用极其广泛,用法 也很多。
②电容 电容,顾名思义,装电的容器。除电阻以外,最常见的元件就是电 容了。电容也有很多作用,旁路、去耦、滤波、储能。
Arduino程序的基本结构由 setup()和loop()两个函数组成。 1、setup() Arduino控制器通电或复位后,即会开始执行 setup()函数中的程序, 该程序只会执行一次。 通常是在 setup()函数中完成 Arduino的初始化设置,如配置I/O口 状态和初始化串口等操作。 2、loop() setup()函数中的程序执行完毕后, Arduino会接着执行loop()函数 中的程序而loop()函数是一个死循环,其中的程序会不断地重复运 行。通常是在loop()函数中完成程序的主要功能,如驱动各种模块 和采集数据等。
③二极管 二极管是单向传导电流的元件。二极管在电路中使用广泛,作用众 多,如整流、稳压等。极管。发光二极管有正负两极,短脚为 负极、长脚为正极。它广泛应用于信号指示和照明等领域。
⑤三极管 三极管是能够起放大、振荡或开关等作用的元件。 三极管有发射极E( Emitter)、基极B(Base)和集电极C( Collector)三极。 有PNP和NPN两种类型的三极管。
第二章 Arduino语言基础
本章内容:
2.1、Ardunio语言及程序结构 2.3、常用电子元件
2.2、C/C++语言基础
2.1、Ardunio语言及程序结构
①arduino语言 Hello world是所有编程语言的第一课,在 Arduino中,Hello
5-Arduino编程语言基础
Arduino程序的总体结构Arduino程序基本结构由setup() 和loop() 两个函数组成:Arduino控制器通电或复位后,即会开始执行setup() 函数中的程序,该部分只会执行一次。
通常我们会在setup() 函数中完成Arduino的初始化设置,如配置I/O口状态,初始化串口等操作。
在setup() 函数中的程序执行完后,Arduino会接着执行loop() 函数中的程序。
而loop()函数是一个死循环,其中的程序会不断的重复运行。
通常我们会在loop() 函数中完成程序的主要功能。
loop()函数的功能相当于MSC-51语言里main()函数中的while(1){}死循环。
Arduino语言中不需要编写main()函数,它已经通过上述两个函数封装了,对程序员是不可见的。
数据类型整数与字符类型int类型整数是数值存储的主要类型。
int类型的长度在8位Arduino板中为16位(2字节),表示范围为-32,768至32,767(-215到215-1)。
在16位Arduino板(如Due)中,int类型的长度为32位(4字节)。
short类型short类型同int类型一样,长度为16位(2字节)。
short类型在所有Arduino 板(8位及16位)中的长度都是16位(2字节)。
unsigned int类型无符号整数,长度与int相同,在8位Arduino板中为16位(2字节),在16位Arduino板(如Due、Zero)中,int类型的长度为32位(4字节)。
由于为无符号数,故16位的unsigned int类型表示范围为0到65,535(216-1)。
long类型长整型,长度为32位(4字节),从-2,147,483,648到2,147,483,647,约±20亿的范围。
unsigned long类型无符号长整型,长度与long类型相同,32位(4字节),由于是无符号数,表示范围为0到4,294,967,295 (232 – 1),约42亿。
arduion编程语言
arduion编程语言
Arduino编程语言是一种简单易学的编程语言,它是基于C和C++语言的。
Arduino编程语言可以用来编写控制器的程序,从而实现各种不同的功能,比如控制灯光、运行机器人、测量环境数据等等。
Arduino编程语言的语法非常简单,可以用来书写各种控制语句、循环语句、函数等等。
编写Arduino程序需要使用Arduino IDE软件,该软件提供了一些常用的函数库和代码示例,方便开发者快速编写程序。
与其他编程语言相比,Arduino编程语言的特点是非常适合初学者学习,因为它的语法非常简单、易于理解。
此外,Arduino编程语言也具备强大的扩展性,可以通过添加额外的模块和传感器来扩展其功能,从而满足不同应用的需求。
总之,Arduino编程语言是一种功能强大、易于学习和扩展的编程语言,它已经被广泛应用于各种物联网设备、机器人等领域,对于学习编程和开发物联网应用的人来说,是非常值得学习的一门语言。
- 1 -。
arduino语言
Arduino语言Arduino语言是建立在C/C++基础上的,其实也就是基础的C语言,Arduino语言只不过把AVR单片机(微控制器)相关的一些参数设置都函数化,不用我们去了解他的底层,让我们不了解AVR单片机(微控制器)的朋友也能轻松上手。
在与Arduino DIYER接触的这段时间里,发现有些朋友对Arduino语言还是比较难入手,那么这里我就简单的注释一下Arduino语言(本人也是半罐子水,有错的地方还请各位指正)。
基础C语言关键字:if...else必须紧接着一个问题表示式(expression),若这个表示式为真,紧连着表示式后的代码就会被执行。
若这个表示式为假,则执行紧接着else之后的代码. 只使用 if 不搭配else是被允许的。
范例:if (val == 1) {digitalWrite(LED,HIGH);}for用来明定一段区域代码重复指行的次数。
范例:for (int i = 0; i < 10; i++) {Serial.print("ciao");}switch caseif叙述是程序里的分叉路口,switch case 是更多选项的路口。
Swith case 根据变量值让程序有更多的选择,比起一串冗长的if叙述,使用swith case可使程序代码看起来比较简洁。
范例 :switch (sensorValue) {case 23:digitalWrite(13,HIGH);break;case 46:digitalWrite(12,HIGH);break;default: // 以上条件都不符合时,预设执行的动作digitalWrite(12,LOW);digitalWrite(13,LOW);}while当while之后的条件成立时,执行括号内的程序代码。
范例 :// 当sensor值小于512,闪烁LED灯sensorValue = analogRead(1);while (sensorValue < 512) {digitalWrite(13,HIGH);delay(100);digitalWrite(13,HIGH);delay(100);sensorValue = analogRead(1);}do... while和while 相似,不同的是while前的那段程序代码会先被执行一次,不管特定的条件式为真或为假。
arduino 语法
arduino 语法Arduino是一种开放源代码的电子平台,它很容易上手,可以用来学习电子知识、设计电路和制作原型,也可以用来控制各种机器和设备。
在使用Arduino时,了解其语法和基础知识是非常重要的,下面将详细介绍Arduino 的语法规则。
一、Arduino语法结构基本语法结构如下:```c++ void setup() { //初始化代码 } void loop () { //主程序代码 } ```这里的`setup()`和`loop()`是两个重要的函数。
`setup()`函数在程序开始运行时只会执行一次,而`loop()`函数会一直执行,直到取消程序。
在`setup()`函数中,主要负责各种初始化操作,如设定串口通信、引脚输入输出等等。
在`loop()`函数中,主要负责程序正常执行中需要的各种操作,如读取传感器、控制输出等等。
二、注释注释是代码中的一种重要元素,它可以帮助我们理解代码并方便代码更改和维护。
arduino注释语法有两种:1. 单行注释:```c++ //这是一条注释 ```2. 多行注释:```c++ /* 这是多行注释第二行注释 */ ```三、变量和常量在Arduino中,变量和常量有三种类型:1. 整数类型变量和常量整数类型包括:byte、int、unsigned int、long和unsigned long,其中byte类型是最小的长度,共占用1个字节,而long和unsigned long类型是占用最大长度,其占用长度为4个字节。
在Arduino中,整数型变量和常量的声明语法如下:```c++ type variable = value; ```其中,`type`是声明的变量类型,`variable`是变量名,`value`是变量的初值。
若没有初值声明变量,该变量被默认为0。
```c++ int a; // 声明一个int型变量a a = 3; // 定义变量a的值为3int b = 5; // 声明时直接定义即可 ```2. 浮点型变量和常量浮点型变量和常量在Arduino中被称为”double”类型,其占用长度为4个字节,在Arduino中,浮点型变量的声明方式与整数型变量类似。
arduino c语言中个各进制的书写方法
arduino c语言中个各进制的书写方法
在Arduino C语言中,可以使用不同的进制来表示数字,包括十进制、二进制、八进制和十六进制。
这些进制在编程中有着不同的书写方法。
十进制是我们日常生活中最常用的进制,书写方法非常简单,只需要直接写出数字即可,例如42、123等。
二进制在C语言中以0b或0B开头,后面跟着二进制数字。
二进制数字只有0和1两种,可以用来表示各种逻辑状态。
例如,0b1010表示十进制的10,0B1100表示十进制的12。
八进制以0开头,后面跟着八进制数字。
八进制数字包括0~7,共8个数字。
例如,077表示十进制的63,034表示十进制的28。
十六进制以0x或0X开头,后面跟着十六进制数字。
十六进制数字包括0~9和A~F(或a~f),共16个数字。
例如,0x2A表示十进制的42,0XDE表示十进制的222。
在Arduino C语言编程中,不同进制的书写方法非常重要,因为它们可以让我们更方便地表示和处理数字。
同时,
也需要注意不同进制之间的转换和精度问题,以避免出现错误或不必要的麻烦。
arduino语法

2.4 Arduino语法——变量和常量加载第一个程序后,要想写出一个完整的程序,需要了解和掌握Arduino语言,本节将对Arduino语言做一个初步讲解,首先介绍变量和常量。
2.4.1 变量变量来源于数学,是计算机语言中能储存计算结果或者能表示某些值的一种抽象概念。
通俗来说可以认为是给一个值命名。
当定义一个变量时,必须指定变量的类型。
如果要变量全是整数,这种变量称为整型(int),那么如果要定义一个名为LED的变量值为11,变量应该这样声明:int led 11;一般变量的声明方法为类型名+变量名+变量初始化值。
变量名的写法约定为首字母小写,如果是单词组合则中间每个单词的首字母都应该大写,例如ledPin、ledCount等,一般把这种拼写方式称为小鹿拼写法(pumpy case)或者骆驼拼写法(camel case)。
变量的作用范围又称为作用域,变量的作用范围与该变量在哪儿声明有关,大致分为如下两种。
(1)全局变量:若在程序开头的声明区或是在没有大括号限制的声明区,所声明的变量作用域为整个程序。
即整个程序都可以使用这个变量代表的值或范围,不局限于某个括号范围内。
(2)局部变量:若在大括号内的声明区所声明的变量,其作用域将局限于大括号内。
若在主程序与各函数中都声明了相同名称的变量,当离开主程序或函数时,该局部变量将自动消失。
使用变量还有一个好处,就是可以避免使用魔数。
在一些程序代码中,代码中出现但没有解释的数字常量或字符串称为魔数(magic number)或魔字符串(magic string)。
魔数的出现使得程序的可阅读性降低了很多,而且难以进行维护。
如果在某个程序中使用了魔数,那么在几个月(或几年)后将很可能不知道它的含义是什么。
为了避免魔数的出现,通常会使用多个单词组成的变量来解释该变量代表的值,而不是随意给变量取名。
同时,理论上一个常数的出现应该对其做必要地注释,以方便阅读和维护。
在修改程序时,只需修改变量的值,而不是在程序中反复查找令人头痛的“魔数”。
- 1、下载文档前请自行甄别文档内容的完整性,平台不提供额外的编辑、内容补充、找答案等附加服务。
- 2、"仅部分预览"的文档,不可在线预览部分如存在完整性等问题,可反馈申请退款(可完整预览的文档不适用该条件!)。
- 3、如文档侵犯您的权益,请联系客服反馈,我们会尽快为您处理(人工客服工作时间:9:00-18:30)。
Arduino语言Arduino语言是建立在C/C++基础上的,其实也就是基础的C语言,Arduino语言只不过把AVR单片机(微控制器)相关的一些参数设置都函数化,不用我们去了解他的底层,让我们不了解AVR单片机(微控制器)的朋友也能轻松上手。
在与Arduino DIYER接触的这段时间里,发现有些朋友对Arduino语言还是比较难入手,那么这里我就简单的注释一下Arduino语言(本人也是半罐子水,有错的地方还请各位指正)。
基础C语言关键字:if...else必须紧接着一个问题表示式(expression),若这个表示式为真,紧连着表示式后的代码就会被执行。
若这个表示式为假,则执行紧接着else 之后的代码. 只使用 if不搭配else是被允许的。
范例:if (val == 1) {digitalWrite(LED,HIGH);}for用来明定一段区域代码重复指行的次数。
范例:for (int i = 0; i < 10; i++) {Serial.print("ciao");}switch caseif叙述是程序里的分叉路口,switch case 是更多选项的路口。
Swith case 根据变量值让程序有更多的选择,比起一串冗长的if叙述,使用swith case可使程序代码看起来比较简洁。
范例 :switch (sensorValue) {case 23:digitalWrite(13,HIGH);break;case 46:digitalWrite(12,HIGH);break;default: // 以上条件都不符合时,预设执行的动作digitalWrite(12,LOW);digitalWrite(13,LOW);}while当while之后的条件成立时,执行括号内的程序代码。
范例 :// 当sensor值小于512,闪烁LED灯sensorValue = analogRead(1);while (sensorValue < 512) {digitalWrite(13,HIGH);delay(100);digitalWrite(13,HIGH);delay(100);sensorValue = analogRead(1);}do... while和while 相似,不同的是while前的那段程序代码会先被执行一次,不管特定的条件式为真或为假。
因此若有一段程序代码至少需要被执行一次,就可以使用do…while架构。
范例 :do {digitalWrite(13,HIGH);delay(100);digitalWrite(13,HIGH);delay(100);sensorValue = analogRead(1);} while (sensorValue < 512);break让程序代码跳离循环,并继续执行这个循环之后的程序代码。
此外,在break也用于分隔switch case 不同的叙述。
范例 ://当sensor值小于512,闪烁LED灯do {// 按下按钮离开循环if (digitalRead(7) == HIGH)break;digitalWrite(13,HIGH);delay(100);digitalWrite(13,HIGH);delay(100);sensorValue = analogRead(1);} while (sensorValue < 512);continue用于循环之内,它可以强制跳离接下来的程序,并直接执行下一个循环。
范例 :for (light = 0; light < 255; light++){// 忽略数值介于 140 到 200之间if ((x > 140) && (x < 200))continue;analogWrite(PWMpin, light);delay(10);}return函数的结尾可以透过return回传一个数值。
例如,有一个计算现在温度的函数叫 computeTemperature(),你想要回传现在的温度给temperature变量,你可以这样写:int temperature = computeTemperature();int computeTemperature() {int temperature = 0;temperature = (analogRead(0) + 45) / 100;return temperature;}goto语法符号:; (分号)Arduino 语言每一行程序都是以分号为结尾。
这样的语法让你可以自由地安排代码,你可以将两个指令放置在同一行,只要中间用分号隔开。
(但这样做可能降低程式的可读性。
)范例:delay(100);{} (大括号)大括号用来将程式代码分成一个又一个的区块,如以下范例所示,在loop()函数的前、后,必须用大括号括起来。
范例:void loop(){Serial.pritln("cial");}程式的注释就是对代码的解释和说明,编写注释有助于程式设计师(或其他人)了解代码的功能。
Arduino处理器在对程式码进行编译时会忽略注释的部份。
Arduino 语言中的编写注释有两种方式//单行注释:这整行的文字会被处理器忽略/*多行注释:在这个范围内你可以写一整首诗*/运算符:=+ 相加- 相减* 相乘/ 相除% 余数除法== 等于!=不等于< 小于> 大于<= 小于等于>= 大于等于&& 交集|| 联集! 反相++ 累加-- 递减+=-=*=/=数据类型:boolean布林布尔变数的值只能为真(true)或是假(false)char字符单一字符例如 A,和一般的计算机做法一样Arduino 将字符储存成一个数字,即使你看到的明明就是一个文字。
用数字表示一个字符时,它的值有效范围为 -128 到127。
注意:有两种主流的计算机编码系统ASCII 和UNICODE。
ASCII 表示了127个字符,用来在序列终端机和分时计算器之间传输文字。
UNICODE可表示的字符量比较多,在现代计算机操作系统内它可以用来表示多国语言。
在位数需求较少的信息传输时,例如意大利文或英文这类由拉丁文,阿拉伯数字和一般常见符号构成的语言,ASCII仍是目前主要用来交换信息的编码法。
byte字节类型储存的数值范围为0到255。
如同字符一样字节型态的变量只需要用一个字节(8位)的内存空间储存。
int整数整数数据型态用到2字节的内存空间,可表示的整数范围为–32,768 到 32,767; 整数变量是Arduino内最常用到的数据型态。
unsigned int 无符号整数(绝对值)无号整数同样利用2字节的内存空间,无号意谓着它不能储存负的数值,因此无号整数可表示的整数范围为0 到 65,535。
long长整数长整数利用到的内存大小是整数的两倍,因此它可表示的整数范围从–2,147,483,648 到 2,147,483,647。
unsigned long 无符号长整数无号长整数可表示的整数范围为0 到 4,294,967,295。
float浮点数浮点数就是用来表达有小数点的数值,每个浮点数会用掉四字节的RAM,注意芯片内存空间的限制,谨慎的使用浮点数double双字节浮点也叫双精度浮点数,可表达最大值为 1.7976931348623157 x 10308。
string字符串字符串用来表达文字信息,它是由多个ASCII字符组成(你可以透过序串端口发送一个文字讯息或者将之显示在液晶显示器上)。
字符串中的每一个字符都用一个组元组空间储存,并且在字符串的最尾端加上一个空字符以提示Ardunio处理器字符串的结束。
下面两种宣告方式是相同的。
例如:char string1[] = "Arduino";//7字符+1空字符char string2[8] = "Arduino"; // 与上行相同array数组一串变量可以透过索引去直接取得。
假如你想要储存不同程度的LED 亮度时,你可以宣告六个变量light01,light02,light03,light04,light05,light06,但其实你有更好的选择,例如宣告一个整数数组变量如下:int light[6] = {0 , 20 , 50 , 75 , 100}"array" 这个字为没有直接用在变量宣告,而是[]和{}宣告数组。
控制指令数据类型转换:char()byte()int()long()HIGH | LOW)。
INPUT | OUTPUT表示数字IO口的方向,INPUT 表示输入(高阻态),OUTPUT表示输出(AVR能提供5V电压 40mA电流)。
true | falsetrue 表示真(1),false表示假(0)。
变数:变量用来指定Arduino 内存中的一个位置,变量可以用来储存数据,程序人员可以透过脚本代码去不限次数的操作变数的值。
因为Arduino 是一个非常简易的微处理器,但你要宣告一个变量时必须先定义他的数据型态,好让微处理器知道准备多大的空间以储存这个变量值。
以上为基础c语言的关键字和符号,有c语言基础的都应该了解其含义,这里也不作过多的解释。
Arduino 语言结构1、声明变量及接口名称(int val;int ledPin=13;)。
2、void setup()在程序开始时使用,在这个函数范围内放置初始化Arduino 板子的程式,主要程式开始撰写前,使Arduino 板子装置妥当的指令可以初始化变量、管脚接口模式、启用库等(例如:pinMode(ledPin,OUTPUT);)。
3、void loop()在setup()函数之后,即初始化之后,loop() 让你的程序循环地被执行。
使用它来运转Arduino。
连续执行函数内的语句,这部份的程式会一直重复的被执行,直到Arduino 板子被关闭。
功能数字 I/OpinMode(pin, mode)数字IO口输入输出模式定义函数,将接口定义为输入或输出接口,用在setup()函数里,pin表示为0~13接口名称, mode表示为INPUT 或OUTPUT。
即“ pinMode(接口名称,OUTPUT或INPUT)”。
范例 :pinMode(7,INPUT); // 将脚位 7 设定为输入模式pinMode(1,INPUT);//将脚位1设定为输入模式pinMode(2,INPUT);//将脚位2设定为输入模式pinMode(3,INPUT);//将脚位3设定为输入模式pinMode(4,INPUT);pinMode(5,INPUT);pinMode(6,INPUT);digitalWrite(pin, value)数字IO口输出电平定义函数,将数字接口值至高或低、开或关,pin 表示为0~13,value表示为HIGH或LOW,即digitalWrite(接口名称, HIGH 或LOW)。
