VMware中创建共享磁盘阵列的方法
01.VMware vSphere5.5添加共享磁盘
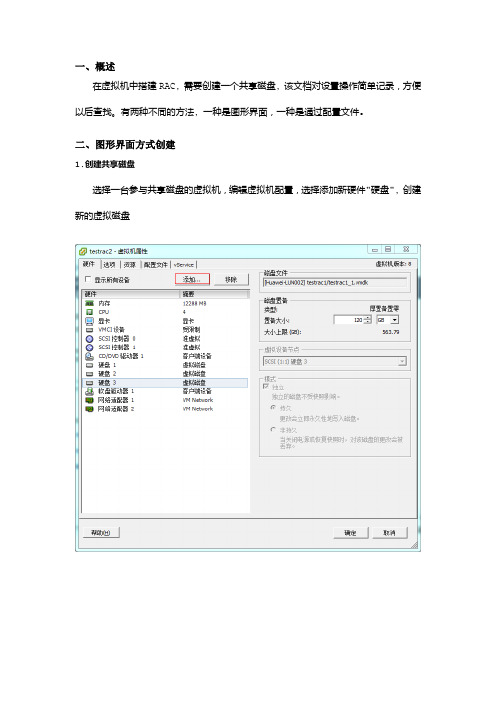
一、概述在虚拟机中搭建RAC,需要创建一个共享磁盘,该文档对设置操作简单记录,方便以后查找。
有两种不同的方法,一种是图形界面,一种是通过配置文件。
二、图形界面方式创建1.创建共享磁盘选择一台参与共享磁盘的虚拟机,编辑虚拟机配置,选择添加新硬件"硬盘",创建新的虚拟磁盘知识点补充:1、厚置备延迟置零(zeroed thick)以默认的厚格式创建虚拟磁盘。
创建过程中为虚拟磁盘分配所需空间。
创建时不会擦除物理设备上保留的任何数据,但是以后从虚拟机首次执行写操作时会按需要将其置零。
简单的说就是立刻分配指定大小的空间,空间内数据暂时不清空,以后按需清空。
2、厚置备置零(eager zeroed thick)创建支持群集功能(如 FaultTolerance)的厚磁盘。
在创建时为虚拟磁盘分配所需的空间。
与平面格式相反,在创建过程中会将物理设备上保留的数据置零。
创建这种格式的磁盘所需的时间可能会比创建其他类型的磁盘长。
简单的说就是立刻分配指定大小的空间,并将该空间内所有数据清空。
3、精简置备(thin)使用精简置备格式。
最初,精简置备的磁盘只使用该磁盘最初所需要的数据存储空间。
如果以后精简磁盘需要更多空间,则它可以增长到为其分配的最大容量。
简单的说就是为该磁盘文件指定增长的最大空间,需要增长的时候检查是否超过限额。
磁盘置备中,选择厚置备置零;位置选择我们的存储设备,将我们的共享磁盘放在存储上接下来的"虚拟设备节点"切记选择独立的SCSI 设备节点,若原来本地使用SCSI(0:0),那现在可以选SCSI(1:0),总之冒号前的数字不能与本地SCSI设备一样;(为了避免快照对各虚拟机的影响,建议"模式"选择"持久"方式2.修改新的SCSI控制器总线共享方式接着,点击右下角"确认"按钮,这台虚拟机的共享磁盘配置即完成3.添加第二台虚拟机连接共享磁盘在第二台参与访问共享磁盘的虚拟机上,同样编辑添加新设备"硬盘",但选择"使用现有虚拟磁盘""虚拟设备节点"部分与第一台一样,选择一个独立的SCSI 节点:回到"虚拟机属性"界面,修改"新的SCSI 控制器"参数为"虚拟"方式:至此,两台虚拟机共享访问同一磁盘的配置已经完成。
vmware ESXI5.1中配置虚拟共享磁盘
ESXI 5.1中创建windows clust共享磁盘MSCS故障转移群集是一组独立的计算机,这些计算机相互协作以提高应用程序和服务的可用性。
多台群集服务器(称为节点)通过物理电缆和软件连接。
如果其中一个群集节点出现故障,另外一个节点就会开始提供服务(该过程称为故障转移)。
从而使用户遭遇服务中断的次数降至最低。
微软MSCS架构下图中,如图1所示,微软MSCS CLUSTER可以实现对应用程序的高可用性,它可以保证应用在短暂的停滞后又快速恢复并且对外提供服务我们在原先物理环境中共享磁盘往往是我们的存储,比如ISCSI存储、FC光纤存储、直连盘柜等等,那么当我们将业务切换至虚拟化环境中后,我们如何在Vsphere的基础架构中创建共享磁盘呢?Vsphere作为业界领先的虚拟化产品,支持在虚拟化环境中是使用MSCS,我们只需要简单配置就能实现。
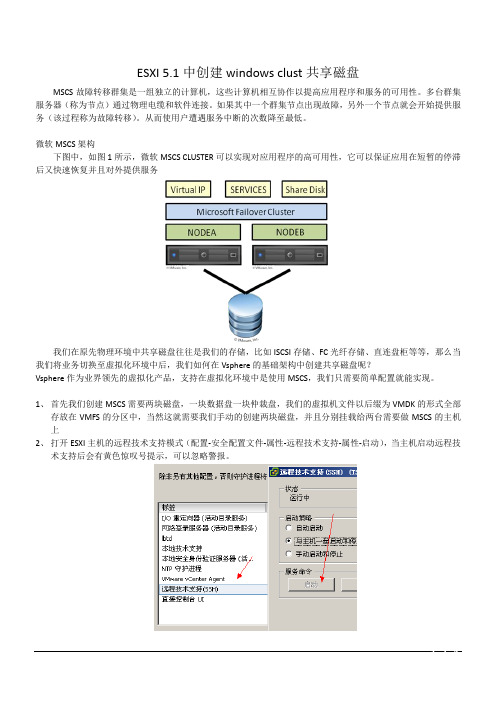
1、首先我们创建MSCS需要两块磁盘,一块数据盘一块仲裁盘,我们的虚拟机文件以后缀为VMDK的形式全部存放在VMFS的分区中,当然这就需要我们手动的创建两块磁盘,并且分别挂载给两台需要做MSCS的主机上2、打开ESXI主机的远程技术支持模式(配置-安全配置文件-属性-远程技术支持-属性-启动),当主机启动远程技术支持后会有黄色惊叹号提示,可以忽略警报。
3、使用Putty工具以Root身份登录到打开远程技术支持的主机上。
4、进入共享磁盘所在的路径。
(例:cd /vmfs/volumes/datastore1)请将datastore1替换成对应的共享VMFS卷名称5、创建共享磁盘。
(例:vmkfstools -c 10000m -d eagerzeroedthick -a lsilogic /vmfs/volumes/datastore1/data.vmdk)(例:vmkfstools -c 1024m -d eagerzeroedthick -a lsilogic /vmfs/volumes/datastore1/quorum.vmdk)(例:vmkfstools -c 1024m -d eagerzeroedthick -a lsilogic /vmfs/volumes/datastore1/msdtc.vmdk)创建好后如下图所示一般仲裁盘和MSDTC盘为1G即1024MB,数据盘根据业务大小自由分配。
VMWare vPC间的磁盘共享

1.更改现有的虚拟机的网络,将其连接到物理网络中,使物理网络中的PC可以与其通讯(建议挂在WIN2003系
统中)
2.在同一台机器中添加硬盘,一定要选择“厚置备置零”,其它两个选项创建出来的盘不能做共共享盘。
此模式创
盘过程较长,需要将新建的盘全部置0。
3.先不要选择虚拟设备节点的SCSI项,用默认就好,然后模式选独立:
4.完成后,启动机器,然后将新挂上的盘格式化,并COPY进文件。
完成后关机。
5.从此系统中将之前添加的硬盘移除,但不要删除磁盘文件:
6.重新添加硬盘,选择“使用现有虚拟硬盘”,然后找到相应的路径,
7.以下是关键,虚拟设备节点要选择SCSI(0:X)以外的,我这里选择了SCSI(1:0),模式选中独立:
8.完成后,一定要选中“新的SCSI控制器”这项,然后将“SCSI总线共享”,设为“虚拟”。
确定就好了。
另外一
台照旧!当然,记得将网卡也要改回到Host-Only状态~~
9.两台机器都搞定后,重启机器,如果进系统看不到新加的磁盘,就进入磁盘管理看一下,重新加载或激活一下
就可以用了,两台机器可以同时使用此盘中的数据:。
VMware虚拟机创建磁盘阵列

第一部分:
首先,利用VMware虚拟机创建3个逻辑磁盘(raid5至少需要3块磁盘)供创建阵列使用!
点击
!
点击
!
点击
!
点击
!
选定虚拟磁盘路径,并取名为:disk1 !
点击
!
点击
!
第一块逻辑磁盘创建完成Hard Disk(SCSI 0:1)!接着,创建第二块,第三块逻辑磁盘(同理),如下图:
第二块逻辑磁盘Hard Disk(SCSI 0:2)!
第三块逻辑磁盘Hard Disk (SCSI 0:1)! 点击
!
接着,点击
(绿色三角)!启动虚拟机!!
第二部分:
配置步骤:
(1)检查是否安装raidtools工具:
经确认没有安装!接下来,安装raidtools工具:
安装完成!(2)检查磁盘:
磁盘显示正常!对磁盘进行分区:
输入“n”,创建新的分区!
输入“p”,创建主分区!
输入“1”,命名分区符号!
默认即可!
输入“p”,确认:
接着,输入“w”,存盘退出!
(同理)/dev/sdc /dev/sdd 进行分区!
现在,进行格式化:
(3)修改raid 配置文件:路径是:/etc/raidtab 默认是不存在的!但幸运的是系统给提供了模板,路径是:/usr/share/doc/raidtools-1.00.3/ 拷贝要用的模板即可!我们这里拷贝raid5.conf.sample
命令是:cp raid5.conf.sample /etc/raidtab
修改配置文件(vi /etc/raidtab):。
VM共享磁盘创建及挂载
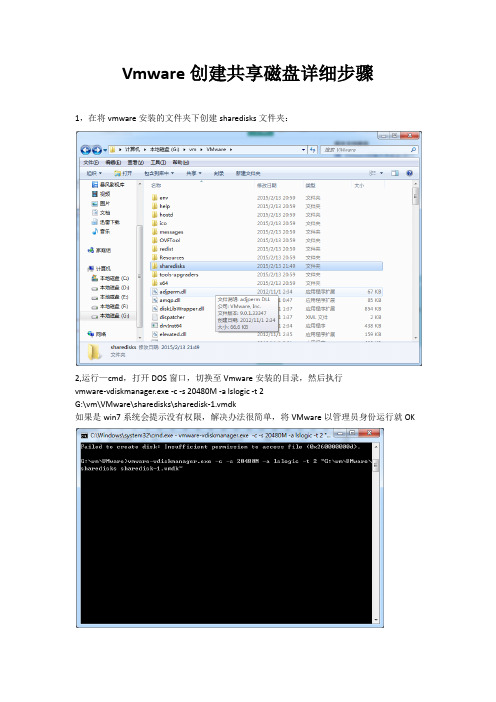
Vmware创建共享磁盘详细步骤1,在将vmware安装的文件夹下创建sharedisks文件夹:2,运行—cmd,打开DOS窗口,切换至Vmware安装的目录,然后执行vmware-vdiskmanager.exe -c -s 20480M -a lslogic -t 2G:\vm\VMware\sharedisks\sharedisk-1.vmdk如果是win7系统会提示没有权限,解决办法很简单,将VMware以管理员身份运行就OK正在创建:3,在我们之前新建的目录sharedisks可看到新生成的两个文件4,配置虚拟机选择 Hard Disk,然后选择 Add..选择 Use an exiting virtual disk,然后点击 Next点击 Browse …,选择我们设置好的共享磁盘点击 Finish这里我们选择 Keep Exiting Format ,如果有需要,可以选择 Convert 进行格式转换选中我们刚建好的磁盘,然后点击 Advanced…选择 SCSI 1:1 不和系统磁盘在一个通道上面点击 OK 即可完成本台设备win2003-1的磁盘添加。
5,配置虚拟机文件,两个节点都要配置找到虚拟机的目录,用记事本打开VMX文件在下方添加diskLib.dataCacheMaxSize = "0"diskLib.dataCacheMaxReadAheadSize = "0"diskLib.DataCacheMinReadAheadSize = "0"diskLib.dataCachePageSize = "4096"diskLib.maxUnsyncedWrites = "0"disk.locking = "false"scsi0:1.deviceType = "disk"scsi0:1.SharedBus = "Virtual"scsi0:1.shared = "true"然后重启两个虚拟机,fdisk -l 查看,是否都已挂载该共享磁盘。
Vmware中共享磁盘创建方法
Vmware中共享磁盘创建方法共享磁盘创建方法注:该方法用于在虚拟机下,创建STORNEXT文件系统中所有PC机需要访问的共享磁盘1) 除操作系统所在磁盘外,还需要两个额外的SCSI磁盘。
一个用来做仲裁磁盘,另一个用来充当数据共享磁盘。
2) 共享磁盘必须位于系统驱动器所用的控制器以外的另一个控制器上。
不要和操作系统所在磁盘使用同一个总线。
3) 所有共享磁盘,包括仲裁磁盘,必须在物理上附加到一个共享总线。
4) 仲裁磁盘空间大小最小50 MB。
为了得到最佳的NTFS文件系统性能,建议采用最小500 MB的磁盘分区。
5) 所有共享磁盘必须配置为基本磁盘,而不能为动态磁盘。
6) 共享磁盘不支持软件容错,不要再试图对共享磁盘做软RAID。
7) 如果您使用的是64位版本的Windows Server 2003的系统,需要注意的是,所有共享磁盘必须配置为主引导记录(MBR),也就是建立主分区。
也不要试图配置为GPT磁盘,因为它不能作为群集磁盘得到支持。
8) 群集磁盘上的所有分区必须格式化为NTFS。
9) 群集节点的操作系统必须采用同架构的版本,不能节点A采用32位系统,而节点B却使用64位系统。
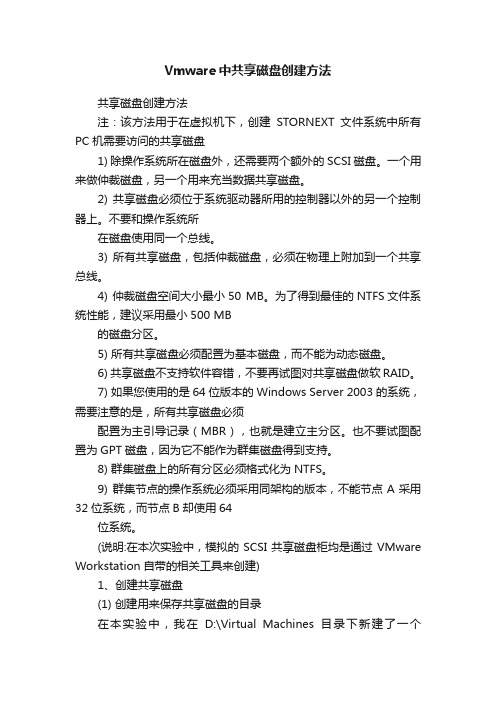
(说明:在本次实验中,模拟的SCSI共享磁盘柜均是通过VMware Workstation自带的相关工具来创建)1、创建共享磁盘(1) 创建用来保存共享磁盘的目录在本实验中,我在D:\Virtual Machines目录下新建了一个ShareDisks文件夹,用来保存后面两个操作建立的虚拟仲裁磁盘文件和数据磁盘文件。
(2) 创建仲裁磁盘进入VMware Workstation软件安装目录,在命令提示符窗口敲入如下命令:vmware-vdiskmanager.exe -c -s 600Mb -a lsilogic -t 2 “D:\VirtualMachines\ShareDisks”\Quorum.vmdk(3) 创建数据共享磁盘进入VMware Workstation软件安装目录,在命令提示符窗口敲入如下命令:vmware-vdiskmanager.exe -c -s 2Gb -a lsilogic -t 2 “D:\VirtualMachines\ShareDisks”\ShareDisk.vmdk(4) 验证共享磁盘是否成功创建进入D:\Virtual Machines\ShareDisks中,可以看到步骤2、3创建的4个虚拟磁盘文件。
虚拟机vmware与本地磁盘共享方法

虚拟机 vmware与本地磁盘共享方法
首先,启动虚拟机内的系统(centos),打开vmware中的VM选项卡,选择setting选项卡。
选择option选项,发现里面的shared Forlders是灰色的,这个时候需要安装vmware tools 安装vmware tools时,开启系统,点击VM里面的 install vmware tools选项,即可以把vmware tools的镜像导入虚拟机中。 1 确保你的DVD里面没有其他的镜像 2 如果桌面有DVD的磁盘镜像,记得unmont。 3 打开computer,发现镜像光盘即可
4 在命令行中把文件பைடு நூலகம்制到自己的磁盘中,解压
使用如下命令 tar -tvf VMware.....进行解压。...明天继续
在vmware虚拟机中创建共享磁盘的方法
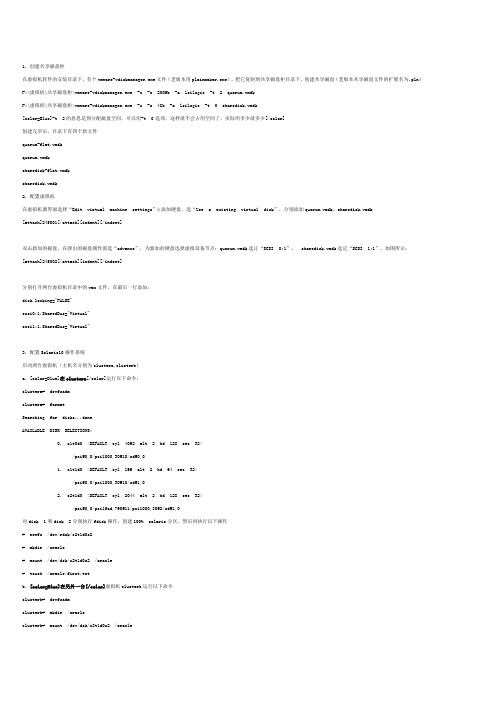
在虚拟机软件的安装目录下,有个vmware-vdiskmanager.exe文件(老版本用plainmaker.exe),把它复制到共享磁盘柜目录下,创建共享磁盘(老版本共享磁盘文件的扩展名为.pln)F:\虚拟机\共享磁盘柜>vmware-vdiskmanager.exe -c -s 200Mb -a lsilogic -t 2 quorum.vmdkF:\虚拟机\共享磁盘柜>vmware-vdiskmanager.exe -c -s 4Gb -a lsilogic -t 0 sharedisk.vmdk[color=Blue]-t 2的意思是预分配磁盘空间,可以用-t 0选项,这样就不会占用空间了,实际用多少就多少[/color]创建完毕后,目录下有四个新文件quorum-flat.vmdkquorum.vmdksharedisk-flat.vmdksharedisk.vmdk2. 配置虚拟机在虚拟机器界面选择“Edit virtual machine settings”à添加硬盘,选“Use a existing virtual disk”,分别添加quorum.vmdk、sharedisk.vmdk[attach]245001[/attach][indent][/indent]双击新加的磁盘,在弹出的磁盘属性窗选“advance”,为新加的硬盘选择虚拟设备节点:quorum.vmdk选订“SCSI0:1”, sharedisk.vmdk选定“SCSI1:1”。
如图所示:[attach]245002[/attach][indent][/indent]分别打开两台虚拟机目录中的vmx文件,在最后一行添加:disk.locking="FALSE"scsi0:1.SharedBus="Virtual"scsi1:1.SharedBus="Virtual"3. 配置Solaris10操作系统启动两台虚拟机(主机名分别为clustera,clusterb)a. [color=Blue]在clustera[/color]运行以下命令:clustera# devfsadmclustera# formatSearching for disks...doneAVAILABLE DISK SELECTIONS:0. c1t0d0 <DEFAULT cyl 4092 alt 2 hd 128 sec 32>/pci@0,0/pci1000,30@10/sd@0,01. c1t1d0 <DEFAULT cyl 196 alt 2 hd 64 sec 32>/pci@0,0/pci1000,30@10/sd@1,02. c2t1d0 <DEFAULT cyl 2044 alt 2 hd 128 sec 32>/pci@0,0/pci15ad,790@11/pci1000,30@2/sd@1,0对disk 1和disk 2分别执行fdisk操作,创建100% solaris分区。
VMware创建共享磁盘(图行-详细)

VMware 添加共享磁盘Host主机:Windows操作系统Guest虚拟机: linux操作系统VMware版本:VMware-workstation-6.5.4安装方式:图形界面一,创建虚拟硬盘:1,创建两台虚拟机2,为1号虚拟机添加硬盘(未说明的均默认设置)打开setting选项——选择Add——选择Hard Disk————勾选——设置大小,可勾选Allocate——设定路径、名称(名称设定为sharedisk1.vmdk)同样的方法再添加一块。
3,设置设备端口回到setting界面——选择sharedisk1————设定端口为SCSI 1:0——确定 为sharedisk2设置端口为SCSI1:1记住两块硬盘的添加顺序(2号机添加的顺序要和一号机器一样)4,为2号机添加硬盘打开setting选项——选择Add——选择Hard Disk————选择1号机刚刚创建的sharedisk1,同时勾选——finish同样的操作添加sharedisk2按照步骤3,更改2号机硬盘端口号注意:vm 6.5要创建共享磁盘,必须勾选Inependent ,否则无法更改端口号。
注意:两个机器磁盘的添加顺序一定要相同,如下图可以验证,如果不相同用步骤4重新为两个机器添加。
二, 修改配置文件打开虚拟机安装目录,用记事本打开&&&&&.vmx文件(&&&&&为你虚拟机名)在文件尾部找到scsi1.present = "TRUE"行,修改该行以下信息为:scsi1.present = "TRUE"scsi1:0.present = "TRUE"scsi1:0.fileName = "sharedisk.vmdk"scsi1:0.mode = "independent-persistent"scsi1:0.writeThrough="TRUE"scsi1:0.sharedBus="virtual"scsi1:0.deviceType = "disk"scsi1:1.present = "TRUE"scsi1:1.fileName = "sharedisk2.vmdk"scsi1:1.mode = "independent-persistent"scsi1:1.writeThrough="TRUE"scsi1:1.sharedBus="virtual"scsi1:1.deviceType = "disk"diskLib.dataCacheMaxSize = "0"diskLib.dataCacheMaxReadAheadSize = "0"diskLib.dataCacheMinReadAheadSize = "0"diskLib.dataCachePageSize = "4096"diskLib.maxUnsyncedWrites = "0"disk.locking = "FALSE"scsi1.virtualDev = "lsilogic"将修改过的部分,复制到另一台虚拟机配置文件相同位置。
VMware Workstation 文件共享及磁盘管理实验
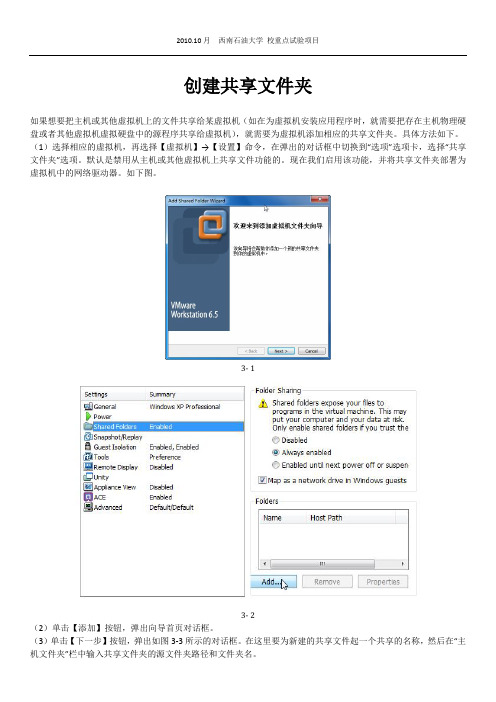
创建共享文件夹如果想要把主机或其他虚拟机上的文件共享给某虚拟机(如在为虚拟机安装应用程序时,就需要把存在主机物理硬盘或者其他虚拟机虚拟硬盘中的源程序共享给虚拟机),就需要为虚拟机添加相应的共享文件夹。
具体方法如下。
(1)选择相应的虚拟机,再选择【虚拟机】→【设置】命令,在弹出的对话框中切换到“选项”选项卡,选择“共享文件夹”选项。
默认是禁用从主机或其他虚拟机上共享文件功能的。
现在我们启用该功能,并将共享文件夹部署为虚拟机中的网络驱动器。
如下图。
3- 13- 2(2)单击【添加】按钮,弹出向导首页对话框。
(3)单击【下一步】按钮,弹出如图3-3所示的对话框。
在这里要为新建的共享文件起一个共享的名称,然后在“主机文件夹”栏中输入共享文件夹的源文件夹路径和文件夹名。
(4)单击【下一步】按钮,弹出如图3-4所示的对话框。
在这里可以设置是否启用该共享文件夹,以及虚拟机用户对该共享文件夹是否仅具有“只读”访问权限。
根据需要选择。
一般出于安全考虑,是仅提供只读权限的。
若要在虚拟机中使用访问读写主机磁盘则选择不勾选“只读”。
3- 3(5)单击【完成】按钮,返回到如图3-2所示的对话框,并会在“文件夹”列表框中显示新添加的共享文件夹及所设置的属性。
在这里可以重新设置总是启用共享文件夹,还是在下次虚拟机电源关闭或挂起前启用共享文件夹。
还可以通过是否选择相应共享文件夹后面的复选框来决定个别共享文件是否启用。
3- 4创建好之后,打开虚拟机,用户可以通过打开“我的电脑”中网络驱动器直接访问指定的主机共享文件夹。
3- 5实验三:为虚拟机添加多块磁盘注意:只有在相应虚拟机处于关闭状态才可以进行如下操作。
(1)选择要创建多块虚拟硬盘的虚拟机,选择【虚拟机】→【设置】命令,打开如图5-74所示的虚拟机设置对话框。
在其中只显示了一块提示为“预分配”的硬盘,这是在创建虚拟机时一起创建的,也就是虚拟机的启动盘(即虚拟机的C盘)。
(2)单击【添加】按钮,弹出如图3-7所示的对话框。
VMwareWorkStation配置共享磁盘
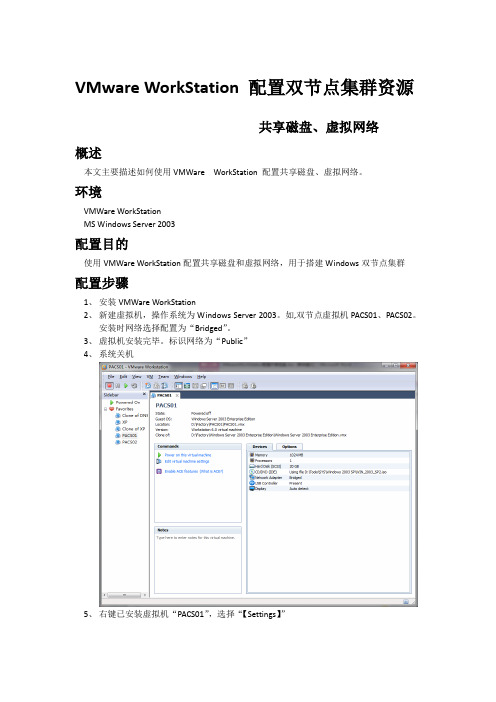
VMware WorkStation 配置双节点集群资源共享磁盘、虚拟网络概述本文主要描述如何使用VMWare WorkStation 配置共享磁盘、虚拟网络。
环境VMWare WorkStationMS Windows Server 2003配置目的使用VMWare WorkStation配置共享磁盘和虚拟网络,用于搭建Windows双节点集群配置步骤1、安装VMWare WorkStation2、新建虚拟机,操作系统为Windows Server 2003。
如,双节点虚拟机PACS01、PACS02。
安装时网络选择配置为“Bridged”。
3、虚拟机安装完毕。
标识网络为“Public”4、系统关机5、右键已安装虚拟机“PACS01”,选择“【Settings】”6、系统弹出虚拟机资源配置界面。
此界面可配置虚拟机内存。
单击【Add】7、弹出资源添加向导一、添加虚拟网卡1、单击选择“NetWork Adapter”,单击【Next】2、如下图所示操作。
选择网络模式为“Custom”。
单击【Finish】。
3、单击【OK】,完成创建。
此时启动PACS01,打开网络连接即可看到新建网卡,标识为“Private”。
二、添加虚拟磁盘1、单击选择“Hard Disk”,单击【Next】2、选择“Create a new Virtual disk”,单击【Next】3、默认磁盘类型为“SCSI”,单击【Next】4、输入磁盘大小,选择存储方式,单击【Next】5、输入虚拟磁盘文件存储位置和文件名(共享图像存储),单击【Finish】6、单击选择所新建的虚拟磁盘,单击【Advanced】7、选择虚拟磁盘节点为“SCSI 1:0”,单击【ok】8、重复1-7,创建虚拟磁盘“SCSI 1:1”DBSQL.vmdk(存放SQL数据文件) 20GB;“SCSI 1:2”Quorum.vmdk(群集仲裁盘) 1GB9、启动群集节点PACS02三、配置群集节点PACS021、右键虚拟机“PACS02”,选择“【Settings】”2、单击【Add】3、单击选择“Hard Disk”,单击【Next】4、选择“Use an existing virtual disk”,单击【Next】5、单击【Browe】,选择新建虚拟存储,单击【Finish】6、单击选择所新建的虚拟磁盘,单击【Advanced】7、选择虚拟磁盘节点为“SCSI 1:0”,单击【ok】8、重复1-7,创建虚拟磁盘“SCSI 1:1”DBSQL.vmdk(存放SQL数据文件) 20GB;“SCSI 1:2”Quorum.vmdk(群集仲裁盘) 1GB9、关闭VMWare WorkStation10、打开虚拟机PACS01配置文件所在存储11、单击选择PACS01.vmx,单击右键,选择打开方式为“记事本”,在文档最后添加一行“disk.locking= "FALSE"”保存并退出。
VMware虚拟机共享文件夹的使用图解
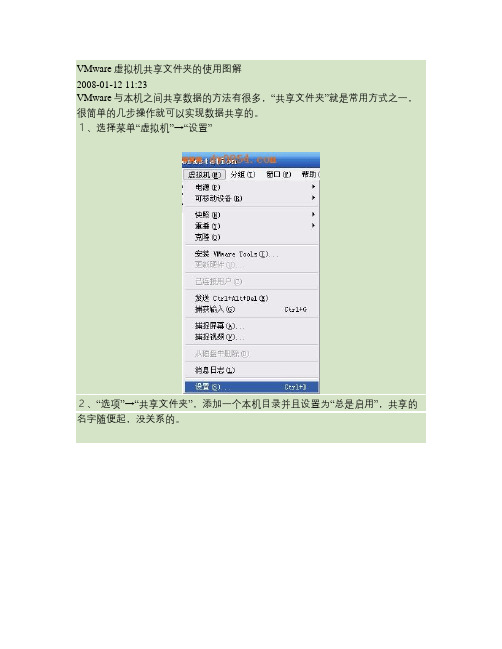
VMware虚拟机共享文件夹的使用图解2008-01-12 11:23VMware与本机之间共享数据的方法有很多,“共享文件夹”就是常用方式之一,很简单的几步操作就可以实现数据共享的。
1、选择菜单“虚拟机”→“设置”2、“选项”→“共享文件夹”,添加一个本机目录并且设置为“总是启用”,共享的名字随便起,没关系的。
3、在虚拟机中,右键点击我的电脑,选择“映射网络驱动器”。
4、“浏览”→“Vmware Shared Floders”,找到本机共享的那个文件新夹。
5、在虚拟机的“我的电脑”中看看,是不是多出一个网络硬盘出来了,打开就可以操作了!虚拟机下共享文件夹的设定前几在LINUX下装了Windows,忖度不快,但总比在Windows和Linux下来回重启要好的多。
刚开始设共享文件夹没成功,咨询了一下田师兄才知道是忘了映射网络驱动了,现在把整个过程记录下来,以备不时之需。
虚拟机的安装教程已经很多了,这里不再多说了,我下的是VirtualBox_1.5.2_Linux_x86.run,用sh安装即可,刚装好的时候提示说少了个什么东东,后来在google下查了一下就解决了,缺啥装啥嘛,ubuntu下安装东东是一种享受。
安装完虚拟机后就可以装windows了。
1. 装完后在vbox的启动页面里设定“共享文件夹”->“双向”,再设一个共享文件夹的目录,我在主目录下建了一个live文件夹,以其为共享文件夹。
2. 启动windows,双击vboxaddtional……,安装虚拟电脑工具包,也可以在“设备”->“安装虚拟电脑工具包”。
3. 在windows里打开我的电脑,选择“工具”->“映射网络驱动器”。
OK,大功告成了。
打开我的电脑看看,里面是不是多了一个“网络驱动器Z虚拟机共享主机文件夹设置操作系统 2008-12-20 17:34:31 阅读1373 评论1字号:大中小(一)主机:XP SP2 虚拟机软件:VMware 6.0 虚拟机:XP SP2 已安装了VMware tools的话直接拖就完事了... 如果没安装的话不能直接拖。
为虚拟机创建共享磁盘

配置时候需要用到共这可根据实际情况选虚拟机配置,规范文件,话框中设置计算机名称,■ 河北 王春海 赵艳磁盘。
创建共享磁盘具体配置下面介绍关键的配置步骤,本文以vSphere 6.5为图1 从模板部署虚拟机图2 设置计算机名称中做故障转移群集不需要仲“厚的虚拟默认情况下,列器”,用在下拉列表中SCSI使:“确定”虚控享”下拉列表中选择“虚拟”。
13.修改WS16R2-A2虚拟机的设置,添加硬盘选择“现有硬盘”,在“选择文件”对话框浏览选择WS16R2-A1虚拟机目录中的WS16R2-A1_1.vmdk虚拟硬盘文件,这是在WS16R2-A1虚拟机添加的大小为1GB的虚拟硬盘。
14.返回WS16R2-A2虚拟机设置对话框,添加了大小为1GB的现有硬盘文件,在“虚拟设备节点”选择“新SCSI控制器”“SCSI(1:0)”,为WS16R2-A2虚拟机添加现有硬盘,选择WS16R2-A1目录中的WS16R2-A1_2.vmdk文件。
15.返回WS16R2-A2虚拟机设置对话框,添加了大小为500GB的现有硬盘文件,在“虚拟设备节点”选择“新控制器”“SCSI(1:“SCSI控制器总线共享”控制器1”线共享”为“确定”按使用共享磁盘配置故障转移集群WS16R2-A2之后,实验。
本文以集为例”的盘管理”的磁盘个磁盘联机、使用地址,虚的拟IPC:\windows\图3 新添加的磁盘■ 河南 郭建伟让RemoteAPP动关联本地文件为了图1 配置分发程序包参数包复制到客户端,在客户端以域管理员身份安装该包。
这样,在客户端双击与之关联的程序,就可以打开该远5.在“验证警告”对话框单击“是”按钮,在“测试选项”对话框单击“运行所有测试”。
6.在“用于管理群集的访问点”对话框输入群集名称并设置群集的访问地址,在本示例中设置群集访问地址为172.18.96.57。
在“摘。
vmware ESXserver添加共享磁盘

vmware ESXserver添加共享磁盘在VMware ESX下安装MSCS时发现,建立虚拟共享磁盘的格式必须要为thick,否则在虚拟节点系统里挂接磁盘后操作系统无法启动,出现如下错误提示:VMware ESX Server cannot open the virtual disk, "........vmdk"for clustering. Please verify that the virtual disk was createdusing the 'thick' option.......Reason: thin/TBZ disks cannot be opened in multiwriter mode..提示共享磁盘要以thick选项创建,原因为thin/TBZ格式的虚拟磁盘不能在多重写模式下打开。
使用ssh登陆ESX Server进入虚拟磁盘的目录,修改创建磁盘命令如下:vmkfstools -c 10240m -a lsilogic -d thick sharedisk.vmdk (添加一块10G的名叫sharedisk的磁盘)在VC上,编辑虚拟节点属性,添加上面创建的磁盘,选择已存在的虚拟磁盘,修改SCSI Controller1的SCSI总线属性为“物理”,并修改每个做群集虚拟机的.vmx配置文件,在文件最后添加如下字段:disk.locking = "FALSE"diskLib.dataCacheMaxSize = "0"scsi1.sharedBus = "virtual"......scsi1:0.deviceType = "disk"……(有多少块磁盘就依次添加上去)启动虚拟节点系统,正常使用共享磁盘。
1.建立虚拟磁盘telnet到ESX server console,通过如下命令建立虚拟磁盘vmkfstools -c 512m -a lsilogic -d thick data4.vmdk #此处thick选项必须,指定预先分配空间2.添加磁盘并共享通过VMware Infrastructure Client登入ESX server图形console,将新建立的磁盘加入虚拟机中,再加入磁盘时选择与不需要共享的磁盘不同的scsi控制器,如已有scsi 0:0是安装操作系统的磁盘设备,则新加入的磁盘应选择scsi 1:x,这样磁盘被加入后会自动建立一个新的scsi控制器,如下图所示。
【VIP专享】VM共享磁盘创建及挂载

Vmware创建共享磁盘详细步骤1,在将vmware安装的文件夹下创建sharedisks文件夹:2,运行—cmd,打开DOS窗口,切换至Vmware安装的目录,然后执行vmware-vdiskmanager.exe -c -s 20480M -a lslogic -t 2 G:\vm\VMware\sharedisks\sharedisk-1.vmdk如果是win7系统会提示没有权限,解决办法很简单,将VMware以管理员身份运行就OK正在创建:3,在我们之前新建的目录sharedisks可看到新生成的两个文件4,配置虚拟机选择 Hard Disk,然后选择 Add..选择 Use an exiting virtual disk,然后点击 Next点击 Browse …,选择我们设置好的共享磁盘点击 Finish这里我们选择 Keep Exiting Format ,如果有需要,可以选择 Convert 进行格式转换选中我们刚建好的磁盘,然后点击 Advanced…点击 OK 即可完成本台设备win2003-1的磁盘添加。
5,配置虚拟机文件,两个节点都要配置找到虚拟机的目录,用记事本打开VMX文件在下方添加diskLib.dataCacheMaxSize = "0"diskLib.dataCacheMaxReadAheadSize = "0"diskLib.DataCacheMinReadAheadSize = "0"diskLib.dataCachePageSize = "4096"diskLib.maxUnsyncedWrites = "0"disk.locking = "false"scsi0:1.deviceType = "disk"scsi0:1.SharedBus = "Virtual"scsi0:1.shared = "true"然后重启两个虚拟机,fdisk -l 查看,是否都已挂载该共享磁盘。
Vmware-workstation9创建共享磁盘

Vmware workstation9创建共享磁盘不论是linux系统还是windows系统,在vmware虚拟机上做双机测试的过程中经常要用到共享磁盘,以下是在vmware 9上测试成功的一种方法,供大家参考!本次测试暂不研究vmware的实现原理,以实现共享磁盘的需求为目地,因此对一些参数的意义没有做深入的研究,有兴趣的可以自己找些资料研究下。
【实验环境】主机操作系统:Windows7-64bitVmware workstation:9.0.2 build-1031769(应该是当前的最新版本)【操作步骤】可以先提前创建一个目录放共享磁盘文件本例中为Z:\sharedisk执行vmware安装目录下的vmware-vdiskmanager.exe命令创建3块共享磁盘(参数除了虚拟磁盘大小能看懂,其它暂不清楚是什么意思,哪位大神有详细的参数说明希望能赐教)vmware-vdiskmanager.exe -c -s 2000Mb -a lsilogic -t 2 "D:\SYSTEM\Virtual machine\ShareDisk\sharedisk1.vmdkvmware-vdiskmanager.exe -c -s 2000Mb -a lsilogic -t 2 "Z:\sharedisk\sharedisk2.vmdk vmware-vdiskmanager.exe -c -s 2000Mb -a lsilogic -t 2 "Z:\sharedisk\sharedisk3.vmdk出现以下提示表示创建成功。
Create: 100% done.Virtual disk creation successful.通过虚拟机界面添加磁盘,注意选择磁盘的时候要选择“use an existing virtual disk”使用已存在的虚拟磁盘,注意以下设置主备机要一致,特别是磁盘的顺序不要搞错了。
VMWare创建共享磁盘

实验环境:VMware Workstation 9.0.1 build-8942471、创建磁盘实验中在本地磁盘E中的/VMWareOS创建Share文件夹,用来存放5GB的共享磁盘。
打开cmd。
进入VMwareStation位置,如下命令:在虚拟机软件的安装目录下,有个vmware-vdiskmanager.exe文件(老版本用plainmaker.exe),运行该命令:E:\VMWareStation>vmware-vdiskmanager.exe -c -s 5000MB -a lsilogic -t 2 e:/VMW areOS/Share/sharedisk.vmdk以上命令在D盘的share文件夹下生成了个5GB的磁盘,有两个文件:sharedisk-flat.vmdksharedisk.vmdk2、配置虚拟机选择相应的虚拟机,添加磁盘。
添加已存在的虚拟磁盘,如下图选项:选择刚刚创建的虚拟磁盘sharedisk.vmdk选择Finish后会提示是否转换虚拟磁盘的格式,选择保持原格式,否则无法设置虚拟磁盘的节点。
对新添加的虚拟磁盘属性进行设置,选Advanced,为新加的硬盘选择虚拟设备节点:sharedisk.vmdk选定SCSI 2:0。
分别打开两台虚拟机目录中的vmx文件,在最后一行添加:scsi2:0.shared="TRUE"disk.locking="FALSE"scsi2:0.SharedBus="Virtual"如不添加以上信息,无法同时开启两个虚拟机。
添加后保存退出vmx文件,开启两个虚拟机,该虚拟磁盘就已经共享。
Vmwareworkstation创建共享磁盘

Vmware workst ation创建共享磁盘不论是lin ux系统还是windows系统,在vmwar e虚拟机上做双机测试的过程中经常要用到共享磁盘,以下是在vm ware9上测试成功的一种方法,供大家参考!本次测试暂不研究vm w a re的实现原理,以实现共享磁盘的需求为目地,因此对一些参数的意义没有做深入的研究,有兴趣的可以自己找些资料研究下。
【实验环境】主机操作系统:Window s7-64bitVmware workst ation:10.0.1 build-1379776【操作步骤】可以先提前创建一个目录放共享磁盘文件本例中为Z:\shared isk开始-运行cmd,进入vmwa re安装目录,执行vmwa re安装目录下的vmware-vdiskm anage r.exe 命令创建3块共享磁盘vmware-vdiskm anage r.exe -c -s 2000Mb -a lsilog ic -t 4 "Z:\shared isk\shared isk1.vmdkvmware-vdiskm anage r.exe -c -s 2000Mb -a lsilog ic -t 4 "Z:\shared isk\shared isk2.vmdkvmware-vdiskm anage r.exe -c -s 2000Mb -a lsilog ic -t 4 "Z:\shared isk\shared isk3.vmdk出现以下提示表示创建成功。
Create: 100% done.Virtua l disk creati on succes sful.通过虚拟机界面添加磁盘,注意选择磁盘的时候要选择“use an existing virtua l disk”使用已存在的虚拟磁盘,注意以下设置主备机要一致,特别是磁盘的顺序不要搞错了。
- 1、下载文档前请自行甄别文档内容的完整性,平台不提供额外的编辑、内容补充、找答案等附加服务。
- 2、"仅部分预览"的文档,不可在线预览部分如存在完整性等问题,可反馈申请退款(可完整预览的文档不适用该条件!)。
- 3、如文档侵犯您的权益,请联系客服反馈,我们会尽快为您处理(人工客服工作时间:9:00-18:30)。
VMware中创建共享磁盘阵列的方法VMware中创建共享磁盘阵列的方法2007-11-07 08:29:59| 分类:CLUSTER | 标签:|字号大中小订阅1.创建共享磁盘柜在虚拟机软件的安装目录下,有个vmware-vdiskmanager.exe文件(老版本用plainmaker.exe),把它复制到共享磁盘柜目录下,创建共享磁盘(老版本共享磁盘文件的扩展名为.pln)F:\虚拟机\共享磁盘柜>vmware-vdiskmanager.exe -c -s 200Mb -a lsilogic -t 2 quorum.vmdkF:\虚拟机\共享磁盘柜>vmware-vdiskmanager.exe -c -s 4Gb -a lsilogic -t 2 sharedisk.vmdk创建完毕后,目录下有四个新文件quorum-flat.vmdkquorum.vmdksharedisk-flat.vmdksharedisk.vmdk2.配置虚拟机在虚拟机器界面选择“Edit virtual machine settings”à添加硬盘,选“Use a existing virtual disk”,分别添加quorum.vmdk、sharedisk.vmdk双击新加的磁盘,在弹出的磁盘属性窗选“advance”,为新加的硬盘选择虚拟设备节点:quorum.vmdk选订“SCSI 0:1”,sharedisk.vmdk选定“SCSI 1:1”。
分别打开两台虚拟机目录中的vmx文件,在最后一行添加:disk.locking="FALSE"scsi0:1.SharedBus="Virtual"scsi1:1.SharedBus="Virtual"vmware中设置共享磁盘,需要满足两个条件:1、硬盘的高级属性中必须设置成1:0,如果增加第二块共享硬盘,也设成1:0,系统就会报错,所以设置成1:1(这种方式本人还没试过,不过在oracle双机的文章中看到过这样的设置方法)2、需要在vmware的配置属性文件(如rhel3.vmx)中加入两条属性scsi[n].sharedBus = "virtual"disk.locking = "false"系统启动的时候会锁定磁盘,所以当启动linux1后共享磁盘被锁定了,linux2就起不来了,因此需要加入disk.locking = "false" 。
一般来说,如果是scsi1:0,则n为1,也就是scsi1.sharedBus = "virtual" ,表示所有的bus都共享,vmare推荐这种做法。
如果说是不是所有的bus都共享的话,可以将上述scsi1.sharedBus = "virtual"改成scsi1:1.shared = "true" 。
SCSI reservation must be enabled in a virtual machine before you can share its disks. To enable it, make sure the virtual machine is powered off. Open the configuration file (.vmx file on Windows hosts, .cfg file on Linux hosts) in a text editor and add the line scsi[n].sharedBus = "virtual" anywhere in the file, where [n] is the SCSI bus being shared. VMware recommends you set up the shared disks on their own SCSI bus, which is a different bus than the one the guest operating system uses. For example, if your guest operating system is on scsi0:0, you should set up disks to share on scsi1 bus.For example, to enable SCSI reservation for devices on the scsi1 bus, add the following line to the virtual machine's configuration file:scsi1.sharedBus = "virtual"This gives the whole bus the ability to be shared. However, if you would rather not share the whole bus, you can selectively enable SCSI reservation for a specific SCSI disk on the shared bus. This prevents the locking of this specific disk. Add the following line to the configuration file:scsi1:1.shared = "true"If SCSI reservation is enabled (that is, scsi1.sharedBus is set to "virtual"), then this setting is ignored.In addition to enabling SCSI reservation on the bus, you need to allow virtual machines to access the shared disk concurrently. Add the following line to the virtual machine's configuration file:disk.locking = "false"This setting permits multiple virtual machines to access a disk concurrently. Be careful though; if any virtual machine not configured for SCSI reservation tries to access this disk concurrently, then the shared disk is vulnerable to corruption or data loss.When SCSI reservation is enabled, a reservation lock file that contains the shared state of the reservation for the given disk is created. The name of this file consists of the filename of the SCSI disk appended with .RESLCK.For example, if the disk scsi1:0.filename is defined in the configuration file asscsi1:0.fileName = "//vmSCSI.pln"then the reservation lock file for this disk is given the default name "//vmSCSI.pln.RESLCK"However, you can provide your own lock file name. Add a definition for scsi1:0.reslckname to the configuration file. For example, ifscsi1:0.reslckname = "/tmp/scsi1-0.reslock"is added to the configuration file, it overrides the default lock file name.Selecting the DiskOnce SCSI reservation is enabled for a disk — that is, thescsi[n].sharedBus = "virtual" and disk.locking = "false" settings are added to the configuration file for each virtual machine wanting to sharethis disk, you need to point to this disk for each virtual machine that wants to access it.Sharing a Disk on the scsi0 BusVMware does not recommend sharing a disk on SCSI bus 0.4.先打开第一台虚拟机,在打开第二台虚拟机,打开后,执行第一台虚拟机的"计算机管理-磁盘管理,取消"欢迎使用写入签名和升级磁盘向导"-右击磁盘1-签名-签名后请对磁盘1和磁盘2进行分区格式化.执行第二台虚拟机的"计算机管理-磁盘管理,取消"欢迎使用写入签名和升级磁盘向导"-右击磁盘1-签名-签名后请对磁盘1和磁盘2进行分区格式化.。
