Zebra路由软件详细使用教程
centos7 zebra用法 -回复

centos7 zebra用法-回复CentOS 7中如何使用ZebraZebra是一个开源的路由软件套件,它提供了类似于Cisco IOS的路由协议,如RIP、OSPF和BGP等。
在CentOS 7中使用Zebra可以实现网络路由的管理和配置。
本文将一步一步地介绍如何在CentOS 7上安装和配置Zebra。
第一步:安装Zebra要在CentOS 7上安装Zebra,需要执行以下命令:sudo yum install -y quagga这将使用yum包管理器自动安装Zebra软件。
第二步:配置Zebra安装完成后,需要进行一些配置才能启动Zebra。
我们需要创建一个配置文件来指定Zebra应该监听哪些接口和使用哪些协议。
在CentOS 7上,Zebra的配置文件位于/etc/quagga/目录中,我们需要创建一个名为zebra.conf的文件。
执行以下命令创建文件并打开编辑器进行编辑:sudo vi /etc/quagga/zebra.conf将以下内容复制到文件中:! zebra.conf示例配置文件!! 以下配置将启用Zebra和准备一个接口,接口的IP地址是192.168.1.1/24。
! 还需指定网关的IP地址以及日志文件的位置。
!开始定义Zebra配置!! 设定路由器ID!router-id 192.168.1.1! 设定全局网络协议!! 可以启用任何需要的协议,例如RIP或OSPF,只需去掉注释!!router rip!network eth0!network eth1! 设定接口并指定IP地址!interface eth0ip address 192.168.1.1/24! 指定默认网关!ip route 0.0.0.0/0 192.168.1.254! 指定日志文件的位置!log file /var/log/quagga/zebra.log!结束定义Zebra配置保存并关闭文件。
搞定zebra 在Ubuntu 下搭建路由器1(图解)

搞定zebra 在Ubuntu 下搭建路由器(图解)-----------------------------------------------------------------------------------------写在之前:在网上查找了不少相关资料,但是由于它们往往太过简略,缺乏我需要的关键内容,导致自己花了不少时间才做出来,历经不少坎坷,不过确实学到了不少东西,本着开源的精神把我的方法分享给大家,不会是最好,但一定是原创(网络模型是借鉴网上的)。
----------------------------------------------------------------------------------------一、网络模型:二、模拟环境:路由器A,B /客户端2:Ubuntu14.0464位(均为虚拟机)客户端1:Windows 764位(真实环境)虚拟机版本:VMware 10.0.0zebra 版本:Zebra-0.95a三、搭建之前:1.安装VMware10.0.0(建议在windows 下使用VMware,在Linux 下使用VitualBox,个人经验!)(不要忘了VMtools )路由器A 路由器B客户端1客户端22.安装Ubuntu14.04(目前最新版!)虚拟机,安装时网络连接请选择桥接(与主机处于同一网络)勾选复制物理网络地址。
3.安装zebra-0.95a,make的时候可能出现生成rtadv.o错误,此时在/lib中的zebra.h增加如下代码一般可以解决问题。
#ifdef GNU_LINUX#define__USE_GNU#endif4.使用root权限操作zebra,ripd四、具体步骤:1.在设置中给每个VMware虚拟机增加一个网络适配器,作为eth1使用。
2.在root下,cd/usr/local/etc,拷贝zebra.conf和ripd.conf,(默认普通用户对/usr/local/etc没有写权限,当然你可以自己配置)3.手动配置网络地址客户端1:客户端2:路由器A eth1:路由器A eth0:路由器B eth0:路由器B eth1:根据子网掩码的算法,以上可以分为如下网段,10.170.66.0-10.170.66.25530.0.0.0-30.0.0.25540.0.0.0-40.0.0.255网段之间,需要使用路由来连接,否则不可访问不同网段主机,至于网关,主要起转发ip包的作用(这个功能请某些系统需要设置ip.forward=1,此ubuntu版本默认,无需修改)。
Zebra路由软件详细使用教程

Zebra路由软件详细使用教程 [转贴 2008-03-20 21:31:42]字号:大中小前言Zebra是一个路由软件包,提供基于TCP/IP路由服务,支持RIPv1, RIPv2, RIPng, OSPFv2, OSPFv3, BGP- 4,和 BGP-4+等众多路由协议。
Zebra还支持BGP特性路由反射器(Route Reflector)。
除了传统的 IPv4路由协议,Zebra也支持IPv6路由协议。
如果运行的SNMP守护进程(需要ucd-snmp)支持SMUX协议,Zebra 还能支持路由协议MIBs。
由以上可见,Zebra的确是一个很不错的路由系统,但比起真正的路由器就简直是小儿科,所以网络高手就当这文章是小孩子过家家吧,而对于象我这样的初学者(特别是没有真实设备或足够设备进行实验)也不失为一个学习和熟悉路由配置、路由协议的好工具。
我没有实际的配置经验,对路由的技术细节也不是十分清晰,完全是在扔破砖头。
希望路由高手指正概念错误。
安装Zebra目前最新的版本是,它的安装非常简单,我们只需从下载zebra-,然后执行以下命令安装(本文环境是):shell> tar xzfshell> cdshell> ./configureshell> makeshell> make install这样Zebra就安装好了,安装的执行文件:shell> ls /usr/local/sbinbgpd ospfd ripd zebra配置文件:shell> ls /usr/local/etc运行编译安装完Zebra后,可以看到有4个可执行文件和5个配置样本文件,我们就使用它的配置样本文件:shell> cd /usr/local/etcshell> cpZebra的各进程有各自的终端接口或VTY,如果我们需要给连接到它们的端口设置别名的话,在/etc/ services文件添加如下内容:zebrasrv 2600/tcp # zebra servicezebra 2601/tcp # zebra vtyripd 2602/tcp # RIPd vtyripngd 2603/tcp # RIPngd vtyospfd 2604/tcp # OSPFd vtybgpd 2605/tcp # BGPd vtyospf6d 2606/tcp # OSPF6d vty然后就可以启动Zebra了:shell> zebra -d这样,Zebra就以守护进程启动了,其它的参数请参考zebra -h。
Quagga的安装和使用

Quagga的安装和使⽤Quagga的安装和使⽤QUAGGA是⼀款开源的路由软件,也是zebra(已经停⽌更新)的升级维护版本。
作⽤:将linux设备变成⼀个功能完整的路由器。
⽀持的协议:rip,ospf,bgp等。
最新版本是2017.2.8⽇的1.2.0,但是在编译的时候源码出现了重定义错误(没研究源码等内容),所以在这⾥我选择的是quagga-1.1.1。
测试环境:VM 12 CentOS 6.5 64位1. Quagga的安装在CentOS下可以直接使⽤yum –y install quagga进⾏安装,也可以使⽤quagga的源代码包进⾏编译安装,如下所⽰:2. 配置zebra复制zebra的配置⽂件模板到下⾯⽬录下,并且启动zebracp /usr/share/doc/quagga-0.99.15/zebra.conf.sample /etc/quagga/zebra.conf如下图所⽰:3. 如果需要使⽤zebra进⾏⽀持OSPF和BGP等协议,还要负载ospfd和bgpd配置⽂件到下⾯的⽬录下,并且启动服务:cp /usr/share/doc/quagga-0.99.15/ospfd.conf.sample /etc/quagga/ospfd.confcp /usr/share/doc/quagga-0.99.15/bgpd.conf.sample /etc/quagga/bgpd.conf如下图所⽰:4. 添加多块⽹卡(物理机添加物理⽹卡,虚拟机添加多块虚拟⽹卡),如下:5. 配置quagga在终端下使⽤vtysh或者telnet 127.0.0.1 2601都可以进⼊quagga的控制台,如下:[root@R1 networking]# vtysh[root@R1 networking]# telnet 127.0.0.1 2601如下图:6. 使⽤OSPF协议打底,配置BGP协议发布路由,如下拓扑:测试结果如下:R1:R2:R3:R4:Selecting previously unselected package quagga-core.(Reading database ... 164946 files and directories currently installed.)Preparing to unpack .../0-quagga-core_1.2.4-1_amd64.deb ...Adding user `quagga' to group `quaggavty' ...Adding user quagga to group quaggavtyDone.Unpacking quagga-core (1.2.4-1) ...Selecting previously unselected package quagga-bgpd.Preparing to unpack .../1-quagga-bgpd_1.2.4-1_amd64.deb ...Unpacking quagga-bgpd (1.2.4-1) ...Selecting previously unselected package quagga-isisd.Preparing to unpack .../2-quagga-isisd_1.2.4-1_amd64.deb ...Unpacking quagga-isisd (1.2.4-1) ...Selecting previously unselected package quagga-ospf6d.Preparing to unpack .../3-quagga-ospf6d_1.2.4-1_amd64.deb ...Unpacking quagga-ospf6d (1.2.4-1) ...Selecting previously unselected package quagga-ospfd.Preparing to unpack .../4-quagga-ospfd_1.2.4-1_amd64.deb ...Unpacking quagga-ospfd (1.2.4-1) ...Selecting previously unselected package quagga-pimd.Preparing to unpack .../5-quagga-pimd_1.2.4-1_amd64.deb ...Unpacking quagga-pimd (1.2.4-1) ...Selecting previously unselected package quagga-ripd.Preparing to unpack .../6-quagga-ripd_1.2.4-1_amd64.deb ...Unpacking quagga-ripd (1.2.4-1) ...Selecting previously unselected package quagga-ripngd.Preparing to unpack .../7-quagga-ripngd_1.2.4-1_amd64.deb ...Unpacking quagga-ripngd (1.2.4-1) ...Selecting previously unselected package quagga.Preparing to unpack .../8-quagga_1.2.4-1_amd64.deb ...Unpacking quagga (1.2.4-1) ...Setting up quagga-core (1.2.4-1) ...Created symlink /etc/systemd/system/multi-user.target.wants/zebra.service → /lib/systemd/system/zebra.service. Setting up quagga-bgpd (1.2.4-1) ...Created symlink /etc/systemd/system/multi-user.target.wants/bgpd.service → /lib/systemd/system/bgpd.service. Setting up quagga-pimd (1.2.4-1) ...Created symlink /etc/systemd/system/multi-user.target.wants/pimd.service → /lib/systemd/system/pimd.service. Setting up quagga-ripd (1.2.4-1) ...Created symlink /etc/systemd/system/multi-user.target.wants/ripd.service → /lib/systemd/system/ripd.service. Setting up quagga-ripngd (1.2.4-1) ...Created symlink /etc/systemd/system/multi-user.target.wants/ripngd.service → /lib/systemd/system/ripngd.service. Setting up quagga-ospf6d (1.2.4-1) ...Created symlink /etc/systemd/system/multi-user.target.wants/ospf6d.service → /lib/systemd/system/ospf6d.service. Setting up quagga-isisd (1.2.4-1) ...Created symlink /etc/systemd/system/multi-user.target.wants/isisd.service → /lib/systemd/system/isisd.service. Setting up quagga-ospfd (1.2.4-1) ...Created symlink /etc/systemd/system/multi-user.target.wants/ospfd.service → /lib/systemd/system/ospfd.service. Setting up quagga (1.2.4-1) ...Processing triggers for man-db (2.8.3-2ubuntu0.1) ...lsgx@DESKTOP-OS0DFSI:~$ vtysh==========⼀、安装流程使⽤虚拟机vmware9 ubuntu12.04LTS quagga-1.1.1.tar.gz安装过程:(在相应的存放tar包的⽬录)1、 tar -xzvf quagga-1.1.1.tar.gz2、 cd quagga-1.1.13、 ./configure --enable-vtysh --enable-user=root --enable-group=root --enable-vty-group=root 上述命令为打开vty功能(CLI功能)并给予相应⽤户权限出现错误(视机器⽽定,如果机器已经安装好这些软件,就不会出现错误):error: GNU awk is required for lib/memtype.h made by memtypes.awk.BSD awk complains: awk: gensub doesn't support backreferences (subst "\1")解决办法:sudo apt-get insatll gawk安装后重新编译,通过。
zebra l10ax 企业版平板电脑 快速入门指南说明书
L10ax 企业版平板电脑快速⼊⻔指南Windows™2023/06/07ZEBRA 和标志性的 Zebra 斑⻢头像是 Zebra Technologies Corporation 在全球许多司法管辖区内注册的商标。
所有其他商标均为其各⾃所有者的财产。
©2023 Zebra Technologies Corporation 和/或其⼦公司。
保留所有权利。
本⽂档信息如有更改,恕不另⾏通知。
本⽂档中描述的软件根据许可协议或保密协议提供。
软件只能按照上述协议的条款使⽤或复制。
有关法律和专有声明的详细信息,请访问:软件:/linkoslegal.版权和商标: /copyright.专利: .保修: /warranty.最终⽤⼾许可协议: /eula.使⽤条款所有权声明本⼿册中包含 Zebra Technologies Corporation 及其⼦公司(“Zebra Technologies”)的专有信息。
⼿册仅供操作与维护本⽂所述设备的有关各⽅参考与使⽤。
未经 Zebra Technologies 的明确书⾯许可,不得出于任何其他⽬的使⽤、复制此类专有信息或将其披露给任何其他⽅。
产品改进持续改进产品是 Zebra Technologies 的⼀项政策。
所有规格和设计如有更改,恕不另⾏通知。
免责声明Zebra Technologies 已采取措施保证发布的⼯程规格和⼿册正确⽆误,但难免发⽣错误。
ZebraTechnologies 保留更正任何此类错误的权利,且不承担由此产⽣的任何责任。
责任限制在任何情况下,Zebra Technologies 或涉及附属产品(包括软硬件)的编制、⽣产或交付的任何其他⽅对于因使⽤本产品或⽆法使⽤本产品引起的任何损害(包括但不限于商业利润损失、业务中断、商业情报损失等连带损害)概不负责。
即使 Zebra Technologies 已被告知可能发⽣此类损害,本公司也概不负责。
搞定zebra在Ubuntu下搭建路由器1(图解)
搞定zebra在Ubuntu下搭建路由器1(图解)搞定zebra 在Ubuntu 下搭建路由器(图解)-----------------------------------------------------------------------------------------写在之前:在⽹上查找了不少相关资料,但是由于它们往往太过简略,缺乏我需要的关键内容,导致⾃⼰花了不少时间才做出来,历经不少坎坷,不过确实学到了不少东西,本着开源的精神把我的⽅法分享给⼤家,不会是最好,但⼀定是原创(⽹络模型是借鉴⽹上的)。
----------------------------------------------------------------------------------------⼀、⽹络模型:⼆、模拟环境:路由器A,B /客户端2:Ubuntu14.0464位(均为虚拟机)客户端1:Windows 764位(真实环境)虚拟机版本:VMware 10.0.0zebra 版本:Zebra-0.95a三、搭建之前:1.安装VMware10.0.0(建议在windows 下使⽤VMware,在Linux 下使⽤VitualBox,个⼈经验!)(不要忘了VMtools )路由器A 路由器B客户端1客户端22.安装Ubuntu14.04(⽬前最新版!)虚拟机,安装时⽹络连接请选择桥接(与主机处于同⼀⽹络)勾选复制物理⽹络地址。
3.安装zebra-0.95a,make的时候可能出现⽣成rtadv.o错误,此时在/lib中的zebra.h增加如下代码⼀般可以解决问题。
#ifdef GNU_LINUX#define__USE_GNU#endif4.使⽤root权限操作zebra,ripd四、具体步骤:1.在设置中给每个VMware虚拟机增加⼀个⽹络适配器,作为eth1使⽤。
2.在root下,cd/usr/local/etc,拷贝zebra.conf和ripd.conf,(默认普通⽤户对/usr/local/etc没有写权限,当然你可以⾃⼰配置)3.⼿动配置⽹络地址客户端1:客户端2:路由器A eth1:路由器A eth0:路由器B eth0:路由器B eth1:根据⼦⽹掩码的算法,以上可以分为如下⽹段,10.170.66.0-10.170.66.25530.0.0.0-30.0.0.25540.0.0.0-40.0.0.255⽹段之间,需要使⽤路由来连接,否则不可访问不同⽹段主机,⾄于⽹关,主要起转发ip包的作⽤(这个功能请某些系统需要设置ip.forward=1,此ubuntu版本默认,⽆需修改)。
用Zebra做OSPF实验
用Zebra做OSPF实验关键字: zebraOSPF(开放最短路径优先)路由协议是一项链路状态型技术,是目前IGP中应用最广、性能最优的一个协议,解决了RIP不能解决的大型、可扩展的网络需求而写的,适用于大规模的网络。
Zebra支持OSPFv2和OSPFv3(用于IPv6的OSPF,CISCO还未对其封装),由于条件所限,下面的OSPF实验同样是在两台单网卡的RedHat7.2下做的。
Zebra使用ospfd程序实现OSPF路由功能,但ospfd需要从zebra程序获得接口信息,所以zebra程序必须在ospfd程序之前运行。
ospfd不支持多个OSPF进程,我们不能指定OSPF进程号。
初始化第一台机器:shell_1> cd /usr/local/etcshell_1> cp zebra.conf.sample zebra.confshell_1> cp ospfd.conf.sample ospfd.confshell_1> zebra -d进入zebra设置IPshell_1> telnet localhost 2601Password:Router> enPassword:Router# conf tRouter(config)# hostname r1r1(config)# int eth0r1(config-if)# ip address 192.168.5.121/24r1(config-if)# ctrl+zr1# copy run start进入第一台机器的ospf设置shell_1> ospfd -dshell_1> telnet localhost 2604Password:ospfd> enospfd# conf tospfd(config)# hostname r1_ospfd !改个名字好辨认r1_ospfd(config)# router ospf !启动ospfr1_ospfd(config-router)# ospf router-id 192.168.5.121 !设置router-idr1_ospfd(config-router)# network 192.168.5.0/24 area 0!最关键的,来标识路由器上哪些IP网络号是OSPF的一部分,对于每个网络,我们必须标识该网络所属的区域。
NETGEAR 2个 Powerline 500AV+ XAVB5501 套装用户指南说明书
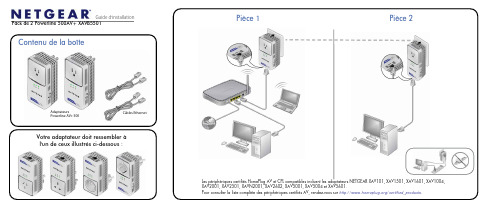
Guide d'installationPack de 2 Powerline 500AV+ XAVB5501Contenu de la boîteAdaptateursCâbles EthernetPowerline AV+ 500Votre adaptateur doit ressembler à l'un de ceux illustrés ci-dessous :Les périphériques certifiés HomePlug AV et CPL compatibles incluent les adaptateurs NETGEAR XAV101, XAV1501, XAV1601, XAV1004, XAV2001, XAV2501, XAVN2001, XAV2602, XAV5001, XAV5004 et XAV5601.Pour consulter la liste complète des périphériques certifiés AV, rendez-vous surAoût 2011Ce symbole a été apposé conformément à la directive européenne 2002/96 sur la mise au rebut des équipements électriques et électroniques (directive WEEE - Waste Electrical and Electronic Equipment). En cas de mise au rebut de ce produit dans un Etat membre de l'Union européenne, il doit être traité et recyclé conformément à cette directive.© 2011 par NETGEAR, Inc. Tous droits réservés. NETGEAR, le logo NETGEAR et Connect with Innovation sont des marques déposées de NETGEAR, Inc. et/ou de ses filiales aux Etats-Unis et/ou dans d'autres pays. Ces informations sont susceptibles d'être modifiées sans préavis. Les autres marques ou noms de produitssont des marques commerciales ou des marques déposées de leurs détenteurs respectifs.Description des voyants et des boutonstionPowerlineVoyant Ethernet SécuritéPort EthernetRéinitialisationVoyant Powerline Avertissement : avant d'appuyer sur le bouton de sécurité, attendez que l'installation de l'adaptateur Powerline soit terminée et que les adaptateurscommuniquent entre eux (voyant Powerline clignotant). En appuyant trop tôt sur ce bouton, vous risquez de désactiver temporairement la communication Powerline. Le cas échéant, appuyez sur le bouton de réinitialisation pour rétablir les paramètres par défaut de l'adaptateur Powerline.Avertissement : afin de réduire la torsion exercée sur la prise secteur par leXAV2501, seul un cordon d'alimentation angle droit peut être branché dans la prise filtrée du XAV2501 GR (allemand) et FR (français) ; il ne doit en aucun cas être tordu.Assistance techniqueNous vous remercions d'avoir choisi les produits NETGEAR.Après l'installation de votre périphérique, notez le numéro de série inscrit sur l'étiquette située sous votre produit. Il vous sera nécessaire pour enregistrer votre produit à l'adresse gear.fr/support/. Vous devez être enregistré pour utiliser notre service d'assistance téléphonique. Nous vous recommandons vivement de procéder à l'enregistrement sur notre site Web.Pour obtenir des mises à jour de produits et consulter le support Web, rendez-vous sur GEAR.fr/support . La licence GPL peut-être incluse avec ce produit. Rendez-vous sur ftp:///files/GPLnotice.pdf pour consulter le contrat de licence GPL.Pour consulter la déclaration de conformité complète, rendez-vous sur le site Web NETGEAR des déclarations de conformité pour l'UE à l'adresse : /app/answers/detail/a_id/11621.EthernetDépannagePour obtenir des informations sur le dépannage, consultez le Manuel de l'utilisateur du XAV5501. Vous pouvez accéder au Manuel de l'utilisateur à l'adresse/support. Recherchez le modèle XAV5501, puis cliquez sur l'onglet Documentation .Informations de sécurité• Pour les homologations nationales (schémas non homologués par des organismesde certification), les normes nationales relatives aux branchements, aux prises de courant et aux blocs directement enfichables (par exemple, aux Etats-Unis) doivent être consultées au cours du test et de l'homologation des produits en fonction des normes nationales.• Puissance nominale de la prise secteur (Amérique du Nord) : 100 à 125 V,0,2 A (max.) ; 50 à 60 Hz, puissance nominale de la prise de courant exclue.• Puissance nominale de la prise secteur (Australie, Royaume-Uni, France, Unioneuropéenne) : 200 à 250 V, 0,2 A (max.), 50 à 60 Hz, puissance nominale de la prise de courant exclue.• Capacité nominale du XAV5501 (charge maximum) : Union européenne : 15 A,250 V~ ; Royaume-Uni : 12 A, 250 V~ ; France : 15 A, 250 V~ ; Amérique du Nord : 14 A, 125 V~ ; Australie : 9 A, 250 V~ ; Suisse : 10 A, 250 V~.• Température de fonctionnement : 0 °C~40 °C• La prise de courant doit être facilement accessible et se trouver à proximité del'équipement.• Seuls les cordons d'alimentation peuvent être branchés à la prise filtrée. Aucun autreéquipement doté d'une fiche directe n'est autorisé. Le cordon d'alimentation doit mesurer 1 m de long maximum et la section transversale 0,75 mm² minimum.• Ne branchez pas de périphériques dépassant la capacité nominale dans la prisefiltrée du XAV5501. La tension de sortie de la prise filtrée doit être identique à celle de la prise de branchement du XAV5501. Afin de ne pas endommager votre système, assurez-vous que les périphériques connectés sont conçus pour fonctionner avec la tension du secteur local.• Si la tension d'entrée est inférieure à 125 V, il se peut que le périphérique branchédans la prise filtrée du XAV5501 ne fonctionne pas de manière optimale.• NE BRANCHEZ PAS DE GROS APPAREILS ELECTROMENAGERS dans la prisefiltrée ou dans un bloc multiprise connecté. Le périphérique n'est pas conçu pour être utilisé avec les appareils électroménagers tels que les climatiseurs, les outilsélectriques, les chauffages d'appoint, les ventilateurs, les sèche-cheveux, les fours ou les réfrigérateurs.• Vérifiez la puissance électrique pour chaque accessoire utilisé avec le périphériqueet respectez la capacité nominale du produit et de votre domicile, ainsi que les exigences électriques.。
花生壳路由器设置_

端口映射帮助文档什么是端口映射?端口映射又称端口转发,有的又称之为NAT、虚拟服务器。
端口映射过程就如同您家在一个小区里B栋2410室,你朋友来找你,找到小区门口,不知道你住哪层哪号?就问守门的保安,保安很客气的告诉了他您家详细门牌号码,这样你朋友很轻松的找到了你家。
这个过程就是外网访问内网通过端口映射的形象说法。
为什么要做端口映射?目前的网络接入主要有2种:1)ADSL连接猫再直接连接主机,这种情况主机是直接进行ADSL宽带拨号,连接上网通过运行CMD 执行ipconfig /all命令可以查看到,PPP拨号连接所获取到得是一个公网IP地址,这种类型的网络是不需要做端口映射的(如图1)图12)ADSL通过路由器来进行拨号,主机通过路由器来进行共享上网,这种情况下主机获取到得通常会是一个192.168.x.x类型的私有(局域网)内网IP地址,如图2:图2这类情况下,是需要在路由器做端口映射,转发端口到对应的服务器上。
端口映射的设置方法:要进行端口映射,首先需要了解清楚服务程序所需要映射的端口是多少,以下列举了部分服务需要映射的默认服务端口号网站TCP:80 FTP TCP:21(控制端口)管家婆财务软件TCP:211 TCP:80 TCP:1433海康威视硬盘录像机TCP:80(WEB端口)TCP:8000(视频数据端口)大华硬盘录像机TCP:80(WEB端口)TCP:37777(视频数据端口)邮件服务 SMTP:TCP25 POP3:TCP110 MSSQL数据库TCP:1433视频采集卡不同厂家所使用的默认端口均不一样,5050 、8000 9000-9002 、37777等以下讲解几款市面主流品牌路由器的端口映射:1)Tp-link路由器(以Tp-link R460为例)内网IP:192.168.1.101是WEB服务器,TP-LINK系列路由器的默认管理地址为http://192.168.0.1,账号admin密码admin 登录到路由器的管理界面,点击路由器的转发规则—虚拟服务器—添加新条目,如图3:图3 端口映射设置如下:服务端口号填写80,如果填写为80-82则代表映射80、81、82端口,IP地址填写内网WEB服务器的IP地址192.168.1.101,协议设置为TCP,若对端口协议类型不了解可以设置选择为ALL,代表所有(包括TCP和UDP),状态必须设置为生效。
斑马ZebraS4M操作手册
斑马ZebraS4M操作手册Zebra S4M1、Zebra S4M条码打印机各部位介绍1.1 控制面板/介质门/电路盖/电源开关/交流电源连接器1.2 警报指示灯/电源指示灯/液晶显示屏/ENTER按钮/MENU(菜单)按钮/上箭头/CANCEL(取消)或左箭头按钮/FEED(进纸)或右箭头按钮//PAUSE(暂停)或下箭头按钮1.3 打印头总成/色带供应轴/色带拾取轴/介质供应架/介质供应导板/折叠式介质槽/张力调节总成/介质导板/打印头松开闩锁/剥离松开杆(选配)/剥离总成(选配)2、Zebra S4M条码打印机控制面板按钮指示灯说明2.1 控制面板液晶屏说明在不同打印模式下,控制面板液晶屏模式有所不同。
■ 在工作模式下,液晶屏显示打印机状态,有时还显示控制面板指示灯,在打印机接收数据时,控制面板显示DATA字样,并循环显示一些点和空白。
■ 在暂停模式下,打印机暂停打印。
■ 在设置模式下,可以使用控制面板液晶屏查看或修改打印机参数。
■ 在错误模式下,液晶屏可以显示警报或错误信息。
2.2 控制面板按钮说明打印机在控制面板上具有六个基本控制按钮,当打印机处于设置模式下时,其中的一些按钮还可作为导航键使用,特定按钮的当前功能是由它旁边的那个指示灯闪亮来确定的。
按钮外观 功能/说明 MENU(菜单)进入和退出设置模式 ENTER 如果需要选择设置模式下的参数或选项,按ENTER 可选择项目。
该按钮只在需要时活动。
CANCEL(取消) CANCEL(取消)功能只在“暂停”模式下有效,按一下CANCEL 按钮会产生以下效果:①取消当前正在打印的标签格式;②如果没有正在打印的标签格式,将取消下一个要打印的内容;③如果没有等待打印的标签格式,则忽略CANCEL 指令。
要清除打印机的整个标签格式存储器,应按住CANCEL 按钮。
FEED(进纸) 送入一张空白标签,①如果打印机空闲或暂停,将立即送入该标签;②如果打印机正在打印,将在打印完成后将标签送入。
Fedora Core 2 zebra路由器配置指南
Fedora Core 2 zebra 路由器配置指南作者:秋叶无声 23.1 zebra 路由器简介 在互连网络中,路由数据流的方法一般都使用路由器。
就路由器而论,虽然有各种品牌的硬件可用,但 是费用较高。
人们自然就会想到运行一个用 Linux 系统构筑的功能丰富的路由器作为代替。
Zebra 路由守 护程序已经使这一切变为现实。
因为支持 IPv4、IPv6 和其它各式各样的协议,所以 Zebra 能够满足我们 所有的路由需求。
它还有一个好处就是, 因为 Cisco IOS 和 Zabra 极为相似, 如果你以前在 Cisco IOS 环 境中工作,可以轻松的过渡到 Zebra 系统;同时,使用 Zebra 也能让你积累起丰富的类似于使用 Cisco IOS 路由器的经验和知识。
23.2 配置接口和内核转发 如果使用 zebra 做路由器,首先系统中要安装两块以上的网卡。
然后要为每块网卡配置 IP 地址,接下 来要配置系统的内核支持 IP 转发。
默认情况下,Fedora Core 2 是不支持内核 IP 转发的。
配置接口地址 是在系统设置→网络中。
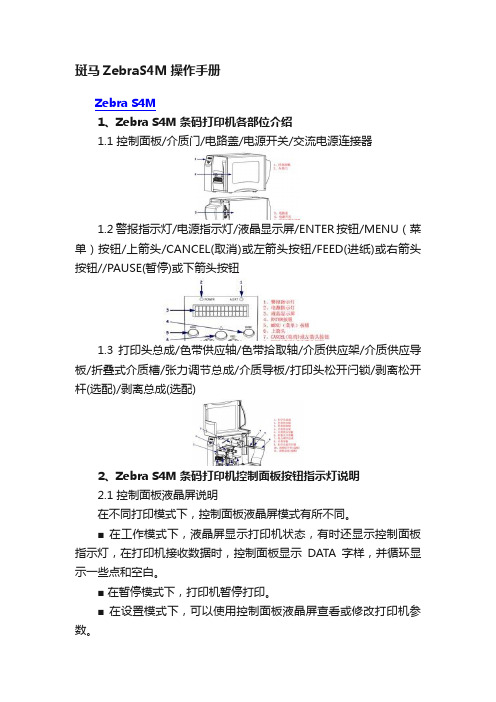
如图 23-1 所示。
图 23-1 网络配置 在“设备”选项卡中可以看到,系统中目前已经安装的网卡。
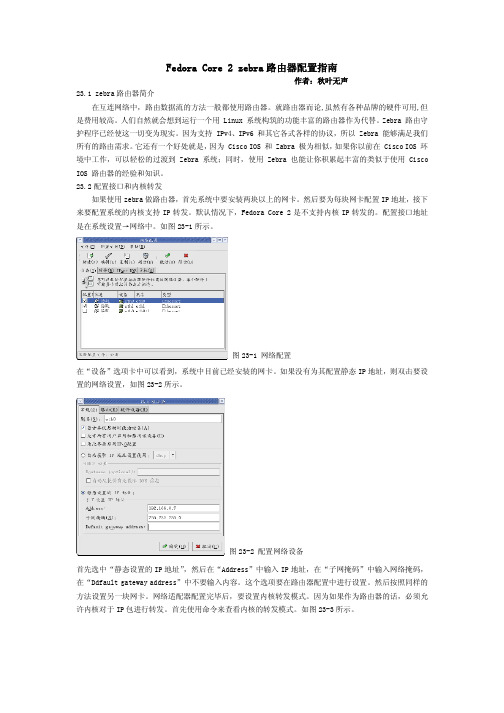
如果没有为其配置静态 IP 地址,则双击要设 置的网络设置,如图 23-2 所示。
图 23-2 配置网络设备 首先选中“静态设置的 IP 地址” ,然后在“Address”中输入 IP 地址,在“子网掩码”中输入网络掩码, 在“Ddfault gateway address”中不要输入内容。
这个选项要在路由器配置中进行设置。
然后按照同样的 方法设置另一块网卡。
网络适配器配置完毕后,要设置内核转发模式。
因为如果作为路由器的话,必须允 许内核对于 IP 包进行转发。
首先使用命令来查看内核的转发模式。
如图 23-3 所示。
图 23-3 显示内核模式 如果命令显示的内容是 0,则表示内核的转发模式是关闭的。
Zebra路由软件详细使用教程
Zebra路由软件详细使用教程 [转贴 2008-03-20 21:31:42]字号:大中小前言Zebra是一个路由软件包,提供基于TCP/IP路由服务,支持RIPv1, RIPv2, RIPng, OSPFv2, OSPFv3, BGP- 4,和 BGP-4+等众多路由协议。
Zebra还支持BGP特性路由反射器(Route Reflector)。
除了传统的 IPv4路由协议,Zebra也支持IPv6路由协议。
如果运行的SNMP守护进程(需要ucd-snmp)支持SMUX协议,Zebra 还能支持路由协议MIBs。
由以上可见,Zebra的确是一个很不错的路由系统,但比起真正的路由器就简直是小儿科,所以网络高手就当这文章是小孩子过家家吧,而对于象我这样的初学者(特别是没有真实设备或足够设备进行实验)也不失为一个学习和熟悉路由配置、路由协议的好工具。
我没有实际的配置经验,对路由的技术细节也不是十分清晰,完全是在扔破砖头。
希望路由高手指正概念错误。
安装Zebra目前最新的版本是,它的安装非常简单,我们只需从下载zebra-,然后执行以下命令安装(本文环境是):shell> tar xzfshell> cdshell> ./configureshell> makeshell> make install这样Zebra就安装好了,安装的执行文件:shell> ls /usr/local/sbinbgpd ospfd ripd zebra配置文件:shell> ls /usr/local/etc运行编译安装完Zebra后,可以看到有4个可执行文件和5个配置样本文件,我们就使用它的配置样本文件:shell> cd /usr/local/etcshell> cpZebra的各进程有各自的终端接口或VTY,如果我们需要给连接到它们的端口设置别名的话,在/etc/ services文件添加如下内容:zebrasrv 2600/tcp # zebra servicezebra 2601/tcp # zebra vtyripd 2602/tcp # RIPd vtyripngd 2603/tcp # RIPngd vtyospfd 2604/tcp # OSPFd vtybgpd 2605/tcp # BGPd vtyospf6d 2606/tcp # OSPF6d vty然后就可以启动Zebra了:shell> zebra -d这样,Zebra就以守护进程启动了,其它的参数请参考zebra -h。
Linux网络配置-Zebra

用Zebra 在Linux 上构建路由器一、Zebra 介绍Zebra 是一个 TPC/IP 路由软件,支持 BGP-4、BGP-4+、OSPFv2、OSPFv3、RIPv1、RIPv2和RIPng。
它的发行遵循GNU通用公共许可协议,可以运行于Linux以及其他一些 Unix 变体操作系统上。
最新版本的Zebra以及文档可以从/下载,Zebra设计独特,采用模块的方法来管理协议。
可以根据网络需要启用或者禁用协议。
Zebra 最为实用的一点是它的配置形式同 Cisco IOS 极其类似。
尽管它的配置与IOS 相比还是有一些不同,但是这对于那些已经熟悉IOS 配置界面的人来说,在这种环境下工作将相当自如。
二、安装1、下载:ftp:///pub/zebra/zebra-0.95a.tar.gz2、安装过程#gunzip zebra-0.95a.tar.gz#tar xvf zebra-0.95a.tar在当前目录下自动生成一个zebra-0.95a 子目录,进入zebra-0.95a 目录后执行以下命令安装:# ./configure# make# make install安装完成后执行文件位于/usr/local/sbin,如下所示:# ls -l /usr/local/sbintotal 6480-rwxr-xr-x 1 root root 1891727 Jan 31 23:37 bgpd-rwxr-xr-x 1 root root 1090742 Jan 31 23:37 ospf6d-rwxr-xr-x 1 root root 1398401 Jan 31 23:37 ospfd-rwxr-xr-x 1 root root 824695 Jan 31 23:37 ripd-rwxr-xr-x 1 root root 713611 Jan 31 23:37 ripngd-rwxr-xr-x 1 root root 677048 Jan 31 23:37 zebra配置样本文件位于/usr/local/etc,如下所示:# ls -l /usr/local/etctotal 44-rw------- 1 root root 572 Jan 31 23:37 bgpd.conf.sample-rw------- 1 root root 2801 Jan 31 23:37 bgpd.conf.sample2-rw------- 1 root root 1110 Jan 31 23:37 ospf6d.conf.sample-rw------- 1 root root 180 Jan 31 23:37 ospfd.conf.sample-rw------- 1 root root 412 Jan 31 23:37 ripd.conf.sample-rw------- 1 root root 396 Jan 31 23:37 ripngd.conf.sample-rw------- 1 root root 375 Jan 31 23:37 zebra.conf.sample三、运行各个zebra 模块运行时需事先定义一个配置文件(*.conf),可直接使用样本配置文件。
Zebra基本配置

ripd 2602/tcp # RIPd vty
ripngd 2603/tcp # RIPngd vty
ospfd 2604/tcp # OSPFd vty
bgpd 2605/tcp # BGPd vty
Router(config)#
自己取一个路由器名字:
Router(config)# hostname r1
r1(config)#
Zebra比较简单,登陆口令不是在line下修改,而是直接在全局模式下用password修改
r1(config)# password {password}
Configuration saved to /usr/local/etc/zebra.conf
r1#
2、用Zebra做简单的RIP实验
RIP是应用较早、使用较普遍的IGP,适用于小型同类网络,是典型的距离向量(distance-vector)协 议。RIP通过广播UDP报文来交换路由信息,每30秒发送一次路由信息更新。RIP提供跳跃计数(hop count)作为尺度来衡量路由距离,跳跃计数是一个包到达目标所必须经过的路由器的数目。如果到相同 目标有二个不等速或不同带宽的路由器,但跳跃计数相同,则RIP认为两个路由是等距离的。RIP最多支 持的跳数为15,即在源和目的网间所要经过的最多路由器的数目为15,跳数16表示不可达。RIPv2支持 验证、密钥管理、路由汇总、无类域间路由(CIDR)和变长子网掩码(VLSMs)。
Router> en
Password:
Router#
输入一个问号,看看Zebra提供了多少路由命令:
Router# ?
完整word版,博达路由器配置经典教程

完整word版,博达路由器配置经典教程博达路由器配置经典教程第一章路由器配置基础一、基本设置方式博达路由器可以用4种方式来设置:1.Console口接终端或运行终端仿真软件的微机;2.通过网络的TFTP服务器;3.通过网络的TELNET程序;4.通过网络的SNMP网管工作站。
注:路由器的第一次配置必须通过方式1进行。
终端的硬件设置如下:波特率:9600 bps数据位:8停止位:1奇偶校验位:无二、命令状态1.bdcom*路由器处于用户态。
在此状态下,用户可检查路由器的连接状态,并可访问其它网络和主机,但不能看到或更改路由器的配置内容。
2.bdcom#在bdcom*提示符下键入enter,路由器进入管理态。
用户除拥有用户态的功能外,还能看到路由器的配置内容,并利用trace等工具跟踪、调试路由器及线路,但不能更改路由器的配置。
3.bdcom_config#在管理态提示符下键入config,出现提示符bdcom_config#,此时路由器进入全局配置态,在此状态下可配置路由器的全局参数、显示各项参数等。
4.bdcom_config_e0#;bdcom_config_c0#;bdcom_config_access#;…..路由器进入局部配置态,在此状态下可配置路由器该端口下的局部参数。
5.monitor>在开机或重起,路由器检测内存时,键入“aaa”,就可以进入系统监控态,这时路由器不能完成正常的功能,只能进行软件升级、检查路由器的系统内存、上下传配置及清除超级用户口令。
注:此状态只适用于console口。
三、符号说明1. 功能字段为了便于识别,凡是“功能”一栏标记“#”符号的命令属于管理态的命令,标记“&”符号的属于局部配置态命令,标记“&#”符号的属于“#”提示符下的命令(属于管理态、配置态和局部配置态),未加标记的属于全局配置态命令。
2. 命令行字段路由器的命令关键字用粗体标识,斜体未加粗的字符为用户输入的参数。
Zebra TC8000 应用指南说明书

TC8000 Application GuidePartner Application Platform Description VerticalsZebraProductProgramStatusNeed a simple PDF Viewer? This application will fit the bill. Justinvoke a download of a PDF file (either by web browser orcustom application)and this application will do the rest allowingNA BlueFletch Enterprise PDF Viewer Androidcustom application) and this application will do the rest, allowingdisplay of the PDF file. Password protected PDF? Not aproblem, PDF Viewer allows for entering needed documentpasswords. PDF Viewer includes text search and the ability tocopy text to the clipboard.Cross-IndustryMC40,TC70,TC75,TC8000ZebraEnterpriseValidatedGuide your field workers through their day with a constant flowof information between the field and core business systems.Cognito iQ provides field workers with an easy to use, intuitiveworkflow,available on any mobile ing decision-tree Energy and Utilitiesworkflow, available on any mobile device. Using decision treelogic to guide workers through tasks, the workflow adapts whendata is entered - that’s the intelligent bit.Standard APICompatible With3rd Party SoftwareEnergy and UtilitiesGovernment ServicesHealthcareHospitalityManufacturingNational ResourcesZebra EMEA Cognito IQ Cognito iQ Mobile (SmartWorker)AndroidCompatible With 3rd Party SoftwareCross-Platform CapabilityDevice AgnosticNational ResourcesPublic SafetyTransportation and Logistics TC8000EnterpriseValidatedExpress Client is a graphical-based client application that workswith the MWA server for Oracle WMS and MSCA. Compared toit h t b d t l t li t GUI li t idTC8000MC9200NA Intellinum Inc. Express Client Androidits character-based telnet client, GUI client provides userinterface that is more attractive and user friendly. Furthermore,users will have quicker access to LOV and action buttons withthe use of touch screen capability.Manufacturing, Retail,Transportation and Logistics,Wholesale DistributionMC9200TC75MC67TC55ZebraEnterpriseValidatedUSignIn is an application designed to utilize the barcodescanner to scan eDoc quickly for signing. PRIVACY ANDSECURITY What really separates USignIn from the rest is that messages are encrypted with our Dynamic PKI encryptionalgorithm. Compliment that with our Biometric Signature Education g p gverification algorithm, only intended recipients can open and read encrypted messages. With email and attachment permissions, you control how your recipient read and download attachments. BIOMETRIC SIGNATURE SIGN IN You can quickly and securely sign into your account by using your finger Government Healthcare Hospitality Human ServicesiSign International quickly and securely sign into your account by using your fingerto sign your signature on the screen. Our short-loop biometricsignature verification system learns your signature over time;the more you sign in, the easier it is for iSign to learn yoursignature. Enrolling your signature takes less than 1 minute andonly requires4signaturesManufacturingPublic SafetyRetailTransportation & LogisticsUtilitiesWholesale DistributionTC70TC75ZebraEnterpriseNA iSign International USignIn Android only requires 4 signatures. Wholesale Distribution TC8000ValidatedG S The MSB App allows you to run mobile applications which havebeen created in the SAP ERP system using the MobisysSolution Builder add-on with the help of the Mobisys ScreenfManufacturing, TransportationMC9200TC55TC70TC75CZebraEnterpriseV lid t dEMEA Mobisys GmbH MSB App Android Designer and by means of ABAP programming.and Logistics, Utilities TC8000ValidatedSkillWeb SmartTask POD A simple app for electronic proof of delivery, producing a PDFfile with the signature of the person receiving the parcel and aweb based interface for retrieval of the data.Transportation and LogisticsTC8000TC55TC75ZebraEnterpriseValidatedEMEA Android p gTransform your mobile device into a powerful integrated tool for managing inventory. A free add-on for Zenventory users!NOTE: To use this free add-on application, you must first have an active Zenventory account set up for the warehouse you want to MC40,MC67,TC55,TC70,TC75ZebraEnterpriseEMEA Ubiquia Inc Zenventory Android active Zenventory account set up for the warehouse you want tomanage.ManufacturingTC75,TC8000EnterpriseValidatedStayLinked Enterprise Terminal StayLinked Enterprise Terminal Emulation (TE) is the only TEsolution designed for wireless environments. StayLinked'sunique architecture reliably and securely connects virtually any Hospitality, Retail, WholesaleZebraEnterpriseV lid dNA StayLinked Corp Emulation Android mobile to mission-critical, server-based applications Distribution TC8000ValidatedDCIxWMS (Warehouse Management System) is a modern on-line solution for complex management of logistics processes inwarehouses, distribution centres and manufacturing companies.Using the advanced DCIxWMS system, record keeping, TC8000EMEA Aimtec DCIxWMS Android management, supervision and control of the warehouse operations, states and inventory movements are simplified, place usage and personnel productivity are improved.Manufacturing, Retail, Transportation and LogisticsMC3200MC9200SISLOG Suite is the result of Atos’ extensive experience in thedesign development and implementation of advanced logisticsdesign, development and implementation of advanced logistics solutions. The suite covers the entire supply chain process fromproduction to warehouse management and distribution. SISLOGadapts to the conditions and needs of virtually every businesssector. It seamlessly integrates with management systems,including ERP and proprietary systems This efficient exibleEMEA Atos Spain S.A.SISLOG Android including ERP and proprietary systems. This efficient, flexible and innovative solution is designed to meet the operational and management needs of the most modern storage and distribution centers.Healthcare, Manufacturing,Retail, Transportation andLogistics, Utilities TC8000EMEA Axes Software Excel App Android Excel App is an application for warehouses.Manufacturing TC8000EMEA Axes Software xTrackWMS Android xTrackWMS is an application for warehouses.Manufacturing TC8000EMEA Axes Software xTrackFO Android Android application for warehouses management.Warehousing TC8000This application is a Proof of Fulfillment application formanufacturers to use when shipping. It allows the user to scan aPO/Invoice and take several pictures of a product before it isNA Barcoding Inc CaptureSoft POF Android PO/Invoice and take several pictures of a product before it is shipped. The collected images are then uploaded to an FTPserver (assumed to be tied to a website) where the customercan view the state of the products as they were shipped.Manufacturing TC8000EMEA Cleverence Soft Mobile SMARTS Android Mobile Business Application platform for creating and executingcustom and out-of-box business solutions. Platform supports alot of PDA's.Retail, Warehousing TC8000 HuB is an application system that supports the collaborativepp y ppshelf replenishment process. The application aims toautomatize sales floor operations on retail, optimizing the usageof resources, the information flow, and reducing the shelfrupture level, in order to maximize sales and improvecustomer’s experience, taking advantage of mobile features.customer s experience, taking advantage of mobile features.HuB controls goods receiving process, the allocation ofproducts in the backroom area, shelf replenishment, goodstransference to the sales floor and its allocation, and productmovements inside the store. It also controls products quantityand stock level using specific algorithms to generateLACR GIC HuB Android and stock level, using specific algorithms to generatereplenishment tasks. At sales floor, shelf addresses areidentified (barcodes). For each one of these addresses,products (one or more) are linked/binded and the replenishmentinformation generated and controlled by HuB.Retail TC8000EMEA Hardis Group Reflex Web Android Based on web technology, Hardis use their own protocol(different from HTML5) for classical Warehouse activities. Retail, Manufacturing TC8000Warehousing ManufacturingEMEA Keep IT Mobile KIM Warehouse Android The solution is designed for logistics companies and provides aclear picture of the entire flow of goods in a warehouse.Warehousing, Manufacturing,Retail, Transportation andLogistics TC8000 Lucas Move, featuring Jennifer, is the core component of ourvoice picking and Mobile Work Execution solutions. Lucas Movestreamlines hands-on processes for warehouse associates whowear headsets and a mobile computer, leaving their eyes andhands-free to focus on their work. DCs can choose to use Movewith rugged smartphones or a range of other voice-capablemobile computers, avoiding the costs of proprietary hardware,NA Lucas Systems, Inc.Lucas Move Androidp,g p p y,and getting all the benefits of using new smart devices andwearables.Manufacturing, Retail,Transportation & Logistics TC8000The Mobisys MSB (Mobisys Solution Builder) App is a hybridApp which can be connected to any SAP System where theMSB Add-On is installed on. With this App, you can carry outmobile applications for SAP business processes that weredefined in the SAP system with the MSB. Using the MSB App y g ppon the mobile device and MSB Runtime in the SAP system, youcan run mobile applications that were created with ABAPdirectly and without any middleware; this is based on SAPstandard technology (Internet Communication Framework, WebDispatcher)and runs via telecommunication or a networkEMEA Mobisys GmbH MSB App Android Dispatcher) and runs via telecommunication or a network connection.Retail, Transportation &Logistics TC8000Control of distribution of pallets / packages by managing loadshipments in the distribution center, and unloading at the finaldestination ensuring the traceability of packages or pallets theEMEA Mostoles Industrial Shipment Tracking Android destination, ensuring the traceability of packages or pallets, the work done and the duration of the same throughout thedistribution process.Warehousing TC8000The app comes with 4 default scenarios, use as is or configure pp geasily for individual needs. Inventory is the most common datacapture scenario needed. Localize it with you own language orheadlines, add og modify lines or menus. Use for simplewarehouse actions as Move, Receive or register items going outof the stock. Use for field service applications, repair Works etc. MC40EMEA Norris Print-Tech MotoScan Android of the stock. Use for field service applications, repair Works etc. Supports Integrated scanners in Zebra Android devices. One time license fee, supports database lookup functions. All without any programming or logic algorithms.Utilities, Manufacturing, Retail, Field mobility MC40TC55TC70/75TC8000Abakus Warehouse solution provides WMS services and similarfunctionalities Receiving put away transfers stock takingEMEA Optiscan OY Abakus Warehouse Android functionalities. Receiving, put-away, transfers, stock-taking, picking and loading are all performed with the technologies bestsuited for the purpose.Transportation & Logistics TC8000VMS allows you to design your own form and collect any kind ofdata in any scenario. You can collect data such as text, number,LACR Proxion Solutions VMS Android images and signatures using the device's hardware whenavailable.Cross-Industry TC8000Put an end to the "blind order" aspect of your current remote order entry system by providing much needed information to your mobile workers with Quest Solution's Order Entry product. It allows two-way communication with your field personnel - as sales orders are sent in, customer and pricing information isNA Quest Solution Quest Solution Order Entry Android updated on the handheld device. Eliminate the time-consumingand error-prone process of faxing or phoning in orders withlegacy equipment.Human Services,Transportation & LogisticsTC8000,WT6000EMEA Zetes Burótica PreAutoSales Android Auto Sales TC8000An Easy Way to Configure Your Printers. The faster you getnew equipment up and running, the more quickly you canachie e o r ret rn on in estment With Zebra’s Android Printerachieve your return on investment. With Zebra’s Android PrinterSetup Utility, configuring your Link-OS printers to optimizeperformance is easy – no specialized knowledge required. Justdownload Zebra’s Printer Setup Utility app on your Androidmobile device and tap the printer you wish to configure. Youri d d i ill i l b i i i iprinter and device will instantly begin communicating viaBluetooth. Then follow the simple setup wizard that walks youthrough how to set specific printing parameters – such as calibration, media type, ribbon, printer language and security – to optimize performance. Bluetooth Printers Now Manageable – MC40, TC55, TC70,NA Zebra Technologies Printer Setup Android Even in the Field Traditionally, Bluetooth printers are not easilymanaged – particularly when the printers are used in the field bya mobile workforce.UtilitiesTC75,MC18,TC8000 The TC8000 Demo is specifically designed to help device usersexperience the differentiating capabilities of the device The appexperience the differentiating capabilities of the device. The appis intended to run on the TC8000. In order to properly use anddemo the SimulScan and Augmented Reality features, pleaseprint off the PDFs found here:SimulScan:https://zebra box com/s/xiz55aibecidoon6kffkgzil9c3nap3sNA Zebra Technologies TC8000 Demo App Android https:///s/xiz55aibecidoon6kffkgzil9c3nap3sAugmented Reality:https:///s/jgnrb27y16hqo4ikbtf0627oih03l85w Utilities TC8000。
zebra软件使用说明书

简介:Label Matrix是一个灵活的排版软件程序,能使你简单、快速的设计你自己的标签。
Label Matrix支持点阵、喷墨、激光、热式打印机等各种类型打印机,可以打印文字、图形、图象、条码,支持可变尺寸的文本和数据库。
由于它所见即所得的图形接口,使设计标签真正变得快速、简单和准确!一旦你设计好标签,你就可以很快将它打印几千枚,或者打印每枚标签时自动从数据库文件中读取数据。
系统要求:Intel 80386以上CPU的计算机Windows3.1或更高的操作系统8—10M硬盘空间8M内存安装Label Matrix:将光盘放入光驱,进入Windows的资源管理器,找到光驱所在的驱动器后,在“lmw40”或“打印软件”的子目录中,双击install(.exe)或setup(.exe)文件开始安装。
或者在“运行”命令中的命令行中输入安装路径和执行文件,单击“OK”或“确定”键。
对于安装过程中出现的对话框,点击对话框中的“Next”或“Yes”(或“OK”)键即可。
运行Label Matrix(以Windows95为例):双击LMW标记进入软件,或按“开始”→“程序”→“strandware”的步骤选择“Label Matrix”项,即出现以下画面。
1.create a new label:创建一个新标签。
2.open a recently used label:打开最近使用过的标签(最多四个)。
3.find an existing label:寻找一个以前创建过的标签。
选择一个所要的项目后点击(OK)键,以后按照使用向导逐步操作即可。
对于本软件的初次使用者,请使用第一个选项:“创建一个新标签”。
步骤一:含四个选项,分别为:1.本软件默认的打印机是×××2.定义纸张尺寸3.从数据库调用信息4.打印标签的数量需要改变的选项,如:本软件默认的打印机(可以不是操作系统默认的打印机)、纸张尺寸等,“√”选中即可。
- 1、下载文档前请自行甄别文档内容的完整性,平台不提供额外的编辑、内容补充、找答案等附加服务。
- 2、"仅部分预览"的文档,不可在线预览部分如存在完整性等问题,可反馈申请退款(可完整预览的文档不适用该条件!)。
- 3、如文档侵犯您的权益,请联系客服反馈,我们会尽快为您处理(人工客服工作时间:9:00-18:30)。
Zebra路由软件详细使用教程[转贴2008-03-20 21:31:42]字号:大中小前言Zebra是一个路由软件包,提供基于TCP/IP路由服务,支持RIPv1, RIPv2, RIPng, OSPFv2, OSPFv3, BGP- 4,和BGP-4+等众多路由协议。
Zebra还支持BGP特性路由反射器(Route Reflector)。
除了传统的IPv4路由协议,Zebra也支持IPv6路由协议。
如果运行的SNMP守护进程(需要ucd-snmp)支持SMUX协议,Zebra还能支持路由协议MIBs。
由以上可见,Zebra的确是一个很不错的路由系统,但比起真正的路由器就简直是小儿科,所以网络高手就当这文章是小孩子过家家吧,而对于象我这样的初学者(特别是没有真实设备或足够设备进行实验)也不失为一个学习和熟悉路由配置、路由协议的好工具。
我没有实际的配置经验,对路由的技术细节也不是十分清晰,完全是在扔破砖头。
希望路由高手指正概念错误。
安装Zebra目前最新的版本是0.92a,它的安装非常简单,我们只需从/下载zebra-0.92a.tar.gz,然后执行以下命令安装(本文环境是RedHat7.2):shell> tar xzf zebra-0.92a.tar.gzshell> cd zebra-0.92ashell> ./configureshell> makeshell> make install这样Zebra就安装好了,安装的执行文件:shell> ls /usr/local/sbinbgpd ospfd ripd zebra配置文件:shell> ls /usr/local/etcbgpd.conf.sample ospfd.conf.sample zebra.conf.samplebgpd.conf.sample2 ripd.conf.sample运行编译安装完Zebra后,可以看到有4个可执行文件和5个配置样本文件,我们就使用它的配置样本文件:shell> cd /usr/local/etcshell> cp zebra.conf.sample zebra.confZebra的各进程有各自的终端接口或VTY,如果我们需要给连接到它们的端口设置别名的话,在/etc/ services文件添加如下内容:zebrasrv 2600/tcp # zebra servicezebra 2601/tcp # zebra vtyripd 2602/tcp # RIPd vtyripngd 2603/tcp # RIPngd vtyospfd 2604/tcp # OSPFd vtybgpd 2605/tcp # BGPd vtyospf6d 2606/tcp # OSPF6d vty然后就可以启动Zebra了:shell> zebra -d这样,Zebra就以守护进程启动了,其它的参数请参考zebra -h。
基本路由配置命令直接用telnet连接:shell> telnet localhost 2601Trying 127.0.0.1...Connected to localhost.Escape character is '^]'.Hello, this is zebra (version 0.92a).Copyright 1996-2001 Kunihiro Ishiguro.User Access VerificationPassword:Zebra会提示输入口令,我们通过/usr/local/etc/zebra.conf可以看到口令是zebra,enable口令也是zebra。
输入口令zebra,得到路由器用户模式提示符:Router>进入特权模式:Router> enPassword:Router#输入一个问号,看看Zebra提供了多少路由命令:Router# ?configure Configuration from vty interfacecopy Copy configurationdebug Debugging functions (see also 'undebug')disable Turn off privileged mode commandend End current mode and change to enable mode.exit Exit current mode and down to previous modehelp Description of the interactive help systemlist Print command listno Negate a command or set its defaultsquit Exit current mode and down to previous modeshow Show running system informationterminal Set terminal line parameterswho Display who is on vtywrite Write running configuration to memory, network, or terminal提供的命令很少,实际路由器好多命令都没有,我们只能用有限的命令投入到无限的实验中去。
Router# sh runCurrent configuration:!hostname Routerpassword zebraenable password zebra!interface lo!interface eth0!line vty!endZebra把操作系统的网络接口当做路由器的接口,所以在做比较复杂的路由实验,会需要比较多的网卡。
进入全局模式,尽可能把实际可用的配置命令都实验一遍:Router# conf tRouter(config)#自己取一个路由器名字:Router(config)# hostname r1r1(config)#Zebra比较简单,登陆口令不是在line下修改,而是直接在全局模式下用password修改r1(config)# password {password}Zebra不支持enable secret {password}这种MD5加密口令,只能使用enable password {password}来修改enable口令:r1# conf tr1(config)# enable password {password}在路由器配置中加密所有的口令:r1(config)# service password-encryption回到特权模式:r1(config)# exitr1# sh runCurrent configuration:!hostname r1password 8 alA5.vcyMAwXQenable password 8 ksbxOFN8xcFMcservice password-encryption!interface lo!interface eth0!line vty!end我们看到刚才的明文密码都进行加密了,给我们的实验机也提高安全性。
Zebra有一点比较恶心,如果我们先设置了service password-encryption,然后再修改口令,sh run就发现口令又都是明文的了,但是由于有service password-encryption,所以就无法登陆了。
去掉会话超时,免得10分钟没有动作,就把我们给踢了。
但是在实际的路由器配置中,为安全起见我们最好还是设上会话超时。
r1# conf tr1(config)# line vtyr1(config-line)# exec-timeout 0 0设置日志记录,Zebra可以把日志记录到标准输出、syslog、以及指定输出文件:r1(config-line)# exitr1(config)# log stdoutr1(config)# no log stdoutr1(config)# log syslogr1(config)# no log syslogr1(config)# log file /usr/local/etc/zebra.log配置接口IP地址:r1(config)# int lor1(config-if)# ip address 127.0.0.1/8r1(config-if)# exitr1(config)# int eth0r1(config-if)# ip address 192.168.5.121/24Zebra比较奇怪,不能使用ip address 192.168.5.121 255.255.255.0这种形式设置IP。
测试一下,就设置成和Linux中使用的一样。
保存我们刚才的配置:r1(config-if)# exitr1(config)# exitr1# copy run startConfiguration saved to /usr/local/etc/zebra.confr1#2、用Zebra做简单的RIP实验RIP是应用较早、使用较普遍的IGP,适用于小型同类网络,是典型的距离向量(distance-vector)协议。
RIP通过广播UDP报文来交换路由信息,每30秒发送一次路由信息更新。
RIP提供跳跃计数(hop count)作为尺度来衡量路由距离,跳跃计数是一个包到达目标所必须经过的路由器的数目。
如果到相同目标有二个不等速或不同带宽的路由器,但跳跃计数相同,则RIP认为两个路由是等距离的。
RIP最多支持的跳数为15,即在源和目的网间所要经过的最多路由器的数目为15,跳数16表示不可达。
RIPv2支持验证、密钥管理、路由汇总、无类域间路由(CIDR)和变长子网掩码(VLSMs)。
Zebra支持RIPv2,使用ripd程序实现RIP路由功能,但ripd程序需要在zebra程序读取接口信息,所以zebra 一定要在ripd之前启动。
由于条件所限,下面的RIP实验是在两台单网卡的RedHat7.2下做的,所以只是最简单的演示。
按照上面基本配置的方法初始化第一台机器:shell_1> cd /usr/local/etcshell_1> cp zebra.conf.sample zebra.confshell_1> cp ripd.conf.sample ripd.confshell_1> zebra -d进入zebra设置IPshell_1> telnet localhost 2601Password:Router> enPassword:Router# conf tRouter(config)# hostname r1r1(config)# int eth0r1(config-if)# ip address 192.168.5.121/24r1(config-if)# ctrl+zr1# copy run start进入第一台机器的rip设置shell_1> ripd -dshell_1> telnet localhost 2602Password:ripd> enripd# conf tripd(config)# hostname r1_ripd !改个名字好辨认r1_ripd(config)# router rip !启动ripr1_ripd(config-router)# network 192.168.5.0/24 !RIPv1是有类别路由协议,RIPv2是无类别路由协议,Zebra 默认支持RIPv2,指定网络需要子网掩码。