vb net操作Word
vb操作word详解

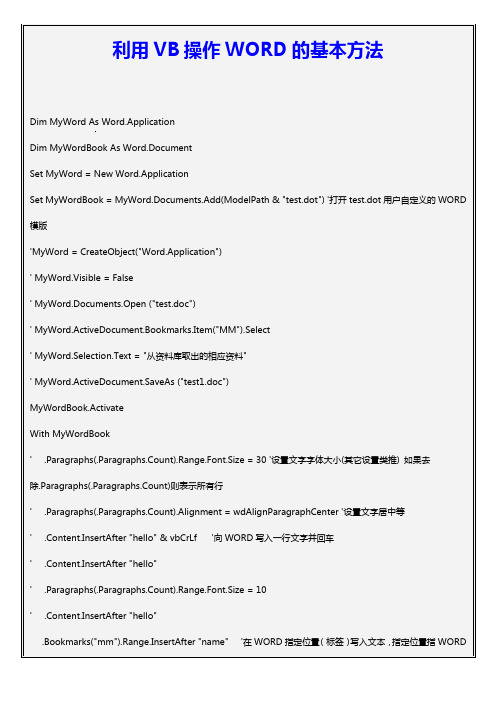
vb操作(cāozuò)word详解vb操作(cāozuò)word详解vb操作(cāozuò)word详解Visual Basic支持一个对象集合,该集合中的对象直接对应于Microsoft Word 97中的元素,并且通过用户界面,用户熟悉这些元素中的绝大多数。
例如,Document 对象代表了一个打开的文档,Bookmark对象代表了一个文档中的书签,而Selection对象则代表了在一个文档窗口窗格(chuānɡ ɡé)中的选定内容。
在Word中,每一类元素-文档、表格、段落、书签、域等等-都可以用Visual Basic的对象来表示。
要在Word中自动执行任务,可以使用这些对象的方法和属性。
关于理解和使用Microsoft Office 97对象模型的一般性内容,请参阅本书的第二章“理解对象模型”。
在Microsoft Office 97中的对象模型相当丰富(fēngfù),其中包含了大约180个对象。
要查看Word对象模型的层次关系图,请参阅“帮助”中的“Microsoft Word 对象”。
要获得对某种特定对象的详细描述,可以在此图中单击该对象的名字,或是在“帮助”的索引中对特定对象进行搜索。
怎样(zěnyàng)显示Word Visual Basic帮助要使用Word Visual Basic帮助,必须在安装过程中选择“自定义”的安装方式,并且为Word选中“Visual Basic在线(zàixiàn)帮助”复选框。
否则,安装程序不会安装Visual Basic帮助。
如果用户已经安装好了Word,那么可以再次运行Setup程序来安装Visual Basic帮助。
要查看Word Visual Basic 帮助,可以在“Visual Basic 编辑器里的“帮助”菜单中点击“目录和索引(suǒyǐn)”一项。
vb操作word全
End WithEnd WithnewDoc.SaveAs filePathnewDoc.CloseEnd Function2、VB程序操作word表格(文字、图片)很多人都知道,用vb操作excel的表格非常简单,但是偏偏项目中碰到了VB操作word表格的部分,google、baidu搜爆了,都没有找到我需要的东西。
到是搜索到了很多问这个问题的记录。
没办法,索性只有自己去尝试了。
下面把一些代码发上来,给需要的朋友一点提示。
打开一个已经存在的wrod文件(这个文件包含了表格)Dim WordAppDim WordSet WordApp = CreateObject("Word.Application")WordApp.Visible = TrueSet Word = WordApp.Documents.Open("c:\record.dot")知道了就很简单了,下面是选定某一个表格的一个单元格,并修改其内容Word.Tables(1).cell(1, 2)="内容"VBA中的这些数组元素下标都是从1开始的,比如excel的第一行一列也是ExSheet.Cells(1,1),而不是ExSheet.Cells(0,0),WORD的表格也是这样,不信自己试一下就知道了。
所以上面那句话的意思就是对整个word 文档中的第一个表格的第一行第二列的内容改变为“内容”。
很简单吧?网上有些人在问是不是Word.Tables(1).cell(1, 2).range.text或者Word.Tables(1).cell(1, 2).text。
试一下就发现这2种都不对。
VB轻松控制Word
VB轻松控制Word今天,我们将制作一个能够控制Word文件的建立和打开的应用程序。
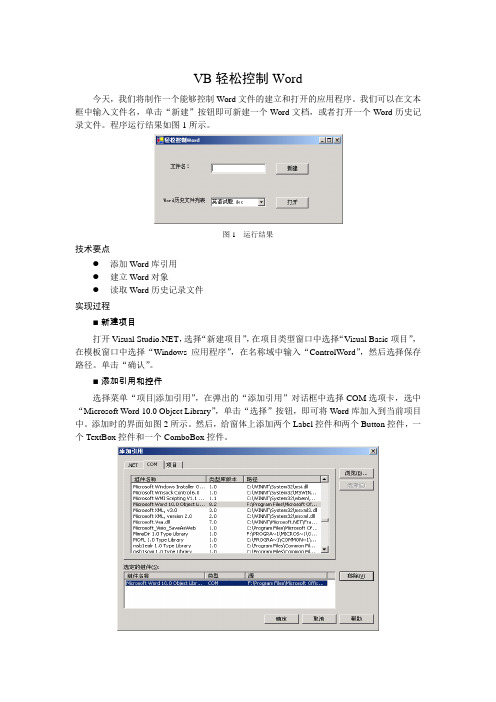
我们可以在文本框中输入文件名,单击“新建”按钮即可新建一个Word文档,或者打开一个Word历史记录文件。
程序运行结果如图1所示。
图1 运行结果技术要点●添加Word库引用●建立Word对象●读取Word历史记录文件实现过程■新建项目打开Visual ,选择“新建项目”,在项目类型窗口中选择“Visual Basic项目”,在模板窗口中选择“Windows应用程序”,在名称域中输入“ControlWord”,然后选择保存路径。
单击“确认”。
■添加引用和控件选择菜单“项目|添加引用”,在弹出的“添加引用”对话框中选择COM选项卡,选中“Microsoft Word 10.0 Object Library”,单击“选择”按钮,即可将Word库加入到当前项目中。
添加时的界面如图2所示。
然后,给窗体上添加两个Label控件和两个Button控件,一个TextBox控件和一个ComboBox控件。
图2 添加Word引用■设置属性对窗体上的控件设置属性,如表所示。
窗体及控件的属性值窗体/控件属性值Form1 Text 轻松控制WordTextBox1 Text 空ComboBox Text 空Button1 Text 新建■添加代码Public Sub New()MyBase.New()'程序启动时,添加Word历史记录文件'This call is required by the Windows Form Designer.InitializeComponent()Dim i As ShortDim tempword As New Word.Application()For i = 1 To tempword.RecentFiles.CountComboBox1.Items.Add(tempword.RecentFiles.Item(i).Name)Next'ComboBox1.Text = ComboBox1.Items.IndexOf(ComboBox1).ToString'combobox1.Items.GetTytempword.Quit()'Add any initialization after the InitializeComponent() callEnd Sub'打开word文件Private Sub Button1_Click(ByVal sender As System.Object, ByVal e AsSystem.EventArgs) Handles Button1.ClickDim b As New Word.Application()b.Documents.Open(ComboBox1.Text)b.Visible = TrueEnd Sub'新建word文件Private Sub Button2_Click(ByVal sender As System.Object, ByVal e AsSystem.EventArgs) Handles Button2.ClickDim word As New Word.Application()word.NewDocument.Add(TextBox1.Text)word.Visible = TrueEnd Sub■运行程序单击菜单“调试|启动”或单击图标运行程序。
在VBA中操作Word文档的批量处理
在VBA中操作Word文档的批量处理VBA(Visual Basic for Applications)是一种用于编写自定义脚本和宏的编程语言,广泛应用于Microsoft Office套件中的各种应用程序,包括Word、Excel和PowerPoint等。
在VBA中,我们可以利用它丰富的功能和灵活的语法来批量处理Word文档,从而提高工作效率和减少重复性工作。
批量处理Word文档在实际工作中经常会遇到,特别是当我们需要对大量文档进行相同或类似的操作时。
下面,我将分享一些在VBA中操作Word文档的批量处理技巧,希望能对您有所启发。
一、批量插入文本或表格在处理多个Word文档时,我们常常需要向这些文档中插入相同或类似的内容。
使用VBA,我们可以通过以下步骤来实现:1. 打开并激活Word文档。
2. 定位到需要插入内容的位置。
3. 使用VBA的插入文本或插入表格方法,在指定位置插入相应内容。
4. 重复上述步骤,直到所有文档都被处理完毕。
二、批量替换文本有时,我们需要对多个Word文档中的某个特定词语进行替换,这时使用VBA可以大大简化工作流程。
以下是具体步骤:1. 打开并激活Word文档。
2. 使用VBA的查找和替换方法,将需要替换的词语定位并替换为新的内容。
3. 保存并关闭文档。
4. 重复上述步骤,直到所有文档被处理完毕。
三、批量添加页眉和页脚在处理多个Word文档时,有时需要为每个文档添加相同的页眉和页脚。
使用VBA,我们可以通过以下方式实现:1. 打开并激活Word文档。
2. 使用VBA的页眉和页脚方法,将相应的内容添加到文档中,并设置为页眉或页脚。
3. 保存并关闭文档。
4. 重复上述步骤,直到所有文档被处理完毕。
四、批量保存为其他格式有时,我们需要将多个Word文档另存为其他格式,如PDF或纯文本。
使用VBA,我们可以轻松实现这一功能:1. 打开并激活Word文档。
2. 使用VBA的保存为方法,设置保存的文件格式为目标格式。
C# 、VB 在Word中添加条码、二维码
C#/ 在Word中添加条码、二维码本文介绍如何通过C# 和代码实现在Word文档中添加条码和二维码。
代码中将分为在Word正文段落中、页眉页脚中等情况来添加。
使用工具:Free Spire.Office for .NET (免费版)工具简介:这是Spire所有.NET平台下免费产品的集合包,包含Spire.Barcode.dll、Spire.DataExport.dll、Spire.Pdf.dll、Spire.Doc.dll、Spire.DocViewer.Forms.dll 、Spire.PdfViewer.Forms.dll 、Spire.Presentation.dll 、Spire.XLS.dll等dll可用于操作Word/PDF/Excel/PPT等文件。
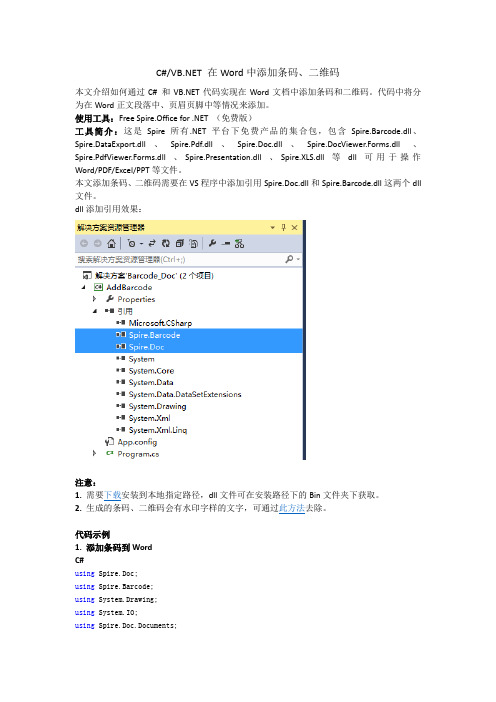
本文添加条码、二维码需要在VS程序中添加引用Spire.Doc.dll和Spire.Barcode.dll这两个dll 文件。
dll添加引用效果:注意:1. 需要下载安装到本地指定路径,dll文件可在安装路径下的Bin文件夹下获取。
2. 生成的条码、二维码会有水印字样的文字,可通过此方法去除。
代码示例1. 添加条码到WordC#using Spire.Doc;using Spire.Barcode;using System.Drawing;using System.IO;using Spire.Doc.Documents;namespace AddBarcode{class Program{static void Main(string[] args){//调用方法 ApplyKey(string key) 移除水印文字Spire.Barcode.BarcodeSettings.ApplyKey("在这里输入去除水印字样的序列号");//创建Document对象,加载Word文档Document doc = new Document();doc.LoadFromFile("test.docx");//获取第2节Section section = doc.Sections[1];//使用Spire.Barcode的BarcodeSettings和BarcodeGenerator类创建条码并保存为图片BarcodeSettings settings = new BarcodeSettings();settings.Type = BarCodeType.Code128;settings.Data = "123456789";settings.Data2D = "123456789";settings.ShowText = false;settings.BarHeight = 4;settings.X = 0.3f;settings.HasBorder = true;settings.BorderWidth = 0.5f;settings.BorderColor = Color.AliceBlue;settings.BackColor = Color.Wheat;BarCodeGenerator barCodeGenerator = new BarCodeGenerator(settings);Image Image = barCodeGenerator.GenerateImage();//Image.Save("Barcode.png", System.Drawing.Imaging.ImageFormat.Png);//如果需要保存生成的Barcode图片,可执行此步骤代码//添加条码到正文段落Paragraph paragraph = section.AddParagraph();paragraph.Text = "收货码:";paragraph.AppendPicture(Image);paragraph.Format.HorizontalAlignment = HorizontalAlignment.Right;//添加条码图片到Word页脚HeaderFooter footer = section.HeadersFooters.Footer;Paragraph footerpara = footer.AddParagraph();footerpara.Text = "扫码识真伪:";footerpara.AppendPicture(Image);footerpara.Format.HorizontalAlignment = HorizontalAlignment.Left;//保存文档doc.SaveToFile("BarCodeToWord.docx", FileFormat.Docx2013);System.Diagnostics.Process.Start("BarCodeToWord.docx");}}}条码添加效果:Imports Spire.DocImports Spire.BarcodeImports System.DrawingImports System.IOImports Spire.Doc.DocumentsNamespace AddBarcodeClass ProgramPrivate Shared Sub Main(args As String())'调用方法ApplyKey(string key) 移除水印文字Spire.Barcode.BarcodeSettings.ApplyKey("在这里输入去除水印字样的序列号")'创建Document对象,加载Word文档Dim doc As New Document()doc.LoadFromFile("test.docx")'获取第2节Dim section As Section = doc.Sections(1)'使用Spire.Barcode的BarcodeSettings和BarcodeGenerator类创建条码并保存为图片Dim settings As New BarcodeSettings()settings.Type = BarCodeType.Code128settings.Data = "123456789"settings.Data2D = "123456789"settings.ShowText = Falsesettings.BarHeight = 4settings.X = 0.3Fsettings.HasBorder = Truesettings.BorderWidth = 0.5Fsettings.BorderColor = Color.AliceBluesettings.BackColor = Color.WheatDim barCodeGenerator As New BarCodeGenerator(settings)Dim Image As Image = barCodeGenerator.GenerateImage()'Image.Save("Barcode.png", System.Drawing.Imaging.ImageFormat.Png);//如果需要保存生成的Barcode图片,可执行此步骤代码'添加条码到正文段落Dim paragraph As Paragraph = section.AddParagraph()paragraph.Text = "收货码:"paragraph.AppendPicture(Image)paragraph.Format.HorizontalAlignment = HorizontalAlignment.Right'添加条码图片到Word页脚Dim footer As HeaderFooter = section.HeadersFooters.FooterDim footerpara As Paragraph = footer.AddParagraph()footerpara.Text = "扫码识真伪:"footerpara.AppendPicture(Image)footerpara.Format.HorizontalAlignment = HorizontalAlignment.Left'保存文档doc.SaveToFile("BarCodeToWord.docx", FileFormat.Docx2013)System.Diagnostics.Process.Start("BarCodeToWord.docx")End SubEnd ClassEnd Namespace2. 添加二维码到WordC#using Spire.Doc;using Spire.Barcode;using System.Drawing;using System.IO;using Spire.Doc.Documents;using System;namespace AddQRCode{class Program{static void Main(string[] args){//调用方法 ApplyKey(string key) 移除水印文字Spire.Barcode.BarcodeSettings.ApplyKey("在这里输入去除水印字样的序列号");//创建Document对象,加载Word文档Document doc = new Document();doc.LoadFromFile("test.docx");//获取第2节Section section = doc.Sections[1];//使用Spire.Barcode的BarcodeSettings和BarcodeGenerator类创建二维码并保存为图片BarcodeSettings settings = new BarcodeSettings();settings.Type = BarCodeType.QRCode;settings.ImageWidth = 50;settings.ImageHeight = 50;settings.Data = "123456";settings.Data2D = "123456";settings.X =0.7f;settings.LeftMargin = 1;settings.ShowTextOnBottom = true;settings.QRCodeECL = QRCodeECL.Q;settings.QRCodeDataMode = QRCodeDataMode.Numeric;BarCodeGenerator generator = new BarCodeGenerator(settings);Image image = generator.GenerateImage();//image.Save("QRCode.png", System.Drawing.Imaging.ImageFormat.Png);//如果需要保存生成的二维码图片,可执行此步骤代码//添加二维码到正文段落Paragraph paragraph = section.AddParagraph();paragraph.AppendPicture(image);paragraph.Format.HorizontalAlignment = HorizontalAlignment.Right;//添加二维码图片到Word页眉HeaderFooter header = section.HeadersFooters.Header;//HeaderFooter footer = section.HeadersFooters.Footer;//获取页脚Paragraph headerpara = header.AddParagraph();headerpara.AppendPicture(image);headerpara.Format.HorizontalAlignment = HorizontalAlignment.Center;//保存文档doc.SaveToFile("QRCodeToHeader.docx", FileFormat.Docx2013);System.Diagnostics.Process.Start("QRCodeToHeader.docx");}}}二维码添加效果:Imports Spire.DocImports Spire.BarcodeImports System.DrawingImports System.IOImports Spire.Doc.DocumentsNamespace AddQRCodeClass ProgramPrivate Shared Sub Main(args As String())'调用方法ApplyKey(string key) 移除水印文字Spire.Barcode.BarcodeSettings.ApplyKey("在这里输入去除水印字样的序列号")'创建Document对象,加载Word文档Dim doc As New Document()doc.LoadFromFile("test.docx")'获取第2节Dim section As Section = doc.Sections(1)'使用Spire.Barcode的BarcodeSettings和BarcodeGenerator类创建二维码并保存为图片Dim settings As New BarcodeSettings()settings.Type = BarCodeType.QRCodesettings.ImageWidth = 50settings.ImageHeight = 50settings.Data = "123456"settings.Data2D = "123456"settings.X = 0.7Fsettings.LeftMargin = 1settings.ShowTextOnBottom = Truesettings.QRCodeECL = QRCodeECL.Qsettings.QRCodeDataMode = QRCodeDataMode.NumericDim generator As New BarCodeGenerator(settings)Dim image As Image = generator.GenerateImage()'image.Save("QRCode.png", System.Drawing.Imaging.ImageFormat.Png);//如果需要保存生成的二维码图片,可执行此步骤代码'添加二维码到正文段落Dim paragraph As Paragraph = section.AddParagraph()paragraph.AppendPicture(image)paragraph.Format.HorizontalAlignment = HorizontalAlignment.Right'添加二维码图片到Word页眉Dim header As HeaderFooter = section.HeadersFooters.Header'HeaderFooter footer = section.HeadersFooters.Footer;//获取页脚Dim headerpara As Paragraph = header.AddParagraph()headerpara.AppendPicture(image)headerpara.Format.HorizontalAlignment = HorizontalAlignment.Center'保存文档doc.SaveToFile("QRCodeToHeader.docx", FileFormat.Docx2013)System.Diagnostics.Process.Start("QRCodeToHeader.docx")End SubEnd ClassEnd Namespace。
VB操作WORD详解
VB操作WORD详解VB操作Word是一种常见的编程任务,可以用来自动化创建、修改和格式化Word文档。
VB是Visual Basic的简称,是一种简单易学的编程语言,广泛应用于Windows平台上的开发工作。
下面将详细介绍如何使用VB操作Word。
一、引用和初始化Word对象模型在使用VB操作Word之前,需要先引用Word对象模型。
在VB的项目中,点击“项目”菜单,选择“引用”,在弹出的对话框中找到并勾选“Microsoft Word xx.0 Object Library”(这里的xx表示Word的版本号),点击“确定”进行引用。
在VB中操作Word,首先要创建一个Word.Application对象,用来表示Word应用程序实例,在这个实例上进行后续的操作。
可以使用如下代码创建Word应用程序实例:Dim wdApp As Word.ApplicationSet wdApp = New Word.Application二、打开、创建和保存Word文档1. 打开现有的Word文档可以使用如下代码打开一个现有的Word文档:Dim wdDoc As Word.DocumentSet wdDoc = wdApp.Documents.Open("C:\path\to\your\file.docx")2. 创建新的Word文档可以使用如下代码创建一个新的Word文档:Dim wdDoc As Word.DocumentSet wdDoc = wdApp.Documents.Add3. 保存Word文档可以使用如下代码保存一个Word文档:wdDoc.SaveAs "C:\path\to\save\your\file.docx"三、操作Word文档内容1.读取和写入文本内容可以使用如下代码读取和写入文本内容:Dim strText As StringstrText = wdDoc.Range.Text '读取文档内容到字符串变量wdDoc.Range.Text = "Hello, World!" '向文档中写入文本内容2.插入和删除文本内容可以使用如下代码插入和删除文本内容:wdDoc.Range.InsertBefore "Insert Before" '在光标位置之前插入文本wdDoc.Range.InsertAfter "Insert After" '在光标位置之后插入文本wdDoc.Range.Delete '删除光标当前所在位置的文本3.格式化文本内容可以使用如下代码格式化文本内容,如设置字体、大小、颜色等: = "Arial" '设置字体为ArialwdDoc.Range.Font.Size = 12 '设置字体大小为12wdDoc.Range.Font.Color = RGB(255, 0, 0) '设置字体颜色为红色四、操作Word文档样式和格式1.设置段落样式可以使用如下代码设置段落的样式,如对齐方式、缩进等:wdDoc.Range.Paragraphs.Alignment = wdAlignParagraphCenter '设置居中对齐wdDoc.Range.Paragraphs.LeftIndent = 36 '设置左缩进为0.5英寸2.设置页面样式可以使用如下代码设置页面的样式,如边距、纸张大小等:wdDoc.PageSetup.TopMargin = 72 '设置页边距上为1英寸wdDoc.PageSetup.PaperSize = wdPaperA4 '设置纸张大小为A43.插入表格可以使用如下代码插入一个表格到Word文档:Dim wdTable As Word.TableSet wdTable = wdDoc.Tables.Add(wdDoc.Range, 3, 3) '添加3行3列的表格4.格式化表格可以使用如下代码格式化表格,如设置边框、背景颜色等:wdTable.Borders.InsideLineStyle = wdLineStyleSingle '设置内部边框为实线wdTable.Borders.OutsideLineStyle = wdLineStyleDouble '设置外部边框为双线wdTable.Rows(1).Cells(1).Shading.BackgroundPatternColor = RGB(255, 0, 0) '设置第一行第一列的背景颜色为红色五、关闭Word应用程序使用完Word应用程序后,需要关闭它以释放系统资源。
net操作word,权限问题
net操作word,权限问题1.先安装office2.在“DCOM配置”中,为IIS账号配置操作Word(其他Office对象也⼀样)的权限:开始》运⾏》输⼊ dcomcnfg 或者 comexp.msc -32 》确定具体操作:“组件服务(Component Service)”->计算机(Computers)->我的电脑(My Computer)->DCOM配置(DCOM Config)->Microsoft Office Word 97 - 2003 ⽂档,右击“Microsoft Office Word 97 - 2003 ⽂档”,选择“属性”进⾏⼀下两步操作:(1)在【标识(Identity)】选项卡中选中“交互式⽤户(The interactive user)”. ----交互式是当前已登录的⽤户(使⽤⽹站放在本地电脑浏览),如果你的⽹站是放在服务器⾥的话,那要选择下列⽤户,然后把管理员的账户密码写进去才可以。
(2)在【安全(Security)】选项卡中,分别给前两个组(启动和激活权限,访问权限)选择“⾃定义(customer)”,然后点“编辑”,在弹出的界⾯中添加IIS账号(Server版的操作系统⼀般为NETWORK SERVICES,其他系统(XP)可能会是),并在下⾯的权限框中,给该⽤户分配所有权限。
(3)为站点应⽤池分配本地账号:具体操作:在IIS中,为站点创建新的应⽤程序池,再改应⽤程序池属性的【标识(identity)】选项卡中,为“预定义账户”选择“本地系统(LocalSystem)”。
如果是IIS7.0中,则按以下步骤操作:为站点创建新的应⽤程序池。
选中该应⽤程序池,⾼级设置->进程模式—>标识:选择localSystem。
如第2步 DCOM配置⾥没有找到 Microsoft Office Word 97 - 2003 ⽂档,请在开始》运⾏》输⼊ mmc -32 》确定,在控制台⾥找到⽂件》添加/删除管理单元》在可⽤的管理单元⾥找到 “组件服务” 》添加,然后在组件服务⾥找到 Microsoft Office Word 97 - 2003 ⽂档跟上⾯第2步⼀样的操作。
VBA中的操作Word文档的技巧

VBA中的操作Word文档的技巧在VBA中操作Word文档是自动化办公的重要一环,通过使用VBA编程语言,我们可以实现对Word文档的自动创建、编辑和格式化等操作。
本文将介绍一些常用的VBA技巧,帮助您更好地操作Word文档。
1. 打开Word文档:在VBA中,使用`Documents.Open`方法可以打开一个Word文档。
您可以指定文档的路径和名称,还可以设置一些可选参数,例如是否以只读模式打开。
2. 创建新的Word文档:通过`Documents.Add`方法可以创建一个新的Word文档。
您可以选择在创建文档时是否要基于现有的模板进行创建,并可以指定模板的路径和名称。
3. 保存Word文档:使用`Document.Save`方法可以保存当前的Word文档,您可以指定路径和名称,还可以选择是否另存为其他格式。
4. 关闭Word文档:通过`Document.Close`方法可以关闭当前的Word文档,同时保存对文档的修改。
您可以使用可选参数来控制是否强制保存。
5. 插入文本:使用`Selection.TypeText`方法可以在当前光标位置插入文本。
您可以通过VBA代码来控制插入的文本内容和格式。
6. 插入图片:通过`InlineShapes.AddPicture`方法可以在当前位置插入图片。
您可以指定图片的路径和名称,并可以设置插入图片的位置和大小。
7. 设置字体样式:可以使用`Selection.Font`属性来设置文本的字体样式,例如字体名称、字号、加粗、斜体等。
8. 设置段落格式:通过`Selection.ParagraphFormat`属性可以设置段落的格式,例如对齐方式、缩进、行间距等。
9. 遍历文档内容:可以通过VBA的循环结构来遍历文档的每个段落、句子、单词或字符,并可以对其进行相应的操作。
10. 替换文本:使用`Selection.Find`和`Selection.Replace`方法可以查找和替换文本。
VBNET去掉WORD中的空格实例

End If
End Try
Return True
End Function
End Class
MessageBox.Show("Please Select valid path of word document!", "Error", MessageBoxButtons.OK, MessageBoxIcon.[Error])
Return
End If
If openfileDialog.ShowDialog() = DialogResult.OK Then
txbWordPath.Text = openfileDialog.FileName
wordPath = openfileDialog.FileName
Imports System.IO
Imports System.Runtime.InteropServices
Imports Word = Microsoft.Office.Interop.Word
Public Class MainForm
'the path of word document
End If
End Sub
''' <summary>
''' Remove Blank Page in Word document
''' </summary>
Private Function RemoveBlankPage() As Boolean
''' <param name="e"></param>
用VBA操作Word

用VBA操作Word(转)在所有Office 应用程序中,Microsoft Word 可能是应用最广泛的应用程序,它还经常在自定义Office 解决方案中扮演重要的角色。
开发人员用各种不同的方式使用Word,有一些方式很简单,而另一些极其复杂。
无论涉及何种自定义解决方案,用Visual Basic for Applications (VBA) 处理Word 文档的基本方法都是一样的。
在本栏目中,我将概括地介绍如何使用Word,并提供一些关于如何运用Range 对象处理Word 文档内容的详细资料。
理解基本方法在Word 中,几乎所有的操作都要调用Document 对象本身或其内容。
当您用VBA 操作Word 时,Document 对象表示一个打开的文档,而且所有的Document 对象都是Application 对象的Documents 集合的成员。
文档是一个由字符、单词、句子和段落组成的集合,字符组成单词,单词组成句子,句子组成段落,等等。
因此,每一个Document 对象都具有Characters、Words、Sentences 和Paragraghs 四个集合。
此外,每个文档具有一个包含一个或多个节的Sections 集合,每一个节都有一个包含该节页眉和页脚的HeadersFooters 集合。
注意:您可以在Microsoft Office 2000 开发人员对象模型指南(英文)中查阅完整的Word 对象模型。
另外,您也可以使用对象浏览器和Microsoft Word Visual Basic 参考帮助来学习有关具体某个对象、属性、方法和事件的详细内容。
通过VBA 使用Word 时,Document 对象处于中心位置。
如果您要打开文档或创建新文档,就要创建新的Document 对象。
每个打开或新创建的文档均被添加至Documents 集合。
具有焦点的文档称为活动文档,由ActiveDocument 属性表示。
在VBA中操作Word文档的技巧和建议

在VBA中操作Word文档的技巧和建议VBA(Visual Basic for Applications)是一种用于自动化任务的编程语言,在操作Word文档方面具有广泛的应用。
无论是处理大量数据,自动生成报告,还是简化重复性任务,VBA都能为我们提供强大的工具。
以下是一些在VBA中操作Word文档的技巧和建议,旨在提高效率和准确性。
一、管理文档1. 打开和关闭文档:使用VBA代码打开和关闭Word文档是非常常见的操作。
使用`Documents.Open`方法打开文档,可以指定文件路径和其他选项。
使用`ActiveDocument.Close`方法关闭文档,可以选择保存或不保存更改。
2. 复制和粘贴文本:使用`Selection.Copy`方法可以将选定的文本复制到剪贴板上。
使用`Selection.Paste`方法可以将剪贴板上的内容粘贴到文档中的位置。
3. 保存和另存为:使用`ActiveDocument.Save`方法可以保存当前的文档。
使用`ActiveDocument.SaveAs`方法可以将文档另存为其他格式或具有不同的文件名。
二、格式化文档1. 字体和样式:通过VBA代码,我们可以轻松地更改文档中的字体样式。
使用``方法可以更改选定文本的字体。
使用`Selection.Font.Size`方法可以更改选定文本的字体大小。
使用`Selection.Font.Bold`方法可以设置选定文本为加粗。
2. 段落对齐和缩进:可以使用VBA代码来设置文档中段落的对齐方式和缩进。
使用`Selection.ParagraphFormat.Alignment`方法可以设置段落的对齐方式,如左对齐、居中、右对齐等。
使用`Selection.ParagraphFormat.LeftIndent`方法可以设置段落的左缩进值。
3. 表格格式:在VBA中,我们可以修改和设置Word文档中的表格。
使用`Tables.Add`方法可以插入新表格。
VB。net调用Word
写word文件代码:Dim wordApp As New Word.ApplicationDim objSelection As Word.SelectionDim Title As String = "K388+400常胜沟大桥"wordApp.Documents.Add()oDocument = wordApp.ActiveDocumentobjSelection = wordApp.SelectionwordApp.Selection.TypeText(Title)objSelection.TypeParagraph()wordApp.Selection.TypeText("一、桥梁基本状况卡片")objSelection.TypeParagraph()wordApp.Selection.TypeText("A行政数据识别,B技术结构数据")objSelection.TypeParagraph()wordApp.Selection.TypeText("A行政数据识别。
B技术结构数据。
C档案资料(全、不全、或无)。
D最近技术状况评定")objSelection.InsertBreak() '插入分页符,相当于2个字符objSelection.TypeText("E修建工程记录")SetRange(1)With wordApp.Selection.Font.Size = 18 '字体(小二).ParagraphFormat.Alignment = 1 '水平居中.Font.Bold = TrueEnd WithSetRange(2)With wordApp.Selection.Font.Size = 14 '字体(四).Font.Bold = True = "华文琥珀"End WithSetRange(25, 44, True)With wordApp.Selection.Font.Size = 9 '字体(小五).Font.Bold = True.Font.Italic = TrueEnd WithSetRange(4, 2)With wordApp.Selection.Font.Size = 9 '字体(小五).Font.Bold = TrueEnd With'文件保存oDocument.SaveAs("d:\" & Title & ".doc") wordApp.Visible = True。
利用VBA自动化操作Word文档
利用VBA自动化操作Word文档VBA(Visual Basic for Applications)是Microsoft Office套件中的一种编程语言,用于自动化操作各种办公软件,包括Word、Excel、PowerPoint等。
在本文中,我们将讨论如何使用VBA自动化操作Word文档。
自动化操作Word文档的好处之一是提高工作效率。
通过编写VBA宏,我们可以自动执行重复性任务、批量处理文档、创建自定义功能等。
下面,我将介绍一些常见的VBA应用和操作示例。
1. 打开和关闭Word文档:在VBA中,可以使用“Documents.Open”方法打开Word文档,并使用“Document.Close”方法关闭文档。
以下是一个简单的示例代码:```vbaSub OpenAndCloseDocument()Dim doc As DocumentSet doc = Documents.Open("C:\Documents\example.docx")' 执行你的操作...doc.Close SaveChanges:=wdDoNotSaveChangesEnd Sub```2. 创建和保存新文档:通过VBA,我们可以创建新的Word文档,并将其保存到指定位置。
以下是示例代码:```vbaSub CreateAndSaveDocument()Dim doc As DocumentSet doc = Documents.Add' 执行你的操作...doc.SaveAs2 "C:\Documents\new.docx"doc.CloseEnd Sub```3. 文本处理:使用VBA可以轻松进行文本处理操作,例如替换文本、插入文本、复制和粘贴等。
以下示例展示了如何替换文档中的特定文本:```vbaSub ReplaceText()Dim doc As DocumentSet doc = ActiveDocumentdoc.Content.Find.Execute FindText:="要替换的文本", _ReplaceWith:="替换为的文本", Replace:=wdReplaceAllEnd Sub```4. 格式设置和样式应用:VBA还允许我们对文档进行格式设置和样式应用。
用VB操作word方法
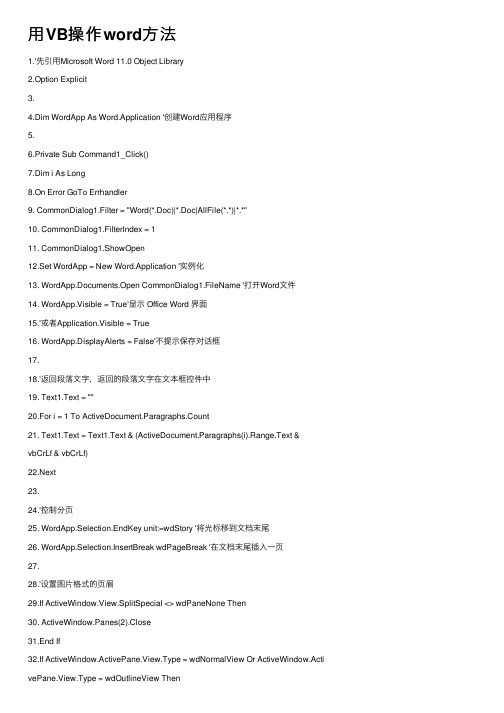
⽤VB操作word⽅法1.'先引⽤Microsoft Word 11.0 Object Library2.Option Explicit3.4.Dim WordApp As Word.Application '创建Word应⽤程序5.6.Private Sub Command1_Click()7.Dim i As Long8.On Error GoTo Errhandler9. CommonDialog1.Filter = "Word(*.Doc)|*.Doc|AllFile(*.*)|*.*"10. CommonDialog1.FilterIndex = 111. CommonDialog1.ShowOpen12.Set WordApp = New Word.Application '实例化13. WordApp.Documents.Open CommonDialog1.FileName '打开Word⽂件14. WordApp.Visible = True'显⽰ Office Word 界⾯15.'或者Application.Visible = True16. WordApp.DisplayAlerts = False'不提⽰保存对话框17.18.'返回段落⽂字,返回的段落⽂字在⽂本框控件中19. Text1.Text = ""20.For i = 1 To ActiveDocument.Paragraphs.Count21. Text1.Text = Text1.Text & (ActiveDocument.Paragraphs(i).Range.Text & vbCrLf & vbCrLf)22.Next23.24.'控制分页25. WordApp.Selection.EndKey unit:=wdStory '将光标移到⽂档末尾26. WordApp.Selection.InsertBreak wdPageBreak '在⽂档末尾插⼊⼀页27.28.'设置图⽚格式的页眉29.If ActiveWindow.View.SplitSpecial <> wdPaneNone Then30. ActiveWindow.Panes(2).Close31.End If32.If ActiveWindow.ActivePane.View.Type = wdNormalView Or ActiveWindow.Acti vePane.View.Type = wdOutlineView Then36. Selection.InlineShapes.AddPicture FileName:="F:\资料\My Pictures\2013年元旦.gif", LinkToFile:=False, SaveWithDocument:=True'加载⼀图⽚⽂件作为页眉37. Selection.ParagraphFormat.Alignment = wdAlignParagraphLeft38. ActiveWindow.ActivePane.View.SeekView = wdSeekMainDocument39.40.'设置⽂本格式的页眉41.If ActiveWindow.View.SplitSpecial <> wdPaneNone Then42. ActiveWindow.Panes(2).Close43.End If44.If ActiveWindow.ActivePane.View.Type = wdNormalView Or ActiveWindow.Acti vePane.View.Type = wdOutlineView Then45. ActiveWindow.ActivePane.View.Type = wdPrintView46.End If47. ActiveWindow.ActivePane.View.SeekView = wdSeekCurrentPageHeader48. Selection.TypeText Text:="办公室常⽤⼯具"49. ActiveWindow.ActivePane.View.SeekView = wdSeekMainDocument50.51.'隐藏页眉的横线52. WordApp.ActiveDocument.Sections(1).Headers(wdHeaderFooterPrimary).Range. Borders(wdBorderBottom).Visible = False53.54.'取得页眉的内容55. Debug.Print WordApp.ActiveDocument.Sections(1).Headers(wdHeaderFooterFir stPage).Range.Text '获取WORD第⼀节的页眉的⽂字内容56.57.58.'设置页脚59.If ActiveWindow.View.SplitSpecial <> wdPaneNone Then60. ActiveWindow.Panes(2).Close61.End If62.If ActiveWindow.ActivePane.View.Type = wdNormalView Or ActiveWindow.Acti vePane.View.Type = wdOutlineView Then66.If Selection.HeaderFooter.IsHeader = True Then67. ActiveWindow.ActivePane.View.SeekView = wdSeekCurrentPageFooter68.Else69. ActiveWindow.ActivePane.View.SeekView = wdSeekCurrentPageHeader70.End If71. Selection.TypeText Text:="2013年"'设置页脚72. Selection.Fields.Add Range:=Selection.Range, Type:=wdFieldNumPages73. ActiveWindow.ActivePane.View.SeekView = wdSeekMainDocument74.75. ActiveDocument.SaveAs "c:\MyWord.doc"'保存最后⽣成的word⽂档76.77.Errhandler:78.Exit Sub79.End Sub80.81.Private Sub Form_Unload(Cancel As Integer)82.On Error Resume Next83. WordApp.Quit84.Set WordApp = Nothing85.End Sub效果图如下:2、控制Word⽂档中的⽂本框对象[vb] view plaincopy1.'先引⽤Microsoft Word 11.0 Object Library2.Option Explicit3.4.Dim WordApp As Word.Application '创建Word应⽤程序5.6.Private Sub Command1_Click()7.On Error GoTo Errhandler8. CommonDialog1.Filter = "MS Office Word(*.Doc)|*.Doc|AllFile(*.*)|*.*"9. CommonDialog1.FilterIndex = 110. CommonDialog1.ShowOpen11.Set WordApp = New Word.Application '实例化12. WordApp.Documents.Open CommonDialog1.FileName '打开Word⽂件13.If Documents.Count >= 1 Then14. Text1.Text = "打开的Word⽂件是:" & /doc/be9311f16edb6f1afe001f81.html & vbCrLf & vbC rLf15.End If16. WordApp.Visible = True'显⽰ Office Word 界⾯17.'或者Application.Visible = True18. WordApp.DisplayAlerts = False'不提⽰保存对话框19.20. WordApp.Selection.EndKey unit:=wdStory '将光标移到⽂档末尾21. WordApp.Selection.Font.Bold = 122. /doc/be9311f16edb6f1afe001f81.html = "⿊体"23. WordApp.Selection.Font.Size = 1824. WordApp.Selection.TypeText Text:="在Word⽂件中插⼊⽂本框对象"25. WordApp.Selection.ParagraphFormat.Alignment = Word.WdParagraphAlignment. wdAlignParagraphCenter '居中显⽰26.27.'创建⽂本框对象,座标(100,100),宽度200,⾼度20028.With ActiveDocument.Shapes.AddTextbox(msoTextOrientationHorizontal, 100, 100, 400, 300).Fill29.'.Transparency = 1 '设置透明⾊30. .ForeColor = vbRed '设置前景颜⾊31. .UserPicture ("F:\资料\My Pictures\758254_960x1000_0.jpg") '设置⽂本框对象的背景图⽚32.End With33. ActiveDocument.Shapes(1).TextFrame.TextRange.Text = "这是⼀个美⼥"'给⽂本框赋值34.'ActiveDocument.Shapes(1).Line.Transparency = 1 '设置透明边框线条35.36.'再创建⼀个透明背景的⽂本框对象37.With ActiveDocument.Shapes.AddTextbox(msoTextOrientationHorizontal, 100, 400, 400, 300).Fill38. .Transparency = 1 '设置透明⾊背景39. .ForeColor = vbRed '设置前景颜⾊40.End With41. ActiveDocument.Shapes(2).TextFrame.TextRange.Text = "这是⼀个透明背景的⽂本框"'给⽂本框赋值42.'ActiveDocument.Shapes(2).Line.Transparency = 1 '设置透明边框线条43.44.'下⾯是获取⽂本框对象的内容45.Dim i As Long46.For i = 1 To ActiveDocument.Shapes.Count47. Text1.Text = Text1.Text & ("第" & i & "个⽂本框的内容:" & ActiveDocum ent.Shapes(i).TextFrame.TextRange.Text & vbCrLf)48.Next49.50. ActiveDocument.SaveAs "c:\MyWord.doc"'保存最后⽣成的word⽂档51.52.Errhandler:53.Exit Sub54.End Sub55.56.Private Sub Form_Unload(Cancel As Integer)57.On Error Resume Next58. WordApp.Quit59.Set WordApp = Nothing60.End Sub效果图如下:3、在Word⽂档中设置Excel风格的页码[vb] view plaincopy1.'先引⽤Microsoft Word 11.0 Object Library2.Option Explicit3.4.Dim WordApp As Word.Application '创建Word应⽤程序5.Dim WordDoc As Word.Document '创建Word⽂档对象6.7.Private Sub Command1_Click()8.Dim i As Long9.On Error GoTo Errhandler10. CommonDialog1.Filter = "Word(*.Doc)|*.Doc|AllFile(*.*)|*.*"11. CommonDialog1.FilterIndex = 112. CommonDialog1.ShowOpen13.Set WordApp = New Word.Application '实例化14.Set WordDoc = WordApp.Documents.Open(CommonDialog1.FileName) '选择并打开W ord⽂件15. WordApp.Visible = True'显⽰ Office Word 界⾯16.'或者Application.Visible = True17. WordApp.DisplayAlerts = False'不提⽰保存对话框18.19.'设置Word⽂档第⼀页页码20.Dim WordRange As Range21.Set WordRange = WordApp.ActiveDocument.Sections(1).Footers(wdHeaderFoote rPrimary).Range22.23.With WordRange24. .InsertAfter "第"25. .Font.Size = 1426. .Collapse Direction:=wdCollapseEnd27.28.'插⼊页码域29. .Fields.Add Range:=WordRange, Type:=wdFieldEmpty, Text:="PAGE \* Arabic ", PreserveFormatting:=True30. .Expand unit:=wdWord31. .InsertAfter "页 "32.33. .InsertAfter "共"34. .Collapse Direction:=wdCollapseEnd35.36.'插⼊页数域37. .Fields.Add Range:=WordRange, Type:=wdFieldEmpty, Text:="NUMPAGES \* Arabic ", PreserveFormatting:=True38. .Expand unit:=wdWord39. .InsertAfter "页"40.41. .InsertAfter "【我的Word⽂件作者:ChenJL1031(东⽅之珠)】"42. .ParagraphFormat.Alignment = wdAlignParagraphRight '右对齐43.End With44.45.'Text1.Text = WordApp.ActiveDocument.Sections(1).Headers(wdHeaderFooterF irstPage).Range.Text46.47.Set WordRange = Nothing48. ActiveDocument.SaveAs "c:\MyWord.doc"'保存最后⽣成的word⽂档49.50.Errhandler:51.Exit Sub52.End Sub53.54.Private Sub Form_Unload(Cancel As Integer)55.On Error Resume Next56. WordApp.Quit57.Set WordApp = Nothing58.End Sub效果图如下:。
vbaword基本操作(经典)

vbaword基本操作(经典)⼀.⽅法:Word打开⽅法时调⽤的⽅法:Document_Open()Word关闭时调⽤的⽅法:Document_Close()调⽤subInt过程:Call subIntFunction fun() As Integer‘代码Fun=1End Function调⽤fun函数:在其他调⽤的⽅法或函数中直接⽤函数(因为函数要返回⼀个值),⽐如:if(fun=1)then….end if1.1操作⽂件:Private Sub deleteXML()‘判断⽂件是否存在,然后删除⽂件If Dir(ThisDocument.Path + "/" + filename1) <> "" ThenKill (ThisDocument.Path + "/" + filename1) ‘End IfEnd SubPrivate Sub rename()‘重命名⽂件If Dir(ThisDocument.Path + "/" + "temp.xml") <> "" ThenName ThisDocument.Path & "/" & "temp.xml" As ThisDocument.Path & "/" & filename1 End IfEnd Sub‘取得同⽬录下⽂件的名字Private Sub HX_FileName()Dim fso As Object, folder As Object, subfolder As Object, objFile As Scripting.file '创建FSO对象Set fso = CreateObject("scripting.filesystemobject")Set folder = fso.GetFolder(Path)For Each objFile In folder.FilesIf Strings.Right(, 8) = "gplx.xml" And Len() > 8 Then filename1 = NextEnd Sub⼆.声明变量Dim a as IntegerPublic mybut As CommandBarButtonPublic mybar As CommandBar三.常⽤语句1.If(a=1) thenElseEnd if2.do while a<26Loop3. For ID = 0 To count - 1 Step 1pidtemp = “123”exit for ‘如果要跳出for语句,就加上此句Next ID四:字符串字符串的替换:将textbox1中的内容的回车和换⾏都替换为空。
VB NET文件操作

知识点1 文件结构
为了有效的对数据进行处理,必须以某种特定的方式 存放数据,这种特定的方式称为文件结构。文件由记 录(Record)组成,一个文件含一个以上的记录,记 录是由一组相关的字段(Field)组成。字段也称域, 由若干字符(Character)组成,用来表示一项数据。 字符是构成文件的最基本单位。字符可以是数字、字 母、特殊符号或单一字节。
件夹下,并改名为VB,语句如下: Directory.Move(“E:\VBNET”,“E:\program\VB”)
GetLogicalDrivers 获取逻辑盘符
该方法功能是返回一个字符串数组,为当前计算机中 所有逻辑驱动器名,每个驱动器名是形如“C:\” 的字符串,格式如下:
Directory.GetLogicalDrivers()
除此之外,可根据存储数据的性质将文件 分为程序文件和数据文件;根据文件的流 向分为输入文件和输出文件;根据文件的Βιβλιοθήκη 存储介质分为磁盘文件、磁带文件等等。
知识点3 文件访问方式
文件访问主要是对文件的读、写操作。 读文件是将文件中的数据读入计算机内存。即向计算机输入数据。 写文件---------将计算机内存中的数据写入文件中。 顺序文件、随机文件以及二进制文件由于文件中记录的组织方式和
无论Directory类还是DirectoryInfo类都是System.IO命 名空间的成员,因此在使用两个类之前,需要先引入 System.IO命名空间。
Directory类提供了文件夹操作的全部方法,由于该类 提供的方法是共享的,所以不需要先建立对象就可以 直接调用它的方法,下面介绍它的常用方法:
GetDirectories 获取文件夹下的子文件夹
GetFiles 获取文件夹下的文件
VBS操作Word

VBS操作Word'注意需要安裝微軟的WORD才可以正常使用welText='本腳本運行後將在WORD種顯示一些電腦的資訊'MsgBox welText'定義Word.application變數Dim ObjWDDim ObjDOCDim countiSet WshNetwork=CreateObject('work')'啟動WordSet ObjWD=CreateObject('Word.application')'設置Word為可視ObjWD.Visible=True'增加一個文檔ObjWD.Documents.AddSet ObjDOC=ObjWD.ActiveDocuments'設置格式為劇中對齊ObjWD.selection.ParagraphFormat.Alignment=wdAlignPara graphCenterObjDOC.Range 0,0ObjWD.selection.TypeText '電腦資訊一覽表'+Chr(13)'增加一張四行二列的表格ObjDOC.Tables.Add ObjWD.selection.Range,4,2ObjWD.selection.TypeText '類別'ObjWD.selection.MoverightObjWD.selection.TypeText '值''迴圈填寫表格內容For counti=1 To 3ObjWD.selection.MoveDownObjWD.selection.MoveLeftSelect Case countiCase 1ObjWD.selection.TypeText '功能變數名稱'ObjWD.selection.MoveRightObjWD.selection.TypeText erDomain Case 2ObjWD.selection.TypeText '電腦名'ObjWD.selection.MoveRightObjWD.selection.TypeText puterName Case 3ObjWD.selection.TypeText '用戶名'ObjWD.selection.MoveRightObjWD.selection.TypeText erNameEnd SelectNext'將WORD視窗最大化ObjWD.WindowState=1'選中全部文檔ObjWD.selection.WholeStory'設置字體='宋體''設置字型大小ObjWD.selection.font.Size=14'設置對齊方式為居中ObjWD.selection.ParagraphFormat.Alignment=1'取消全部選中ObjWD.selection.MoveDown我们先来说,这两个对象Application对象、Document对象。
在VB.NET中导出数据到WORD中

查看文章在中导出数据到WORD中2006年07月19日星期三01:49首先要添加引用一个MicroSoft Word 11.0 Object Library的一个引用。
然后再程序的最上面引用声明一下. Imports Microsoft.office.interop接着在相对应的按钮事件,添加如下代码即可,导出到Word中Dim oword As Word.ApplicationDim odoc As Word.DocumentDim otable As Word.TableDim opara1 As Word.ParagraphDim opara2 As Word.ParagraphDim opara3 As Word.ParagraphDim opara4 As Word.ParagraphDim orng As Word.RangeDim oshape As Word.InlineShapeDim ochart As ObjectDim pos As Double'启动Microsoft Word并打开文件模板oword = CreateObject("Word.application")oword.Visible = Trueodoc = oword.Documents.Add'在文件的开头处插入一个段落opara1 = odoc.Content.Paragraphs.Addopara1.Range.Text = "标题一"opara1.Range.Font.Bold = Trueopara1.Format.SpaceAfter = 24 '在段落之后24 Pt 空格opara1.Range.InsertParagraphAfter()'在文件的尾端插入一个段落'**\endoFdoc 是一个事先定义的书签opara2 = odoc.Content.Paragraphs.Add(odoc.Bookmarks.Item("\endoFdoc").Range)opara2.Range.Text = "标题二"opara2.Format.SpaceAfter = 6opara2.Range.InsertParagraphAfter()'插入另外一个段落opara3 = odoc.Content.Paragraphs.Add(odoc.Bookmarks.Item("\endofdoc").Range)opara3.Range.Text = "这是单纯的一句文字。
VB.NET操作Word,解决“RPC服务器不能用”错误

操作Word,解决“RPC服务器不能用”错误环境: 2005,Word2003需求:A、用打开word,从自定义的模板生成WORD文档。
B、把相应字段替换成用户指定的数据。
C、文档关闭前,自动读取户修改后固定位置的文本到中。
D、不管用户是否选择保存Word文档,都自动取得需要的文本。
E、用户可以通过关闭Word,也可以手工关闭Word。
(1)选择项目,右键属性=》添加引用=》COM,添加Microsoft Word 11.0 Object Library。
在程序中引用方法:Imports Microsoft.Office.Interop(2)MyWord_Quit是关键,如果不在这里面释放掉用Dim WithEvents定义的MyWord,当用户不在中,而用手工直接关闭Word程序后,再次调用Word程序,就会产生“RPC 服务器不能用”错误。
(3)程序代码:Imports Microsoft.Office.InteropPublic Class Form1Dim WithEvents MyWord As Word.Application 'WithEvents '用于存放 Microsoft Word 引用的变量。
Dim MyDoc As Word.DocumentDim WordWasNotRunning As BooleanDim DocWasNotOpened As BooleanDim str1 As String'-------------------------------------------------------------------------------------'打开Word程序,如果Word已经运行,就GetObject,否则就CreateObjectPrivate Sub Get_Word()On Error GoT o Open_word '不带第一个参数调用 Getobject 函数将'返回对该应用程序的实例的引用,如果该应用程序不在运行,则会产生错误。
- 1、下载文档前请自行甄别文档内容的完整性,平台不提供额外的编辑、内容补充、找答案等附加服务。
- 2、"仅部分预览"的文档,不可在线预览部分如存在完整性等问题,可反馈申请退款(可完整预览的文档不适用该条件!)。
- 3、如文档侵犯您的权益,请联系客服反馈,我们会尽快为您处理(人工客服工作时间:9:00-18:30)。
Private oWordApplic As Word.ApplicationPrivate oDocument As Word.DocumentPrivate oRange As Word.RangePrivate oSelection As Word.SelectionPublic Sub Neword()'激活com word接口oWordApplic = New Word.ApplicationoWordApplic.Visible = TrueEnd Sub'设置选定文本Public Sub SetRange(ByVal para As Integer)oRange = oDocument.Paragraphs(para).RangeoRange.Select()End SubPublic Sub SetRange(ByVal para As Integer, ByVal sent As Integer)oRange = oDocument.Paragraphs(para).Range.Sentences(sent)oRange.Select()End SubPublic Sub SetRange(ByVal startpoint As Integer, ByVal endpoint As Integer, ByVal flag As Boolean)If flag = True ThenoRange = oDocument.Range(startpoint, endpoint)oRange.Select()ElseEnd IfEnd Sub'生成空的新文档Public Sub NewDocument()Dim missing = System.Reflection.Missing.ValueDim isVisible As Boolean = TrueoDocument = oWordApplic.Documents.Add(missing, missing, missing, missing)oDocument.Activate()End Sub'使用模板生成新文档Public Sub NewDocWithModel(ByVal FileName As String)Dim missing = System.Reflection.Missing.ValueDim isVisible As Boolean = TrueDim strName As StringstrName = FileNameoDocument = oWordApplic.Documents.Add(strName, missing, missing, isVisible)oDocument.Activate()End Sub'打开已有文档Public Sub OpenFile(ByVal FileName As String)Dim strName As StringDim isReadOnly As BooleanDim isVisible As BooleanDim missing = System.Reflection.Missing.ValuestrName = FileNameisReadOnly = FalseisVisible = TrueoDocument = oWordApplic.Documents.Open(strName, missing, isReadOnly, missing, missing, missing, missing, missing, missing, missing, missing, isVisible, missing, missing, missing, missing)oDocument.Activate()End SubPublic Sub OpenFile(ByVal FileName As String, ByVal isReadOnly As Boolean) Dim strName As StringDim isVisible As BooleanDim missing = System.Reflection.Missing.ValuestrName = FileNameisVisible = TrueoDocument = oWordApplic.Documents.Open(strName, missing, isReadOnly, missing, missing, missing, missing, missing, missing, missing, missing, isVisible, missing, missing, missing, missing)oDocument.Activate()End Sub'退出WordPublic Sub Quit()Dim missing = System.Reflection.Missing.ValueoWordApplic.Quit()System.Runtime.InteropServices.Marshal.ReleaseComObject(oWordApplic)oWordApplic = NothingEnd Sub'关闭所有打开的文档Public Sub CloseAllDocuments()oWordApplic.Documents.Close(Word.WdSaveOptions.wdDoNotSaveChanges)End Sub'关闭当前的文档Public Sub CloseCurrentDocument()oDocument.Close(Word.WdSaveOptions.wdDoNotSaveChanges)End Sub'保存当前文档Public Sub Save()TryoDocument.Save()CatchMsgBox(Err.Description)End TryEnd Sub'另存为文档Public Sub SaveAs(ByVal FileName As String)Dim strName As StringDim missing = System.Reflection.Missing.ValuestrName = FileNameoDocument.SaveAs(strName, missing, missing, missing, missing, missing, missing, missing, missing, missing, missing, missing, missing, missing, missing, missing)End Sub'保存为Html文件Public Sub SaveAsHtml(ByVal FileName As String)Dim missing = System.Reflection.Missing.ValueDim strName As StringstrName = FileNameDim format = CInt(Word.WdSaveFormat.wdFormatHTML)oDocument.SaveAs(strName, format, missing, missing, missing, missing, missing, missing, missing, missing, missing, missing, missing, missing, missing, missing)End Sub'插入文本Public Sub InsertText(ByVal text As String)oWordApplic.Selection.TypeText(text)End Sub'插入一个空行Public Sub InsertLineBreak()oWordApplic.Selection.TypeParagraph()End Sub'插入指定行数的空行Public Sub InsertLineBreak(ByVal lines As Integer)Dim i As IntegerFor i = 1 To linesoWordApplic.Selection.TypeParagraph()NextEnd Sub'插入表格Public Sub InsertTable(ByRef table As DataTable)Dim oTable As Word.TableDim rowIndex, colIndex, NumRows, NumColumns As IntegerrowIndex = 1colIndex = 0NumRows = table.Rows.Count + 1NumColumns = table.Columns.CountoTable = oDocument.Tables.Add(oWordApplic.Selection.Range(), NumRows, NumColumns)'初始化列Dim Row As DataRowDim Col As DataColumnFor Each Col In table.ColumnscolIndex = colIndex + 1oTable.Cell(1, colIndex).Range.InsertAfter(Col.ColumnName)Next'将行添入表格For Each Row In table.RowsrowIndex = rowIndex + 1colIndex = 0For Each Col In table.ColumnscolIndex = colIndex + 1oTable.Cell(rowIndex, colIndex).Range.InsertAfter(Row(Col.ColumnName)) NextNextoTable.AllowAutoFit = TrueoTable.ApplyStyleFirstColumn = TrueoTable.ApplyStyleHeadingRows = TrueEnd Sub'设置对齐Public Sub SetAlignment(ByVal strType As String)Select Case strTypeCase"center"oWordApplic.Selection.ParagraphFormat.Alignment = Word.WdParagraphAlignment.wdAlignParagraphCenterCase"left"oWordApplic.Selection.ParagraphFormat.Alignment = Word.WdParagraphAlignment.wdAlignParagraphLeftCase"right"oWordApplic.Selection.ParagraphFormat.Alignment = Word.WdParagraphAlignment.wdAlignParagraphRightCase"justify"oWordApplic.Selection.ParagraphFormat.Alignment = Word.WdParagraphAlignment.wdAlignParagraphJustifyEnd SelectEnd Sub'设置字体Public Sub SetFontStyle(ByVal strFont As String)Select Case strFontCase"bold"oWordApplic.Selection.Font.Bold = 1Case"italic"oWordApplic.Selection.Font.Italic = 1Case"underlined"oWordApplic.Selection.Font.Subscript = 1End SelectEnd Sub'取消字体风格Public Sub DissableStyle()oWordApplic.Selection.Font.Bold = 0oWordApplic.Selection.Font.Italic = 0oWordApplic.Selection.Font.Subscript = 0End Sub'设置字体字号Public Sub SetFontSize(ByVal nSize As Integer)oWordApplic.Selection.Font.Size = nSizeEnd Sub'跳过本页Public Sub InsertPageBreak()Dim pBreak As IntegerpBreak = CInt(Word.WdBreakType.wdPageBreak)oWordApplic.Selection.InsertBreak(pBreak)End Sub'转到书签Public Sub GotoBookMark(ByVal strBookMark As String)Dim missing = System.Reflection.Missing.ValueDim BookMark = CInt(Word.WdGoToItem.wdGoToBookmark)oWordApplic.Selection.GoTo(BookMark, missing, missing, strBookMark) End Sub'判断书签是否存在Public Function BookMarkExist(ByVal strBookMark As String) As BooleanDim Exist As BooleanExist = oDocument.Bookmarks.Exists(strBookMark)Return ExistEnd Function'转到文档结尾Public Sub GotoTheEnd()Dim missing = System.Reflection.Missing.ValueDim unit = Word.WdUnits.wdStoryoWordApplic.Selection.EndKey(unit, missing)End Sub'转到文档开头Public Sub GotoTheBegining()Dim missing = System.Reflection.Missing.ValueDim unit = Word.WdUnits.wdStoryoWordApplic.Selection.HomeKey(unit, missing)End Sub'转到表格Public Sub GotoTheTable(ByVal ntable As Integer)'Dim missing = System.Reflection.Missing.Value'Dim what = Word.WdGoToItem.wdGoToTable'Dim which = Word.WdGoToDirection.wdGoToFirst'Dim count = ntable'oWordApplic.Selection.GoTo(what, which, count, missing)'oWordApplic.Selection.ClearFormatting()'oWordApplic.Selection.Text = ""oRange = oDocument.Tables(ntable).Cell(1, 1).RangeoRange.Select()End Sub'转到表格的某个单元格Public Sub GotoTableCell(ByVal ntable As Integer, ByVal nRow As Integer, ByVal nColumn As Integer)oRange = oDocument.Tables(ntable).Cell(nRow, nColumn).RangeoRange.Select()End Sub'表格中转到右面的单元格Public Sub GotoRightCell()Dim missing = System.Reflection.Missing.ValueDim direction = Word.WdUnits.wdCelloWordApplic.Selection.MoveRight(direction, missing, missing) End Sub'表格中转到左面的单元格Public Sub GotoLeftCell()Dim missing = System.Reflection.Missing.ValueDim direction = Word.WdUnits.wdCelloWordApplic.Selection.MoveLeft(direction, missing, missing)End Sub'表格中转到下面的单元格Public Sub GotoDownCell()Dim missing = System.Reflection.Missing.ValueDim direction = Word.WdUnits.wdCelloWordApplic.Selection.MoveDown(direction, missing, missing)End Sub'表格中转到上面的单元格Public Sub GotoUpCell()Dim missing = System.Reflection.Missing.ValueDim direction = Word.WdUnits.wdCelloWordApplic.Selection.MoveUp(direction, missing, missing)End Sub'插入图片Public Sub InsertPic(ByVal FileName As String)Dim missing = System.Reflection.Missing.ValueoWordApplic.Selection.InlineShapes.AddPicture(FileName, False, True, missing) End Sub。
