VB轻松控制Word
vb操作word全
End WithEnd WithnewDoc.SaveAs filePathnewDoc.CloseEnd Function2、VB程序操作word表格(文字、图片)很多人都知道,用vb操作excel的表格非常简单,但是偏偏项目中碰到了VB操作word表格的部分,google、baidu搜爆了,都没有找到我需要的东西。
到是搜索到了很多问这个问题的记录。
没办法,索性只有自己去尝试了。
下面把一些代码发上来,给需要的朋友一点提示。
打开一个已经存在的wrod文件(这个文件包含了表格)Dim WordAppDim WordSet WordApp = CreateObject("Word.Application")WordApp.Visible = TrueSet Word = WordApp.Documents.Open("c:\record.dot")知道了就很简单了,下面是选定某一个表格的一个单元格,并修改其内容Word.Tables(1).cell(1, 2)="内容"VBA中的这些数组元素下标都是从1开始的,比如excel的第一行一列也是ExSheet.Cells(1,1),而不是ExSheet.Cells(0,0),WORD的表格也是这样,不信自己试一下就知道了。
所以上面那句话的意思就是对整个word 文档中的第一个表格的第一行第二列的内容改变为“内容”。
很简单吧?网上有些人在问是不是Word.Tables(1).cell(1, 2).range.text或者Word.Tables(1).cell(1, 2).text。
试一下就发现这2种都不对。
网页或VB中操作word的方法

⽹页或VB中操作word的⽅法这段代码给我帮了很⼤的忙,希望他能帮到更多的⼈!1Public Function copy_mb(file1, file2path) As String2Dim fso As Object3Dim name4name = Date & ((Timer() - 0.0001)) * 100005Set fso = CreateObject("Scripting.FileSystemObject"[img]/images/wink.gif[/img]6Set f2 = fso.getfile(file1)7f2.Copy (file2path & name & ".doc"[img]/images/wink.gif[/img]8Set f2 = Nothing9Set fso = Nothing10copy_mb = file2path & name & ".doc"11End Function121314Public Function del_file(filename) As Boolean15Dim fso As Object16Set fso = CreateObject("Scripting.FileSystemObject"[img]/images/wink.gif[/img]17Set f2 = fso.getfile(filename)18f2.Delete19Set f2 = Nothing20Set fso = Nothing21End Function222324Public Function word_exe(filename, find_str, change_str) As String25Dim wdapp As New Word.Application26On Error GoTo e127Dim f_str() As String, c_str() As String, i As Integer28wdapp.Visible = True29wdapp.Documents.Open filename30f_str = Split(find_str, "|"[img]/images/wink.gif[/img]31c_str = Split(change_str, "|"[img]/images/wink.gif[/img]32For i = 0 To UBound(f_str)33If Len(c_str(i)) < 255 Then34wdapp.ActiveDocument.Content.Find.Execute f_str(i), , True, , , , , , , c_str(i), 235Else36Dim j As Integer, n As Integer37If (Len(c_str(i)) Mod (254 - Len(f_str(i)))) > 0 Then38 j = Int(Len(c_str(i)) / (254 - Len(f_str(i)))) + 139Else40 j = Int(Len(c_str(i)) / (254 - Len(f_str(i))))41End If4243For n = 1 To j44If n <> j Then45 wdapp.ActiveDocument.Content.Find.Execute f_str(i), , True, , , , , , , Mid(c_str(i), (n - 1) * (254 - Len(f_str(i))) + 1, 254 - Len(f_str(i))) & f_str(i), 246Else47 wdapp.ActiveDocument.Content.Find.Execute f_str(i), , True, , , , , , , Mid(c_str(i), (n - 1) * (254 - Len(f_str(i))) + 1, Len(c_str(i)) - (n - 1) * (254 - Len(f_s tr(i)))), 248End If49Next n50End If5152Next i5354wdapp.ActiveDocument.Save55wdapp.ActiveDocument.Close56wdapp.Quit5758Set wdapp = Nothing59word_exe = "OK"60Exit Function6162e1:63wdapp.Quit64Set wdapp = Nothing65Dim ErrMsg As String66ErrMsg = "Error Number:" & Err.Number & "<br><br>"67ErrMsg = ErrMsg & "Error Source:" & Err.Source & "<br><br>"68ErrMsg = ErrMsg & "Error Description:" & Err.Description & "<br><br>"69word_exe = ErrMsg70Exit Function7172End Function73747576Public Function open_word(filename)77Dim wdapp As New Word.Application78wdapp.Visible = True79wdapp.Documents.Open filename80End Function81828384Public Function copy_file(file1, file2, openstr) As String85Dim fso As Object86Set fso = CreateObject("Scripting.FileSystemObject"[img]/images/wink.gif[/img] 87Set f2 = fso.getfile(file1)88f2.Copy (file2)89Set f2 = Nothing90Set fso = Nothing91copy_file = file292If openstr = "yes" Then93Call open_word(file2)94End If95End Function96979899Public Function open_new(filename) As String100Dim wpsapp As New Word.Application101wpsapp.Documents.Add102wpsapp.Documents(1).SaveAs filename103wpsapp.Documents.Open filename104wpsapp.Visible = True105open_new = filename106End Function107108109110Public Function copy_content(filename) As String111Dim wdapp As New Word.Application112wdapp.Visible = False113wdapp.Documents.Open filename114wdapp.Selection.WholeStory115copy_content = wdapp.Selection.Text116wdapp.ActiveDocument.Close117wdapp.Quit118Set wdapp = Nothing119End Function120121122123Public Function copy_content2(filename) As String124Dim wdapp As New Word.Application125wdapp.Visible = False126wdapp.Documents.Open filename127wdapp.Selection.WholeStory128wdapp.Selection.Copy129copy_content2 = "已复制内容到剪贴板!!"130wdapp.ActiveDocument.Close131wdapp.Quit132Set wdapp = Nothing133End Function134135136137138Public Sub create_obj(a, b, c)139Dim obj As New WebFile140Call obj.HTTPPutFileEx(a, b, c)141Set obj = Nothing142End Sub143144145146Public Sub get_obj(a, b, c)147Dim obj As New WebFile148Call obj.HTTPGetFile(a, b, c)149End Sub150151152153154vbscript中的处理⽅法:155=========================================156157以下内容为程序代码:158159<script language="vbscript">160161On Error Resume Next162163Dim wApp164165Set wApp = CreateObject("Word.Application"[img]/images/wink.gif[/img] 166If Err.number > 0 Then167Alert "没法保存为Word⽂件,请正确安装Word软件"168else169wApp.visible = True170//.操作代码!171end if172173174。
VB轻松控制Word
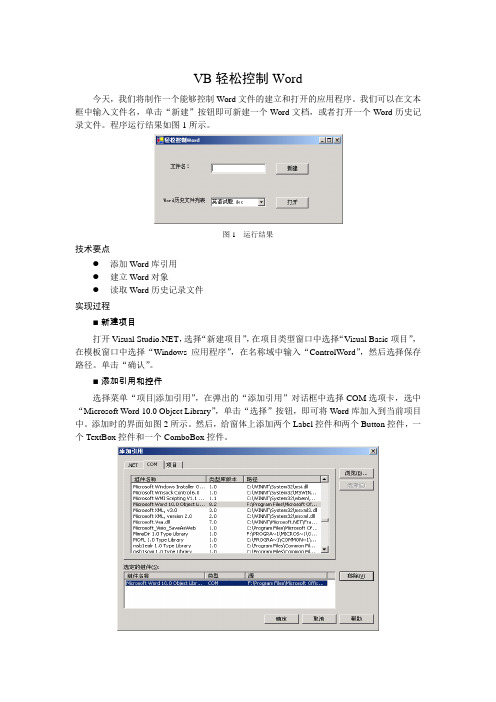
VB轻松控制Word今天,我们将制作一个能够控制Word文件的建立和打开的应用程序。
我们可以在文本框中输入文件名,单击“新建”按钮即可新建一个Word文档,或者打开一个Word历史记录文件。
程序运行结果如图1所示。
图1 运行结果技术要点●添加Word库引用●建立Word对象●读取Word历史记录文件实现过程■新建项目打开Visual ,选择“新建项目”,在项目类型窗口中选择“Visual Basic项目”,在模板窗口中选择“Windows应用程序”,在名称域中输入“ControlWord”,然后选择保存路径。
单击“确认”。
■添加引用和控件选择菜单“项目|添加引用”,在弹出的“添加引用”对话框中选择COM选项卡,选中“Microsoft Word 10.0 Object Library”,单击“选择”按钮,即可将Word库加入到当前项目中。
添加时的界面如图2所示。
然后,给窗体上添加两个Label控件和两个Button控件,一个TextBox控件和一个ComboBox控件。
图2 添加Word引用■设置属性对窗体上的控件设置属性,如表所示。
窗体及控件的属性值窗体/控件属性值Form1 Text 轻松控制WordTextBox1 Text 空ComboBox Text 空Button1 Text 新建■添加代码Public Sub New()MyBase.New()'程序启动时,添加Word历史记录文件'This call is required by the Windows Form Designer.InitializeComponent()Dim i As ShortDim tempword As New Word.Application()For i = 1 To tempword.RecentFiles.CountComboBox1.Items.Add(tempword.RecentFiles.Item(i).Name)Next'ComboBox1.Text = ComboBox1.Items.IndexOf(ComboBox1).ToString'combobox1.Items.GetTytempword.Quit()'Add any initialization after the InitializeComponent() callEnd Sub'打开word文件Private Sub Button1_Click(ByVal sender As System.Object, ByVal e AsSystem.EventArgs) Handles Button1.ClickDim b As New Word.Application()b.Documents.Open(ComboBox1.Text)b.Visible = TrueEnd Sub'新建word文件Private Sub Button2_Click(ByVal sender As System.Object, ByVal e AsSystem.EventArgs) Handles Button2.ClickDim word As New Word.Application()word.NewDocument.Add(TextBox1.Text)word.Visible = TrueEnd Sub■运行程序单击菜单“调试|启动”或单击图标运行程序。
教你如何以VB对word 文件进行读写操作
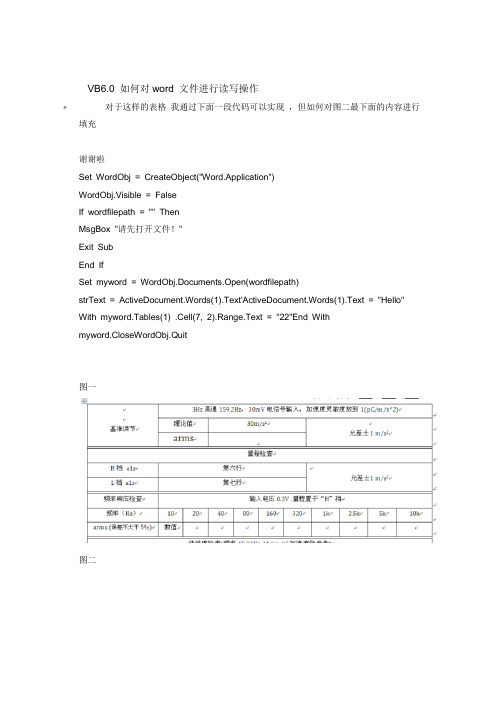
VB6.0 如何对word 文件进行读写操作•对于这样的表格我通过下面一段代码可以实现,但如何对图二最下面的内容进行填充谢谢啦Set WordObj = CreateObject("Word.Application")WordObj.Visible = FalseIf wordfilepath = "" ThenMsgBox "请先打开文件!"Exit SubEnd IfSet myword = WordObj.Documents.Open(wordfilepath)strText = ActiveDocument.Words(1).Text'ActiveDocument.Words(1).Text = "Hello"With myword.Tables(1) .Cell(7, 2).Range.Text = "22"End Withmyword.CloseWordObj.Quit图一图二•百度下很多的,下面是我以前用的方法,要样板首先在要修改的word样板中要修改的地方随便写几个字(我写的是标记)作为标志,然后选中这些字,点工具插入mark,记住你起的名字(我起的是标记),然后参考以下代码。
Dim wd As New Word.ApplicationDim doc As Word.Documentwd.Visible = FalseSet doc = wd.Documents.Add(App.Path & "\样板.doc") '当模板用add,否则用open doc.Bookmarks("标记").Range.Text = "这里写你要输入的文字"doc.SaveAs "样板1.doc"doc.Closewd.Quit。
vb操作word详解
vb操作word详解Visual Basic支持一个对象集合,该集合中的对象直接对应于Microsoft Word 97中的元素,并且通过用户界面,用户熟悉这些元素中的绝大多数。
例如,Document 对象代表了一个打开的文档,Bookmark对象代表了一个文档中的书签,而Selection对象则代表了在一个文档窗口窗格中的选定内容。
在Word中,每一类元素-文档、表格、段落、书签、域等等-都可以用Visual Basic的对象来表示。
要在Word中自动执行任务,可以使用这些对象的方法和属性。
关于理解和使用Microsoft Office 97对象模型的一般性内容,请参阅本书的第二章“理解对象模型”。
在Microsoft Office 97中的对象模型相当丰富,其中包含了大约180个对象。
要查看Word对象模型的层次关系图,请参阅“帮助”中的“Microsoft Word 对象”。
要获得对某种特定对象的详细描述,可以在此图中单击该对象的名字,或是在“帮助”的索引中对特定对象进行搜索。
怎样显示Word Visual Basic帮助要使用Word Visual Basic帮助,必须在安装过程中选择“自定义”的安装方式,并且为Word选中“Visual Basic在线帮助”复选框。
否则,安装程序不会安装Visual Basic帮助。
如果用户已经安装好了Word,那么可以再次运行Setup程序来安装Visual Basic帮助。
要查看Word Visual Basic 帮助,可以在“Visual Basic 编辑器里的“帮助”菜单中点击“目录和索引”一项。
在“帮助主题”对话框的“目录”一表中,双击“Microsoft Word Visual Basic 参考”,然后再双击“Visual Basic 参考”。
“帮助主题”对话框会重新出现,显示出Microsoft Word Visual Basic的目录和索引。
VBNET操作word文档代码
操作WORD(VBA)操作WORD1Public Class WordOpLib234 Private oWordApplic As Word.ApplicationClass5 Private oDocument As Word.Document6 Private oRange As Word.Range7 Private oShape As Word.Shape8 Private oSelection As Word.Selection91011 Public Sub New()12 '激活com word接口13 oWordApplic = New Word.ApplicationClass14 oWordApplic.Visible = False1516 End Sub17 '设置选定文本18 Public Sub SetRange(ByVal para As Integer)19 oRange = oDocument.Paragraphs(para).Range20 oRange.Select()21 End Sub22 Public Sub SetRange(ByVal para As Integer, ByVal sent As Integer)23 oRange = oDocument.Paragraphs(para).Range.Sentences(sent)24 oRange.Select()25 End Sub26 Public Sub SetRange(ByVal startpoint As Integer, ByVal endpoint As Integer, ByVal flag As Boolean)27 If flag = True Then28 oRange = oDocument.Range(startpoint, endpoint)29 oRange.Select()30 Else3132 End If33 End Sub3435 '生成空的新文档36 Public Sub NewDocument()37 Dim missing = System.Reflection.Missing.Value38 Dim isVisible As Boolean = True39 oDocument = oWordApplic.Documents.Add(missing, missing, missing, missing)40 oDocument.Activate()41 End Sub42 '使用模板生成新文档43 Public Sub NewDocWithModel(ByVal FileName As String)44 Dim missing = System.Reflection.Missing.Value45 Dim isVisible As Boolean = False46 Dim strName As String47 strName = FileName48 oDocument = oWordApplic.Documents.Add(strName, missing, missing, isVisible)49 oDocument.Activate()50 End Sub51 '打开已有文档52 Public Sub OpenFile(ByVal FileName As String)53 Dim strName As String54 Dim isReadOnly As Boolean55 Dim isVisible As Boolean56 Dim missing = System.Reflection.Missing.Value5758 strName = FileName59 isReadOnly = False60 isVisible = True6162 oDocument = oWordApplic.Documents.Open(strName, missing, isReadOnly, missing, missing, missing, missing, missing, missing, missing, missing, isVisible, missing, missing, missing, missing)63 oDocument.Activate()6465 End Sub66 Public Sub OpenFile(ByVal FileName As String, ByVal isReadOnly As Boolean)67 Dim strName As String68 Dim isVisible As Boolean69 Dim missing = System.Reflection.Missing.Value7071 strName = FileName72 isVisible = True7374 oDocument = oWordApplic.Documents.Open(strName, missing, isReadOnly, missing, missing, missing, missing, missing, missing, missing, missing, isVisible, missing, missing, missing, missing)75 oDocument.Activate()76 End Sub77 '退出Word78 Public Sub Quit()79 Dim missing = System.Reflection.Missing.Value80 oWordApplic.Quit()81 System.Runtime.InteropServices.Marshal.ReleaseComObject(oWordApplic)82 oWordApplic = Nothing83 End Sub84 '关闭所有打开的文档85 Public Sub CloseAllDocuments()86 oWordApplic.Documents.Close(Word.WdSaveOptions.wdDoNotSaveChanges)87 End Sub88 '关闭当前的文档89 Public Sub CloseCurrentDocument()9091 oDocument.Close(Word.WdSaveOptions.wdDoNotSaveChanges)92 End Sub93 '保存当前文档94 Public Sub Save()95 Try96 oDocument.Save()97 Catch98 MsgBox(Err.Description)99 End Try100 End Sub101 '另存为文档102 Public Sub SaveAs(ByVal FileName As String)103 Dim strName As String104 Dim missing = System.Reflection.Missing.Value105106 strName = FileName107108 oDocument.SaveAs(strName, missing, missing, missing, missing, missing, missing, missing, missing, missing, missing, missing, missing, missing, missing, missing)109 End Sub110 '保存为Html文件111 Public Sub SaveAsHtml(ByVal FileName As String)112 Dim missing = System.Reflection.Missing.Value113 Dim strName As String114115 strName = FileName116 Dim format = CInt(Word.WdSaveFormat.wdFormatHTML)117118 oDocument.SaveAs(strName, format, missing, missing, missing, missing, missing, missing, missing, missing, missing, missing, missing, missing, missing, missing)119 End Sub120 '插入文本121 Public Sub InsertText(ByVal text As String)122 oWordApplic.Selection.TypeText(text)123 End Sub124 '插入一个空行125 Public Sub InsertLineBreak()126 oWordApplic.Selection.TypeParagraph()127 End Sub128 '插入指定行数的空行129 Public Sub InsertLineBreak(ByVal lines As Integer)130 Dim i As Integer131 For i = 1 To lines132 oWordApplic.Selection.TypeParagraph()133 Next134 End Sub135 '插入表格136 Public Sub InsertTable(ByRef table As DataTable)137 Dim oTable As Word.Table138 Dim rowIndex, colIndex, NumRows, NumColumns As Integer139 rowIndex = 1140 colIndex = 0141 If (table.Rows.Count = 0) Then142 Exit Sub143 End If144145 NumRows = table.Rows.Count + 1146 NumColumns = table.Columns.Count147 oTable = oDocument.Tables.Add(oWordApplic.Selection.Range(), NumRows, NumColumns)148149150 '初始化列151 Dim Row As DataRow152 Dim Col As DataColumn153 'For Each Col In table.Columns154 ' colIndex = colIndex + 1155 ' oTable.Cell(1, colIndex).Range.InsertAfter(Col.ColumnName)156 'Next157158 '将行添入表格159 For Each Row In table.Rows160 rowIndex = rowIndex + 1161 colIndex = 0162 For Each Col In table.Columns163 colIndex = colIndex + 1164 oTable.Cell(rowIndex, colIndex).Range.InsertAfter(Row(Col.ColumnName))165 Next166 Next167 oTable.Rows(1).Delete()168 oTable.AllowAutoFit = True169 oTable.ApplyStyleFirstColumn = True170 oTable.ApplyStyleHeadingRows = True171172 End Sub173 '插入表格(修改为在原有表格的基础上添加数据)174 Public Sub InsertTable2(ByRef table As DataTable, ByVal strbmerge As String, ByVal totalrow As Integer)175 Dim oTable As Word.Table176 Dim rowIndex, colIndex, NumRows, NumColumns As Integer177 Dim strm() As String178 Dim i As Integer179 rowIndex = 1180 colIndex = 0181182 If (table.Rows.Count = 0) Then183 Exit Sub184 End If185186 NumRows = table.Rows.Count + 1187 NumColumns = table.Columns.Count188 'oTable = oDocument.Tables.Add(oWordApplic.Selection.Range(), NumRows, NumColumns)189190191 '初始化列192 Dim Row As DataRow193 Dim Col As DataColumn194 'For Each Col In table.Columns195 ' colIndex = colIndex + 1196 ' oTable.Cell(1, colIndex).Range.InsertAfter(Col.ColumnName)197 'Next198199 '将行添入表格200 For Each Row In table.Rows201 colIndex = 0202 GotoRightCell()203 oWordApplic.Selection.InsertRows(1)204 For Each Col In table.Columns205 GotoRightCell()206 colIndex = colIndex + 1207 Try208 oWordApplic.Selection.TypeText(Row(Col.ColumnName))209 Catch ex As Exception210 oWordApplic.Selection.TypeText(" ")211 End Try212 'oWordApplic.Selection.Cell(rowIndex, colIndex).Range.InsertAfter(Row(Col.ColumnName))213 Next214 Next215 '如果strbmerge不为空.则要合并相应的行和列216 If strbmerge.Trim().Length <> 0 Then217 strm = strbmerge.Split(";")218 For i = 1 To strm.Length - 1219 If strm(i).Split(",").Length = 2 Then220 MergeDouble(totalrow, strm(0), strm(i).Split(",")(1), strm(i).Split(",")(0))221 End If222 MergeSingle(totalrow, strm(0), strm(i))223 Next224 End If225 '删除可能多余的一行226 'GotoRightCell()227 'GotoDownCell()228 'oWordApplic.Selection.Rows.Delete()229 'oTable.AllowAutoFit = True230 'oTable.ApplyStyleFirstColumn = True231 'oTable.ApplyStyleHeadingRows = True232 End Sub233 '插入表格(专门适应工程结算工程量清单)234 Public Sub InsertTableQD(ByRef table As DataTable, ByRef table1 As DataTable)235 Dim oTable As Word.Table236 Dim rowIndex, colIndex, NumRows, NumColumns As Integer237 Dim xmmc As String238 Dim i As Integer239 Dim j As Integer240 rowIndex = 1241 colIndex = 0242243 If (table.Rows.Count = 0) Then244 Exit Sub245 End If246247 NumRows = table.Rows.Count + 1248 NumColumns = table.Columns.Count249 'oTable = oDocument.Tables.Add(oWordApplic.Selection.Range(), NumRows,NumColumns)250251252 '初始化列253 Dim Row As DataRow254 Dim rowtemp As DataRow255 Dim row1() As DataRow256 Dim Col As DataColumn257 Dim coltemp As DataColumn258 'For Each Col In table.Columns259 ' colIndex = colIndex + 1260 ' oTable.Cell(1, colIndex).Range.InsertAfter(Col.ColumnName)261 'Next262263 '将行添入表格264 For Each Row In table.Rows265 colIndex = 0266 xmmc = Row("项目名称")267 GotoRightCell()268 oWordApplic.Selection.InsertRows(1)269 For Each Col In table.Columns270 GotoRightCell()271 Try272 If (Col.ColumnName = "项目序号") Then273oWordApplic.Selection.TypeText(intToUpint(Val(Row(Col.ColumnName))))274 Else275 oWordApplic.Selection.TypeText(Row(Col.ColumnName))276 End If277 Catch ex As Exception278 oWordApplic.Selection.TypeText(" ")279 End Try280 'oWordApplic.Selection.Cell(rowIndex, colIndex).Range.InsertAfter(Row(Col.ColumnName))281 Next282 row1 = table1.Select("项目名称='" + xmmc + "'")283284 For i = 0 To row1.Length - 1285 GotoRightCell()286 oWordApplic.Selection.InsertRows(1)287 For j = 0 To table1.Columns.Count - 1288 If (table1.Columns(j).ColumnName <> "项目名称") Then289 GotoRightCell()290 Try291 oWordApplic.Selection.TypeText(row1(i)(j))292 Catch ex As Exception293 oWordApplic.Selection.TypeText(" ")294 End Try295 End If296 'oWordApplic.Selection.Cell(rowIndex, colIndex).Range.InsertAfter(Row(Col.ColumnName))297 Next298 Next299300301302 Next303 '删除可能多余的一行304 'GotoRightCell()305 'GotoDownCell()306 'oWordApplic.Selection.Rows.Delete()307 'oTable.AllowAutoFit = True308 'oTable.ApplyStyleFirstColumn = True309 'oTable.ApplyStyleHeadingRows = True310 End Sub311 '插入表格,为了满足要求,在中间添加一根竖线312 Public Sub InsertTable3(ByRef table As DataTable, ByVal introw As Integer, ByVal intcol As Integer)313 Dim rowIndex, colIndex, NumRows, NumColumns As Integer314 Dim Row As DataRow315 Dim Col As DataColumn316 If (table.Rows.Count = 0) Then317 Exit Sub318 End If319 '首先是拆分选中的单元格320 oDocument.Tables(1).Cell(introw, 3).Split(table.Rows.Count, 2)321 '选中初始的单元格322 oDocument.Tables(1).Cell(introw, 3).Select()323 '将行添入表格324 For Each Row In table.Rows325 Try326 oDocument.Tables(1).Cell(introw, 3).Range.InsertAfter(Row(0))327 oDocument.Tables(1).Cell(introw, 4).Range.InsertAfter(Row(1))328 Catch ex As Exception329 oDocument.Tables(1).Cell(introw, 3).Range.InsertAfter(" ")330 oDocument.Tables(1).Cell(introw, 4).Range.InsertAfter(" ")331 End Try332 introw = introw + 1333 Next334 End Sub335 '设置对齐336 Public Sub SetAlignment(ByVal strType As String)337 Select Case strType338 Case "center"339 oWordApplic.Selection.ParagraphFormat.Alignment = Word.WdParagraphAlignment.wdAlignParagraphCenter340 Case "left"341 oWordApplic.Selection.ParagraphFormat.Alignment = Word.WdParagraphAlignment.wdAlignParagraphLeft342 Case "right"343 oWordApplic.Selection.ParagraphFormat.Alignment = Word.WdParagraphAlignment.wdAlignParagraphRight344 Case "justify"345 oWordApplic.Selection.ParagraphFormat.Alignment = Word.WdParagraphAlignment.wdAlignParagraphJustify346 End Select347 End Sub348 '设置字体349 Public Sub SetStyle(ByVal strFont As String)350 Select Case strFont351 Case "bold"352 oWordApplic.Selection.Font.Bold = 1353 Case "italic"354 oWordApplic.Selection.Font.Italic = 1355 Case "underlined"356 oWordApplic.Selection.Font.Subscript = 1357 End Select358 End Sub359 '取消字体风格360 Public Sub DissableStyle()361 oWordApplic.Selection.Font.Bold = 0362 oWordApplic.Selection.Font.Italic = 0363 oWordApplic.Selection.Font.Subscript = 0364 End Sub365 '设置字体字号366 Public Sub SetFontSize(ByVal nSize As Integer)367 oWordApplic.Selection.Font.Size = nSize368 End Sub369 '跳过本页370 Public Sub InsertPageBreak()371 Dim pBreak As Integer372 pBreak = CInt(Word.WdBreakType.wdPageBreak)373 oWordApplic.Selection.InsertBreak(pBreak)374 End Sub375 '转到书签376 Public Sub GotoBookMark(ByVal strBookMark As String)377 Dim missing = System.Reflection.Missing.Value378 Dim BookMark = CInt(Word.WdGoToItem.wdGoToBookmark)379 oWordApplic.Selection.GoTo(BookMark, missing, missing, strBookMark)380 End Sub381 '判断书签是否存在382 Public Function BookMarkExist(ByVal strBookMark As String) As Boolean383 Dim Exist As Boolean384 Exist = oDocument.Bookmarks.Exists(strBookMark)385 Return Exist386 End Function387 '替换书签的内容388 Public Sub ReplaceBookMark(ByVal icurnum As String, ByVal strcontent As String) 389 strcontent = strcontent.Replace("0:00:00", "")390 oDocument.Bookmarks(icurnum).Select()391 oWordApplic.Selection.TypeText(strcontent)392 End Sub393394 '得到书签的名称395 Public Function GetBookMark(ByVal icurnum As String, ByRef bo As Boolean) As String 396 Dim strReturn As String397 If Right(oDocument.Bookmarks(icurnum).Name, 5) = "TABLE" Then398 bo = True399 Dim strTemp As String400 strTemp = oDocument.Bookmarks(icurnum).Name()401 strReturn = Mid(strTemp, 1, Len(strTemp) - 5)402 Else403 bo = False404 strReturn = oDocument.Bookmarks(icurnum).Name405 End If406 Return strReturn407 End Function408 '得到书签的名称409 Public Function GetBookMark1(ByVal icurnum As String) As String410 Return oDocument.Bookmarks(icurnum).Name411 End Function412 '转到文档结尾413 Public Sub GotoTheEnd()414 Dim missing = System.Reflection.Missing.Value415 Dim unit = Word.WdUnits.wdStory416 oWordApplic.Selection.EndKey(unit, missing)417 End Sub418 '转到文档开头419 Public Sub GotoTheBegining()420 Dim missing = System.Reflection.Missing.Value421 Dim unit = Word.WdUnits.wdStory422 oWordApplic.Selection.HomeKey(unit, missing)423 End Sub424 '删除多余的一行425 Public Sub DelUnuseRow()426 oWordApplic.Selection.Rows.Delete()427 End Sub428 '转到表格429 Public Sub GotoTheTable(ByVal ntable As Integer)430 'Dim missing = System.Reflection.Missing.Value431 'Dim what = Word.WdGoToItem.wdGoToTable432 'Dim which = Word.WdGoToDirection.wdGoToFirst433 'Dim count = ntable434435 'oWordApplic.Selection.GoTo(what, which, count, missing)436 'oWordApplic.Selection.ClearFormatting()437438 'oWordApplic.Selection.Text = ""439 oRange = oDocument.Tables(ntable).Cell(1, 1).Range440 oRange.Select()441442 End Sub443 '转到表格的某个单元格444 Public Sub GotoTableCell(ByVal ntable As Integer, ByVal nRow As Integer, ByVal nColumn As Integer)445 oRange = oDocument.Tables(ntable).Cell(nRow, nColumn).Range446 oRange.Select()447 End Sub448 '表格中转到右面的单元格449 Public Sub GotoRightCell()450 Dim missing = System.Reflection.Missing.Value451 Dim direction = Word.WdUnits.wdCell452 oWordApplic.Selection.MoveRight(direction, missing, missing)453 End Sub454 '表格中转到左面的单元格455 Public Sub GotoLeftCell()456 Dim missing = System.Reflection.Missing.Value457 Dim direction = Word.WdUnits.wdCell458 oWordApplic.Selection.MoveLeft(direction, missing, missing)459 End Sub460 '表格中转到下面的单元格461 Public Sub GotoDownCell()462 Dim missing = System.Reflection.Missing.Value463 Dim direction = Word.WdUnits.wdCell464 oWordApplic.Selection.MoveDown(direction, missing, missing)465 End Sub466 '表格中转到上面的单元格467 Public Sub GotoUpCell()468 Dim missing = System.Reflection.Missing.Value469 Dim direction = Word.WdUnits.wdCell470 oWordApplic.Selection.MoveUp(direction, missing, missing)471 End Sub472 '文档中所有的书签总数473 Public Function TotalBkM() As Integer474 Return oDocument.Bookmarks.Count475 End Function476 '选中书签477 Public Sub SelectBkMk(ByVal strName As String)478 oDocument.Bookmarks.Item(strName).Select()479 End Sub480 '插入图片481 Public Sub InsertPic(ByVal FileName As String)482 Dim missing = System.Reflection.Missing.Value483 oWordApplic.Selection.InlineShapes.AddPicture(FileName, False, True, missing).Select()484 oShape = oWordApplic.Selection.InlineShapes(1).ConvertToShape485 oWordApplic.Selection.WholeStory()486 oShape.ZOrder(Microsoft.Office.Core.MsoZOrderCmd.msoSendBehindText)487 End Sub488 '统一调整图片的位置.也就是往上面调整图片一半的高度489 Public Sub SetCurPicHei()490 Dim e As Word.Shape491 For Each e In oDocument.Shapes492 oDocument.Shapes().Select()493 oWordApplic.Selection.ShapeRange.RelativeHorizontalPosition = Word.WdRelativeHorizontalPosition.wdRelativeHorizontalPositionPage494 oWordApplic.Selection.ShapeRange.RelativeVerticalPosition = Word.WdRelativeVerticalPosition.wdRelativeVerticalPositionParagraph495 oWordApplic.Selection.ShapeRange.LockAnchor = True496'oWordApplic.Selection.ShapeRange.IncrementTop(oDocument.Shapes().Height)497 Next498 End Sub499500 Public Sub SetCurPicHei1()501 Dim e As Word.Shape502 For Each e In oDocument.Shapes503 oDocument.Shapes().Select()504oWordApplic.Selection.ShapeRange.IncrementTop(oDocument.Shapes().Height / 2)505 Next506 End Sub507 Public Sub SetCurPicHei2()508 Dim e As Word.Shape509 For Each e In oDocument.Shapes510 oDocument.Shapes().Select()511oWordApplic.Selection.ShapeRange.IncrementTop(-oDocument.Shapes().Height / 2)512 Next513 End Sub514 Public Function intToUpint(ByVal a As Integer) As String515 Dim result As String = "一百"516 Dim a1, a2 As Integer517 Dim strs() As String = {"零", "一", "二", "三", "四", "五", "六", "七", "八", "九", "十"} 518 If (a <= 10) Then519 result = strs(a)520 ElseIf (a < 100) Then521 a1 = a / 10522 a2 = a Mod 10523 If (a = 1) Then524 result = "十" + strs(a2)525 End If526 Else527 result = strs(a1) + "十" + strs(a2)528 End If529 Return result530 End Function531 '合并没有参照的某一列,一般来讲对应第一列532 'itotalrow 总行数533 'initrow 初始开始的行数,一般情况下该值不为0,没有标题栏的一般为0534 'intcol 列数535 Public Sub MergeSingle(ByVal itotalrow As Integer, ByVal initrow As Integer, ByVal intcol As Integer)536 oDocument.Tables(1).Cell(initrow + 1, intcol).Select()537 Dim irow As Integer '当前行数538 Dim strValue As String '循环比较的行初值539 Dim i As Integer540 Dim direction = Word.WdUnits.wdLine541 Dim extend = Word.WdMovementType.wdExtend542543 i = 0544 irow = 1 + initrow '初始值为1545 For i = 2 + initrow To itotalrow + initrow546547 strValue = oDocument.Tables(1).Cell(irow, intcol).Range.Text548 If (oDocument.Tables(1).Cell(i, intcol).Range.Text = oDocument.Tables(1).Cell(irow, intcol).Range.Text) Then549 '这是对最后一次处理的特殊情况.550 If (i = itotalrow + initrow) Then551 oWordApplic.Selection.MoveDown(direction, (i - irow), extend)552 If (i - irow >= 1) Then553 oWordApplic.Selection.Cells.Merge()554 End If555 oDocument.Tables(1).Cell(irow, intcol).Range.Text = strValue556 End If557 Else558 oWordApplic.Selection.MoveDown(direction, (i - irow - 1), extend)559 If (i - irow - 1 >= 1) Then560 oWordApplic.Selection.Cells.Merge()561 End If562 oDocument.Tables(1).Cell(irow, intcol).Range.Text = strValue563 irow = i564 oDocument.Tables(1).Cell(irow, intcol).Select()565 End If566 Next i567 End Sub568 '合并有参照的某一列569 'itotalrow 总行数570 'initrow 初始开始的行数,一般情况下该值不为0,没有标题栏的一般为0571 'intcol 列数572 'basecol 参照合并的那一列573 Public Sub MergeDouble(ByVal itotalrow As Integer, ByVal initrow As Integer, ByVal intcol As Integer, ByVal basecol As Integer)574 oDocument.Tables(1).Cell(initrow + 1, intcol).Select()575 Dim irow As Integer '当前行数576 Dim strValue As String '循环比较的行初值577 Dim i As Integer578 Dim direction = Word.WdUnits.wdLine579 Dim extend = Word.WdMovementType.wdExtend580581 i = 0582 irow = 1 + initrow '初始值为1583 For i = 2 + initrow To itotalrow + initrow584585 strValue = oDocument.Tables(1).Cell(irow, intcol).Range.Text586 If (oDocument.Tables(1).Cell(i, intcol).Range.Text = oDocument.Tables(1).Cell(irow, intcol).Range.Text) And (getdata(i, basecol) = getdata(irow, basecol)) Then587 '这是对最后一次处理的特殊情况.588 If (i = itotalrow + initrow) Then589 oWordApplic.Selection.MoveDown(direction, (i - irow), extend)590 If (i - irow >= 1) Then591 oWordApplic.Selection.Cells.Merge()592 End If593 oDocument.Tables(1).Cell(irow, intcol).Range.Text = strValue594 End If595 Else596 oWordApplic.Selection.MoveDown(direction, (i - irow - 1), extend)597 If (i - irow - 1 >= 1) Then598 oWordApplic.Selection.Cells.Merge()599 End If600 oDocument.Tables(1).Cell(irow, intcol).Range.Text = strValue601 irow = i602 oDocument.Tables(1).Cell(irow, intcol).Select()603 End If604 Next i605 End Sub606 '得到某个单元的值,如果为空的话,有两种情况.607 '其一:是一个合并的单元格,取其上面的值608 '其二:该单元格本来就是空值609 Public Function getdata(ByVal introw As Integer, ByVal intcol As Integer) As String610 Try611 If (oDocument.Tables(1).Cell(introw, intcol).Range.Text = "" Or (oDocument.Tables(1).Cell(introw, intcol).Range.Text = Nothing)) Then612 getdata = getdata(introw - 1, intcol)613 Else614 getdata = oDocument.Tables(1).Cell(introw, intcol).Range.Text615 End If616 Catch ex As Exception617 getdata = getdata(introw - 1, intcol)618 End Try619620621 End Function622End Class要想作为一个优秀的编程人员,不得不每天都进行学习,来增加自己的知识库,以免被技术所淘汰。
VB操作WORD详解
VB操作WORD详解VB操作Word是一种常见的编程任务,可以用来自动化创建、修改和格式化Word文档。
VB是Visual Basic的简称,是一种简单易学的编程语言,广泛应用于Windows平台上的开发工作。
下面将详细介绍如何使用VB操作Word。
一、引用和初始化Word对象模型在使用VB操作Word之前,需要先引用Word对象模型。
在VB的项目中,点击“项目”菜单,选择“引用”,在弹出的对话框中找到并勾选“Microsoft Word xx.0 Object Library”(这里的xx表示Word的版本号),点击“确定”进行引用。
在VB中操作Word,首先要创建一个Word.Application对象,用来表示Word应用程序实例,在这个实例上进行后续的操作。
可以使用如下代码创建Word应用程序实例:Dim wdApp As Word.ApplicationSet wdApp = New Word.Application二、打开、创建和保存Word文档1. 打开现有的Word文档可以使用如下代码打开一个现有的Word文档:Dim wdDoc As Word.DocumentSet wdDoc = wdApp.Documents.Open("C:\path\to\your\file.docx")2. 创建新的Word文档可以使用如下代码创建一个新的Word文档:Dim wdDoc As Word.DocumentSet wdDoc = wdApp.Documents.Add3. 保存Word文档可以使用如下代码保存一个Word文档:wdDoc.SaveAs "C:\path\to\save\your\file.docx"三、操作Word文档内容1.读取和写入文本内容可以使用如下代码读取和写入文本内容:Dim strText As StringstrText = wdDoc.Range.Text '读取文档内容到字符串变量wdDoc.Range.Text = "Hello, World!" '向文档中写入文本内容2.插入和删除文本内容可以使用如下代码插入和删除文本内容:wdDoc.Range.InsertBefore "Insert Before" '在光标位置之前插入文本wdDoc.Range.InsertAfter "Insert After" '在光标位置之后插入文本wdDoc.Range.Delete '删除光标当前所在位置的文本3.格式化文本内容可以使用如下代码格式化文本内容,如设置字体、大小、颜色等: = "Arial" '设置字体为ArialwdDoc.Range.Font.Size = 12 '设置字体大小为12wdDoc.Range.Font.Color = RGB(255, 0, 0) '设置字体颜色为红色四、操作Word文档样式和格式1.设置段落样式可以使用如下代码设置段落的样式,如对齐方式、缩进等:wdDoc.Range.Paragraphs.Alignment = wdAlignParagraphCenter '设置居中对齐wdDoc.Range.Paragraphs.LeftIndent = 36 '设置左缩进为0.5英寸2.设置页面样式可以使用如下代码设置页面的样式,如边距、纸张大小等:wdDoc.PageSetup.TopMargin = 72 '设置页边距上为1英寸wdDoc.PageSetup.PaperSize = wdPaperA4 '设置纸张大小为A43.插入表格可以使用如下代码插入一个表格到Word文档:Dim wdTable As Word.TableSet wdTable = wdDoc.Tables.Add(wdDoc.Range, 3, 3) '添加3行3列的表格4.格式化表格可以使用如下代码格式化表格,如设置边框、背景颜色等:wdTable.Borders.InsideLineStyle = wdLineStyleSingle '设置内部边框为实线wdTable.Borders.OutsideLineStyle = wdLineStyleDouble '设置外部边框为双线wdTable.Rows(1).Cells(1).Shading.BackgroundPatternColor = RGB(255, 0, 0) '设置第一行第一列的背景颜色为红色五、关闭Word应用程序使用完Word应用程序后,需要关闭它以释放系统资源。
VB操作word总结

请耐心看完:问题出现得较复杂。
我的目的:将多个文档内容逐一拷贝粘贴到另一文档后面我的方法:wordapp=new word.applicationSet doc = wordapp.Documents.AddwhilepathTemp = App.Path & "\temp.doc"LoadFile rs("word"), pathTempSet doctemp = wordapp.Documents.Open(pathTemp)doctemp.Content.Selectwordapp.Selection.copySet myRange = doc.Range(Start:=doc.Content.End - 1, En d:=doc.Content.End)myRange.Select' wordapp.Selection.deletewordapp.Selection.InsertParagraphBeforewordapp.Selection.Collapse wdCollapseEndwordapp.Selection.pasteClipboard.Cleardoctemp.Close wdDoNotSaveChangesdoc.SaveAs App.Path & "\papertemp.doc"如果我的文档(待拷贝的文档,这些文档都是从数据库中读出来的,存在pathTemp文件中)都较小的话,我的程序可以顺利完成任务,如果其中一个文档较大,那么问题出现了,但是问题不是马上出现,该文档的内容能顺利从数据库下载到文件pathTemp中,也能打开到doctemp中,复制粘贴到doc中也没有问题,但是关闭doctemp时却发现隐藏的~$temp.doc并没有消失(意味着doctemp并没有关闭?),接着我把下一个文档从数据库读出放到doctemp中也能完成,temp.doc中内容正确,但是当我用Set doctemp = wordapp.Documents.Open(pathTemp)打开时却出现了问题,运行时错误‘5121’文档的名称或路径无效,请使用如下建议:....手动打开temp.doc也出现同样的错误,但是当我关掉doc(即papertemp.doc)时,打开temp.doc却是正常,而且里面数据也正常请高手指教,愿送所有分问题点数:100、回复次数:8Top1 楼faysky2(出来混,迟早是要还嘀)回复于2005-10-26 01:19:45 得分4是着释放doctemp 看看:....Clipboard.Cleardoctemp.Close wdDoNotSaveChangesdoc.SaveAs App.Path & "\papertemp.doc"Set doctemp=Nothing'--->释放掉doctempTop2 楼hapluo(言先必行,多说无益)回复于2005-10-26 20:49:54 得分0还是不行,哪位高手帮我解决,另送200分Top3 楼hapluo(言先必行,多说无益)回复于2005-10-26 20:56:53 得分0这个号所有分相送,这个号就剩500分了,数来帮我啊,分不够我另外一个号还可再加!Top4 楼hapluo(言先必行,多说无益)回复于2005-10-26 21:28:55 得分0help,Top5 楼mylord()回复于2005-10-26 21:55:46 得分2正在学习中...Top6 楼northwolves(狼行天下)回复于2005-10-26 23:46:20 得分90何必打开,直接合并不行? 试试:Private Sub Command1_Click()Dim wordapp As New Word.application, doc As New Document, pathtemp As StringSet doc = wordapp.Documents.Open(App.Path & "\papertemp.doc")doc.Content.SelectDo While Not rs.EOFpathtemp = App.Path & "\temp.doc"LoadFile rs("word"), pathtemp'你写的过程吧With wordapp.selection.InsertFile FileName:=pathtemp, ConfirmConversions:=False.InsertParagraphAfter.InsertBreak Type:=wdSectionBreakNextPage.Collapse Direction:=wdCollapseEndEnd WithKill pathtemprs.movenextLoopdoc.SaveEnd IfTop7 楼faysky2(出来混,迟早是要还嘀)回复于2005-10-26 23:48:40 得分4把doc也关掉试试:.....Clipboard.Cleardoctemp.Close wdDoNotSaveChangesdoc.SaveAs App.Path & "\papertemp.doc"doctemp.Quitdoc.QuitSet doc=Nothing Top8 楼hapluo(言先必行,多说无益)回复于2005-10-27 00:57:23 得分0northwolves(狼行天下) ,非常感谢,虽然没有问题之所在,但是绕开了问题相当于解决了问题,再次感谢!有什么办法可以把分一下相送,以示感激之情?除了多开几贴还有其他办法嘛?vb控制word的类模块,查找、替换Word文档内容在VB6.0中,操作word,使用它强大的查找、替换、删除、复制、翦切功能。
vb操作word详解
vb操作word详解Visual Basic支持一个对象集合,该集合中的对象直接对应于Microsoft Word 97中的元素,并且通过用户界面,用户熟悉这些元素中的绝大多数。
例如,Document 对象代表了一个打开的文档,Bookmark对象代表了一个文档中的书签,而Selection对象则代表了在一个文档窗口窗格中的选定内容。
在Word中,每一类元素-文档、表格、段落、书签、域等等-都可以用Visual Basic的对象来表示。
要在Word中自动执行任务,可以使用这些对象的方法和属性。
关于理解和使用Microsoft Office 97对象模型的一般性内容,请参阅本书的第二章“理解对象模型”。
在Microsoft Office 97中的对象模型相当丰富,其中包含了大约180个对象。
要查看Word对象模型的层次关系图,请参阅“帮助”中的“Microsoft Word 对象”。
要获得对某种特定对象的详细描述,可以在此图中单击该对象的名字,或是在“帮助”的索引中对特定对象进行搜索。
怎样显示Word Visual Basic帮助要使用Word Visual Basic帮助,必须在安装过程中选择“自定义”的安装方式,并且为Word选中“Visual Basic在线帮助”复选框。
否则,安装程序不会安装Visual Basic帮助。
如果用户已经安装好了Word,那么可以再次运行Setup程序来安装Visual Basic帮助。
要查看Word Visual Basic 帮助,可以在“Visual Basic 编辑器里的“帮助”菜单中点击“目录和索引”一项。
在“帮助主题”对话框的“目录”一表中,双击“Microsoft Word Visual Basic 参考”,然后再双击“Visual Basic 参考”。
“帮助主题”对话框会重新出现,显示出Microsoft Word Visual Basic的目录和索引。
如何利用VBA编写控制Word域的功能

Word域在软件开发中的应用liyu摘要域是Word最具有实用价值的功能之一,它表示文档中可能发生变化的数据或邮件合并文档中套用信函、标签中的占位符。
Microsoft Word 可以在您使用一些特定命令时插入域,如“插入”菜单上的“日期和时间”命令。
您也可使用“插入”菜单上的“域”命令手动插入域。
1.引言事实上,我们在日常工作中常会脱离Microsoft Word的操作环境。
一般,用户是先建立好一些Word文件模板,然后利用所提供的应用程序功能向Word文件模板中插入域,然后用该域对应的值取代域值,这样就达到了向Microsoft Word文件中插入数据的作用。
我们常把数据放入数据库中,数据库的内容不断地变化,我们的域值也跟着不断地变化,取到灵活自动更新的作用,要达到这方面的功能,就应该把数据库与Word域结合起来。
首先要解决这一问题,我们必须先了解Word域有关的知识:Word域代码位于花括号或大括号 ( { } )中,域类似于 Microsoft Excel 中的公式:域代码类似于公式,域结果(域结果:当 Microsoft Word 执行域指令时,在文档中插入的文字或图形。
在打印文档或隐藏域代码时,将以域结果替换域代码。
)类似于公式产生的值。
可在文档中切换显示域代码及其结果。
正好,数据库的字段名对应域代码,字段值对应域结果。
2.实现功能下面是本人利用VBA编写的一通用的处理Word域的程序:主要功能:通用VB6编写通用的类,给用户提供可视化的编辑界面,用于用户在Word 文件中插入域标志。
针对Word文件或Excel表格文件,扫描整个文件,将其中的域标志(如Set “aaa”)取出来,然后通过从数据库中取出”aaa”字段所对应的值,将值填写到文件中域对应的位置。
若对应位置已有值,则判断该值与要填写的值是否相同,若不同则替换。
插入值分为:A.单纯的值,直接使用一个值替换域。
B.表格中的单元格。
如何利用VBA编写控制Word域的功能

Word域在软件开发中的应用liyu摘要域是Word最具有实用价值的功能之一,它表示文档中可能发生变化的数据或邮件合并文档中套用信函、标签中的占位符。
Microsoft Word 可以在您使用一些特定命令时插入域,如“插入”菜单上的“日期和时间”命令。
您也可使用“插入”菜单上的“域”命令手动插入域。
1.引言事实上,我们在日常工作中常会脱离Microsoft Word的操作环境。
一般,用户是先建立好一些Word文件模板,然后利用所提供的应用程序功能向Word文件模板中插入域,然后用该域对应的值取代域值,这样就达到了向Microsoft Word文件中插入数据的作用。
我们常把数据放入数据库中,数据库的内容不断地变化,我们的域值也跟着不断地变化,取到灵活自动更新的作用,要达到这方面的功能,就应该把数据库与Word域结合起来。
首先要解决这一问题,我们必须先了解Word域有关的知识:Word域代码位于花括号或大括号 ( { } )中,域类似于 Microsoft Excel 中的公式:域代码类似于公式,域结果(域结果:当 Microsoft Word 执行域指令时,在文档中插入的文字或图形。
在打印文档或隐藏域代码时,将以域结果替换域代码。
)类似于公式产生的值。
可在文档中切换显示域代码及其结果。
正好,数据库的字段名对应域代码,字段值对应域结果。
2.实现功能下面是本人利用VBA编写的一通用的处理Word域的程序:主要功能:通用VB6编写通用的类,给用户提供可视化的编辑界面,用于用户在Word 文件中插入域标志。
针对Word文件或Excel表格文件,扫描整个文件,将其中的域标志(如Set “aaa”)取出来,然后通过从数据库中取出”aaa”字段所对应的值,将值填写到文件中域对应的位置。
若对应位置已有值,则判断该值与要填写的值是否相同,若不同则替换。
插入值分为:A.单纯的值,直接使用一个值替换域。
B.表格中的单元格。
使用VBA自动化处理Word文档的技巧分享

使用VBA自动化处理Word文档的技巧分享在使用Microsoft Word处理文档时,我们经常需要进行重复性的操作,比如搜索替换特定文本、生成标准化报告、插入图片或表格等。
为了提高效率和节省时间,我们可以利用VBA(Visual Basic for Applications)来自动化处理这些任务。
本文将分享一些使用VBA自动化处理Word文档的技巧,帮助您更高效地处理文档。
1. 启用开发者选项在使用VBA之前,我们需要先启用Word的开发者选项。
打开Word,点击顶部菜单栏中的“文件”,并选择“选项”。
在弹出的窗口中,选择“自定义功能区”选项,并勾选“开发人员”复选框。
点击“确定”以关闭窗口,此时会在菜单栏中看到“开发人员”选项卡。
2. 打开VBA编辑器在开发人员选项卡中,点击“Visual Basic”按钮,即可打开VBA编辑器。
在编辑器中,我们可以编写、编辑和运行VBA 代码。
3. 使用录制宏功能如果您不熟悉VBA编程,可以使用Word的录制宏功能来快速生成VBA代码。
打开VBA编辑器后,点击“录制宏”按钮,弹出录制宏对话框。
在对话框中,为宏命名并选择宏存储的位置(默认存储在个人文档中)。
开始录制宏后,您可以进行Word中的操作,所有操作都会被录制并转换为VBA代码。
完成操作后,点击停止录制按钮,即可停止录制宏。
4. 编写VBA代码在VBA编辑器中,我们可以查看和编辑录制的宏代码。
对于一些简单的任务,直接使用录制宏生成的代码可能已经足够。
但对于一些复杂的操作,可能需要手动编写VBA代码。
以下是一些常见的VBA代码示例:(1) 搜索替换文本:```Sub ReplaceText()Selection.Find.ClearFormattingSelection.Find.Replacement.ClearFormattingWith Selection.Find.Text = "旧文本".Replacement.Text = "新文本".Forward = True.Wrap = wdFindContinue.Format = False.MatchCase = True.MatchWholeWord = False.MatchWildcards = False.MatchSoundsLike = False.MatchAllWordForms = FalseEnd WithSelection.Find.Execute Replace:=wdReplaceAll End Sub```(2) 插入图片:```Sub InsertPicture()Dim myPicture As InlineShapeSet myPicture = ActiveDocument.InlineShapes.AddPicture("图片路径")myPicture.SelectWith myPicture.Width = 200.Height = 150.LockAspectRatio = msoFalseEnd WithEnd Sub```(3) 创建表格:```Sub CreateTable()Dim myTable As TableSet myTable =ActiveDocument.Tables.Add(Range:=Selection.Range, NumRows:=3, NumColumns:=3)With myTable.AutoFitBehavior (wdAutoFitContent).Rows.Height = CentimetersToPoints(1).Borders.InsideLineStyle = wdLineStyleSingle.Borders.OutsideLineStyle = wdLineStyleSingleEnd WithEnd Sub```5. 自定义快捷键为了更便捷地使用VBA代码,我们可以为常用的宏指定快捷键。
VB千里行-操作Word与Excel

文将告诉你如何使用VB代码连接Office应用程序,并简要接触一下在文件中输入数据的方法。
实际上,在VB中用代码与Word和Excel进行会话并控制它们,是可行的。
但是请注意,首先需要在机器上安装office应用程序,才能在VB代码中存取它们的对象。
下面就是一些例子,告诉你如何与这些程序会话,并控制它们。
Option ExplicitDim xlsApp As Excel.ApplicationDim wrdApp As Word.Application只要相关的对象库已经被选择,在应用程序中进行对象变量的赋值是可能的。
Microsoft Excel 8.0对象库是相对于Excel的,而 Microsoft Word 8.0 对象库是为Word服务的。
在VB的IDE环境中,从“工程”菜单中选择“引用”,可以看到系统可用的所有库列表。
Private Sub Command1_Click()Set xlsApp = Excel.ApplicationWith xlsApp´Show Excel.Visible = True´Create a new workbook.Workbooks.Add´Put text in to the cell that is selected.ActiveCell.Value = "Hi"´Put text into A3 regardless of the selected cell.Range("A3").Value = "This is an example of connecting to Excel" End WithEnd Sub在上面的程序段中,我们在变量xlsApp中建立了一个对象,这样Excel就对用户可见了。
当Excel象这样启动后,并不包含一个工作簿,所以必须创建或者执行打开操作。
VBA中的操作Word文档的技巧

VBA中的操作Word文档的技巧在VBA中操作Word文档是自动化办公的重要一环,通过使用VBA编程语言,我们可以实现对Word文档的自动创建、编辑和格式化等操作。
本文将介绍一些常用的VBA技巧,帮助您更好地操作Word文档。
1. 打开Word文档:在VBA中,使用`Documents.Open`方法可以打开一个Word文档。
您可以指定文档的路径和名称,还可以设置一些可选参数,例如是否以只读模式打开。
2. 创建新的Word文档:通过`Documents.Add`方法可以创建一个新的Word文档。
您可以选择在创建文档时是否要基于现有的模板进行创建,并可以指定模板的路径和名称。
3. 保存Word文档:使用`Document.Save`方法可以保存当前的Word文档,您可以指定路径和名称,还可以选择是否另存为其他格式。
4. 关闭Word文档:通过`Document.Close`方法可以关闭当前的Word文档,同时保存对文档的修改。
您可以使用可选参数来控制是否强制保存。
5. 插入文本:使用`Selection.TypeText`方法可以在当前光标位置插入文本。
您可以通过VBA代码来控制插入的文本内容和格式。
6. 插入图片:通过`InlineShapes.AddPicture`方法可以在当前位置插入图片。
您可以指定图片的路径和名称,并可以设置插入图片的位置和大小。
7. 设置字体样式:可以使用`Selection.Font`属性来设置文本的字体样式,例如字体名称、字号、加粗、斜体等。
8. 设置段落格式:通过`Selection.ParagraphFormat`属性可以设置段落的格式,例如对齐方式、缩进、行间距等。
9. 遍历文档内容:可以通过VBA的循环结构来遍历文档的每个段落、句子、单词或字符,并可以对其进行相应的操作。
10. 替换文本:使用`Selection.Find`和`Selection.Replace`方法可以查找和替换文本。
【精品文献】vb操作word
[追加500分求教] VB操作WORD问题悬赏分:200 - 解决时间:2007-7-28 11:42说明,用VB操作WORD,以下源码第一次操作完全正常,正常打开,正常替换,正常退出。
进程中并没有留下windword的进程,但第二次继续操作时就出问题,运行到ReplaceWord()就出现462错误,关闭程序重新开始又正常。
请指教出错及解决原因,追加到500分'=============打开word==============Function OpenWord(FileName) '打开指定word文档Dim wordApp As New Word.ApplicationDim wordDoc As New Word.DocumentSet wordApp = CreateObject("Word.Application")wordApp.Visible = FalseSet wordDoc = wordApp.Documents.Open(FileName)End Function============替换关键字===========Function ReplaceWord(SearchStr, ReplaceStr) '全部替换函数Selection.Find.ClearFormattingSelection.Find.Replacement.ClearFormattingWith Selection.Find.Text = SearchStr.Replacement.Text = ReplaceStr.Forward = True.Wrap = wdFindContinue.Format = False.MatchCase = False.MatchWholeWord = False.MatchByte = True.MatchWildcards = False.MatchSoundsLike = False.MatchAllWordForms = FalseEnd WithSelection.Find.Execute Replace:=wdReplaceAllEnd Function'==================另存为===================Function SaveAsWord(DiskStr, NameStr)ChangeFileOpenDirectory DiskStrActiveDocument.SaveAs FileName:=NameStr, FileFormat:=wdFormatDocument _ , LockComments:=False, Password:="", AddToRecentFiles:=True, _ WritePassword:="", ReadOnlyRecommended:=False, EmbedTrueTypeFonts:=False, _ SaveNativePictureFormat:=False, SaveFormsData:=False, SaveAsAOCELetter:= _ FalseApplication.Documents.CloseApplication.QuitEnd Function'===================清除对象============Function CloseWord()Set wordDoc = Nothing '清除文件实例Set wordApp = Nothing '清除WORD实例End Function问题补充:根据《小fisher》的答案,已经解决问题,另外在SaveAsWord过程中,ChangeFileOPenDirectory DiskStr更改为ChangeFileOpenDirectory DiskStr ,ActiveDocument.SaveAs更改为wordDoc.SaveAs,再加上原先《小fisher》提到要更改的地方,已经完美解决,谢谢!!PS:由于百度只能2次提高悬赏,每次50分,所以现在只有200分,未能对现500分的诺言,所以只有另开贴来加送300分!提问者:有野问 - 经理五级最佳答案1) Function ReplaceWord(SearchStr, ReplaceStr) '全部替换函数Selection.Find.ClearFormattingSelection.Find.Replacement.ClearFormattingWith Selection.Find.......这个函数过程有错误!因为Selection是word的对象而不是VB的对象,所以不能在VB中直接引用,必须用wordApp.Selection替换掉Selection才行!这段代码在word VBA中调试不会出问题,但移植到VB中时要注意。
vb控制word实例2

1、返回Word文档的段落文字,控制分页,设置页眉和页脚[vb] view plaincopy1.'先引用Microsoft Word 11.0 Object Library2.Option Explicit3.4.Dim WordApp As Word.Application '创建Word应用程序5.6.Private Sub Command1_Click()7.Dim i As Long8.On Error GoTo Errhandler9. CommonDialog1.Filter = "Word(*.Doc)|*.Doc|AllFile(*.*)|*.*"10. CommonDialog1.FilterIndex = 111. CommonDialog1.ShowOpen12.Set WordApp = New Word.Application '实例化13. WordApp.Documents.Open CommonDialog1.FileName '打开Word文件14. WordApp.Visible = True'显示 Office Word 界面15.'或者Application.Visible = True16. WordApp.DisplayAlerts = False'不提示保存对话框17.18.'返回段落文字,返回的段落文字在文本框控件中19. Text1.Text = ""20.For i = 1 To ActiveDocument.Paragraphs.Count21. Text1.Text = Text1.Text & (ActiveDocument.Paragraphs(i).Range.Text & vbCrLf & vbCrLf)22.Next23.24.'控制分页25. WordApp.Selection.EndKey unit:=wdStory '将光标移到文档末尾26. WordApp.Selection.InsertBreak wdPageBreak '在文档末尾插入一页27.28.'设置图片格式的页眉29.If ActiveWindow.View.SplitSpecial <> wdPaneNone Then30. ActiveWindow.Panes(2).Close31.End If32.If ActiveWindow.ActivePane.View.Type = wdNormalView Or ActiveWindow.ActivePane.View.Type = wdOutlineView Then33. ActiveWindow.ActivePane.View.Type = wdPrintView34.End If35. ActiveWindow.ActivePane.View.SeekView = wdSeekCurrentPageHeader36. Selection.InlineShapes.AddPicture FileName:="F:\资料\My Pictures\2013年元旦.gif", LinkToFile:=False, SaveWithDocument:=True'加载一图片文件作为页眉37. Selection.ParagraphFormat.Alignment = wdAlignParagraphLeft38. ActiveWindow.ActivePane.View.SeekView = wdSeekMainDocument40.'设置文本格式的页眉41.If ActiveWindow.View.SplitSpecial <> wdPaneNone Then42. ActiveWindow.Panes(2).Close43.End If44.If ActiveWindow.ActivePane.View.Type = wdNormalView Or ActiveWindow.ActivePane.View.Type = wdOutlineView Then45. ActiveWindow.ActivePane.View.Type = wdPrintView46.End If47. ActiveWindow.ActivePane.View.SeekView = wdSeekCurrentPageHeader48. Selection.TypeText Text:="办公室常用工具"49. ActiveWindow.ActivePane.View.SeekView = wdSeekMainDocument50.51.'隐藏页眉的横线52. WordApp.ActiveDocument.Sections(1).Headers(wdHeaderFooterPrimary).Range.Borders(wdBorderBottom).Visible = False53.54.'取得页眉的内容55. Debug.Print WordApp.ActiveDocument.Sections(1).Headers(wdHeaderFooterFirstPage).Range.Text '获取WORD第一节的页眉的文字内容56.57.58.'设置页脚59.If ActiveWindow.View.SplitSpecial <> wdPaneNone Then60. ActiveWindow.Panes(2).Close61.End If62.If ActiveWindow.ActivePane.View.Type = wdNormalView Or ActiveWindow.ActivePane.View.Type = wdOutlineView Then63. ActiveWindow.ActivePane.View.Type = wdPrintView64.End If65. ActiveWindow.ActivePane.View.SeekView = wdSeekCurrentPageHeader66.If Selection.HeaderFooter.IsHeader = True Then67. ActiveWindow.ActivePane.View.SeekView = wdSeekCurrentPageFooter68.Else69. ActiveWindow.ActivePane.View.SeekView = wdSeekCurrentPageHeader70.End If71. Selection.TypeText Text:="2013年"'设置页脚72. Selection.Fields.Add Range:=Selection.Range, Type:=wdFieldNumPages73. ActiveWindow.ActivePane.View.SeekView = wdSeekMainDocument74.75. ActiveDocument.SaveAs "c:\MyWord.doc"'保存最后生成的word文档76.77.Errhandler:78.Exit Sub80.81.Private Sub Form_Unload(Cancel As Integer)82.On Error Resume Next83. WordApp.Quit84.Set WordApp = Nothing85.End Sub效果图如下:2、控制Word文档中的文本框对象[vb] view plaincopy1.'先引用Microsoft Word 11.0 Object Library2.Option Explicit3.4.Dim WordApp As Word.Application '创建Word应用程序5.6.Private Sub Command1_Click()7.On Error GoTo Errhandler8. CommonDialog1.Filter = "MS Office Word(*.Doc)|*.Doc|AllFile(*.*)|*.*"9. CommonDialog1.FilterIndex = 110. CommonDialog1.ShowOpen11.Set WordApp = New Word.Application '实例化12. WordApp.Documents.Open CommonDialog1.FileName '打开Word文件13.If Documents.Count >= 1 Then14. Text1.Text = "打开的Word文件是:" & & vbCrLf & vbCrLf15.End If16. WordApp.Visible = True'显示 Office Word 界面17.'或者Application.Visible = True18. WordApp.DisplayAlerts = False'不提示保存对话框19.20. WordApp.Selection.EndKey unit:=wdStory '将光标移到文档末尾21. WordApp.Selection.Font.Bold = 122. = "黑体"23. WordApp.Selection.Font.Size = 1824. WordApp.Selection.TypeText Text:="在Word文件中插入文本框对象"25. WordApp.Selection.ParagraphFormat.Alignment = Word.WdParagraphAlignment.wdAlignParagraphCenter '居中显示26.27.'创建文本框对象,座标(100,100),宽度200,高度20028.With ActiveDocument.Shapes.AddTextbox(msoTextOrientationHorizontal, 100, 100, 400, 300).Fill29.'.Transparency = 1 '设置透明色30. .ForeColor = vbRed '设置前景颜色31. .UserPicture ("F:\资料\My Pictures\758254_960x1000_0.jpg") '设置文本框对象的背景图片32.End With33. ActiveDocument.Shapes(1).TextFrame.TextRange.Text = "这是一个美女"'给文本框赋值34.'ActiveDocument.Shapes(1).Line.Transparency = 1 '设置透明边框线条35.36.'再创建一个透明背景的文本框对象37.With ActiveDocument.Shapes.AddTextbox(msoTextOrientationHorizontal, 100, 400, 400, 300).Fill38. .Transparency = 1 '设置透明色背景39. .ForeColor = vbRed '设置前景颜色40.End With41. ActiveDocument.Shapes(2).TextFrame.TextRange.Text = "这是一个透明背景的文本框"'给文本框赋值42.'ActiveDocument.Shapes(2).Line.Transparency = 1 '设置透明边框线条43.44.'下面是获取文本框对象的内容45.Dim i As Long46.For i = 1 To ActiveDocument.Shapes.Count47. Text1.Text = Text1.Text & ("第" & i & "个文本框的内容:" & ActiveDocument.Shapes(i).TextFrame.TextRange.Text & vbCrLf)48.Next49.50. ActiveDocument.SaveAs "c:\MyWord.doc"'保存最后生成的word文档51.52.Errhandler:53.Exit Sub54.End Sub55.56.Private Sub Form_Unload(Cancel As Integer)57.On Error Resume Next58. WordApp.Quit59.Set WordApp = Nothing60.End Sub效果图如下:3、在Word文档中设置Excel风格的页码[vb] view plaincopy1.'先引用Microsoft Word 11.0 Object Library2.Option Explicit3.4.Dim WordApp As Word.Application '创建Word应用程序5.Dim WordDoc As Word.Document '创建Word文档对象6.7.Private Sub Command1_Click()8.Dim i As Long9.On Error GoTo Errhandler10. CommonDialog1.Filter = "Word(*.Doc)|*.Doc|AllFile(*.*)|*.*"11. CommonDialog1.FilterIndex = 112. CommonDialog1.ShowOpen13.Set WordApp = New Word.Application '实例化14.Set WordDoc = WordApp.Documents.Open(CommonDialog1.FileName) '选择并打开Word文件15. WordApp.Visible = True'显示 Office Word 界面16.'或者Application.Visible = True17. WordApp.DisplayAlerts = False'不提示保存对话框18.19.'设置Word文档第一页页码20.Dim WordRange As Range21.Set WordRange = WordApp.ActiveDocument.Sections(1).Footers(wdHeaderFooterPrimary).Range22.23.With WordRange24. .InsertAfter "第"25. .Font.Size = 1426. .Collapse Direction:=wdCollapseEnd27.28.'插入页码域29. .Fields.Add Range:=WordRange, Type:=wdFieldEmpty, Text:="PAGE \* Arabic ", PreserveFormatting:=True30. .Expand unit:=wdWord31. .InsertAfter "页 "32.33. .InsertAfter "共"34. .Collapse Direction:=wdCollapseEnd35.36.'插入页数域37. .Fields.Add Range:=WordRange, Type:=wdFieldEmpty, Text:="NUMPAGES \* Arabic ", PreserveFormatting:=True38. .Expand unit:=wdWord39. .InsertAfter "页"40.41. .InsertAfter "【我的Word文件作者:ChenJL1031(东方之珠)】"42. .ParagraphFormat.Alignment = wdAlignParagraphRight '右对齐43.End With44.45.'Text1.Text = WordApp.ActiveDocument.Sections(1).Headers(wdHeaderFooterFirstPage).Range.Text46.47.Set WordRange = Nothing48. ActiveDocument.SaveAs "c:\MyWord.doc"'保存最后生成的word文档49.50.Errhandler:51.Exit Sub52.End Sub53.54.Private Sub Form_Unload(Cancel As Integer)55.On Error Resume Next56. WordApp.Quit57.Set WordApp = Nothing58.End Sub效果图如下:。
vb操作word详解(二)

vb操作word详解(二)运用Find和Replacement对象可以使用Find和Replacement对象来查找并且替换文档中文字的特定范围。
Find对象可以在Selection对象或Range对象中使用(根据Find对象是从Selection对象还是从Range对象返回的,查找操作也略有不同)。
使用Selection.Find如果是在Selection对象中使用Find对象,那么当找到符合选择条件的文本后选定内容将会改变。
以下的示例选定下一次出现的单词“Hello”。
如果在找到单词“Hello”之前已经到达了文档的末尾,那么停止搜索。
With Selection. Find.Forward = True.Wrap = wdFindStop.Text = "Hello".ExecuteEnd WithFind对象包含与“查找”和“替换”对话框(在“编辑”菜单中)里的选项有关的属性。
用户既可对Find对象的属性逐一进行设置,也可以随同Execute方法使用参数来进行设置,如果以下示例所示。
Selection. Find. Execute FindText :="Hello", Forward :=True, Wrap :=wdFindStop使用Range.Find如果是在Range对象中使用Find对象,选定内容不会改变,但是当找到符合选择条件的文本时范围会被重新定义。
以下的示例确定活动文档中第一次出现的单词“blue”的位置。
如果查找操作成功,将重新定义范围并且设置单词“blue”的格式为粗体。
With ActiveDocument. Content. Find.Text = "blue".Forward = True.ExecuteIf .Found = True Then .Parent.Bold = TrueEnd With以下的示例执行了和上述示例相同的操作,只是使用了Execute 方法的参数。
利用VBA自动化操作Word文档
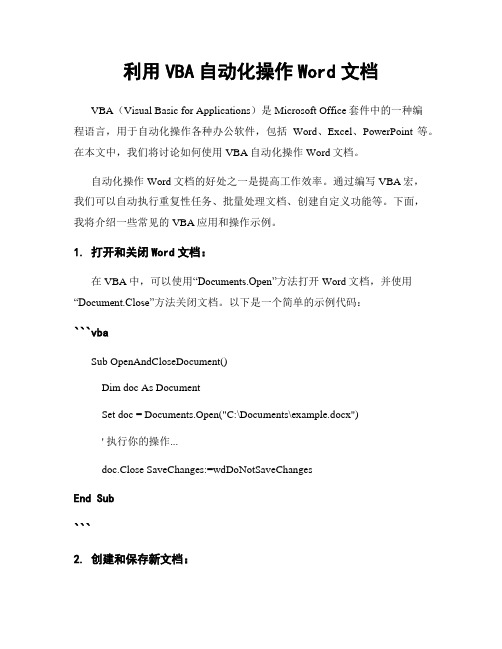
利用VBA自动化操作Word文档VBA(Visual Basic for Applications)是Microsoft Office套件中的一种编程语言,用于自动化操作各种办公软件,包括Word、Excel、PowerPoint等。
在本文中,我们将讨论如何使用VBA自动化操作Word文档。
自动化操作Word文档的好处之一是提高工作效率。
通过编写VBA宏,我们可以自动执行重复性任务、批量处理文档、创建自定义功能等。
下面,我将介绍一些常见的VBA应用和操作示例。
1. 打开和关闭Word文档:在VBA中,可以使用“Documents.Open”方法打开Word文档,并使用“Document.Close”方法关闭文档。
以下是一个简单的示例代码:```vbaSub OpenAndCloseDocument()Dim doc As DocumentSet doc = Documents.Open("C:\Documents\example.docx")' 执行你的操作...doc.Close SaveChanges:=wdDoNotSaveChangesEnd Sub```2. 创建和保存新文档:通过VBA,我们可以创建新的Word文档,并将其保存到指定位置。
以下是示例代码:```vbaSub CreateAndSaveDocument()Dim doc As DocumentSet doc = Documents.Add' 执行你的操作...doc.SaveAs2 "C:\Documents\new.docx"doc.CloseEnd Sub```3. 文本处理:使用VBA可以轻松进行文本处理操作,例如替换文本、插入文本、复制和粘贴等。
以下示例展示了如何替换文档中的特定文本:```vbaSub ReplaceText()Dim doc As DocumentSet doc = ActiveDocumentdoc.Content.Find.Execute FindText:="要替换的文本", _ReplaceWith:="替换为的文本", Replace:=wdReplaceAllEnd Sub```4. 格式设置和样式应用:VBA还允许我们对文档进行格式设置和样式应用。
怎样在VB中控制WORD

怎样在VB中控制WORD使用VB编程时,有时需要调用Microsoft Word对文字进行编辑、排版及输出。
为实现这种调用,可以使用Shell函数、OLE自动化、在包容器中嵌入Word对象等方法。
经过试用和比较,总结出了这几种方法的各自特点。
1 使用Shell函数直接调用语法:Shell (pathname[,windowstyle]).Pathname是指要执行的程序的名字和任何必须的参数或命令行开关,可以包括目录和驱动器名;Windowstyle是执行程序的窗口风格的数字。
使用Shell调用Word比较简单,编程量小,但必须明确指定Word所在路径,这不利于移植,而且,不能对Word进行控制,不利于程序和Word之间的数据交换。
2 使用OLE自动化控制Microsoft Word2.1 使用方法(1)Word为OLE自动化提供一种称为“Basic”的对象,要在VB中控制Word ,首先要定义一个引用Word中“Basic”对象的对象变量:Dim Wordobj as Object(2)将Word 中的“Basic”对象赋给该对象:Set Wordobj=CreateObject("Word.Basic")(3)可以使用大多数WordBasic语句和函数控制Word或Word文档,使用方法和在Word宏中使用WordBasic指令的方法基本相同。
(4)关闭Word:Set Wordobj =Nothing。
注意:“Basic”对象不支持关闭它自己的一个方法。
即若在OLE自动化中关闭了Word,则对象被置为Nothing,便不能再对对象进行操作,程序出错。
2.2 VB指令与WordBasic指令的差异(1)有一些语句和函数不能使用,包括:控制结构,如While…Wend和If…Then…Else;声明语句,如Dim;定制对话框相关的语句:FileExit语句;要求数组变量作为参数的语句或函数。
用VB5.0控制Microsoft Word97的方法

用VB5.0控制Microsoft Word97的方法
刘兵; 刘欣
【期刊名称】《《武汉工业学院学报》》
【年(卷),期】1999(000)004
【摘要】论述了用VB5.0控制MicrosoftWord的方法,重点介绍MicrosofstWord中对象、属性、方法、事件以及对象的操作方法。
【总页数】4页(P78-81)
【作者】刘兵; 刘欣
【作者单位】电气信息工程系; 海军工程大学
【正文语种】中文
【中图分类】TP311.56
【相关文献】
1.用VB5.0实现微机与可编程控制器的串行通信 [J], 石剑民;高军
2.Vb5.0建立Microsoft Access类数据库 [J], 钱焕荣;廖宏
3.用VB5.0后台控制EXCEL 97技巧一例 [J], 彭正洪;冯永兵;李玉磊
4.用VB
5.0实现PC机与多台单片机控制系统的多机通讯 [J], 周庆民;王孟平;孙寅聪;罗斌斌;刘成安
5.Microsoft Word97在科技期刊排版中的应用 [J], 毛承洁
因版权原因,仅展示原文概要,查看原文内容请购买。
- 1、下载文档前请自行甄别文档内容的完整性,平台不提供额外的编辑、内容补充、找答案等附加服务。
- 2、"仅部分预览"的文档,不可在线预览部分如存在完整性等问题,可反馈申请退款(可完整预览的文档不适用该条件!)。
- 3、如文档侵犯您的权益,请联系客服反馈,我们会尽快为您处理(人工客服工作时间:9:00-18:30)。
VB轻松控制Word
今天,我们将制作一个能够控制Word文件的建立和打开的应用程序。
我们可以在文本框中输入文件名,单击“新建”按钮即可新建一个Word文档,或者打开一个Word历史记录文件。
程序运行结果如图1所示。
图1 运行结果
技术要点
●添加Word库引用
●建立Word对象
●读取Word历史记录文件
实现过程
■新建项目
打开Visual ,选择“新建项目”,在项目类型窗口中选择“Visual Basic项目”,在模板窗口中选择“Windows应用程序”,在名称域中输入“ControlWord”,然后选择保存路径。
单击“确认”。
■添加引用和控件
选择菜单“项目|添加引用”,在弹出的“添加引用”对话框中选择COM选项卡,选中“Microsoft Word 10.0 Object Library”,单击“选择”按钮,即可将Word库加入到当前项目中。
添加时的界面如图2所示。
然后,给窗体上添加两个Label控件和两个Button控件,一个TextBox控件和一个ComboBox控件。
图2 添加Word引用
■设置属性
对窗体上的控件设置属性,如表所示。
窗体及控件的属性值
窗体/控件属性值
Form1 Text 轻松控制Word
TextBox1 Text 空
ComboBox Text 空
Button1 Text 新建
■添加代码
Public Sub New()
MyBase.New()
'程序启动时,添加Word历史记录文件
'This call is required by the Windows Form Designer.
InitializeComponent()
Dim i As Short
Dim tempword As New Word.Application()
For i = 1 To tempword.RecentFiles.Count
ComboBox1.Items.Add(tempword.RecentFiles.Item(i).Name)
Next
'ComboBox1.Text = ComboBox1.Items.IndexOf(ComboBox1).ToString
'combobox1.Items.GetTy
tempword.Quit()
'Add any initialization after the InitializeComponent() call
End Sub
'打开word文件
Private Sub Button1_Click(ByVal sender As System.Object, ByVal e As
System.EventArgs) Handles Button1.Click
Dim b As New Word.Application()
b.Documents.Open(ComboBox1.Text)
b.Visible = True
End Sub
'新建word文件
Private Sub Button2_Click(ByVal sender As System.Object, ByVal e As
System.EventArgs) Handles Button2.Click
Dim word As New Word.Application()
word.NewDocument.Add(TextBox1.Text)
word.Visible = True
End Sub
■运行程序
单击菜单“调试|启动”或单击图标运行程序。
小结
本实例我们先引用了Word库,然后新建Word对象,这样就可以实现与Word的连接了。
其余对象的引用类似。
